Summary
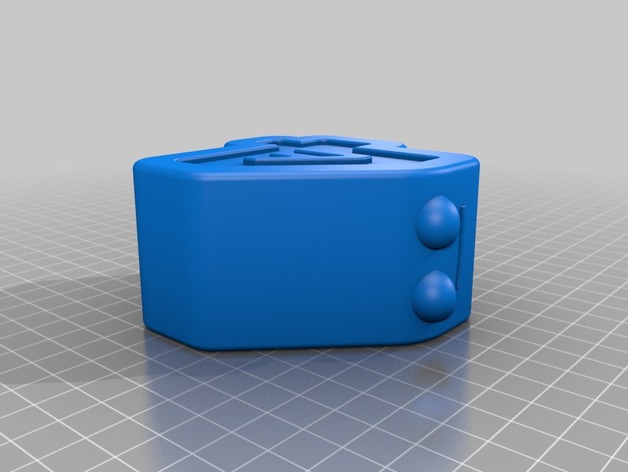
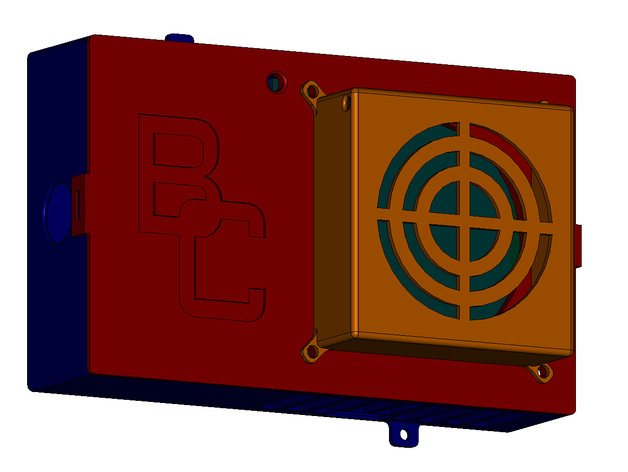
I’m working on cleaning up my printer station and couldn’t find a container for my RAMPS board that I liked, so I’ve designed this one. I haven’t printed it yet so it most likely still needs tweaks. As soon as I finish printing my enclosure brackets I will be making this next.
I’m using an 80mm wide and 30mm deep fan for cooling the board.
The idea of the design is that the cables will come in through the large circle opening, can be wrapped around the pegs to shorten them, then run them through the gaps to the board itself. The fan cable is fed through the small hole in the corner of the fan guard, then through the hole in the lid. The latch on the right hand side is meant to go on first, then the one on the left (really not sure if that’s going to work or not).
Because I’m building an enclosure I didn’t design the mounts to attach to the frame of the printer but to the outside wall.
The only sections that should need support is on the fan guard depending on which side you print up, and possibly the latches on the container itself.
If anyone notices anything I got wrong, suggestions for changes, etc, please let me know! If you print one, let me know how it went!
Author: Thingiverse
-
FLSUN Prusa i3 RAMPS Container 3D Print Model
-
Cougar Keychain 3D Print Model
Summary
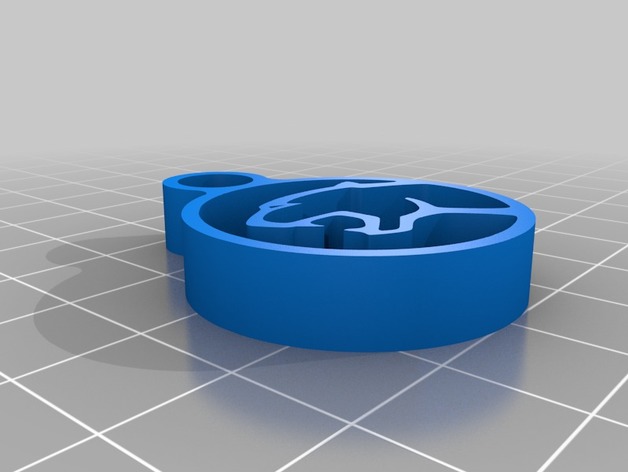
I wanted to make a Mercury Cougar/Capri keychain for a friend… so here is what I came up with -
MFD Link (R Link) Mount and Battery Holder 3D Print Model
Summary
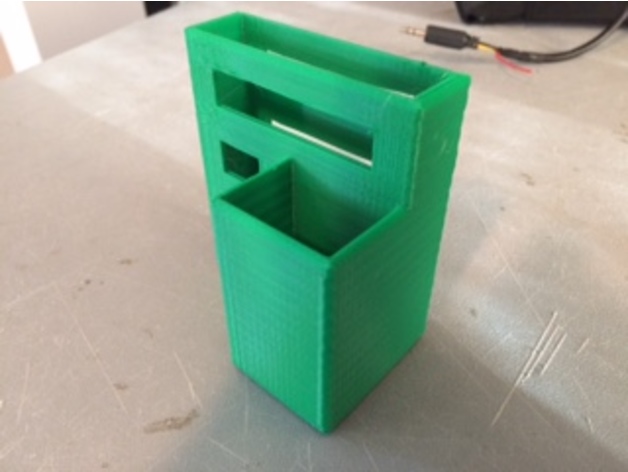
Use heavy duty mounting tape or velcro to mount to back of RC Tx. -
ePIc Pi Addons ( raspberry pi 2 and 3 case ) 3D Print Model
Summary
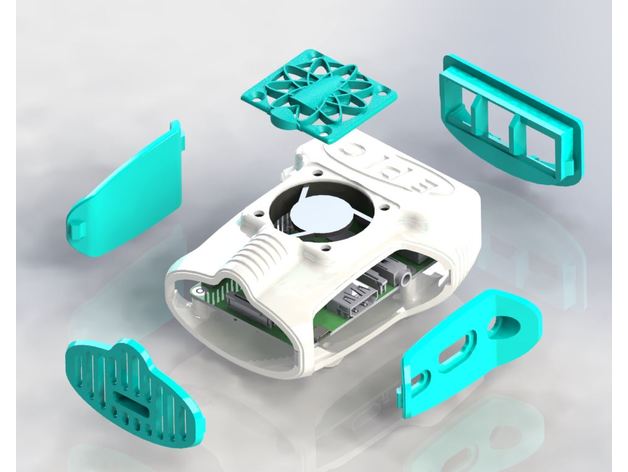
These are the addon plates for my raspberry pi 2 and 3 case called ePIc Pi. The main body can be purchased by itself that allows these plates to be printed in any color you wish to match your color scheme.
The ePIc pi mounts directly to 2020 extrusion for use with octopi via the mounting bracket I have included here.
I plan on releasing many upgrade plates to the main body after receiving feedback on the current plates.
The body can be found here.
https://www.etsy.com/listing/544101702/epic-pi-body-only?ga_order=date_desc&ga_search_type=all&ga_view_type=gallery&ga_search_query=epic pi&ref=sr_gallery_3
or search epicpi -
Cookies cutter – Batman 3D Print Model
Summary
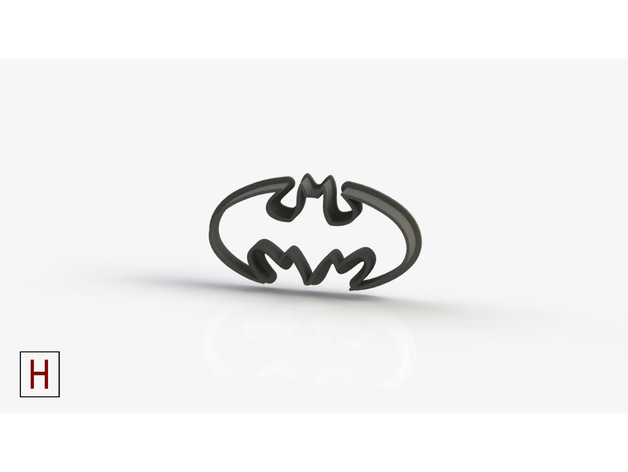
http://horizonlab.co/2017/09/14/cookies-cutter-batman/ -
Tomoquads UL4 and UL3 3D Printed Accessories 3D Print Model
Summary
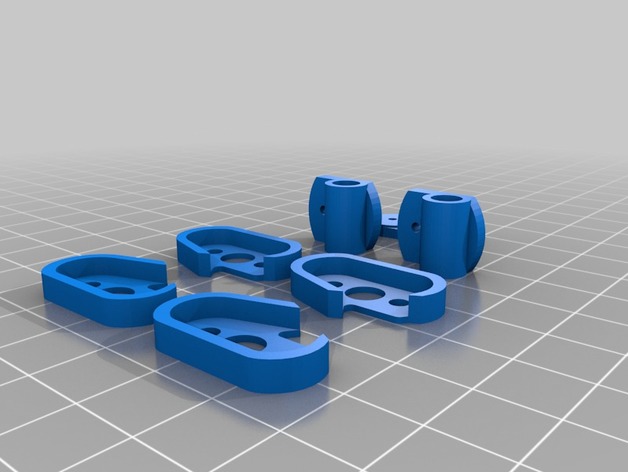
Tomoquads 3d printed accessories for the UL4 and UL3
Print only in TPU with 20-30% infill while the center bushing must be printed in PLA or ABS with high 50% infill
www.tomoquads.com -
Fender Pickup Cover 3D Print Model
Summary
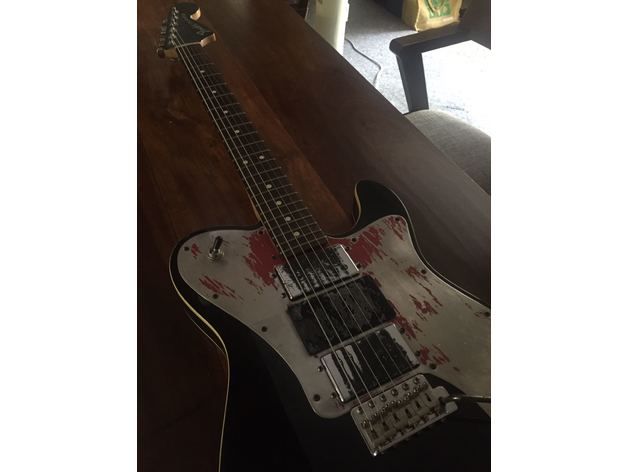
Cover plate for Fender John 5 Triple Telecaster.
A friend received a guitar with a missing humbucker (and a gaping hole).
Print this flat, and cut off the 8 corner struts, which are meant to keep the piece from warping during print.
Print Settings
Rafts:
No Supports:
No Infill:
20% -
MQC-ONE or 40Width x50Length bolt, session mount 3D Print Model
Summary
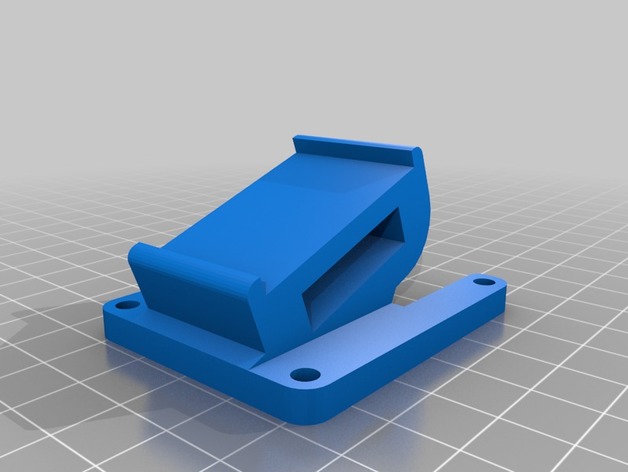
40width by 50 length gopro session mount or runcam cube. -
wall mounted articulating arm Tablet Hook 3D Print Model
Summary
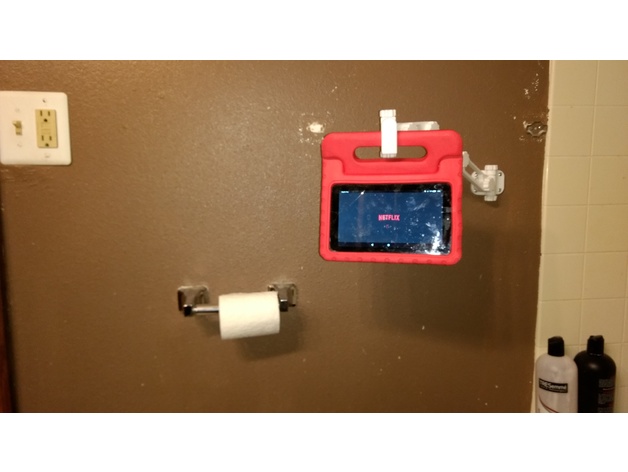
I have a tablet with a handle on it that my wife generally watches shows on while in the bath. I added this hook to the original set of parts to fit that tablet. -
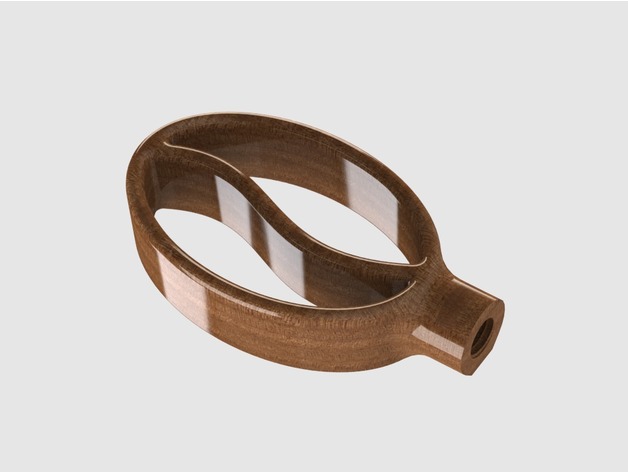
Tap Handle – Coffee Bean (3/8″-16 Thread) 3D Print Model
Summary
Please note: I still have to test this on a tap handle!
This design uses the icon Coffee Bean by Abir Alward from the Noun Project as a base.
The current stl is threaded for a 3/8″-16 Tap. -
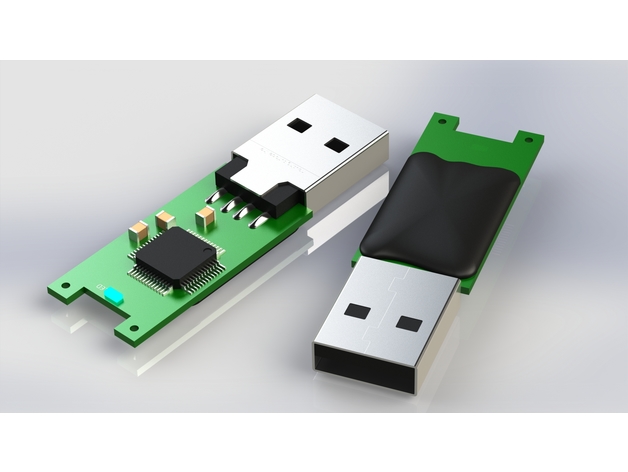
Cheap stick enclosure replacement 3D Print Model
Summary
The housing of a cheap USB stick (see photos) was broken easily, so I decided to make a model of the inner part to create a new printable enclosure.
The enclosure models here are very basic on the outside. Feel free to remix or redesign them! -

Cessna Citation X 3D Print Model
Summary
Solid. Rocket. Boosters.
These are the words that best describe the engines on this beautiful bird. Claimed to be the fastest civilian aircraft in the world, this plane can eat up a mile of sky in just six seconds, crusing comfortably over Mach 0.90. Cessna went about designing this airplane in response to the reputation the Citation line held as a slower fleet of business jet aircraft. To compete with rival Learjet in the high-speed market, the Citation X was created. The aircraft was designed largely from scratch, a significant departure from the rest of the Citation line.
This was a really fun build. I’ve loved the look of this airplane for a long time and it was a pleasure designing. The sweeping curves on the underside of the fuselage were challenging to create, as were the highly swept winglets, which due to their thin profile may experience difficulties in printing. I will be running this through a series of previews and renders in an attempt to improve printing stability while not sacrificing accuracy to the real thing. Enjoy!
Print Settings
Printer Brand:
MakerBot Printer:
MakerBot Replicator (5th Generation) Rafts:
Yes Supports:
Yes Resolution:
0.1mm High Resolution Infill:
10% 0.4mm Diamond (fast) -
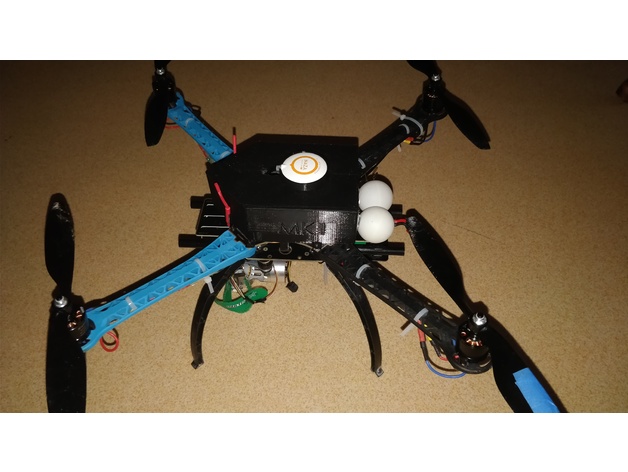
Cover S500 frame with naza gps 3D Print Model
Summary
This is a cover for S500 Frame with support for naza gps -
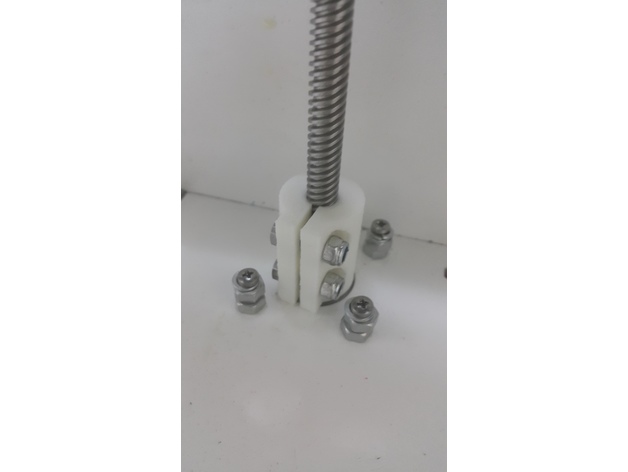
coupling_5x8 3D Print Model
Summary
please be in vertical position..
Print Settings
Printer:
diy printer Rafts:
No Supports:
No Resolution:
0,2 Infill:
60 -
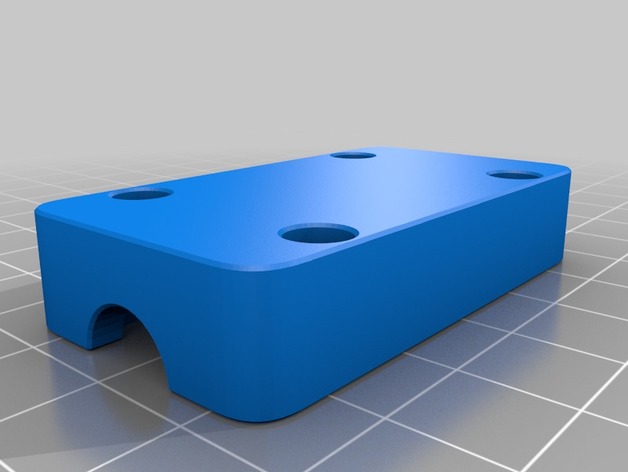
XY Clamp for RJ4JP-01-08 Bearings 3D Print Model
Summary
This is the clamp for the Hypercube to house two Ignus RJ4JP-01-08 bearings. Works with the XY Joiner from here: https://www.thingiverse.com/thing:2012443
Print Settings
Printer:
Anet A8 Rafts:
No Supports:
No Resolution:
0.2 Infill:
25-30 -
Homer Inciense Holder 3D Print Model
Summary
Homer Inciense Holder ( Homer porta incienso)
Print Settings
Printer:
CreateBot Mini Rafts:
No Supports:
Yes Resolution:
0.2 Infill:
15 Notes:
Fill density 10 (densidad de relleno)
2 perimeters (2 perímetros) -
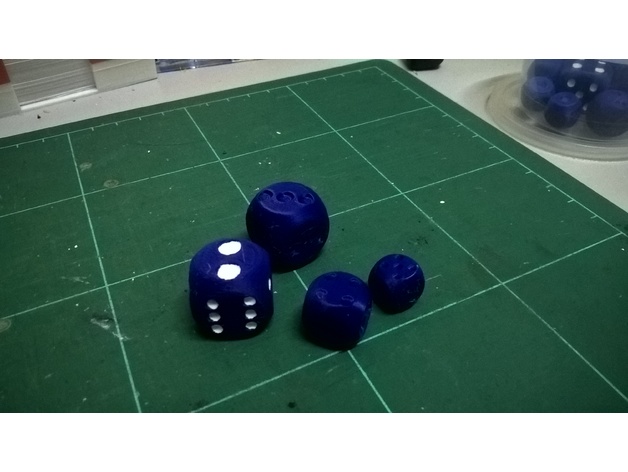
The Dramatic Yet Fair(er) D6 3D Print Model
Summary
Similar to my D20 design, this is what I considered to be an ideal D6 with the following characteristics:
Rolls just the right amount even with the smallest amount of effort (even as close to none), to prevent cheats or just standard flukes
Show a hint of uncertainty before settling on a face, making it more exciting to witness the results of a roll
All pips indented in a way that they can be easily read even without painting them
Have the (almost) perfect weight distribution with the right amount of indentation and pip sizes
Has a better numeric distribution on the die so that whichever the edge or corner it traverse would have an equal chance of getting both high and low values (inspired via this Youtube video https://www.youtube.com/watch?v=pF8goco4ix0)
Requires no supports when printing using FDM printers (* may need minimal supports for larger prints)
You can get a preview of how the die behaves in my video here: https://youtu.be/_clKuOQilCs
There are two versions of the die included:
D6_fairer.stl – This is what I consider to be default but uses a non-standard number distribution to ensure that which ever corner/edge the dice traverse, you are likely to encounter a good spread of possible low and high values
D6_standard.stl – This would be your standard “opposite faces add up to 7” dice. Have included this version because there are some modern tabletop dice games that use this characteristic as a mechanic where you manipulate the dice to its opposite face.
The design is a 100mm die and can be resized to whatever you fancy. Personally recommend standard sizes of 12mm, 15mm, 20mm and 25mm.
Print Settings
Printer Brand:
Prusa Printer:
Prusa Mk2 Rafts:
Doesn’t Matter Supports:
No Resolution:
0.15mm Infill:
30% Notes:
At 25mm or smaller sizes, would recommend a 25% or 30% infill to make the die have a satisfying weight and sound.
Post-Printing
You might want to use a file to smooth out the round edge of the bottom (where the 1 pip face is at) and probably the top. Just so you get a smooth feel to the whole die.
How I Designed This
The die is designed in FreeCAD 0.17.
As much as I won’t be posting the original file as it took me a long time to tune every single measurement to make it perfect, the general idea of how it is done can be viewed in this video tutorial by another Youtuber 🙂 https://www.youtube.com/watch?v=uBKhBwSP_iM -
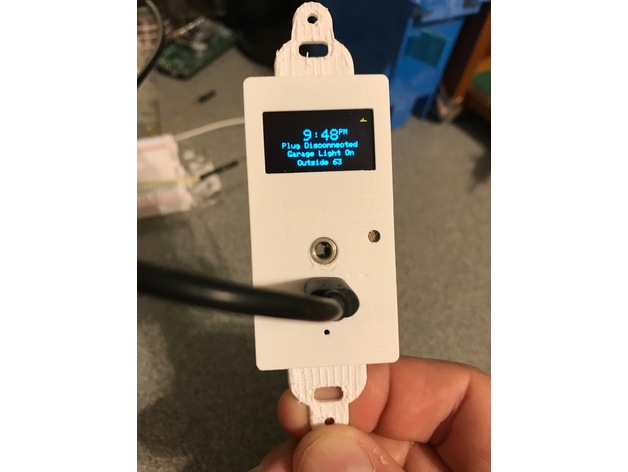
Room_Monitor 3D Print Model
Summary
Needed a sensor for detecting “lights on” and “door open” for the garage. Plate has a hole for a 3.5mm jack (I used Digi-key CP-SJ1-43502PM-ND), photo sensor, and mini USB jack. The photo cell glues into place. A Particle Photon slides into the plate exposing the USB port for power and is held in place with the …Bracket.stl. The complete unit mounts in a standard (USA) 2X4 electrical box.
I printed it in White PLA (to match the cover plate) at .2mm height and 10% fill
Post-Printing
Special Print Setting
This MUST be printed with Support BUT NO Raft. I printed the plate face down on glass to get a gloss smooth finish.
Also you must tap the two outside screw holes to 6-32 for the cover plate mounting.
How I Designed This
123D -
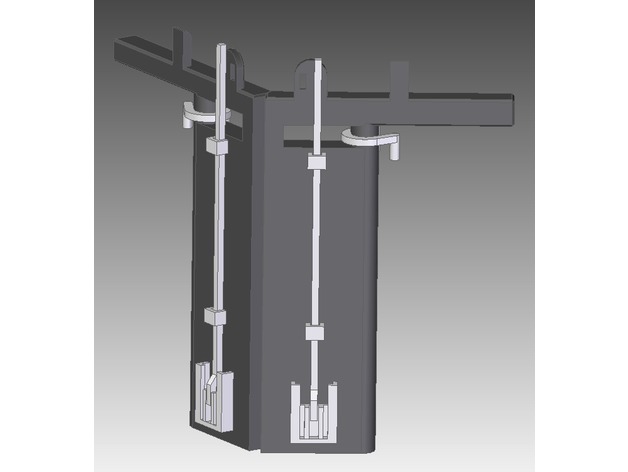
00 scale 7 foot wide canal lock 3D Print Model
Summary
Make from ABS so you can glue with acetone.
I split the Chamber into 7 parts and glued using acetone.
The paddles work they just need gluing using acetone.
Gate hinge pins for the base of the lock gates should be made form some 2mm wire rod.
The boat in the photos is a 00 scale 70′ long narrow boat (not 3D printed). -
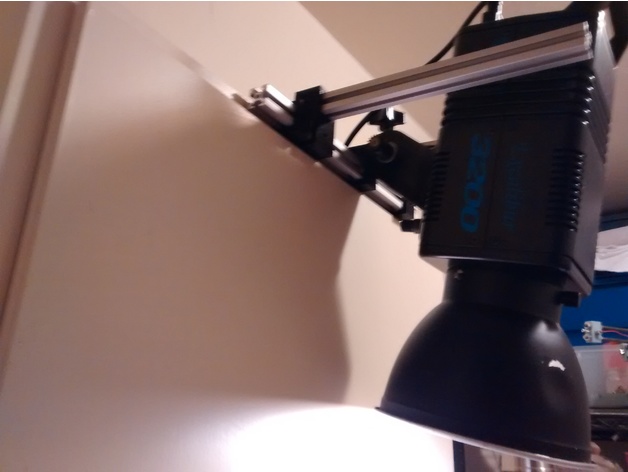
Cabinet Camera/Light holder 3D Print Model
Summary
This is designed for kitchen video system without drilling holes in the walls. It is mounted on top of a .75 inch thick wood cabinet.
Print Settings
Rafts:
Doesn’t Matter Supports:
Doesn’t Matter Resolution:
.2 Infill:
.2 -
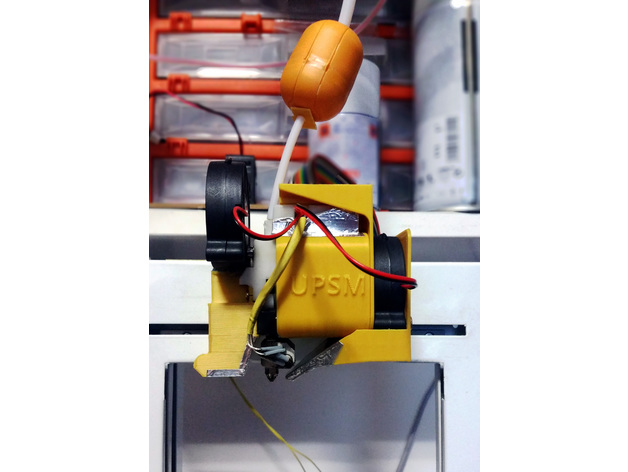
PP3DP UP Plus 2 PLA printing kit 3D Print Model
Summary
PP3DP UP Plus and UP Plus 2 are usually terrible with printing PLA. Three major issues with these printers are
The throat of the hotend gets too hot as heat creep up the steel tube and the PLA starts to bulge there and gets impossible to reliably extrude
Extruder stepper motor gets hot during print, both from the fact that it’s a puny motor doing a lot of work and because it’s used partially as a cooler for the cold part of the hot end. This heats up the PLA print and does not allow it to solidify properly, overhangs are crap and bridges are almost impossible.
PLA requires cooling, the “solution” originally is that hotend cooling duct has a “door” that let some of the air go into to part. The “solution” does not work.
To solve these problems I started by redesigning the extruder cooling. This solves both the issue of bulging inside the hotend and the problem with extruder getting too much heat from the hotend. This solves all the print issues with ABS, PETG, PC, Nylon.. but is not enough for PLA.
To tackle second and third problem this small project was created.
The fan duct goes over the stepper motor and allows for air to pass around the motor and exit back to cool the motor. Make sure you are extracting air and not pushing air in. The “cover” part will clip in to original top part on the UP Plus / UP Plus2 and will come behind the fun duct keeping it in place. As you can notice on both cover and duct there is 2 set of screw holes, 4 holes for the 40mm axial fan and 2 holes for the radial fan. If you do not need part cooling (ABS, PETG..) you mount 40mm axial fan here to extract air and you are golden.
If you do want to use part cooling fan (PLA requires it), I decided to recycle the air and push the air that we get from cooling the extruder motor into the part. This way the air is not “too cold” and will not stress neither the part nor the nozzle and it should (time will tell, so far so good) create PLA parts with less in-built stress. The part cooling duct houses a radial fan (no glue, hotsnot, silicone .. needed, just put it there) and screws trough the back of the cover into the duct.
I’m using custom firmware on the UP Plus2 so I’m controlling the fan trough there. On the top board you can see 3 3pin connectors (picture attached). The leftmost is 12V supply where your extruder cooler is connected. Middle (on the right side of the board the left connector) is also 12V supply and you can connect your fan here. If you are using only motor cooling (no part cooling) this is where you want to connect your fan. The third, rightmost connector is PWM-able. Originally this is where “light strip” is connected on some of these printers. If you have CPU upgrade with NXP chip to run smoothieware (I do) this is on port 1.18. If you are using original UP Studio software then probably check if you can change “light intensity” from software to change fan speed or just connect part cooling to a constant 12V, there’s usually never too much cooling for PLA so should work ok 😀
smoothieware config:
switch.fan.enable true
switch.fan.input_on_command M106
switch.fan.input_off_command M107
switch.fan.output_pin 1.18
switch.fan.output_type hwpwm
switch.fan.max_pwm 100
switch.fan.ignore_on_halt true
switch.fan.startup_state true
switch.fan.startup_value 0
switch.sw1.fail_safe_set_to 100
Print Settings
Printer:
self made Rafts:
Doesn’t Matter Supports:
Yes Resolution:
0.2 – 0.3 Notes:
You want the part to be solid but everything is “thin” here so the infill itself is irrelevant (I use 0%) but you want
4top, 4bottom solid layers
5 perimeters
I printed this in ABS, some other high temp plastic should work (PETG should be great for cover for e.g.)
Do not print in PLA it will deform quickly
Post-Printing
Self adhesive aluminium tape is your friend 🙂
remove supports
take a piece of self adhesive aluminium tape and attach it over the top part of the part cooling duct “nozzle”. This way the heat from the heater block will be reflected and part will last much longer. Also the ABS oils and other dirt that exist in vapors around the heater block will be easier to wipe off.
if you feel the whole contraption is not “stiff” enough, you can use a small piece of tape and attach the duct to the top plastic piece housing the small pcb board.
How I Designed This
onshape source available
this whole project was heavily influenced by PrintMo’s work -
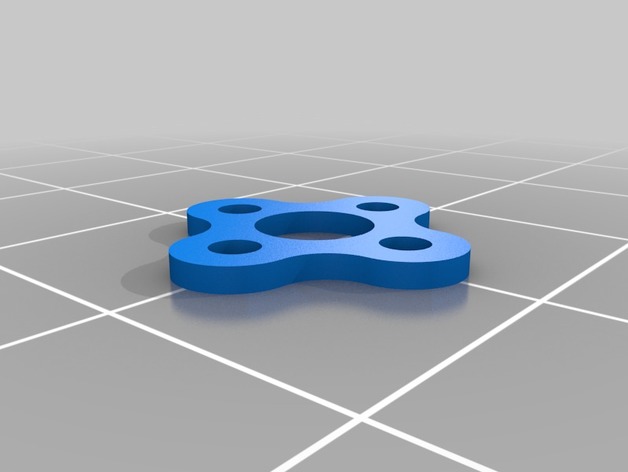
Flexible motor dampener collection 3D Print Model
Summary
Shock absorber to reduce Motor vibration. Must be printed on TPU or TPE
Included Designs*:
· 11xx
· 13xx
· 18xx
· 22xx
· 23xx
· 28xx
· 31xx
· 35xx
· 40xx
· 41xx
*These are general designs for most brands and models. It is possible that with some mark does not coincide exactly the measures
By AIRK – http://www.airk.eu -
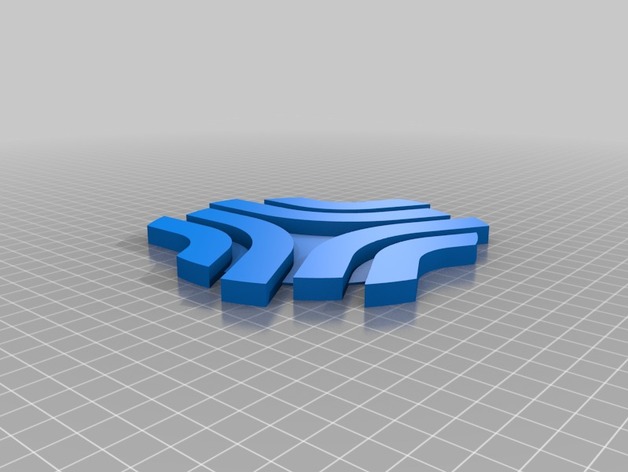
Boosted Board Logo Charger Cable Holder 3D Print Model
Summary
I wanted somewhere to put my charge cable when not in use, so decided to make a large version of the logo, where the spacing between the logo holds the charger cable. Lots of ways to place the cable in the logo. Grab the most orange filament you have, set your printer to fast, and stick the result to your wall, above your pride and joy! -
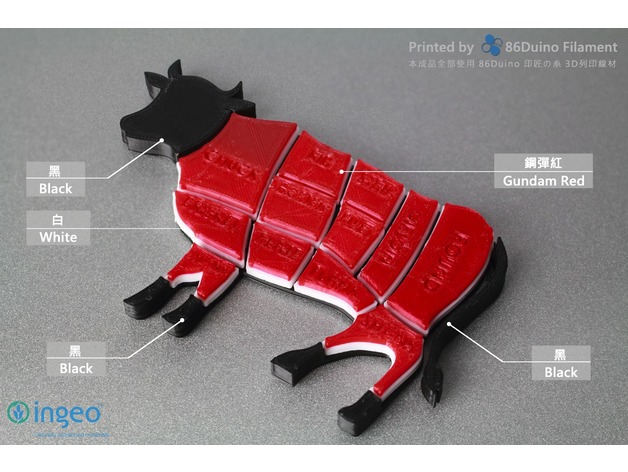
86Duino Steak profile 3D Print Model
Summary
For more printing object please visit 86Duino facebook and give us a “like” and thanks for the tips…https://www.facebook.com/86duino
喜歡圖檔的好朋友請記得到 86Duino Filament 3D 列印 / 耗材 – 不正經研究中心 粉絲團給我們按讚哦 https://www.facebook.com/86duino
Post-Printing -
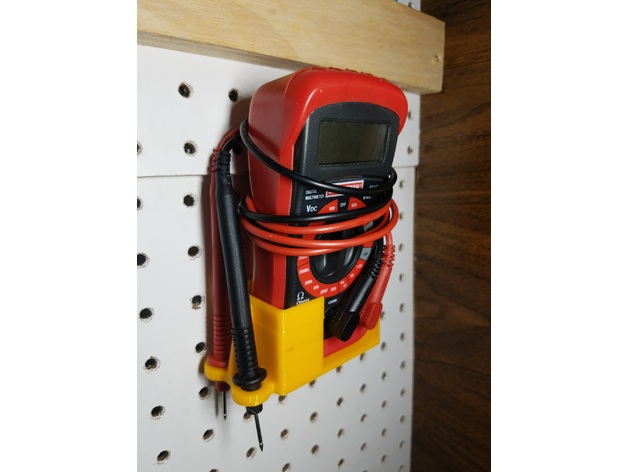
Multimeter Pegboard Holder 3D Print Model
Summary
Pegboard holder for a Multimeter,
Has the pegs as separate parts, they are a lose fit and made to be hot glued in place!
Can fit Meters about 2.5″ x 1.75″ base.
Print the holder and the pegs so the base plate is flat on your print bed.
If you make one, post it! Id like to see!
Print Settings
Printer:
Anet A8 Supports:
No Infill:
20 -
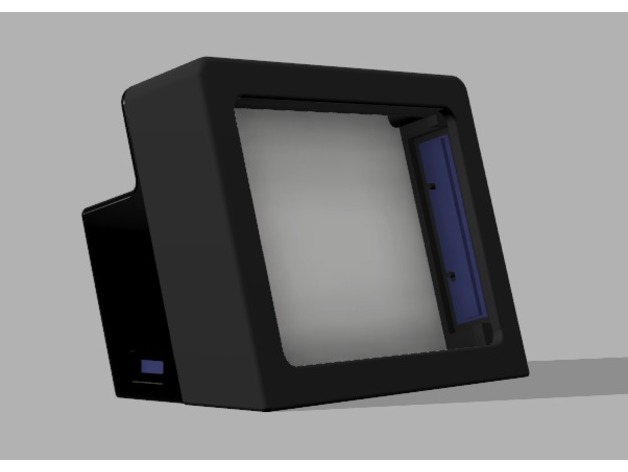
Neopixel Lithophane Frame 3D Print Model
Summary
This is a lithophane frame backlighted with 2×8 Neopixel sticks controlled by a Adafruit Trinket 3.3v.
It is designed for a 100x75x3 mm Lithophane with 5mm border.
It is powered from a 1100mAh battery and rechargeable via USB. It has an on/off switch and a potentiometer to go through different colors.
You can grab de Trinket code and schematic from GitHub.
Print Settings
Printer:
Tevo Tarantula Rafts:
No Supports:
No Resolution:
0.1 Infill:
20% Notes:
Print the frame in every color you want.
The reflector may be printed in glossy white.
The difusser for battery leds may be printed in clear PLA -
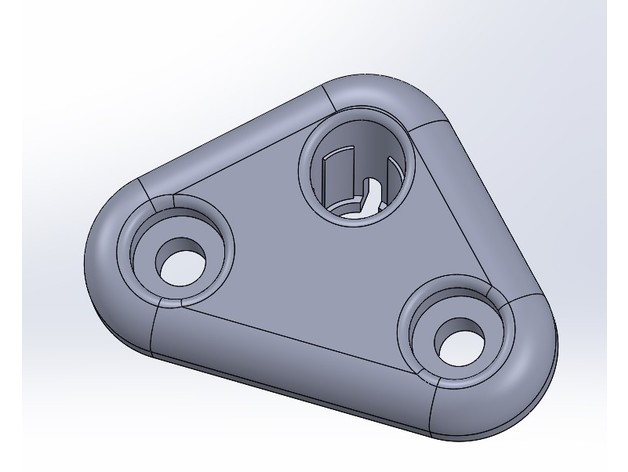
Subaru Forester Sun Visor Mount 3D Print Model
Summary
This is the mount that holds up the sun visor in a 2008 Subaru Forester. On my 10 year old car, the visor mount cracked and the visor fell out, so I designed this replacement. It works great. I would imagine that it works in other model years and maybe even other Subaru models as well, but I do not know for sure. I printed this in ABS and it works great. Keeps the sun out of your eyes!
SolidPart is from SolidWorks 2016.
Print Settings
Printer:
Fusion F306 Rafts:
No Supports:
Yes Notes:
I tried this part in several orientations. It worked best with the flat side on the printer bed. The determining factor is how well the ears at the bottom of the hole grab the end of the visor. I didn’t like having the flat side completely smooth because it doesn’t match the texture of the other materials in the vehicle, but the print was the best in this orientation. -
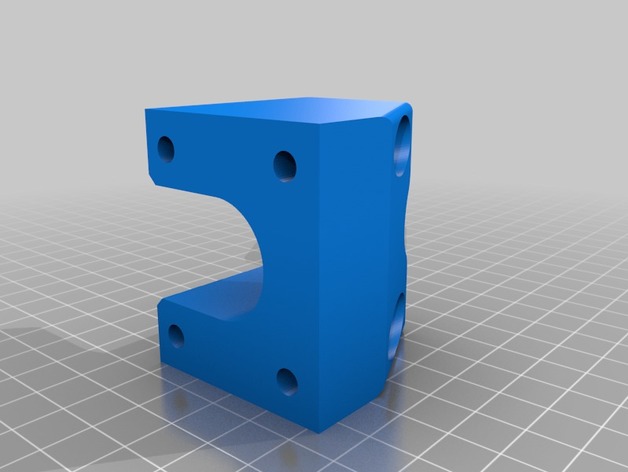
Skookum 18mm pipe side holder for shelving rolled sheet material such as fiberglass 3D Print Model
Summary
Made these to mount on plywood to make a rack for rolled sheet materials: Fiberglass, carbon fiber, protective sheeting etc.
Use M5 screws / bolts to mount. These are skookum as frig!
Print Settings
Printer:
CR-10 / Ender-4 Rafts:
No Supports:
No Resolution:
0.4mm Infill:
15 Notes:
1.8mm walls. If you feel it is not strong enough make thicker walls / Add infill.
PLA is suitable for this task.
Post-Printing
Might require some minor cleanup with a drill bit.
In my design i used 230mm x 230mm spacing for 2 rows of materials.
It means on first row 460mm between mounting points, and in the middle 230mm deeper is another roll.
Recommend lowest is a bit higher, measure your material and decide which suits you best 🙂 -
Garbage Bag Clip 3D Print Model
Summary
I want to try making a clip for garbage bags, based on a shortened version of a clip to an english muffin package I had laying around. -
Worlds First 3D Printed Fishing Fly – The Garrett Adams 3D Print Model
Summary
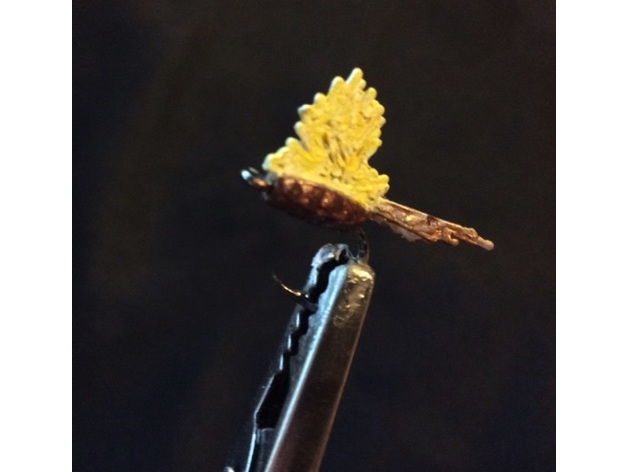
Worlds First 3D printed “dry fly” – based on the popular Parachute Adams traditional tied fly.
More to come, as I get better at “hair” and related natural replications. Will also add pictures of 3D printed fly’s in action!
Enjoy! -
Mega Housing 3D Print Model
Summary
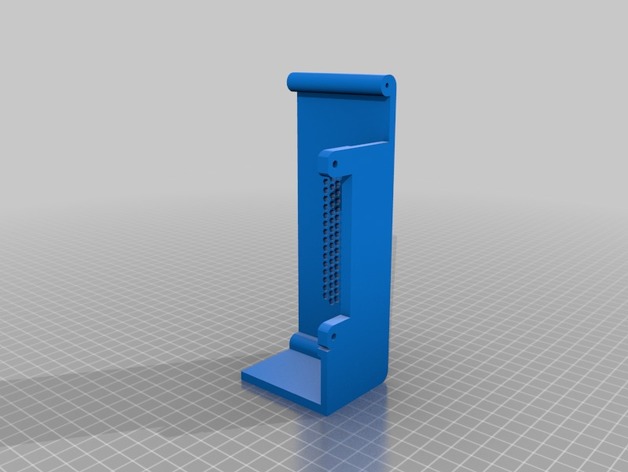
I got the idea for this after the significant other decided there was a good chance that a sideways glance from her would destroy my printer. I originally was going to just print something that had already been uploaded but I couldn’t find something that would really work so I used the lid off of the geeetech 2560 GT housing and designed my own frame. I have included 2 different versions though one I would suggest you print only if you are courageous. I have included links to the amazon fan controller and fan I opted to use. I also included the SolidWorks files for those who like to tinker.
Print Settings
Printer Brand:
Prusa Printer:
Prusa Clone Rafts:
Doesn’t Matter Supports:
No Resolution:
.2 Infill:
25% Notes:
YOU MUST USE RAFTS ON THE ONE WITH THE OVERHANG OR HAVE A HELL OF A MESS TO CLEAN UP.
Post-Printing
IT GOES WITHOUT SAYING
If you want to print the file with the stadium style top you are definetly going to have to tinker with the supports and the infill should be at lest 50 as the walls are rather thin.Custom Section
Items used
Temperature sensor and fan controller
https://www.amazon.com/gp/product/B016OA7KNE/ref=oh_aui_detailpage_o09_s00?ie=UTF8&psc=1
Fan 4 wire 80mmhttps://www.amazon.com/gp/product/B00H3SWJ24/ref=oh_aui_detailpage_o08_s00?ie=UTF8&psc=1 -
Bead Craft Station 3D Print Model
Summary
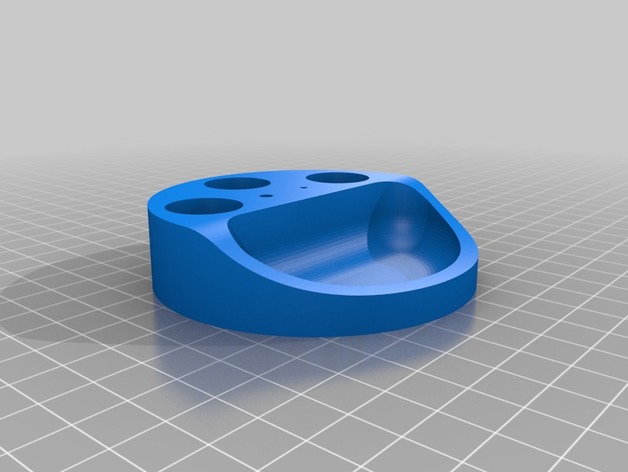
This is a beading station that holds 3 bead canisters (17.9mm diameter), a sewing needle (1.8mm) and a number 6 crochet needle (3.3 mm). It also has a rounded bead bowl in the front. My wife makes bead bracelets and needed a way to avoid spilling her tall canisters.
If the needle hole sizes do not match your taste, just drill them larger after printing.
Dimensions
80mmx80mmx20mm
Print Settings
Printer:
Monoprice Select Mini 3D V2 Rafts:
Yes Supports:
No Resolution:
0.2mm Infill:
15% Notes:
Speed: 35mm/s
Top/Bottom thickness: 1.2mm
Shell thickness: 0.8
Temp: 195/45 -
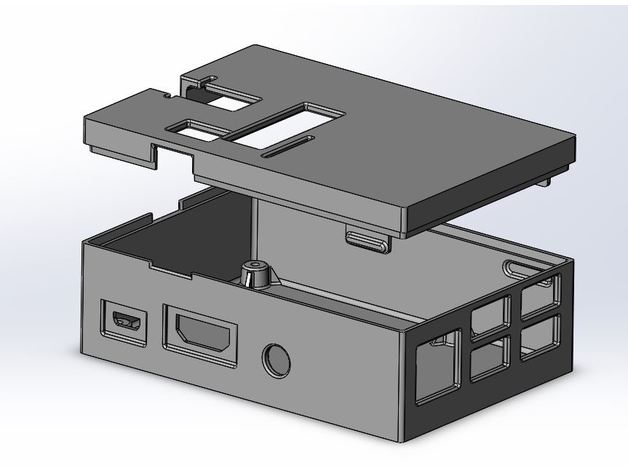
Raspberry PI case for RGB Matrix Hat 3D Print Model
Summary
This Raspberry PI case was designed to accommodate the add-on card “RGB Matrix HAT + RTC” from Adafruit. See the product here: https://www.adafruit.com/product/2345
That add-on card was needed for the Raspberry PI LED Matrix Display project.https://learn.adafruit.com/raspberry-pi-led-matrix-display/software?view=all
I made the shell 2mm thick and mounting bosses 5mm high
Sidewall indents for the power plug and HDMI cable are only 1mm thick to ensure the plugs have a solid connection
Screws used to mount the Raspberry Pi:
“#4 x 3/8in” -
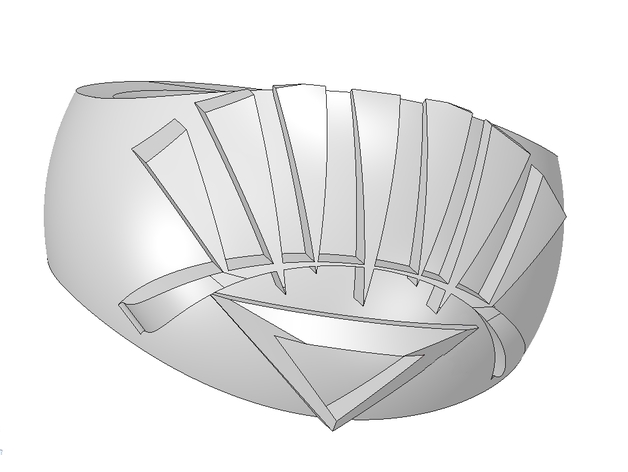
White Lantern Ring 3D Print Model
Summary
I made this ring for my 5 year old daughter. Should size nicely. Just making these for fun, and I’m open to requests! This is the White Lantern’s power ring. -
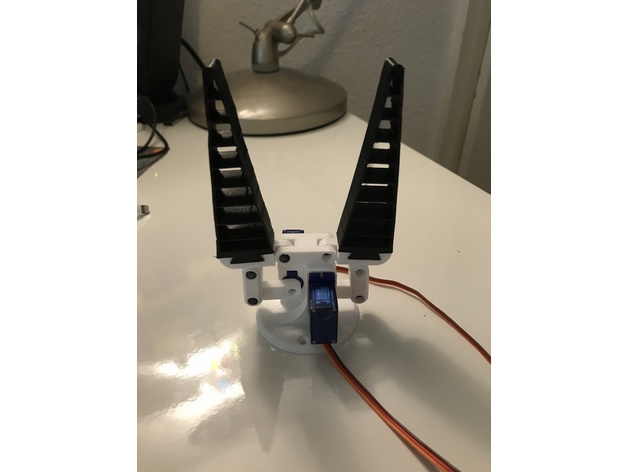
Adaptive Gripper V1 3D Print Model
Summary
Created this thing for my robotic arm. It is not as strong as I wanted it to but it works great so I bought why not publish it here.
Servo:
Tower Pro 9g
Parts:
1x main
2xServoarm
2xconnectingpeace
2xGripperholder
2xGripperflex
6xBolt (5mm*15mm) you can print them aswell
Print Settings
Printer Brand:
Prusa Printer:
Prusa Mk2 Rafts:
No Supports:
Doesn’t Matter Resolution:
0.2 Infill:
20% Notes:
Main part needs support other parts can be printed without. -
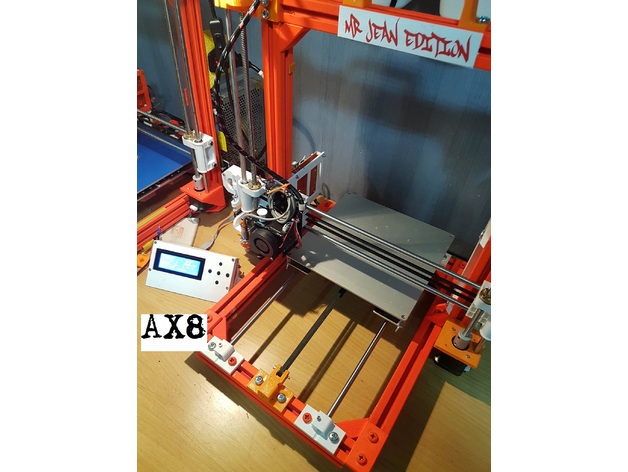
AX8 Anet a8 frame ( AM8 remix ) 3D Print Model
Summary
Just a 3030 anet a8 🙂 , is a AM8 remix so all credit go:
To pheneeny for https://www.thingiverse.com/thing:2263216 ( many parts )
To EclipseDS for https://www.thingiverse.com/thing:2374402 ( Z rod )
to Leo_N for https://www.thingiverse.com/thing:2360242/#files ( fan and sensor )
to jbrandonferg for https://www.thingiverse.com/thing:2127743/#files ( x belt tentions)
to GaryK47 for https://www.thingiverse.com/thing:2367376/#files ( cable holder )
to runtimejack for https://www.thingiverse.com/thing:2380794 ( psu mount )
LCD mount u get here https://www.thingiverse.com/thing:2005640
like i said before , i remixed somes parts and adapted them to 3030 , works perfekt , i just use screws from local store , m6 10 and m6 nuts , printed brackets and works like a dream, i used to put a screwdeiver on the side of the nut when i screw it , i dindt buy any special screw/nuts , i am not pro on this so please if u can make some upgrades just do it <3
Thx
Mr Jean
Print Settings
Rafts:
Doesn’t Matter Supports:
Doesn’t Matter -
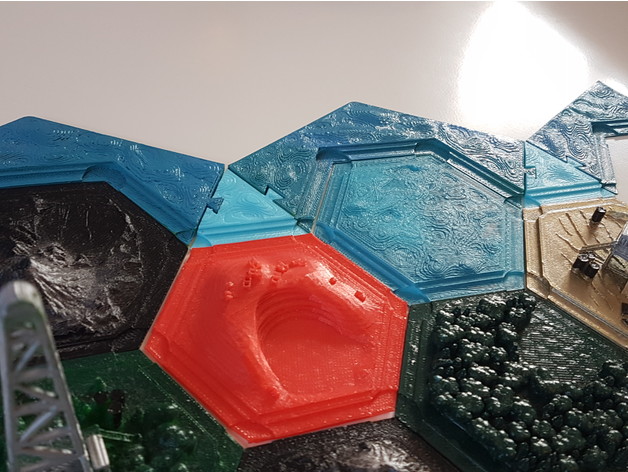
Settlers of catan triangle border 3D Print Model
Summary
For some scenarios the boarders don´t fit so i made a triangle for those cases i also have another remix coming soon. -
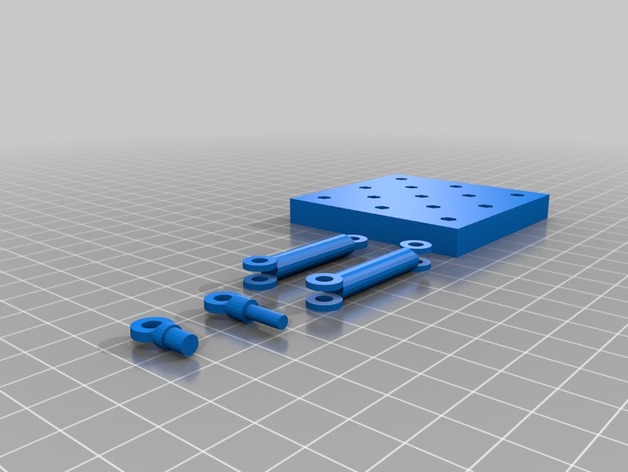
Nendoroid Stand / Base / Support 3D Print Model
Summary
Experimental version!! Need to print and test it
Nendoroid Base, using Legend Of Zelda Majora’s Mask version one for reference -
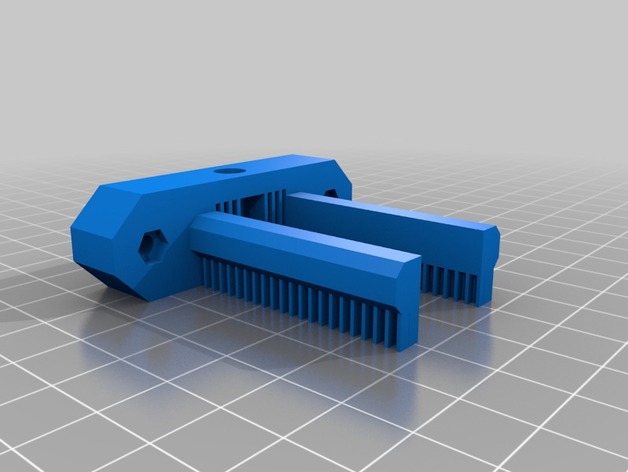
X-axis tensioner for use with toothed idler. 3D Print Model
Summary
I recently released a x tensioner for use with my own x axis parts. This version is based upon the same design but with a few modifications to suit a stock x axis on the Anet A8 (The version with ABS printed x axis sides though it may work with the injection moulded parts too!)
This is oriented as intended for printing with supports built in. You will need to cut away the supports on the underside of the two prongs, the supports inside the central rectangular hole and most (not all) of the cylinder in the center.
You should ideally leave an equal amount of the central cylinder on either side such that the idler wheel is barely able to move from side to side but can rotate freely when mounted.
My first print of this is not ideal as I had set the bed level incorrectly and had a belt tension problem at the time. I will be reprinting.
Print Settings
Printer:
Anet A8 Rafts:
No Supports:
No Resolution:
0.4mm nozzle and 0.32mm layer (0.2 would also be fine!) Infill:
50% but you can probably get away with a bit less
Post-Printing
Supports will need to be removed from the model after printing and before fitting. You will also need 3 sets of m3 screw and nut to hold the idler in place and fit to the top and bottom of the part to allow you to adjust the screws to tweak the tension in the x axis belt.
How I Designed This
A few modifications on a previous OpenSCAD design used in my version of the x axis idler and motor mounts. Slightly thicker walls to accomodate recesses for nut and screw head on the idler hole, thinner prongs due to available space and slightly increased gap for the idler to be mounted. -
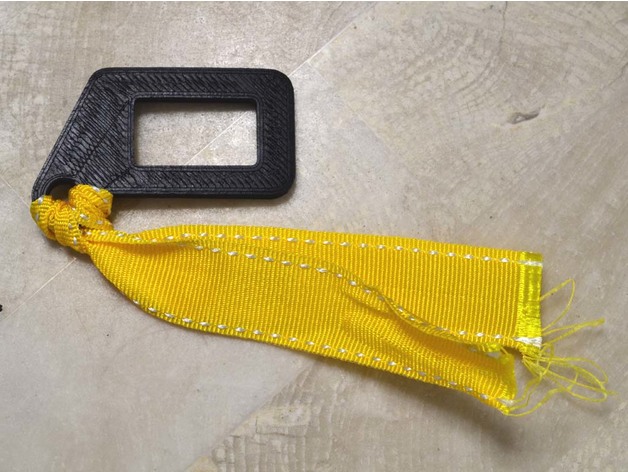
Seat Belt Alarm Stopper for SUBARU 3D Print Model
Summary
When putting a load on the rear seat, the seat belt alarm sounds.
I made alarm stopper as it is noisy.
Seat belt alarm stopper is commercially available.
But their heads were big and disturbing.
Print Settings
Printer:
JGAURORA A3 Rafts:
No Supports:
No Resolution:
Z Step : 0.2mm Infill:
20% Notes:
The filament used ABS.
Even if the inside of the car gets hot, it will not melt if it is ABS.
Post-Printing
I attached a ribbon to make it easy to handle. -
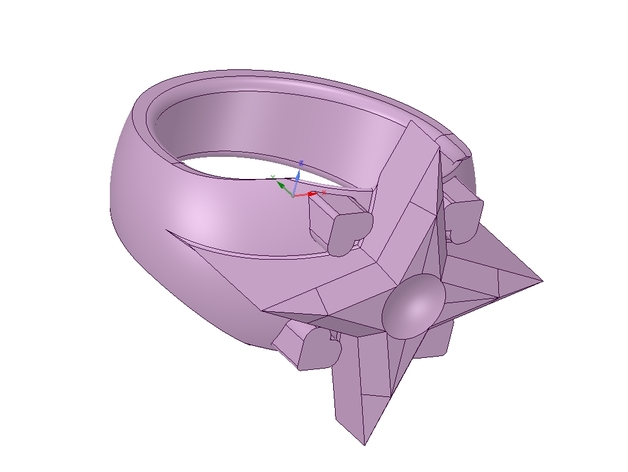
Star Saphhire Lantern Corps Ring 3D Print Model
Summary
I made this ring for my 3 year old. It’s my own interpretation of the otherwise plain logo that the Star Sapphire lanterns use. -
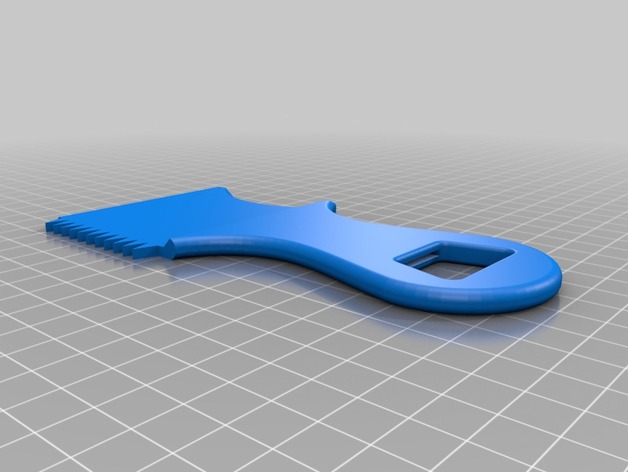
Surfboard Wax Comb with Bottle Opener 3D Print Model
Summary
Hey brah, wax your board then pop open a cold drink with this handy wax comb.
The bottle opener idea is from this model. After printing, use pliers to push a penny as far as you can into the slot. -
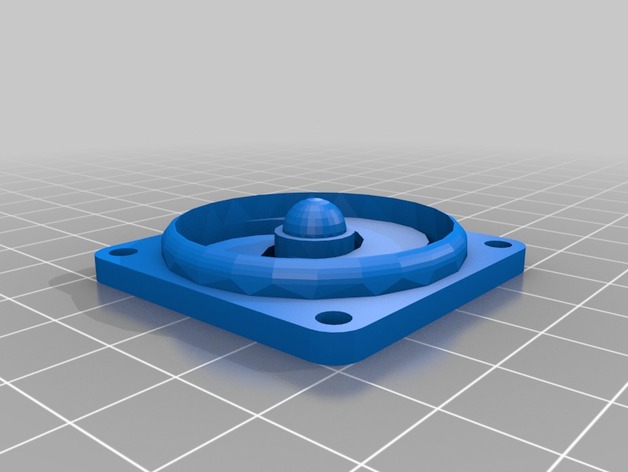
40mm fan cover for anet a8 3D Print Model
Summary
40mm fan cover designed to fit in place of the metal one on the anet a8 -
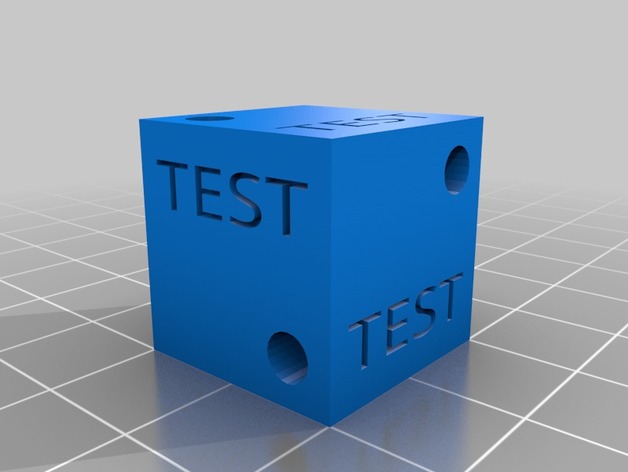
Calibration Testcube with bores 3D Print Model
Summary
simpe testcube for x y z axis bore calibration -
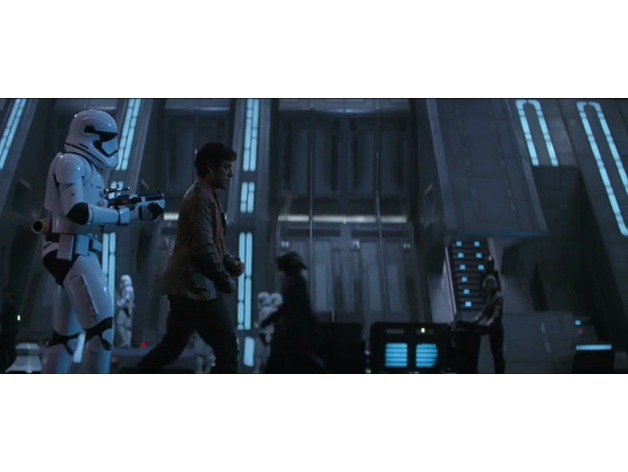
First Order Hanger Generator 3D Print Model
Summary
Created a First Order Hanger Generator for my 1:72 Hanger diorama. It is a bit small, but it works, Printed it in blue transparent filament. Can be scaled up for other models
There is a solid version (with a hole for a 3mm led)
and a open one that comes in 5 parts (3 handles, 1 lid, and one body)
Print Settings
Printer Brand:
Ultimaker Printer:
Ultimaker 2 Rafts:
No Supports:
No Resolution:
0.02 Infill:
100% -
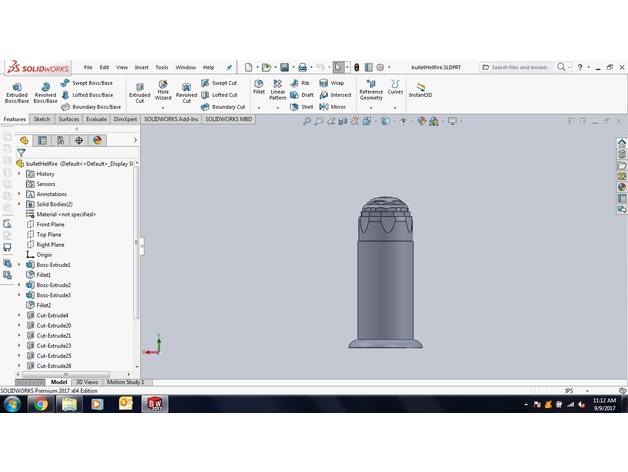
Shadows of Brimstone Hellfire bullet 3D Print Model
Summary
Hellfire bullet for Shadows of Brimstone -
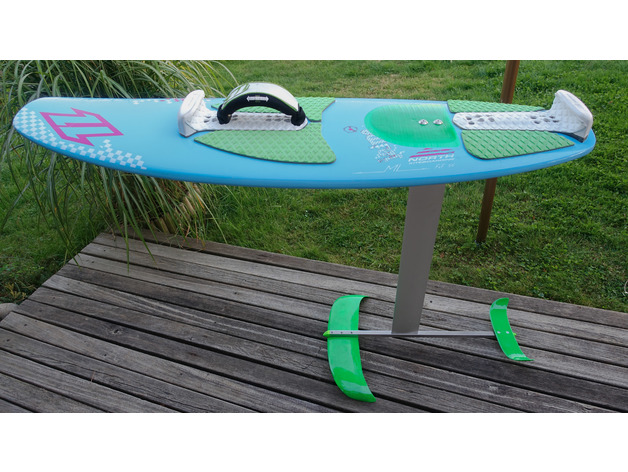
Kite Foil 3D Print Model
Summary
A hydrofoil allows kitesurfing in very low wind conditions. Unfortunately, they are quite expensive.Therefore, I decided to build my own.
I used for both wings an Eppler 817 profile
The wing area is about 600cm2 / 200cm2
The mast is a Manta 2 aluminium mast
buyed here: https://www.mantafoils.com/e-shop/Manta-aluminum-mast-production-scrap-p59642799
For the fuselange i choosed a 20×20 stainless steel square tube
The 3D-Printed wings were covered with gfk, the mast-box is also laminated with gfk.
The Board is a North freestyle fish 5`2″
The laminated wings are very stiff. The mast to board connection with the 3d mast adapter is not as stiff as i wished. Perhaps a laminated mast base plate is the better choice. -
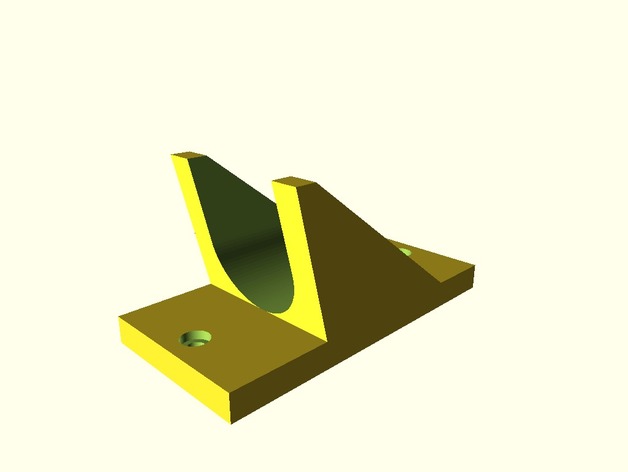
Not so sharp Shovel Wall Hook 3D Print Model
Summary
Altered the end angle a bit so it wasn’t so sharp. Also removed the backside relief pocket so it would print cleaner for me. -
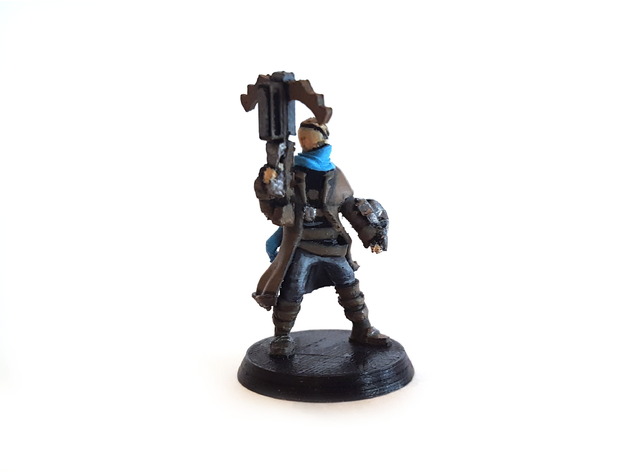
Pathfinder Inquisitor with Crossbow 3D Print Model
Summary
This is a miniature with a 25mm base for a recent game of Pathfinder that I was playing (model and character’s name is Tycho). Printed with a .3mm nozzle with supports built into the model. I would not recommend trying to print with a larger nozzle without enlarging the model as well since much of the detail will be lost.
There is a fair amount of trimming that must be done to remove the built in support but I found that the model comes out with better surface finish using modeled supports rather than automatically generated supports.
Happy gaming! -
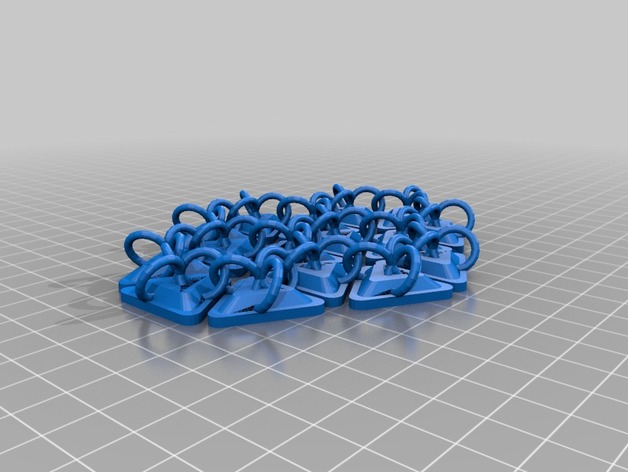
Triangular Scale Mail Pattern 3D Print Model
Summary
As with my other two scale mail patterns, this design is tileable and prints interlocked. I would recommend printing it on glass if you want it to look glossy…
I have not printed this design yet, and I doubt I am going to get a chance to soon. The school workload is stepping up. I wanted to upload my design so that others might print it and find ways to modify and improve it.
Please scale it to whatever dimensions you want. LMK what works and what doesn’t in the comments! I’ll get to it when I can.
Happy printing! -
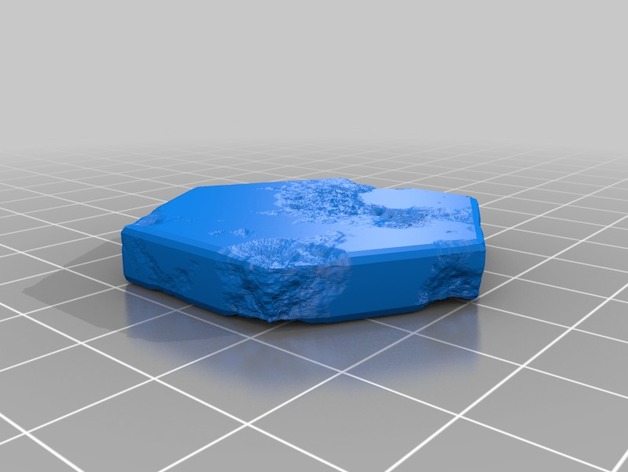
Hexagonal Armor for wasteland 3D Print Model
Summary
Some corroded hex plates for armor or hanging doodads and flare. use these for whatever you desire, but have fun. -
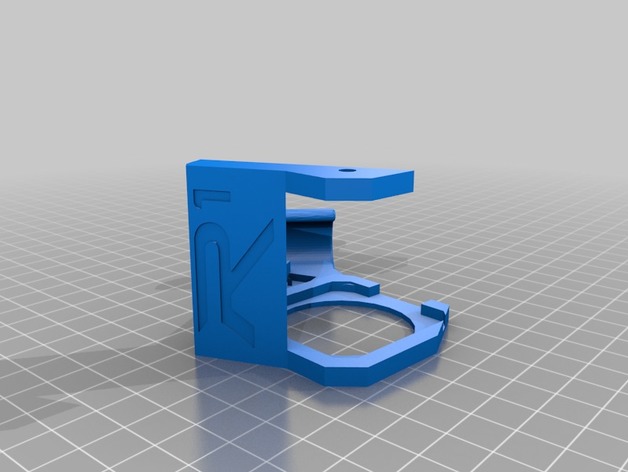
Robo 3D R1 Plus Shroud with Cable Hook 3D Print Model
Summary
This was a simple combination to allow an easier alternative to a cable chain. It seems to work fine if you add the two screws to fasten it down.
Print Settings
Printer Brand:
Robo 3D Printer:
R1 ABS + PLA Model Rafts:
Yes Supports:
Yes Resolution:
.2 Infill:
100% -
MicroBitBox 3D Print Model
Summary
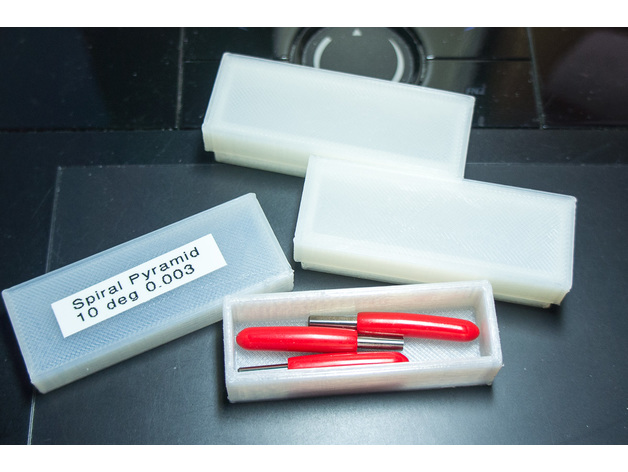
Small handy box for storing small too bits, drills, etc. Prints quickly, low cost.
Print Settings
Printer:
AnyCubic Delta K2 Rafts:
No Supports:
No Resolution:
.02 layer height, 3 walls (1.2MM) Infill:
20% Notes:
Size 60 x 20 x15 MM
How I Designed This
Nice fitting small box with lid.
I have a collection or tiny end mills used in CNC carving wax for “lost wax” casting of silver jewelry. I wanted a small box I could label to store these milling bits. They are 1/8″ diameter with tip sizes down to 0.003″.
Could be useful for storing spare small drill bits. I usually buy in multiples.
Easily labeled using a Brother P-Touch.
Overall size of this MicroBitBox is 60MM x 20MM x 15MM (LWH). The top is a secure snug fit. The box section is designed to be stout (heavy wall) while the top is purposely lighter weight.
I used natural PLA in the examples shown. -
Fitting Planetary Gear 3D Print Model
Summary
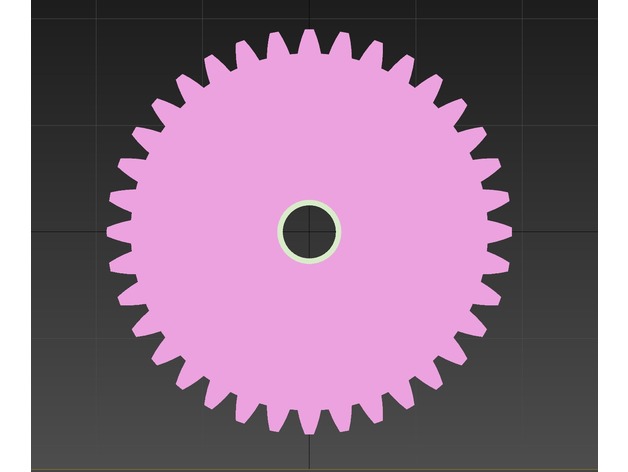
The sun and planetary gears did not fint the shaft. So I widened the holes a tiny bit to make them fit
It includes all needed files to print. Just make sure you print 3 x planet gears and 1 x sun gear
Print Settings
Printer:
Anet A8 Rafts:
Doesn’t Matter Supports:
Doesn’t Matter Resolution:
0.12mm Infill:
20 -
Taz 4 (or 5) Hot End Extruder Bracket Clamp 3D Print Model
Summary
I still use my Taz 4 which I bought in 2014. One thing that always annoyed me was the fact that the hot end assy holder which only has one screw at the top (for quick assembly) allows the weight of the extruder and hotend parts to allow the bracket to pull forward at the top corners of the bracket. I usually use some plastic clamps to pul the bracket back at the corners to the X-carriage and double bearing holder. I would be happier if the design used screws at the corners. The result of the corners pulling away from the carriage is some slop in the hotend which causes deviations and irregularities in the paths as the hot end changes direction. Some of that can be seen as patterns over a large flat surface. The clamps help some, but the entire system has play so you cannot get rid of all of it. Also, poor adjustment and leveling of the bed can make this issue worse.
Anyway, I have used some cheap plastic clamps from Harbor Freight but they pop off easily because of the geometry, and I decide to do something to improve the clamping.
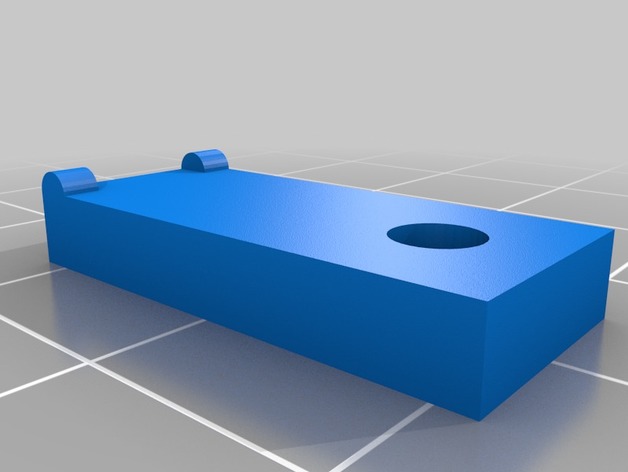
The result is what you see here. It uses two different clamp pieces and a 6-32 x 1.25″ long machine screw and two #6 nuts (because that’s what I had). You could use M3 hardware of the same length. On each corner the existing outer top double bearing holder screw and washer is used to hold the shorter part of the clamp. It is a bit too short for my taste so I will get an M5-.5x15mm screw when I get a chance. The stock one is a bit short even though I recessed it into the clamp. But it works for now. Note that the long clamp has two bumps on one side that go against the extruder bracket. On the left side those two bumps actually straddle the gusset. The extra nut is to help keep the bracket straighter. As you can see it starts to tilt as it is tightened. You only need to tighten it enough to pull the bracket against the X-carriage; just lightly tightened. If I figure out something better, I will revise this. This design will fit both the V1 Budahschnozzle and V2 all metal extruder brackets. (The heights are different). You may need to clean up the holes with a .140″ and .130″, or close, bit to insert the screws more easily. I used a fairly high fill: 90%. I used ABS with a .5 nozzle, .20mm layers and slowed it down about 20% to get the parts to stick well.
There are other solutions involving a major overhaul to the X carriage parts, but this is a fairly easy improvement. -
Skull Worx wheel hub cover 3D Print Model
Summary
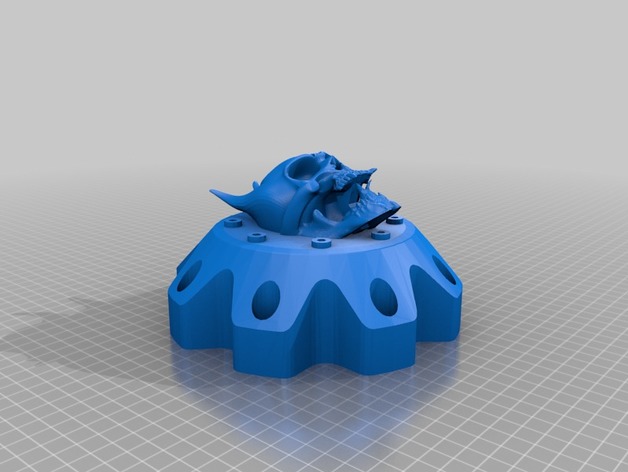
Just blended Wheel Hub Cover for Worx 803 Beast Truck Wheel by anglegrinder9 with Oni Skull by Jooxoe3i to create a skull wheel cap not printed or tested yet just thought it may look cool 🙂 I may add more soon 🙂 threw in the blank 1 too for those of you who wish to add your own logos or models -
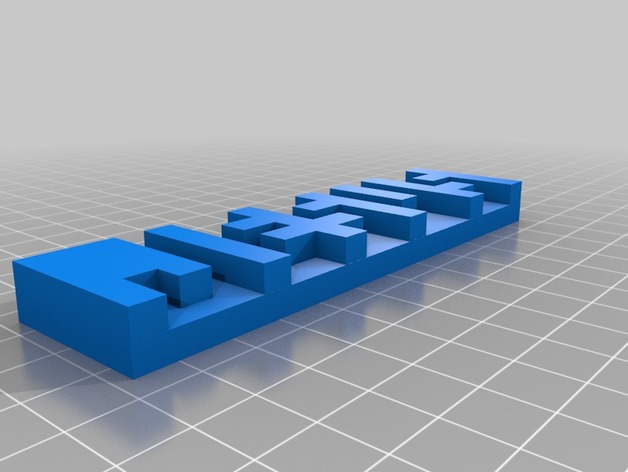
Jesus optical illusion 3D Print Model
Summary
I tried to cut this out of wood. (one layer not both at a time) It was very difficult to sand and make it smooth. So I figured why not design one then 3D print it. -
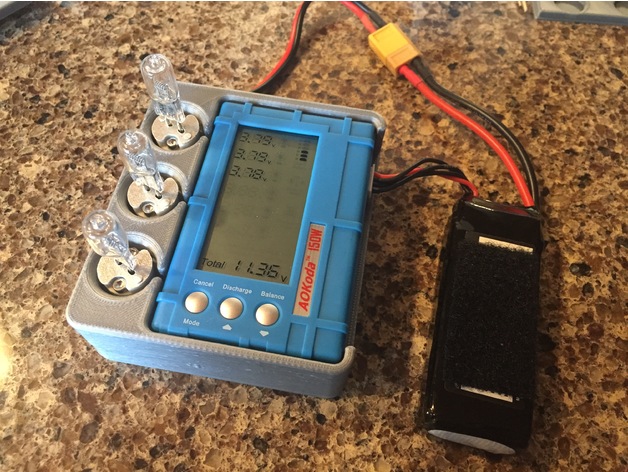
3 in 1 150W Discharger Voltage Tester Balancer For Lipo Battery 3D Print Model
Summary
Housing for the 150W lipo discharger that many RC guys are using. Has a press fit compartment for the actual controller and holders for the three light bulbs fixtures. The light bulb controller and all wires are located underneath the controller. There is also a storage compartment with a slide out cover to hold the battery cable and the three light bulbs when not in use. The unit ships with a Deans style T connector and I purchase a 9″ long XT-60 adapter cable and it is about the perfect length to be able to store and still easily reach the battery balance connector location when in use.
Hardware Required
Qty 18 x 4-40 Socket Head Cap Screws 0.500 long. (6 for bulbs holders & 12 for cover)
Qty 6 x 4-40 hex nuts (for light bulb holders)
The 12 screws for the cover can be shorter (I wouldn’t go less than 0.250 long) but the design will accommodate up to 0.500 long.
The threads for the bottom cover are designed into the part, but the screws will end up cutting the plastic a bit on first installation. I find it best to go slow with the screws about 1 turn at a time and then allow the screw to cool before continuing. When turned continuously the screws will get hot enough to melt PLA and ABS and destroy the threads.
I printed in PLA and have successfully discharged a 1500mah 4S battery from 16.8v to 14.8v without any overheating of the plastic parts (all 3 bulbs were on). However the bulbs get VERY HOT, DO NOT LEAVE UNATTENDED. I have not tested higher voltages than 4S.
Design files are included for easy modifications, Print Files are high resolution and do not always render on the thingiverse server.
Discharger amazon (the one in the pictures)https://www.amazon.com/Targethobby-Discharger-Voltage-Balancer-Battery/dp/B01ET33R5S/ref=sr_1_2?ie=UTF8&qid=1504837626&sr=8-2&keywords=150w+lipo+discharger
9″ Deans to XT-60 Cable Amazon (the one in the pictures)https://www.amazon.com/gp/product/B016AN4T8O/ref=oh_aui_detailpage_o01_s00?ie=UTF8&psc=1
Discharger Banggoodhttps://www.banggood.com/AOK-3-in-1-150W-Discharger-Voltage-Tester-Balancer-For-Lipo-Battery-p-1051214.html?rmmds=search
XT-60 Cable Banggood, A little shorter then I would recommendhttps://www.banggood.com/150mm-XT60-Female-Plug-To-T-Male-Plug-Adapter-Connector-p-1137559.html?rmmds=search
Print Settings
Printer Brand:
Prusa Printer:
i3 MK2S Rafts:
No Supports:
Yes Resolution:
.35 Fast default setting with support Infill:
20-25% Notes:
Make sure your slicer is not generating supports for the 12 threaded holes, it will be almost impossible to remove the support material from the threaded holes.
Print in the orientation shown in pictures 3, 4 & 5
How I Designed This
Designed in Alibre Design, Exported to Fusion 360 to add threads, Exported as .stl for printing. -
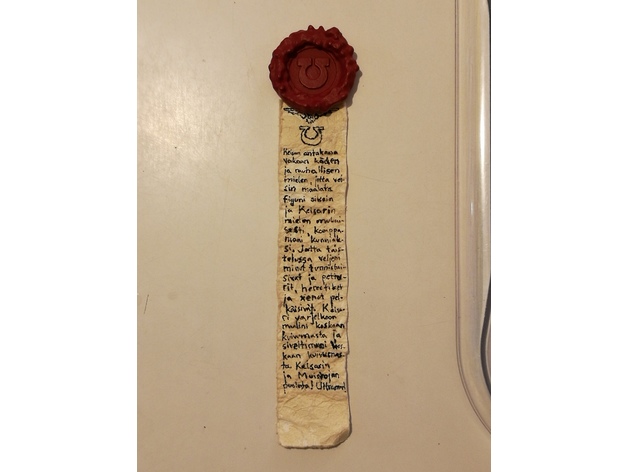
Ultramarine Purity Seal 3D Print Model
Summary
Converted from https://www.ifind3d.com/stl-file/3D-model/design/11898 to incorporate the Ultramarine-logo and a flat bottom and cleaner area inside of the seal. I had to print the Ultramarine-logo as a separate piece since it was easier for the printer that way.
Post-PrintingThis is the final product made as a gift for my dear friend how (like me) is really into Warhammer 40k. I painted the seal first with gesso and the gave it four layers of red. The paper is thick watercolor paper soaked in coffee and I used actual ink and an ink pen to write nonsense about painting and stuff (in Finnish).
How I Designed This
I found the actual seal from the address above and used tinkercad to add and remodel it a bit. I used inkscape to design the logo and then just threw it to tinkercad. -
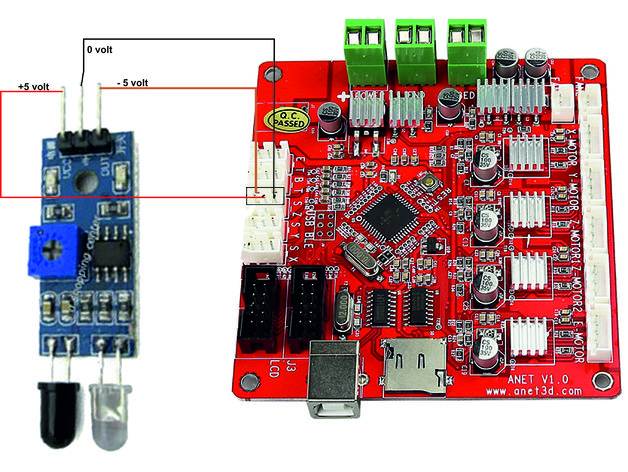
autolevel anet a8 3D Print Model
Summary
autonivel with effective and economic proximity sensor.
is installed directly at end of stroke z axis.
without changes in skinet just as the capacitive does not modify anything. -
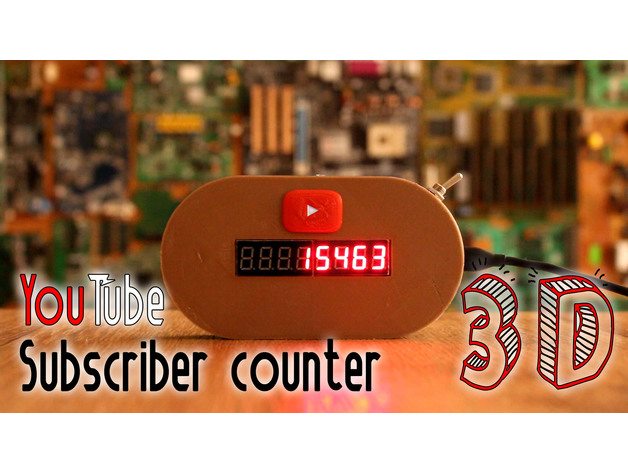
YouTube subscriber counter WIFI 3D Print Model
Summary
This is a homemade WIFI subscriber counter. It has a 3D printed case designed in Blender. The schematic is very easy. The code as well. It is all based on the YouTube API example that you get when installing the library. It uses the WeMos board with the ESP8266 WIFI module. All you have to do is instal the WeMos core, install the youtube API liblary, copy the code, solder the small schematic and upload the code. I hope you enjoy.
Youtube tutorial video: https://www.youtube.com/watch?v=dB7XR6gkT14
Webpage: http://www.electronoobs.com/eng_arduino_tut16.php
Help my projects on Patreon: https://www.patreon.com/ELECTRONOOBS
my Q&A page: http://electronoobs.com/eng_preguntas.php
Creality Cr-10: https://www.gearbest.com/3d-printers-3d-printer-kits/pp_441282.html?lkid=11235055
Anet E10 printer: https://www.gearbest.com/3d-printers-3d-printer-kits/pp_664901.html?lkid=11235052
Print Settings
Printer:
Anet E10 Rafts:
No Supports:
No Resolution:
0.4mm Infill:
20% Notes:
use 2 perimeters -
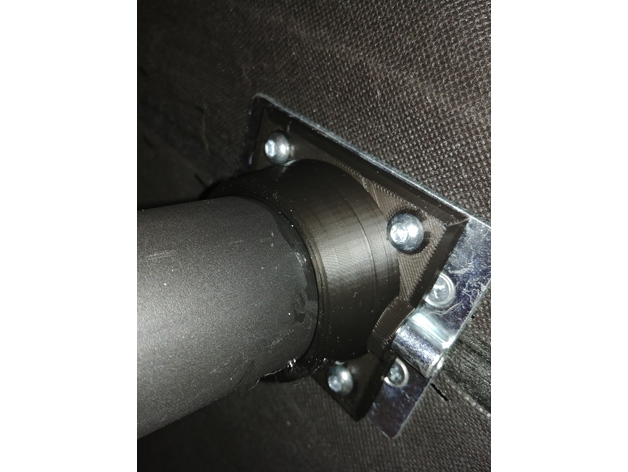
Replacement Leg Brackets For Futon 3D Print Model
Summary
The plastic legs broke on the center of my futon (which for some reason hinges in the middle?!) and so I sawed off the broken bracket portion of the legs and printed replacement brackets which could be epoxied onto the remaining legs. It works great while in place because the brackets don’t need to be load bearing but I would not be able to move the futon without breaking them. So if you use these be smart about it. This futon was a bad design. -
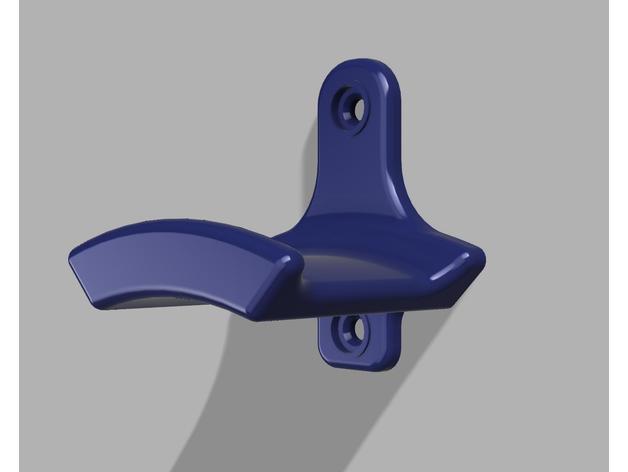
Headphone Hanger 3D Print Model
Summary
A redesign/copy of mistertech’s lovely Headphone / Headset Wall Hanger. Added a backing hook to mount on a modular shelf so I don’t need to drill into the cubicle wall.
Print Settings
Printer Brand:
FlashForge Printer:
Creator Pro Resolution:
0.20 mm -
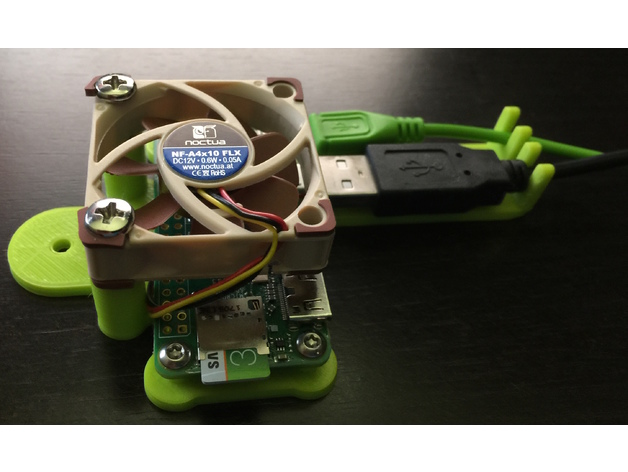
Raspberry Pi Zero wall mount bracket 3D Print Model
Summary
Due to a lack of space, I needed a way to mount raspberry pi zero on the wall. Hope you’ll find it useful for your project(s).
DC Fan dimensions: 40mm x 40mm. -
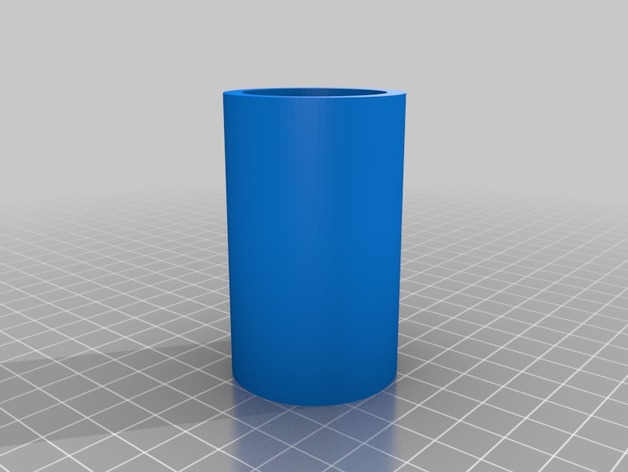
Choke Test Cylinder 3D Print Model
Summary
I saw that Jonathan Bobrow’s file had some messed up shells, but thanks to the PDF he provided, it was easy to redesign in Fusion 360. -

Jessica Jones Allias Investigations 3D Print Model
Summary
I extruded this logo from a image I edited in Adobe Illustrator. This is a decorative logo from a image found online. I do not own this logo, I just edited it.
Print Settings
Printer:
CR 10 Rafts:
No Supports:
No Resolution:
.2 Infill:
40% or over Notes:
Should be printed with high infill for the logo to turn out correctly. -
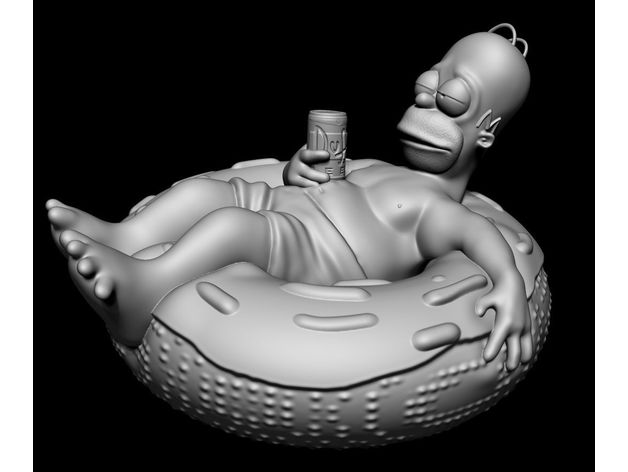
Homero con Soportes 3D Print Model
Summary
Supports Free
Print Settings
Printer:
CreateBot Mini Rafts:
Doesn’t Matter Supports:
Doesn’t Matter Resolution:
0.2 Infill:
15 Notes:
Fill density 10 -
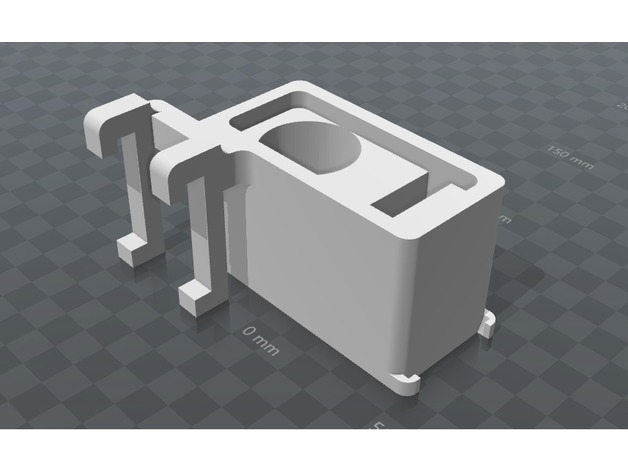
Toolholder for Orginal Prusa i3 MK2s 3D Print Model
Summary
This is a simple construction to organize your tools direct to the printer. It has space for a glue and a pliers. On the side you can hang your scraper.
Print Settings
Printer Brand:
Prusa Printer:
i3 MK2S Rafts:
No Supports:
Yes Resolution:
layer height 0.3 mm Infill:
20% -
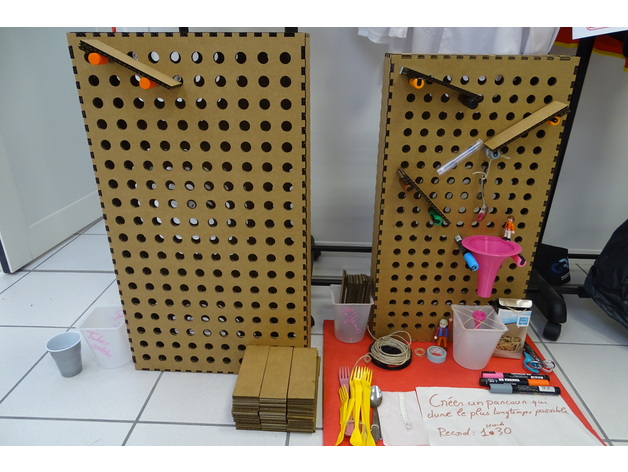
Marble Machine 3D Print Model
Summary
This Marble Machine is inspire by the Coursera MOOC of The Tinkering Studio : Motion & Mechanic.
I created the plan with the website MakerCase then i drawed circles on Inkscape.
To make this project you need a laser cutter and cardboard (Tickness : 6mm Dimension : 700×400).
18.1mm is for Sodebo sauce tubes
16.568mm is for Posca.
You can make your one Marble Machine with MakerCase and Inkscape. -
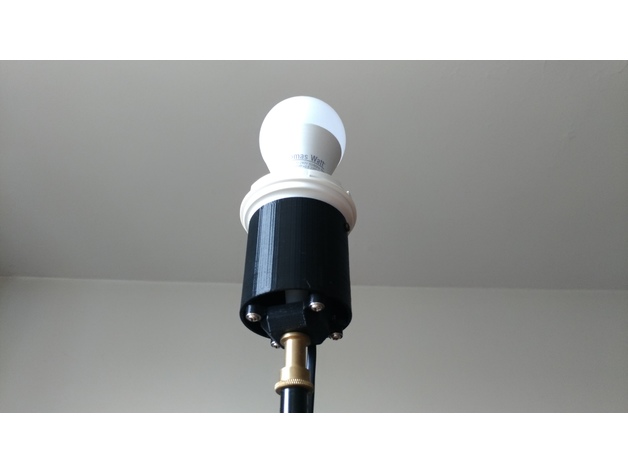
Adapter for IKEA PS 2014 3D Print Model
Summary
Hello !
This is an adapter for the “IKEA PS 2014”, mounted on a Manfrotto 5001b tripod.
Best regards,
Jeremie.
Print Settings
Printer:
BQ Hephestos 2 Rafts:
Yes Resolution:
0.2 Infill:
50
How I Designed This
Designed with Blender v2.34 -
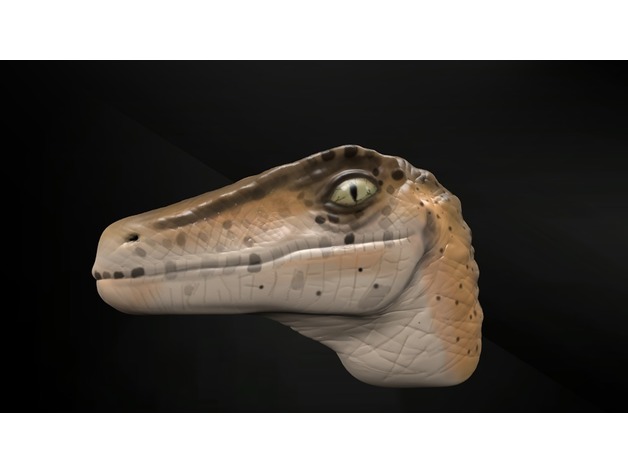
Velociraptor 3D Print Model
Summary
VELOCIRAPTOR
Made by Vaptor
Print Settings
Printer:
Tevo tarantula Rafts:
Yes Supports:
Yes Resolution:
0,2 Infill:
20 -
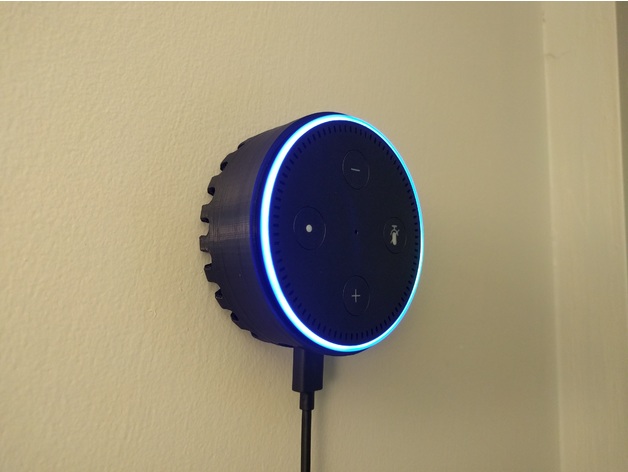
Amazon Echo Dot Wall Mount ( Low Profile ) 3D Print Model
Summary
Great low profile Amazon Echo Dot Wall Mount. This design does not require supports, has multiple mounting options, great sound transmission and is less than a 2 hour print. Check out the video https://youtu.be/dyQPKg6SQA4
50lb dry wall anchor screws: http://amzn.to/2w4HpXN
Reference to other model : https://www.thingiverse.com/thing:1463045 -
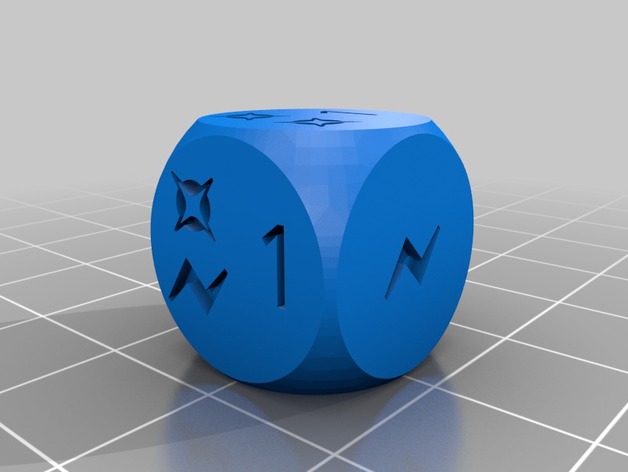
Imperial Assault Dice 3D Print Model
Summary
If you lose a die or can’t buy extras because they seem to be out of stock almost everywhere- here you go. Not sure how balanced they are but they were fun to make. Have only printed the red die so far and the symbols on the sides came out nicely, while the symbols on the top and bottom were too shallow. I have tried to adjust this by making the top and bottom symbols slightly deeper but am yet to test how this turn out. I intend to print with filament on the appropriate colour and then use black or white paint to make the symbols stand out.
Print Settings
Printer Brand:
Ultimaker Printer:
Ultimaker 2 Extended Rafts:
Doesn’t Matter Supports:
No Infill:
100% Notes:
The depth of the symbols on the top and bottom sides of the dice may need to be deeper. Depth of all symbols varies. -
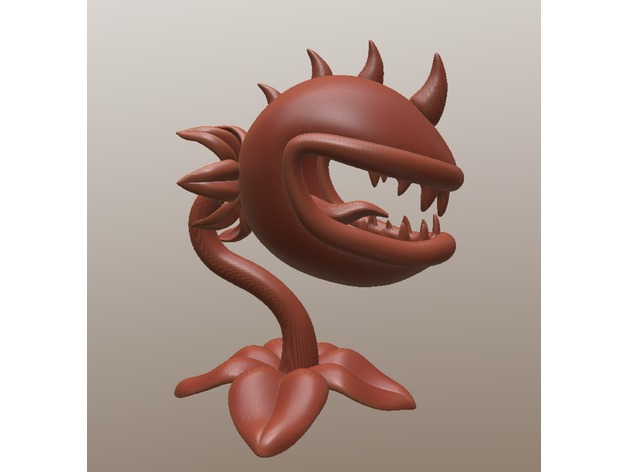
Chomper 3D Print Model
Summary
this is Chomper from Plants vs zombies, it has around 850k faces, modeled in 3d coat, I haven’t printed it -
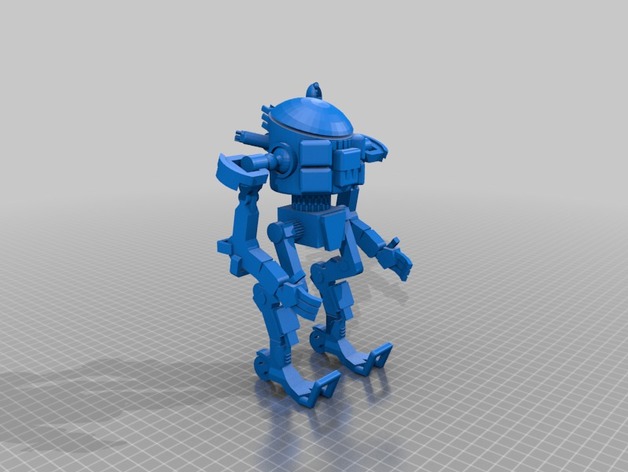
Titanfall Scavenger (rough draft) 3D Print Model
Summary
If you know Respawn can you ask them to put him in, This titan can steel weapons and abilities from fallen enemies that have been terminated by him, his “rewards core allows him to go from a stryder class titan with no dashes, to an atlas titan with one dash, then finally to an ogre class titan with two dashes, these cores have a 250% faster core gain than from most titans and in the menu you can customize the loadout with merits (first you need to unlock it by using the weapon or ability in combat with Scavenger) , and the Four scavenger kits would be; 1. All abilities will have a 20% less cooldown. 2. Removes weakpoints from scavengers chasis. 3. enemies will always be shown with a map hack (for you only.) 4. Titan kills generate a shield and assists generate half a shield. Also if you equip the 40mm tracker cannon it automatically changes your offensive ability with tracking rockets and the other way around. -
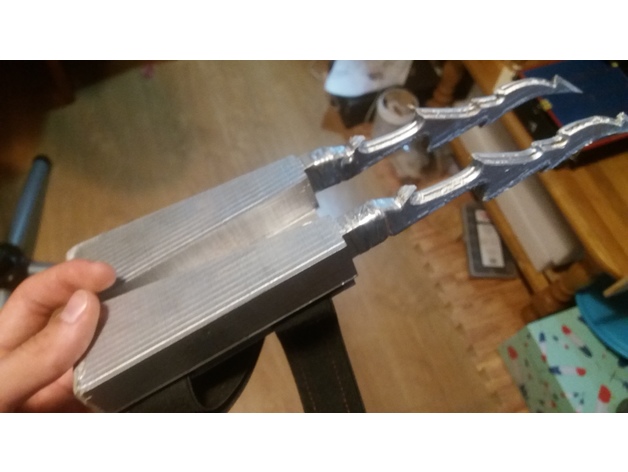
predator functional knives 3D Print Model
Summary
cuchillas de predator funcionales lo nunca viste para la impresion 3d
material adicional=cinta elastica y belcro
leed el archivo del bloc de notas que dice ller importante se os explicaran un par de cosillas a tener en cuenta.
pasaos por mi canal de youtube a partir del 8/9/2017 para ver el “3d reviw”
mi canal:https://www.youtube.com/channel/UC_qQQCfLqemEyeDy8zRWBDg -
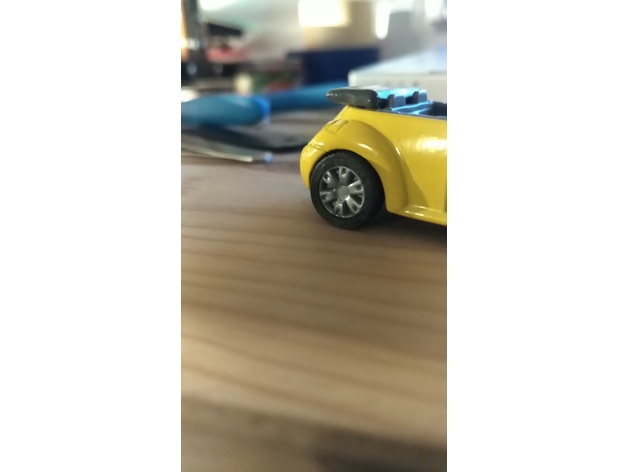
Tire for siku car 3D Print Model
Summary
I have made tires for small Siku modell cars. Tested with Siku 1056, VW Beatle Cabrio.
My little son has lost the original tires and the printed replacement was a pleasure for him 🙂
Printed with FlexiSMART TPE-Filament!
Print Settings
Printer:
Creality CR-10 Supports:
No Resolution:
0,06 Infill:
100 Notes:
FlexiSMART TPE
How I Designed This
Designed with FreeCAD -
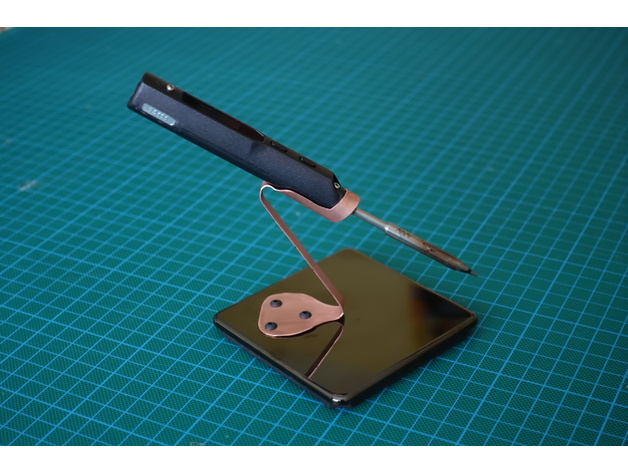
TS100 Soldering Iron Stand 3D Print Model
Summary
This is a Soldering Iron Stand intended for the TS100 Soldering Iron and is made from a copper water pipe.
The design is provided as an SVG file which should be printed out and the selected template cut out and wrapped around the pipe and then cut out of the copper. See the video https://youtu.be/K7X_7fUIjKI for details.
How I Designed This
Autodesk Fusion 360 and ExactFlat
I used Fusion 360 for the desing of the stand.Inspiration for the iron holder can from a ring spanner so that was used for the initial angles and holder shape.
As the design was applied to a tube I needed to flatten this and used the ExactFlat add-in for fusion to do this.
The template produced by ExactFlat wasn’t quite the correct size, probably due to differences in paper sizes. Inkscape was used to size it, tidy up the design and produce variations.Overview and Background
Looking for a stand for my TS100 Soldering iron I found inspiration from a spanner and converted a piece of copper water pipe into the stand.
I used a off cut from a copper water pipe of 15mm diameter and just over 150mm in length and a paper template to show me where to cup the pipe.
Once cut to shape certain parts were unrolled. There is no reason that the template can’t be used on a flat sheet and then the front part that holds the soldering iron rolled up.
Materials Needed
What was used
I used a piece of copper tube 15mm in diameter and approximately 150mm in length.
Once cut and shapped I mounted it on a Black Nickel electrical blanking plate. Anything with a bit of weight could ne used, such as a piece of wood or perspex. -
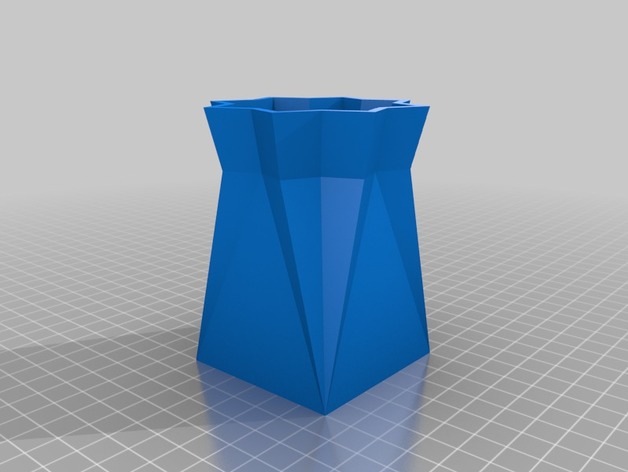
Folded Container 3D Print Model
Summary
Desktop container in origami folding appearance.
Print Settings
Rafts:
Doesn’t Matter Supports:
No Resolution:
Higher the better! -
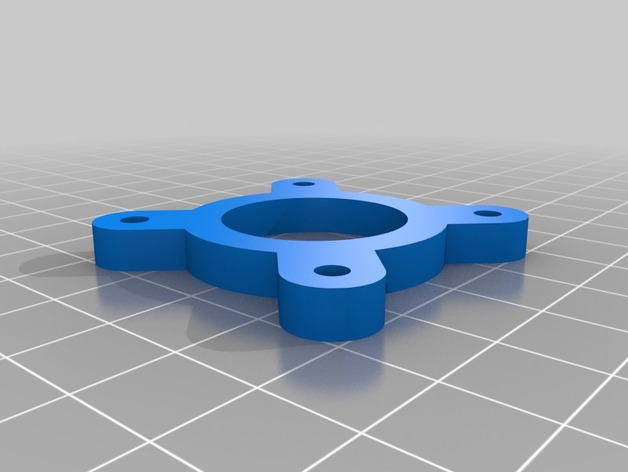
3D Printer XY Motor Parts for the M-Project 3D Print Model
Summary
3D Printer XY Motor Parts for the M-Project -
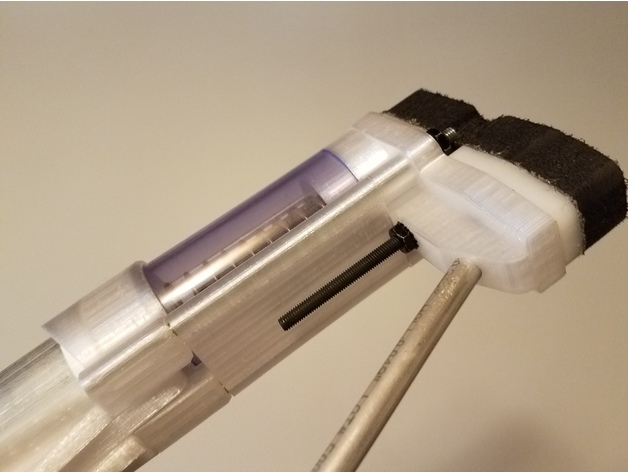
Caliburn – Lower Stock Reinforcement 3D Print Model
Summary
This is a reinforcment part for https://www.thingiverse.com/thing:2376150.
I printed my Caliburn in PETG, which is more flexible than the PLA the designer intended the blaster to be printed in. The stock_alt2 part would be spread apart by the clear tube at the end when the threaded rods were tightened, enough to reduce catch’s reliability. Rather than print an entire new blaster in PLA, I made this part which keeps the threaded rods and stock_alt2 from spreading.
Print Settings
Printer:
D300VS Rafts:
No Supports:
No Resolution:
.2mm Infill:
20% Notes:
Rotate so it is standing vertically before printing -
Audi B5 S4 Drive Shaft Center Bearing Support 3D Print Model
Summary
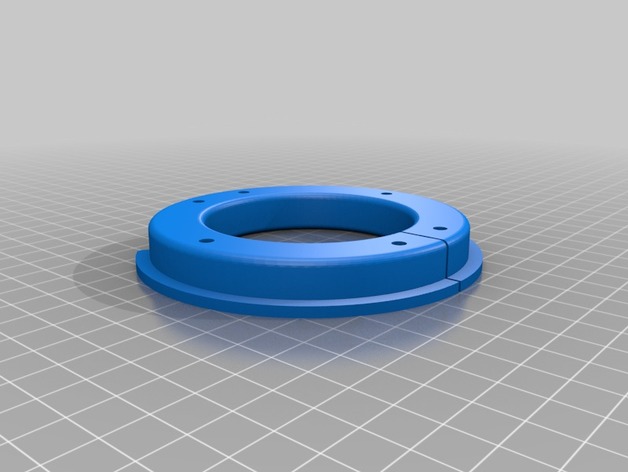
Audi B5 S4 Drive Shaft Center Bearing Support
Just something to pack out the rubber webbing in the center support on the drive shaft and firm things up.
Pretty much only fits in there one way so easy to figure out.
Hardware:
6pcs M4 x 40mm Bolt
6pcs M4 Lock Nut
12pcs M4 Washer -
Abacus for the Blind 3D Print Model
Summary
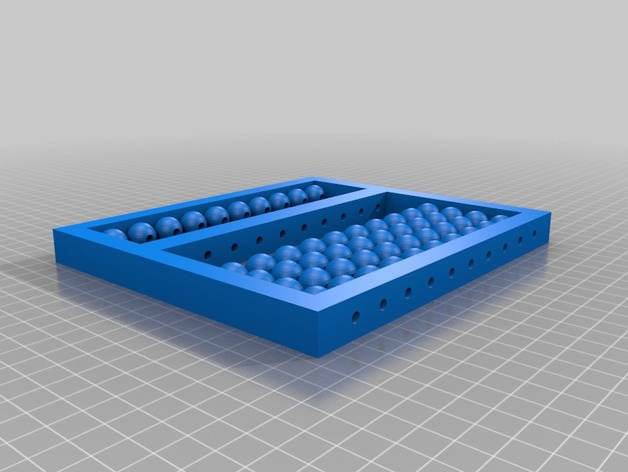
A soroban abacus for the blind with spherical beads. There is extra spacing to make it more identifiable tactically. It has ten rows, so ten places. Can go up to one billion.
Required materials:
50 Abacus Bead
1 Abacus Frame
10 bamboo skewers
Glue
Print Settings
Printer:
Monoprice Maker Select V2 Rafts:
No Supports:
No Resolution:
0.2 Infill:
20%
Post-Printing
Thread bamboo skewers through beads and frame as seen in “Abacus for the Blind.” Glue in place. Remove excess. -
Ground Mount Cup Holder 3D Print Model
Summary
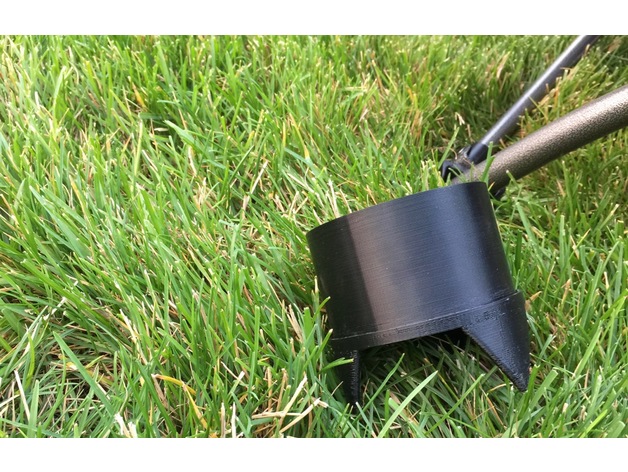
Got some event chairs and they didn’t have a cup holder so I made some that mount on or into the ground.
The 2 files top and bottom sections make printing simple and a bit of epoxy to join them after printing. -
TV Remote Holder 3D Print Model
Summary
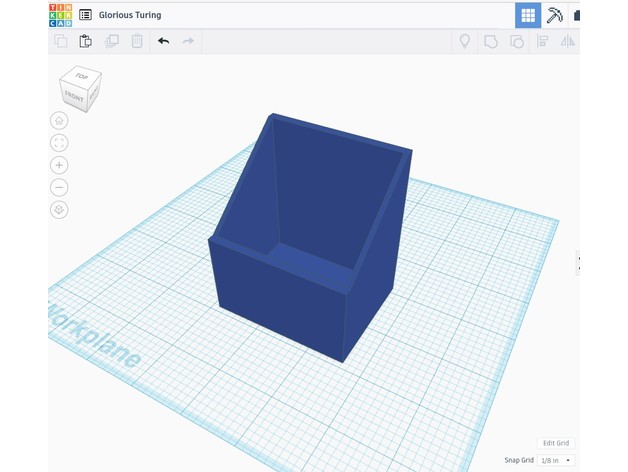
Tired of having all my remotes lying around, so threw this together in Tinkercad. Print as many as you need and super glue them together. Change the width in Tinkercad to fit a particular remote. Doesn’t need rafts or supports.
Print Settings
Printer Brand:
FlashForge Printer:
Creator Pro Rafts:
No Supports:
No Resolution:
Std Infill:
Default 15% -
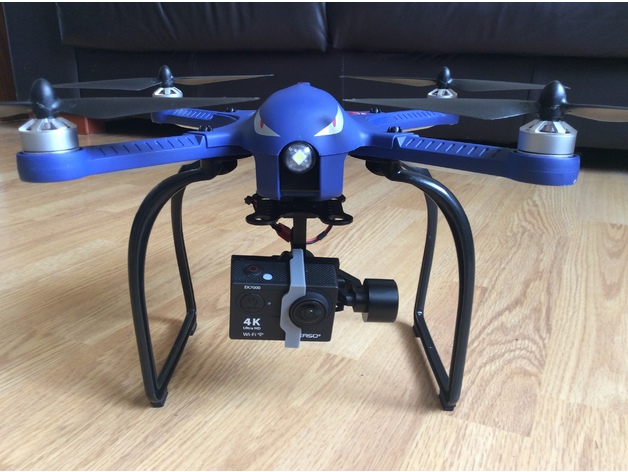
Bugs 3 drone Walkera gimbal mod 3D Print Model
Summary
This simple but effective mod allows you to fit a Walkera G2D gimbal to the stock camera mount fitting beneath the battery.
Allows for quick and easy fitting and removal of the gimbal.
I used this clip to secure my Akaso EK700 camera …. https://www.thingiverse.com/thing:1795933
And this is the landing gear I use ….. https://www.amazon.co.uk/gp/product/B06VV21JYF/ref=oh_aui_detailpage_o00_s00?ie=UTF8&psc=1
I had to drill the screw holes a bit wider in this landing gear as they didn’t quite line up with the Bugs 3.
First test with the gimbal fitted ….. https://www.youtube.com/watch?v=FKtRV4nx8h4&feature=youtu.be
Gimbal mount adapter :
Fix the adapter to the gimbal mounting plate with 2 screws and nuts (see pictures above).
Gimbal power :
I used the balance port from the stock battery to power the gimbal.
Remove the female connector and middle wire from a 2s lipo balance expansion cable and splice it to the cable with the 2 pin female connector that comes with the gimbal. -

Best of the Week: 8/28/17 3D Print Model
Summary
My collection of the best Things posted for the week of 8/28/17:https://www.thingiverse.com/LoboCNC/collections/best-of-the-week-8-28-17
This is the second week of my experiment with crowd-sourced curation. I’ve looked at every single Thing posted from 8/28/17 through 9/3/17 and selected what I think are the best Things according the criteria listed below. This posting here is sort of a meta-Thing to help people find this collection. Let me know what you think of this idea in the comments section.
If you like this concept, please “Like” this Thing to help others find it. You can also “Like” the collection itself. And if you really like this idea, create your own Best of the Week collection. I’ve tagged this with “BOTW” and “Curation” and would encourage others to use the same tags.
Post-Printing
My Selection Criteria
What I look for:
Things that are unique
Things that are well executed
Things that are of general interest
Things that are well presented
Things that make me smile
What I pass over:
Cover images that are a rendering (i.e.: no photo of a real print)
Accessories for very specific products (e.g.: for GoPro Hero, Samsung Galaxy 7, etc.)
Things based on copyrighted material
3D printer parts (just too many, too specific and too boring) -
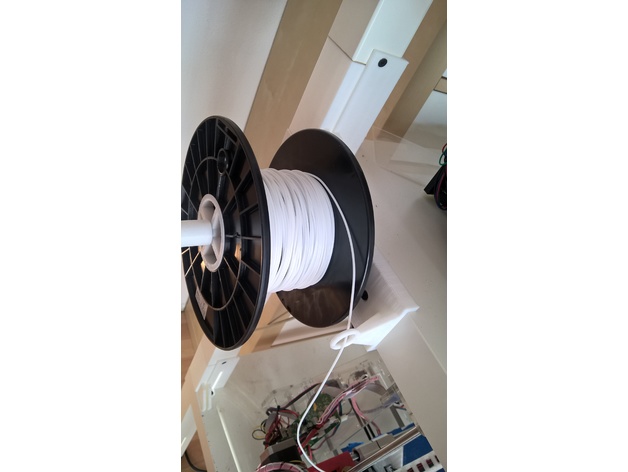
Filament Mount for LACK table 3D Print Model
Summary
Hy there,
i have mounted my Printers on IKEA Lack tables and now the Filament can easy Mount on the left or right side of the table.
Print Settings
Printer Brand:
Prusa Printer:
Prusa Clone Rafts:
No Supports:
No Resolution:
.2 Infill:
10