Summary
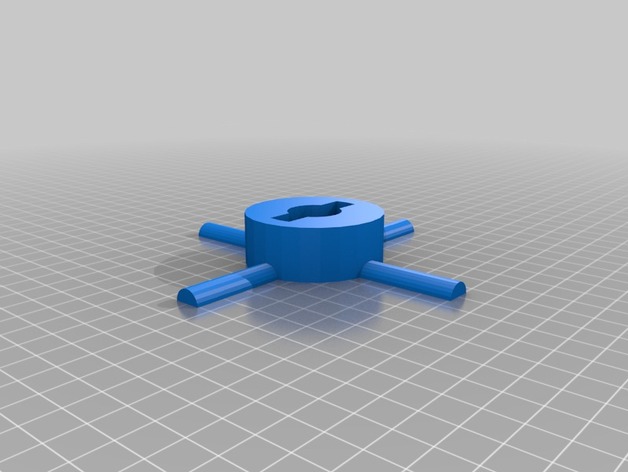
This is a fast lock floor mount for my Lixit Corporation Food and Water dishes that normally mount to the cage wall and twist lock in and out. I love the dishes so I made mounts to move them everywhere I want my bird to be. I’m not sure if I’m allowed to put the actual dish link on here but I’ll paste it in and see.https://www.amazon.com/gp/product/B0002DIYVC/ref=oh_aui_detailpage_o07_s00?ie=UTF8&psc=1
Print Settings
Printer:
Hictop Prusa I3 Rafts:
No Supports:
Yes Resolution:
.3 Infill:
10 Notes:
I printed with Supports Touching Build Plate.
Author: Thingiverse
-
Floor Fast Lock Mount for Lixit bird food and water dish
-
Bird Exercise Bike Bowl Fast Lock Mount
Summary
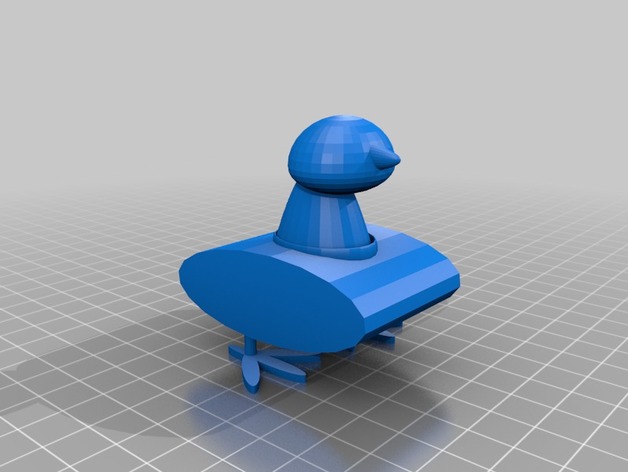
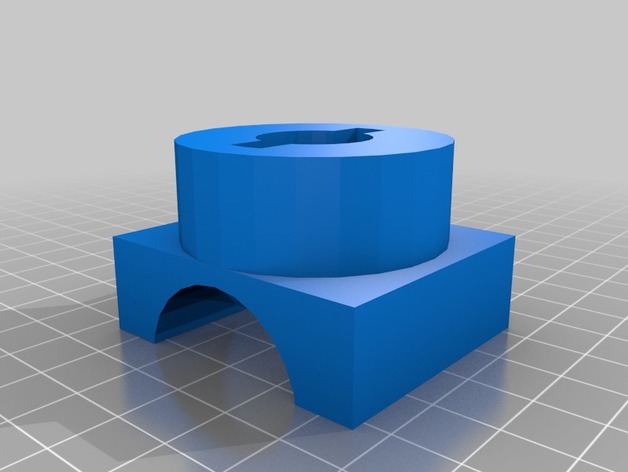
This is an exercise bike mount for my birds fast lock food dish. I like to feed him and exercise so I made a mount for his dish on the bike. A link to the dish which I love is below.
Print Settings
Printer:
Hictop Prusa I3 Rafts:
No Supports:
Yes Resolution:
.3 Infill:
10 -
Mon-Mon Drone Fidget Spinner V2 (smaller)
Summary
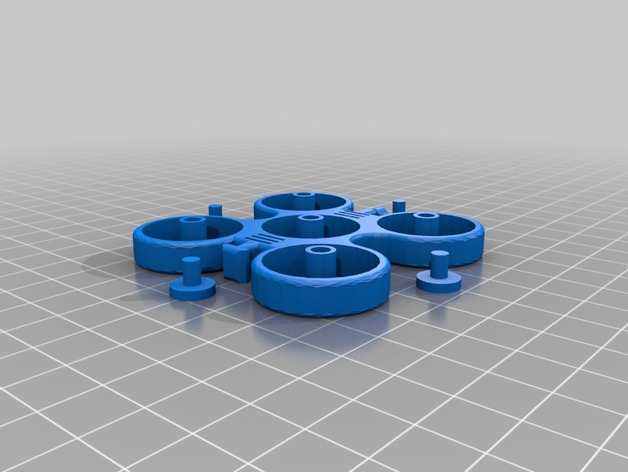
Smaller newer version of Mon-Mon Drone Fidget Spinner. (same bearing specs) -
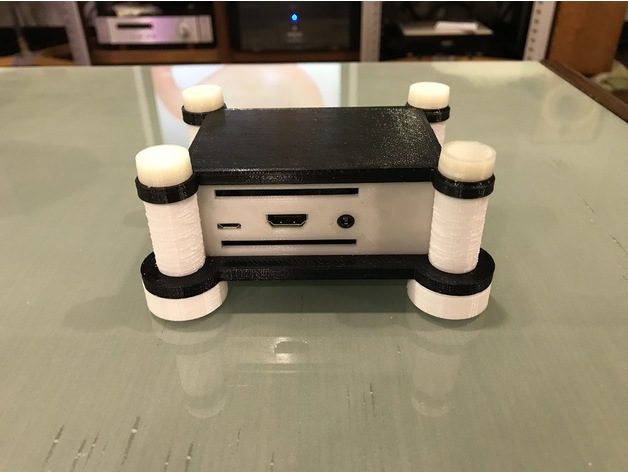
Raspberry Pi 3 model B case
Summary
I use Raspberry Pi as my digital audio player. So I like Raspberry Pi has a Hi-End audio machine look case.
It is easy to assembly, just look pictures you will know how to.
Note: you need prepare 8 pcs M3 screw for top and bottom cover.
Print pillar.stl 3 pcs + pillarUSB.stl 1 pcs; pillarUSB.stl must fix to USB connector side.
Print top-cap1.stl, top-cap2.stl *4 pcs
Others print 1 pcs.
Print Settings
Printer Brand:
RepRap Printer:
RepRap Ord Bot Hadron Rafts:
No Supports:
No Resolution:
0.1mm Infill:
30%
Post-Printing -
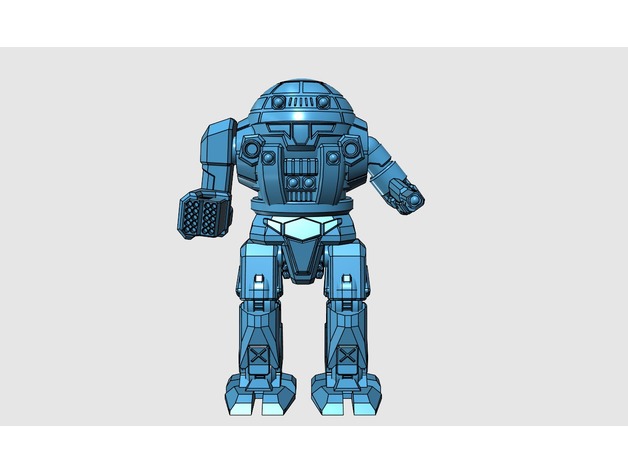
MWO Style Imp
Summary
I one saw a post in the mechwarrior forums talking about how the Imp was too ugly to be added to the game.
This is my response
This design was made using Autodesk 123D design. -
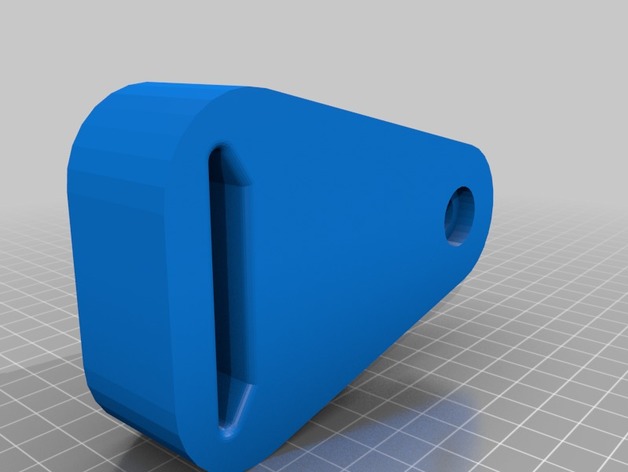
Jungle Jym Bucket piece022_837
Summary
I created this as the original Jungle Jym Backyard Playground piece needed for the bucket module broke.
Print Settings
Printer:
Anet A8 Rafts:
Doesn’t Matter Supports:
No Resolution:
0.3 Infill:
25% -
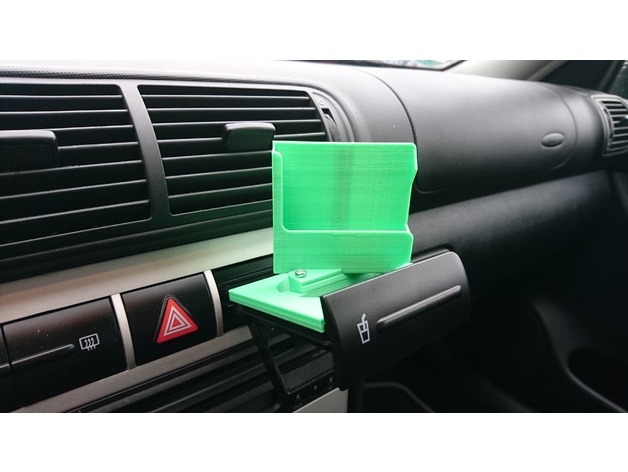
Mobile holder for Cupholder Seat Leon 1M (till 2006) Z5 Compact
Summary
Mobile holder for my Seat Leon 1M. Fits perfect in the Cupholder to store my phone
Use two M3x16 with matching nuts to screw it together. -
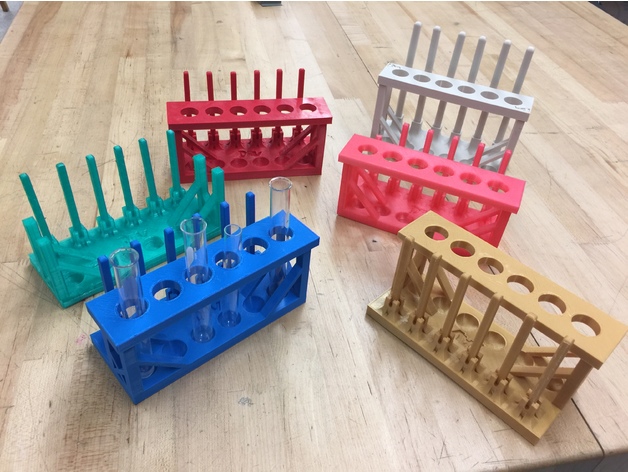
Test Tube Rack
Summary
The science department at our school did not like the test tube racks they were using. They found them cumbersome and annoying to use, so we created this new design.
The parts of the test tube rack are printed separately, and they are all detachable. If one of the drying rods snaps, you can either remove it and replace it, or you can print a drying rod sleeve and fit it snugly over the broken stub of the drying rod.
Two test tube racks can be stored compactly by interlocking them within each other. The drying rods on both test tube racks can be inserted simultaneously into the other rack’s holding rack (the top piece with six large holes), making two test tube racks take roughly the same amount of space as one.
PARTS:
1 Test Tube Rack Bottom Piece
1 Test Tube Rack Top Piece
6 Test Tube Rack Drying Rods
However many Drying Rod Sleeves are needed
Print Settings
Printer:
Dremel Idea Builder Rafts:
Yes Supports:
No
Post-Printing
Sanding is sometimes needed if the raft is difficult to remove.Overview and Background
Limitations and obstacles
10cm x 20cm print plate
Had to accommodate for risk of drying rods breaking
Had to create multiple prototypes, taking suggestions from the science department each time
First prototype was too big; had to make it smaller
Should the drying rods be printed separately from the bottom piece or printed as a part of it? We began with a detachable drying rod design in our first prototype, decided to try printing the drying rods as part of the bottom piece in our second prototype, and upon realizing this design was prone to breaking, we reverted to a detachable design in our final product.Had to create a test tube rack in which multiple sizes of test tubes could fit
Image taken from Solidworks (right: first prototype; left: second prototype)
Lesson Plan and Activity
1) As a class, students discuss and think of products that the science department needs or would like (ex. test tube stirrer, cellular model, etc.)
2) Students divide into groups and each group chooses a product
3) Each group creates an initial design for their product and asks teachers throughout the science department for feedback and suggestions on their design
4) Update the existing design and create a new prototype based on the teachers’ suggestions
5) Ask teachers throughout the science department for more suggestions
6) Repeat steps 4 and 5 until a satisfactory final product is created
Materials Needed
3D printer
3D printer filament
3D design software (such as Solidworks) -
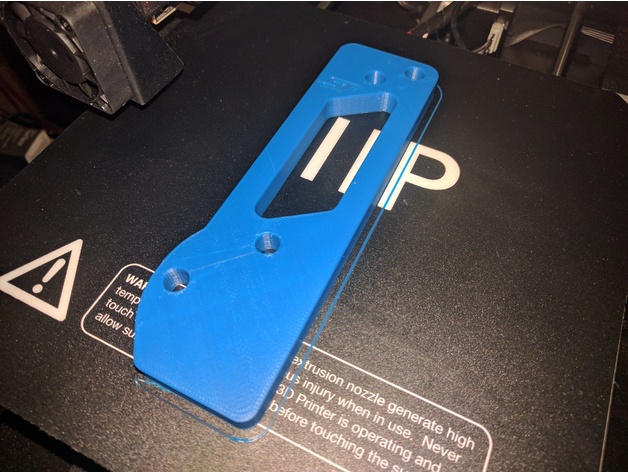
Focus ST Pedal Spacer
Summary
The Focus ST acceleration pedal default position is highly recessed. This spacer moves the pedal forward to put it more in line with the other pedals. The 9.6 mm thickness should install with the default hardware. I designed it based on a 2017 Focus ST, but it should fit any Third Generation Focus (2012 to now).
You MUST use ABS or similar that has a higher glass transition temperature. Using a low transition temperature material (like PLA) can fail when typical temperatures are reached in hot cars.
Print Settings
Printer Brand:
Wanhao Printer:
Wanhao Duplicator i3 V2 Rafts:
No Supports:
No Resolution:
0.2mm Infill:
60 Notes:
I used 40% infill which seems to work, but I think 60%+ would be better suited for this.
ABS or similar should be used. -
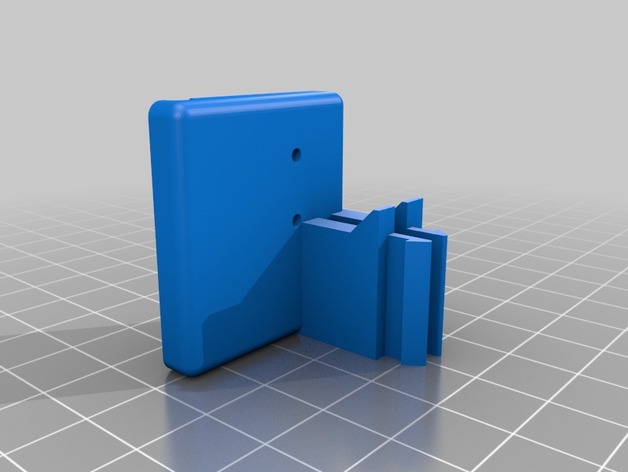
Wanhao Duplicator 6 Filament Runout Sensor
Summary
This is a bracket to mount an nc microswitch sensor on a Wanhao Duplicator 6/Monoprice Maker Ultimate to detect when filament runs out. To be able to use this feature you will need to install a custom Marlin firmware that was developed for the D6/MU:
https://github.com/1bigpig/Marlin
After installing the firmware, all you need to do is connect an nc microswitch to the board and mount it to the printer using this bracket.
For the microswitch you’ll need to get one with a similar design to the one in my pictures if you want it to fit perfectly without any modifications.
To connect the sensor to the board you’ll need a “JST XH 2.5-3 Pin” connector and connect that to the open J9 analog plug on the printer (using the two outermost pins) and connect those wires to the two outermost pins on the microswitch. The printer will automatically detect this once it’s plugged in and pause the printer when there is no filament keeping the microswitch closed.
Print Settings
Printer Brand:
Wanhao Printer:
Duplicator 6 Rafts:
Doesn’t Matter Supports:
No Resolution:
.15 Infill:
20% Notes:
You can print both of these upright without needing to use any support (there are two small support columns built in that will easily snap off) -
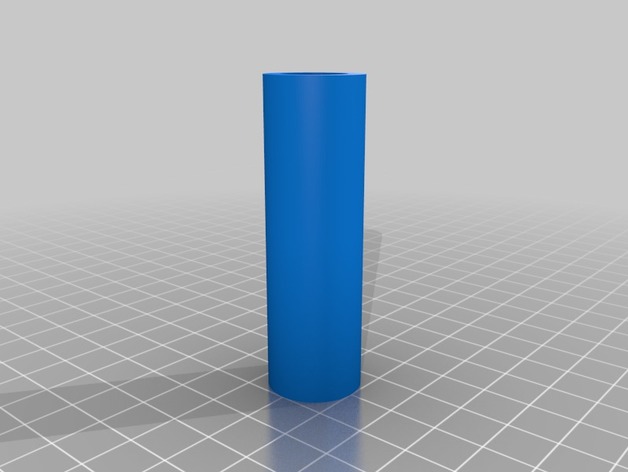
Knock Box Wood Dowel Stick
Summary
This is a remix stick for the Knock Box designed by DonJorhe. I broke my stick so i decided to design one that will fit a 13mm wood dowel. Just print 2.
Print Settings
Printer:
Maker Select V2.1 Rafts:
No Supports:
No Notes:
Need to print 2 sticks. -
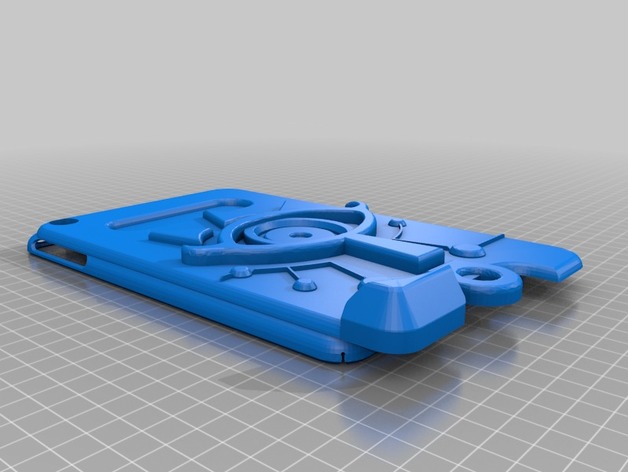
Shiekah Slate(iPad Mini case)
Summary
My first thought when I saw the Sheikah Slate. A Sheikah Slate iPad was an obvious next step for any fans of both Zelda and Apple.
Print Settings
Printer Brand:
MakerBot Printer:
MakerBot Replicator (5th Generation) Rafts:
Doesn’t Matter Supports:
Yes Resolution:
Doesn’t matter Infill:
Doesn’t matter
Post-Printing
For post-printing I would recommend making a silicone mould of the case an using another, stronger material. If you are like me, and can only print in PLA, you know how brittle PLA can be and how short lived a PLA case will be. -
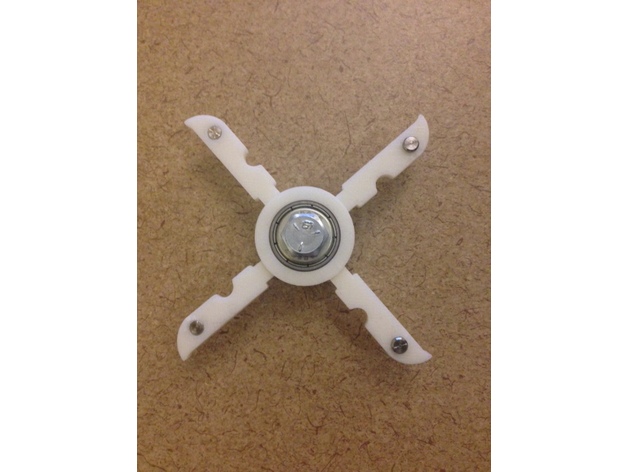
Naruto Fidget Spinner
Summary
This fidget spinner is based off the design of Zabuza’s sword in the anime show Naruto. The 4 swords connect into a bearing holder. The pins in the swords add weight to the spinner and prolong the spin time. -
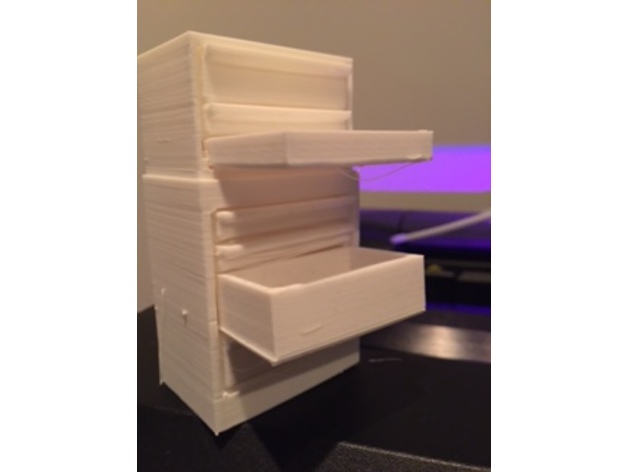
tool chest for RC cars/trucks
Summary
3d tool chest for RC car/truck 1/10 scale garage.
Print Settings
Printer Brand:
MakerBot Printer:
MakerBot Replicator 2 Rafts:
Doesn’t Matter Supports:
Doesn’t Matter
How I Designed This
3dc on my iPhone -
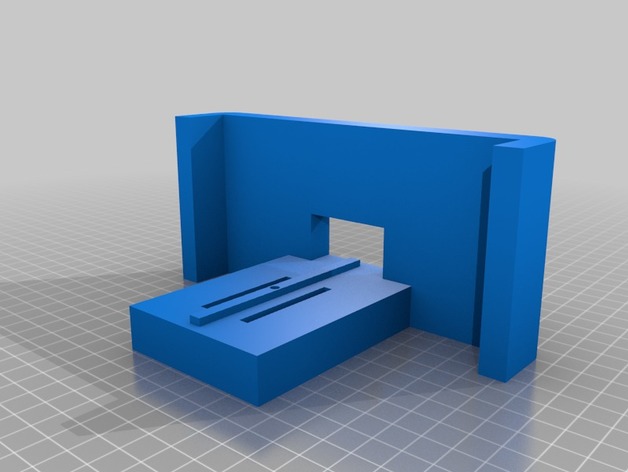
Adjustable Phone Stand
Summary
Hi this is my 2nd print. It might be a little bulky but I’ve used it myself and it works quite nicely. This one works best with phones that are about 14.5 cm in length. Any shorter is fine as well though I think it might wobble a little. Also a small bit of filing might be needed to fit some of the parts , nothing too complicated though
Main – This is the main body of the stand
Mount – This is the mount that is supposed to slide into the base of the main body
Pole ( Optional ) – This is actually really optional . I personally used something I got from a Lego set but this one works as well . I’ve not tried it yet but I bet you could cut a small part of the stick of a Chupa Chup Lollipop and use it as well . -
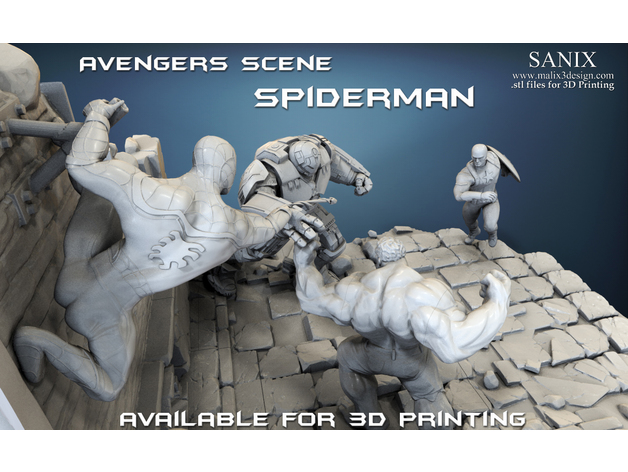
Avengers scene – SPIDERMAN / 3D Printable Model
Summary
About 37 hours of modeling and here it is the result, Avengers Scene -SPIDERMAN , 3D printable 1:13 scale model is a model ready for printing all settings included indifferent to the type of printer used, high quality poly allow printing a wonderful detailing, you can download four files absolutely free test, fully model can be found here: www.malix3design.com
Print Settings
Printer Brand:
Ultimaker Printer:
Ultimaker 2 -
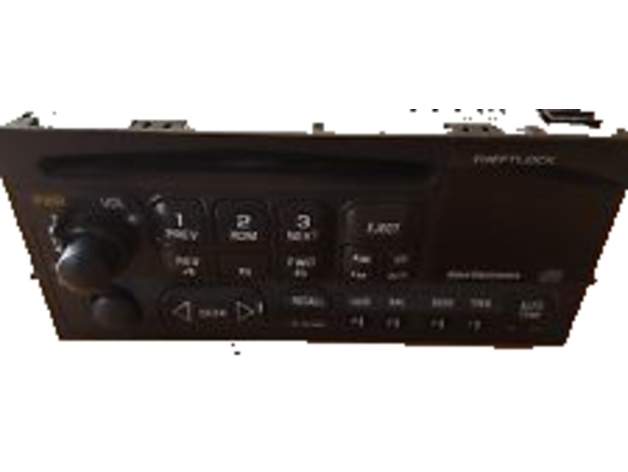
98-02 GM Radio Volume Knob
Summary
This is a Radio Volume Knob for the radio in a 1995-2002 GM CHEVY TAHOE SILVERADO
Print Settings
Printer:
FT 2020 Prusa Rafts:
No Supports:
Yes Resolution:
.2mm Infill:
Solid Notes:
Printed in Black ABS
How I Designed This
SolidWorks -
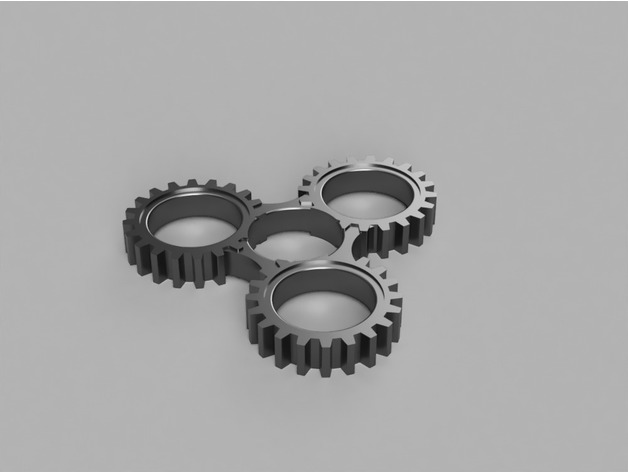
Tri-Spinner with Gears
Summary
This was made via a combination of http://www.thingiverse.com/thing:2084477 pencil top Fidget spinner and a standard tri-spinner.
Print Settings
Printer Brand:
Prusa Printer:
Prusa Clone Rafts:
No Supports:
No Resolution:
.2 mm Infill:
20% -
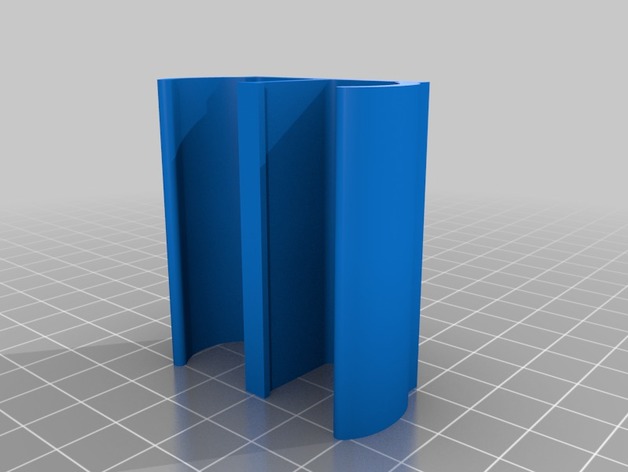
Apache Camper Bed End Support Bar Holder
Summary
This is my take on the often-broken holders for the bed-end support bars on Apache Solid State Campers. When I got mine it had one holder still complete, so I used it as a template for this. This version has slightly more rounded corners and is thicker in areas that were prone to cracking before.
I haven’t mounted mine yet, but in a good “shake test” they hold onto the bars as well as the original. I also gave mine an acetone vapor bath to better adhere the outside layers and painted them for UV protection.
Print Settings
Printer:
Reach 3D Rafts:
No Supports:
No Resolution:
.15 Infill:
100% -
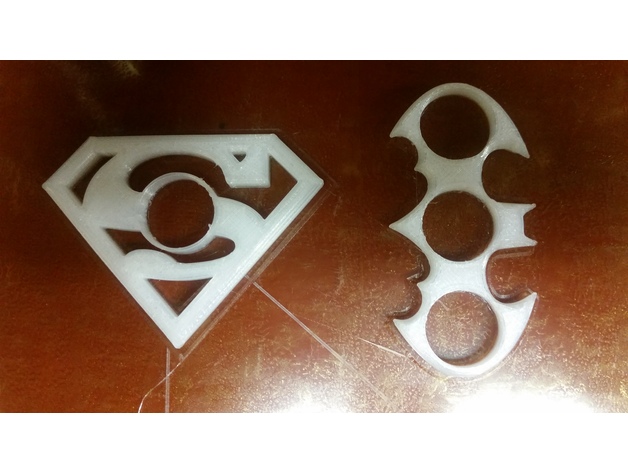
Superman vs. Batman Spinners
Summary
Superman and batman spinners, take your pick or print them both! enjoy these excellent spinners.
If you like these things, please donate a dollar or two to help me continue to create new and original things, thank you! -
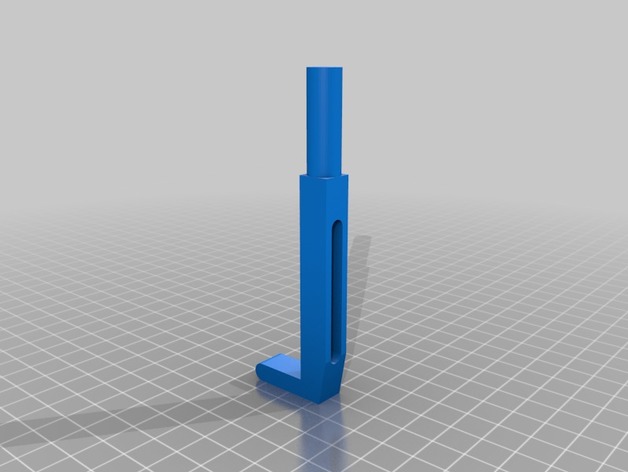
Velux plastic stop for attic windows
Summary
Plastic object used on attic windows Velux to stop the open at minimum position to have ventilation. -
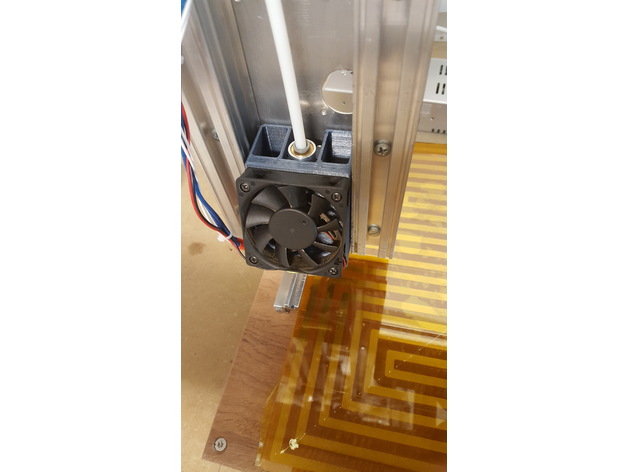
Hotend setup for custom router
Summary
This is a hotend setup for my custom router. The idea behind it is that the airflow can reach the cooling fins of the hotend without cooling the printed object. It’s ment for ABS & PET-G printing. Sorry PLAérs ;-).
This part can hold a cheap chinees J-Hotend clone with a diameter of 22.25mm & hight 26mm. The red thing in the picture is a representation of this hotend. The second red thing above it represents a Bowden tube adaptor. The Fan is 60x60mm.
because this part is for a custom machine i didn’t want to share this at first, but perhaps other people can still use it due the maney customizers and self builders i have seen on the internet 🙂
Print Settings
Printer:
i printed the part on the foto on a Anet A6 Rafts:
No Supports:
No Resolution:
0.2 Infill:
15 – 20% Notes:
Just print the main model standing up. tested with PET-G -
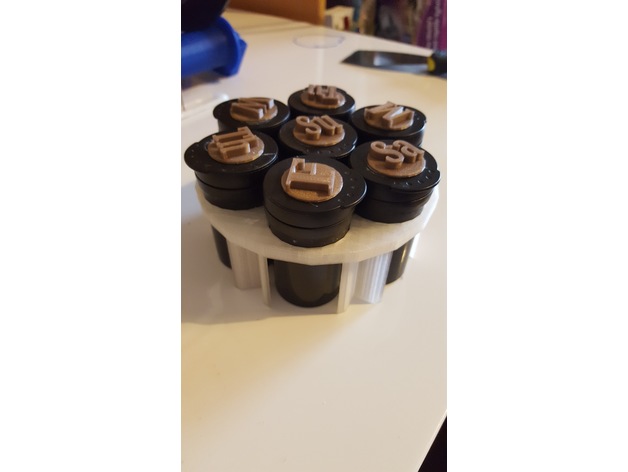
weekley pill holder
Summary
PRINT AT 105% to fit standard 30mm wide pot as i didn’t take shrinkage of PLA into account
i re utilized my diabetic test strip pots to make this weekly pill organizer
Print Settings
Printer Brand:
Wanhao Printer:
Wanhao Duplicator i3 V2 Rafts:
No Supports:
No Resolution:
0.02MM Infill:
20% Notes:
REMEMBER PRINT AT 105% to fit standard 30mm wide pot -
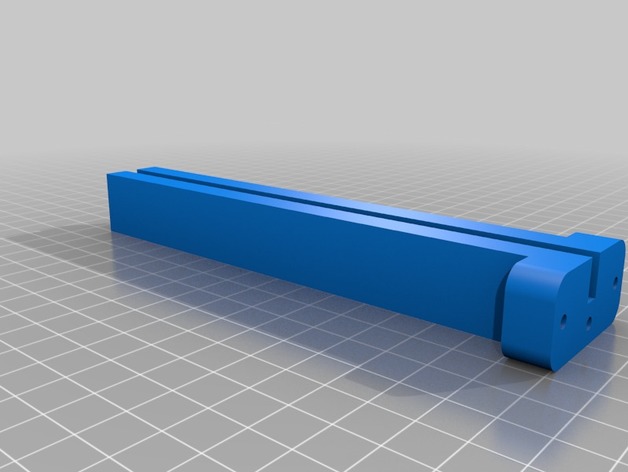
Frame élément
Summary
J’ai essayé d’assembler le cadre mais j’ai buté sur le dernier élément a assembler !
J’ai donc fait une pièces a imprimer 4 fois
Il faut utiliser des vis M4 pour l’assemblage.
C’est plus simple comme cela
Imprimer 5 Frame_element et 4 frame_element_1 a la place des 9 Frame_element.
prévoir un tareau de filetage M4 -
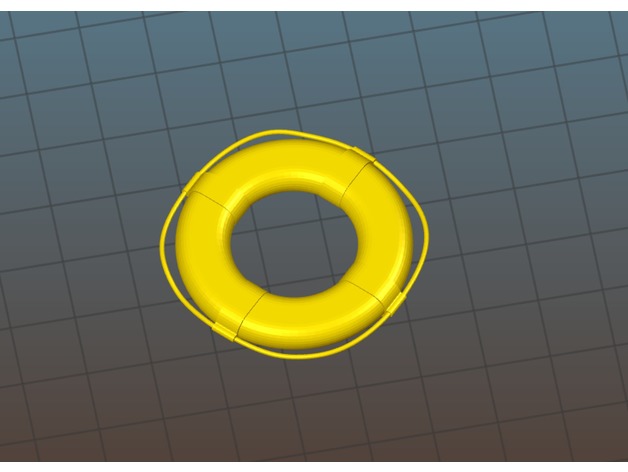
ship life preserver ring
Summary
A ship life preserver ring I made for a sterling model boat I’m restoring.
Had a hard time printing the ropes around the edges but the rest of it turned out really nice.
Print Settings
Printer Brand:
Prusa Printer:
Prusa Mk2 Rafts:
Doesn’t Matter Supports:
Doesn’t Matter Infill:
n/a -
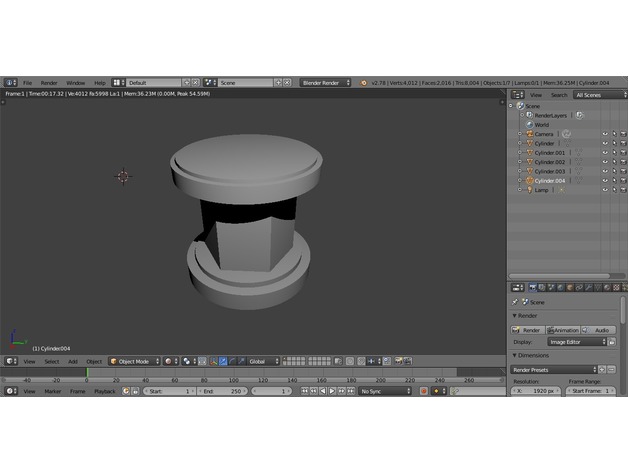
smokey making table
Summary
This is my 1st attempt at making a blender file. It is a real table in my house (without the opening doors yet) that I created. I just finished with udemy course on blender section 1. More to follow as time allows. -
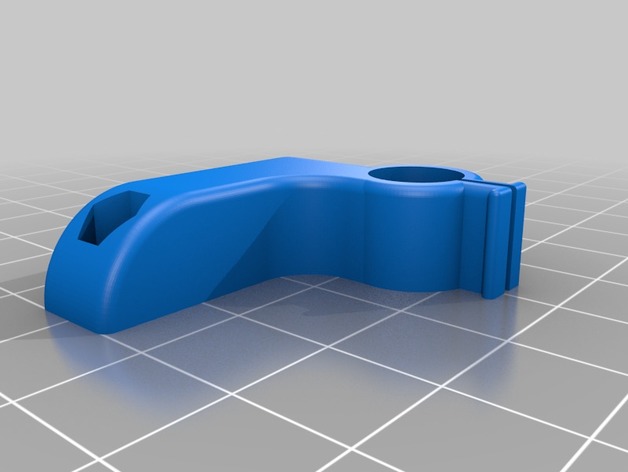
Maker Select V2.1 fan mount for Dial Indicator
Summary
Made a copy of the Dial Indicator clamp to fit my Maker Select V2.1 but offsetting the dial indicator to line up with the extruder. M3 nuts and M3 bolts longer than the original fan bolts necessary. -
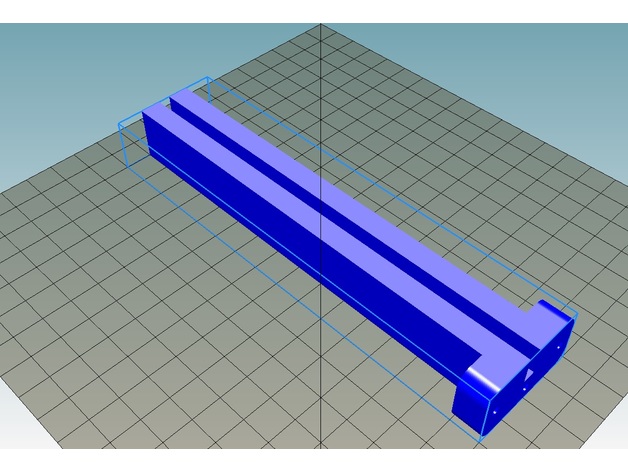
Frame élément mower garage
Summary
remix de http://www.thingiverse.com/thing:683367
J’ai essayé d’assembler le cadre mais j’ai buté sur le dernier élément a assembler !
J’ai donc fait une pièces a imprimer 4 fois
Il faut utiliser des vis M4 pour l’assemblage.
C’est plus simple comme cela
Imprimer 5 Frame_element et 4 frame_element_1 a la place des 9 Frame_element.
prévoir un tareau de filetage M4
Dans l’original , ne pas oublier d’imprimer les pièces en double mais pour le bottom_link et top_link les pièces sont a imprimer a l’envers !
Print Settings
Rafts:
No Supports:
No -
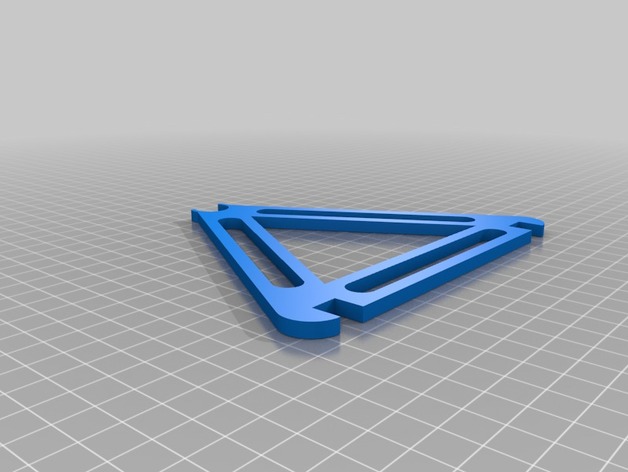
YASH – Yet another spool holder – metric version
Summary
Hi there,
first of all: This is not pure 3D printing – this needs a 15mm aluminium rod cut to the appropriate length.
You can print it quite fast and I really love the ease of use on it. If you´re swapping filament very very often stay tuned I´ll designing a version for this application too and add it here.
What to print for regular 1kg spools:
side 2 times
bar110 2 times (the 110 is also the lenght of 15mm aluminium tube you´ll need)
wheel 2 times (I´ll be adding a few spool diamters – If you need anything special let me know and I´ll provide those files too).
spacers as needed (assemble everything except the spacer to figure out how much you need or just print a few of each size and use them as you need them)
What to come (“work-in-progress”):
version for bigger spools (this means only longer bars and a longer rod).
Taller version If someone tells me that his spools are touching the ground.
AND: Imperial version – but since I don´t know what since aluminium tube you can source cheap in the US I´ll wait for your input on this issue.
Print Settings
Printer:
Prusa i3 mk2 Rafts:
No Supports:
No Resolution:
200 micron Infill:
10% Notes:
3 perimeters
3 top and bottom layers
10% rectilinear infill
You can crank up those values according to your needs but they work fine for me. -
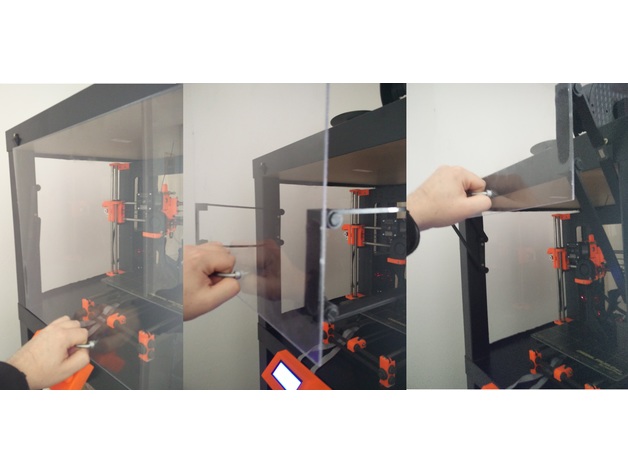
Top-Door-Opener Ikea Lack Enclosure Upgrade
Summary
This will allow you to open and close a door topside for your enclosure. -
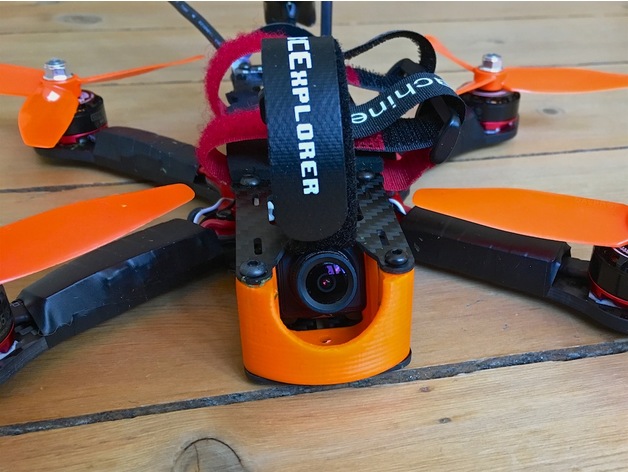
RunCam Swift mini mount for 25mm Martian II / Alien
Summary
Mount for the RunCam Swift Mini that allows use of 25mm stand-offs on the Martian II and Alien frames. Some modifications to the top plate might be necessary depending on the desired camera angle.
Replaces the stock camera mount.
Print Settings
Printer Brand:
Solidoodle Printer:
Solidoodle 4 Rafts:
No Supports:
No Resolution:
0.1-0.3 Infill:
100% Notes:
Tested using ABS. PETG and PLA should also be possible
How I Designed This
Autodesk Fusion 360 -
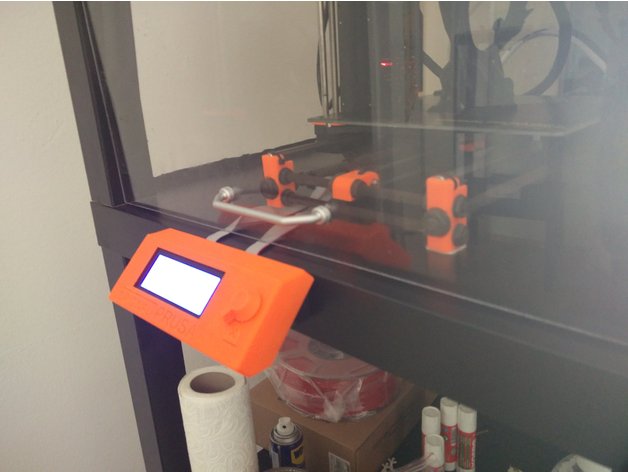
Prusa-I3-MK2 LCD Mount Lack Enclosure
Summary
This is a sample LCD Mount, which is easily removable for the Prusa I3 mk2. -
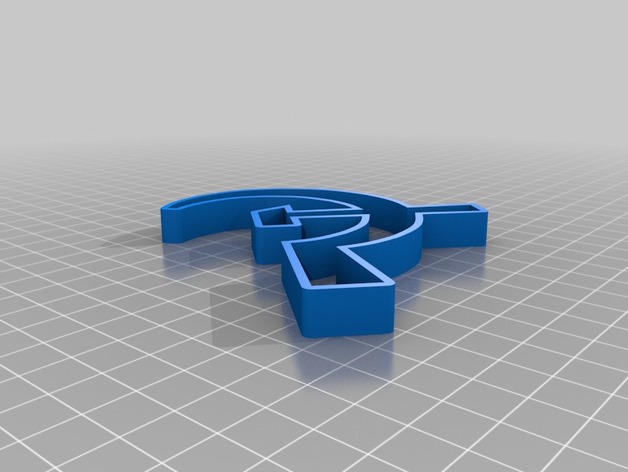
Hammer and sickle cookie cutter
Summary
A spectre is haunting thingiverse: the spectre of baked goods! Once you’ve seized the means of cookie production, celebrate your victory (and the inevitable victory of the proletariat) with this hammer-and-sickle cookie cutter. Give it a shot – you have nothing to lose but the boring shapes of yesteryear’s cookies. -
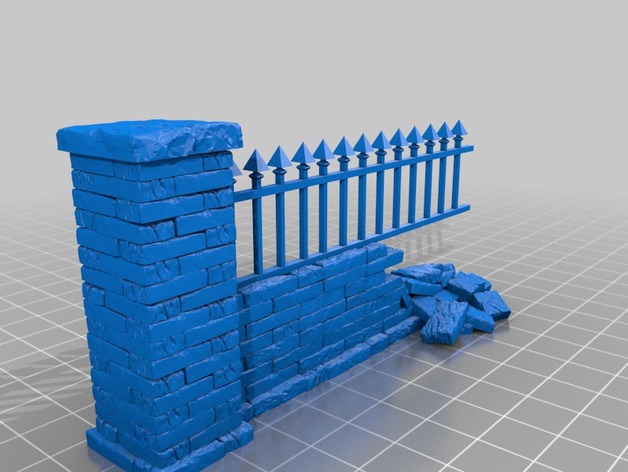
Stone wall broken
Summary
Broken and collapsed wall parts.
After printing the broken wall, carefully heat the metal spikes and deform them to your liking. -
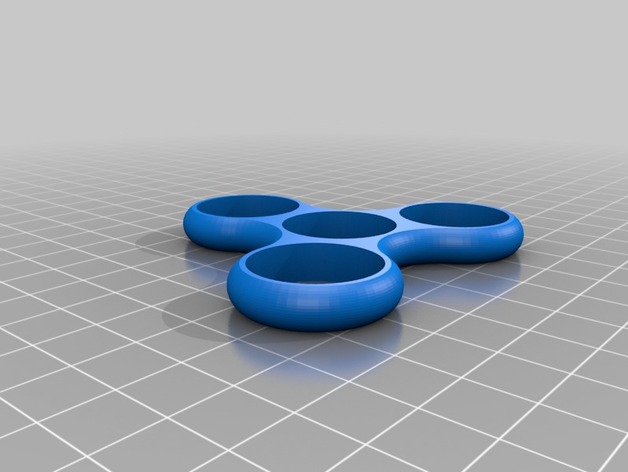
Fidget Spinner v2
Summary
A fidget spinner with multiple bearings. I’ve determined that printing them in one piece DOES NOT WORK!!! You will still need three 608zz ball bearings but that is unavoidable. If you use “Gear Bearing” then you will need “Cap 2.” I wouldn’t recommend using “Gear Bearing” but I’ve included it anyway for those rebels out there. -
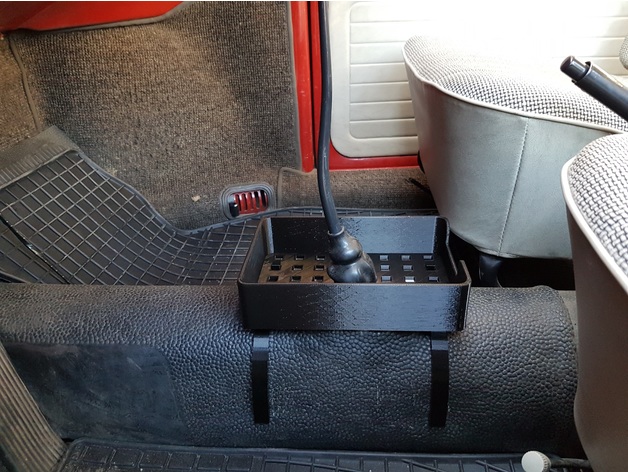
Basket for type1 beetle
Summary
Needed staple basket for my old beetle to keep etc phone and bluetooth speaker. Also included clips for phone, thin and thicker versions, you can put them on inside or outside or both.
Please add pics if you print this 😀
Print Settings
Printer Brand:
Prusa Printer:
Prusa Mk2 Rafts:
No Supports:
No Resolution:
0,35 Infill:
20 -
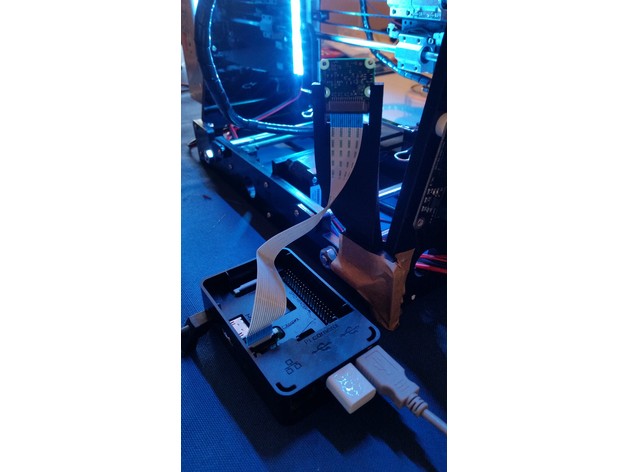
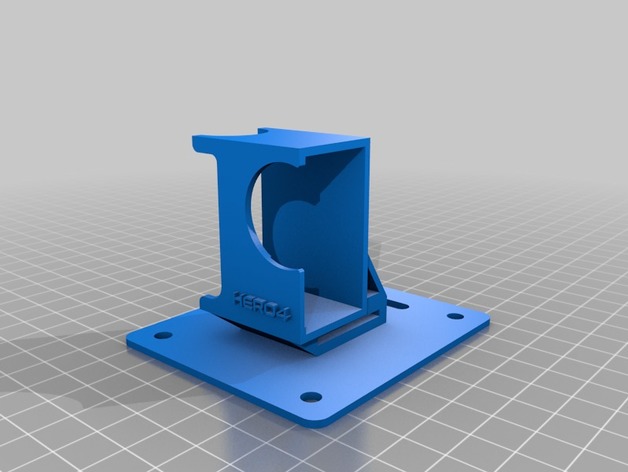
Raspberry Pi Camera 1.3 holder for Anet A8 (or any 3D printer with 8mm frame)
Summary
Simple one piece holder for Raspberry Pi Camera 1.3, i made this for the Anet A8 but as long your 3Dprinter frame is 8mm and you have clearance, it should be compatible.
Can be printed without supports.
Print Settings
Printer Brand:
Prusa Printer:
Prusa Clone Rafts:
No Supports:
No Resolution:
0.2 Infill:
10-20% -
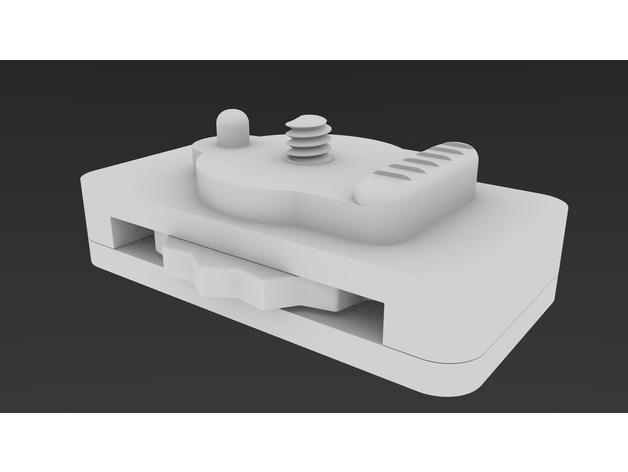
HTC Vive Tracker Dock with Side-Tightening Wheel
Summary
Docking mechanism for HTC Vive Tracker with side-tightening wheel.
Consists of three parts: the upper body, the screw with side-tightening wheel, and the lower body. There are two different versions of the lower body, a blank one that can be used as basis for customizations, and one that can be mounted on a picatinny rail.
Print Settings
Printer Brand:
Prusa Printer:
Prusa Mk2 Rafts:
No Supports:
Yes Resolution:
0.2 Infill:
20% Notes:
Printed with PLA -
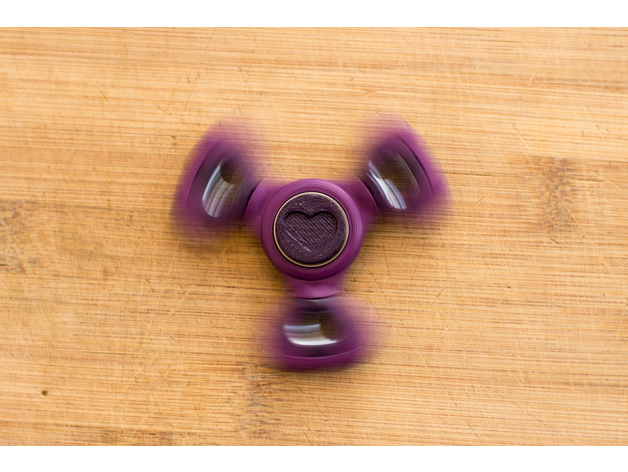
Girly Spinner
Summary
I made this Spinner for my little Sister.
She always saw me spinning mine and wanted a smaller one for her own.
So i designed one with (the most girlish thing i could imagine on a Fidget Spinner) Hearts!
Its quite small so it can fit every hand.
I printed with Supports because the Hearts are slightly thicker than the Ring in the center.
Print Settings
Printer Brand:
FlashForge Printer:
Creator Pro Rafts:
Doesn’t Matter Supports:
Yes Resolution:
0.1mm – 0.3mm Infill:
15-20%
Post-Printing
Requirements : 1x 608ZZ Ball Bearin (22x7x8mm) 3x M10 Nuts
No glue needed just a bit of Force when pushing the 608ZZ Bearing and the M10 Nuts into their holes.
I used a Spraycan to paint it, just because i wanted to see how the colour behaves on the PLA and because i think purple is more appropriate for my little sister. -
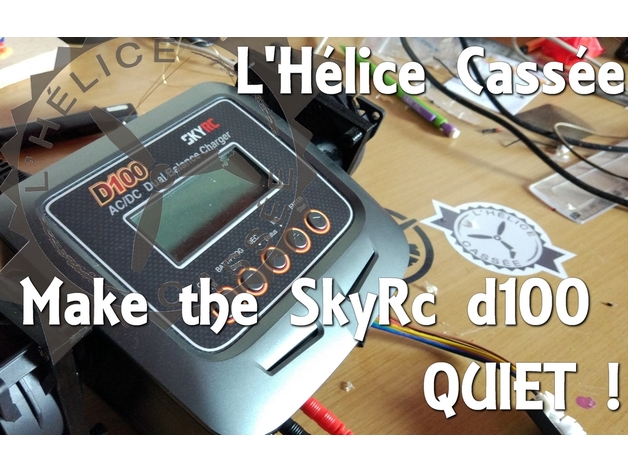
Skyrc d100 80mm fan mod – L’Hélice Cassée
Summary
Hi guys !
With this little mod, you can remove the little, noisy fans and put big quiet 80mm fan so your charger won’t give you head ache anymore 🙂 The charger used to be 70dB and now it’s only 20 !
Fans I used : https://www.amazon.fr/gp/product/B00IOIJ4AC/ref=oh_aui_detailpage_o04_s00?ie=UTF8&psc=1
Visit my facebook page : https://www.facebook.com/helicecassee/
Youtube video :https://youtu.be/na64Pc6ad9o
Support my work and become my patreon ! : https://www.patreon.com/helicecassee -
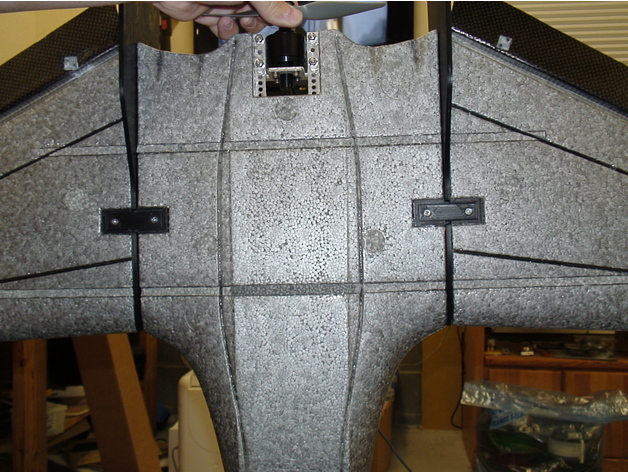
Mini Drak Bolt-on Wing Joiner
Summary
I wanted a more positive connection of the wings to my mini drak so I developed these for 3mm nut and flat head screw (6mm long).
Be careful when gluing these in place you must make sure everything lines up properly. So let the glue cure with wings, spars and fins installed. Don’t forget to put the hex nuts into the bases first!
I designed this with two screws instead of a male and female with one screw in the hopes that if anything breaks, it will be the bar piece and so replacing that would be simpler than having to carve out and reglue the base piece.
I recommend gluing the big fins to either the center fuse or the wings (not both obviously). This makes the fins stay rigid and vertical in high g manuevers. Otherwise it takes very little force to wiggle them around with any wing joining method (this one, velcro or the O rings) which could result in more wag. -
![[WIP] Laser Cut Maker Puzzle – Color mapped](https://3dhunt.co/static/2017/04/4def2bcda6a342ed7da3a3b19cac35c6.jpeg)
[WIP] Laser Cut Maker Puzzle – Color mapped
Summary
This is an alternative version of Jennifer Schachter’s Laser Cut Maker Puzzle, built with Adam Savage for Tested.com’s SXSW 2017 Scavenger Hunt. Details and original engraving/cutting/assembly tips at https://www.thingiverse.com/thing:2240542.
This is VERY MUCH a work in progress aiming to make the puzzle easier to engrave and cut on the laser cutter at the Johnson County Library MakerSpace, or any laser cutter that can process color-mapped designs. -
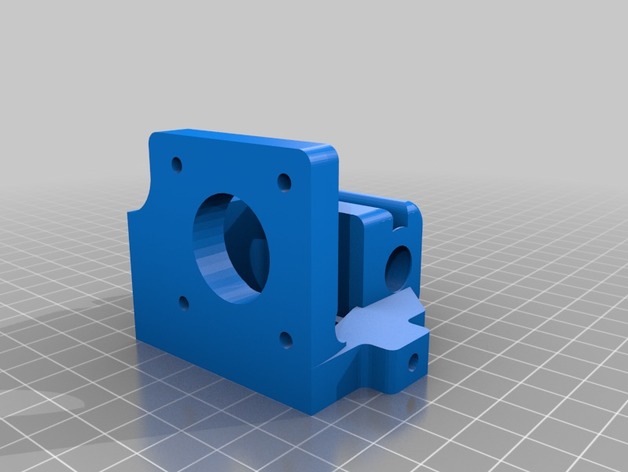
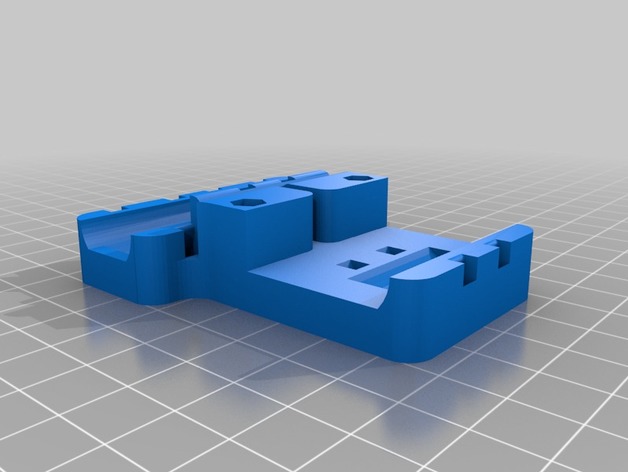
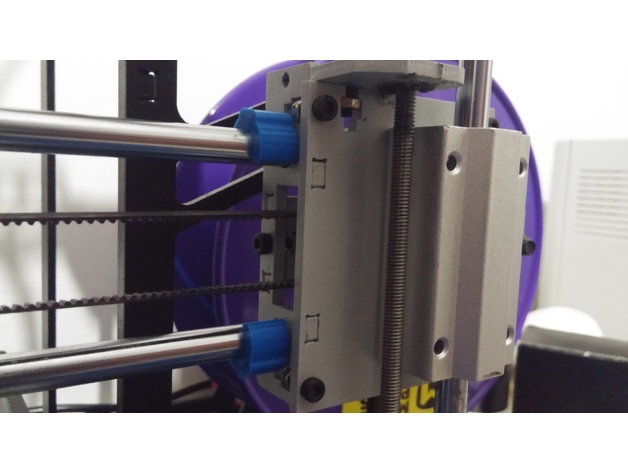
Flsun i3 x/z axis 45 mm redesign
Summary
I’ve decided to make a version of my x/z-axis redesign with a center to center distance for the x-axis rods of 45 mm, with the belt centered. There have been many requests from certain people who want to use a prusa carriage with their flsun printer, so if you’d like to print an original prusa carriage with 45mm rod spacing and the belt centered, these are the brackets for your flsun i3!
For reference, this is the complete redesign with the original 70 mm spacing. Many people have reported success with this design alternative also.http://www.thingiverse.com/thing:2116748 -
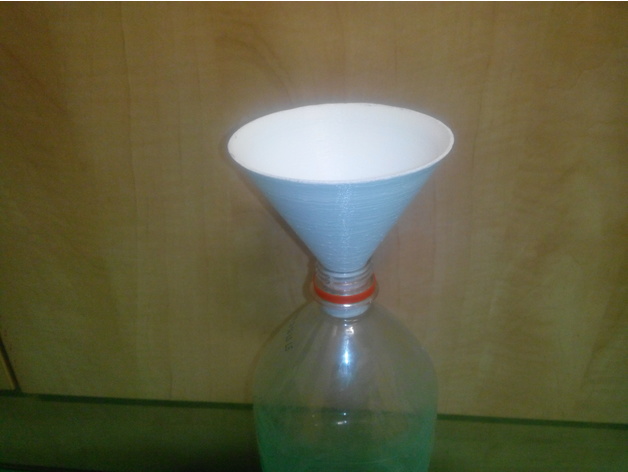
plastic bottle funell
Summary
Simple funnel that fits into 2l plastic bottle.
Print Settings
Printer:
Reprap sinuhed Rafts:
Doesn’t Matter Supports:
No Resolution:
0.25 Infill:
full Notes:
60mm/s
Plastic do not matter but im using PLA for it.
Takes 1-1,5h to print using just mutiple outer lines. -
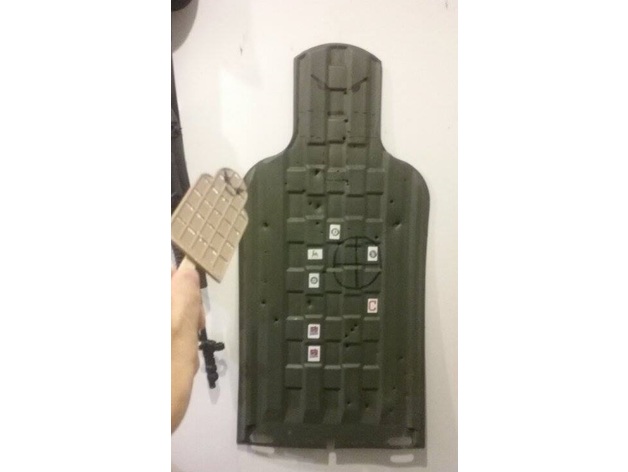
Miniature Silhouette Target
Summary
A very small target.
I have not added any sort of stand, just for ease of use. Glue to a wall, cardboard, a popsicle stick, or anywhere else you want it. -
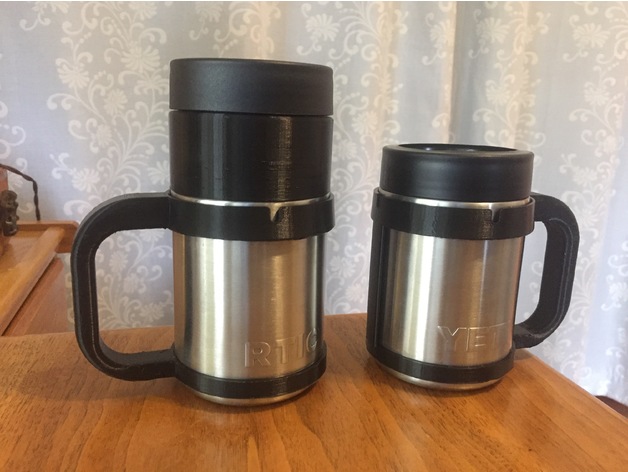
Yeti Colster Mug Handle
Summary
I alway thought the Colster was too wide to easily hold so I made it into a mug. I have included 2 models. cuptomug will need a bit of shimming behind the top ring. (I used a zip tie.) cuptomug2 will need a bit of sanding or Dremel work to get to slide past the Yeti logo. I prefer cuptomug2 it fits better and has an extra support bar. You can also make this to make your Colster fit a 16 oz can. http://www.thingiverse.com/thing:2022139 -
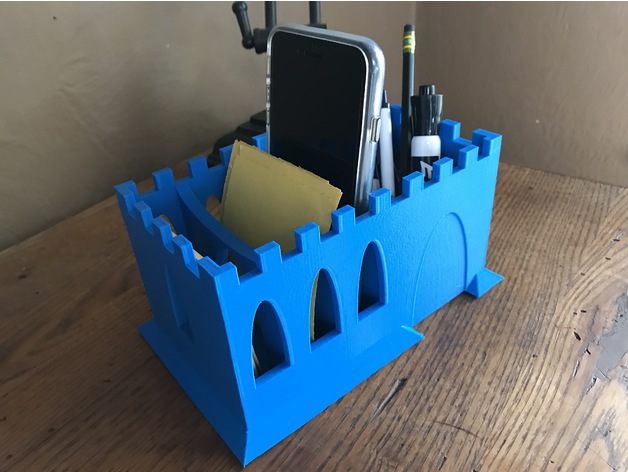
Desktop Keep
Summary
I needed a place to keep things safely on my desk, and so the Desktop Keep was born! -
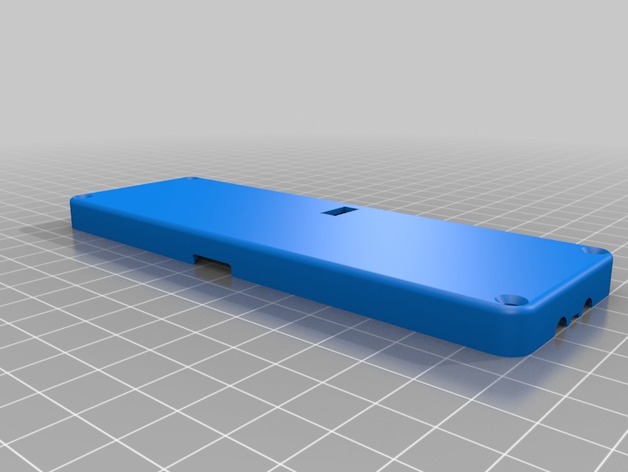
VESC Case mod
Summary
Just made the area for the capacitors 1cm bigger since mine had some longer wire leads between the vesc and the capacitors also put a hole in for the servo JST to be exposed since I’m using that for my custom receiver. -
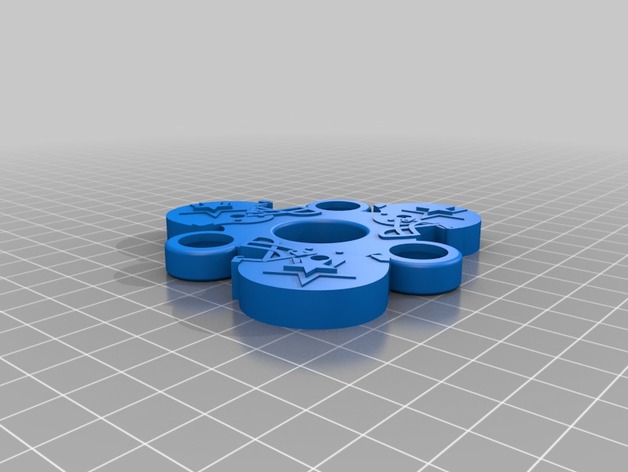
Dallas Cowboys Helmet Fidget Spinner – Wingnut2k
Summary
Per a request, here’s a Dallas Cowboys Helmet fidget spinner that I came up with. I did take some liberty and made the star 3D. This spinner uses (3) 1/2″ ball bearings and (1) 608 bearing. This spinner is about 3-1/2″ in diameter overall.
If you want to print his with the star in a different color, you can start printing it after 8mm. The top 1mm is just the star. If you want to print the helmet in a different color, the helmet starts at 7mm.
Print Settings
Printer Brand:
PowerSpec Printer:
PowerSpec 3D Pro Rafts:
No Supports:
No Resolution:
0.2mm Infill:
50% -
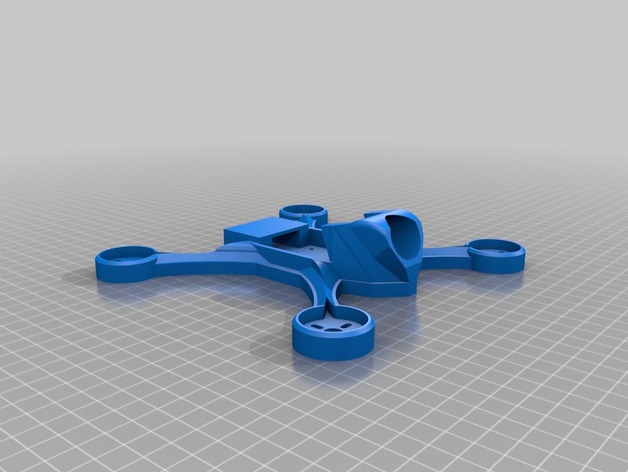
200mm Tiny Kwad
Summary
200mm for 30.5 x 30.5 fc and esc stacks. 2204-2300kv motors. I personally use a Run Cam night own fpv cam which fits. Haven’t tested any other cameras.
Print Settings
Supports:
Yes Resolution:
.01 Infill:
40 Notes:
4 outer walls, 4 solid top and 4 solid top layers. Triangle infill at 40%. Solid layer ever 10 layers. -
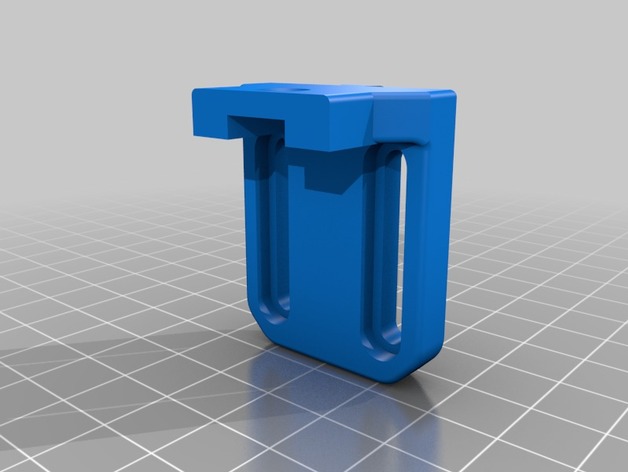
LPA Sensor Mount for Aluminium X-Carriage
Summary
Meant to be used in combination with Isaac’s aluminium X Carriage, and the LPA sensor dovetail sensor plates found under: http://www.thingiverse.com/thing:1829292
There are sensor plates for SN04, BLTouch, and LJ 18A Family sensors. -
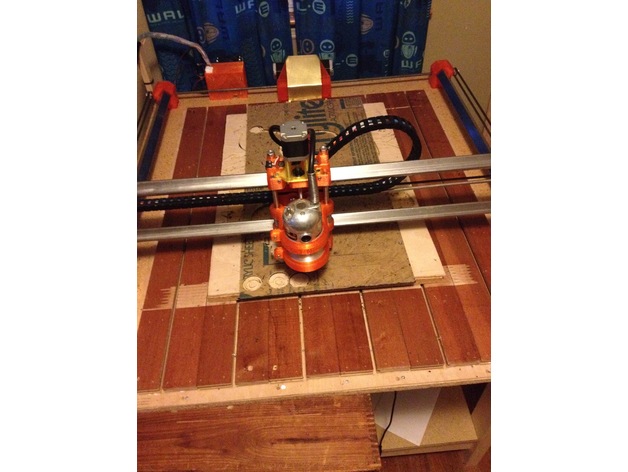
ROOT 2 MODDERFY!!!
Summary
Having trouble with your STOCK original root 2 cnc. Now it’s time to MODDERFY!!!
I’ve helped many people that run into problems with this model. If your having a problem with a part check these mods out.DISAPPEARING Y RAIL MOD
The Y rods get pelted with stuff as you mill, most of it can be compacted by the carriages, but if you mill acrylic you have to keep them clean as you go or it could get nasty. A mod to fix this is to lengthen the side panels upwards. Take a 2×8 and and a 2×4 and make an L on each side. Connect these with 3 rows of 2×3’s to make a “bed frame” Sit the machine into it and use wood screws to screw the feet into the short section of the L from underneath. Now cut your waste board and screw it to the 2×3’s. Wide enough so it almost touches the inner sides of the panels. If you need a further hint check MAKER TR3E CNC out to understand the clue. Now the bars are hidden. You will have to cut a section out of the back 2×8 to accommodate the Y motors. Now the rails have disappeared!!ANTI BACKLASH MOD
Check the photo. First insert 1 nut into the underside of the bottom spindle holder. Keep screwing until you are halfway to the other one. Use 2- 5/16 washers stacked, spring, 2 more washers. Put this on the screw. Now on the underside of the upper spindle holder put another nut. Hold both pieces tight together in your LAP ( yes take it off the machine, leave the smooth rods on.) Screw into and through the second nut. You shouldn’t be able to move them apart, and if you pull on the screw there is no jiggle or slop. It might take you an hour to get this right. You might even have to shave a little off the rod to start at a different spot when you screw it into the second nut. The spring can be found in the spring multipack at Home Depot. Stand in front of the threaded rod there and then turn around, it right there where all the gate hinge stuff is. When you have it right leave enough room at the bottom for one nut to fit snug against the bottom. Apply locktite to the threads of the nut and screw it on, leave overnight, throw the other nut away.DIRECT DRIVE Z MOD
Props to Adrenaflo for designing this! Z axis repeatability pissing you off!! First do the anti backlash mod. Then undo the z axis motor, throw the mount away. Print the Modderfy.stl Screw your motor onto the mount. Screws can’t be hanging out the end. Now take the mounted motor and sit it on top. Throw the nuts that go on the top of the leadscrew away. Now mark where spindle and the rod meet and cut it. You will have to prop something under the screw so the assembly doesn’t fall through. Cut the rod where it stands and use a coupler here. You can make one out of 2 different sized clear tubing at home depot plumbing section and 3 zip ties. They will overlap each other and you won’t think you can do it but you got to push, scream if you have to. Now the motor is on. Move the side fins of the mount to where the holes will meet the crevices of where the smooth rods go. Use wood screws and screw it down, small little screws. Now go over to the board and flip the direction of the Z you have plugged in. THERE ARE NO NUTS ON TOP!!! Screw, coupler, motor, that’s it. Now apply general purpose lithium grease to the rod. Go into the firmware under configuration.h and change the Z steps to 2650. It could be anywhere from this number or a little higher lower, as each threaded rod looks the same but are not. In your favorite program move the the z axis a little up at a time till you reach the top. (If you didn’t do the anti backlash mod right you will have a problem.) Go up and down repeatedly to work the grease into the threads. You will have to apply grease periodically, make sure this is clean of chips before you start milling or there will be problems.
I want to use Fusion 360 to CAD, CAM, and make GCODE but there isn’t any post processor for this machine.
Use the cps file and either insert it manually into the directory where it will poll all the post processor selections or select personal and tell it where the file is. Select to use this for all operations. This is the menu where you go to give your gcode a name, look up higher and you will see something that looks like a directory structure, start clicking around up there and you will figure it out.
When I go to mill it acts fine then starts doing weird stuff, like shifting.
This is the most common problem, and the first point you will encounter of this is NOT like your 3D printer. You know that board that just hangs off your printer, probably doesn’t even have a fan on it, because it isn’t working very hard. Now it’s working double overtime, gonna die because now there is torque involved. When the chip gets too hot it will activate the thermal cutoff protection. Power will be lost to the motor for a second so the chip doesn’t melt. This will result in lost steps and hence a shifted mill. It’s not the big chip but rather the smaller chips surrounding it that the heatsink doesn’t touch. GO FIGURE, RIGHT. So you need a fan blowing on the board to keep it COLD. You also need to check your amps on the drivers and adjust the pots, max is too high. If you use the program to move the machine and you put your hand in the way and dies there isn’t enough power. It should be pushing against you like get out of my way I’m milling here!! You might have to upgrade your drivers to DRV8825. Set the pots to 1A max. There are plastic parts inside your nema 17 motors if they get too hot too long you will ruin them for good. If you want to do aggressive milling or mill thick pieces of wood, like thicker than 1/2 inch consider a nema 23 model.POWER MOD
I want just a little more power from my nema 17’s. Mod the ramps board for 24 volt as seen on youtube. If you mill from an onboard screen and not a computer you will have to use a power plug to power the arduino, as the ramps will no longer give the arduino power, it will blow it up. Buy a 24v 10amp power supply. Upgrade the drivers to DRV8825 set at 1 amp for nema 17 and 3 amp for nema 23. Do not go higher on nema 17 or you will toast them! Position fan to blow across the width of the board, hooked directly to power supply. I just stick the wires into the ramps where the power goes in. Position heatsink fins to where they are in line with the current of wind from the fan. Use a big computer fan, make it cold. Do research, use common sense, and above all Nema 17’s are NOT some magic little motor that can power your car, they are meant for printers, scanners, and other machines that move parts around where torque is not involved. Yes they are fun and can do some milling, but if your not getting the result you were looking for use bigger motors. If they are getting too hot, then your abusing them and don’t expect them to last very long.I will not be answering questions on this post. I’ve said all I want to. If you need additional help please join the Root 2 group and ask the community there. I made this post to help newbies and you might get directed here from the group to answer your question. I think this is better than repeatedly answering the same question over and over again. Pete Newberry made an awesome machine, which has been upgraded and improved from this first version. Please post any mods you make in the I made one so people have more visual clarification. And if you come up with a new mod please post it into the remix section. Help me Help others as you have been Helped. The mission of this post is to catalogue problems and make it a reference resource to help you understand and operate your machine more efficiently, with less hair pulling, and fewer headaches.
And remember this is the Root, your foothold, where you started from. How will you sprout from here? Share what you did to make it work for your purpose. Even if it meant designing a totally different kind of machine. -
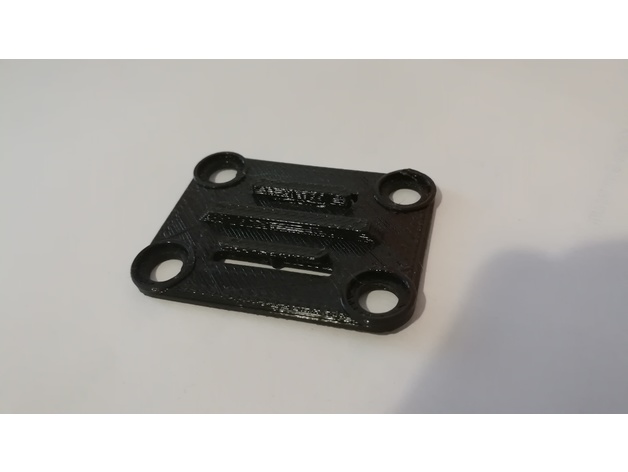
Onepaa x2000 mount
Summary
This is a clone of the Onepaa x2000 camera mount. For me it works very well.
Print Settings
Printer Brand:
Prusa Printer:
Prusa Clone Rafts:
No Supports:
No Resolution:
0.1mm or 0.2mm Infill:
20% -
Ultima F5J fuselage cap
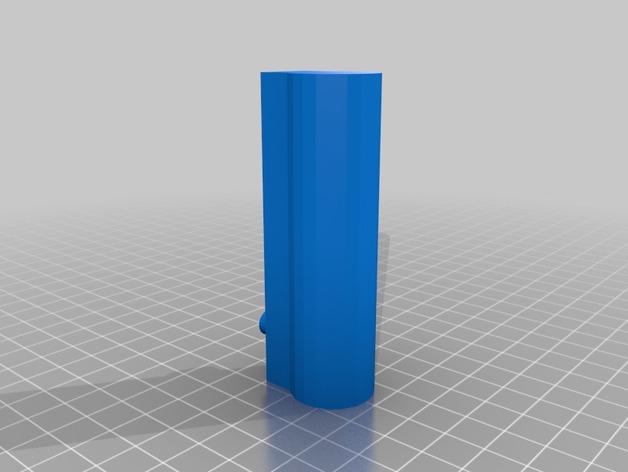
Summary
This cap protects the end of the fuselage of an Ultima F5J for transportation. The button locks the cap on the fuse through the rudder support hole.
Print Settings
Printer Brand:
Prusa Printer:
Prusa Mk2 Rafts:
Doesn’t Matter Supports:
Doesn’t Matter Resolution:
.35 Infill:
20% is okay Notes:
I printed it without supports and the button prints okay. You need to tweak your bridge settings to print it cleanly or with supports. -
Phab 2 Pro Mount for Kobuki robot base
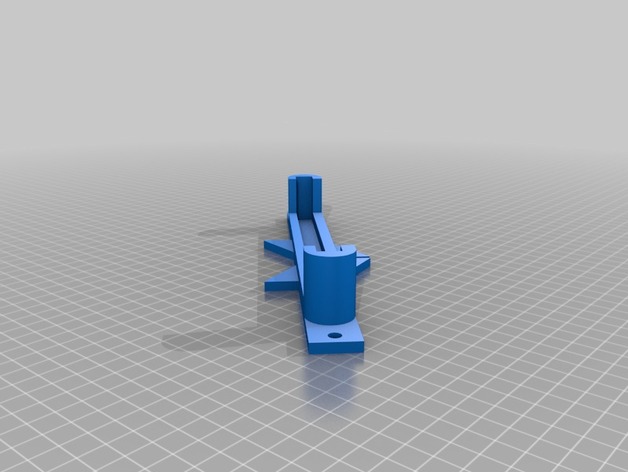
Summary
This is a cellphone mount for the Lenovo Phab 2 Pro to be mounted over a Yujin Kobuki or iRobot Create robotic mobile base, as found on the Turtlebot kits.
This was created as part of the Tangobot project – see http://wiki.ros.org/Robots/Tangobot -
Zisa Dolls head and hands
Summary
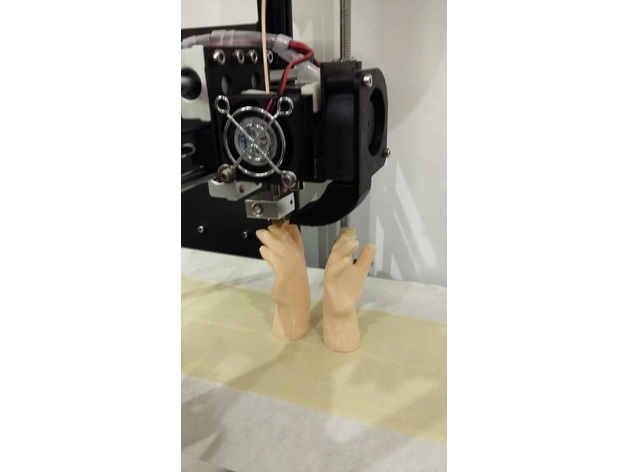
DIY Zisa doll parts: head and hands.
Zisa doll is a composition doll, head and hands are 3D printed (I suggest PLA filament) and body and limbs are sewn in felt and then padded.
This tutorial https://www.zisadolls.com/listing/510030690/fai-da-te-una-zisa-doll-due-stl-file-per with illustrations and step-by-step explanations, will allows you to make this soft retro style 18 inch doll.
The product contains 4 files:
2 PDF files to be downloaded and printed on A4 paper (with a home printer or external printer service; can adapt to USA letter size), one is this tutorial and the other is the pattern to sew the doll’s body.
The www.zisadolls.com website also offers patterns and tutorials to create your own Zisa Doll wardrobe.
Post-PrintingHow I Designed This
Custom Section
-
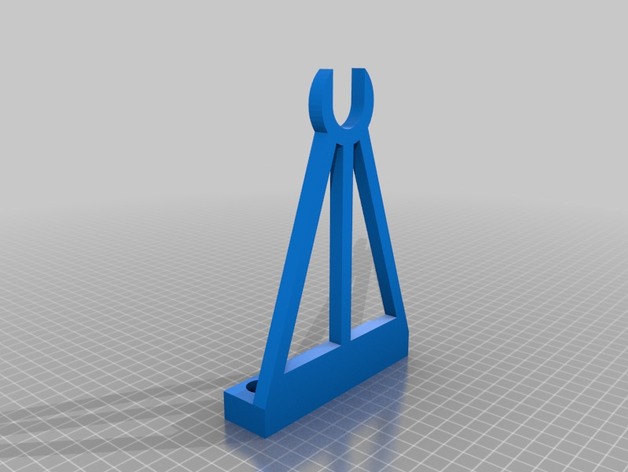
Spool Holder
Summary
Made to be screwed down on top of my lack table setup. The top of the spool is open so the threaded rod can just slide right out.
Made to fit 5/16 rods with washers and bolts keeping the rod in place on the spool holder. The rod is fitted with 2x 608 bearings on the edges with optional 2 more in the middle where the spool sits on the rod.Custom Section
-
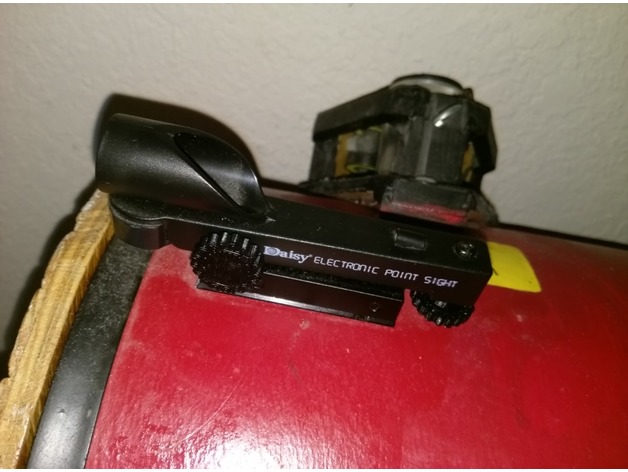
Daisy red dot sight adjustment knobs
Summary
This is an adjustment knob for a Daisy red dot sight, which makes it easier to dial in the azimuth and altitude adjustments. This is particularly useful if you use the sight on a telescope.
To use this, print two. Then make sure the hex nuts on the two Daisy adjustment screws are well glued onto their screws, because the knobs will attach to the hex nuts. If they aren’t well glued, then glue them to the screw with superglue. Then glue on the knobs (or just press-fit). If they don’t fit, increase the tolerance setting.
No supports needed. -
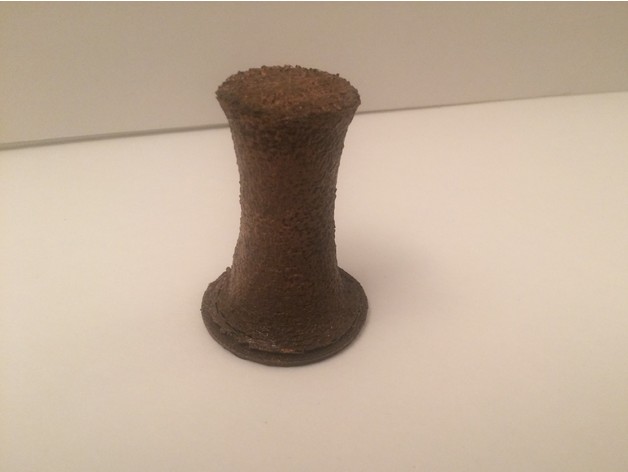
Miniature Cave Mud Column
Summary
This is a 3 and 3/4 inch cavern tile for 28mm games or scenery. It is printable without supports, having an internal core to provide support. Can be combined with my cavern tile or with several other 28mm tiles and add ons such as the following link http://www.thingiverse.com/thing:2035167 from Jennifer. Column is finely detailed with a mud flow textures.
Print Settings
Printer Brand:
PowerSpec Printer:
PowerSpec 3D Pro Rafts:
Yes Supports:
No Resolution:
0.15 Infill:
10% Notes:
Suggest printing with rafts unless your printer is good at support at heights over 3 inches. Also suggest printing at finer detail to see texture applied to column -
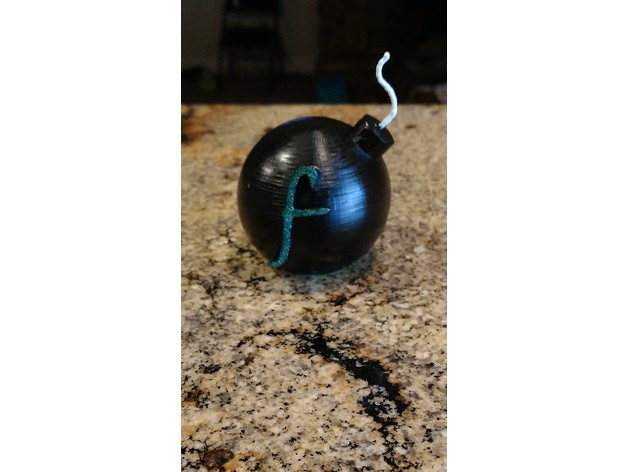
F BOMB
Summary
Made this for my wife. She wanted one for her desk at work. She is the one who painted it.
This is my very first design on my own, I think it turned out great. Please give me feed back if you need any details. I am very new at this.
Print Settings
Printer:
xyz Da Vinci pro Rafts:
Yes Supports:
No Infill:
10% Notes:
The infill was at 10% but I’m going to print another one, soon, to see if i can skip the infill and just add another layer to the shell. Shell was set to 3 layersCustom Section
-
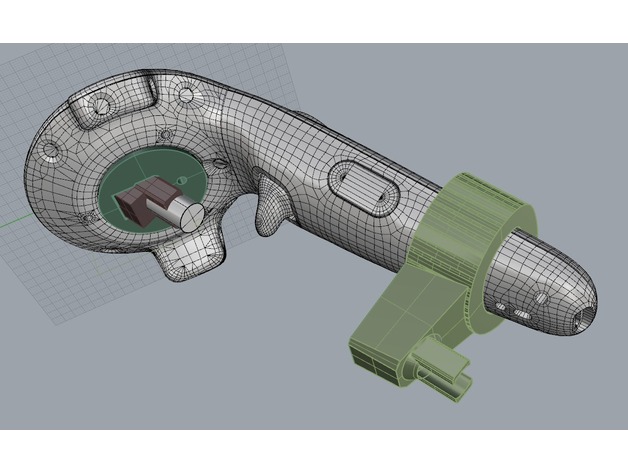
Vive golf club mount
Summary
A mounting system to put a vive controller on a 12mm tube (I used a towel holder I pulled apart). You also need some screw-in braces/grommets to secure the mount, and I’d recommend going to a golf shop to buy the handle (they are cheap). The plug in the vive top is secured with a long m3 screw and nut (about 40mm? spacer nuts can be added at the top side).
You can view a writeup of the project here:
www.msawtell.com/research/viveclub -
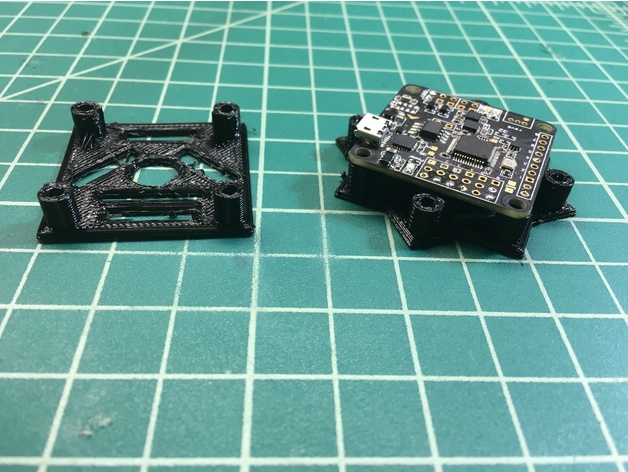
Soft Mount for Flight Controller (FC) and Power Distribution Board (PDB)
Summary
I wanted to design an option for soft mounting my flight controller and power distribution board. These are intended to be printed with a semiflex filament. M3 screws will fit through the holes. I recommend using M3 nylon screws.
SoftMount_PDBv2 – this model has 4 screw columns. It can be used for a Power Distribution Board, 4-in-1 ESC, or a Flight Controller. Since it only has 4 screw columns, it may still transfer some vibrations- but this option is easy to mount, as it will go directly into your frame (assuming it is for a 36x36mm board, with 30.5×30.5 mounts- this is what most F3/F4 flight controllers, such as the Naze 32 are).
SoftMount_FC_PDBv2 – this model has 8 screw columns. 4 of the columns are intended to be mounted to your frame, and the other 4 are used to mount your board. When using this mount, you will need to update your flight controller configuration so it knows that your board is rotated 45 degrees.
Use M3 nylon screws and nuts to secure the screws. You will need a screw long enough to go through the columns for the flight controller. You will need a longer screw for your frame (depending on frame thickness). For the flight controller, I think a 10mm 3M screw should work, and give you enough for a nut, but it would be good to double check.
Print Settings
Printer:
Reach 3D Rafts:
No Supports:
No Resolution:
.2 Infill:
20% Notes:
Use a flex filament. I am printing with a Titan e3d extruder and need to print around 15-20mm/sec. This is a tricky print with flex. -
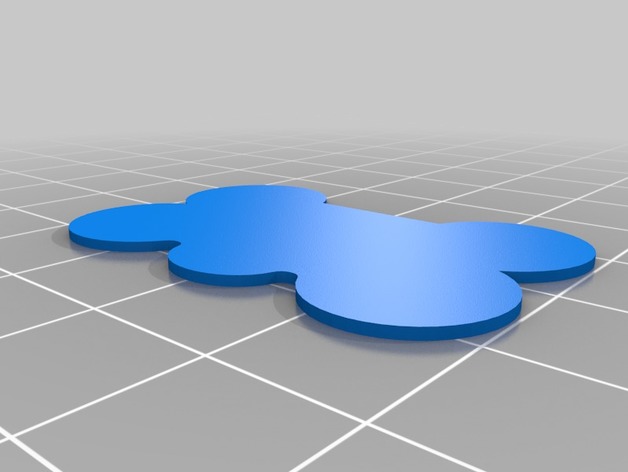
Dog Tag Bone Trim Ring for Collar
Summary
Made this for my dogs noisy metal name tag on their collars. Bone shape which is popular from online retailers.
Instructions:
The ring is best made from TPU or similar.
Blank from PLA or similar.
Print blank
Start trim ring print and stop just before overhang layer begins
Insert blank into object cavity
Finish print
Remove blank
Enjoy
Details:
First tried printing with supports, which made for a messy print on the upper layers due to the overhang. Overcame it by printing a filler piece from PLA first then stopping the print just before overhang layer began, inserting the filler piece, and restarting the print. When complete, toss the filer piece or reuse on another print. Works like a charm. No more noisy dog collars!
Print Settings
Printer Brand:
Prusa Printer:
Prusa Mk2 Rafts:
No Supports:
No Resolution:
0.2mm Infill:
100% -
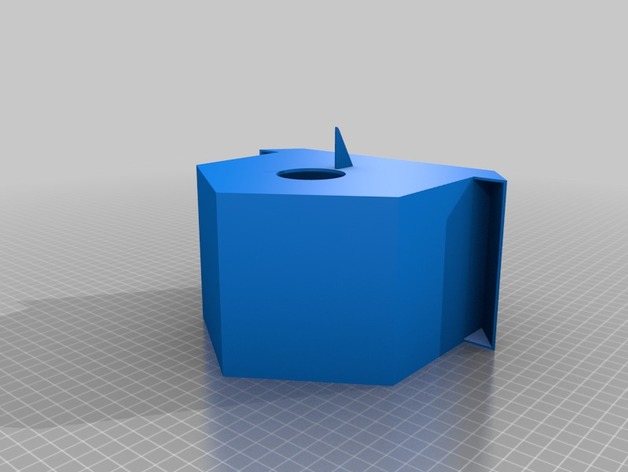
Bird House
Summary
I designed this birdhouse for the backyard song sparrows and also put in troughs on the sides of the birdhouse which I planted wild flowers in to attract the bees as well.
Print Settings
Printer Brand:
Prusa Printer:
Prusa Clone Rafts:
Yes Supports:
No Resolution:
0.3 Infill:
15% -
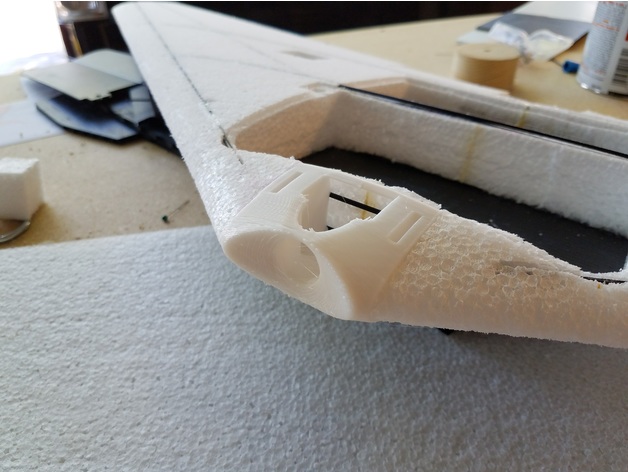
Ritewing Vollocity48 cam mount
Summary
Here’s one of my Ritewing Hardcore mount’s to fit Shelby’s Vollocity48. -
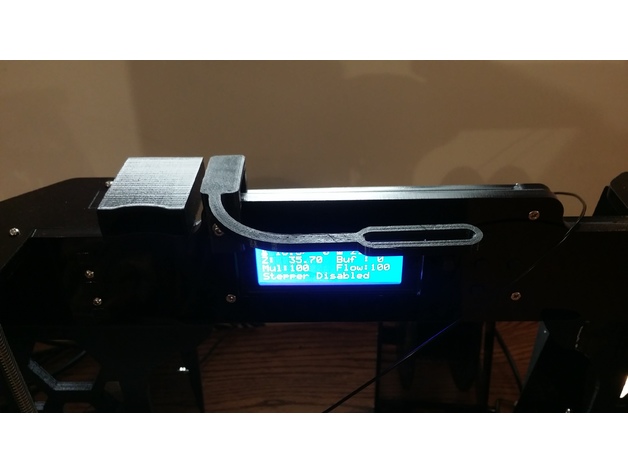
Anet A8 Filament Guide Arm redux
Summary
I needed a way to guide filament to the extruder, so I printed
Anet A8 Filament Guide Armhttp://www.thingiverse.com/thing:1915337
Made byhttp://www.thingiverse.com/DevDorian
but, it wouldn’t fit as I have a corner bracehttp://www.thingiverse.com/thing:2243664
that replaced the stand offs behind the LCD, so I made the connector thick enough to go around the three layers of the frame. I also worried it might be too wide to get around my SD Card adapter, so I shrunk its width. Which I now think was not necessary… -
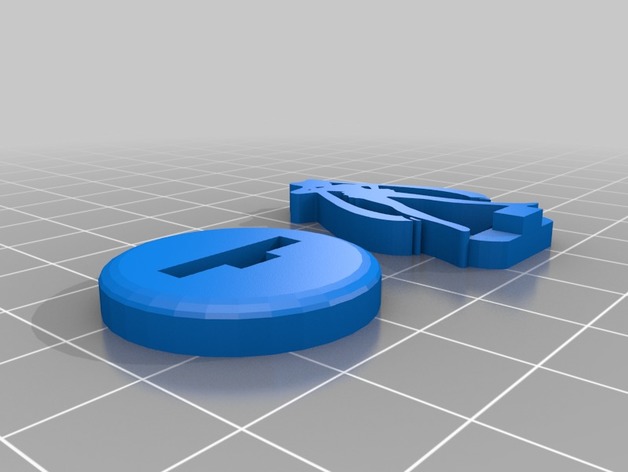
FlatMinis: Magical Girl
Summary
Sailor Moon based magical girl flatmini.
Print Settings
Printer Brand:
MakerBot Printer:
MakerBot Replicator Rafts:
No Supports:
No Resolution:
.15 Infill:
5% -
Bathroom Cabinet Organizer Stacking Adapter
Summary
Quickly whipped up this adapter for our new bathroom organizer drawers from Bed Bath and Beyond. https://www.bedbathandbeyond.ca/store/product/org-medium-under-the-sink-mesh-slide-out-cabinet-drawer/3285496?categoryId=23320
We bought two of these but they didn’t come with any hardware for stacking. I wasn’t comfortable with them stacked using only the small plastic bumps that didn’t seem secure for daily use.
This is the beautiful thing about consumer 3D printing that’s easily accessible. Opened Fusion 360 (for the first time) and with the digital caliper created a part in minutes and sent it off to the printer. BAM! prototype #1 was perfect.
Anyways, sharing this on the off chance someone else with a 3D printer has this same organizer.
Enjoy!
Print Settings
Printer:
M3D Micro Rafts:
Yes Supports:
No Resolution:
Lowest Notes:
Printed with lowest settings for fastest print time and fit perfectly. -
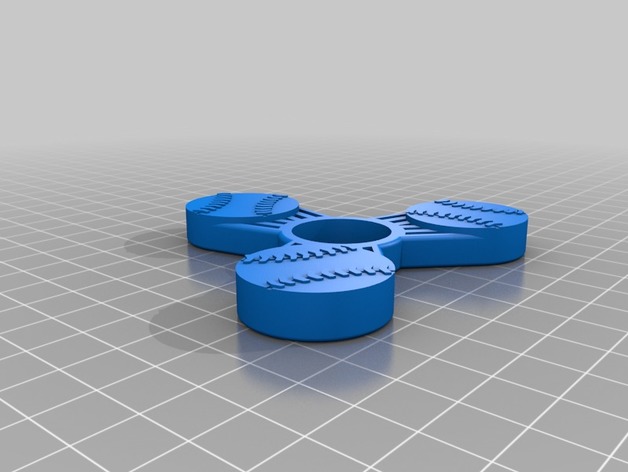
Baseball Fidget Spinner – Wingnut2k #2
Summary
Per a request, here’s another Baseball fidget spinner that I came up with. This spinner uses (4) 608 skateboard bearings. This spinner is only about 3-1/2″ in diameter overall.
I’ll upload a picture when I get a chance to print one.
Print Settings
Printer Brand:
PowerSpec Printer:
PowerSpec 3D Pro Rafts:
No Supports:
Yes Resolution:
0.2mm Infill:
50% Notes:
Make sure to turn on the supports for the holes behind the baseballs. -
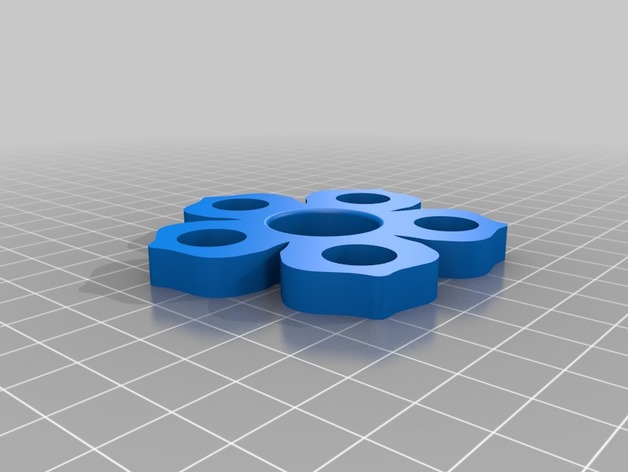
Flower Fidget Spinner – Wingnut2k
Summary
Here’s a Flower shaped fidget spinner that I came up with. This spinner uses (5) 1/2″ ball bearings and (1) 608 bearing. This spinner is about 3″ in diameter overall.
I’ll upload a picture when I get the print finished.
Print Settings
Printer Brand:
PowerSpec Printer:
PowerSpec 3D Pro Rafts:
No Supports:
No Resolution:
0.2mm Infill:
50% -
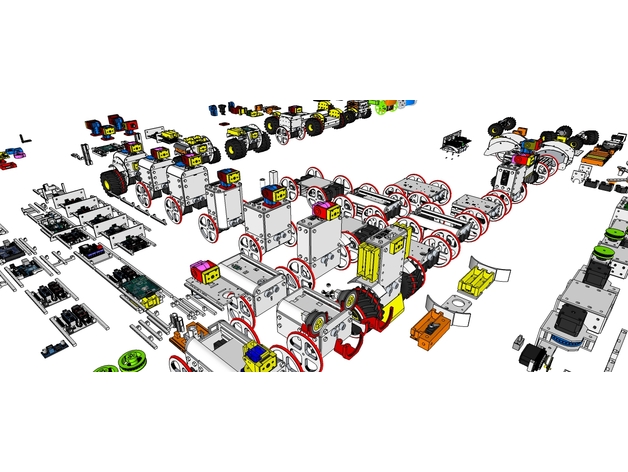
ProfileBlock – Design Concepts
Summary
[ Upload design concept 20170418]
ProfileBlock – DIY Robots & Rover & RC & Etc. Platform
3D Design Tool: SketchUp Pro
ProfileBlock’s robots are built on top of an open source Arduino-based platform.
drawBot: Drawing Robot (Polargraph, Pen, …
Rover
eX-Robot: Self Balancing Robot
Scara
Arm
XY Plot
HomeIoT
Etc…
Hardware
Base Plate(Parts):
Profile DF 2020
DRF 2020
Acrylic
3D Printing
Step Motor:
NEMA 17 – Phase: 4, Step Angle: 1.8 Deg/Step, Holding Torque: 2.6Kg.cm
28BYJ-48
Servo:
Standard Servo
G90
Electrical
Control Board:
Arduino
ESP8266
Raspberry Pi
Power Requirements:
4.2DVC
8.4VDC
12 VDC
Battery:
18650 x 2ea
16340 x 2ea
How I Designed This -
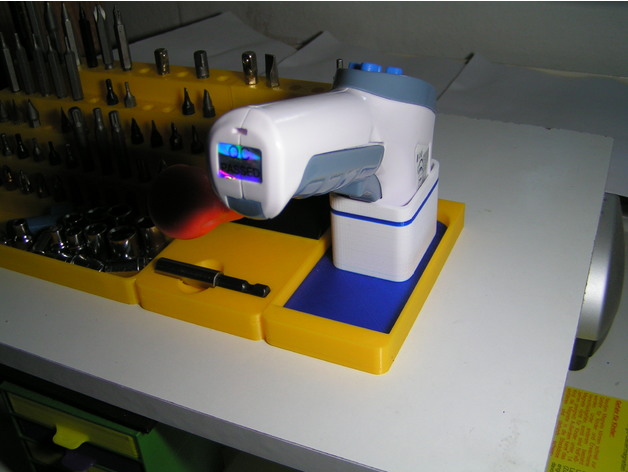
Infra-Thermo-Org
Summary
wer möchte kann das Infrarot-Thermometer zu den Bit-Organizern dazustellen:
http://www.thingiverse.com/thing:2251462http://www.thingiverse.com/thing:2252014http://www.thingiverse.com/thing:2252392 -
PirateTofu
Summary
Avast ye mangy mutt! It’s a TofuDog with a tricorn hat, eye patch and a pegleg. A fine edition to the expanding TofuDog pack.
We’ve set up a Patreon page for anyone who’s interested to help fund us so we can keep making free and open sourced games like Pocket-Tactics, Wayfarer Tactics. and others, not to mention the growing catalog of gaming miniatures that you can use for whatever you want!
Thanks for looking!
Print Settings
Printer Brand:
MakerBot Printer:
MakerBot Replicator Rafts:
Doesn’t Matter Supports:
Yes Resolution:
.2 Infill:
10% -
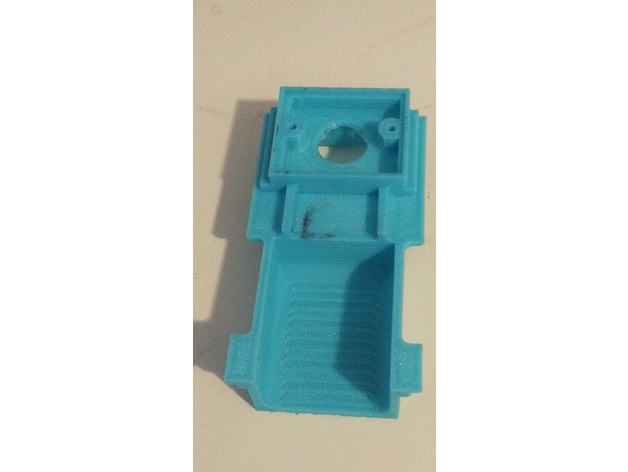
Aug A2 A3 mag holder
Summary
Replacement part for aug A2/A3 .
its inside the gun. that holds mag in place and gearbox
Print Settings
Printer:
Geetech i3 Rafts:
Yes Supports:
Yes Resolution:
0,25 Infill:
50 -
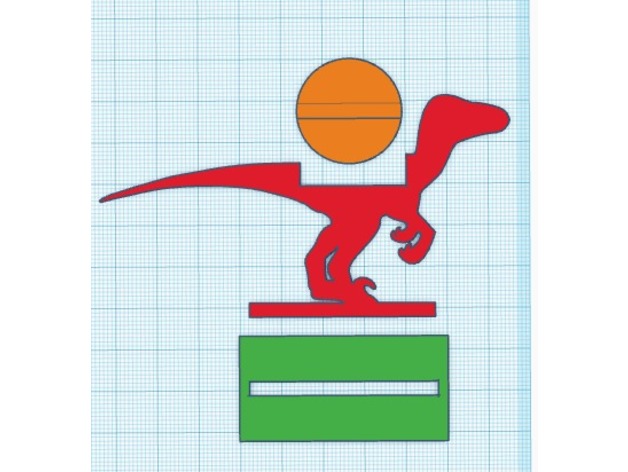
Silhouette Minis – Set 9 – Lizard Mount for Rider
Summary
Here’s a flat lizard mount for your 28mm PC and NPC minis to ride!
Dutchmogul’s caveman shown for scale. Thanks! -
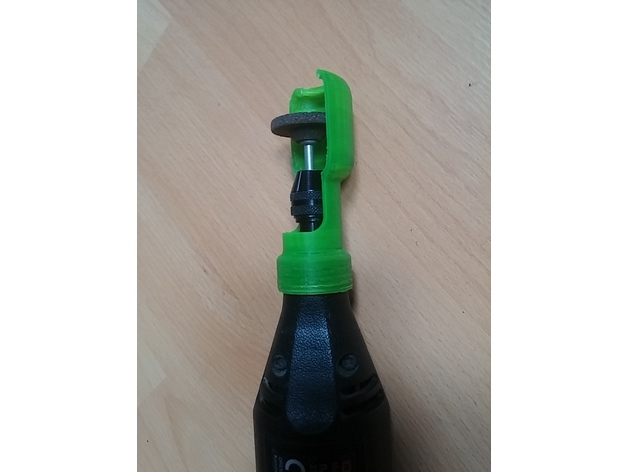
Dremel protection
Summary
Needed some protection while grinding, sanding, cutting.
You can stop the print or cut the top if you want an easier access to install large wheels.
Print Settings
Printer:
Improved Geetech Al Rafts:
Doesn’t Matter Supports:
No Resolution:
0.2 Infill:
25 Notes:
HD Glass filament, 220°C, print time 25 min @ 100 mm/s. print vertically. -
MakerBot Replicator – Tensioning Belt Clip
Summary
Clip that connects the belt ends broke a clip…. Created this replacement while the new one shipped to me…
I just used basic print settings -
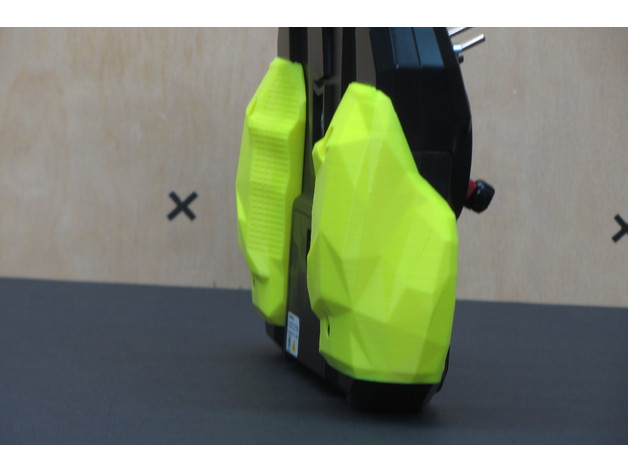
TX Flysky i6 hand PAD
Summary
Here’s a set of hand pad that I created to hold well this thin i6 transmitter from Flysky.
I printed them without any support, standing, be careful there’s not much touching bottom layer, you can try adding manual support.
Polygon look is wanted.
I drilled holes on my tx with a 2.6ish mm mesh than screw metal 3mm hex screw.
If you want to try first, I could image you print it as vase mode first maybe.
Print Settings
Printer Brand:
RepRap Printer:
RepRap Kossel Rafts:
No Supports:
No Resolution:
0.2 Infill:
a few Notes:
bottom, top and wall at like 4 layers to get it tough. But not much infill, maybe around 8%. It took around 6h to print one at an average of 30mm/s