Summary
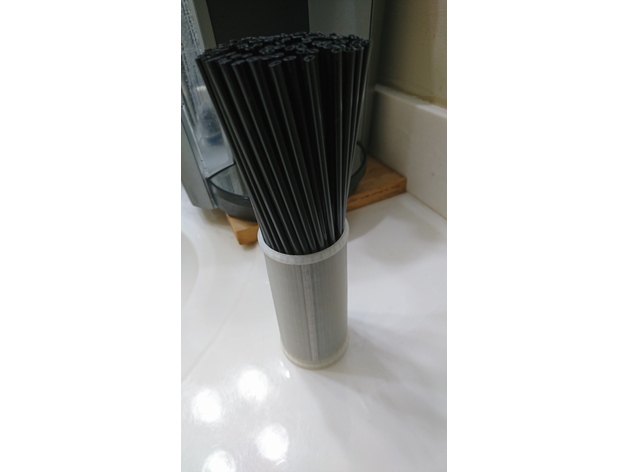
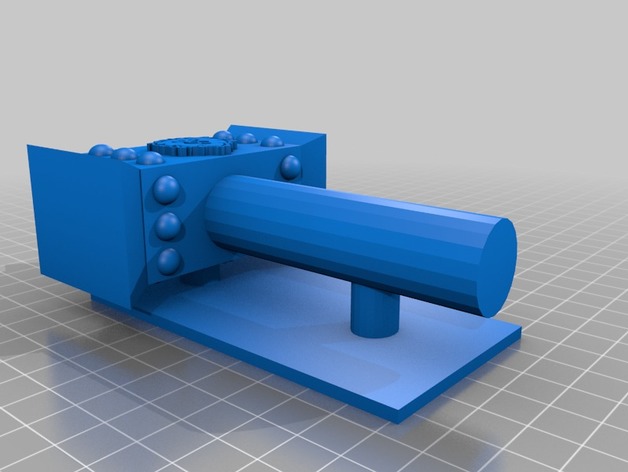
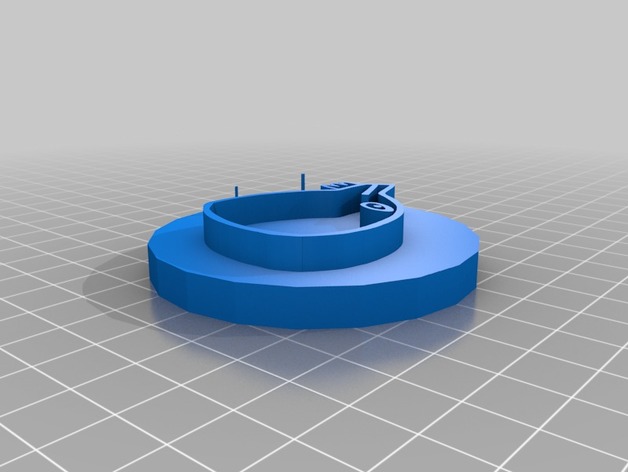
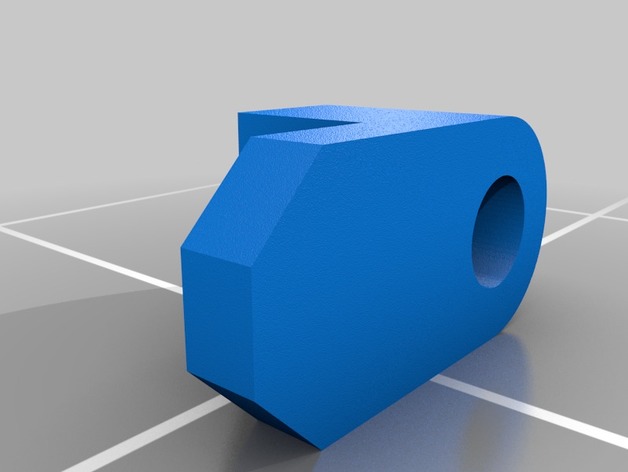
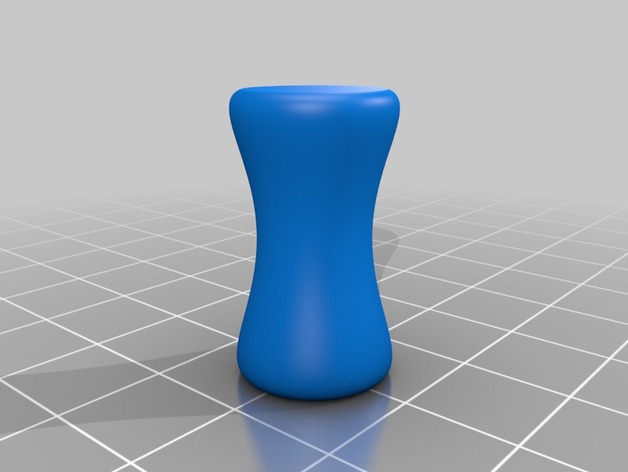
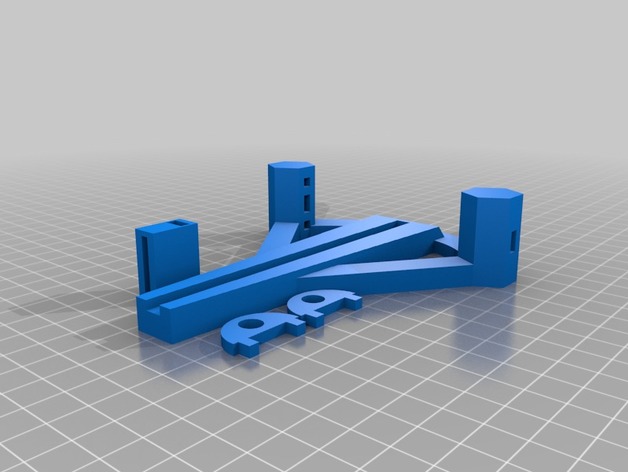
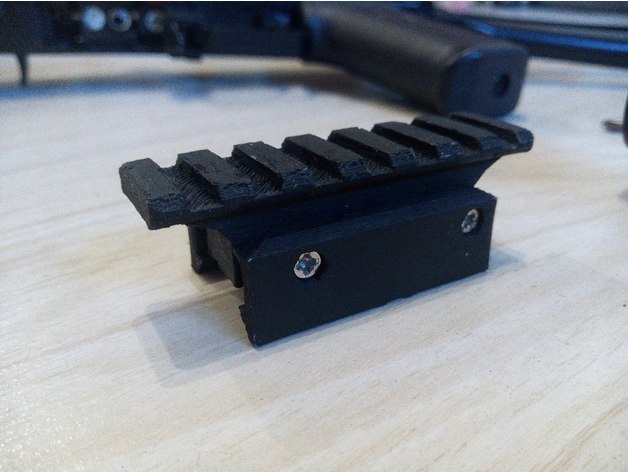
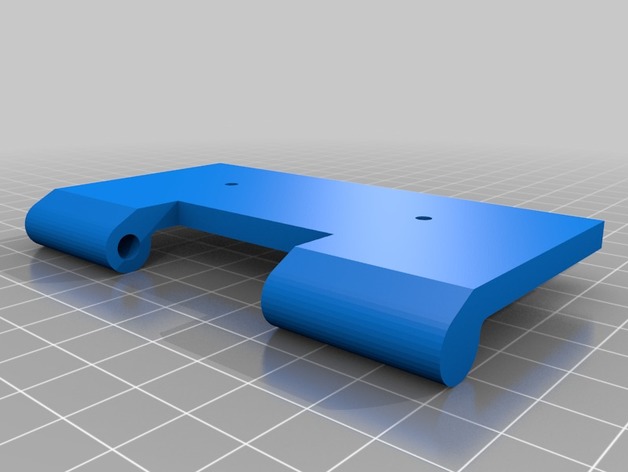
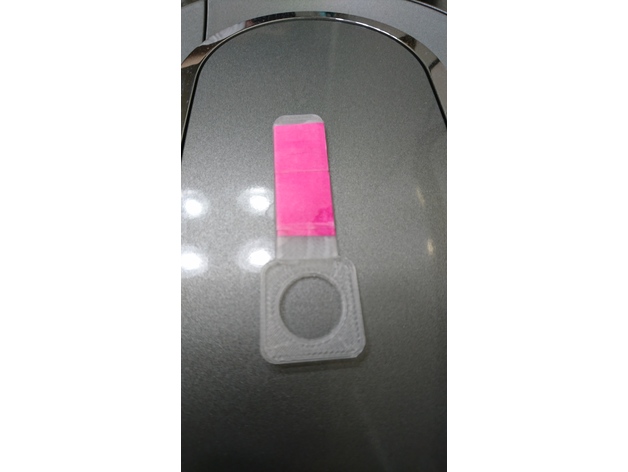
Keurig hack. inspired by the keurig freedom key.
you can tape a purple post it note on one side with masking tape to unlock special menu.
Note that if you print with PLA it might be soften by the heat. recommend to use ABS for this.
Author: Thingiverse
-
keurig Hack 3D Print Model
-
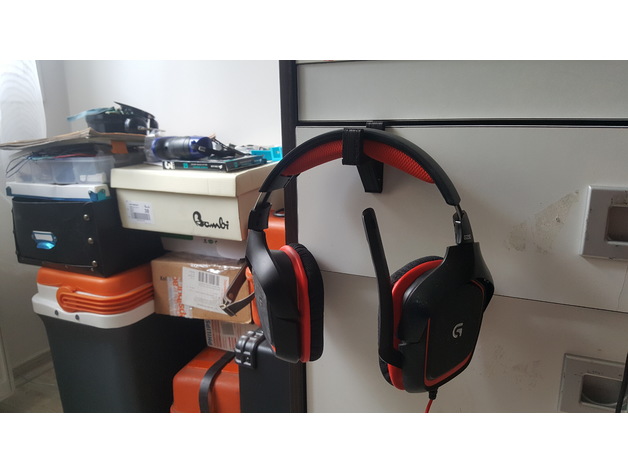
Headset or headphone holder 3D Print Model
Summary
easy to print, Small and strong holder.Headphone/headset holder for drawer or screen
Print Settings
Printer:
pursa i3 Rafts:
Doesn’t Matter Supports:
No Infill:
20 -
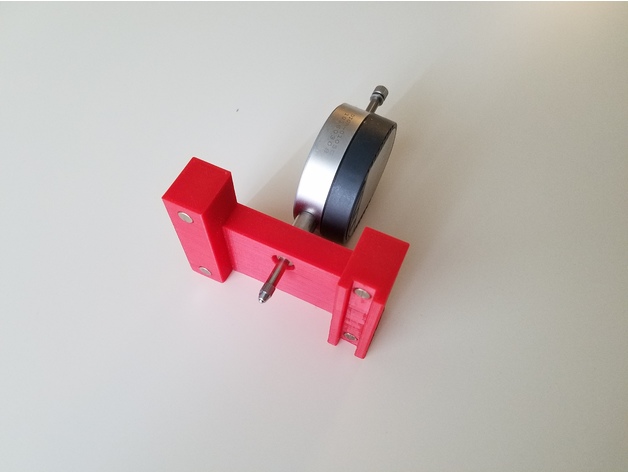
Digital caliper holder for 3D printer bed leveling 3D Print Model
Summary
This tool is designed to hold digital caliper for bed leveling. I made it to avoid constant pain with bed leveling which involves eye-balling and playing with Feeler Gauges.
Intended use algorithm:
1) Level bed manually — make sure you heated the bed first (temperature will temper readings). Make sure to heat your printer but not caliper.
2) Measure distance above each leveling knob
3) Next time you need to level a bed just use this tool to adjust knobs
Parts:
It assumes use of magnets to attach to rails and ensure there will be no fidgeting: “Magnets 6x3mm”
I used a caliper like this “Clockwise Tools DIGR-0105 Electronic Digital Indicator Gage Gauge Inch/Metric Conversion 0-1 Inch/25.4 mm with Back Lug Auto Off”
Post-Printing
It’s recommended to glue digital caliper to holder to make sure readings will be consistent. -
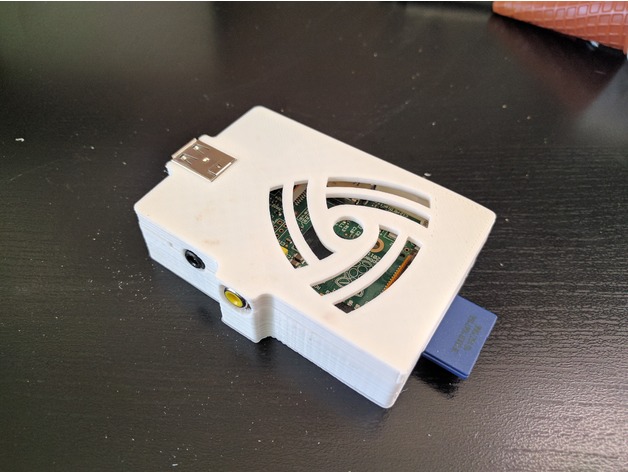
Raspberry Pi 1B Case – no screws 3D Print Model
Summary
Remixed from 0110-M-P’s excellent original design. I was going for style more than functionality, and removed the addtional port openings and screw holes. It’s designed to snap together, but probably isn’t sturdy enough to just toss in a bag and still stay connected.
Second photo shows a comparison between 0110-M-P’s original design on the left, and my remix on the right.
TinkerCAD links, in case anyone wants to see my atrocious editing job (might be useful for extracting the “logo” for your own design):
Top: https://www.tinkercad.com/things/9NS4N4xiAHE
Bottom: https://www.tinkercad.com/things/9ZxpVprNRZ3
Print Settings
Printer Brand:
SeeMeCNC Printer:
Rostock MAX v2 Rafts:
No Supports:
No Resolution:
.1 Infill:
20% -
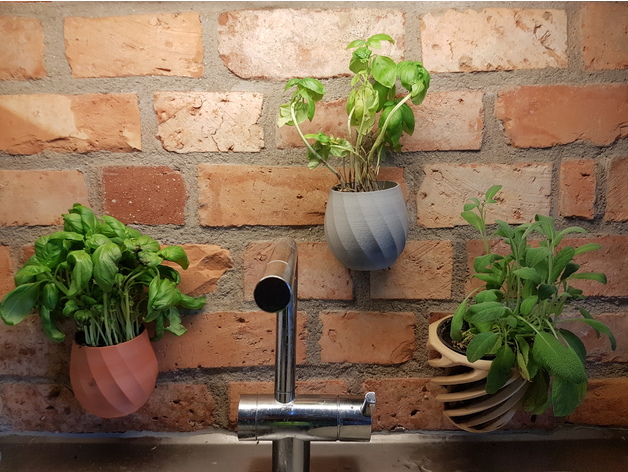
wallmounted flowerpot 3D Print Model
Summary
Printed easily without support.
Remixed from my own regular pots.
I hang them on the wall with sugru. works perfectly. I guess that drilling a keyhole should work as well for hanging with skrews. -
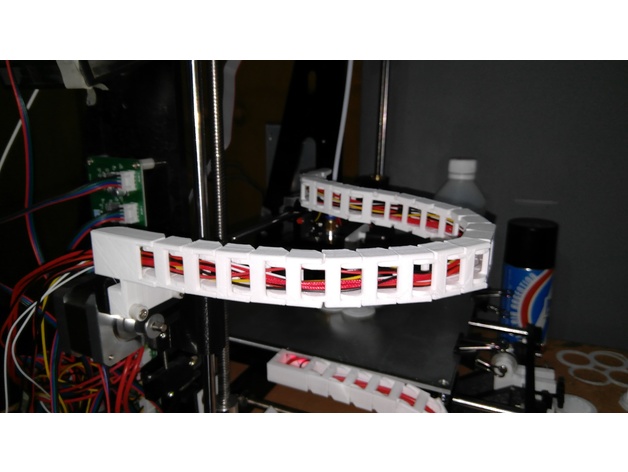
Cable Chain Adapter for Tronxy P802E – Axis X 3D Print Model
Summary
A simple remix from Cable Chain Adapter for Prusa i3 (Hictop) -
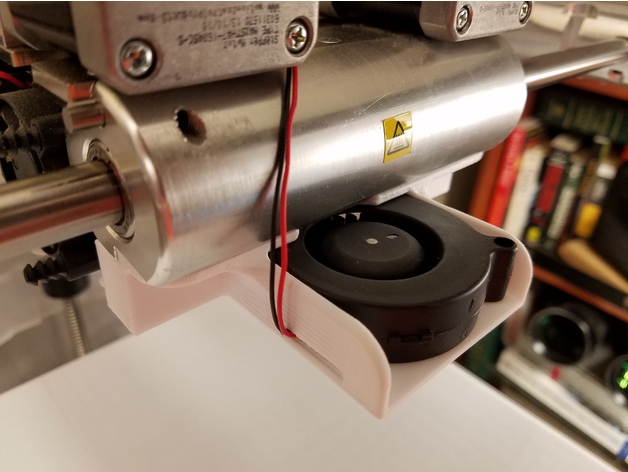
CubeX Part Cooling Fan – Front Mounted 3D Print Model
Summary
This is a part cooling fan for the CubeX and possibly Cube Pro 3D (not verified) printers. It uses a centrifugal blower (see specs below). The blower spacing is for using extruders 1 and 3. Remember to print two ducts. I will eventually upload a plenum for a 1-2, 2-3, and 1-2-3 option. Constructive feedback is appreciated.
These files are a work in progress. I prefer to have all my parts snap together without fasteners, but the plenum will need to be glued in place for now until I finalize the design.
Fan
Delta Electronics
BFB0512H-R00 (12V)https://www.digikey.com/products/en?keywords=BFB0512H-R00
BFB0524H-R00 (24V)https://www.digikey.com/products/en?keywords=BFB0524H-R00
Flow: 3.9cfm @0.709in H20
Noise: 38dB
Size: 51mm x 51.3mm x 15mm
Hardware
Socket Head Machine Screws M3 x 0.5 mm, 6 mm Long (quantity 2)https://www.mcmaster.com/#91292a111/=17i1kxt
Glue
Loctite Professional Liquid Super Gluehttp://www.loctiteproducts.com/p/sg_bottle_pro/overview/Loctite-Super-Glue-Liquid-Professional.htm
Print Settings
Supports:
No Resolution:
0.2mm Infill:
20% Notes:
Use PETG or ABS.
The models print easily with no supports.
The ducts require a raft so that they don’t get knocked over. If you flip them around the other way, the overhang is too extreme for PETG (on my printer at least).
Post-Printing
Assembly
1) Clean prints of stringing, blogs, and check internals for blockage.
2) Glue the plenum to the bracket with super glue. I use tape to align and secure it until the glue dries.
3) Snap in the two ducts.The ducts snap into place as long as your printer is well calibrated.
4) Screw the assembly onto the front of the carriage using the two outside screw holes where the OEM fan attaches.
5) Slide in the fan wires through the slot and snap fan into place. The blue wire is not used.
6) Connect power to your preferred source on your control board, or build a fused circuit directly from the power supply. Make sure you get the correct voltage fan for your 3d printer. -
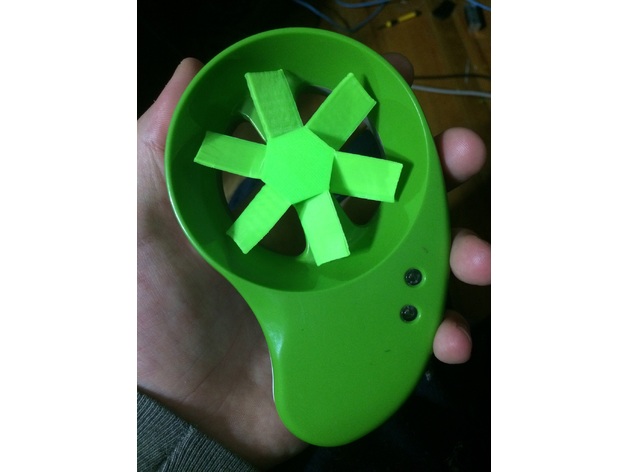
HYmini Wind Charger Impeller Blade 3D Print Model
Summary
This is a replacement impeller for the HYmini wind charger. Printed in ABS. Sixth and Seventh versions included. Designed by me. It’s pretty fragile so print it denser / solid. Does not need supports. Printed on Anet A8. -
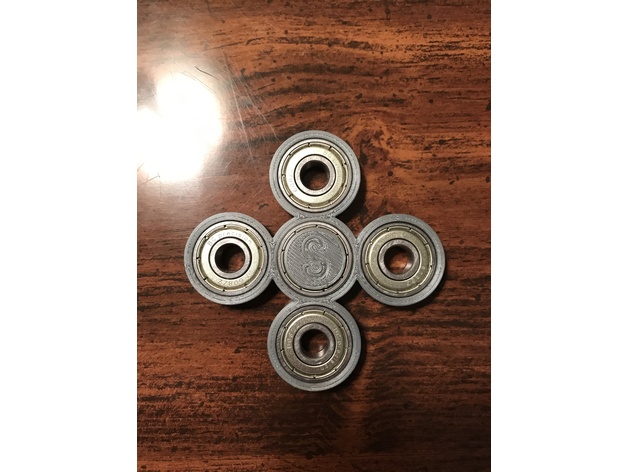
Quad Spinner 3D Print Model
Summary
This is a Fidget Spinner I created in Fusion 360. Works with five 608ZZ 8mm X 22mm X 7mm bearings. Also includes center caps as separate file. Hope you enjoy, let me know what you think!
Print Settings
Printer Brand:
Printrbot Printer:
Printrbot Simple Metal Resolution:
.15mm Infill:
80% -
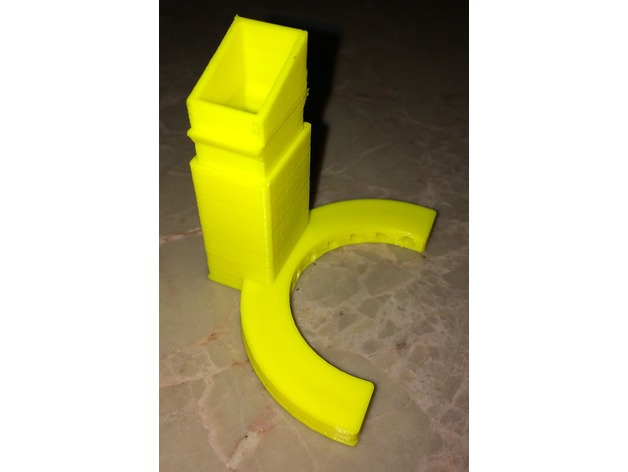
A6 Semi-circular Fan (Improved) 3D Print Model
Summary
This is an improvement to my previous Anet A6 Adjustable Fan. I have made this version for the Anet A6 in light of the results from testing by 3D Maker Noob. See his video at https://www.youtube.com/watch?v=vedP3jhMpy4&t=15s
I made the adjustable part smaller since several people complained that it was very hard to fit and adjust. This one is truly adjustable.
Print Settings
Printer:
Anet_A6 Rafts:
No Supports:
No Resolution:
.1 Layer height .4 nozzle Infill:
20% -
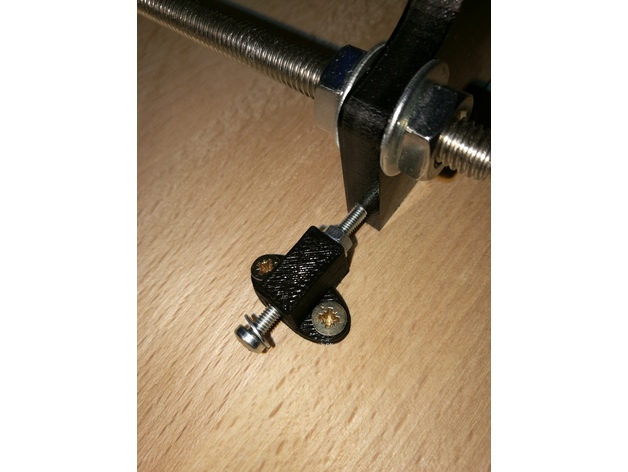
Anet A8 adjustment for Y-axis and printer leveling 3D Print Model
Summary
I’ve had the problem the floor on which the table for the printer stood wasn’t leveled. Which led to corners at the z-axis which haven’t had 90°. The same happened at the y-axis, because the threaded bars are bent.
If you just have a problem with a bend y-axis:Parts List:
Wooden board
10x screws for wood 3×12
1x M3x30
2x washer for M3
1x nut for M3
Angle profile length ~240mm
First cut the angle profile in two parts of ~62mm length and two parts of ~50mm length.
Drill in every part two holes and screw the ~62mm parts at the front of the housings and the ~50mm parts at the sides.
Print the STL, put the M3 screw with the washers and the nut in the small hole and screw it onto the wooden board near the side of the frontplate of the y-axis. Use the M3 screw to adjust the y-axis.
If you also have problems that your printer isn’t levelled perfect horizontally:
Parts List:
4x screwable case legs
Drill 4 holes in the corners of the wooden board by following the manual of the case legs. Use a water bubble to level the board.
Print Settings
Printer:
Anet A8 Rafts:
No Supports:
No Resolution:
0.2 Infill:
100% -
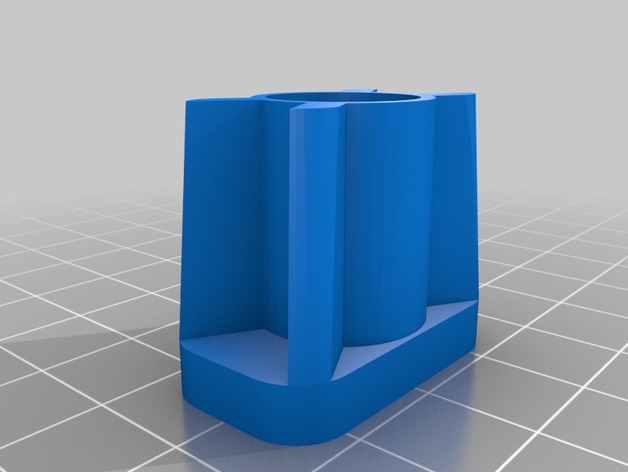
Camera stand Ricoh Theta 3D Print Model
Summary
Próximamente medidas de tubos y tornillería.
Print Settings
Printer:
Prusa B3D Rafts:
No Supports:
Yes Resolution:
0.3 Infill:
30% -
Cup Holder Wire Manager 3D Print Model
Summary
i was no balls’ed on reddit to post this 😀 -
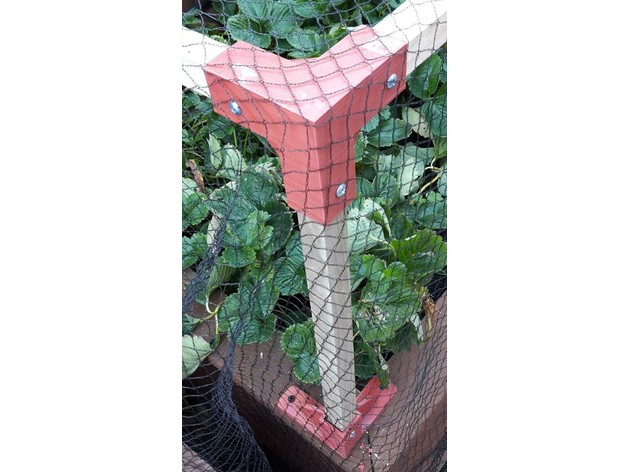
Brackets to join 25×25 mm wooden stakes to create a garden frame 3D Print Model
Summary
I made these brackets to build a framework from 25 x 25 mm wooden stakes for bird netting to protect my raised strawberry garden. It has proven to be very robust (over engineered one might say!) and the bird netting simply drapes over the frame from being attached to an adjacent fence. Because my stakes were a little under size I have drilled each bracket and screwed through the bracket into the stake to give it rigidity.
I enabled supports for the several parts that required bridging of significant area but my printer overrode that and printed quite satisfactorily just as if supports had not been enabled.
Sliced with Slic3r and printed at .3mm layers since surface finish was not a priority.
Print Settings
Printer:
FLSUN i3 clone Rafts:
No Supports:
Doesn’t Matter Resolution:
.3 mm Infill:
25% -
Thatched Home 4-Piece 3D Print Model
Summary
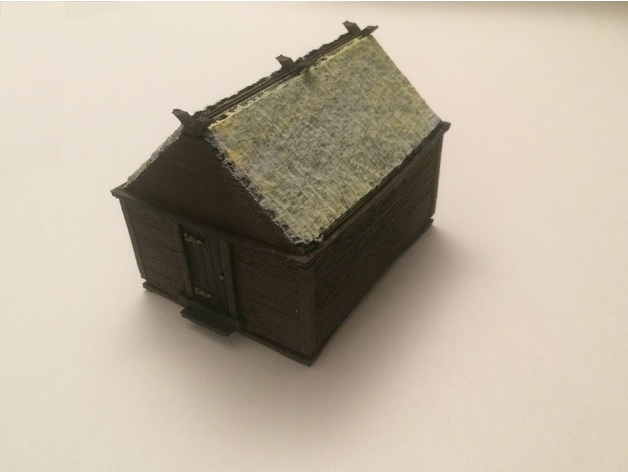
This is a small thatched house for 28mm play. It comes with 4 pieces that can be snapped together. It is purposely made of 4 components. This allows the gamer to have the home and then remove the walls or roof when entered. The walls outside have a detailed rough wood look. The floor is quite a detailed design over which the wall can be placed and then a roof. The door can be slid in and out of the opening. The roof is best done by using rafts which if possible should only be used for the lower portion to allow the lid feature to fit into the walls. The thatched roof is quite detailed with straw texturing. I just noticed that in the picture with everything assembled, I didn’t snap the walls into the floor. It fits snugger than the picture shows.
Print Settings
Printer Brand:
PowerSpec Printer:
Ultra 3D Rafts:
Yes Supports:
No Resolution:
0.2 Infill:
15% -
Orange Pi (OPi) Zero Minimalized Case 3D Print Model
Summary
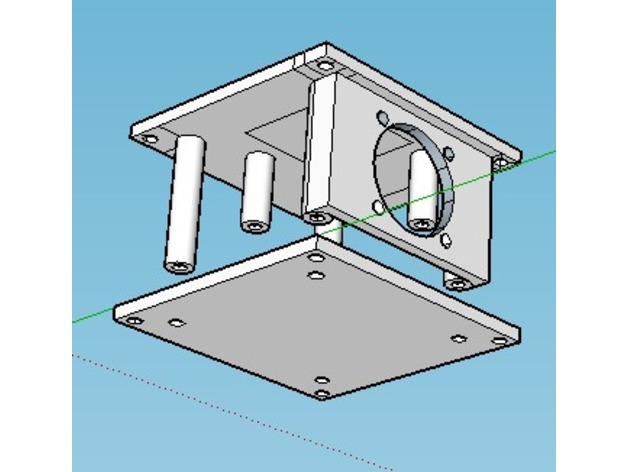
Since Orange Pi Zeros have an overheating issue (mine does), I figured I’d make a minimalized ‘open air’ tall case with a 25mm 5v DC fan mount to blow directly at the core processor.
Notes:
I included the original Sketchup file with an outline (on the top and bottom) showing where I think an alternate location for another fan mount may be. This file also includes the measurements I used (after making the top portion) to make the bottom, just in case anyone wants to redo the bottom.
The design uses 3mm screws/bolts.
The holes on the ‘towers’ are deliberately undersized (a bit) to help create a good thread when attached to the top.
It can be bolted from the top or bottom – change the hole sizes if needed.
The fan mount is for a generic 25mm fan, but I specifically use the 2510S 5V DC fan attached to pins 4 and 6 (on the OPi Zero pinout). -
Creampuff camera mount 30 degree 3D Print Model
Summary
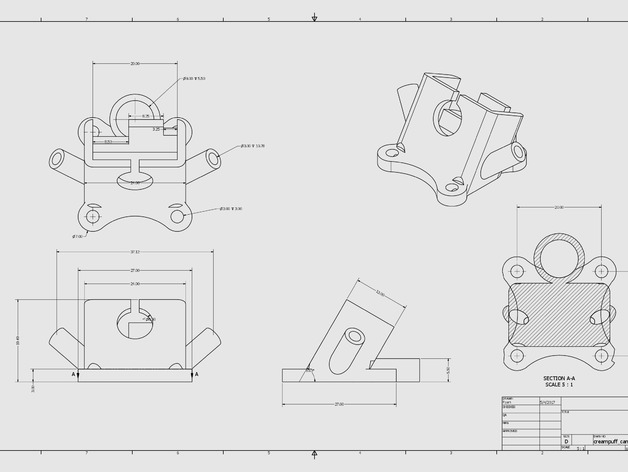
Creampuff camera mount. 30 degree recline. 20mm x 20mm mounting holes. Equipped with antenna mounts w/ 3mm holes. Also, a holder is added at the rear for a 9mm x 5.5mm buzzer.
Print in TPE/TPU.
Print Settings
Supports:
Doesn’t Matter -
Anet A2 Mainboard Cover MKS Mosfet 3D Print Model
Summary
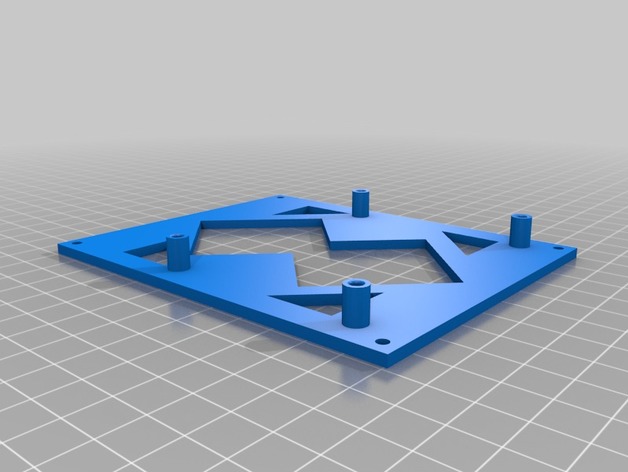
This is a Mainboardcover for Stock Anet A2 Mainboard with mounts for MKS Mosfet.
Print Settings
Printer:
Anet A2 Rafts:
No Supports:
No Resolution:
0.2 Infill:
20% -
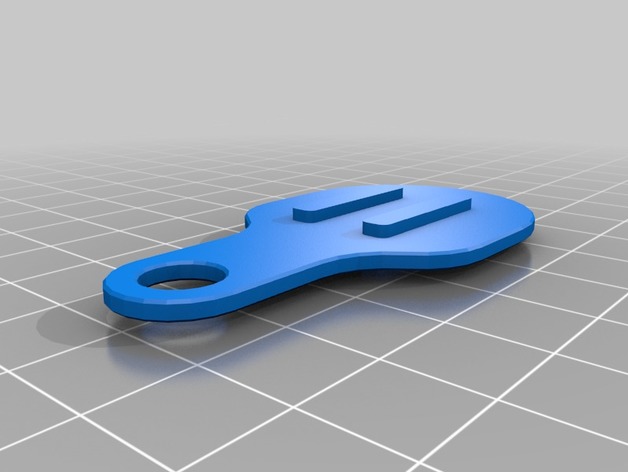
Chipcard for “Autoscooter/Autoskooter/Autodrom” 3D Print Model
Summary
After much searching around I have accidentally found an old chip coin for the autodrom and I thought to myself who would not like to drive for free. So I just made a chip card which comes after the dimensions of the original chip. For the chip card you have to use a support structure. Otherwise, there is nothing to consider.
I do not take any responsibility if someone is caught or caused harm!
Have fun printing;) -
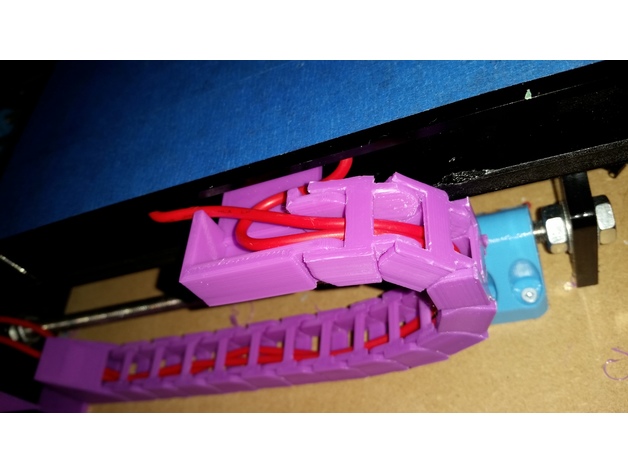
TronXY P802E Y-Axis Cable Chain Remix 3D Print Model
Summary
I saw a number of chains for various frames for the TronXYs but none that fit for the P802E specifically. After printing a couple that didn’t quite fit properly, i ended up remixing the designs of two other chains. This fits properly and doesn’t fray your bed cable.
Print Settings
Printer:
TronXY P802E Rafts:
No Supports:
No Resolution:
0.2 Infill:
30% -
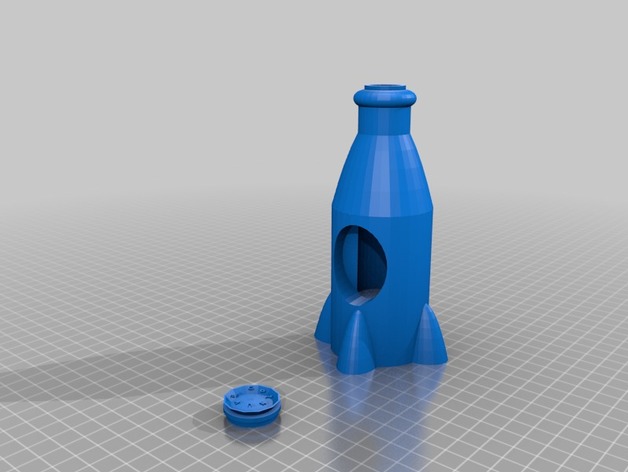
Nuka Cola from Fallout 4 3D Print Model
Summary
This is a not-so-accurate model of a Nuka Cola bottle from Fallout 4. Not watertight, work in progress, the label part goes through, and there is a big hole in the model. Just saying, not watertight in the least, so don’t try.
Print Settings
Printer Brand:
MakerBot Printer:
MakerBot Replicator Rafts:
Doesn’t Matter Supports:
Doesn’t Matter Resolution:
? Infill:
? Notes:
? -
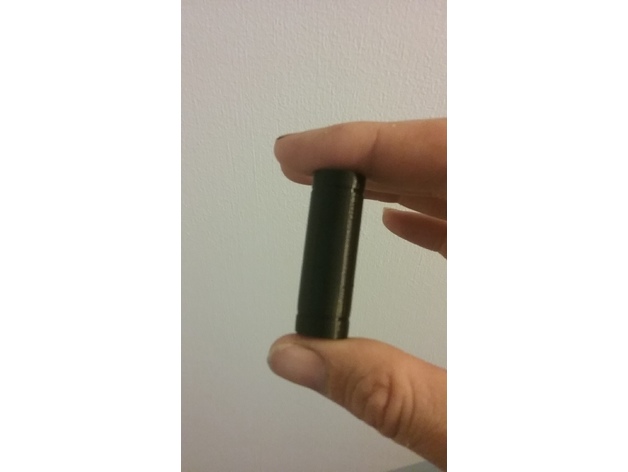
LM8LUU File down bearing 3D Print Model
Summary
I remixed this bearing because some people have problems printing exact sizes, the bearing I made should fit off the printer, but with only 5 access points you can easily hand file the inner diameter with a small file if you need to. I recommend using PLA, on a smooth rod this bearing should last for many years be for it gets enough slop to be noticeable.
Print Settings
Rafts:
Yes Supports:
No -
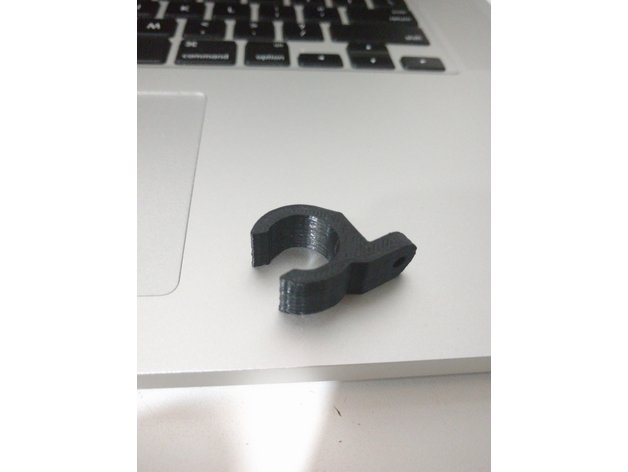
Extruder Cable Support 3D Print Model
Summary
This is 3d printer part for support the cables of extruder and hot end.
Print Settings
Printer:
Graber Pro Rafts:
No Supports:
No Resolution:
0.2 Infill:
15% Notes:
Printed with ABS Premium -
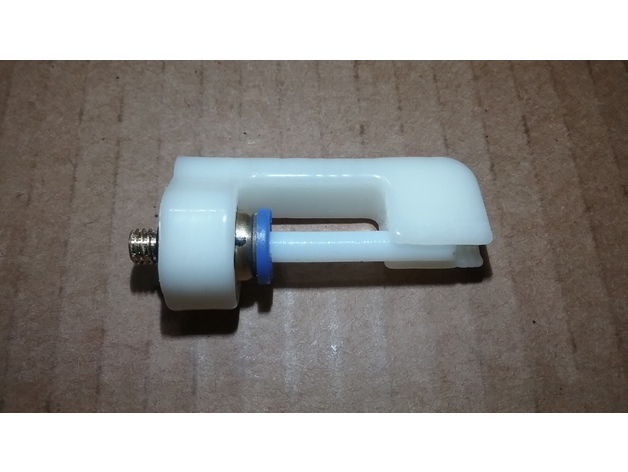
Bowden tube strain relief used on extruder motor 1.75mm 3D Print Model
Summary
I created this to relieve the strain on the bowden tube pneumatic connector on the extruder motor for 1.75mm filaments. It has been tested and is working great. This should pretty much fit all pneumatic connectors with 10mm diameters from face to face on the flat sides and can be used on the extruder motor or the effector end.
Print Settings
Printer:
FLSUN Delta Supports:
Yes Resolution:
.2 mm Infill:
30% -
Cut Out 3D Print Model
Summary
It looks like I cut my name out of the actual project! I hope you like it!!!!!! -
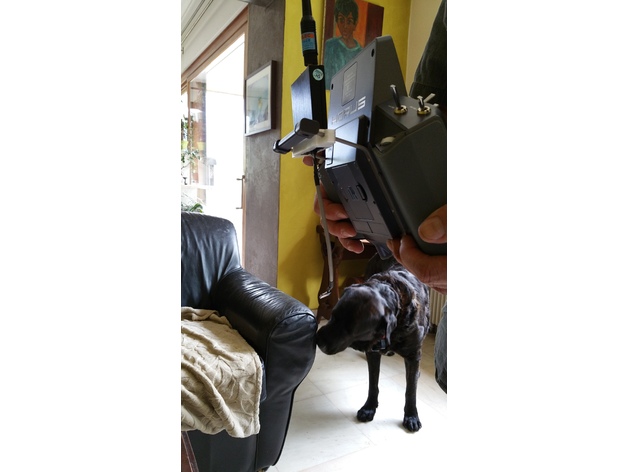
Frsky Horus x12s Mount for Rlink Transmitter 3D Print Model
Summary
printed with flex filament
Print Settings
Printer:
tevo tarentula Rafts:
Doesn’t Matter Supports:
Yes Infill:
30 Notes:
printed with flex filament -
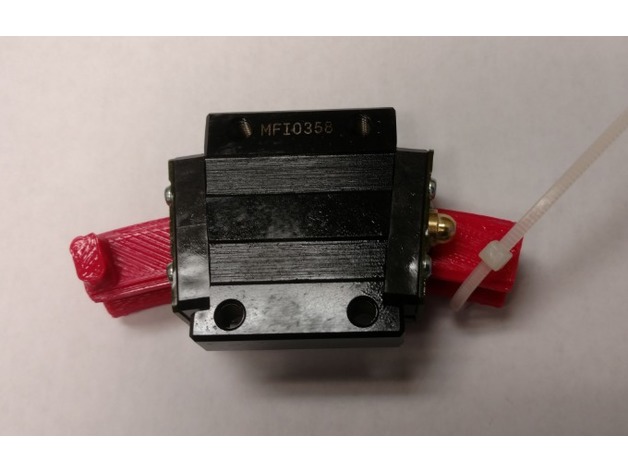
Shipping insert for THK brand HCR 15A 150R 3D Print Model
Summary
Doubt anyone would need this, but what the heck. I printed at 99% scale
Shipping insert for THK brand curved rail cart HCR 15A 150R
https://tech.thk.com/en/products/pdfs/en_a01_318.pdf -
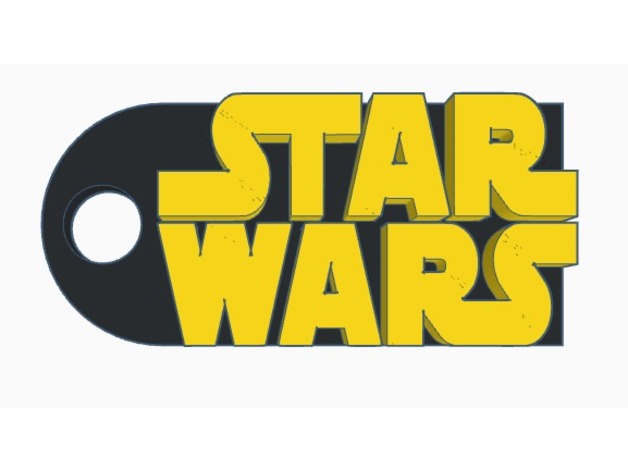
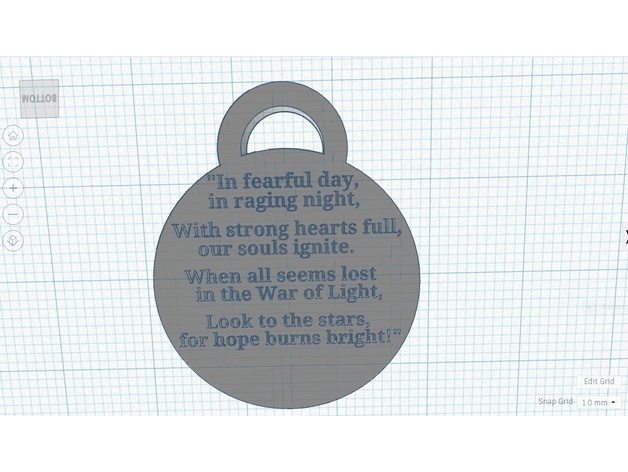
Star Wars Keychain | Tinkercad Import Lesson 3D Print Model
Summary
A Thingiverse search for “star wars keychain” brings up a couple results but they have some small flaws (too flimsy, hole not positioned well, etc.) I’m trying to fix those issues with this simple design. The keychain looks best printed in multiple colors (If your printer allows pauses, switch out the filament color once it starts printing the logo.) May the 4th be with you!Overview and Background
Originally this was just a quick, fun little project for Star Wars day. However, I then realized that many students may not know about the Import feature of Tinkercad, and it could make a great learning experience. This lesson assumes students have been introduced to the basics of Tinkercad. The focus of this lesson is to:
a) learn to vectorize images
b) use the Tinkercad Import feature
c) design a keychain around their chosen artwork
I’ll be using the Star Wars logo as an example, however, students may use any clip art or logo of their choosing.
Lesson Plan and Activity
Step 1: Choose an Image
Do a quick google image search for whatever you’re going to include on your keychain. Usually a logo or clipart is best, so try including those words in your search. For more precise results, try using the “tools” tab to search for transparent images, and large ones with a high resolution. Then choose and download your image as a .jpg or .png.
Search for your imageSet to
Here’s the logo I chose
Step 2: Vectorize
Now you’ll take your downloaded .jpg or .png and convert it to a vector image (.svg.), since a vector is the only type of image file Tinkercad can accept. There are a number of free online vectorizers you can use, but my favorite is https://www.vectorizer.io/ and that’s what I tend to use. It has fairly good instructions and is relatively intuitive, so just follow their directions and you should be just fine. Download your converted image as an .svg. Step 3: Import Logo to Tinkercad
Go to https://www.tinkercad.com/ (if you’ve never used Tinkercad, watch this video first: https://www.youtube.com/watch?v=KCaenAGeK_Q It is a bit outdated, so sorry!), open a workspace, and name it. Click the “Import” button.
Import button
This will open a window, asking you to choose a file. Select your .svg you created before. Then change your dimensions to something reasonable, such as 20 mm. Your logo should now be imported.
Logo imported!
Step 4: Design the Keychain
Personally, I like to work in inches, so click “edit grid” and convert to inches.
Insert a ruler somewhere into your workspace. Now we can rescale our logo to inches. I suggest making it .2″ thick, and then scaling so that you keep approximately the same ratio for the sides, but no dimension is more than 2″. For the Star Wars logo, 1.75″ by .75″ seemed best. Now we can go on to build the keychain itself.
Scaling Logo
Step 5: Designing the Keychain
Of course, there are many ways to go about this, but here is the one I used. Insert a rectangle the size of your logo, but .1″ high. Then insert a cylinder, also .1″ high, with the diameter of the shorter side of your rectangle. Place the rectangle so the it is “inside” the circle, and cuts the circle in half. Then group these 2 shapes.
Base keychain: only 2 shapes!
Now put in a hole. Insert a cylinder with a diameter of .25″ and .1″ high. Place it in the rounded edge you just created and group to form a hole. (Snap grid helps with this!)
Step 6: Add the Logo
Finally, you can drag your logo back in and center it on your base keychain. Once again, group, and you’re all finished! You just created a custom keychain with your very own image! High five!
All finished!
Materials Needed
Software
Tinkercad
Slicer/Host software of your choice Physical
3d printer
Keyrings
Black and Yellow filament (preferable)
Skills Learned
Tinkercad
Tinkercad Import
Image Conversion
Duration of Lesson
30 minutes- 1 HourFurther Learning
Dual Color Printing
Teach the students how to pause a print and switch out the filament using g-code commands in slic3r! https://www.youtube.com/watch?v=sk1aP6MQEhc Negative Image
Instead of having the image extruded out of a thin keychain, try making the base keychain .2″ thick and an 1/8″ larger in the other directions. Change the logo to a hole, .1″ thick and .1″ raised from the plane. Center it in the base keychain and group!
Negative Extrude
Conclusion
I hope this guide was helpful! I had a blast making it and poured a bunch of time into it, so please support me by liking it, and upload your own designs as remixes. Thanks for checking it out, and happy Star Wars day! -
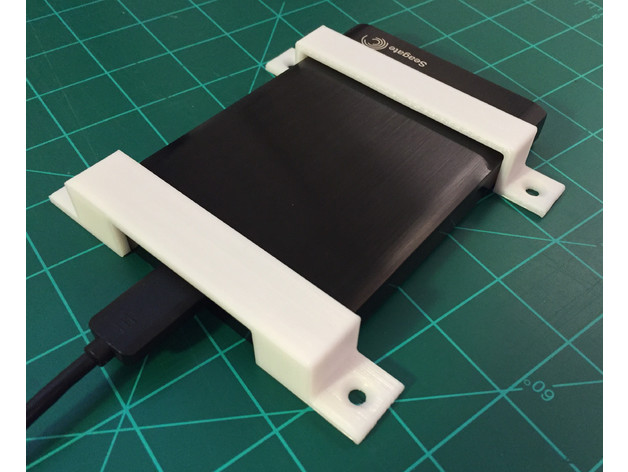
Seagate Backup Plus mounting brackets 3D Print Model
Summary
Use these brackets to mount your Seagate Backup Plus external hard drive under your desk or against any flat surface. The holes are countersunk to fit a #8 screw. See drawings for dimensions. -
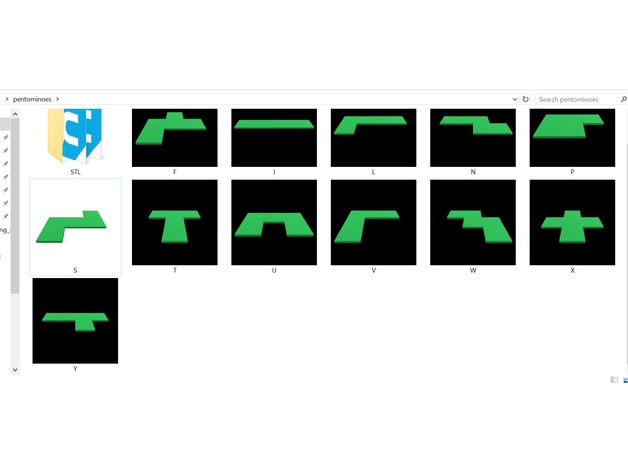
Pentomino 3D Print Model
Summary
Pentomino is the set of puzzle pieces made by joining five identical squares.
There are a total of 12 unique conformations of the shapes, excluding rotation and reflection.
It is a 2-player game, and is played on a 8×8 grid.
each player takes turn to lay down a piece, any piece, on the gird without overlapping any of the previously laid pieces.
The play who fails to lay a piece legally loses; or IOW, the last play who successfully put down a piece wins.
Further reading:https://en.wikipedia.org/wiki/Pentomino
(Each square is 20mm x 20mm x 2mm) -
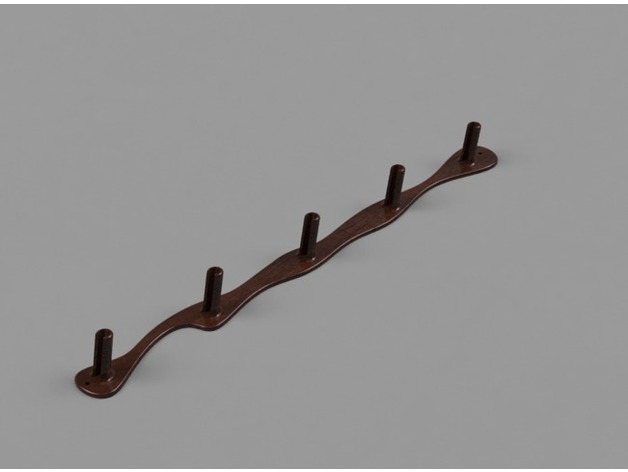
Glasses Wall Mount – 5 Piece 3D Print Model
Summary
Here’s a wall mount for 5 pairs of sunglasses or eyeglasses. The holes for mounting are 2mm in diameter and work well for most small nails or even a thumb tack. The 5 pegs are each 7mm wide at their widest point and point upwards a few degrees to keep the glasses in their spot.
I designed and rendered in Fusion 360, and have provided the STEP files in case you’d like to make any changes of your own.
You’ll see 3 STL’s ready for printing. The one labeled “1 Pc” is meant to be printed in one piece but will not fit most printers. It is 250mm long.
The other two, labeled “Top Split” and “Bottom Split” are meant to be broken down and printed on smaller printers. The longer of the two is still roughly 160mm Long. There is one dovetail-style snap joint meant to fit the two together, with a tolerance of .25mm. You may need to play with it or force it, depending on your printer.
I’ll iterate and change this item as needed. -
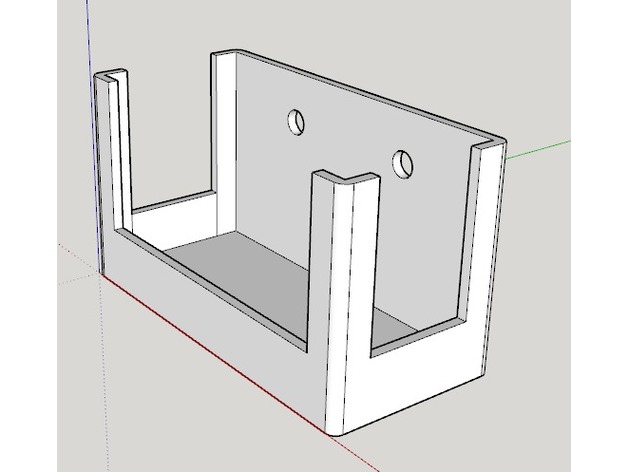
Lutron Caseta Bridge Holder 3D Print Model
Summary
A holder for the Lutron Caseta Smart Bridge.
Designed to mount on the wall. Pics coming once I have a chance to print it. -
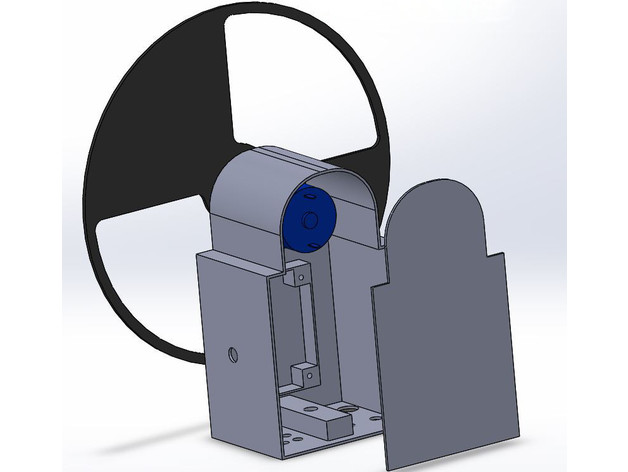
Lightpainting Interval Exposure Tool 3D Print Model
Summary
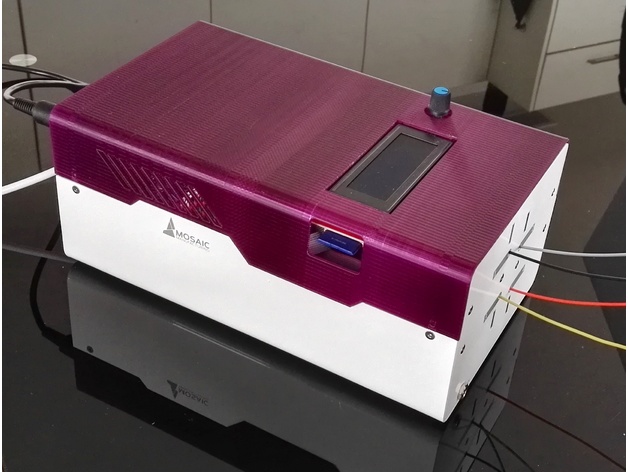
This is a tool designed to be used in long exposures. It spins a disc with open segments in front of a camera lens to interrupt a long exposure in intervals. This creates a unique look in light trails and any other technique used in lightpainting.
This tool uses a geared 12V dc motor with around 720RPM with a standard PWM controller.
The controller potentiometer knob is mounted outside the box along with a power plug and a switch for power. The discs are separated to be printable but need at leas 300×200 print area.
The slit disc right is actually a little wrong, it should have been mirrored. I realized this after i printed and glued them together, but left them as they are because this creates a slight irregularity that adds character and makes the pattern look less artificial.
Example images show which type of disc created which type of effect.
Detailed instruction for this technique will be published soon and I will add a link here once they are. -
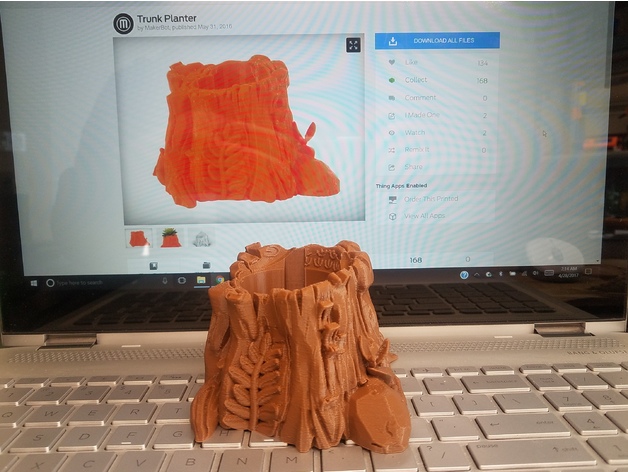
Trunk for Smiling Owl night light 3D Print Model
Summary
Printed a pink Smiling Owl (https://www.thingiverse.com/thing:1320992) for my wife that looked like it would make a good night light. So, I took this cool Trunk Planter for a cactus (https://www.thingiverse.com/thing:292837), modified it to fit an LED lamp from Ikea (http://www.ikea.com/us/en/catalog/products/50302670/), and further modified it to tightly hold on to the Smiling Owl. Voila! Pink reading light. It’s much too bright for a night light. A lower wattage LED, or variable brightness LED, would make it better for a night light. Still, looks great and my wife is happy. I also painted the stump to highlight some details.
Print Settings
Printer Brand:
Prusa Printer:
Prusa Clone Rafts:
No Supports:
No Resolution:
0.2mm Infill:
15% Notes:
Printed on my Hictop Prusa i3 (3DP18) using Inland Brown PLA and JustPLA Pink PLA.
Post-Printing
Painting
Just a touch of paint on the leaves, rocks, and butterfly
How I Designed This
Modified STL
Used 123D Design to fill in the planter’s top opening then used the Smiling Owl (enlarged by 0.4mm) as a cut-out on the stump. Cut a cylinder for housing the LED and rectangles for routing the power cable. -
Ipod touch 5th generation case 3D Print Model
Summary
Sonrisa = smille -
Beta Delta Casing 3D Print Model
Summary
Code Files for 3D printed casing for a raspberry pi and motion sensor circuit combination. -
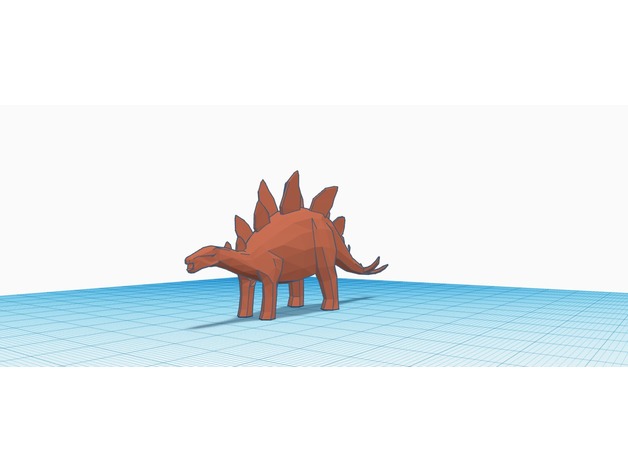
Low Polly Stegosaurus 3D Print Model
Summary
This is a model of a stegosaurus from the game Jurassic Park: operation genesis. -
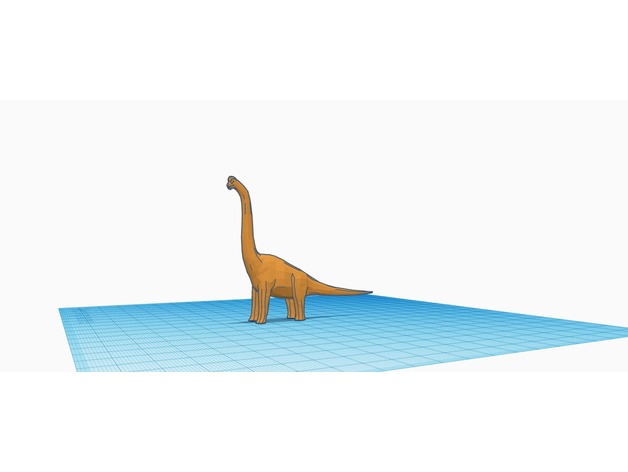
Low Polly Brachiosaurus 3D Print Model
Summary
This is a model of a brachiosaurus from the game Jurassic Park: Operation Genesis. -
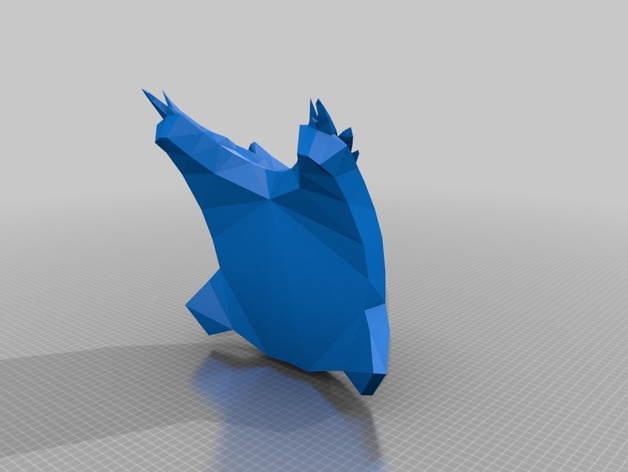
crest_of_alpha_lupi_male_chest_armor front plate 3D Print Model
Summary
Crest of Alpha not to scale and not in finished form, can remix or fix how every you like! -
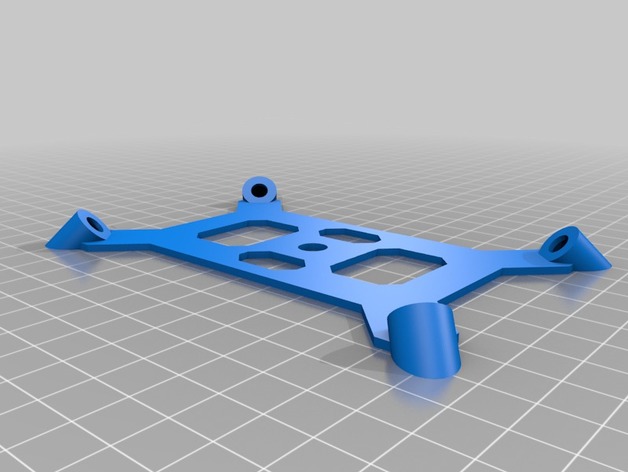
Pixhawk 2.1 Cube Vibration Isolating Mount 3D Print Model
Summary
This is a vibration isolating mount for Pixhawk 2.1 the Cube flight controller.
The top plate has screwholes if you wish to screw your FC to the mount, or you can use adhesive.
Note: This is made for a larger frame 800 mm craft, it’s fairly large.
I’m working on one with a smaller footprint, and I’ll post it when I do.
I was going for lower profile on this.
Autodesk 123 & .stl files included
Print Settings
Printer Brand:
Prusa Printer:
Prusa Mk2 Rafts:
Doesn’t Matter Supports:
Doesn’t Matter Resolution:
Fine Infill:
35
Post-Printing -
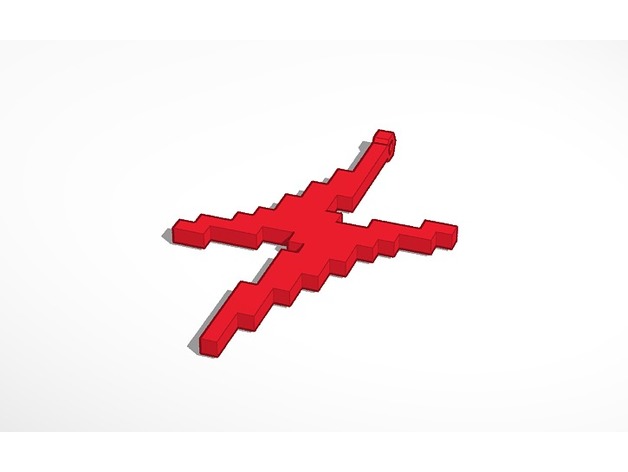
Bolt Pendant (Pixelated) 3D Print Model
Summary
Just a simple pendant that I designed for fun! 🙂
Print Settings
Printer Brand:
MakerBot Printer:
MakerBot Replicator 2 Rafts:
Yes Supports:
No -
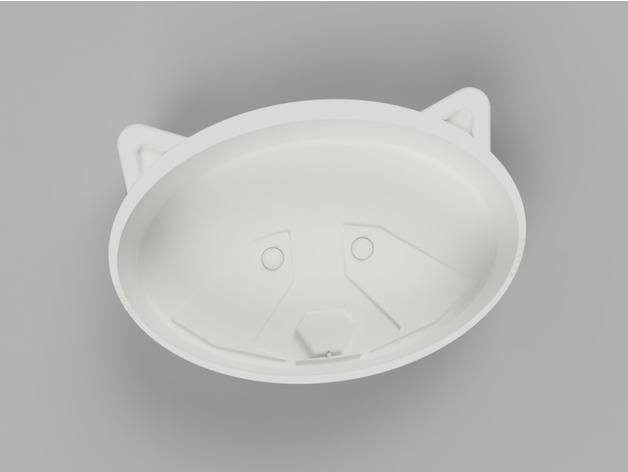
Tanuki Trinket Tray v1 (Small) 3D Print Model
Summary
Too many people said that the last Thing looked too much like Hello Kitty, or a cat, not a raccoon. Cute…but not a raccoon. Here’s a link to that Thing:
http://www.thingiverse.com/thing:2272760
That was also a remix of a cute little bowl.
This Thing is based on a raccoon, a specific picture of a raccoon, which is shown in the pictures. I’m learning to improve my seeing and drawing skills – getting perspective, distances, whitespace, and lines correct. Part of the design process is “seeing” things correctly, so you can get the proportions correct.
Funny enough, I didn’t do a very good job measuring what a bowl, even a small bowl, should be size-wise, so this is not a bowl – it’s a dish. I will be making a new version that will be a larger, cat-food (or raccoon-food!) bowl. I’ll also be making another version of the larger bowl with “wings” that will secure the bowl to my back porch railing, so the raccoons may eat the food, but not steal the bowl.
If you’d like to see a new, different, tweaked version, please let me know in the comments!
Print Settings
Printer Brand:
FlashForge Printer:
Creator Pro Rafts:
No Supports:
No Resolution:
Medium Infill:
30% Notes:
I haven’t printed this yet, but there are no overhangs, so it should just print. I will share pictures of the printed Thing once it has finished printing!
Post-Printing
As with any 3D printed object, you may need to clean out the inside of the bowl. Sandpaper?
How I Designed This
I designed this Tanuki Trinket Tray from scratch, using Fusion 360, clean-up in Netfabb 2017, and sliced for printing using Simplify3D. As reference, I used a picture of a raccoon, a bowl I had laying around, and my digital calipers. Reference Raccoon -
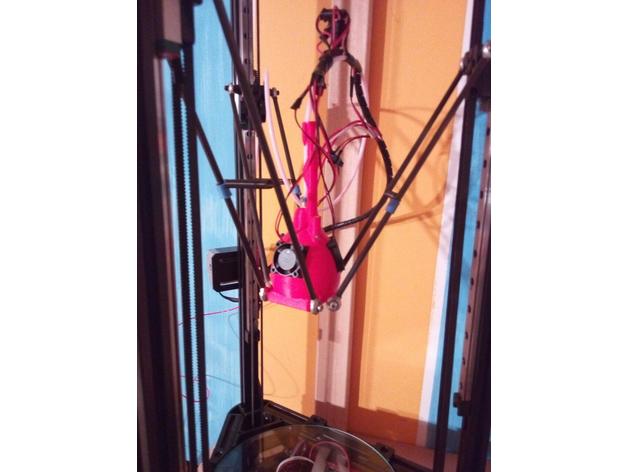
Pear2 effector 3D Print Model
Summary
This effector were inspired by Kirill91’s one (http://www.thingiverse.com/thing:1569106), designed for E3D-V6.
I wanted one for E3D-V5 (and E3D-V5 clones), and this is an improved version of http://www.thingiverse.com/thing:2208759.
Pay attention: I used small axial fan (http://tinyurl.com/l3kpx46), 25mm X 25mm X 10mm.
I also used some magnets (3mm diameter per 3mm height, from www.supermagnete.it) to join diffuser (“diffusore”) with base. This should simplify assembly and disassembly, without any nuts.
A good idea would be to add some kapton all around aluminium hot block in order to insulate it.
The project is still work-in-progress: even though it is simple to dismantle, compared with V1 version, there should some issues concerning total hotend lenght, depending on your nozzle lenght.
However Pear Effector works very good by now!
Suggestions are welcomed, remix as you like (Solidworks 2016 version)!
Print Settings
Printer:
kossel mini Rafts:
No Supports:
Doesn’t Matter Resolution:
0.1 Infill:
20 Notes:
Supports may be needed to print diffuser -
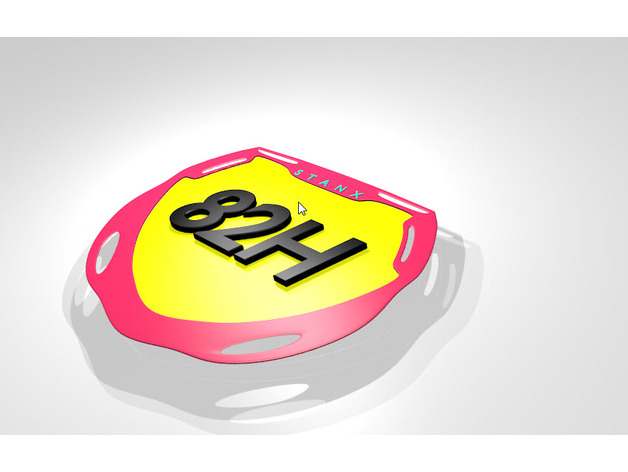
bmx plate front 3D Print Model
Summary
hi,
my first 3d blender object for thingiverse.
BMX plate.
if correction needed or OBJ/STL needed tell me 🙂
2 blend versions :
1 all assembly object (*.blend)
1 all disassembly object (*.blend) -
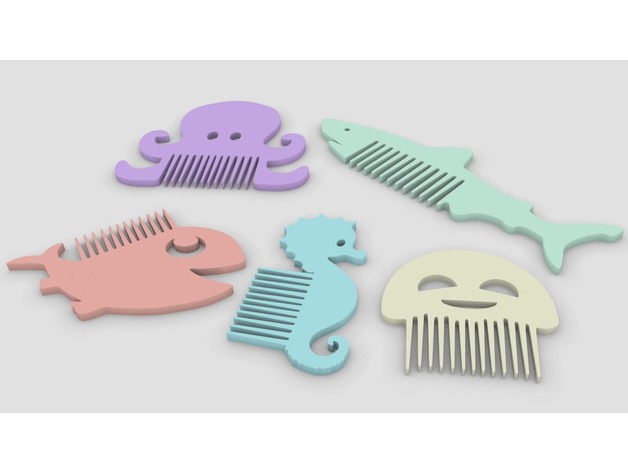
Fantasy combs ocean – Peignes fantaisie océan 3D Print Model
Summary
The amazing shark comb from faberdasher (http://www.thingiverse.com/thing:384599) felt very lonely, so I made him a little family ! The family will possibly expand in the future…
Le peigne requin de faberdasher (http://www.thingiverse.com/thing:384599) se sentait très seul, alors je lui est fait une petite famille ! Il est possible que la famille s’agrandisse à l’avenir… -
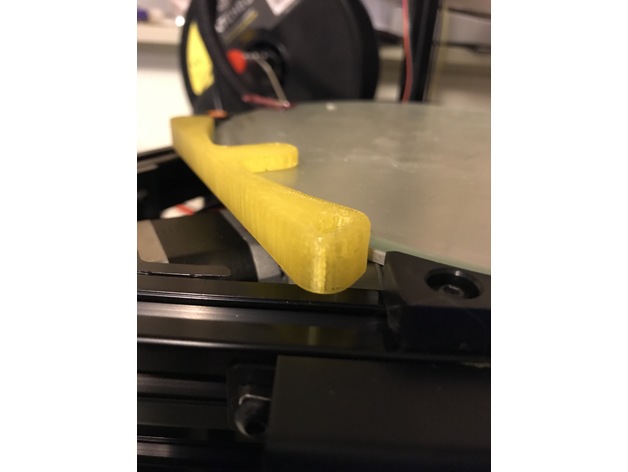
Anycubic Plus bed clip for 240mm bed and glass
Summary
JamesWhite made a great bed mount that surpassed the original 6 mounting blocks that were provided with the Anycubic Linear Plus Kit. My version (03/21/2017) came with a 240mm aluminum heated build platform and 240mm glass plate. I just knocked down the tab a bit with Sketchup so they’d both fit without sitting higher. Admittedly, I don’t have any skills with design or these cad apps, so this is just a tweak.
If one were so inclined, adding a few bulges or tangs to the last 1-1.25mm at the top would likely hold the glass in place without the need for the top clips. I don’t think this would even protrude too far from the edge, just far enough to put a touch of pressure on the glass.
Thanks, JamesWhite.
Print Settings
Printer:
Anycubic Linear Plus Rafts:
Doesn’t Matter Supports:
No Resolution:
.2-.4 Infill:
30% Notes:
You could probably up the infill a hair, but this seems strong enough. I just printed it and did a test fit before I printed the rest. Should work well for my needs. -
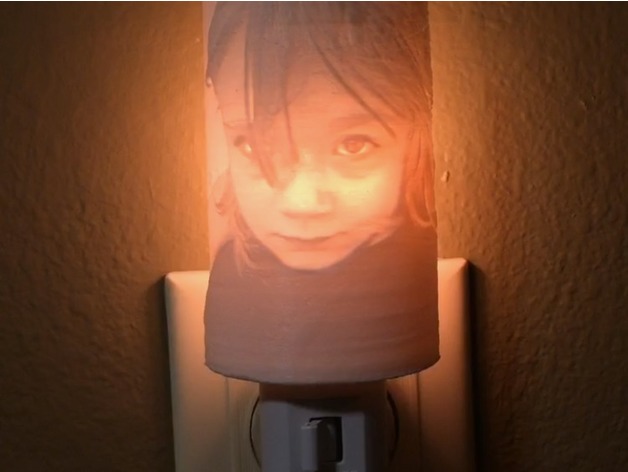
Lithophane Night Light adapter (remix)
Summary
This is a slight remix of poor_red_neck’s Lithophane Night Light adapter. I used his guide to create mine. I used all of the same settings as him, except in the model settings on http://3dp.rocks/lithophane/ I set the curve to 160. This makes the lithophane wrap around the light more.
I remixed his adapter, adding more curve to fit the new shape of the lithophane as well as adding a bit of support to the wings that slide around the light. -
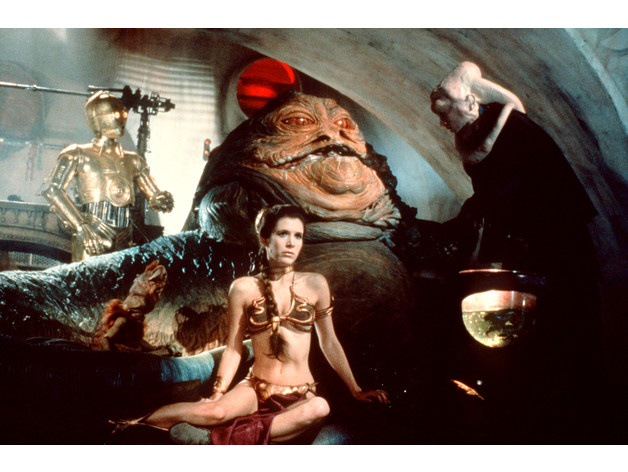
Princess Leia Slave scene Lithophane
Summary
I had never heard of “lithophanes” before seeing them here on Thingiverse. Having found them, and having printed several myself, these things are amazing! This is my contribution to this awesome art form – the (in)famous Princess Leia slave scene in the Jabba the Hutt throne room. I couldn’t decide which pose looked better, so I did both.
Ever since I discovered 3d printing, I have been searching high and low for a good, high quality model of this scene. If anyone has a model, or knows where I can find one… PLEASE let me know!
How I Designed This
This was rendered via the 3dp.rocks/lithophane web site. -
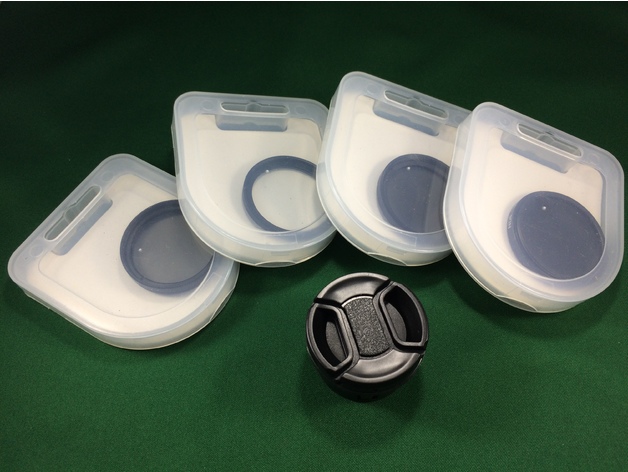
Filters (37mm) and Adapter box for DJI Phantom 3 Standard
Summary
This box is to hold a set of 37mm filters and adapter for my DJI Phantom 3 Standard. The sets come with an adapter and four filters UV, ND4, ND8 and CPL with thickness 6mm, 6.5mm, 6.5mm and 8 mm respectively.
Print Settings
Printer:
Anet A8 Rafts:
No Supports:
No Resolution:
0.2 Infill:
15% -
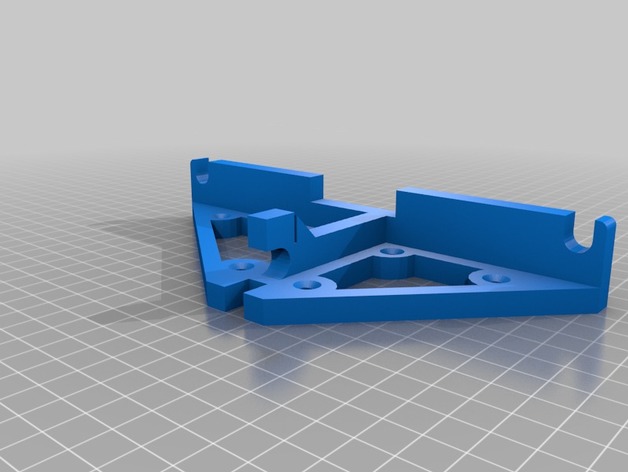
Anet A6 Back Frame Brace with Screwholes
Summary
This is a Remix of the back frame brace from http://www.thingiverse.com/thing:1912107
I put some screw holes in it. -
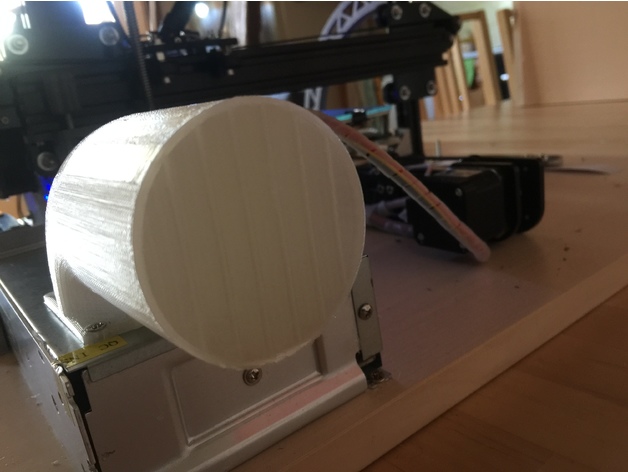
Fan silencer with 60mm hose adapter (beta)
Summary
Works as a car muffler to reduce noise on a fan… i use it on my Tevo Tarantula PSU fan and it works quite nicely .
i do not have a dB meter so if someone has one and decide to print this i’ll be pleased to add the dB values in the description
Can also fit a 60mm hose if needed -
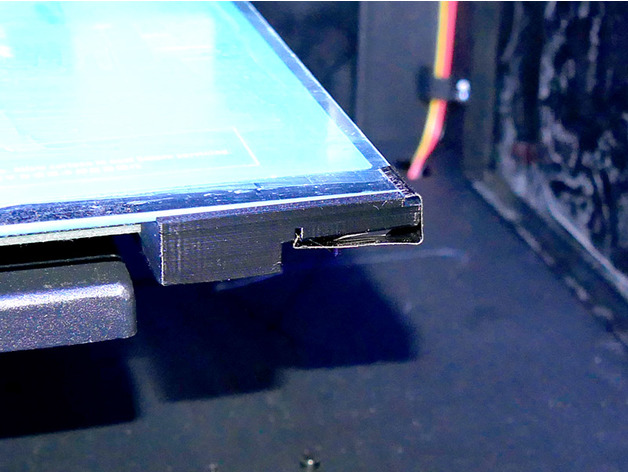
Imageframe glasholder 18x24cm with included spring
Summary
This a simple solution for picture-frame glasplates. I don’t want to cut the glasplates from the
buyable image frames (24x18cm is a standard size in Germany – costs around 1-2EUR/piece) and so
screwable solutions don’t work good and bulldogclamps need too much place. Here are 4 corners
(marked with FR, FL, RR and RL – FrontRight, FrontLeft, RearRight and RearLeft),
attached to the corner screws under the bed (you need additional 4 x M3 nuts and fitting washers).
The glasplate will be attached with the four springs delivered with the frame.
Because there are several springsolutions I’ve added the Sketchup-file – so change
the mounting, if you need another one.
Print Settings
Printer Brand:
FlashForge Printer:
Creator Pro Rafts:
No Supports:
Yes Resolution:
mid Infill:
std Notes:
use ABS (its mounted directly to the bed)
Post-Printing
4 x M3 nuts and fitting washers
How I Designed This
Sketchup -

Hex nut Spinner
Summary
This is remix of next page http://www.thingiverse.com/thing:2246964
What-the-Hex (pick-a-weight) Fidget Spinner by Lucina
I’m just a little repair code. For example you can notice how. This was my first attempt at getting to know the code in OpenScadu. -
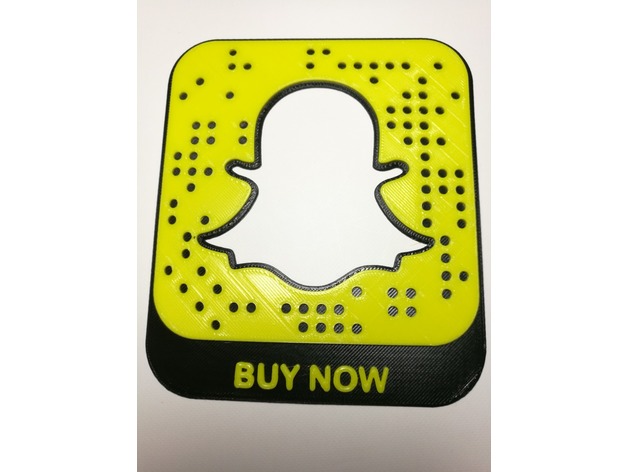
Custom Ghost Code Website
Summary
This is a 3d printed Snapchat code. The code will scan and direct to a website. For scalability high contrast is necessary. In one color it can be used for decorative purpose only.
These codes have been produced by CustomGhostCodes.com.
Print in Black filament and switch to yellow filament after the 1mm layer has finished. This will produce a scannable code.
Getting your own code:
If you want to use your own code, there are a few steps to achieve this.
Download your Snapcode SVG from Snapchat
Go into your favorite design program and pull the SVG into a model.
Export to a .STL file
Slice with your printer settings.
Add pause code to switch filament color.
Those are all the steps and you can produce your own code.
If you want this process done for you check out www.CustomGhostCodes.com
They will create your STL or complete the entire process for you.
Print Settings
Printer Brand:
SeeMeCNC Printer:
Rostock MAX v2 Rafts:
No Supports:
No Resolution:
.2 Infill:
30% Notes:
For this print to be scannable it must be printed in two colors. To achieve dual colors, the filament must be switched after the 1mm layer. This is done by entering pause code in the g-code. -
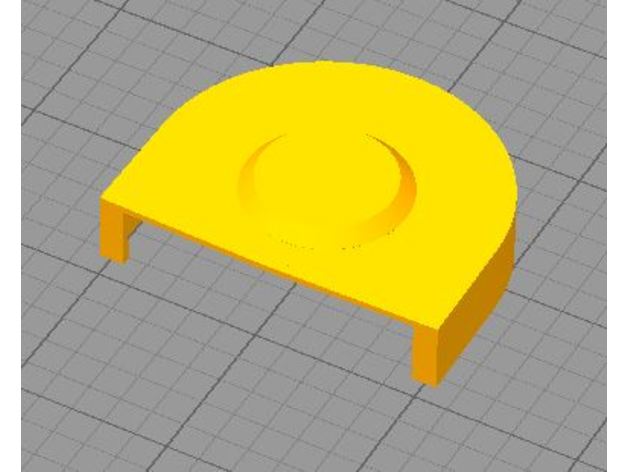
Wombot Front Y Axis cover
Summary
Wombot front Y axis cover, to fit over existing plastic cover, this cover prevent and dust from getting into bearing. -
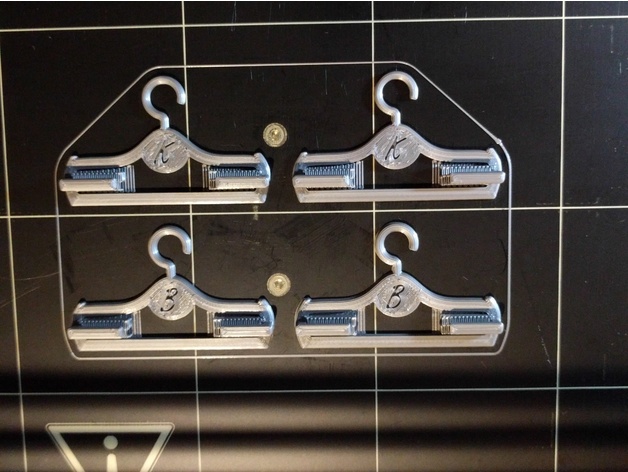
Barbie Clothes Hanger
Summary
This is a close replica of the original Barbie Clothes Hangers that come with Barbie accessories like the “Barbie Style Ultimate Closet”.
I’ve included three designs. A plain hanger, Barbie’s Hanger and Ken’s Hanger (Or Kendal’s for that matter).
Print Settings
Printer Brand:
Prusa Printer:
Prusa Mk2 Rafts:
No Supports:
Yes Resolution:
.15-.20 Infill:
20% Notes:
I was able to print four of these at one time in 43 minutes. -
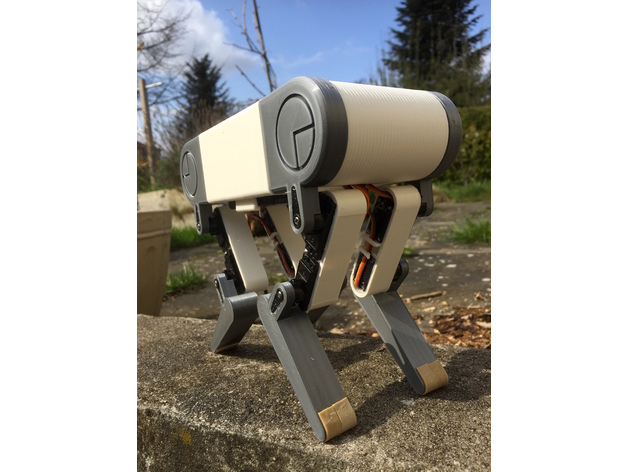
Quadruped Robot
Summary
This is a new version/design of a simple quadruped robot. The robot should be easy to print on a hobby grade printer (the one depicted was print on a Prusa I3Mark2). The assembly doesn’t requires screws/bolts , the parts click-fit together (0.3mm of tolerance).
For the electronics you will need 8 servos (9G.) a microcontroller a servo controller and power. The model in the picture use the following:
Ada fruit Feather (https://www.adafruit.com/products/2829)
Adafruit 8 channel Servo FeatherWing (https://www.adafruit.com/products/2928)
4xAA Batteri holder (https://www.adafruit.com/products/830)
8x MG90S High Speed Micro Servo Metal Gear
The robot was designed using OnShape, a browser based parametric CAD software package. You are free to copy/customise the project. The link to the project is: https://cad.onshape.com/documents/0accd1a24676e15bf99fd11e/w/0962067c20c6b1476c426a1c/e/33ba89d76935e0f2094cbde6
You can read more about other quadruped bots at my blog at www.burningservos.com and on twitter @ronaldxjt.
I’ll add a link here to an Instructable I’m currently working on. -
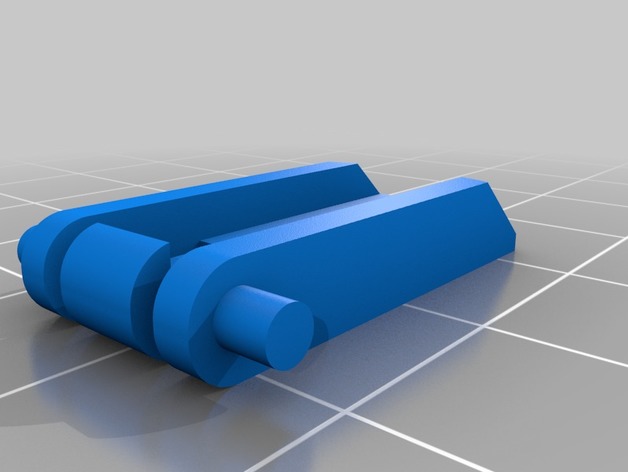
Redgragon Keyboard Foot
Summary
Leg (foot) for Redragon Karura K502 keyboard.
Print Settings
Printer:
Anet A8 Rafts:
No Supports:
No Resolution:
.1 Infill:
50% Notes:
Printed in PLA
Post-Printing
File pins
File or sand the side of the pins to make it easier to insert into the keyboard. -
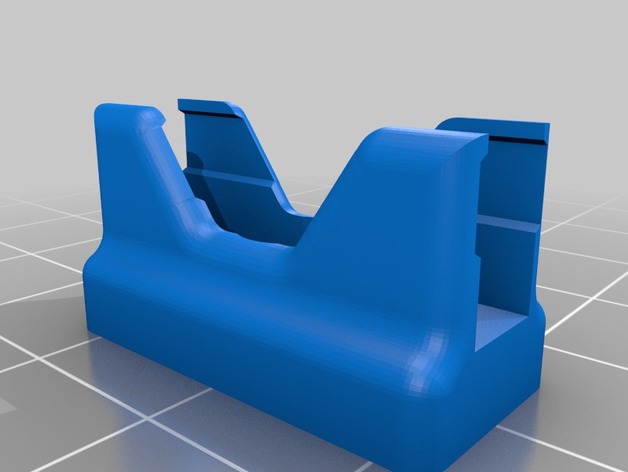
Driver bit holder for WORX cordless hammer drill
Summary
This is a driver bit holder for WORX cordless hammer drill.
How I Designed This -
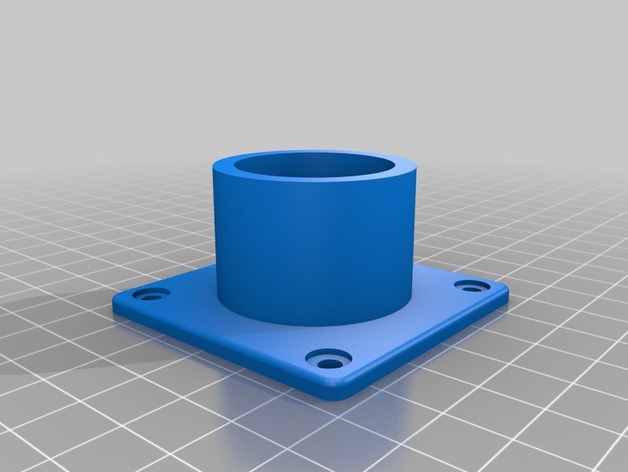
12 V Surface Mount Plate
Summary
This is a remix of http://www.thingiverse.com/thing:995385, I was in the same situation with having a 12 volt adapter that will not recess into the wall of an RV but had trouble with the original files and really didn’t need the larger diameter circle in the back. This version needs no supports and should print easily. I included the .mix file as well if you needed it.
Print Settings
Printer Brand:
Prusa Printer:
Prusa Mk2 Rafts:
No Supports:
No Resolution:
0.15mm Infill:
20% -
parametric sanding block sandpaper holder
Summary
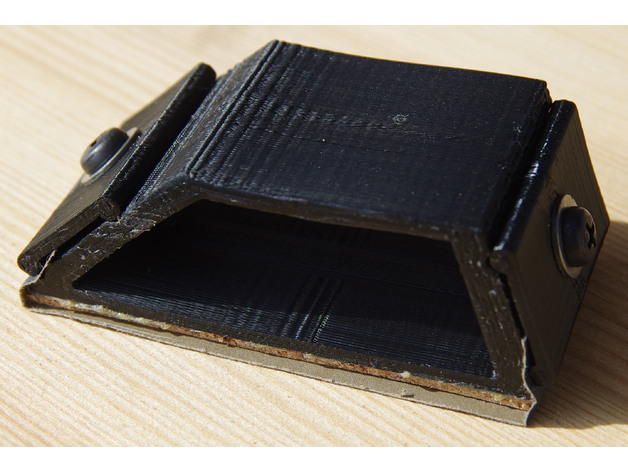
A customizable sanding block designed to economize by not requiring much extra length of sandpaper to wrap around and clamp in place. Default dimensions are small, but you can make it whatever size you like. You can also customize the end angles. The clamping pieces are printed inside, in close enough proximity that they don’t tip over during printing, and probably stick lightly to the inside of the block. I was able to pry them off easily with a screwdriver afterwards.
Vitamins required: 2 M5 bolts (around 1.5-2cm long) and 2 M5 square nuts. Wing bolts might be nice if you have them, otherwise you’ll need a screwdriver to install the sandpaper. Or use hex-head bolts and print out a pair of knurled knobs. If you want to make a soft pad on the bottom, you can use some self-adhesive felt or cork, or glue on a piece of denim from old jeans. -
Potentiometer knob with round socket and turner bar
Summary
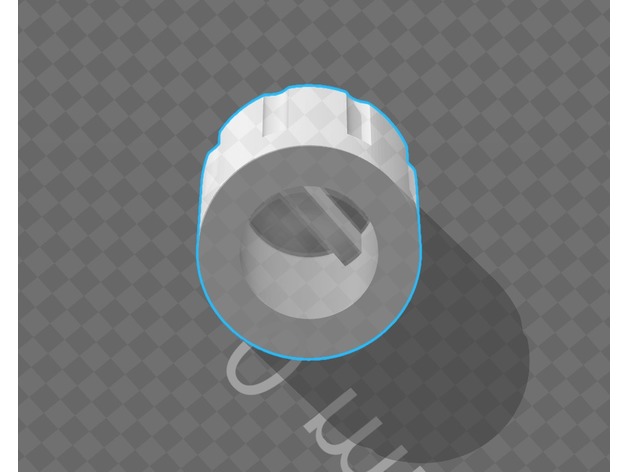
Add 2 new setting to llegoff’s original scad’s code:
Option for round socket or flatted socket
Option to add a bar at the top of the knob that will catch onto the potentiometer’s shaft to make sure it won’t slip.
Print Settings
Printer:
Raiscube Rafts:
No Supports:
No Resolution:
0.2mm Infill:
0% -
Weight Bearing Keychain Grappling Hook
Summary
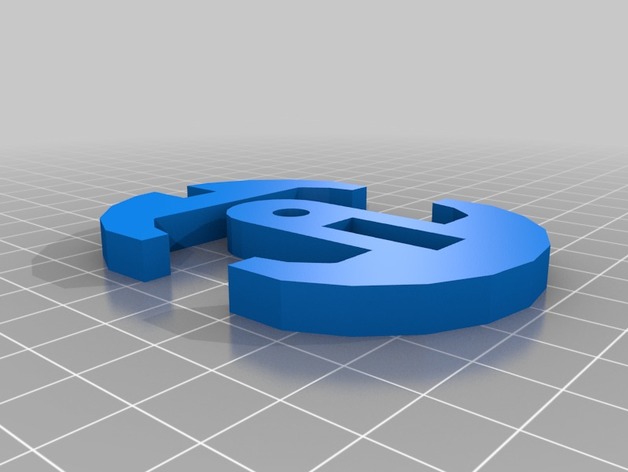
Ok, so the two piece hook didn’t actually survive my weight for long. The simpler flat hook did however, and it seemed like it could do so indefinitely. I weigh about 200 lbs. and was swinging around a bit so a couple extra lbs. of centrifugal force too. Tied to 3mm Kevlar line. Don’t actually use this for anything life threatening, obviously.
Printed with PLA 100% infill, a raft is a must because it warps so much while printing. The two piece file is included if anyone wants to improve on it, it broke at the slot so a larger hook with more material around that area may help, but the goal was to make a weight bearing grappling hook that was as small as possible.
Print Settings
Printer Brand:
MakerBot Printer:
MakerBot Replicator 2 Rafts:
Yes Supports:
No Resolution:
0.3mm Infill:
100% -
anycubic delta carriage tightener
Summary
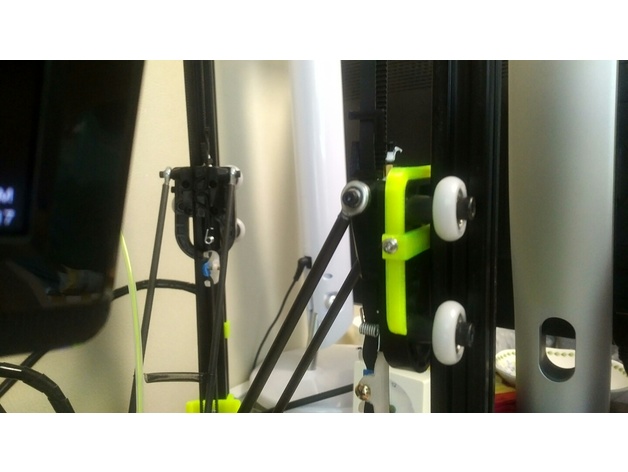
For those who have stripped thread bolt hole for carriage tightener, use this.
I didn’t measure size of carriage precisely, but this works for me.
The hole is 3mm dia.
애니큐빅 델타 캐리지에 있는 조임장치에 볼트가 헛돌아서 만든 부품입니다.
Print Settings
Printer:
anycubic delta kossel Rafts:
No Supports:
No Resolution:
0.25 Infill:
100 -
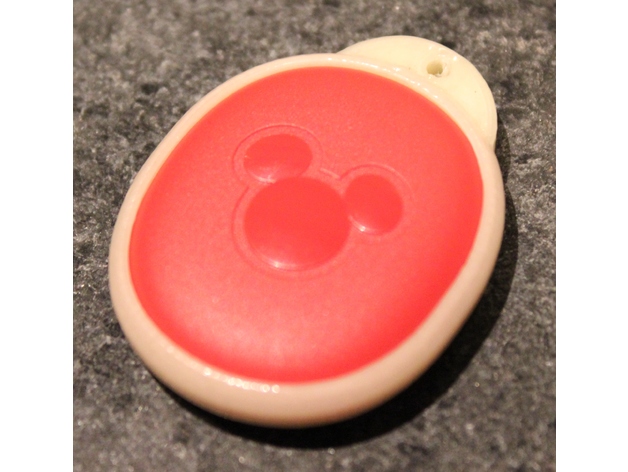
Magic Band 2 Keeper
Summary
This is for the newer “magic band 2” for the Disney parks, which use the removable center piece. While you can buy keepers from Disney, we wanted something smaller for my daughter Annie’s charm bracelet. The print is fairly easy and quick, once you get the setting right, and, if printed with accurate dimensions, seems to pop pretty securely onto the “icon”. Disclaimer: this has not yet been field tested!
Print Settings
Printer Brand:
Printrbot Printer:
Printrbot Simple Metal Rafts:
Yes Supports:
No Resolution:
0.4mm nozzle, 0.2mm layers Infill:
100% Notes:
I use 85% flow rate for dimensional accuracy. 0.1mm gap between raft and piece.
Post-Printing
Steam for about 2 minutes in acetone mist (gently heated) to give a nice glossy finish. Paint to desired color with fingernail polish or spray laquer. -
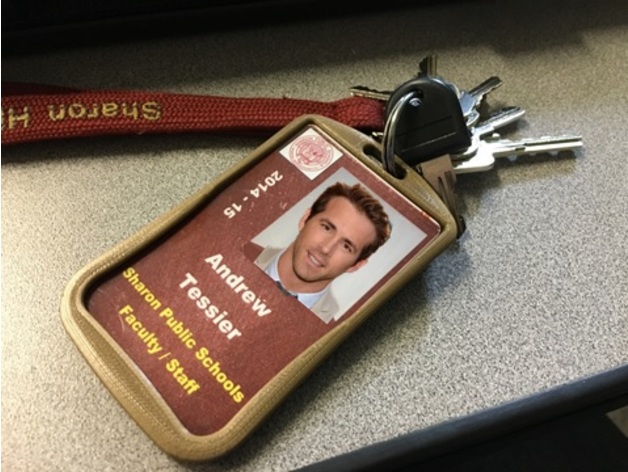
SHS ID Badge Holder
Summary
Standard ID Badge Holder. We’re Sharon High School, so I naturally engraved it with SHS.
Yes, that is the Star Wars Font.
If your printer is any good at bridging you should have little problem printing it.
ID slides in from the top and fits pretty snug but is pretty easy to swap out. -
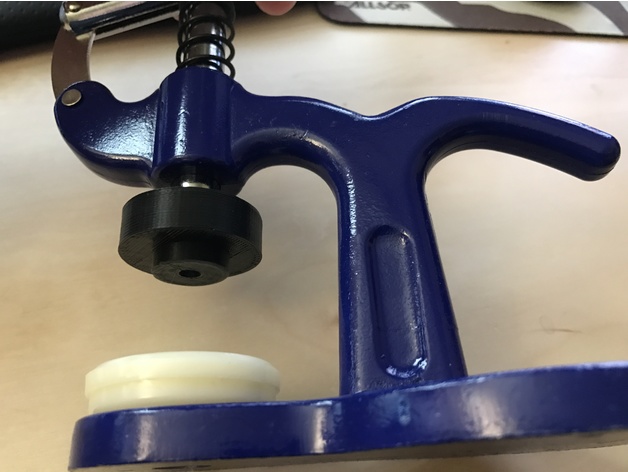
Penny Press head
Summary
This is a head for my Watch Back Press set (I have one from Ruihua).
Since I was making a batch of tri-spinners that take pennies, I needed a reliable way to press them into position before gluing so I designed this to screw into the top of my press and use a standard flat end from the press itself to get the pennies in. The hole down the middle was just right to self-tap into the screw on the press.
The head is slightly smaller than the penny, but will provide consistent pressure.
Print Settings
Printer:
Reach 3D Rafts:
No Supports:
No Resolution:
0.2 mm Infill:
30% Notes:
I didn’t get the axis right on export, so you will have to spin it to put the big side down.
I am sure you can play with the settings. I was a bit worried about cracking so I put the fill up to 30% which got me through 78 pennies with no issues, but it may work with lower infil percentages. -
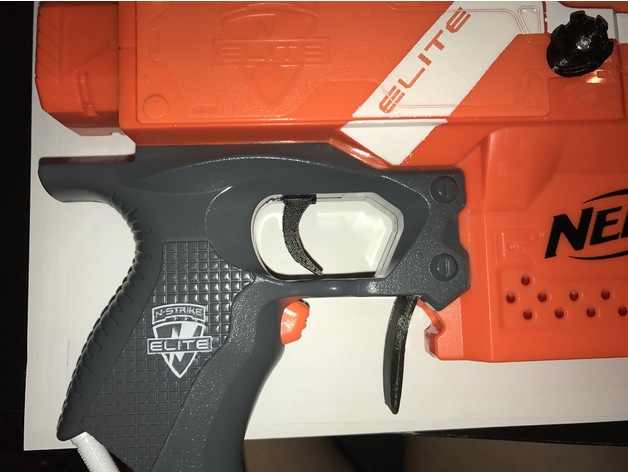
Nerf Stryfe Microswitch Trigger
Summary
Yo,
I built the AutoStryfe mod kit by kitsune109(/thing:2245550) and wanted to have a nice pistol trigger and some more space for the microswitch. So I took the Nerf Stryfe Trigger V1 by bkbstar21, modded it a little bit and glued the P36 Airsoft Trigger by Big-E to it. (thanks to you guys!)
This trigger will only work if you put in a microswitch in a Nerf Stryfe!
cheers
Print Settings
Printer Brand:
Prusa Printer:
Prusa Clone Rafts:
No Supports:
Yes Resolution:
0.2 Infill:
100 Notes:
For me the print fitted out of the printer.
No sanding needed. -
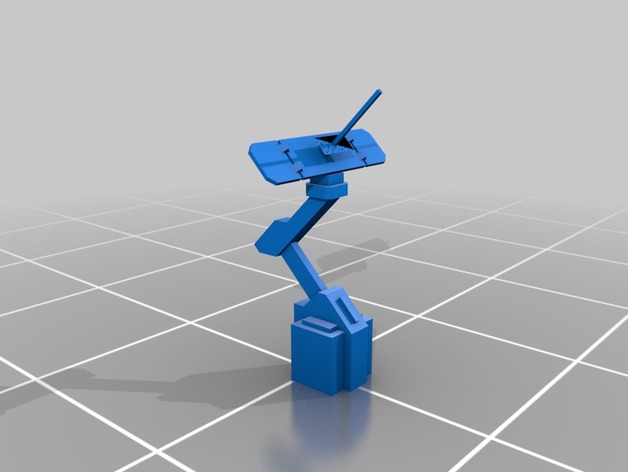
Planetary Annihilation Titans Radar
Summary
This is the Radar from Planetary Annihilation Titans, ripped straight from the game files. Comment if you have a request or post it on my group page. I will upload it within 2 days max. -
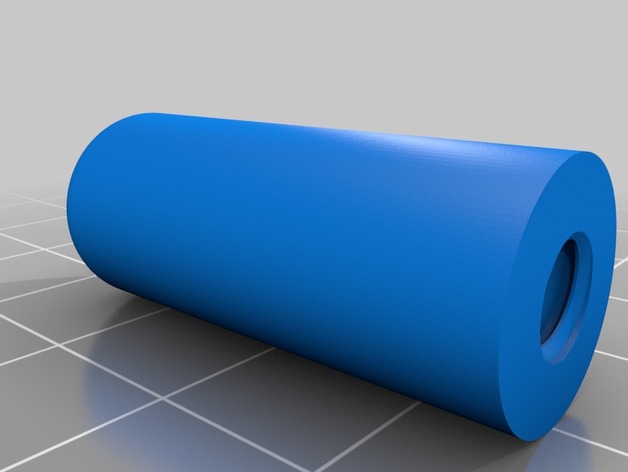
Cub Cadet Deck Height Adjustment Button
Summary
Designed for my Cub Cadet HDS 2155 on which the deck height button had long been broken. Its a simple cylinder with a chamfer(.125″ if I remember correctly) on the top and 1/4-20 threads .75″ deep. This was modeled in Fusion 360.
Print Settings
Printer Brand:
Prusa Printer:
Prusa Clone Rafts:
No Supports:
No Resolution:
.12 Infill:
100% -
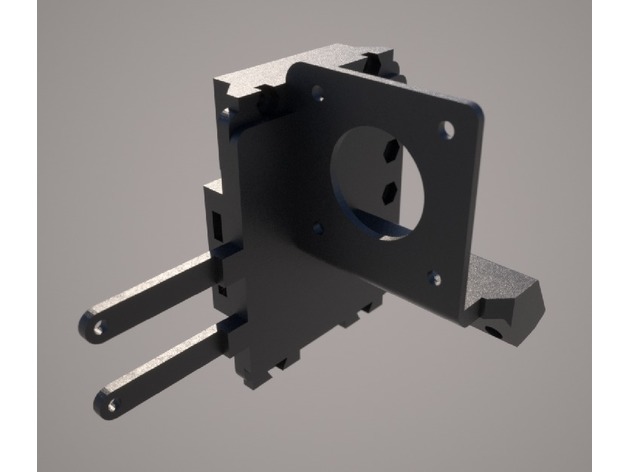
Graphite Bushing E3D Titan Carriage for HyperCube
Summary
I would like to use Graphite Bushing on my newly built HyperCube, so I make one.
This mounts the E3D Titan with a Stepper Motor. You will also need an end stop, 2x 81130 graphite bushing, some M3x15 screws and M3 nuts, and super-glue or something that can stick everything together. Since I make it in separated part to print them more easily.
This is still a WIP
Print Settings
Printer:
MakerOne Rafts:
No Supports:
No Resolution:
0.2mm Infill:
25%
How I Designed This
Using SketchUp -
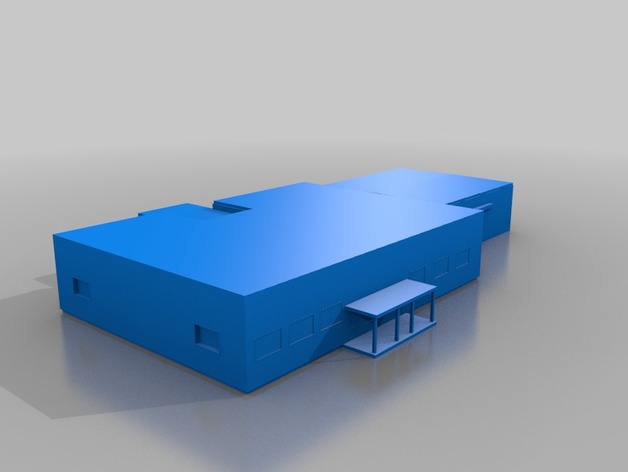
I-Building
Summary
Campus project
Print Settings
Printer Brand:
MakerBot Printer:
MakerBot Replicator -
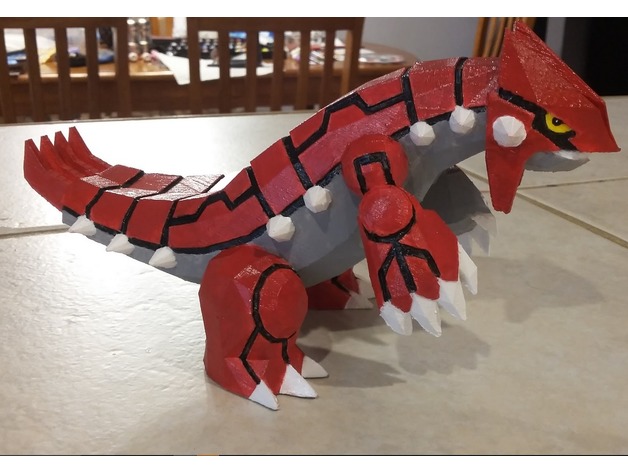
Pokemon Groudon
Summary
I did not create this 3D Model. I downloaded it from:
http://roestudios.co.uk
I did however have to run it through makeprintable.com in order to print with Simplify3D 🙂
Here is the license information:
The file you are about to download was produced by Nintendo/GameFreak, and they are the legitimate copyright holders. How you use any of the downloaded files is up to you BUT your usage MUST conform to USC 17 Section 107 and must NOT violate international copyright/intellectual property law, or the copyright/intellectual property law of the United States, the United Kingdom, Japan, your own country of residence, and any other member states, the key points of which are summarized here:
You must not use this file in any way which generates a profit for yourself or anyone else. This includes re-distribution on sites such as MegaUpload, Mega, Dropbox and MediaFire. ‘Mirroring’ of any files contained within this download is expressly prohibited without permission from RootOfEvilStudios
You must attribute Nintendo and Gamefreak in any visual or digital (including rendered/modeled/traced images) reproduction, with the text “Pokemon is Copyright Gamefreak, Nintendo and The Pokémon Company 2001-2013” in a clear and visible font
DEVIANTART: THE LAST POINT IS LEGALLY BINDING. YOU MUST ADD THE COPYRIGHT NOTICE “3D model data is Copyright Gamefreak, Nintendo and The Pokémon Company 2001-2013” TO YOUR IMAGE DESCRIPTION
ONE FINAL TIMEYou must credit Gamefreak, Nintendo and The Pokémon Company in ANY reproductions of ANY of the downloaded files.
Print Settings
Printer Brand:
Prusa Printer:
Prusa Mk2 Rafts:
No Supports:
Yes Resolution:
.15 Infill:
Variable… Notes:
I printed this guy in Simplify3D using 100% infill for the feet, tail, and a bit of the underbelly; and then 15% for the rest. That way, it will stand up. -
RC10 inspired spinner
Summary
inspired by the front wheels of the vintage RC10. Uses a 608 bearing for the main bearing, and 608 inner races for the weights, or whatever fits. -
T-Wrench
Summary
this was designed for the wheel nuts and slipper clutch nut the most Team Associated cars -
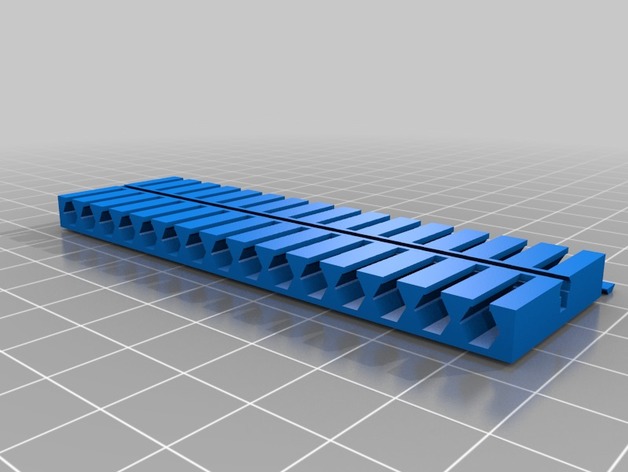
Micro Driver Magnetic Holder
Summary
Micro Driver Magnetic Holder (version 6) uses add-during-print (15) 2x5mm disc magnets.
My favorite precision bit set came with (3) junky 10-bit holders. I didn’t like that. This holds up to 30 micro screwdriver bits efficiently with easy release.
Prusu .15mm ‘optimal’ settings (modified infill for 2%) for PLA print (large face to the bed).
WARNING. I PROVIDE NO WARRANTY FOR THIS PRINT PROCESS: MAGNETS ADDED DURING PRINT. [USE ONLY NON-FERROUS HOT ENDS & NOZZLES]
VERY IMPORTANT PROCESS NOTES:
See notes on print settings.
Assembled dimensions:90.5mm x 27.2mm x 6mm
Version Information:
1.0 Initially holds 40 bits. Unprintable with conventional FDM printers.
1.3 Stacked more densely. Still un-extrudable.
2.0 Realigned bit holder to have a single flat back. Holds 20 bits.
3.0 Mirrored along X-axis allowing 40 bits. Simplified to 30 total.
4.0 Subtle redesign allowing for faster travel in several G-code settings.
5.0 Added magnetic mounts in center strip, unprintable. Revised documentation process.
6.0 Refined magnetic strip to include notches indicating pause position and ‘locking’ cap.
Print Settings
Printer Brand:
Prusa Printer:
Prusa Mk2 Rafts:
No Supports:
No Resolution:
.2mm Infill:
2% Notes:
WARNING. I PROVIDE NO WARRANTY FOR THIS PRINT PROCESS.
[USE ONLY NON-FERROUS HOT ENDS & NOZZLES]
VERY IMPORTANT:
This iteration requires a pause during print to insert the 15 disc magnets into the center holders before the lip is extruded above. This can be visually noted by the notches located at the top of where your magnets should rest. ENSURE YOUR MAGNETS ARE FULLY UNDER THE EXTRUDED LAYERS BEFORE PROCEEDING. Once you have inserted the magnets and confirmed that your extruded will not collide with them, resume the print.
Post-Printing
Add the ‘locking’ cap to finalize the magnets position, add a dot of hot glue (or other adhesive) if desired.