Summary
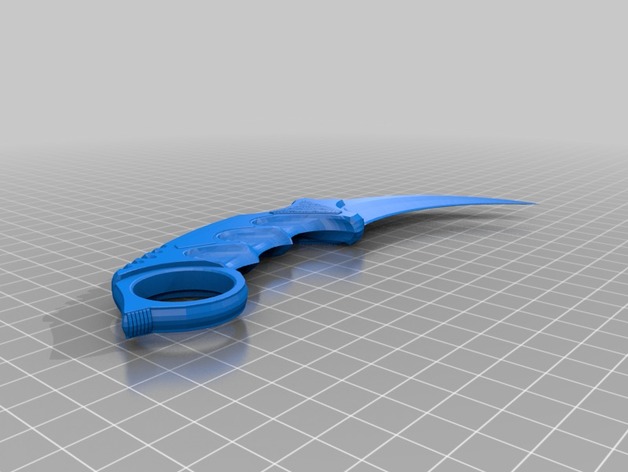
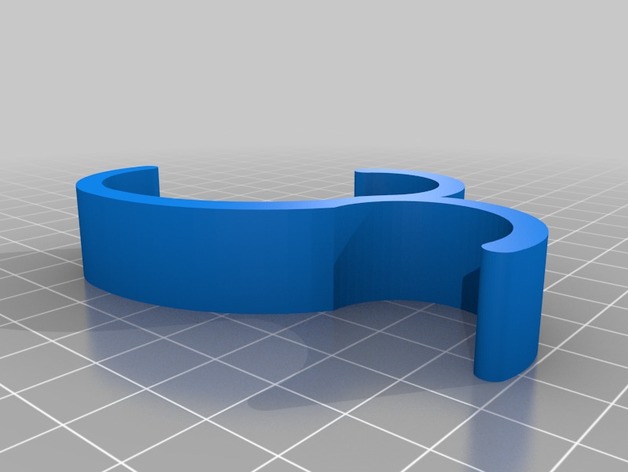
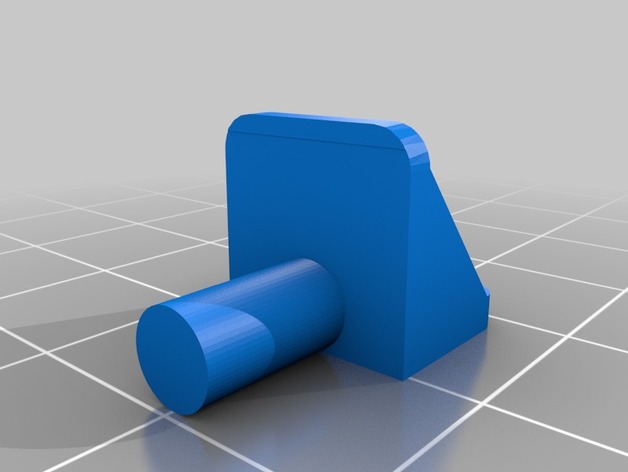
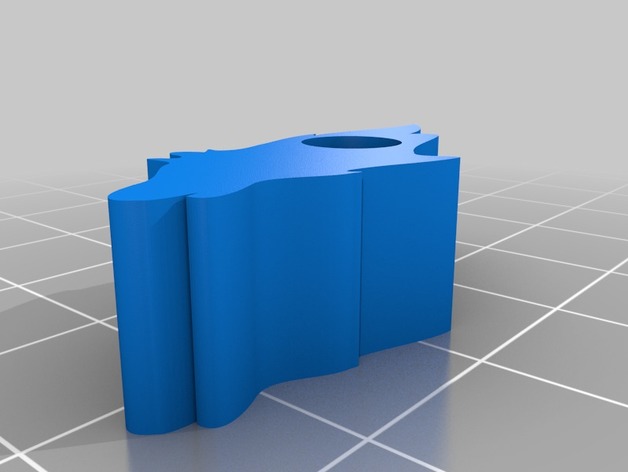
This is my take on a useful tool.
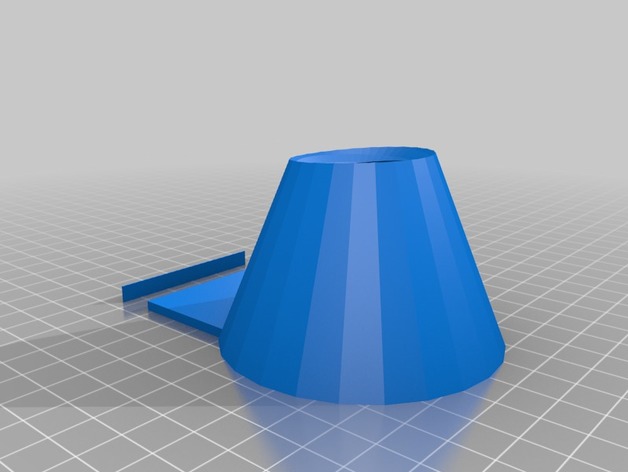
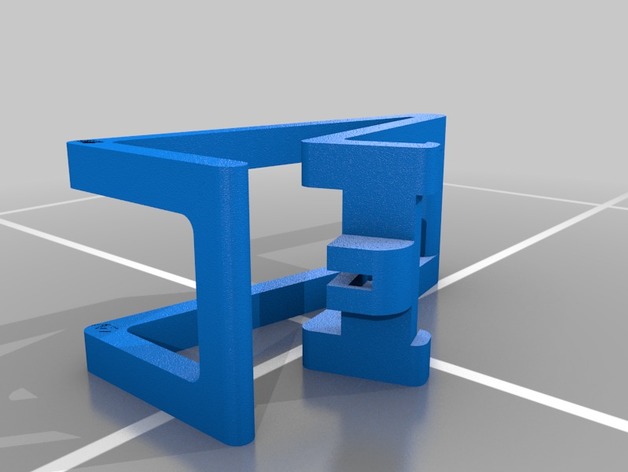
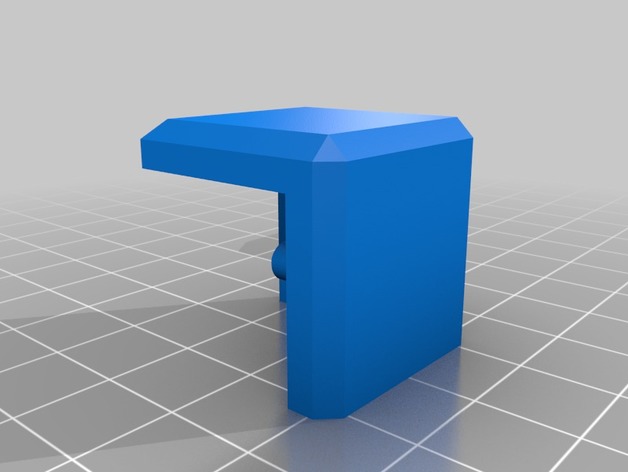
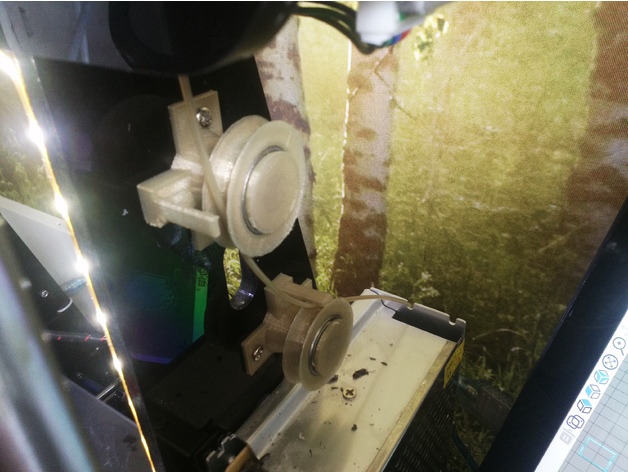
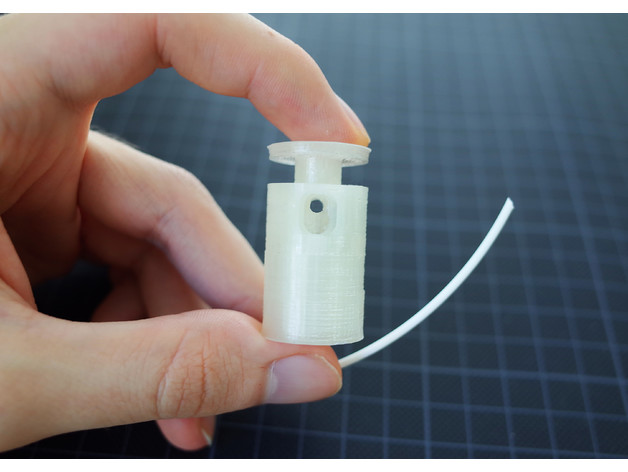
It cuts 1.75mm filament in a 45° angle for a better grip when inserting it into the feeder gear.
Features:
• Works with a regular spring out of a pen.
• No screws are needed.
Prints without support.
The printer should be well calibrated before attempting this print, since it needes fine detail to work.
Additional Needed Parts:
1x Spring out of a pen
1x Three segments (15mm) of a 9mm snap-off cutter blade
Demonstration and Assembly: https://youtu.be/xb1yQvIPFL8
Author: Thingiverse
-
Filament Cutter 3D Print Model
-
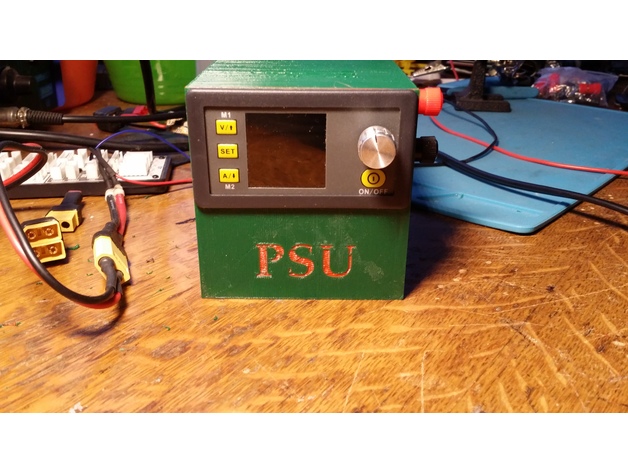
netzteil dps3005 + Switching Power 3D Print Model
Summary
https://www.banggood.com/DPS3005-32V-5A-Buck-Adjustable-DC-Constant-Voltage-Power-Supply-Module-Integrated-Voltmeter-Ammeter-p-1062474.htmlhttps://www.banggood.com/AC-DC-Inverter-100-240V-To-36V-5A-180W-Switching-Power-Adapter-Converter-Module-p-1161864.html -
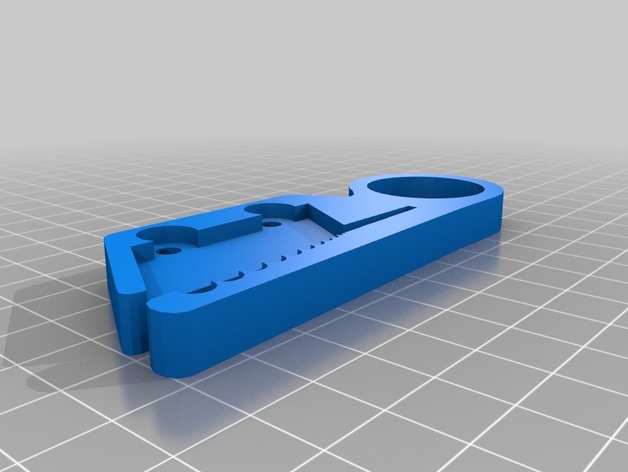
Wire Stripper (Cutter Blade) 3D Print Model
Summary
Wire Stripper (Cutter Blade)
You will need:
2x M4 5mm screw
2x M4 7mm nut -
Wanhao i3 120mm PSU Fan Upgrade for Undermount 3D Print Model
Summary
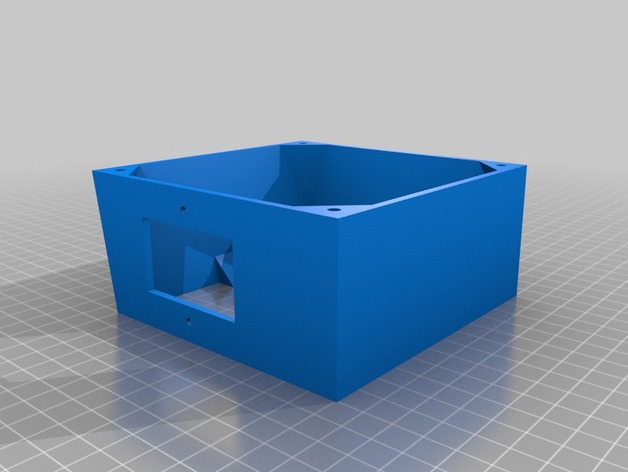
I needed a 120mm fan upgrade for my Maker Select v2, as the stock fan makes a terrible grinding noise every time I turn the printer on. But, none of the options worked for me, because I have mounted my control box under the table my printer is on! So I flattened the top and increased the angle on the bottom to accommodate the 120mm fan.
This is an extended back cover for the Wanhao Duplicator i3 PSU (also rebranded as Monoprice Maker Select, Balco 3D Printer, Cocoon Create). This model allows you to use a 120mm fan instead of the noisy tiny internal one. The new fan will be mounted outside of the power supply, but it will be much more silent. It adds about 10mm of extra length to the bottom.
I don’t know if other versions of the printer have a different arrangement for the screw holes. This was designed for a v2.1 (v2 should be the same). Check compatibility for v1 and rebranded versions before printing.
The stock screws won’t work for this part. Use M3x8mm or longer to attach the cover to your PSU case. Screw holes aren’t countersunk (just counterbored), so choose screws with a flat top.
Print Settings
Printer Brand:
Wanhao Printer:
Wanhao Duplicator i3 V2 Rafts:
Doesn’t Matter Supports:
Yes Resolution:
0.2mm Infill:
10% Notes:
It should be aligned with the PSU screw holes facing the build plate, already. Enable supports for the IEC connector/power switch plate and wiring loom slot.
It’s not a must, but I recommend using 3 shells/solid perimeters for the holes where the fan mounts on, so when threading the screws the plastic doesn’t break.
Post-Printing
Installation guide
Unplug the power cord from the wall socket and from the printer. Safety first!
Unscrew the 4 black screws that hold the sheet metal back cover in place. Save them if you plan to reinstall the stock cover in the future (they are too short to work with this mod).
The cable loom going from the control box to the printer goes through a cut in the back plate and is held by a zip tie. Cut that zip tie to free the loom from the plate.
Disconnect the spade connectors going to the IEC power socket + switch combo. Notice the wire colors and location to reinstall them later in the correct position. Take a picture if necessary.
Disconnect the small fan from the power supply.
Unscrew the fasteners holding the socket/switch in place. You should be able to lift it off the plate (use a flat screwdriver as leverage if you need so to get it out).
Position the back cover and align it with the screw holes tapped in the case of the control box. Make sure the wire loom goes through the U-shaped cut-out provided.
Use M3x8mm or longer to attach the plate to the metal case.
Take the wires that were attached to the IEC connector/switch and guide them through the rectangular cutout provided (located on the top or sides, depending on the model you have printed). Re-attach the wires to the switch and screw it in back. You can reuse the stock screws that came with it (be gentle when doing this, you’re threading into plastic).
Take your 120mm fan and use the +12v and GND wires to connect it to the psu. If your fan has a molex connector (3 or 4 pin) you should be able to just plug the cable in to the existing connector you left coming from the power supply.
You may want to use some electrical tape or a drop of hot glue to secure the connection.
Align the fan with the mounting holes of the printed cover. Use M4x40mm screws or self-tappers of similar length to secure the fan to the cover. Make sure to tidy all the cables up inside so they don’t catch on the fan blades.
Enjoy your silent printer!
Extra
I recommend the addition of a fan grill to protect your fingers from the spinning blades. It is one of the drawbacks of having the fan exposed instead of inside the case. Be careful! -
Llavero pescador 3D Print Model
Summary
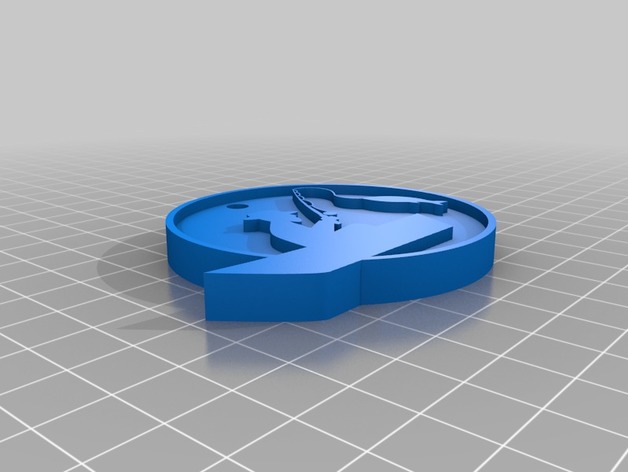
Llavero hombre pescando. Solo diseñe, no probé imprimirlo.
Keychain fishing man. I only design, I don´t print it -
Anet A8 Z-Axis Rod Stabilizers 3D Print Model
Summary
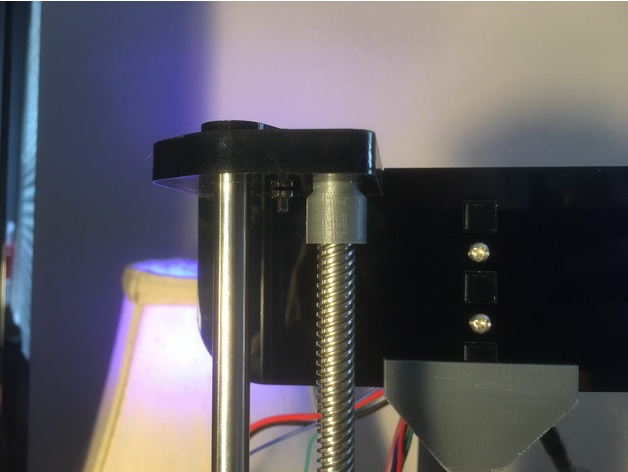
These parts will improve the stability of your Z-Axis. Designed with very tight tolerances to pressure fit the rods yet spin freely on the frame. No need for bearings or screws. Just print two.
Print Settings
Printer:
Anet A8 Rafts:
Doesn’t Matter Supports:
No Resolution:
0.1mm Infill:
25% -
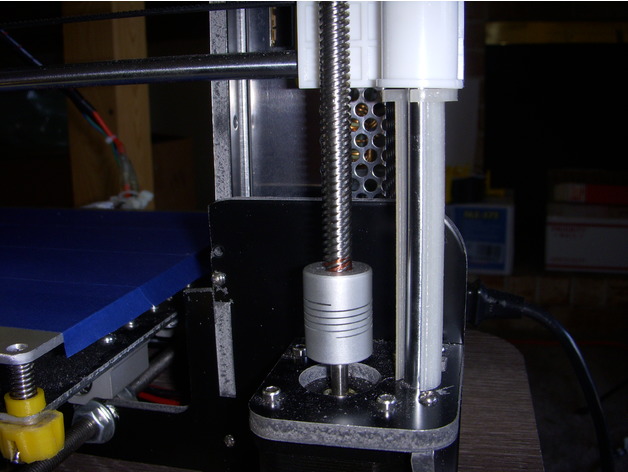
Anet A8 Z Axis Height Gauge 3D Print Model
Summary
A quick design of a thing used to help set and check the Z axis height. I rotated the object 90 degress so that the large diameter is at the bottom of the print I then multiplied it by 1 to print 2 each. -
HELP ornaments 3D Print Model
Summary
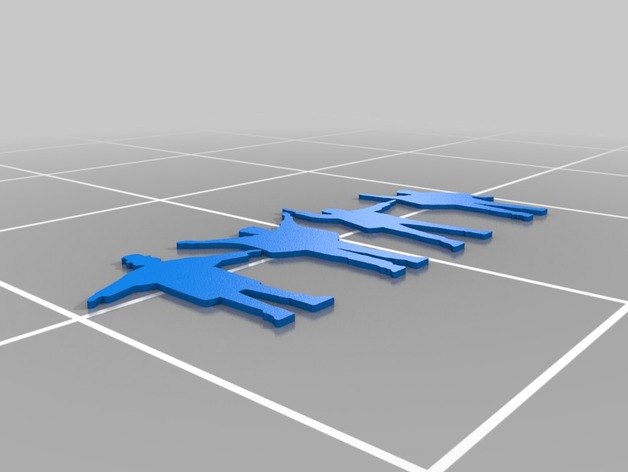
Made for Christmas, but has many other uses. HELP that Beatle fan in your life with this wonderful set of the fab four. -
The Circle Spinner 3D Print Model
Summary
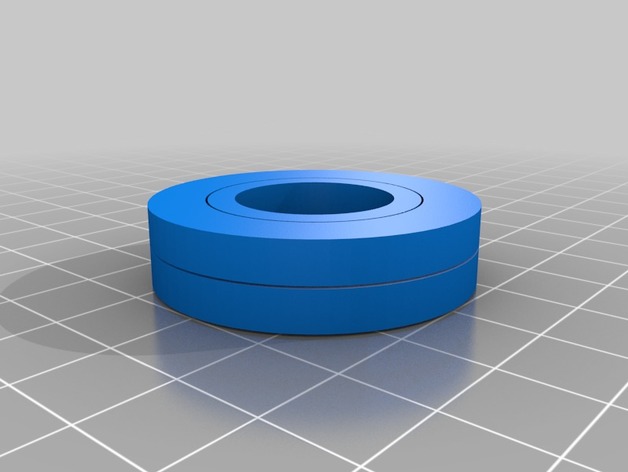
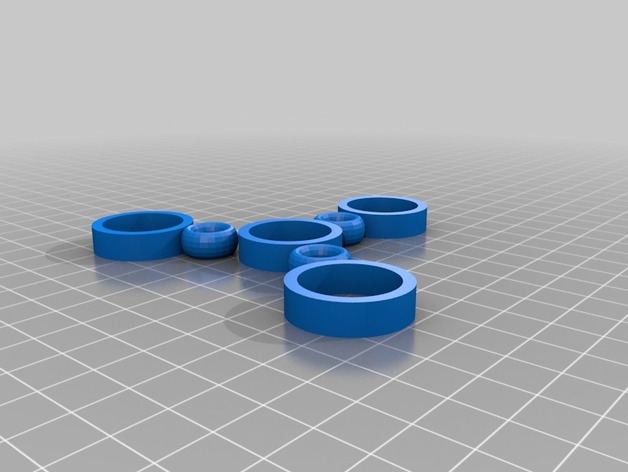
This is the first spinner I have made. I used tinkercad to design. -
Quartz NightLight! 3D Print Model
Summary
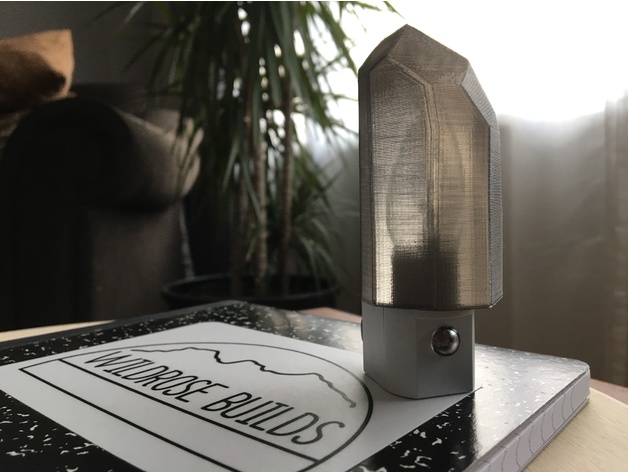
This is a cover for a standard bulb night light. printed at .25mm layer height with transparent black pla filament. enjoy!
please check out the design and print timelapse video here: https://youtu.be/dlt9fiKnzGc -
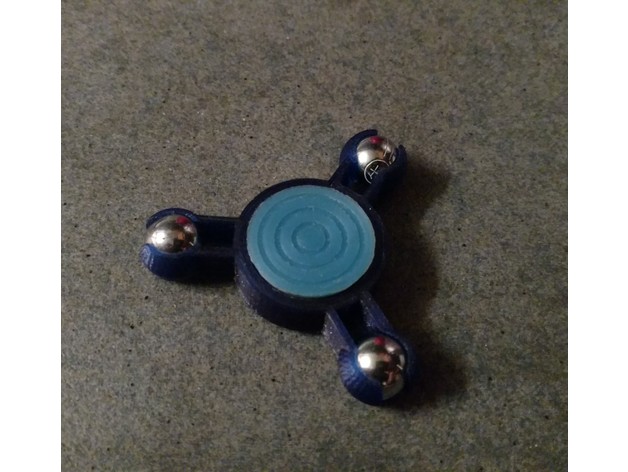
Micro Fidget Spinner 3D Print Model
Summary
This is a spinner I designed for my Neice
She is 5, so she has small hands.
Uses a 22mm bearing
The balls are 11mm / 7/16. Popular slingshot size.
I used Pachinko Balls
Cap is from https://www.thingiverse.com/thing:2403050
Print Settings
Printer:
Anet A8 with Titan Aero Rafts:
No Supports:
No Resolution:
0.1 Infill:
100% Notes:
I used a brim to help the cups adhere.
Super easy and fast to print -
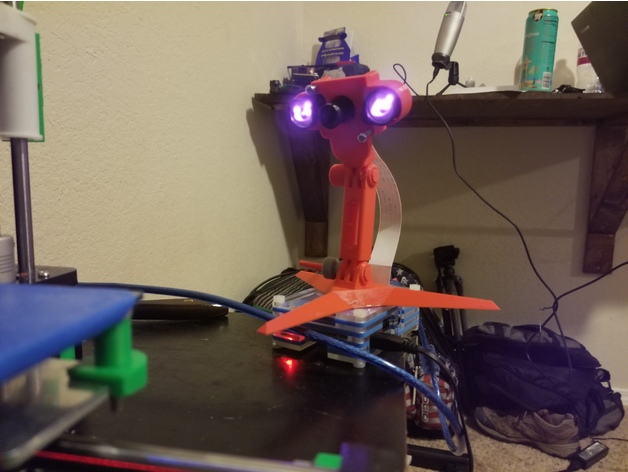
Raspberry Pi Night Vision Camera mount with Modular Mounting System attachment. 3D Print Model
Summary
I created this remix in order to mount my night vision Raspberry Pi camera onto the Modular Mounting system that I had previously printed.
The rest of the camera case can be found here: https://www.thingiverse.com/thing:1889356
The Modular Mounting System that it attaches to can be found here: https://www.thingiverse.com/thing:2194278
Print Settings
Printer:
Anet A8 Rafts:
Doesn’t Matter Supports:
No Resolution:
.2 Infill:
10% -
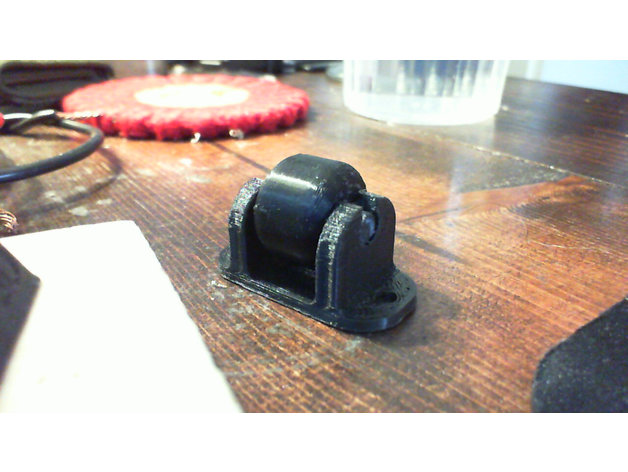
Low Profile Caster Wheel 3D Print Model
Summary
Designed these to be affixed to the bottom of a rolling box that is stored under a table. Print with 100% infill. The axle just needs to be tapped in with a gentle persuader once the wheel is in position of the hub. Don’t install the axle first even though it looks like you can snap it in. Uploaded the 3 parts as a set or as individual pieces.
Print Settings
Printer:
Anycubic Kossel Mini Rafts:
No Supports:
No Resolution:
.4 Infill:
100% -
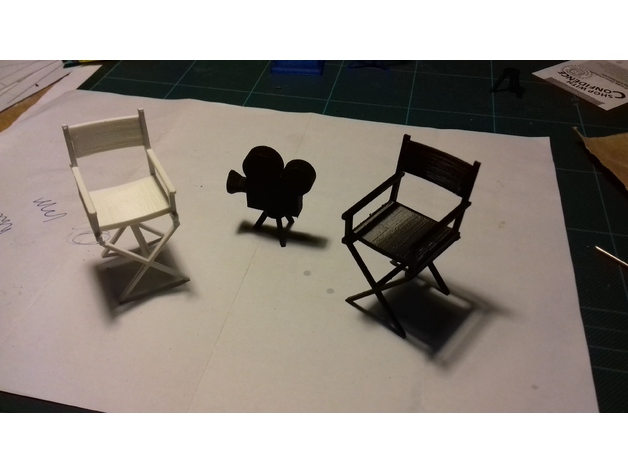
Cartoon Film Camera & tripod 3D Print Model
Summary
This is a (cartoon) print of a film camera, originally created as a wedding cake decoration for a film fan. The file contains both the camera and tripod but will need to be reoriented to print. The tripod will print without support if the round part is placed flat on the print bed. The camera needs support under the lens to print successfully. Initially printed in PLA. Layer height of 0.2 will work. -
Raspberry PI with Screen adapter for InMoov back 3D Print Model
Summary
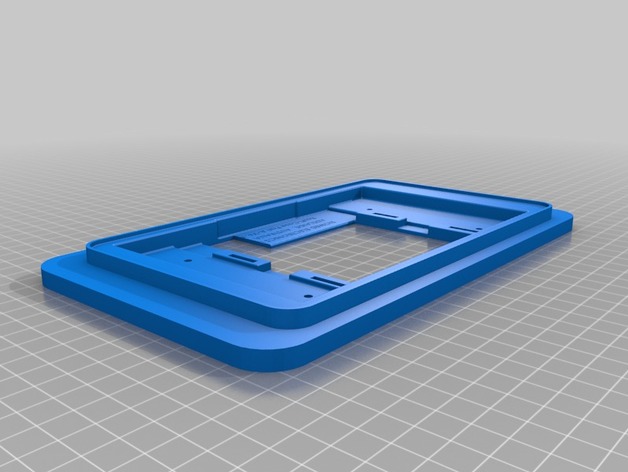
This is an adapter based on https://www.thingiverse.com/thing:1384316 that will hold the ras pi with the 7″ touchscreen in the back of the InMoov. -
Support écran discoeasy200 3D Print Model
Summary
A LIRE AVANT DE PRINT !!!!!!!!!!!!!!!!!!!!!!!!!!!!!!!!!!!!!
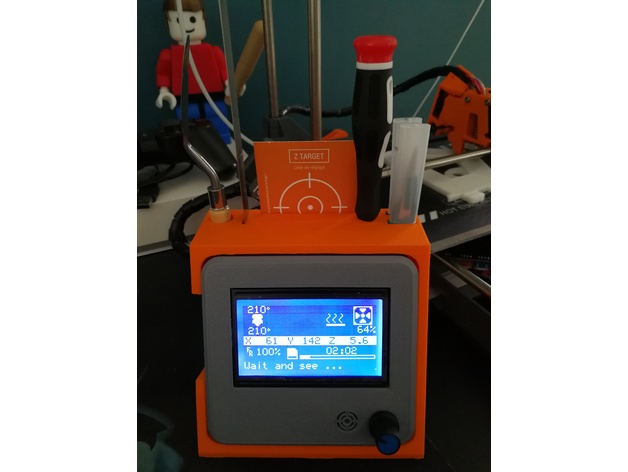
Voici un support d’écran + porte accessoires pour dagoma discoeasy 200.
Je l’ai conçu pour mes accessoires, vérifier les cotes de toutes les fentes avant de l’imprimer pour ne pas dire après “ma spatule rentre pas” ou autre 😉
Je vous invite donc à le modifier a votre guise !
Il vous faudra imprimer les 3 éléments car le cache écran n’est pas celui de base mais est modifié pour un gain de place.
L’ouverture pour insérer la carte SD n’est pas très esthétique, je vous l’accorde, mais après plusieurs test, c’est le meilleur compromis pour la retirer sans problèmes.
Remplissage 17% suffisant
Support “partout” uniquement pour le gros support porte outil (orange)
Si vous avez des questions ou suggestions, n’hésitez pas 🙂 -
PS Vita Gamecard to SD case 3D Print Model
Summary
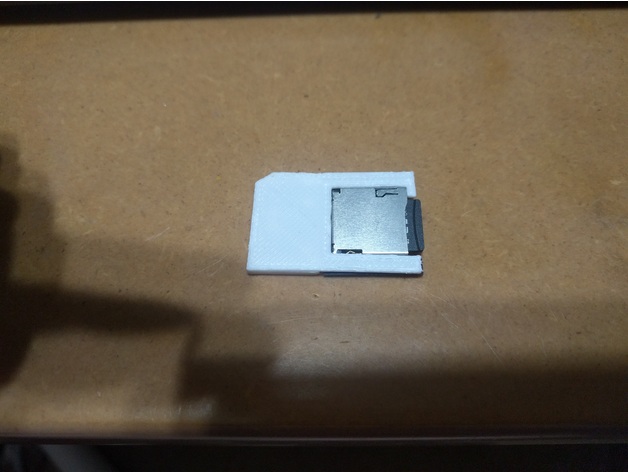
PS Vita Gamecard to SD card adapter case.
This finishes off your game card adapter so that it locks in and ejects like a real gamecard.
This is really thin, and requires all layers to be printed at 0.1mm to function correctly.
Print Settings
Rafts:
Yes Resolution:
0.1 -
Emoji Spinner 3D Print Model
Summary
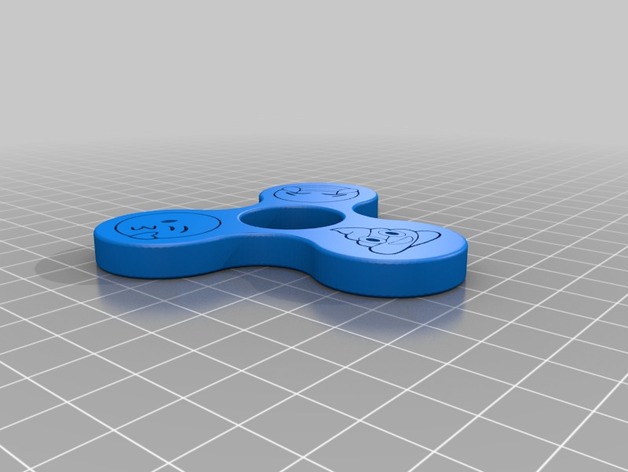
Add a 608 Bearing and caps if you wish 6 nickels are buried in the ends for weight (2 each hub) pause the print around layer 20 or pop them in as it prints. This was a request from a customer, I have a Sponge Bob coming next. Forgot to snap a completed pic so if you print one please post. She wanted Yellow with Blue caps looked nice!
Print Settings
Printer Brand:
Prusa Printer:
Prusa Clone Rafts:
No Supports:
No Resolution:
.2 Infill:
20% Notes:
Forgot to take a picture befroe giving to customer if you print one please post a pic! -
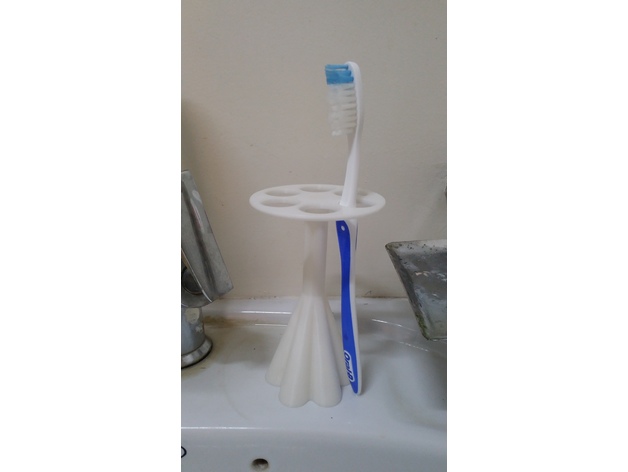
Toothbrush Holder for 6 brushes 3D Print Model
Summary
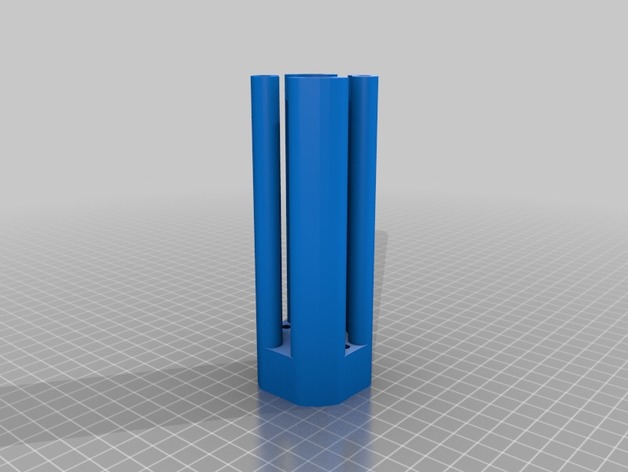
My toothbrush holder broke, so I designed and printed a new one. It can hold up to 6 brushes so also good for a family bathroom.
Print Settings
Printer Brand:
Prusa Printer:
Prusa Clone Rafts:
No Supports:
No Resolution:
0.3 Infill:
10% Notes:
You can even print at 0.2 or 0.1(though there’s not enough detail to warrant that resolution) and you can increase the infill if you want, too. -
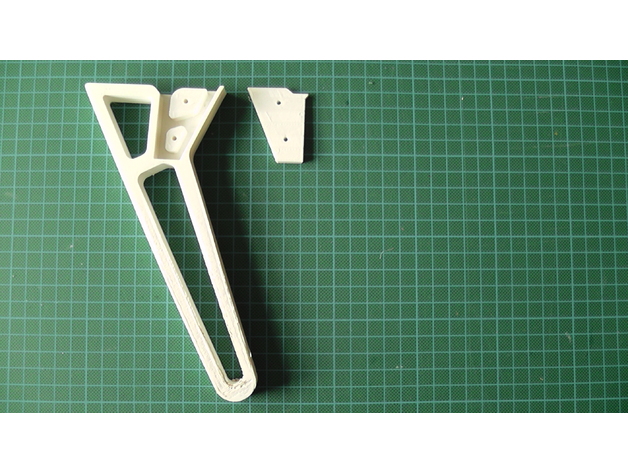
F450 Quadcopter Extended Legs 3D Print Model
Summary
Improved extended legs for an F450 style Quadcopter. These provide clearance for a camera gimbal to be slung beneath the quadcopter.
Video dedcription at: https://youtu.be/9Vwqu6JT6Z8
Print Settings
Printer Brand:
Prusa Printer:
Prusa Clone Rafts:
Doesn’t Matter Supports:
No Resolution:
0,2mm Infill:
Depends on number to top and bottom layers Notes:
These would look quite good with no top and bottom layers,so that the infil shows. It may be necessary to increase the infil amount to give a similar strength to a part with top and bottom layers. 3-4 outer layers are needed to give strength.
I used models of small discs intersecting with the bottom of the leg to prevent warping and increase adheasion to the print surface.
Post-Printing
I printed the legs in ABS and painted the inside to the part that connects to the 450 legs with acetone and left it to dry. I think this gives a bit more strength but that could be wrong.
How I Designed This
Designed in fusion 360 from imported photographs of the existing 450 legs. -
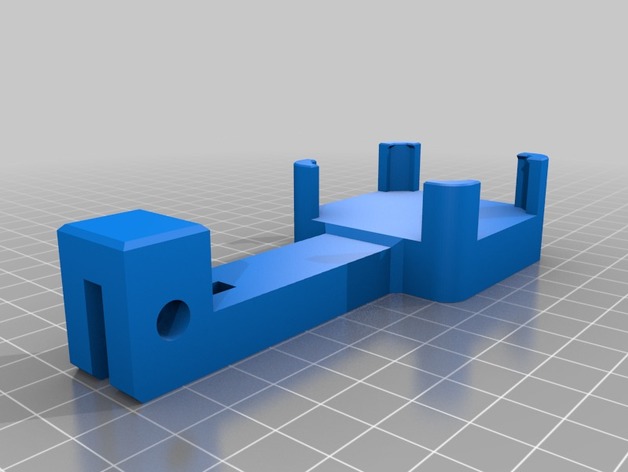
Dial Indicator Mount Prusa MK2 – modified 3D Print Model
Summary
some modification on the original design by slayer1551:https://www.thingiverse.com/thing:2308978
I liked the original design idea, but wanted it to be a bit different, namely:
turn the dial to face the front (!!)
center the hanging beam (which for some reason was offset)
reduce the hanging beam length – saving material, printing time and reducing torque on the print head
added some chamfer on the protruding tabs and on one side below for easier extraction from PEI print area
Print Settings
Printer Brand:
Prusa Printer:
Prusa Mk2 Rafts:
No Supports:
No Resolution:
0.2 Infill:
15% Notes:
you can probably print with even lower infill
Post-Printing
1 M6 bolt to secure the dial to the holder -
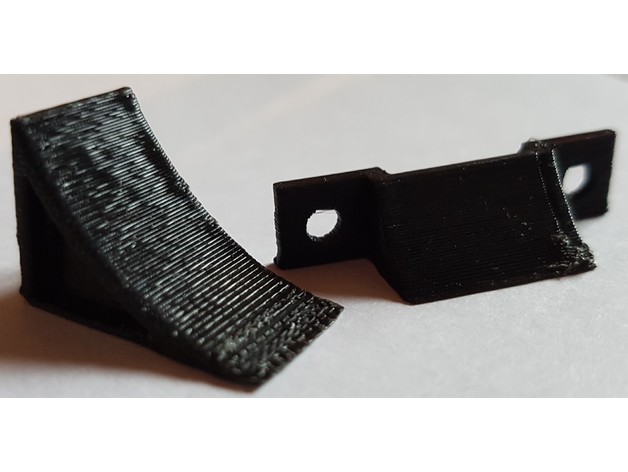
Hemmschuh 1:16 3D Print Model
Summary
Hemmschuh und Halter im Massstab 1:16
Print Settings
Printer:
Tronxy P802 -
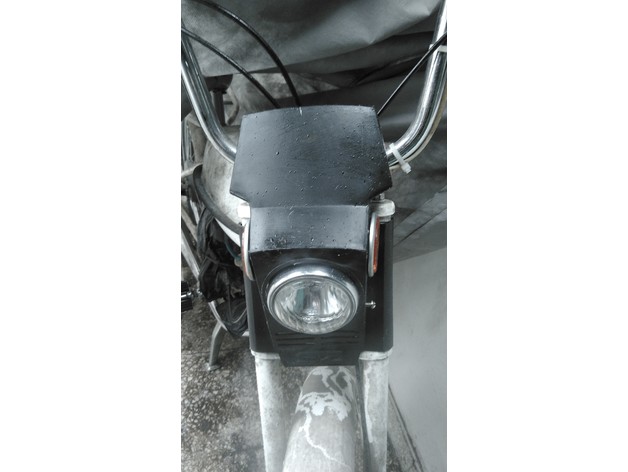
Riga 13 SZ Soporte Tablero 3D Print Model
Summary
Soporte para el “tablero” Riga 13 SZ
Print Settings
Printer:
Replikat M5 Extendida Rafts:
Doesn’t Matter Supports:
Yes Resolution:
0.2 Infill:
30 % Notes:
Nozzle: 0.4
PLA -
ECOtanka or SIGG Waterbottle holder for bike 3D Print Model
Summary
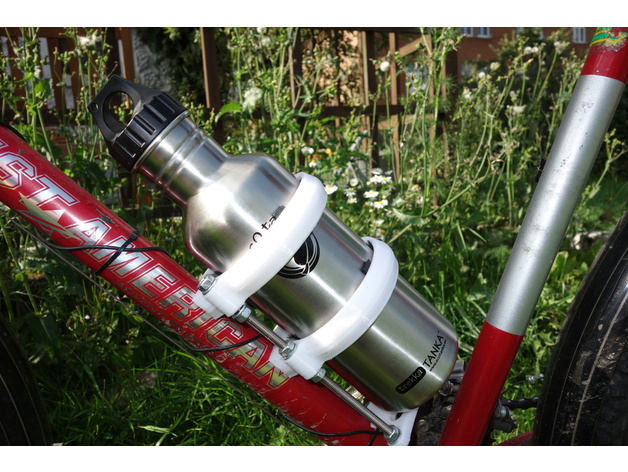
This is a easy to print bottleholder for Bikes. It fits for SIGG and ECOtanka bottles with the size of 1 litre. The holder is for bikes with 35mm frame diameter. But it fits also on a bit bigger or smaller one.
This holder is super stable! Use M6 bolts for fixing the parts.
Tape some foam or felt in the holder to get this thing very silent and safe for your bottle! -
Pokemon Curveball Template for Samsung Galaxy S6 3D Print Model
Summary
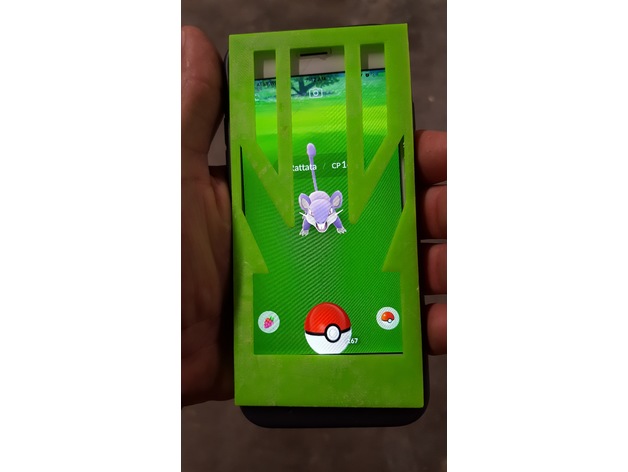
This is a simple template to assist in throwing a curveball ( or strait ) in the Pokemon Go App. It is a layover design so that it will not interfere with your current Samsung Galaxy S6 case or battery pack. Also being thin, it travels easy in your pocket or purse.
While this was designed for the Samsung Galaxy S6, It seems to work well with other phones of similar size.
View the YouTube video to see it used in action here:https://youtu.be/YHFHvWAEmQc
This video was shot for the iphone template, however the principals are still the same.
Print Settings
Printer Brand:
FlashForge Printer:
Creator Pro Rafts:
No Supports:
No Resolution:
Medium Infill:
none Notes:
No special settings required. Once printed allow for it to cool off before removing it from the bed. If it is removed while hot, the model tends to bend and stay bent. -
GoPro Hero4 Lens Holder 3D Print Model
Summary
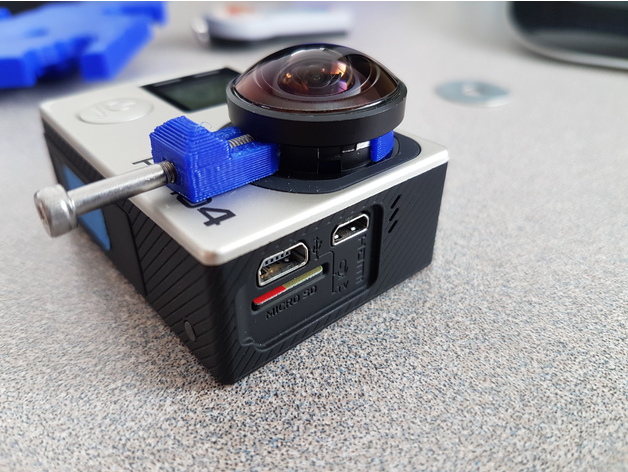
This is a lens holder for GoPro Hero4. Its useful if you use custom lenses with your GoPro. I helps keeping the lens in focus so you wont turn it accidentally. You will need one 3mm nut and bolt.
Also, you may want to help the nut with a soldering iron an to sand a little bit the flaps of the holder in order to make it fit perfectly.
Dont turn too hard as you risk to tilt your lens.
Check some more of my work at:
http://www.alterlab.iohttp://www.sbromberg.co -
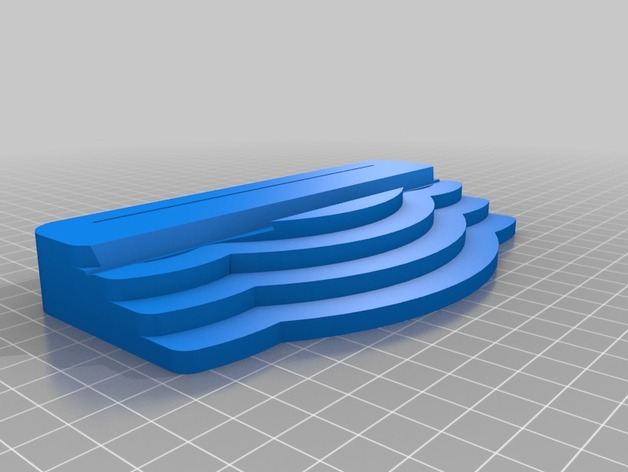
Base Portacelular Muse 3D Print Model
Summary
Base portacelular Muse
Print Settings
Printer Brand:
Robo 3D Printer:
R1 ABS + PLA Model Supports:
No Resolution:
0.2 Infill:
20% -
Tron Disc 3D Print Model
Summary
This is the weaponised Disc used in the Tron movie
is about 10cm(100mm) long -
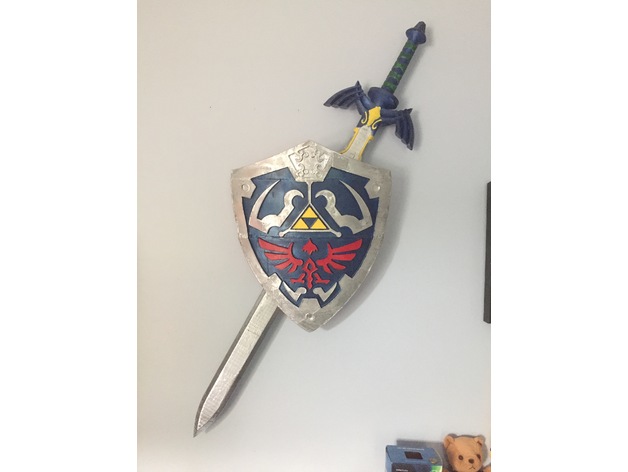
Wall Hanger for Master Sword and Hylian Shield 3D Print Model
Summary
I designed a very simple wall hanger for two very helpful tools for combat. I actually made Adafruit’s Hylian Shield (https://www.thingiverse.com/thing:824544) and ChaosCoreTech’s Master Sword Designs (https://www.thingiverse.com/thing:1449187) just for fun, but I thought that hanging the two prints in my room would be cool. So i designed the hanger with the sword being held at a 30 degree angle.
Just a little disclaimer: Currently with my design the shield is drooping down from the top a little bit from what I would like, but nonetheless still looks amazing to have in the room. Mainly I wanted to show this display method can be done: Try this design if you want. I failed to insert a folded notecard to tighten the shield and holder, so I will probably work on making the handle part of the wall hanger tighter in my design.
Print Settings
Printer:
Monoprice Maker Select V2 Rafts:
No Supports:
Yes Resolution:
.30 Infill:
20 Notes:
If you do print this, be wary that this is a work in progress as explained above, and that you probably want a decently strong hanger to support holding both a shield and sword, which requires more plastic to print the infill/ shell thickness. This print also needs “supports” set to everywhere if you use Cura.
Rotate the object so that the “handle holder” part is flush with the bed. Your printer should only print supports for the top of the handle holder. I’m not sure why Solidworks exports STLs in a different orientation when I designed this with the correct positioning.
I felt comfortable having the shell thickness to be 2 mm, and its holding fine. Printed in pla grey plastic with extruder 215 c and bed 60 c -
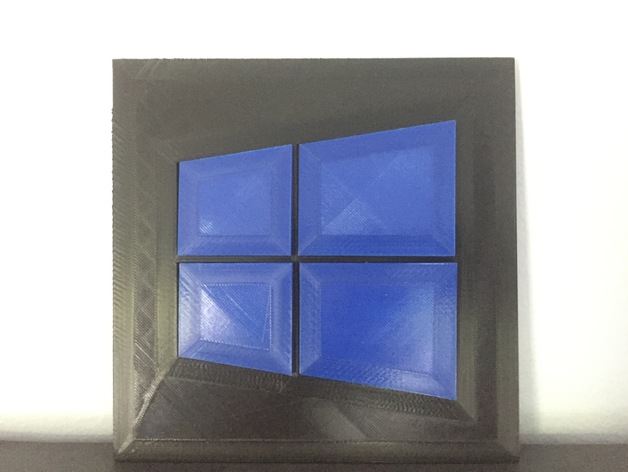
Windows 10 Themed Start Button 3D Print Model
Summary
A simple angled windows 10 themed logo, which looks like the start menu button. I used pla hatchbox blue and black filament. Printed on my Monoprice Maker Select v2 at 215 c for extruder and 60 c on heated bed.
I was able to stick the four blue window panels to go in the holes at an angle; however, if you force the pieces in too much you may get them stuck in the plate (at no angle, just a boring flat look 😛 ). How I inserted the window panels: The right sides of the four window panels are angled towards you.
Modeled in Solidworks
Print Settings
Printer:
Monoprice Maker Select V2 Rafts:
No Supports:
No Resolution:
I’d recommend at least .20 for the detail, but you probably won’t need any lower res Infill:
Doesn’t Matter Notes:
The prints do not need to be particularly strong, just make sure your bed is level as possible to avoid warping on especially the back plate.
Keep in mind of your shell thickness for this one. The blue panels has a noticeable “pattern” by the borders. of the panels. If you want the pattern to be as wide as mine is, go with a shell thickness of 2.5 mm. It adds a little bit of shadow detail, which I like. -
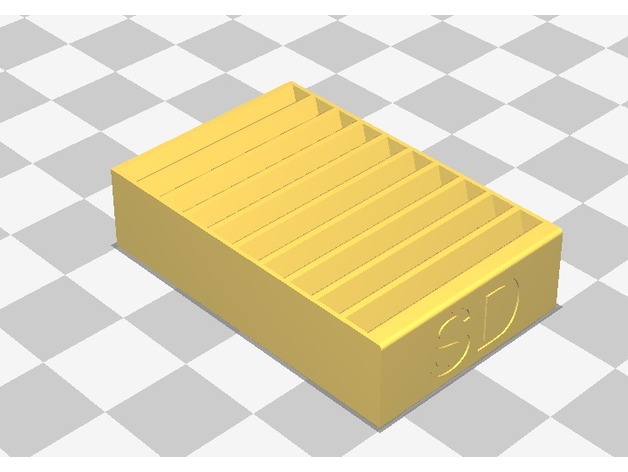
SD Card box 3D Print Model
Summary
sd cardbox
sd cardbox
sd cardbox
sd cardbox
sd cardbox
sd cardbox -
Tak Piece Cutting Jig 3D Print Model
Summary
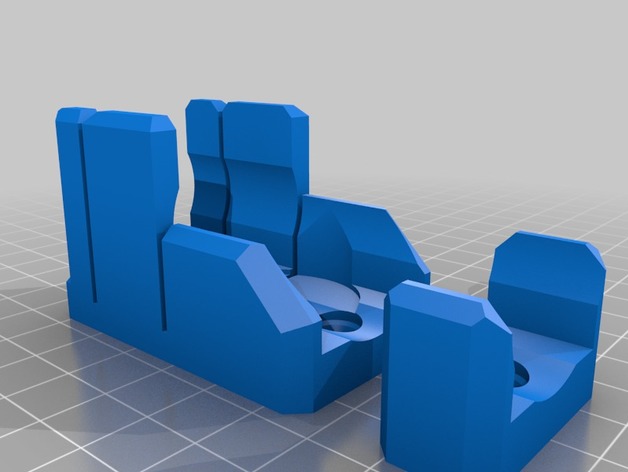
This jig is made to use with 1″ square and/or 1-1/8″ round dowel. There is an end stop for a 10mm slice (~3/8″ after sanding), and a spot to place the discs to trip a flat. The second holder is to support the length at a greater distance. There are screw holes for #6 or #8 drywall screws. that can be used to screw it down to a 1×2 or other support.
I have a portable work bench with clamping sections. I made the bottom plates to work with M3 bolts to clamp down on a slot of my workbench which secures it entirely satisfactorily. #6 bolts would likely work just as well. The holes may need to be expanded a bit, but should be tappable.
I printed the jig and support with 3 walls and 15% infill, the clamp plates with 4 walls and 35% infill. -
Heated Bed Clips 3D Print Model
Summary
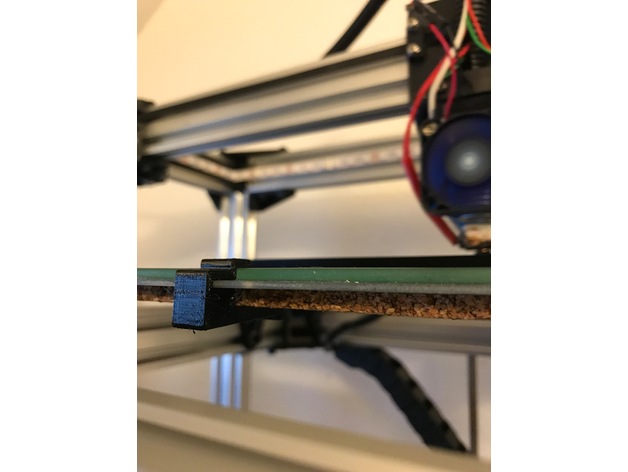
Heated bed clip for heated bed with glass and insulated with cork.
Print Settings
Printer:
DBot Supports:
No -
Bob Long Detent 3D Print Model
Summary
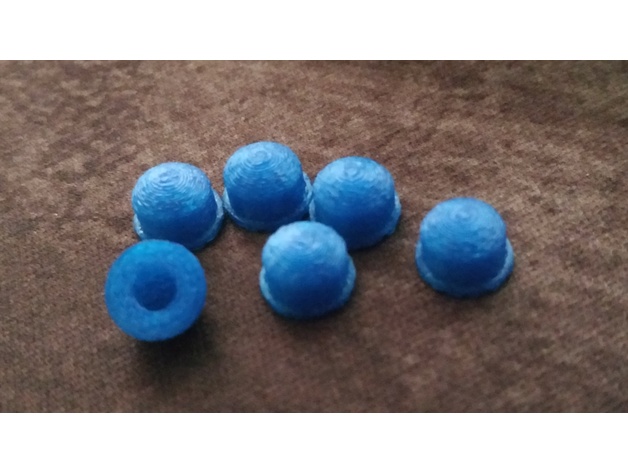
My detents on my G6r were worn down and causing me some issues so I made some replacements. They hold up so far and work perfectly.
I used PLA at 210 with a resolution of .1, no rafts, and 100% infill (its small enough it was going to be 100% either way). My original plan was to use an SLA printer but these are holding up well enough that I’m probably not going to get around to it. -
20$ Tornado(vortex) Generator 3D Print Model
Summary
Background History First
About a month ago.. I was about :the half of my peanut butter toast when my wife mentioned me that my older son has selected his subject for his third grade presentation… Tornado! Seriously! That’s great… That kind of subject spark my interest…
So I went here to find something kick-ass to spice up his presentation, I’ve found a pretty cool tornado vase… So i start printing it… I was looking at my print starting up, finishing my toast (lol)… And my brain was already at the next step… This looks great… But…. It’s so… Passive…
So i went back, and i remembered playing with bottle and tornado coupler when a was a youngster… Great found that one and start the print on another printer… Ok now the bad news… I didn’t drink soft drink so 2L bottle didn’t exist at home… Humm ok, that’s right… You could be surprised what I’m ready to do in the name of science 😉
I went back to ask my wife to buy some 2l bottle fill with any liquid , after giving explanation why i leave the table as…. She agreed to add those to the groceries list…
So i go to work… But you know… My brain was working over that… Traffic jam are a great reason to go in my wonderful alternative reality lol
So I made a great kit… Right?… Great, yes! But not awesome… Need to add some mad scientific stuff…
So I search and didn’t find something that would fill my needs…Tornado + motor = awesome!
So … I fired my freecad!
design details
This as been designed to be affordable as possible… About 20$ and that includes at least 2L of your favorite soft drinks 😉
Basic system need a 5-10$ ultrasonic mist generator 24v, and a 50-60mm 24v centrifugal computer fan and a cheap standard on-off rocker switch …
Since my 24v fan and my cheap PWM pot didn’t find their way to my home in time…I was forced to create that “CSL Editdion” (Chinese Shipping Latency Edition). Currently i use a 60mm 12v fan… Since i was forced to take down the voltage to 24 to 12 v I’ve used an lm317, some resistor and a pot that enable the operator to play with wind speed…
This design as been build with 150x150mm delta in mind… So almost any 3d printer could print that project…
Please Note: This is the first release…. post printing explanation in progress so stay tuned 😉
end of story
So after countless hours of printing and prototyping… I’ve got that working design… Which work really well…
I’m not equipped with professional photographer rig… And droplet of water lighten by led seems to saturate camera sensor… So pictures or video of the tornado are all over exposed… But no issue up to now with human eyes… It looks great if you use your bare eyes to look at it 😉
I’ve holded this design until my kid completed his presentation… You know people with 3d printer have tendency to hide between normal people…lol … Would be a nightmare if other kid in is classroom show up with the same kickass tornado generator… Lol
Be warn: the hardest part of that project was to successfully convince the teacher that my kid designed this by himself… Just joking 😀
Hope it would be useful for you… Also it make a great room humidifier 🙂 -
Plastic Reef #2: Random Octopus Generator 3D Print Model
Summary
Hi!
This is the second generator of Plastic reef series .
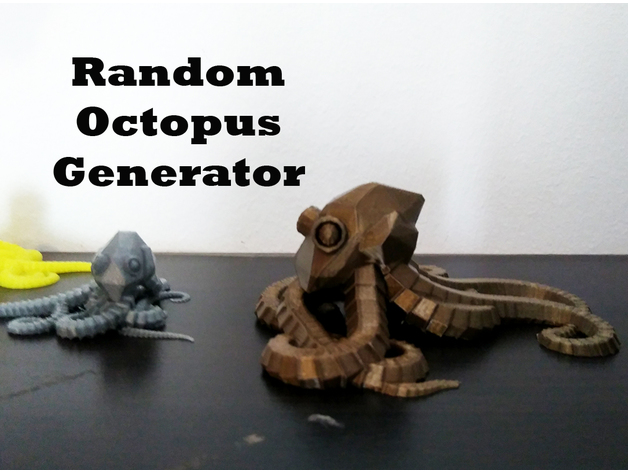
You can create random octopus in two styles: ‘organic’ and ‘mechanic’ and populate your room with this weird creatures 🙂
Every Customization generates 5 sightly random octopus. You just need to set the style (organic or mechanic) and let the customizer works.
I’ve used some code from Torleif’s openscad website: https://openscadsnippetpad.blogspot.com.es/2017/05/1-dimensional-noise.html
Hope you enjoy it!
Have fun!
Print Settings
Printer:
BQ Prusa i3 Hephestos Rafts:
No Supports:
No Resolution:
0.2 it’s ok Infill:
something between 10% – 20% Notes:
Easy print!
There’s no need to use supports. You may notice some overhangs under the figure but the are not visible. -
Zen Meteor 3D Print Model
Summary
First things first:
All credit for the IP of this work goes to Bungie and ActiVision; thank you for giving us this great game.
Next thing:
THIS IS NOT YOUR DAD’S MODEL TRAIN SET. I’ve re-meshed this thing from zilch; from sneezes, air pie, and trodden dreams. It WILL require hand fitment and a robust understanding of construction techniques.
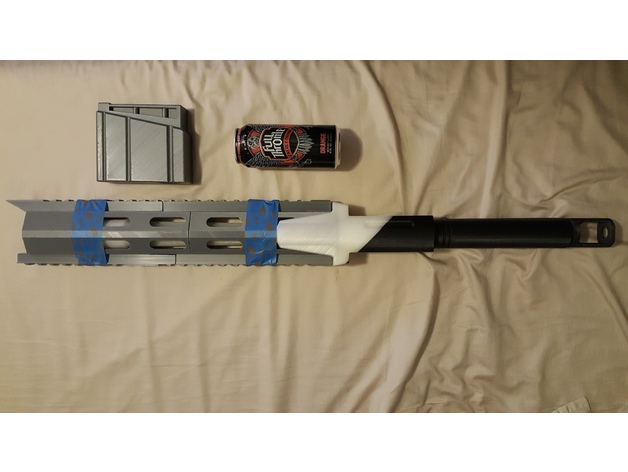
With that out of the way, here it is Fam – Zen Meteor – essentially an anti-material rifle for the gunpowder hedonists in all of us. It is a true 1:1 scale of the weapon in Destiny, and as such imposes several challenges to the would-be builder. As you can see this is a work in progress – I still have to mesh out the scope, and then go through a build iteration and post best practices for assembly. Before I get these out, if you have any questions, please hit me up in PM’s and we can rap there.
CHALLENGE #1: It’s Big.
*** It’s REALLY big. It is also somewhat slender over that length, so there are critical parts and part junctures that NEED a lot of strength. Handling, showing, transporting this thing to and from CONs, cosplay parties, etc, will test its structural integrity. I’ve tried to engineer some good joints into this thing, and have a little more work to do on some pieces to give the design as much engineering cajones as it can possibly have. Also, it will take a LOT of material to print. Lastly, you may notice that the individual pieces themselves are large, too. That is because I have a 300x300x400 build area to work from, and I intend to use the whole thing. I will NOT be re-slicing these things so it can be built on an 200x200x200 printer.
CHALLENGE #2: It’s Long.
*** Building this thing for strength and handling comes at a cost, and that is time. The forend (minus the rails) took 76 hours to print. The receiver takes 100 (when you use the shells and infill that I believe is required. Even if you are more conservative on your shells and infill, I kept the pieces as large as I could to print the biggest assemblies I was able to (so the size alone will still make longer prints than you may be use to). This is primarily due to my leaning toward threaded steel rods through the receiver to join the barrel, forend, and receiver together. Doing this pretty much dictates that building it in halves is a no-go because a tensioned threaded fastener would burst the center seam apart (or it would be trying to). Ultimately, it is going to take so long to sand this thing, prime it, paint it, weather it…and attempt to get it screen accurate…I just accepted the longer print times for the extra robustness it would provide.
CHALLENGE #3: Asssembly.
*** The order in which you build this thing MATTERS, particularly when you get to the gas block, the forward and aft halves of the forend, the rails, barrel, and receiver. Since I’m still tweaking things I DON’T have a definite build strategy though I have some ideas. I’ll post the ‘tried and true’ method when I finalize all stages of assembly, but one thing that is immediately apparent up front is that the rear barrel (the pretty one with all the fluting on it and the sweet taper) will need to be sanded, painted, sealed, weathered, DONE before you put the forend together over it! And before you put the forend together, at very least the insides of the forend will have to be finished So there is a definite order of operations that should be followed – I just haven’t put anything down as gospel yet.
Ultimately, the size of this build alone make it pretty ambitious. Please give feedback with any problems you run into – I’ll try to be responsive about making any changes that need to be made in the files. As an aside, I was considering not releasing this because I like having unique things and benefitting form my work, but the community of makers and the coolness that is 3D printing is why I put all this work out in the first place. So here it is – the thing that I cut my teeth on learning Fusion 360, and breaking in my 3D printer.
Print Settings
Printer:
Creality CR 10 Rafts:
Yes Supports:
Yes Resolution:
.15mm Infill:
Varies Notes:
My thoughts on this are that shells and infill are lowest out toward the muzzle end, and progressively get denser until you reach the receiver, where they start tapering back again into the buttstock assembly. Use your best judgement, but the max I hit was 8 shells and 60% infill for the receiver. -
Z-Axis Balance Gauge 3D Print Model
Summary
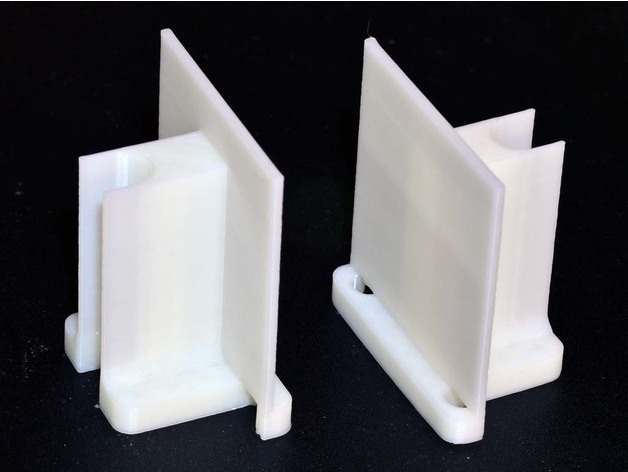
I made a gauge as an index when adjusting the Z axis screw balance.
With this gauge you can easily and quickly adjust the balance of the Z axis.
Designed for JG AURORA A3.
The height of the gauge was 48 mm.
The gauge is approximately 0.5mm higher than the zero position of the z axis.
Print Settings
Printer:
JG AURORA A3 Rafts:
No Supports:
Yes Resolution:
ABS Layer:0.2mm Nozzle:0.4mm Infill:
20% -
Layer Fan Duct for MakerParts 3D printer 3D Print Model
Summary
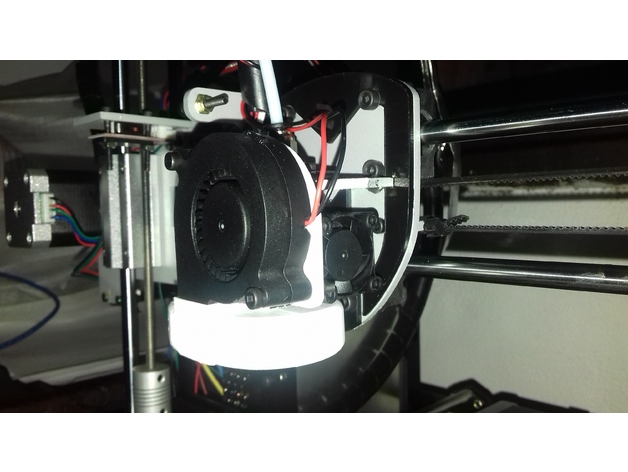
Fan Duct for the MakerParts 3D printer. This one uses a 50mm Radial Fan. The fan itself has 56.7mm between mounting holes, and the output is a rectangle whose exterior dimensions are 19.3mm x 15mm
This thing works wonderfully, and attaches to the heatsink of the E3D v6. You NEED to place kapton tape around the aluminium block of the extruder, otherwise, the fan will cool it down so much the printer will stop extruding!
With this fan duct installed, i was able to print at 200mm/s with no quality loss at all!
Ducto para ventilador de capa para la MakerParts: Este ducto utiliza un ventilador radial de 50mm (el mío lo conseguí en (http://articulo.mercadolibre.com.ar/MLA-655049187-ventilador-radial-turbina-50-mm-12-v-printalot-_JM).
El ventilador radial en sí mismo tiene 56.7mm entre los agujeros de montaje, y la salida de aire tiene 19.3mm x 15mm.
Este ducto funciona maravillosamente, y se sujeta del mismo disipador del hotend E3D v6. Es INDISPENSABLE colocar cinta Kapton (o algún otro aislante térmico) rodeando el bloque de aluminio donde está la punta del hotend, porque sino, al encenderse el ventilador del ducto, la temperatura del hotend cae tanto que es imposible seguir extruyendo!
Con este ducto de capa instalado, es posible imprimir a 200mm/s sin pérdida de calidad de impresión
Print Settings
Printer:
MakerParts Rafts:
No Supports:
Yes Resolution:
0.1 Notes:
It is advisable to rotate the piece in Cura, to minimize the support material being used
How I Designed This
Done with SolidWorks while trying to learn how to use it. -
Mag Ball for open builds Mini V wheel plate 3D Print Model
Summary
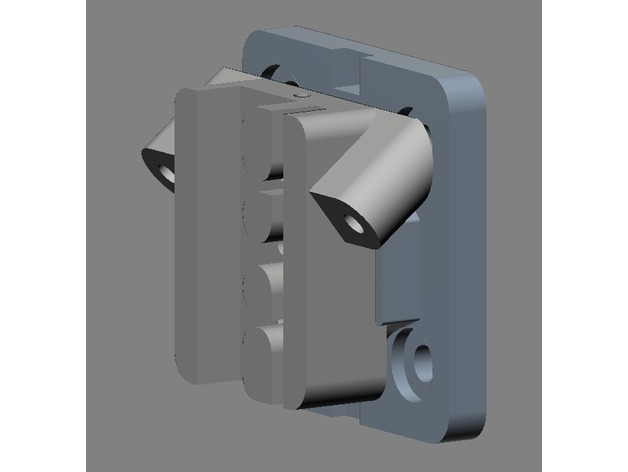
The carriage and the adapter will need to be glued together.
I recommend self-tapping screws from the back side of the open builds plate into the plastic.
I am not totally satisfied with this design. It has too many construction pit falls. -
Animalarm – a sensor to control pet movements 3D Print Model
Summary
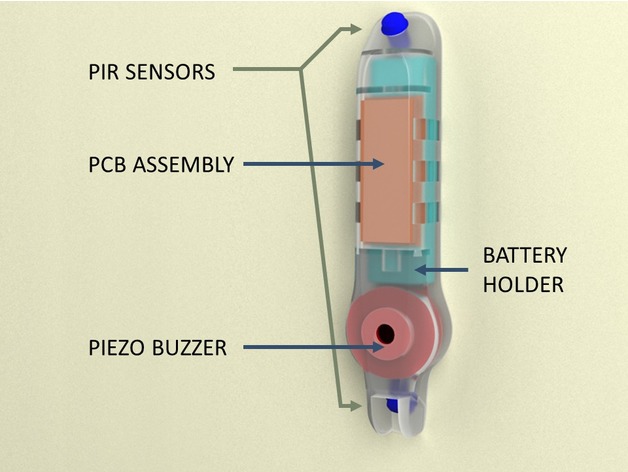
A simple but elegant project to create a “pet zone alarm” in your house. It uses infrared motion detectors to sense when a pet (or small child) is moving through a doorway or hall and sends out a loud tone. It does not beep when a (tall) person moves through the same area. With a bit of training animals recognise where they are welcome – without having to use physical gates.
NOTE: WIP – Some electronic component values are subject to change
Post-Printing
Caveats
Obviously, you will need to be able to get the PCB manufactured. The files are all there to do so and it is very cheap. And of course you need the skills and equipment to source and assemble the electronics!
If you want to use a different buzzer, you will need to make your own shell – but the electronics at least will work for you… Application
There is a single trimpot to set the length of the beep, once the alarm is triggered. You can also change component values (C1 in particular) to alter the delay before the alarm goes of before triggering the alarm. Set it longer if the system is triggering falsely.
There are pads in the 3D print design at the top and bottom of the Animalarm. Use double sided tape or bluetack at those locations to mount the alarm on the wall / doorway.
How I Designed This
How this works
The Animalarm uses two PIR (passive infrared) detectors to detect and discriminate between pets and people. The detector needs to be mounted on a door / wall about a meter above the ground. One PIR “looks down”, the other “looks up” to detect motion. A pet only triggers the lower detector and sets of the alarm. If a person is detected, the alarm either never triggers or is shut off.
The circuitry is built around a single CMOS chip and a few transistors – and of course battery, buzzer and PIR detectors. The circuitry is incredibly power efficient, drawing less than 30µW normally and only 10mA when triggered. This means the batteries will probably last a year in normal use… Electronics
The attached files include:
the Eagle design files (schematic and PCB)
Circuit schematic
PCB layers images
Gerber files for the PCB to be produced by seedstudio.com
List of special components and their sources
All the components are incredibly cheap; the PIR detectors are less than $2, the circuit board less than $1; indeed the most expensive component is the buzzer. The total component cost is about $15 (printed shell aside) -
Paper holder 3D Print Model
Summary
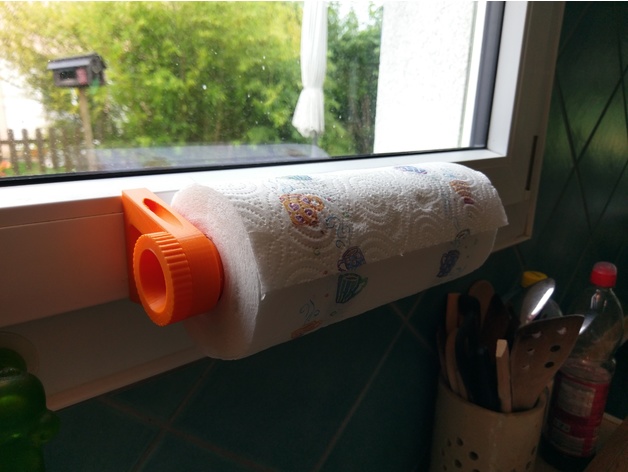
Nothing to do post-printingOverview and Background
Requirement
You need 4 screws to fix the two supports 🙂
Lesson Plan and Activity
Printing
You can print the two different pieces in one shot 🙂 -
Antech Light to GoPro Bracket 3D Print Model
Summary
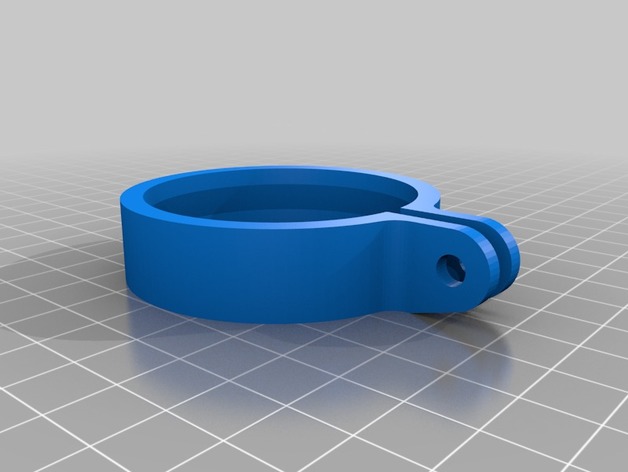
This is a bracket to adapt an Antech light (http://a.co/jfEcPOR) to a standard GoPro mount.
Print Settings
Printer Brand:
Tinkerine Printer:
Ditto Pro Rafts:
Yes Supports:
Yes Resolution:
0.2mm Infill:
80% Notes:
The default mount that came with the light did not seem strong enough to resist a mountain bike ride, which is what I need it for.
I included a cutout for the cable to exit towards the front, but there is actually enough space for it to go directly to the back between the “legs”, as shown on the pictures.
Post-Printing
After printing, I had to trim a bit the bottom face for the stop to fit in the grove between the cooling fins. Also, the fit was extremely tight; the GoPro mount was really bent at first. After a few days under stress, it looks like the bracket extended a bit and now the fit is perfect.
The model I uploaded has a slightly larger inner diameter and slightly thinner stop, so that should provide an easier fit (although not tested). -
3D Carving Clamp for Inventables 3D Carving Clamp Set 3D Print Model
Summary
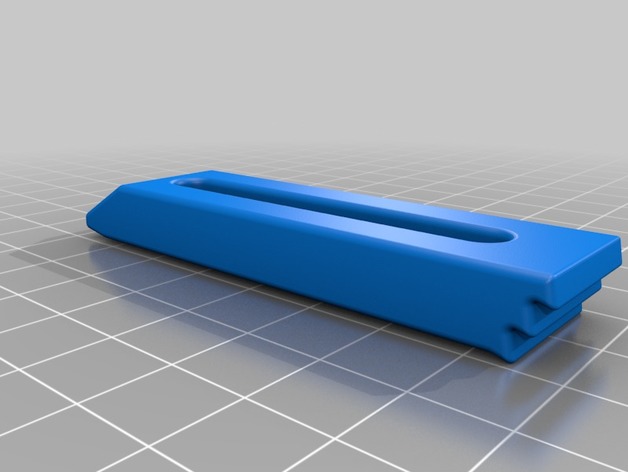
These are additianal/disposable clamps for the Inventables Clamp Set for 3D Carving.
I uses these 3D printed clamps when I think I might cut into a clamp.
I can also make really long clamps by changing the “clamp_body_length” variable in my OnShape design (see below).
Print Settings
Printer Brand:
SeeMeCNC Printer:
Rostock MAX v2 Rafts:
No Supports:
No Resolution:
<= 0.3 Infill:= 40%
Notes:
Print upside down so the teeth on the back face up.
The tip angle is such that it should not require supports.
How I Designed This
Designed in OnShape
https://cad.onshape.com/documents/22648524c1495f64cd5b693a/w/048698dabc7cae365e489c8b/e/e801f7bacb52b1e5d2d05e7d -
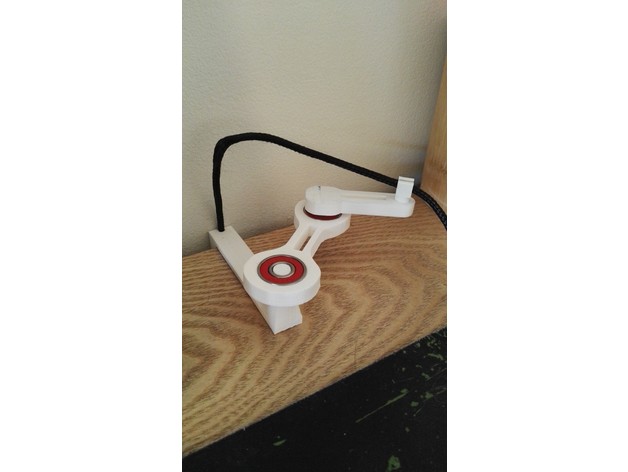
Table mount for “Mouse Bungee V3 by mer_at” 3D Print Model
Summary
A desk mount for the “Mouse Bungee V3 by mer_at”. Using all the same files as on the original but replaces the base with a desk mount. -
PIECES POUR AEP avec arduino nano (HOME-MADE) 3D Print Model
Summary
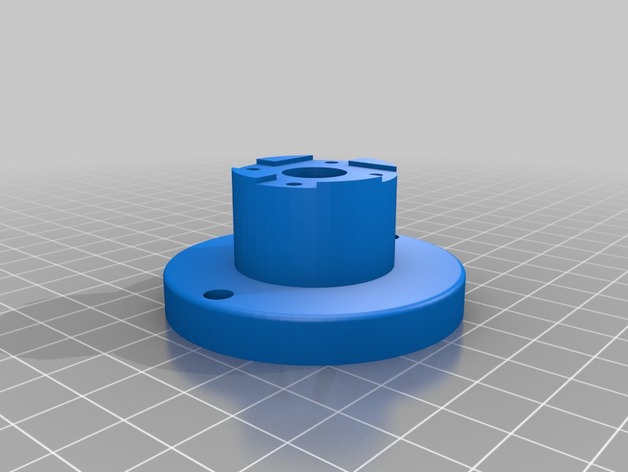
Quelques pièces pour fabriquer un allumage électronique programmable pour Véhicules anciens (A allumeur, et rupteur) -
Z-axis Wobble Isolation Bearing Blocks 3D Print Model
Summary
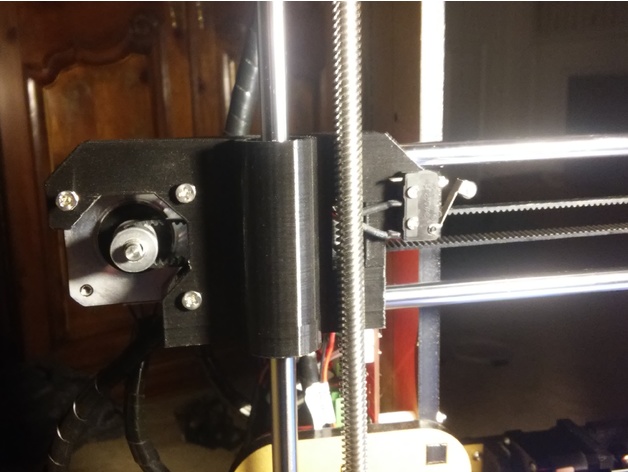
Isolated bearing blocks for Z-axis. No mounts for brass nuts.
Left bearing block has been scalloped, to allow Y-axis trigger switch to be mounted from the rear.
Right bearing block has been scalloped to allow recessed idler pulley arm.
Appropriate idler pulley arm included in file bundle.
Use with integrated Z-axis wobble isolation risers here: https://www.thingiverse.com/thing:2458534 -
Vacuum Ejector 3D Print Model
Summary
This is a vacuum ejector designed for compressed air to vacuum generation. Advantages of this type of vacuum generation is that it is instant when compressed air is applied it starts generating vacuum. Also, it can handle contaminants in the vacuum flow. As long as the contaminants being ingested in the vacuum port are smaller that the mixing tube diameter (3mm in this case) the ejector will not be blocked.
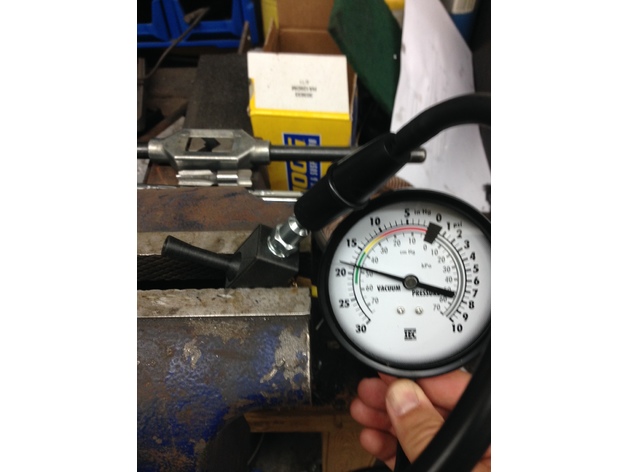
The input port injects compressed air that is exhausted on the output port. Air in the mixing chamber is entrained in the flow and a vacuum is developed. I have measured 18.5″ of mercury (-9PSI) on the vacuum port with 0 flow. I don’t have a flow gauge so I can’t judge efficiency or flow with an open input.
Graphs with the input pressure and vacuum achieved are attached.
Both the compressed air input and vacuum ports are designed to be tapped with a 1/4″ NPT thread. The wall taper matches the NPT thread and allows easy connection to air fittings.
Print Settings
Printer Brand:
Wanhao Printer:
Duplicator 6 Rafts:
No Supports:
No Resolution:
.1mm layer height Infill:
25% Notes:
Using Simplify3d variable thin wall extrusion can help print quality with the fine features. A minimum of 1.6mm wall thickness is needed to avoid the NPT tap from breaking through.
How I Designed This
This design was based of research on steam ejectors and air vacuum generators. There is little useful documentation on the design of these I have found. There were three previous version that did not perform as well (max 5″ of Hg) before I looked at steam ejectors.
The main improvement is the ratio between the expansion tube and the length of the expansion tube. The initial designs had short expansion tubes, but a ratio of 7 for the expansion tube diameter to length greatly improved things.
Since this design tops out at ~75psi, I suspect that I need to look at the mixing tube diameter to prevent supersonic flow. This should improve performance at higher input pressures. -
Hi-Ho Cherry-O: replacement cherries 3D Print Model
Summary
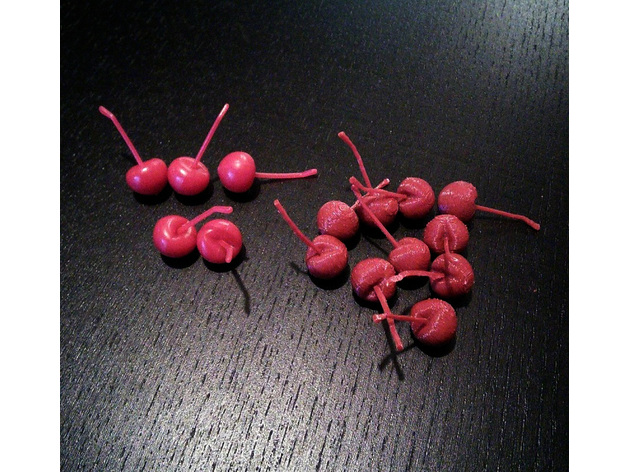
Replacement cherry for “Hi-Ho! Cherry-O!”
Print the cherry on its side, with supports. The cherry stem may be difficult to remove from supports without breaking the stem off; if needed, use a knife to separate the support material. -
Fidget 9 nut 3D Print Model
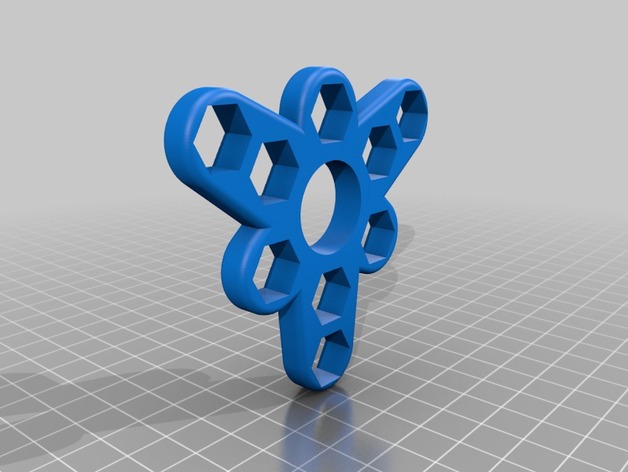
Summary
This fidget has 6 legs of which 3 contain 1 nut each and the other 3 contain 2 nuts each. This is to make the fidget heavier to have more kinetic engery when spinning, but not too much to add exessive friction on the bearing. -
Maryland Blue Crab 3D Print Model
Summary
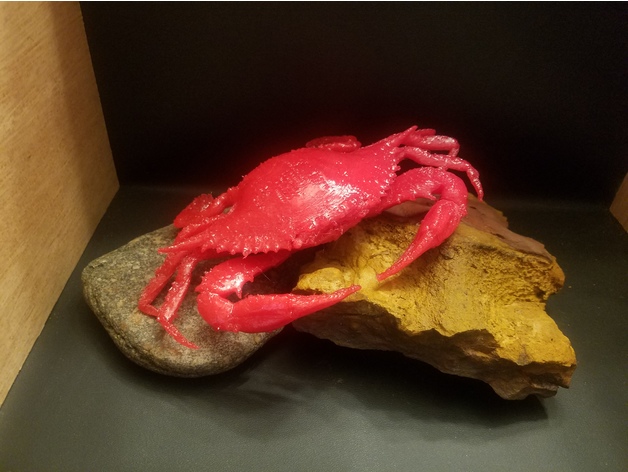
3D model of a female Maryland blue crab
The 3D model was created from CT scan data (11M triangle OBJ file) at the Smithsonian Institution – Digitization | 3D https://3d.si.edu/
To simplify printing, the .obj file was simplified in MeshLab to reduce the object faces down from 11,317,504 to 2,000,000 faces and exported as an .stl file.
Print Settings
Printer:
Prusa Wilson Rafts:
No Supports:
Yes Resolution:
0.2 mm Infill:
35% Notes:
Model printed in translucent magenta PETG. Object was sliced upside-down with supports to ensure the legs came out well.
Post-Printing
Cleaning up the print
After careful removal of supports and light sanding (with a Dremel, of course), the object was coated in XTC-3D and cured for 30 min at 150C. -
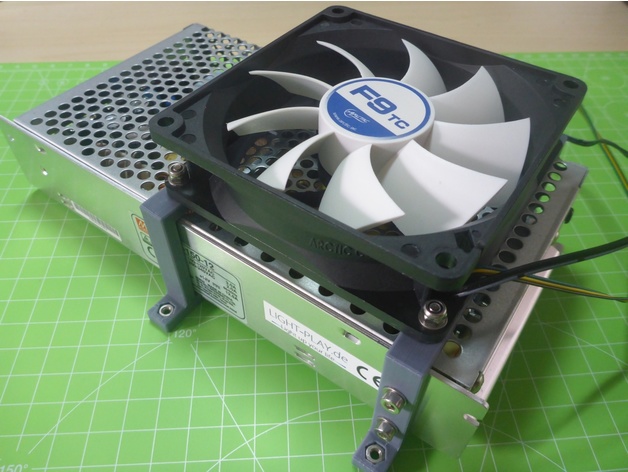
RS-150-12 Bracket / Fan Mount 92mm 3D Print Model
Summary
RS-150-12 bracket and fan mount for 92mm fan.
The front bracket (filename_F) has two mounting holes to secure the power supply (M3*8).
To attach it to the board, simply drop four M3 nuts into the holes.
Mounting Holes: 118,5mm x 82,5mm x 3,5mm -
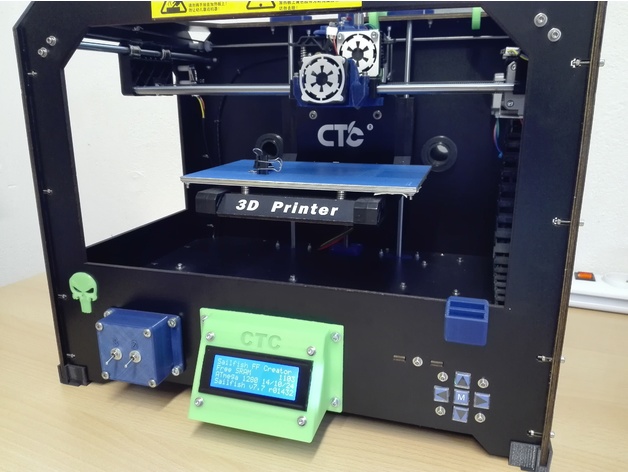
CTC Display Mount 3D Print Model
Summary
I searched for an angled display holder for my CTC printer, but found nothing useful!
The only one I like a bit: https://www.thingiverse.com/thing:2057624
So I reworked this according to my ideas 🙂
Print Settings
Printer:
CTC printer with dual extruder Rafts:
Yes Supports:
Yes Resolution:
0,1mm Infill:
30% Notes:
The raft is absolutely necessary, otherwise the supports does not hold on the base plate!!! -
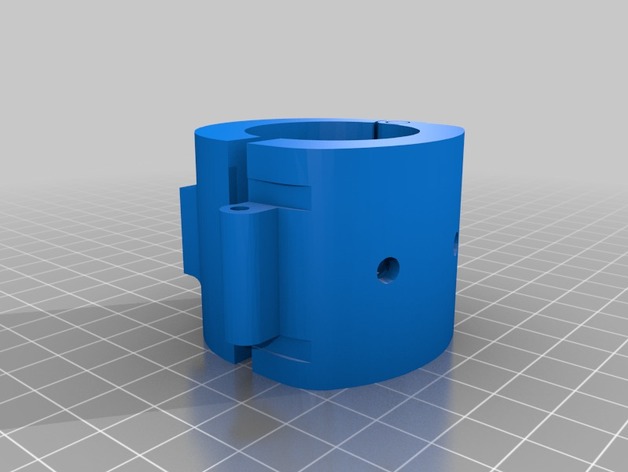
KLAMP – IKEA lamp hot air gun holder remix (print in place) 3D Print Model
Summary
Saw a design flaw in the original…how are you going to get the clamp pieces together if the rod is already there…only thing I could think of to fix was put them together in tinkercad for a print in place solution…haven’t tested it yet…but it should work..hopefully.
You will need the other KLAMP parts from the original -
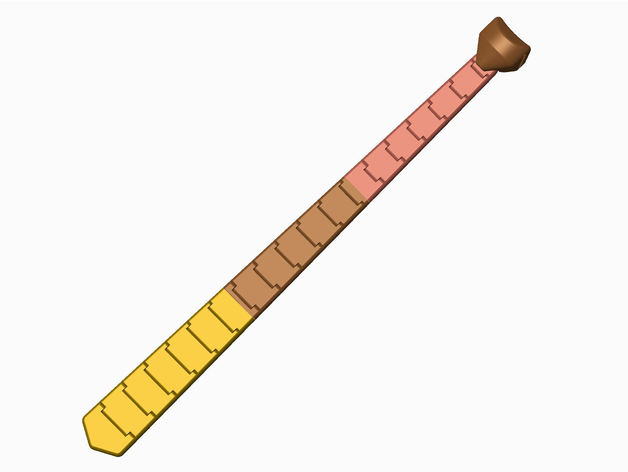
Articulated Necktie 3D Print Model
Summary
The necktie segments are fully articulated and should print well without supports. The segment hinges are completely contained and will only require bending the the hinge to snap loose any stuck plastic. The necktie is made up of 3 articulated segments, the knot and a retaining washer. The tie segments are connected together by applying a drop of epoxy or other adhesive and tapping the pins on the part into the holes of the adjacent part. The retaining washer is attached with a #6 x 1/2″ flat head wood screw. The neck strap is fed through the channel in the knot and can be whatever material is available. It was designed for a 5/8″ cloth strap with velcro attached at the ends.
Print Settings
Printer Brand:
Prusa Printer:
Prusa Clone Rafts:
Doesn’t Matter Supports:
Doesn’t Matter Resolution:
.2mm Infill:
25% Notes:
Only the knot will need supports. I have only printed this in PLA -
72mm lens cap clip for neck strap 3D Print Model
Summary
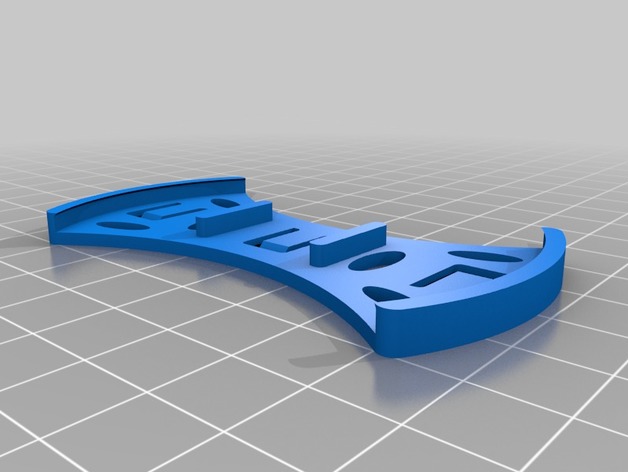
I designed this for my Sony, but I’d expect it can work with other brands. I didn’t like the others I saw that are round and bulky when no cap is attached so I designed this streamlined version. I holds tenaciously.
To attach to neck strap, pinch a fold and insert it over one of the three tabs. You’ll have to work it a bit and pull from other side as it is designed to be snug. Repeat for other two. -
Power Add battery bank phone holder 3D Print Model
Summary
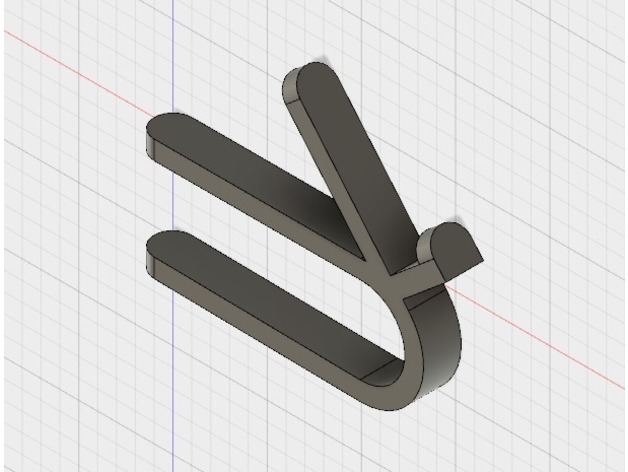
My Nexus 6p’s battery seems to not last long enough for my Netflix watching while in bed. Generally I will use my PowerAdd battery bank to combat this issue without being tethered to a wall, but it became a problem as I didn’t want to hold the phone let alone the phone and the battery. This model when printed as a pair clips onto the battery to hold the phone.
It will likely work on other phone models as is a centimeter of clearance on the stand to account for my phone’s case.
Enjoy!
Print Settings
Printer Brand:
Prusa Printer:
Prusa Mk2 Rafts:
No Supports:
No Resolution:
.25 Infill:
30% Notes:
This model would likely work at a lower infill, I chose 30% to ensure that it would be plenty strong enough for my phone. -
Sony Alpha accessory mount dust cap 3D Print Model
Summary
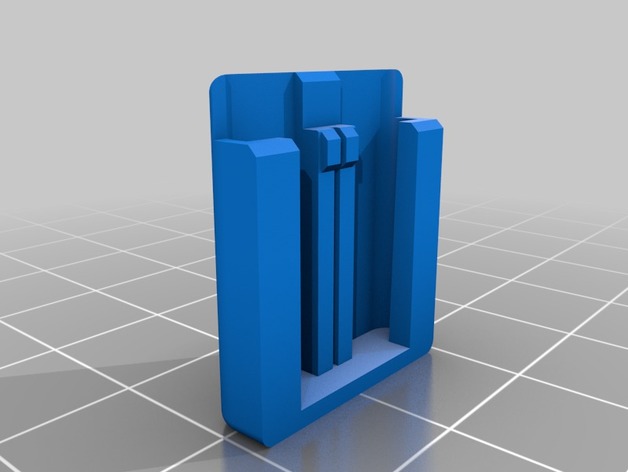
I’m off on an adventure and thought I’d like a dust cap for my accessory mount. So I made one. Thought I’d share. Designed to print vertically so add a brim. -
CS1/CSR/160R Deuce Trigger 3D Print Model
Summary
Tools:
Drill
Helicoil Installation Toolhttps://www.amazon.com/ZFE-Helicoil-Thread-Repair-Insertion/dp/B00RFKHHRW
Helicoil
Stainless Steel Helical Insert, M2.5 x 0.45 Thread, 2.5 mm Long
91732A764
Instructions:
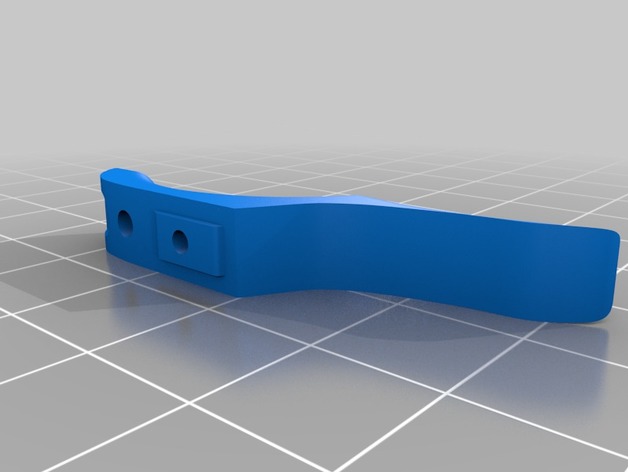
Print the file using 1mm supports

Remove supports from the back of the trigger andthrough all the holes.

Print using the proper settings for your printer and material.
Finishing may be accomplished by sanding, Acetone Vapor Bath, or whatever method is required for the material being used.
Use the drill from the helicoil installation kit to drill out all 3 holes in the trigger.
Use the tap from the kit to tap the center hole.

Install the helicoil per the kit instructions.
Install the trigger on your CS1/160R. Enjoy!
Print Settings
Printer Brand:
MakerGear Printer:
MakerGear M2 Rafts:
No Supports:
Yes Resolution:
.1 Infill:
60% -
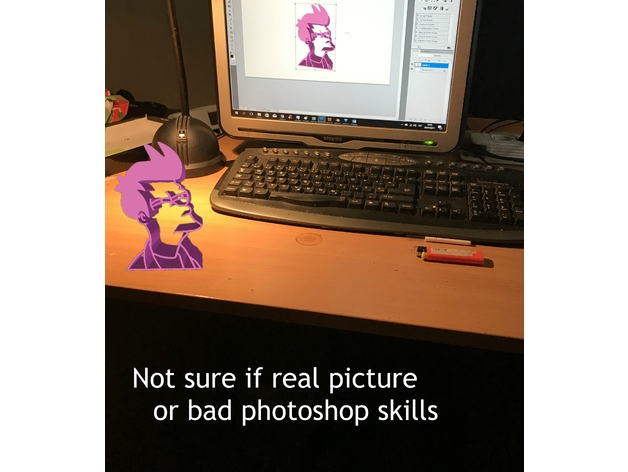
Fry Futurama Head Stand Suspicious Look 3D Print Model
Summary
Found something similar but water cutted. It got a lot of attention so why not make a 3D printable version.
Print it as it is, otherwise with ABS and similar plastics you will not get a flat bottom. -
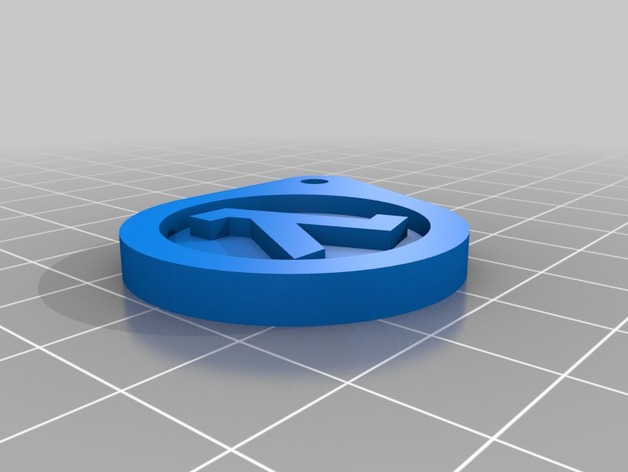
Half Life logo keychain 3D Print Model
Summary
Just a simple Half Life game logo keychain.
Print Settings
Printer:
DaVinci 1.0 Pro Rafts:
No Supports:
No Resolution:
0.1mm Infill:
20%
Post-Printing -
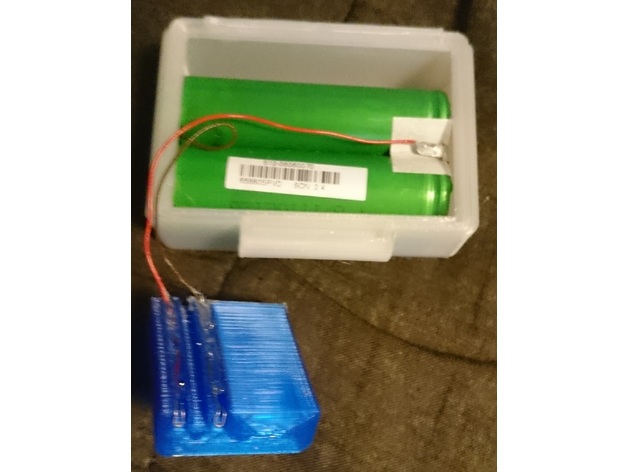
Eken H9R Action Camera Battery Box 3D Print Model
Summary
Extreme capacity battery box for the Eken (SJCam, …) Action camera. The box will replaced the scuba housing back door and can carry up to two 18650 Li-Ion cells. They can provide up to 7000mAh (connected to parallel) power, meaning 7x operation time.
The cells are connected parallel to give voltage 3.7V-4.2V (as internal battery).
The wires are glued to the Battery Adapter treads. Make U-shape connectors to the upper end. See the picture and the original battery.
Obviously the box the hinder the visibility of the back screen when closed. Though you can power the camera up with the front button and press lower side button to active WiFi. Use the camera’s remote app to control it.
Ps. Note the printed unit might not be waterproof even if you’d add the shielding. -
Tronxy X5 Z-axis Holder 3D Print Model
Summary
Hey,
some more Spareparts for the Tronxy x5.
I will customize it as soon as possible for you. -

Fan Suggestion Pack 1 3D Print Model
Summary
This is the result of the fan suggestion competition held recently (https://www.thingiverse.com/groups/the-world-at-war/topic:17315)
all models are 1:100
Special thanks to everyone who helped test print these vehicles .Also special thanks to those who sent me information on Panhard turrets
Currently contains
IS-7
5.5″ gun
AB40-43
Panhard
Dragon Wagon
All models made from scratch
Please join my group http://www.thingiverse.com/groups/the-world-at-war/topics
Please view my other packs https://www.thingiverse.com/TigerAce1945/designs
Print Settings
Printer:
Davinci 1.0 Rafts:
Doesn’t Matter Supports:
Yes Resolution:
.1mm Infill:
10% Notes:
print hulls and turrets horizontally. Print tracks hull side down. -
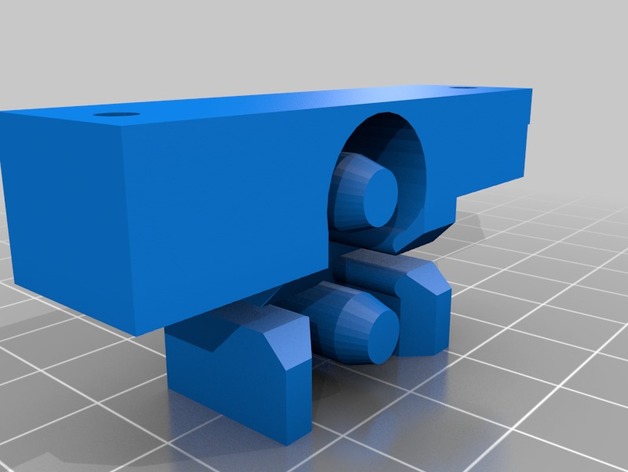
Prusa I3 Belt Holder for REPRAP.ME frame 3D Print Model
Summary
Modified original Prusa part form MK2 to accomodate trayhttp://www.reprap.me/prusai3blackacrylic.html
y-belt-holder-longer-2mm.stl for Black Version
Print Settings
Printer Brand:
Prusa Printer:
Prusa Mk2 Rafts:
Doesn’t Matter Supports:
Doesn’t Matter Resolution:
0.1 Infill:
15 Notes:
Print on side with pins point up. -
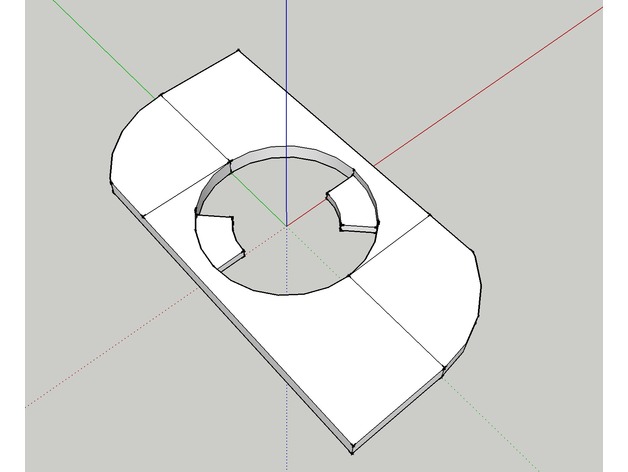
Case Concept Model 3D Print Model
Summary
This is just a concept for a phone case, and won’t be of any actual use, as I’m using this for testing. Note that if you do print this, be careful removing the supports, as the parts can be relatively thin (1/4 millimeters thin at times!). -
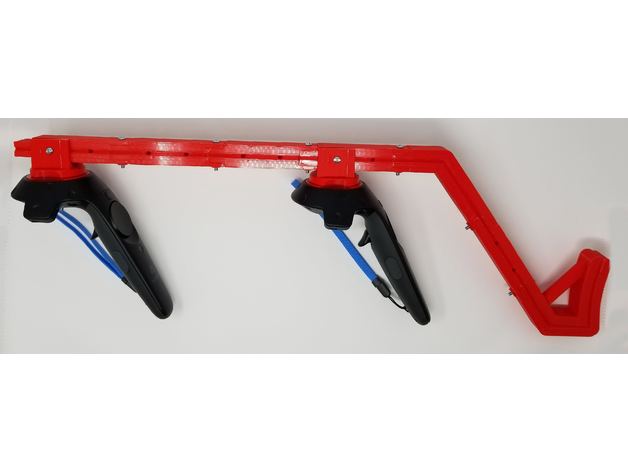
HTC Vive Gun Stock (magnetic, adjustable, easy print) 3D Print Model
Summary
While there are many existing variants of gun stocks available either for 3D printing, or purchase (on Etsy, eBay, etc.), I had some issues with the few ones I tried, thus I made my own version.
Is it better? How is it different from other designs?
There are few things I’d like to call out;
this design is easier to print – may not look as cool as a version made to resemble Picatinny rail, but the print time is significantly shorter, there’s no need to remove tricky supports, and the construction is very sturdy,
can be printed on small bed size – including Monoprice Select Mini! (which is what
I use 🙂 just make sure you rotate the longest pieces [rail, stock a, stock b] and decrease the brim size to 6 lines),
the stock is adjustable – the spacing between controllers, as well as controllers and arm support can be adjusted in 1.6″ – 2.4″ increments to make sure it fits you comfortable,
the shoulder support part is lower than the rail, which makes sure it doesn’t hit the headset during intense gaming sessions,
multiple sizes of magnets are supported – if you have some, chances are they may fit – and if not, you can either buy the ones I used, or leave me a message with the exact dimensions of your magnets (diameter, height) and I’ll make version for you 🙂 [absolute max would probably be around is 20mm x 10mm],
you can easily attach strap to have the accessory secured when not in use, or prevent it from falling when reloading in Onward while under fire 😉 Just guide the strap through one of the unused holes in the rail,
and, well, my design is tried 🙂 I printed out a number of versions, improving parts in between, making sure the tolerances are correct and everything fits properly and stays strong. Some of the other available designs that I tried had issues with tolerances and wouldn’t fit without manually trimming the parts after printing.
But you be the judge, and please let me know if you have any feedback 🙂
And most importantly, I hope you’ll have fun using it!
Parts to print:
2 copies (one for each controller): Controller – bottom
2 copies (one for each controller): Controller – top – select the variant for your magnet size
2 copies (one for each controller): Controller – mount – select the variant for your magnet size
5 copies: Rail
1 copy: Stock – A
1 copy: Stock – B
Required for assembly:
screw + nut, #8-32 x 1-1/2 in – quantity: 4
screw + nut, #8-32 x 1-1/4 in – quantity: 6
magnets – use neodymium, not ceramic disc (we need more strength than those can provide. Quantity depending on the size – see the “Controller – top” and “Controller – mount” part variants as reference (for a total of 12 or 14 magnets). The bigger the magnet (the stronger it is) – the better 🙂
Links to hardware (if you need to buy any):
screws: http://www.homedepot.com/p/Everbilt-8-32-Machine-Screw-Kit-800994/204331402
nuts and washers: http://www.homedepot.com/p/Everbilt-94-Piece-Stainless-Steel-Nut-and-Washer-Kit-803334/205949033
magnets:
http://www.homedepot.com/p/MASTER-MAGNETICS-0-7-in-Neodymium-Rare-Earth-Magnet-Discs-3-per-Pack-07047HD/202526369
http://www.homedepot.com/p/MASTER-MAGNETICS-1-2-in-Neodymium-Rare-Earth-Magnet-Discs-6-per-Pack-07046HD/202526367?keyword=neodymium+6+per+pack
if you head to Home Depot, you’ll find a selection of magnets in the aisle with machine screws and fasteners: http://imgur.com/QZAhJz9I recommend magnets: 0.472 x 0.118 inch (12 mm x 3 mm).
They’re available in Home Depot as well.
Hope you enjoy!
For other hobby projects, please visit my blog:http://www.BogdanBerg.com/
Print Settings
Printer:
Monoprice Select Mini Rafts:
No Supports:
Yes Resolution:
0.2mm – 0.3mm Infill:
20% Notes:
See provided screenshot for best printing orientation, and information on which pieces need support:http://imgur.com/4sP0OGc
Post-Printing
Gluing the magnets
To glue the magnets, you can either use Super Glue (cyanoacrylate), or epoxy. Make sure the surfaces are clean (no grease/oil from fingers) and additionally you can scorch the surface of magnets for better adhesion (i.e. with screwdriver).
Things to keep in mind:
Make sure the polarities are correct!
Really, I can’t stress this enough 🙂 Double and triple check before gluing. Also, use same polarities for mounts of both controllers, so they can be used interchangeably (this can be helpful if you need to swap them, for any reason).
Let the glue dry/cure fully – neodymium magnets are quite strong, and we don’t want them to pop out mid-game
And please refer to the photo of assembled stock for reference on how the pieces come to life together 🙂 Note that there’s one “Rail” piece between the “stock A” and “stock B” pieces. -

AutoCAD Logo 2018 (not accurate) 3D Print Model
Summary
I made this likely AutoCAD 2018 logo just for fun and practice. -
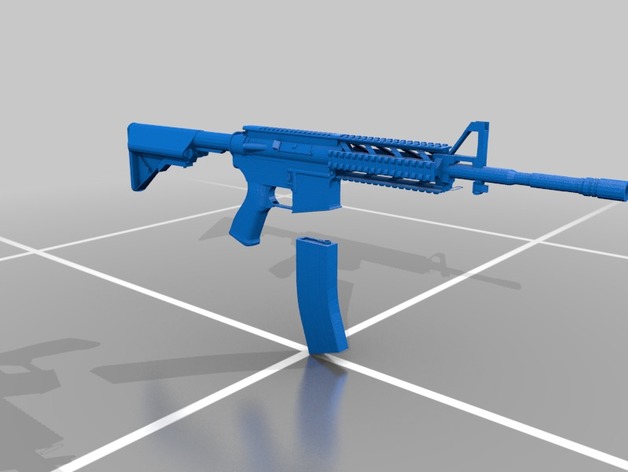
CM16/M4 GAME MODEL LOW POLY NON firing 3D Print Model
Summary
NOT SUITABLE FOR PRINTING UN MODDED (might work small tho) -
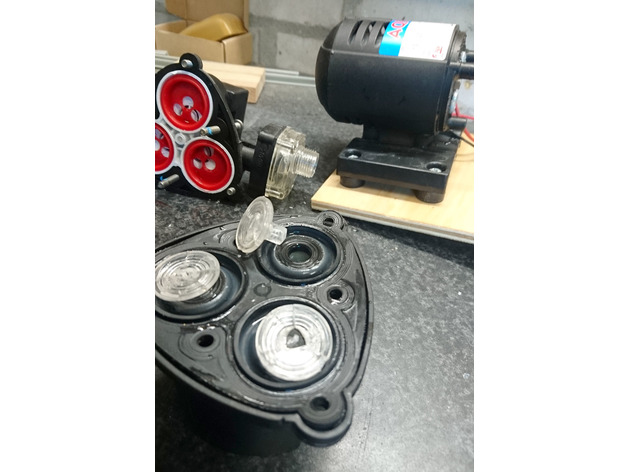
Fiamma aqua 8 pump piston replacement 3D Print Model
Summary
I have a Fiamma Aqua 8 water pump, which lost lots of its pumping capacity.
Turns out the three acryllic(?) “pistons” inside were cracked and broken to pieces.
Replacements are available at Fiamma, but not these pistons as a set, you get almost half a pump when you order the part number. It costs almost 50 euros!
I printed these pistons in ABS with a 0.2mm layer height, 35% infill and 3 outline perimeters as well as 3 top and bottom layers. -
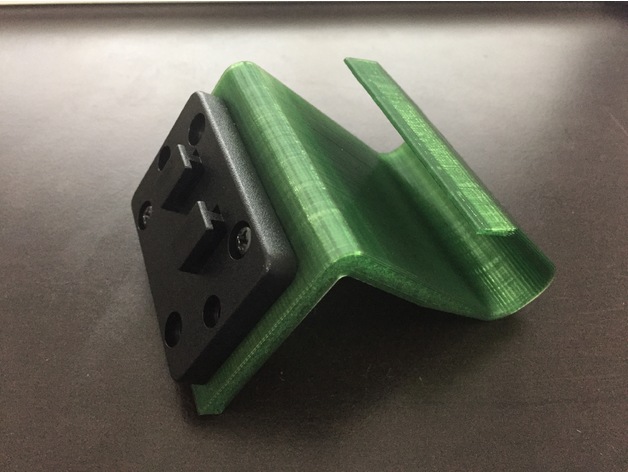
Chevy Colorado Front Pocket AMPS Dock 3D Print Model
Summary
The tiny front pocket in the dash of the ’15 and up Colorado is nearly useless. Even if you shove a wallet or garage door opener in there it’ll slide right out if you hit the gas at all. This ‘pocket dock’ for phone or tablet gives it some purpose.
To use the dock you’ll want 10lb ‘poster’ tape – the kind that is a mm or two thick. Place a piece on the top and bottom flat parts, pinch, and insert into the dock. The hole pattern matches industry standard AMPS. Once appropriately installed it is pretty locked in. You’re more likely to rip the phone from the mount than the dock from the pocket.
There are three different versions. the base version sits very close to the dock edge and is appropriate for RAM ball style docks or other longer, positionable docs. The medium-lower dock hangs below the pocket and is appropriate for most phones and likely horizontal tablets. The ‘long’ version is good for lower profile docks (eg: magnetic).
Print Settings
Notes:
Super-easy to print on its side as long as you have decent bed adhesion. -
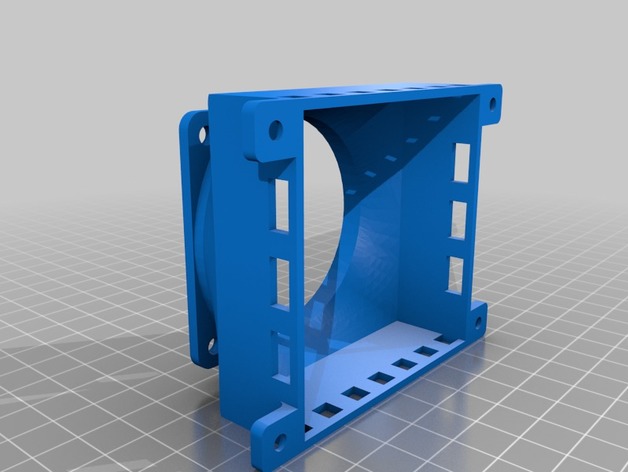
Mini Air Scrubber 3D Print Model
Summary
This is an Air Scrubber I created for use in my 3D printer enclosure. It uses a 60mm fan and carbon filters like these: https://www.amazon.com/gp/product/B00XIN1ENI/ref=oh_aui_detailpage_o00_s00?ie=UTF8&psc=1 If you cut the carbon filters into 4 equally sized squares, the air scrubber uses a stack of 2 squares at its base–one amazon package of air filters will be more than you’ll need for a long time.
Make sure to orient the fan such that air is being pulled into the bottom of the scrubber and expelled through the top (out the fan). The scrubber is intended to be screwed to a wall or other surface.
Print Settings
Printer:
MP Select Mini Rafts:
No Supports:
Yes Resolution:
0.175mm Infill:
100% Notes:
Print with supports, with the fan opening facing upwards. -
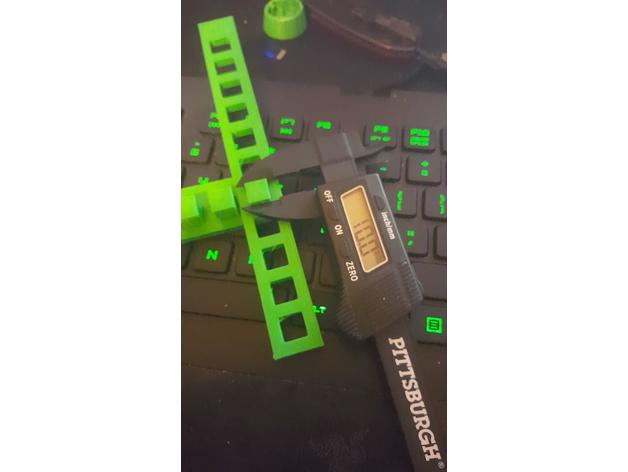
Tolerance Tester 3D Print Model
Summary
Designed a simple tolerance tester each square next to each other are ±.1 from 10mm to 11mm on both inside and outside. Might make one with circles to see if I get different results. -
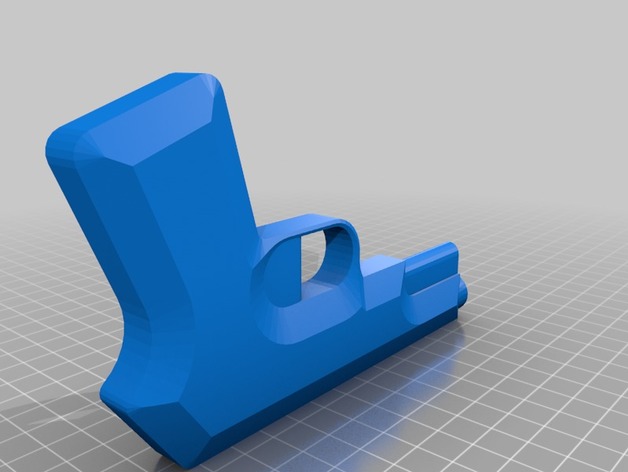
PROP GUN (PISTOL) 3D Print Model
Summary
This is a low-detail prop gun that should be easily printed in one piece with some support material.
Print Settings
Printer Brand:
Prusa Printer:
Prusa Clone Rafts:
No Supports:
Yes Infill:
15% – 100% -
19mm Socket Sleeve 3D Print Model
Summary
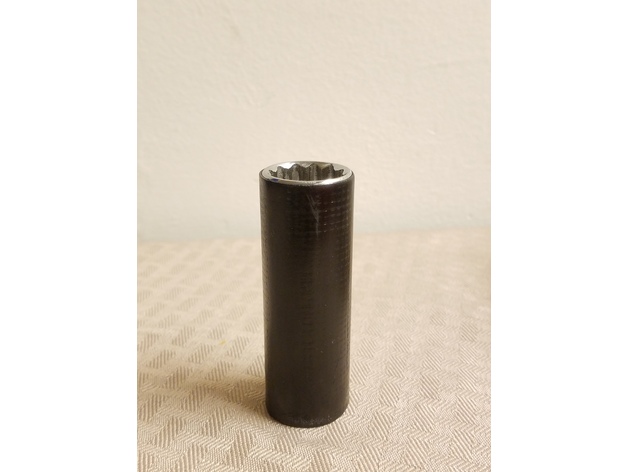
This is a sleeve that is placed on a 19mm deep wall socket. Its purpose is to protect rims from getting scratched when you remove the lug nuts. This model is for a regular chrome socket with a diameter of 1.01″ X 3.04″L (25.66mm X 77.22mm). The socket I used was made by Husky.
The sleeve has an inside diameter of 1.035″ ID and wall thickness of 0.02″. It is 3.03″ tall.
Post-Printing
I just wiped it with acetone to give it a smoother finish, but you don’t have to. -
wavy thing vase 3D Print Model
Summary
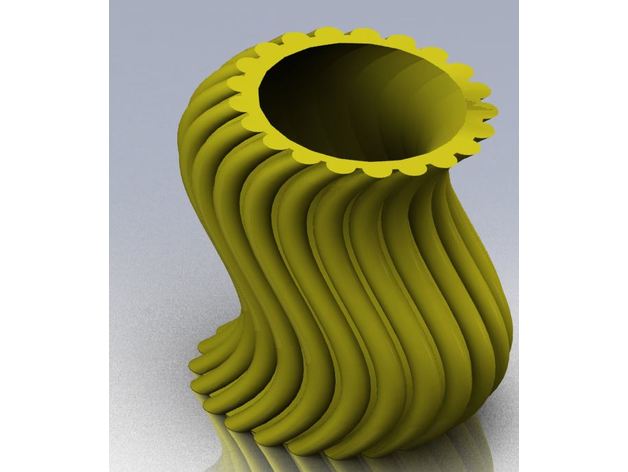
Let me know if you like it, rate it from 1 to 10 🙂
Print Settings
Printer:
Prusa Mendel I3 Rafts:
No Supports:
No Resolution:
0.2 Infill:
20% -
Eken H9R Action Camera Lens Hood 3D Print Model
Summary
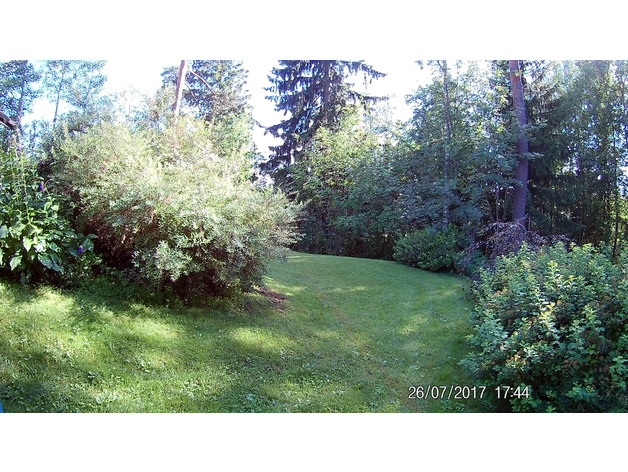
Here is the lens hood to cover side light (there are two pictures to show the effect)
Eken H9R has 20.8mm diameter lens, so the unit has 21m hole. You might zoom with your slicer to adjust the hole size for your meeds. The hood is for the 170 degree lens angle.
Obviously it is recommended to use black (mate) filament to avoid reflections.
The printing face down, no additional support needed. Even with this low angle using 0.1mm layer high and good cooling the PLA 50mm/s, 0.4mm nozzle seems to print nice.