Summary
First things first:
All credit for the IP of this work goes to Bungie and ActiVision; thank you for giving us this great game.
Next thing:
THIS IS NOT YOUR DAD’S MODEL TRAIN SET. I’ve re-meshed this thing from zilch; from sneezes, air pie, and trodden dreams. It WILL require hand fitment and a robust understanding of construction techniques.
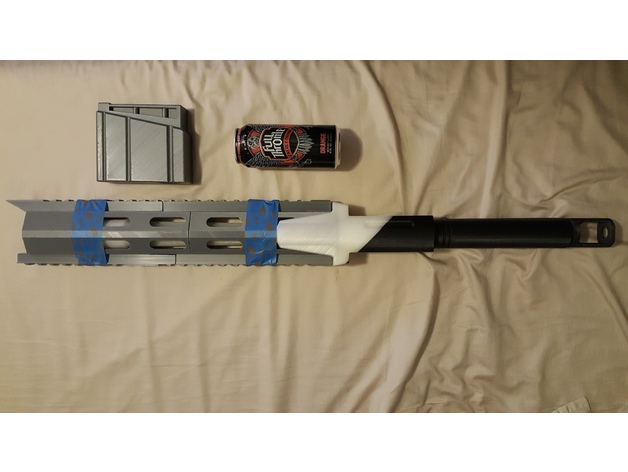
With that out of the way, here it is Fam – Zen Meteor – essentially an anti-material rifle for the gunpowder hedonists in all of us. It is a true 1:1 scale of the weapon in Destiny, and as such imposes several challenges to the would-be builder. As you can see this is a work in progress – I still have to mesh out the scope, and then go through a build iteration and post best practices for assembly. Before I get these out, if you have any questions, please hit me up in PM’s and we can rap there.
CHALLENGE #1: It’s Big.
*** It’s REALLY big. It is also somewhat slender over that length, so there are critical parts and part junctures that NEED a lot of strength. Handling, showing, transporting this thing to and from CONs, cosplay parties, etc, will test its structural integrity. I’ve tried to engineer some good joints into this thing, and have a little more work to do on some pieces to give the design as much engineering cajones as it can possibly have. Also, it will take a LOT of material to print. Lastly, you may notice that the individual pieces themselves are large, too. That is because I have a 300x300x400 build area to work from, and I intend to use the whole thing. I will NOT be re-slicing these things so it can be built on an 200x200x200 printer.
CHALLENGE #2: It’s Long.
*** Building this thing for strength and handling comes at a cost, and that is time. The forend (minus the rails) took 76 hours to print. The receiver takes 100 (when you use the shells and infill that I believe is required. Even if you are more conservative on your shells and infill, I kept the pieces as large as I could to print the biggest assemblies I was able to (so the size alone will still make longer prints than you may be use to). This is primarily due to my leaning toward threaded steel rods through the receiver to join the barrel, forend, and receiver together. Doing this pretty much dictates that building it in halves is a no-go because a tensioned threaded fastener would burst the center seam apart (or it would be trying to). Ultimately, it is going to take so long to sand this thing, prime it, paint it, weather it…and attempt to get it screen accurate…I just accepted the longer print times for the extra robustness it would provide.
CHALLENGE #3: Asssembly.
*** The order in which you build this thing MATTERS, particularly when you get to the gas block, the forward and aft halves of the forend, the rails, barrel, and receiver. Since I’m still tweaking things I DON’T have a definite build strategy though I have some ideas. I’ll post the ‘tried and true’ method when I finalize all stages of assembly, but one thing that is immediately apparent up front is that the rear barrel (the pretty one with all the fluting on it and the sweet taper) will need to be sanded, painted, sealed, weathered, DONE before you put the forend together over it! And before you put the forend together, at very least the insides of the forend will have to be finished So there is a definite order of operations that should be followed – I just haven’t put anything down as gospel yet.
Ultimately, the size of this build alone make it pretty ambitious. Please give feedback with any problems you run into – I’ll try to be responsive about making any changes that need to be made in the files. As an aside, I was considering not releasing this because I like having unique things and benefitting form my work, but the community of makers and the coolness that is 3D printing is why I put all this work out in the first place. So here it is – the thing that I cut my teeth on learning Fusion 360, and breaking in my 3D printer.
Print Settings
Printer:
Creality CR 10 Rafts:
Yes Supports:
Yes Resolution:
.15mm Infill:
Varies Notes:
My thoughts on this are that shells and infill are lowest out toward the muzzle end, and progressively get denser until you reach the receiver, where they start tapering back again into the buttstock assembly. Use your best judgement, but the max I hit was 8 shells and 60% infill for the receiver.
Zen Meteor 3D Print Model