Summary
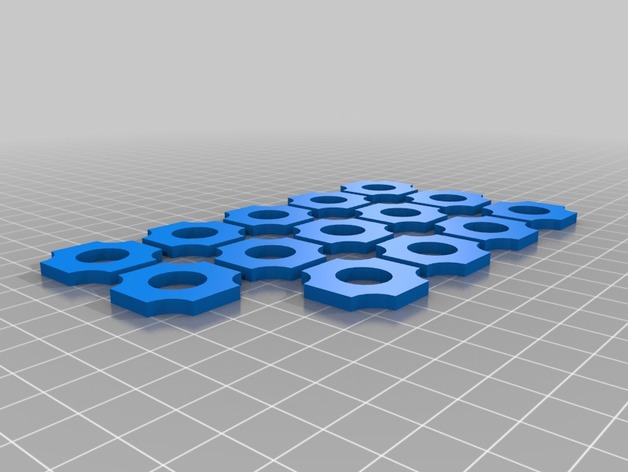
30% infill
Author: Thingiverse
-
Hummingbird Feeder Platform 3D Print Model
Summary
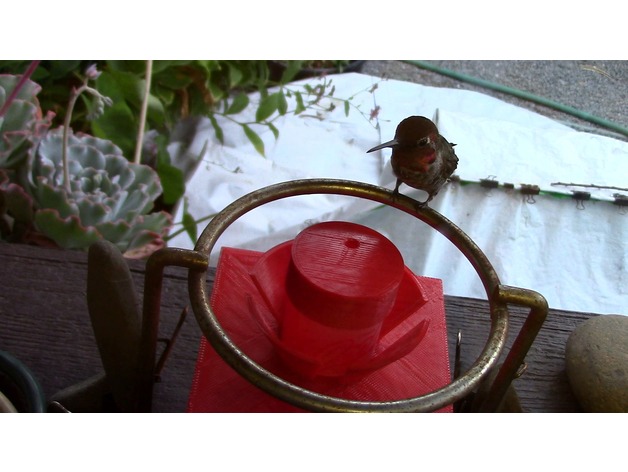
I made a holder and platform for my father’s hummingbird feeder!
-
Keychain Make ART Not WAR 3D Print Model
Summary
Layer Ligth0: 0.15
Shell Thickness: 0.8
Bottom/Top thinckness: 0.2
Fill Density: 25
Filamento: PLA 1.75mm
Print Settings
Printer Brand:
PrintrBot Printer:
Play Rafts:
No Supports:
No Resolution:
0.15 Infill:
0.25Standards
NGSS
Overview and Background
Lesson Plan and Activity
consejos
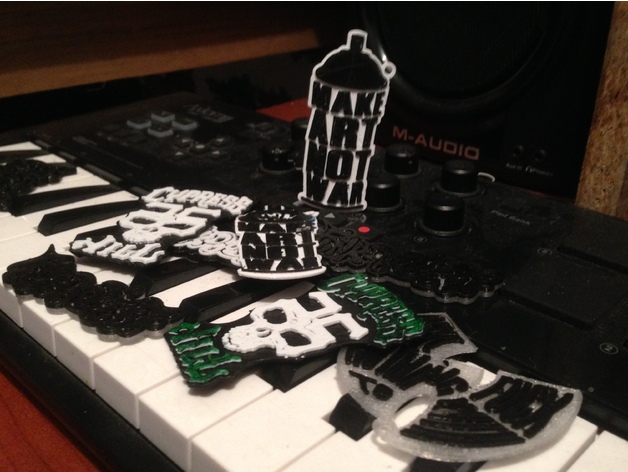
Esto es un forma de dar contra del rasismo, guerra e indiferencias existentes en nuestro entorno.
Materials Needed
FILAMENTO
PLA 1.75 -

Merle’s Extreme Teen Bible Cover – The Adventure Zone 3D Print Model
Summary
Made a resizeable book cover that you can print and put on top of a book. Thus converting that book into Merle’s Extreme Teen Bible! -
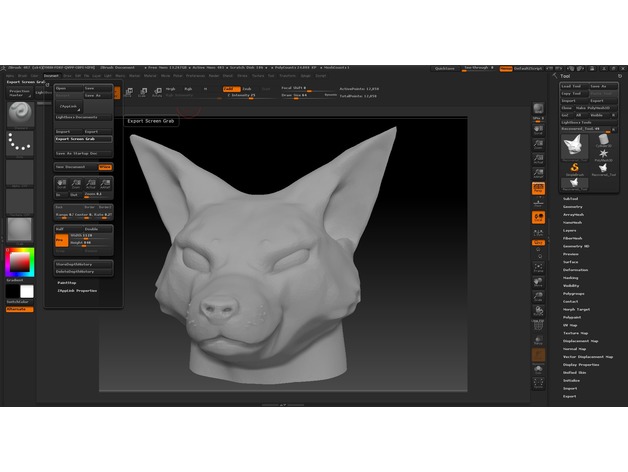
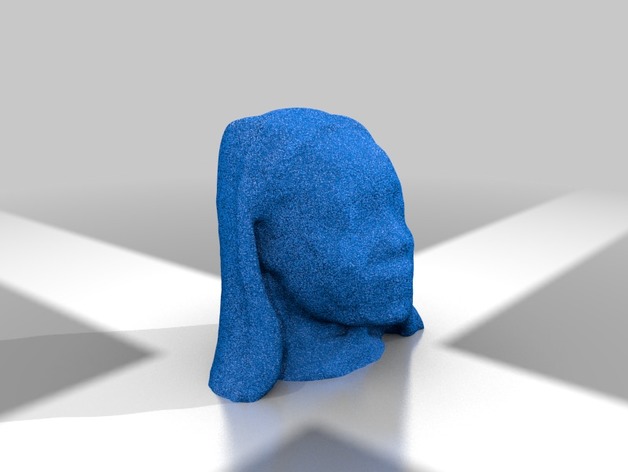
Cheeky Fox Head 3D Print Model
Summary
First thinger I made in ZBrush. Smirky critter. Came out ok. Not sure what else to say :d Could go over it and fix a few lil things but~
Also print it flat not like in the preview here. Idk why it ended up like that
No stealsies/remakes! Just print it and have a fox head thnx 😀 -
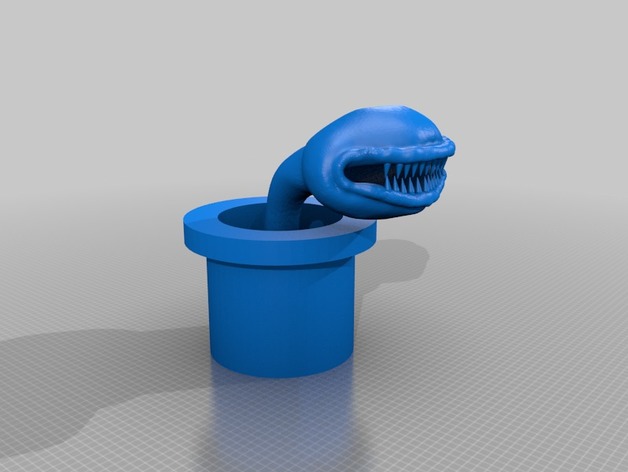
Flower 3D Print Model
Summary
The piranha flowers in the Mario brothers games.
Let me know if you like this kind of thing.
Visit my patreon page athttps://www.patreon.com/leobb -
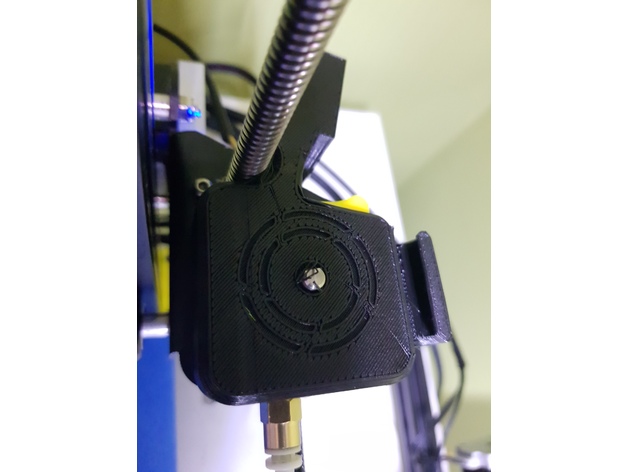
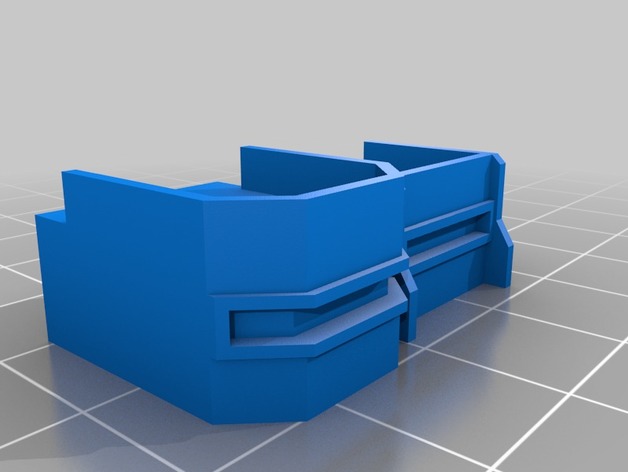
Filament Sensor and Cover (OEM sensor) 3D Print Model
Summary
Remix version that will work with the sensor that comes with the oem kit.
Print Settings
Printer:
Cr-10 Rafts:
No Supports:
No Resolution:
0.20 Infill:
30 -
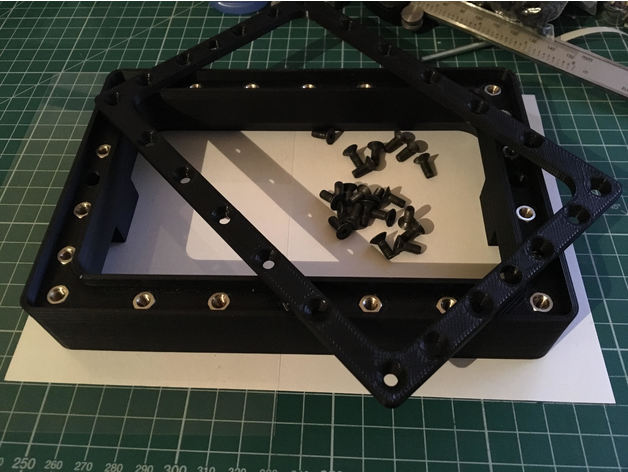
Better IncrediVat D7 3D Print Model
Summary
Wanhao Duplicator 7 VAT Standard and XL.
Standard design is a rip off from the official VAT.
Enhanced version is reworked as: Slopped edge, pouring slope, increased capacity.
330ml – Standard.
350ml – Enhanced.
400ml – Standard.
420ml – Enhanced.
You will need the following hardware:
22x M4x12 Metal spacer.
22x M4x10 Countersunk screws.
This is not litterally a remix but since mister Z use big word and think he own the design right on FlexVAT or any VAT that exist, here it is.
This is NOT from his design but to please him, I’ll act like it is. =)
The original model posted here is under license CC BY-NC 3.0 which allow me to:
Share — copy and redistribute the material in any medium or format
Adapt — remix, transform, and build upon the material
And “The licensor cannot revoke these freedoms as long as you follow the license terms.”
According to https://creativecommons.org/licenses/by-nc/3.0/
Print Settings
Printer:
Bertha Rafts:
No Supports:
Doesn’t Matter Resolution:
0.2mm Infill:
15 Notes:
Print 1 version of your liking and 1 seal.
Post-Printing
The metal spacer is tight fit but use glue/epoxy then push them in place. -
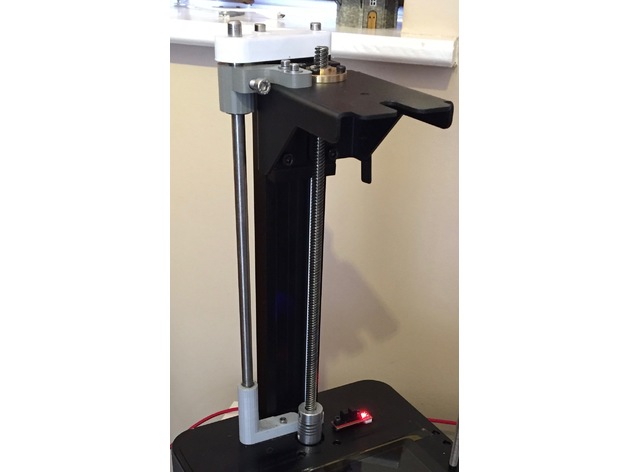
Additional Z-Axis Stabilizer for Wanhao D7 3D Print Model
Summary
Adds another stabilizing rod to the z-axis on the Wanhao D7. Work in progress. Alignment is not perfect and required a little torch action on base piece to soften PLA to fit! -

Dodge Demon Logo 3D Print Model
Summary
Traced and image, all conic arcs, using Onshape. 5mm Extrude. -
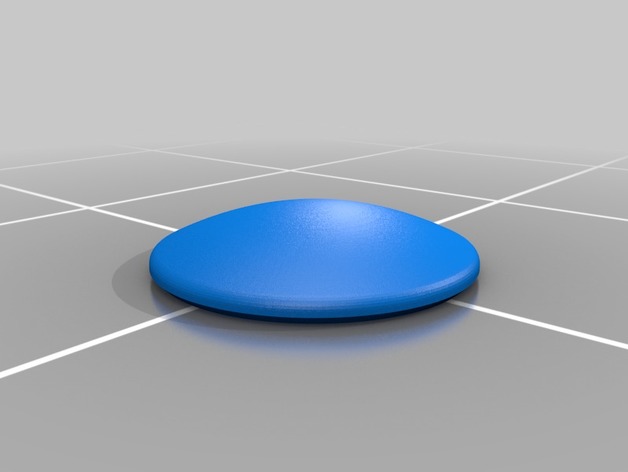
Rosarius of the Adeptus Ministorum 3D Print Model
Summary
All hail the God-Emperor, may his guidance always protect us from the encroachment of the Heretics.
Directed by the Omnissiah to create this symbol of office, I made it needlessly complex by making the gemstone mount removable, in theory meaning that I could replace it with a different gemstone shape, such as a teardrop for Blood Angels, or whatever. It should also make it easier to print/finish/paint in parts, so the gemstone, the gemstone mount, and the badge could all be printed in different ways, and different filaments with any simple printer, then painted as needed with a minimum of masking needed.
I didn’t find an Imperialis (winged skull) that fit my desires, so I made some wings and found a good skull, then squished the skull thinner to make it more jewelry-able. I’ve uploaded the wings in case someone has a need for them.
Print Settings
Printer:
Folger Tech Kossel rev B Supports:
No Resolution:
.05mm Notes:
I’m printing it now, so I’ve not had a chance to test the fit.
I’m printing this thing super thin to reduce the post-processing necessary. I’d go thinner if I thought it would help, but mostly the finest detail is lost just because it’s not being hand carved and molded. Honestly printing the wings as solid blocks and carving them down with a sharp exacto is the only way to do justice. I’m not that handy with a blade, so this is the next best thing.
Maybe in 30 years when we are looking at this design with our monitors 10x the resolution of human sight and using our 0.00001mm resolution 3D printers, this will be a perfect model for a Games Workshop bankruptcy party costume. -
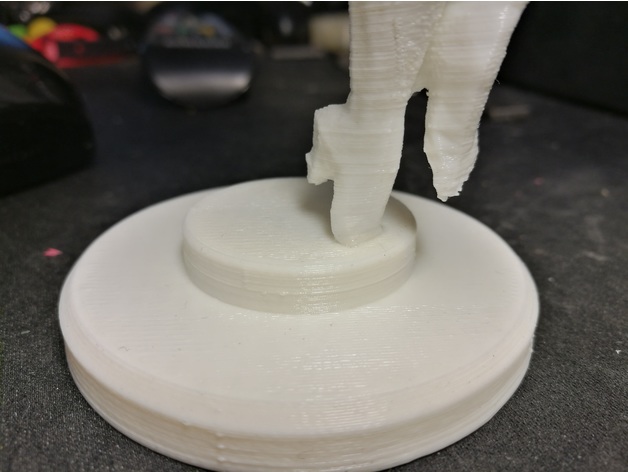
Stand for Kerrigan figure 3D Print Model
Summary
I bade a base platform for Kerrigan. Original one snapped off on me =(
Also, I added threaded post inside for M12 nut for weight.
Just make i little form-work with a hobby-knife on a slot for her toe, slide it in and add some glue 😉
NOTE: The base model is for Kerrigan 60% scaled. So scale it for your needs.
Autodesk Fusion 360 link: http://a360.co/2uTn5Ii -
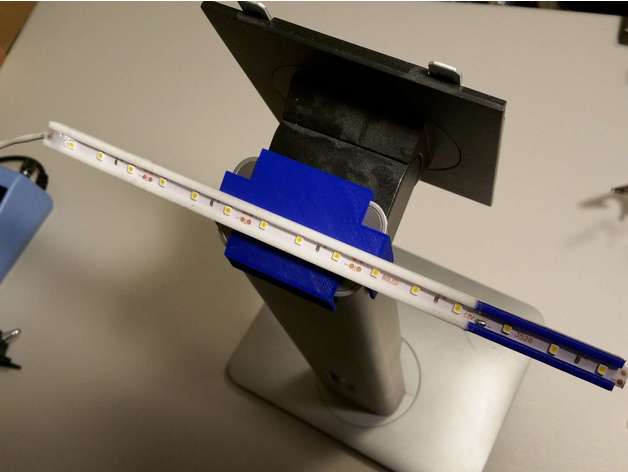
Dell monitor LED bar 3D Print Model
Summary
This LED mount is for Dell P2414H and 3528 SMD 12V LED
Post-Printing
Print the stand top cover and LED mount and glue them together.
LED 12V hook up to desktop power supply
computer on, LED on. -
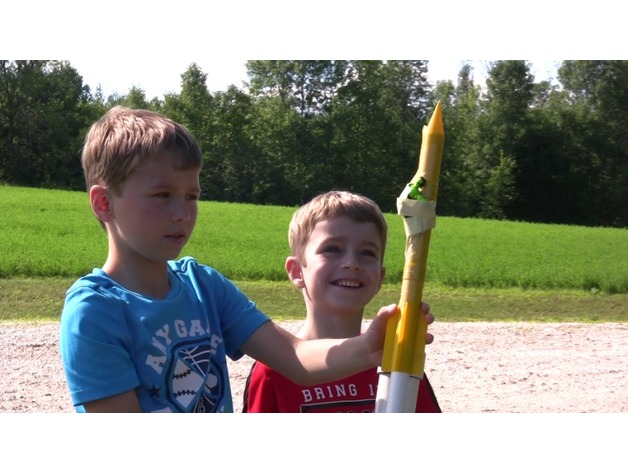
Fully Printed Air Rockets 3D Print Model
Summary
I have modified the original compressed air rocket created by Cbonsig to fit onto 3/4″ PVC pipe. It was also modified to fit my Replicator 2 and add a center section allowing for additional rocket length.
I was inspired by the same Make Magazine article (http://makezine.com/projects/make-15/compressed-air-rocket/) but wanted to make an air cannon that was a little more versatile. I replicated the Air Piston Cannon created by NightHawkInLight https://youtu.be/G1VCZEXi384
USE EXTREME CAUTION!!! We fully taped all rockets to prevent individual pieces from flying.
The modified SolidWorks files have been included.
Print Settings
Printer Brand:
MakerBot Printer:
MakerBot Replicator 2 Rafts:
Doesn’t Matter Supports:
No Resolution:
.2 Infill:
100 -
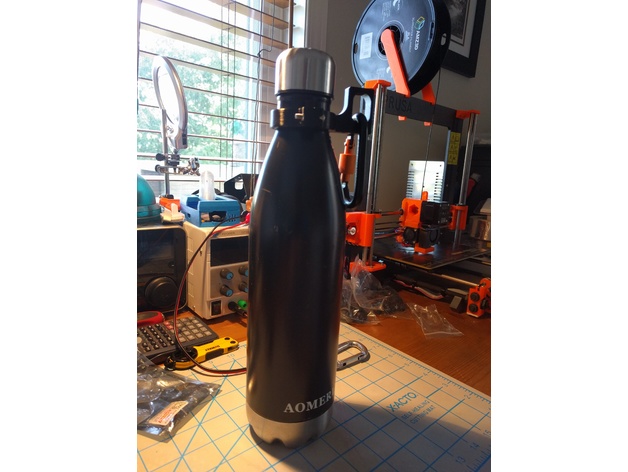
Water Bottle holder 3D Print Model
Summary
I wanted a way to hold my vacuum water bottle for hiking, made this up to clip to my back pack shoulder strap. The photo shows a previous generation, I have rounded over the corners and reduced the hold slightly to make it stronger.
Enjoy. -
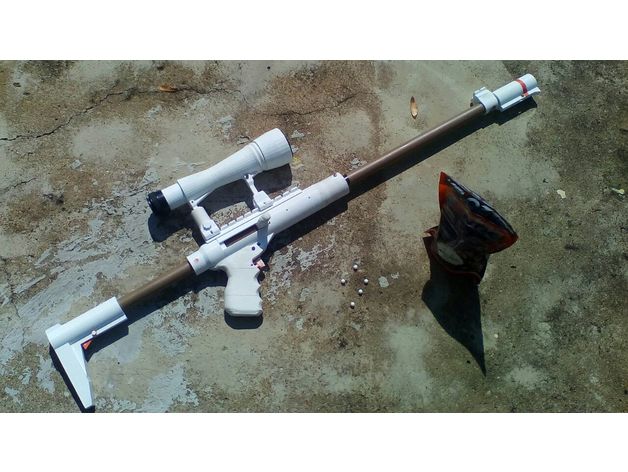
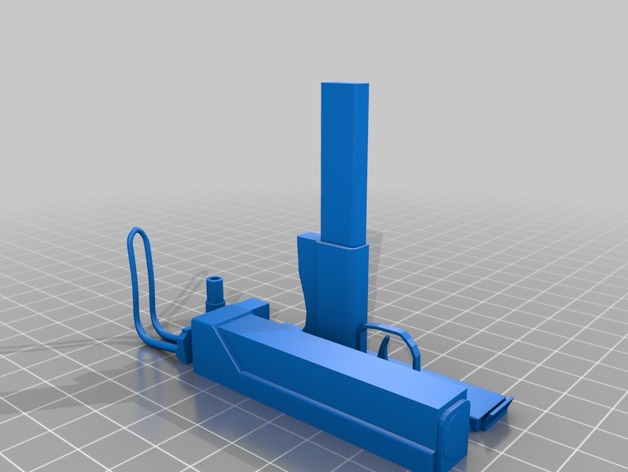
Airsoft 3d 3D Print Model
Summary
This’s my homemade airsoft, i spent a lot of time to create this object.
To create this project, you need to dedicate yourself and have creativity, some parts are not made with the printer so you have to create some pieces.
I used 3/4 inch and 1/2 inch pipes, a 6 mm threaded bar, a piece of leather, pen springs, an umbrella spring and a few screws. The barrel is a precision barrel for airsoft.
The sights is in another project of mine here on the thingiverse.
Good look!
Print Settings
Printer Brand:
Prusa Printer:
i3 MK2S Rafts:
No Supports:
Yes Resolution:
0.1 Infill:
50% Notes:
Print each part individually. -
CR-10 Raspberry Pi Integration 3D Print Model
Summary
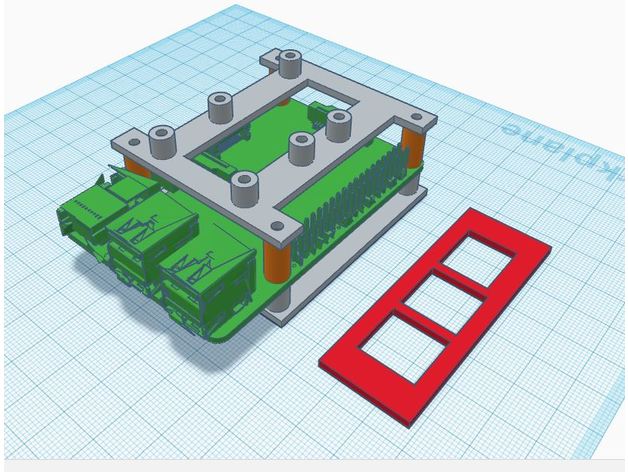
I integrated a raspberry pi inside of the CR-10 electronics case.
Instructions
Cut a 54mm x 20mm hole 11mm from the top and 40mm from the back of the case.
Epoxy pi mount in place. I don’t have measurements of where the mount should be placed as I kind of winged it by attaching the pi to the mount and then placing it where it needed to be.
Epoxy the IO cover to the outside of the case.
Note: The raspberry pi is placed directly over the cable tie mount. The mount will still be usable after installation the wires will just have to be run under the pi.
In addition to the raspberry pi mount there is a mount for a single channel relay and a LM2596 DC-DC adapter with spacers to mount it above the raspberry pi.
Note: If you just want to integrate the raspberry pi and power it with independently the power supply cable can be put through the existing cable grommet.
The pi is powered from the 12V power supply using the LM2596 and using the relay to toggle power to the CR-10 main board. The rear exhaust fan was, replaced with a quieter fan, and rewired to be powered on independently of the main board so that it runs as long as the power supply is switched on. The front fan still powers on with the main board.
I have had this setup install for about 2 weeks now and the printer has been running pretty much non stop since and I have had no issues.
Next time I open the case I will take some pictures of the inside.
Links to parts used.
LM2596:https://www.amazon.com/RioRand-LM2596-Converter-1-23V-30V-1Pcs-LM2596/dp/B008BHAOQO
Single channel relay:https://www.amazon.com/Tolako-Arduino-Indicator-Channel-Official/dp/B00VRUAHLE
Rear fan replacementhttps://www.amazon.com/Noctua-Cooling-Blades-Bearing-NF-A4x10/dp/B009NQLT0M
As for screws: I used the screws that held the old thicker exhaust fan to mount everything as they were the perfect length. To mount the new fan I used some M3x12mm screws that I had around. -
Cr-10 Filament Sensor Bracket 3D Print Model
Summary
PRINT:
NOTE: When using S3D slicer you must do: Mesh -> Separate Connected Surface
Otherwise you will get a hollow bits.
For Cura im not sure if you have this ability, please comment if you know how to fix the issue.
Sorry just my lack of design ability led to this issue.
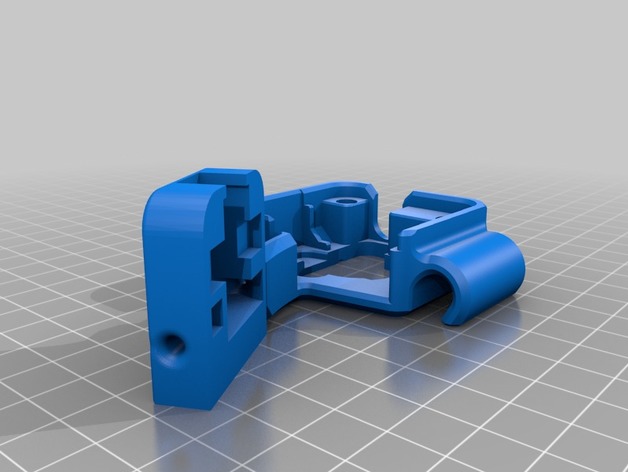
I designed a Bracket to hold a filament run-out sensor i bought off ebay.
This gives my 3d printer the ability to sense when there is no more Filament left, and pauses the print.
It slips over the Extruder, and also has a cable holder integrated.
The design allows it so you can use a small amount of PTFE tube to make it easier for the filament to guide into the extruder motor.
Sensor i used:http://r.ebay.com/PxV1Jx
Connected to: Raspberry pi 3B
For setup: https://youtu.be/j7JfQXTf16U
Print Settings
Printer:
Creality Cr-10 Rafts:
No Supports:
Yes Resolution:
0.2 Infill:
10 Notes:
Supports settings:
Support pillar resolution: 2.5mm
Max overhang angle: 65 Degrees.
PRINT:
NOTE: When using S3D slicer you must do: Mesh -> Separate Connected Surface
Otherwise you will get a hollow bits. -
Whiteboard/picture-frame mounting brackets 3D Print Model
Summary
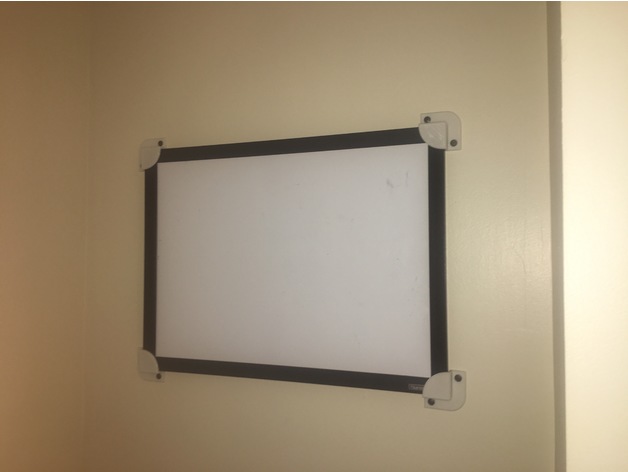
I sturdy and snug way to mount my whiteboard, and I couldn’t find anything similar so I designed this.
Print Settings
Printer Brand:
Afinia Printer:
AFINIA H480 Rafts:
Doesn’t Matter Supports:
Yes Resolution:
0.4mm Infill:
20% -
100:1 Compound Planetary Gear Reducer 3D Print Model
Summary
Featured In These YouTube Videos:
Two in series https://youtu.be/wsk3gqiS__M
Torque Capabilities
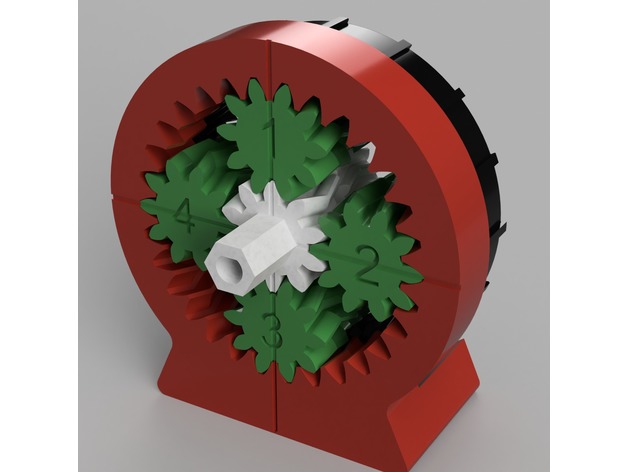
Please know that i designed this gearbox for a demonstration model so that it would be easy for everyone to understand how a compound planetary works, for that reason i omitted the 3rd module that increases the torque capabilities.
Because of that, this gearbox cannot handle much load.
How This Works
100 Turns of the input sun gear will result in ring gear #2 making one full rotation.
These are designed to be able to mount them in series on the channel, or drive them with the included stepper motor mount. You will need to scale the channel longer if you want to use two gearboxes and the stepper motor mount on the same channel, but keep in mind it is very boring to watch the second gearbox rotate, as it is very slow.
This gearbox can not be back-driven, every piece of plastic on it will snap before you get the input to turn.
Compatibility?
This gearbox is the the exact same form factor as my 1379:1 gearbox. The mounting channel and back cover are EXACTLY the same parts but keep in mind that the gears themselves are incompatible.
Gearing Information:
The gear ratio of two of these in series is 10,000:1
Gears Used:
Planets: 4
Helix angle 20deg
Pressure Angle 25degPlanetary Gearset #1 (Input End) Tooth Module = 2.1875
Sun = 10T
Planets = 10T
Ring = 30TPlanetary Gearset #2 (Output End) Tooth Module = 1.2868
Sun = 18T
Planets = 16T
Ring = 50TOther Important Info:
CAD Files??
I Included the Fusion 360 Project with this, message me for the CAD .STEP Files
Feel free to create your own modifications and parts for this project, and if you do, make sure you create a remix and upload them, I’ll link to them and possible create a collection for all of them!
Show Your Work!
Make a “make” and show everyone what you made! Everyone will thank you for it!
For More Cool Projects and Upgrades, Don’t forget to Follow Me on Thingiverse and Subscribe to my Youtube Channel
Gear Down For What? -
Monoprice Mini Delta SD Card Extender Bracket 3D Print Model
Summary
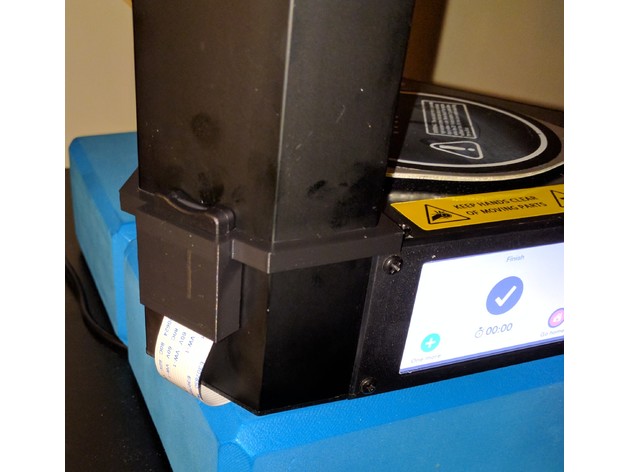
The SD card slot on the MP Mini Delta isn’t in a great position for easy access, so I purchased an SD card slot extender to move it to the front. This securely fastens it in place.
SD Card Extender: https://www.amazon.com/LANMU-Extension-Extender-MicroSDHC-Raspberry/dp/B01D9J8KQE
Print Settings
Printer Brand:
Prusa Printer:
i3 MK2S Rafts:
No Supports:
No Notes:
This is an extremely snug fit to ensure it’s secure when it clips on. If your machine over-extrudes, you may want to print scaled up 1-2% to make up for that. -
Air Pump Nozzle for Air Mattress or Inflatable 3D Print Model
Summary
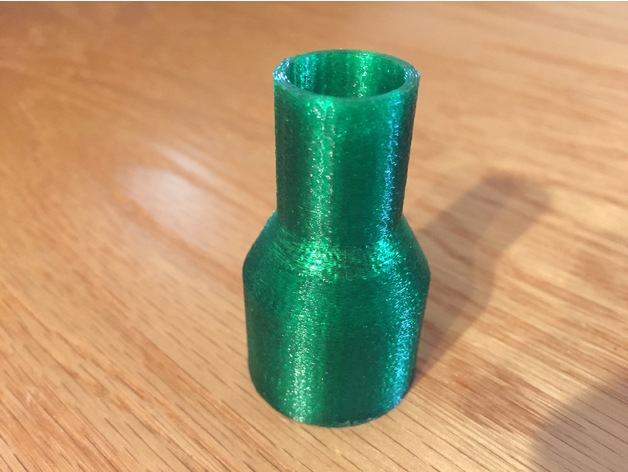
Did you loose your air pump nozzle too? This nozzle was designed to fit those cheap air pumps that may have come with an air mattress or were sold separately. Nozzle fits on the outside of the pump and fits in the air mattress. I have uploaded the STL that is 20mm inner diameter to fit the pump and 17.5mm outer diameter to fit inside the air mattress or inflatable. If your dimensions are different, I have uploaded the SCAD file so that you can tweak the measurements to your needs. -
The Most Awesome Glass Plate Holder Ever 3D Print Model
Summary
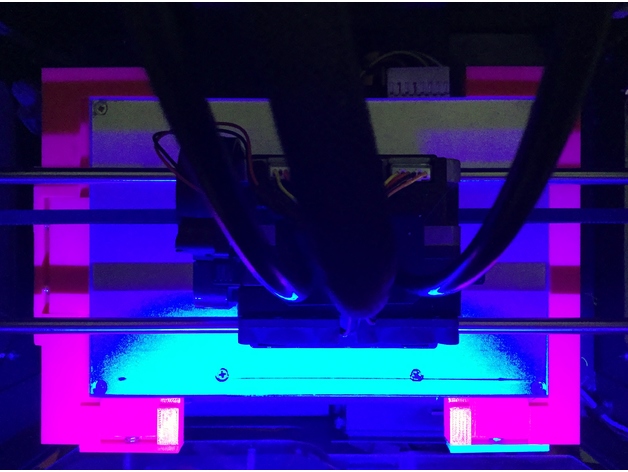
The Most Awesome Glass Plate Holder Ever.
The bed dimensions are 230mm x 150mm and the clips will fit multiple makerbot dual clones or printers using the same bed configuration.
Recommended
There are two versions of the left side clip. The second versions are the last four stl. files. The modified version features a lever that is used to pull the clip back. This option enables the user to use the left index finger to compress the springs on the left side clip and with the glass in the right hand align the front edge of the glass to front clips and push into place.
Print Settings
Printer:
QIDI Tech Rafts:
No Supports:
Yes Resolution:
.2-.3mm Infill:
5%-10%
Post-Printing
Post Process
All mechanical parts must be cleaned, filed, sanded, and fitted. The parts should slide easily with very little to no resistance without creating too much play.Custom Section
Hardware
The screws are 2.5mm-2.75mm wood or plastic screw with coarse thread. The springs are compression springs 7mm x 12.5mm x .5mm wire Diameter. There are a number of screw kits and compression spring kits available for purchase on Amazon.
Custom Section
Please Say You Make One
Print it, use it, and show you make one please. -
Posable Hollowed figurine 3D Print Model
Summary
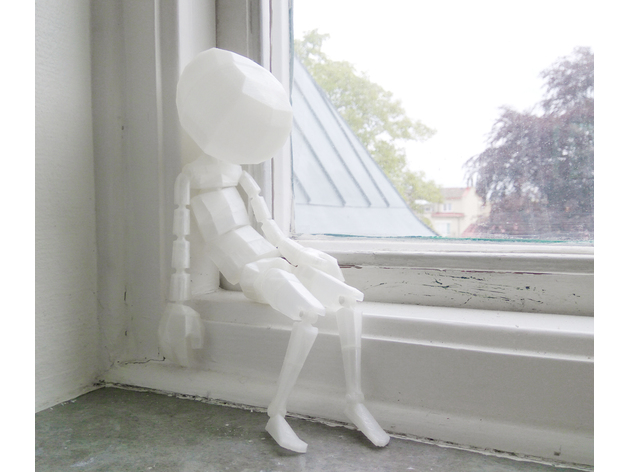
Depending on assembly, the doll can be made to be very loose and more of a ragdoll or more of a posable figurine once assembled.
Needed for assembly:
Glue (preferably some kind of super glue)
About 100mm of 1.75mm PLA filament to use as rivets.
Something to heat up PLA, lighter or soldering iron works fine.
Sandpaper
This print is in 36 parts to ensure that it can be printed on pretty much any type and/or size of printer.
The two .stl files you see here are mostly for reference but Posable_Hollowed_Reference_Layout.stl can also be used to print out all parts at once if your print bed is large enough – you will have to print a 2nd copy of the head as it needs to be printed twice to give you both parts needed – .
With download you’ll get three Blender files, PosableHollowed_ColorCoded_LRUB.blend and PosableHollowed_ColorCoded_Position.blend are to help with assembly and PosableHollowed_Parts.blend is for those interested in modding or just curious how it’s built.
This design was a pet project of mine, mostly to learn about printing joints but also something I used to brainstorm poses for my creative work.
Print Settings
Printer Brand:
Printrbot Printer:
Play Rafts:
No Supports:
No Resolution:
tested 0.1-0.2 Infill:
No infill should be nessesary Notes:
As you might have noticed, there’s only one half of the head, that’s because it’s identical on both sides, so just print it twice and you’ll have all the parts.
The version in the pictures is printed in 0.2mm layer hight on a 0.4mm nozzle.
The print is designed to be able to be printed without any infill and support.
If you are experiencing problems with Left/Right arm_1 where the ball joint starts you might want to add some support or alternatively print multiple parts at once as with how small the parts are, if you don’t have cooldown settings the nozzle might not allow the print to cool down between layers causing it to sag down.
Keep a lookout for warping, especially on the head as all parts need to be flat when glued together.
Got any questions, is something off in the files or just curious about something?
Post a comment or send me a message and I’d be happy to help out 🙂
Post-Printing
Good to know for assembly.
Sandpapered off a tiny bit too much on a small part?
Super glue leaves a pretty thick, smooth and solid surface once dried.
So you might be able to salvage the part with a drop or two of super glue.
Most types of super glue goes matte once dried, use that to know when it’s ok to see if the part fits better with the added thickness from the glue.
Part references:
With the download you’ll get three Blender files, PosableHollowed_ColorCoded_LRUB.blend and PosableHollowed_ColorCoded_Position.blend are to help with assembly.
Turquoise = Right,
Red = Left,
Yellow = Top/Upper
Purple = Bottom/Lower
If a part is split in two, there can be a Top and a Bottom part.
Don’t have Blender?
Don’t worry, it’s a free software that you can get over at https://www.blender.org
All you need to know to use the 3D references is that you use the middle click to spin the camera around, select an object with right click and that all the parts are listed in the panel to the right of the screen.
Joint assembly:
There are three different types of assembly needed for the joints.
Most joints just pop into place, like arms, neck and the ball joints connecting the legs to the pelvis. If you are experiencing a lot of resistance, give the ball joint a light rub down with sandpaper and try again. The joints on the Pelvis might need to be heated up slightly as well as the Thigh parts are quite thick.
The joints in the torso require that you glue the front and back or left and right side while around the ball joint, if glued together before you will not be able to get the ball joint into the socket.
The ankle and knee joints require some special attention as they use 1.75mm filament as rivets.
For those who are new to useing PLA as rivets,
Cannedmushrooms explains how to create PLA rivets pretty spot on: www.youtube.com/watch?v=WqNxYHWpYko
Grab a lighter, soldering iron or something very warm and about 100mm of 1.75mm filament. I can only recommend PLA as I have not had the chance to test other materials for this use.
Heat up the end of the filament (only about 3mm of the edge) and push it against a smooth surface. Next thread the filament through the joints you want to connect until the flat surface is flush against the joints. Cut off the other end so only about 3mm sticks out, heat it up and push it against a smooth to create the other end of the rivet.
This only needs to be done 4 times to connect the ankles and knees, and that’s it! easy peasy.
Gluing parts together:
As with any surfaces that will be glued together, it will need to be lightly sandpapered down so that the surfaces will bond properly with the glue. For this print most super glues will work fine as there wont be any stretching going on.
As always, keep a fan on as fumes from super glue isn’t the best to inhale. -
Angel bow 3D Print Model
Summary
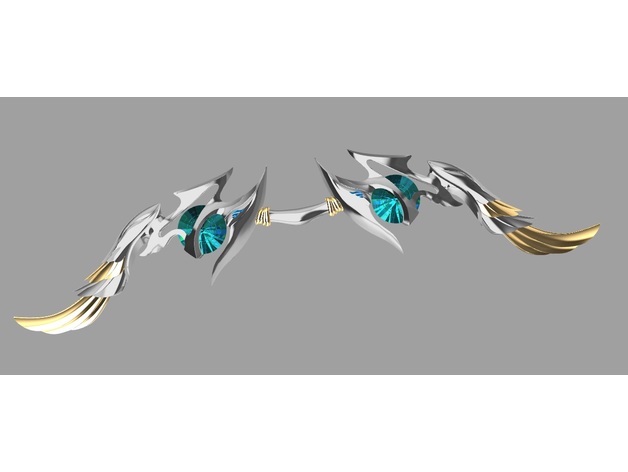
This is a weapon in the game
I like its shape
It’s nice to draw it into 3D
Hope that friends can make it out, regardless of size -
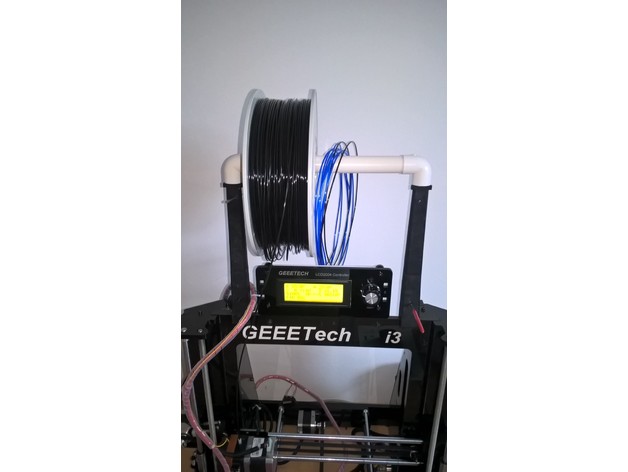
Filament spool holder for Geeetech Prusa i3 3D Print Model
Summary
This spool holder is almost vertical to minimize the constraints on the 3D printer frame.
As it use the white pipe delivered with the Geeetech Prusa i3 Pro B, it can hold 2 spools side by side. Filament samples will be also fit to this holder.
The various holes in the holder allow to block the filaments in order to recover them very quickly. You can also use these holes to stock your Allen wrenches or your gauge used to remove the plastic jam in the extruder.
You’ll need 4 screws 3 x 12 mm to assemble the bottom with the top parts of the right and left supports.
Print Settings
Printer:
Geeetech Prusa i3 Pro B Rafts:
Doesn’t Matter Supports:
Yes Resolution:
0.2 Infill:
30% Notes:
Make sure that the front side of each arm is facing the heat bed in order to have a nice aspect on front of you when it is installed on your printer. -
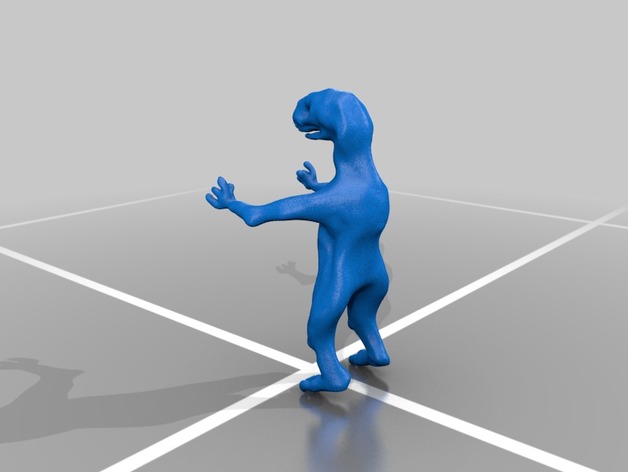
Lizardperson 3D Print Model
Summary
I am having trouble modeling things in Sculptris. I get something out of it, but not what I set out to do.
Let me know what you think about this model. If you like what I do please visit my patreon page.https://www.patreon.com/leobb -
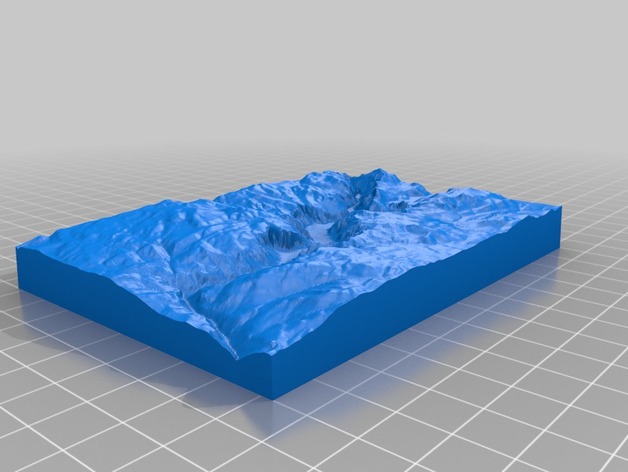
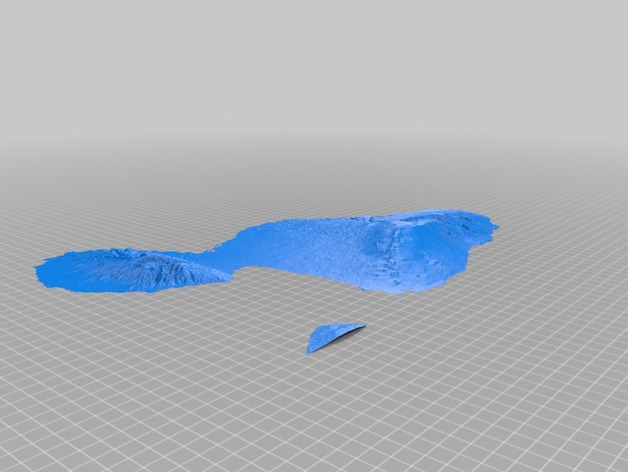
Oahu 3D Print Model
Summary
Oahu -
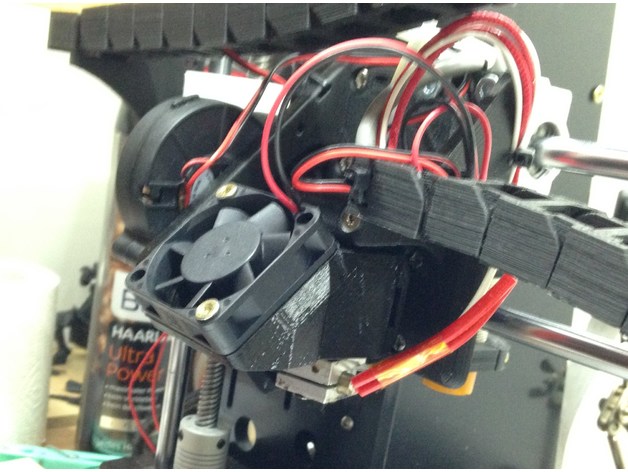
E3D V6 40mm Fan Mount 3D Print Model
Summary
My E3D clone fan was just to loud and I had the feeling that I got heat creep, so I wanted to get a bigger (40mm) and therefore quiter fan.
I liked the snapon design of this (https://www.thingiverse.com/thing:354723) and this (https://www.thingiverse.com/thing:2058949) but it was just to bulky and didn’t quite fit with the hotend and carriage.
I also liked this (https://www.thingiverse.com/thing:506958) design with the angled fan, but the snap on didn’t fit for me.
So I kind of took both ideas and combined them in one design.
WIP ideas:
The only issue I have is, that the air blows through the E3D just fine, but has no propper path to escape, so it might flow down to the printing area. If anybody has suggestions, put it in the comments and I might try it. -
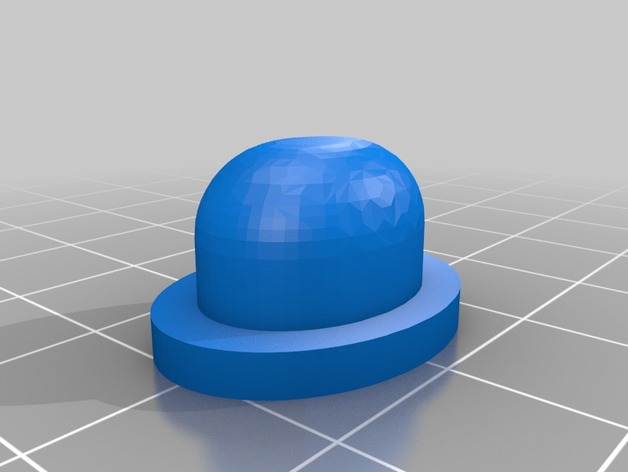
Box BF 26650 3D Print Model
Summary
Réalisé en PLA mais devrai mieux convenir en ABS 😉
temperature 195°
bed 50°
Quelques modifications seront encore a apporté par la suite
Bonne Vape 🙂 -
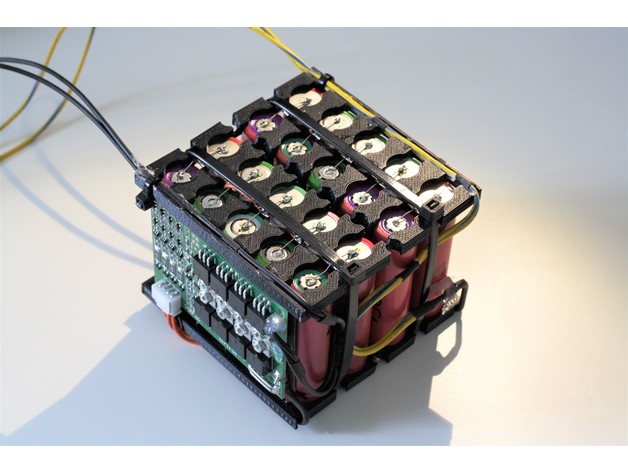
18650 holder 4 bank 5 cells remix PowerPlayground 3D Print Model
Summary
It’s a remix for a powerbank, with 4 bank 5 cells
Print Settings
Printer:
Dagoma Discovery 200 Rafts:
No Supports:
No Resolution:
0.15mm Infill:
33% -
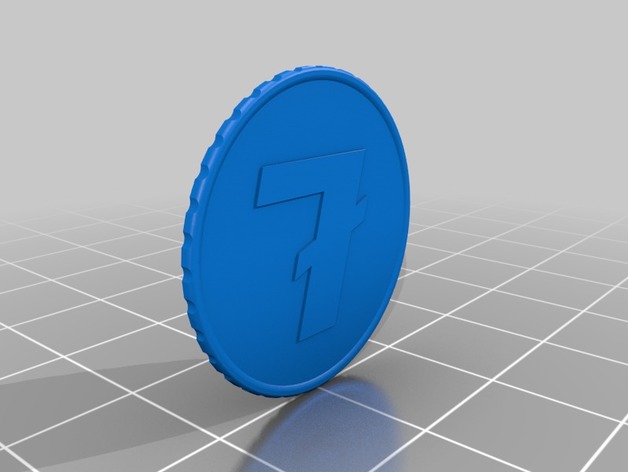
Simple Litecoin Trinket Coin Design 3D Print Model
Summary
Made a simple coin in light of cryptos doing well lately. -
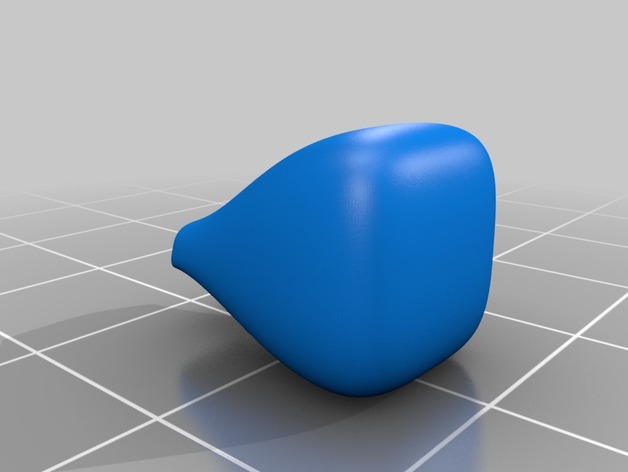
Vase 3D Print Model
Summary
This is a new vase style design. I hope you like this basic design as it would look really good in any house hold. Don’t forget to upsize it before you print. Happy Printing! -
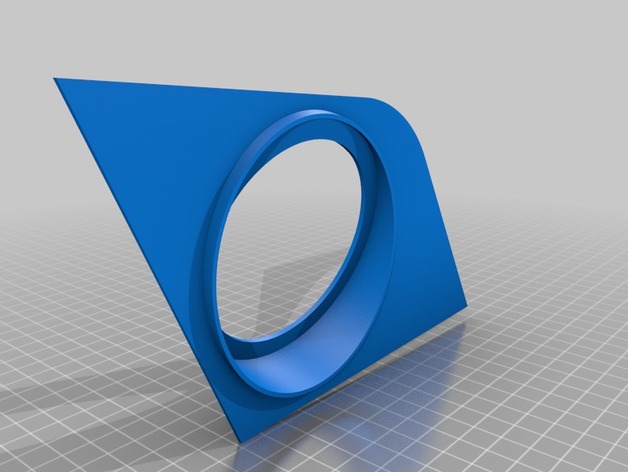
Audi A4 B8 Replacement dash speaker grill for 3 inch mid 3D Print Model
Summary
work in progress
Audi dash speaker grill incorp. 3inch focal flax midrange
best to print on side so support works better
need to watch for delamination
best to print in ABS or petg for heat resistance
reverse/mirror sti for other side
this item will need post prep (sanding, filler and paint)
dash internals may need modifying to fit speaker
Print Settings
Printer Brand:
FlashForge Printer:
Creator Pro Rafts:
Yes Supports:
Yes Resolution:
0.2 Infill:
lots Notes:
heated bed
check for delamination
best printed in ABS or PETG
post cleanup and prep required
Post-Printing
post prep
sanding, putty and paint required
some mods to dash internals to fit speaker basket
needs to be stuck into dash recess – does not use factory clips
when finished suits dash
paint in black plastidip for factory looking results -
Large Monster Markers 2×2 inch 3D Print Model
Summary
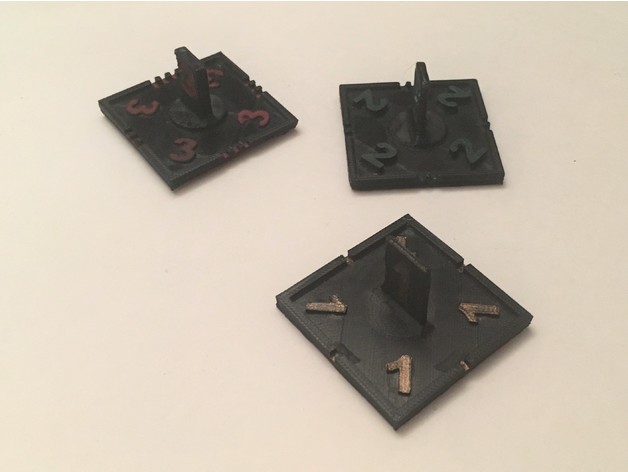
I was asked to make markers for D&D that would handle the larger monsters. I wanted them to be number clear so the 1 through 4 have the number on the bottom, in the middle peg and in roman numerals on the side. The 5 through 9 have just been thrown together with only the number on the middle post, but I will be revising those and making it clearer over the weekend.
Print Settings
Printer Brand:
PowerSpec Printer:
PowerSpec 3D Pro Rafts:
No Supports:
No Resolution:
0.15 Infill:
15% -
Scrap Jet fighter splits 3D Print Model
Summary
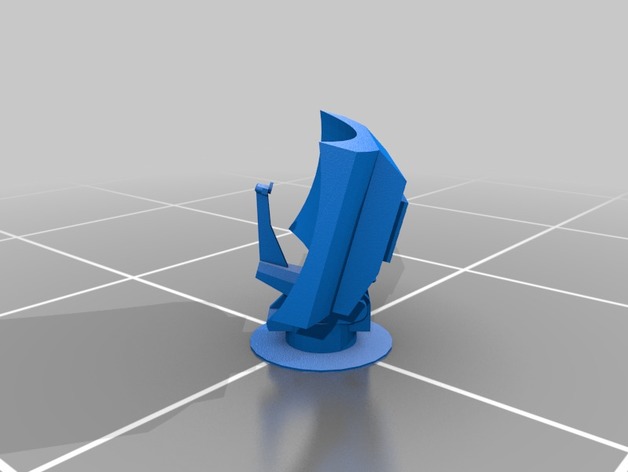
Split of the Scrap Jet by Festera521to make it easy to print. Printed this at 185% scale to match size of an Ork Dakkajet.
Print Settings
Printer Brand:
Prusa Printer:
Prusa Mk2 Rafts:
No Supports:
Yes Resolution:
0.05mm Infill:
Yes Notes:
Printed at 0.05mm resolution and it came out great. Would probably look very nice at 0.1mm layers as well. -
Mazda MX-5 (Miata) Cell Phone Mount 2015-present 3D Print Model
Summary
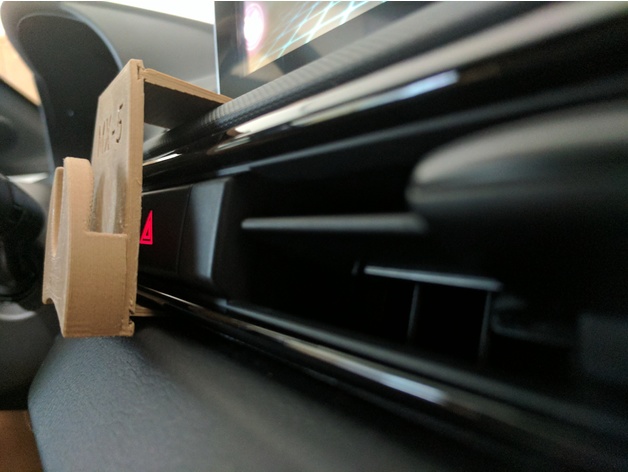
Cell phone mount for the Mazda MX-5 (Miata) 2015-present.
Consider shrinking wedges 2-3% for easier fit.
Requires PopSockets from Amazon (http://a.co/9WpVO6J)
Video Demo: https://youtu.be/1XKq-8PhxMY -
Time Turner 3D Print Model
Summary
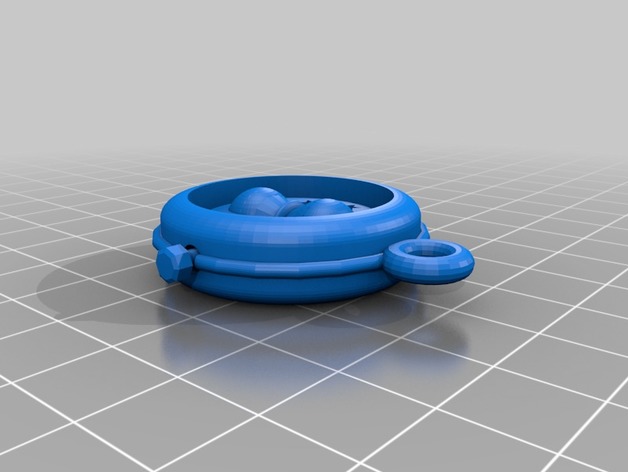
For all my witches and wizards out there, it’s my take on the Time Turner. It does print all in one go , and actually spins.
Print Settings
Printer Brand:
Ultimaker Printer:
Ultimaker 2 Extended Rafts:
Doesn’t Matter Supports:
Yes Infill:
20 Notes:
It needs a lot of support to print the underside, I like to put them everywhere and just fidget with the overhang until I get supports under the little knobs and eye. I think I put overhang around 10 degrees. Also, it need a fairly dense support structure to get good details i like to put the support density to 30% and structure to grid. -
Blank Universal tool mount for MPCNC 525 remix by Brink 3D Print Model
Summary
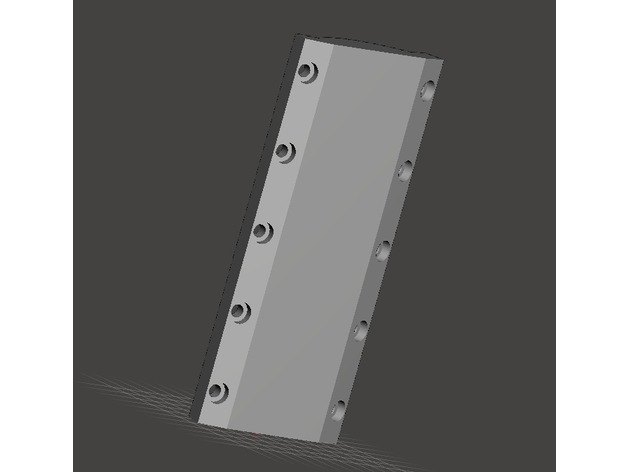
I mixed in and printed wbarber69’s in a tool mount I was working on before I realized that the shoulder on the insides of the holes were very thin. My tool was substantial and I feared that it would rip those thin shoulders right out of the back of the mount plate. I ended up using washers on mine that made the screws grab the front of the hole. I thought though that I would beef up the thickness of the shoulders since it was easy for me to do so and my help someone else who wished to use wbarber69’s design in their project.
This is the same as wbarber69’s mount except for thicker shoulders inside the mount holes. The screw heads wont go as deep and there is more “meat” for the screw to grab hold of.
Includes only stl file. -
Geeetech filament guide 3D Print Model
Summary
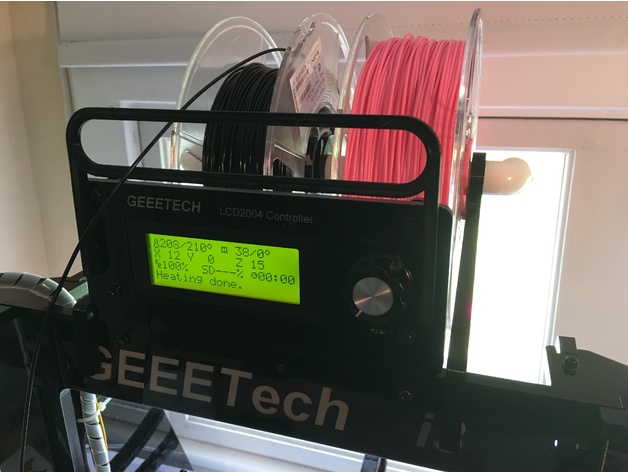
A filament guide for the Geeetech I3 Pro B. I use a rear-mounted spool holder and this guide allows me to use the full Z height of the printer. The guide attaches to the mounting holes in the LCD cover plate. It is a press-fit, so no screws are needed. -
Minecraft Blynclight Cover 3D Print Model
Summary
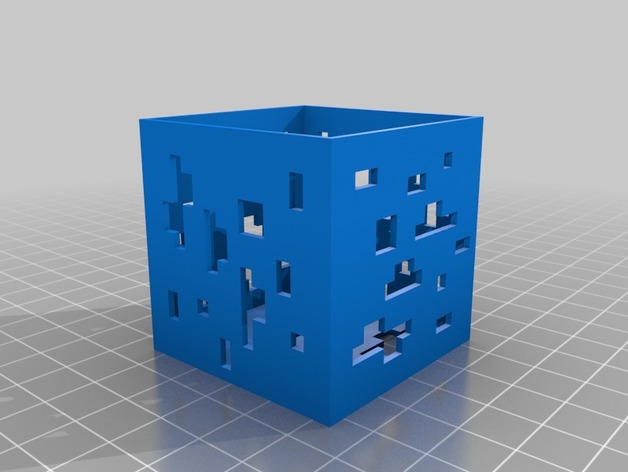
Thanks I_am_me for the thing. Resized the box to act as a cover for the Blynclight standard. -
Sci Fi Walls v2 3D Print Model
Summary
This is a remix of my original Sci Fi walls.https://www.thingiverse.com/thing:2472303
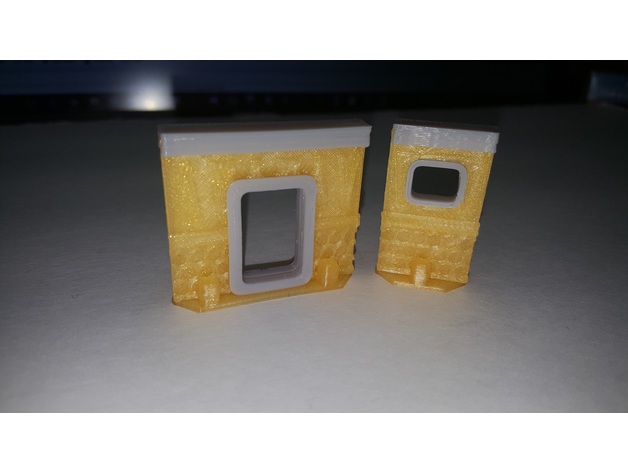
I wanted to give more room for expansion so I modified them. I probably won’t be adding more styles to the original walls but these are the same scale so they’ll work fine together.
I added a cap and separate door and window inserts for a more detailed look. This allows the external face of the wall to have some texture as well. This also allows me to make these walls stackable and to add clip on flooring, even on multiple levels.
The walls with the cap and stands are 35mm tall, matching the height of dutchmogul’s models. They’re 1, 2 and 3 segments long, with each segment being 20mm long. This makes the wall segments 20×35, 40×35 and 60×45. The walls are actually 33mm tall and the cap and stand adds 1mm height each. The stands should clip on and hold just fine or you can glue them.
Because everyone’s printer is different, you may have to adjust print settings to get it just right. -
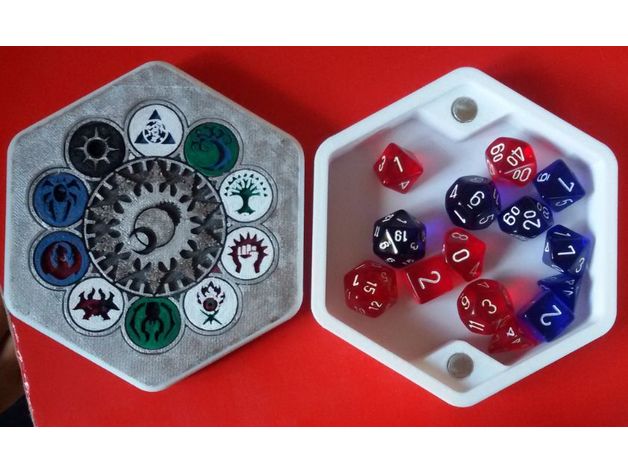
Ravnica Magnetic Dice Box 3D Print Model
Summary
A simple hexagonal dice box, with all ravnica’s guilds insert on top. It is remixed from another dice box but I can’t find it, please link it in the comments if you can.
It got 4 slot for standard round magnets, but printing it with default scaling makes it anyway a tight fit.
Many thanks to Wanna B. Drawings for her awesome work on painting it!
Print Settings
Printer:
Anet A8 Rafts:
No Supports:
No Resolution:
0.2mm Infill:
20-25% Notes:
I printed the top piece with 99.99% scaling, but should be fine with 100%, let me know. -
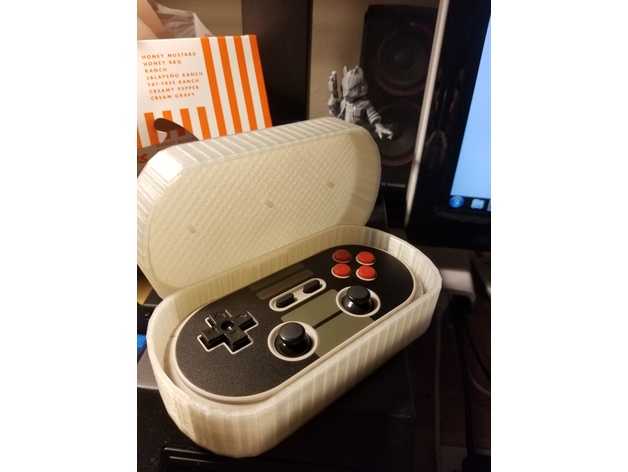
8bitdo NES30 Pro Controller Case 3D Print Model
Summary
Created a small case to store my 8bitdo NES30 Pro Controller so it can be stored without accidentally turning it on. Made this from scratch in SketchUp and regret scaling the CASE STL because it crushed the shape of the curved sides making it difficult to make the top match perfectly. I could re-create it again but was just doing this quick on time thing which i wasted 2 test prints on. Padding could also be added to reduce the controller’s wiggle room but it’s still pretty good where it is.
Print Settings
Printer Brand:
Wanhao Printer:
Wanhao Duplicator i3 V2 Rafts:
No Supports:
No Resolution:
0.2mm Infill:
20% Notes:
No rafts or supports needed for the pieces as you just need to simply print them with the largest flat surface pointing down. I used 20% infill as well to increase rigidity and because the top surface with this natural inland pla filament i used doesn’t like top surface gaps without ample support.
Post-Printing
Post Printing
None needed! Works straight off the print bed.
How I Designed This
Drawing from Scratch
Drew this item from scratch using Sketchup using simple circles. -
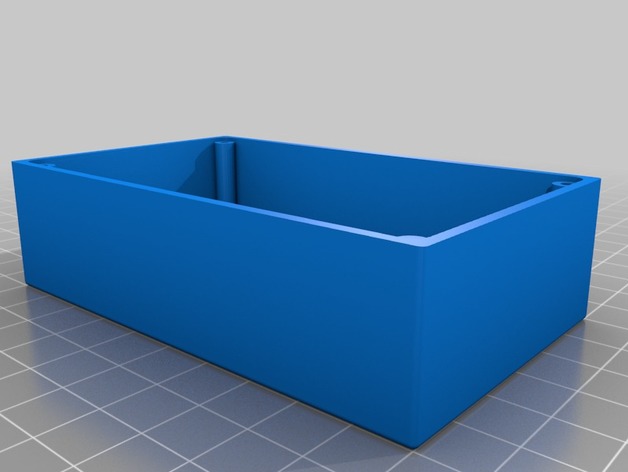
Project Box 100x60mm 3D Print Model
Summary
This is a project box I worked on as practice for another project. It is 100 x 60 x 29 mm (with lid attached). It should accommodate 4-40 3/8 machine screws with flat heads. Wall thickness is 2mm. Orientation is ready to print, these should print well with .2mm or lower layer height.
Print Settings
Printer Brand:
Wanhao Printer:
Wanhao Duplicator i3 Plus Rafts:
Doesn’t Matter Supports:
No Resolution:
.2 or lower Infill:
90%+ recommended -
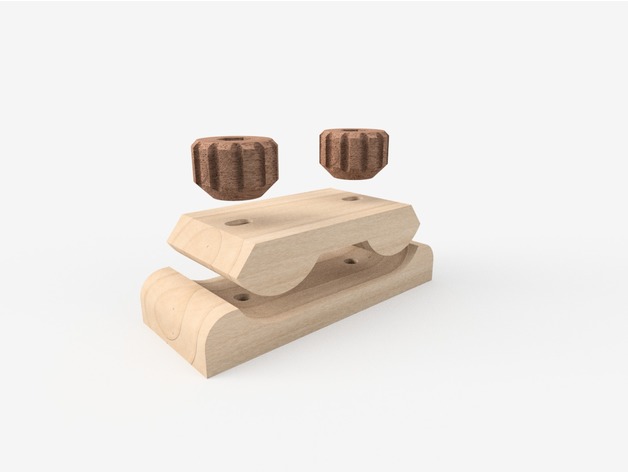
Mini Sander 3D Print Model
Summary
Mini sander.
Additional requirement: 2 sets of 25-30 mm hexagon head m3 screw.
Print Settings
Printer Brand:
FlashForge Printer:
Creator Pro Rafts:
No Supports:
Yes Resolution:
0.2mm Infill:
50%
How I Designed This -
Farm 3D Print Model
Summary
hello guy this is my real first creation but i dont have 3d printer so sorry i dont know the settings and i didn’t change the files name
BTW: sorry for my bad english -
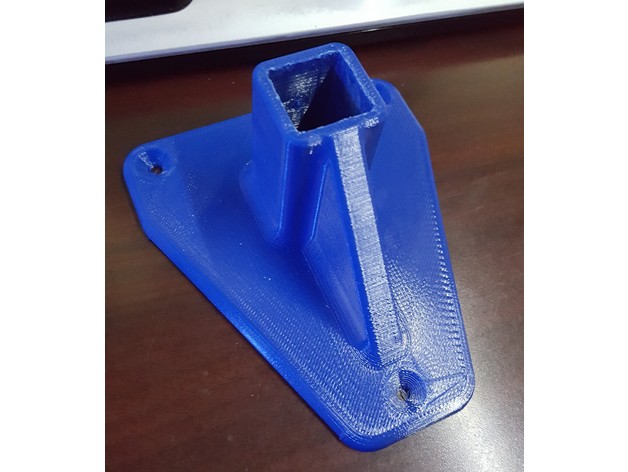
2020 wall mount 3D Print Model
Summary
wall mount for 2020. I’m using this to mount LED lighting for an aquarium
Print Settings
Printer:
Tronxy x3a Rafts:
No Supports:
No Resolution:
medium Infill:
35-50% Notes:
if you dont have the tolerances nailed down on your printer, make sure to print at 101-103%. -
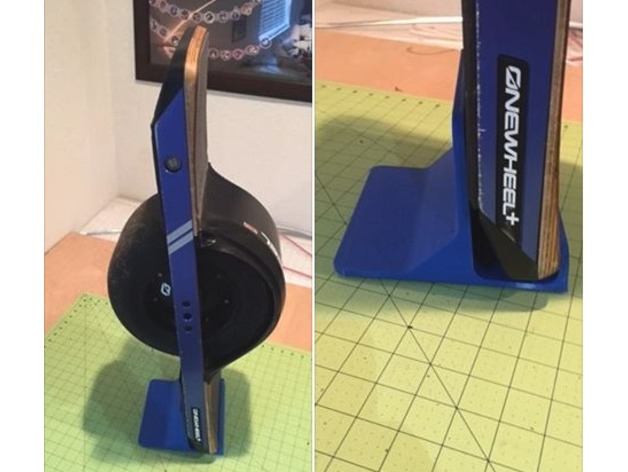
Onewheel+ Stand 3D Print Model
Summary
This is a stand for the Onewheel +. The file is to scale in inches. I made one for my ride and thought I would share it to all you other Onewheeling freaks! Print it out and add some rubber feet to the bottom. It has just enough angle to keep it rested back in a nice vertical position. It fits like a glove even with the float plates on. Have fun and happy nosediving!
Cheers,
Joe
Industrial Designer / Concept Artist
www.coroflot.com/maccarthy -
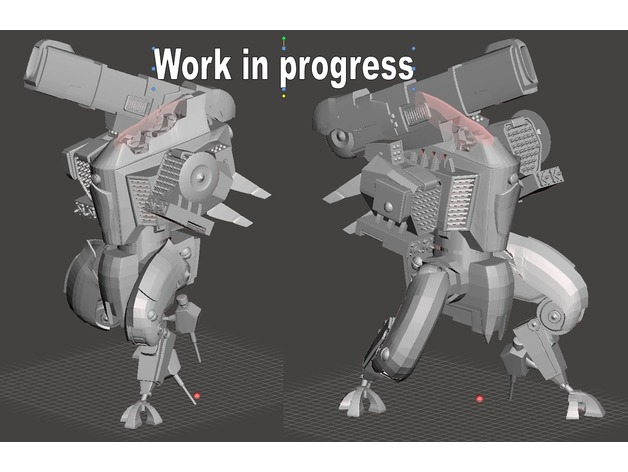
Stormsurge proxy 28mm 3D Print Model
Summary
This is a work in progress of the Tau Titan Stormsurge.
The original model was hand drawn by guchu17.
I am currently struggling with non closed meshes,
then I will add many more detail to the figure, and make poseable articulations as much as possible.
Some parts seem to be missing, and some have strange proportions (feet).
Will be updated soon.
Copyright infringement is not intended. All parts are created freehand in 3d modeling software, no copyrighted product had been scanned or copied in any way. -
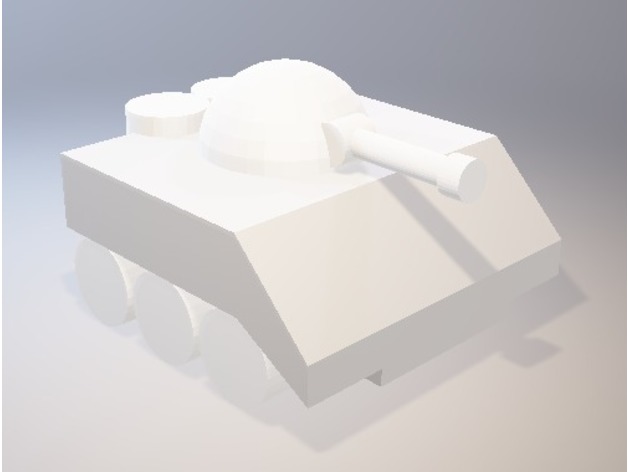
Cartoon Tank 3D Print Model
Summary
cartoon tank
̿̿ ̿̿ ̿̿ ̿’̿’̵͇̿̿з= ( ▀ ͜͞ʖ▀) =ε/̵͇̿̿/’̿’̿ ̿ ̿̿ ̿̿ ̿̿ -
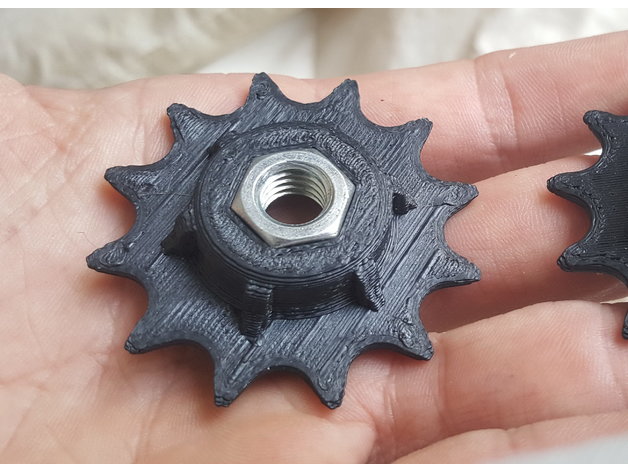
12 tooth sprocket for standard bicycle chain 3D Print Model
Summary
12 tooth sprocket for standard bicycle chain
54mm Diameter with 14mm nut recess -
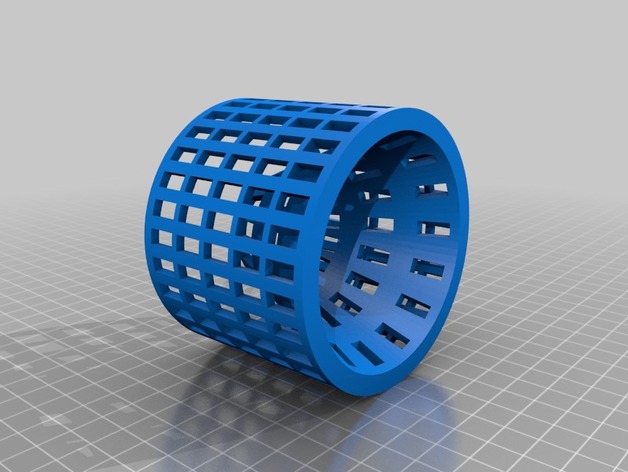
Small Fish Trap 3D Print Model
Summary
A three part cage style fish trap. I designed it to fit within the dimensions of my printer and without the need for support material.
Print Settings
Printer:
M3D Micro Rafts:
No Supports:
No Infill:
Solid Notes:
Tested with both PETG and Flexible filament. Flexible filament is much more rugged and is not prone to breaking as with other filaments. The trap has not been tested for its ability to catch fish yet but should work nonetheless.
PRINTING INSTRUCTIONS:
The minnow trap is created by printing two end pieces and as many middle pieces as desired. I used small zip ties to attach the pieces together. The trap can be scaled to fit your needs. -
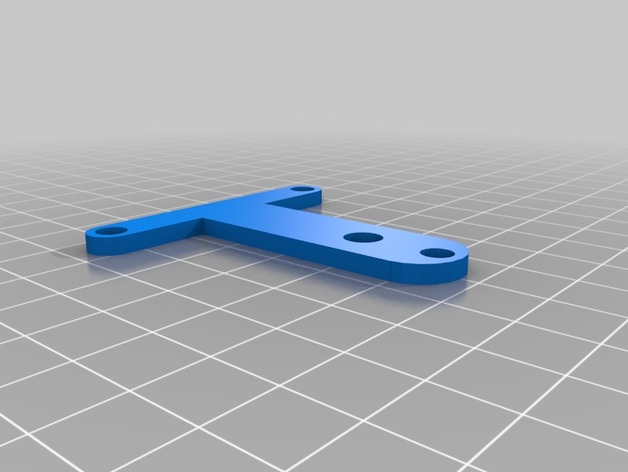
Concept 6 Vtx pigtail mount. 3D Print Model
Summary
Made a simple mount to hold a Unify pro pigtail out the back of the BBFPV Concept 6 frame.
Print in TPU at 100%
Designed so the rear can move so when you crash it takes part of the impact instead of it all going to your antenna. -
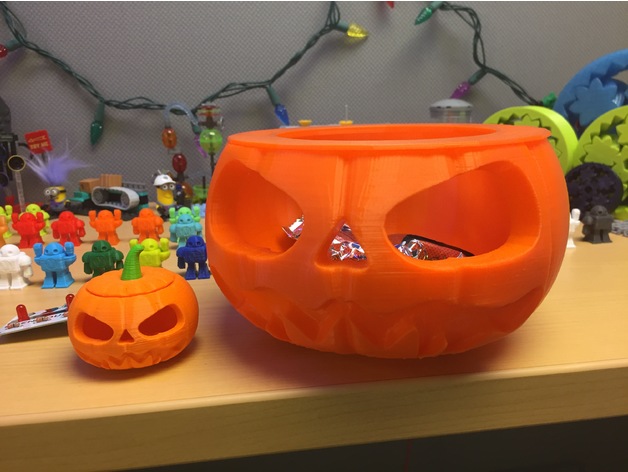
Makies Pumpkin Candy Bowl 3D Print Model
Summary
Custom brim for a 3x scaled Makies Pumpkin Base — Makes a nice Halloween Candy Bowl
I was printing a 3x scaled Makies Pumpkin and was 85 to 86% complete when the print died. (Was printing from SD card but host machine in lab was rebooted and to my surprise/disgust the two machines that were printed directly from SD card also stopped when the host went down) Rather than waste 18 hours of print time and half a roll of filament I came up with a lid/brim that covered the exposed infill and reasonably salvaged this print for an alternative use. I printed it in black PLA and felt it was too start so I then printed this brim in Orange PLA and I am happy with the result.
Print Settings
Printer Brand:
LulzBot Printer:
TAZ 6 Rafts:
No Supports:
No Resolution:
0.25mm Infill:
20% Notes:
Prints fine w/o a brim.
Pause or kill your pumpkin body print at 85 or 86%. Then print this cover. Use Loctite 401 to glue the cover onto the pumpkin body. Enjoy -
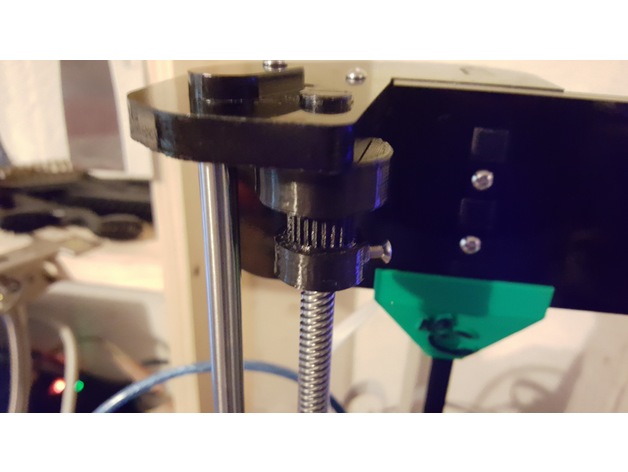
Anet A8 (Prusa) Z axis synchronising gizmo, 608 bearing 3D Print Model
Summary
Modified for the 608 bearing. Changed the 2 pulleys to one pulley, and added .1 to the inner diameter, and swapped out the toothed pulley for deeper toothed one (by Grimlock_UK).
Print Settings
Printer:
Anet A8 Rafts:
No Supports:
No Resolution:
.2 Infill:
30 Notes:
See original post by FredGenius for instructions and tool to put belt together.https://www.thingiverse.com/thing:2350350 -
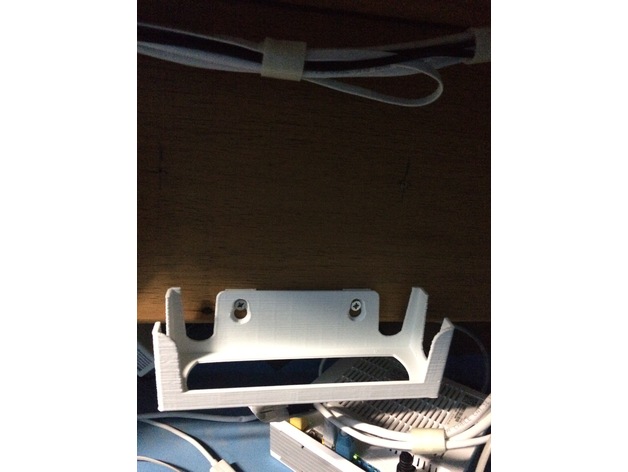
sfr NB6 holder 3D Print Model
Summary
Need a holder to attach my internet router box on the wall
Print Settings
Printer Brand:
Prusa Printer:
Prusa Clone Rafts:
No Supports:
No Resolution:
0,2 Infill:
30 -
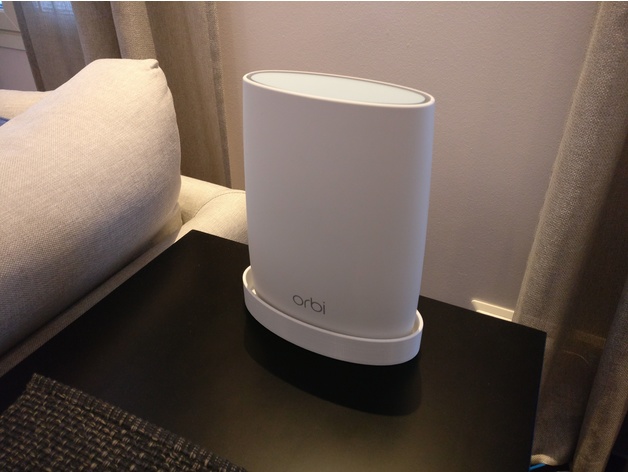
Netgear Orbi wall stand 3D Print Model
Summary
I love my Netgear Orbi setup (powerfull router + satellite), but was a bit disapointed that it was so difficult to put in a wall. I have built rj-45 sockets high in the wall for a good router placement, so hanging it into the wall was a “must” for me. As a result I ended up to design a wall mount for the router. It fits the satellite as well.
There are couple two elements in the design that help to secure the router to the mount with a zip-tie. I also designed the edges to a bit higher to prevent the router to drop accidentally. There’s intentionally some some extra space left into mount to let the air circulate.
Print Settings
Printer:
Prenta Duo Rafts:
No Supports:
Yes Resolution:
high Infill:
25% Notes:
Don’t use raft since it will ruin the bottom of the model. When you hang the router on the wall you will be looking at the bottom, so it’s important to keep it nice (especially if you don’t plan to paint the model). -
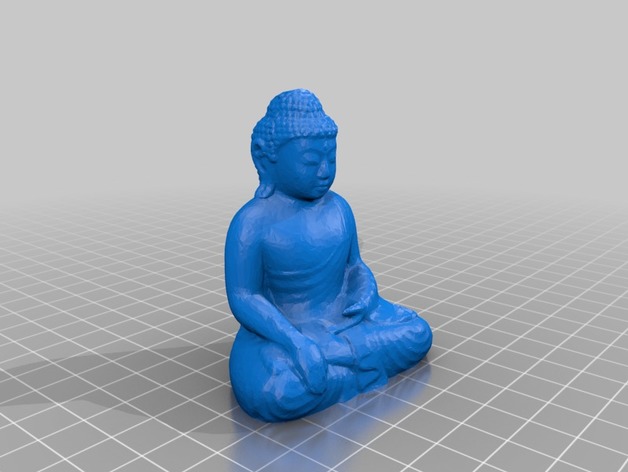
Buddha 3D Print Model
Summary
Small Buddha for printing
Print Settings
Printer:
Wanhao i3 Rafts:
Doesn’t Matter Supports:
No Resolution:
0,2mm Infill:
20% -
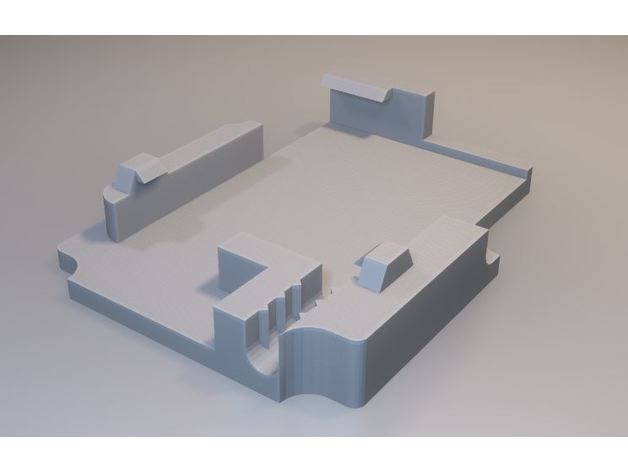
XHover Stingy XSR receiver mount 3D Print Model
Summary
I created this little mount to mainly hold my RX horizontal antenna, but then decided a rear mounted XSR would be better so extended it. It;s still a work in progress, suggestions for improvement welcome.
My main consideration is keeping it as weightless as possible. -
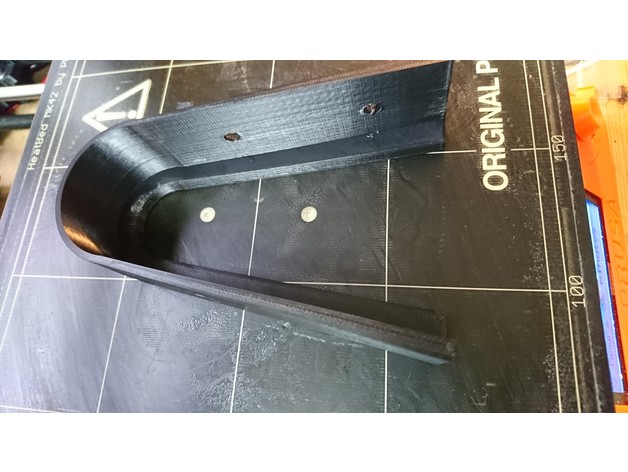
Canoe End Cap 3D Print Model
Summary
Made this to protect the wood at each end of my open canoe, printed with supports in ABS, it has a little give so my be able to spring open or closed to fit your canoe. -
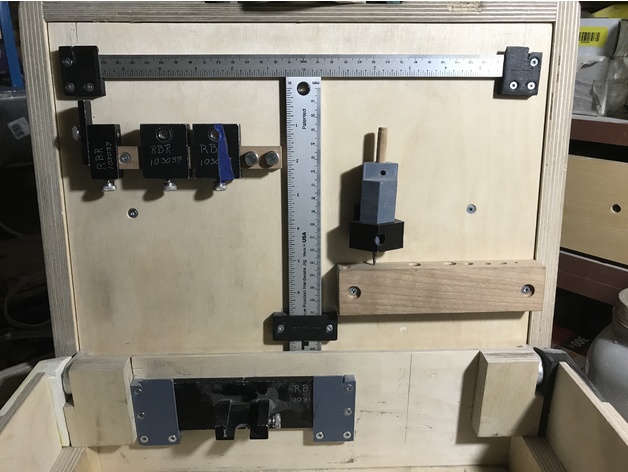
Guide Support 3D Print Model
Summary
Custom made for the cabinet handle JIG
Print Settings
Printer:
Prusa i3 Custom Made Rafts:
No Supports:
No Resolution:
0.1 – 0.2 Infill:
100% Notes:
I used ColorFabb PLA/PHA filament 1.75mmCustom Section
Material
The holes are made for #6 tapper wood screws. -
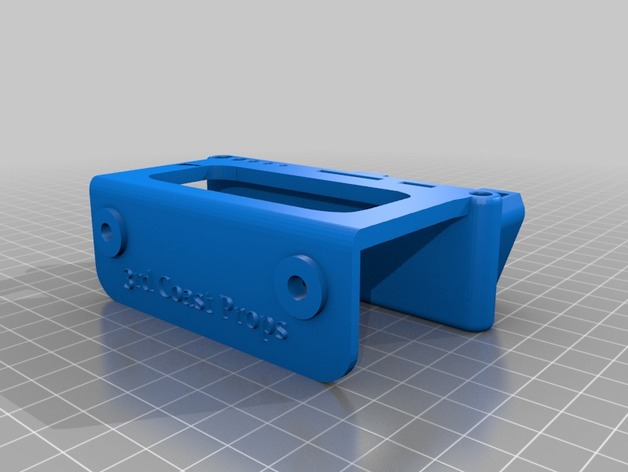
CR10 Tool holder 3D Print Model
Summary
A little tool holder I use for my cr10’s… Still a work in progress though lol, anyhow it will hole all the tools that came with the unit. so enjoy -
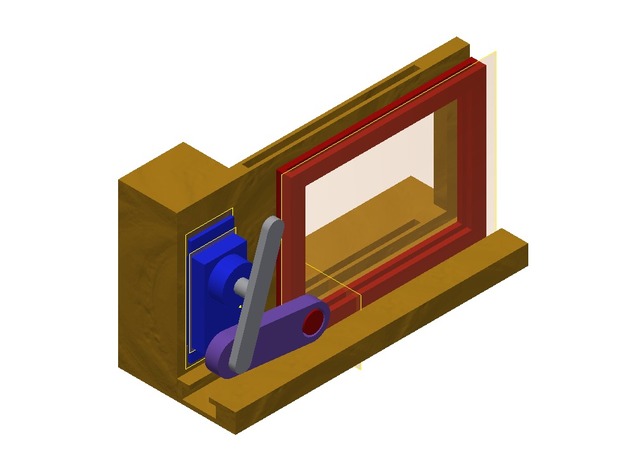
Rotary Linear Conversion using Stepper 3D Print Model
Summary
If one has to move something from rotation to linear. We had to shift something.. -
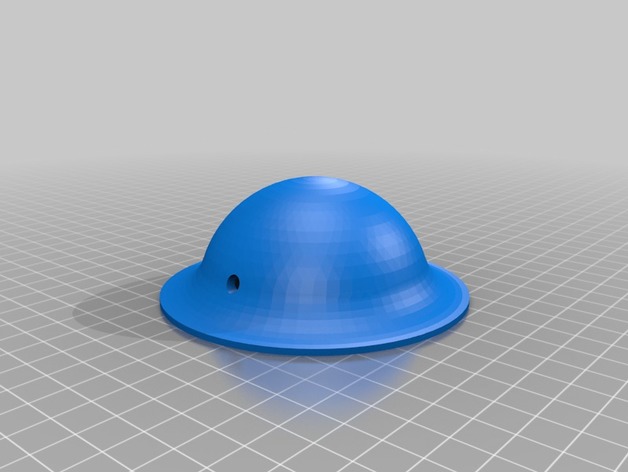
Ceiling junction box for pendant lamps 3D Print Model
Summary
A small junction box for the ceiling. I use it to hide the cables and screw terminal (luster terminal) that come out of the ceiling. This allows me to move the hanging lamp (pendant lamp) away from the hole in the ceiling while hiding its ugly connectors.
Cable hole: 5,2 mm
Diameter: 100 mm
Height: 38 mm
Video:https://youtu.be/qc448HdpeAg -
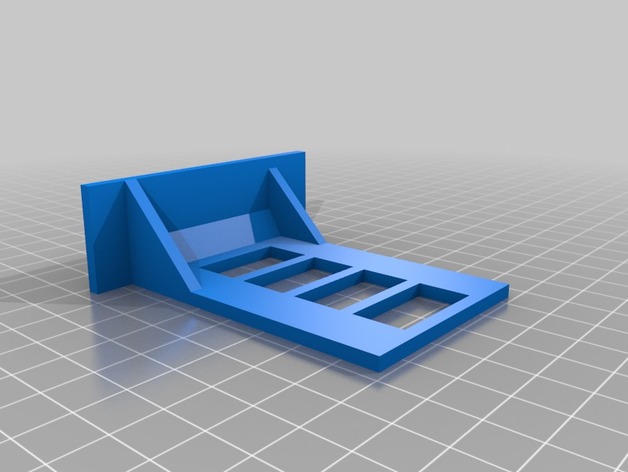
super cub battery holder system 3D Print Model
Summary
A system to hold a battery in place in a Super Cub. The tray holder goes in the top and the battery tray hooks onto the holder -
Programación_156e1165ef4ec4c71437432cb1a55135 3D Print Model
Summary
Mi robot es capaz de hacer:
Avanzar en diferentes sentidos, emitir sonidos, mover los brazos, evitar obstáculos, cambiar la expresión facial, seguir líneas, ser controlado por vía bluetooth.
Post-Printing -
box with hinged lid 100x70x25 3D Print Model
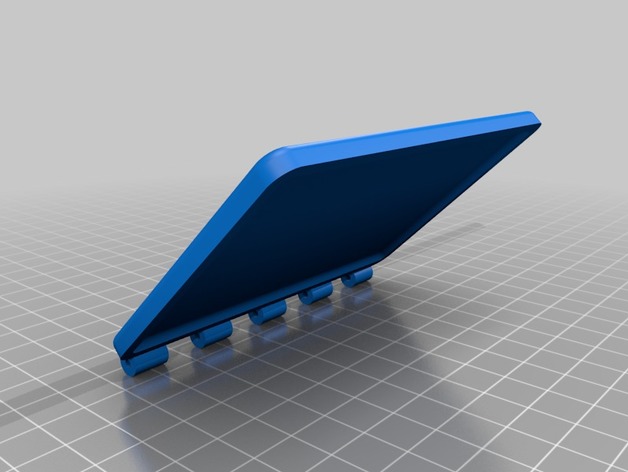
Summary
storage box with hinged lid requires a metal rod for pin. open holes with a drill bit if required.
supports will be needed for hinge -
Laser cut Forest Frame w/ Squirrel 3D Print Model
Summary
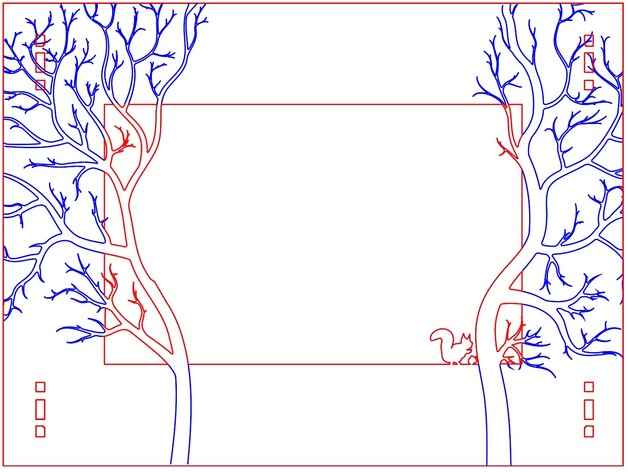
Remix of laser cut forest frame with the addition of a little squirrel and a nut
3 mm wood -
Runcam 2 Picatinny Rail Mpount 3D Print Model
Summary
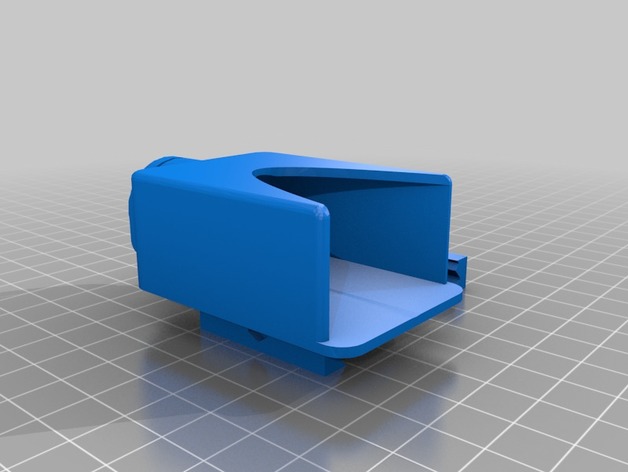
This is a runcam 2 picatinny mount, you will have to get the bolt and nut yourself, I suggest going to a local hardware store and seeinbg what fits in this. -
Adjustable endstop 3D Print Model
Summary
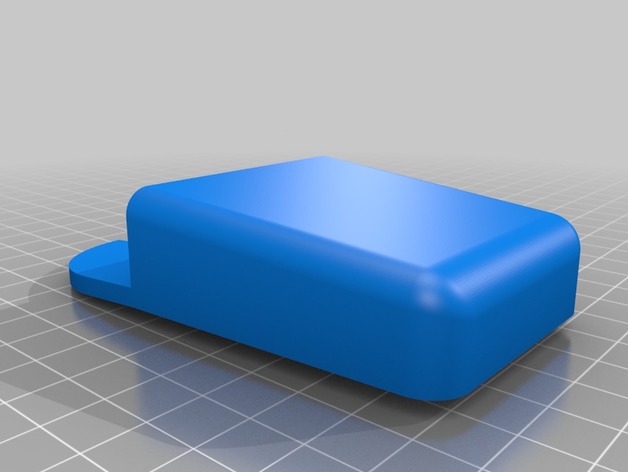
ok so I wanted to have an adjustable Z endstop for my tronxy X3 and seeing as how I couldn’t find one I liked and would really work with my X3 I went ahead and remixed one I found on here…. The third part of this I didn’t remix I have not printed any of this yet as my printers printing other items, But I’m hoping it will all work together to allow minor adjustments without any chance of messing things up.
Let me know if this works for you… I hope to be printing soon then mount it on the printer for test.
I forgot to rotate the mount for ease of printing so you’ll need to do that.
Print Settings
Printer:
tronxy X3 Notes:
normal printer settings should work good.
How I Designed This
this was fully done with tinkercad for ease and speed. -
Whirlpool Designer Series (YET19DKXSW03) Freezer Door Shelf Part 3D Print Model
Summary
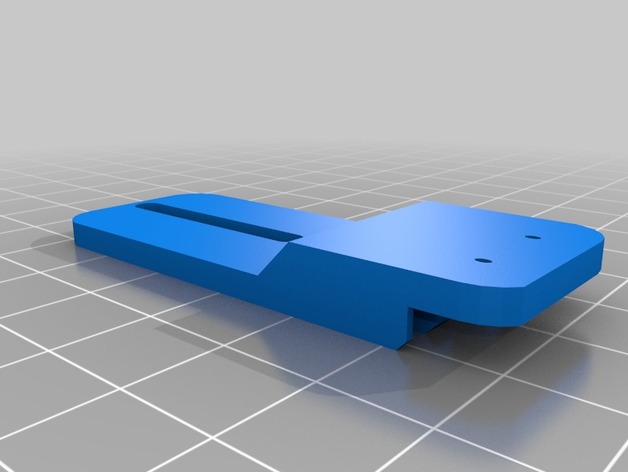
This is a freezer door shelf part for the Whirlpool Designer Series (YET19DKXSW03). When I moved into my new house all but 1 was broken (and even that one was broken a bit). I finally got around to designing and printing a replacement after about 3 months!
This is to be used with wooden dowels (purchase from any hardware store, I got mine from Home Depot). The diameter of the dowels were 12.1mm and the approximate length I cut them dowels to was 550mm.
You’ll have to print them with support and I recommend you print them standing on their side for maximum strength. It also gives you more than enough room to print 4 at the same time when they are standing on their side.
Print Settings
Printer Brand:
Prusa Printer:
Prusa Clone Rafts:
No Supports:
Yes Resolution:
.32 Infill:
25 -
STACKABLE BINS ORGANIZER 3D Print Model
Summary
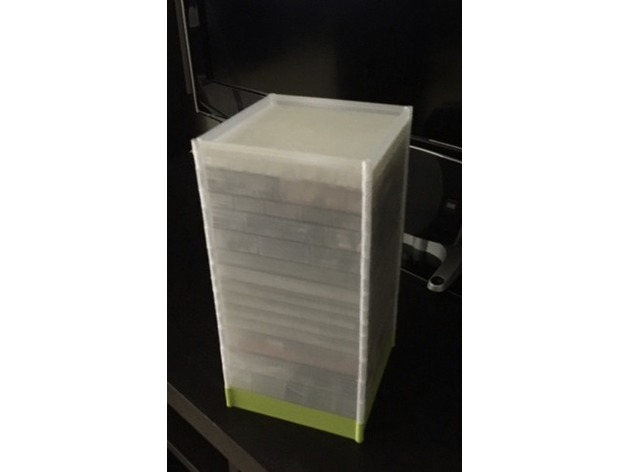
It was designed to keep my electronic parts organized. However, it could be used for different items as well. Hope you will find it useful in your household. -
Scarf Hanger 3D Print Model
Summary
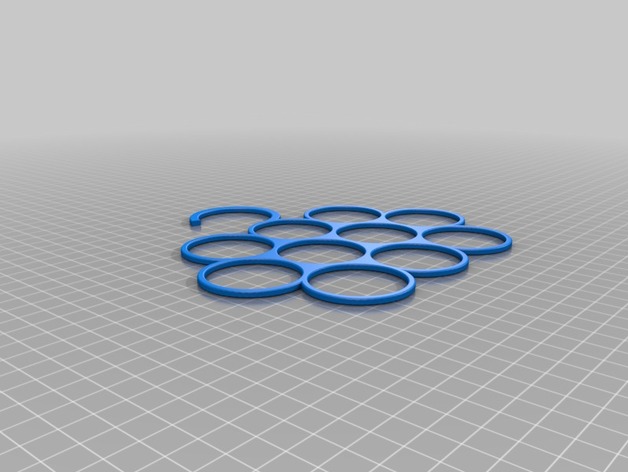
Designed a scarf hanger with my wife.
Print Settings
Printer:
Tevo Tarantula Rafts:
No Supports:
No Resolution:
0.2 Infill:
100 Notes:
preferably print 100% infill cause its only 3mm thick -
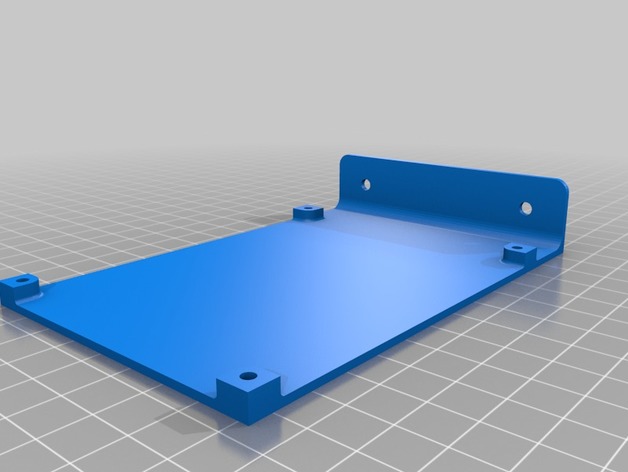
MKS GEN-L Adapter board 3D Print Model
Summary
for 2020 aluminum
Print Settings
Printer:
Tevo Tarantula Rafts:
No Supports:
Doesn’t Matter Resolution:
0.2-0.25 Infill:
30% -
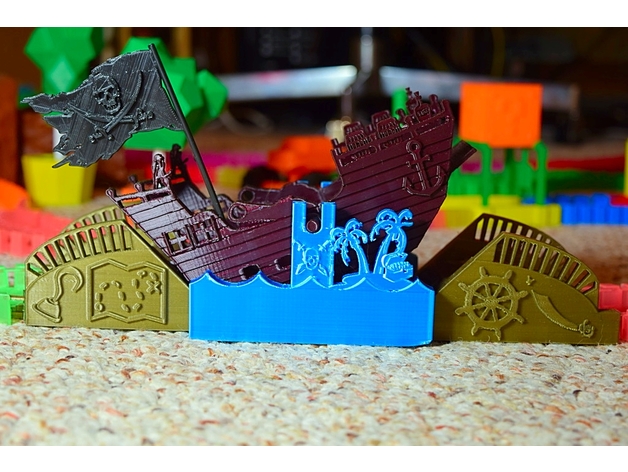
Pirate Ship Seesaw for Magic Tracks, Neo Tracks, and everything compatible 3D Print Model
Summary
All parts were printed in the position I uploaded them in.
I printed the ship in two parts due to having a small print bed. I included a single print ship file for those with a larger bed.
I printed one flag which provides sufficient weight to make the seesaw return to the original position after each car passes through. I included an optional second flag for the opposite side. I have not tested to see if this is too much weight for the seesaw to function normally.
Supports are required for all parts, but very little is necessary.
Works with Magic Tracks, Neo Tracks, and anything else compatible with these.
Print Settings
Printer:
Monoprice Select Mini Rafts:
Doesn’t Matter Supports:
Yes Infill:
10-15 -

Dibujo 3D AL PACINO 3D Print Model
Summary
Dibujo 3D AL PACINO
Imprimir las 3 primeras capas con filamento negro
de la 4 hasta terminar en filamento blanco…
respetar la altura de capa
0.2 mm la primera capa
0.1 mm la altura de capa
100 % relleno
velocidad 45 mm/s máximo
boquilla 0.4 mm
DRAWING 3D AL PACINO
Print the first 3 layers with black filament
From 4 until finished in white filament …
Respect layer height
0.2 mm the first layer
0.1 mm layer height
100% filler
Speed 45 mm / s maximum
Nozzle 0.4 mm -
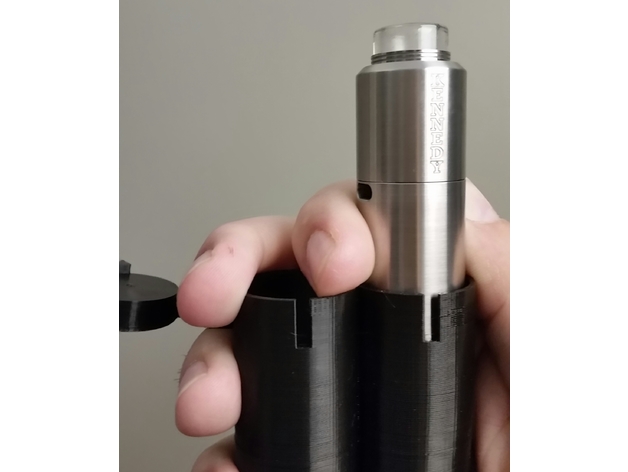
Double Barrel Mech Mod Tube 3D Print Model
Summary
This is a tube to hold your mech mods. it can hold 2 mech mods or one mech mod and batteries (make sure to put something between batteries, so they won’t discharge). I personally only use it for when I’m taking 2 mods out with me. Made to hold 2 24mm tube mods snugly. it looks like a double barrel shotgun and the sights double for a tab to open the top caps. I hope you enjoy this and please let me know if you can think of other vape related things that you’d like me to design.
I included one version with my @3MB13 Vapes logo and one version without any text
Print Settings
Printer:
Anet A2 Rafts:
No Supports:
No Resolution:
0.2 Infill:
100%
How I Designed This
Sketchup -
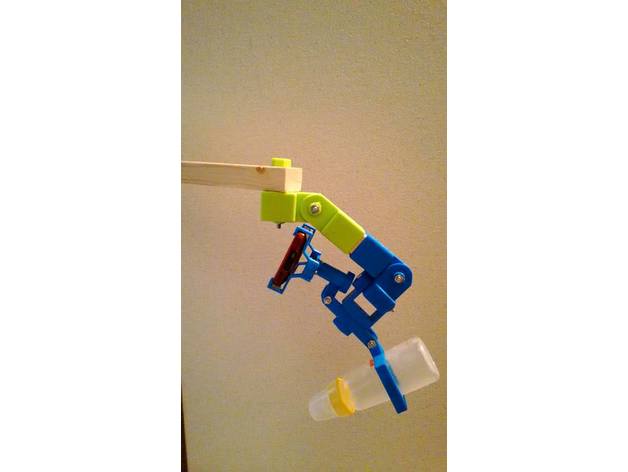
3D Printed Wood Arm Joints using 30mm x 40mm wood v0.7.0 3D Print Model
Summary
Attention: This project is released under the General Public License version 3.
There is no warranty for any problems that occurred using this project.
GPL v3:https://github.com/silvershell/printed-wood-arm-joints/blob/master/LICENSE
3D Printed Wood Arm Joints using 30mm x 40mm wood.
Scad files of models are generated with scad-builder.js and scad-builder-proj.js.
.scad and others are here.
GitHub:https://github.com/silvershell/printed-wood-arm-joints/tree/v0.7.0 -
72 hour jam beep boy case 3D Print Model
Summary
this is my entry for the summer 2017 jam
please do not download it until its finalized -
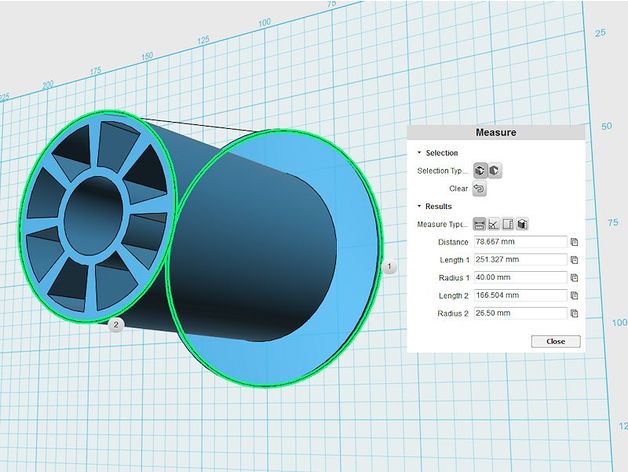
Omnistand 53mm spool holder with large 80mm flange 3D Print Model
Summary
A larger spool holder with a larger flange to prevent the filament roll running over the little flange on the one provided with the omnistand V1.36 by BaronWilliamshttps://www.thingiverse.com/thing:652415
Pretty simple print. Print with the flange at the bottom. -
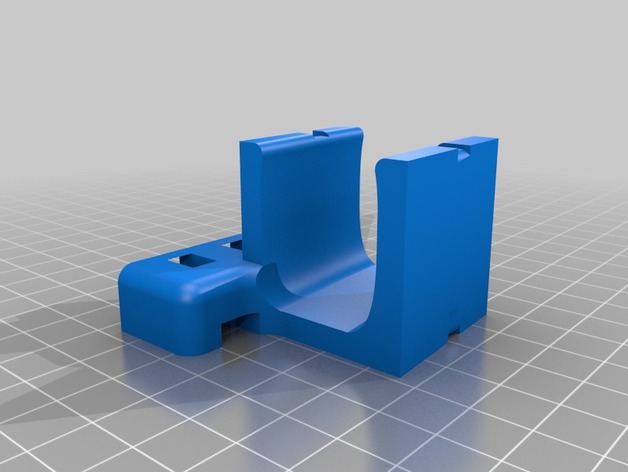
Cube Stereo Hybrid – Speed and Cadence Sensor 3D Print Model
Summary
Got a Cube Stereo Hybrid 120, a Full-Suspension E-Mountainbike.
The distance to the magnet on the spoke is much too large to get the BT smart speed and cadence sensor working with.
Sensor example: https://tinyurl.com/ycpqkn5g
Designed a base that is tightened with a zip tie to the frame and has the needed socket to install the sensor on it. So it uses the same magnet that is already in position for the Bosch motor and Bosch Intuvia / Purion display unit.
What you should have is a small flat rubber strip between the printed part and the frame to keep away any movements. Not too big and not too much, the 02_base.stl has only space for one side with 1mm thickness.
Print Settings
Printer Brand:
Prusa Printer:
Prusa Mk2 Rafts:
No Supports:
No Resolution:
0.3 Infill:
20% -
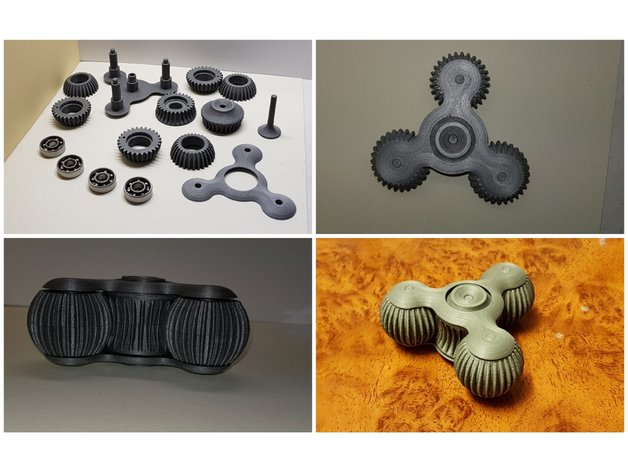
Spinner with massage balls 3D Print Model
Summary
ludique et relaxant
avec 4 roulements 608
suivre le montage avec les photos
Playful and relaxing
With 4 bearings 608
Follow the editing with the photos
NOP21
Print Settings
Printer Brand:
Ultimaker Printer:
Ultimaker 2 -
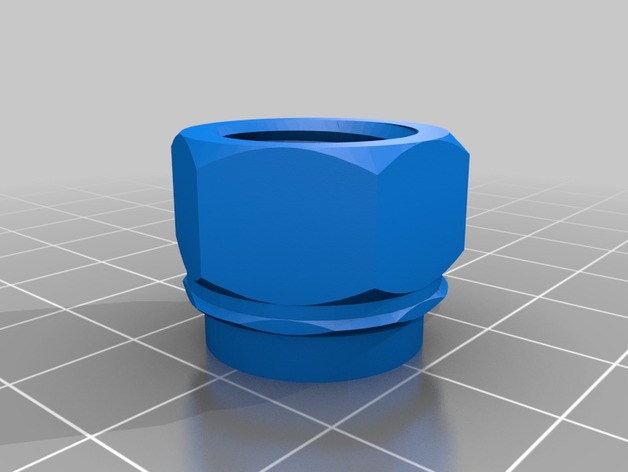
Colgate “Snap on tub to screw on travel” toothpaste transfer connector 3D Print Model
Summary
Inspired byhttps://www.thingiverse.com/thing:158910
andhttps://www.thingiverse.com/thing:800679
and especially this customizable one:https://www.thingiverse.com/thing:1972293
where I used it to create the bottom (screw to the small Colgate tube) and then added a snap on connection in tinkercad.
So this “thing” connects snap on Colgate big tubes to screw on Colgate little travel tubes.
It did not need supports. -
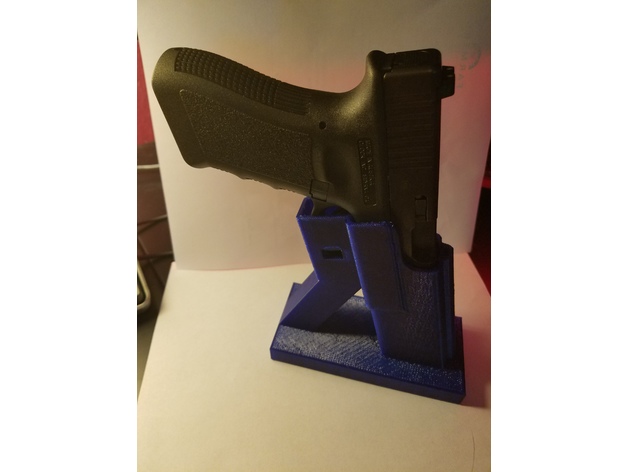
Glock Console Holster 3D Print Model
Summary
I wanted a way to carry my Glock 23 when driving but still have quick access should the need arise. This console holster fits horizontally inside the console with grip pointed toward the driver. Thanks to PrintedFirearm for the basic holster shape, this is a remix.
To adhere you can cut the thin piece of carpet at the bottom of the console to match the profile, then use double stick tape or glue to attach to the plastic console bottom. I’ll upload additional designs with a longer base to wedge fit, but wanted to upload the original design for people that have different size consoles.
v1 has about 10mm extra length for the gun barrel. I’ll upload v2 shortly customized to fit the Glock 23 exactly.
Printed with PetG, as I’ve had issues with PLA melting inside the console in the Texas heat.
Look here for additional (and soon to be revised) console trays, as well as other Tacoma and truck parts:
Console Trays https://www.thingiverse.com/thing:2260403
CargoTie Downs https://www.thingiverse.com/thing:2289782 -
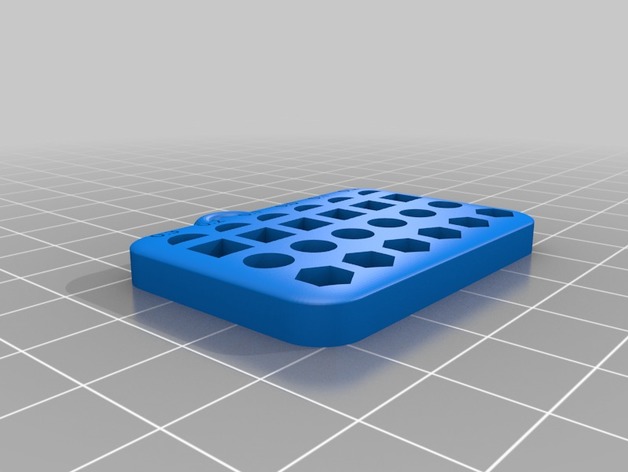
Tolerances – Margin Checking 3D Print Model
Summary
USE TWO SHELLS ONLY ON TOLERANCE BOARD –
With 0.4mm nozzle or above it will be similar to 100% infill and have slightly different results, print 100% infill later to compare results ####
Objects are designed to test the margins/tolerances of your 3D printer.
By knowing the tolerances your printer creates with, you can make adjustments int he model and get near perfect results.
Tolerance objects are small so they are quick to print and exist around the 5mm mark for checking (4.8 – 5.3 mm). Holes with consisting pins consist of Semi Circle, Square, Circle and Hex (for allen keys).
Print the tolerance board, to check tolerance of holes;
use vernier calipers to check the sizes of holes
use real time objects to see how they fit
print the ‘pins’ which fit the holes to see which one fits
Choose a set of ‘pins’ with handles for easy manipulation ;
“Tolerances-All_4_8.stl” – has pins of 4.8mm
“Tolerances-All_4_9.stl” – has pins of 4.9mm
“Tolerances-All_5_0.stl” – has pins of 5.0mm…
…”Tolerances-All_5_3.stl” – has pins of 5.3mm
Discover tolerances between Prints and real world objects and between two separate prints. This will allow for easy designing of functioning parts int he future.
Print Settings
Printer Brand:
MakerBot Printer:
MakerBot Replicator 2 Rafts:
No Supports:
No Resolution:
Any Infill:
compare 10%, 25% and 100% Notes:
Only use two shell layers for the board,
Video available on youtube
How I Designed This
Blender 3D