Summary
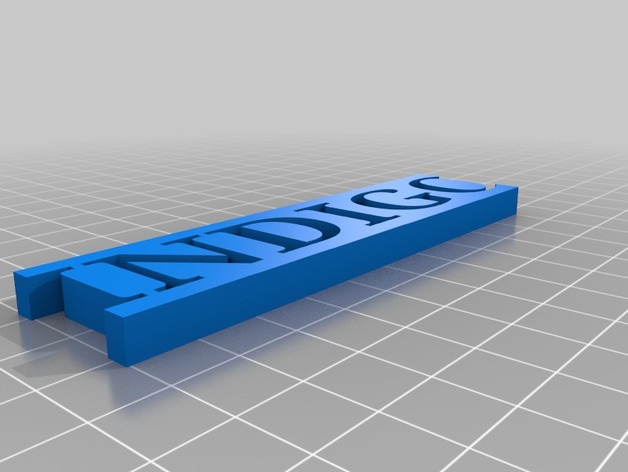
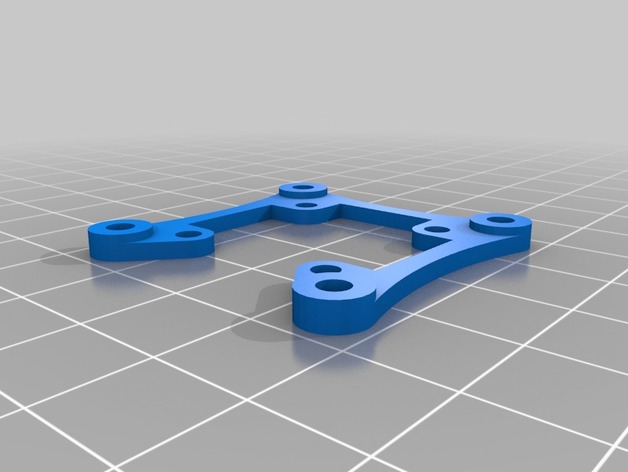
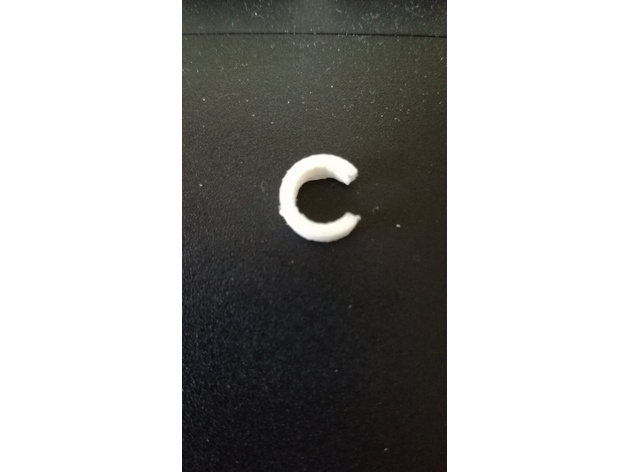
i was getting tired of having to buy a new loading plate clip for my well MB-01 so measured it and made a design so when it breaks again i just print a new one.
just make sure to lay it flat on the print surface
Print Settings
Printer Brand:
Wanhao Printer:
Wanhao Duplicator i3 Plus Rafts:
Yes Supports:
No Resolution:
0.6 Infill:
100 Notes:
i used default settings which worked fine for me
Post-Printing
Bit of sanding
to make it fit perfectly
Author: Thingiverse
-
Loading plate locker voor Tokyo Marui AWP en Well MB44xx 3D Print Model
-
Quick release for Raspberry Pi Case 3D Print Model
Summary
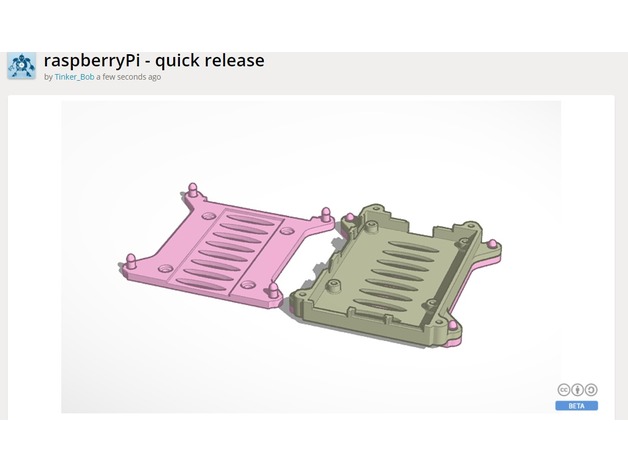
This is a quick release mount for the case https://www.thingiverse.com/thing:922740
Wanted to be able to quickly take my Pi out of my printing cabinet when I need it for another project.
Print with high infill to make the pegs stronger.
Post print: push each peg through a hole a few times to clean up any residue. This will make it easier to put all 4 pegs on at once (IE they won’t break when you try to remove).
This is set up with my printers tolerances so it may be a bad fit for your case. You can edit the peg sizes here: https://www.tinkercad.com/things/l91VsItmHf9-raspberrypi-quick-release -
voldemort wand small version (pendant) 3D Print Model
Summary
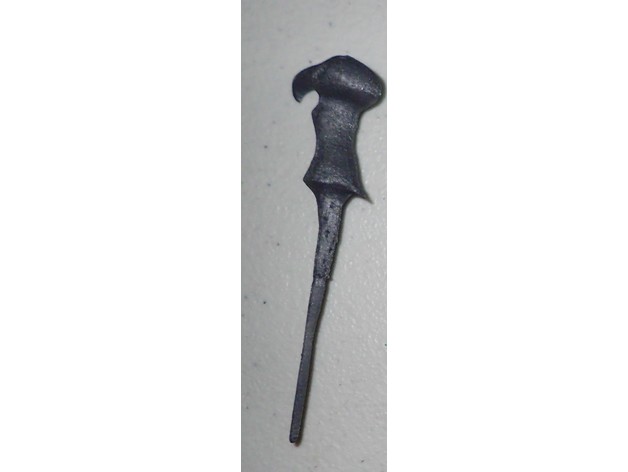
Size of this wand is
Z= 15mm
X= 28mm
Y= 106.803mm
You can use whatever you want.
Print Settings
Printer:
Anet A8 Rafts:
Doesn’t Matter Supports:
Yes Resolution:
.1mm Infill:
100% Notes:
Nozzle size 0.2mm diameter.
Printing speed 60mm/s -
Replacement Sunglass Frames 3D Print Model
Summary
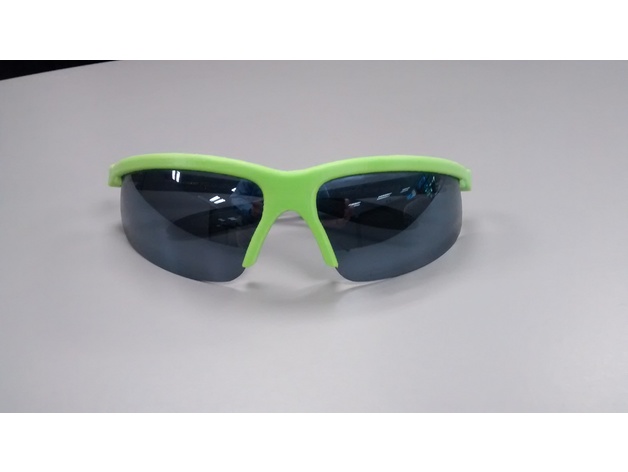
I play volleyball and break a pair of glasses every season (which is why I buy cheap ones…), but this year it happened early in the season, and I decided that I was going to build my own replacement… after all the lenses were perfectly fine.
The frame (green plastic) is modeled after, and uses the the lenses from a pair of inexpensive Foster Grant “Slam Dunk” Polarized sunglasses. (Frame name was imprinted on on temple of the original frames).
I designed these replacement frames from scratch, and tweaked the design a lot to get the lenses to snap in and hold firm just right. I used the original temples (black plastic) and hinge screws.
Print Settings
Printer:
Anet A6 Rafts:
No Supports:
Yes Resolution:
Fine Infill:
60% Notes:
I used supports to the build plane only. -
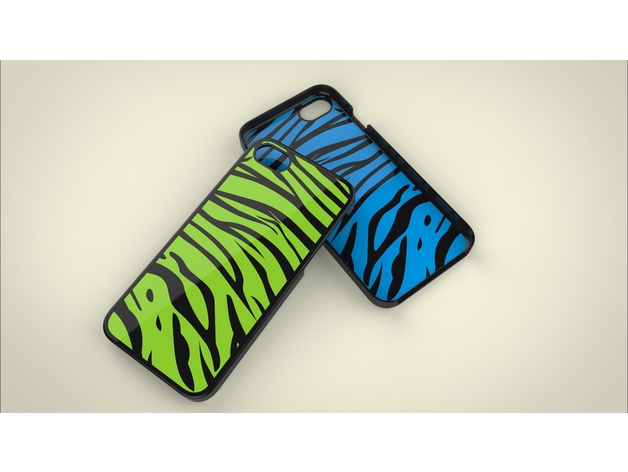
Iphone 7 Case – Tiger Stripes Dual Exrusion 3D Print Model
Summary
Tiger striped pattern Iphone 7 case for dual extrusion machines.
Please make sure you align the bodies together before printing. (You can tell when the camera holes line up).
Print Settings
Printer Brand:
FlashForge Printer:
Creator Pro Rafts:
No Supports:
No Resolution:
.16 Infill:
20 -
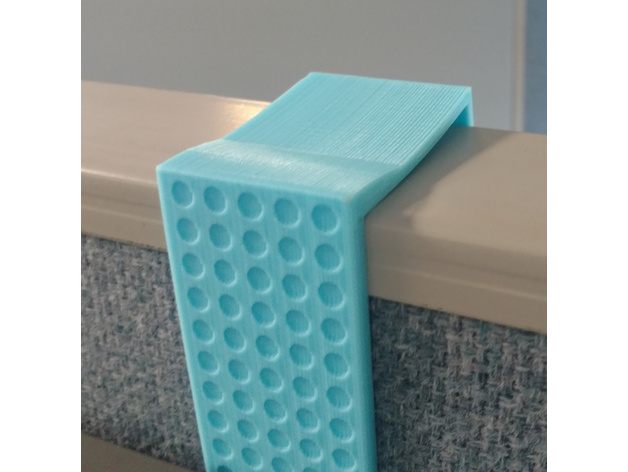
Generic Office Cube Wall Hanger 3D Print Model
Summary
Used for hanging something on a cube wall. Was specifically created to hang a whiteboard on the cube wall, using the metal clips that came with the whiteboard.
Designed for a 50mm width cube wall.
Print Settings
Printer:
Tronxy X3 Rafts:
Yes Supports:
No Resolution:
.2 Infill:
0% Notes:
Used 2mm walls, with no infill.
How I Designed This
Designed in Fusion 360 -
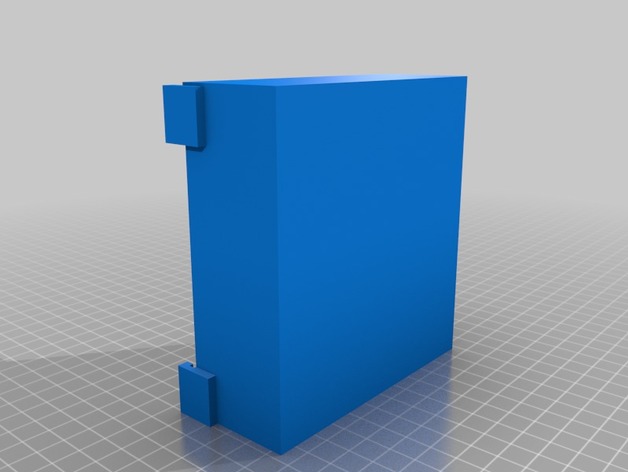
4x4in label holder no lid 3D Print Model
Summary
the 4x4in label holder without lid, if you want to print them separately -
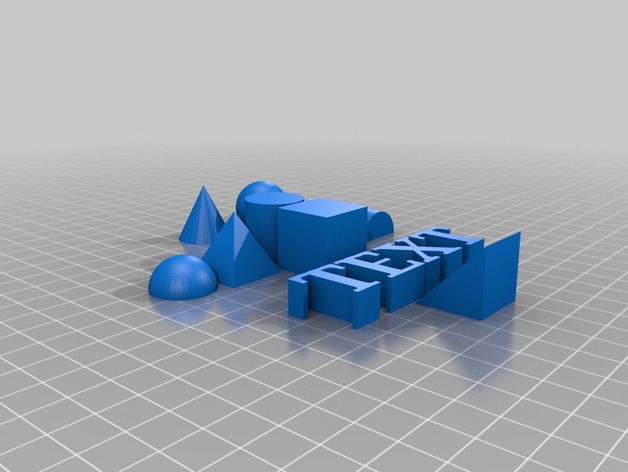
Tina Original Design 3D Print Model
Summary
Camper Christina created her own original design.
Print Settings
Printer Brand:
MakerBot Printer:
MakerBot Replicator+ Rafts:
Doesn’t Matter -
4×4 label holder lid 3D Print Model
Summary
the lid to go with the separate label holder. This set is smaller then the combined set. -
Kirby Whispy Woods Plant Pot 3D Print Model
Summary
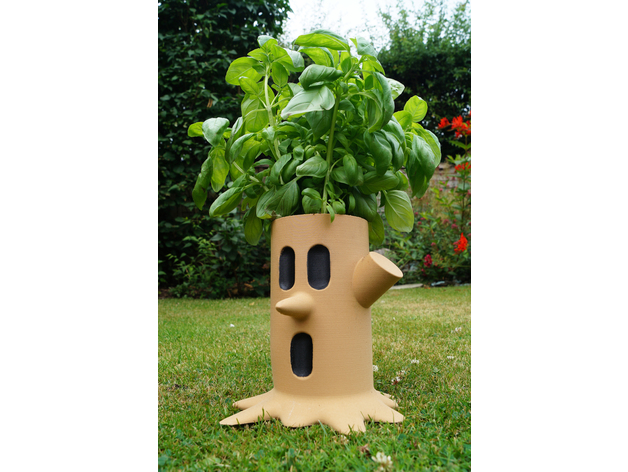
Nintendo Kirby Whispy Woods Inspired Plant Pot.
This plant pot is inspired by Whispy Woods, the tree boss from Kirby.
This garden accessory is printed in Polywood and helped bring the character to life, it’s up to you to give them a bushy head of leaves that it so desperately needs!
You may need to scale him up a bit in which ever 3D print software you use is, as I made the design smaller than I intended to.
Print Settings
Printer Brand:
Ultimaker Printer:
Ultimaker 2 Extended Rafts:
No Supports:
Yes Resolution:
0.2 Infill:
8-10%
How I Designed This
Designed using Fusion 360 -
Threaded Shark Container 3D Print Model
Summary
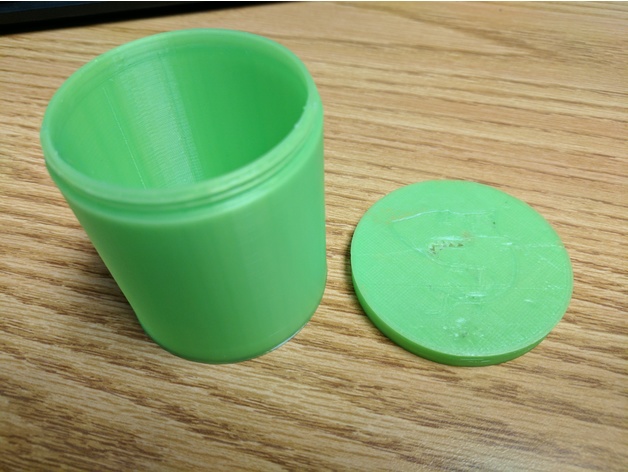
Container for holding shark teeth (or whatever else you want) in honor of #sharkweek!
Designed in OpenSCAD with the use of @parkinbot’s threading.scad library. -
Male Orc with Shield and Hand Ax 3D Print Model
Summary
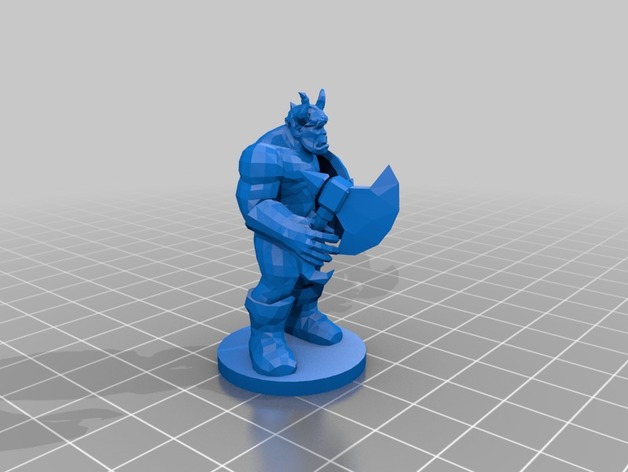
Male Orc with shield and ax. Positioned in Blender then scaled and edited onto the base using MeshMixer. -
BT 880 “Mickey” Supertank 3D Print Model
Summary
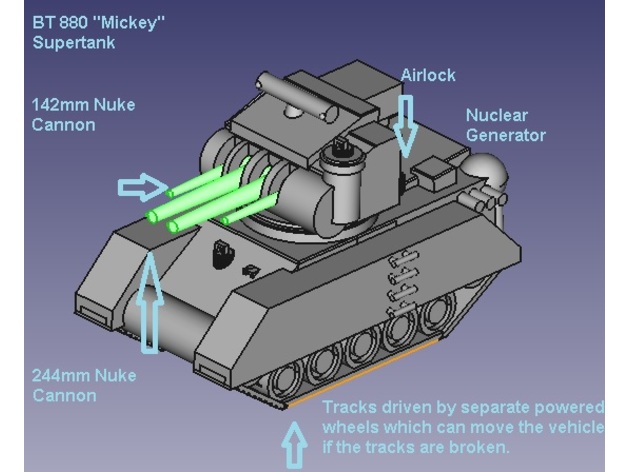
Representing the first of the new generation super tanks, the “Mickey” BT 880 was widely used and replaced previous vehicles in most tank formations of the Federation. The vehicle is powered by a massive Smith and Westor nuclear generator at the back left, and separate generators at the back of the turret. This supertank, although slower than previous smaller vehicles was very well protected by shields and heavy Carbon armour.
The main armament was a double 244mm Nuclear Slug Cannons, as well as two 142mm nuke cannons. This larger guns could fire at extreme range (up to 5000km) and was provided with a dedicated rangefinder on the turret roof. The size of the vehicle meant that up to 50 nuclear rounds could be carried, as well as hundreds of other rounds. HE and AT dart rounds were also carried, and a common tactic against similarly shielded vehicles would be to ripple fire the 142mm guns and then the 244mm guns. The smaller nuke rounds would reduce the shielding, and the second 244mm Nuclear round round destroy anything. Against un-shielded targets a single nuke round would normally be enough, although in many situations a HE or AT round would be preferable especially if friendlies were nearby and to reduce collateral damage to civilians and infrastructure. -
Folgertech FT5 Cooler 3D Print Model
Summary
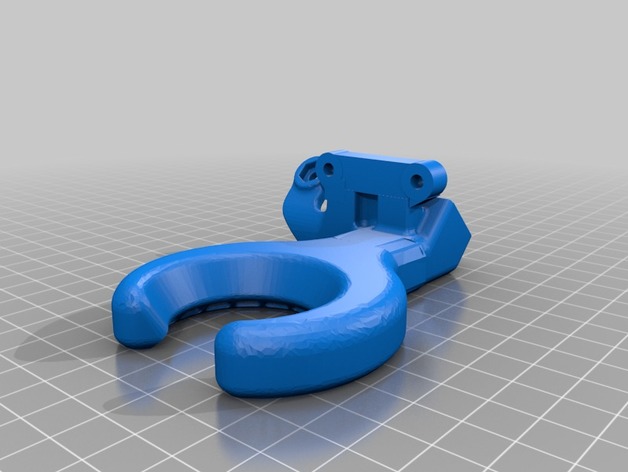
Needed a cooler for the FT5 with stock extruder assembly, but using 713maker ultralight extruder mount. -
Bigmouth Bubbler Lid Clamp 3D Print Model
Summary
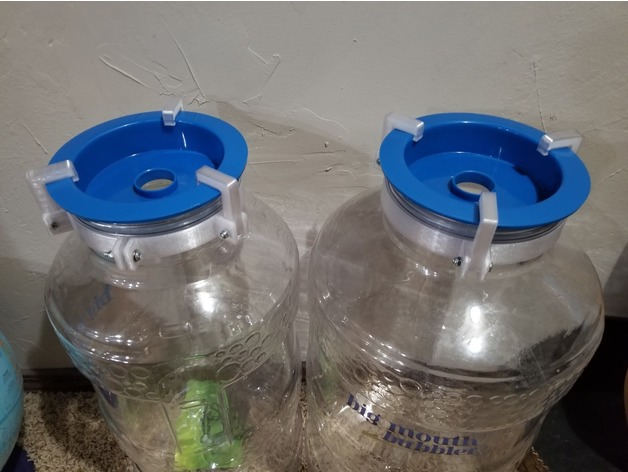
The Bigmouth Bubbler plastic carboy has issues with the lid pushing out under certain circumstances. This is my solution for the issue. The main ring clamps under the collar and the arms clip over the lid to hold it down and secure. I printer it it of PETG and used stainless 4mm hardware to assemble. This way I don’t fear dunking it in sanitizer if needed.
Print Settings
Printer:
Prusa MK2 Original Rafts:
No Supports:
No Resolution:
.20 Infill:
30 Notes:
Clean holes and use 4mm stainless hardware. -
Anet A8 Fan short nozzle with optimized air flow 3D Print Model
Summary
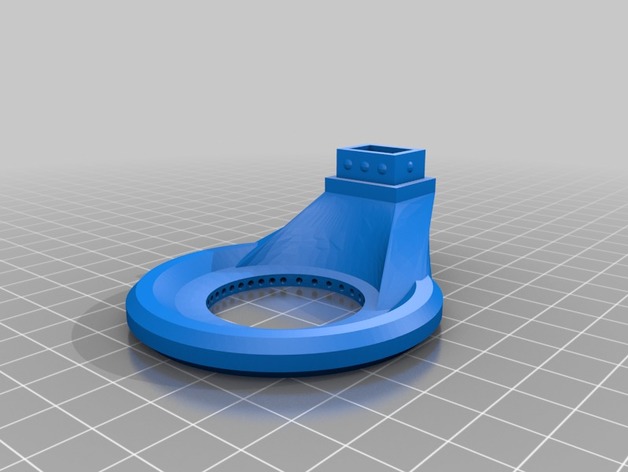
I use a shorter nozzle so i need another fan. The fan have an opitmized air flow.
Print Settings
Printer:
Anet A8 Supports:
Yes Resolution:
0,1mm Infill:
25 % -
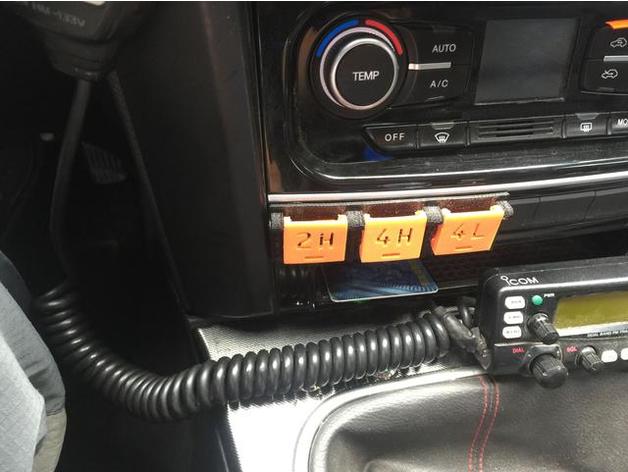
Great Wall Hover H5 Four-drive Switch Cover 3D Print Model
Summary
Great Wall Hover H5 (Great Wall X200/X240) Four-drive Switch Cover,2H/4H/4L Switch Cover -
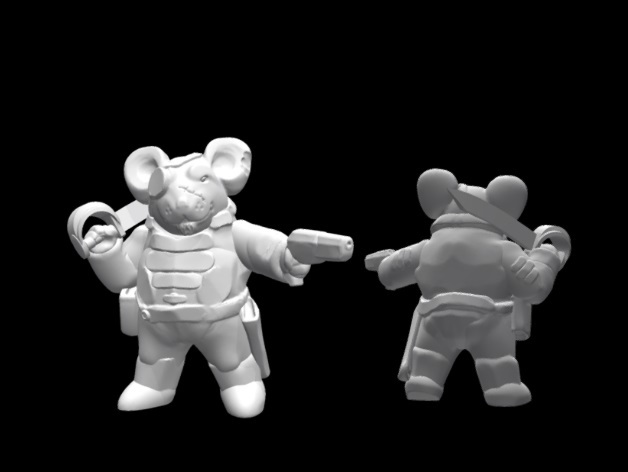
Mouse Pookah Space Pirate (28mm/Heroic scale) 3D Print Model
Summary
This character is from our tabletop roleplaying game, Wayfarer: Things Beyond Wonder.
We’ve set up a Patreon page for anyone who’s interested in helping to fund us so we can keep making free and open sourced games like Pocket-Tactics, Discord, and others, not to mention the growing catalog of gaming miniatures that you can use for whatever you want! (Psst… we take requests and commissions…)
Enjoy! -
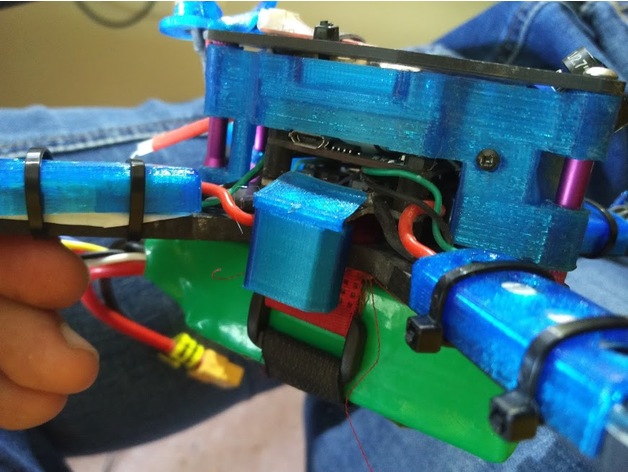
Matek PDB XT60 cover protection 3D Print Model
Summary
Protection anti sock for electric conections and make more easy unplug the connector
Protección para que no de la corriente con las conexiones al desconectar. Mucho mas sencillo desconectar la batería de un dron.
Print Settings
Printer:
p3Steel Rafts:
Doesn’t Matter Supports:
Yes Resolution:
0.2mm -
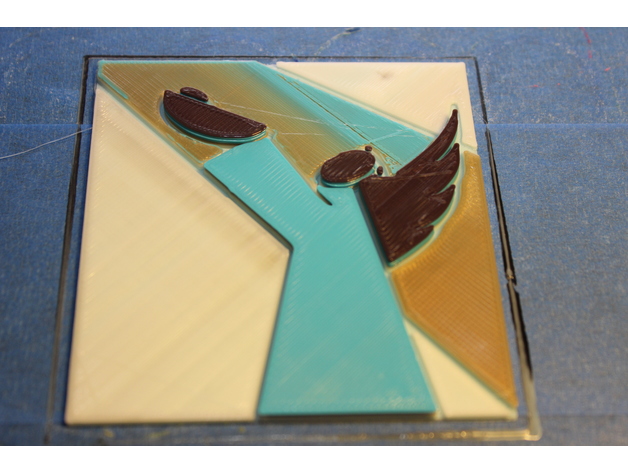
Garden of Innocents Logo Plate 3D Print Model
Summary
Garden of Innocents (GOI) is a non-profit charity that provides a dignified memorial and burial for children who remains have been abandoned or not been claimed by any family.
Information about the Garden of Innocents can be found here, http://www.gardenofinnocence.org/
As part of an ongoing project, I am designing a 3D printable urn to donate to Garden of Innocents. I challenge other 3D printers and designers to print and design their own urns to donate to GOI.
This log plate is designed to be printed flat, with the option to change colors for each layer to produce a multicolored GOI logo that you can attach to any urn you make. You can also take this logo plate and place it into the print, or attach any other way you wish.
GOI relief logo1.stl and GOI relief 2.stl are different versions you can use in your project.
Print Settings
Printer Brand:
LulzBot Printer:
TAZ 5 Rafts:
Doesn’t Matter Supports:
No Resolution:
0.2 – 0.5 Infill:
5 – 10 % Notes:
Print in 4 colors. The first layer should be light blue, 2d gold / yellow, 3d dark blue, 4th white or black.
Each layer is 2 mm thick, so you can slice or add g code to pause and change filaments -
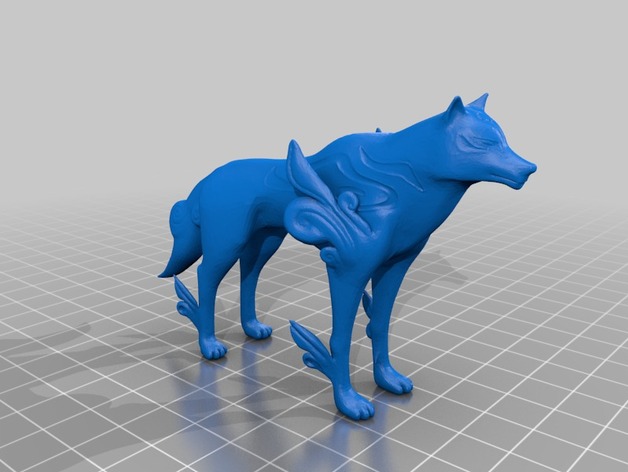
Okami Amaterasu – Thicker tail for printing 3D Print Model
Summary
This is a remix of Amaterasu by kijai. The only thing I did was make the point where the tail connects to the body a bit thicker, since it was very prone to breaking on the one I printed. There are also fewer triangles on this model, because the original file was really massive and nearly crashed Meshmixer. -
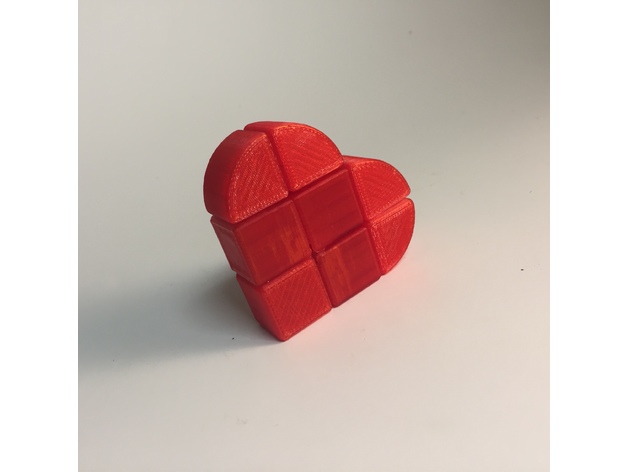
1x2x2 Heart Cube 3D Print Model
Summary
I made this as a simple test for a 19mm-cubie 1x2x2 design, intended for use in future projects. It can hardly be considered a puzzle, since it has something like 3-4 possible positions. The heart extensions were designed and printed after being inspired by the transparent red filament used to print the base “puzzle”.
Like many of my designs, this “puzzle” is designed to be assembled without hardware. However, I haven’t gotten my peg design quite right yet, so the rim of the peg needs to be trimmed down a bit with some wire cutters in order to fit in the hole. It turns alright straight off the printer, but a little spritz of silicon lube does wonders.
As it is, this is more of a cute fidget toy than a proper twisty puzzle. If I could size it down some more, it would make a nice keychain or bag charm for any twisty puzzle enthusiast.
PARTS LIST:
1x Anchor.stl
1x Ball.stl
3x Edge.stl
1x Heart.stl
Print Settings
Printer Brand:
Up! Printer:
Up Mini Rafts:
Doesn’t Matter Supports:
Yes Notes:
Anchor.stl and Ball.stl should be printed at slightly higher infill, because 3D printers sometimes have trouble dealing with spheres. If you are using a perforated bed (standard on the Up Mini 2) rafts are recommended to avoid a bumpy bottom texture.
At this moment, the rim of the peg needs to be trimmed down with a knife/cutter until it can fit into the hole. I will probably fix this design flaw in the future, though it is not a top priority.
Jamming a folded strip of paper into the notch of the peg helps it stay in a lot tighter. Recommended to prevent popping. -
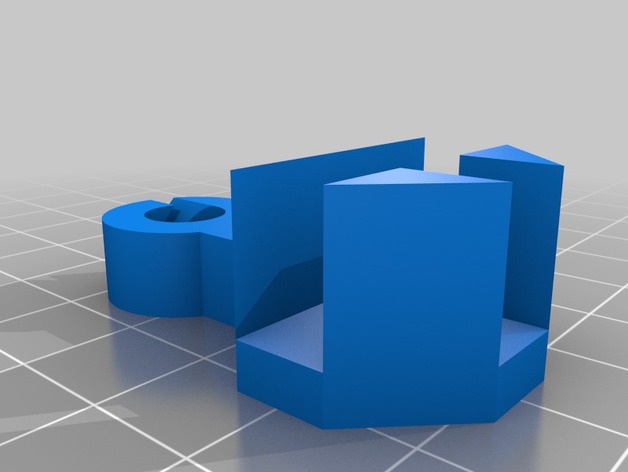
Anet A8 Side Filament Guide V2 3D Print Model
Summary
Slots onto the corner of an Anet A8 and guides filament coming in from the side.
Will work with any T joint that is 8mm thick.
If you print one off, click “I Made One” above and show me!
This is the second version of this filament guide, you can view the previous version here: https://www.thingiverse.com/thing:2076358
Improvements:
Smaller size
Improved filament insertion slot
Reduced volume
Print Settings
Printer:
Anet A8 Rafts:
Doesn’t Matter Supports:
No Infill:
20%-100% recommended -
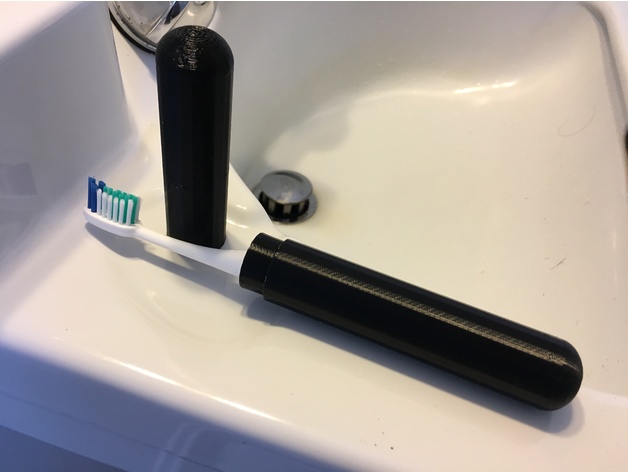
Toothbrush Travel Case 3D Print Model
Summary
Friction-fit standard size toothbrush travel case. Fits toothbrushes smaller than ~19cm long. A 2mm hole has been added to the top to allow some airflow.
Print Settings
Printer:
UP Mini 2 Rafts:
No Supports:
Yes Resolution:
0.3 Infill:
13% Notes:
I used UP PLA. With 0.3, some banding on the curved end occurs, but looks great otherwise. Print both sides with the end up. Supports are needed for the inner and outer ridges on the friction-fit parts, but should not be necessary for the ends.
How I Designed This
Designed in Tinkercad. -
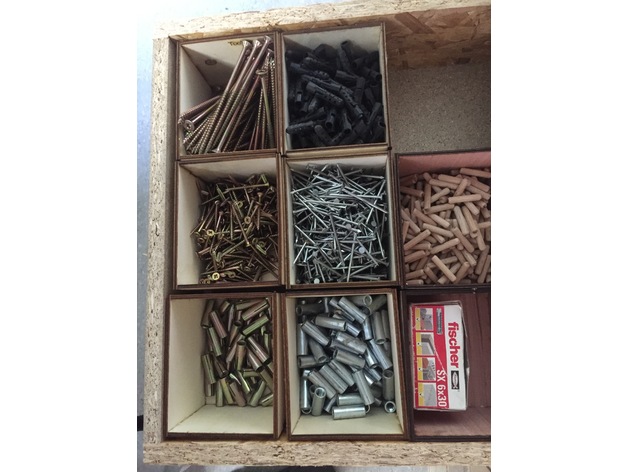
Toolbox ( for Screws ) 3D Print Model
Summary
Toolbox for my Screws and other small things ( L x B x H, 120mm x 100mm x 90mm )
How I Designed This
China 60W CO2 Laser, Speed 15mm/s, Laserpower 65%, 4mm poplar plywood -
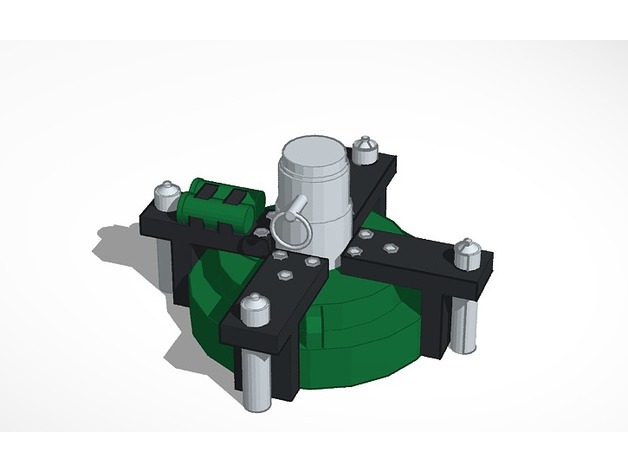
Cluster Charge | Rainbow 6 Siege 3D Print Model
Summary
This is a model of Fuze’s Cluster Charge from Rainbow Six Siege. Unfortunately I can’t print it yet because my 3D printer isn’t working, but once I fix it I will post a picture of the object printed and painted. Remember to give this a like and comment if you want to see anymore Rainbow Six Siege gadgets. -
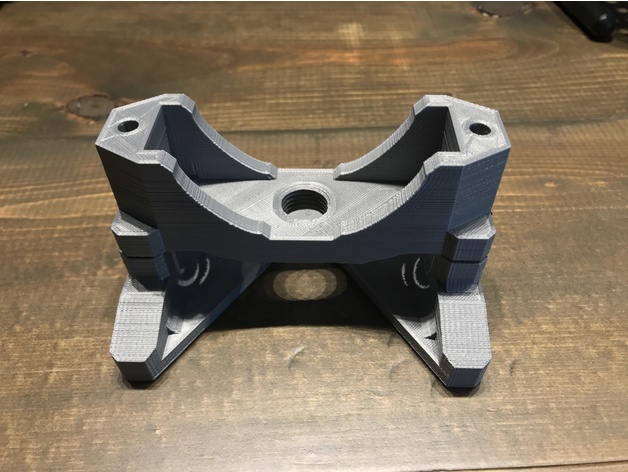
Dremel Router Attachment 3D Print Model
Summary
This is a remix of another design in which I added slopes to 90° edges to improve strength, added bolt recesses for better functionality, added measurement marks, and did some overall trimming to reduce material that did not contribute to strength. I printed this in true silver Hatchbox PLA. I personally have a Dremel 4000, but from what I have read, this will work on any Dremel with the same threading.
I would say a raft is essential to prevent lifting
x2 1/4″ bolts (4 in)
x6 1/4″ nuts
Print Settings
Printer Brand:
Prusa Printer:
Prusa Mk2 Rafts:
Yes Supports:
Yes Resolution:
.2 Infill:
15% Notes:
Raft is essential to prevent lifting. -
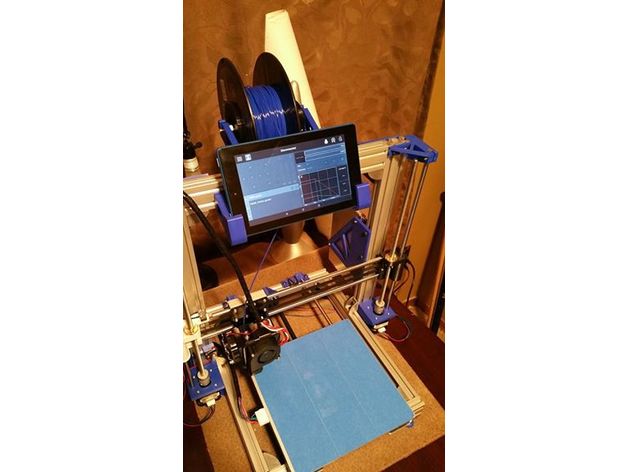
AM8 Tablet Holder 3D Print Model
Summary
This is a tablet holder for the AM8. With Octoprint, you can replace your printer’s screen with a dedicated cheap/old tablet. This was designed with the Kindle Fire in mind, but it should work with many different tablets.
Print Settings
Printer:
Anet AM8 Rafts:
No Supports:
No -
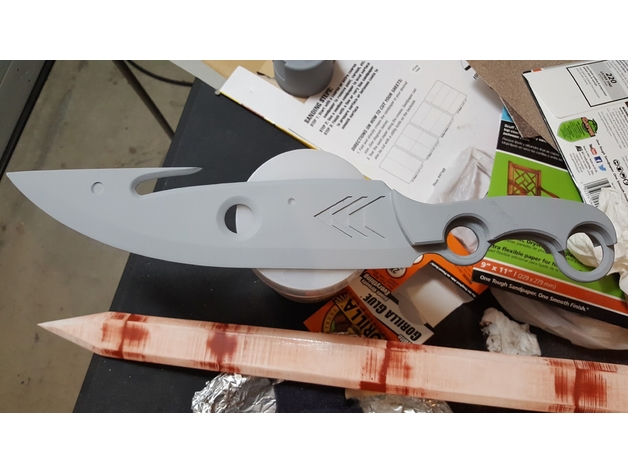
Hunter Knife Handle Scales 3D Print Model
Summary
Let me open with a thank you to WinterHawk904 for his great Destiny knife model.
These are handle scales that would go on the sides of the handle to fill out the grip and protect the hand from kinetic shock and kinetic transfer down the steel of the blade and full length tang. They’re used a lot in knives of today, and seeing as how the knife hasn’t changed terribly much in function over all of recorded history, I set out to make some handle scales for this far future knife because it needed them (550 cord only goes so far!)
As an aside, I also made these handle scales because I split my knife into two pieces for printing…in about the middle of the handle (using Autodesk MeshMixer). This is about the right size for a 300×300 build plate. As noted by some other makers the cross section of the blade is too small (even for this HUGE knife) to just glue the ends together and be done with it.
Without there being much material to play with in the knife’s cross section (to create more complex joints) I opted for an outside approach to increase the gluing surface area…which meant handle scales. I tried to keep them consistent with the look, lines, and ‘appointment’ of the Hunter knife and I think I have!
Make sure you line up the front (lower) part of the handle scales with the natural line of the blade bevel – the rest should fall into place well.
Last but not least – I’m totally new to the world of 3D printing and 3D design. This is my first project to ‘give back’ to the community writ large for some really helpful, friendly people that have made 3D printing accessible and enjoyable! Thanks everyone!
Print Settings
Printer:
Creality CR 10 Rafts:
No Supports:
No Resolution:
.2 Infill:
30% Notes:
This is essentially a structural piece for those of you that split your blade in the middle of the handle like I did. So over-engineer it and make it tough! Used tetrahedral infill pattern in Cura for strongk-ness. -
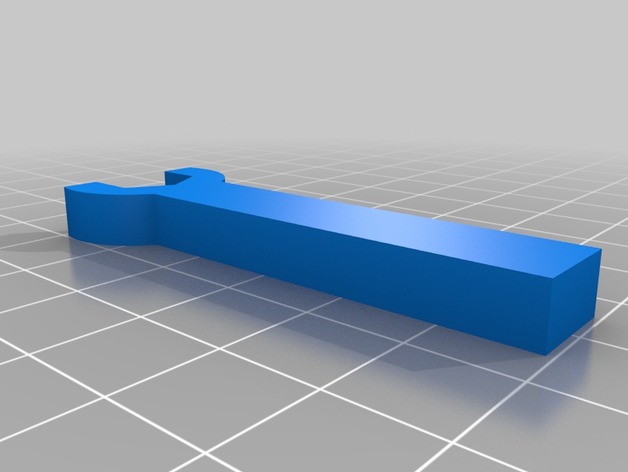
CZS 3D Printer eccentricSpacer wrench 偏心塊板手 3D Print Model
Summary
CZS 3D Printer eccentricSpacer wrench 偏心塊板手 -
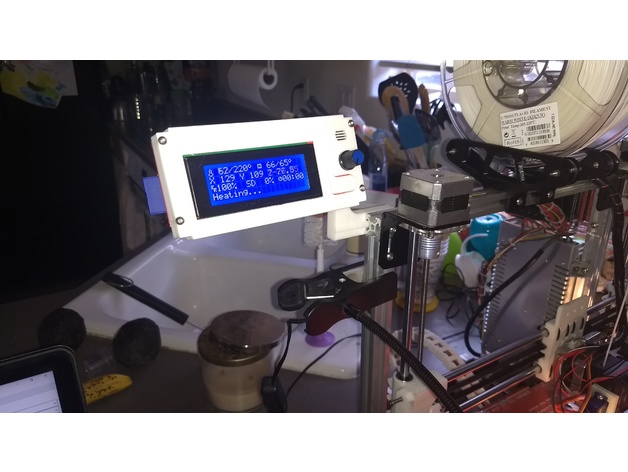
Folgertech 2020 i3 2004 Discount LCD Display Left Arm Mountable 3D Print Model
Summary
A remix of two other types of mounts. The best display front I have found plus a heavily modified arm to support it from the left side of my i3. Note the pictures provided where it uses two M5’s to mount it quite securely. Also note that the m3x30’s used to mount the screen use two sets of nuts, the first gives almost the perfect clearance for the soldered joints on the back and the latter hold it to the arm.
Print Settings
Printer Brand:
Prusa Printer:
Prusa Clone Rafts:
No Supports:
No Resolution:
300um Infill:
20% with 3 outer layers from 400um nozzle -
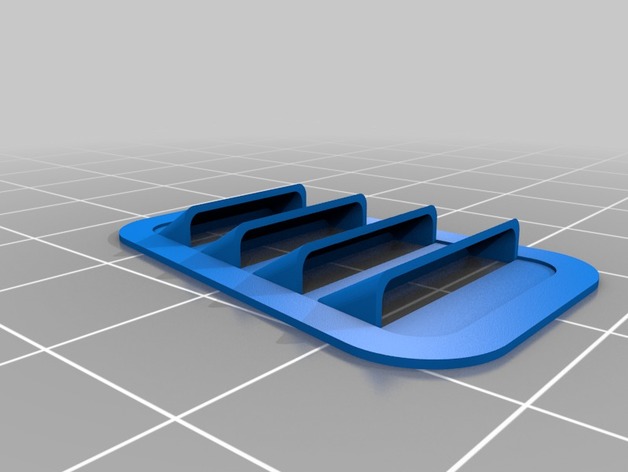
TRX-4 Parts 3D Print Model
Summary
Consolidated post of all my TRX-4 Designs. Development thread is http://www.rccrawler.com/forum/traxxas-trx-4/587308-trx-4-development-thread.html#post5729889 -
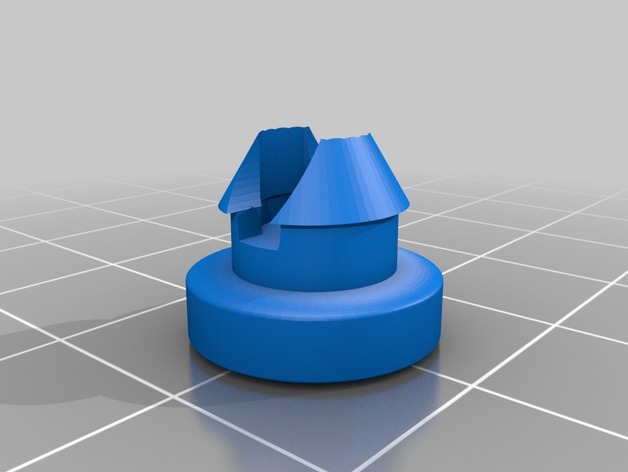
Nissan Altima Brake Pedal Bumper 3D Print Model
Summary
I Made this in tinkercad to fit a 97 Nissan Altima brake pedal bumper, The replacements are $10 a piece for a rubber version, I printed in pla and is working just fine. -
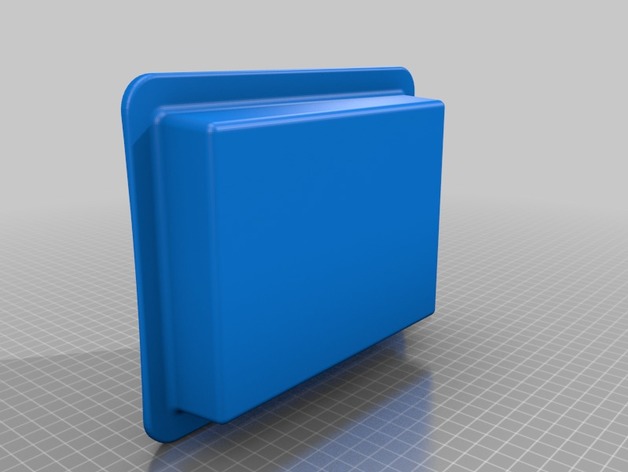
Bettery Box for Electric skateboard 3D Print Model
Summary
Just a simple box designed to fit on the booton of a curved bottom skateboard and home 2 3s 4500 maH batteries. I’m uploading the solidworks file so you can change the curve to your need -
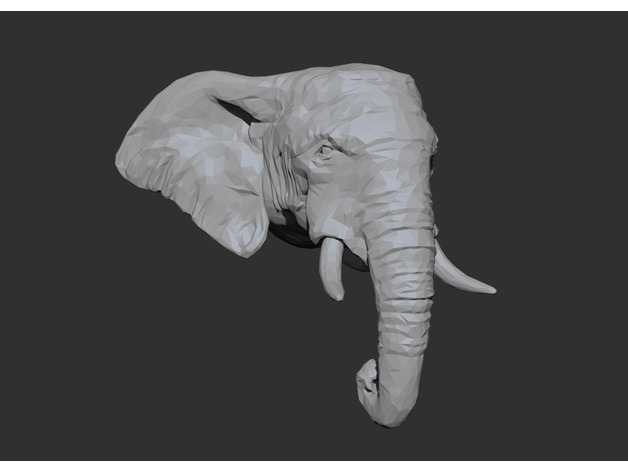
African Elephant Head – Low Poly 3D Print Model
Summary
Low poly version of a African Elephant’s head, for the low poly lovers and for everyone else.
If you would like to see more of my stuff, you can check my Instragram page here : https://www.instagram.com/ricardo.jfa/
Or my artstation here:https://www.artstation.com/artist/ricardo-jfa
How I Designed This
This one I sculpted in Zbrush a few months ago when I was doing daily sculpts everyday.
I did several animal heads, with this one being the first. -
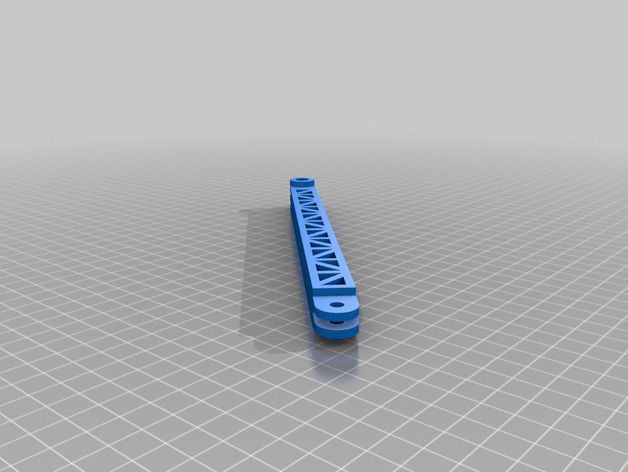
GoPro – Helmet Extensor 3D Print Model
Summary
GoPro – Helmet Extensor
Nozzle size – 0.3 mm
Layer height – 0.1 mm
Shell thickness – 0.6 mm
Fill Density – 60%
Bottom/Top thickness – 0.2 mm
Nozzle temp – 240°C (Material: ABS)
Bed temp – 83°C
Speed.
Travel – 150 mm/s
Bottom layer – 40 mm/s
Infill – 65 mm/s
Top/bottom – 40 mm/s
Outer shell – 40 mm/s
Inner shell – 55 mm/s
Support type – Everywhere
Estimated Time – 6 hs
Print Settings
Printer Brand:
Prusa Printer:
Prusa Steel Rafts:
No Supports:
Yes Resolution:
0.1 Infill:
60 -
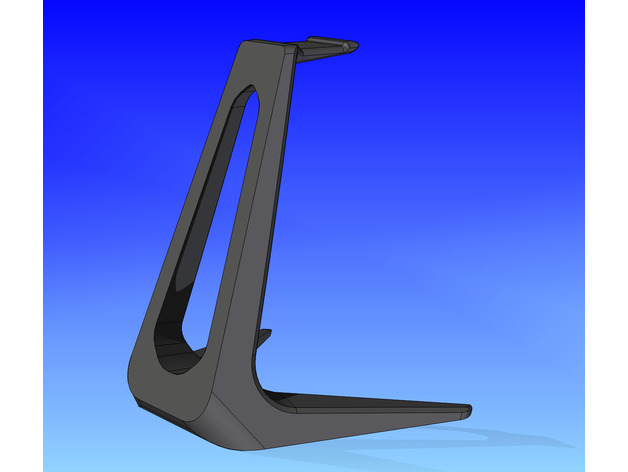
Headphone Stand – Easy Print 3D Print Model
Summary
Inspired by the cool looking Makerbot Headphone Stand, I have designed this version from the ground up.
It is “waaaay” easier to print and get looking good IMHO.
A little more agressive looking, with more resolved overhangs for better results.
Have fun, enjoy ; )
01-0.3 Resolution (0.2 Good compromise, 0.15 looks excellent)
No supports required
Infill > 10% (15% min recommended)
PLA – Works very well
ABS – Haven’t tried : (
2-3 Shells
3 Bottom Layers
3-4 Top Layers -
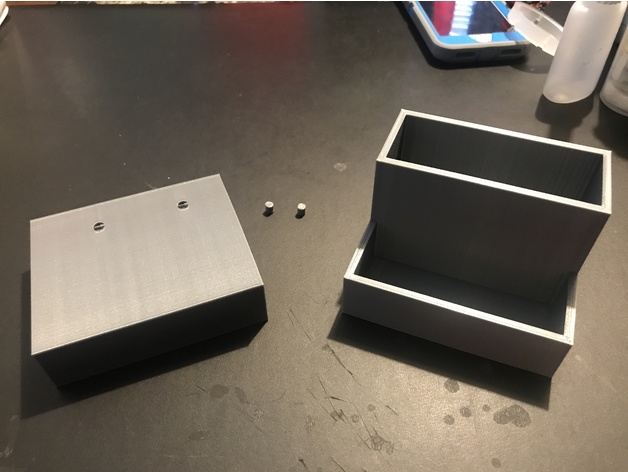
Simple Easy Slip-On Organizer 3D Print Model
Summary
This is a slip-on storage bin that does require pinning and gluing together. Pins are provided. The slip-on support is setup for a “1-by” board (3/4″ width). I use it to store my clippers and filament clips so they are readily available.
Print Settings
Printer Brand:
MakerBot Printer:
MakerBot Replicator+ Rafts:
Doesn’t Matter Supports:
No Resolution:
200 microns Infill:
10% Notes:
I use a raft but I am sure the 3D Print Masters will not need one. The STL is set so it will print without supports and it is compact on the build plate. -
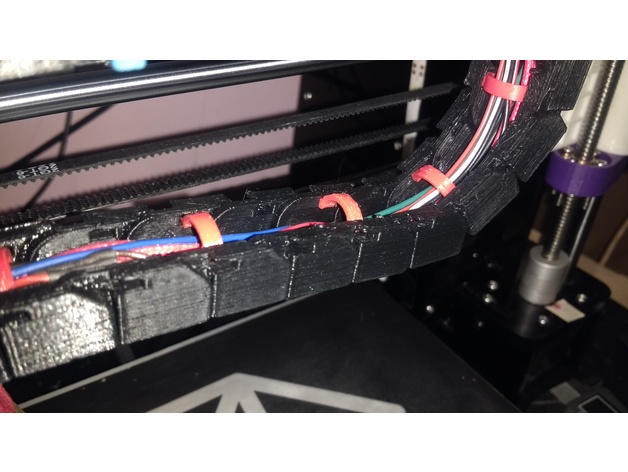
Linear Chain – Wire Tabs 3D Print Model
Summary
My Filament kept getting caught on the zip ties… this is my solution! -
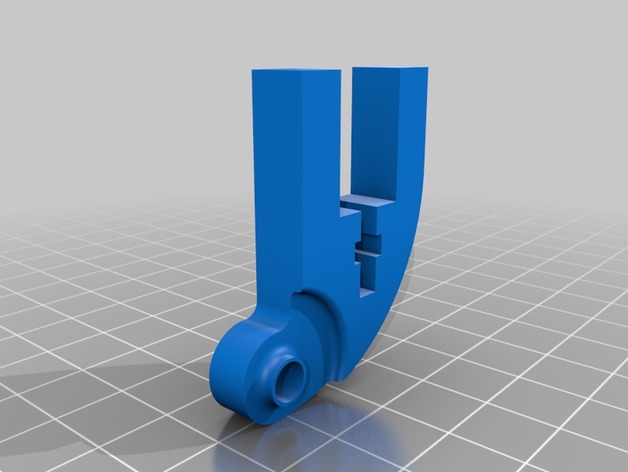
Anet A8 Y-Axis belt tensioner with Ø3mm and Ø5mm hole Zahnriemenspanner Umlenkung Y-Achse 3D Print Model
Summary
Neue Umlenkung für den Anet A8, zum Spannen des Zahnriemens, für Zahnriemenscheiben mit Ø5mm Bohrung oder Ø3mm Bohrung. Das zweite Teil muss gespiegelt gedruckt werden.
Attention: The second part must be printed mirrored. -
GR-12L SUMD 20mm x 20mm mount 3D Print Model
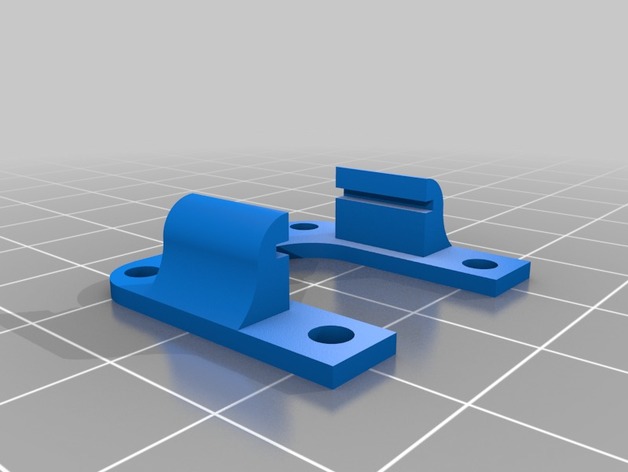
Summary
This is a 20mm x 20mm mount for the Graupner GR-12L SUMD receiver. The receiver, when removed from the shrink wrap, slides into the mount, allowing it to be installed at the top of the flight control stack.
Print Settings
Printer:
Monoprice Select Mini Rafts:
No Supports:
No Infill:
50
How I Designed This
Onshape -
Kawaii Flower pot 3D Print Model
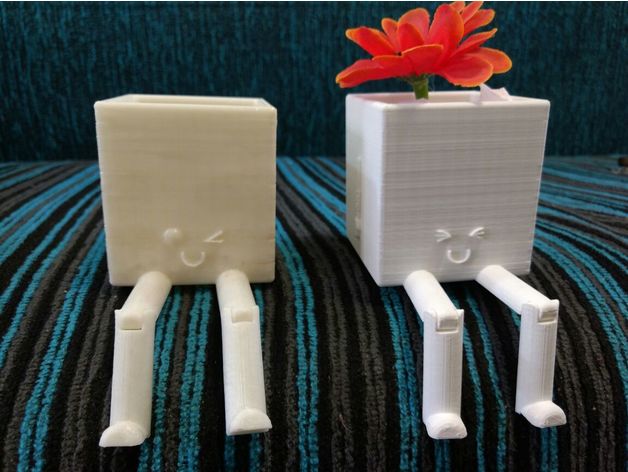
Summary
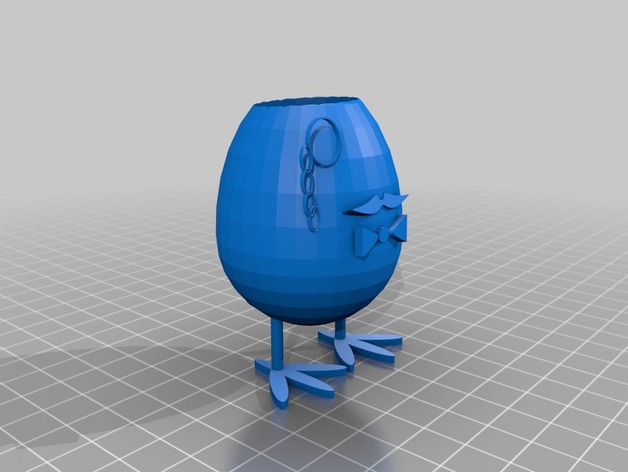
kawaii flower pot moving legs, its a funny decoration 🙂
Print Settings
Printer:
Prusa Mendel i3 Rafts:
No Supports:
No Resolution:
0.2 Infill:
20 Notes:
i made it in PLA and other in ABS
0.8 shell thickness
How I Designed This
Kawaii Flower pot
I made it at solid works -
rocker switch 3D Print Model
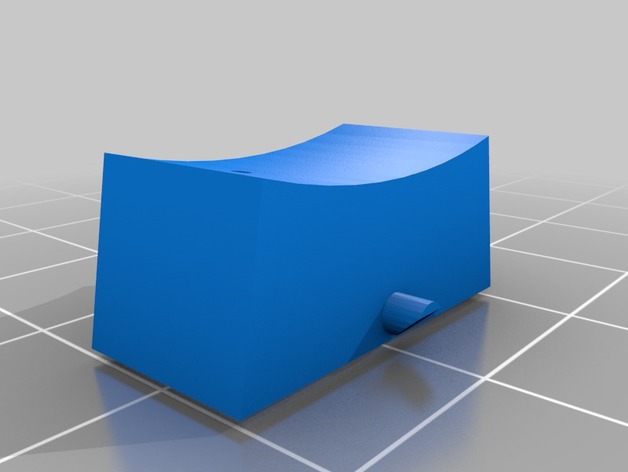
Summary
In order not to throw away the multiple socket I made the tilt switches that had broken -
Junkrat Tire Spike (narrow) 3D Print Model
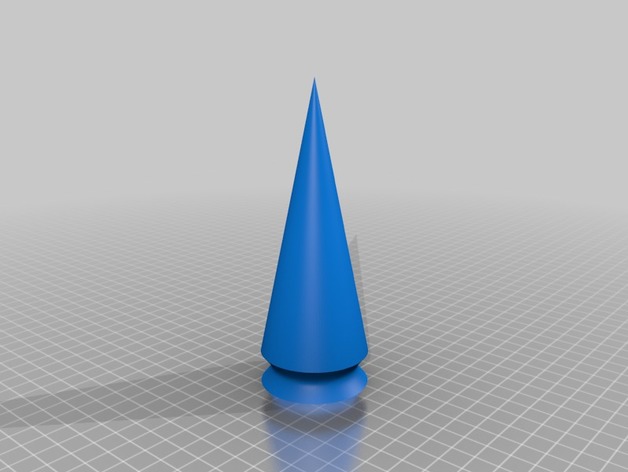
Summary
this is a narrow version of the spikes for a Cosplay RIP Tire. for the fat version, check my other files. -
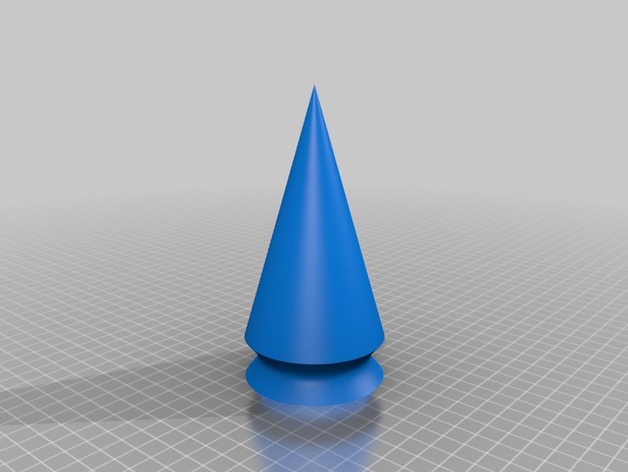
Junkrat Tire Spike (Fat) 3D Print Model
Summary
this is the fat version of the tire spikes on junkrat’s RIP Tire intended for cosplay. in my opinion this is the better looking of my 2 versions but uses double the time and material. -
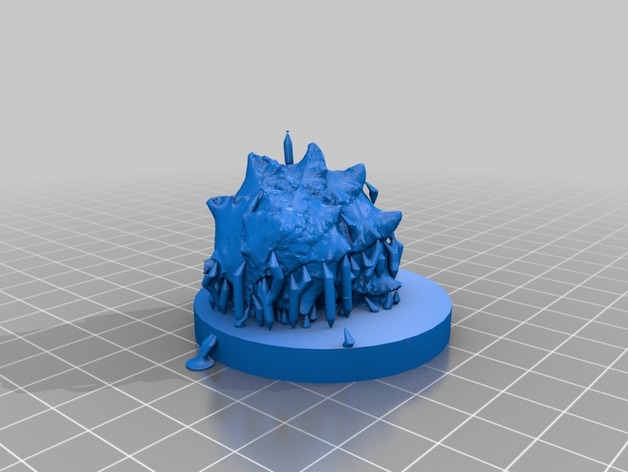
Pointy Shell 3D Print Model
Summary
A shell that I scanned using Photoscan pro.
Print Settings
Printer Brand:
Wanhao Printer:
Wanhao Duplicator i3 V2 Rafts:
Doesn’t Matter Supports:
No Infill:
10% Notes:
This includes supports added in meshmixer. The base is pretty wide and unchamfered, so I had some difficulty getting it off the printer. -
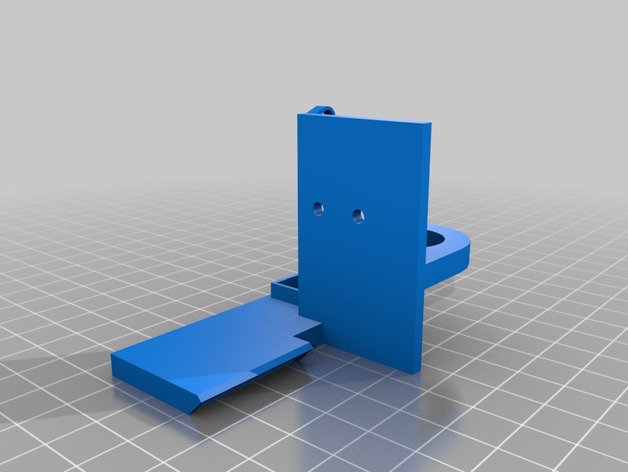
TronXY X3 Autolevel+5015 Fan Mount 3D Print Model
Summary
Since the TronXY X3 did not come with an autolevel/fan mount combo and desperately needed hotend cooling, I decided to make a mount that fit a 5015 Turbo cooler fan. This accomodates any 18mm autolevel probe, with x:-45 y:-5 when setting up the autoleveling portion of the firmware.
If you’re thinking about purchasing a TronXY X3, I highly recommend printing this first so you’ll have autoleveling and cooling ready to go.
If you’re looking for a good deal on one of these awesome printers, GearBest has them for $220.00 USD shipped: http://www.gearbest.com/3d-printers-3d-printer-kits/pp_436308.html?lkid=10991506 — Just use coupon code “GBTE”.
Print Settings
Printer:
Custom RepRap Rafts:
No Supports:
Yes Resolution:
0.2 Infill:
30 -
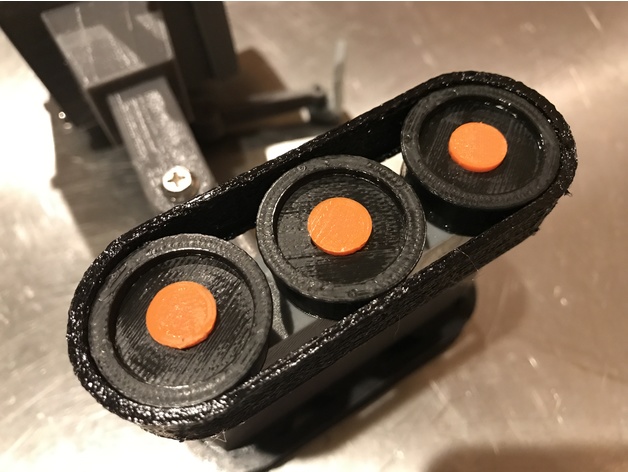
Butter Robot remix parts 3D Print Model
Summary
I liked the files jimbone provided but wanted a more screen accurate model. still not perfect, but simple Tinkercad created a few modifications. Lens is in three parts. outer printed in grey, mid printed in black and inner printed in light blue. also made some caps, that need to be glued (not press-on) for the orange part.
Print Settings
Printer Brand:
Robo 3D Printer:
R1 ABS + PLA Model Rafts:
No Supports:
No Resolution:
.2 -
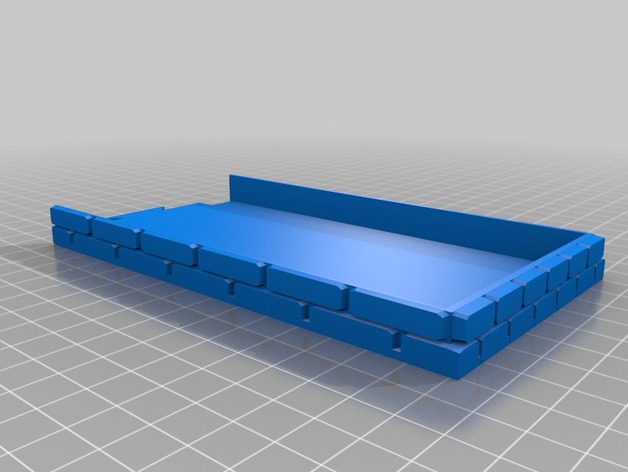
Dice Tower – Extended Draw Bridge 3D Print Model
Summary
Modified from the beautiful Modular Castle created by sablebadger. Extended draw bridge, suitable for those who are playing with lots of dice.
The original Design can be found here: http://www.thingiverse.com/thing:1657208 -
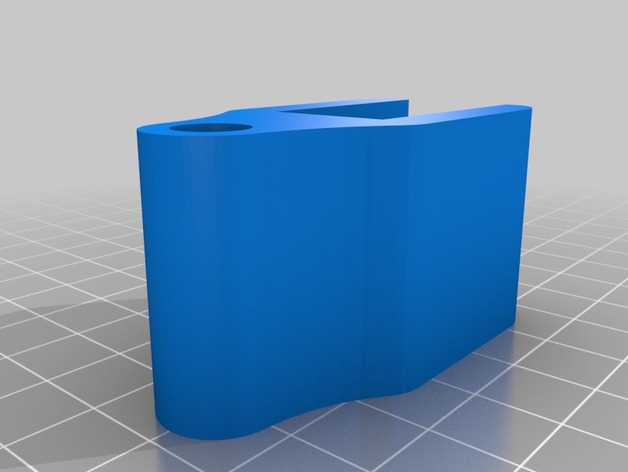
Lcd mount for Itopie 3D Print Model
Summary
This mount its for Itopie with 16mm frame.
For bracket i use this https://www.thingiverse.com/thing:587653 and for full lcd case i chose this https://www.thingiverse.com/thing:684778
You can mount any part of the structure, the two holes are 3mm so you can attach to the structure
Print Settings
Printer Brand:
Prusa Printer:
Prusa Clone Rafts:
No Supports:
No Resolution:
0.2 Infill:
40 -
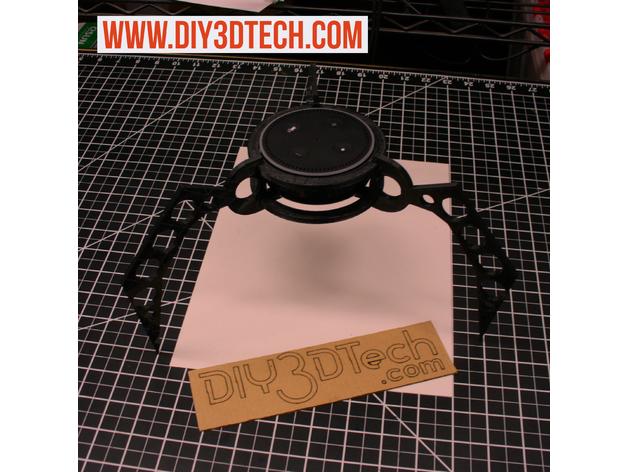
Amazon Echo Dot Robo-Spider Base! 3D Print Model
Summary
I was inspired to create this from the Sci-Fi movie Pacific Rim (http://amzn.to/2ue6p0M0) as to “Combat Monsters you have to build Monsters of you own”. The mode is rather straight forward and easy to print as well as providing a stark conversational look when as it is sure to be a conversation piece in any office or home! In addition it also offers many finishing option should not like the 3D printed look (which my wife doesn’t) as you can use a stone spray paint such this (http://amzn.to/2ue7gyw) which my wife even approves of or a lighter textured version such as this (http://amzn.to/2uewehx) to cover the layer lines. However any way you decide to go, this functional piece of art is sure to give you a smile (or scare) every day!
Also note you can use the holes in the legs to run the wire neatly (hidden feature of the design) providing for a clean seamless steam punk or reto-modern decor look!
Also, please follow us on Thingiverse and give this a like if this came in handy and for more information on this project, please visit us at http://www.DIY3DTech.com as well as subscribe to our YouTube Channel at http://YouTube.DIY3DTech.com along with a visit to our drone site and YouTube channel at http://video-drone.DIY3DTech.com
If you are looking for one of a kind swag shop for yourself or a Maker Geek friend, visit our swag shop at http://Swag.DIY3DTech.com for unique 3D Printing, Laser Cutting and CNC swag! Too, if you want a behind the scene look at what we are working on be sure to follow us on Instagram (https://www.instagram.com/diy3dtech/)!
Print Settings
Printer:
Any 200mm x 200mm printer will work Rafts:
No Supports:
No Resolution:
.3 or better you pick Infill:
10% Notes:
So this things assembles via pressure fit and while you can glue it, it is not required however to achieve this the interlocking slots are very tight and depending on the plastic you use may require some clean up with a bur tool (such as this: http://amzn.to/2uek6gg) as well as a small file set (such as this: http://amzn.to/2uexS2u) to achieve the required fit of the parts. -
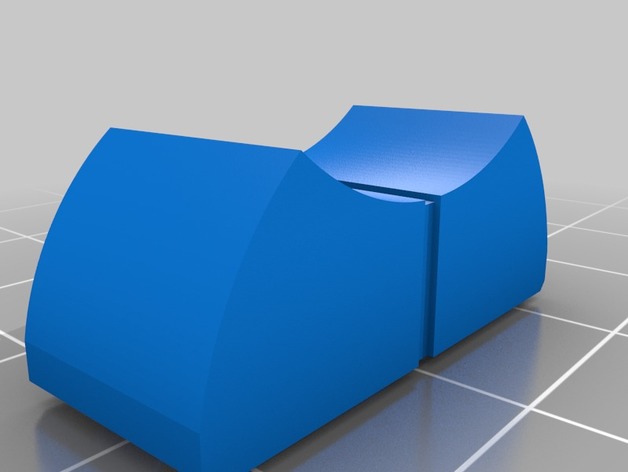
Fader knob 3D Print Model
Summary
Had broken a couple of faders on my Phonic Summit mixer so I modeled this from the existing faders. I’m pretty sure this will fit other mixers as well with minor adjustments.
The center groove is meant to be painted white in oreder to easily align the fader to the underlying scale.
Print Settings
Printer Brand:
Prusa Printer:
Prusa Clone Rafts:
No Supports:
Yes Resolution:
0.15 mm Infill:
20% Notes:
There’s a lot of thin walls here so make sure that your slicer allows some overlap. Supports are necessary to fill the short distance btween the fader foot and the upper body. I use dense support in S3D slicer for best results.
Use ABS to allow for a little flexing. PLA is a bit too hard and will probably make the fitting difficult. -

Basic Covertec holder v4 3D Print Model
Summary
Version 4 of the covertec holder. Added additional material to reinforce the channel.
Print Settings
Printer Brand:
Prusa Printer:
Prusa Clone Rafts:
Doesn’t Matter Supports:
Yes Resolution:
0.15 Infill:
15 -
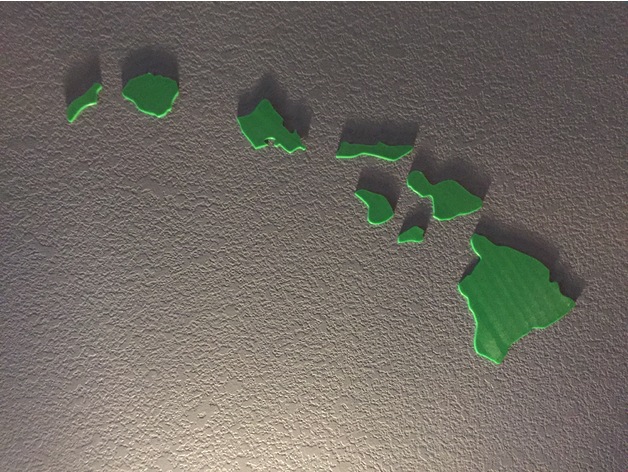
Hawaiian Islands Wall Art 3D Print Model
Summary
I designed this as a decoration for the wall. You can use double-sided take to paste the islands to the wall. I will fix the orientation of each island soon to make it easier for you guys. In the meantime, all you have to do is rotate each island 90 degrees. Please check out my other designs as you might like them.
Print Settings
Printer:
Anet A8 Rafts:
No Supports:
No Resolution:
0.15 – 0.2 Infill:
100%
How I Designed This
I used Fusion 360 to design this. -
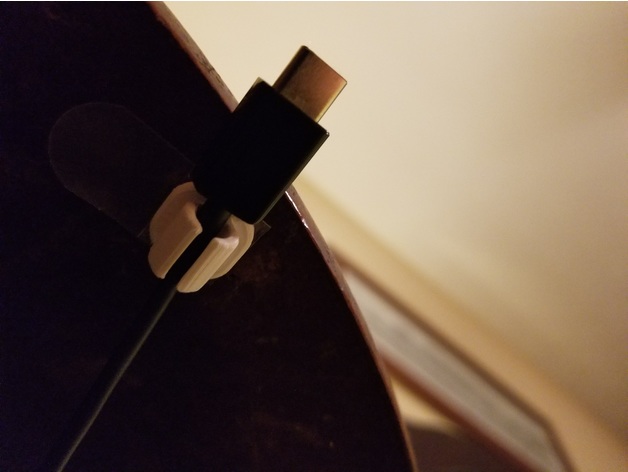
Wire Management Clip 3D Print Model
Summary
This is a simple wire clip, made to be stuck down to a table or the wall with some 3M double sided foam tape. Simply cut the tape down to the side of base of the clip (14×14 mm)
I personally use one under my bedside table to hold my USB-C cord, so when I unplug my phone, the cord doesn’t fall onto the floor. I also use one on my wall to hold my micro USB cable for my LG Tones. -
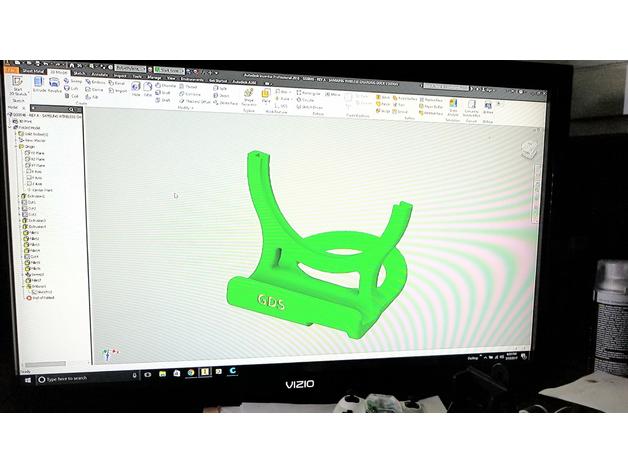
Samsung Galaxy S8 Wireless Charging Dock 3D Print Model
Summary
I was having issues finding a wireless charging stand with the OEM wireless charger, that would fit an S8 with my otterbox case. I came accross Rsavell’s phone stand, and modified it a bit. Also added a slot for the speaker, and more material in the middle. This gave it more strength but the drawback is it also increased the print time a bit.
Print Settings
Printer Brand:
Prusa Printer:
Prusa Steel Rafts:
Doesn’t Matter Supports:
Yes Resolution:
0.12 mm Infill:
25% Notes:
I printed it with ABS, it came out great. The scale was off a bit when I exported the STL. Rescale in your slicer software @ XYZ = 25.4 -
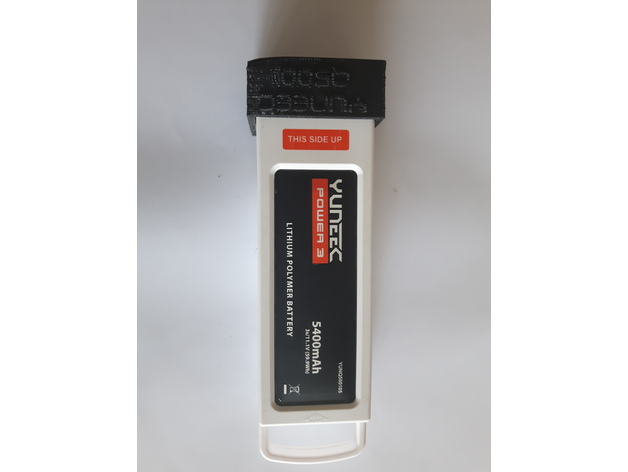
Yuneec Q500 Battery cover 3D Print Model
Summary
I made this cover for my Yuneec Q500 battery, so we could go through customs.
As airlines require that large capacity batteries terminals are covered, and I have a 3D printer, so I made this.
If needed and elastic around the battery will hold the cap on, but for me they fit perfectly.
Print Settings
Rafts:
No Supports:
No Infill:
100% Notes:
No Supports needed -
![Morty Smith [Rick and Morty] 3D Print Model](https://3dhunt.co/static/2017/07/bf30340ef5a1e8f1bdb0f969c54e2562.jpeg)
Morty Smith [Rick and Morty] 3D Print Model
Summary
Watch here: https://youtu.be/hX9XGU1L7OY
Last time I asked if there were any fans of Rick and Morty out there. It turns out there are! Rick got a lot of love, so let’s give him some company. He redeemed his voucher for a replacement Morty.
I created this model in ZBrush. I used ZSpheres to get the main body shape there. I modeled him in an A pose, then I moved his arms to get them in the right position. Then I just went through, extracted the areas where his clothes are, then I shaped and added details to the face.
After modeling I ran it through Meshmixer to plane cut the feet so he’ll stand normally. Then I also exported it in STL format from there. I printed it on my Wanhao D7 with FunToDo Snow White Resin.
Then my wife sanded and primed it. She used her airbrush to paint the skin colors on, then used paintbrushes and acrylic paints to paint everything else. Then we just super glued it to the base.
Printer: Wanhao D7
Filament: FunToDo Snow White Resin
Layer Height: 0.1mm
Supports: Yes -
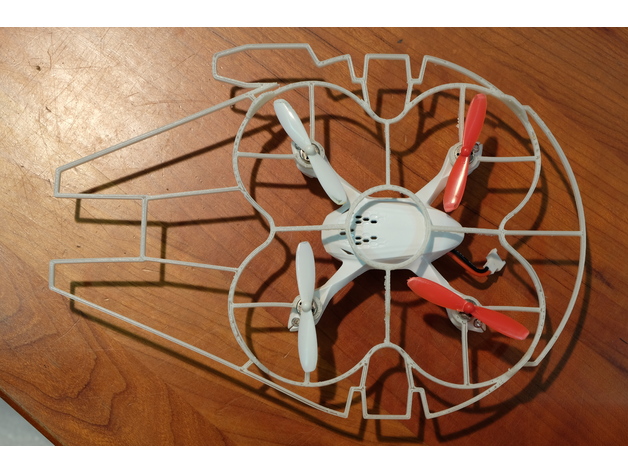
Hubsan X4 Millennium Falcon Shroud 3D Print Model
Summary
A quick print for making your Hubsan X4 ready for the Kessel Run!
Note: this does the opposite of improving speed and agility but it looks cool. -
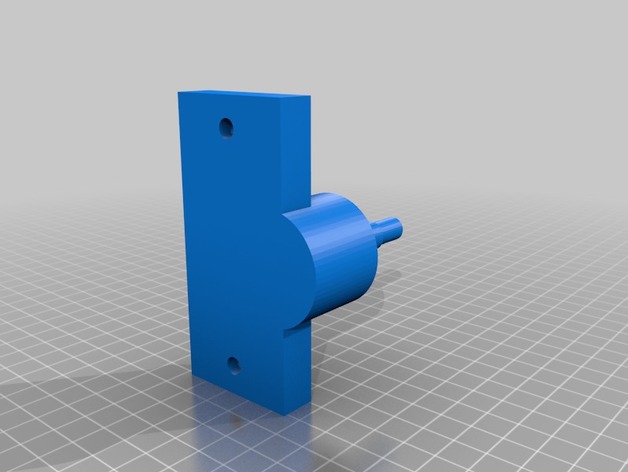
Harbor Freight Mini Mill Dimensioned Models 3D Print Model
Summary
Dimensioned model of HF mini mill parts to support CNC modification -
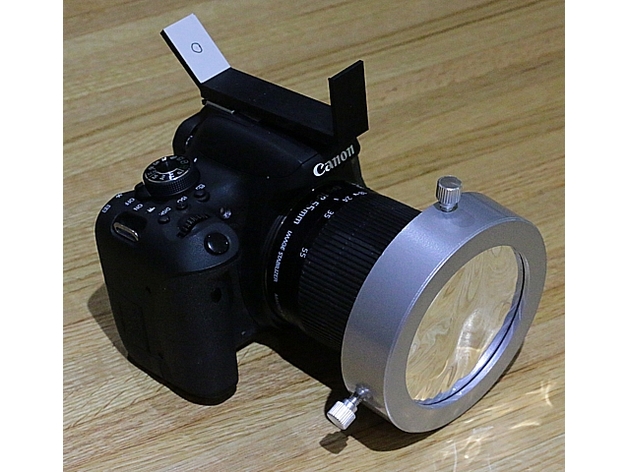
Solar Finder for hot shoe on camera for solar and eclipse photos 3D Print Model
Summary
If you plan on taking photos of the sun, especially during the eclipse of the sun, you don’t want to look through the viewfinder to locate the sun and burn your eyes out. So you need a “solar finder”. There are lots of these for telescopes, but this one fits in the hot shoe (where the flash goes) on your camera. The sun shines through a small hole in the front and makes a dot on the angled part. When the sun shines in the center of the circle, then the camera is pointed at the sun properly. You need to use a solar filter on the front of the camera so you don’t burn out your camera or worse, start a fire in it. Then you can try various exposure settings until you get a good photo. This is for use when the sun is not totally eclipsed. For totality, you would slip off the solar filter in front and hopefully you would have already pointed the camera in the proper direction. Only during totality, you can use the viewfinder.
Anyway, to make this, I printed using ABS with a 0.35mm nozzle, using 0.1mm layer thickness. After printing, cut out a piece of white 3×5 card to glue on the angled part. Then push a pin through the back of the angled part’s hole to locate the correct point on the card and draw a circle there. You might want to test it first outside with the sun (before drawing the circle) in case you had any warping problems printing this thing. You might have to use a fingernail file or 1 to 3 layer folded 120 grit sandpaper to sand off any excess ABS if it doesn’t quite fit your hot shoe (especially for the slots). Have fun taking solar photos with your camera!
Print Settings
Printer Brand:
LulzBot Printer:
TAZ 3 Rafts:
No Supports:
No Resolution:
0.1mm Infill:
20% Notes:
4 layers on top and bottom. 3 perimeters on walls. -
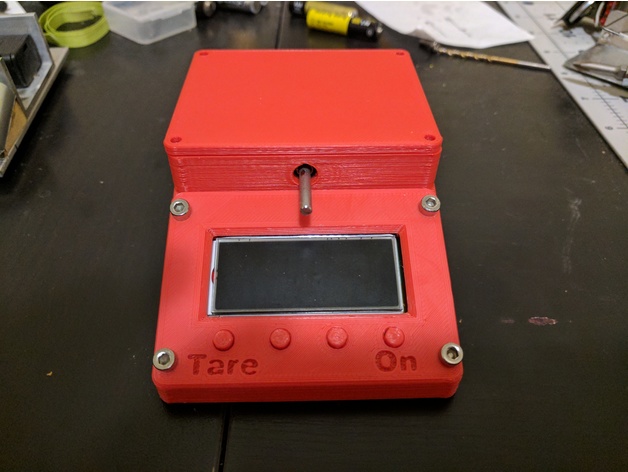
Torque Meter 3D Print Model
Summary
This a torque meter for indoor free flight models. It’s design is based largely on the Flite-Tork meter that was originally developed by Bill Gowen. This design is a work in progress, and I still need to upload the collar that mounts the 1/32″ wire hook to the 1/8″ shaft. I hope to have this uploaded in a day or two.
To build the meter you need 1 of each printed part, as well as the following components:
8 – M3 x 8 button or socket head screws (attaching screen mount and top)
2 – M2 x 25 (attaching load cell)
2 – 1/8″ stop collars
1 – 6-32 x 1/4″ set screw
1 – 6-32 x 1″ pan, truss, or button head screw
1 – 6-32 nut
1 – #5 or #6 washer
2 – R2 open bearing (eBay)
1 – 2xAAA battery holder with leads (eBay)
1 – TBBSC 200g scale (Amazon)
1 – ~3″ long piece of 1/8″ music wire
1 – 1/32″ music wire for hook
I would also recommend cutting the wires between the PCB and the load cell to add a connector. There isn’t enough room in the design to pass the load cell though the front wall. The other option is de-soldering the wires from the board, and re-soldering after the wires are passed through. More details to follow after I upload the last part in a day or two.
Print Settings
Printer:
Tevo Tarantula Rafts:
No Supports:
No Resolution:
0.2mm Infill:
25% -
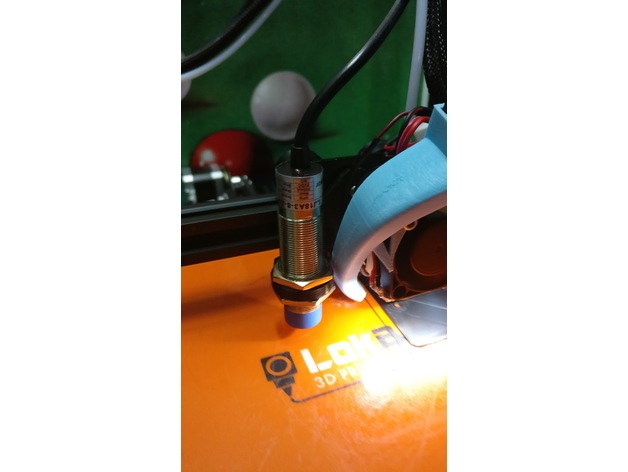
Inductive Sensor Holder 18mm 3D Print Model
Summary
Support for inductive sensor to be used with autobed leveling.
This is for a sensor of 18mm.
Links for sensor:https://www.amazon.com/LJ18A3-8-Z-Approach-Sensor-Inductive-Proximity/dp/B008FZC8F2https://pt.aliexpress.com/store/product/M18-8mm-sensing-DC-5V-NPN-NO-LJ18A3-8-Z-BX-5V-cylinder-inductive-proximity-sensor/1162433_32719316657.html -
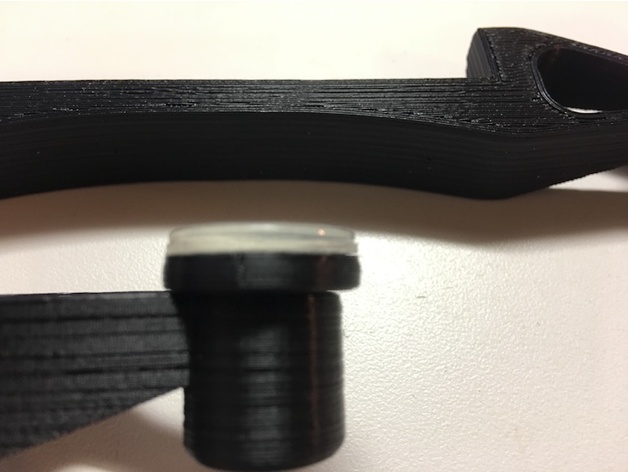
Printrbot Simple Wide Foot Print Foot Pegs 3D Print Model
Summary
The original feet for https://www.thingiverse.com/thing:593072 were too big to insert in the bracket, because I did not have flexible filament. Originals probably fit snug, when printed with different filament.
Someone mentioned https://www.thingiverse.com/thing:280489 these scaled at 130%, however they were too big. Bottoms are 1″; I tried to use felt pads, but they slide to much.
So I created these and made them from stock PLA, they are 3/4″ or 20mm & they fit perfect & snapped into place. I added some rubber pads from Home Depot, and the now the printer does not shift around or move, and it is quietier.
Shout out to Thorped for the design on the foot bar, it is very durable and the best I have seen yet. Snaps into place and widens the stance. Highly recommend you print it, try all of the pegs and find what works best for you.
Print Settings
Printer Brand:
Printrbot Printer:
Play Rafts:
No Supports:
No Resolution:
2.0mm Infill:
50 Notes:
I use 50% infill on all of my parts for the printers. It may be overkill, but at least I don’t have to do it twice.
How I Designed This
Fusion 360
Took all of a few seconds to whip these up. -
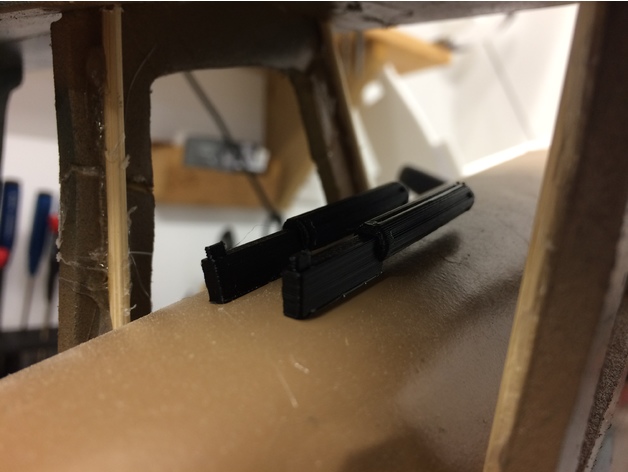
Flite Test Mini WW1 Syle Machine Gun 3D Print Model
Summary
I designed these to give that authentic look to your Flite Test WW1 biplanes. They look great on the SE5A and the DR1 but they would also look great on many other mini planes. You could also scale them up for some bigger builds.
Print Settings
Printer:
Anet A8 Rafts:
No Supports:
Yes Resolution:
0.2 Notes:
I print them at 20mm/s to make sure the barrel comes out nice and clean. There is also a support on the barrel that will have to be cut off after printing. -
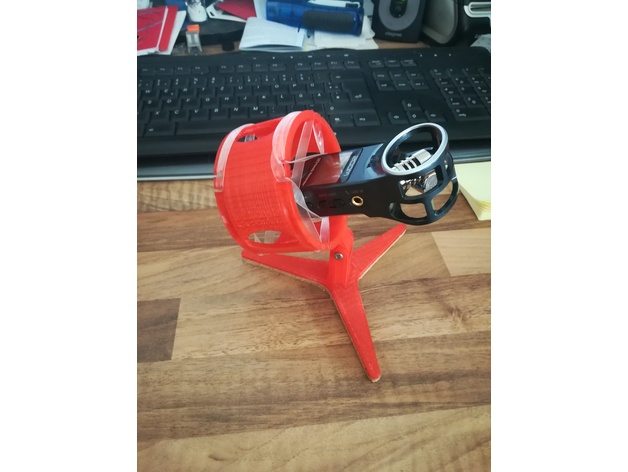
Zoom H1 – Microphone stand with Fusion360 tutorial 3D Print Model
Summary
This is the Zoom H1 microphone stand I created in this weeks tutorial.
Watch the full tutorial on designing and printing over on my youtube channel.
Materials for assembly: m3 bolt 25mm, m3 lock nut, 2 rubber bands 10cm should be fine.
Cheers
Robert
Print Settings
Printer:
CR-10 Rafts:
Doesn’t Matter Supports:
Doesn’t Matter Resolution:
.3 Infill:
low – 15% is fine -
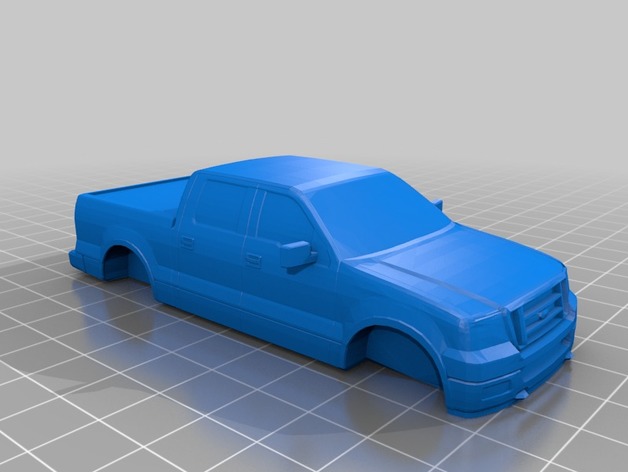
2004-08 Ford F-150 Pickup Truck Toy Body 3D Print Model
Summary
This is a 4-inch long body of a 2004-08 Ford F-150 pickup truck to be added to the base of an already-existing monster truck toy for my son. Wheels are not included.
I’m not sure who created the original model. It was downloaded from the Sketchup Warehouse. All I did was gut out the interior, connect the doors, box, windshield, grille, etc. to the body, and give it a flat bottom. It’s basically just a shell.
Print Settings
Printer Brand:
MakerBot Printer:
MakerBot Replicator 2 Rafts:
Doesn’t Matter Supports:
Doesn’t Matter -
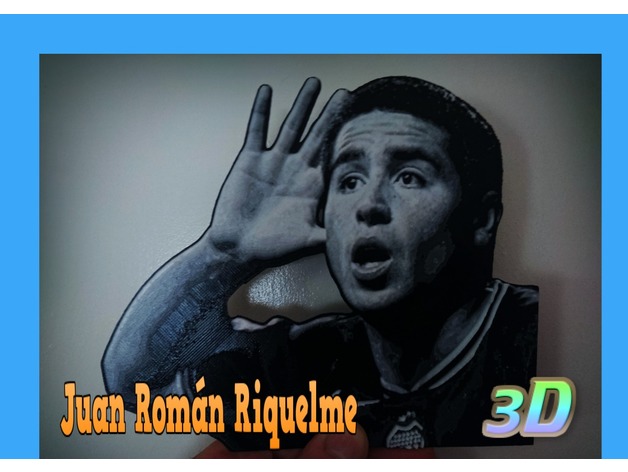
Juan Román Riquelme dibujo 3D 3D Print Model
Summary
Dibujo en 3d Juan Román Riquelme
Imprimir las 4 primeras capas con filamento naranja
de la 5 hasta terminar en filamento blanco…
respetar la altura de capa
0.2 mm la primera capa
0.1 mm la altura de capa
100 % relleno
velocidad 45 mm/s máximo
boquilla 0.4 mm
DRAWING 3D Juan Román Riquelme
Print the first 4 layers with orange filament
From 5 until finished in white filament …
Respect layer height
0.2 mm the first layer
0.1 mm layer height
100% filler
Speed 45 mm / s maximum
Nozzle 0.4 mm -
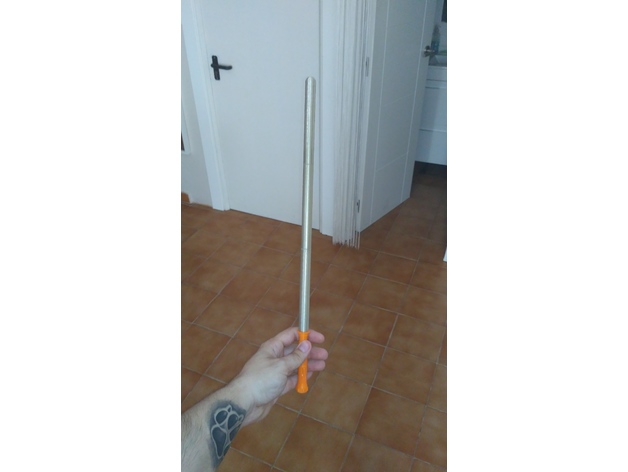
Mini Lightsaber 3D Print Model
Summary
Blade for lightsaber pencil.
Needs:
2 x blade1
1 x blade2
1 x lightsaber
1 x join
Use the join for put the blade in the saber.
Print Settings
Printer:
CROWhite Rafts:
Doesn’t Matter Supports:
Yes Resolution:
0.2mm Infill:
15% -
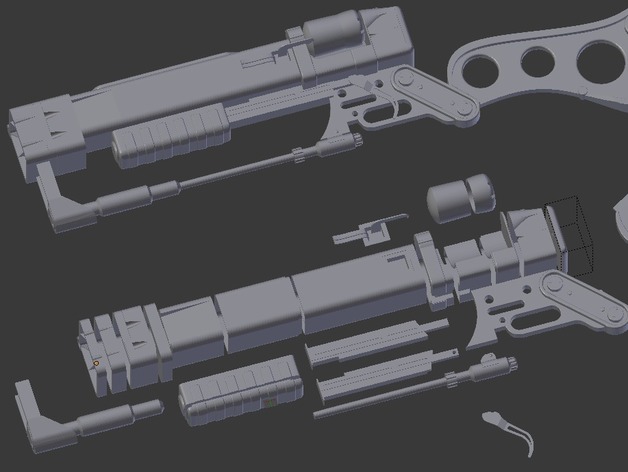
Fallout 4 Lase Rifle Split 3D Print Model
Summary
I’m assembling this into a prop with some internals, so I hollowed out most of the STL files and cut them up for easier printing and assembly. I tried to minimize the amount of infill and supports necessary to make it faster to print. I also tried to keep the more detailed cosmetic sections on the top of the print so you don’t need to deal with cleaning up supports from them. You’ll need to use some kind of adhesive (I’ve found superglue works really well) since this is just a sliced/cleaned remix. -
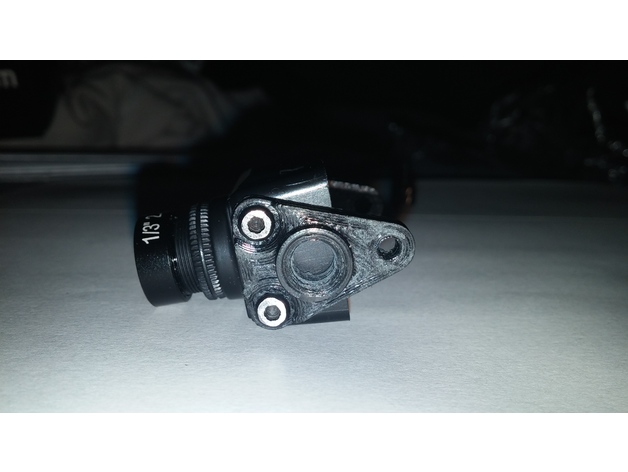
chameleon swift 2mm support 3D Print Model
Summary
simple mais fonctionnelle. la tété des vis ne doit pas dépasser 1.5mm. il y a 2 modèle, un court et un de 2mm plus long comme sur la photo
Simple but functional. The head of the screws must not exceed 1.5mm. There is 2 model, one short and one 2mm longer as in the photo -
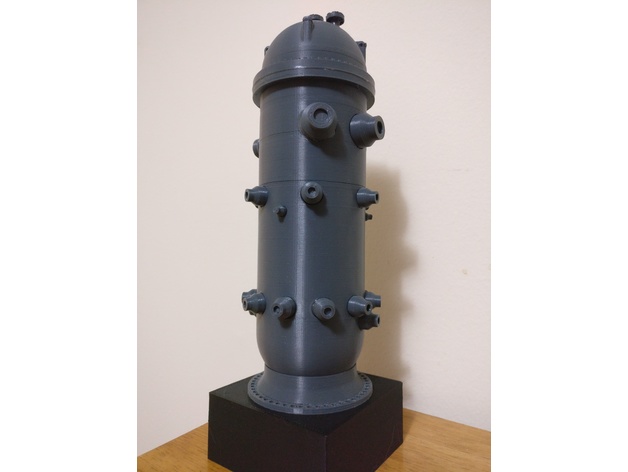
BWR Reactor Vessel Model 3D Print Model
Summary
Needed a trophy for a nuclear power plant-related event, so I designed one based on a BWR reactor pressure vessel. Note that this is not an exact model – it’s more art than engineering.
CAD files are available from Onshape here.
Print the following and assemble with the adhesive of your choice. Tap the hole in the bottom of the vessel for 1/2-13 and attach it to the base with a 1/2-13 x 1.5L bolt.
1 vessel.stl
1 head.stl
1 base.stl
1 skirt.stl
4 ms-part.stl
3 ECCS-part.stl
3 nozzle.stl
18 fw-part.stl -
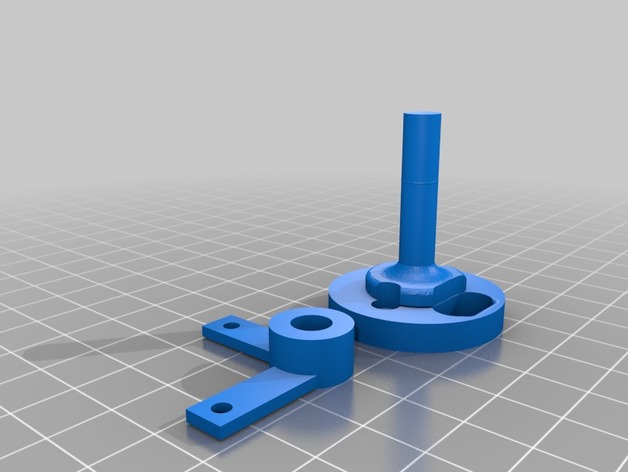
FLTHY’S HOLOPROJECTOR 3d Printed Holoprojector Plug 3D Print Model
Summary
This is a remix, but I can’t find the original maker, I made this to fit in MrBaddeley 3d printed holoprojectors for use with FLTHY’S HOLOPROJECTOR kit.His plug is much bigger. The bracket is glued on the stem of the plug and I connect my servos to it, The plug is a very tight fit, but hasn’t come out, if it does start to come out I was going to put some hot glue around the seam.
Print Settings
Rafts:
No Supports:
No Resolution:
.3 Infill:
40% Notes:
I printed at high infill for strength -
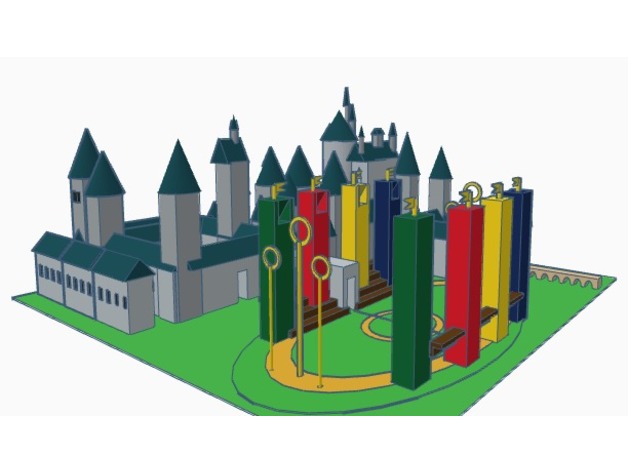
Hogwarts 3D Print Model
Summary
A model of Hogwarts for all Harry Potter fanatics.
Expelliarmus!Standards
NGSS
Overview and Background
MAGIC
Lesson Plan and Activity
Observe
Look at the scale of Hogwarts when reading the sequel!
Materials Needed
3D Printer (plastic) -
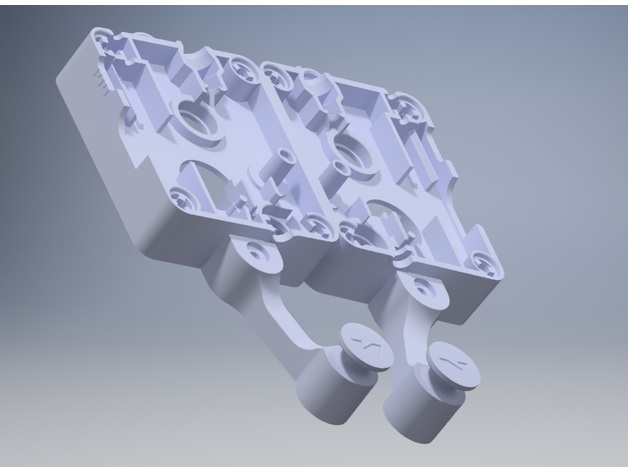
Ultimaker 3 Filament Guide 3D Print Model
Summary
Since this was requested quite a few times by our customers, we have decided to develop an easily printable filament guide.
This was designed for the Ultimaker 3 series but will work on an Ultimaker 2+ as well since they share the same feeder on which the guide is to be mounted.
We welcome any suggestions you may have in regards to the improvement of this filament guide.
Print Settings
Printer Brand:
Ultimaker Printer:
Ultimaker 3 Rafts:
No Supports:
Yes Notes:
Supports are needed at the mounting point.
Post-Printing
Mounting the filament guide.
To mount this filament guide, you will need an M3 x 25 screw, since the original is not long enough. -
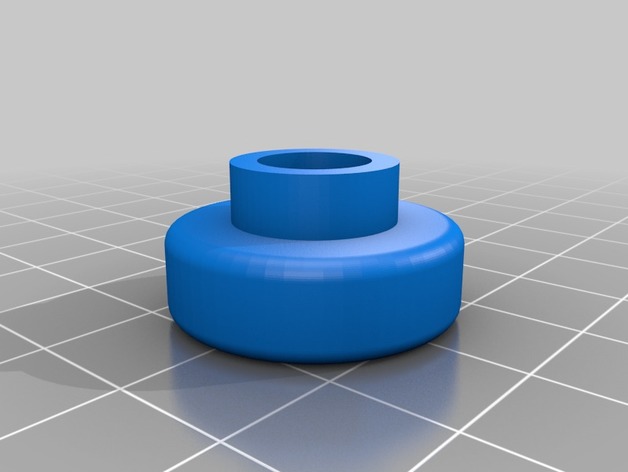
Dishwasher Lower Basket Wheel – AEG Electrolux 3D Print Model
Summary
This is a replacement wheel for the “AEG Electrolux FAVORIT” dishwasher “44760”, but it should fit other models as well.
On thingiverse, there were models of the wheels for the lower basket, but not the upper one.
I didn’t print it yet, because I can’t print ABS at the moment and I don’t think PLA is suitable in that environment, but it should work perfectly.
If you find any errors, please tell me, I will edit the model asap.
How I Designed This
I designed this using onshape.
I measured everything with a caliper off of an old original wheel.
Here’s the link, feel free to copy and modify it:https://goo.gl/z4amYW -
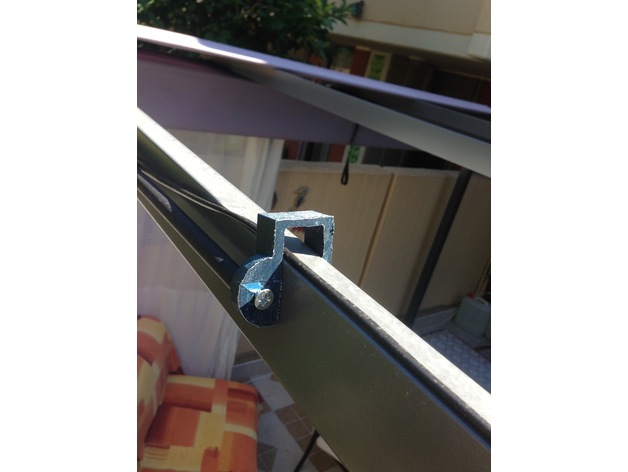
curtain hook for Niagara Gazebo (Leroy Merlin) 3D Print Model
Summary
This is an hook built to maintain an aluminium tube to use to install a curtain on a Gazebo series Niagara bought from Leroy merlin.
Please, print with ABS or PET-G and not with PLA. I published the sky file so that you can change and edit dimensions
This and other creation on www.buonevacanze.org -
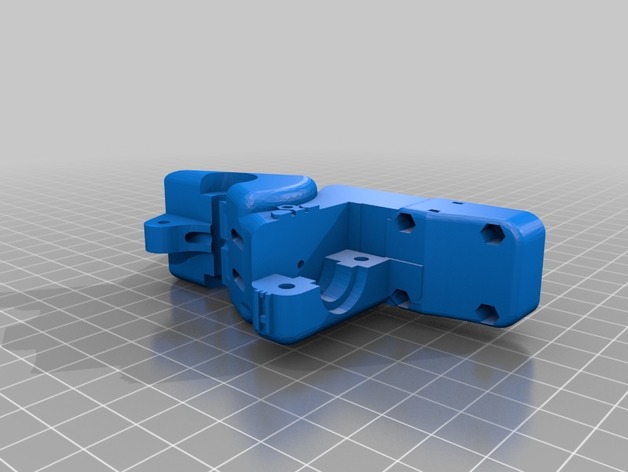
Direct drive extruder for Hypercube 3D Print Model
Summary
remixed to fit the hypercube mount, for the rest of the files use the original’s from the 3D 75 Geared Extruder
Print Settings
Printer:
Hypercube Rafts:
Doesn’t Matter Supports:
Yes -
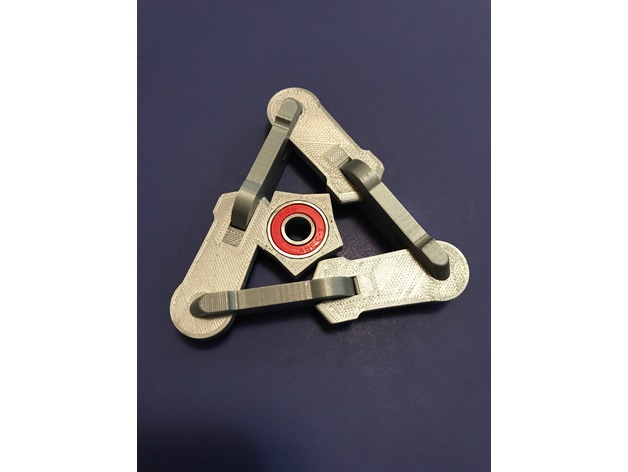
fidget widget spinner 3D Print Model
Summary
print 1 with the ring, and 5 without
standard print settings -
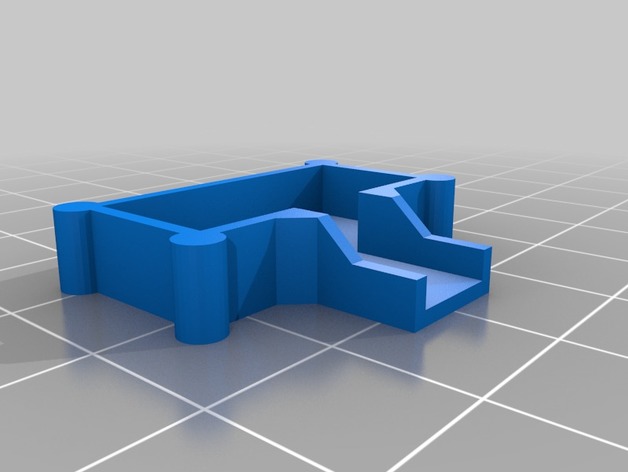
VL53L0X Rage Sensor Enclosure / Box 3D Print Model
Summary
This is a enclosure for a VL53L0X Laser Sensor. I needed it for a Project where I have to mount it on a corner on a Wall, so i also designed a cable tunnel for it.
Printing without support with 0.2 is fine. Better works with 0.1
SketchUp File is free for download. However, this was 2 Days of work, so please be fair.
Have Fun 🙂
Konstantin Pfeiffer
Print Settings
Printer Brand:
Prusa Printer:
Prusa Clone Rafts:
No Supports:
No Resolution:
0.2 Infill:
50 -
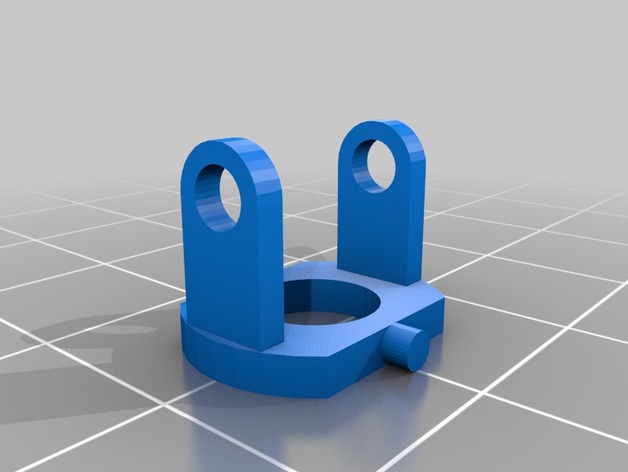
Chain piece 3D Print Model
Summary
to use as flexible cable guide, to protect cables to moving parts. -
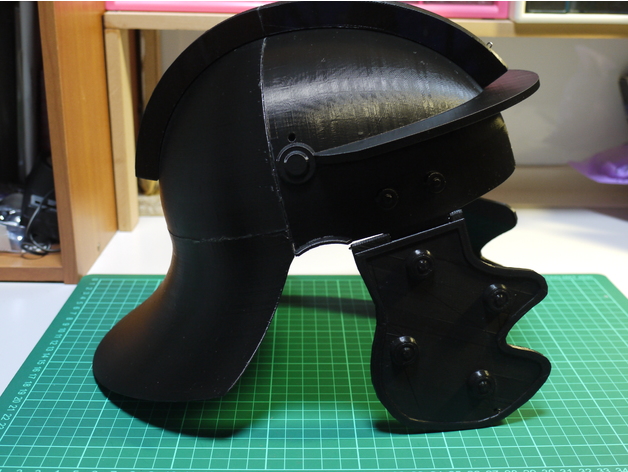
roman helmet 3D Print Model
Summary
The roman helmet was designed as props for a Xmas drama.
You can attach the feather on your own.
The crest part is detachable by design because there could be different forms of feather depending on the roles: captain, centurion, or average soldier.
Print Settings
Printer:
ATOM 2.5EX Rafts:
Doesn’t Matter Supports:
Yes Resolution:
0.2mm Infill:
10%
Post-PrintingPrepare the axles of 1.6mm and 0.8mm in diameter for joining parts. Transform the paperclips into the axles used by chickpieces.
Join the rear-shell and the neck-guard
Join the front-shell and rear-shell parts.
Join the front-crest and rear-rest. Attach the crest on the helmet with the glue or string (for detachable in the future)
Attach the chickpieces to the helmet with the axles made from the paperclips
-
Sailor spinner 3D Print Model
Summary
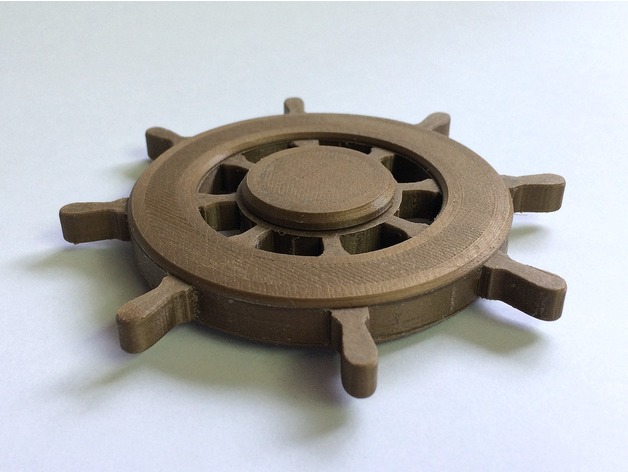
The “unconventional” spinner series continues. This time I was inspired by the rudder of the old galleons, which we have seen many times in pirate films.
To reduce the thickness, I used eight 6MA nuts, 10 mm. hexagon, and the bearing is, as usual, the standard skateboard 608, 22 mm in diameter. As always, it is not necessary any glue to hold everything together.
I downloaded two versions: one called “Timone_centrale”, which is much more like a rudder, but needs supports, a bit of post print jobs, and a pretty accurate printer; and a “Timone_centrale_easy” that does not need supports and It prints easily.
The lids and the bearing caps are suitable for both models.
Print Settings
Printer Brand:
FlashForge Printer:
Creator Pro Rafts:
No Supports:
No Resolution:
0,1 Infill:
50% -
Anet A8 Micro SD extend cord holder 3D Print Model
Summary
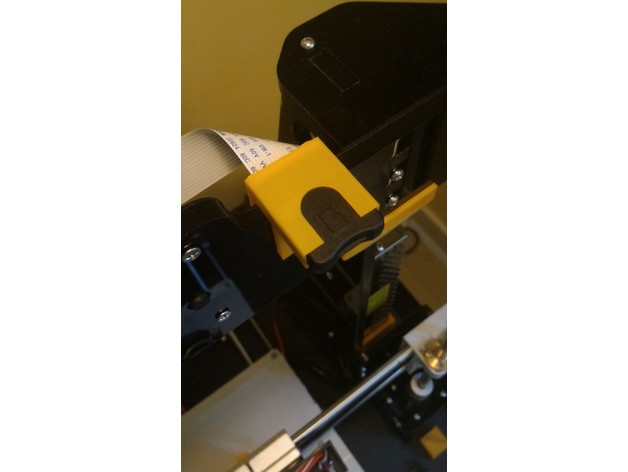
A simple but effective micro SD extension holder.
Print Settings
Printer:
Anet A8 Rafts:
Doesn’t Matter Supports:
Yes Resolution:
0.2mm Infill:
20% Notes:
Hotend temp : 190 °C
Hotbed temp : 45 °C
Material : PLA (orange)Overview and Background
I’ve designed a very simple holder for a micro sd extension I bought on ebay. It was one like this : http://www.ebay.com/itm/TF-Micro-SD-To-SD-Card-Extension-Cable-Adapter-Flexible-Extender-For-Car-GPS-YG-/112084033724?hash=item1a18baa0bc:g:fTEAAOSwZVlXmDqZ
I know the design is ugly, but at least it works.
Skills Learned
Modeling