Summary
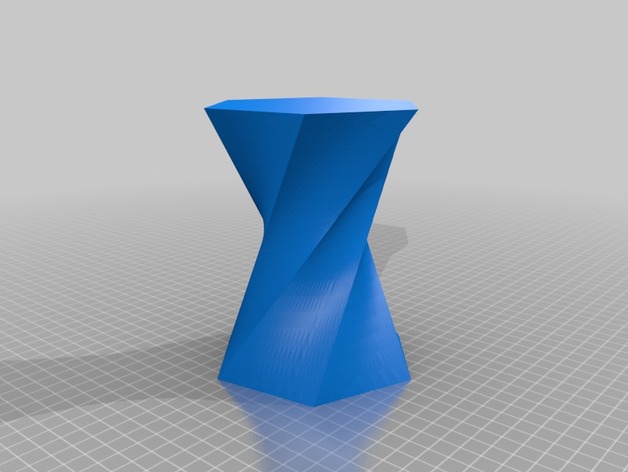
Print this vase in vase mode, I used Slic3r to slice this model and used hatchbox PLA.
Print Settings
Printer Brand:
Prusa Printer:
Prusa Mk2 Rafts:
No Supports:
No Resolution:
.2 mm Infill:
0% Notes:
Print in Vase Mode
Author: Thingiverse
-
Twisted Hexagon Vase 3D Print Model
-
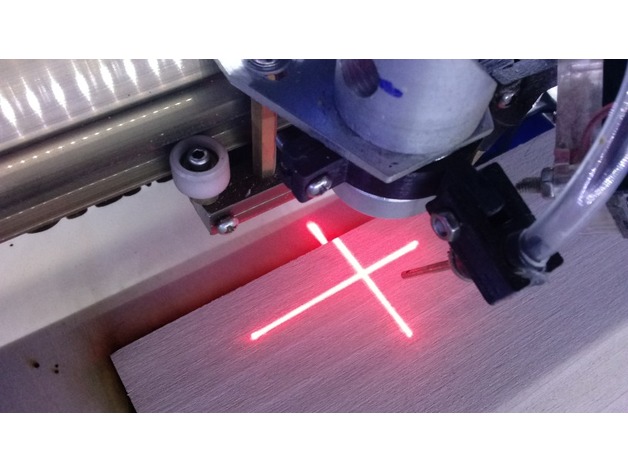
K40 Air and Laser holder 3D Print Model
Summary
Simple clamp for the the K40 laser to hold a laser cross and air nozzle in adjustable brackets. On this model it is for an inflator needle with aquarium tubing for air delivery. The tube will slide into the slot in the
the holder. Use 3:1 adhesive heat shrink to attach the nozzle to the tubing before mounting in the holder. The laser holder is sized for an 8.8mm diameter laser dot or cross.
You will need (3) M3x 12-14mm screws and matching nuts to fit the brackets.
The mounting holes may need clean up work depending on the material used. The clamp is meant to slide up as far as possible when mounting.
Print Settings
Printer:
A8 custom Rafts:
No Supports:
No Resolution:
0.2-0.4 Infill:
65% -
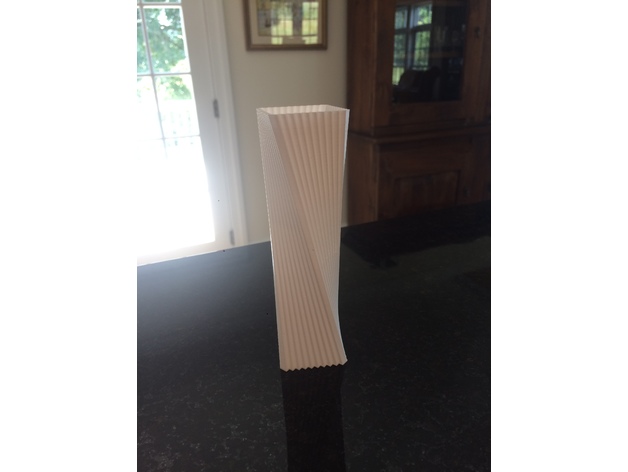
Rippled Vase 3D Print Model
Summary
This is a cool vase that I designed in Fusion 360. I printed it with a .2 mm resolution and in vase mode. I sliced this file with Slic3r and used hatchbox PLA. Happy Printing!
Print Settings
Printer Brand:
Prusa Printer:
Prusa Mk2 Rafts:
No Supports:
No Resolution:
.2 mm Infill:
0% Notes:
Print in Vase mode. -
Toy phone using tactile &Push buttons 3D Print Model
Summary
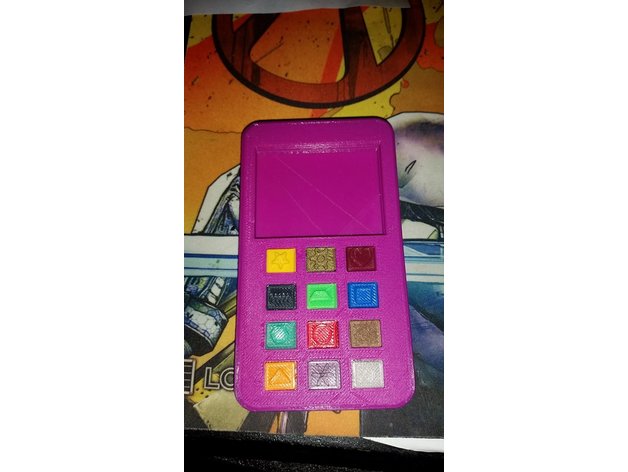
I remixed the original design to implement tactile buttons and mini push buttons , that way she gets the clicking sound. The buttons are a REALLY tight fit. I had to press them in with the butt end of a screwdriver. But all in all, I accomplished what I wanted. All original design credit goes towards the original creator.
These are the exact ones I used:
Mini push buttons: https://www.amazon.com/gp/product/B008MU0CHQ/ref=oh_aui_search_detailpage?ie=UTF8&psc=1
Tactile buttons: https://www.amazon.com/gp/product/B00W0YUV1W/ref=oh_aui_search_detailpage?ie=UTF8&psc=1
Print Settings
Rafts:
No Supports:
No Resolution:
.2 Infill:
30-100 Notes:
Do the top and Bottom shells in 30% infill
Do the buttons 100% infill.
If you break a button getting it in, you’ll need a soldering iron to melt the plastic around it to get it out. hat’s what I had to do.
When you download the files, youll notice 6 buttons are smaller, as in, they hare about 1mm shorter, or something similar. those buttons are designed to be used on top of the “push” type button, not the tactile ones. The tactile ones get the thicker buttons.
TACTILE: Star, Heart,Trapezoid, Hexagon, Basket, Flower
PUSH TYPE: Gear, Screw, Square, Circle, Triangle, Diamond -
Warhammer40k/other unit move plate 3D Print Model
Summary
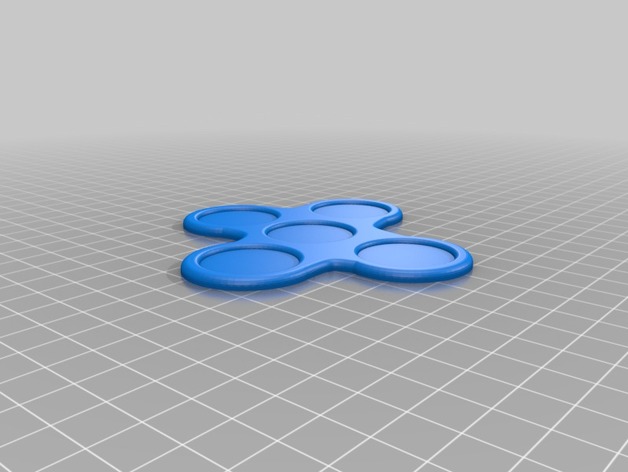
A movement plate for warhammer 40k or other 1in figures.
Work in progress, not yet tried printing myself. Estimate 0,2 should be ok to print with. -
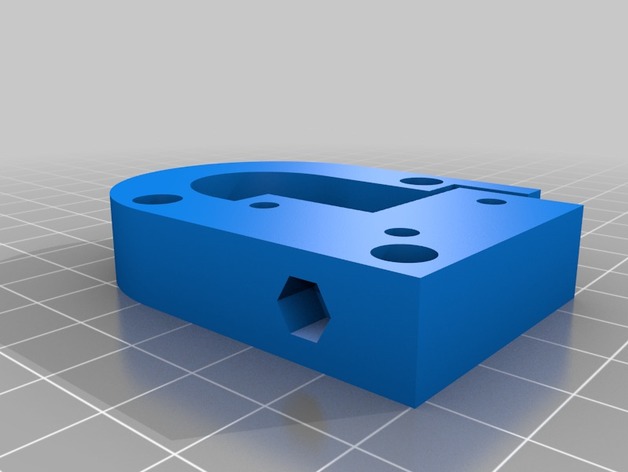
Ver Carriage 2020 3D Print Model
Summary
I AM NOT ORIGINAL CREATOR! PLEASE PRAISE ORIGINAL CREATOR! SORRY FOR ALL CAPS! 😉 -
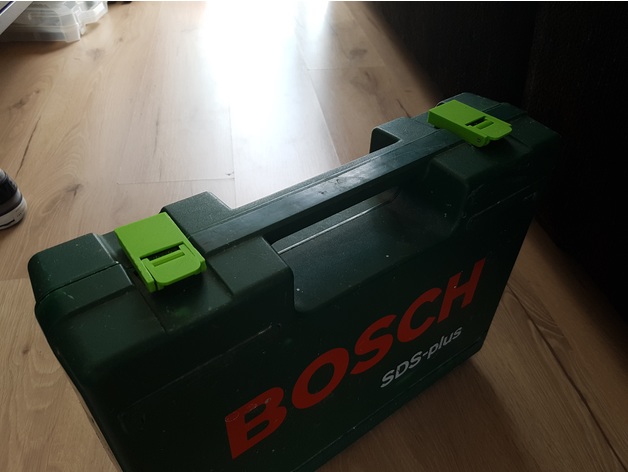
Drilcase Lock 3D Print Model
Summary
The lockclips on Bosch cases happen to break after years of use. Therefore I needed a replacement lock for the case of the Bosch SDS Drill. The lock could be used for other things too of course.
Print Settings
Printer Brand:
Prusa Printer:
Prusa Clone Rafts:
No Supports:
Yes Resolution:
0.28mm Infill:
40% Notes:
Supports is only needed for the block when you want to print it in one piece. Read the steps for more information about printing the block without supports.
How I Designed This
Design
I designed this in OnShape but created a sketch with pencil on paper first. Dimensions are based on what I thought should work out.Parts and steps
Pins
To assemble this lock you need to make pins out of 3mm screws, just saw the top off and make a small incision on one side of the pin to be able to screw them into the parts.
Needed for one lock is a four 3mm screws cut-off to a length of two times 6mm and two times 10mm. Blocks
The blocks can be sliced from 7mm for printing without support material. After printing cleanup both parts of the block and apply a tiny bit of glue before assembling. Holes
Drill the holes to 3mm. You need four screws, rings and nuts to mount this onto the case. See the pictures for the endresult.
Make a small incision into the thread-screwThe parts assembled and attached to the case
Move the top over the block
Press the clip down and the lock is shut!
Happy drilling!
-
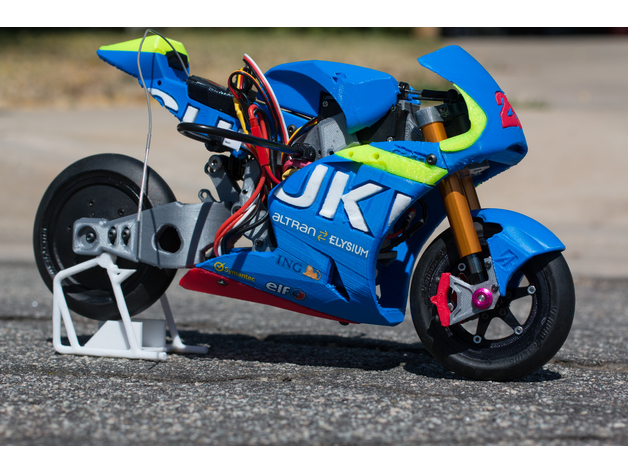
2016 Suzuki GSX-RR 1:8 Racing RC MotoGP Version 2 3D Print Model
Summary
This is a brand new motorcycle. It builds upon the knowledge gained with my previous bikes, but where those were a proof of concept, this is the final product.
This 1/8 size Racing Motorcycle is far more advanced and has been completely redesigned with knowledge gained from actual RC motorcycle designers and racing enthusiasts whose invaluable input was incorporated into the design. This is not meant to be a good 3d printed RC motorcycle, but a serious new RC Motorcycle variant that people can build, design and race at the track.
Version 2:
Completely redesigned from Version 1, Slimmer Body, Narrower chassis, Center of gravity has been moved back and towards the center of the bike, rear gyro, three piece front rim, and electronics are stored on chassis.
Built and Engineered by:
Brett Turnage
bti3dlabs.com
@3dprintracetech
Assembly Manual: https://drive.google.com/open?id=0By6c8kTN8KnBR2dsVHhZU1k3TUE
Parts List: included in download folder
Instructables build: https://www.instructables.com/id/2016-Suzuki-GSX-RR-18-Racing-RC-MotoGP-Version-2/ -
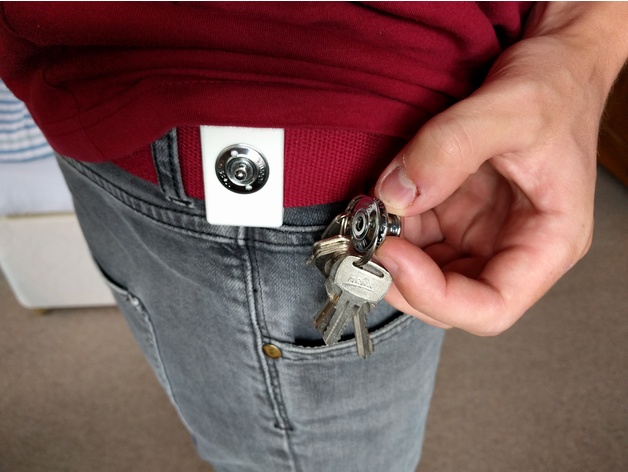
LOXX Belt Clip Connector 3D Print Model
Summary
A strong and safe attachment solution to keep things attached to your person. This belt look design interfaces with LOXX connectors to allow quick connect and disconnect of everyday carry or larger items such as cameras or belt pouches (eg Leatherman sheath)
See more info here: http://www.makealittlemore.com/2017/07/06/experimenting-with-loxx-fasteners/
The connectors can be bought here: http://www.loxx.shop/en/new/loxx-starter-set-nickel/a-676/
They even supply key chains with a hole for the connector pre-made: http://www.loxx.shop/en/neu/loxx-lifestyle-lederpatch-loxx-blau/a-685/
Print Settings
Printer Brand:
Prusa Printer:
Prusa Mk2 Rafts:
No Supports:
No Resolution:
0.15 Infill:
100% Notes:
make it as strong ass possible!! maybe use ABS. -
Fossil Q stand rotated 3D Print Model
Summary
Simply the same object, rotated by 90-12.556, which seems like it’s the right amount (don’t worry, I didn’t trial and error this number).
Slic3r can’t rotate by a non-integer amount, so making this flat is key for probably many slicers.
Werewolf_fr, feel free to suck in this stl file into your design, and I’ll delete this version. -
Printable Helicone 3D Print Model
Summary
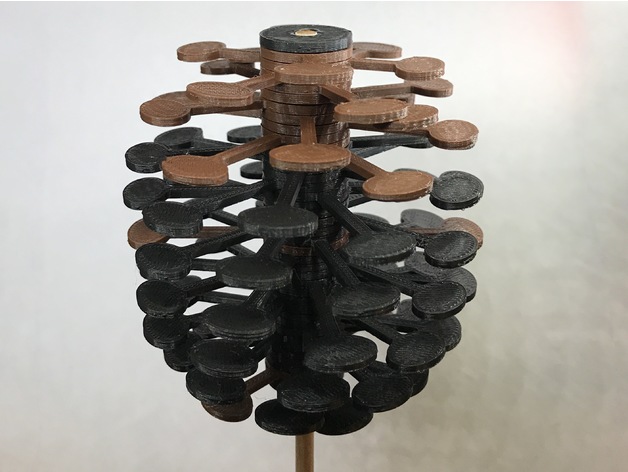
Helicone is an interactive sculpture by John Edmark (more info). You can buy one on Amazon. By rotating the shaft, the arms can settle into a helix, or a pinecone shape that uses (half of) the Golden Angle to fill out the space completely.
I saw a few videos of it in action and decided I wanted to try to make one. I found a few models online, but they all relied on externally visible notches for stops, which the Helicone does not exhibit. After I came up with my solution, I saw a “making of” video with some screen shots of the laser pattern which indicates that it uses a very similar mechanism.
A video of it working.
You can use the Customizer to change various dimensions and petal shape. If you download the OpenSCAD file, you can also adjust the number of slices and experiment with different functions to change the helix angle and 3D outline.
Post-Printing
Print out two of each slice. The slice number is embossed on the underside of one petal to help keep them organized when you drop them. To assemble, thread all the slices and top and bottom caps onto a 3/16″ dowel, working them around until they spin freely. Glue the bottom cap to the rod (I used a dot of superglue; be careful not to glue any other parts to the rod). You can also glue to the top cap into position if you want to prevent the parts flying off the top. -
45° angle transition pieces 3D Print Model
Summary
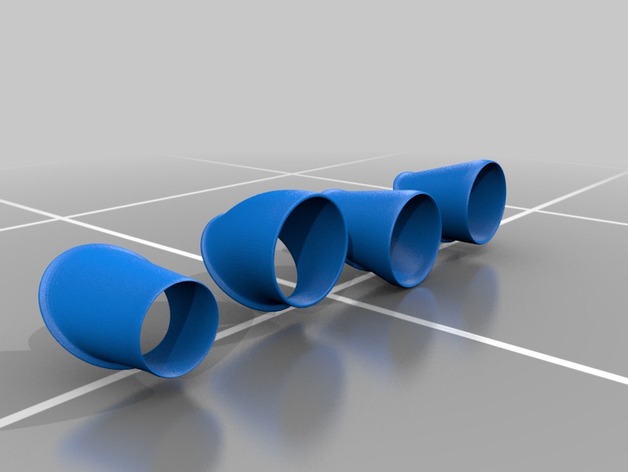
A couple different 45° angle transition pieces. I’d figure they’d have their uses. -
Inmoov Original parts all together 3D Print Model
Summary
Just converted 3d Inmoov V1 SketchUp by Mindless Back to Stl so I could easily swap in derivatives to see how they would fit and work. however not all the parts separated properly and as such I marked it as thing in Progress.
****NOTE THIS IS NOT A 3D PRINTABLE MODEL IN ITS CURRENT STATE I JUST CONVERTED IT BACK TO STL TO WORK ON IT IN 3D BUILDER AND BLENDER
All files created by Gael from the inmoov project here www.inmoov.fr
**square block was also found in files by Mindless and added simply for the reason of posting to thingiverse feel free to print it if you wish 🙂 -
FatShark 18650 battery end caps 3D Print Model
Summary
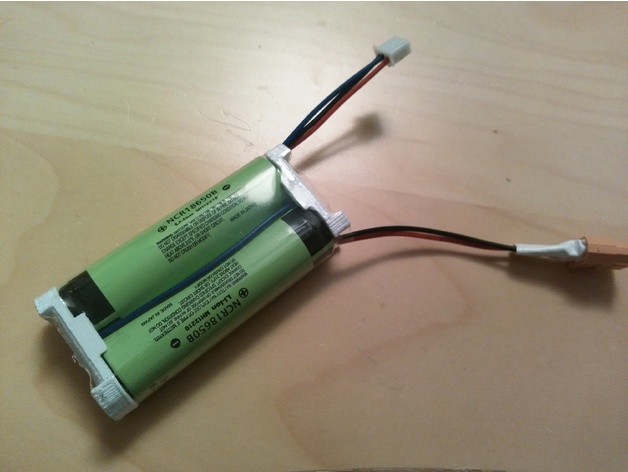
End caps to turn two 18650 batteries (like the famous NCR18650B from Panasonic) into a fatshark-compatible battery that stays in the strap like the original with these “ears” (I don’t know a better word for it) sticking out on both sides of the goggles’ strap.
A parameter in the scad file changes between both caps for your convenience.
I know, in the screenshot I use the “wrong” connector (XT60 instead of barrel) but that is due to a mod of my goggles. -
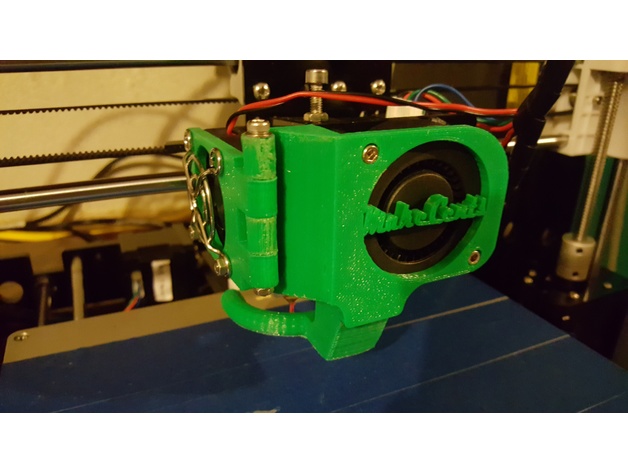
Anet A8 Remix of Extruder Fan Mod V2 by hadoko 3D Print Model
Summary
I added a slot on the bottom of the front of the front mount, and a tab on the half moon shape fan nozzle to hold it in place.
Print Settings
Printer:
Anet A8 Rafts:
No Supports:
Yes Resolution:
.2 Infill:
10 Notes:
Check out his original mod for instructions. Hardest part is drilling to flush mount the screws.https://www.thingiverse.com/thing:2290361
I added my logo to the front of mine, but the files uploaded I removed it. -
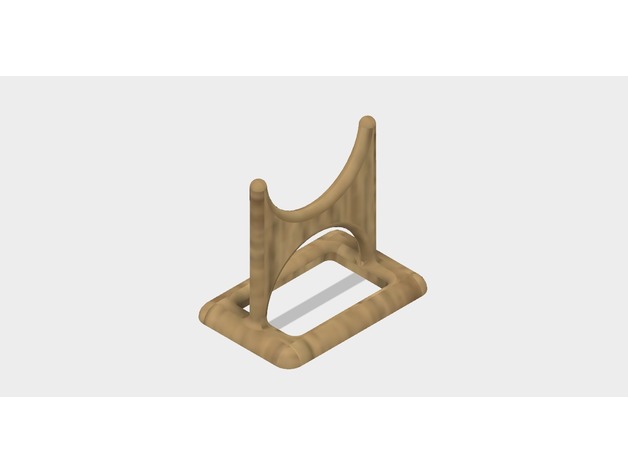
Small rolling pin stand 3D Print Model
Summary
My wife has a decorative wood rolling pin (who knew such a thing existed?) and wanted a small stand for it. Print two (one for each end) and place under the handle. I suppose it could be used for other things that are able to fit in the 1 inch cutout.
Print Settings
Printer Brand:
Prusa Printer:
Prusa Mk2 Rafts:
No Supports:
Yes Resolution:
.15-.20 Infill:
20% Notes:
Printed with wood filament, but could use anything, obviously. -
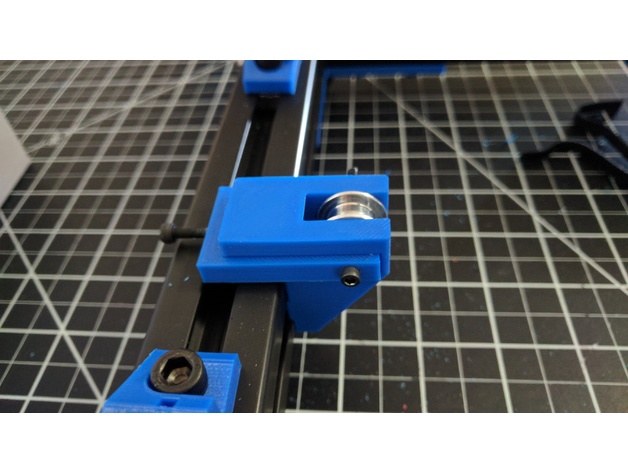
Prusa MK2 Haribo 3030 Y Belt Tensioner 3D Print Model
Summary
Adjustable Y Belt Tensioner for the Prusa MK2 Haribo 3030 Edition, I am sure that it will work for other 3030 setups as well. It uses an M2 screw with an M3 square nut that comes with the Prusa kits.
This is based on the original design on Github so I am not sure who to give credit to for the original design.
I place custom supports in the space where the square nut will sit using S3D, not sure if you can print without supports it give it a try.
Print Settings
Printer:
Prusa MK2 Rafts:
No Supports:
Yes Resolution:
.20 – .30 Infill:
20% -
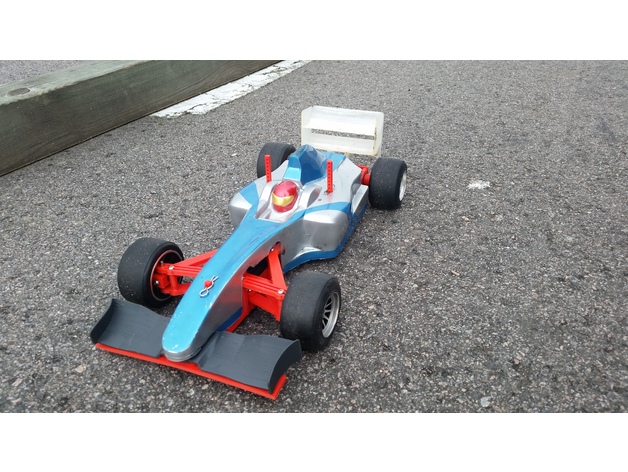
HPD F1 Lexan Body version 3D Print Model
Summary
This is a version of the HPD F1 to use a Lexan Body. Also the front and middle is redesigned. The front is stronger and middle part takes the battery 90 deg rotated.
It is compatible with the rear cradle but there is also a cradle that you build from several parts included, it is not as strong but easier to change individual parts and less waste of plastic when things break. The rear cradle is compatible with the original HPD version but there is also a wide version for this wider body and side_stabs are 2 different versions depending on combinations.
The car was designed to be printed in Nylon like 910 that is slightly rigid. But my prototype I made with prima value PLA did not break so it is very strong with PLA apart from the wings.
The Front wing can use lexan wings or you can bolt on the printed from HPD, fastening points are not ideal but nothing some electrical tape can’t fix 😉 I strongly recommend to print the front wing in Nylon or something with similar flex. Rear wing I have used Bridge Nylon and it flex good and never breaks.
If you want to go cheap or cant find springs, I have used the spring from a ball pen and cut it to shorter length for front. And for rear you can ignore the side springs completely if you just want to go racing and print the plastic main rear spring that is included.
All parts is made in OpenSCAD and source is at github: https://github.com/condac/hpdf1_lexan
Print Settings
Printer:
Home made RepRap style Rafts:
No Supports:
No Resolution:
0.15 or similar Infill:
100% Notes:
All parts are designed to print in 100% infill for strength. -
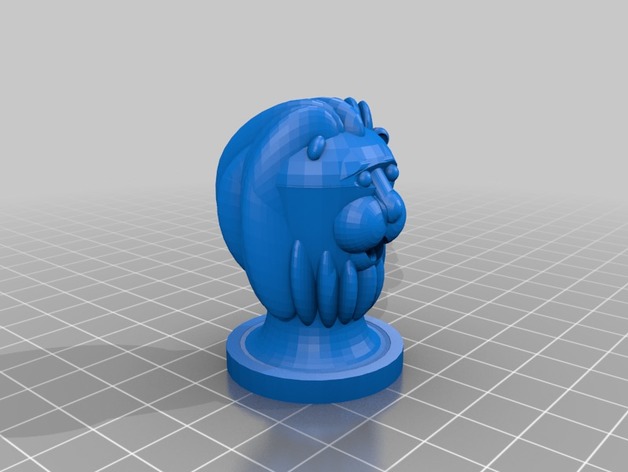
Lannister map marker 3D Print Model
Summary
My reproduction of the House Lannister map marker as seen in A Game of Thrones. -
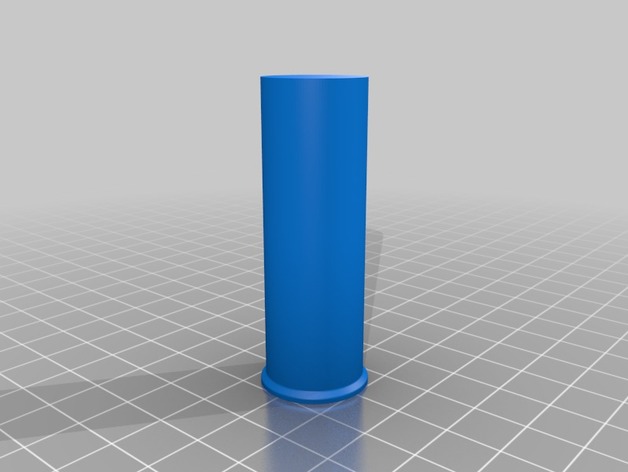
standard size 12 gauge airsoft shotgun shell 3D Print Model
Summary
This is to help you if you need to create something around a PPS airsoft shotgun shell. These are the standard in the industry. The size are perfect.
No really goal to print this…it’s more for meshmixing -
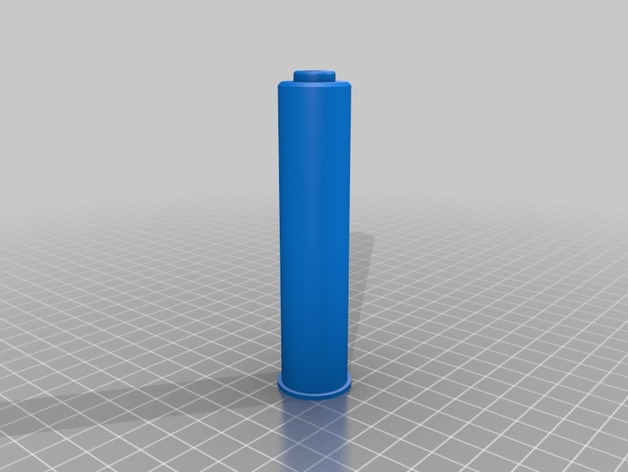
Mad max sawed off airsoft shotgun shell 3D Print Model
Summary
This it the standard shell that comme with the Mad Max double barrel sawed off shotgun. It includes a 7mm hole. There are no really point to print this one. It’s just for modeling. Size are exact. -
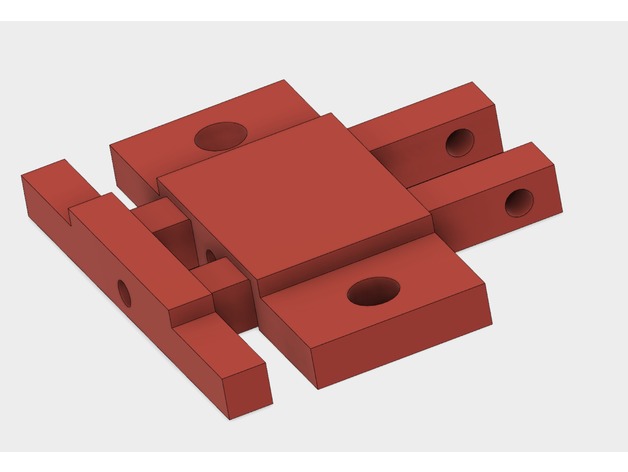
AM8 Lowered Y Tensioner Block 3D Print Model
Summary
This is a Y Tensioner block mod that lowers the tensioner by about 5MM. This was created in response to some people having belt aligment issues because there belt holder considerably lowers the belt position. This also strengthens the Y tensioner so that it can easily be printed horizontal without supports.
Note, I have not tested this. I do not need it for my printer. This is for people that do need it. Let me know if it needs to be changed. -
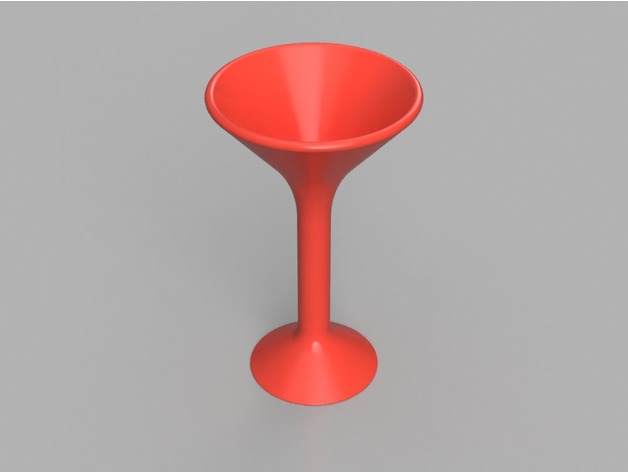
Martini Glass 3D Print Model
Summary
This is a cool martini glass design I created! A great way to make this usable is to print it nice and big and spray it with clear spray paint to seal it. I don’t advise drinking out of it unless you know the clear coat you used is food safe. Enjoy! -
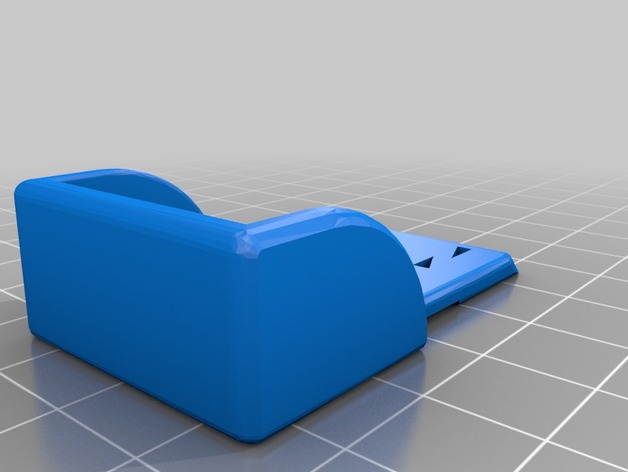
Tattu 450mah 4s 75c Lipo Armor 3D Print Model
Summary
Lipo Armor for Tattu 450mah 4s 75c Battery Pack -
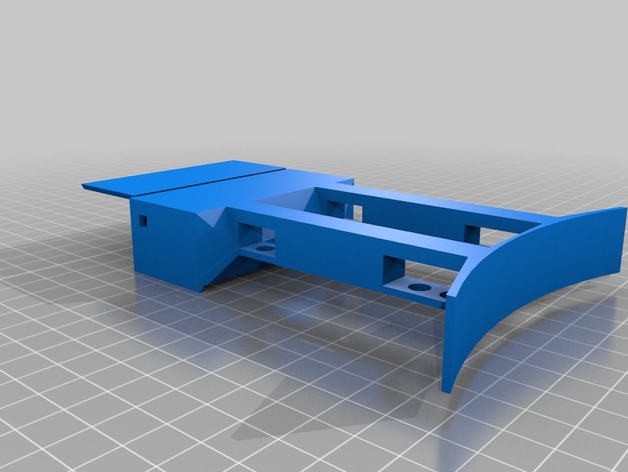
Skateboard rear light 3D Print Model
Summary
Rear light for my Mindless Daily Grande.
Utilizes:
2x10cm red LED strip,
1×18650 battery,
1xTP4056 charger,
1xMT3608 step up,
1xbi-stable 8mm button.
Assembly is intuitive, as is soldering,
Will require four 2mm longer M5 bolts to connect with trucks.
Still work in early beta stage.
Print Settings
Printer:
TEVO Tarantula Rafts:
Doesn’t Matter Supports:
Yes Resolution:
0.2 Infill:
20% (still testing) -
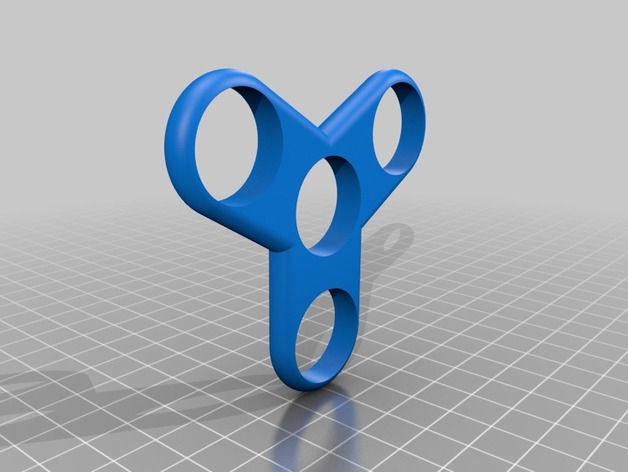
Fidget Spinner 3D Print Model
Summary
This is my first attempt at drafting in 123 design.
Print Settings
Printer Brand:
Prusa Printer:
Prusa Mk2 Rafts:
No Supports:
No Notes:
Currently having trouble with first layers. -
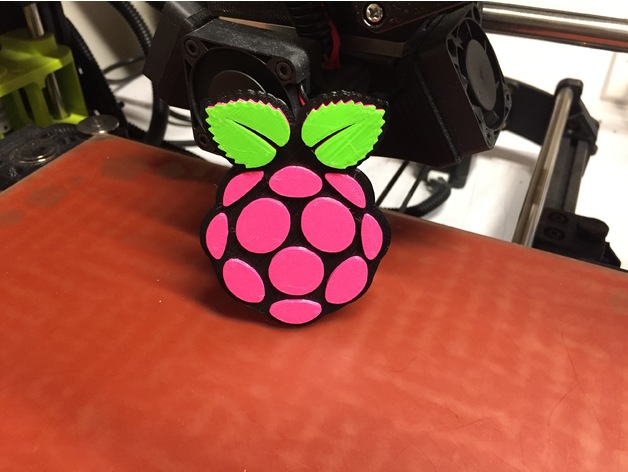
Raspberry Pi Logo 3D Print Model
Summary
I wanted a nice Raspberry Pi logo I could print in full color (3 colors) using a single extruder and filament swapping.
In the model each layer is 1mm thick though for the photo above in Cura I scaled the Z axis so that each layer was 2mm thick.
I’m happy with how it came out.
How I Designed This
I found an SVG for the Raspberry Pi logo, loaded it in inkscape, exported to DWF so SketchUp could ingest it and exported is as an STL -
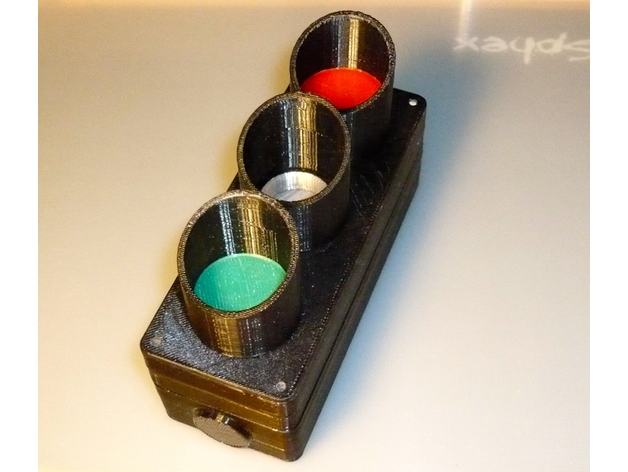
Mini Stoplight by Montiey remix 3D Print Model
Summary
This is a remix of Montiey stoplight.
Since his design makes solid rather complex parts I have split the toppart into pieces and printed them separately.
The sun shilds are inserted from the front and glued together with the case and the neutral white inserts.
Have removed the switch hole,
added mountholes with captured nuts to the backside plate and
added a cable go through at the bottom of the thick back part.
It has the same “Stopfen” that I have made for my Notausschalter-case:https://www.thingiverse.com/thing:2412076
Made a thin and a thick LED mountplate separately, can be adopted easily to LED that has other shapes.
Have the case in two versions:
fat thing that can hold the elctronics and a battery as well
the flat has the LED’s only.
I hate making things for a very special purpose only.
Thats why I have made a series of parts that can be used for other purpose than bringing LED to live.
I.e. make a case for push switches, put them to the CNC mill,…
So, an even more fat thing can be put together by stacking up
the thin parts and or an intermediate LED frame and or a thick backpart of the case.
Not provided as of now publicly. Please ask if you need them.
The depicted red and green inserts can be removed if the LED are not bright enough.
Otherwise a coloured transparent thin foil can be added inside the housing.
Hint:
Germans ask the local hobby store for Windradfolie.
They can be had in many colours.
Take that if you have no other than black filament by hand , he 😉 -
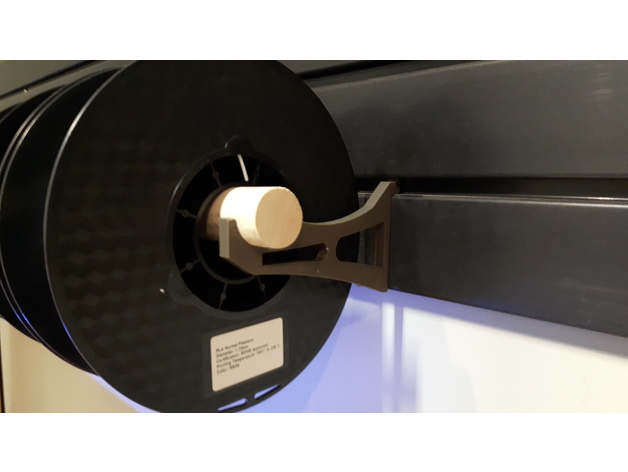
1 1/4″ Dowel Holder for Slat Wall 3D Print Model
Summary
This here is a simple yet efficient slat wall spool holder. I have these placed above our printers for easy access to multiple materials. The holder size is for 1 1/4″ dowel rod.
I went for 30% infill and it is working very nicely. I wouldn’t recommend loading more than 4 x 1 KG spools for every pair; just place the brackets 16″ apart.
Enjoy
Print Settings
Printer Brand:
FlashForge Printer:
Dreamer Rafts:
No Supports:
No Resolution:
0.2mm Infill:
30% or Less -
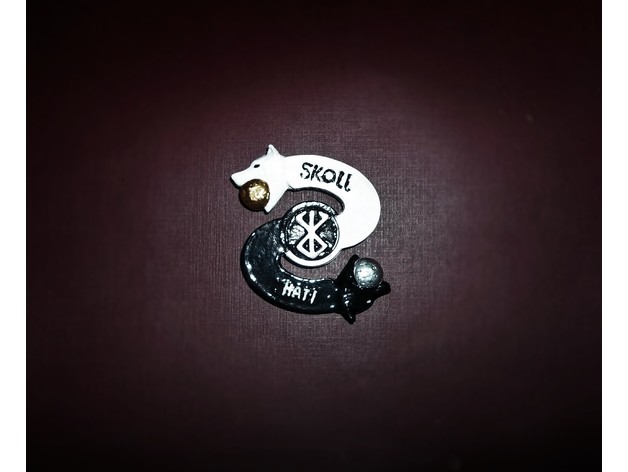
SKOLL & HATI spinner 3D Print Model
Summary
I decided to turn my favourite design into a spinner.
Skoll chasing the sun while Hati chases the moon.
just in time for the total eclipse scheduled for Aug.21 2017 ( north america) -
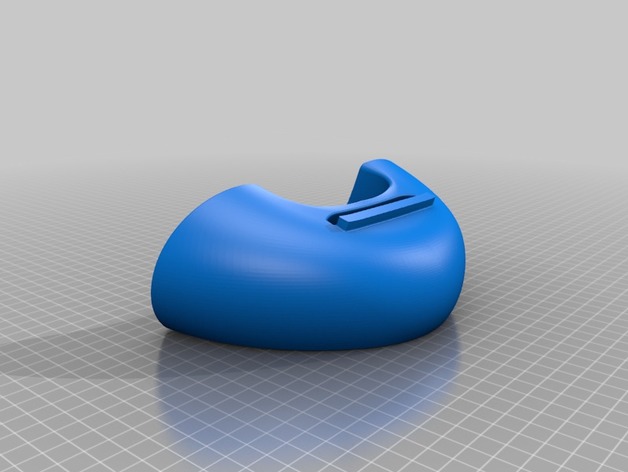
S7 Edge Speaker V2 3D Print Model
Summary
Just a simple amplifierd dock for samsung S7 and S7 edge speakers easy to print.
Print Settings
Printer:
Anet A6 Rafts:
Doesn’t Matter Supports:
No Resolution:
0.2 Infill:
20
Post-Printing
After Print
After printing you just need to stick the samsung name to the place with a glue , I used loctite. -
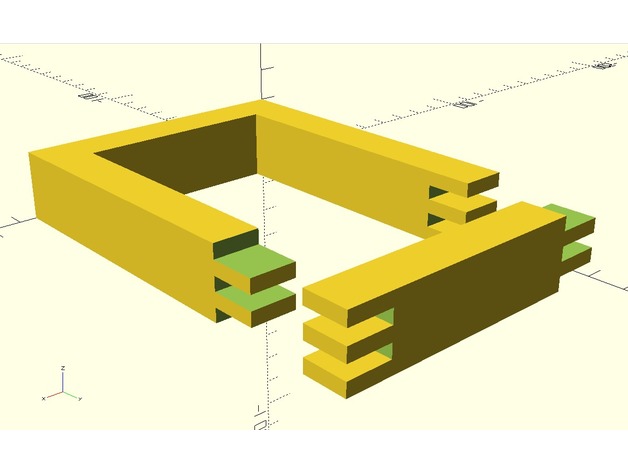
customizable frame 3D Print Model
Summary
This laser-cut friendly frame (take material width into consideration) is a work-in-progress with many potential uses.
To do:
make size and amount of notches customizable
add additional notches for inserting dividers etc
design semi-controllable divider layouts
Other suggestions are most welcome. -
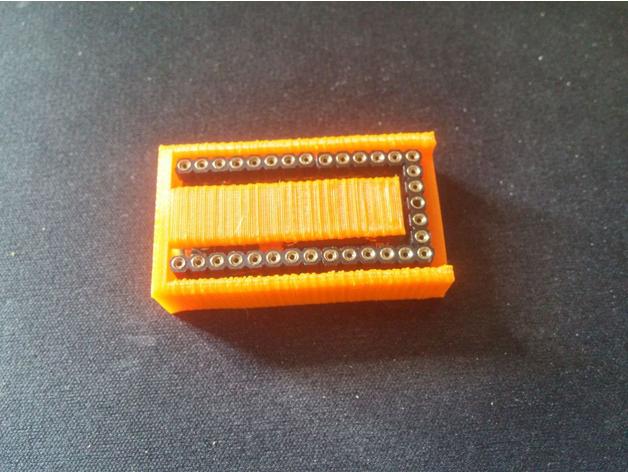
All in one Teensy 3.2 case 3D Print Model
Summary
A single piece Teensy 3.2 case, with a top that can press the reset button. This is slightly tapered so that it isn’t easily knocked. Designed to suit turned pin sockets in the outer pins.
No access to bottom or inner pins.
Print Settings
Printer:
Vellemann K8200 Rafts:
Yes Supports:
No Resolution:
0.4mm Infill:
25-35% -
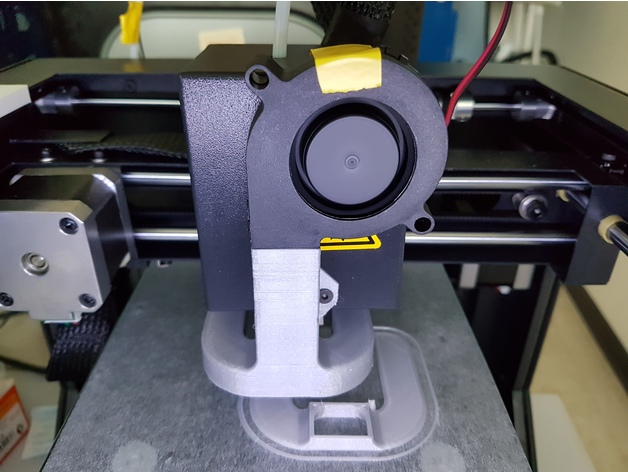
Renkforce RF100 Part-Cooling duct 3D Print Model
Summary
I found the available fan-attachments for the RF100 to take up to much space around the printhead, or simply don’t produce enough airflow.
This cooling solution utilizes a radial fan design and can be attached to the printhead using already existing screws on the sides of the head.
It adds just about 15mm of depth and about 8mm of width to the printhead, so you can still extend the RF100s 10x10x10cm print area a bit if you like.
Post-Printing
Mounting
After printing and getting rid of support materials, unscrew the screws on the front and bottom of the printhead(behind the heaterblock on the 45 degree angle part), then attach the duct to the printhead using the two screws you removed earlier.
Attach the blower-fan (I use a Delta 5015 compatible model) and secure it to the printhead using either tape, or the provided mounting brackets (TODO: design mounting brackets)
How I Designed This
Designed in Fusion360 spending a lot of time measuring the printhead, printing, attaching, cursing, adjusting and reprinting. -
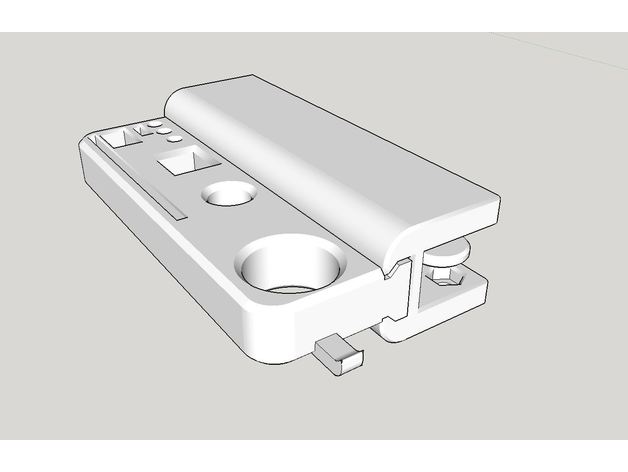
Tools holder on table edge. 3D Print Model
Summary
You need M6 screw2 and M6 nut2.
The thickness of table should be under 15mm. -
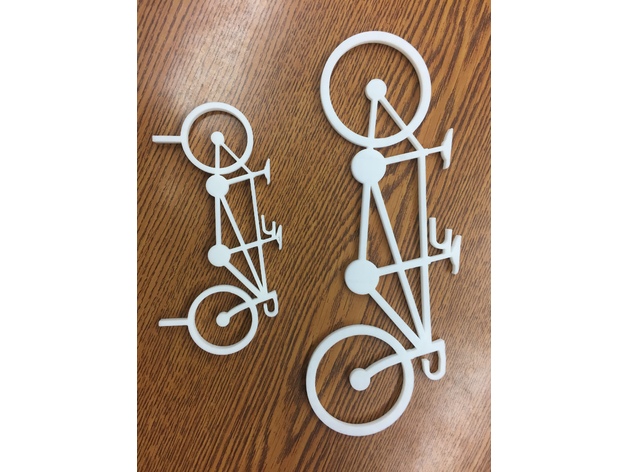
tandem bike 3D Print Model
Summary
i made this for my sister’s wedding cake topper so i decided to post it 🙂
Print Settings
Printer:
anet a8 Rafts:
No Supports:
No -
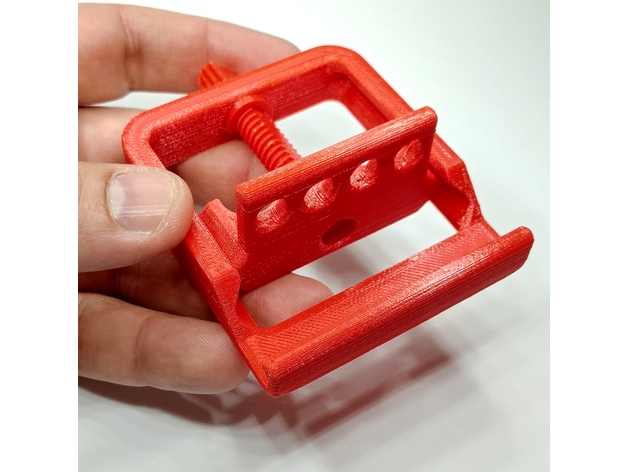
Adjustable Phone Stand (Fully Printable, No Supports) 3D Print Model
Summary
I designed this to be an adjustable smartphone stand that you can very finely adjust the viewing angle of your phone or small tablet.
To assemble:
Slide the screw all the way in to the stand.
Turn the screw until it is fully seated against the frame.
Install the snap ring over the smooth part of the screw, against the frame as depicted in the photos.
Note: This design can be scaled up to suit large tablets if you so choose.
Print Settings
Printer:
Hatchbox Alpha Rafts:
No Supports:
No Resolution:
0.25mm Infill:
20% Notes:
This does NOT require any supports or rafts. -
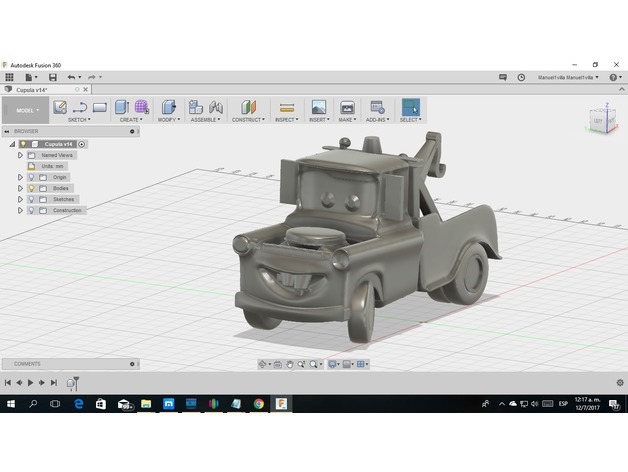
toy cars mater 3D Print Model
Summary
Este Medelo es un remix que he bajado de https://archive3d.net/?a=download&id=b7395f8e fui modificandolo para que fuera mas facil imprimirlo.
Post-PrintingHow I Designed This
-
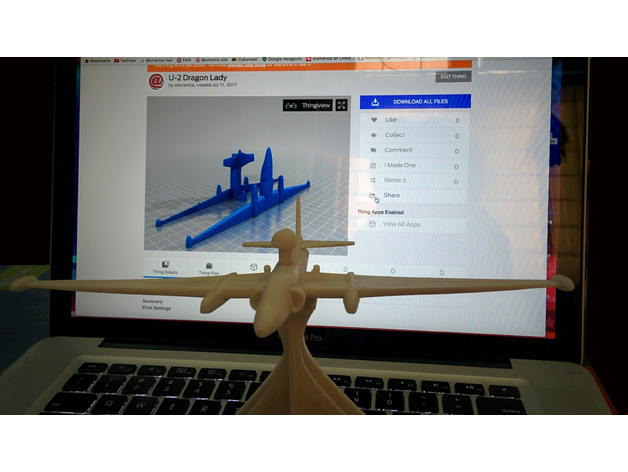
U-2 Dragon Lady 3D Print Model
Summary
Resize as you like.
Print Settings
Printer Brand:
Ultimaker Printer:
Ultimaker 2 Rafts:
No Supports:
No Resolution:
0.15 Infill:
100%
Post-Printing -
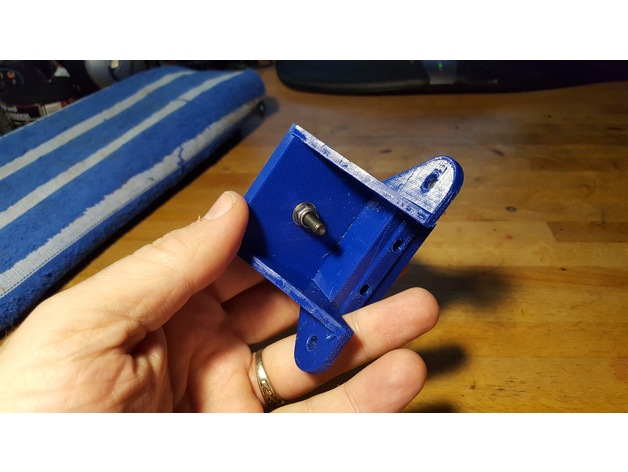
idler pulley mount for M5 bolt hole, mounts on 2020 or larger v-slot 3D Print Model
Summary
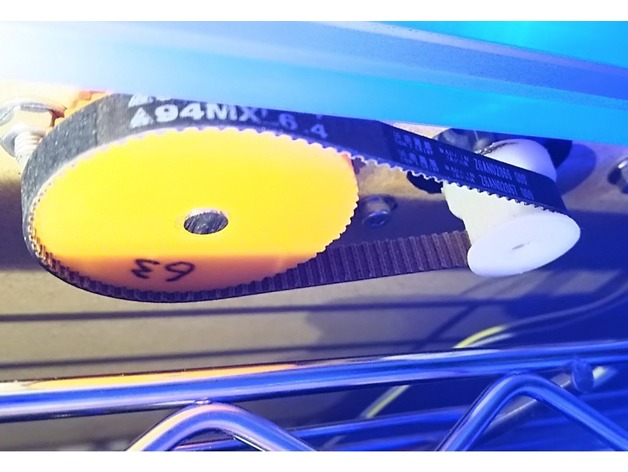
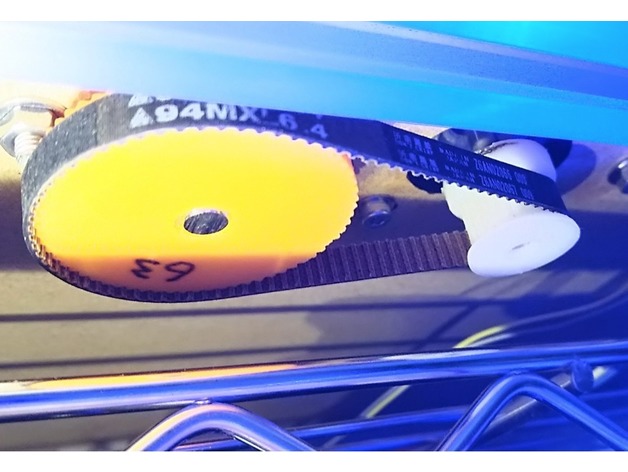
This is a simple mount for attaching to a 2020 or 2040 v-slot rail, to hold a single 5mm bore idler pulley. I needed this for my installation of a 3-leadscrew Z axis system on my D-bot.
It’s useful to help take up the slack if a belt is a little longer than needed, or to change the direction of the belt, or whatever.
A much smaller and more compact mount could be designed to hold a single 5mm bore pulley, but I just started with the Z axis bearing mount assembly that I’d remixed as part of my bearing assembly for 3 leadscrew setups.
The following thing has a photo that includes this bearing mount as part of my installed 3-leadscrew Z axis.https://www.thingiverse.com/thing:2401504
The Z axis bearing mount in that thing is a remix of the original Z axis stepper motor mount. I typically include sources in my things, but in this case I don’t have any sources. I edited the original D-bot stepper mount in Tinkercad to produce the version I used in my 3-screw bearing assemblies. For this 5mm bore pulley mount I simply filled in the hole that held the flanged bearing, filled in the screw holes, and then added a single 5mm diameter hole in the center of the mount surface.
In my case, a single M5 washer and a 7mm high aluminum spacer raised the pulley up to the same height as my other geared pulleys used in the 3-leadscrew Z axis system. Whatever spacing you need you can either fulfill by finding an appropriate spacer, stack of washers, printed spacer, or whatever.
I printed this in PETG at 260/70 C with a .4mm nozzle onto PEI. I used 98% infill to make it nice and solid. You can print this with whatever settings work with whatever filament you choose on your printer, but I’d recommend it be printed solid, since this pulley may be under considerable sideways strain if it’s being used to take up slack in a fairly tight belt. -
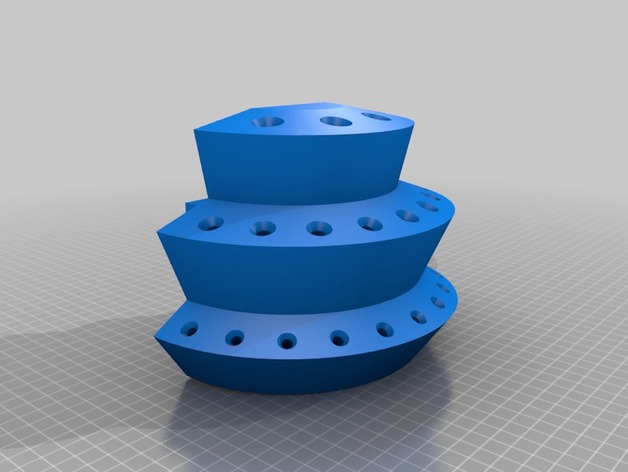
French cleat screwdriver holder 3D Print Model
Summary
I added a french cleat to this nice screwdriver holder. -
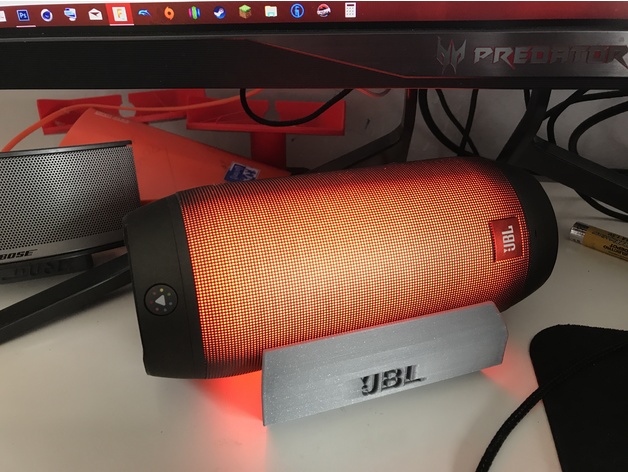
JBL PULSE 2 STAND 3D Print Model
Summary
stand for JBL Pulse 2
Simple Design for pc setup …
Print Settings
Printer:
anet 8 Rafts:
No Supports:
No Resolution:
0.2 or 0.25 Infill:
20 -
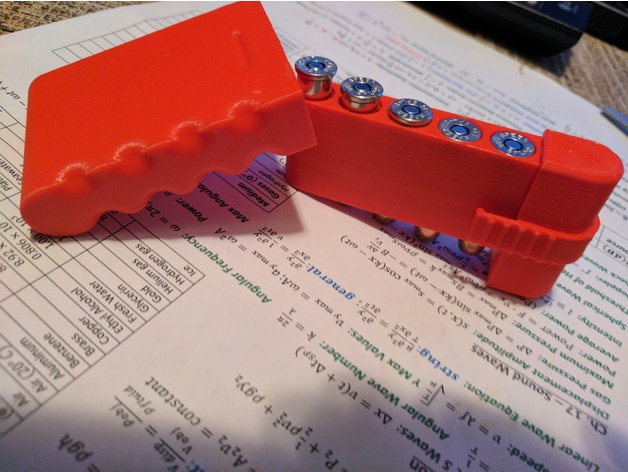
.38 Special 5-Round Pocket Case 3D Print Model
Summary
Item Details
One of my friends requested a case for .38 Special rounds to keep in his pocket while hunting. This is what I came up with.
This is 5 parts total.
You may need to do some sanding to get the dovetail joints aligned, but it shouldn’t require much.
I used super glue to secure the parts, but, without any sanding, everything was functioning without the super glue.
The clip may require some slight bending to get the case to close. I had one function perfectly off the printer, but the other one had to be gently pried back. I think it was just a printer cooling issue that caused some slight warping.
All objects should be oriented correctly for printing.
Printing Details
I used a 0.2 mm layer height since this item doesn’t need to be pretty.
This piece doesn’t require a lot of skill.
Print Settings
Rafts:
No Supports:
No Resolution:
0.2 mm -
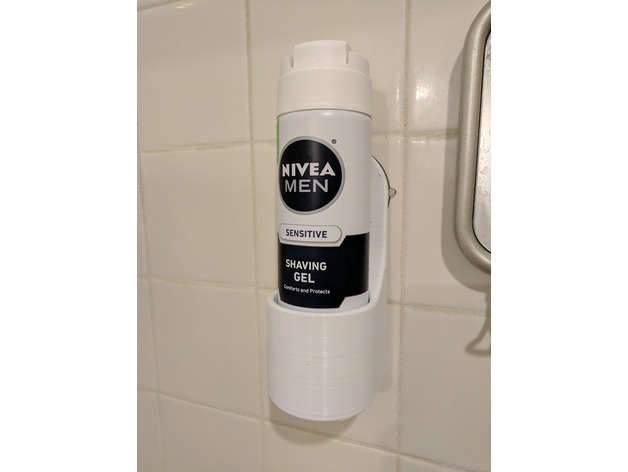
Shower Shaving Gel Holder 3D Print Model
Summary
A simple shaving gel canister holder for the shower. Should fit most 55mm canisters.
Designed to be held by a 2.5″ ‘mushroom head’ suction cup, such as http://a.co/3Xw5eVm (without the hook).
Print Settings
Printer Brand:
Wanhao Printer:
Wanhao Duplicator i3 Plus Rafts:
No Supports:
Yes Resolution:
0.2mm Infill:
25% Notes:
For the best quality, this model is designed to be printed in the upright position.
Depending on your overhang capabilities, a small support is recommended for the suction cup mounting hole, but should remove easily. I printed mine at 25% infill, 3 top/bottom layers, however you likely could decrease infill without sacrificing strength of the part.
How I Designed This
Modeled in Fusion 360 -
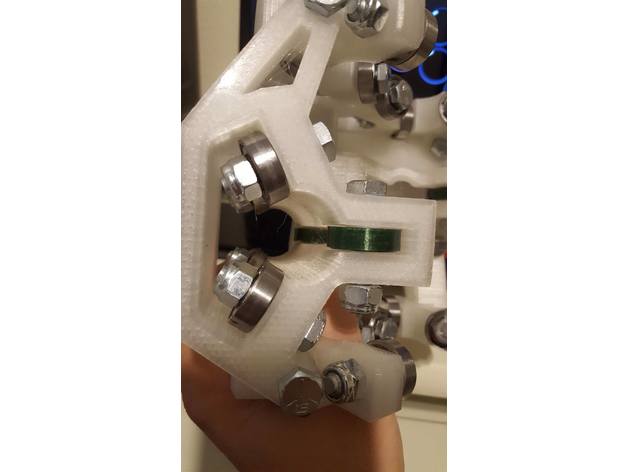
MPCNC spacer for 608zz to remove any play in rails 3D Print Model
Summary
This is a simple spacer you can put on your 608zz bearings to make the ride more smooth without any play. PLA worked great for me and make sure your increase or lower your layer width so you have a good bond. .44 worked for me on a .4 nozzle -
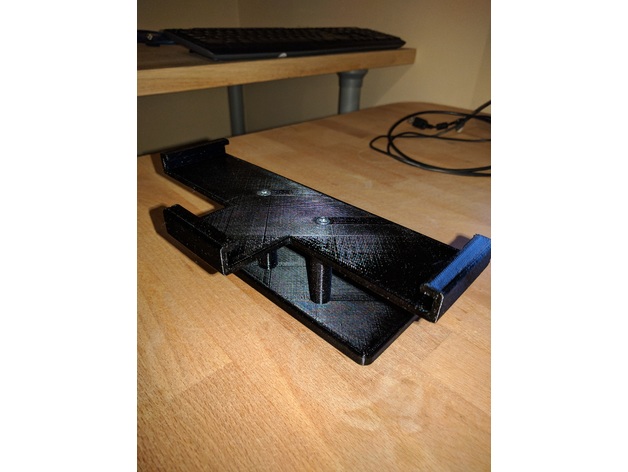
DJI Controller Tablet Adapter 3D Print Model
Summary
This could easily be changed at any time, as I may need to tweek it depending on how long this one lasts
I got a DJI Spark a week ago and have been using my nexus 5x with the controller. I have a Nexus 7 tablet I rarely use but it doesnt fit in the spark controller arms. So I modeled up a fake Nexus size block and two posts with a bracket on top that fits the Nexus 7 well….Note, I added 2% to the print in slicing to make up for some shrinkage and it was spot on.
I printed it today and just used it tonight. I had some screws laying around..3/4″ #4 (sheet metal or wood screws are fine), with counter sunk heads. Used a counter sink bit to the printed holes to make them fit just right on the top and bottom pieces. 4 screws total. Printed in PETG.
View in OnShape: https://cad.onshape.com/documents/69057d51bc0b35a6b7eef7eb/w/5b144210a157a733396063a4/e/6800ac592d0402424c93f4b1
Print Settings
Printer Brand:
PowerSpec Printer:
PowerSpec 3D Pro Rafts:
Doesn’t Matter Supports:
Yes Resolution:
0.3 Infill:
10% and 30% Notes:
Printed in PETG (black), 10% infill for the tablet bracket for a little more flex and 30% for the posts and “phone” block that locks on to the controller. Im sure you could get away with changing those some. Supports are only needed for the tablet bracket.
Post-Printing
Screw holes
May need to ream holes in posts to help screw together easier and use a countersink bit on printed countersunk holes for better fit.
How I Designed This
Modeled in OnShape. -
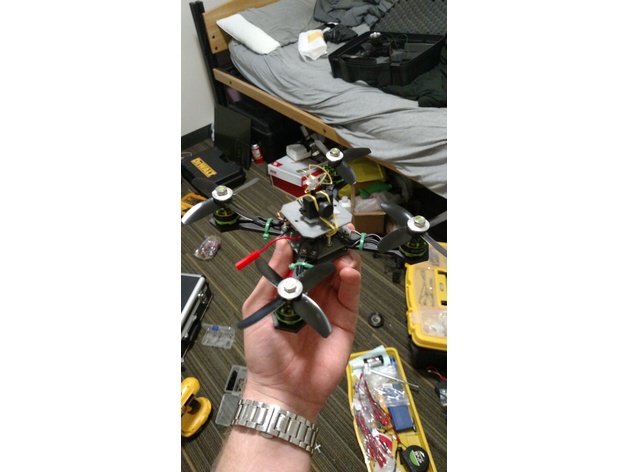
Whoop Killer 3D Print Model
Summary
I wanted something that could fly indoors just like a whoop but also fly outdoors
UPDATE:
Parts list added in files tab with links to parts used
Print Settings
Printer:
MonoPrice Select MIni Rafts:
Doesn’t Matter Supports:
No Infill:
100 Notes:
Need four arms. Parts list and video will be available shortly -
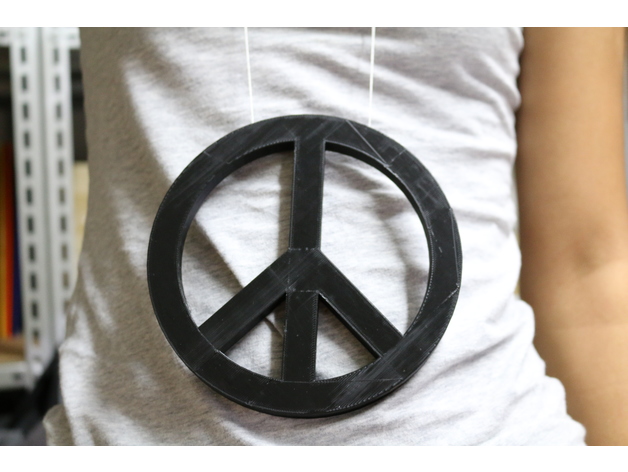
Peace 3D Print Model
Summary
For a party with hippie dress code.
Print Settings
Printer Brand:
Prusa Printer:
Prusa Clone Rafts:
Doesn’t Matter Supports:
No Resolution:
0.3 Infill:
15 -
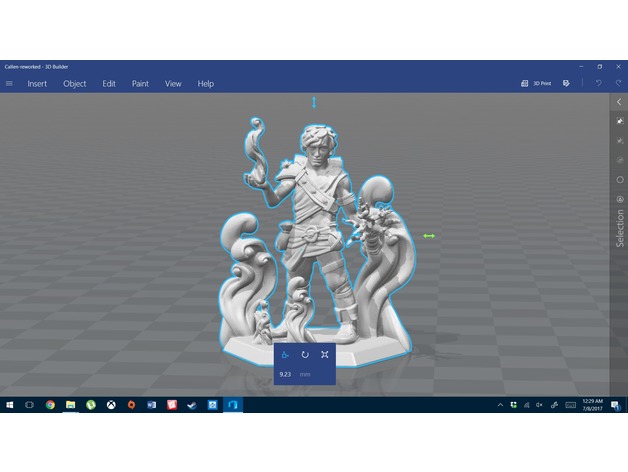
d&d character 3D Print Model
Summary
my custom water elementalist, i hope you enjoy. he is a reworked heroforge model. -
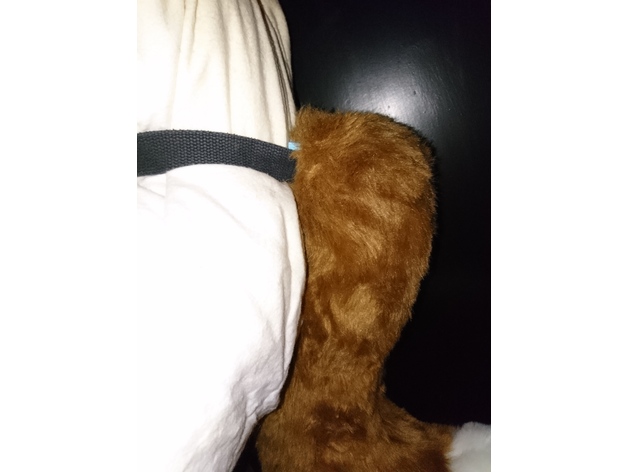
furry tail belt attachment 3D Print Model
Summary
fixation de ceinture pour queue cosplay ou fursuit -
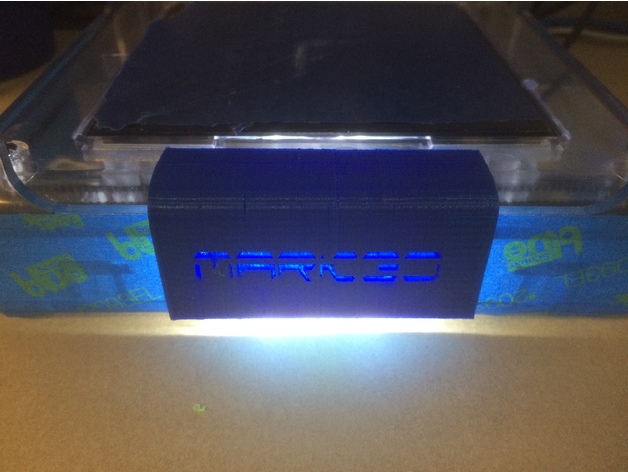
M3D Nameplate 3D Print Model
Summary
This is just a little plate that sits on the front of your M3D that you can cut words into that will glow through using the M3D logo lighting.
I’ve included the Blender file that is already set up to put your own text in there. -
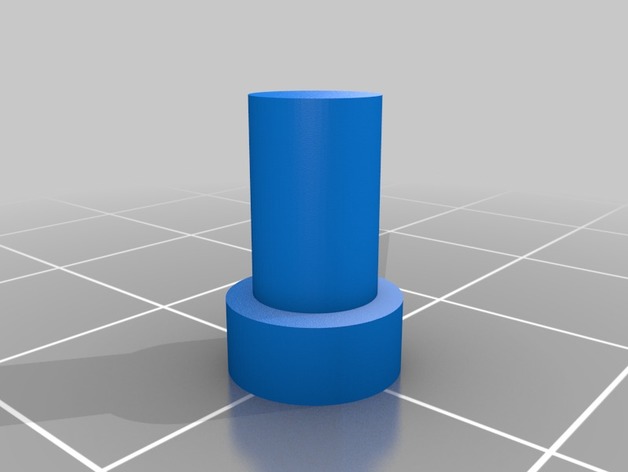
model rocket 3D Print Model
Summary
this it a model rocket with a pin to hold every thing together. I recommend using pin 2.stl and warping electrical tape around the pin and body to keep it in
Print Settings
Printer:
Tevo Tarantula Rafts:
Doesn’t Matter Supports:
No Resolution:
0.2 Notes:
for the infill you need 10% on the model rocket body, on every thing else you need at lest 75% -
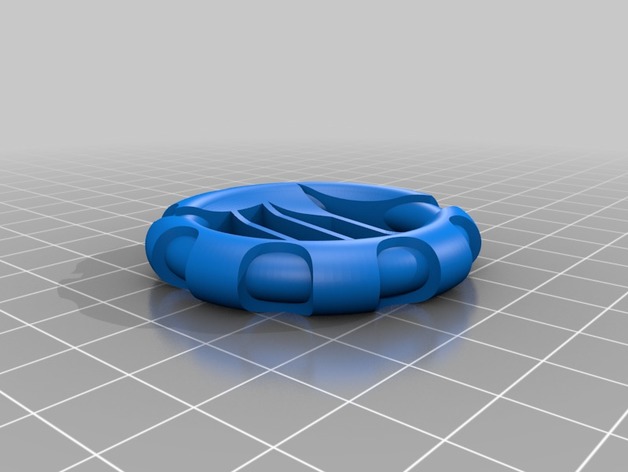
Maker Coin (Wotcha Making) 3D Print Model
Summary
Maker Coin your my youtube channel that I use for testing fillament. -
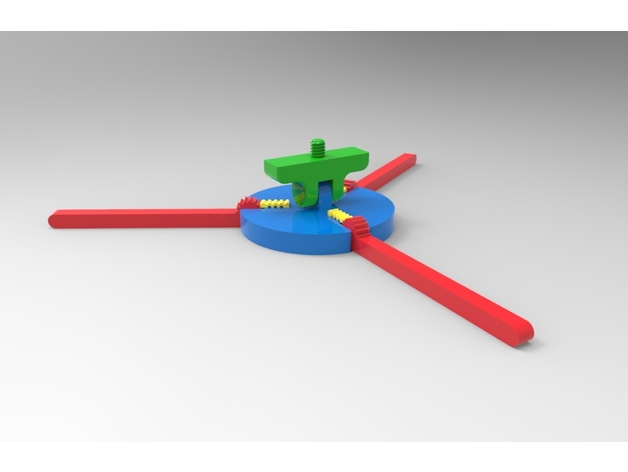
mini tripod w spring ratchet 3D Print Model
Summary
a mini tripos that uses spring ratchets to hold the legs in place. the legs snap into place as does the platform, into the base. the tripod swivels and holds via friction fit. -
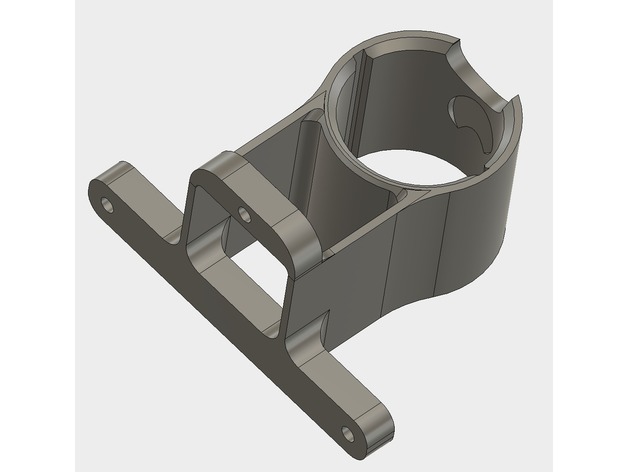
Dyson V8 accessory mounting bracket 3D Print Model
Summary
The Dyson V8 comes with 6 fittings (7 if you count the pipe) but only 2 places to hang them. My broom closet is rather small so I needed a way of mounting where I could choose the placement for each fitting. The mount has been designed so that the Dyson fittings hang from it.
Print Settings
Printer:
Anet A8 Rafts:
Doesn’t Matter Supports:
Yes Resolution:
0.2 Infill:
40% Notes:
Refer to the picture to see print orientation. The supports breaks out easily. Minor cleanup required but Dyson parts will fit directly as it comes from the 3d printer. I included the gcode if you trust the way I sliced it 😉 and are printing with PLA. Otherwise, use the stl and slice it yourself.
Post-Printing
Minor cleanup and removal of the supports. Best way to mount is to pilot drill a single hole to start and then screw the bottom of the bracket onto the wall. This will allow you to rotate till level and then pilot drill the top 2 holes and fix with appropriate screws. -
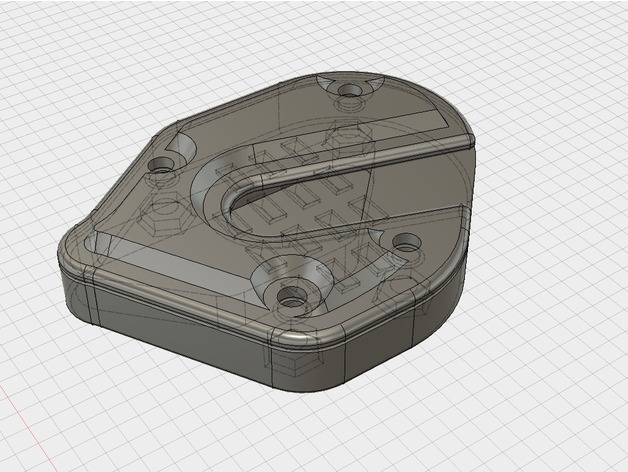
First Gen Suzuki V-Strom 650 Kickstand Pad 3D Print Model
Summary
I designed and printed this for a friend. It has been in the wild for months and has survived without issue. The design increases the surface area of the kickstand pad 300%, decreasing the chance of it sinking into mud, sand, or soft asphalt. Aside from the printed parts, four M6x16 bolts are needed as well as threadlock and four plain M6 nuts.
Print Settings
Printer Brand:
PrintrBot Printer:
Play Rafts:
No Supports:
Yes Resolution:
0.2mm Infill:
80% cubic Notes:
I use support when printing the base to support the cavity where the kickstand will rest. Also, I printed these parts in Taulman 910 for strength and heat resistance. -
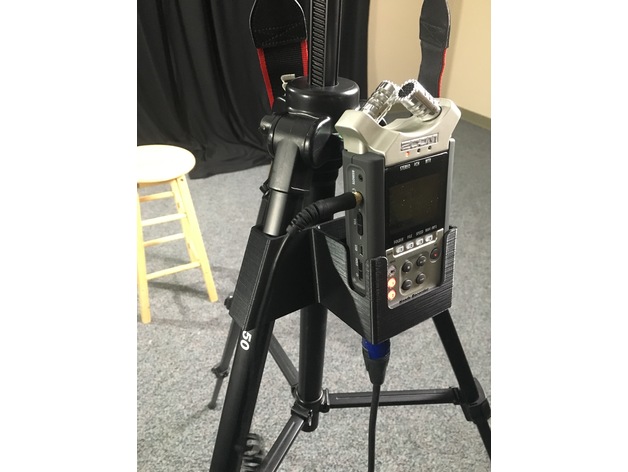
Zoom H4N Tripod Mount 3D Print Model
Summary
I modeled this as a convenient solution to mounting my Zoom H4N audio recorder in a easily visible & accessible location. This mount simply and securely hooks onto the legs of your tripod so that it is just as accessible as your camera!
Print Settings
Printer Brand:
Robo 3D Printer:
R1 ABS + PLA Model Rafts:
No Supports:
No Resolution:
0.2mm Infill:
25% Notes:
Printed in PLA using a 0.4mm nozzle. -
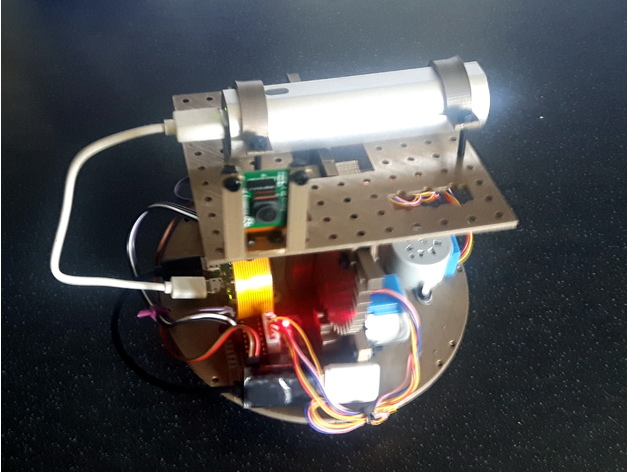
PiSkyScan 3D Print Model
Summary
PiSkyScan – in action here https://www.piskyscan.com/wp-content/uploads/2017/07/pisky1.mp4
A Rasperry Pi Zero project to allow a camera to be remotely pointed any where.
Suitable for CCTV, 3d scanning room scanning, building scanning and hopefully much more.
Pi model B and model 3 versions coming soon.
Build instructions here.
https://www.piskyscan.com/
Print Settings
Printer Brand:
FlashForge Printer:
Creator Pro Rafts:
No Supports:
No Resolution:
0.1mm Infill:
15% Notes:
Apart from size (145mm x 145mm) should hopefully be a fairly straightforward print.
You need to print bearingCentre and smallGear twice.
The camera holder prints vertically, it needs rework anyway.
Post-Printing
Build instructions
Build instructions here https://www.piskyscan.com/
How I Designed This
Design
Designed using Blender.
Gears designed with help from http://www.otvinta.com/ (great sight for gears in Blender).
Design is coded in Python and then run in Blender to produce the various parts. -
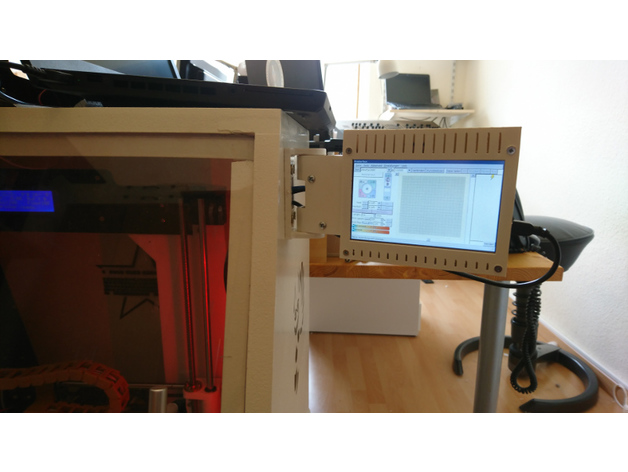
WaveShare 5inch Display Housing and Display Mount 3D Print Model
Summary
NOTE: Before printing please check, if it looks sane for you! Some of the models around thingiverse seem to have been designed for a different version of the display. My display and my Raspberry did not fit into those housings, so I designed this one.
This model contains a housing that fits a WaveShare 5inch Display (Version 2) including a Raspberry PI 3.
The project contains two versions of the model:
normal box without a mount
housing with a “wall mount” with a movable arm
I use the second version to mount a Raspberry PI running Pronterface mounted to my printer-housing.
The movable arm allows routing cables inside the arm. It is basically possible to also route the power-supply inside the arm, but I still need to solder micro-usb connector that is small enough to fit into the housing.
To close the housing, I used the spacers included in the WaveShare package including addidional M3 screws for the front-plate. The arm is fixed with M3.5 metal screws. Those can be easily removed to allow access to the USB and ethernet-ports of the Raspberry PI.
Print Settings
Printer Brand:
Prusa Printer:
Prusa Clone Rafts:
No Supports:
Yes Resolution:
0.2mm Notes:
The archive contains a model with and without a mount. The model without the mount only consists of the bottom and top part. The top part is also used for the model including the mount. Please ensure that you look at the files before printing and be sure that you rotate them properly.
For only the display case print
WaveShare_5inch_Bottom.stl
WaveShare_5inch_Top.stl
For the box including the mount, print
WaveShare_5inch_Top.stl
WaveShare_Mount_5inch_Bottom.stl
WaveShare_Mount_5inch_Mount_Top.stl
WaveShare_Mount_5inch_Mount_Plate.stl
I used slic3r for slicing. During the print I used white ABS. To ensure that the round parts came out nicely, I had to manually tune the support material settings.
The wall mount prints best, if printed on the side to ensure that the round parts are completely circular.
Note: The movable arm could use a drop of oil (yes oil, not WD40). Not much, so it does not drip out but enough to make it move smoothly. -
Water pipe turbine 3D Print Model
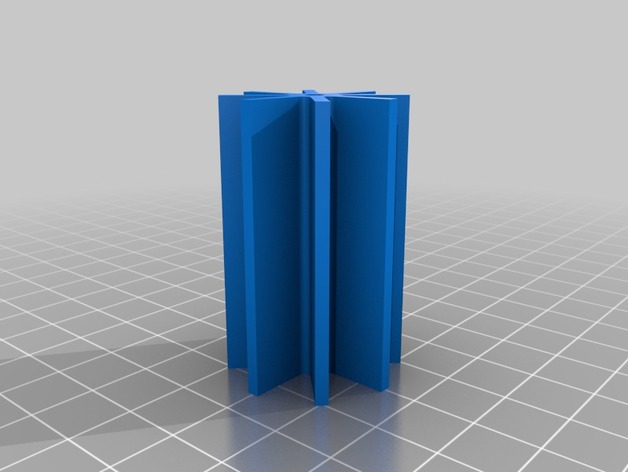
Summary
made this for a 30mm ID glass tube. Used a 3mm axle and two 3/4″ ID, 1″ OD, 1/8″ width O rings for the seals. Try printing just one stopper and scale it up and down a percentage or two to get a good fit. and I use a coat hangar wire with a small L bend at the end to extract the turbine. -
Tronxy P802M (Prusa i3) Filament Guide 3D Print Model
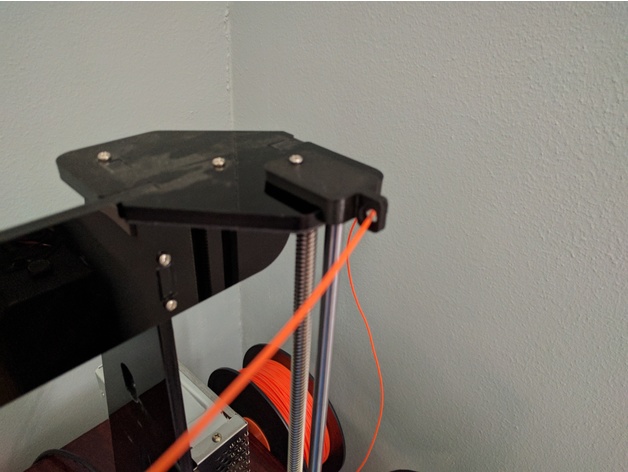
Summary
Simple filament guide for Tronxy P802M (Prusa i3 Clone).
May work with other printers. Location of mounting hole may require remix or drilling to fit. -
CTC Prusa i3 Pro B (E3D V6 Mount w/ Radial Fan mount) 3D Print Model
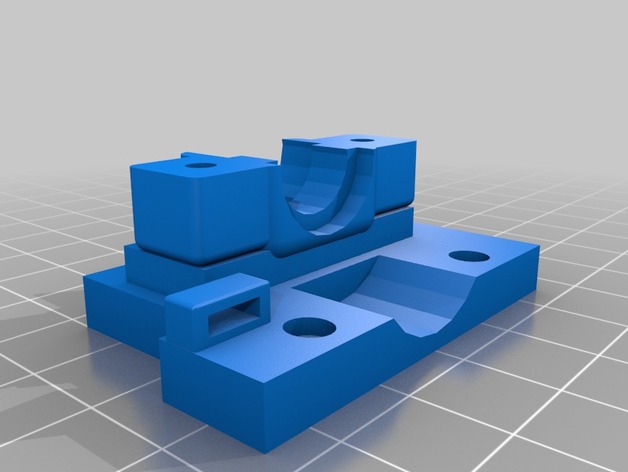
Summary
Created using TinkerCAD.
This mount was created to allow a 40mm radial fan to be attached to the front of the mount. The mount connects to the original carriage. It allows for a zip tie to be placed in order to hold all wiring.
Print Settings
Printer:
CTC Prusa I3 Rafts:
No Supports:
Yes Resolution:
.3mm Infill:
60% Notes:
Rotate top 180 degrees for the print. -
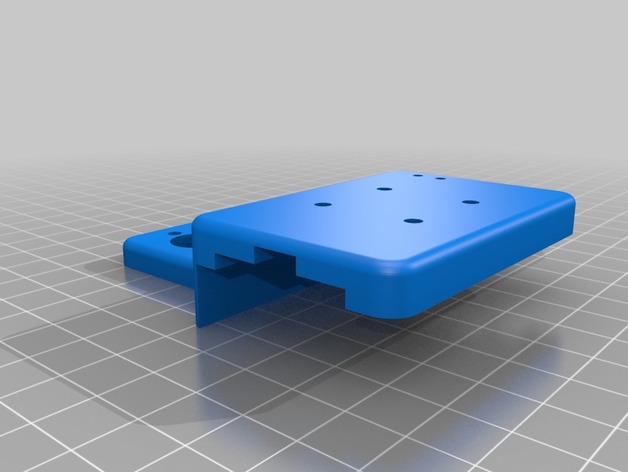
Modular Tevo Tarantula Dual Extruder X Carriage for MGN12H Linear Rail 3D Print Model
Summary
This is an X carriage for the Tevo Tarantula with dual extruder option. It is designed to be mounted on an MGN12H block on a linear guide rail. Make sure you get a block that has the same spacing as an MGN12H block (20mm distance between mounting holes).The belt is attached to the lower portion only and the upper portion screws on top of it (through it and into the MGN12H block). This allows the upper portion that holds the hotend, endstop, fans to be removed without detaching the belt. I designed it this way because I intend to have several different versions of the upper part to hold a single extruder or to hold other hotends.
Lastly, the top part has intentionally been left clear so as to accomodate other parts that can be bolted on later. I am currently working on cable management attachments that take advantage of this feature. It can also be used to attach fans, lights, etc.
Print Settings
Printer:
Tevo Tarantula Rafts:
Doesn’t Matter Supports:
Yes Resolution:
0.2mm Infill:
20% Notes:
Make sure your printer is calibrated correctly specially in the X and Y axes to ensure that the screw holes line up. -
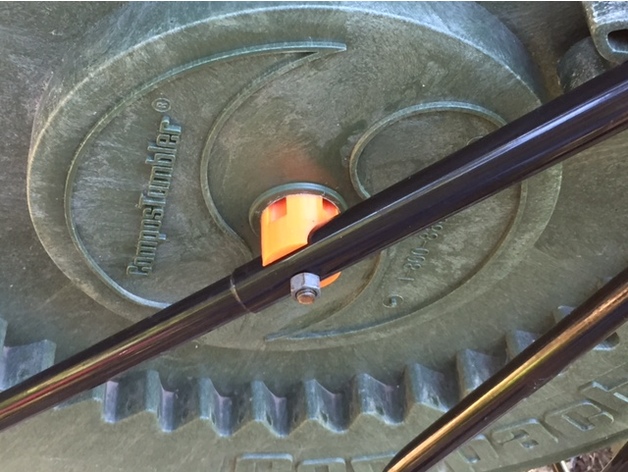
Compact ComposTumbler Stub Axle 3D Print Model
Summary
The axle on my Dad’s Compact ComposTumbler broke and he asked me if I could make a new one. Using the old one as a template, I created a copy of it in SketchUp and then used makeprintable to clean up the stl.
Here is a time lapse of the print – https://www.youtube.com/watch?v=NHK7dY1UrKQ
Print Settings
Printer Brand:
Wanhao Printer:
Wanhao Duplicator i3 V2 Rafts:
No Supports:
No Resolution:
2MM Infill:
80% Notes:
I printed this part with 3 shells and 80% infill. Honestly, that was probably overkill. I imagine you could get away with 50% and still be fine. -
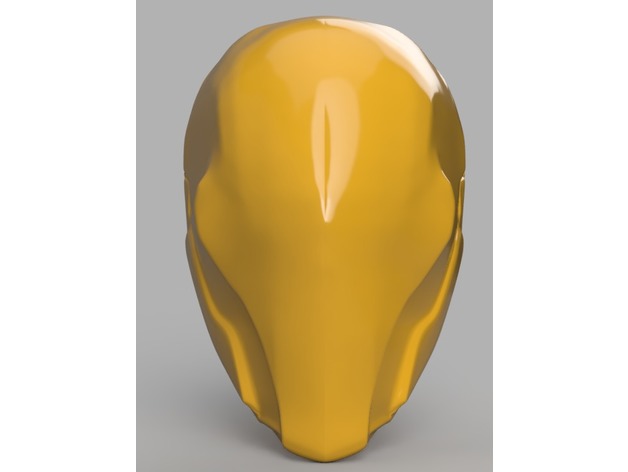
Deathstroke Mask with no eyes 3D Print Model
Summary
I wanted to complete the set of Deathstroke Masks. So here is the one with no eyes. -
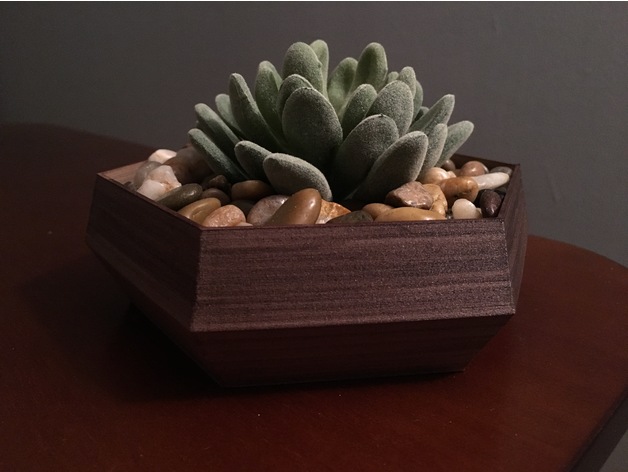
Hexagonal Succulent Planter 3D Print Model
Summary
Hollow hexagonal planter made with Hatchbox Wood PLA (see Post-Printing section for information on wood stain). After staining, fill with pebbles (I purchased a small bag of pebbles at the local craft store) and a small plant (I purchased a fake succulent plant on Amazon)
Print Settings
Printer Brand:
Prusa Printer:
Prusa Clone Rafts:
No Supports:
No Resolution:
0.2 Infill:
0-10%
Post-Printing
Staining Wood PLA
After printing in Hatchbox wood PLA, I used a “stain marker” to stain the planter (my particular stain marker is a dark walnut stain made by Rust-Oleum). Apply the stain marker in slow, uniform strokes (all strokes in the same direction and that direction should follow the layer lines). By slightly overlapping the strokes, it simulates wood grain and gives the wood a more realistic look. I do NOT sand the wood before staining, because in this particular application I think the layer lines enhance the wood look.
Note, the stain marker I used is 2-in-1 stain + finish (and it’s instant dry)… so it doesn’t rub off and can get wet. If you use a different kind of stain, you may want to finish it with a protective coat so the stain doesn’t rub onto your skin. -
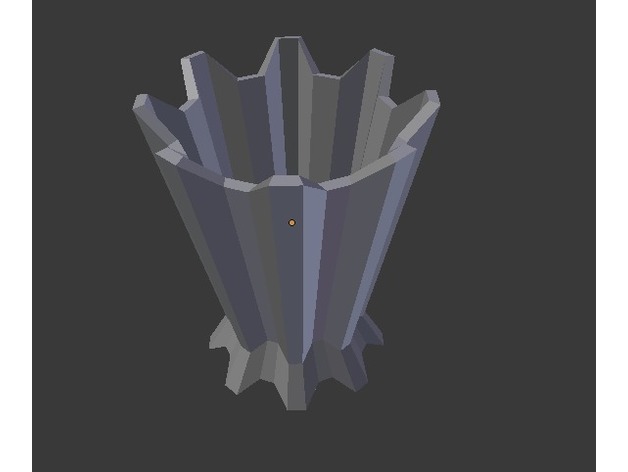
Spiky plant pot 3D Print Model
Summary
This is a plant pot that all plants desire to have. With this pot you can have any plant grow to its fullest. -
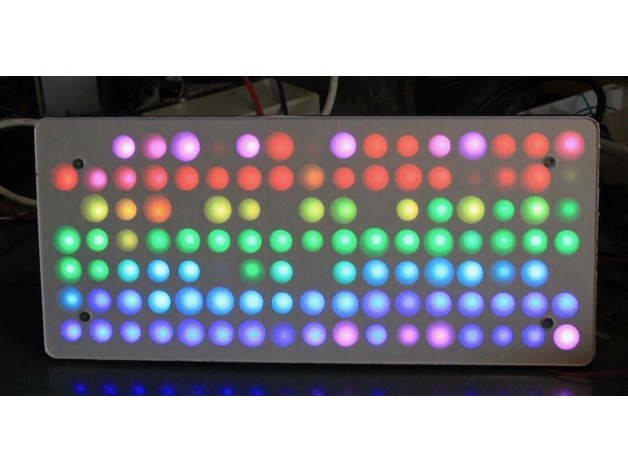
Irregular Neopixel matrix 3D Print Model
Summary
Irregular Neopixel matrix constructed from lasercut 4mm MDF, 2mm perspex, paper and 60 pixels/m Neopixel strip. Parametric Openscad design.
Controlled by an Arduino Micro using the Adafruit Neomatrix / Neopixel libraries. -
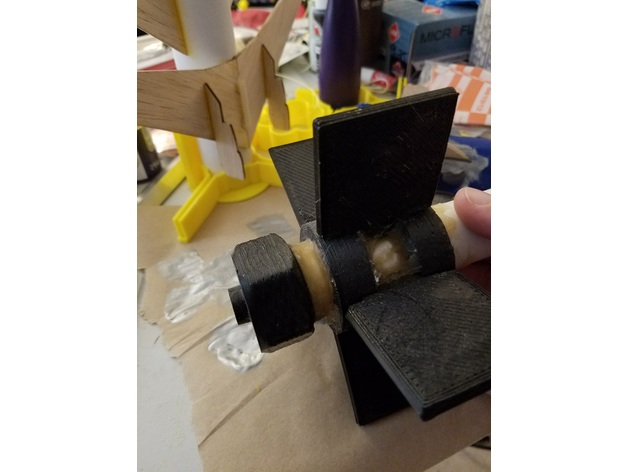
Parametric Motor Retainer 3D Print Model
Summary
This parametric motor retainer uses the “Poor man’s openscad screw library” found here: https://www.thingiverse.com/thing:8796
The settings in the scad file are adapted to my printer, aside from the dimensions at the top, you may need to adjust the “fudge_factor” setting until you get an appropriate fit on your body tube and a well-functioning thread.
Use this at your own risk, if you do not have sufficient layer adhesion, this part will not retain your motor when the ejection charge goes off. Ensure that your printed part is sufficiently strong before using it in flight! If the threads are too loose, they can slip off the retainer ring, so be sure your thread clearance is tight enough as well. The clearance should be as tight as possible while the threads are still functional.
Note that not all adhesives work well with printed plastics! Be sure you have a strong bond between the retainer ring and the motor mount tube before you use it for flight.
Print Settings
Printer Brand:
SeeMeCNC Printer:
Rostock MAX v2 Rafts:
No Supports:
No Resolution:
0.2 Infill:
N/A Notes:
A resolution of 0.1 mm might produce nicer threads; experiment to find the smoothest working & strongest part your printer is able to produce. -
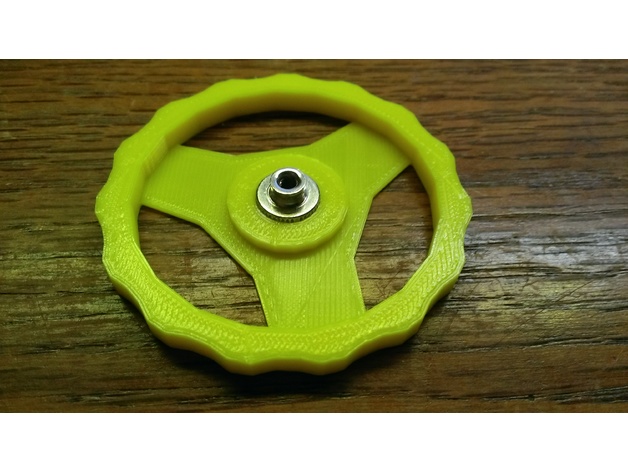
Tevo Tarantula Bed Level Knob WIDE 3D Print Model
Summary
Created this using TinkerCad, inspiration from the CR-10 bed level knob created by Valsrath. I was immediately spoiled by how easy it was to bed level once I had his knobs installed on my machine. Wanted the same experience for my Tevo, hadn’t yet seen anything like this, so I made my own. It’s a tight fit, intentionally, highly recommend removing the bed level nuts and then gently hammer them in place.
Designed this to use minimal amount of filament, but does appear to be plenty strong. I printed this on my CR-10. -
Quadbot 17 3D Print Model
Summary
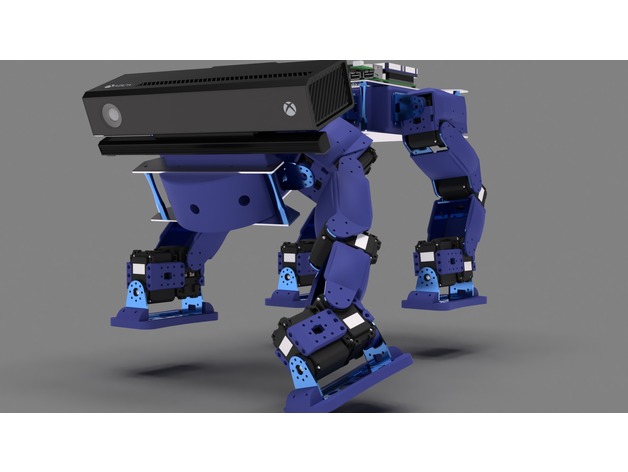
This is Quadbot 17, a work-in-progress quadruped robot born out of a learning exercise in Autodesk Fusion 360.
This quadruped robot will use AX-12A Dynamixel servos (might be upgraded to the more powerful AX-18A). The legs currently have 20 DoF and there are an additional 2 DoF for the body. Servos and brackets are from the Robotis range, with some replaced by their metal counterparts available from Trossen Robotics. They will be painted to match the colour theme. The rest of the robot is designed with 3D printed parts in mind. The main framework of printed parts forming the body will be sandwiched between 1.6 mm thick custom plates.
The novel aspects of this quadruped are its articulated legs, which have higher DOF than usually found on small quadrupeds, and its articulated “spine”, which will help it in navigating uneven terrain.
A number of options are considered for the “head”, or main sensor pack: an XBOX Kinect v2 time-of-flight sensor, a Scanse Sweep LiDAR and an Intel RealSense depth-sensing camera.
Currently, a hardware test rig of one leg has been built, and the kinematics have been calculated and tested.
How I Designed This
Further information
For news and updates on progress of this robot, visit Cognitive Dissonance. -
Rain Gauge Mount 3D Print Model
Summary
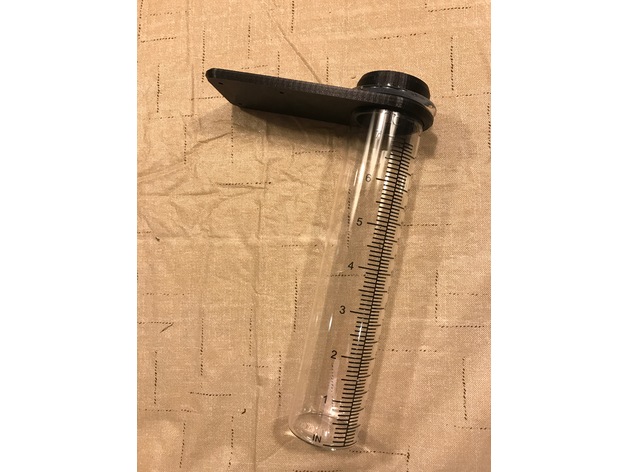
This is a holder for a replaceable rain gauge tube, or odometer. See the photos for the glass replacement tube info. I buy mine at Menards up here in northern USA for about $5.
The holder is a simple plate that allows one to attach it to a railing like on a deck. The first one I made clips to my deck railing, but since most railings are different I created this simple flat one that can be screwed down to any flat surface. The holes are 3mm which works great for #4 sized stainless steel screws.
The calibration ring helps the gauge read correctly. The glass tube is flanged outwards at the top which allows extra water to roll into the tube. This results in readings that can be 30% larger than the actual rain fall. The calibration ring should fit snugly so that water can’t run into the gauge between the glass and the ring. I simply silicone it in place.
Be sure to mount the gauge in a place that has an open view of the sky and is not shadowed by buildings or trees. -
Bagel Slicer 3D Print Model
Summary
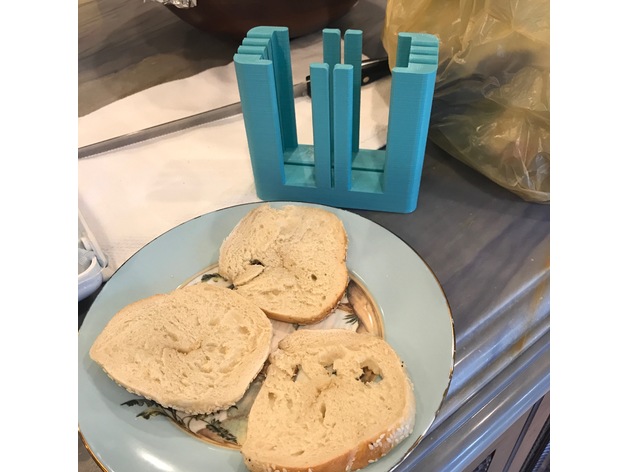
This item helps guide the knife through the bagel.
Print Settings
Notes:
I suggest using thick walls and high infill. -
Tronxy x3 Z leadscrew stabilizer bearing support 3D Print Model
Summary
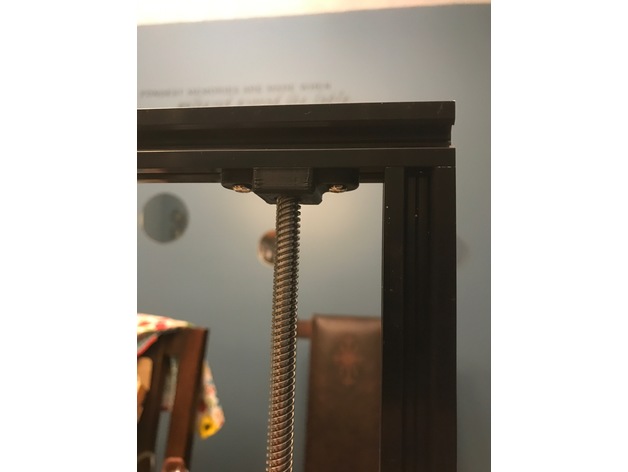
I needed a stabilizer that would house a 16mm bearing, as that is all I had. So I designed these instead of using the 22mm 608z skate bearings. The bearing is a 16x5x8. Enjoy.
Print Settings
Printer:
Tronxy X3 Rafts:
No Supports:
Doesn’t Matter Resolution:
.2 ish Infill:
your liking -
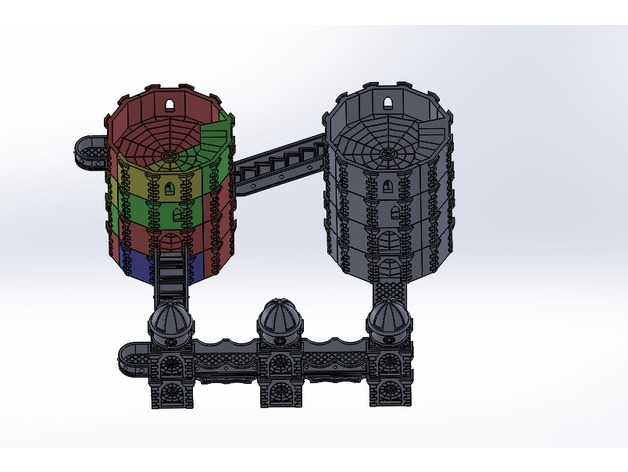
12-Sided Tower Accessory – Bridge Connectors PLUS 3D Print Model
Summary
This is a set of connector walkways and brdige parts to connect 12-Sided Towers at a long distance than the first bridge. It is completely modular and the same heights as the floorsfor the building so it all buiulds off the original.
Enjoy! -
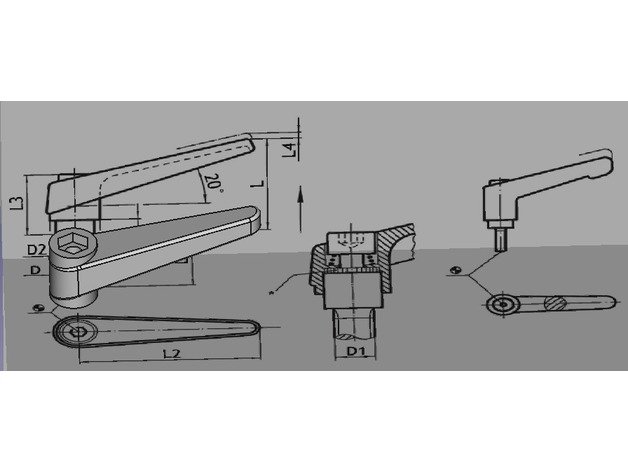
Spangrepen Clamping levers M6 3D Print Model
Summary
A M6 Clamping levers.
Printed in PLA 0.2.
Print layers perpendicular to the screw for more solidity. May be difficult to print
A M6 Clamping levers.
Imprimé en PLA 0.2.
Imprimer de facon a avoir les couches perpendiculaires a la vis pour plus de solidité. -
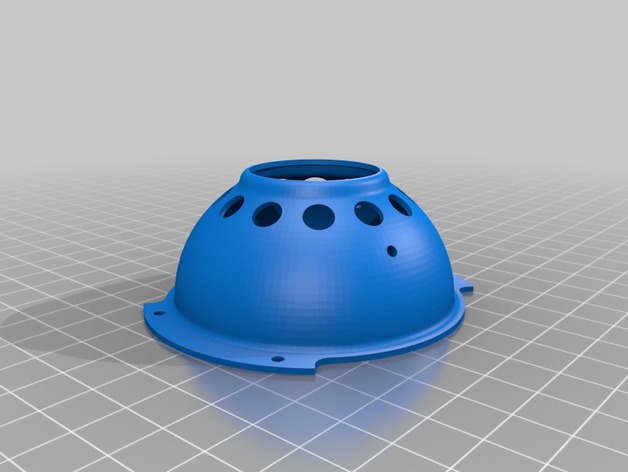
Holo Projector for R2D2 3D Print Model
Summary
This is the Holo Projector for R2D2. OpenScad Source Code included. -
Mazda 3 Shift Knob 3D Print Model
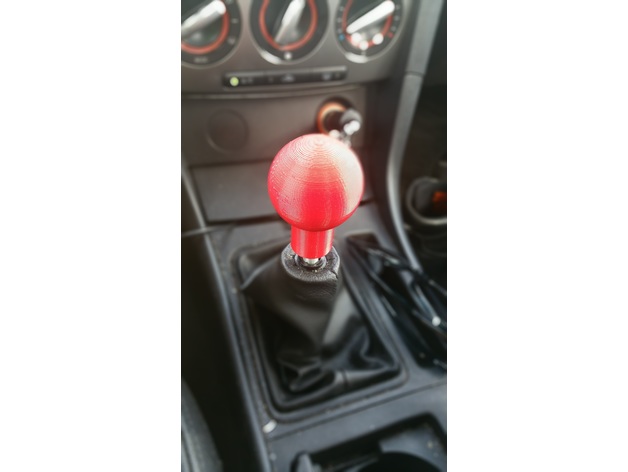
Summary
My shift knob in my 2007 Mazda 3 broke, so instead of just buying a new one I created my own simple one. The picture shown does not have the knob screwed on all the way, it does go all the way down to the boot.
I was worried about printing this upright and using support, but it worked just great. I have since printed it upright without support so it is whatever you want to do with your specific printer.
The thread on it is M10x1.25, so even though I did this for a Mazda 3 it should fit any shifter that has that thread on it. It was a little hard to twist on, but I prefer that to ensure it won’t come off while driving.
I printed mine with a higher infill than I usually do (35%vs10%), this is because of the force that will be put on the center thread/core while shifting. I wanted give it a little more robustness while driving.
I hope at least one person finds this useful, it is my first upload to Thingiverse. Enjoy.
Print Settings
Printer Brand:
MakerBot Printer:
MakerBot Replicator Rafts:
Doesn’t Matter Supports:
Doesn’t Matter Resolution:
0.25 Infill:
20% + Notes:
Pretty easy print, shouldn’t be a problem. I did mine in ABS because that is what I have. -
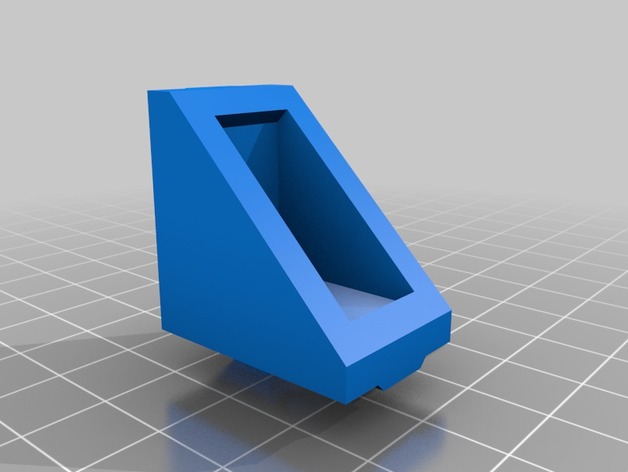
2020 Corner Bracket w/nut stop 3D Print Model
Summary
This is a 2020 corner bracket that has a built in stop for square nuts, which makes alignment easier when using them.
Created this because I’m using 8x8mm square nuts for my current d-bot build, and got sick of having issues with lining them up with my corner brackets so I made these to help me out.
Print Settings
Printer:
Custom Rafts:
No Supports:
No Infill:
100 Notes:
Put the face of the bracket on the print bed, and no supports are needed. I print at 100% infill since I’m using PLA and wanted rigidity. -
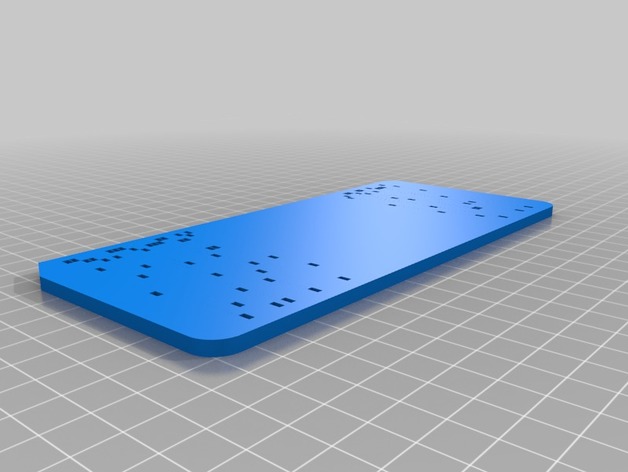
Punch Card 3D Print Model
Summary
Made this punch card. It says something specific for a retiree, so I uploaded the SketchUp file in case you want to change the message. -
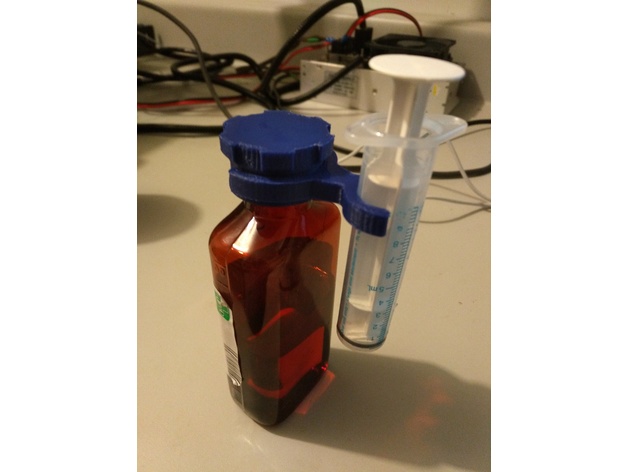
Medical bottle cap and syringe support 3D Print Model
Summary
First Useful thing printed.
Liquid medic bottle cap with syringe support. This cap fit and screw on the bottle neck over rubber reducer adapter for syringe that fit in the bottle neck. You can keep the adapter in place and seal the bottle with this cap. Plus, you have a outer reduced diameter groove to snap the syringe support. Hence, not loosing the … syringe anymore… 😉
I dont know the model of the supplied bottle of my pharmacy store but probably a very common model in Canada and in the US.
Cap must be printed upside down off course!
Enjoy!
Print Settings
Printer:
Tevo Tarantula XL Rafts:
No Supports:
No Resolution:
0.2 Infill:
20% -
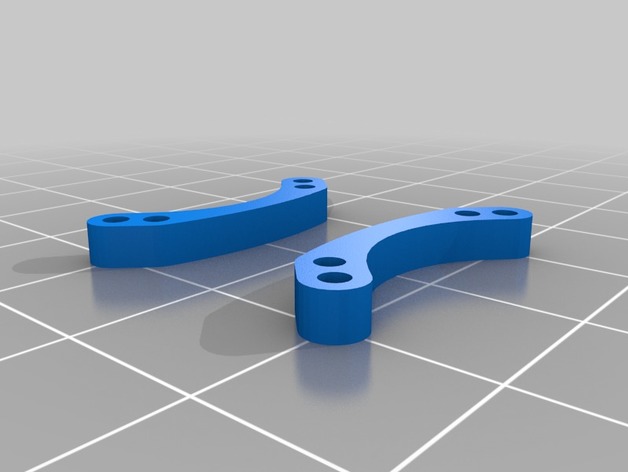
16x16mm to 20x20mm ESC/Flight Controller Adapter 3D Print Model
Summary
Used to mount a 16x16mm nano ESC or Flight controller on a frame that supports 20x20mm boards.
Best printed on ABS wtih 100% infill
For the 20x20mm holes, you will need to use thread using a M3x0.5 tap. For the 16×16, you can either thread using a M2x.04 tap or enlarge to use a M2 screw.
Print Settings
Printer Brand:
FlashForge Printer:
Creator Pro Rafts:
No Supports:
No Resolution:
.2mm Infill:
100 -
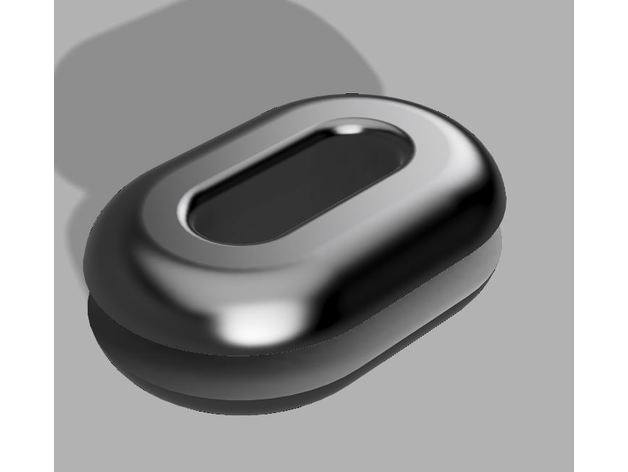
QAV210 grommet 3D Print Model
Summary
I didn’t feel like buying these so I made a model to replace the QAV210 quad copter frame grommet that holds the battery lead.
I made this with NinjaFlex, but any TPU is recommended. -
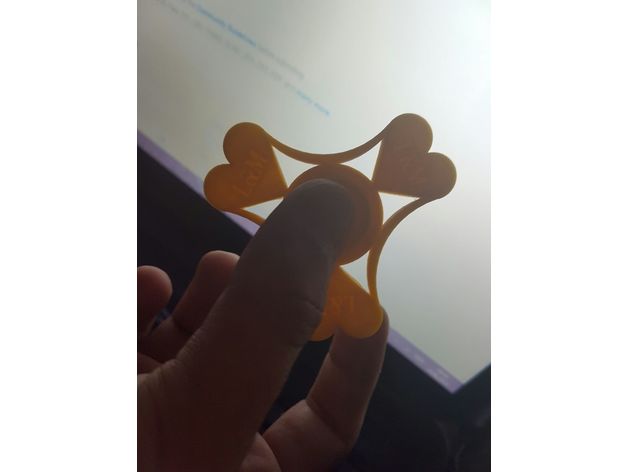
Love Spinner 3D Print Model
Summary
Designed as a Present for my Girlfriend.
(I have a ceramic bearing in there, and its spinning very nice) -
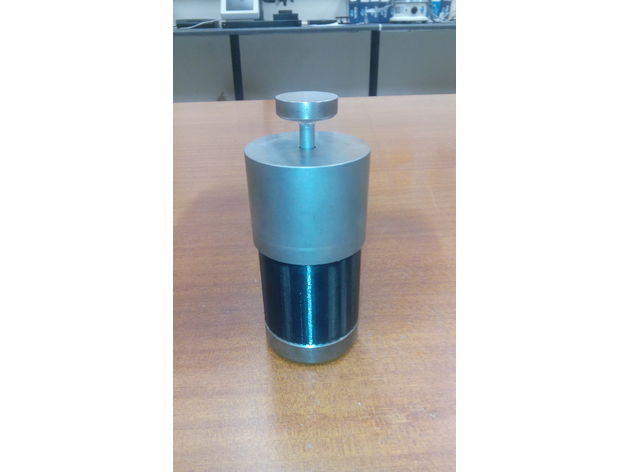
10mm Punch and Die set spacer 3D Print Model
Summary
This is a spacer for a 10mm die set. Used to create a floating die for compaction in both downward and upward directions. -
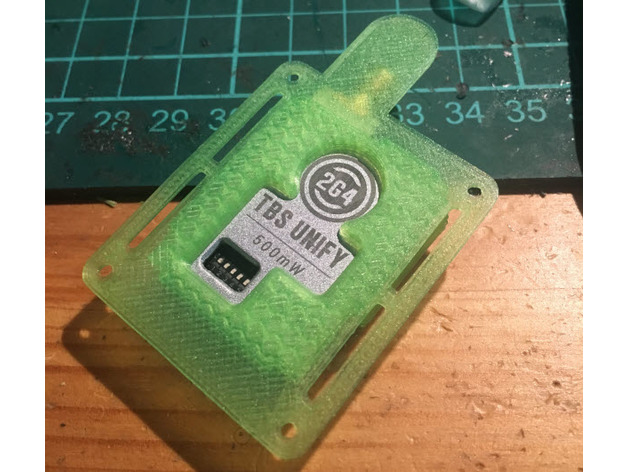
S800 Reptile 2G4 VTX Cover 3D Print Model
Summary
Just a quick mod of my VTX cover to incorporate the 2.4 VTX I’m planning on adding in rev 2. Shows off the VTX nicely and give access to all the dip switches. I plan on using hot glue or similar to mount the VTX, currently not sure how hot it will get for the hot glue but hopefully should be fine. -
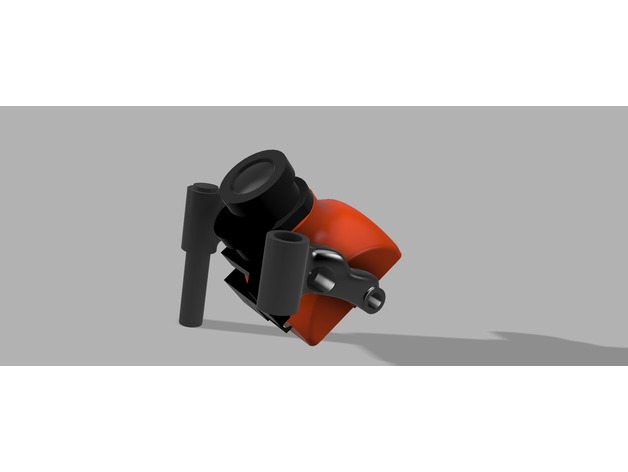
HS1177 or Micro FPV Cam Mount – 30.5 mm spacing 5mm standoff 3D Print Model
Summary
This mount will work for either an hs1177 or a micro fpv cam -
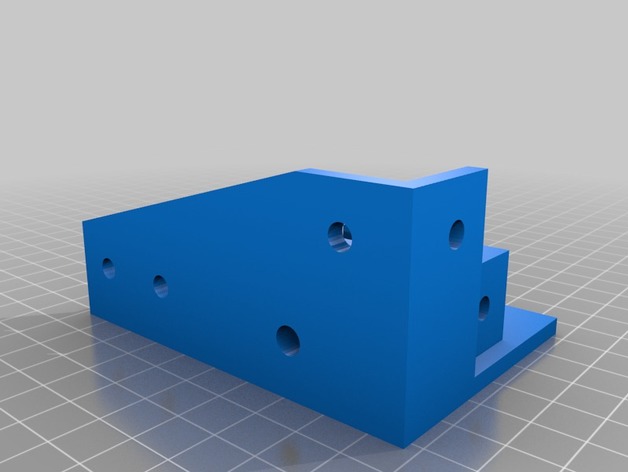
D-BOT – ALUMINUM CORNERS – MGN12H 3D Print Model
Summary
Do not print at this time. Still working on files.
Decided to redo the C-Bot/D-Bot files as I wanted to sturdy the frame with aluminum corner pieces. This allows room for the aluminum pieces to hold the frame together while the motor and idler ends are attached to the frame, hopefully keeping the printed pieces from strain. It gets to 120 degrees where I’m at and I planned on moving this around from time to time, so I wanted to build it as sturdy as possible. At the moment, all pieces are cut from misumi with the standard D-Bot build dimensions and a 2020 piece instead of a 2040 for the x gantry.