Summary
remix de :
https://www.thingiverse.com/thing:2762355
https://www.thingiverse.com/thing:2757715
https://www.thingiverse.com/thing:2683909
https://www.thingiverse.com/thing:2710235
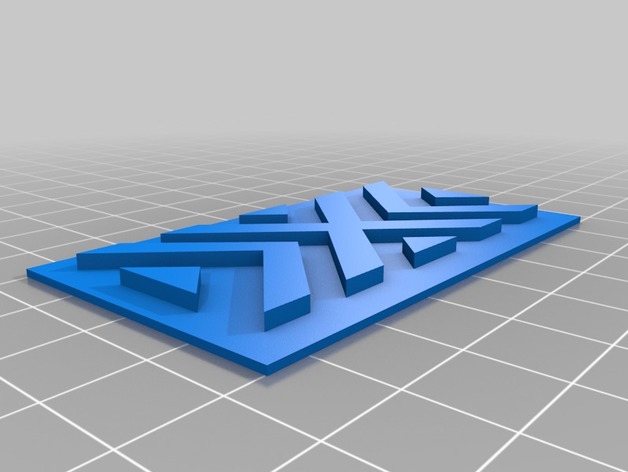
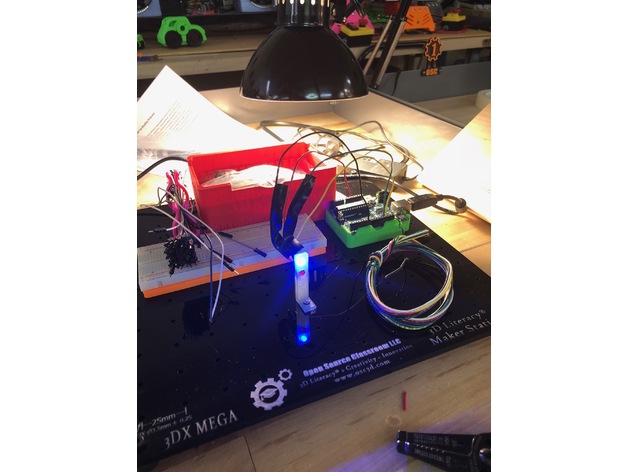
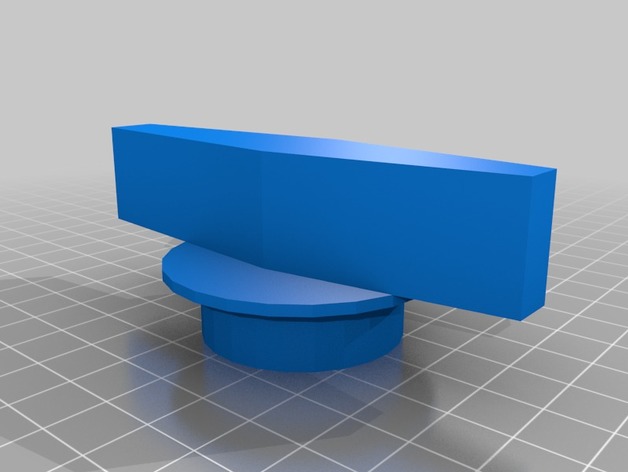
soit un “Storage-for-Snapmaker-accessories_FilamentGuide_ScreenBracket”
bon la conception “fusion” de l’ensemble n’est pas parfaite, je ne maîtrise pas encore les logiciels
Extruder : 200°
Heated Bed : 50°
with supports
Print Settings
Printer:
Snapmaker
Rafts:
Doesn’t Matter
Supports:
Yes
Notes:
see attached files 😀
How I Designed This
Category: Free 3D Models
Free 3D models ready to be used in your CG projects such as films, visualizations, games, VR etc. All 3D Models and Free 3D Print Models are available for download in several formats including .MAX, .STL, .FBX, .3DS, .C4D, .OBJ, .BLEND, .DWG, .DXF, .LWO and much more. If you’re in search of high-quality Free 3D assets, we have a huge library of 3d models for all your needs. Also you can visit 3D Models and 3D Print Models category.
-
Storage-for-Snapmaker-accessories_FilamentGuide_ScreenBracket 3D Print Model
-
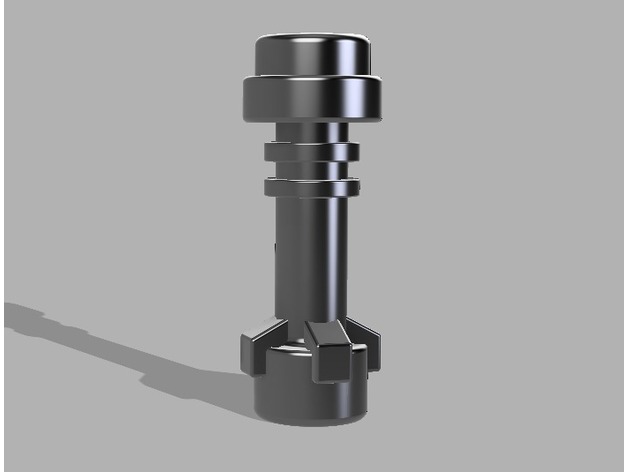
LEGO Star Wars Lightsaber Hilt 3D Print Model
Summary
Model of LEGO Star Wars lightsaber hilt made in Fusion 360. -
Alex Bridge pt 2 3D Print Model
Summary
Part 2 to bridge -
Fan Aperture Base – Remixed 3D Print Model
Summary
I added supports for the aperture blades. I was having a lot of trouble tightening the screws enough to hold the blades flat but also loose enough to still spin the outer ring. Works pretty well now. -
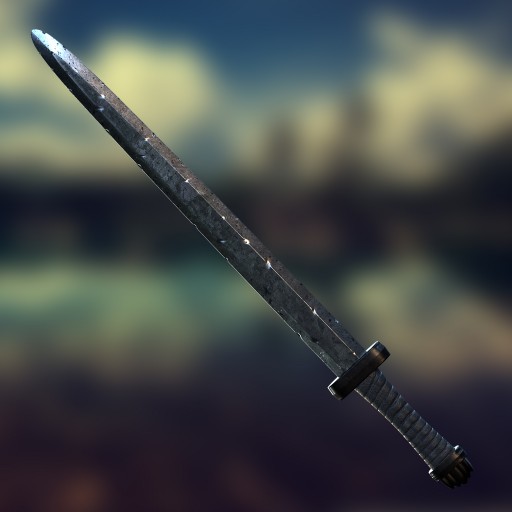
Viking Sword Free 3D Model
Another weapon in the series. This is a well used viking sword. Hope you like it, and if so, leave a comment! 🙂
-
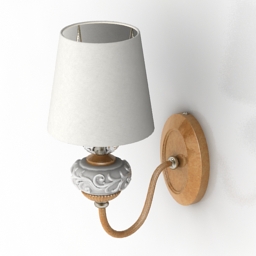
Sconce 3D Model
Additional Info: Sconce W110175 donolux N010917 – 3D model (*.gsm+*.3ds) for interior 3d visualization.
-
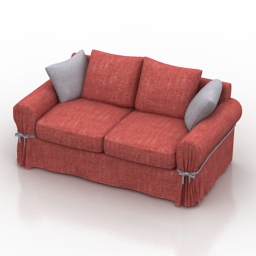
Sofa 3D Model
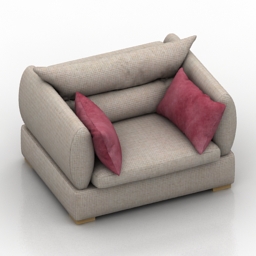
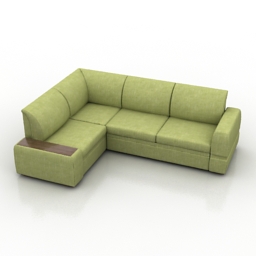
Additional Info: Sofa Bri Pushe N050118 – 3D model (*.gsm+*.3ds) for interior 3d visualization.
-
PK380 Magazine Extender 3D Print Model
Summary
Walther PK380 Magazine Extender, add +2 to your PK380 Magazines.
Print Settings
Resolution:
.25
Infill:
100% -
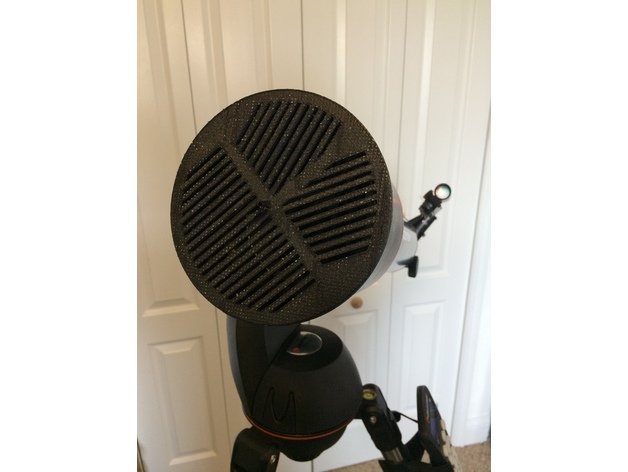
Bahtinov Mask – Celestron NexStar 102 SLT 3D Print Model
Summary
Redesigned this to fit the Celestron NexStar 102 SLT -
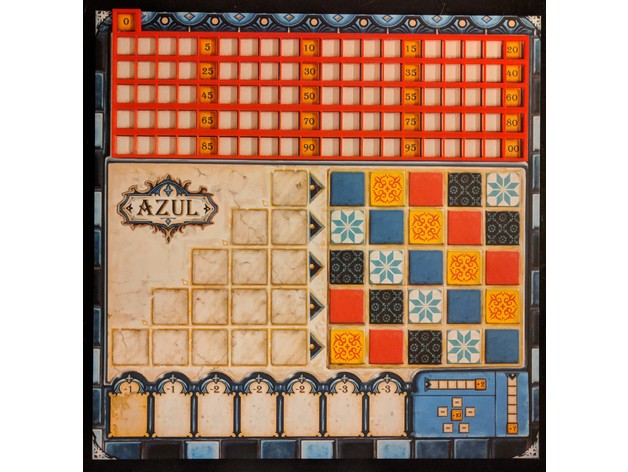
Azul Scoretrack Overlay – Board Game 3D Print Model
Summary
This is an overlay for the scoretrack in the board game Azul.
It lays over the scoretrack well, and the cube fits. Depending on the tolerance of your machine, the fit can be a bit tight. You can print it at 101 or 102% to have the cube fit better, but then it will not line up perfectly with the squares on the scoretrack.
[The scoretrack squares are slightly smaller than the cube size, making this a frustrating design.] -
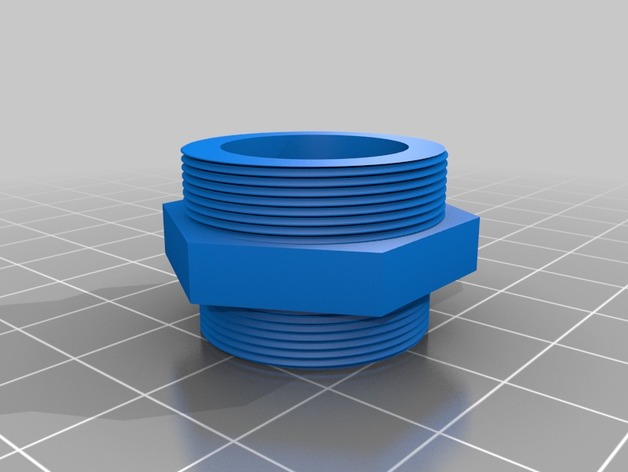
M24 to M22 UK tap adaptor 3D Print Model
Summary
I needed a tap connector for an ebay special tap aerator, unfortunately the tap has a 24mm thread and the aerator a 22mm thread. -
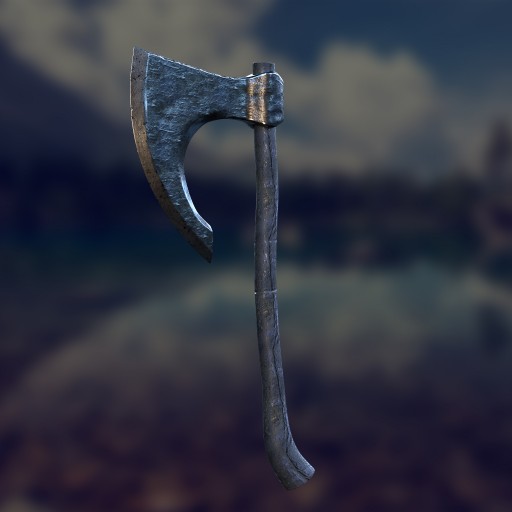
Viking Axe Free 3D Model
I made this axe to go with my previous shield!
It’s PBR using blenders new shader! -
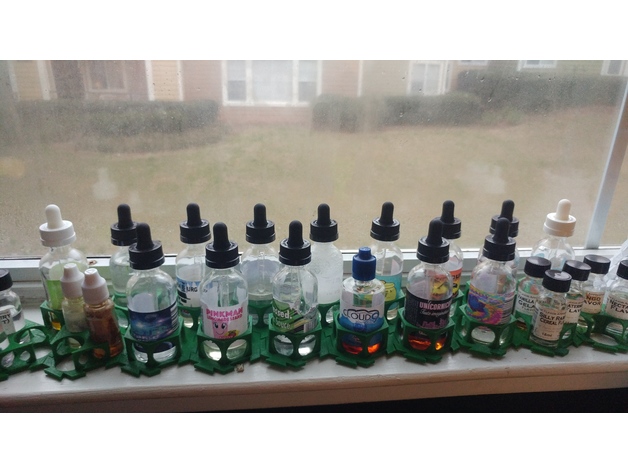
Modular (Vape Juice) Bottle Holders 3D Print Model
Summary
Modular organizers for standard 60mL and 30mL bottles. Designed for vape juice bottles.
With 0.3mm layer height and 10% infill, I was able to print each one in under an hour; they are designed to use a small amount of filament while at the same time being stable enough to hold the bottles and snap together.
I included a “blankModule” so that this design can be modified to organize other items.
There is a smaller and a larger holder for 30mL bottles, the larger one fits the glass bottles, while the smaller one fits the plastic dropper bottles. -
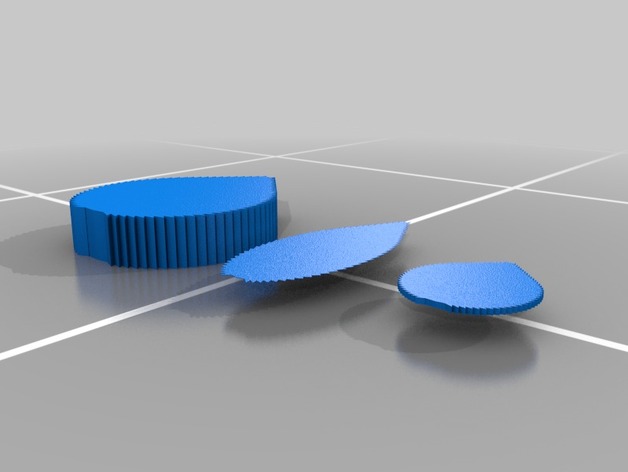
GreenEllipsis OpenSCAD Collection 3D Print Model
Summary
The first in a collection of OpenSCAD modules I’ve developed on the way to making things. Posted here in the hope you might find them useful. -
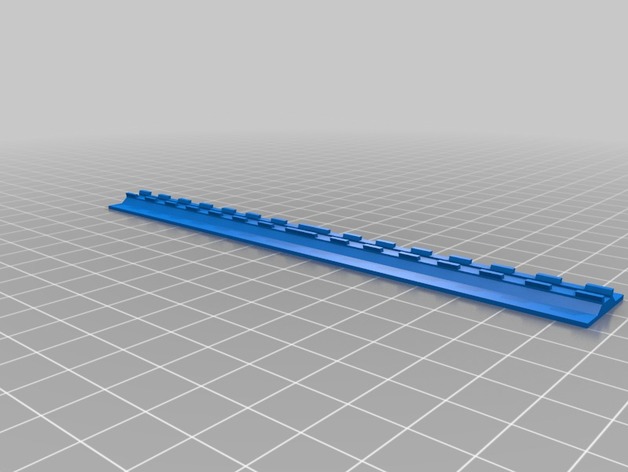
LED Flat Plate for V-Slot Rail D-Bot 3D Print Model
Summary
Just made these to hold my LED strip (2 rows, one above the other) And they snap into the V-Rail.
Print Settings
Rafts:
No
Supports:
No
Resolution:
0.3
Infill:
100%
Notes:
Nothing special, suggest a skirt to prevent the drooling of the little nubs. But up to the individual. -
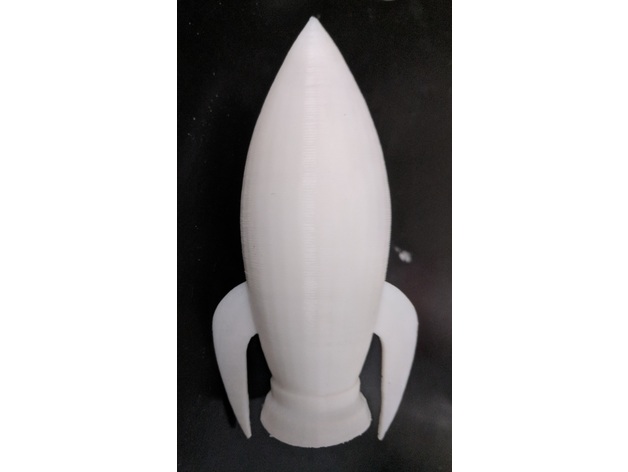
Rocket Blasting Off 3D Print Model
Summary
Could use some additional supports on the rocket or perhaps change the angle of the print for better quality. Just a cartoon rocket blasting off. Made it for my son, inspired by those Rocket Mortgage commercials.
Print Settings
Printer:
MP Mini Delta
Rafts:
No
Supports:
Yes
Resolution:
150
Infill:
20 -

Porcelain Rabbit Table Lamp 3D Model
Porcelain Rabbit Table Lamp free low-poly 3d model ready for Virtual Reality (VR), Augmented Reality (AR), games and other real-time apps.
Porcelain Rabbit Table Lamp Modeled in Blender 2.79 Rendered with Blender’s Cycles engine OBJ, FBX, 3DS, Blend included No textures were used or included Low poly model
A porcelain table lamp shaped like a rabbit. There are three variants of the rabbit: one in profile, one with head and body slightly tilted, and a third with two baby rabbits attached. All three can use the same lamp. The rabbits can also be used as figures without the lamp object. The meshes are UV unwrapped and 2 LOD levels are included.
The lamp has two alternate light sources, a light bulb mesh with an emission texture, or a point light of the same color. Using the point light I used 1/5 the samples for the same amount of noise, and it rendered in 1/4 the time as using the light bulb mesh, so unless the light bulb will be seen in your project, I don’t recommend using it.
The model uses five shaders: a glazed porcelain, a raw porcelain for the bottom of the object, a matte white paint, a silvery metal, and a translucent white paper for the shade.
These are the mesh objects:
Lamp, 3851 verticies LampLOD1, 1069 verts LampLOD2, 326 verts LampShade, 728 verts; parented to Lamp LampShadeLOD1, 196 verts; parented to LampLOD1 LampShadeLOD2, 63 verts; parented to LampLOD2 LightBulb, 954 verts; parented to Lamp LightBulbLOD1, 240 verts; parented to LampLOD1 LightBulbLOD2, 63 verts; parented to LampLOD2 RabbitFamily, 4566 verts RabbitFamilyLOD1, 1138 verts RabbitFamilyLOD2, 408 verts RabbitStraight, 3042 verts RabbitStraightLOD1, 762 verts RabbitStraightLOD2, 188 verts RabbitTurned, 3042 verts RabbitTurnedLOD1, 762 verts RabbitTurnedLOD2, 188 verts -
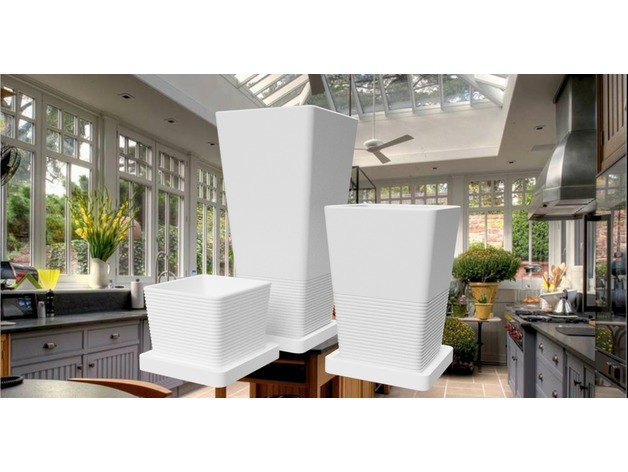
flowerpot “STRATOCONIK” 3D Print Model
Summary
I wanted to create series of flowerpot for spring, and here is: flowerpot “STRATOCONIK” -
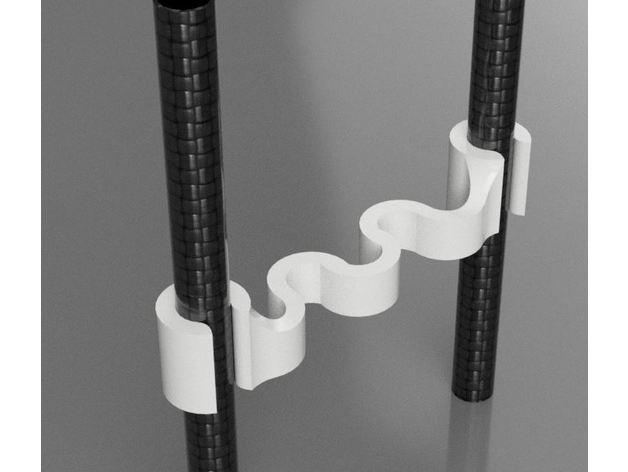
Delta arm dampener 56mm pitch 3D Print Model
Summary
This dampener is what I use as the rods I use have 56mm pitch (center to center distance on the rods) and 7mm diameter.
Others I found were much too short. I have made sure the model is sliced correctly on S3D as well as Cura etc. I have also reinforced the center arc sides a little as that seems to be where the stress can cause failures on dampeners. Also made the snapping on and off easier by rounding the inner edges of the rod grips.
I advise using PETG or ABS as PLA just isn’t great for this type of attachment.
Print Settings
Printer:
Anycubic Kossel
Rafts:
No
Supports:
No
Resolution:
0.1 – 0.2 (I prefer 0.15)
Infill:
100% -
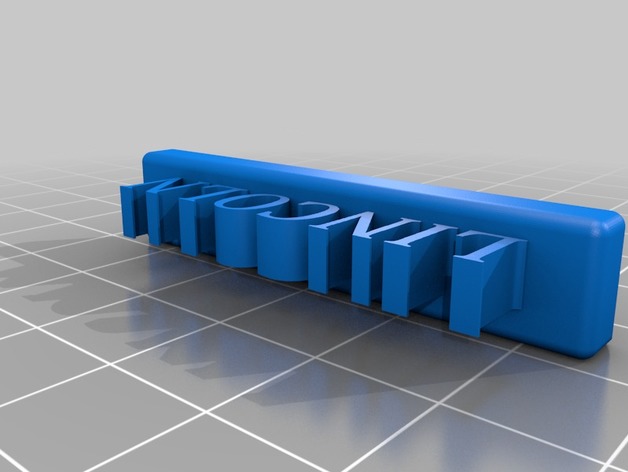
lincoln plaque 3D Print Model
Summary
Lincoln plaque
Print Settings
Printer:
anet a8
Rafts:
No
Supports:
Doesn’t Matter
Resolution:
0.2
Infill:
20 -
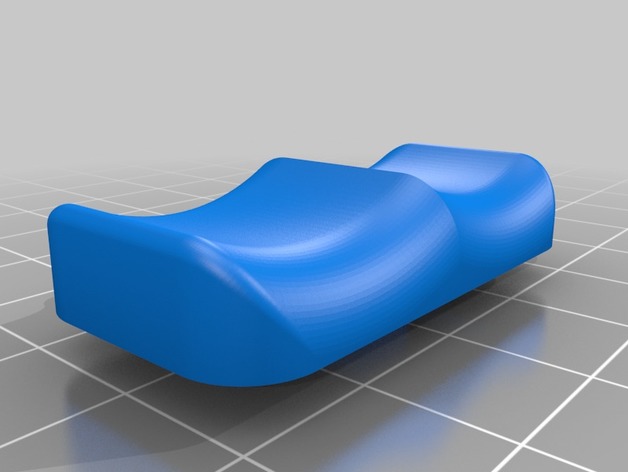
replacement moonroof / sunroof switch for lincoln ls 3D Print Model
Summary
mine was missing so I made this.. -
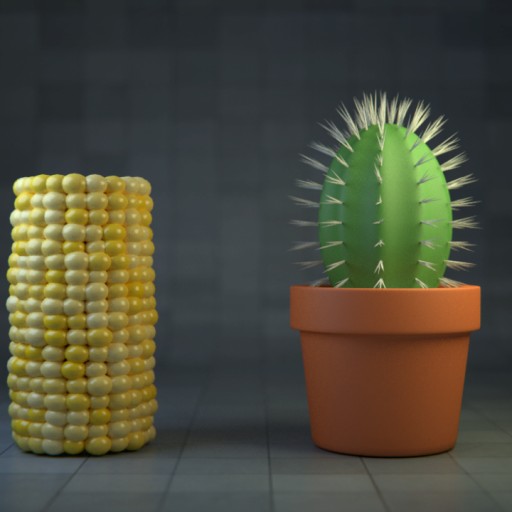
CGC Classic: Uniformity with Particles Free 3D Model
In the tutorial that this file is the source for, Josh Maul covers how to use Blender’s particle systems to create natural objects that have evenly distributed features.
-
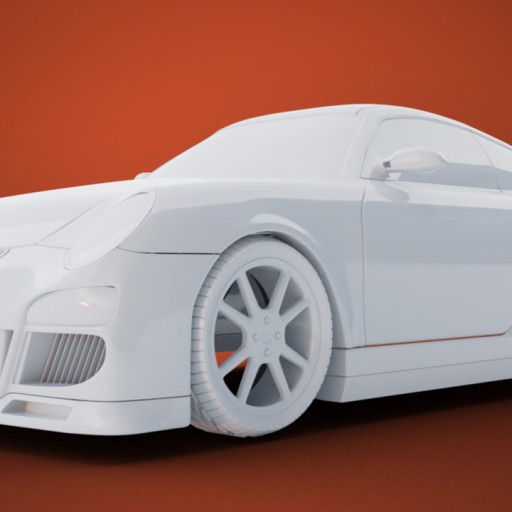
CGC Classic: Porsche Free 3D Model
In the tutorial series that these files are the source for, follow along with Jonathan Williamson as he models a Porsche from start to finish.
-
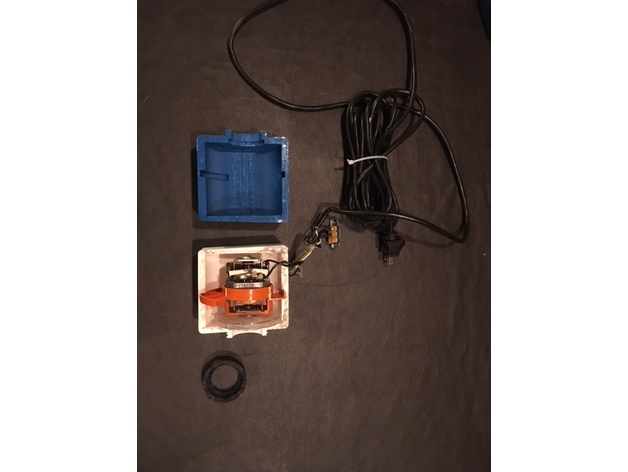
Vacuum Impeller Housing 3D Print Model
Summary
Needed a small vacuum to clean up my work area after all the messes that accrue. Rather than spend $30 on a small shop vac, I figured it could be an interesting opportunity to see how sturdy of a print I could make while testing out how accurate I could print threads generated in Fusion 360. I went to a local goodwill and bought a corded dust buster for $3, a seal-able ammo can from harbor freight, and a couple other components. In all it cost around $10. I used extra filament which is why the assembly is three colors. overall it works a hell of a lot better than the original used vacuum, but I would’ve maybe chosen a more powerful impeller motor if I were starting over. -
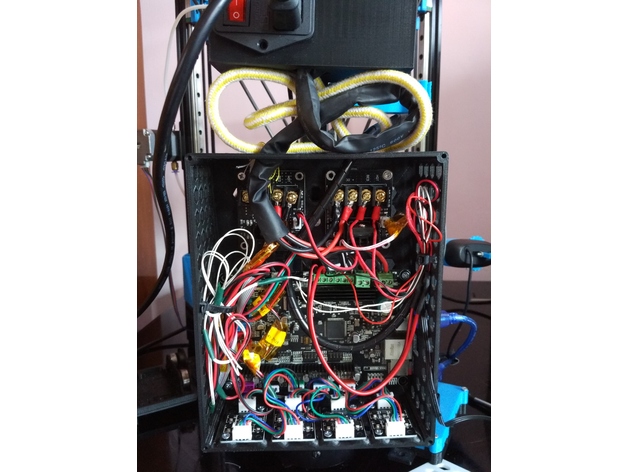
MKS SBASE 1.3 BOX include Dual Mosfet, Four TL-Smoother, and FAN 120mm and Bracket to Alumunium Profile 3D Print Model
Summary
This is MKS Sbase case the dimension is 200x160x63 need a larger printer to do that.
Support for dual mosfet and four TL Smoother
Cooling by 120 mm Fan
add three hole on center to mount to alumunium profile vertically
Print Settings
Printer Brand:
Prusa
Printer:
Prusa Clone
Rafts:
No
Supports:
No
Infill:
20 -
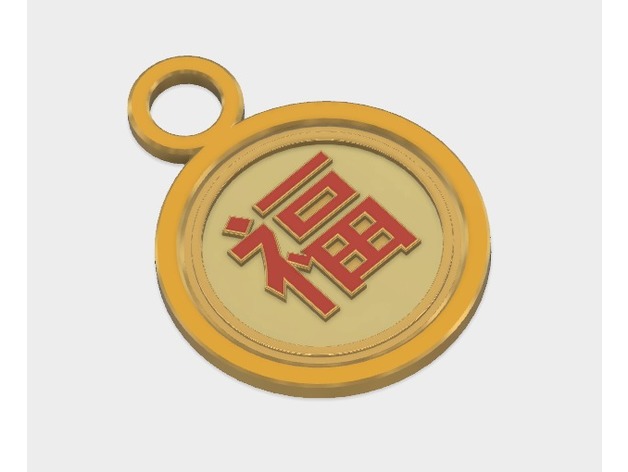
Key Chain, Happy Chinese New Year, Happiness, Spring Festival, 福, 春 3D Print Model
Summary
Key Chain Spinner, Happiness & Spring, 福, 春
To observe the Chinese New Year or Spring Festival, people in China like hanging well-wishing Chinese characters or poetic couplets on their door frames, cars, or other places. The spinner here has Happiness (福) on one side and Spring ( 春) on the side. It is about 45mm in diameter. It might be an interesting 3D design project for those interested. May the little thing bring you peace and happiness!
Print Settings
Rafts:
No
Supports:
No
Resolution:
.1 to .2mm
Infill:
5-20% -
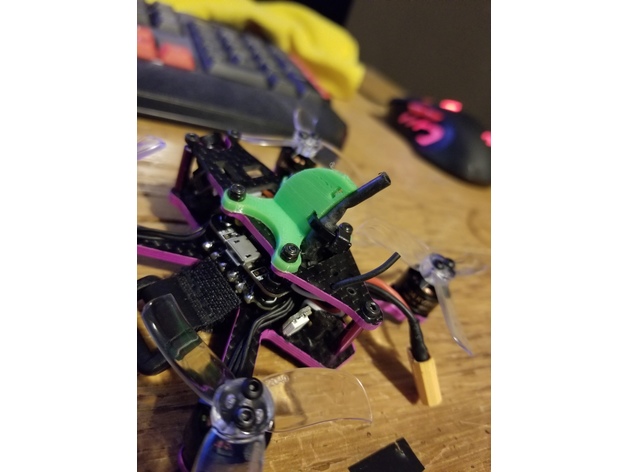
Spcmaker 95 shark fin antenna mount/brace 3D Print Model
Summary
I whipped up this antenna mount for the spcmaker 95. Helps with turtle mode. Also keeps fpv antenna out of the props.
Print Settings
Printer Brand:
Prusa
Printer:
i3 MK2S
Rafts:
No
Supports:
No
Infill:
Solid -
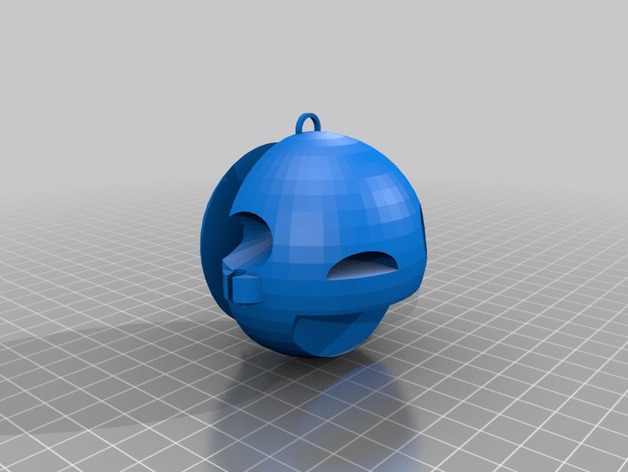
Emoji Headphone Wrap 3D Print Model
Summary
Weird headphone wrap designed to look like an emoji with earbuds -
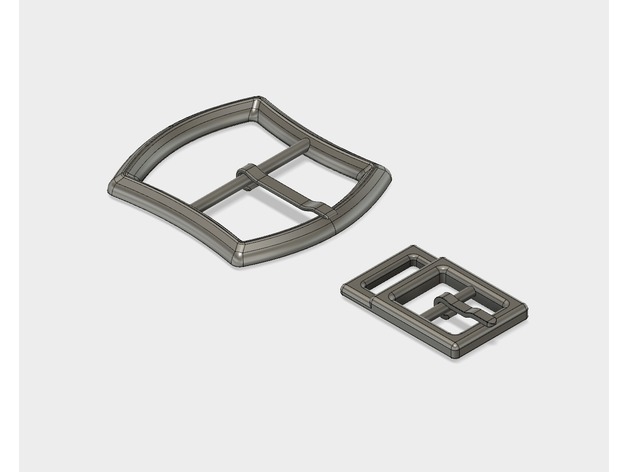
Syanna Buckle Set – The Witcher 3D Print Model
Summary
About The Model
Here we have a pair of buckles for Sylvia Anna’s (Syanna’s) outfit in the Witcher 3: Wild Hunt.
They are used as follows:
Large buckle – upper waist – 55mm strap.
Small buckle – lower waist – 25mm strap
Obviously being plastic these have a limit on their weight bearing compared to metal, so I suggest a hidden secondary support on the belts, This being said, the largest one has been tested bearing up to 30kg of weight (in PLA at 100% infill) and passed not breaking, so are more resilient than expected.
Support Me
Though I provide this print for free, if you’d like to shout me a coffee or support my work (Patreon’s will get future files earlier than everyone else) – all of which helps me create more of these free models – you can do so on the following links:
Ko-fi: https://ko-fi.com/valentinecostumes
Patreon: https://patreon.com/valentinecostumes
Commissions
If you’re interesting in commissioning other buckles from the Witcher series, or any other file, feel free to contact me on here.
Socials
You can follow me and my work on the following sites:
Instagram
Facebook
Twitter -
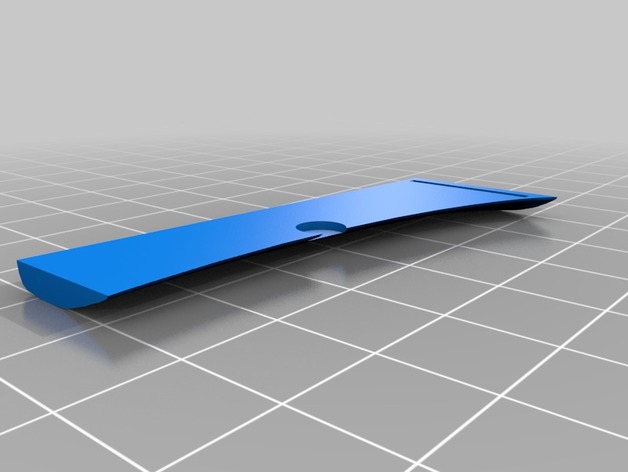
Falcata Sword for casting 3D Print Model
Summary
I was looking for a suitable sword for casting in aluminium and found this:https://www.thingiverse.com/thing:1715548
I split it in half, added pegs and removed connectors as they were wildly off.
You can see me casting it here:
-
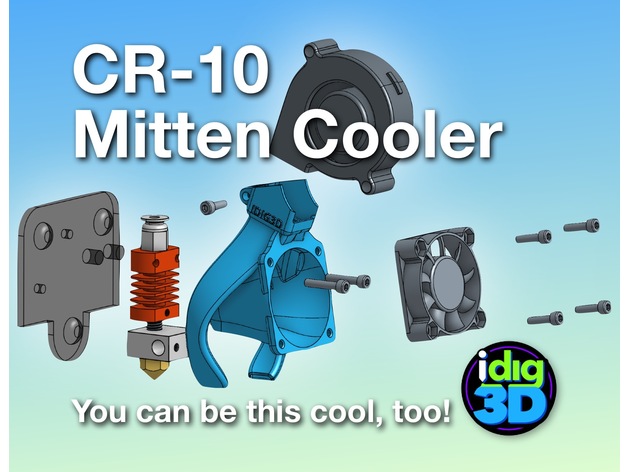
CR-10 / Tronxy Mittens Cooler 3D Print Model
Summary
Let’s keep it cool!
My take on a better cooler for the CR-10 Tronxy X1/3 type hotend. The stock CR-10 set up can cool the heater block too much if you don’t have it wrapped. The parts doesn’t cool all sides well. My Tronxy X3 didn’t have a parts cooler and the heater block couldn’t get temps over 205C.
I tried a couple other popular coolers but did not fit my original parts blower or just not that efficient.
So the Mittens Cooler evolved. Printed in PETG, it weighs 12 grams. Has a bit fo a twist for a little vortex of air.
Needs a few things: a 5015 blower/fan, a few screws, a bit of rewiring, and a bit of tenacity.
WARINING: It works for me. Your results may vary wildly.
If this helps you, a tip would be nice. At least a like and show your makes.
I’ve gone through dozens and dozens of printed revisions to get to this version. Help keep me in plastic. Thanks!
Please note, this is not compatible with the auto-leveling sensor. Send me one and I’ll try to make one fit.
Print Settings
Printer:
Creality CR-10
Rafts:
No
Supports:
No
Resolution:
0.2mm
Infill:
15%
Notes:
Printed with a 10mm brim. My CR-10 took about 2 hours to print.
2 perimeters/shells, 5 top and 4 bottom layers.
I printed in PLA to get started then switch to better temperature-resistance PETG.
Has a built-in support piece (square patch) that should snap out easily. If not, you may have a bit of over-extrusion.
Post-Printing
Clean up
Break out the square support. Careful using hobby knife, trim away the brim and any stray printed strands.Check the parts blower outlets and clean up as needed.
WARNING: Use at your own risk. I’ve tested this best I can at this time and works great for me. Your results may vary greatly.
Gather parts
existing 40mm fan
M3x12 or possible 10s (2-4) — for mounting fan to Mittens Cooler (should be able to reuse existing screws)
5015 blower/fan (needs to be wired–splice and solder or add a connector)
M3x8 screw — for holding 5015 fan/blower
M3x16 screw (2) — for attaching Mitten Cooler and block to mount (should be able to reuse existing screwsDisassembly
Disassemble the hot end removing the housing screws and the fan mounting screws.
Wire in the new 5015 fan.blower paying attention to red and black wiring.
Save the screws since some can be reused.Assembly
The screws should thread themselves into the Mitten Cooler. If they are super tight, you may be over-extruding. Ream the holes bit and try fitting the screws again.
make sure the printer is off
snap the hot end in the back of the Mitten Cooler with the heater wiring to the left
line up the mounting holes to the top two holes on the finned cooling block
push through the M3x16 screws
check to make sure the parts cooling outlets are above the nozzle opening
carefully line up to the mount
tighten screws — if there is an resistance, make sure the screws are aligned properly
insert the 5015 fan/blower
insert the Mx8 screw in the top hole
tighten screw to snuggle hold the 5015 fan/blower
screw in the 40mm fan using M3x12/16. Can get by with just two screws. Snug but not too tight or you could warp the fan adding more noise
check clearance on everything and the give it a go -
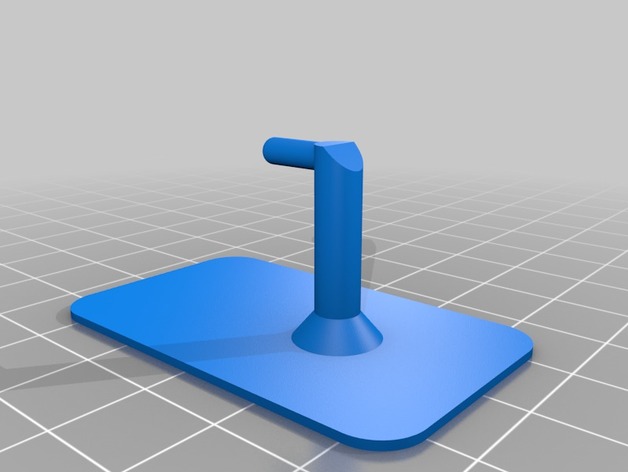
Hook 3D Print Model
Summary
I hung on the hook cooking utensils
Print Settings
Printer:
self made
Rafts:
No
Supports:
Yes
Infill:
20% -
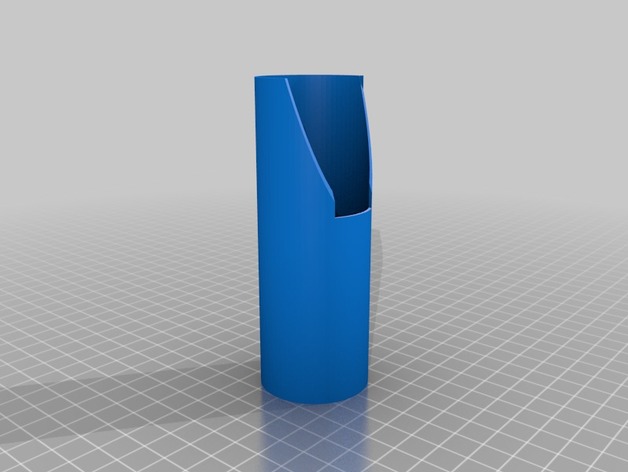
custom lightsaber designed by Mawena Gawe 3D Print Model
Summary
This is a custom lightsaber designed by my friend, Mawena. When I saw his design I went into tinkercad and started working on a 3d design for it
Here are the colors for the different pieces:
silver/light gray: bottom shell, top
black: base and circular part
red: smaller button on control panel
white: longer button on control panel
gold: control panel
dark gray: bottom
How I Designed This
I used tinkercad -
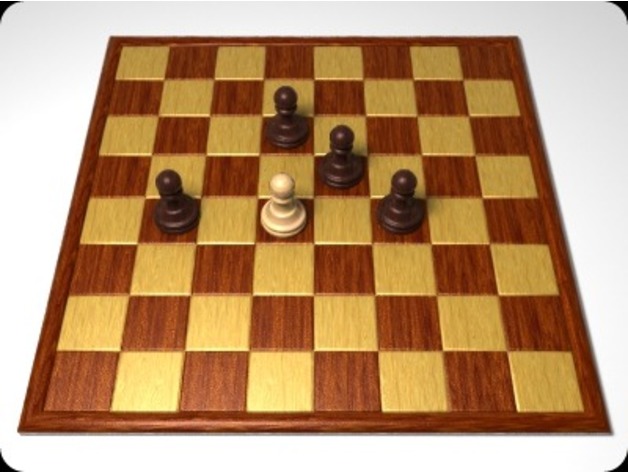
Fox and Hounds Board Game 3D Print Model
Summary
Fox and Hounds is played on a chess board or checkers board sized 8×8. 4 similar colored pawns or checkers as hounds and a single pawn or checker in other color as a fox.
Hounds are placed onto fields b8, d8, f8, and h8. Fox starts set onto e1. Fox moves first.
Hounds hunting the fox. The fox moves diagonally one field range forward or backward onto an empty adjacent square per turn. Hounds can only move diagonally one field forward (towards row 1) onto an empty adjacent square.
Since only diagonal moves are allowed the game is played on the 32 dark fields of the chess board only.
There is no capturing by jumping and no stacking of checkers. Neither by jumping the opponent as in Checkers nor by moving onto its field replacing the opponent.
Fox wins by reaching the other side of the board (8th row where hounds started their hunt).
Hounds win by blocking the fox such that it cannot move anymore (when fox has no legal move left).
If moving perfect then hounds will win.
I have 2 playing pieces for this game with dogs heads even though when I was growing up I plaid this with chess pawns. Enjoy. -
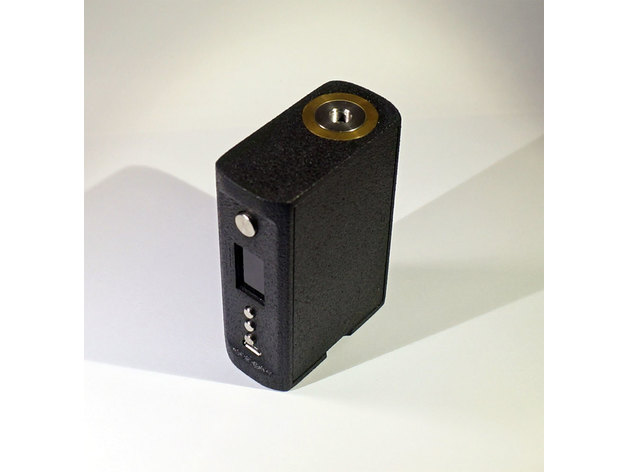
DNA 75/75c Squonk Box Mod 3D Print Model
Summary
Check out the Build Video for full details.
Need some parts?
DNA 75 / 75c BoardStainless Steel Actuators8ml Silicone Squonk BottleBattery ContactsM2 8mm screws & nuts
Truckbed Liner Spray -
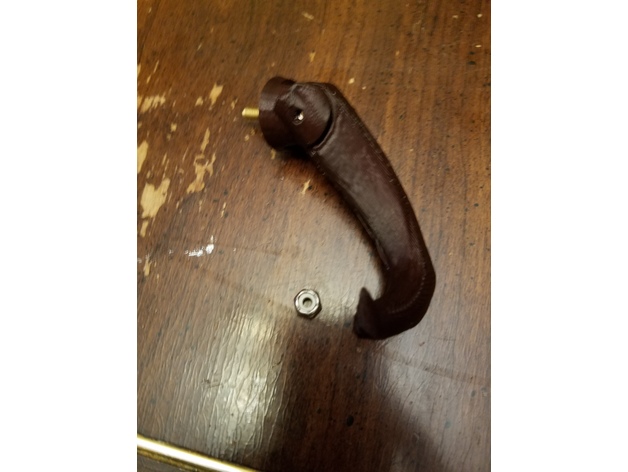
Coffee Cup Hook 3D Print Model
Summary
This is a simple hook on which to hang coffee cups.
It requires a 1/8″ or M3 screw to connect the hook to the wall mount, and another to connect the wall mount to the wall. I used a washer and nylon locknut to attach the mount to the side of my cabinet.
Flip the tentacle and mount in order to make a left-hand version.
Print Settings
Printer Brand:
Prusa
Printer:
Prusa Mk2
Rafts:
Doesn’t Matter
Supports:
Yes
Notes:
The tentacle requires supports, but the mount does not.
How I Designed This
To create the tentacle, I started with tapered cylinders in OpenSCAD, as shown in CoffeeCupHook.scad. After I was happy with their orientation, I exported to STL and used Blender to smooth out the junctions and adjust the curvature to make it more organic looking, then exported it to rawtentacle.stl.
Then I imported rawtentacle.stl back into OpenSCAD and used boolean logic to make the final tentacle and the wall mount pieces. -
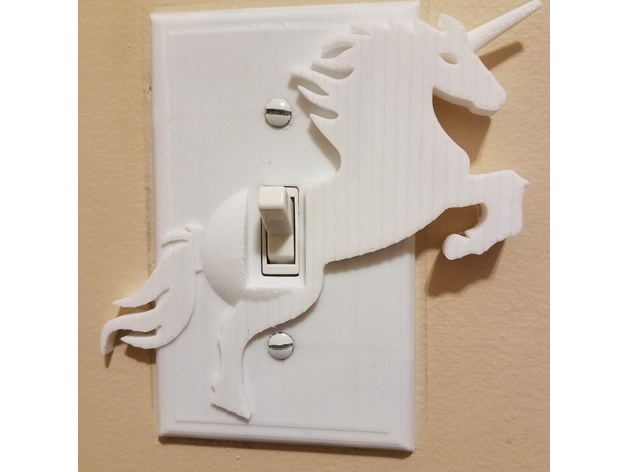
Unicorn Light Switch Cover 3D Print Model
Summary
I’m very new to printing and modelling but I saw the Unicorn light switch cover plate by MikeMasek and thought my girls would go bonkers for it. Only issue was that it wouldn’t fit on my Monoprice Select Mini. So, I hacked this one together and probably made all kinds design mistakes but it worked and the girls love it. If you’d like to tell me all the things that could be improved, I’m all ears and eager to learn.
If you decide to print this on a MP Select Mini, be advised…I changed my print bed x and y dimensions to 127 to make this work. On one pass while printing the raft I did hear it bump against its hard limit so if you can make it work with everything set to 126 mm you might be better off. Needless, this print makes for a very full print bed on the MPSM.
I printed with white PLA and it turned out pretty well. On the next one, I’ll probably increase the outer layer a bit because it is a little translucent in some light. It is also 1 or 2mm smaller in diameter than the cover that was on there but it still covers well and looks good. Last thing is that the screws won’t sit flush unless you dremel them out a bit…could be easily fixed in the model. If I do another version, I’ll fix this in the model.
Thanks! Enjoy!
Print Settings
Printer:
Monoprice Select Mini
Rafts:
Yes
Supports:
Yes
Resolution:
.4
Infill:
20 -
Office PC equipment printer scaner ups 3D Collection
Office PC equipment printer scaner ups 3d Models
-
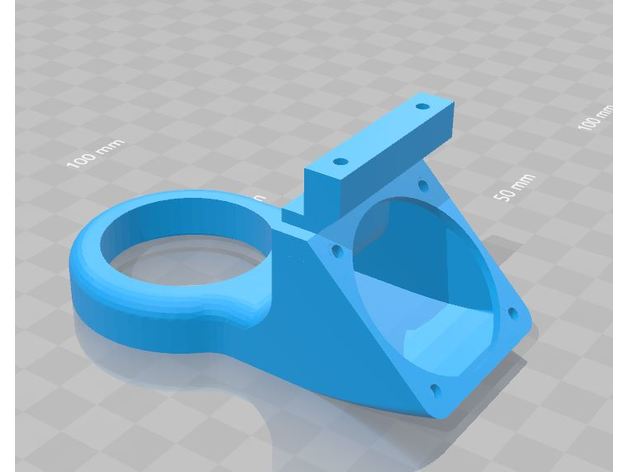
Duplicator i3 Plus (or Clone) Cooling Duct 3D Print Model
Summary
I was looking for a cooling duct for my Balco Touch 3D Printer (duplicator i3 Plus clone) that used the stock 40mm fan and liked the one created for the i3 (https://www.thingiverse.com/thing:969338) However the position of the cooling ring, the mount, fan mount and the depth did not fit my printer. I therefore modified the design to offset the cooling ring, correct the mounting, depth and fan mount to fit. This is the result which should fit any i3 Plus or clone with a stock 40mm fan. -
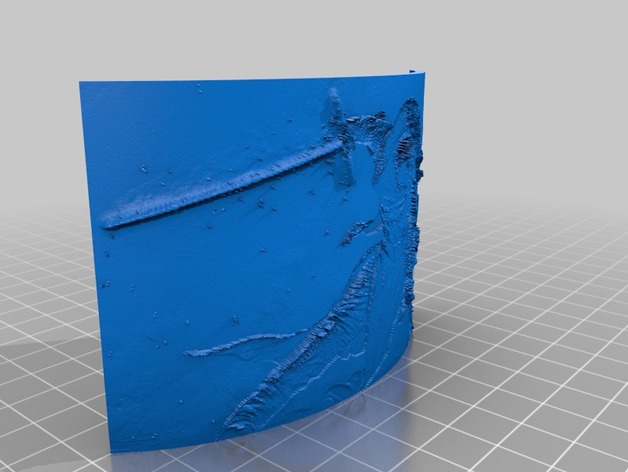
Kylo Ren Lithophane 3D Print Model
Summary
This is a Lithophane of Kylo Ren from Star Wars. When held up to light, you can see the image clearly. -
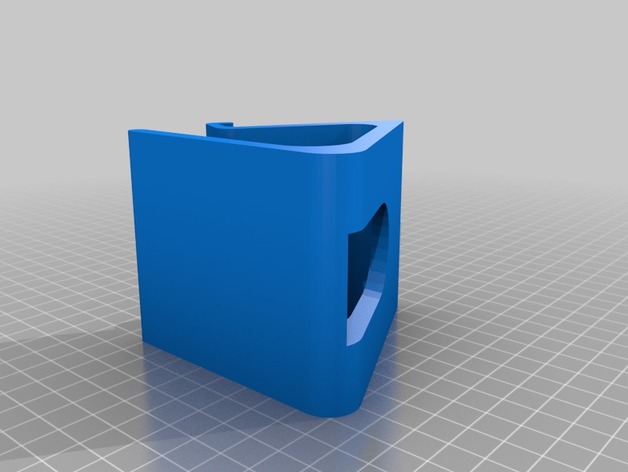
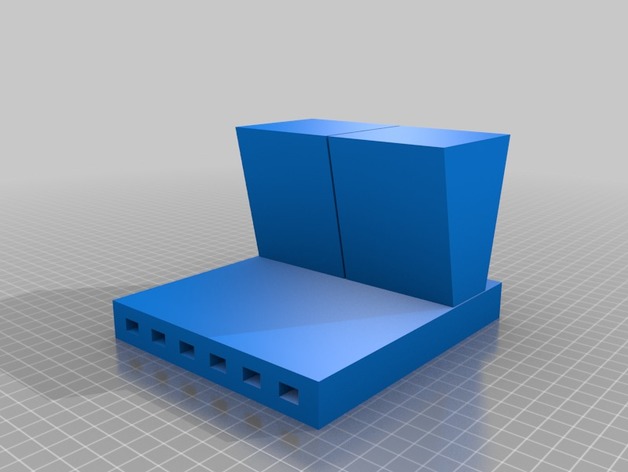
Phone Stand 3D Print Model
Summary
Remixed to make the seat openings a little larger for my phone in its case. Also moved the upper section a little higher up so a cable can easily fit under it. -
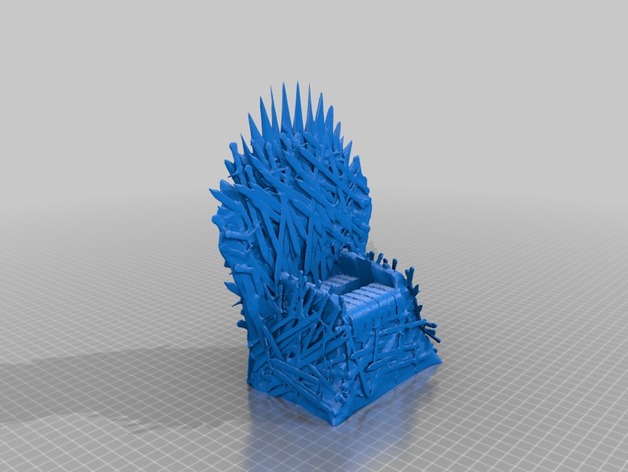
Game of Thrones – Iron Throne – Cell Phone Holder 3D Print Model
Summary
This thrown is awesome….so awesome I thought it would be neat to make as a holder for my Moto G4 smartphone.
Using JinxtheRabit idea in his Galaxy Nexus Dock Enhanced, I designed it the same way for the cord and mount.
NOTE: This stand is for smartphones that have a width within 70mm and have a charging port on the middle bottom (medium smartphones). I provided the 3mf file for editing for different phones, but if you like I can try to make one fit yours (just send me the dimensions).
Print Settings
Printer Brand:
Prusa
Printer:
Prusa Clone
Rafts:
No
Supports:
No
Resolution:
.2
Infill:
10%
Notes:
This is a 27 hr print. -
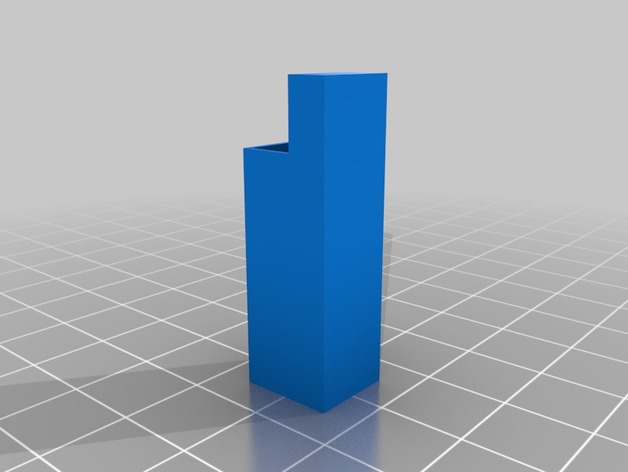
LED Holder for 9x5mm Arms 3D Print Model
Summary
LED holders for the Riplite but can be used for other frames like the Hyphylite -
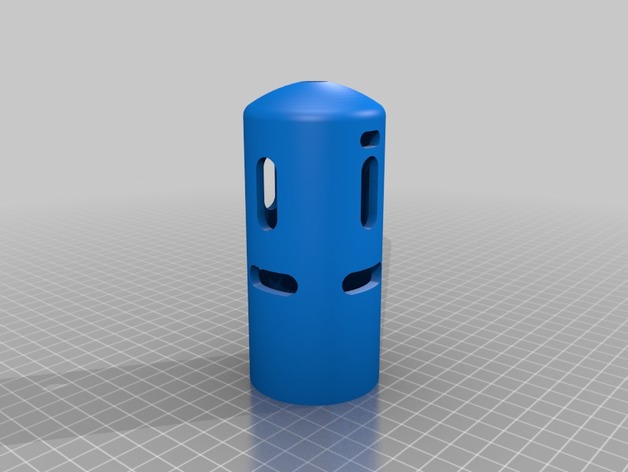
Redline Motor Cover 3D Print Model
Summary
This year, we’re using a few redline motors on our robot. They’re the kind of motor that have tabs you solder the wire to, but they seem a bit delicate and easy to get torn off if a lose wire got caught on something. To protect the motor and our service loop, I created a cover to keep the tabs and loop nice and safe.
When you put it on, you might need a layer or two of electrical tape depending on the motor, pahse of the moon, days untill next leap year, ect.
Print Settings
Printer Brand:
LulzBot
Printer:
TAZ 6
Rafts:
Yes
Supports:
No
Resolution:
0.3 mm
Infill:
100 %
Notes:
If you use the model with what looks like tubes running all over, dont use supports, the tubes are supports. Otherwise, you’ll need to create your own supports.
First layer hieght is 0.36 mm.
Post-Printing
You will need to remove the supports, which for me was a bit of a pain.
Step One: Remove “looser” supports
Us a pair of needlenose pliers or simailer to remove the majority of the support on the outside and inside of the cover. Dont go crazey trying to get supports that stick too strongly, they”ll come of in one of the other steps.
Step Two: Remove supports from the cuttouts
Use a scratch awl/ center punch and hammer to punch out the supports from inside the cutouts and any strgglers you couldn’t get with the pliers (except the ones where the raft was, leave those for the next step). I find it helpful to put the cover in a vice and lightly – I repeat- lightly clamp in in and let it settle to the bottom, then tap the supports out.
Step Three: Remove the supports from where the raft was
Usually, I use a chisle to remove supports like this, but had trouble executing. Instead, I held the peice in a pair of vise-grips and used a belt sander to remove them, which leaves a rough, woodstained section, but is probably smoother (and certanly faster) than trying to get them off with pliers.
How I Designed This
This tutorial is designed to work to make a cover for any motor you may have, using the redline motor as an example. Screenshots were taken in Onshape.
Step One (a): Create the main body
On whatever plane you choose, create a sketch consisting of a line half the diamiter of your motor plus relief (e.g. [(1.77/2 in)+0.25 mm]) from the origin and as long as you want your cover to be tall ( because part of the purpose of my cover was to proect a service loop, I left a lot of room up there). Also create a rounded top as tall or flat as you wish. The top is pretty unimportant and you can just eyeball it. I like to fillet the connection between the line and the arc to make it nice and smooth.(b)
Offset this entire sketch as thick as you see fit, I used 0.15 in. Also connect the offset sketch to the original one with a line, and be careful with the top arc. Make sure that line is parellel with whichever direction is “up” and even with the offset arc, then connect those two lnes with another line (see close up picture).Don’t forget to connect the two arcs properly!
(c)
Revolve that sketch a full 360 degrees into a new solid, using the line parrellel to the “up” direction and in the center of where the solid will be as the revolve axis.Step Two (a): Make cutouts for air cerculation and wire routing.
After offseting a plane the radius of the hollow cylinder you’ve created, sketch slots for any air circualation cutouts in your motor. If you’re making a cover for a sealed motor, like a CIM, dont worry about air. You can find the distance for your cutouts by eyeballing with a caliper or ruler about how far up they start and stop, and to make it nice rounding off the edges with arcs.(b)
Take any sketches you made for cutouts and extrude them all the way through, or use emboss if your software has it, which is a feature Onshape lacks. Another, much more annoying thing to be witho is the abillity to pattern your holes, so the only way to get more cutouts is to duplicate you sketch onto a perpendicular plane and extrude it through again. I don’t think you can rotate the part or make a plane wuth a costum angle, but if I’m wrong please correct me.(c)
Now you’ll need cutouts for your wire to exit from, unless you’re cool with them coming through the other cutouts (i think that looks messy). Create two lines. The distance between them is equal to the diamiter of your wire plus relief. Make them as long as the diamiter of your wire times two plus relief, then round the edges with arcs to make it nice. Extrude this, but not all the way through. I also like to add one coming out the top so you’ve got options. The diamier of the hole I extrude out the top is the diamiter of the wire times two plus relief.Step Three: Add finishing touches
I like to chamfer all of the parts you’ll have to stick things through or into to make it easier to align. I chamfered the large opening for the motor to go through and the two wire routing holes.Congrats, you’re done!
Enjoy your cosutom motor cover, maybe even engrave your team name or number on it! -
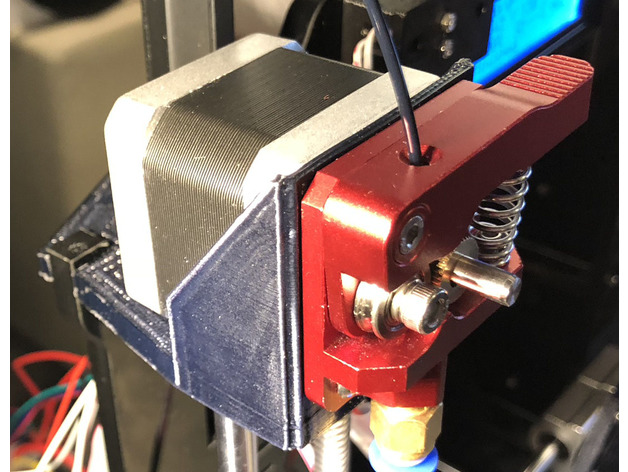
Bowden High Stepper Motor Mount for Hictop Acrylic Printer 3D Print Model
Summary
This is a remix of mechaet’s motor mount (V4) for conversion of the Hictop acrylic printer to a Bowden or style. Supports 2 extruders (one motor on each side). This piece replaces the entire top left acrylic piece and has a built in mount for a Nema 17 motor. Sits front and center for easy filament tube down to the nozzle. If you want this one on the top-right just mirror the print in your tool of choice.
Print Settings
Printer:
Hictop i3 Acrylic
Rafts:
No
Supports:
No
Resolution:
.2
Infill:
25%Post-Printing
Mine required some slight sanding to get it to fit in place, but otherwise works fine.
How I Designed This
Modeled in Tinkercad based off of mechaet’s V4 https://www.thingiverse.com/thing:1816832 -
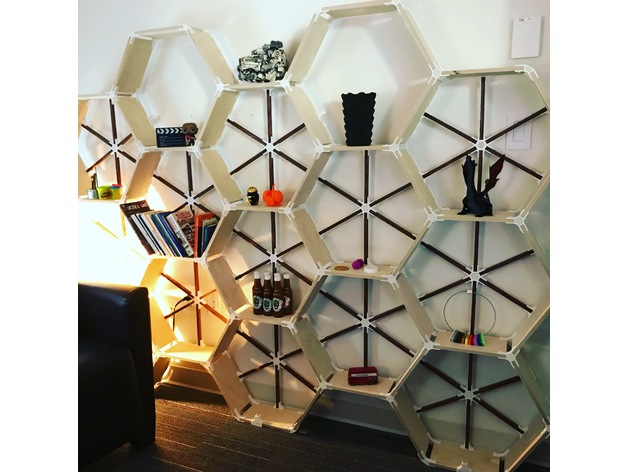
Hex-a-shelves (with other brackets as well) 3D Print Model
Summary
Brackets designed in Fusion360 to allow custom shelf design. I built a shelf for my office (see pictures) which was a huge hit.
Print Settings
Printer Brand:
Prusa
Printer:
i3 MK2S
Rafts:
No
Supports:
No
Resolution:
0.2mm
Infill:
30%
Notes:
Assembly instructions:
Please note before starting, it is best to assemble the pieces with it laying flat on the floor (like the shelf has fallen over) so that the back support brackets can be attached before standing it up. Without the back brackets, you will not have a very sturdy shelf and any weight added to it will result in tears… yours.
I chose to make a pretty hefty hex grid of shelves as you can see in the picture, but you can modify and make whatever design you want. My support brackets are only designed for the hex arrangement and if you alter, you may need to design and print some brackets depending on your design to help support it. There was quite a bit of printing to get this design. The bigger the shelf, the more you’ll be printing… I used 6 full 1kg spools of white filament by the time I was done.
The wood measurements for me below:
Main shelf length 240mm
Back support strip length 205mm, width 15mm. Orientate so you see the edge towards you.
Baltic Plywood Thickness 1/2 inch (or 12.5mm)
I used 1/2 inch white tipped screws for the construction. You only need to go in one side of the bracket, not both.
Printing the brackets, I decided not to have the top and bottom layers filled in. I chose a honeycomb pattern as it matched the overall design. You will need to experiment with your printer to get the strongest results. I used 9 perimeters, no top or bottom, and 30% infill. I printed on both my Prusa MK3 and MK2s.
Depth of shelf is up to you… I made mine 6” deep, that way I could get all the pieces I needed from 1 4’x8’ sheet of plywood. I used Baltic Birch as it has a nice edge after being cut. Don’t forget about the kerf (thickness) of the blade when making cuts to make sure you get accurate measurements. The depth of your shelf could be at least 8” before needing to print a middle bracket for support.
I stained the back support to give it extra contrast, up to you if you want to do the same.
If you use these brackets and post, please credit me @vfxsoup (for instagram) for my design. Initial inspiration came from looking at a design by martcaset on thingiverse. Good luck, it was a really fun project printing all the parts and putting it together. -
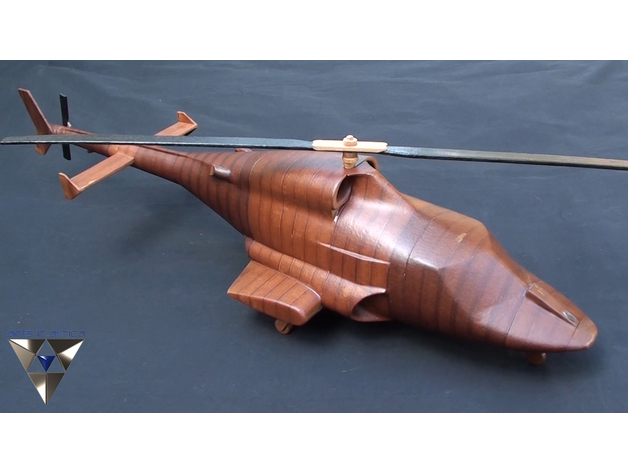
Airwolf Stacked Vector model 3D Print Model
Summary
Here is an idea I thought up a few years ago, and thought I would share it here for free.
It is a stacked vector concept that can be used to re-create almost any 3d model in any material that is in sheet form.
By slicing a 3d model into slices the width of a chosen real world material, the profiles can be rendered out and cut out of that material and stacked one on top of the other.
I used the method to create a wooden airwolf model and a spaceship from the 80’s TV series.
I cut each slice by hand, which I don’t recommend, but I supplied the files in DXF and Ai formats, so it can be cut with a cnc I beleive?
Since this method can be scaled using a projector, I have optimistic plans to create a full size Zuul terror dog from Ghost busters, using this technique and foam sheets.
I used a slice modifier in 3ds Max to do this, but I’m sure it is possible on most 3D software.
I hope this inspires new designs. -
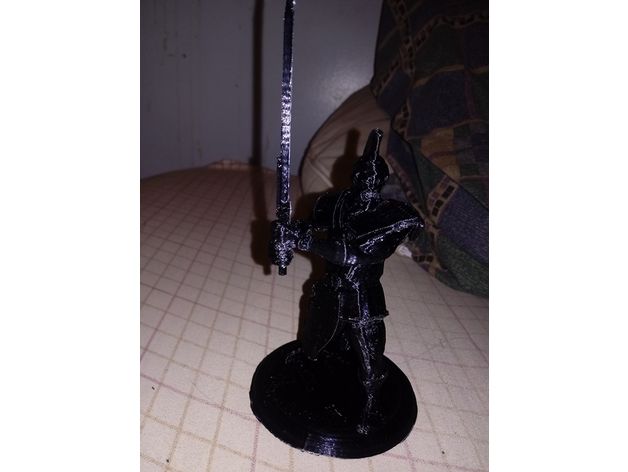
Storm Giant 3D Print Model
Summary
I don’t claim credit for this model. I just attached a nicer base and separated the sword into a separate file. Ive included the original file as well. My printer don’t like tall objects and the feet weren’t enough to keep the model stable and attach to the print bed, hence the base.
Original download can be found here https://www.shapeways.com/product/S3DWZPRSE/storm-giant?key=0fdd6bbb1c819cc9122749f4a0b42020
Print Settings
Printer:
Alunar M505
Rafts:
No
Supports:
Yes
Resolution:
0.2
Infill:
10 -
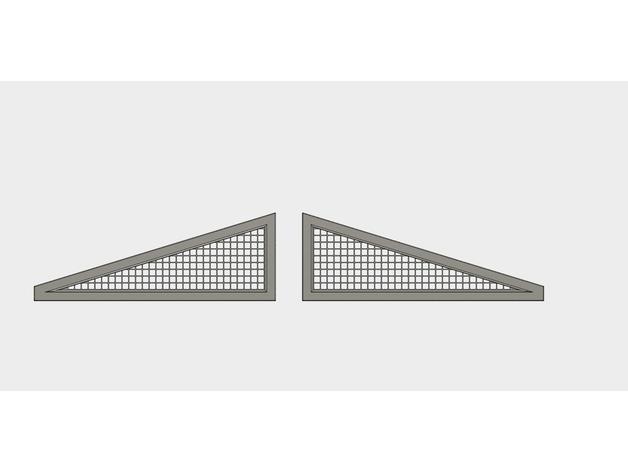
TRX-4 Tactical Rear Triangle Window Grill 3D Print Model
Summary
Leave me a comments if you like its. -
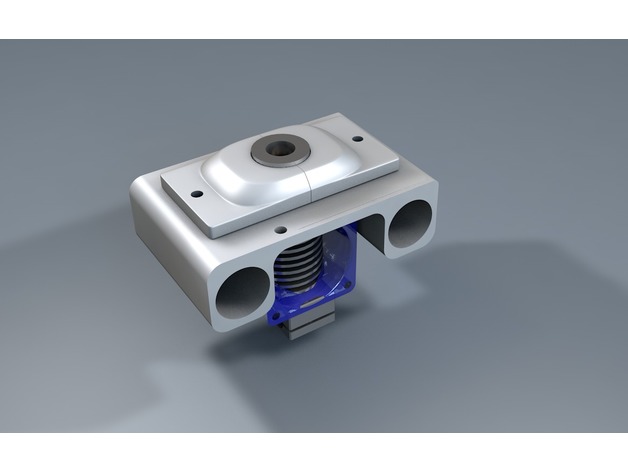
P905X E3D V6 Bowden 3D Print Model
Summary
Version pour E3D V6 Bowden.
A faire avec support sur le lit -
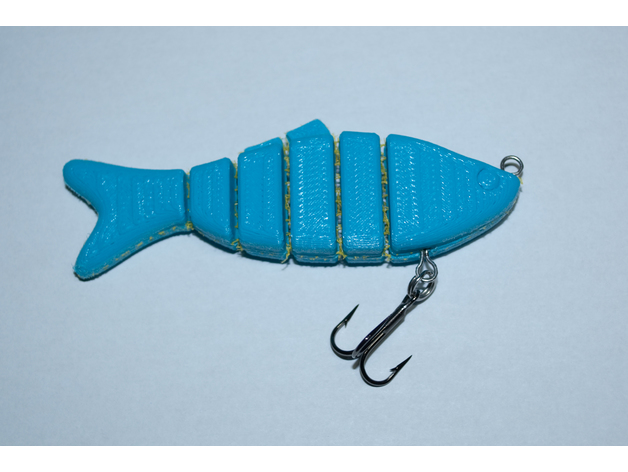
Joined Swiming Lure (Fabric Printing) 3D Print Model
Summary
This is a work in Progress and the lure has NOT been tested yet!
This is just a prototype for an idea I’m playing around with using the new technique of printing on fabric. I did not come up with this idea I am just trying to find new creative ways of using it. I believe the original idea came from Shorey Designs from Instagram.
The design of the lure was just a rough 10 minute design I came up with to try this idea. I have no idea if it will actually swim correctly as I have not tested it yet. I am posting the file already because other expressed interest in trying it themselves.The Printing Process.
The process starts by printing a few layers (two In this case) and then pausing the print.
The tulle fabric was then taped to the bed over the print.
The print was then resumed and continues to print over the fabric imbedding it into the print.
The finshed print.
The fabric acts as a hinge allowing the lure to bend.
I add tie on/hook points and a little wieght (.177 BB’s) and then superglue the two havles together.
The finished lure before painting.
Wiggle wiggle wiggle……
This video shows the entire process. -
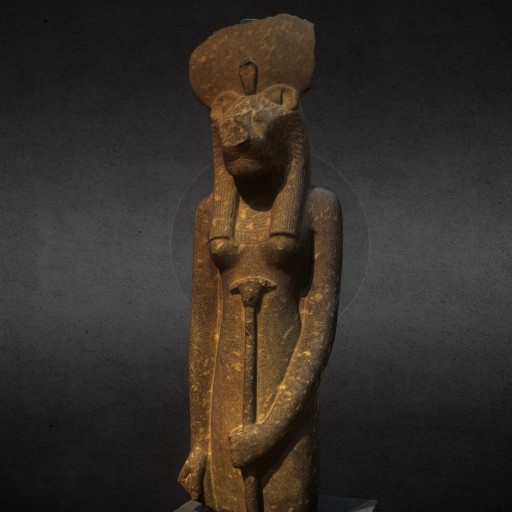
Sekhmet Free 3D Model
Sekhmet, the Lion-goddess, 1300 BCE, Egypt. Musee du Cinquantenaire (Brussels, Belgium). Made with ReMake and ReCap pro from AutoDesk.
-
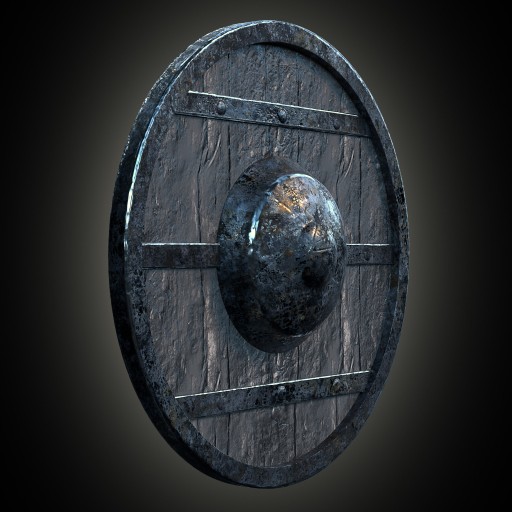
Torn Shield Free 3D Model
Been away from Blender for some time. I felt like a comeback. So this is my first Blend in a year or so. Hope you like it, and feel free to leave a comment!
-
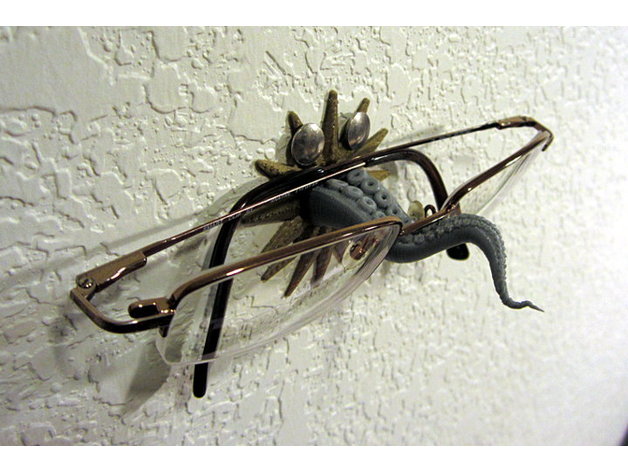
Tentacle glasses perch 3D Print Model
Summary
Put a star-shaped base on VeerleC’s tentacle and added a couple of thumbtack holes for mounting. -
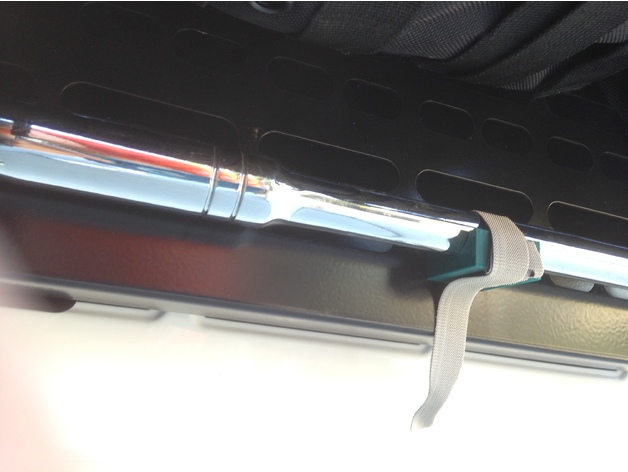
Molle Mount for Breaker Bar 3D Print Model
Summary
I recently purchased a tailgate table from Springtail Solutions for my Jeep. The table has Molle attachments points. So I designed and printed some insert mounts that will hold some of the items that I take off road. This is a mount for a breaker bar. I designed it to use a Velcro type fastener.
Print and clean the mount. Then attach the Velcro fastener.
I really like this table/molle storage option for my Jeep. I will be making more attachments for ‘stuff’.
Print Settings
Printer:
Monoprice Maker Select v2
Rafts:
No
Supports:
Yes
Resolution:
0.2
Infill:
100
Notes:
Print Head Temp – 220
Bed Temp – 70
PLA+ -
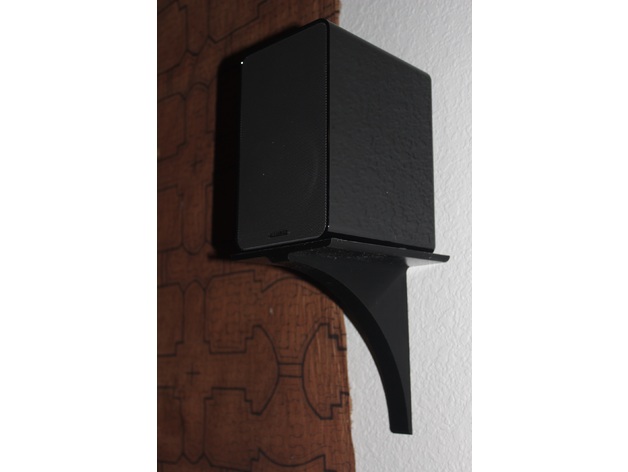
Small Speaker Shelf 3D Print Model
Summary
Shelf made to hold speakers 5.5″wx7″d or smaller.
Print Settings
Printer Brand:
Robo 3D
Printer:
R1 ABS + PLA Model
Rafts:
No
Supports:
No
Resolution:
.3mm
Infill:
30% -
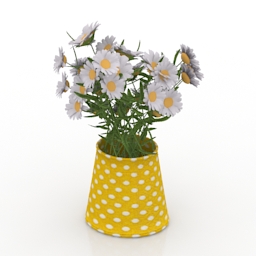
Vase 3D Model
Additional Info: Vase chamomile N110118 – 3D model (*.gsm+*.3ds) for interior 3d visualization.
-
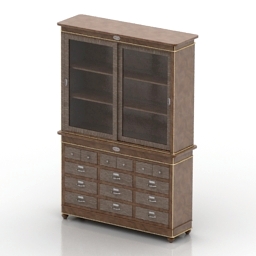
Bookcase 3D Model
Additional Info: Bookcase BetaMobili N150118 – 3D model (*.gsm+*.3ds) for interior 3d visualization.
-
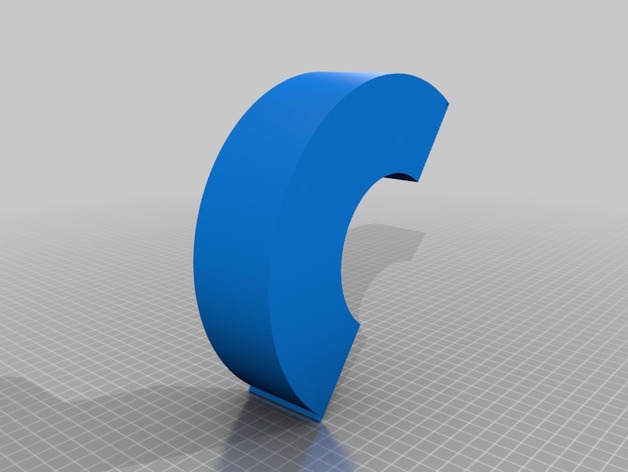
e-SUN Spool Box 3D Print Model
Summary
Hallo !
I designed thise drawers for eSUN spools …
Inner diameter is 91 mm .
Outer diameter is 200 mm .
Hinge inner diameter is 2 mm .
Drawer height is 55 mm .
The ” racord ” piece is to bridge 2 spools on in top of the other .
Needs 4 pieces of 2mm screws ( or maybe a piece of filament ? ) .
NOT printed yet …
Print Settings
Printer:
Freesculpt x1
Rafts:
Doesn’t Matter
Supports:
Doesn’t Matter
Resolution:
0.30
Infill:
0.20Post-Printing
How I Designed This
Created on Fusion 360 . -
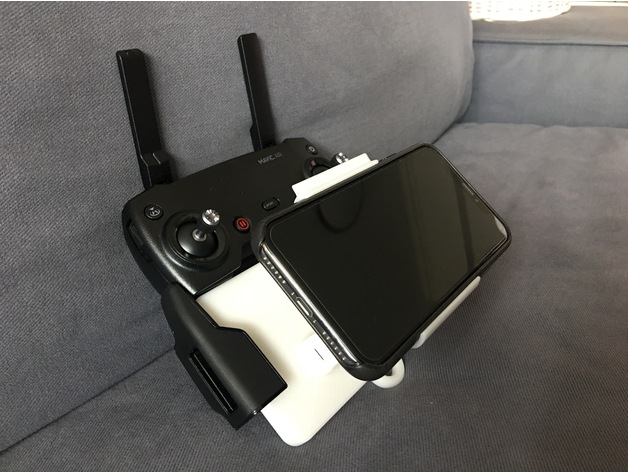
DJI Mavic Remote Control iPhoneX (with Apple Leather Case) Bracket 3D Print Model
Summary
DJI Mavic series remote control iPhoneX bracket
Suitable for Apple iPhoneX with Apple leather/silicon case -
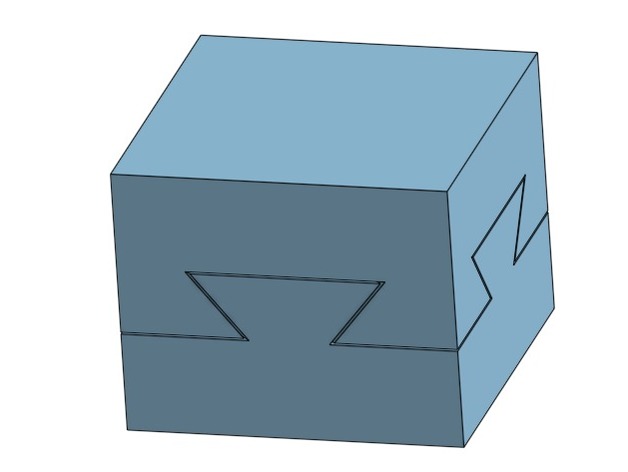
Dovetail box 3D Print Model
Summary
Trick yourself with this tricky box!
Print Settings
Printer Brand:
Ultimaker
Printer:
Ultimaker 2
Rafts:
Doesn’t Matter
Supports:
Doesn’t Matter
Resolution:
0.1/0.2
Infill:
10/20/30 -
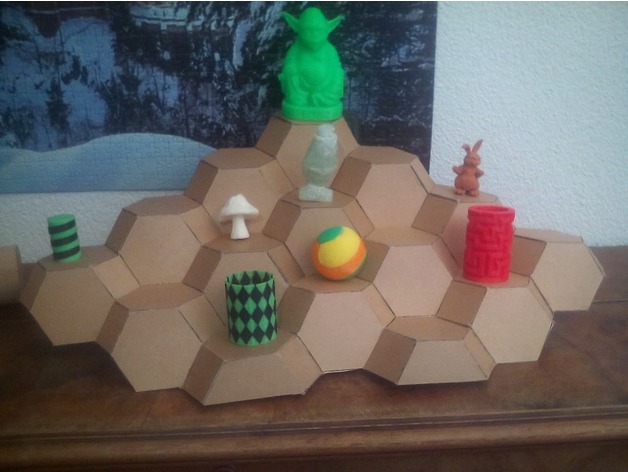
Fancy Type Case 3D Print Model
Summary
I wanted to have a special type case. This one is based on truncated octaeders and its not as boring as just rows and columns.
In order to be effective I printed a template to cut the required cardboard
How to create
Print the Template
use the Template to copy the figure onto cardboard ( in my picture 15 times, but refrain from create mirror copies …)
Cut out the figure
Use Biro and Ruler to mark the edges
Fold and glue every pice
Glue the pieces together as shown in the picture – you might need to cut halves in the very bottom
Enjoy your new Type Case -
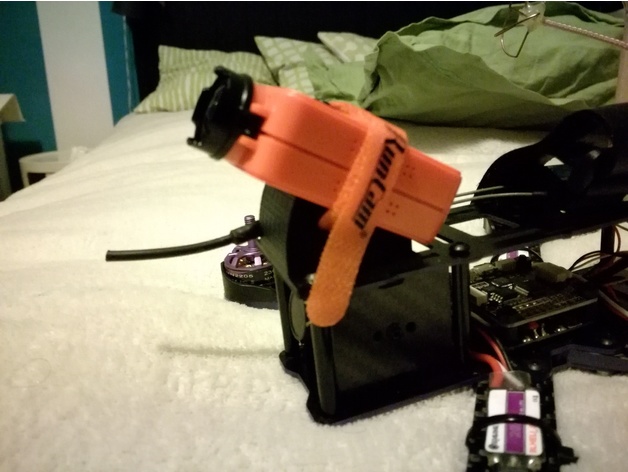
Eachine Wizard X220 Runcam2 Mobius camera mount small 3D Print Model
Summary
This is a shorter camera mount to fit a Runcam2 (or similar) on the top deck of an Eachine Wizard without limiting the room for the battery (up to 3S 1800 mAh).
Printed in ABS. -
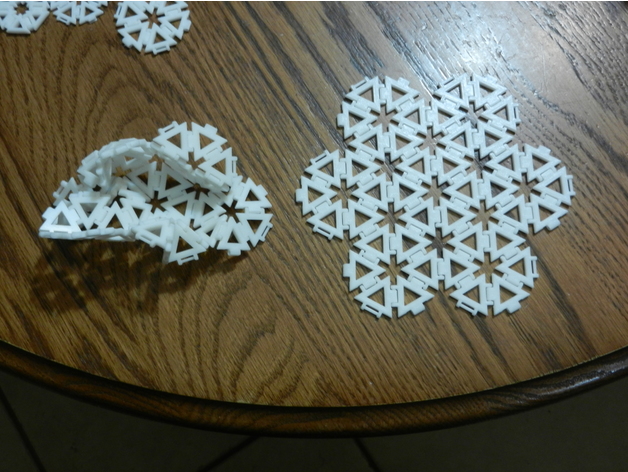
Flexible Doilie 3D Print Model
Summary
I saw the original idea, and wanted to make it work for FDM printers. Here it is.
I used a Folgertech FT-5 R1 with an E3D Titan Aero installed. ESun PLA+.
All of the hinges are print-in-place. 3mm thick total.
I Used a layer thickness of 0.15mm at 40mm/sec print speed. -
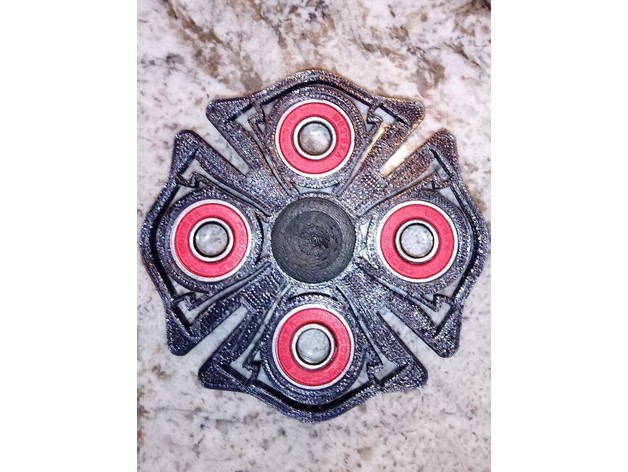
Fire Fighter Fidget Spinner 3D Print Model
Summary
Thanks to all the fire fighters out there. I made this for one of my buddies that is a retired firefighter!
Bearings= 608-2RS Skateboard Bearing
I recommend printing with taulmen 910 or my personal favorite (eSUN 1.75mm ePA-CF Carbon Fiber Filled Nylon Filament )
Check out https://www.jpsev.com/designs for more things and filament!!!
Im still working on the web site so be patience thx!!
Print Settings
Rafts:
Doesn’t Matter
Supports:
Doesn’t Matter
Resolution:
.2mm with .4 nozzle
Infill:
25 percent -
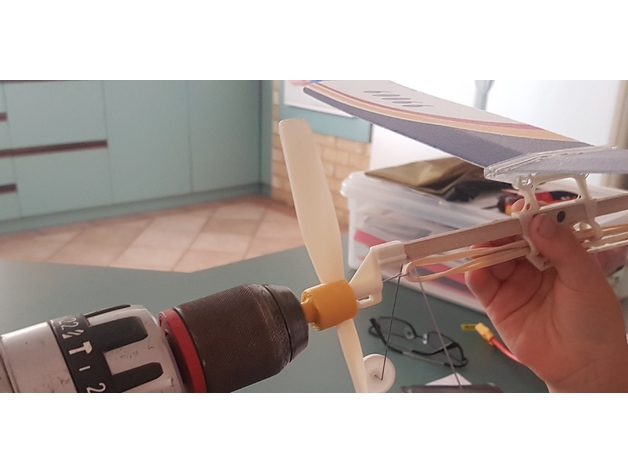
Rubber Plane Winder Drill Adapter 3D Print Model
Summary
My kids had rubber band planes and I got a sore finger winding them. This was a quick solution to my problem! Should fit most small rubber band planes. Put it in a drill chuck and wind!
I used 100% infill for strength.
Print Settings
Printer Brand:
Wanhao
Printer:
Wanhao Duplicator i3 V2
Rafts:
Doesn’t Matter
Supports:
Yes
Resolution:
.2
Infill:
100%
Notes:
Printed upright with supports. -
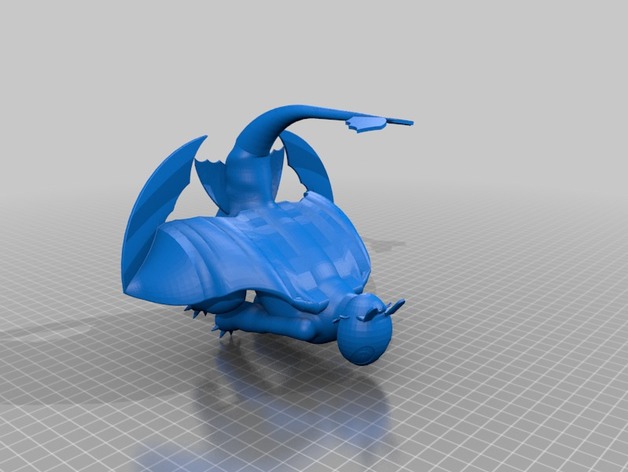
toothless 3D Print Model
Summary
This is toothless from How to Train Your Dragon. Note: if anyone knows how to save the re-orientation of this, that’ll be great. -
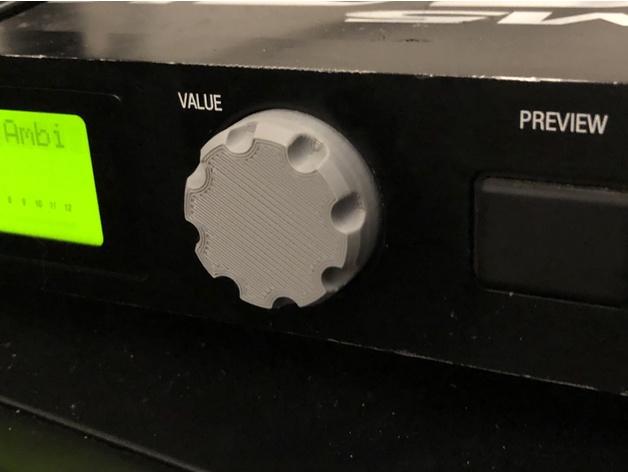
Alesis DM5 Knob 3D Print Model
Summary
Replacement knob for Alesis DM5 drum module.
Print Settings
Printer:
Monoprice Select Mini v2
Rafts:
No
Supports:
No
Resolution:
0.1mm
Infill:
30%
Notes:
wall_thickness=1.2mm -
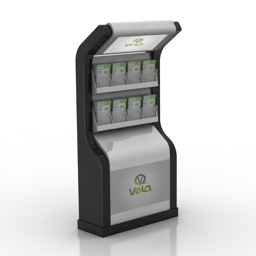
Rack 3D Model
Additional Info: Rack market N161217 – 3D model (*.gsm+*.3ds) for interior 3d visualization.