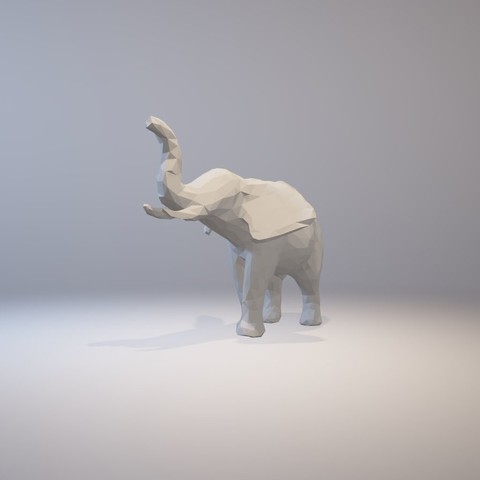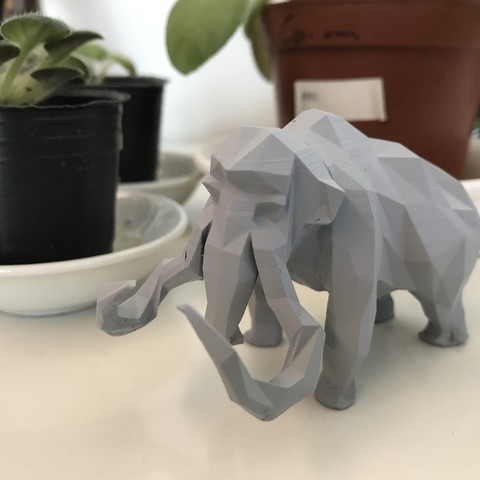
A low-poly mammoth sculpture
Category: 3D Print Models
Premium & 3D Print models ready to be 3d printed. 3D Print Models and Free 3D Print Models are available for download in several formats including .STL, .3DM, .OBJ, .3DS, .DAE, .SKP, .BLEND, .DWG, .DXF, .STEP and much more. If you’re in search of high-quality 3D printed assets, we have a huge library of 3d print models for any of your needs. Also you can visit 3D Models and All 3D Models category.
-
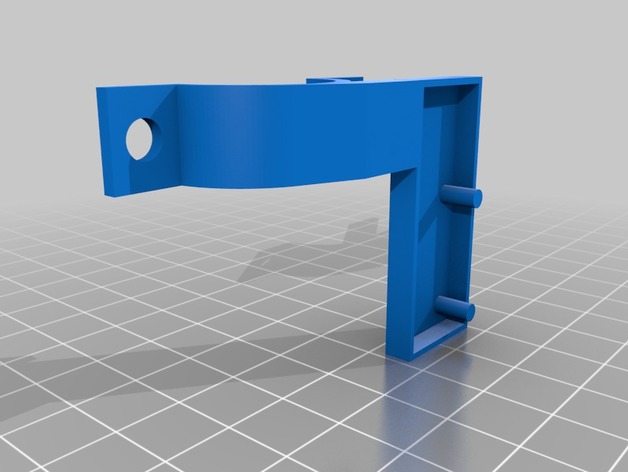
MPCNC EndStop Mount 3D Print Model
Summary
I bought physical switch endstops and didn’t like any of the existing versions. So I made my own from scratch. The End Stops sit snuggly into the trays using pegs to hold them straight. You could drop a tab of hot glue to hold VERY securely if you like.
I used this End Stop
Print Settings
Printer Brand:
Prusa Printer:
i3 MK2S Rafts:
No Supports:
Yes Resolution:
.15 Infill:
20% Notes:
I had to use supports at first, because I did not pay any attention to how it might need to be printed. If you have good cooling and are an overhang master, maybe you can go without. If you do use supports, I had them stood away from the model by .2 mm so they were easy to detatch
Post-PrintingY-Axis Top
X-Axis Top
Bottom Ring for both
How I Designed This
Used Fusion 360
This uses nuts and bolts to assemble, used #6 thread in my case because it’s what I had. -
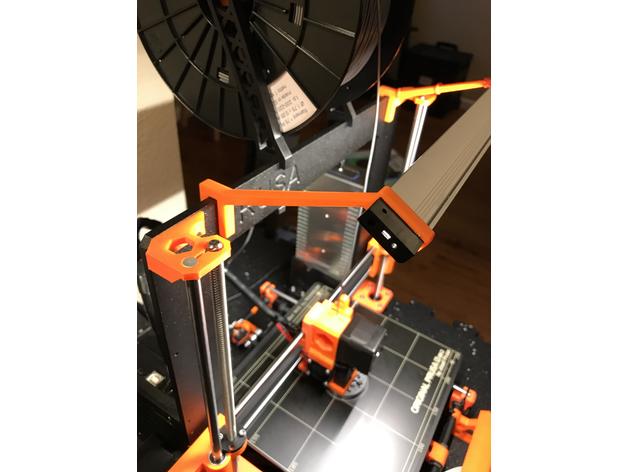
Prusa i3 MK2/MK2S Light Bracket 3D Print Model
Summary
I designed this light bar bracket in Fusion 360 for my i3 MK2S. it its a nice tight fit over the plastic end caps of the light bar but moves more freely once over the extruded aluminum. The light bar used is the following: https://www.lowes.com/pd/Utilitech-11-8-in-Plug-in-Under-Cabinet-LED-Light-Bar/1000033647
The light is activated by waving your hand underneath. It is also dimmable if you hold your hand under the sensor. Once the desired brightness is achieved, move your hand.
Print Settings
Printer:
Reality CR10 Rafts:
No Supports:
No Resolution:
0.3 mm Infill:
25% -
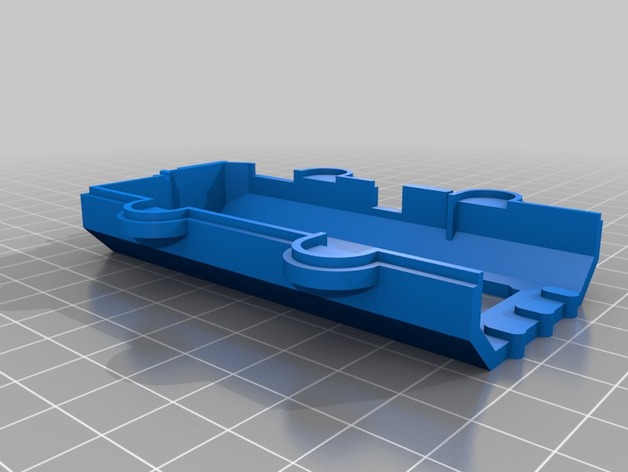
SmartExtruder Cover (Not SmartExtruder+) 3D Print Model
Summary
I own two original SmartExtruders and one SmartExtruder+. I’ve figured out the SmartExtruder+ is great because and only because it’s held on by screws instead of clips. They are about the same as far as performance goes, but it’s nice to have more extruders dedicate for different nozzle diameters.
Anyway, anyone who owns one of these 5th Gens or had owned one would understand the frustrations of the clip-on extruder covers. Mine are holding on to dear life by my extruder holder or painters’ tape, since it’s readily available.
The part is self explanatory so there are little words to say about this part, other than I’ve put in about 2 weeks of work on this, but it’s not quite right yet. Measurements were taken and modeled with and without the back-cover for assembly for accuracy, before and after printing. Printed parts were checked under a microscope then the model was adjusted accordingly. Well, I hadn’t finished it yet, but it’s roughly 90% accurate.
Other work got in the way and I hadn’t worked on this for a couple months and decided to release this to all of you. If it works for you, GREAT! If it doesn’t, I hope someone can finish it, make improvements and share it.
It’s best to print this at 0.3mm resolution and print it solid. 0.2mm is better but that’s a lot of time spent for an incomplete part that may or may not work. There aren’t any features there that require 0.2mm resolution. 0.4mm prints faster but I feel it’s not fine enough for this application.
I’ve printed only PLA but it hasn’t quite fit JUST right so I have no idea what will happen at the hot-end.
Enjoy.
Print Settings
Printer Brand:
MakerBot Printer:
MakerBot Replicator (5th Generation) Rafts:
No Supports:
No Resolution:
0.3mm Infill:
50%+ -
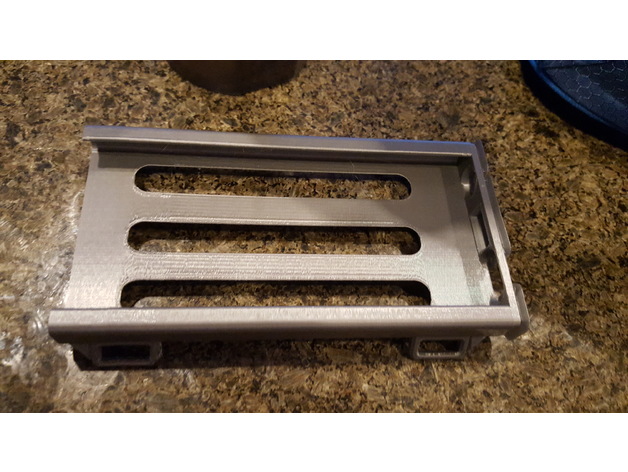
Samsung S6 Arm band case (with phone case) 3D Print Model
Summary
This is a arm case for the Samsung Galaxy s6 (with an external case). It has 4 loops to attach elastic so that it can be worn on the arm.
Print Settings
Printer Brand:
Prusa Printer:
i3 MK2S Rafts:
No Supports:
No Resolution:
0.4 nozzle, 0.20 layer Infill:
20% Notes:
Added Brim for adhesion -
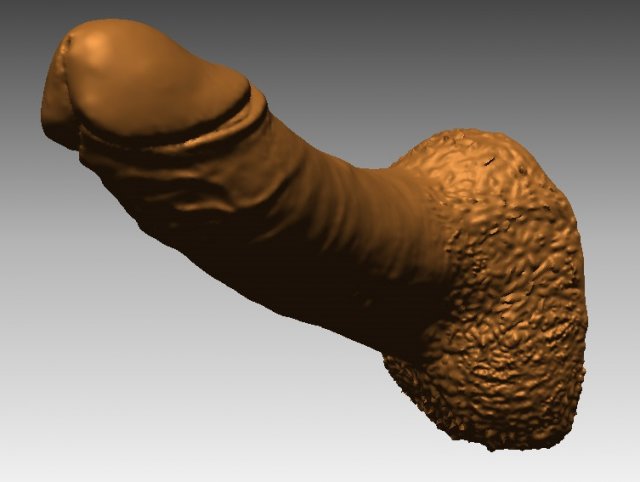
Realistic human erected penis coat rack 3D Model
Hi detailed 3d scan of a human penis in erection that can be used as a coat rack (wall mounting hole for screw included).But you might also use it any way that please you.1:1 scale.Ready to print.
-
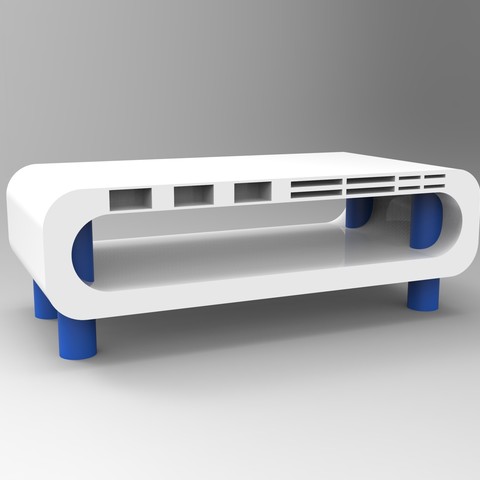
Computer cabinet with sd card holder, micro sd and USB key 3D Print Model
Computer cabinet with sd card holder, micro sd and USB key.
This cabinet has two parts that can be printed on any printer, including a tray of at least 20 * 20 cm.
#DAGOCULTS -
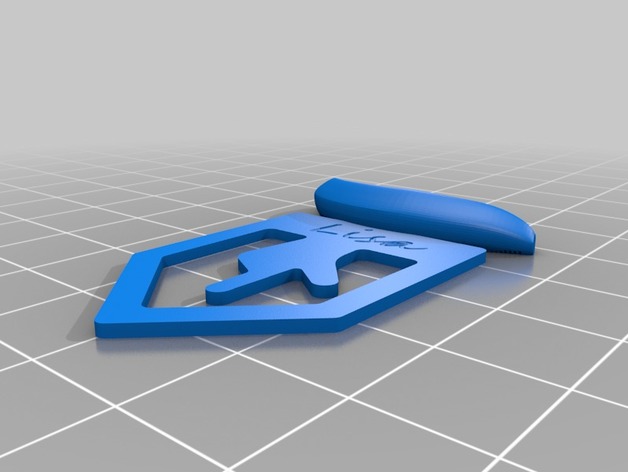
Banana Page Tracker 3D Print Model
Summary
add a banana on the page tracker so that i look more interesting 🙂 i also emboss name on the page tracker for customization. -
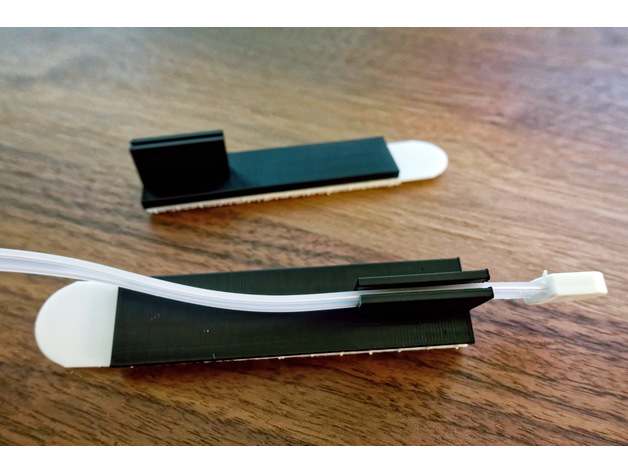
Dipole antenna holder 3D Print Model
Summary
I have tried securing dipole antennas to furniture forever. This solves that problem. It’s designed to adhere to 3M Command large picture hanging strips (http://bit.ly/2iEa3NP). -
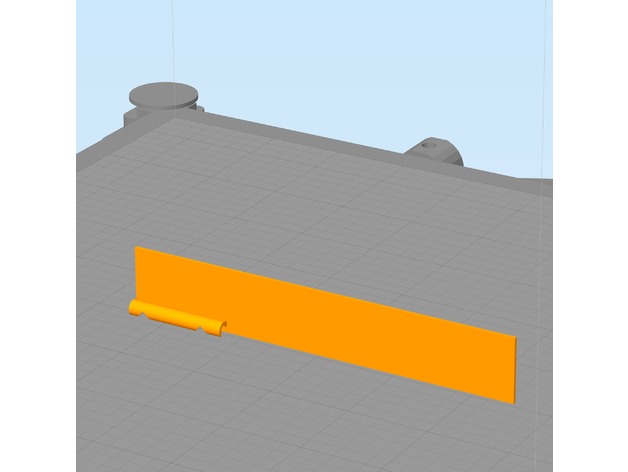
E-Step Calibration Jig (3mm filament) 3D Print Model
Summary
Trying to hold calipers or a ruler next to my filament while marking it for E-Step Calibration isn’t always easy, especially if your printer is in an enclosure. This jig has 2 notches. The lower notch is at 100mm the upper notch is at 120mm. Snap the filament channel onto the filament and lower the jig until it touches the top of the extruder. Then use a fine point marker to mark inside the V slots as shown in the photo. This jig requires your printer to be reasonably dialed in. You can use calipers to inspect the printed part for accuracy. I have found this tool to be quite handy.
E-Step calibration guides can be found in many places, I follow this: http://reprap.org/wiki/Triffid_Hunter%27s_Calibration_Guide#Measure
This is designed to be printed with the filament channel facing downward and a wide brim. The model was also designed to print with a .5mm nozzle but should print fine with smaller nozzles. The brim secures it to the build platform. Remove the brim after printing. See photos for usage.
Print Settings
Printer Brand:
LulzBot Printer:
TAZ 6 Rafts:
No Supports:
No Resolution:
.2 mm Infill:
none Notes:
This is designed to be printed with the filament channel facing downward and a wide brim. The model was also designed to print with a .5mm nozzle but should print fine with smaller nozzles. The brim secures it to the build platform. Remove the brim after printing. See photos for usage. -
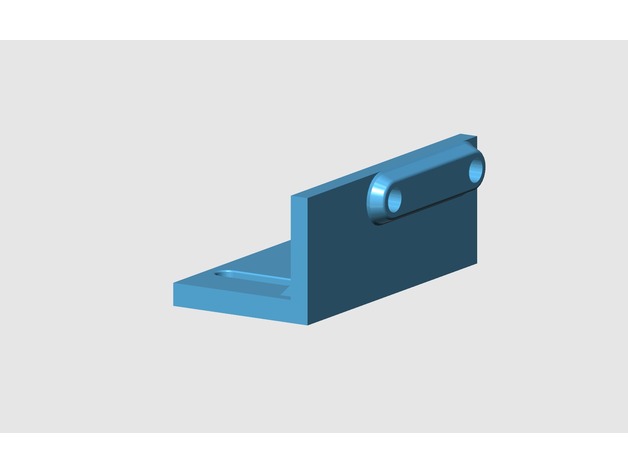
Wanhao d7 new limit switch 3D print model 3D Print Model
Summary
Wanhao d7 new limit switch 3D print model.
I have created this mount to install a mechanical end stroke instead of the optical one.
https://www.cgtrader.com/3d-print-models/hobby-diy/mechanical-parts/wanhao-d7-new-limit-switch -
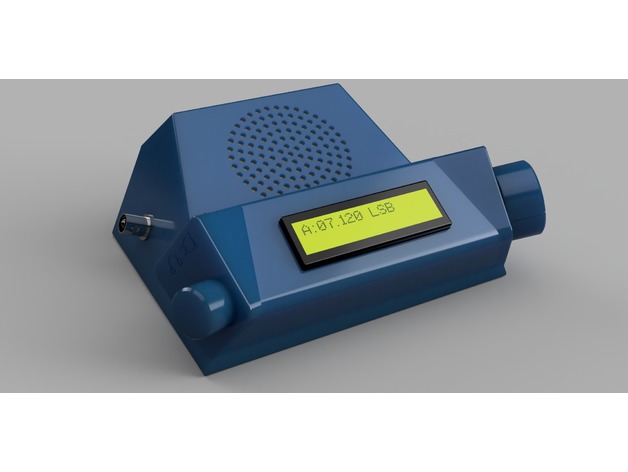
BitX40 Ergonomic Enclosure 3D Print Model
Summary
This is yet another enclosure for VU2ESE Ashar Farhan’s BitX40 transceiver. It’s different from other boxes because it’s ergonomically more efficient–the volume and tuning dials are positioned for ease of use and the speaker is tilted up towards the operator’s head. It’s small and has a much larger heat sink to accommodate 100% duty cycle transmissions that digital modes require.
Print Settings
Printer Brand:
Prusa Printer:
Prusa Mk2 Rafts:
No Supports:
No Resolution:
Normal or Optimal (.20 or .15mm) Infill:
20% Notes:
These models have supports built-in where required and can be easily knocked out after printing. I’ve printed these parts successfully in PLA and PET.
Post-Printing
Parts & Assembly
The model is composed two halves for the case: a base that holds the circuit board and the bottom feet using M3 screws and a top. There are also four chamfered holes on the base that attach the top case using M3 flat head screws. The base is also marked “FRONT” and “BACK” for proper positioning of the top case and the board. The bottom feet can additionally be fitted with silicone rubber feet.
The volume on/off pot and tuning pot that come in the BitX40 kit will fit but their shafts require trimming so the vol and tuning knobs will fit. The Vol knob is nylon and can be trimmed using a knife, but I had to use a Dremel grinder to cut down and dress the shaft of the Tuning pot. You should cut the length of the shaft to about 15mm and flatten about 10mm of that. Use caution to ensure that when you are cutting and grinding that you don’t burn out the bearings of the pot. Alternatively, you can use a pot from your own junk box.
The Raduino slides into a slot at the bottom. My design is meant to allow it to be affixed to the inside of the top case with small self-tapping screws, but when I printed it in blue translucent PET, there was insufficient area to support screws, so I ended up hot gluing the LCD module to the case and using screwed standoffs between the LCD and the Arduino modules to hold them in place.
You can also use hot glue to fix the a 65mm dia. speaker over the grille area. Mine was recovered from an old clock radio.
Because I intend to use my BitX40 on JT-65 and WinLink, I needed to replace the small heatsink over the final TX transistor with one that would allow it to handle the 100% duty cycle that digital modes usually demand. I bought a “DIY Cooler Aluminum Heatsink Heat Sink Chip 1002510mm for IC LED Power Transistor” at Aliexpress. I fastened it to the box with small nylon zip ties.
In his BitX40 instructions, Farhan mentions that you can use one of the small earphone style audio jacks for headphones, so that when you plug in the headphones it cuts out the speaker, but leaves out specific instructions “as an exercise to you”. I found a circuit that worked for me. -
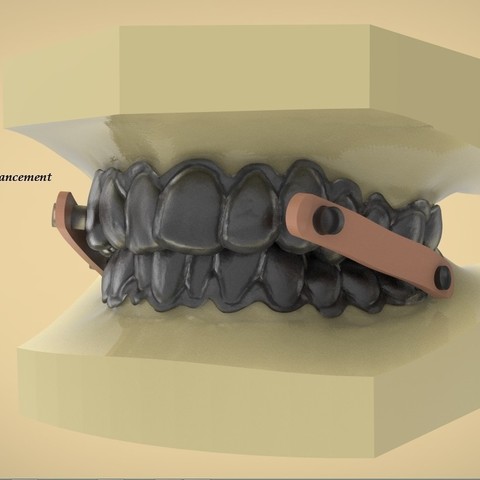
Digital Elastic Mandibular Advancement Appliance 3D Print Model
Digital Elastic Mandibular Advancement Appliance
3Shape Appliance Designer & KeyShot Pro -
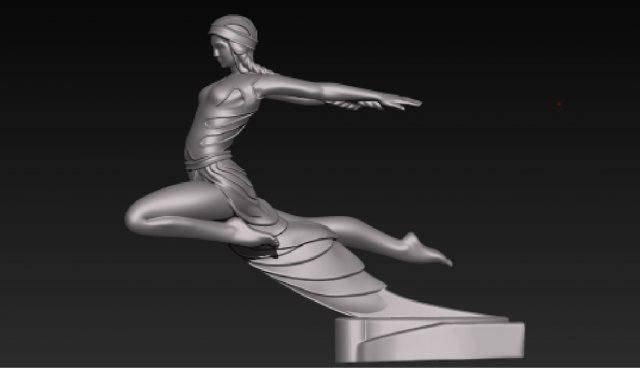
Goddess of speed PONTIAK 1934 3D Model
Goddess of speed PONTIAK 1934 hood ornament 3D print model (Model size is 32mm-98mm-83mm)
-
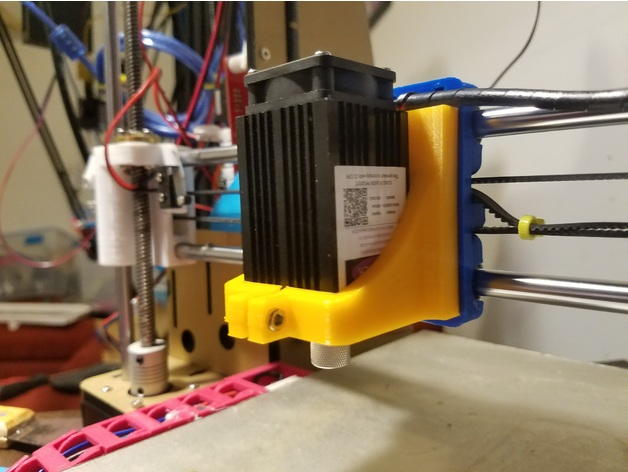
Laser Mount for Prusa i3 Rework X Carriage 3D Print Model
Summary
Mount for Laser (https://www.aliexpress.com/item/500mw-405NM-focusing-blue-purple-laser-module-engraving-with-TTL-control-laser-tube-diode-protective-googles/32562052620.html)
Compatible with the X Carriage from the Prusa i3 Rework – https://www.thingiverse.com/thing:119616
Print Settings
Supports:
No Infill:
10% -
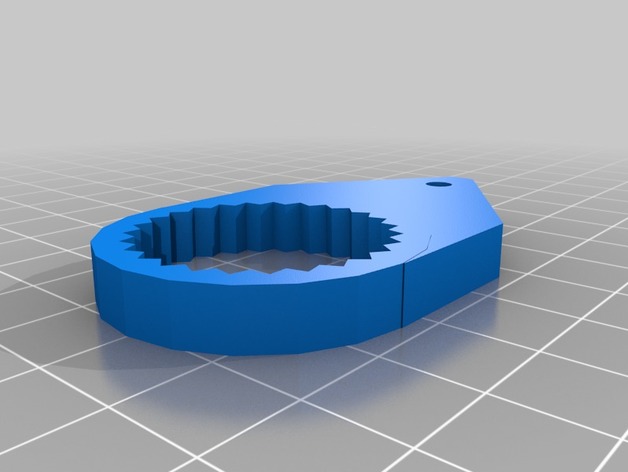
Twist Off Bottle Opener 3D Print Model
Summary
Modeled in tinkercad. SImple design but it works; wife had a hard time opening bottles. Took a few tries to get the ID right on the grip. Have fun. -
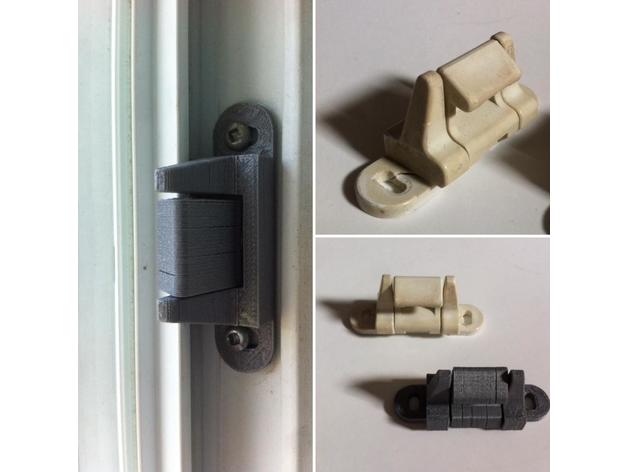
Sliding Window Latch 3D Print Model
Summary
replacement part. Assembly required.
Post-Printing
Assembly
You will need:
(1) compression spring coil 1/4″ X 0.038″
(1) slotted spring pin 1/8″
(2) screw
(1) hot glue or else
1- place the finger part over the vice jaws, that are slightly open
2- push firmly the slotted spring pin into the hole, and hit it with an hammer to push it in place (centered)
3- I use UV resin to stick the spring coil onto the finger. Hot glue should work to.
4- Press the spring coil with the base, then engage the slotted spring pin.
5- screw the assembly in place and enjoy having a safer home! 🙂
How I Designed This
Design with Autodesk Inventor. -
Math 3D8005 3D Model
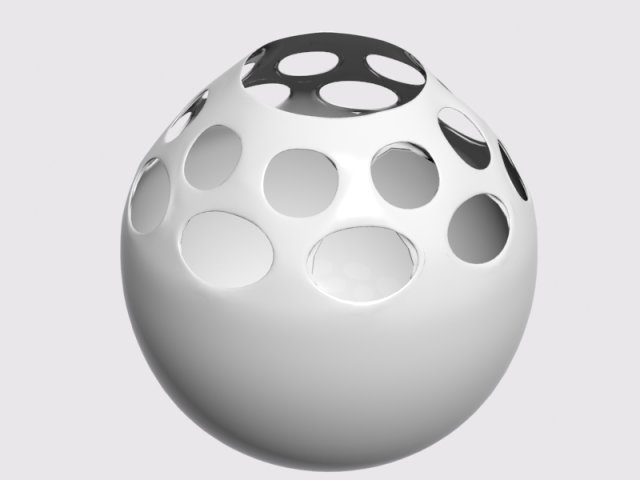
High quality model. Math Objectversion : 3ds Max 2014Render : V-Ray 2.40.30Format : STL filewidth : 20mmHeight : 20mmDept : 33mmThe RAR file includes MAX file, FBX file, 3DS file, STL file.
-
Horse figurine on the hood of a car 3D Model
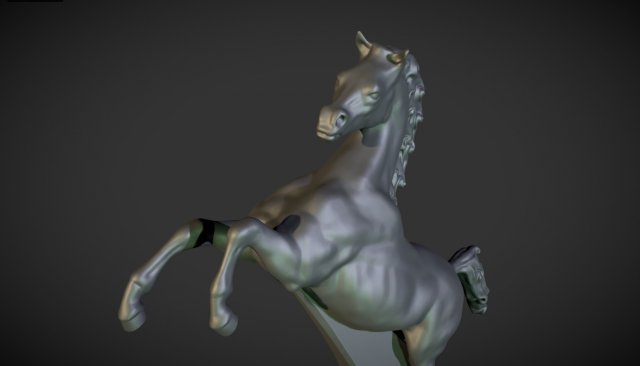
https://sketchfab.com/models/196af43bc8604ef1981906a483120ccbHorse figurine on the hood of a car.File contains two horse models for printingthe model kit includes a stand for neodymium magnet 20-4mm, with a countersink for 6.5*3.5 mmthe thickness of the magnet can be varied up to 10mm
-
Furniture Leg and Caster 3D Print Model
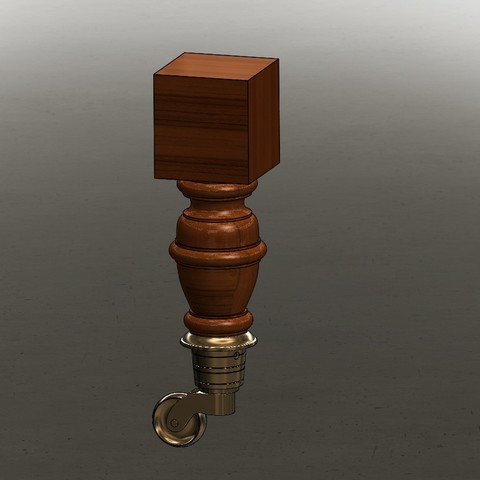
Here is my favorite leg that I have drawn in SolidWorks to date. This was a recreation of an antique leg and caster that was in poor condition.
#DAGOCULTS -
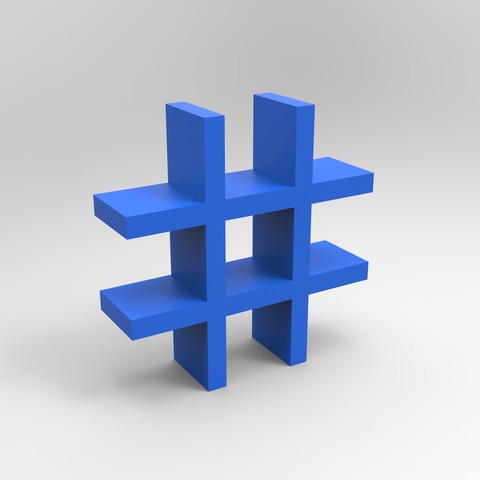
Storage shelf # 3D Print Model
Storage shelf #
This cabinet is printable on any printer with a tray of at least 20 * 20cm.
#DAGOCULTS -
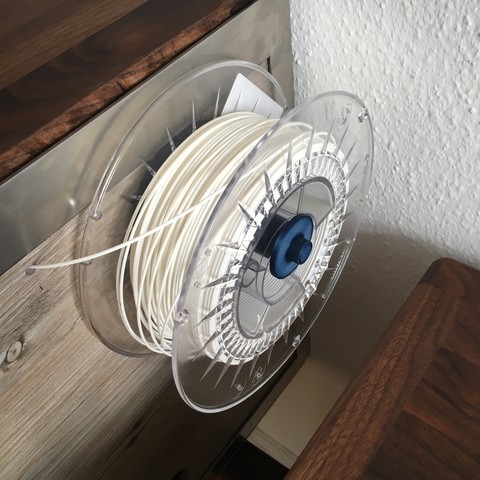
Filament holder side mounted 3D Print Model
This holder is mounted with 3, 6mm bolts. Its easy to print, and works well for me.
Different spools fits on the holder. Spool width 35-80mm. -
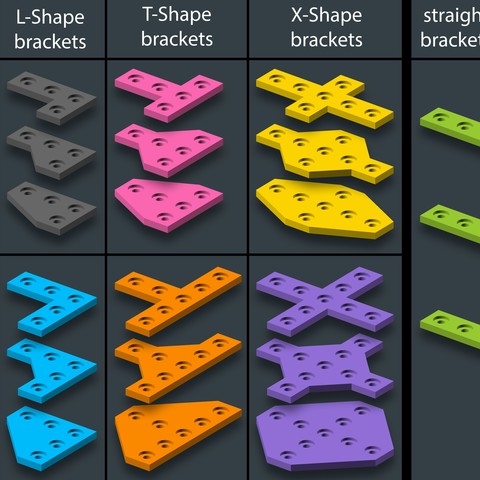
Customizable Plate Bracket for Aluminium Extrusion Profiles (Misumi 2020, 2040, 4040, …) 3D Print Model
This is a customizable 3d model that allows you to create and print aluminum extrusion brackets for different types and sizes of extrusion profiles.
-
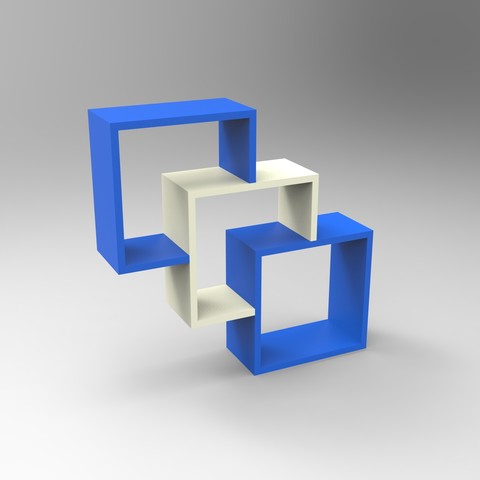
Custom designed shelf 3D Print Model
Design shelf to be custom-made
This piece of furniture has 3 different parts completely printable on a printer with a tray of at least 20 * 20cm.
#DAGOCULTS -
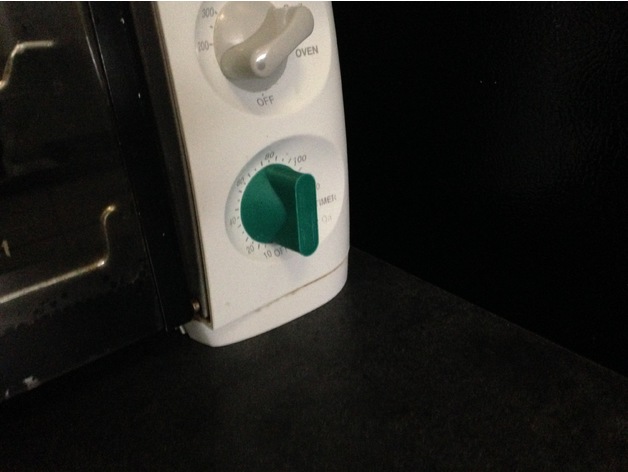
Replacement Oven Dial Knob 3D Print Model
Summary
I get really attached to my kitchen items. Each one has been carefully chosen at the time of purchase to fulfill a specific purpose and my heart breaks when, after decades of use, a small part either disappears or just craps out, rendering the whole thing unusable.
Well, I’m not gonna let that happen to my beloved Toastmaster toaster oven, doggone it! So, the timer knob popped off and never really fit on again. So, I pulled out the calipers, dusted off the ol’ 3D printer and came up with this thing. Fits perfectly. Lovely, even.
If you found this useful, it would bring me great joy to see your work – so be sure to share. 🙂
Or, better yet, please feel free to dump a bitcoin or two here (you can spare a bitcoin, can’t ya?):
1Py3TUeR8noBN2giHyFV1GfB6x3Kh2WEVv
… include a note to the effect of “Hi 3E8, thanks for the Toastmaster dial thing… my life is infinitely better on account of it and please accept this paltry amount in gratitude”.
You’re welcome! (in advance) 😀
Also, feel free to peruse my other submissions which are almost as varied as they are many:
http://www.thingiverse.com/3E8/designs
Enjoy! -
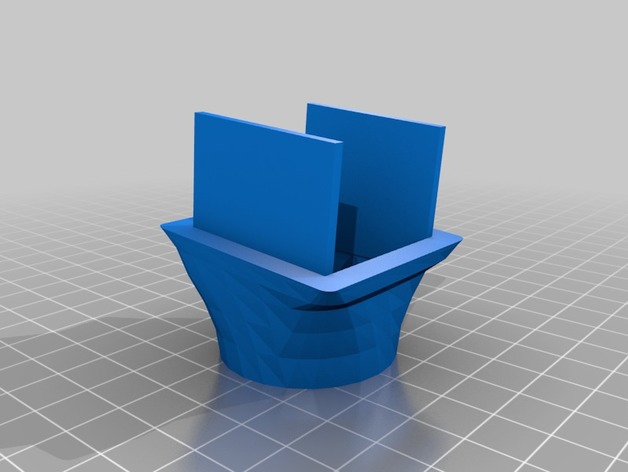
FT Simple Soarer Custom Motor Mount 3D Print Model
Summary
Custom motor mount for the Simple Soarer. This gives the Simple Soarer a much more aerodynamic front end.
IMPORTANT NOTE:
This has a 5 degree down tilt built in so make sure you put it with the motor wire hole on the top.
Print Settings
Rafts:
No Supports:
No Infill:
15% -
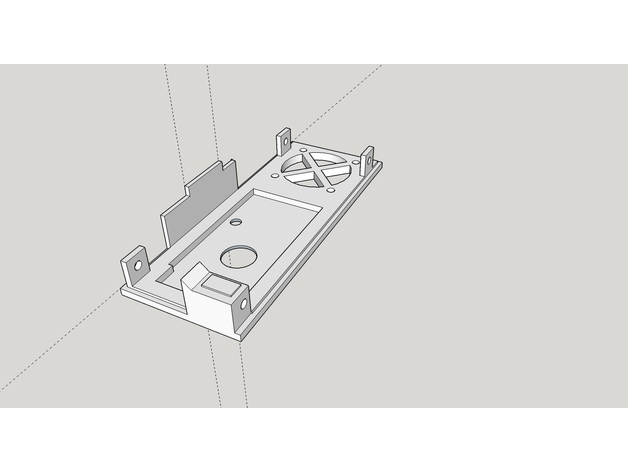
Case for Chorus RF Laptimer 3D Print Model
Summary
https://youtu.be/UfGwfbJc-js
Videotutorial completo del montaje de un cuentavueltas basado en el proyecto Chorus RF Laptimer de voroshkov, con la PCB de J.R.Reis. Cuentavueltas basado en la lectura del vtx que llevamos en nuestros drones. Material necesario, soldaduras, programación de arduino, configuración del modulo bluethoot, uso de la aplicación EXCLUSIVA para android y test del proyecto. No se detalla el esquema electrónico dando por hecho que trabajaremos sobre una PCB específica. De momento solo funciona con ANDROID. Se están buscando desarrolladores para iOS.
ACLARACIÓN DEL MONTAJE: El par de pines que hay al lado del buzzer son para cerrar/abrir (mediante jumper) la alimentación hacia los siguientes módulos desde el que tiene la batería. El modulo que queda a la izquierda del grupo debe de tener puenteado con un jumper los pines TX y RX ( del grupo de 4 pines abajo izquierda)
Si tenéis alguna duda, por favor hacérmelo saber en los comentarios del vídeo. Entre todos podemos aportar para hacer mas completo este videotutorial
HC-06
COMANDOS PARA EL MODULO BLUETHOOT (desde arduino IDE)
AT+BAUD8 – cambia el baud rate a 115200
AT+NAMEnombreelegido – sustituye “nombreelegido” por el nombre que quieras poner
AT+PINxxxx – sustituye “xxxx” por el PIN numérico que elijas
HC-05
Adaptador TTL: https://goo.gl/2RCeD2
solo cuatro cables necesarios; RX, TX, +5V y GND
(TX-RX cruzados)
Hay que conseguir entrar en el modo AT2 (pulsar el boton al conectar al TTL y soltar) parpadeo de led 1/seg
Ventana de comandos a 38400 baudios (Ambos NL & CR)
Introducimos:
AT+UART=115200,1,0
AT+NAME=NOMBRE
el pin será 1234
Con esa configuración funcionan perfectamente
Partir siempre de la configuración original
MATERIAL:
RX5808: https://goo.gl/f3nrkt
Arduino: https://goo.gl/SWZoyv
Modulo Bluethoot HC-06: https://goo.gl/yj4M19
Buzzer activo: https://goo.gl/E1DFay
BEC regulable. https://goo.gl/VhiGfR
Pines M-H 2.54: https://goo.gl/dcyU1B
HERRAMIENTAS
SOLDADOR: https://goo.gl/zMaVgp
BASE SILICONA: https://goo.gl/uBBGxT
FTDI: https://goo.gl/uZa7et
LINKS:
Proyecto original: https://github.com/voroshkov/Chorus-RF-Laptimer
Proyecto arduino (.zip): click en “clone or download”
IDE arduino: https://www.arduino.cc/en/Main/Software
APK android: https://github.com/voroshkov/Chorus-RF-Laptimer/blob/master/Android/ChorusRFLaptimer/app/ChorusRFLaptimer-release.apk
APK Maikel rf laptimer: próximamente…
Canal JLO fpv: https://goo.gl/t6yq5Q
Grupo de TELEGRAM: https://goo.gl/RDRACS
Comunidad de Facebook: https://goo.gl/qFVj8A
Instagram: https://goo.gl/1KCvPR
Print Settings
Printer:
STEEL PRUSA i3 Rafts:
Doesn’t Matter Supports:
No Resolution:
0,2 Infill:
40% -
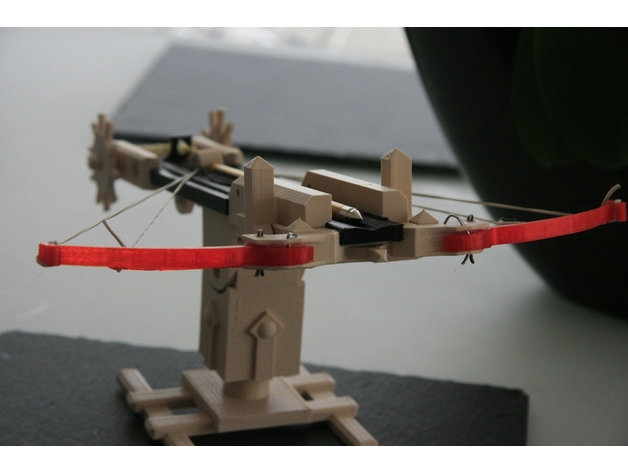
game of thrones crossbow 3D Print Model
Summary
It’s a replica of the crossbow in
Season 7 episode 4 of the game series of thrones
The total dimensions are: length / 261.731mm, width / 242.832, height121.001.they can rotate 360 degrees, crossbow arms can close exactly as in serial
DO NOT FORGET TO VIEW AND RESTORE THE PROJECTS FROM MY PROFILE
have fun
Print Settings
Printer Brand:
MakerBot Printer:
MakerBot Replicator+ Supports:
No -
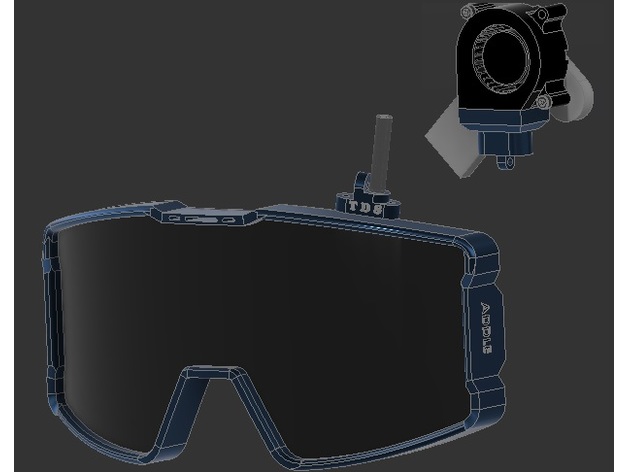
TDS Airsoft google cooling fan adapter 3D Print Model
Summary
An adapter for a standard 3d printer blower fan to two goggle mounts to immediately defog your goggles (or cool anything that needs cooling!)
requires .25in flexible tubing, a blower fan, and zipties
This is a little bit of a work in progress, the airblade in the goggle side probably needs adjusting be sure to leave me some feedback!
Like and Follow TDS Airsoft on Facebook for more stuff like this! -
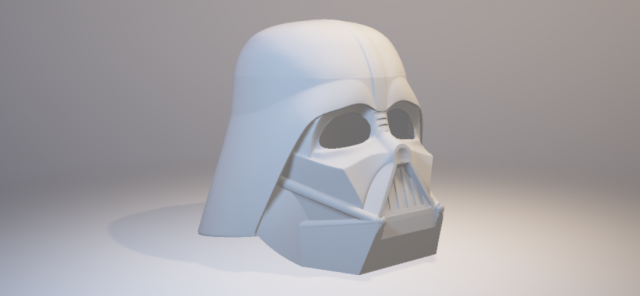
DARTH VADER helmet 3D Model
STAR WARS – DARTH VADER Helmet 100% 3D printableEnjoy & Happy Printing…more models at… wWw.medelis.se
-
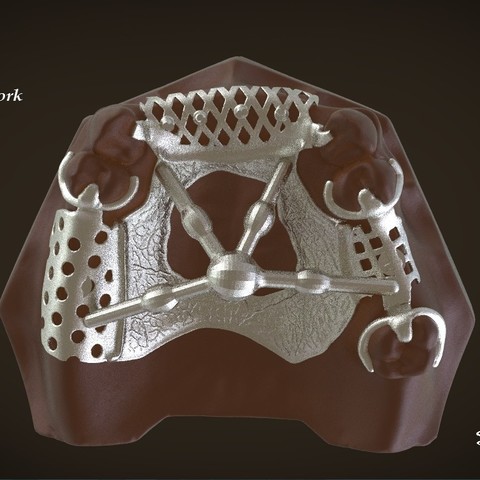
Digital Removable Partial Denture Framework 3D Print Model
Digital Removable Partial Denture Framework
-
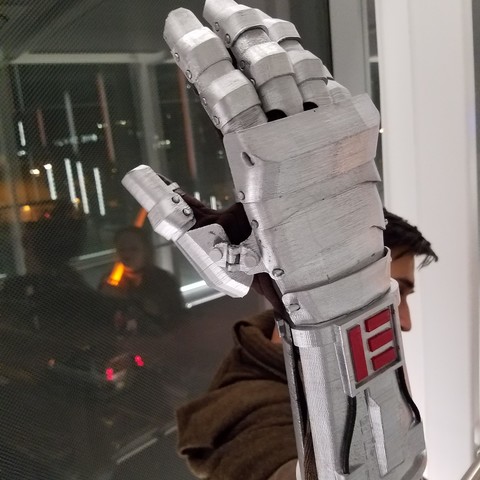
Star Wars Inspired Mandalorian Gauntlet 3D Print Model
This Gauntlet is FULLY PRINTABLE! The only extra thing needed is a glove for comfort! The Gauntlet is made for medium to large hands with a glove. Assembly is easy. Only the hinge connecting the thumb to the rest of the plates requires any type of adhesion. I just used the tip of a hot glue gun to heat up the cap and melt the plastic together forming a strong bond.
-
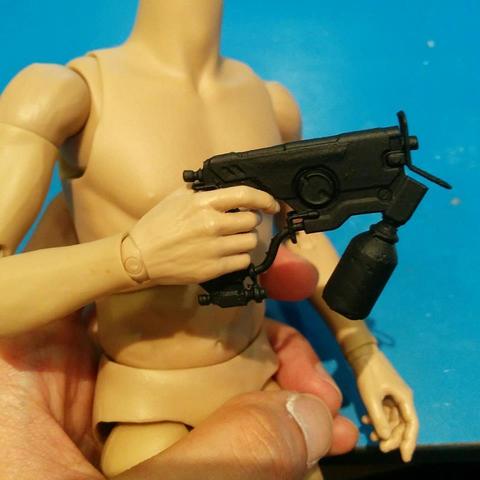
Tracer’s TraceMaker (1/6th Scale) from Overwatch 3D Print Model
This is a 1/6th scale model based in Tracer’s TraceMaker from the massively popular Overwatch game. It has been scaled to fit a 1/6th scale (or 12 inch) figurine.
-
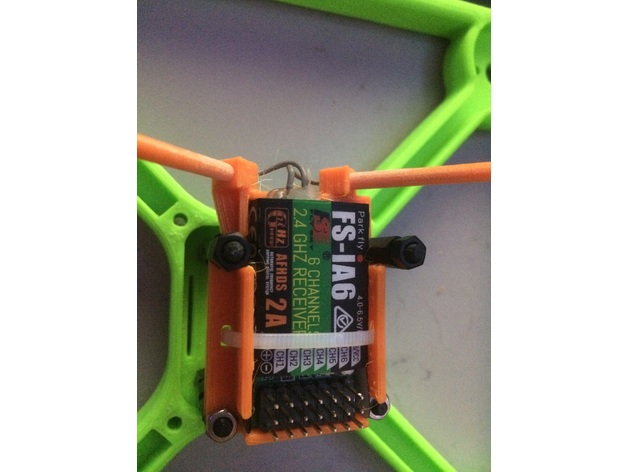
30.5 X 30.5 MM Mount for FS-iA6 Reciever w/ Antenna Tubes 3D Print Model
Summary
Receiver mount and antenna tubes for FlySky i6 Receiver, the FS-iA6. Designed to fit on the 30.5 X 30.5MM Mounting standard. I printed the antenna tubes one at a time vertically with 6 lines of raft, and then tapered the ends with sandpaper by hand for a tight fit into the base. Recommend 100% infill. .20mm layer height. -
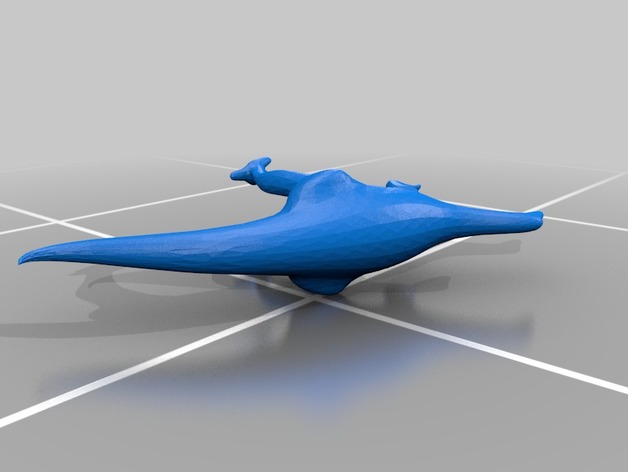
Dinosaur 3D Print Model
Summary
A simplistic dinosaur model capable of standing on its own. This is a good model for painting or practicing post production tactics, due to its relative simplicity.
Print Settings
Printer:
Monoprice Mini Rafts:
Yes Supports:
Yes Resolution:
0.06 Infill:
30% Notes:
It is suggested to print this on its side for optimal results
Post-PrintingHow I Designed This
Blender
I designed this in blender with the aide of a mirror modifier, and a subdivision surface at the end to smooth things over. -
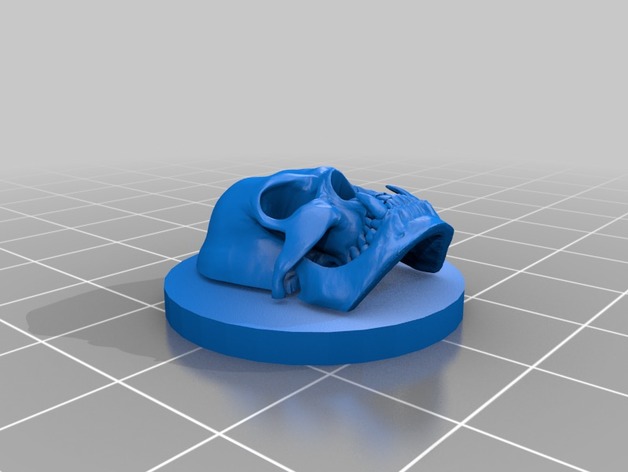
Orc Skull Death Marker 3D Print Model
Summary
On a 25mm base for tabletop gaming, replace an orc miniature with this when the creature hits 0 hp. It’s dead not prone. -
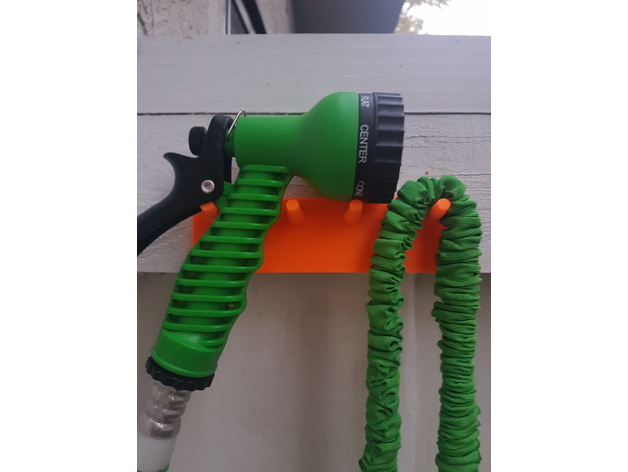
Little hose support 3D Print Model
Summary
I designed this to hang my garden hose out of the ground.
I has 4 little hooks bended up and two holes for screws.
Printed with PLA in my QIDI printer, took about an hour and I didn’t need any support.
Including the source files if anyone wants to modify it.
Print Settings
Printer:
Qidi Rafts:
Doesn’t Matter Supports:
No
How I Designed This
Using 3D Studio Max 2015 -
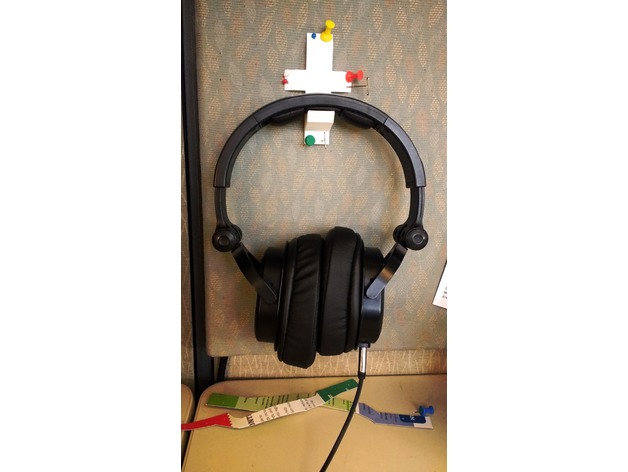
Headphone holder 3D Print Model
Summary
Headphone holder, using a corkboard for mounting 🙂
it’s one of those odd things that probably won’t do most people any good but i love it.
Print Settings
Printer:
Monoprice mini v2 Rafts:
No Supports:
Doesn’t Matter Infill:
20% -
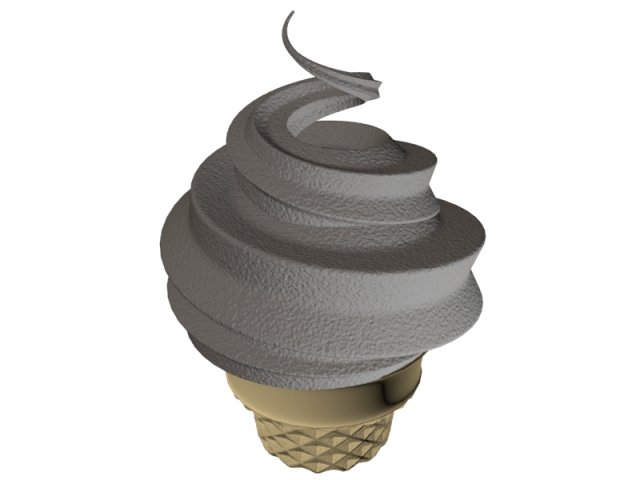
Mini Ice Cream 3D Model
High quality model. Mni Ice Creamversion : 3ds Max 2014Render : V-Ray 2.40.30Format : STL filewidth : 20mmHeight : 20mmDept : 33mmThe RAR file includes MAX file, FBX file, 3DS file, STL file.
-
Z-15 Stealthy Tomcat 3D Print Model
This is inspired by the famous F-14 Tomcat and the F-24 concept from the ATF program. For those who don’t know the F-24 concept is basically a naval version of the F-22 with variable-sweep wing. Unfortunately, it remained as a concept.
-
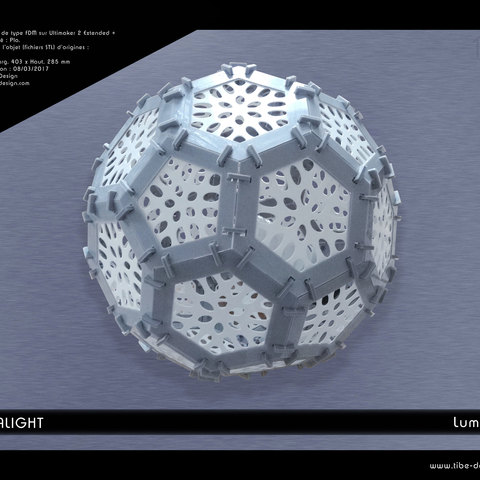
Hedralight Lighting 3D Print Model
This pretty fully customizable luminaire is intended for a cold E27 bulb (electric kit not provided). It is made up of several pieces that assemble by clipping them (neither glue nor screws). There are several different patterns to choose from. You are spoiled for choice of pattern and color to brighten your interior decoration. You can choose to use this luminaire as a table lamp or as a pendant lamp. For suspension mode, you can also choose it either as a half-sphere or as a complete sphere.
-
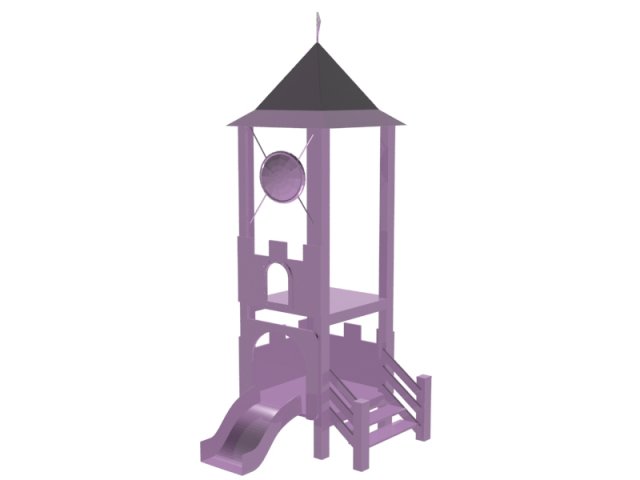
Playground equipment 3D Model
High quality model. playground equipmentversion : 3ds Max 2014Render : V-Ray 2.40.30Format : STL filewidth : 49.36mmHeight : 100mmDept : 39.9mmThe Zip file includes MAX file, FBX file, 3DS file, STL file.
-
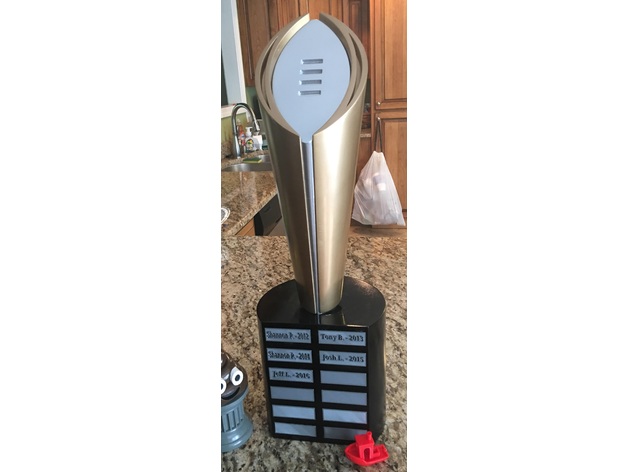
Base with Name Plates 3D Print Model
Summary
Base is designed at 62% scale. So trophy will need to be printed at 62% scale and base at 100%.
Link to Name Plates: https://www.tinkercad.com/things/cfAT1RvVRy2-name-plates. I printed the name plates upside down at .1 and issues a color change at .7. Name plates should press-fit to allow removal of the blanks.
Print Settings
Printer Brand:
Prusa Printer:
i3 MK2S Rafts:
No Supports:
No Resolution:
.20 Infill:
10% -
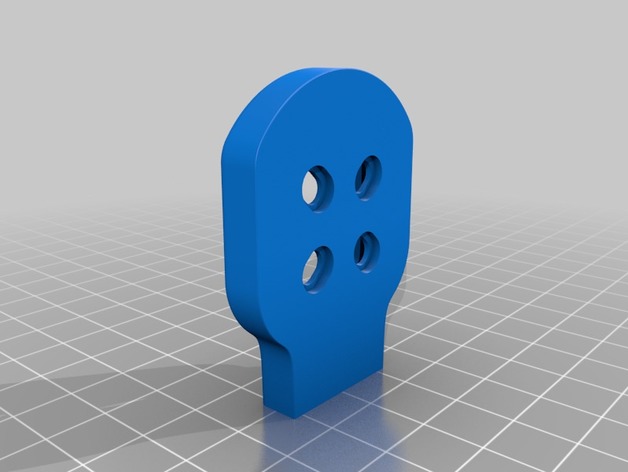
Epiquad 210x – arm protectors 3D Print Model
Summary
The rock solid carbon fiber plates of the Epiquad can handle a lot, but I like a bit of protection for indoor flying. So I created these arm protectors voor de 210x version.
I printed this with TPU with at least 50% infill and 3 lines for wall. This is how you get a nice bumper that can handle some scratches from concrete.
EpiQuad 210x Low Rider Edition – https://droneracingparts.nl/epiquad210x
Also check my other protectors and mounts for the EpiQuad.
Print Settings
Printer:
Prima Creator P120 Rafts:
No Supports:
Yes Resolution:
0.2 Infill:50%
Notes:
I really like the zigzag supports of Cura. With these you can remove the support underneath the edge, in one simple move. -
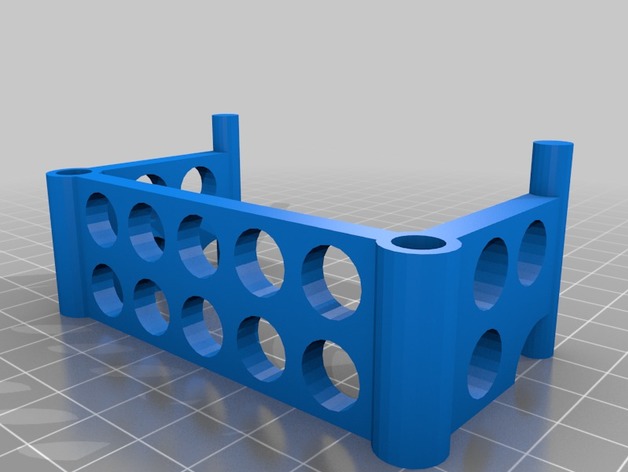
Wanhao Duplicator 4x Filament Alignment Bracket 3D Print Model
Summary
Filament alignment bracket to fit Wanhao Duplicator 4x -
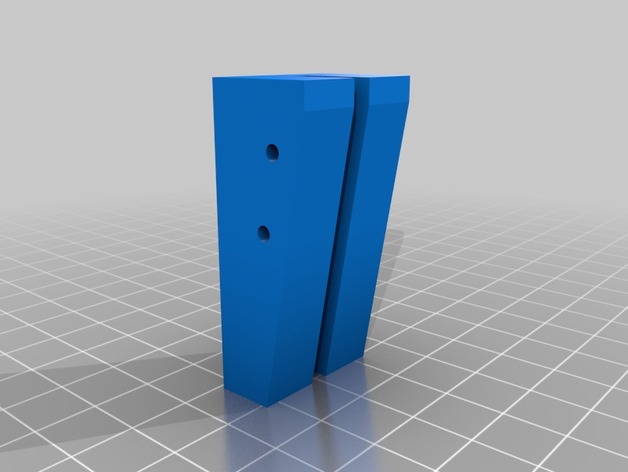
Caliper adapter to measure wider objects 3D Print Model
Summary
To measure a steel wire. Print 2.
Print Settings
Printer:
Tevo tarantula Rafts:
No Supports:
No Resolution:
0.2-0.25 Infill:
20% -
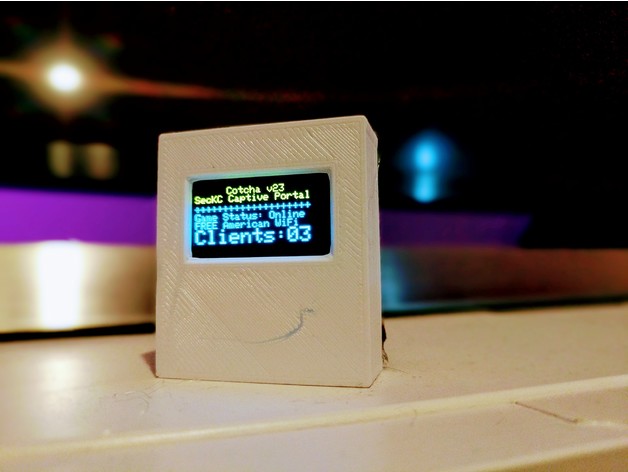
SecKC Cotcha Case 3D Print Model
Summary
Case for SecKC Cotcha for ESP8266 & SSD1306 (multicolor). See more at SecKC.org
Print Settings
Printer:
Monoprice MP Select Mini Rafts:
No Supports:
No Resolution:
.02 Infill:
10% Notes:
Bed 55
Nozzle 195
PLA 1.71mm
102% -
Tassimo – Capsule holder 3D Print Model
195mm capsule holder for Tassimo coffee machine.
-
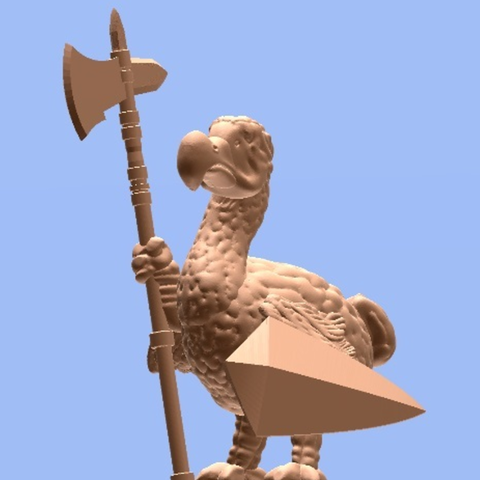
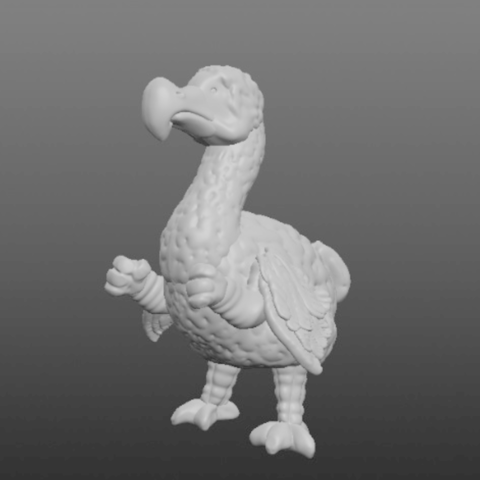
Dodo Guard (28mm/Heroic scale) 3D Print Model
This character was designed for tabletop roleplaying/wargaming.
-
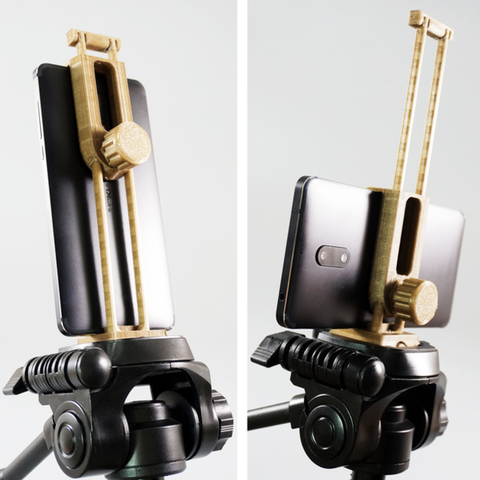
Tripod expansion “Phone stand ” 3D Print Model
size : 185X53X45mm
files : 3 pieces : 7
total print time: 03:00 -
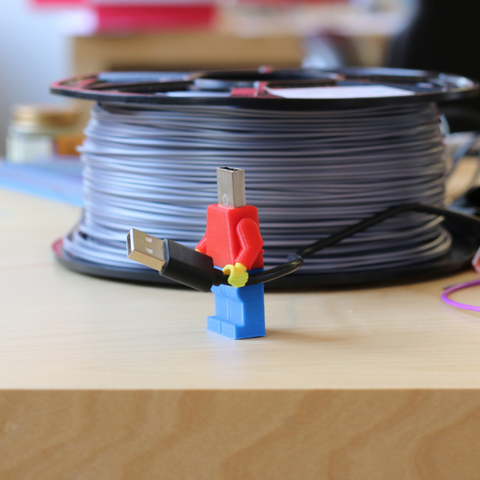
Multi-Color Lego Figure USB Drive Case 3D Print Model
Is that Lego’s head stuck in our computer ?! It definitely looks like it with this multi-color Lego figure USB drive case.
-
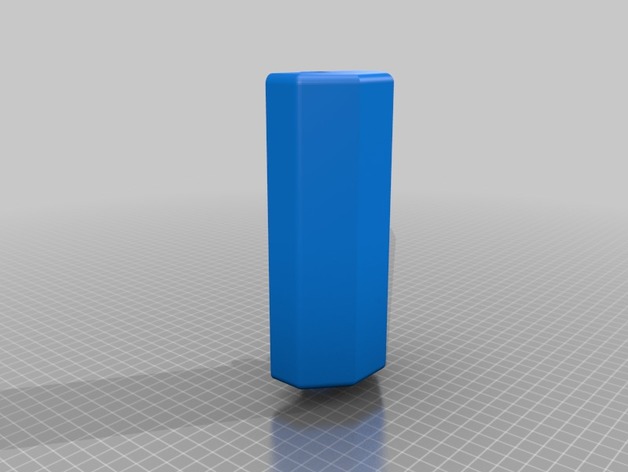
Magic chef replacement ice bucket 3D Print Model
Summary
Replacement ice “bucket” for my magic chef ice maker. Mine cracked and started leaking rusty water from the motor and the alternative is $20-30 (37 from Amazon/prime)
Not quite at the final design, but will update when I am. Designed it as two parts because it’s just beyond a 200mm bed. The long this party was the easiest to cut off and make assemblable. Just bolt with a 40(?)mm m3 bolt, nut and locking washer.
Print Settings
Printer:
Da Vinci Rafts:
No Supports:
Yes Resolution:
0.2mm Notes:
Supports will probably help. 0.2 or lower, but you will want to acetone/vapor polish to make it (more) food safe. Do all this at your own risk, I take no responsibility, etc. -
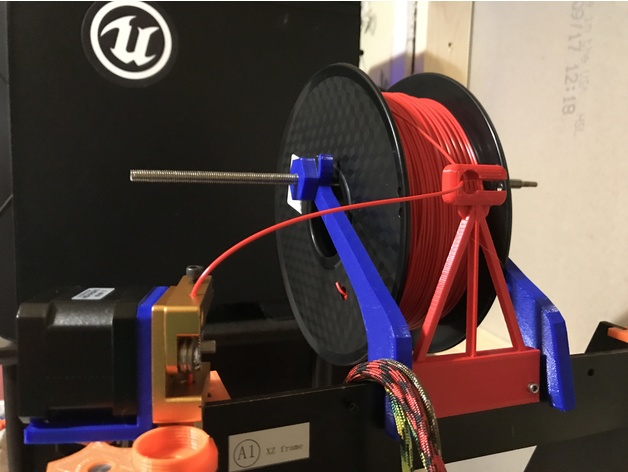
CTC Filament Guide 3D Print Model
Summary
This is a simple filament guide. This can be placed in front of the spool in order to keep the process simple.
Print Settings
Printer:
CTC Prusa I3 Rafts:
No Supports:
Yes Resolution:
.3mm Infill:
50% -
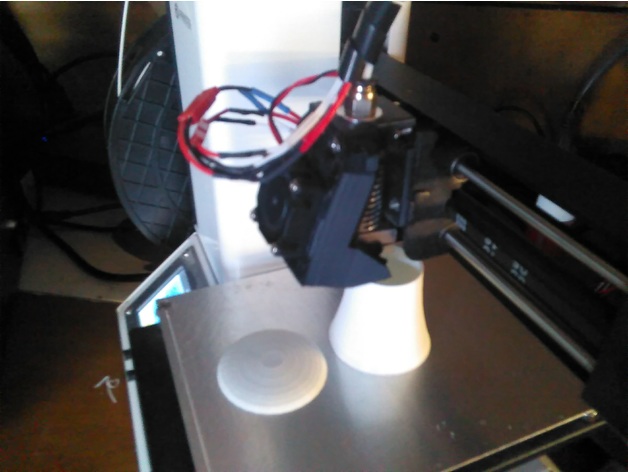
Monoprice Select Mini E3D 30mm single fan hotend and nozzle cooling 3D Print Model
Summary
I wanted to upgrade my MP select mini (V1) with an e3d hot end, but couldn’t find a holder for it that didn’t require an additional new fan. The closest I could find was Toolboxx’s upgrade for a single fan, but that still assumed I would be switching out the fan for a 40mm fan. So I did a simple remix.
All the 3D printed parts you need are included. You will need 2 M3x15mm screws and M3 bolts. -
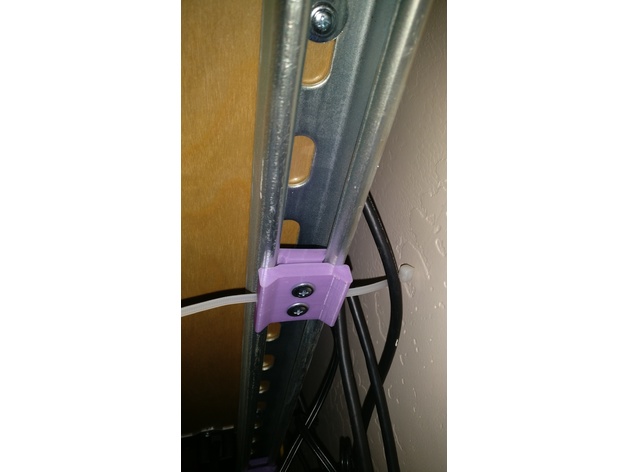
UniStrut Zip Tie Attachment 3D Print Model
Summary
Screws: http://www.homedepot.com/p/Everbilt-8-3-4-in-Lath-Sharp-Point-Screw-1-lb-Box-215-Pack-116102/205142852
Zip-Ties: https://www.lowes.com/pd/Utilitech-800-Pack-8-in-Nylon-Cable-Ties/999971176 -
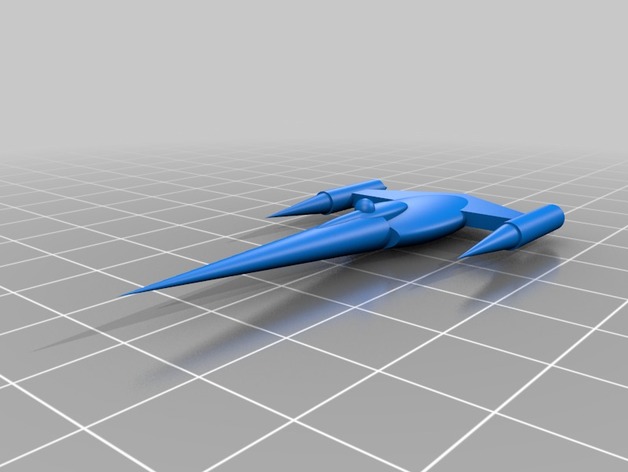
N-1 Starfighter 3D Print Model
Summary
The N-1 Starfighter, a sleek starfighter that’s eco friendly, the signature of the Naboo military, flies on a small base. -
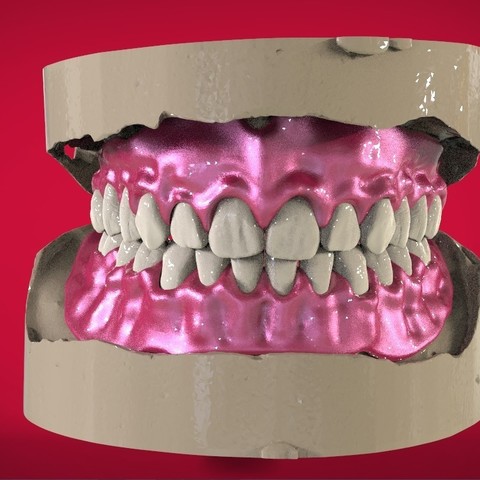
Digital Full Dentures for 3D Printing, Milling & Injection Molding 3D Print Model
Digital Full Dentures for 3D Printing, Milling & Injection Molding
-
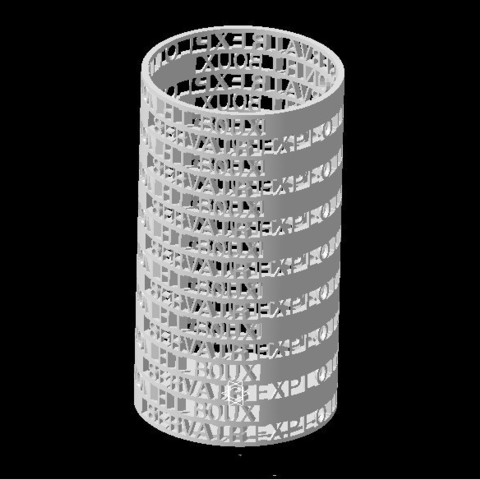
PERSONALIZABLE PENCIL PORTRAIT SERVAIR EXPLOITATION HIBOUX SERVAIR 3D Print Model
SERVAIR EXPLOITATION HIBOUX SERVAIR
-
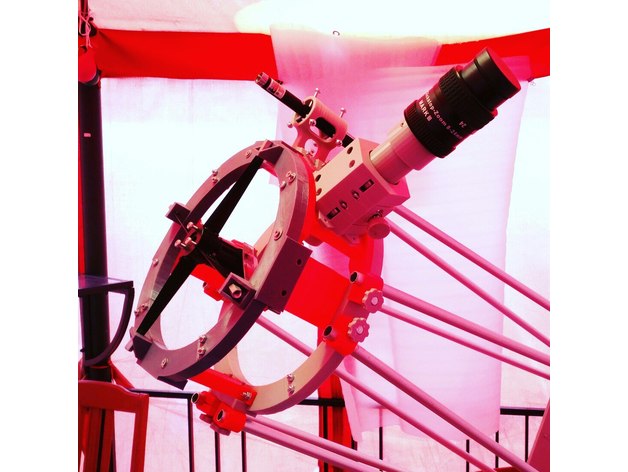
ABSFCS-1.25 focuser 3D Print Model
Summary
ABSFCS-1.25″
Crayford focuser… The version .. 0.1b
will be upgraded
624zz bearing 6
bolts M4 25mm 4
bolts M3 30mm 4
nuts M3 4
bolt M4 70+mm 1 -
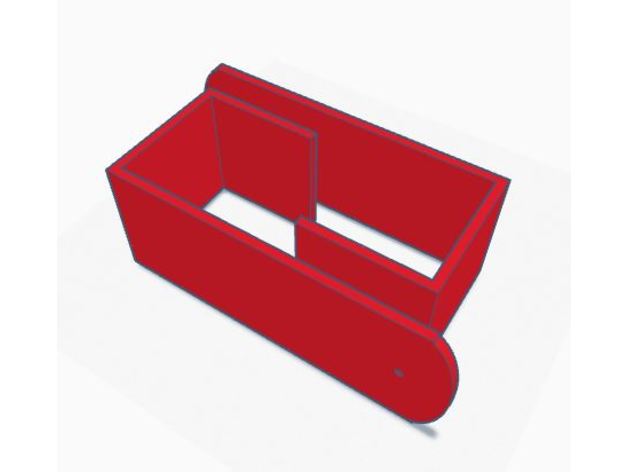
Office divider calendar hangers 3D Print Model
Summary
I needed a way to hang a large calendar from an office divider. I printed 2 of these with holes to put hooks into. You could also use Velcro. Created in Tinkercad
Print Settings
Printer:
Anet A8 Rafts:
Yes Supports:
No Resolution:
.15 Infill:
50%
Post-Printing -
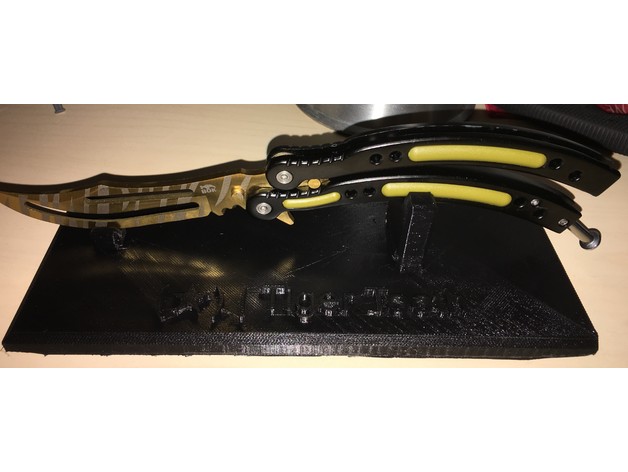
CSGO Butterfly Knife Stand 3D Print Model
Summary
A small stand for my Butterfly Knife replica Tiger Tooth.
I know my print looks bad, but you can do it better 😀
BTW I added a clean one without the Name.
Enjoy
Print Settings
Printer Brand:
Prusa Printer:
Prusa Clone Rafts:
No Supports:
No Resolution:
100 micron Infill:
14% -
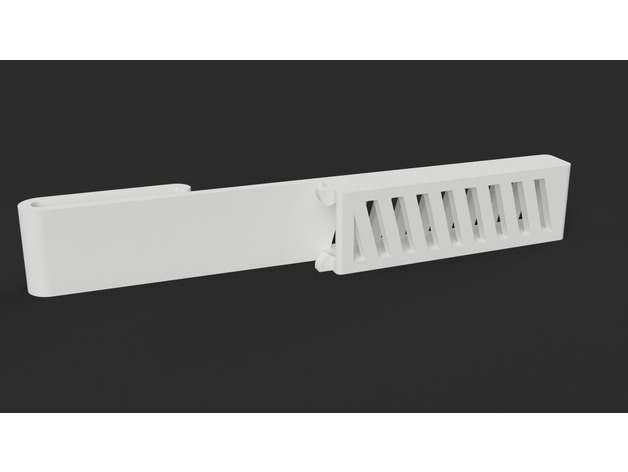
Bundeswehr Besteck Halter 3D Print Model
Summary
This is a belt holster for german Bundeswehr cutlery. It snaps right in.
Print Settings
Printer:
Creality CR-10 Supports:
No Resolution:
0.2 Infill:
20% Notes:
Janbex White PLA 1.75 @ 190°C – 60°C Buildplate
Post-Printing
Free Snaps
The springy bits of the design may be stuck to the main body, so you have to cut them free.
To be able to print with no supports, the file is split into two parts, they have to be glued together afterwards. I have made very good experiences with using regular superglue. -
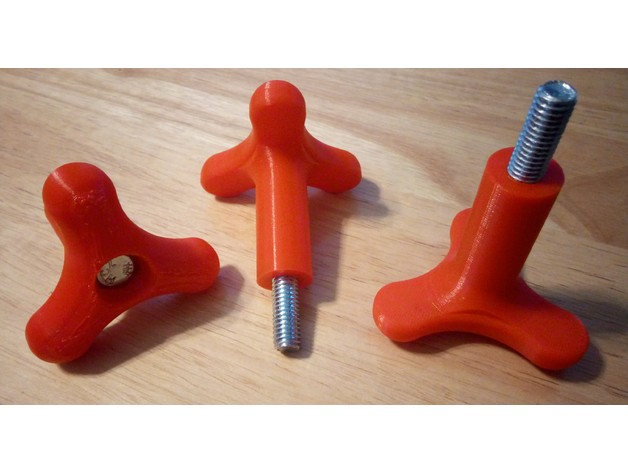
Celestron C8 Tripod Bolts 3D Print Model
Summary
These are customized “Smooth n’ Curvy” knobs designed for mounting my Celestron 8″ GPS telescope to its tripod. They use 3″ long 3/8″ bolts, leaving 1″ protruding from the knob. Depending on your printers dimensional accuracy, you may have to ream the hole out with a 3/8″ drill bit so you can press the bolt in. Recommend flipping the model so knob side is down and printing with supports.
Print Settings
Printer:
Monoprice Maker Select Rafts:
Doesn’t Matter Supports:
Yes Resolution:
.2mm Infill:
20% Notes:
Recommend printing with at least 3 walls so you can ream if needed with a 3/8″ drill bit. -
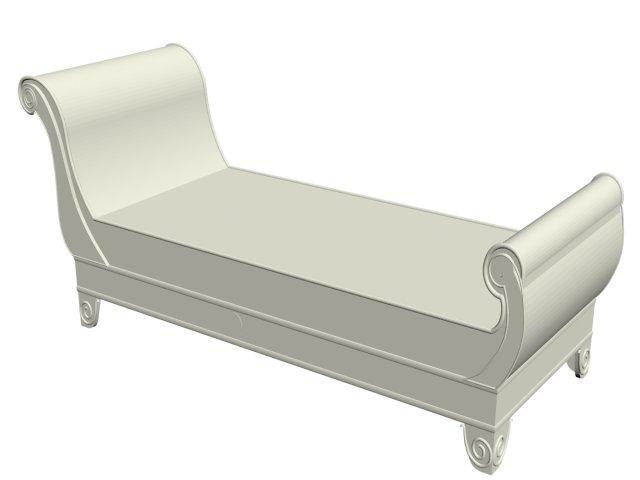
Couch 3D Model
High quality model. Couchversion : 3ds Max 2014Render : V-Ray 2.40.30Format : STL filePrinting Model Size :Height : 33mmWidth :70.65mmDept: 26.68mmThe Rar file includes STL file, Image for product
-
SPINNER ULTIMATE (SMALL HOLE) 3D Print Model
This is a classic Spinner model with the smallest gap for all those who have smaller bearings which have a longer turn time, and is more resistant to knocks and falls with a more modern design.
-
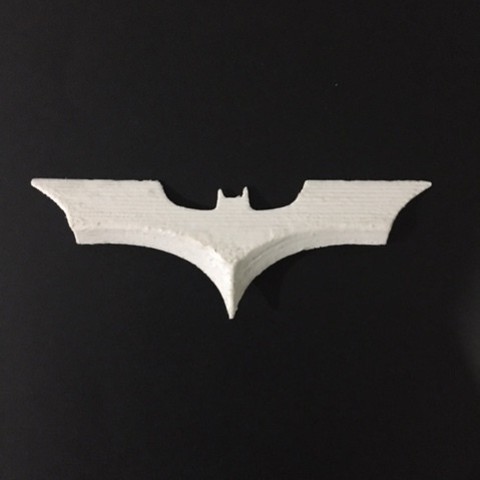
BATARANG !!! 3D Print Model
It is the best model of a Batarang !!! With a spectacular design and incredible cutting ability! You can do it the size you want by expanding it !!!
-

Morsmordre (Harry Potter) ‘Pendant’ 3D Print Model
Morsmordre used by Death Eaters, Voldemort’s followers.
This creation can be used as pendant, keychain or whatever you want. -
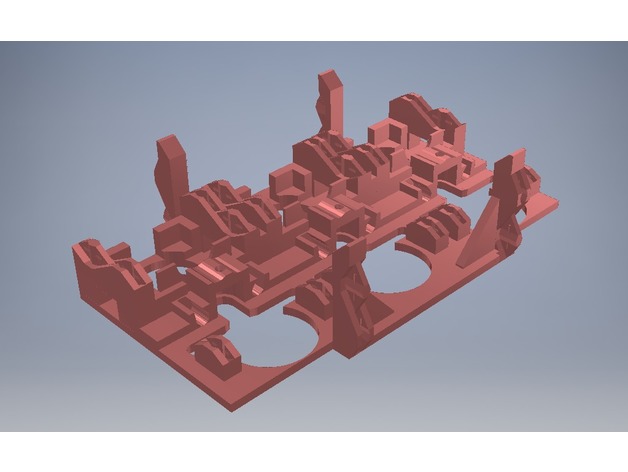
RepRap Snappy jhead platform triple extruder 3D Print Model
Summary
I took the jhead extruder mount and patterned it so that two more extruders can be added. I’m not 100% happy with how the extruders stick out, so the part will probably be modified after a little testing. -
Big Collection Of Random Band Logos 3 3D Print Model
Summary
This time it’s random band logos. I included the .SVG files I used to create the .STL files with. As always feel free to use this in anyway you please and if you come up with a great design please take all the credit. Just doing this to pass the time.
If you have a suggestion or request, leave it in the comments. I’ll get to it as fast as I can -
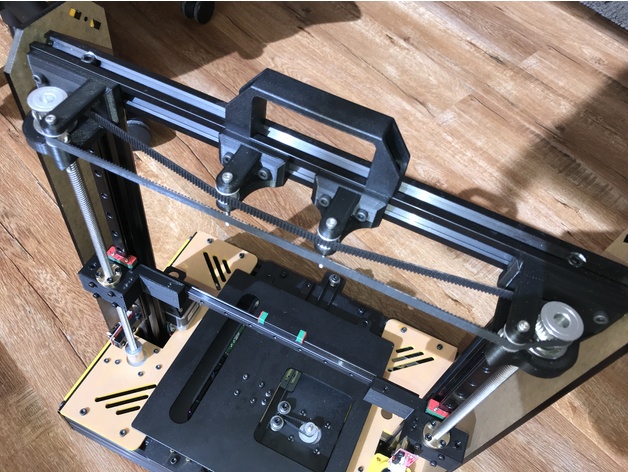
Prusa i4 Single Stepper Belt Driven Z Axis Modification 3D Print Model
Summary
Never one to just assemble the kit, here is one of the modifications I’m making to my Prusa i4 before I have it up and running.
Required parts:
2 x GT2 Timing Gear Pulley 30 Tooth Bore 8MM
2 x 608Z Flange Bearing
8 x M5 bolt
8 x T-Nut for 20×20 TSlot
4 x M3 bolts at least 20mm long
2 x GT2 Timing Gear Pulley 16 Without Teeth Bore 3MM
2 x GT2 Timing Gear Pulley 16 Tooth Bore 3MM
2 x Anti Backlash Spring Loaded Nut for 8mm Threaded Rod Lead Screws
1 x Bearing Block KFL08
1 x A 6R51M345060 GT2 Belt
Print Settings
Rafts:
Doesn’t Matter Supports:
Yes Resolution:
0.2mm Infill:
15% Notes:
I didn’t add supports in the horizontal holes -
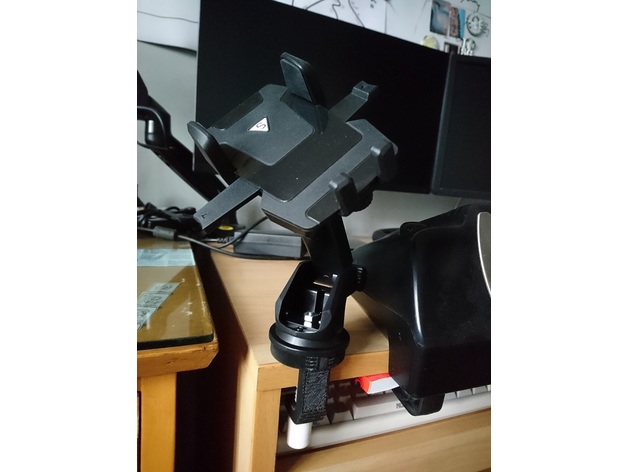
G-Clamp for replacing smartphone holder suction cup 3D Print Model
Summary
It is designed to replacing the suction cup of a smartphone holder.
You will need to remove the suction cup and use an M6 screw and bolt to fix it to the holder.
Please use the screw and clamp protector from the original design.
Print Settings
Printer Brand:
Ultimaker Printer:
Ultimaker 2 Extended Rafts:
Yes Supports:
Yes Resolution:
0.15mm Infill:
20% Notes:
Notes:
Resolution and infill don’t matter much. -
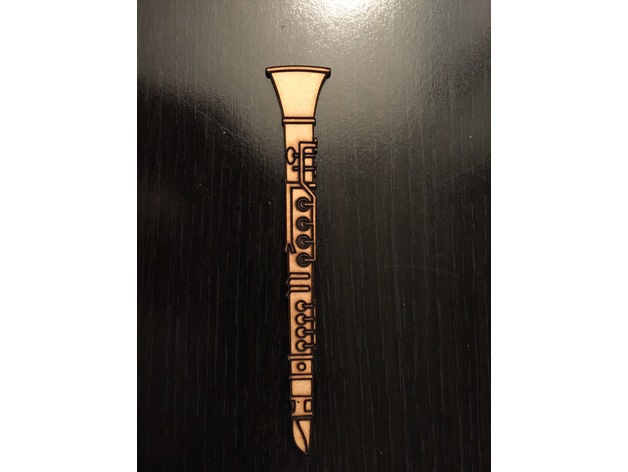
Clarinet (Laser Cut) 3D Print Model
Summary
I had designed this clarinet for someone. I thought to share it also with the Thingiverse community.