Summary
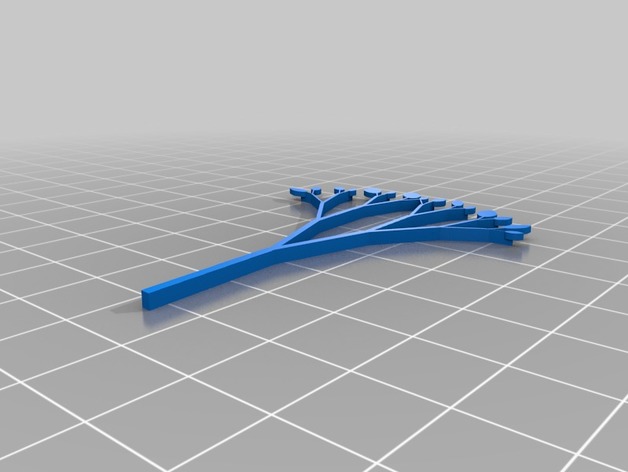
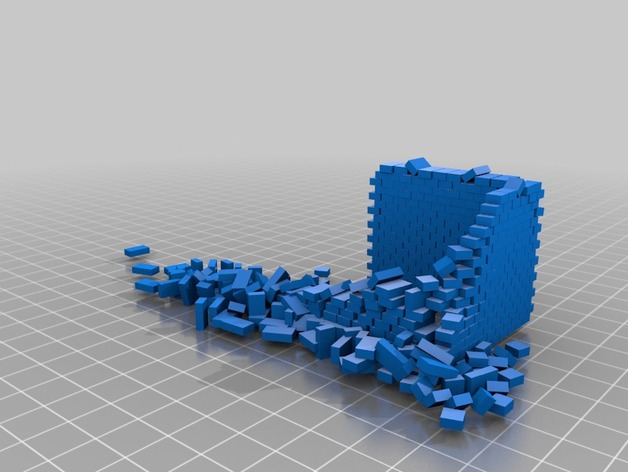
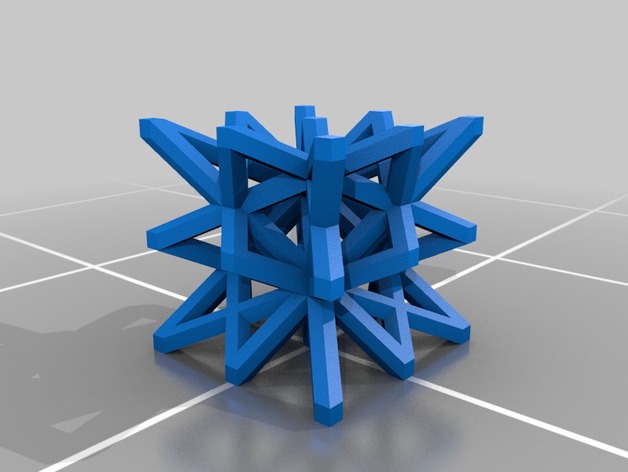
This is a code by a french mathematician from Thingiverse, except I can’t find their name and page. The cube goes flat with nbr = 4 and 6 10 14 18 22
Author: Thingiverse
-
lissajous spirograph 3D Print Model
-
Led lamp holder 3D Print Model
Summary
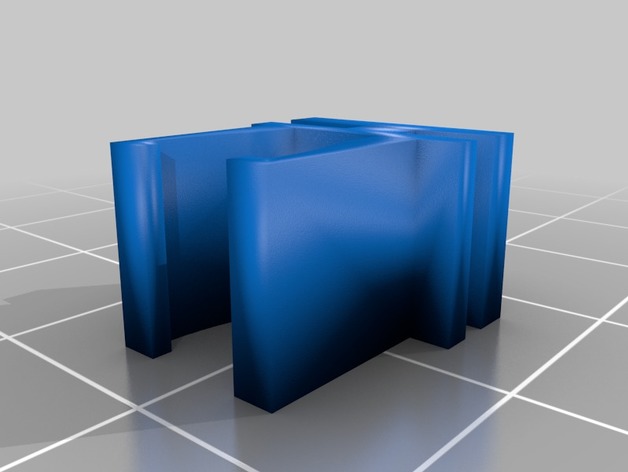
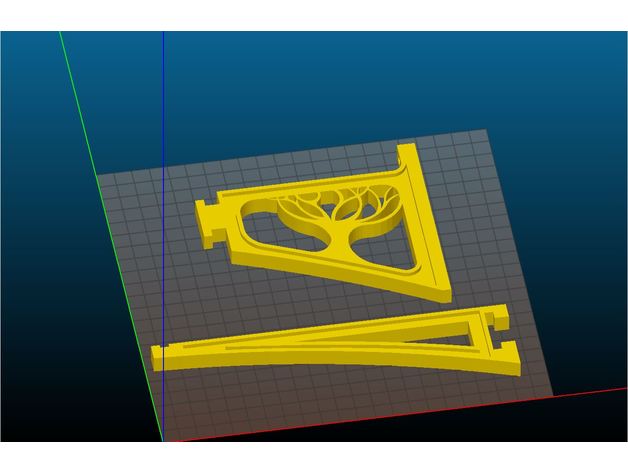
Led lamp holder for this led lamp:https://www.amazon.it/gp/product/B01HO2OIHW/ref=oh_aui_detailpage_o02_s00?ie=UTF8&psc=1
Made in two parts. -
Octopus Stand V3 portable 3D Print Model
Summary
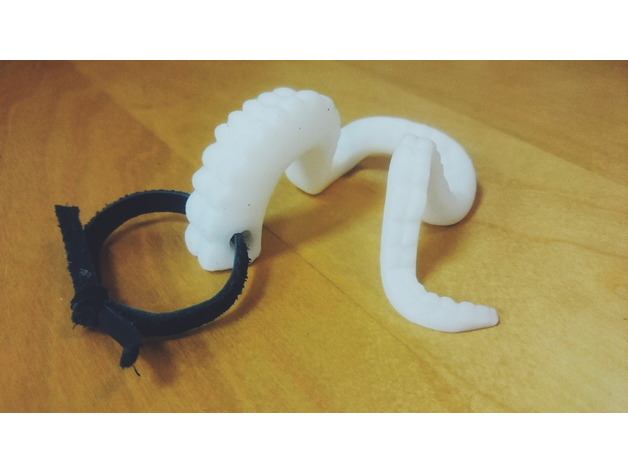
It’s a remix from notcolinforreal’s Octopus Standhttps://www.thingiverse.com/thing:607518
Put a hole on it to make it portable.
Print Settings
Printer Brand:
Zortrax Printer:
Zortrax M200 Rafts:
Yes Supports:
Yes Resolution:
0.14 Infill:
Mediem -
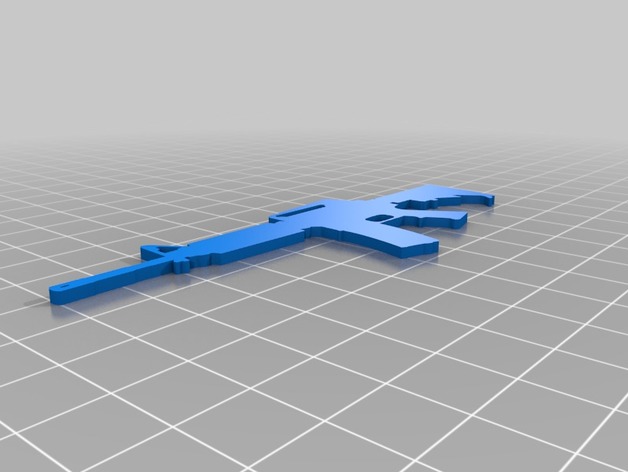
AR-15 Silhouette 3D Print Model
Summary
I love making silhouettes here is an AR15 silhouette
Print Settings
Printer:
CR10 Rafts:
No Supports:
No Resolution:
0.3 Infill:
100 -
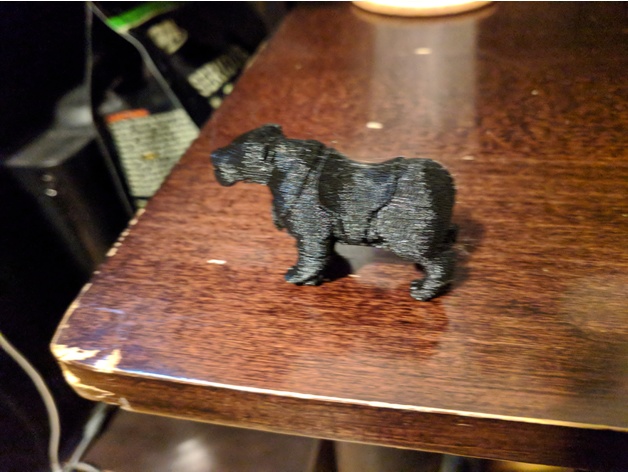
Wizard101 – Bengal Tiger 3D Print Model
Summary
This is straight from the game’s files.I smoothed it out in 3ds Max, so it looks a bit more smoother than the one in the game.
Print Settings
Printer:
Anet A8 Rafts:
No Supports:
Yes Resolution:
.2 Infill:
10 Notes:
Be careful with the supports. I printed it in the position that it is in the stl file, and the legs broke off (had to superglue it). The tail snapped off as well, but I left it out in the pictures because I thought it looked better without it. -
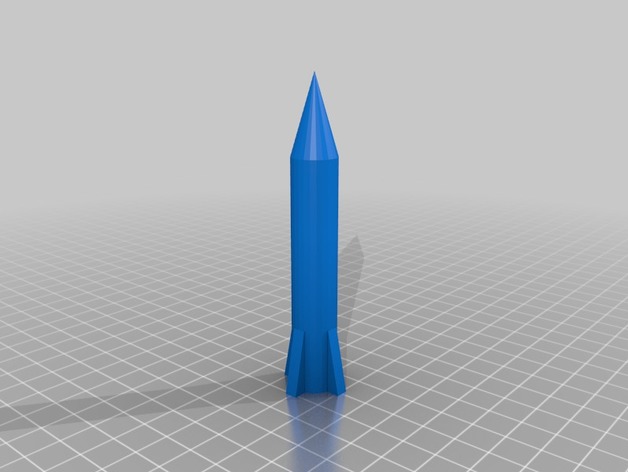
Rocket 3D Print Model
Summary
A simple rocket. I give credit to Tinkercad for the software in creating this. -
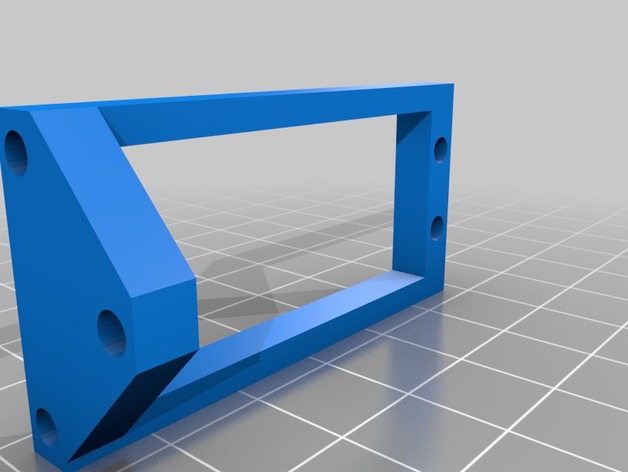
Feiyue FY-03 1/10 mg995 servo mount 3D Print Model
Summary
This is a vertical adapter for the Feiyue FY-03 to fit a TowerPro mg995
You need to mark out and drill/melt 3 new holes in the base of the car to fit this new mount for your steering servo. (I have no phone at the moment, pics will be added soon.)
Freecad included -
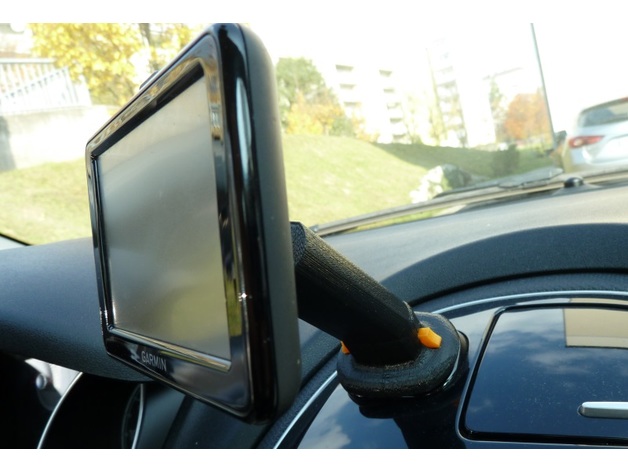
Fiat-Garmin mount 3D Print Model
Summary
Perfect for my Fiat Punto. Matching steel spring (from a ballpoint pen) is needed.
Print Settings
Printer:
Anet A8 Rafts:
No Supports:
No Resolution:
0,2 -
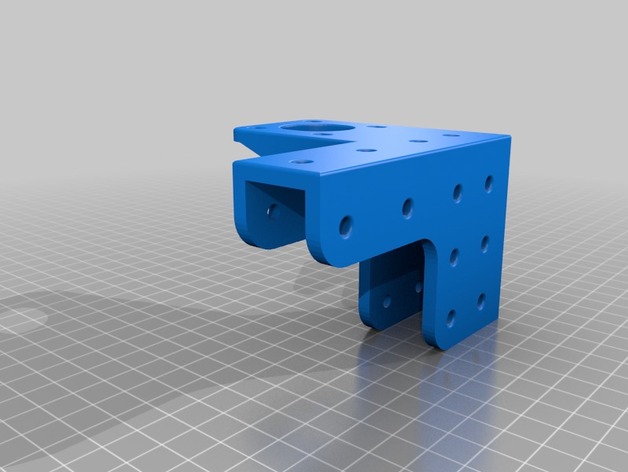
Modified R_Z_Top bracket 3D Print Model
Summary
Modified R_Z_Top bracket, moved the Stepper bracket to the far right to so that my ‘Oldham’ does not foul the X Carriage. -
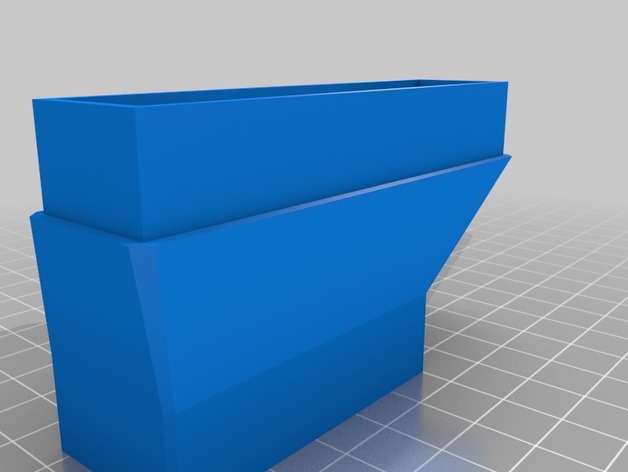
Xeon Phi passive-to-active cooling adapter 3D Print Model
Summary
This is a simple blower fan adapter for the Intel Xeon Phi coprocessor. With this you can adapt a blower fan to the Phi to make a passively cooled coprocessor become actively cooled. This is ideal for use in systems that do not otherwise have enough cooling capacity to cool passively cooled devices such as Nvidia Telsa P100 or V100 GPUs. -
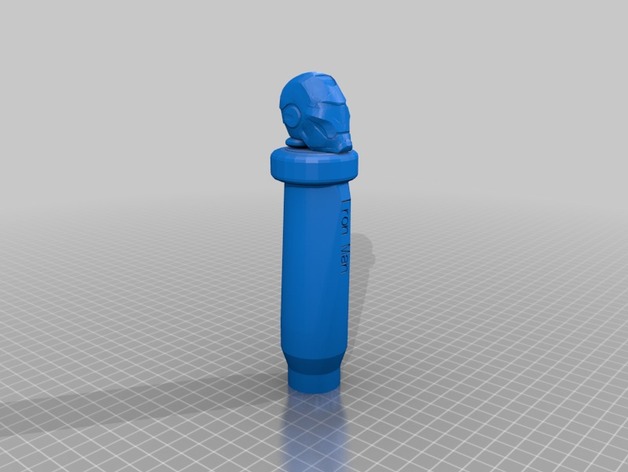
Iron Man Tap Handle 3D Print Model
Summary
An Iron Man Tap Handle I made for my kegerator. I printed in PLA at 75% with support. The hole in the bottom is for a tap handle insert. Print, remove the support including the support inside the hole in the bottom, and thread in the insert. If the hole is too small, heat up the insert and you can thread it in hot because it melts the PLA.
Print Settings
Printer Brand:
Robo 3D Printer:
R1 ABS + PLA Model Rafts:
Doesn’t Matter Supports:
Yes Infill:
75% -
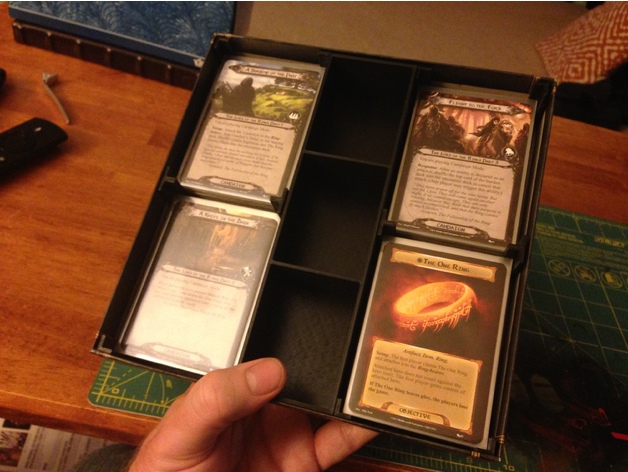
FFG LCG Deluxe Box Trays 3D Print Model
Summary
This is a set of card and token holders for several of the Fantasy Flight Games LCGs. This will work in any of the games that use the older style boxes with a removable lid. These include the Star Wars LCG and Lord of the Rings LCGs. Unfortunately, FFG has moved towards a cheaper tuckbox style for their newer LCGs. The card holder is designed to work with standard FFG “gray” card sleeves.
I like to print the components separately, but did include a file with the three pieces together.
Print Settings
Printer Brand:
Prusa Printer:
i3 MK2S Rafts:
No Supports:
No Resolution:
0.2mm Infill:
N/A -
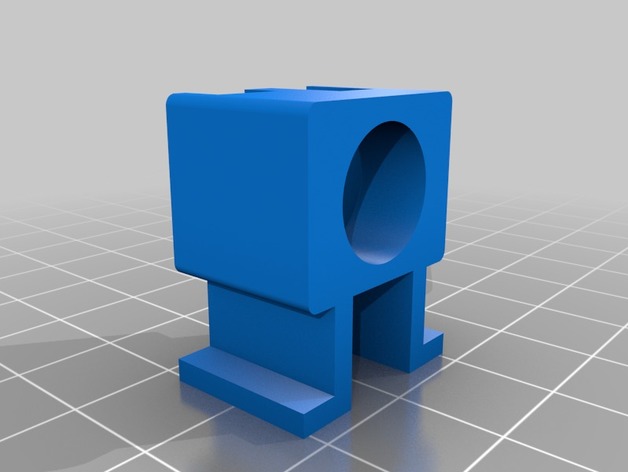
Nerf FPV 3D Print Model
Summary
Experience your Nerf battles in a new way.. Mount this FPV system on a Nerf gun, find an open and safe area, put a set of goggles on and battle away. Add a DVR system and record your battles in first person view, it’s like playing a video game but you are in the game.
Print Settings
Printer Brand:
Robo 3D Printer:
R1 ABS + PLA Model Rafts:
No Supports:
No Resolution:
.100-.300 Infill:
100% Notes:
Some sanding may be required to achieve a clean fit.
How I Designed This
fusion 360 -
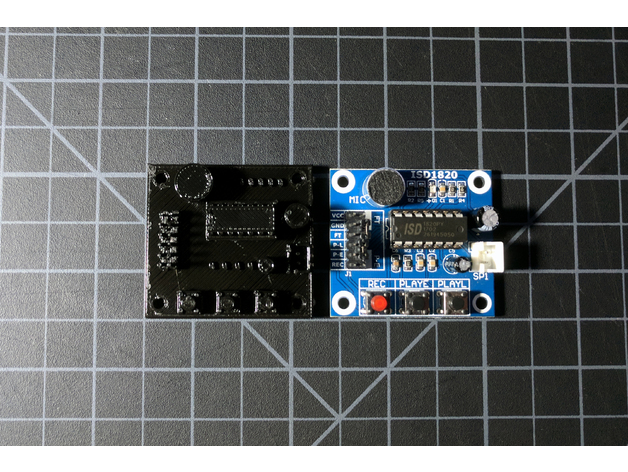
ISD1820 Recording / Speaker Module Placeholder 3D Print Model
Summary
This is a placeholder you can print and/or incorporate into your models in place of an ISD1820 recording/playback module PCB. Useful for planning or test-fitting the module into your prints or other projects.
There are many variants of the ISD1820 and similar recording modules available online, but this is the one I used for this design: https://www.amazon.com/gp/product/B01I37DBNE
OpenSCAD file is included if you want to modify the geometry.
Print Settings
Printer Brand:
Prusa Printer:
Prusa Clone Rafts:
No Supports:
No Resolution:
0.3 Infill:
20 -
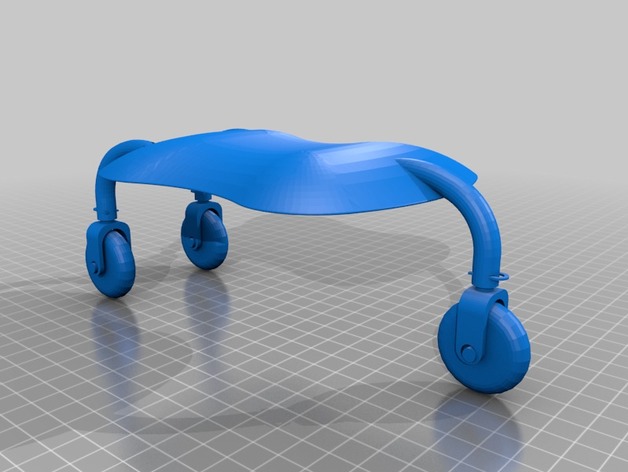
Teal drone on wheels 3D Print Model
Summary
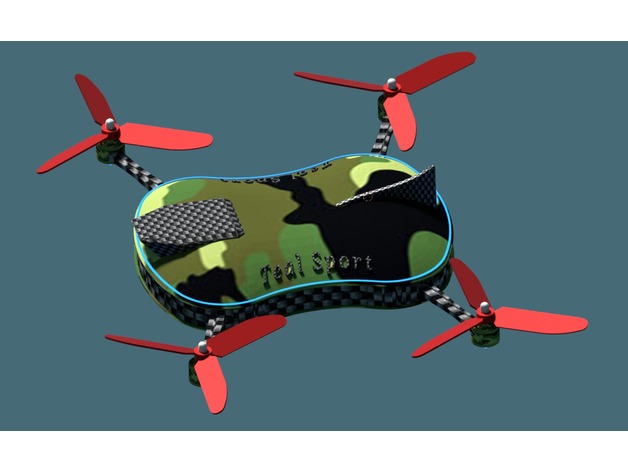
Teal drone with swivel wheels, use for taxiing on surface to takeoff-point or after landing taxiing toward you…. you can also try some joyriding 😉
Print Settings
Printer:
k8200 Notes:
print 1x body, 3x wheel, 3x wheel support and 3x clip -
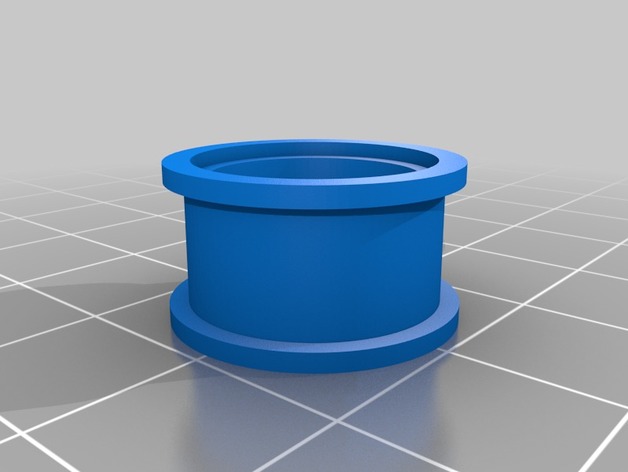
CR-10 X & Y Tensionser Remix Kit 3D Print Model
Summary
So I had some issues with both x and y tensionsers I found here and ended up redesigning some of the parts. After the parts are all printed and the existing pulley/tensioner assemblies, switch the bearings and add the bearing jacket and insert on each one. This is a work in progress so the parts are subject to change. -
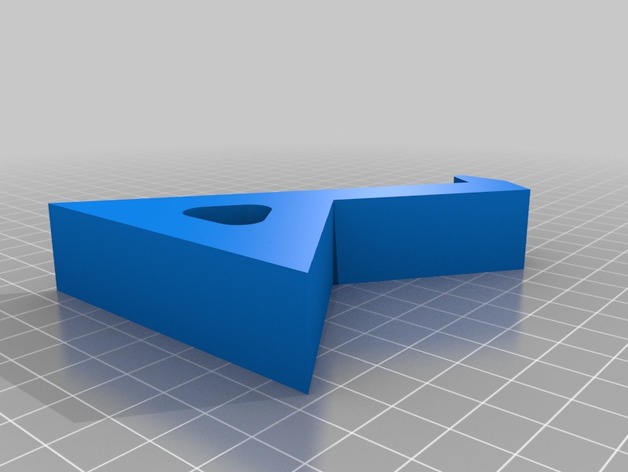
60% and under keyboard display 3D Print Model
Summary
Just a simple Wall display for most 60% and under keyboards. sized to wall mount with large command strips. print 2.
Print Settings
Printer Brand:
Prusa Printer:
Prusa Clone Rafts:
Doesn’t Matter Supports:
No Resolution:
.3 Infill:
15% -
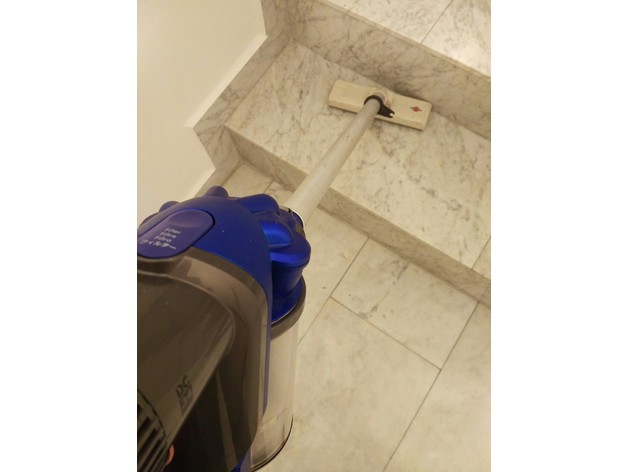
Dyson to Progress hoover 3D Print Model
Summary
Waht to do with an dead old handheld Progress hoover.
Convert it to a dyson handheld for stair hoovering. -
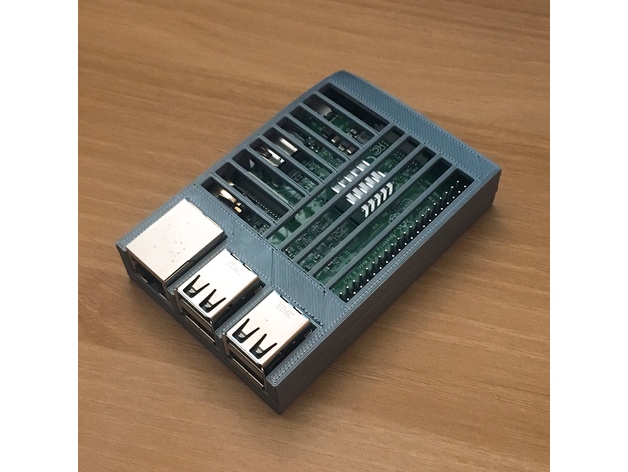
Simple case for Raspberry Pi 3b 3D Print Model
Summary
Simple case for Raspberry Pi 3b.
Print Settings
Printer Brand:
Prusa Printer:
i3 MK2S Rafts:
No Supports:
No Resolution:
0.2mm Infill:
20%
How I Designed This
I wanted to design my own case with a more organized pattern. -
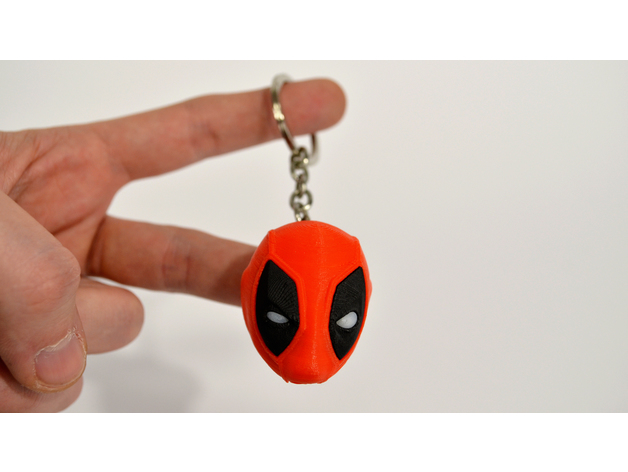
Deadpool Head Keychain 3D Print Model
Summary
Awesome Deadpool Head Keychain, 3dprintable and assembled. Create your own at home!
Print Settings
Printer Brand:
Zortrax Printer:
Zortrax M200 Rafts:
Yes Supports:
Yes Resolution:
0.09 Infill:
low Notes:
x — 3.3 cm
y — 4 cm
z — 3.4 cm
Post-Printing -
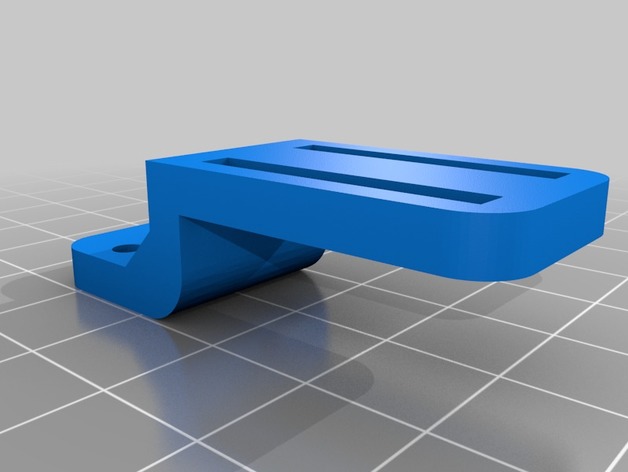
Proximity sensor support 4mm 3D Print Model
Summary
Support for proximity sensor 4mm for https://www.thingiverse.com/thing:1496019 -
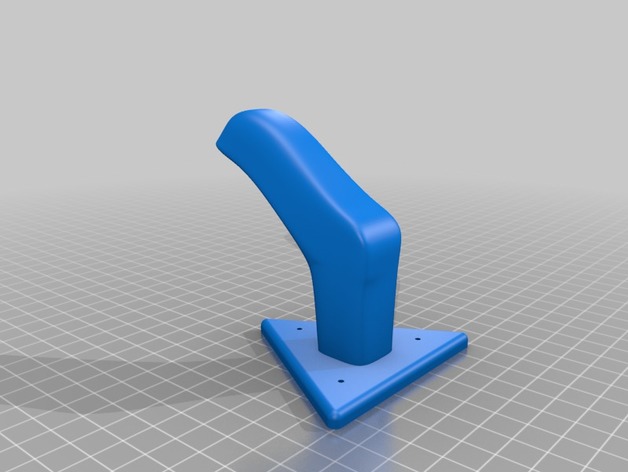
Motor Bike Helmet Hanger 3D Print Model
Summary
This is a simple motor bike helmet hanger that can be used to hang a motor bike helmet.
How I Designed This
Design info
Some of the larger more spherical motor bike helmets can be hard to hang.
It also has a center pilot hole on the back in case you wish to screw in from behind. -
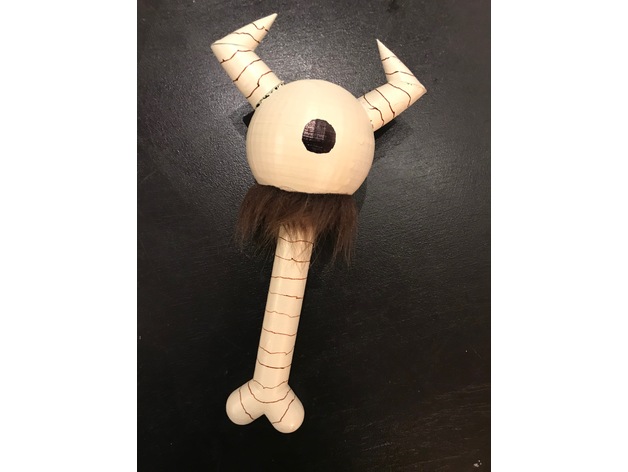
Chester “eye bone” 3D Print Model
Summary
Chesters eyebone!! based on the game don’t starve and made with fusion and a little tinkercad
you can find the fur at a craft store and if you have white PLA you won’t have to paint it I just wrote with a color sharpie for the eye and bone detail.
Print Settings
Printer:
Anet A 8 Rafts:
No Supports:
No Resolution:
i dont care what u do Infill:
3-5% -
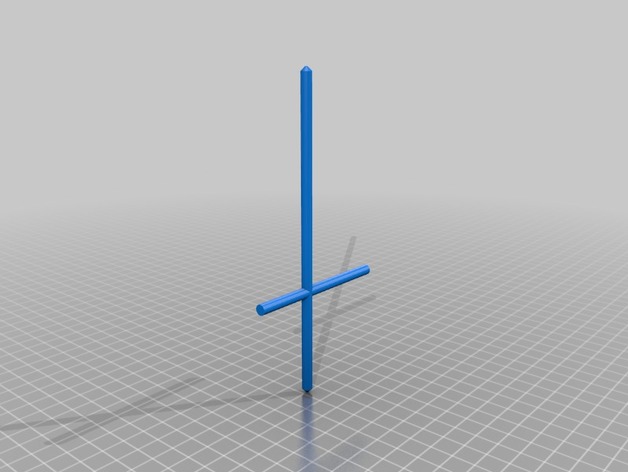
Halloween tombstone stakes 3D Print Model
Summary
Replacement stakes for holding up Halloween tombstone decorations.
Two stakes per tombstone recommended.
For styrofoam tombstones – Insert the short pointed ends into the tombstone, and the long pointed ends into the ground. (These are usually solid, and the existing holes are fairly short.)
For plastic tombstones – Insert the long pointed ends into the plastic tombstone and the short pointed ends into the ground. (These are usually hollow, so the short end doesn’t provide enough support.)
Print Settings
Printer:
TronXY X1 Rafts:
No Supports:
No Resolution:
0.2mm Infill:
50% Notes:
Rotate to print flat on bed. I was able to fit two at a time on my 150×150 print bed -

1912 Ford badge.logo 3D Print Model
Summary
1912 Ford badge. please enjoy and tip your designer.
Print Settings
Rafts:
Doesn’t Matter Supports:
Doesn’t Matter Resolution:
0.1 + Infill:
any, but the higher the better Notes:
for best result without the base plate use 80-100% infill -
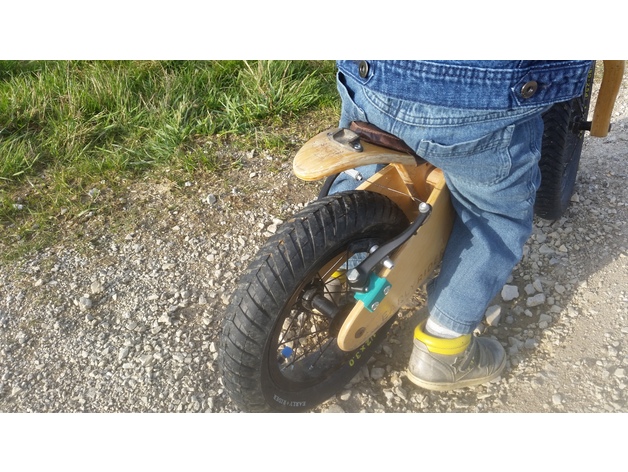
Early rider pusher 3D Print Model
Summary
Push your child and his Early Rider bike using a hiking pole. -
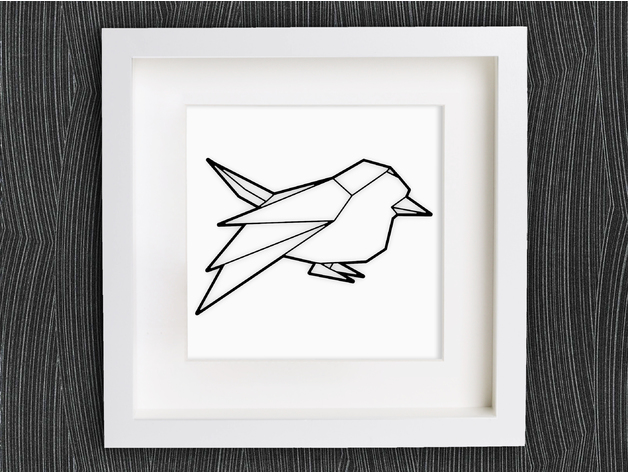
Customizable Origami Sparrow 3D Print Model
Summary
This is a customizable 2D origami art of a sparrow. You can glue it into square picture frame (e.g. Ikea Ribba), use it as pendant, rings, earrings or just place it on a shelf…
Customizable Settings
Use the Customizer or OpenSCAD to create your own customized 2D sparrow.
You can set following paramters:
the max size of the longest side and the height
thickness of the outer and inner outline
Customizable Origami Series
This is part of my Customizable Origami series. Follow me, if you want to be informed about a new part of this series!
How to support me?
Do you like my things and do you want to support me? You can use these links if you want to buy something. This helps me doing more things. Thanks!
Banggood: https://goo.gl/ZXgx3A
Gearbest: https://goo.gl/FfE59f
Aliexpress: https://goo.gl/bQLi15
Print Settings
Printer:
Anet AM8 Rafts:
No Supports:
No Resolution:
0.2 Infill:
50% -
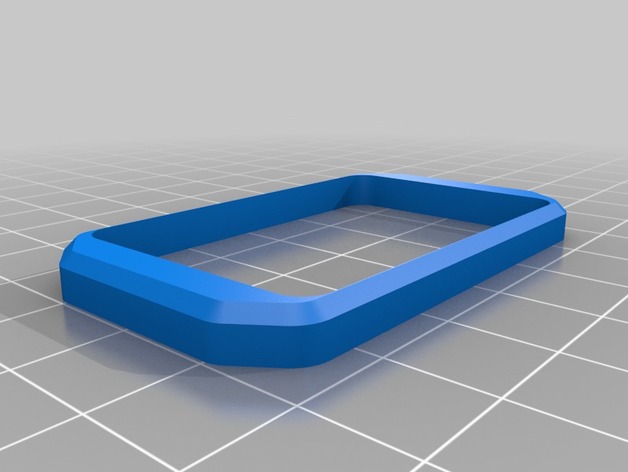
Tarot 680, DJI F450-550, Battery Holder 3D Print Model
Summary
This is a customizable case for drone’s battery. You have to print it as separate parts and then super glued all of them. I layout the parts like that for a better resistance to break.
I am going to use a rubber band to keep the battery in place, tie to the front holder
Pics on my Tarot 680 build are coming soon.
Print Settings
Printer Brand:
FlashForge Printer:
Creator Pro Resolution:
0.20 Infill:
25 Notes:
I am using a tempered glass, with Elmer’s violet stick school glue. And after each print I clean my print plate with isopropyl alcohol, the adhesion is very incredible. I also have my printer fully enclosured, much heat, the better.
Happy Print!!! -
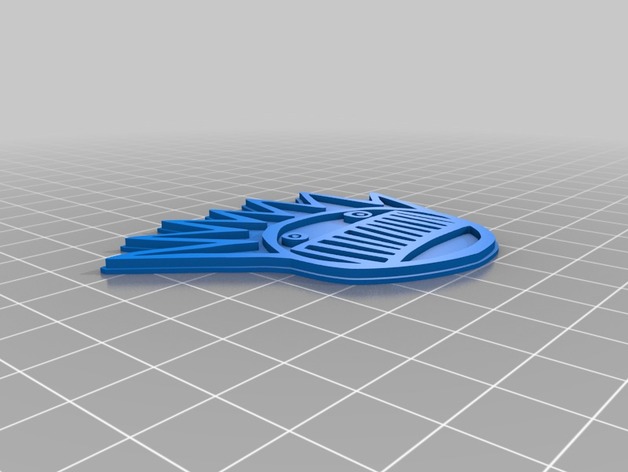
Ween Boongish 3D Print Model
Summary
Went to a ween concert on Halloween. Figured this was necessary. -
jigsaw 3D Print Model
Summary
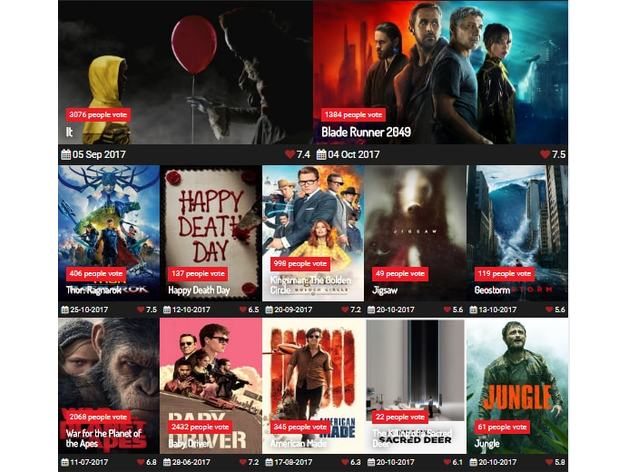
film, moviesStandards
NGSS
Overview and Background
Lesson Plan and Activity
Materials Needed
-
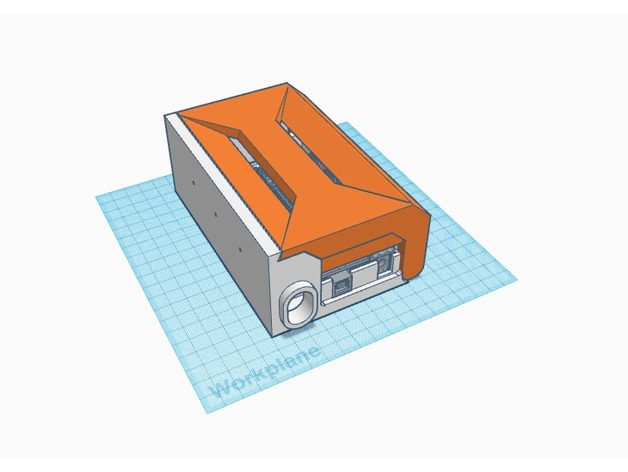
Large Ramps 1.4 Case – Right Handed Version 3D Print Model
Summary
You don’t have enough space with conventional ramps 1.4 cases? That’s all you need! Inspired by Dasaky’s Ramps case. This is the right-handed version of my previews Large Ramps 1.4 Case, it measures 100mmx150mm, plenty of space for wires management and heat dissipation.
Left-Handed Version: https://www.thingiverse.com/thing:2618146
Print Settings
Printer:
Prusa I3 like Rafts:
Doesn’t Matter Supports:
Yes Resolution:
0.25 Infill:
30% -
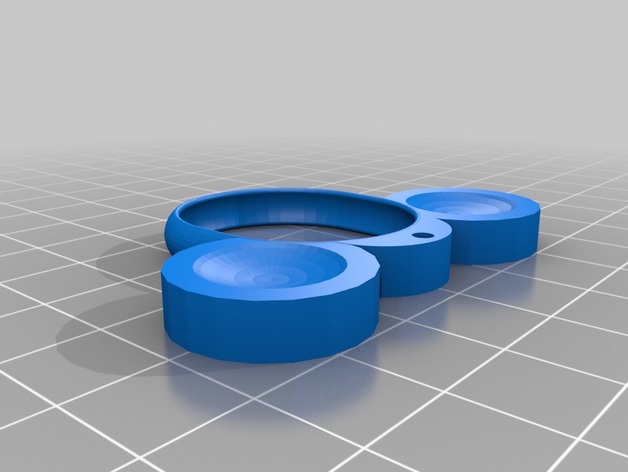
disney magic band 2 holder with ears 3D Print Model
Summary
kids don’t want to wear the disney magic band,
I found a design by GordonInnovations,
I add two ears, hope you like it. -
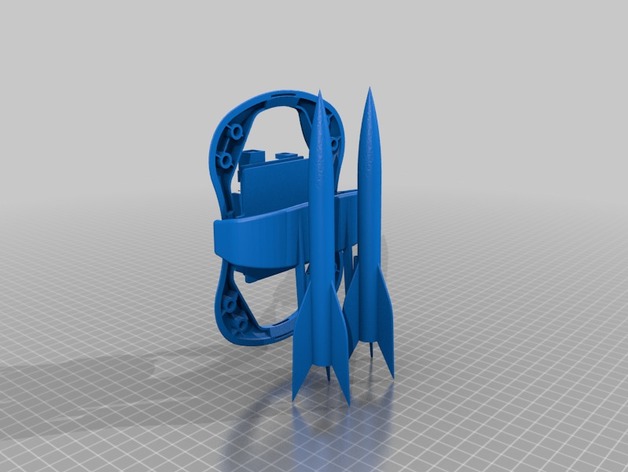
Teal Modular Addon System 3D Print Model
Summary
Following the quick-swap, modular mentality of the Teal Sport, this ‘thing’ is a modular addon system that allows for modules to be snapped into the top and bottom of the drone. A few addon modules are shown here, but the possibilities are endless.
Rocket Launcher
The rocket launcher module attaches two rockets beneath the drone. The rockets shown are based on the 1/4A rocket motor. Launch control is handled by an arduino and some supporting circuitry (an Arduino is overkill, but it’s simple to show). Launch could be triggered through an additional radio or by detecting certain movement patterns with an accelerometer.
…standby for more modules!
Note: I do not own this drone so exact dimensions may need tweaking. If I win this contest, I will for sure be fleshing out and building the rocket launcher 🙂 -
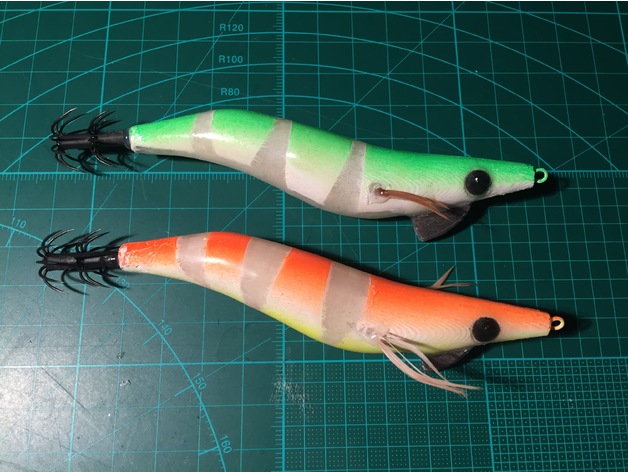
Squid Jig size 3.0 3D Print Model
Summary
This is my design for a size 3.0 squid jig.
Print Settings
Printer Brand:
RepRap Printer:
RepRap Kossel Rafts:
No Supports:
Yes Resolution:
0.2mm Infill:
10% Notes:
Use glow in the dark PLA for better performance at night.
Post-PrintingThe first thing to do is to print the parts, and get the other hardware together.
You will need:
Wire for the nose ring (I used stainless lock wire)
Lead for the keel weight. You can use a sinker, or any lead really, bash it into shape. This needs to weigh around 4 grams.
Barb crown for the tail. You can either cut up a small pencil jig, or get a new set of barbs.
The best I’ve found are Harimitsu brand, you can get these here: http://www.fishonproshop.com.au/fishonproshop/SelectProd.do?prodId=657The parts go together like this.
Glue the two halves together, with the nose ring and lead keel in place. Leave the barbs out for now, you can put them in later.
Have fun with masking out the lure and painting it. Ensure that you sand the layer lines off before painting.
Glue the eyes in after painting. I print the eyes in black filament, so that there is less to paint. You can use whatever colour you like, obviously.
After painting, you can cover the lure in a layer of clear epoxy. Keeping the lure rotating for a couple of hours can keep the coat more even, and eliminate drips. This is a simple setup to keep the lure rotating while the glue cures.
Finally, glue in some feathers and the barb at the back, and you’re ready to catch some squid! -
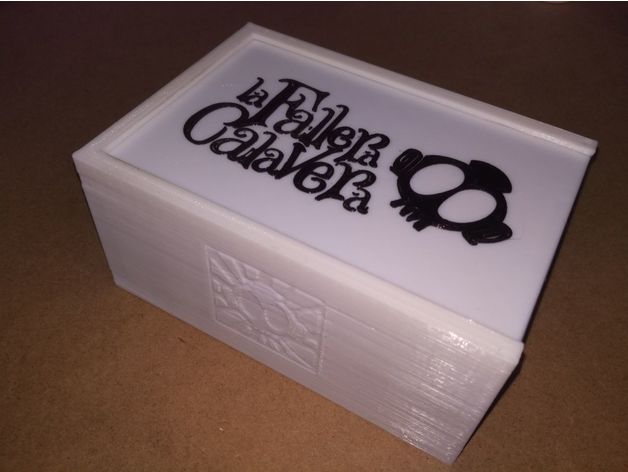
Caja Fallera Calavera (con fundas) + expansión 3D Print Model
Summary
Caja fara la fallera calavera y fallera calavera 2, diseñada para cartas enfundadas.
Print Settings
Printer Brand:
Prusa Printer:
Prusa Clone Rafts:
Doesn’t Matter Supports:
Yes Resolution:
Any Infill:
Any -
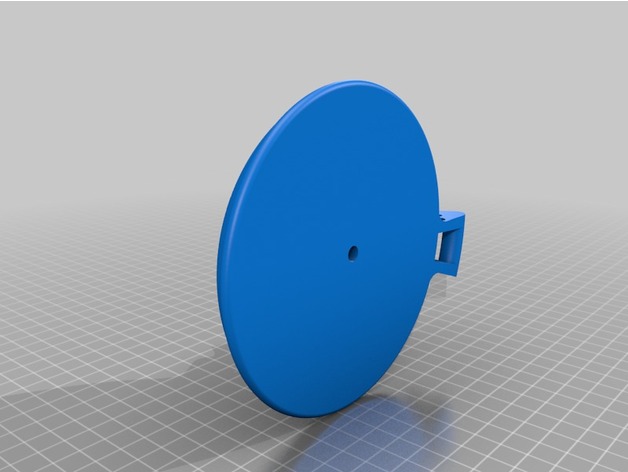
Beer Stein 3D Print Model
Summary
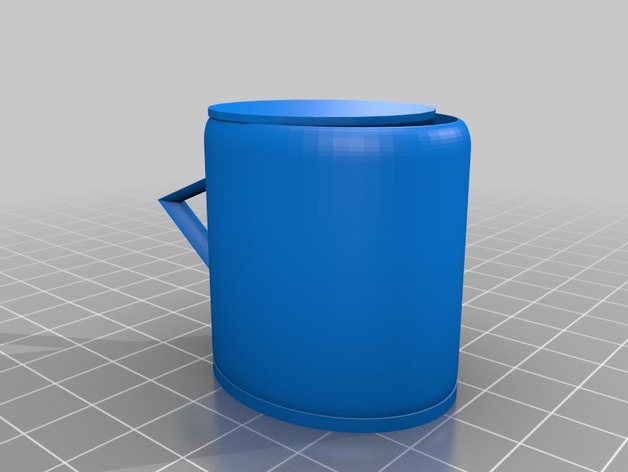
Being Recently engaged, I needed something special to give my groomsmen-to-be that really embraced two of my passions, beer and 3D printing!
I’ve printed 9 total.. plan on adding pictures of the finished product at some point.
Print Settings
Printer Brand:
Robo 3D Printer:
R1 ABS + PLA Model Rafts:
No Supports:
No Resolution:
.3 mm Infill:
25% Notes:
3 perimeters (since they’ll possibly be holding liquid)
Printed at 0.7 scale. I designed it big but scaled it down to cut print time. -
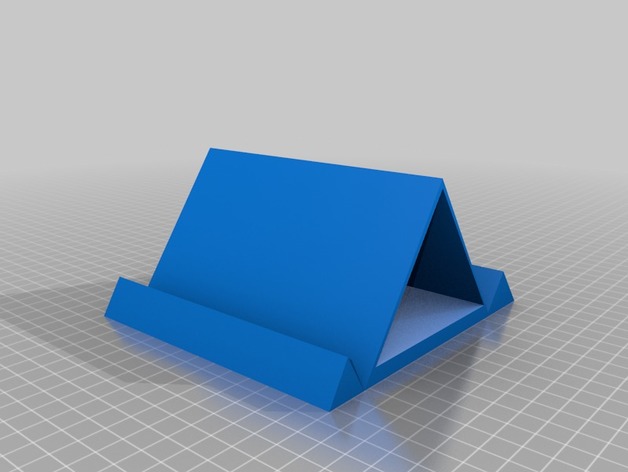
tablet holder 3D Print Model
Summary
thank you so much for all your support and here it is my 6th design holds two tablets or other small devices -
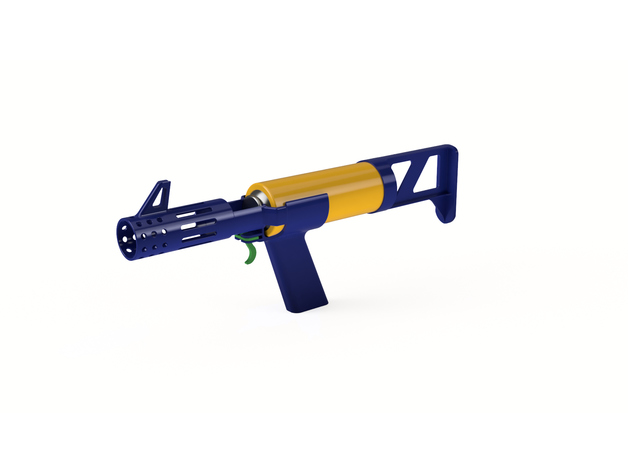
Tacti-Cool Silly String Gun 3D Print Model
Summary
Behold the mighty Silly String Gun!
Still a WIP so feedback welcome.
Trigger: Print on its side for maximum strength
Stock: Print on the Butt
Receiver: Print vertical with handle touching build plate and support
Barrel: Print vertical with front touching build plate
Support: Enable ‘support touching build plate’ for all parts. (Part to part support is not necessary)
Because the can is horizontal, its probably not the most efficient use of propellant, so I may make another version that holds the can at a 45 in a ‘magazine’ position
Here is the Silly String I designed this for (FYI, its larger than your typical dollar store cans)
-
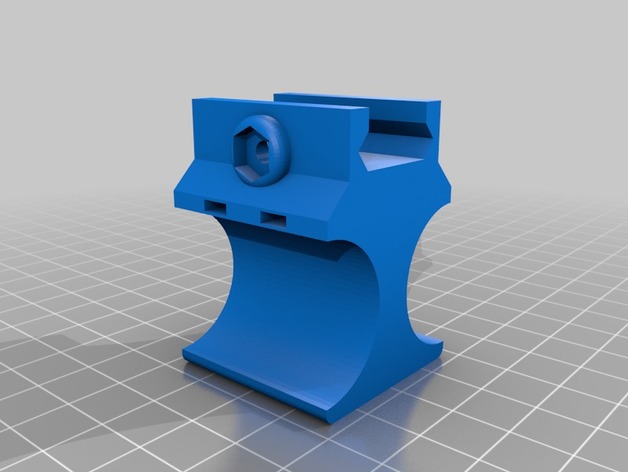
Dual Flashlight Picatinny Attachment 3D Print Model
Summary
This attachment uses 2 1$ Walmart flashlights. The attachment is held on a rail with a 6-32 x 1 1/4 in machine bolt and a matching nut.
Print Settings
Printer:
JGAurora A3 Rafts:
Yes Supports:
Yes Resolution:
0.2mm Infill:
100%
Post-Printing -
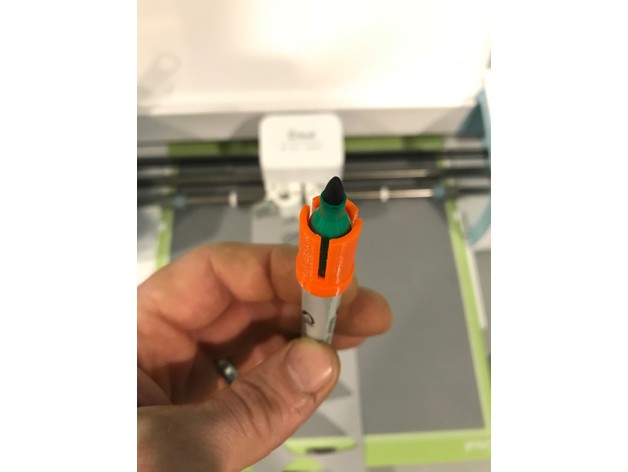
Cricut Air Adapter for fine point Sharpie (easy) 3D Print Model
Summary
Quick easy print to adapt a fine point sharpie into a Cricut air, a few others out there but thought i would try to make an easy to print one, only takes about ~10min.
I had some difficulty getting the inside diameter right, it need to be 10.7mm, but when I made it with that size, it ended up being 10.4mm, which is to small. I’m using a 0.4mm nozzle, so that might have something to do with it, as the outside is 14mm and it came out right.
Print Settings
Printer:
Anet A6 Rafts:
No Resolution:
0.25 Infill:
20%
Post-Printing
none hopefully. -
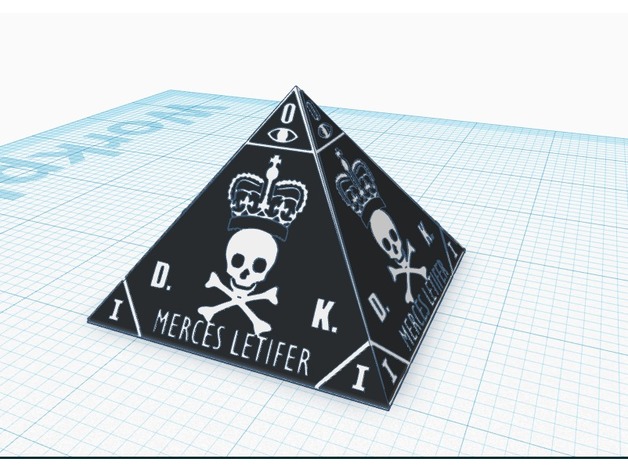
Hitman Paperweight 3D Print Model
Summary
Just a simple paperweight based on the Hitman series that I made when I was bored. Haven’t gotten around to printing it yet. -
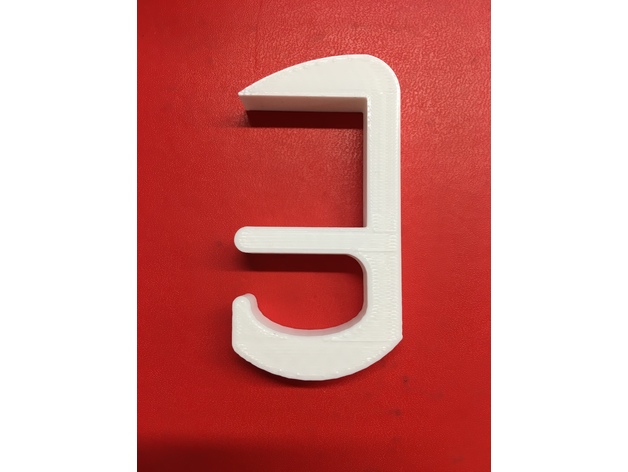
Under-Desk Hook for 30mm desktop 3D Print Model
Summary
A sturdy hook for hanging jackets, bags, purses, etc. underneath a desk with a 30mm thick top (which is pretty standard). The current size slides on and off the desk easily with a close fit. If you are looking for a perfect/tight fit on a 30mm thick desktop, scale the piece to 99% and you should have a snug fit.
Feel free to remix this to fit your needs. I don’t care if you print some and sell them, just mention me in the design credits.
Print Settings
Printer Brand:
FlashForge Printer:
Creator Pro Rafts:
No Supports:
No Resolution:
.2mm Infill:
20% Notes:
The curves on the design help to reduce the chance your corners will peel up while you are printing. Plus, they look better. -
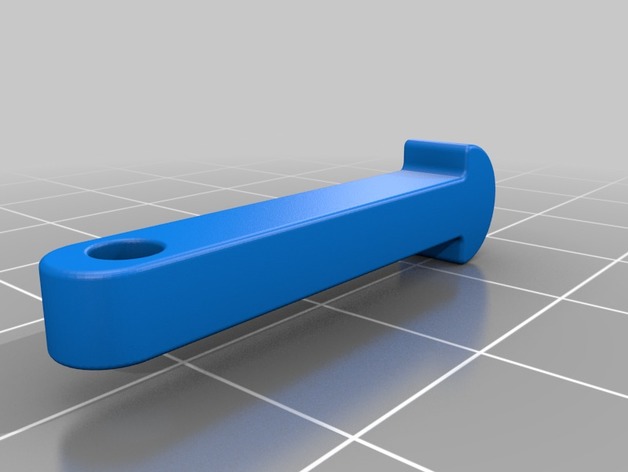
Balisong latch 3D Print Model
Summary
A replacement latch for a balisong knife also known as butterfly -
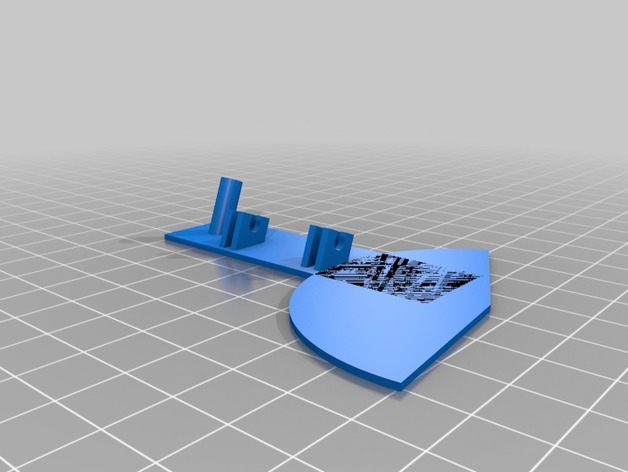
Park Zone Spitfire MKIV Gear Fairing 3D Print Model
Summary
Gear fairing for discontinued Parkzone Spitfire MKIV. Mirror object to obtain a left and right cover. Sand openings for gear wire if they do not clip on easily or break. -
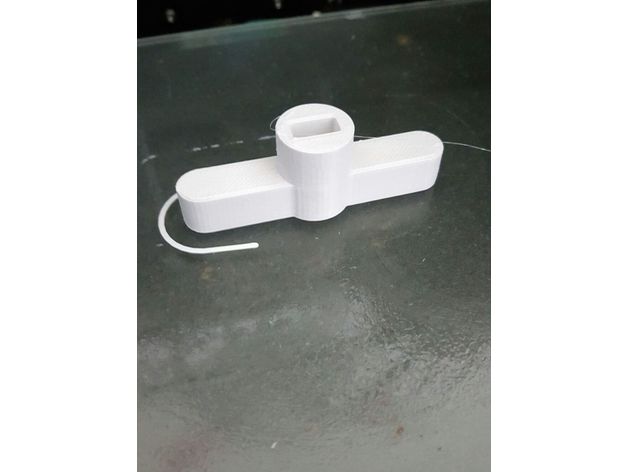
Key for tap 3D Print Model
Summary
This “key” allow to open tap without head (like on the picture).
Freecad file included -
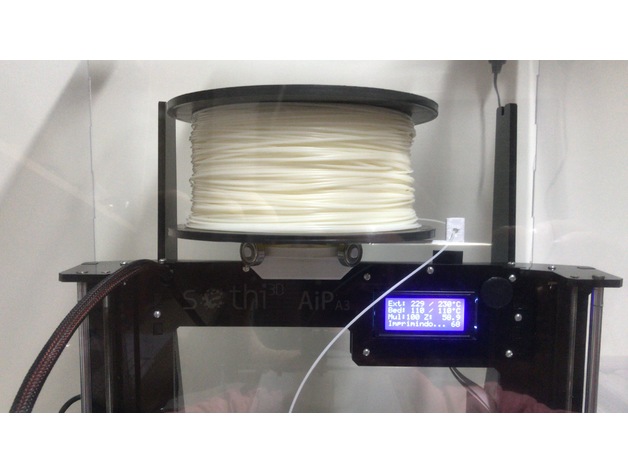
Spool Holder 97 mm 3D Print Model
Summary
This is an adaptation of Hictop spool holder for an Sehi3D AiP 3D printer!!! -
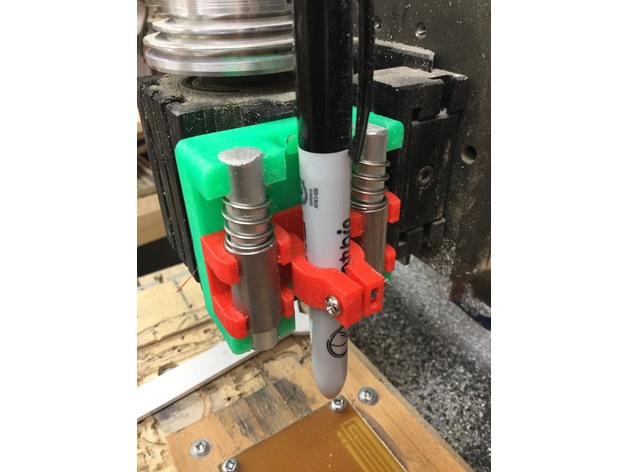
PCB Etching with 3D Printer Agitatior 3D Print Model
Summary
I made Tech2C’s Pen holder https://www.thingiverse.com/thing:2459624
I used it on my Milling machine to apply sharpie ink as an etch resist.
Then I used my 3D printer to heat and agitate the Ferric Chloride solution with the pcb in it.
GCODE
g1 y0 f4000
g1 y50
g1 y0 f200
g1 y50
make many copies of this. Takes about 15 seconds to execute.
You can see the sample pcb traces that I produced using this technique. I would increase the overlap of the sharpie lines and print twice to ensure a good resist. the thin lines were just one layer of sharpie. they worked but got a little undercut.
I will add a video later showing the etching setup.
I found that setting my bed temp to 100C kept the Ferric Chloride solution below the recommended 55C maximum with my plastic tray which is pretty thick.
If anyone has a great way to get pcb gerbers into Fusion 360, please message me or comment on this thing -
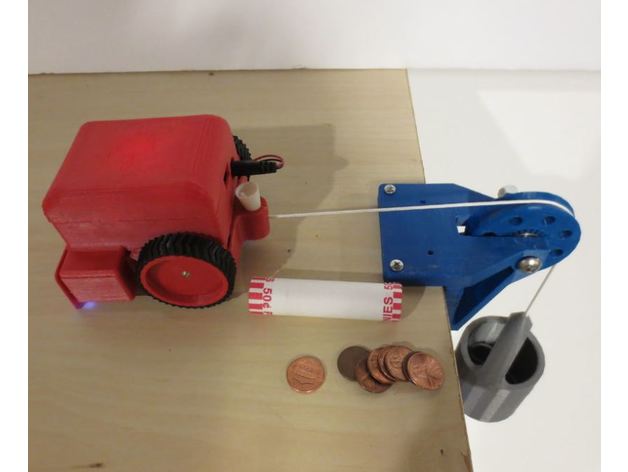
Weight Hanger & Pulley Assembly 3D Print Model
Summary
This is a pulley and weight hanger assembly suitable for use in a physics classroom. Designed for use with SimpleSumo robots: https://www.thingiverse.com/thing:2574286
On this setup I recommend using pennies for weights because they are standard small equal units of weight, easily available, and cheap.
The pulley uses one 608 bearing. This link is for a fidget spinner bearing which will spin with the least resistance, although you will have to protect it from dirt: http://amzn.to/2xBN9xF
Uses one 5/16″ bolt to hold the assembly together.
Video of experiment involving this pulley setup shown at 6min 18 sec:https://youtu.be/JAGPEJZuJWw -
1407 Cobra motor mount 3D Print Model
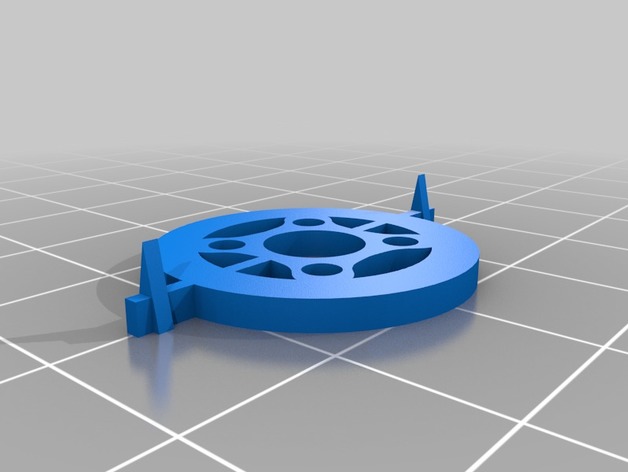
Summary
This is for a specific application, but I figured someone might find it useful.
Print Settings
Printer:
AM8 (rebuilt Anet A8) Rafts:
No Supports:
No Resolution:
.2 Infill:
25 Notes:
I printed with 3 perimeter layers. If you only use 2, then you might need 100% infill. -
St. Dupont lighter Gas Refill Adapter 3D Print Model
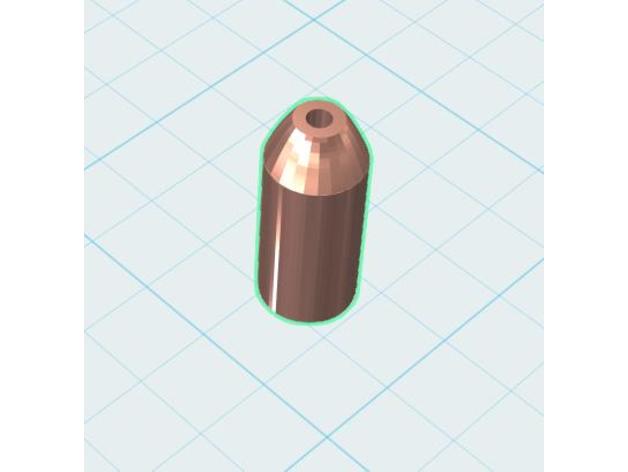
Summary
This is an adapter to refill a St. Dupont lighter with gas.
If you like it and like to show some love, than please share it or add it to your list.
Enjoy ! 🙂
JoeyHills.de
3Dsection.de -
![Moving Alien Chestburster Halloween Costume [No Support, Easy Assembly] 3D Print Model](https://3dhunt.co/static/2017/10/8b8a0d7992b0020d7864fc77f6af0a08.jpeg)
Moving Alien Chestburster Halloween Costume [No Support, Easy Assembly] 3D Print Model
Summary
This is an easy to print, and fully functional Alien Chestburster Halloween custom.
You just need to print the mechanism and the head, clip together, take a belt and knot a fishing line or in my case a Waxed Denteal Floss onto its place and read to scare!
Here you can see how easy is that:https://youtu.be/iz7sXwunJf8
And in action:https://youtu.be/gxmnxGZeG2o
Print Settings
Printer:
Anet A6 Rafts:
No Supports:
No Resolution:
0.2 mm Infill:
10% Notes:
0.4mm nozzle
240°C PETG
60°C heated bed
60% cooling fan
30 mm/s print speed
2mm Z hop when rectract. (My retraction was not the best, thats why I’ve got many strings, if your retraction tuned well, than the separation will be even easier than in my case, as you seen on the video)
I printed my model from PETG, becase of the higher durability.
With PLA not tested yet!
For the head I used 10% infill till the throat part to be some support for it, after that just 3 walls and 5 solid top layers has been used.
For the mechanism I’ve just used 3 walls and 5 top and buttom solid layers and no infill.
How I Designed This
The base idea came form the Platform Jack, but I have redesigned the whole thing from scratch and optimised it till I got this version. It looks really complex from a close view, but every little detail has a function. -
Aura bass shaker mounting plate 3D Print Model
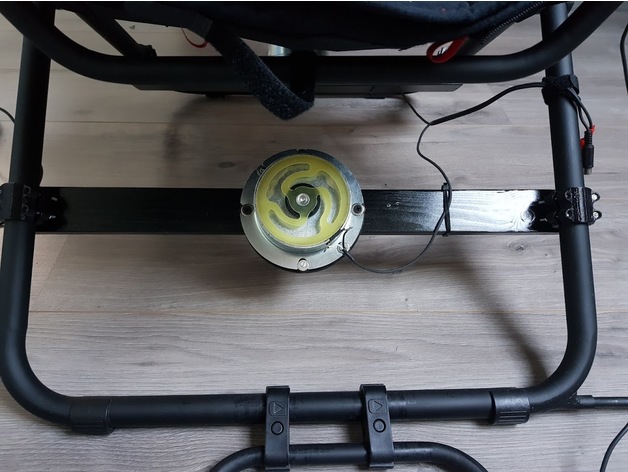
Summary
Designed this plate to mount an Aura Basshaker to my Playseat Challange.
Used the following clamp to mount it all:https://www.thingiverse.com/thing:561762
Used a simple woorden bar between the legs using the above clamps and used this mounting plate to mount the bass shaker itself.
Print Settings
Printer Brand:
Wanhao Printer:
Duplicator 6 Rafts:
Doesn’t Matter Supports:
No Resolution:
0.2 Infill:
50 Notes:
Used PLA. Tried PETG but its to flexible to me. -
CTC Prusa Low friction spool holder 3D Print Model
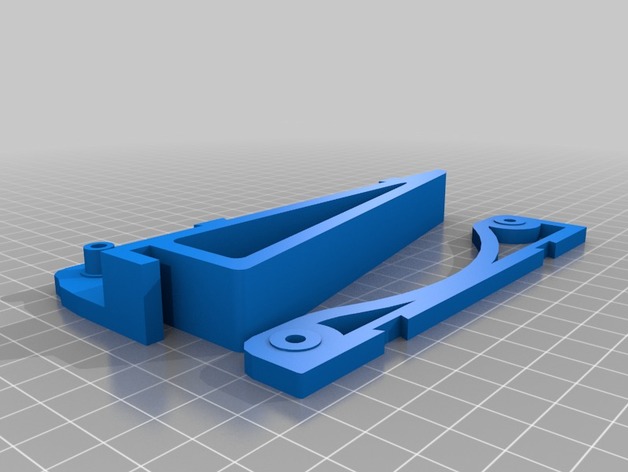
Summary
for CTC prusa i3 5mm plywood frame
resolution 0.3mm -
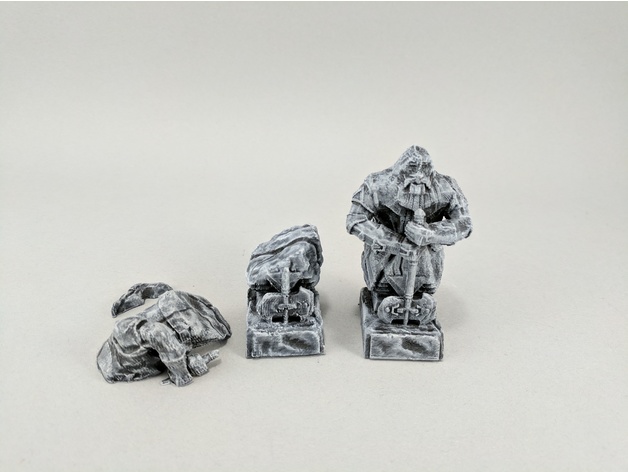
Worn and Broken Dwarven Statues 3D Print Model
Summary
This is a remix of Wargaming_Miniature_Showcase’s Dwarven Paragon with Battleaxe. I needed a few old and broken dwarven statutes for my game so I roughed up and broke apart this model.
Enjoy!
Print Settings
Printer:
Maker Select v2 Rafts:
No Supports:
Yes Resolution:
.1mm Infill:
12%-15% -
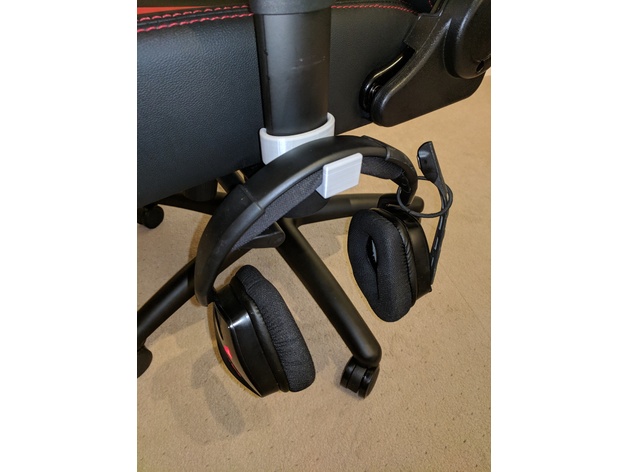
GT Omega headset holder 3D Print Model
Summary
Made for the GT Omega Racing Master XL chair (might fit other models). Clips to the bottom of the arm rest (left or right), and lets you hand your headset for easy access.
Print Settings
Printer Brand:
Wanhao Printer:
Wanhao Duplicator i3 V2 Rafts:
No Supports:
No Resolution:
0.2mm Infill:
25% -
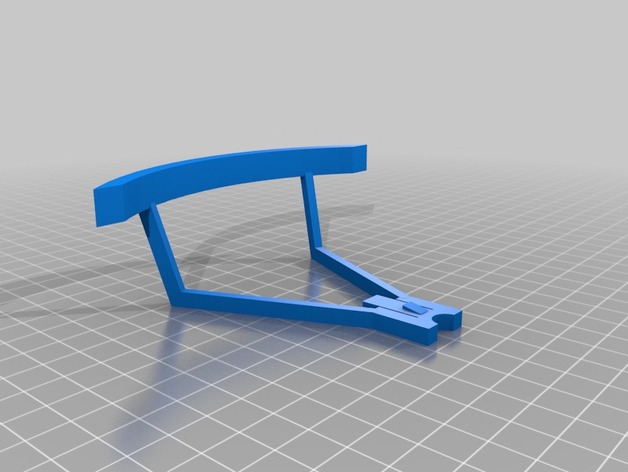
Visuo XS809 Prop Guard 3D Print Model
Summary
The Prop-Guards on my Visuo Drone needed to be changed….
First try.
Print Settings
Printer:
ANET A8 Rafts:
No Supports:
Yes Resolution:
0.2 Infill:
5% -
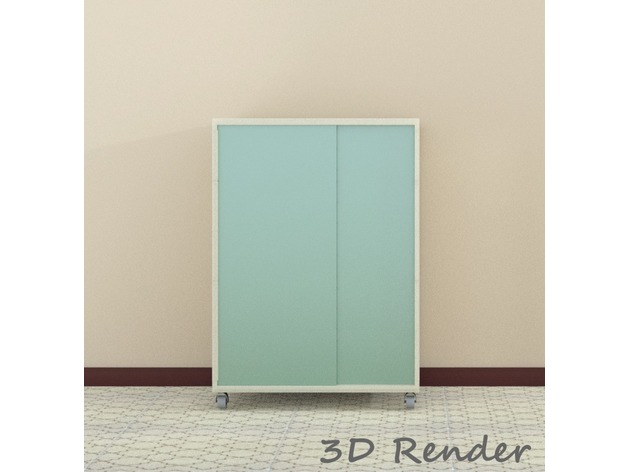
Cabinet 3D Print Model
Summary
Cabinet should measure about 24″ x 36″ x 16.5″ when completed. 1/4″ wood dowels (oak dowels recommended) connect the parts along the width and regular dowels along the depth. I have not determined if glue will be necessary. PLA/PHA or another filament that allows some flexibility is neccessary.
Print Settings
Printer Brand:
Prusa Printer:
Prusa Clone Rafts:
No Supports:
No Resolution:
.2 mm Infill:
20% Notes:
2 perimeters -
Zombie Pikachu coming out of my head 3D Print Model
Summary
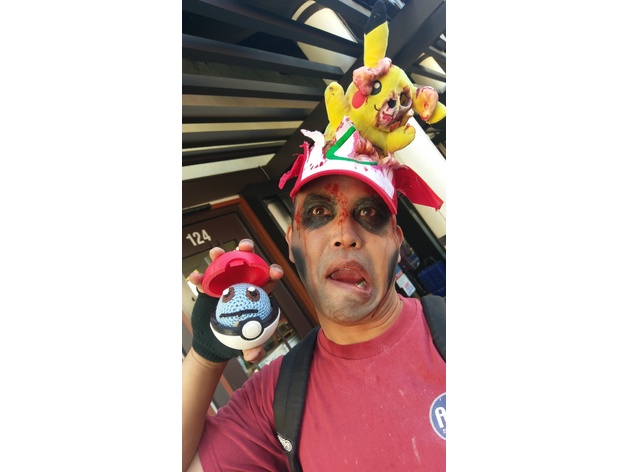
As I’m performing as a zombie in Little Tokyo for the 2018 Thrill the World event, I wanted to go with an Anime theme. Hence, zombie Pikachu coming out of my head.
The Pikachu doll (fair use!) was from Amazon, as was the hat. I 3D printed the Pikachu skull (based on bfince’s cat skull), and inserted it into the head, Terminator style. I also designed a “skull cap” with a hole and brains coming out.
Small plush Pikachu: https://smile.amazon.com/gp/product/B00GGKKXC8/ref=oh_aui_detailpage_o02_s00?ie=UTF8&psc=1
Ash hat: https://smile.amazon.com/gp/product/B00A4XBTX0/ref=oh_aui_detailpage_o03_s00?ie=UTF8&psc=1
I also used Great Stuff spray foam (windows and doors) to fill in some “brains.”
For the STL files, I’m including the modified cat skull, 4 versions of the skull cap. One with no brains in case someone wants to use it. One low poly count brain version, one with a higher poly count (It may be 5mm shorter than the previous ones, after test fitting for my own head). The 4th one has the doll support I glued on pre-merged with the skull cap.
I’m holding a Pokeball designed by Intentional3D: https://www.thingiverse.com/thing:411193 The little Squirtle inside is a friend’s crochet creation.
CostumeChallenge2017
Print Settings
Printer Brand:
Wanhao Printer:
Wanhao Duplicator i3 Plus Rafts:
No Supports:
Yes Resolution:
0.2mm Infill:
20
How I Designed This
Here’s the Imgur album on the design: https://imgur.com/a/lFLDL
Basically, I took that skull cap, scaled it up, made a “hole version” offset a few mm down to make the whole thing thinner. Cut off the bottom with a box to give it a printable edge, and cut out the jagged hole with a bunch of polygons.
I imported that into Oculus Medium as a stamp, and sculpted some brains around the edges, exported that back into TinkerCAD to merge with the skull cap.
The cat skull was scaled upward and filled in with solid polygons to better fit the doll head.
Pained the “brains” a salmon color for a base coat. Will add some browns and reds.Some more detail on the skull cap. I really should have primed it first. Some painting done to darken the eye and nose socket, and make the tongue red. Dilute wash of red over a lot of the skull.
Found I needed a support structure to hold up the doll. Printed this up, and glued it on. New version of the file has it incorporated
Skull placed into doll.
-
Wu Wei: Journey of the Changing Path 3D Print Model
Summary
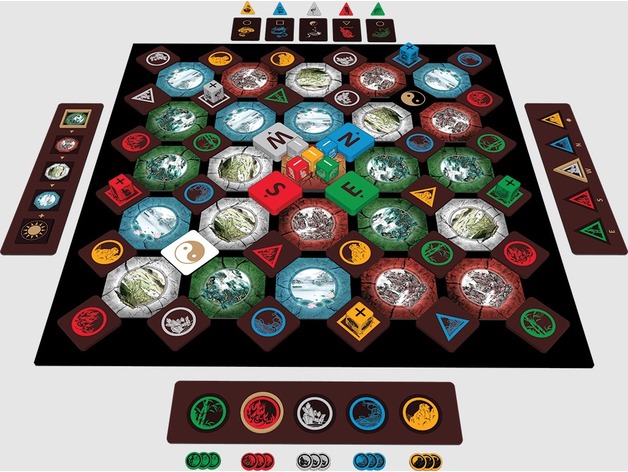
Wu Wei: Journey of the Changing Path is a strategy game that embraces the universal concept of the Tao (the way). This game is deeply rooted in Chinese philosophy martial arts strategy and carries with it the concepts of yin and yang, the four seasons, chi (energy), and the eight directions.
You will need to paint and print out the cards to play. -
Anet A8 – Logitech C310 Webcam Nozzle Mount 3D Print Model
Summary
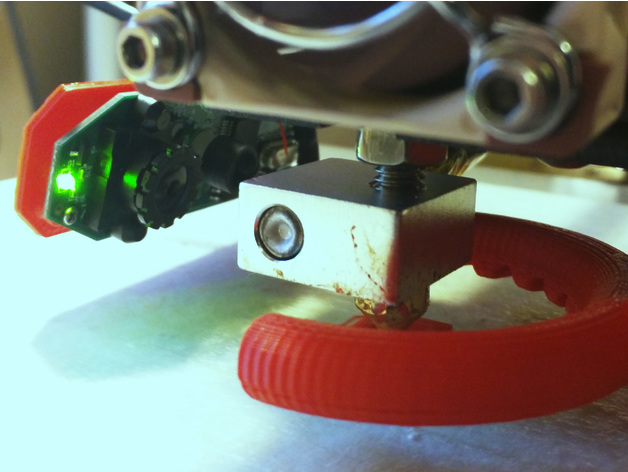
This is a small bracket for mounting a Logitech C310 webcam to the print head of your Anet A8 so that you can monitor the print nozzle. Since it simply inserts into the bearing this might work on other printers with similar design. But I cannot guarantee that.
Here is a youtube video showing it in action. As you can see it can make a pretty detailed image of how your nozzle is performing.
Also, this is designed for a fairly stock Anet A8 and it just barely clears the frame and other parts while homed. If you’ve made major modifications to your A8 this might not work and you might have to alter the stl file.
As you can see from the photos you’ll have to remove the casing of the webcam and get to the bare electronics. This can be tricky for the inexperienced. There is a wire soldered to the board that has to be un-soldered and re-soldered. If you break your webcam it’s not my fault, obviously.
Important note: There is a dab of glue on the side of the main lens that holds it at a certain focus distance. You’ll have to remove that dab of glue with a small pick of some kind. After that you can screw the main lens in and out to change the focus distance. Here is a video showing that.https://www.youtube.com/watch?v=v-gYgBeiOVI
Print Settings
Printer:
Anet A8 Rafts:
No Supports:
No Resolution:
0.2 mm Infill:
100% -
Adjustable Y Axis Tensioner 3D Print Model
Summary
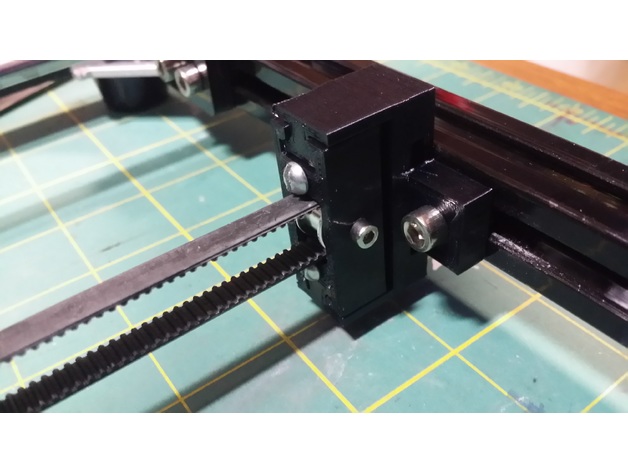
I designed this adjustable tensioner bracket for my HICTOP 3DP-17 Y-Axis as the stock ‘pulley’ would not keep the belt on the bearing and would rub (and squeak) no matter how well aligned it was.
This design should also work with most 20X20 extruded aluminum frame printers.
I purchased the Timing Belt Idler Pulley from Amazon:https://www.amazon.com/gp/product/B01H3FNZ4M
To build, use either M3x25 or 6-32 X 1″ bolts for the adjustment screws.
I designed it for M3 bolts with M3 nuts in the nut traps but didn’t have any 25mm long so I just used some 6-32 machine screws I had laying around.
The idler pulley will need an M3 X 16 or longer bolt to hold it in.
Happy printing!
Print Settings
Printer Brand:
Prusa Printer:
Prusa Clone Rafts:
No Supports:
No Resolution:
.2mm Infill:
55%+ -
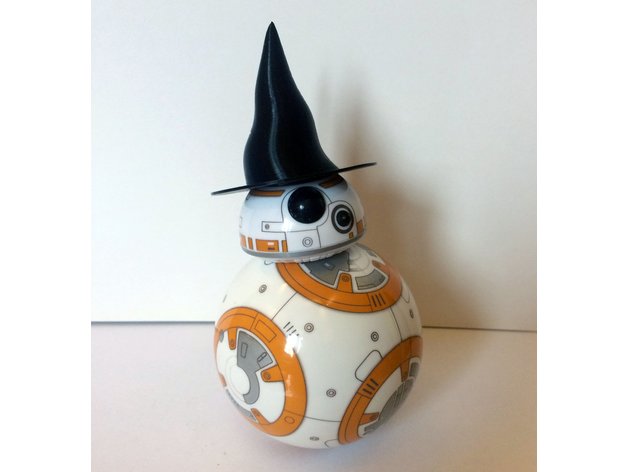
Halloween Sphero BB-8 Witch Hat 3D Print Model
Summary
Printed 0.3 layer height
0% infill
No supports
Used a little blu-tack / sticky tack to hold it in place. -
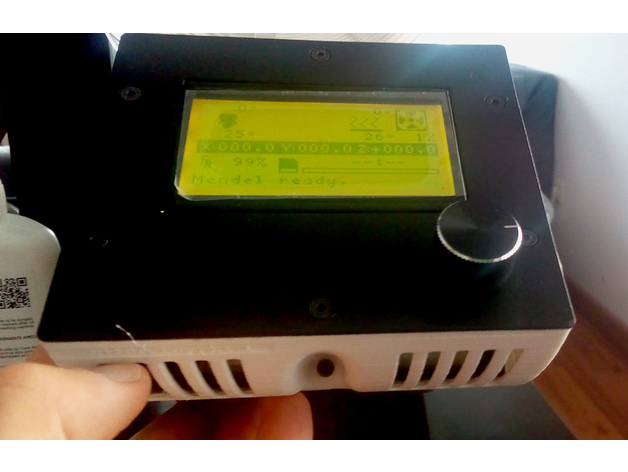
Malyan M150 LCD Angle Mod 3D Print Model
Summary
Don’t understand why everyone just copying “Di3 LCD Angler” from cheetahkid and name it as “Malyan m150 mod”. Ok it’s 99% similar, but it has parts that we don’t need. For the first time on thingiverse, true mod, designed specially for real Malyan M150 and similar. There is no stupid sd card hole on the side, no place for RepRapDisco’s Stop button, Just the stuff that we need.
Will need 6 nuts for all the screws from lcd’s part.
One extra screw to hold the angler at bottom.
Just small issue, the construction is fine but there will be some lift anyway.
Like it and Enjoy!
Print Settings
Printer:
Malyan M150 Rafts:
No Supports:
Yes Resolution:
0.1 Infill:
20% Notes:
Print that with at least with 20% infill, place a lot of support for the vents. -
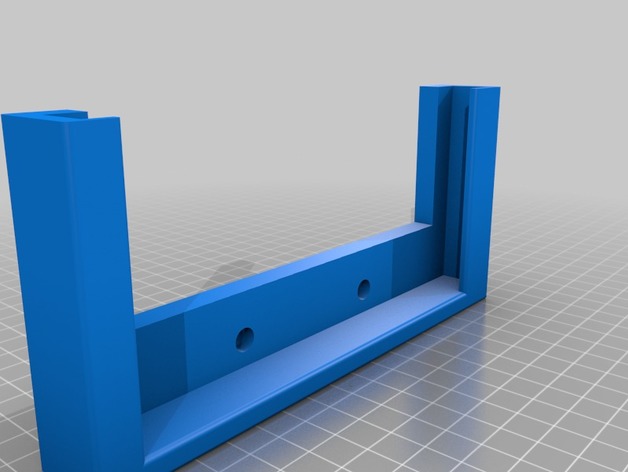
Fanatec CSL Elite Support S8 3D Print Model
Summary
Support for Samsung S8 to apply to Flying Fanatec CSL Elite.
Support was created to support the phone with its “Unicorn Beetle” cover
In short, I will make a version for the phone without Cover. -
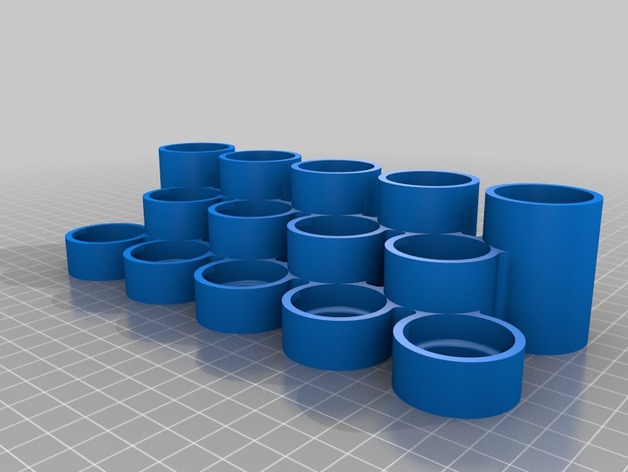
Essential oil counter display 3D Print Model
Summary
I made this for my wife and decided to share. there are 3 configurations for this set, single, double wide and a double tall and expandable infinitely the more you print them. DO NOT SCALE they are sized for 5 and 15 ml bottels. enjoy -
Archer Night Vision Goggles 3D Print Model
Summary
I made these for a Archer Halloween costume. I used a shade 5 green welding shield for the lenses with a green vinyl mesh overlay. Visibility is pretty good. I used a rubber strap from a pair of swim goggles for the strap and I padded the interior of the lenses with foam. For the bridge of the nose I used a small part of the swim goggle strap that was excess.
Im making it public, so I can’t stop you from printing and selling it, all I ask is that you give me credit for the model.
If you print for your own personal use please, please, please post pictures! Theres nothing cooler than seeing someone make/use something you designed!
Print Settings
Printer Brand:
Prusa Printer:
Prusa Clone Rafts:
No Supports:
Yes Resolution:
.1 Infill:
25% -
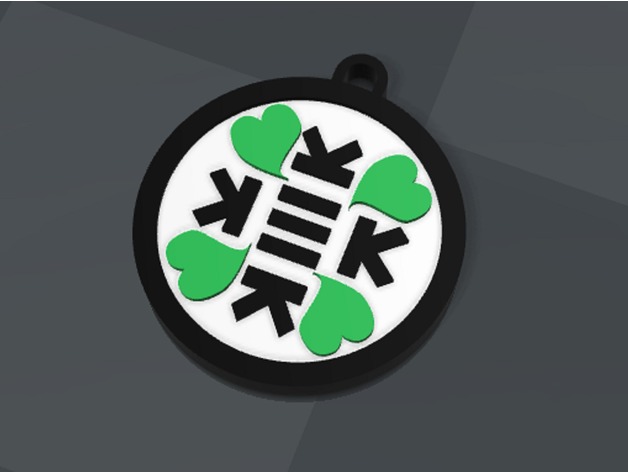
Medallion Of Kekistan 3D Print Model
Summary
I just wanted to make a Medallion Of Kekistan that can be printed with more than one colour so it would stand out more when it is put on a keychain and or worn as a medallion.
Print Settings
Printer:
Anet A8 Rafts:
Doesn’t Matter Supports:
No Infill:
20% -
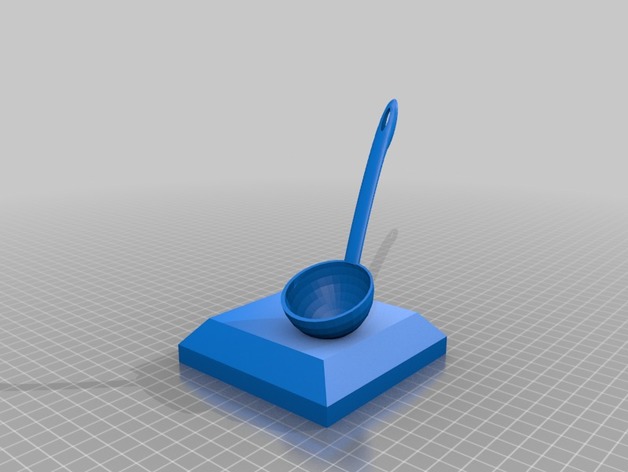
Chili Cook Off Trophy 3D Print Model
Summary
Chili Cook Off Base and Ladle Only
Chili Cook Off Base and Ladle w/flames
Chili Cook Off Base and Ladle w/Texas -
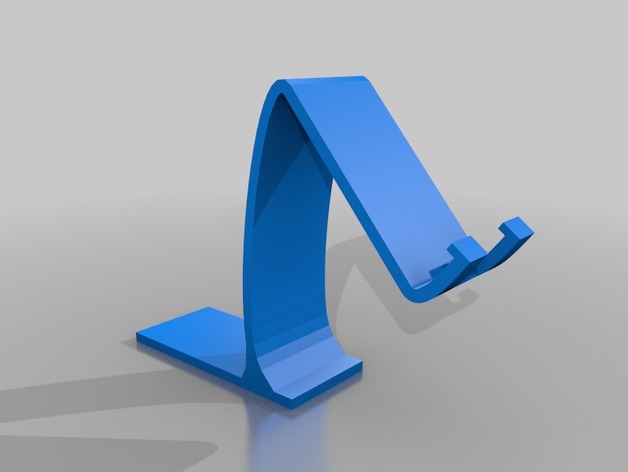
Slide-under Phone Mount 3D Print Model
Summary
Hello, I took danielolivier’s phone stand and made a version that can slide under an object to hold it stable (such as a monitor base). You may have to scale down 10x. Let me know how you like it and let me know if you have any more small ideas for items to remix. -
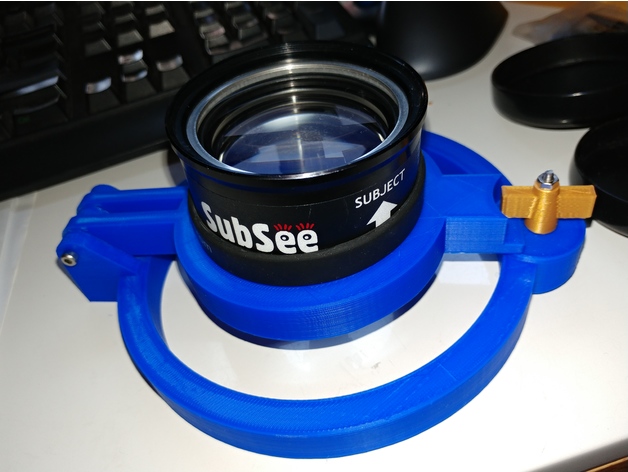
Camera house mount for Subsee +10 3D Print Model
Summary
I have make a Subsee +10 len mount for my Olympus camera diving house.
Apart from the printing parts, you will need some screw and nuts
M3 35 mm X 3
M3 40 mm X 1
M3 nut X 4
M3 washer X 2 -

Halter für Steckernetzteil 3D Print Model
Summary
Kleiner Halter für Steckernetzteile mit der Möglichkeit das Kabel aufzuwickeln. -
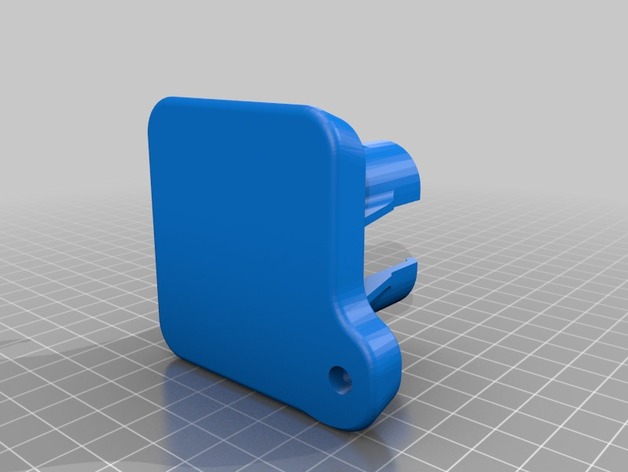
Plate Adapter for Gopro Session for Zhiyun Gimbal 3D Print Model
Summary
Center Mount Plate Adapter for Gopro Session for Zhiyun Gimbal
Print Settings
Printer:
CR10 Rafts:
No Supports:
No Resolution:
.2 Infill:
20 Notes:
you have to have a 12mm steel dowel mounted with a 6mm screw to make this balance -
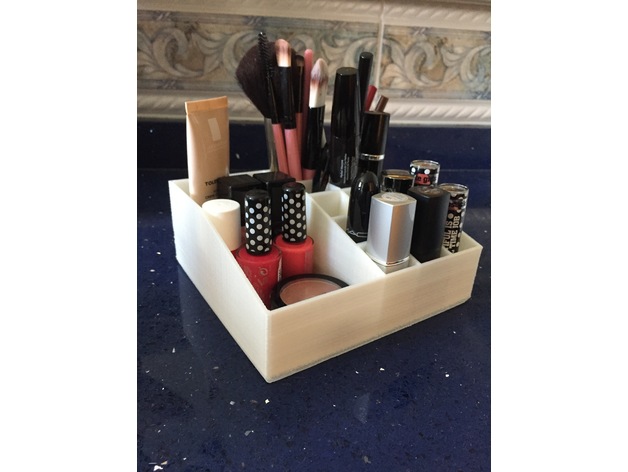
Make up organizer 3D Print Model
Summary
Makeup organizer, has a main hole to place large objects, two deep holes in the back to place brushes and 12 locations to place the lipstick.
Print Settings
Printer:
Anet A8 Rafts:
Doesn’t Matter Supports:
Yes Resolution:
0.2 Infill:
20 -
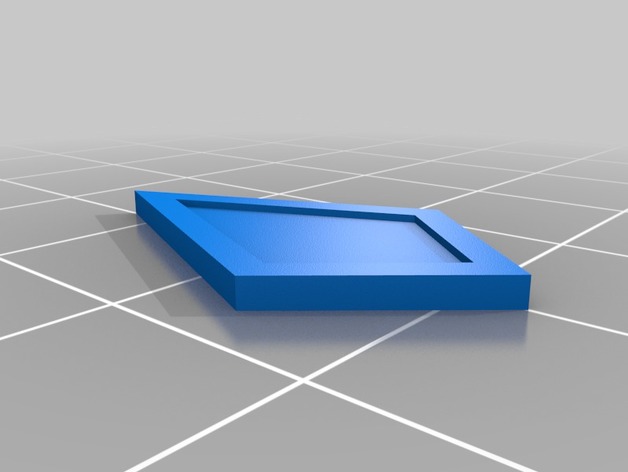
Colonial Rank Insignia 3D Print Model
Summary
Rank insignia worn by Colonial warriors in the 2003 Battlestar Galactica reboot.
So far I’ve finished the junior officers ranks, a couple of which cross over to the enlisted ranks; just needs a different paint color.
More to come.
As always, pictures or it didn’t happen. -
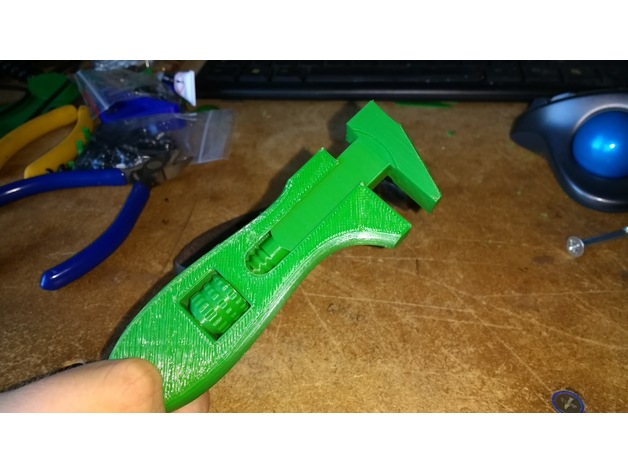
Useless (but cool) Adjustable Wrench/Spanner 3D Print Model
Summary
I recreated a neat little adjustable wrench I picked up from a car boot sale a while back. Just a fun little project and I thought someone might enjoy it.
There are two files for the clamp part of the wrench – one with a hole down the centre for a ~3in m5 wood screw to reinforce the threads, and one without.
If anyone wants to create their own custom threads in Fusion 360, check this out: https://knowledge.autodesk.com/support/fusion-360/troubleshooting/caas/sfdcarticles/sfdcarticles/Custom-Threads-in-Fusion-360.html
Print Settings
Printer:
Hypercube Rafts:
Doesn’t Matter Supports:
No Resolution:
0.16mm Infill:
20% Notes:
I actually forgot to toggle support material on the clamp part and it came out probably slightly better than the surface would have been with the supports removed -
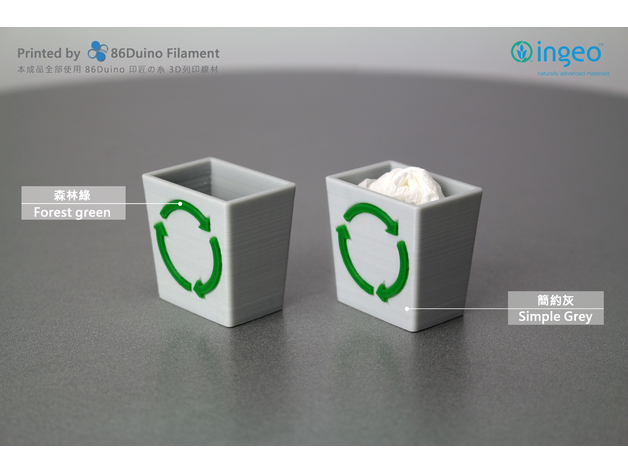
Windows 95 Recycle Bin 3D Print Model
Summary
have you used Windows 95?
Or you still using Windows 95 ?
Which version is the best in your Windows experience?
For more printing object please visit 86Duino facebook and give us a “like” and thanks for the tips…https://www.facebook.com/86duino
喜歡圖檔的好朋友請記得到 86Duino Filament 3D 列印 / 耗材 – 不正經研究中心 粉絲團給我們按讚哦 https://www.facebook.com/86duino -
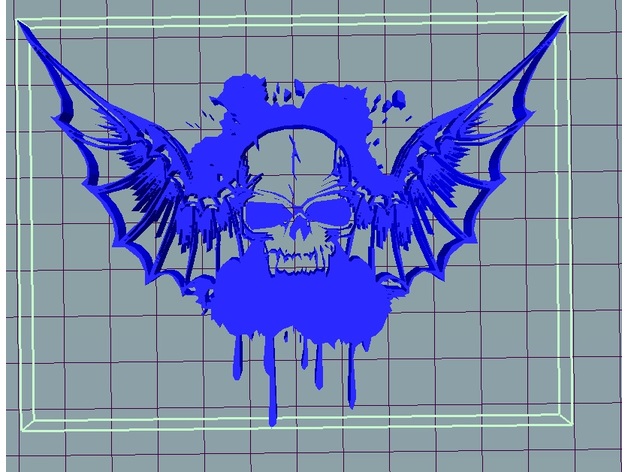
skull bat wings splash 3D Print Model
Summary
skull bat wings splash , this 3d model seems like useless however if you are creative you can use it well ,example :wall picture , stamp ,cnc milling and the list goes onOverview and Background
Lesson Plan and Activity
skull bat wings splash -
Screw Anchor 3D Print Model
Summary
I made this to be an screw anchor for the bumper of my Jeep but I think it should work for other things you need. -
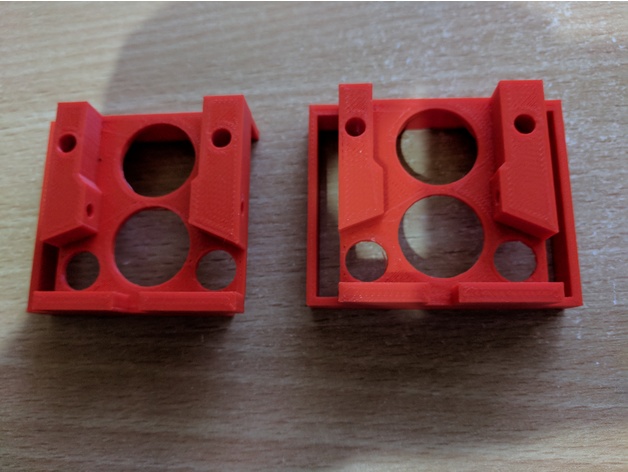
Remix Creality CR-10 Bed Leveling Indicator V3 3D Print Model
Summary
remix of CallJoe’s Creality CR-10 Bed Leveling Indicator V2 as it would not go over my air cooling exhaust.
Print Settings
Printer Brand:
FlashForge Printer:
Creator Pro Rafts:
No Supports:
Yes Resolution:
0.18 Infill:
20% Notes:
I added some extra manual supports in S3D to make sure I had no issues and printed on my FFCP as I’m still working out the bed leveling on the CR-10 and my gauge hasn’t arrived yet 🙂
How I Designed This
just used Tinkercad to remove the right hand side -
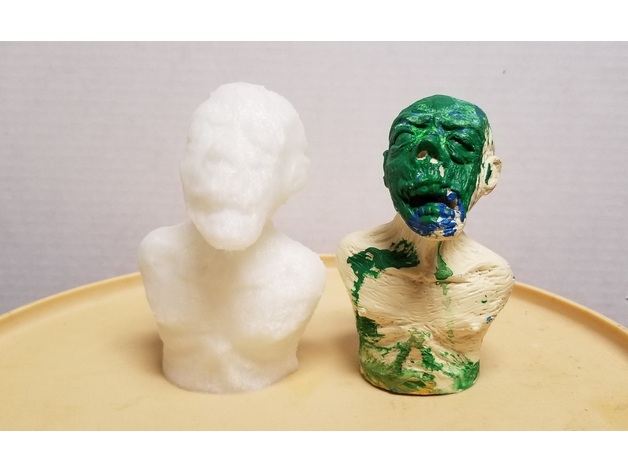
Zombie 3D Print Model
Summary
This is a lower resolution scan from a sculpture of a zombie bust. I ended up rigging a custom 3D scanner to automate taking pictures and depth mapping. This was more of a proof of concept for myself, but I really like how it came out. Feel free to print out some spooky zombies!
Print Settings
Printer Brand:
Wanhao Printer:
Duplicator 6 Rafts:
Doesn’t Matter Supports:
Yes Resolution:
.25mm Infill:
20% Notes:
The resolution and infill are first attempt numbers. I’m sure they can be tweaked to make this more efficient. The scale was a bit off, but I never intended for this to be a specific size. 2.5x scale was a good starting point. -
ANYCUBIC END EFECTOR FOR PCB PRINTING 3D Print Model
Summary
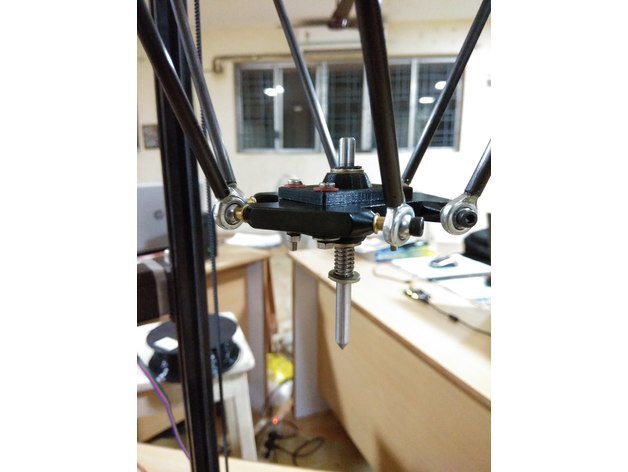
Get ready with all the parts along with the additional requirements on each parts. Assemble the part according to the sketch on the lower left corner on the sketch image. Place the copper plate on the working area. Upload the gcode file for PCB plotting. After the process is done you get a PCB, where you can solder the remaining electronic devices to get a circuit board.Materials Needed
Requirements
Shaft. Dimension: 6mm (Diameter), Material: Stainless Steel(SS), Length: 8cm
Circlips. Inner Diameter: 5mm , Qty: 2
Metal Washers: Inner Diamerter: 6.5mm, Outer Diameter:12. Qty: 3
Spring: Inner Diameter: 6mm
Shaft Holder. (3D Printed). File Attached as: Upper_part.stl
M3 SS Bolts. Qty: 4
Metal Washers. Inner Diameter :3mm Qty: 4
Fiber washers. Inner Diameter: 3mm Qty: 4
Spring Washers. Inner Diamerter: 3mm. Qty: 4
M3 Nuts. Qty: 4
Preparation
Making Parts Ready
1: The File attached under the name of Upper_part.stl must be printed before we start assembling stuffs (Two of such parts is needed). This might take a moment but please be patient.
2: After the Parts have been successfully printed, We need to calibrate the hole of 6mm which s there right on the middle of the work-piece. For this Take the 6mm shaft and heat it a little ( The Process which was used meanwhile was placing the Shaft on the Drill, Rotating it at its maximum speed and Applying Sandpaper on its Surface. This Process will not only heat he shaft but also will smooth the shafts surface.) The heated shaft is inserted in the hole so that the shaft moves through the hole with less resistance.
3: Making Circlip Slots, Mark 10mm and 50mm from one side of the rod (Let this side be named as A and other be B) Make the slots for the Circlip slots on those marked points. The method which we used was placing the shaft on the drill and then placing a hacksaw blade on the marked line)
4: Sharpening the Shaft, the other side of the shaft i.e B has to be sharpen. We used an angle grinder with a buffing blade, placed the shaft with some constant angle and rotated the shaft.
5: Ready the copper plate, The copper plate of required dimension was sliced out and one face of it is perfectly sketched with black sketch pen.Assembling Parts
Gather your Tools
Bolt both the 3D printed part, sandwiched between the bed. Apply Fiber washer below bolt head and Metal Washer right before spring washer and nut. Rest of the part should be assembled as the sketch image attached.
Feel free to ask any doubts regarding the assembly. -
Topiary Golem (Amazon) (28mm/Heroic scale) 3D Print Model
Summary
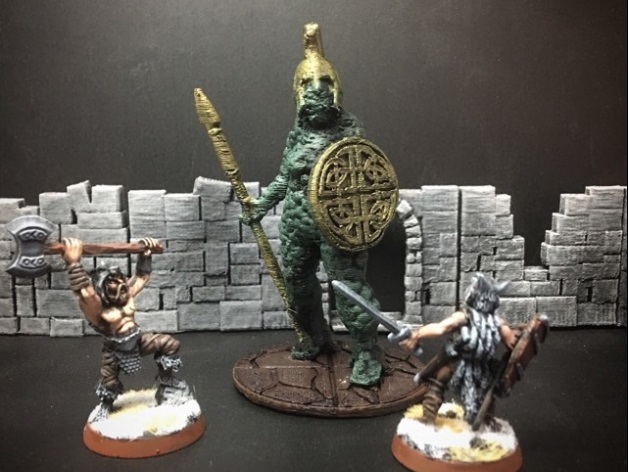
This character was designed for tabletop roleplaying/wargaming.
We’ve set up a Patreon page for anyone who’s interested in helping to fund us so we can keep making free and open sourced games like Pocket-Tactics, OpenTactics. and others, not to mention the growing catalog of gaming miniatures that you can use for whatever you want! (Psst… we take requests and commissions…)
Enjoy! -
Induction sensor mount for the D-Bot Core XY 3D Print Model
Summary
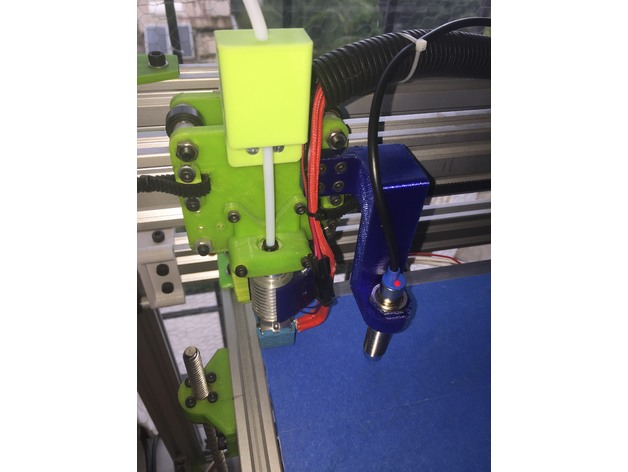
An induction sensor mount for auto bed leveling on the D-Bot. I tweaked my printer for almost 6 months before realizing I needed this. After this, first layers are flawless and overall print quality has also improved.
Print Settings
Printer:
D-Bot Core XY Rafts:
Doesn’t Matter Supports:
Yes Resolution:
0.2mm Infill:
50%+ Notes:
Print with either ABS or PETG. -
Stepper motor damper V2.0 3D Print Model
Summary
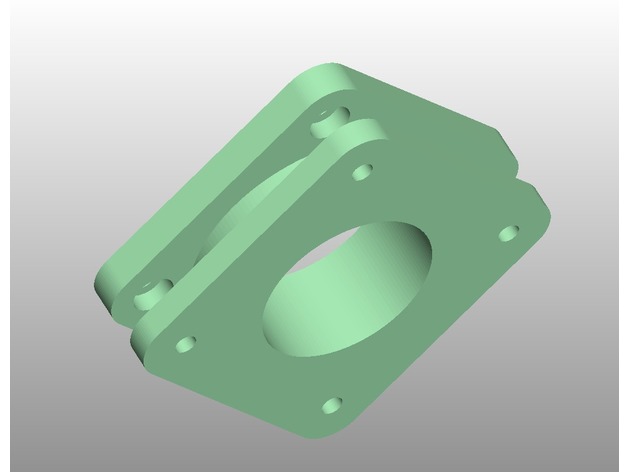
Hi this is stepper motor damper to make your printer way way quite , I made this so i can print day and night since my printer is near my bed and don’t want to be disturbed… i ordered original dampers but they are still on a slow boat from china and i didn’t want to wait…. 😀
I used this for my CR-10 printer for X and Y axis only and i needed following materials
8x M3 nut (you will need to insert this into the damper from the inner side)
8x M3 bolt x 5mm length (for stepper motor side)
4x M3 bolt x 8mm length (for mounting X axis sensor on CR-10)
4x M3 bolt x 6mm length (for mounting to Y axis support)
Please don’t over tighten your belts as this will make the support to bend and belt slide towards one side, tighten it just so the belt will not slide
hope you enjoy my design -
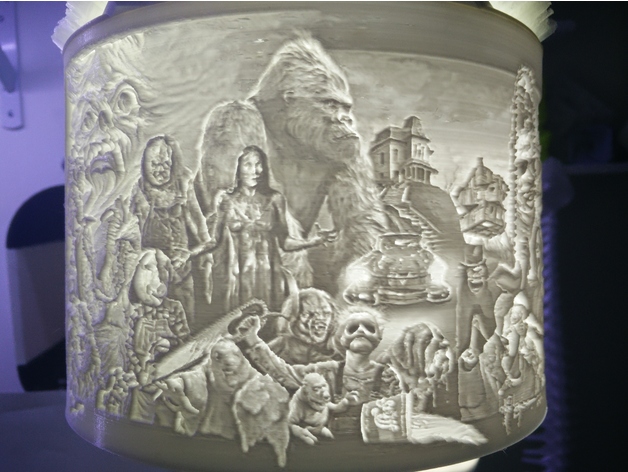
Halloween Horror Movie Lithophane 3D Print Model
Summary
I thought I would share the centerpiece of my Halloween project. This has to be the most epic horror movie mashup I’ve seen. I grew up loving horror movies and thought I would make an ode to them. The pictures don’t do it justice. Credit goes to Chris Labrenz for the original artwork. Video: https://youtu.be/mireoleQ9Z0 -
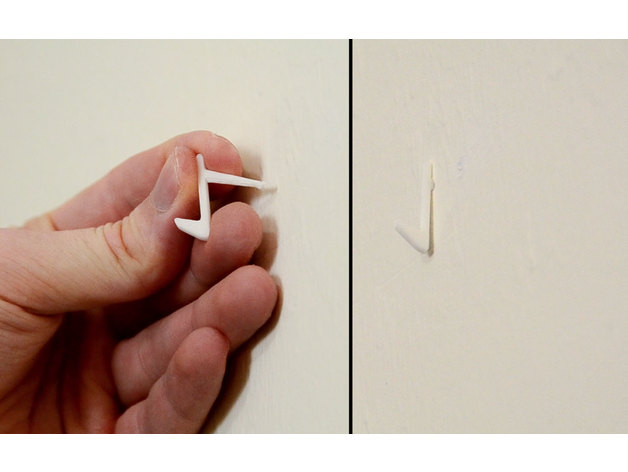
Vitamin Free Picture Hanger 3D Print Model
Summary
I needed to hang a picture, but I didn’t have any push pins, nails, or removable adhesives.
This small 3D-printable picture hanging hook can easily support a couple pounds in drywall while leaving a 2mm nail-size hole. And it only takes about a minute to print!
Installation/removal video: https://youtu.be/Bektwe62OsY
To install:
Pre-punch a 1.5mm to 2mm hole at a slight downward angle using a small screw driver or allen key.
Insert printed hook into new hole.
Hang picture/decor on hook. -
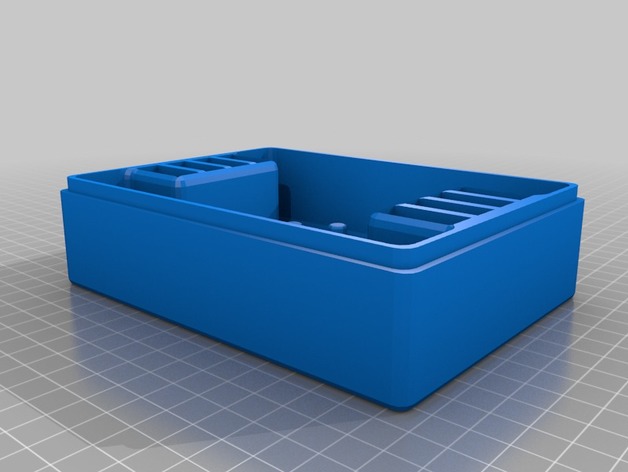
JJRC JJPRO T1 Case 3D Print Model
Summary
Since I couldn’t find any carrying cases/ boxes for my T1, I decided to make my own.
Print Settings
Printer Brand:
MakerBot Printer:
MakerBot Replicator Rafts:
Yes Supports:
Yes Resolution:
.2 Infill:
15% Notes:
Bottom piece took around 11 hours.
Top piece took around 4 hours.
Many features are overbuilt/ thicker than they needed to be. I made it this way to make the box sturdier.
Post-Printing
Filing
The inside of the top piece may need to be filed in order to fit the lip on the bottom piece depending on the tolerances of individual printers.
Or you can edit the CATIA part to make it the inside wider if needed. -
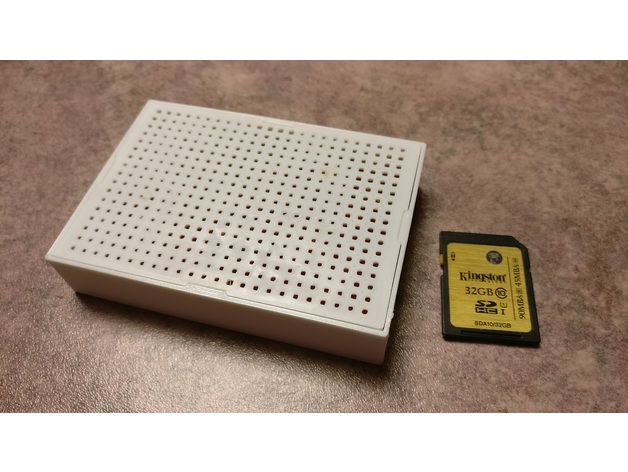
Desiccant box, microwaveable 3D Print Model
Summary
This is my own version of a desiccant (silica gel beads) box. Designed for a 0.4mm nozzle, 0.2mm layer height, PETG recommended for microwave use.
Design goals:
-Microwaveable!!!
->waterproof
->no metal
->no glue
->if warpage occurs after heating, flat surfaces easily restored with a flat table surface
->heat will not cause desiccant leakage
Silica gel desiccant: cheapest to buy in bulk, by the quart, on amazon, ebay, etc. I recommend either the orange indicator type or orange indicator mixed with clear type. -
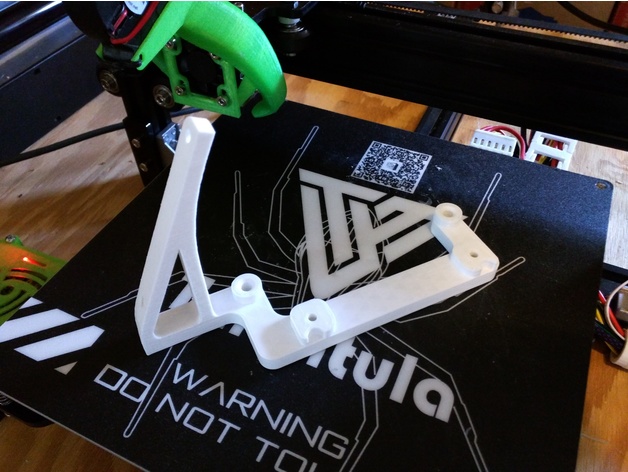
Display and board stand for Tevo Tarantula 3D Print Model
Summary
It’s a display and board stand for the Tevo Tarantula that keeps all the fancy clear acrylic pieces. Print twice, with one of them mirrored. Supports are helpful for the upside-down countersunk holes in the base, but not strictly necessary.
I will eventually tame this rat’s nest of wires; this is just the first step. -
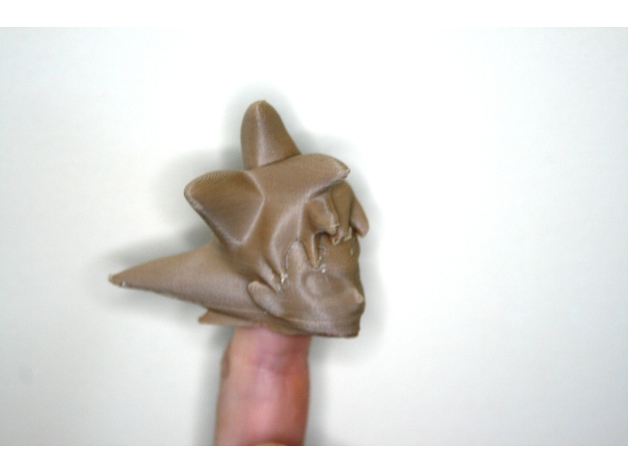
Fingerspop Goku 3D Print Model
Summary
le Fingerspop est une figurine pouvant se déposer sur le doigt. les enfants adorent, il se les échanges dans les cours de récréation et s’invente des histoires avec.
le Fingerspop et née d’une association entre la société LV3D et moi-même
Si vous n’avez pas d’imprimante 3D cela n’est pas grave vous pouvez toujours les imprimer chez LV3D en cliquant sur ce lien
https: //lv-3d.fr/impression-3d …
Code promo: BRICOLOUPLV3D
PACK « LV3D DÉCOUVERTE » https://lv-3d.fr/produit/pack-imprima…
Voici le lien où vous trouverez tout les modèles existants:https://pinshape.com/users/238658-sebastien-bricoloup#designs-tab-open -
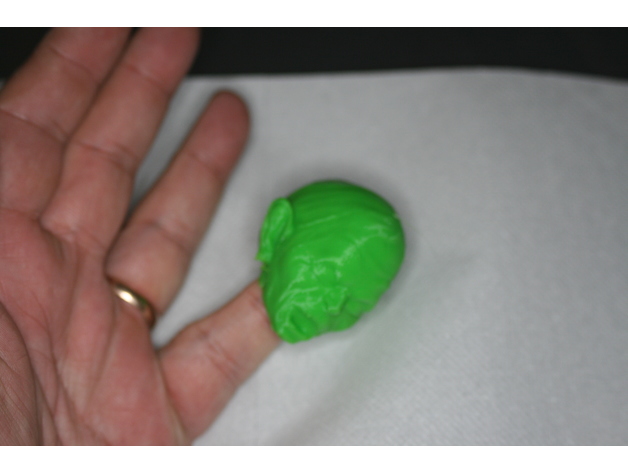
Fingerspop Gollum 3D Print Model
Summary
le Fingerspop est une figurine pouvant se déposer sur le doigt. les enfants adorent, il se les échanges dans les cours de récréation et s’invente des histoires avec.
le Fingerspop et née d’une association entre la société LV3D et moi-même
Si vous n’avez pas d’imprimante 3D cela n’est pas grave vous pouvez toujours les imprimer chez LV3D en cliquant sur ce lien
https: //lv-3d.fr/impression-3d …
Code promo: BRICOLOUPLV3D
PACK « LV3D DÉCOUVERTE » https://lv-3d.fr/produit/pack-imprima…
Voici le lien où vous trouverez tout les modèles existants:https://pinshape.com/users/238658-sebastien-bricoloup#designs-tab-open