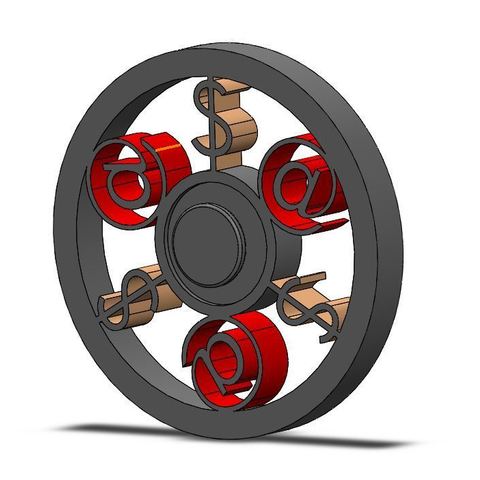
Tribal Tattoo model for print.Modeled in 3DS MAX.Checked with STL check modifier and Blender Add-on 3d print tool.Faces: 11939Vertices: 23874x: 74,429 cmy: 0,363 cmz: 76,487 cm.Resizing can be done on request.
Category: 3D Print Models
Premium & 3D Print models ready to be 3d printed. 3D Print Models and Free 3D Print Models are available for download in several formats including .STL, .3DM, .OBJ, .3DS, .DAE, .SKP, .BLEND, .DWG, .DXF, .STEP and much more. If you’re in search of high-quality 3D printed assets, we have a huge library of 3d print models for any of your needs. Also you can visit 3D Models and All 3D Models category.
-
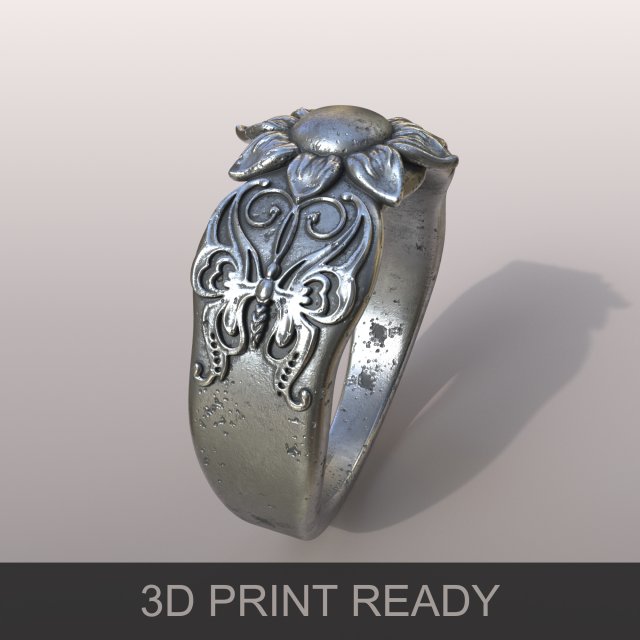
Ring butterfly Free 3D Model
3D model ring butterflyReady for 3d printingDimensions:- 11.5mm x 22.5mm x 23.9mm in stl/obj file- 1.15cm x 2.25cm x 2.39cm in max files- inner diameter – 18 mm (stl/obj)- 1.8 cm (3ds max)Also you can use it for render, max file contain scene ready for render 3ds Max 2016 (Corona render 1.5.2)——————————————————————————-FEATURES:- Model is built to real-world scale- Scene lighting is included- UVs- Presented render not been subjected to post-processing——————————————————————————-TEXTURES (4096×4096):- ring_butterflyt_Diffuse.png- ring_butterfly_Normal.png- ring_butterfly_Reflection_color.png- ring_butterfly_fresnel_ior.png- ring_butterflyt_reflection_glossiness.png- ring_butterfly_Height.png- HDRI map——————————————————————————-SUPPORTED FORMATS:- 3ds Max 2016 (Corona render 1.5.2)- obj- stl——————————————————————————-If the product satisfies you, check also my other models.Created by Dragon Utopia, 2017.
-
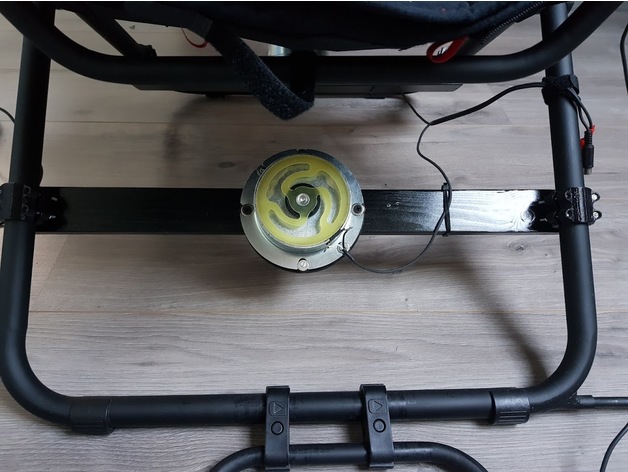
Aura bass shaker mounting plate 3D Print Model
Summary
Designed this plate to mount an Aura Basshaker to my Playseat Challange.
Used the following clamp to mount it all:https://www.thingiverse.com/thing:561762
Used a simple woorden bar between the legs using the above clamps and used this mounting plate to mount the bass shaker itself.
Print Settings
Printer Brand:
Wanhao Printer:
Duplicator 6 Rafts:
Doesn’t Matter Supports:
No Resolution:
0.2 Infill:
50 Notes:
Used PLA. Tried PETG but its to flexible to me. -
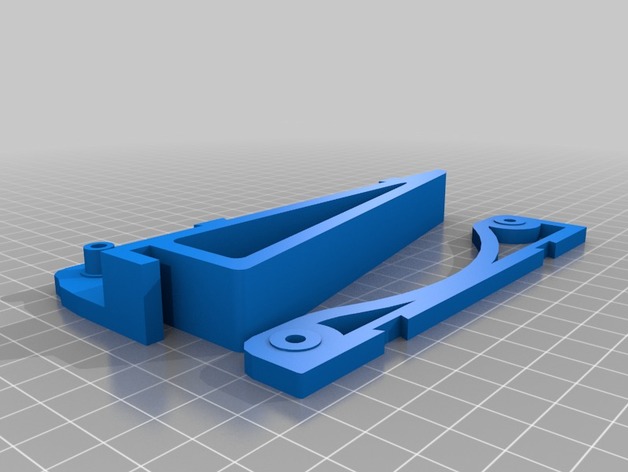
CTC Prusa Low friction spool holder 3D Print Model
Summary
for CTC prusa i3 5mm plywood frame
resolution 0.3mm -
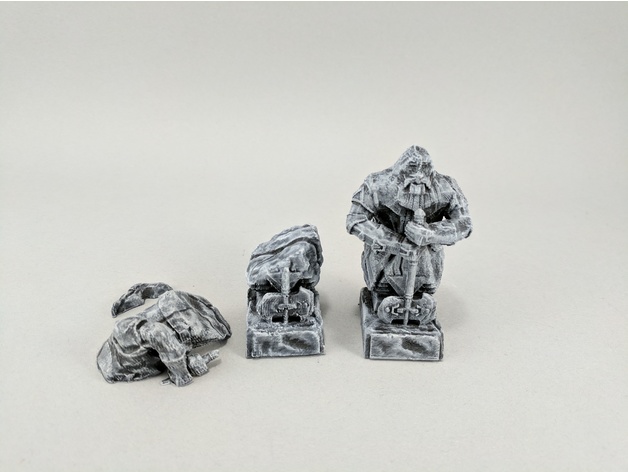
Worn and Broken Dwarven Statues 3D Print Model
Summary
This is a remix of Wargaming_Miniature_Showcase’s Dwarven Paragon with Battleaxe. I needed a few old and broken dwarven statutes for my game so I roughed up and broke apart this model.
Enjoy!
Print Settings
Printer:
Maker Select v2 Rafts:
No Supports:
Yes Resolution:
.1mm Infill:
12%-15% -
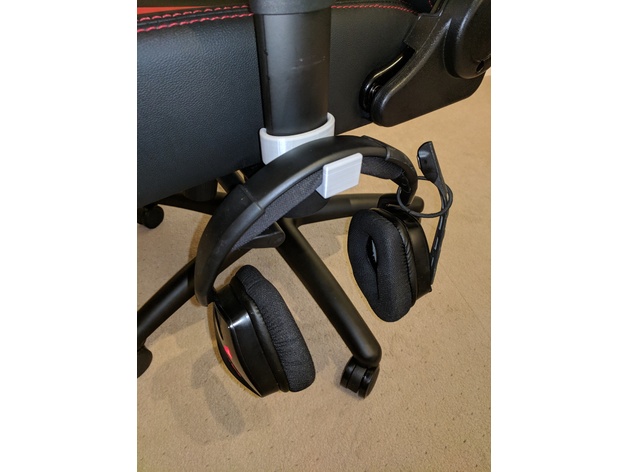
GT Omega headset holder 3D Print Model
Summary
Made for the GT Omega Racing Master XL chair (might fit other models). Clips to the bottom of the arm rest (left or right), and lets you hand your headset for easy access.
Print Settings
Printer Brand:
Wanhao Printer:
Wanhao Duplicator i3 V2 Rafts:
No Supports:
No Resolution:
0.2mm Infill:
25% -
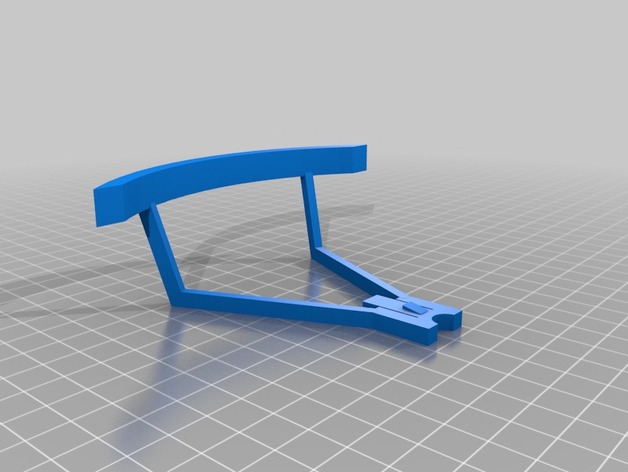
Visuo XS809 Prop Guard 3D Print Model
Summary
The Prop-Guards on my Visuo Drone needed to be changed….
First try.
Print Settings
Printer:
ANET A8 Rafts:
No Supports:
Yes Resolution:
0.2 Infill:
5% -
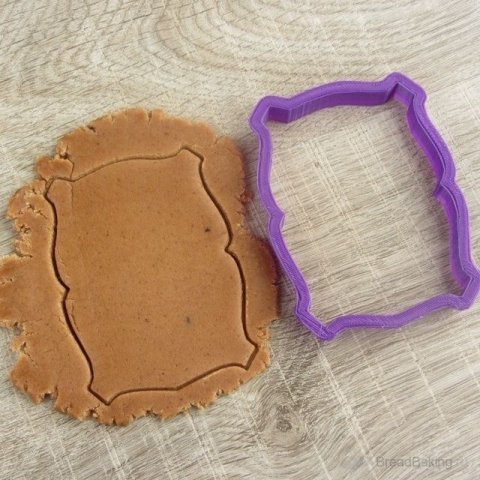
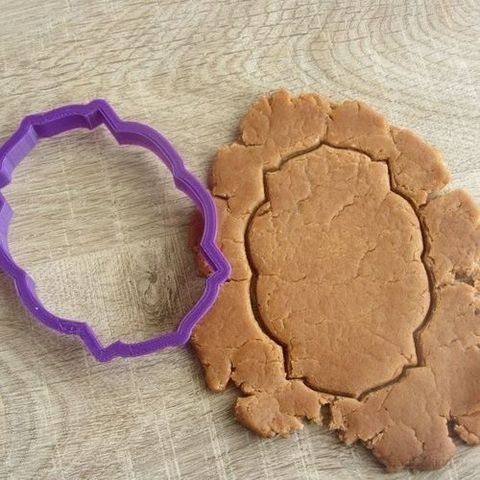
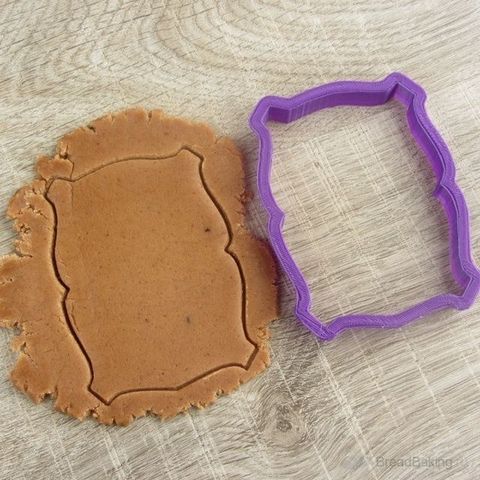
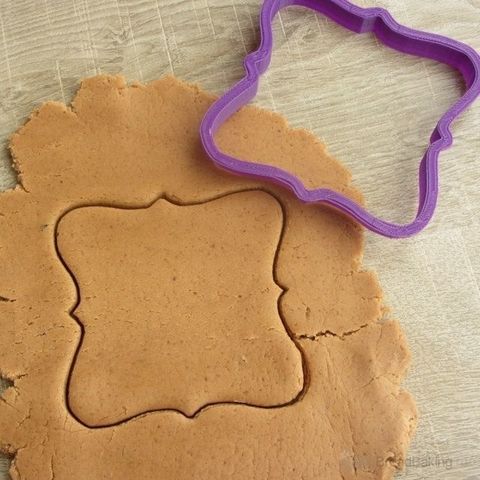
Plate 24 cookie cutter for professional 3D Model
It is a professional cookie cutter, with special cut surface. This cutter was tested by professional pastry. It can be use with fondant (sugar paste) too.The size of the form – 99 mm.
-
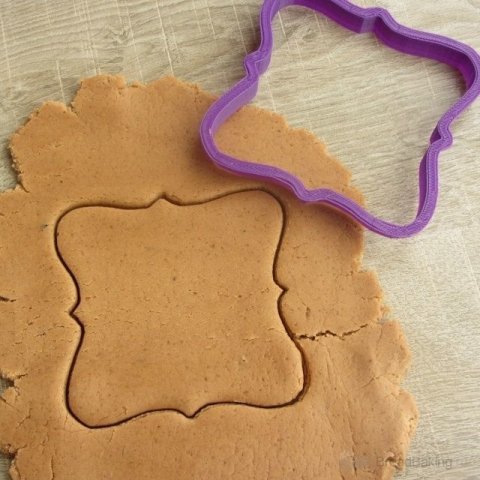
Plate 23 cookie cutter for professional 3D Model
t is a professional cookie cutter, with special cut surface. This cutter was tested by professional pastry. It can be use with fondant (sugar paste) too.The size of the form – 97 mm.
-
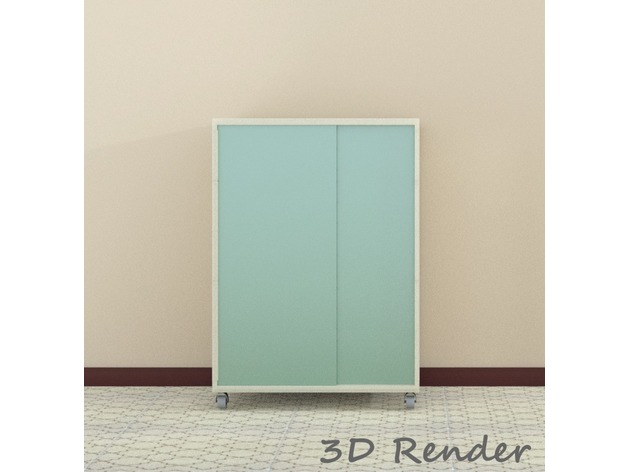
Cabinet 3D Print Model
Summary
Cabinet should measure about 24″ x 36″ x 16.5″ when completed. 1/4″ wood dowels (oak dowels recommended) connect the parts along the width and regular dowels along the depth. I have not determined if glue will be necessary. PLA/PHA or another filament that allows some flexibility is neccessary.
Print Settings
Printer Brand:
Prusa Printer:
Prusa Clone Rafts:
No Supports:
No Resolution:
.2 mm Infill:
20% Notes:
2 perimeters -
Zombie Pikachu coming out of my head 3D Print Model
Summary
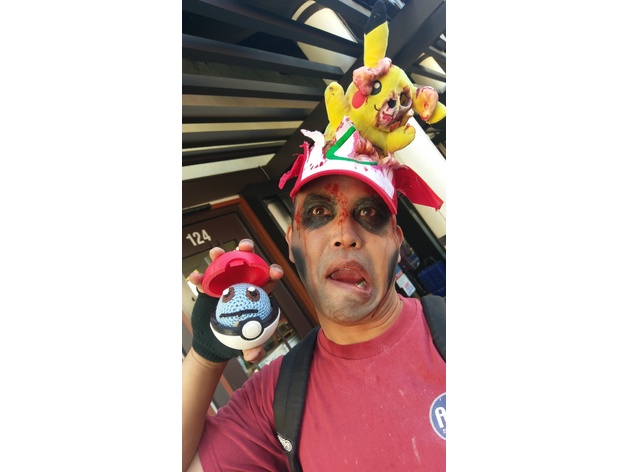
As I’m performing as a zombie in Little Tokyo for the 2018 Thrill the World event, I wanted to go with an Anime theme. Hence, zombie Pikachu coming out of my head.
The Pikachu doll (fair use!) was from Amazon, as was the hat. I 3D printed the Pikachu skull (based on bfince’s cat skull), and inserted it into the head, Terminator style. I also designed a “skull cap” with a hole and brains coming out.
Small plush Pikachu: https://smile.amazon.com/gp/product/B00GGKKXC8/ref=oh_aui_detailpage_o02_s00?ie=UTF8&psc=1
Ash hat: https://smile.amazon.com/gp/product/B00A4XBTX0/ref=oh_aui_detailpage_o03_s00?ie=UTF8&psc=1
I also used Great Stuff spray foam (windows and doors) to fill in some “brains.”
For the STL files, I’m including the modified cat skull, 4 versions of the skull cap. One with no brains in case someone wants to use it. One low poly count brain version, one with a higher poly count (It may be 5mm shorter than the previous ones, after test fitting for my own head). The 4th one has the doll support I glued on pre-merged with the skull cap.
I’m holding a Pokeball designed by Intentional3D: https://www.thingiverse.com/thing:411193 The little Squirtle inside is a friend’s crochet creation.
CostumeChallenge2017
Print Settings
Printer Brand:
Wanhao Printer:
Wanhao Duplicator i3 Plus Rafts:
No Supports:
Yes Resolution:
0.2mm Infill:
20
How I Designed This
Here’s the Imgur album on the design: https://imgur.com/a/lFLDL
Basically, I took that skull cap, scaled it up, made a “hole version” offset a few mm down to make the whole thing thinner. Cut off the bottom with a box to give it a printable edge, and cut out the jagged hole with a bunch of polygons.
I imported that into Oculus Medium as a stamp, and sculpted some brains around the edges, exported that back into TinkerCAD to merge with the skull cap.
The cat skull was scaled upward and filled in with solid polygons to better fit the doll head.
Pained the “brains” a salmon color for a base coat. Will add some browns and reds.Some more detail on the skull cap. I really should have primed it first. Some painting done to darken the eye and nose socket, and make the tongue red. Dilute wash of red over a lot of the skull.
Found I needed a support structure to hold up the doll. Printed this up, and glued it on. New version of the file has it incorporated
Skull placed into doll.
-
Wu Wei: Journey of the Changing Path 3D Print Model
Summary
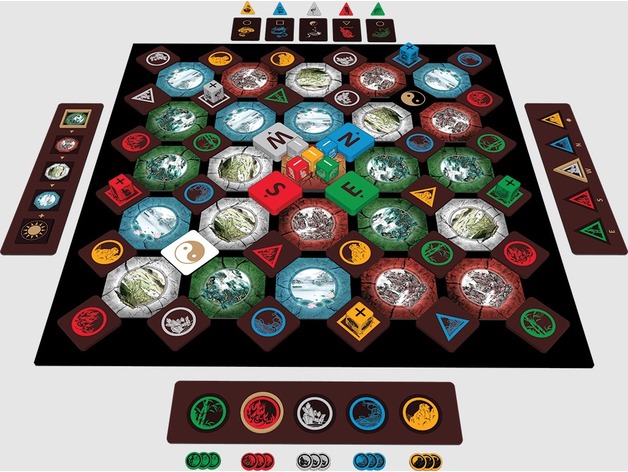
Wu Wei: Journey of the Changing Path is a strategy game that embraces the universal concept of the Tao (the way). This game is deeply rooted in Chinese philosophy martial arts strategy and carries with it the concepts of yin and yang, the four seasons, chi (energy), and the eight directions.
You will need to paint and print out the cards to play. -
Anet A8 – Logitech C310 Webcam Nozzle Mount 3D Print Model
Summary
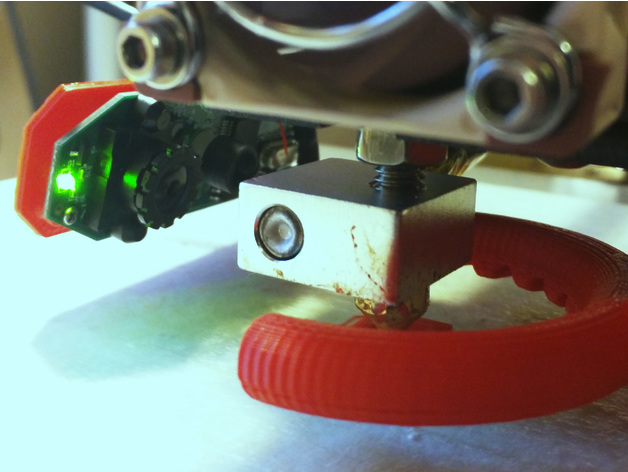
This is a small bracket for mounting a Logitech C310 webcam to the print head of your Anet A8 so that you can monitor the print nozzle. Since it simply inserts into the bearing this might work on other printers with similar design. But I cannot guarantee that.
Here is a youtube video showing it in action. As you can see it can make a pretty detailed image of how your nozzle is performing.
Also, this is designed for a fairly stock Anet A8 and it just barely clears the frame and other parts while homed. If you’ve made major modifications to your A8 this might not work and you might have to alter the stl file.
As you can see from the photos you’ll have to remove the casing of the webcam and get to the bare electronics. This can be tricky for the inexperienced. There is a wire soldered to the board that has to be un-soldered and re-soldered. If you break your webcam it’s not my fault, obviously.
Important note: There is a dab of glue on the side of the main lens that holds it at a certain focus distance. You’ll have to remove that dab of glue with a small pick of some kind. After that you can screw the main lens in and out to change the focus distance. Here is a video showing that.https://www.youtube.com/watch?v=v-gYgBeiOVI
Print Settings
Printer:
Anet A8 Rafts:
No Supports:
No Resolution:
0.2 mm Infill:
100% -
Adjustable Y Axis Tensioner 3D Print Model
Summary
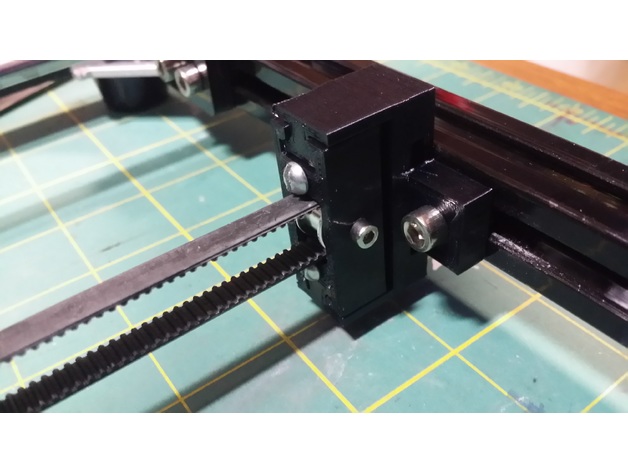
I designed this adjustable tensioner bracket for my HICTOP 3DP-17 Y-Axis as the stock ‘pulley’ would not keep the belt on the bearing and would rub (and squeak) no matter how well aligned it was.
This design should also work with most 20X20 extruded aluminum frame printers.
I purchased the Timing Belt Idler Pulley from Amazon:https://www.amazon.com/gp/product/B01H3FNZ4M
To build, use either M3x25 or 6-32 X 1″ bolts for the adjustment screws.
I designed it for M3 bolts with M3 nuts in the nut traps but didn’t have any 25mm long so I just used some 6-32 machine screws I had laying around.
The idler pulley will need an M3 X 16 or longer bolt to hold it in.
Happy printing!
Print Settings
Printer Brand:
Prusa Printer:
Prusa Clone Rafts:
No Supports:
No Resolution:
.2mm Infill:
55%+ -
Tribal Tattoo 1 3D Model
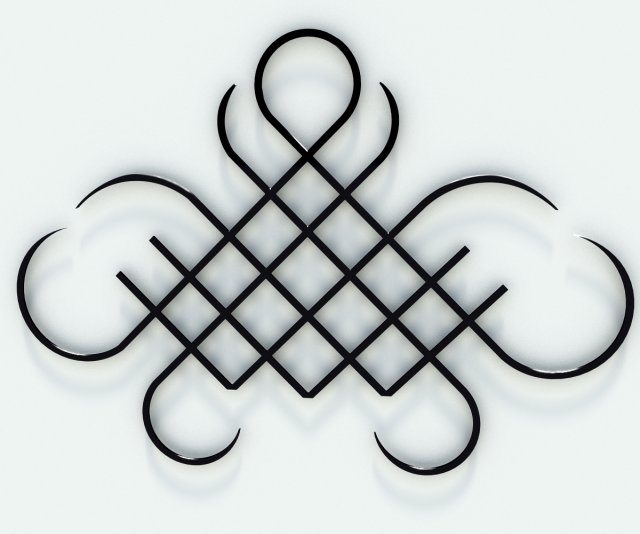
Tribal tattoo style for 3d printing.55,077 x 39,124 x 0,258.Faces: 4493Verts: 4431One object named tribal01.Modelled in 3ds Max.Checked with Blender Add-on 3d priter box.The pictures above is rendered with Mental RayMore tribal tattoos to come!
-
Tribal Tattoo 3 3D Model
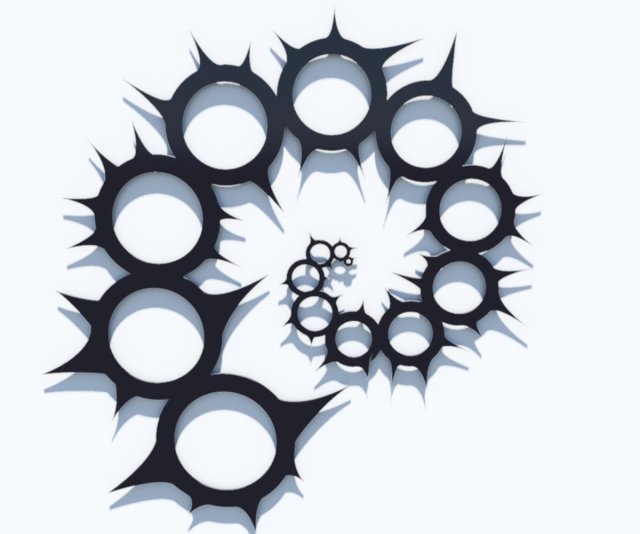
Tribal Tattoo model for print.Modeled in 3DS MAX.Checked with STL check modifier and Blender Add-on 3d print tool.Faces: 15276Vertices: 17107x: 74,096 cmy: 0,227 cmz: 78,743 cm.Resizing can be done on request.
-
Halloween Sphero BB-8 Witch Hat 3D Print Model
Summary
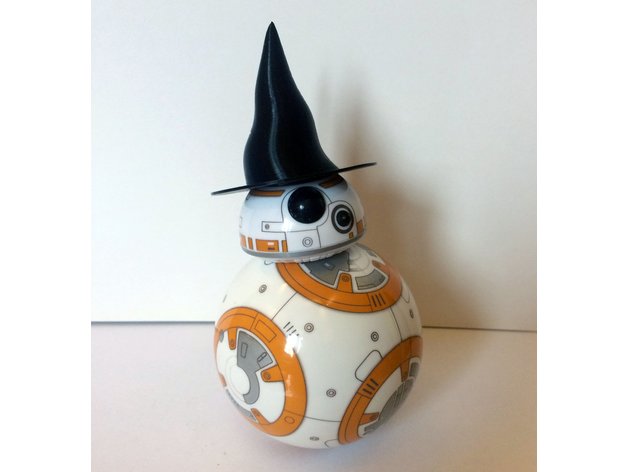
Printed 0.3 layer height
0% infill
No supports
Used a little blu-tack / sticky tack to hold it in place. -
Malyan M150 LCD Angle Mod 3D Print Model
Summary
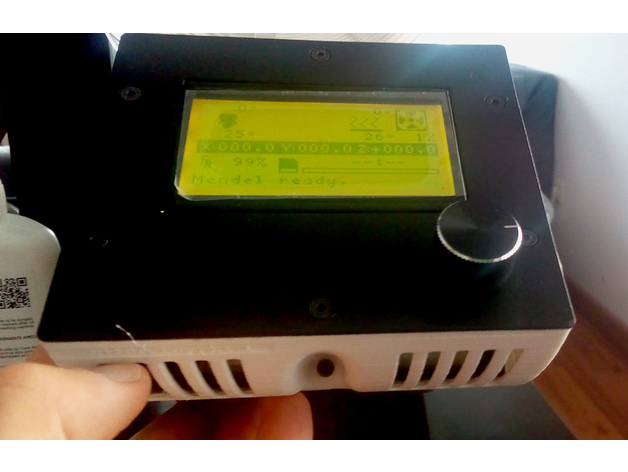
Don’t understand why everyone just copying “Di3 LCD Angler” from cheetahkid and name it as “Malyan m150 mod”. Ok it’s 99% similar, but it has parts that we don’t need. For the first time on thingiverse, true mod, designed specially for real Malyan M150 and similar. There is no stupid sd card hole on the side, no place for RepRapDisco’s Stop button, Just the stuff that we need.
Will need 6 nuts for all the screws from lcd’s part.
One extra screw to hold the angler at bottom.
Just small issue, the construction is fine but there will be some lift anyway.
Like it and Enjoy!
Print Settings
Printer:
Malyan M150 Rafts:
No Supports:
Yes Resolution:
0.1 Infill:
20% Notes:
Print that with at least with 20% infill, place a lot of support for the vents. -
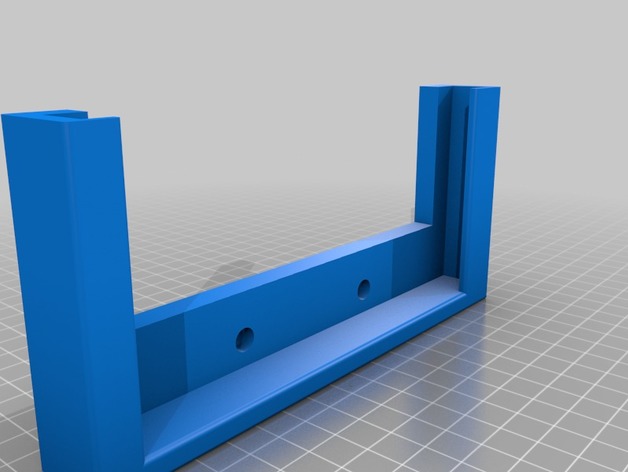
Fanatec CSL Elite Support S8 3D Print Model
Summary
Support for Samsung S8 to apply to Flying Fanatec CSL Elite.
Support was created to support the phone with its “Unicorn Beetle” cover
In short, I will make a version for the phone without Cover. -
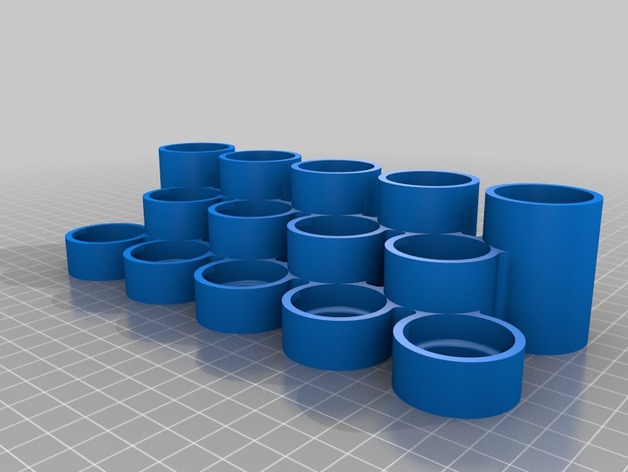
Essential oil counter display 3D Print Model
Summary
I made this for my wife and decided to share. there are 3 configurations for this set, single, double wide and a double tall and expandable infinitely the more you print them. DO NOT SCALE they are sized for 5 and 15 ml bottels. enjoy -
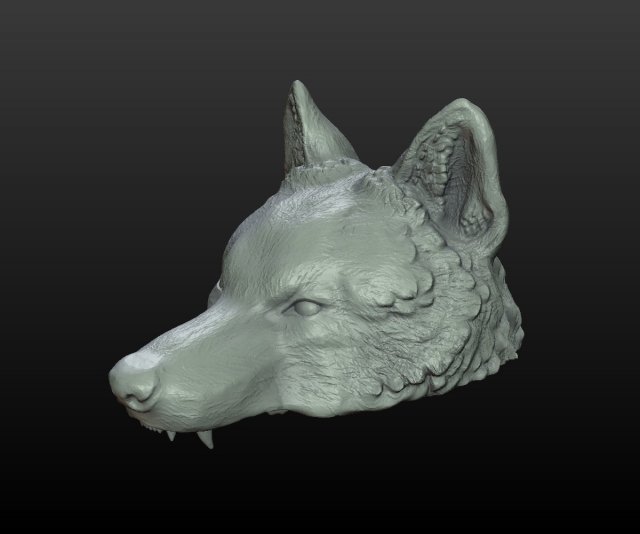
Wolf Cap 3D Model
High poly wolf head cap.Diameter of opening: 21.8×20 cmMeters was used as measure units it is about 33 cm in length.Each file contains one mesh object except for files with suffix “_parts” there it is divided in two parts like on one of screenshots.Object is manifold, there is no bad contiguous edges and loose partsNative format is .blend.avilable formats: .blend, .fbx, obj, stl, .3ds.Faces count: 391216
-
Archer Night Vision Goggles 3D Print Model
Summary
I made these for a Archer Halloween costume. I used a shade 5 green welding shield for the lenses with a green vinyl mesh overlay. Visibility is pretty good. I used a rubber strap from a pair of swim goggles for the strap and I padded the interior of the lenses with foam. For the bridge of the nose I used a small part of the swim goggle strap that was excess.
Im making it public, so I can’t stop you from printing and selling it, all I ask is that you give me credit for the model.
If you print for your own personal use please, please, please post pictures! Theres nothing cooler than seeing someone make/use something you designed!
Print Settings
Printer Brand:
Prusa Printer:
Prusa Clone Rafts:
No Supports:
Yes Resolution:
.1 Infill:
25% -
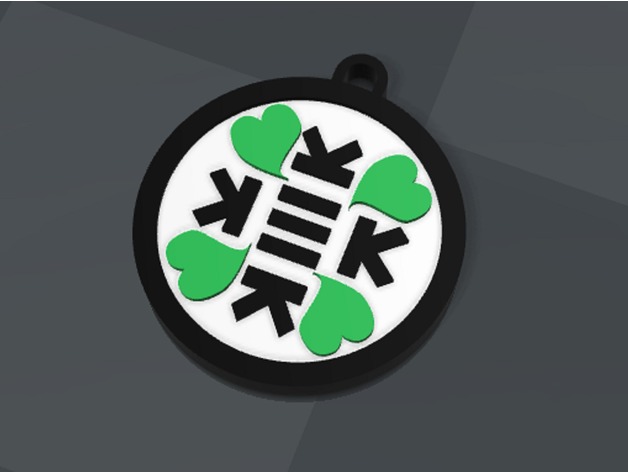
Medallion Of Kekistan 3D Print Model
Summary
I just wanted to make a Medallion Of Kekistan that can be printed with more than one colour so it would stand out more when it is put on a keychain and or worn as a medallion.
Print Settings
Printer:
Anet A8 Rafts:
Doesn’t Matter Supports:
No Infill:
20% -
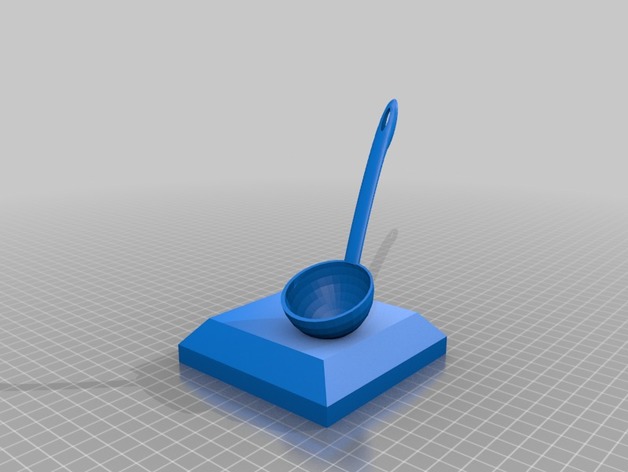
Chili Cook Off Trophy 3D Print Model
Summary
Chili Cook Off Base and Ladle Only
Chili Cook Off Base and Ladle w/flames
Chili Cook Off Base and Ladle w/Texas -
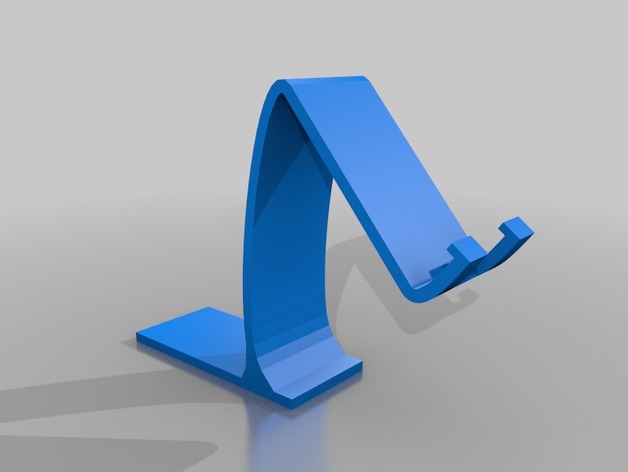
Slide-under Phone Mount 3D Print Model
Summary
Hello, I took danielolivier’s phone stand and made a version that can slide under an object to hold it stable (such as a monitor base). You may have to scale down 10x. Let me know how you like it and let me know if you have any more small ideas for items to remix. -
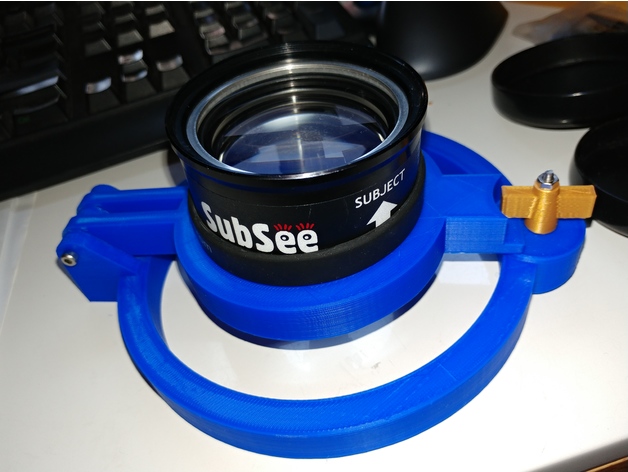
Camera house mount for Subsee +10 3D Print Model
Summary
I have make a Subsee +10 len mount for my Olympus camera diving house.
Apart from the printing parts, you will need some screw and nuts
M3 35 mm X 3
M3 40 mm X 1
M3 nut X 4
M3 washer X 2 -
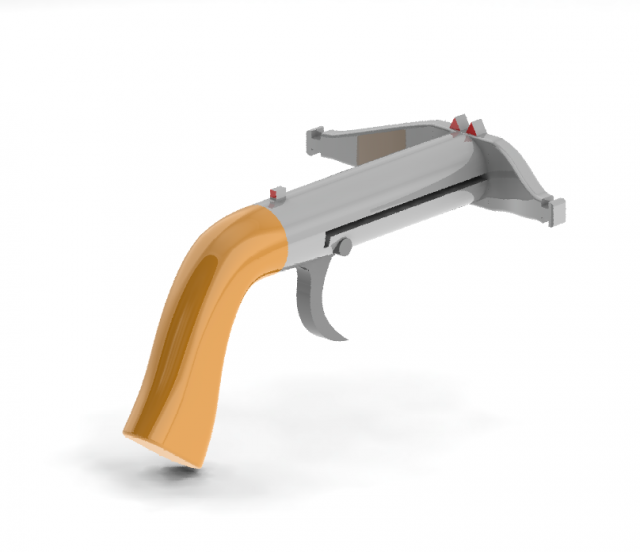
Crossbow-mini Free 3D Model
Hello. Boring day at office…this is the right answer for it. Make it for you and your co-worker and have fun. Just simply install rubber band,put the bolt trough body and trigger. Darts make from grill sticks ( on the and of darts put balls) and you are ready for war.For printing i used 0,2mm precision, PETG with hotend 250C,bed first layer 75C and then 50C. No suport needed.crossbow lenght: 14cmheight:6.5cmdarts lenght: 7.5cmrange: cca. 6-7m
-

Halter für Steckernetzteil 3D Print Model
Summary
Kleiner Halter für Steckernetzteile mit der Möglichkeit das Kabel aufzuwickeln. -
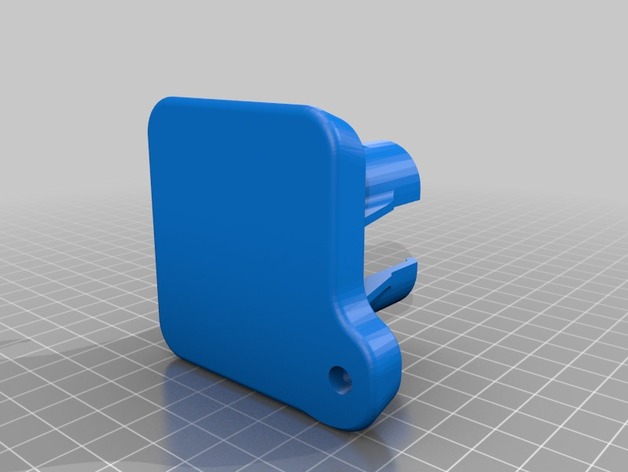
Plate Adapter for Gopro Session for Zhiyun Gimbal 3D Print Model
Summary
Center Mount Plate Adapter for Gopro Session for Zhiyun Gimbal
Print Settings
Printer:
CR10 Rafts:
No Supports:
No Resolution:
.2 Infill:
20 Notes:
you have to have a 12mm steel dowel mounted with a 6mm screw to make this balance -
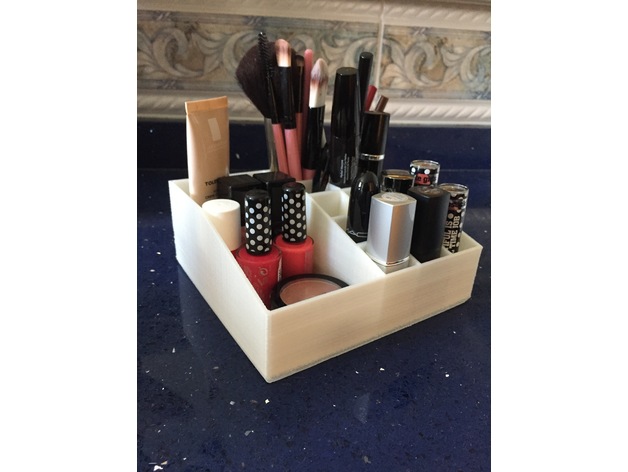
Make up organizer 3D Print Model
Summary
Makeup organizer, has a main hole to place large objects, two deep holes in the back to place brushes and 12 locations to place the lipstick.
Print Settings
Printer:
Anet A8 Rafts:
Doesn’t Matter Supports:
Yes Resolution:
0.2 Infill:
20 -
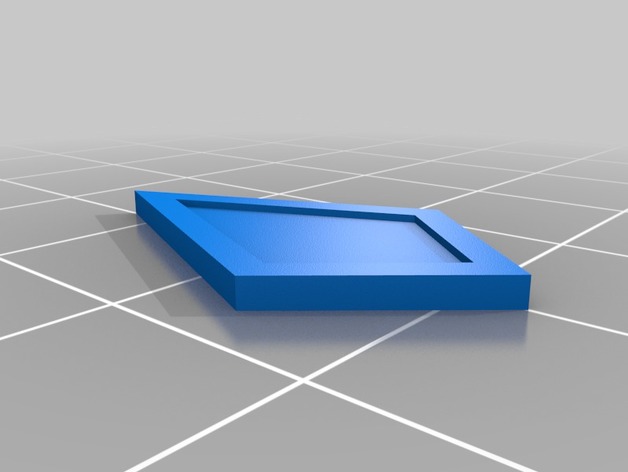
Colonial Rank Insignia 3D Print Model
Summary
Rank insignia worn by Colonial warriors in the 2003 Battlestar Galactica reboot.
So far I’ve finished the junior officers ranks, a couple of which cross over to the enlisted ranks; just needs a different paint color.
More to come.
As always, pictures or it didn’t happen. -
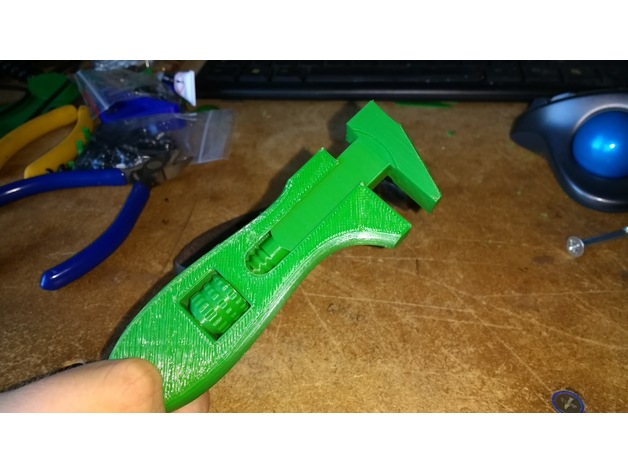
Useless (but cool) Adjustable Wrench/Spanner 3D Print Model
Summary
I recreated a neat little adjustable wrench I picked up from a car boot sale a while back. Just a fun little project and I thought someone might enjoy it.
There are two files for the clamp part of the wrench – one with a hole down the centre for a ~3in m5 wood screw to reinforce the threads, and one without.
If anyone wants to create their own custom threads in Fusion 360, check this out: https://knowledge.autodesk.com/support/fusion-360/troubleshooting/caas/sfdcarticles/sfdcarticles/Custom-Threads-in-Fusion-360.html
Print Settings
Printer:
Hypercube Rafts:
Doesn’t Matter Supports:
No Resolution:
0.16mm Infill:
20% Notes:
I actually forgot to toggle support material on the clamp part and it came out probably slightly better than the surface would have been with the supports removed -
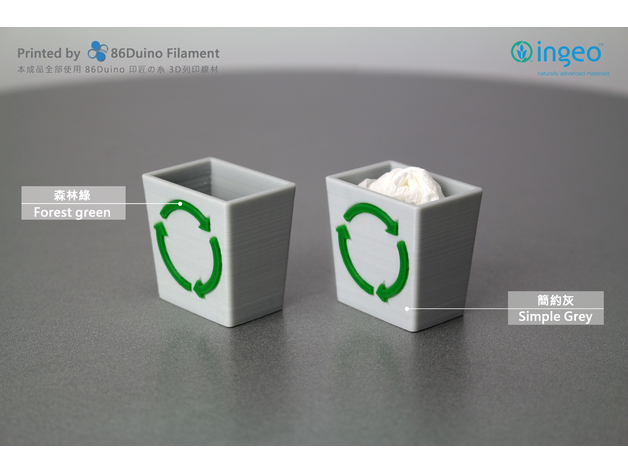
Windows 95 Recycle Bin 3D Print Model
Summary
have you used Windows 95?
Or you still using Windows 95 ?
Which version is the best in your Windows experience?
For more printing object please visit 86Duino facebook and give us a “like” and thanks for the tips…https://www.facebook.com/86duino
喜歡圖檔的好朋友請記得到 86Duino Filament 3D 列印 / 耗材 – 不正經研究中心 粉絲團給我們按讚哦 https://www.facebook.com/86duino -
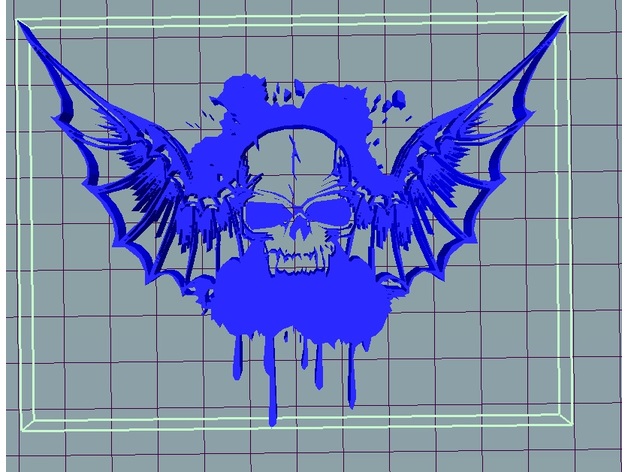
skull bat wings splash 3D Print Model
Summary
skull bat wings splash , this 3d model seems like useless however if you are creative you can use it well ,example :wall picture , stamp ,cnc milling and the list goes onOverview and Background
Lesson Plan and Activity
skull bat wings splash -
Screw Anchor 3D Print Model
Summary
I made this to be an screw anchor for the bumper of my Jeep but I think it should work for other things you need. -
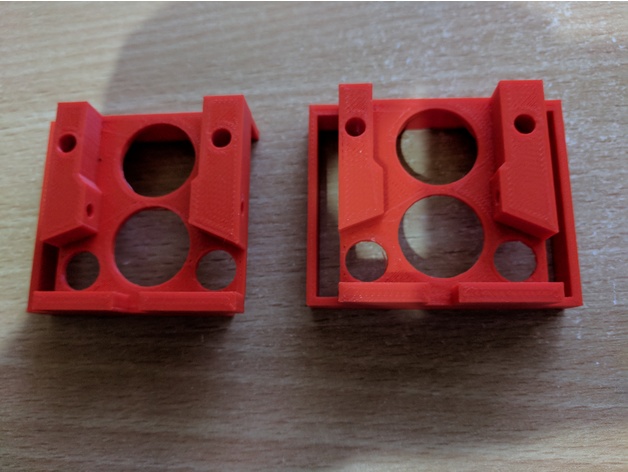
Remix Creality CR-10 Bed Leveling Indicator V3 3D Print Model
Summary
remix of CallJoe’s Creality CR-10 Bed Leveling Indicator V2 as it would not go over my air cooling exhaust.
Print Settings
Printer Brand:
FlashForge Printer:
Creator Pro Rafts:
No Supports:
Yes Resolution:
0.18 Infill:
20% Notes:
I added some extra manual supports in S3D to make sure I had no issues and printed on my FFCP as I’m still working out the bed leveling on the CR-10 and my gauge hasn’t arrived yet 🙂
How I Designed This
just used Tinkercad to remove the right hand side -
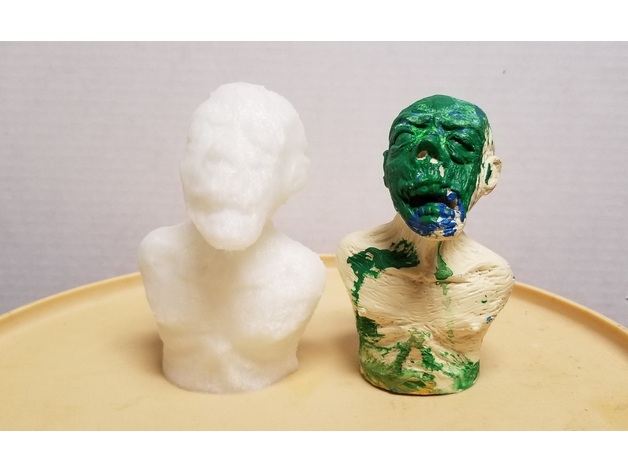
Zombie 3D Print Model
Summary
This is a lower resolution scan from a sculpture of a zombie bust. I ended up rigging a custom 3D scanner to automate taking pictures and depth mapping. This was more of a proof of concept for myself, but I really like how it came out. Feel free to print out some spooky zombies!
Print Settings
Printer Brand:
Wanhao Printer:
Duplicator 6 Rafts:
Doesn’t Matter Supports:
Yes Resolution:
.25mm Infill:
20% Notes:
The resolution and infill are first attempt numbers. I’m sure they can be tweaked to make this more efficient. The scale was a bit off, but I never intended for this to be a specific size. 2.5x scale was a good starting point. -
Crossbow-mini 3D Model
Hello. Boring day at office…this is the right answer for it. Make it for you and your co-worker and have fun. Just simply install rubber band,put the bolt trough body and trigger. Darts make from grill sticks ( on the and of darts put balls) and you are ready for war.For printing i used 0,2mm precision, PETG with hotend 250C,bed first layer 75C and then 50C. No suport needed.crossbow lenght: 14cmheight:6.5cmdarts lenght: 7.5cmrange: cca. 6-7m
-
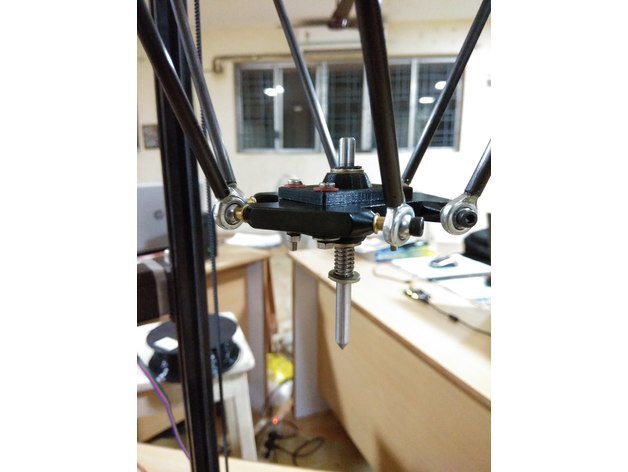
ANYCUBIC END EFECTOR FOR PCB PRINTING 3D Print Model
Summary
Get ready with all the parts along with the additional requirements on each parts. Assemble the part according to the sketch on the lower left corner on the sketch image. Place the copper plate on the working area. Upload the gcode file for PCB plotting. After the process is done you get a PCB, where you can solder the remaining electronic devices to get a circuit board.Materials Needed
Requirements
Shaft. Dimension: 6mm (Diameter), Material: Stainless Steel(SS), Length: 8cm
Circlips. Inner Diameter: 5mm , Qty: 2
Metal Washers: Inner Diamerter: 6.5mm, Outer Diameter:12. Qty: 3
Spring: Inner Diameter: 6mm
Shaft Holder. (3D Printed). File Attached as: Upper_part.stl
M3 SS Bolts. Qty: 4
Metal Washers. Inner Diameter :3mm Qty: 4
Fiber washers. Inner Diameter: 3mm Qty: 4
Spring Washers. Inner Diamerter: 3mm. Qty: 4
M3 Nuts. Qty: 4
Preparation
Making Parts Ready
1: The File attached under the name of Upper_part.stl must be printed before we start assembling stuffs (Two of such parts is needed). This might take a moment but please be patient.
2: After the Parts have been successfully printed, We need to calibrate the hole of 6mm which s there right on the middle of the work-piece. For this Take the 6mm shaft and heat it a little ( The Process which was used meanwhile was placing the Shaft on the Drill, Rotating it at its maximum speed and Applying Sandpaper on its Surface. This Process will not only heat he shaft but also will smooth the shafts surface.) The heated shaft is inserted in the hole so that the shaft moves through the hole with less resistance.
3: Making Circlip Slots, Mark 10mm and 50mm from one side of the rod (Let this side be named as A and other be B) Make the slots for the Circlip slots on those marked points. The method which we used was placing the shaft on the drill and then placing a hacksaw blade on the marked line)
4: Sharpening the Shaft, the other side of the shaft i.e B has to be sharpen. We used an angle grinder with a buffing blade, placed the shaft with some constant angle and rotated the shaft.
5: Ready the copper plate, The copper plate of required dimension was sliced out and one face of it is perfectly sketched with black sketch pen.Assembling Parts
Gather your Tools
Bolt both the 3D printed part, sandwiched between the bed. Apply Fiber washer below bolt head and Metal Washer right before spring washer and nut. Rest of the part should be assembled as the sketch image attached.
Feel free to ask any doubts regarding the assembly. -
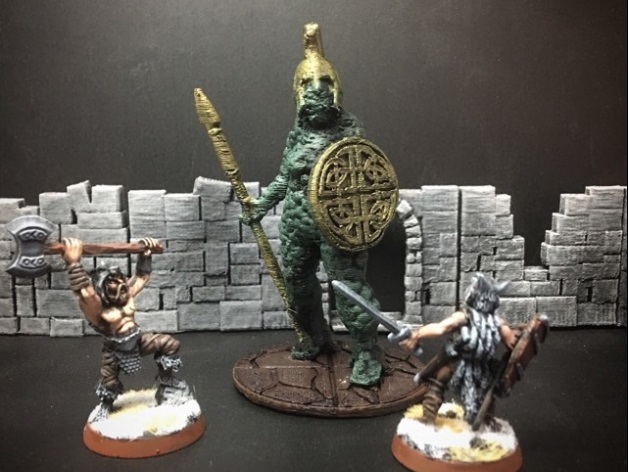
Topiary Golem (Amazon) (28mm/Heroic scale) 3D Print Model
Summary
This character was designed for tabletop roleplaying/wargaming.
We’ve set up a Patreon page for anyone who’s interested in helping to fund us so we can keep making free and open sourced games like Pocket-Tactics, OpenTactics. and others, not to mention the growing catalog of gaming miniatures that you can use for whatever you want! (Psst… we take requests and commissions…)
Enjoy! -
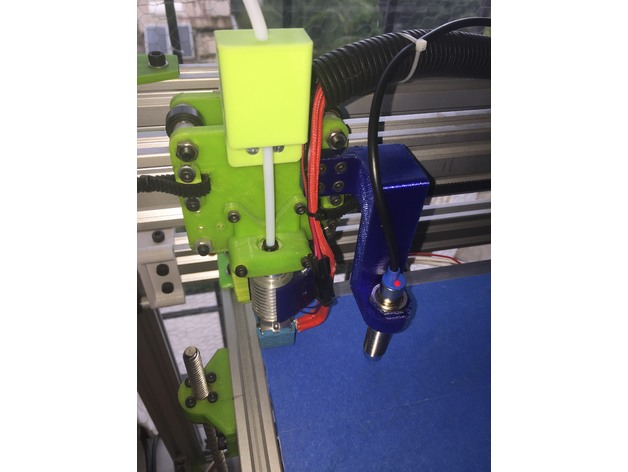
Induction sensor mount for the D-Bot Core XY 3D Print Model
Summary
An induction sensor mount for auto bed leveling on the D-Bot. I tweaked my printer for almost 6 months before realizing I needed this. After this, first layers are flawless and overall print quality has also improved.
Print Settings
Printer:
D-Bot Core XY Rafts:
Doesn’t Matter Supports:
Yes Resolution:
0.2mm Infill:
50%+ Notes:
Print with either ABS or PETG. -
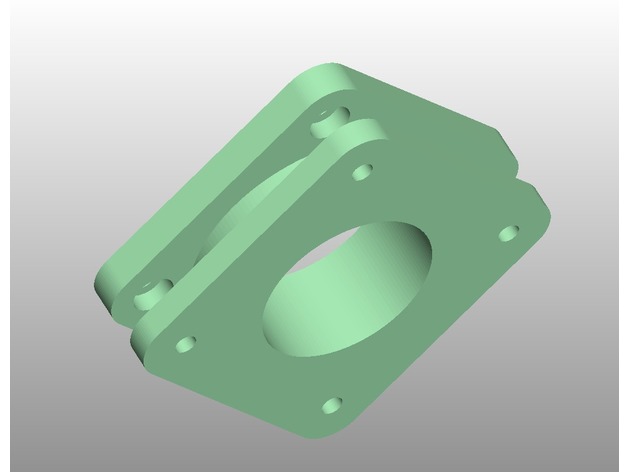
Stepper motor damper V2.0 3D Print Model
Summary
Hi this is stepper motor damper to make your printer way way quite , I made this so i can print day and night since my printer is near my bed and don’t want to be disturbed… i ordered original dampers but they are still on a slow boat from china and i didn’t want to wait…. 😀
I used this for my CR-10 printer for X and Y axis only and i needed following materials
8x M3 nut (you will need to insert this into the damper from the inner side)
8x M3 bolt x 5mm length (for stepper motor side)
4x M3 bolt x 8mm length (for mounting X axis sensor on CR-10)
4x M3 bolt x 6mm length (for mounting to Y axis support)
Please don’t over tighten your belts as this will make the support to bend and belt slide towards one side, tighten it just so the belt will not slide
hope you enjoy my design -
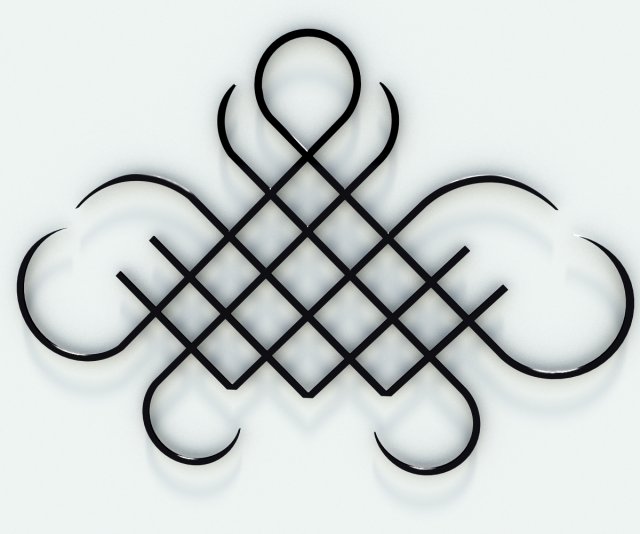
Tribal Tattoo 3D Model
Tribal tattoo style for 3d printing.55,077 x 39,124 x 0,258.Faces: 4493Verts: 4431One object named tribal01.Modelled in 3ds Max.Checked with Blender Add-on 3d priter box.The pictures above is rendered with Mental RayMore tribal tattoos to come!
-
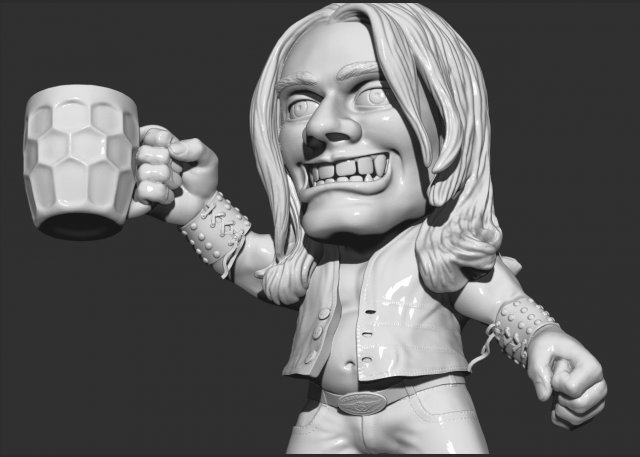
The man drinks beer 3D Model
Figurine “rocker drinks beer”. Designed for 3D printing. The height of the figure is 150mm. or 6 inches.