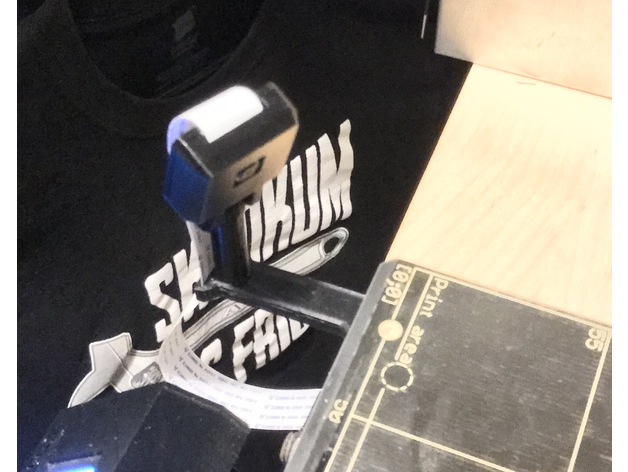
Download Free 3D Model The Best Damn Prusa i3 MK2 Bed Camera Mount 3D Print Model
Summary
As many San Francisco Bay Arean makers know, we reach Ikea demo display levels of usability with our tiny living spaces. It’s sometimes tough build stuff and still have more than a hammock draped between two burning man art cars to sleep on.
For me, the perfect spot to locate my first printer was the closet because:
it was relatively draft-free
I could leave the light on for timelapse prints without annoying anyone
being surrounded by clothes it really dampens the screeching from these new electronical overlords
and the small chest o’drawers in there just collected random coins, lint, and automotive fuses and bulbs lifted from my trips to Pick-Your-Part that I’d emptied from my pockets onto the end of the day anyway #amiright ???
Unfortunately, since upgrading from my quaint Printrbot Simple Metal 1403 to the Original Prusa i3 MK2, the larger footprint makes it a veritable behemoth in there. It hangs off the end of the dresser so gets a corresponding larger share of snags, bumps, and bruises from being right in the middle of a very active area (the closet is home to my daily-used Dyson V6, broom, ironing board, clothes, shoes, Plex Media Server, etc). Because of this, I’ve broken the bed camera mount of 3 separate designs on it, including JPgxuAHFR22RQo’s and cocoknight’s. This afternoon I’d had enough…
<POPEYE>
That’s all I can stans — I CAN’T STANS NO MO !</POPEYE>
Ladies and gents, without further adieu I give you:
The Best Damn Prusa i3 MK2 Bed Camera Mount !
Nitty Gritty:
Doesn’t snap in two as if it were crafted from paper mâché like every other lightweight bed mount design I’ve tried
Minimal weight (only 5g for this part when printed in ABS, ~6g for PETG or PLA)
As close and tall as possible to the bed while still not interfering with the extruder stepper motor during homing — no more viewing your timelapse knife-edge right at the bed
Left-mounted, where it gosh-darn ought’be ! With luc_e’s over-engineered [4x M3 screws and nuts to hold in an RPi ? Really ? :] but sweet as August corn, Original Prusa MK2 style Octopi cover that mounts the RPi perfectly over the MK2’s MiniRAMBo enclosure, and along with Adafruit’s 24″ RPi camera CSI ribbon extension, allows the ribbon to slide along under the MK2’s aluminum Z frame. I’m even powering the RPi from 5v from a spare endstop pin off the Mini RAMBo – who has 3hrs to same-day Amazon’ yet another USB charger ?
No metal fasteners needed (the MK2 comes with an extra 12mm M3 screw to replace the stock 10mm one as part of the kit 😉
Part of its magic is its infill layout and settings (detailed below) but since I know what printer you’re using, I’ve even included gcode for the uninitiated among us (you know who you are 😉
It’s Skookum as Frig !
Enjoy !
-=dave
Print Settings
Printer Brand:
Prusa Printer:
Prusa Mk2 Rafts:
No Supports:
No Resolution:
200 microns Infill:
11% Notes:
Slice with Slic3rPE with following adjustments:
Original Prusa i3 MK2 Colorprint printer profile settings
0.20mm NORMAL print profile settings
Solid top/bottom layers: 4/3
Seam position: rear
Fill density: 11%
Fill pattern: Grid
Combine infil every: 2
Solid infill every: 25
Fill angle: 0
Solid infill threshold area: 46
Print !
Gcode for ABS (tested), PETG, and PLA (untested) included for you lazy geniuses !
Categories: 3D Print Models, All 3D Models, Free 3D Models
Sorry, comments are closed for this item.


