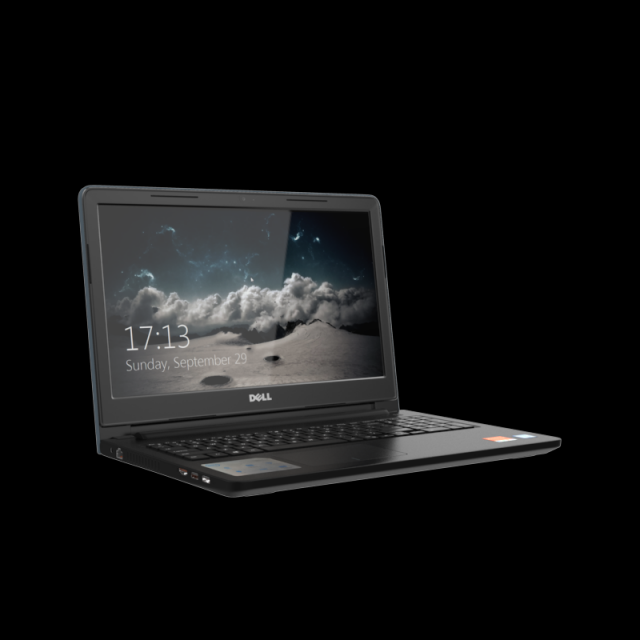
INSPIRON_3567_39CM_INTEL_CORE_I3_4GB_1TB_BLACKPoly Count 1239824Verts Count 1254088Texture Size 4096 x 4096Material – YesUV Unwraped- MixedRigged- NoAnimation- NoFile Format- OBJ & FBX & STL & MAYA
Tag: i3
-
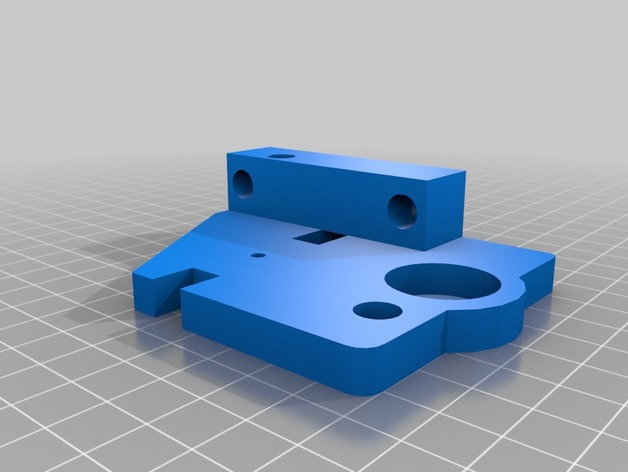
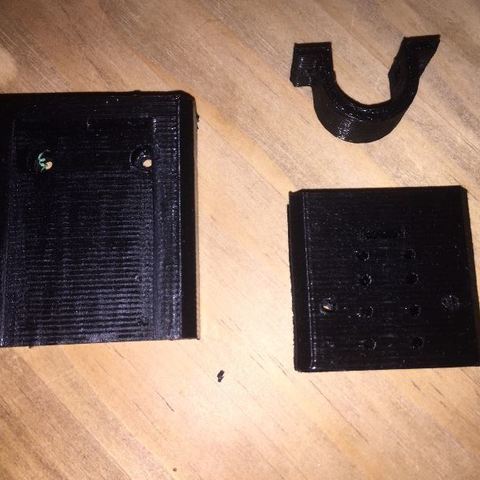
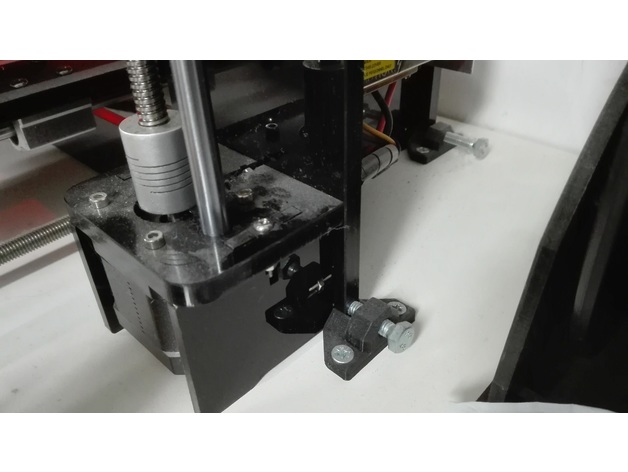
Geeetech i3 Pro B Top Z Bracket with M8 Support. 3D Print Model
Summary
Have some left over M8 all-thread after upgrading to lead screws? This might be the perfect up-cycle option for them
Print Settings
Printer:
Geeetech i3Pro B
Rafts:
Doesn’t Matter
Supports:
No
Resolution:
.2
Infill:
30 -
Wanhao/Monoprice i3 Mini Fan Shroud (Mk 2) 3D Print Model
Summary
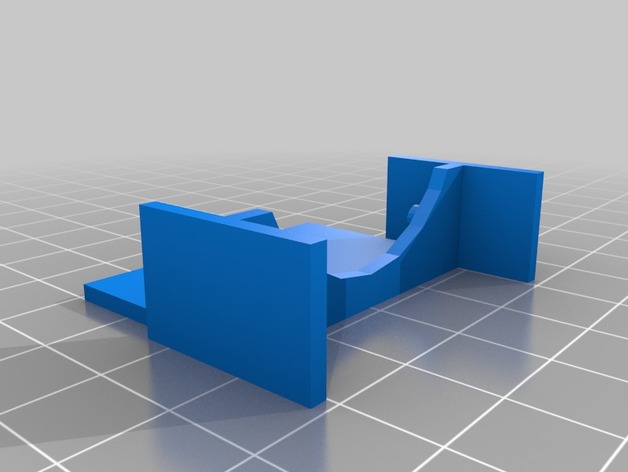
This product allows i3 Mini users to effectively turn off print cooling and then turn it back on once the initial layer is finished. Without stopping the print or making permanent mods to the machine! This part can drastically improve bed adhesion on the lovable i3 Mini.
The i3 Mini lacks a second fan for cooling the printed filament. Instead it has a baffle that splits the airflow from a single fan onto the build bed as well as the hotend. This design choice likely helps to keep the i3 Mini inexpensive, but also creates a major flaw in that there is no control over print cooling as the one fan must remain on at all times to control the hotend temperature.
I found that the i3 Mini therefore required a fair amount of work to get decent bed adhesion. Blue tape, glue, slow speeds, etc were all necessary to get a usable initial layer. Unless the airflow is blocked from reaching the build plate. So I created this fan shroud which slides on and off easily; allowing the user to effectively turn off the fan for the first couple layers (or the entire build if so desired). Once a solid layer is complete and print cooling is needed, the user only needs to gently tug the shroud off and the rest of the build goes as expected without interruption.
Print Settings
Printer Brand:
Wanhao
Printer:
i3 Mini
Rafts:
No
Supports:
Yes
Resolution:
0.4mmW x 0.2mmH x 60mm/s
Infill:
Parallel Lines, 20% -
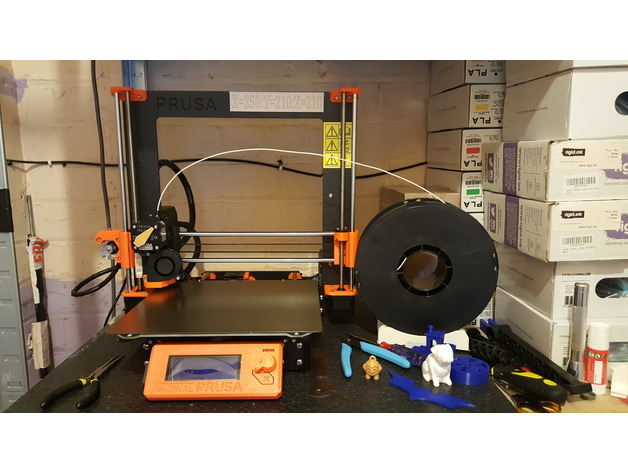
Prusa I3 MK3 Build Volume Reminder 3D Print Model
Summary
Just thought I would print something to remind myself of my printers Build Volume 🙂
Held onto Frame with BluTak
Print Settings
Printer Brand:
Prusa
Printer:
i3 MK3
Resolution:
0.2
Infill:
100%
Notes:
If you want to change the numbers, Goto Tinkercad – Upload .stl – click .stl – click Ungroup – click Text (numbers) – edit to your own Build Volume – when done select all objects (ctrl+A) – click group – click Export, and your done.
Use Settings that work for you. -
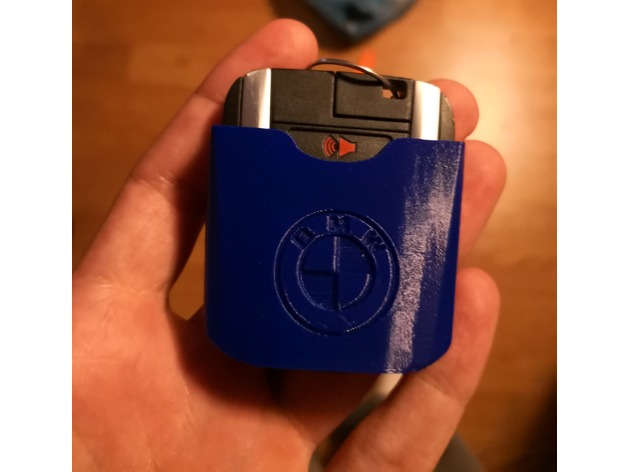
BMW i3 Key fob cover 3D Print Model
Summary
The key fob for the BMW i3 has got to be the worst shape and design I’ve ever seen. This thing is obnoxiously wide and flat. In my pocket, I’ve accidentally unlocked the car at least 7 times in 3 months. One time caused my car to be burglarized. So I decided that I needed a cover to block the buttons from being pressed. It took some iterations to get the shape right, but I now have a working cover that easily slides on and off for the BMW i3 key fob.
Hopefully this helps you too.
Print Settings
Printer Brand:
Prusa
Printer:
Prusa Mk2
Rafts:
No
Supports:
Yes
Resolution:
0.2mm
Infill:
50%
Notes:
The edge that this prints on has very little surface area, make sure your first layers are good or it will get loose from the bed. -
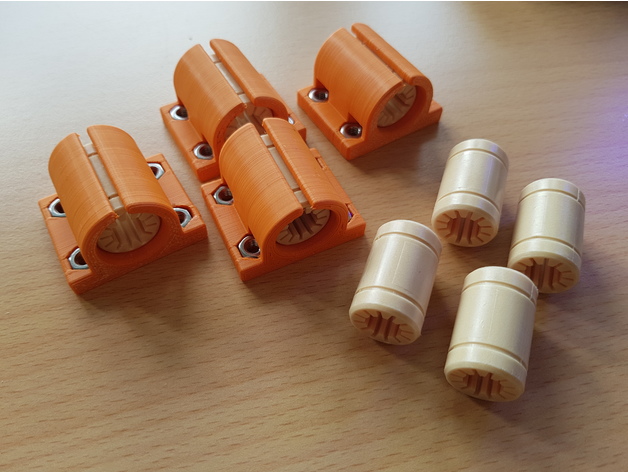
Anycubic i3 Mega IGUS RJM-01 Bearing Adapter 3D Print Model
Summary
These bearing adapter can mount the IGUS RJM-01 (and maybe the RJMP-01) bearings on the ultrabase printbed. The design has been optimised to fix the bearing without squeezing it to much, so the bearing will not be deformed. the printbeds height remains the same as with the stock bearings. The design will be tested during the next days/weeks, hopefully there will not be the need to insert retaining rings to hold the bearing in place. Current design allows the use of a single bearing, maybe i will upgrade it to a double bearing version after the basic design is tested. For the current test, i used 0.15 layers of nx2 pla from extrudr, which actually sticks like hell on the ultrabase printbed (; (200°C, 60°C). -
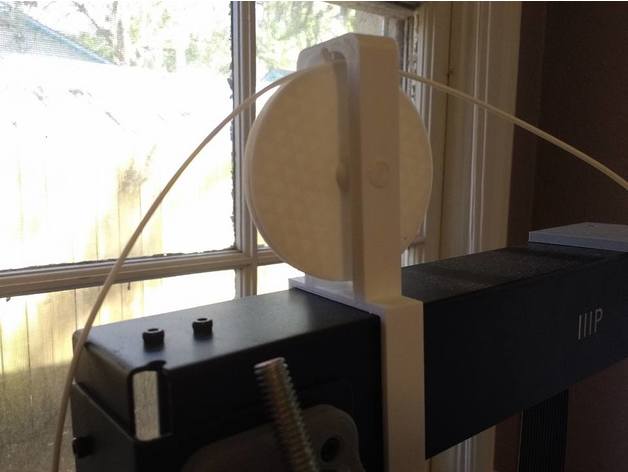
Filament Guide Wheel for Wanhao i3 Plus 3D Print Model
Summary
I designed this because I wanted my spool to sit beside my printer rather than on top, but I needed an elegant way for the filament to go up and back down over the top of the frame. This is the problem this wheel is meant to solve.
It’s designed to not need any glue. Just print the wheel, the frame, and the axle and assemble. Depending on your printer’s tolerances, you may need to sand the axle for the smoothest rotation.
Print Settings
Printer Brand:
Wanhao
Printer:
Wanhao Duplicator i3 Plus
Rafts:
Doesn’t Matter
Supports:
No
Resolution:
0.2
Infill:
wheel/frame:30%, axle:60%
Notes:
Use 3 or more lines for the axle. Print with a brim vertically. You don’t have to take the brim off to use it as an axle either, it’ll just butt up against the side of the frame.
You have two options to print the wheel. You can print the wheel as a whole piece with an extension on each side (with support) or you can print just the wheel and two washers separately. -
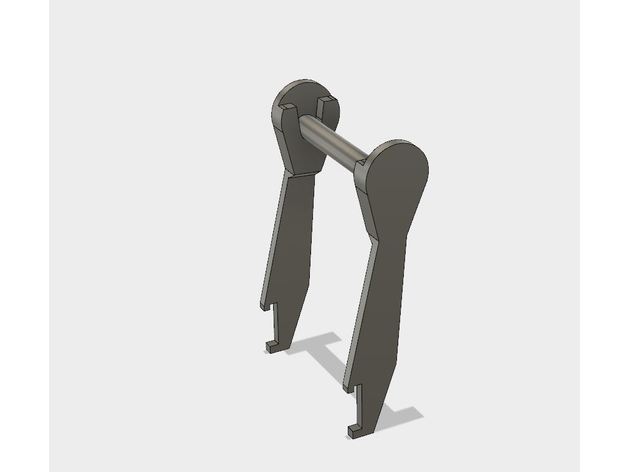
Better Filament Holder for Prusa i3 3D Print Model
Summary
this is a better filament holder for your Prusa machine.
Print Settings
Printer Brand:
Prusa
Printer:
Prusa Mk2
Rafts:
Doesn’t Matter
Supports:
No
Resolution:
.25
Infill:
20-30% -
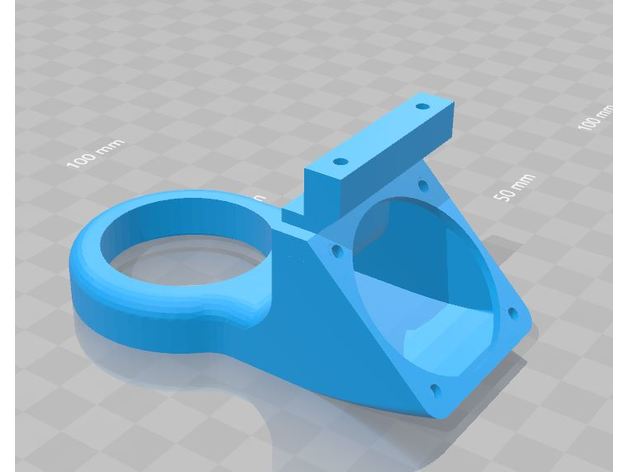
Duplicator i3 Plus (or Clone) Cooling Duct 3D Print Model
Summary
I was looking for a cooling duct for my Balco Touch 3D Printer (duplicator i3 Plus clone) that used the stock 40mm fan and liked the one created for the i3 (https://www.thingiverse.com/thing:969338) However the position of the cooling ring, the mount, fan mount and the depth did not fit my printer. I therefore modified the design to offset the cooling ring, correct the mounting, depth and fan mount to fit. This is the result which should fit any i3 Plus or clone with a stock 40mm fan. -
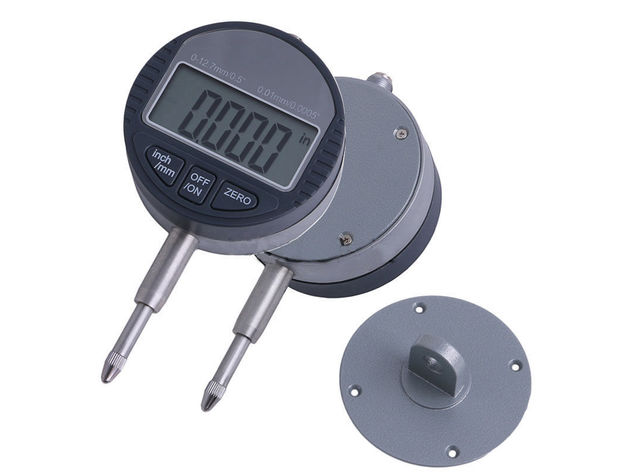
Anycubic I3 Mega Digital Dial support 3D Print Model
Summary
A remix between 2 great designs.
ltlowe design was too short, x9x9x9x9x9 was for a different dial…
Will soon post a photo of the real deal.
Print Settings
Printer:
Anycubic I3 Mega Rafts:
Doesn’t Matter Supports:
Yes Resolution:
.28 Infill:
10 Notes:
Just print 🙂 -
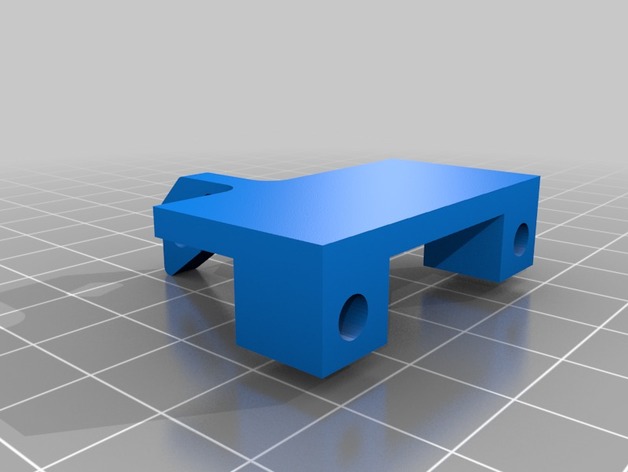
CTC Prusa i3 fan adapter 3D Print Model
Summary
This adapts the https://www.thingiverse.com/thing:1161013 to a CTC prusa -
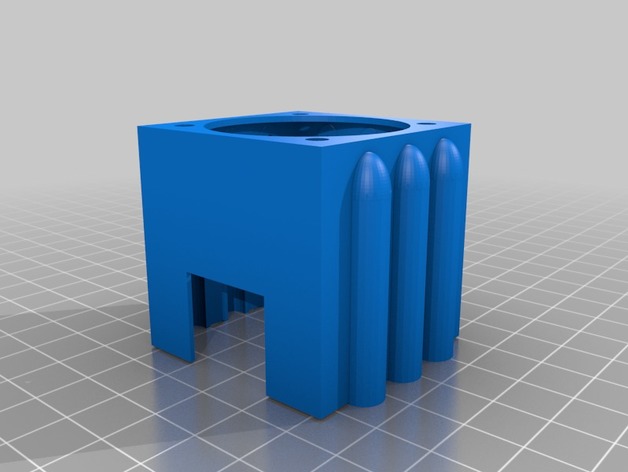
Anycubic I3 Mega X axis Fan stepper fan mount with heat sink clearance 3D Print Model
Summary
Friction fit fan mount with air channels and clearance for 40mm heat sink stuck on the end of Z axis stepper. Mounting holes designed for 40mm fan. Print with mount side down. There are minimal supports needed.
Print Settings
Printer:
Anycubic I3 Mega Rafts:
Yes Supports:
Yes Resolution:
0.2 Infill:
20
Post-Printing -
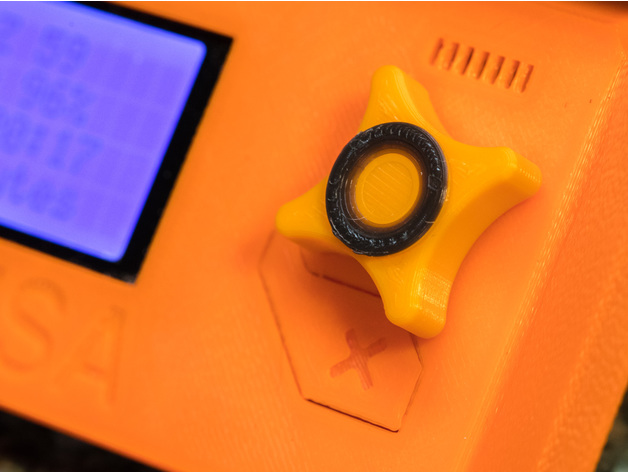
Prusa i3 Mk2 Ergonomic Control Knob 3D Print Model
Summary
I wanted a better knob for the control panel on my Prusa i3 MK2, but none that I found on Thingiverse were quite what I wanted. I designed this version with two main advantages over others. First, it has a four-point star shape that comfortably accommodates your right thumb for navigation without looking away from the screen (with a recessed center area for clicking the current selection). And second, the back side has a flexible socket patterned after the original Prusa knob, which makes installation much easier than a simple hole on the back. In the sample shown, I changed filament near the end so that I’d have a contrasting ring in the center button area.
Print Settings
Printer Brand:
Prusa Printer:
Prusa Mk2 Rafts:
No Supports:
No Resolution:
0.15 Infill:
35% Notes:
Because this part is relatively small, I opted for much more infill than I normally use on larger items. The 35% infill provided plenty of support for the concentric rings at the top. A smaller infill percentage might work just fine, but I haven’t tried it.
Due to the fine detail on the first layer, I found it helpful to print layer 1 at half the speed of the normal, already slower first layer. Also, a layer of glue stick on the build platform helped the details stick well. Once the second layer started, I cranked the speed back up to 100%, and the printing was easy after that. -
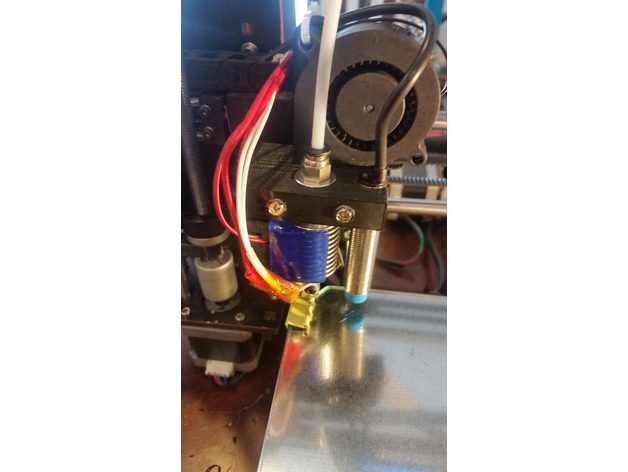
CTC PRUSA i3 Pro B Bowden Drive with Autoleveling 3D Print Model
Summary
My CTC hotend broke and I was without a 3D printer. Luckily I am in the process of building a HEVO and therefore I had the mount, hotend, extruder, retainer and duct already on hand. By drilling two extra holes and removing a little plastic near the X endstop flag in the mount, I made it fit the CTC carriage perfectly. Again, since my printer was down, I didn’t design this in CAD and just modified the piece I had by hand and then created the STL for thingiverse so no guarantees that it will fit. I left a bridge in there for support that you will have to break out and I put in two mounting options; one way the way I mounted it by drilling holes, and another for mounting it with M3 brass fittings to lower the mount closer to the bed. The HEVO mount has the proximity probe spot already, so I figured I should add that sensor as well.
If you are ready for a double mod, keep reading…
Items Needed:
Soldering Iron
several connectors
connector wires (from breadboard)
Arduino IDE
an extra Arduino as ISP to update the bootloader on the CTC Aduino
Marlin firmware
BOM:1 x 5V NPN M12 inductive sensorhttps://www.aliexpress.com/item/M12-4mm-detection-5VDC-NPN-NO-LJ12A3-4-Z-BX-5V-cylinder-inductive-proximity-sensor-switch/32553311139.html?spm=2114.13010608.0.0.iDrnoz
3D Printer Accessories V6 J-Head Hotend RepRap Extruder for 1.75mm Filament, Direct Feed or Bowden. w/ 0.4mm Nozzle, 12V fan, and 3ft PTFE Bowden Tube
ALPTAhttp://a.co/9PxYSl48.5″ x 8.5″ galvanized 28ga metal plate to place between the hotbed and glass plate. This ensures that the sensor is triggered properly. Without it you will need to either not use glass or you are going to be very close to the nozzle level. Ferrous metals are the best at triggering proximity sensors, that’s why I didn’t use aluminium.
8.5″ x 8.5″ x 0.880″ glass plate. I prefer to print on glass.
Extruder of your choice (e.g. find one on thingiverse)
ProcessPrepare and install your material for your heat bed. Cut the galvanized plate with some metal shears to size. IMPORTANT: make sure the metal does not short out any contacts on the heated bed. You need to cut around those areas!.
Get the glass plate from your a hardware store. They will cut it to size if you ask nicely. You need the corners angled to have room for the screw heads.
Prepare and install the J hotend and proximity sensor with the extruder mount, retainer and duct from the HEVO project.
Solder the 5V and Ground connections to the board. I chose to use add a connector for easy disconnect.
Make a backup of the original settings. These were mine:
15:07:46.286 : echo:Hardcoded Default Settings Loaded
15:07:46.286 : echo:Steps per unit:
15:07:46.287 : echo: M92 X78.74 Y78.74 Z2560.00 E105.00
15:07:46.287 : echo:Maximum feedrates (mm/s):
15:07:46.287 : echo: M203 X400.00 Y400.00 Z2.00 E45.00
15:07:46.287 : echo:Maximum Acceleration (mm/s2):
15:07:46.287 : echo: M201 X1400 Y1400 Z100 E80000
15:07:46.287 : echo:Acceleration: S=acceleration, T=retract acceleration
15:07:46.287 : echo: M204 S1400.00 T5000.00
15:07:46.287 : echo:Advanced variables: S=Min feedrate (mm/s), T=Min travel feedrate (mm/s), B=minimum segment time (ms), X=maximum XY jerk (mm/s), Z=maximum Z jerk (mm/s), E=maximum E jerk (mm/s)
15:07:46.287 : echo: M205 S0.00 T0.00 B20000 X13.50 Z0.30 E5.00
15:07:46.287 : echo:Home offset (mm):
15:07:46.287 : echo: M206 X0.00 Y0.00 Z0.00
15:07:46.287 : echo:PID settings:
15:07:46.287 : echo: M301 P19.86 I1.00 D98.93Upgrade your bootloader. Here is how to do it:
Time to download, configure and install Marlin. Use the GEEETECH example in the examples folder as a base. I attached my Configuration.h file here for reference with auto leveling enabled: https://www.thingiverse.com/download:4494314 . Using this config will consume 94% of the memory. So there is hardly anything left for additional features.
Last but not least make sure you adjust the z-axis in the LCD until you get the nozzle in the correct location (mine was -0.25). Then make sure you save your settings.
*ANOTHER BENEFIT of UPGRADING YOUR FIRMWARE**
The CTC is over-extruding (at least mine was). In Cura I had set the correction in the start script, but with the new firmware I changed the E stepper from 105 to 95 in the configuration.h, so no more start code fix needed! -
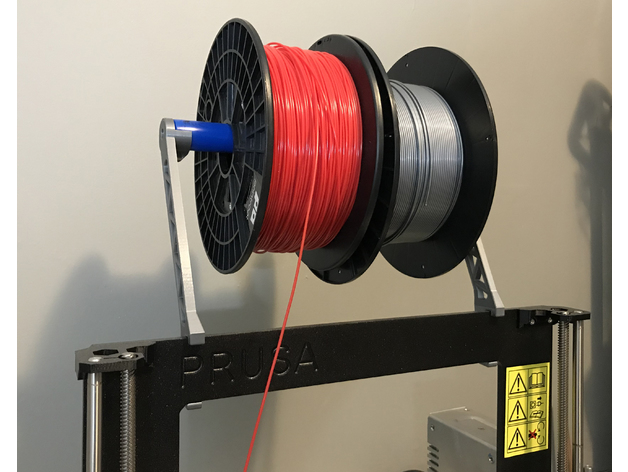
Prusa i3 spool holder arm 3D Print Model
Summary
This is a spool holder for a Prusa i3 that will hold a 1/2 to 3/4 dowel or pipe allowing you to add another spool as well as easily changing spools without removing the arms. I used a piece of PEX piping I had sitting around the house for mine.
Print Settings
Printer Brand:
Prusa Printer:
Prusa Mk2 Rafts:
No Supports:
No Resolution:
.2 Infill:
20
How I Designed This
Designed in Fusion 360. -
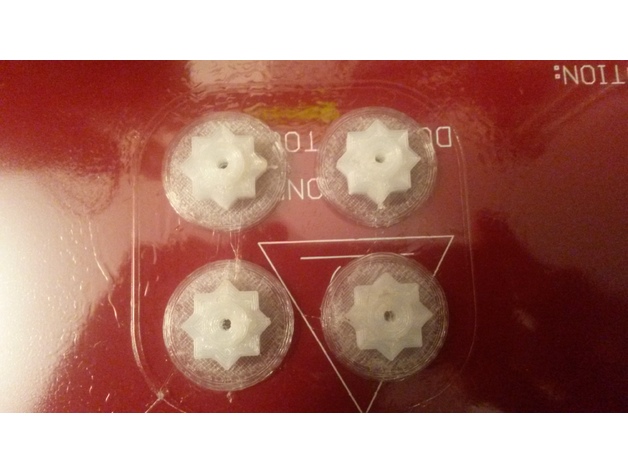
Geeetech i3 Hotbed adjustment nut 3D Print Model
Summary
First thing printed !! The wingnuts to adjust the hotbed are not very confortable to turn, it is a two hands job, so the first thing I printed are these knobs. As I had only some nylon to print with, I added a .5mm skirt to make the piece stick better to the bed as in the first try it got loose and went moving around. I printed without supports, and when the print was high enough, I paused and drop the M3 nuts in, so the top side would have something to lay on. -
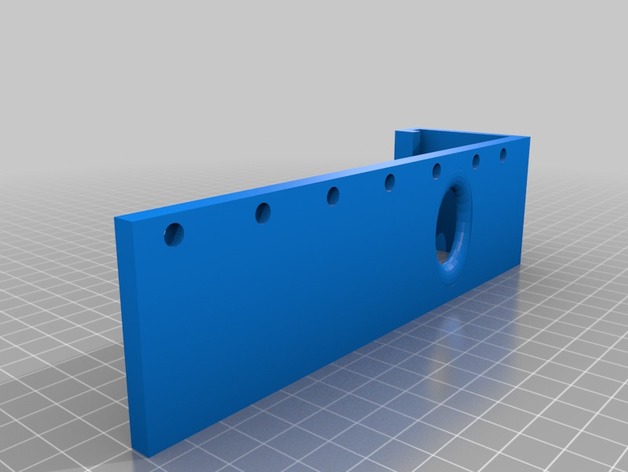
Prusa I3 Mk2/S Filament guide and light holder 3D Print Model
Summary
I have been running into problems with new rolls where the filament would spring of and get tangled. I was going to print one of the many filament guides available, but decided to make this. I use a Yorkville music stand light to light up the build plate when printing. Its pretty bright for its size, and you can power it off a spare usb port on the raspberry pi (assuming you use one for octoprint, but any usb port will work). I use the light both for checking in remotely and for the time lapses I create with octoprint. I initially had the light clipped to the frame of the printer but wanted to bring the light arms more forward to take care of some shadows. the holes in the side allow tie wraps to keep the power cord out of the way.
The light I use can be found here: https://www.long-mcquade.com/12870/Band/Metronomes_Tuners_Stands/Yorkville_Sound/Dual_Music_Stand_Lite.htm -
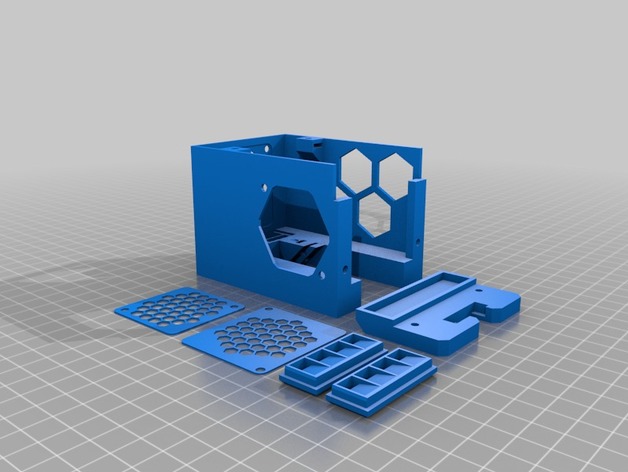
Anycubic i3 Mega partfan monstrosity 3D Print Model
Summary
Boxy, but good (enough).
This is an attempt to get partfan coverage from both/all sides, while retaining the original plate mount to the bearings. After several attempts I gave up in disgust with the quest to design something elegant, and just settled for monstrous and temporary: I am a little bit over trying to modify the mega’s existing hotend, so this is simply a temporary means of getting better part cooling while I print components for an entirely different printer.
I may eventually revise this later, but it will likely be in a version that completely replaces the megas hotend compartment right back to the X carriage bearings.
It’s not pretty, and despite having a COD LED inside it to illuminate the nozzle it’s almost impossible to see underneath the ducts anyway, and the LED reaaaaaly needs a trimpot to turn the light down a little. So consider the COB LED slot completely optional. I also soldered the connections to it so they exit *towards8 the leds light emitting surface, so the slots I allowed for solde blobs may not be big enough for your standard lazily soldered fat blobs of solder and a wire direction change… maybe, maybe not.
The top bolt on the partfan doesnt fit, due to an oversight, so mine runs with it missing.
LED COB 26x16mm has a heatsink stuck to it’s metal side:
heatsink 14x14x6mm (7x1mmVanes, typically sold in combination with an even smaller one for use on raspberry pi)
The partfan outlets just click in, helps if you put the short end thats closest to the actual partfan in first, and then force the further edge in last.
No supports, bridging sucks a bit on the partfan outlets, but it doesnt create enough surface roughness to pull the airflow onto the heatsink, so it’s ok. You could try flipping them, maybe use supports, and make the airflow surface nice and smooth by printing as the top face.
The partfan fan is a 5015 blower, some are stronger than others. I picked the strongest I had.
The heatsink fan is still the stock 4010None of the nuts require a print-pause now, but it is designed for square M3 nuts… which you may not have. Gluing in a hex nut would also work. I use glue to lightly tack several of them in just to make assembly easier.
PLA, 0.4mm nozzle, 20% infill … pretty standard (not really important)
1.2mm walls (IS important; or your bridging will suck and all of the basic design assumptions are for that thickness)
It’s annoyingly close to the print, and ugly.. but it is a slight partfan improvement.
dealwithit.jpg -
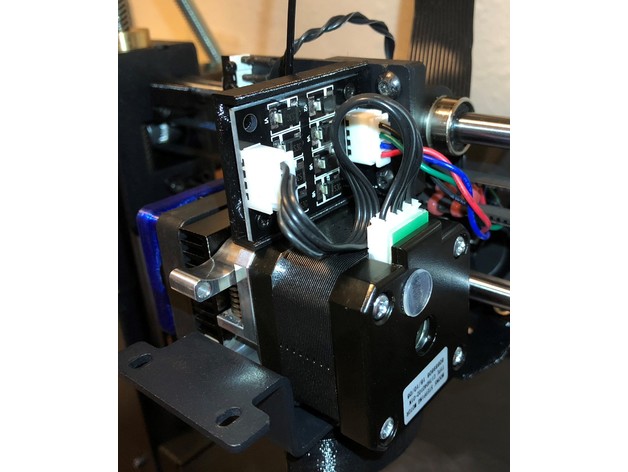
TL-Smoother BIGTREETECH extruder mount Wanhao i3 Plus 3D Print Model
Summary
This is a BIGTREETECH TL-Smoother mount for the Wanhao i3 Plus.
One of the files includes, in which I recommend, the previous filament guide I had designed.
You can use the “no guide” version included but the filament will drag the mount more.
Check out instructions for filament guide here https://www.thingiverse.com/thing:2349460
This seems to take away some Z height. I usually don’t print very high so it is not a problem.
Print Settings
Printer Brand:
PowerSpec Printer:
Duplicator I3 PLUS Rafts:
No Supports:
No Resolution:
0.20 Infill:
20% -
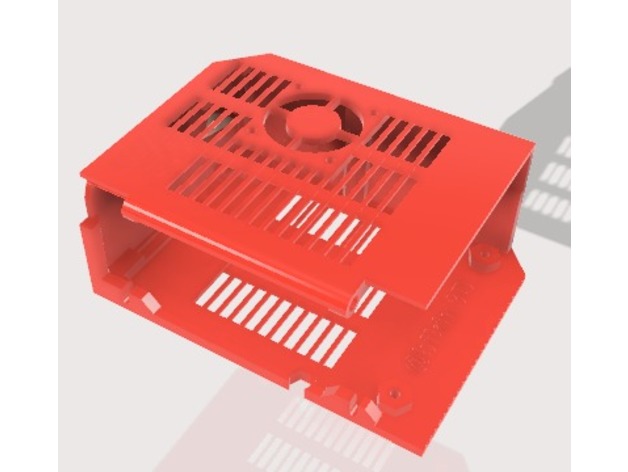
MKS GEN L V1.0 Prusa i3 MK2 / MK2s Case 3D Print Model
Summary
I edited using Fusion 360 and already printed for my self. I its work for you too.
Print Settings
Printer Brand:
Prusa Printer:
Prusa Mk1 Rafts:
No Supports:
No Resolution:
0.2mm Infill:
15 -
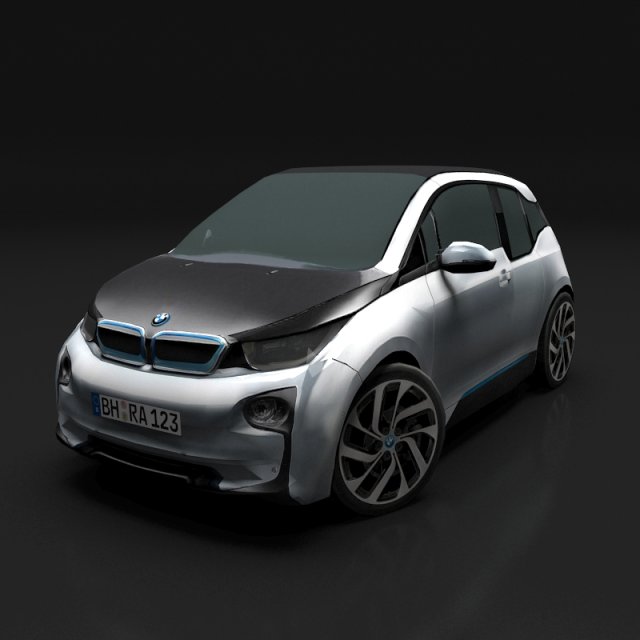
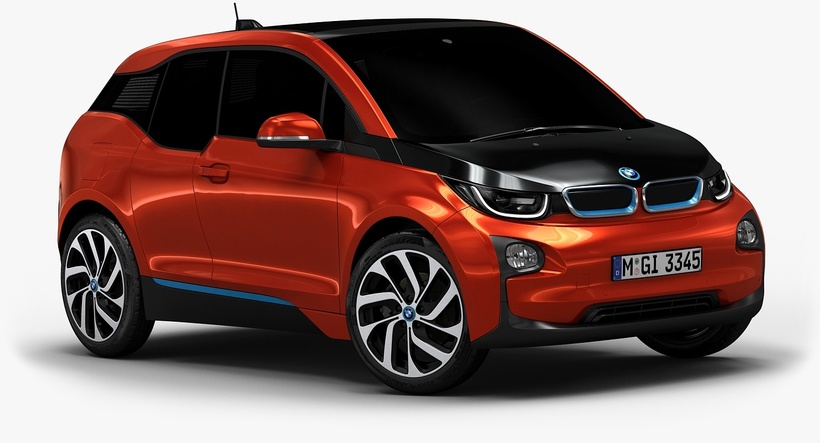
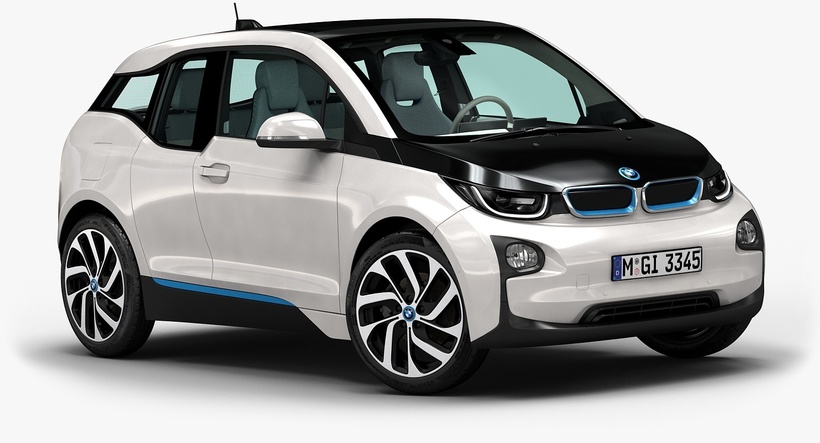
BMW i3 3D Model
Lowpoly vehicle Euro i3 with the low polygon count, but still keeping the details very high and realistic.______________________________________________-Model is in real scale-All parts are named CORRECTLY-All parts are in correct layers-All materials are named CORRECTLY-Very Detailed model with all construction details-Position 0,0,0-Model is Dummy object for better manipulation-diffuse,normal maps,specularFile Formats:-3ds Max 2012______________________________________________PLEASE RATE THIS PRODUCT IF YOU ARE SATISFIED.
-
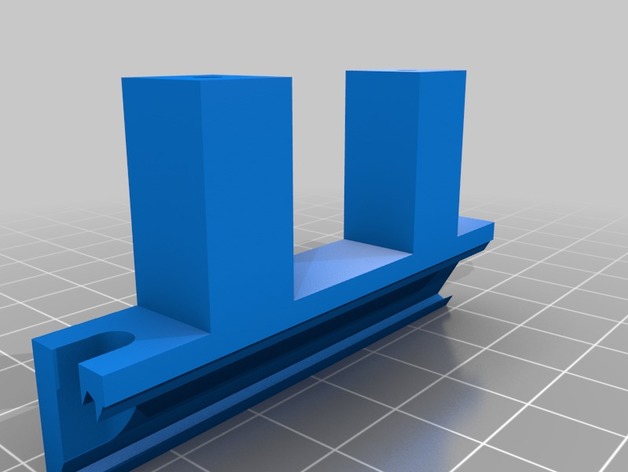
X Carraige LED Strip Holder – Wanhao i3 3D Print Model
Summary
I am running an aftermarket cooler which freed up the mounting holes used by the stock cooler. I searched for a while, but was unable to find an LED strip holder that fit the i3 Plus so I made one.
This should hold any standard width (~11mm) LED strip. There is no need to use adhesive as the strip should just slot in and be fairly secure.
Print Settings
Printer Brand:
Wanhao Printer:
Wanhao Duplicator i3 Plus Rafts:
Doesn’t Matter Supports:
No Resolution:
0.16mm Infill:
30 -
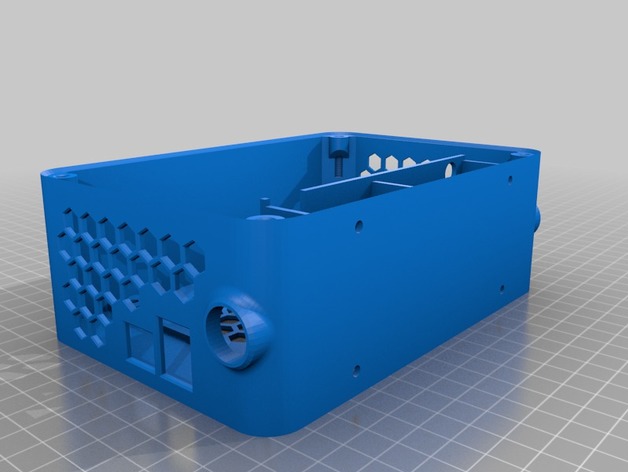
Geeetech GT2560 housing for I3 Alu 3D Print Model
Summary
Adapt for my I3 Alu
I use sanguinololu hole to fix it -
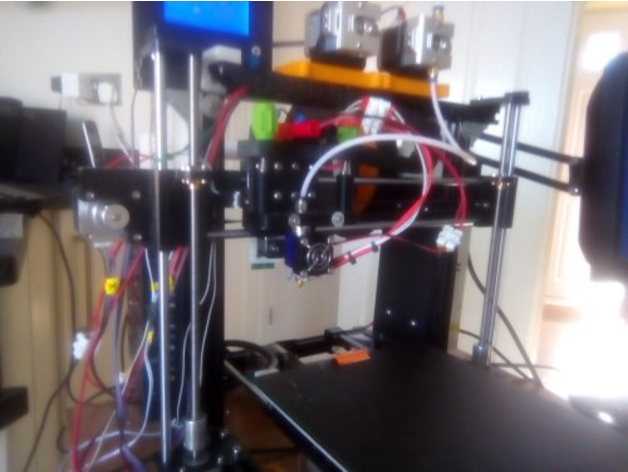
Prusa I3 Single/Dual E3D Mount 3D Print Model
Summary
This collection of things provide a single or dual mount for E3D nozzle assemblies for the Prusa I3 printer.
Full details are provided in the encvlosed PDF document.
Print Settings
Printer Brand:
FlashForge Printer:
Dreamer Rafts:
Doesn’t Matter Supports:
No Resolution:
0.2 Infill:
20% -
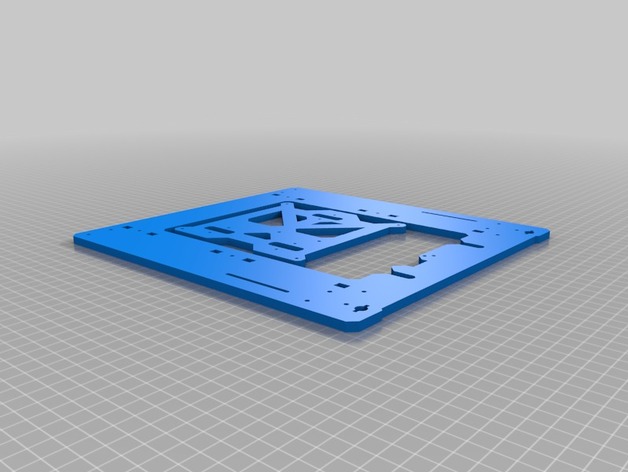
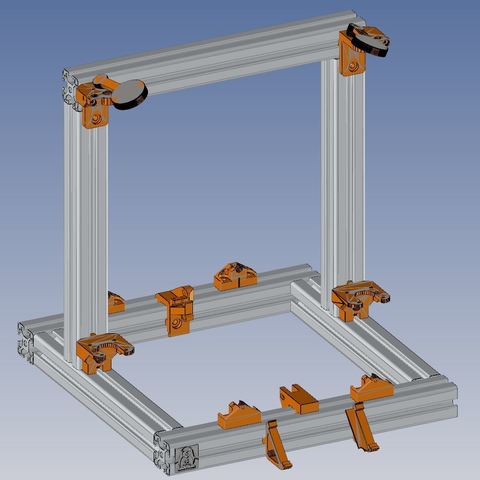
Prusa Mini i3 Printable Frame 3D Print Model
Summary
This is a printable version of Prusa’s “Mini” version of the i3 printer frame and bed carriage. It is designed to be printed out of PLA (less warping) but you could do it out of any material you like.
You will need a LARGE print bed for this! It is designed to fit on the Creality3D CR-10 bed with no modifications.
You can download all of the files for the Mini i3 at https://github.com/josefprusa/Prusa3/tree/master/mini and build your own! -
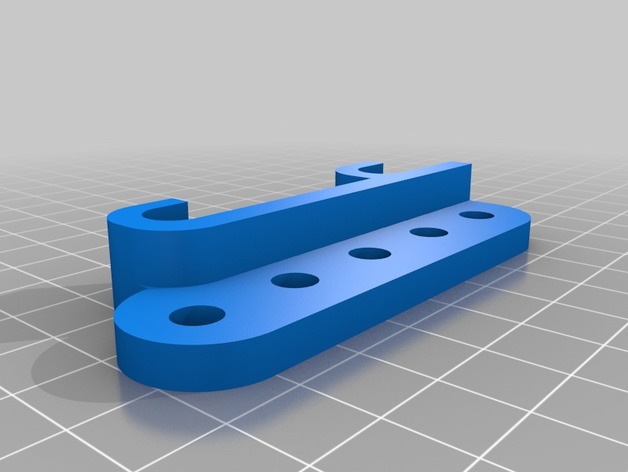
Dial Indicator Mount for Prusa i3 3D Print Model
Summary
Could not find a good Dial indicator mount for Prusa i3 that would mach the one I bought from Amazon, so i created my own version. Apparently different models have different probe length. -
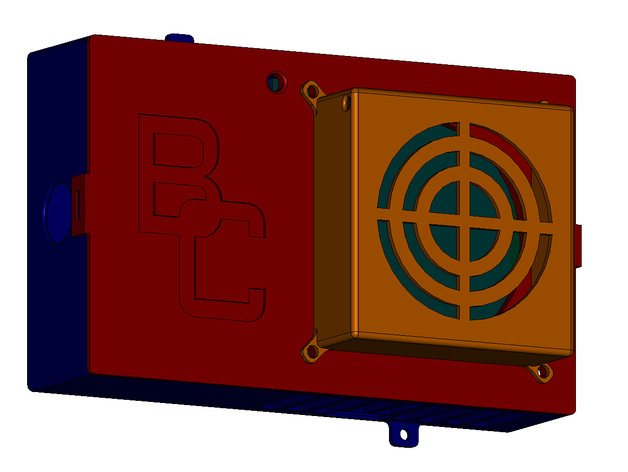
FLSUN Prusa i3 RAMPS Container 3D Print Model
Summary
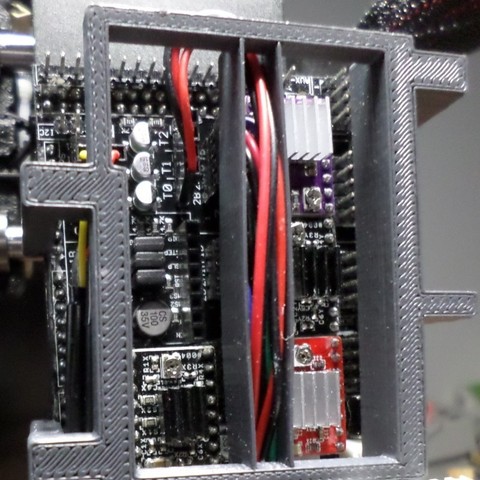
I’m working on cleaning up my printer station and couldn’t find a container for my RAMPS board that I liked, so I’ve designed this one. I haven’t printed it yet so it most likely still needs tweaks. As soon as I finish printing my enclosure brackets I will be making this next.
I’m using an 80mm wide and 30mm deep fan for cooling the board.
The idea of the design is that the cables will come in through the large circle opening, can be wrapped around the pegs to shorten them, then run them through the gaps to the board itself. The fan cable is fed through the small hole in the corner of the fan guard, then through the hole in the lid. The latch on the right hand side is meant to go on first, then the one on the left (really not sure if that’s going to work or not).
Because I’m building an enclosure I didn’t design the mounts to attach to the frame of the printer but to the outside wall.
The only sections that should need support is on the fan guard depending on which side you print up, and possibly the latches on the container itself.
If anyone notices anything I got wrong, suggestions for changes, etc, please let me know! If you print one, let me know how it went! -
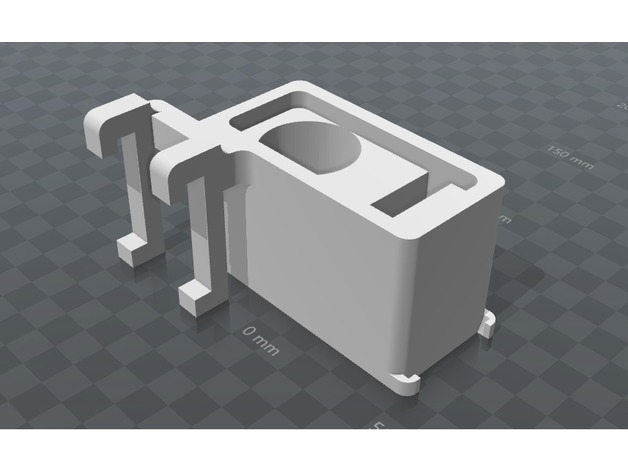
Toolholder for Orginal Prusa i3 MK2s 3D Print Model
Summary
This is a simple construction to organize your tools direct to the printer. It has space for a glue and a pliers. On the side you can hang your scraper.
Print Settings
Printer Brand:
Prusa Printer:
i3 MK2S Rafts:
No Supports:
Yes Resolution:
layer height 0.3 mm Infill:
20% -
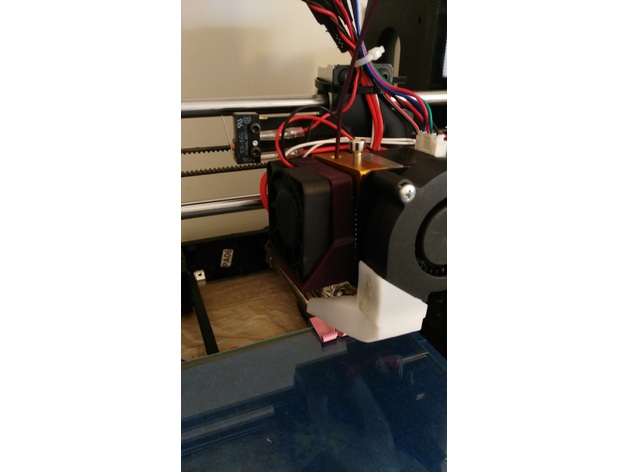
Anycubic prusa i3 – left side motor fan support 3D Print Model
Summary
This is a 40mm fan support for the extruder motor.
With this design you can cool the motor and keep the hotend protected from the fan air flow.
You can screw the fan with the support to the motor (with M3 bolts) or you can use neodymium magnet (4mmx2mm) and insert them in the holes. This second option offer a better access to the filament when you have to change it.
Print Settings
Printer Brand:
Prusa Printer:
Prusa Clone Rafts:
No Supports:
No Resolution:
0.2 Infill:
20-30% -
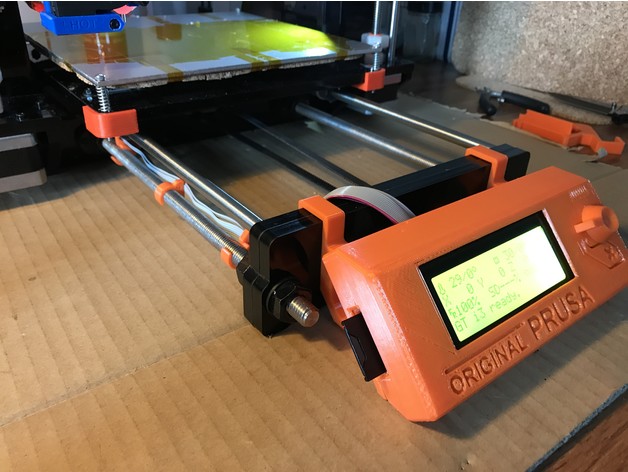
Geeetech i3 Pro B LCD holder 3D Print Model
Summary
This is a modification of original Prusa LCD holder for Geeetech i3 Pro B (acrylic). While original Prusa has LCD mounted on front of the printer on two rods, i3 Pro B has LCD mounted on top of the printer. I moved LCD to the front as well and modified LCD holder to fit on two layers of 8mm acrylic there.
LCD supports (A and B) has been modified to fit i3 Pro B.
LCD cover and LCD knob is the same as original Prusa https://github.com/prusa3d/Original-Prusa-i3/tree/MK2/Printed-Parts/stl
LCD cable holders are resized to fit threaded rod Geeetech has (mine on i3 has 9.5mm outside diameter, original Prusa use 10mm rods).
The assembly is the same as original -http://manual.prusa3d.com/Guide/6.+LCD+assembly/300
The rotary encoder and reset button on i3 are too long, it’s necessary to cut reset button by about 5mm and encoder rod by about 7mm so it fits to LCD cover. Measure twice before cutting, the length might depend on which Chinese clone you have.
Print Settings
Printer:
Geeetech i3 Pro B Rafts:
No Supports:
No Resolution:
0.2mm Infill:
20% Notes:
printed in PETG -
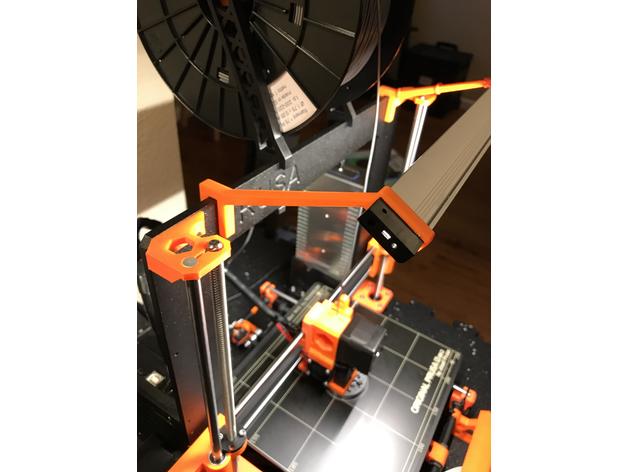
Prusa i3 MK2/MK2S Light Bracket 3D Print Model
Summary
I designed this light bar bracket in Fusion 360 for my i3 MK2S. it its a nice tight fit over the plastic end caps of the light bar but moves more freely once over the extruded aluminum. The light bar used is the following: https://www.lowes.com/pd/Utilitech-11-8-in-Plug-in-Under-Cabinet-LED-Light-Bar/1000033647
The light is activated by waving your hand underneath. It is also dimmable if you hold your hand under the sensor. Once the desired brightness is achieved, move your hand.
Print Settings
Printer:
Reality CR10 Rafts:
No Supports:
No Resolution:
0.3 mm Infill:
25% -
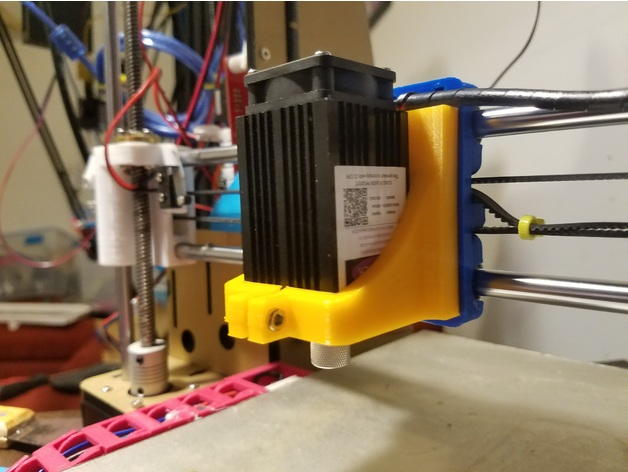
Laser Mount for Prusa i3 Rework X Carriage 3D Print Model
Summary
Mount for Laser (https://www.aliexpress.com/item/500mw-405NM-focusing-blue-purple-laser-module-engraving-with-TTL-control-laser-tube-diode-protective-googles/32562052620.html)
Compatible with the X Carriage from the Prusa i3 Rework – https://www.thingiverse.com/thing:119616
Print Settings
Supports:
No Infill:
10% -
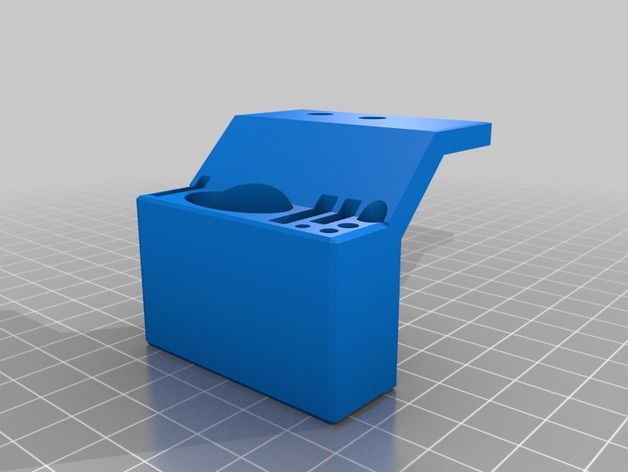
i3 Mega Tool Caddy 3D Print Model
Summary
I Noticed there are no tool holders for i3.
Here is my first attempt at one. Fits the right side of the i3 mega.
Fits most tools that come with the i3 Mega except the Spatula.
Will fit the left hand side if you mirror the image in cura
Printed on its front down with no supports.
Print Settings
Printer:
Anycubic i3 Mega Rafts:
No Supports:
No Resolution:
.3 Infill:
100 Notes:
printed on its side down with no supports.
How I Designed This
Used tinkercad -
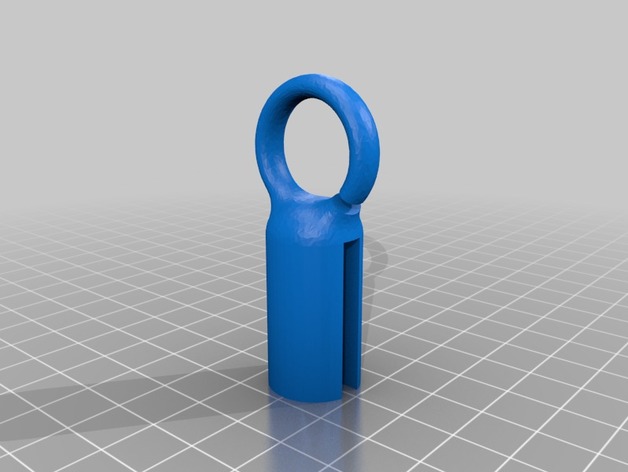
Anycubic i3 Mega Spool Stand Filament Guide 3D Print Model
Summary
Quite often, when I moved the printer around, filament would come spiraling off the spool. This helps keep it on the spool. -
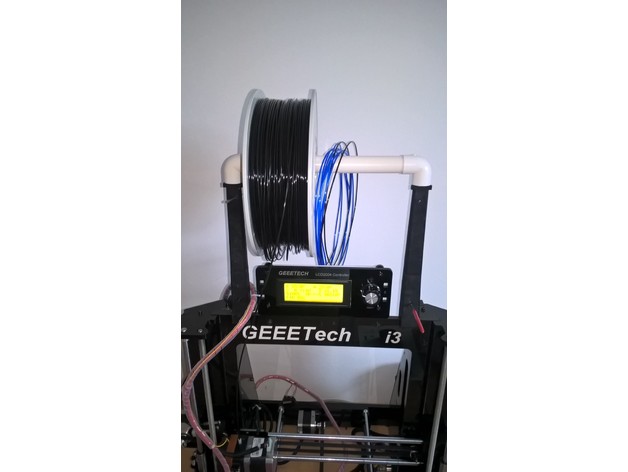
Filament spool holder for Geeetech Prusa i3 3D Print Model
Summary
This spool holder is almost vertical to minimize the constraints on the 3D printer frame.
As it use the white pipe delivered with the Geeetech Prusa i3 Pro B, it can hold 2 spools side by side. Filament samples will be also fit to this holder.
The various holes in the holder allow to block the filaments in order to recover them very quickly. You can also use these holes to stock your Allen wrenches or your gauge used to remove the plastic jam in the extruder.
You’ll need 4 screws 3 x 12 mm to assemble the bottom with the top parts of the right and left supports.
Print Settings
Printer:
Geeetech Prusa i3 Pro B Rafts:
Doesn’t Matter Supports:
Yes Resolution:
0.2 Infill:
30% Notes:
Make sure that the front side of each arm is facing the heat bed in order to have a nice aspect on front of you when it is installed on your printer. -
Wanhao i3 120mm PSU Fan Upgrade for Undermount 3D Print Model
Summary
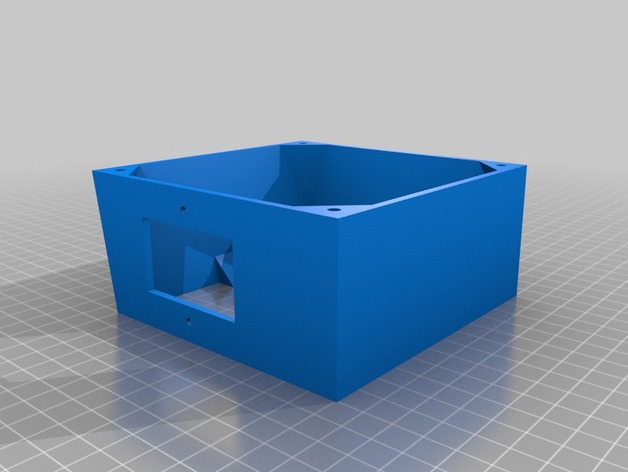
I needed a 120mm fan upgrade for my Maker Select v2, as the stock fan makes a terrible grinding noise every time I turn the printer on. But, none of the options worked for me, because I have mounted my control box under the table my printer is on! So I flattened the top and increased the angle on the bottom to accommodate the 120mm fan.
This is an extended back cover for the Wanhao Duplicator i3 PSU (also rebranded as Monoprice Maker Select, Balco 3D Printer, Cocoon Create). This model allows you to use a 120mm fan instead of the noisy tiny internal one. The new fan will be mounted outside of the power supply, but it will be much more silent. It adds about 10mm of extra length to the bottom.
I don’t know if other versions of the printer have a different arrangement for the screw holes. This was designed for a v2.1 (v2 should be the same). Check compatibility for v1 and rebranded versions before printing.
The stock screws won’t work for this part. Use M3x8mm or longer to attach the cover to your PSU case. Screw holes aren’t countersunk (just counterbored), so choose screws with a flat top.
Print Settings
Printer Brand:
Wanhao Printer:
Wanhao Duplicator i3 V2 Rafts:
Doesn’t Matter Supports:
Yes Resolution:
0.2mm Infill:
10% Notes:
It should be aligned with the PSU screw holes facing the build plate, already. Enable supports for the IEC connector/power switch plate and wiring loom slot.
It’s not a must, but I recommend using 3 shells/solid perimeters for the holes where the fan mounts on, so when threading the screws the plastic doesn’t break.
Post-Printing
Installation guide
Unplug the power cord from the wall socket and from the printer. Safety first!
Unscrew the 4 black screws that hold the sheet metal back cover in place. Save them if you plan to reinstall the stock cover in the future (they are too short to work with this mod).
The cable loom going from the control box to the printer goes through a cut in the back plate and is held by a zip tie. Cut that zip tie to free the loom from the plate.
Disconnect the spade connectors going to the IEC power socket + switch combo. Notice the wire colors and location to reinstall them later in the correct position. Take a picture if necessary.
Disconnect the small fan from the power supply.
Unscrew the fasteners holding the socket/switch in place. You should be able to lift it off the plate (use a flat screwdriver as leverage if you need so to get it out).
Position the back cover and align it with the screw holes tapped in the case of the control box. Make sure the wire loom goes through the U-shaped cut-out provided.
Use M3x8mm or longer to attach the plate to the metal case.
Take the wires that were attached to the IEC connector/switch and guide them through the rectangular cutout provided (located on the top or sides, depending on the model you have printed). Re-attach the wires to the switch and screw it in back. You can reuse the stock screws that came with it (be gentle when doing this, you’re threading into plastic).
Take your 120mm fan and use the +12v and GND wires to connect it to the psu. If your fan has a molex connector (3 or 4 pin) you should be able to just plug the cable in to the existing connector you left coming from the power supply.
You may want to use some electrical tape or a drop of hot glue to secure the connection.
Align the fan with the mounting holes of the printed cover. Use M4x40mm screws or self-tappers of similar length to secure the fan to the cover. Make sure to tidy all the cables up inside so they don’t catch on the fan blades.
Enjoy your silent printer!
Extra
I recommend the addition of a fan grill to protect your fingers from the spinning blades. It is one of the drawbacks of having the fan exposed instead of inside the case. Be careful! -
Prusa I3 Belt Holder for REPRAP.ME frame 3D Print Model
Summary
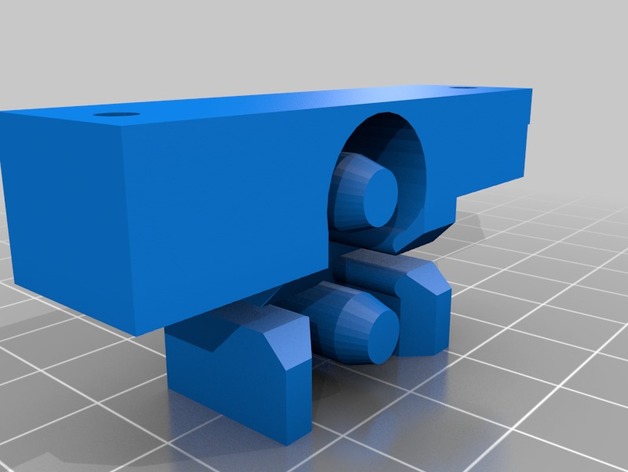
Modified original Prusa part form MK2 to accomodate trayhttp://www.reprap.me/prusai3blackacrylic.html
y-belt-holder-longer-2mm.stl for Black Version
Print Settings
Printer Brand:
Prusa Printer:
Prusa Mk2 Rafts:
Doesn’t Matter Supports:
Doesn’t Matter Resolution:
0.1 Infill:
15 Notes:
Print on side with pins point up. -
Folgertech 2020 i3 2004 Discount LCD Display Left Arm Mountable 3D Print Model
Summary
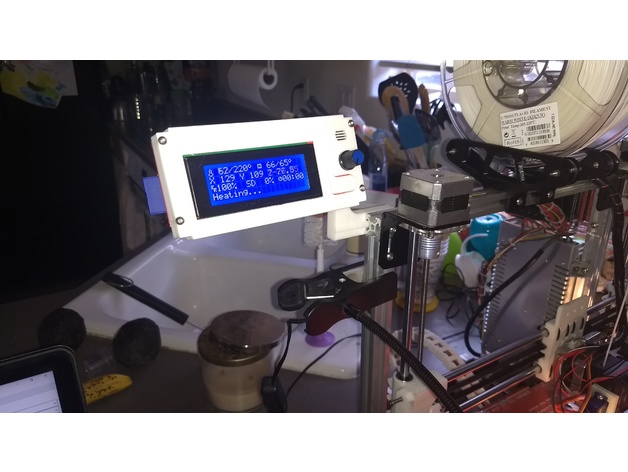
A remix of two other types of mounts. The best display front I have found plus a heavily modified arm to support it from the left side of my i3. Note the pictures provided where it uses two M5’s to mount it quite securely. Also note that the m3x30’s used to mount the screen use two sets of nuts, the first gives almost the perfect clearance for the soldered joints on the back and the latter hold it to the arm.
Print Settings
Printer Brand:
Prusa Printer:
Prusa Clone Rafts:
No Supports:
No Resolution:
300um Infill:
20% with 3 outer layers from 400um nozzle -
Tronxy P802M (Prusa i3) Filament Guide 3D Print Model
Summary
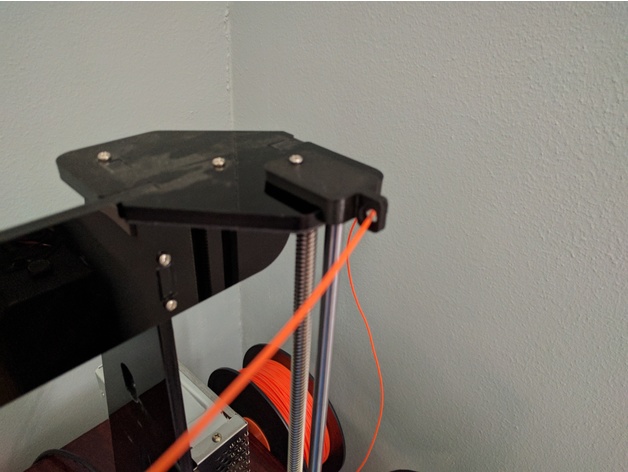
Simple filament guide for Tronxy P802M (Prusa i3 Clone).
May work with other printers. Location of mounting hole may require remix or drilling to fit. -
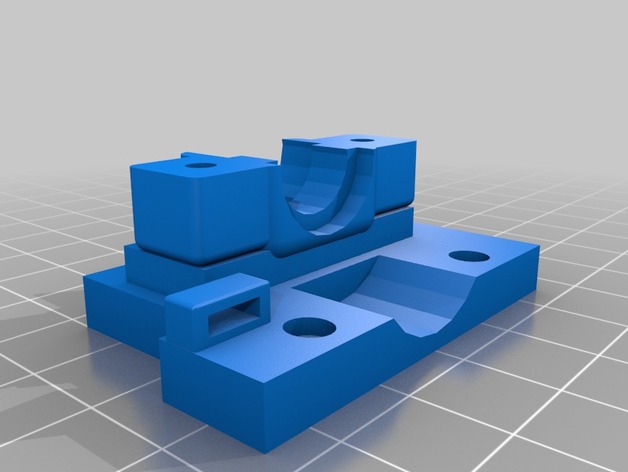
CTC Prusa i3 Pro B (E3D V6 Mount w/ Radial Fan mount) 3D Print Model
Summary
Created using TinkerCAD.
This mount was created to allow a 40mm radial fan to be attached to the front of the mount. The mount connects to the original carriage. It allows for a zip tie to be placed in order to hold all wiring.
Print Settings
Printer:
CTC Prusa I3 Rafts:
No Supports:
Yes Resolution:
.3mm Infill:
60% Notes:
Rotate top 180 degrees for the print. -
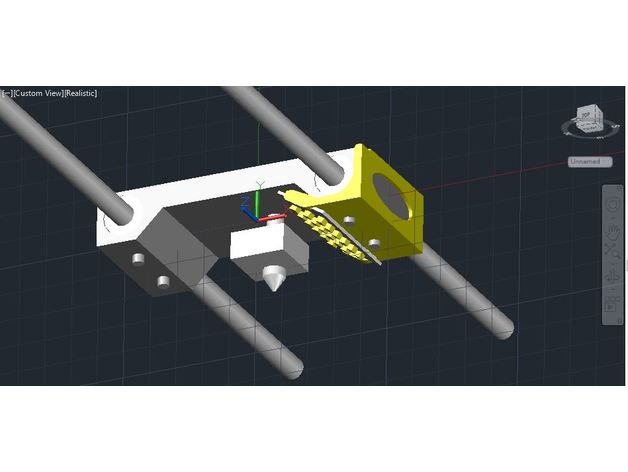
Anet a6 prusa i3 led plate holder 3D Print Model
Summary
I designed this for my anet a6 prusa i3 3d printer. Every time I was printing I needed a flashlight to see in detail what the printer was doing. At first I wanted to add lights to the frame but since the extrude is moving there was never a perfect spot without shadow. So I measured the aluminum extruder base and made a 3d model of it. Then designed something so it would fit the led plate I had. I think I found the same Led in the link below but i am not sure. For the costs it is worth trying. And if not you have to change the clamping part in acad yourself to make it fit to the different measurements of the new led plate. The file is made for a led plate of 47X20 mm.
The power leads are put together with the rest of the extruder cables and go to a switch. power is taken from the powersupply. The led plate will consume just minimal power so no worries if the powersupply can feed the led’s.
order the led plate here:
https://nl.aliexpress.com/item/1PCS-Super-Bright-T10-18-LED-1210-SMD-3528-Car-Auto-Interior-Reading-Door-Light-Panel/32800244364.html?spm=2114.010208.3.68.267Quc&ws_ab_test=searchweb0_0,searchweb201602_4_10152_10065_10151_10068_10084_10083_10080_10304_10082_10081_10177_10110_10136_10137_519_10111_10060_10112_10155_10113_10114_437_10154_10056_10055_10054_10182_10059_303_100031_10099_10078_10079_10103_10073_10102_10052_10053_10142_10107_142_10050_10051,searchweb201603_2,ppcSwitch_7&btsid=f5f04a42-0ce2-4926-bc45-6bfa0c134434&algo_expid=857e0932-25b8-43dd-b230-5caa9d3c3864-9&algo_pvid=857e0932-25b8-43dd-b230-5caa9d3c3864 -
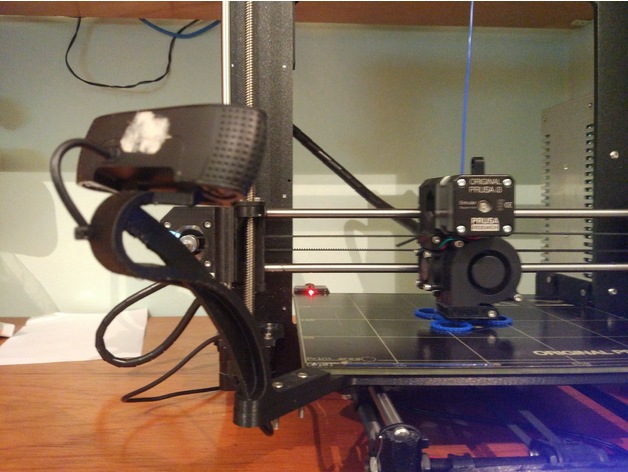
Prusa I3 MK2 Logitech C920 Mount 3D Print Model
Summary
Logitech C920 Mount for Original Prusa I3 MK2 / MK2S
Its a little modification from (https://www.thingiverse.com/thing:2283508) for mount the Logitech C920.
Required unmount the webcam for replace the standard support for this.
The result it’s amazing in terms of stability.
Demo: https://www.youtube.com/watch?v=RylwI2aTmnQ
Print Settings
Printer Brand:
Prusa Printer:
Prusa Mk2 Rafts:
Doesn’t Matter Supports:
Yes Resolution:
0.2 Infill:
50% Notes:
It is recommended to use ABS for the heat of the bed -
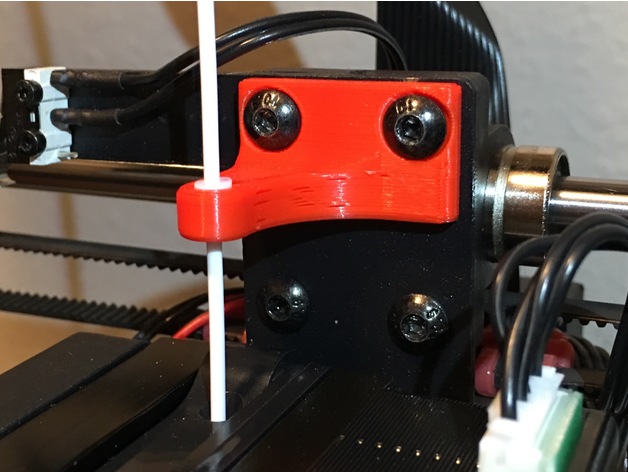
Filament Guide for Wanhao i3 plus 3D Print Model
Summary
A teflon tube assisted filament guide for your Wanhao Duplicator I3 Plus! Also fits the I3 (non-plus.)
Print Settings
Printer Brand:
Wanhao Printer:
Wanhao Duplicator i3 Plus Rafts:
No Supports:
No Resolution:
0.20 Infill:
~20%
Post-Printing
5mm of Teflon tubing required.
Cut Teflon with razor blade to prevent making out-of-round.
Slightly persuade tube into appropriate hole with blunt object.
Use existing screws!
You’re done! -
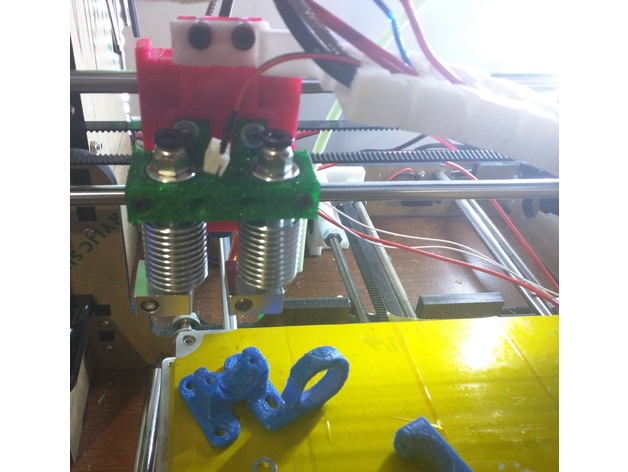
Prusa i3 Remix Multi-Hotend Mount 3D Print Model
Summary
I liked aaroncm’s minimal/simple hotend mount, I had been using it for a while.
But I want to use two hotends on it, so I measured the original model and got it close to the original in OpenSCAD.
Everything is square in my scad because I don’t know how to make rounded shapes that won’t deform their original size in OpenSCAD.
I designed this so the values are all in variables that someone can change.
There is also a setting to specify how many hotends you want. I only needed two, but it works past 10… I have no limit on it.
If there is any suggestions, or ways I can improve my program, please let me know. I’m a fluent programmer, but I’m a novice with OpenSCAD still.
I did not design this with a proximity sensor mount because I am using a modified rear one that attaches to the back of the i3 remix carriage. -
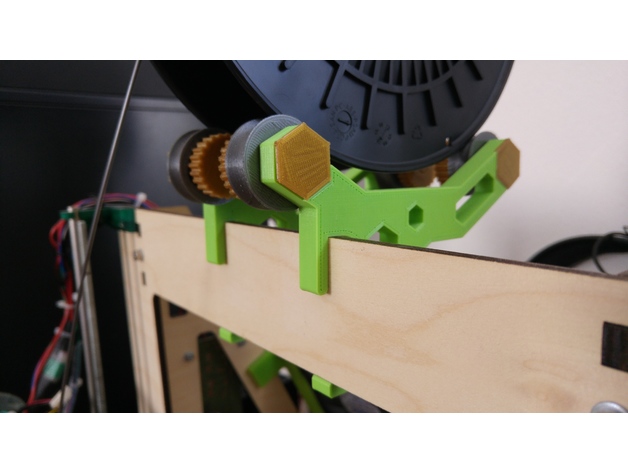
Extended Arms – Spool Holder for Prusa i3 MK2 – Hex Design – Toolless Mounting – Fast spool replacement 3D Print Model
Summary
I Just extended the Arms to fit a 52mm (wooden) Frame. Thanks to Martin Majewski for this fantastic design!
Print Settings
Printer:
Custom Prusa I3 Rafts:
No Supports:
No Resolution:
0,1-0,3mm Infill:
20% Notes:
Grab the other Parts from the original design -
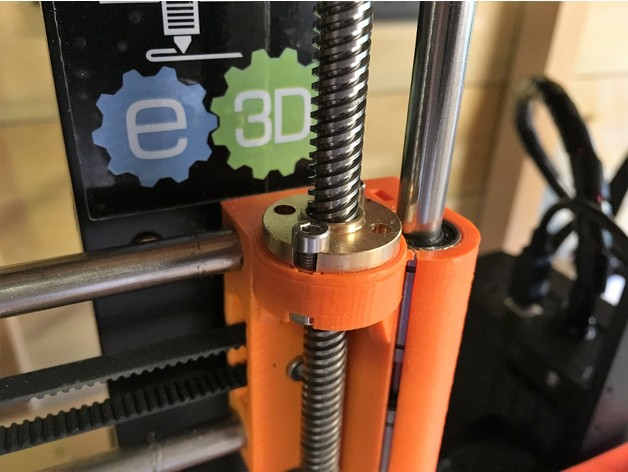
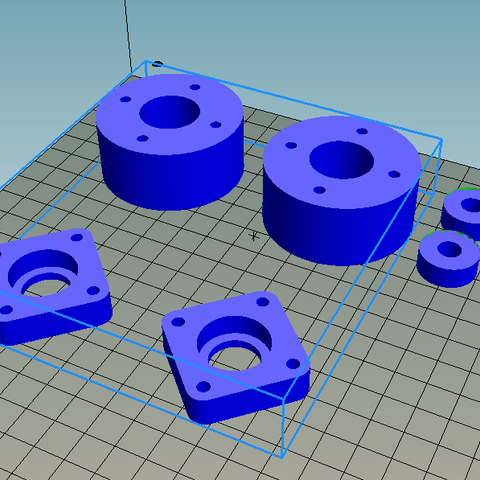
Prusa i3 MK2 Clone Brass TR8 Nut Adapter 3D Print Model
Summary
This adapter will allow a brass TR8 nut, commonly supplied with cheap TR8 rod, to fit into the standard Prusa i3 MK2 X End parts. You will need to cut some material from the nut, so that the bolt holes in the standard parts (and adapter) line up. A file can be used to cut away the soft brass, quite quickly. The photo shows the nut and adapter in place. -
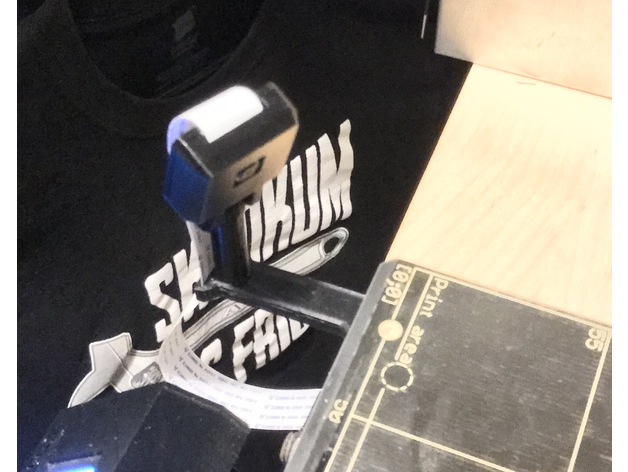
The Best Damn Prusa i3 MK2 Bed Camera Mount 3D Print Model
Summary
As many San Francisco Bay Arean makers know, we reach Ikea demo display levels of usability with our tiny living spaces. It’s sometimes tough build stuff and still have more than a hammock draped between two burning man art cars to sleep on.
For me, the perfect spot to locate my first printer was the closet because:
it was relatively draft-free
I could leave the light on for timelapse prints without annoying anyone
being surrounded by clothes it really dampens the screeching from these new electronical overlords
and the small chest o’drawers in there just collected random coins, lint, and automotive fuses and bulbs lifted from my trips to Pick-Your-Part that I’d emptied from my pockets onto the end of the day anyway #amiright ???
Unfortunately, since upgrading from my quaint Printrbot Simple Metal 1403 to the Original Prusa i3 MK2, the larger footprint makes it a veritable behemoth in there. It hangs off the end of the dresser so gets a corresponding larger share of snags, bumps, and bruises from being right in the middle of a very active area (the closet is home to my daily-used Dyson V6, broom, ironing board, clothes, shoes, Plex Media Server, etc). Because of this, I’ve broken the bed camera mount of 3 separate designs on it, including JPgxuAHFR22RQo’s and cocoknight’s. This afternoon I’d had enough…
<POPEYE>
That’s all I can stans — I CAN’T STANS NO MO !</POPEYE>
Ladies and gents, without further adieu I give you:
The Best Damn Prusa i3 MK2 Bed Camera Mount !
Nitty Gritty:
Doesn’t snap in two as if it were crafted from paper mâché like every other lightweight bed mount design I’ve tried
Minimal weight (only 5g for this part when printed in ABS, ~6g for PETG or PLA)
As close and tall as possible to the bed while still not interfering with the extruder stepper motor during homing — no more viewing your timelapse knife-edge right at the bed
Left-mounted, where it gosh-darn ought’be ! With luc_e’s over-engineered [4x M3 screws and nuts to hold in an RPi ? Really ? :] but sweet as August corn, Original Prusa MK2 style Octopi cover that mounts the RPi perfectly over the MK2’s MiniRAMBo enclosure, and along with Adafruit’s 24″ RPi camera CSI ribbon extension, allows the ribbon to slide along under the MK2’s aluminum Z frame. I’m even powering the RPi from 5v from a spare endstop pin off the Mini RAMBo – who has 3hrs to same-day Amazon’ yet another USB charger ?
No metal fasteners needed (the MK2 comes with an extra 12mm M3 screw to replace the stock 10mm one as part of the kit 😉
Part of its magic is its infill layout and settings (detailed below) but since I know what printer you’re using, I’ve even included gcode for the uninitiated among us (you know who you are 😉
It’s Skookum as Frig !
Enjoy !
-=dave
Print Settings
Printer Brand:
Prusa Printer:
Prusa Mk2 Rafts:
No Supports:
No Resolution:
200 microns Infill:
11% Notes:
Slice with Slic3rPE with following adjustments:
Original Prusa i3 MK2 Colorprint printer profile settings
0.20mm NORMAL print profile settings
Solid top/bottom layers: 4/3
Seam position: rear
Fill density: 11%
Fill pattern: Grid
Combine infil every: 2
Solid infill every: 25
Fill angle: 0
Solid infill threshold area: 46
Print !
Gcode for ABS (tested), PETG, and PLA (untested) included for you lazy geniuses ! -
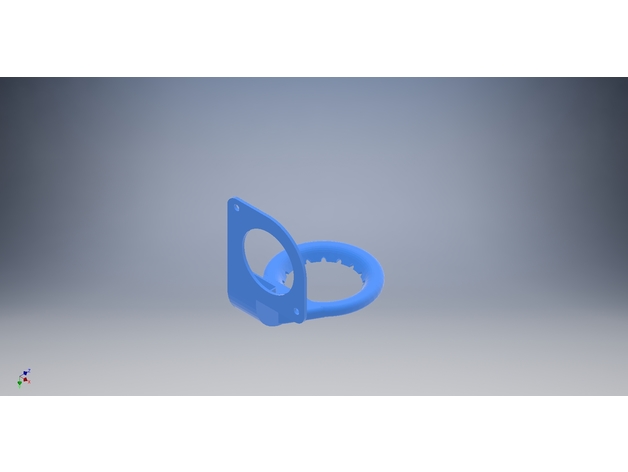
Prusa i3 Screw Mount Nozzle Hictop & Anet A8 Nozzle 3D Print Model
Summary
Screw mount cooling nozzle, a more permanent solution than the commonly available one which sticks into the fan using friction (which cracked my fan nose).
enjoy!
3dcalgary -
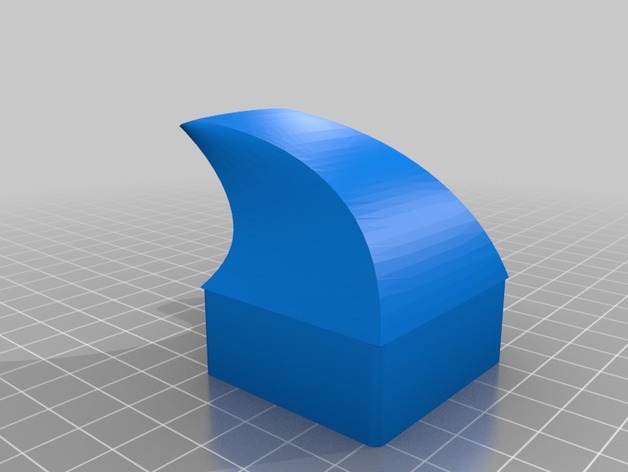
Left fanduc for prusa i3 L3K extruder & SimpleOne Hotend 3D Print Model
Summary
Left fanduct for L3K extruder with a Simple One hotend.
Small change of original part, just a little too small for me.
Ventilo de refroidissement d’impression pour le très bon extruder L3K équipé d’une hotend Simple One. Petite modification du modèle original qui est 4 à 5mm trop haut dans mon cas et qui souffle sur la hotend. -
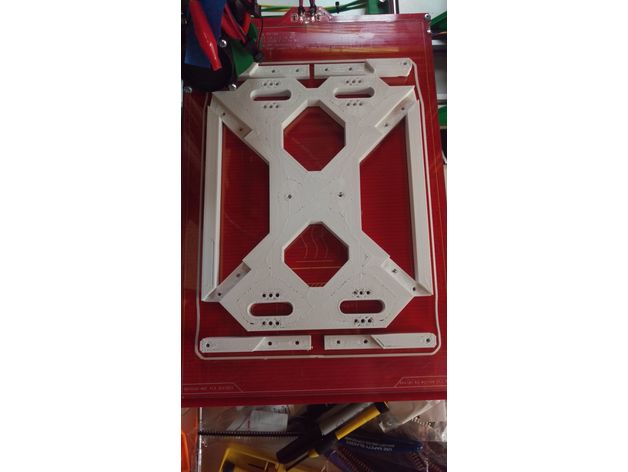
Prusa i3 MK2 Y carriage printable bed 3D Print Model
Summary
This is a fully printable Y carriage plate for mounting your heated bed. I adapted the Prusa i3 MK2 dxf file and modified it so that you can bolt on the arms in order to make this a fully printed part rather than having to rely on cutting one out of wood or having one laser cut or machined for you. It is 10mm thick, and the legs go in the slots only one direction each so that you cant mix them up and they use 3mm screws to bolt down. I printed mine with cubic infill to give it some additional rigidity, but it’s a very solid piece once it’s complete.
I adapted this version to use 4 lm8uu bearings instead of the 3 that are called for in the plans. However if you want to modify it back to a 3 bearing design, i’m including the sketchup file itself for your reference. I may improve this design by making it a little thinner so it’s lighter. it comes in at about 159 grams. You can print this on a standard 200mm square build plate.
I also added additional 3mm holes for extra zip ties or screws for the bearings. Some of you like to use blocks so I gave plenty of options to tie them all down however you see fit.
May come back and add some lm8uu bearing brackets in the future if there is interes.
Print Settings
Printer:
Wilson II reprap mjrice Rafts:
No Supports:
No Resolution:
.25 Infill:
30% Notes:
I printed this with .25mm layer height (since it’s a large unseen part, you dont need to do fine details on this) and a .5mm nozzle on my Wilson II printer. I used a top/bottom thickness of 1.5mm and a wall thickness of 2mm, but this is way overkill. you can use a 1mm thickness all around to speed up print time. as is, i printed it in about 8.5 hours.
Setting to 1mm wall/top/bottom thickness it drops to about 6.5 hour print at 60mm/sec.
Post-Printing
use 8x m3x12 cap head or pan screws with nuts on the other side to attach the legs to the body. Legs mate to their slots in only one direction flush and tight. -
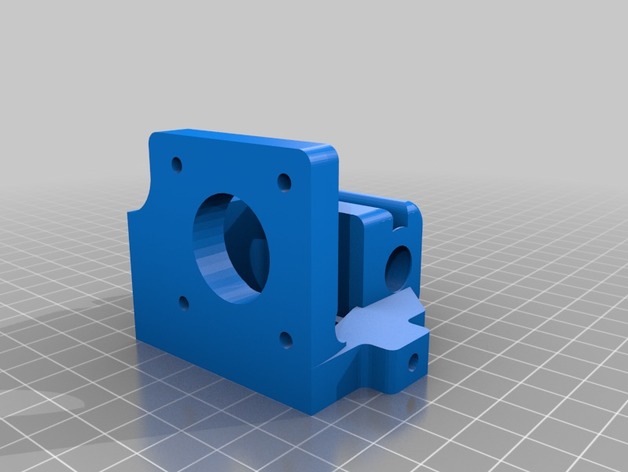
Flsun i3 x/z axis 45 mm redesign
Summary
I’ve decided to make a version of my x/z-axis redesign with a center to center distance for the x-axis rods of 45 mm, with the belt centered. There have been many requests from certain people who want to use a prusa carriage with their flsun printer, so if you’d like to print an original prusa carriage with 45mm rod spacing and the belt centered, these are the brackets for your flsun i3!
For reference, this is the complete redesign with the original 70 mm spacing. Many people have reported success with this design alternative also.http://www.thingiverse.com/thing:2116748