Summary
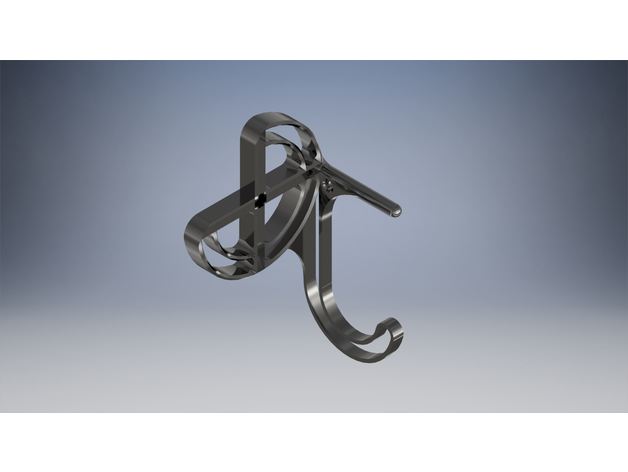
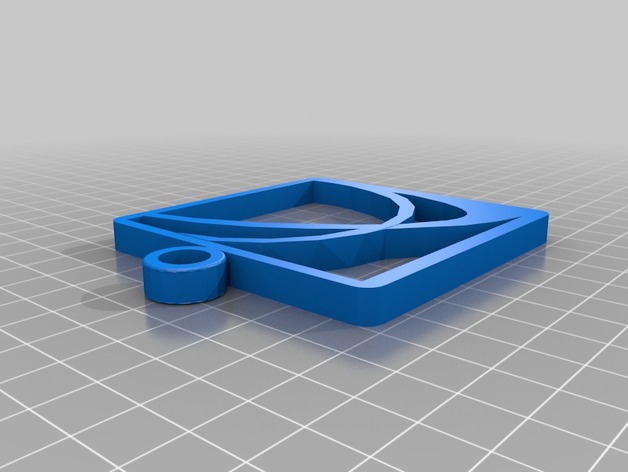
Simple key chain for Yamaha SZR model name
Author: Thingiverse
-
Key chain yamaha szr bike 3D Print Model
-
Tronxy & CR-10 Rail insert 3D Print Model
Summary
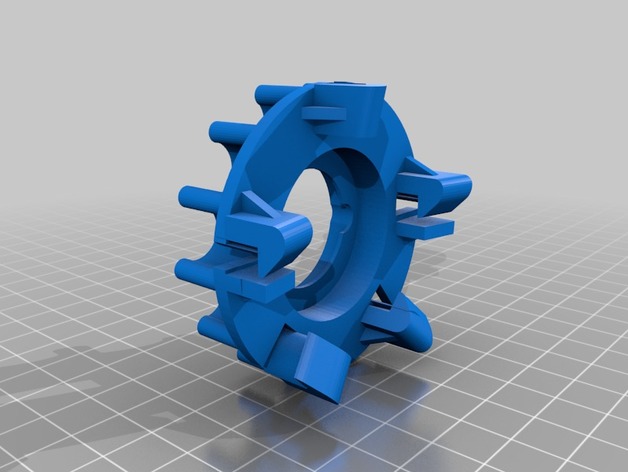
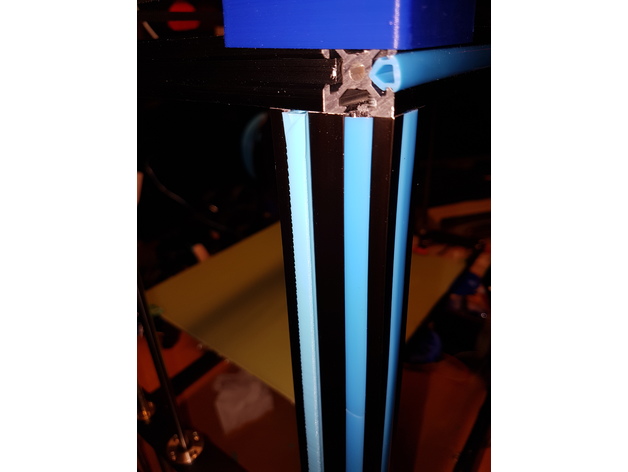
Found this Rail insert made by Moby2112, and re-saved it in 100-400mm for easy printing.
Really nice to be able to swap/print color.
Print in vase-mode. No raft needed (atleast on a CoreXY-printer).
The last 100-150mm might be a bit shaky due to the hight.
Print Settings
Printer:
Tronxy X5S Rafts:
Doesn’t Matter Supports:
No -
Open Laser Rifle 3D Print Model
Summary
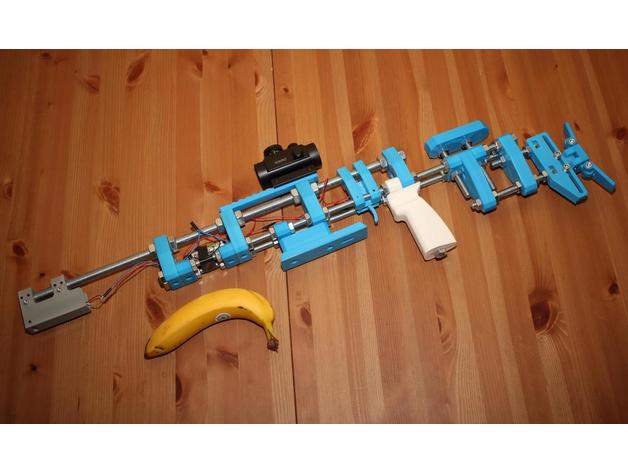
This is Open Laser Rifle, a special laser rifle for Home LASER Shooting Simulator project (http://homeless-eng.webnode.com/). This rifle is for training purpose and can not be turned into firearm.
Main parameters:
Two axis adjustable LASER.
Fully adjustable frame.
Picatinny rail or 11mm rail (sights are not included yet).
Powered by two AA battery.
RC timed LASER system.
File “OpenRifleParts.zip” contain all files sorted to directory.
Parts to print
Frame
1x frame_D10
3x frame_M6
2x frame_support_D10
3x frame_support_M6
1x frame_support_D6
2x butt
1x cheekpiece
2x tm_holder
Palmrest
1x palmrest
1x palmerst support
Rail
1x mount_rail_11mm_70
1x mount_rail_11mm_155
or
1x mount_rail_picatinny
Grip
1x grip
or
2x grip_splited (one of these must be mirrored)
Buttplate:
1x holder
1x slider_M6
1x rotator_M6
1x wing_A_M6
1x wing_B_M6
Trigger mechanism
1x body_bottom
1x body_top
1x trigger_v2
Laser Adjust:
1x case_v2b
2x case_holder_v2
1x horizontal_adjuster
1x vertical_adjuster_v2
Parts to buy
All dimensions are in millimeters.
Frame
1x M14x600 threaded rod
2x M10x600 threaded rod
2x M10x140 threaded rod
3x M10x80 threaded rod
1x M6x35 screw (for grip)
8x M14 nut
48x M10 nut
Palmrest
2x M6x35 screw
Rail
2x M4x8 (per rail)
Buttplate
5x M6x25 screw
5x M6 nut
2x screw washer for M6
Trigger mechanism
2x M3x6 screw
1x M4x4 set screw
1x 2mm diameter spike from bicycle
Laser Adjust:
4x M4x8 screw
4x M3x6 screw
8x M4x4 set screw
1x M3x6 set screw (for vertical adjust)
1x M3x10 set screw (for horizontal adjust)
1x M3x4 set screw (for laser holder)
Electrical
1x Capacitor 2200 uF, 6.3 V (higher voltage is possible)
1x Microswitch (ON-ON, some similar for RepRaps)
1x Battery clip (AA or AAA)
1x Laser module (some simple with 10mm diameter max, red dot, 3 mW is enough)
1x wires (about 1 meter red and blue)
Tools
3D printer 😀
saw
file
screw tap (M3, M4, M6)
sandpaper
soldering iron
etc. -
Door Chain Lock 3D Print Model
Summary
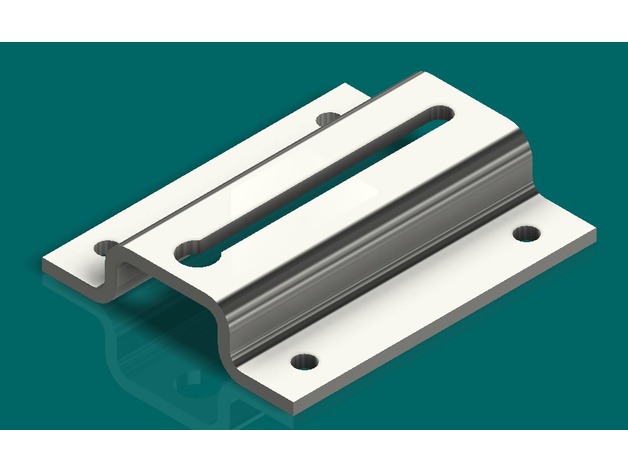
I made this for my door because the other got damaged, for this designed I added the .ipt file so you guys can change the dimensions if needed.
Made in Inventor. -
FT Power Pod 182mm 3D Print Model
Summary
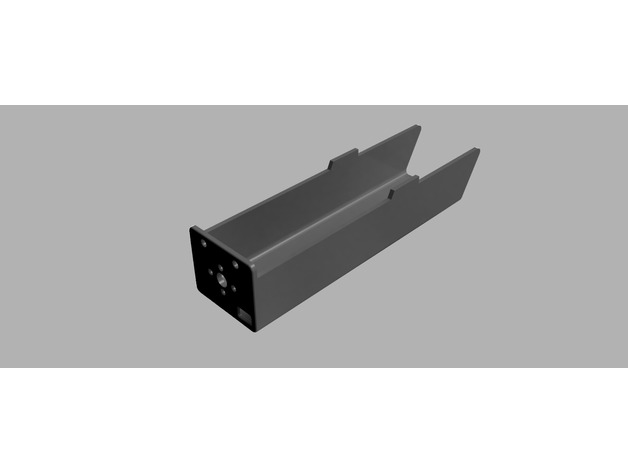
A printed power pod for your FT designs! Don’t worry about cutting out any more firewalls or folding foamboard; just hit print! I have tested this on the following FT planes: Bloody Baron, Simple Cub, Nutball, Bloody Wonder. Versawing, FT Delta. Leave a comment if it works for you on other aircraft.
This is slightly shorter than the FT power pod plans, but is designed to print in one piece vertically, with the firewall facing down, on most printers.
Includes stl file with and w/o holes for motor mounting. Holes are 4mm at standard 16mm and 19mm widths.
Also has cutout in bottom of pod for XT60 connector pass through.
Enjoy!
JGplanes
Print Settings
Printer Brand:
Prusa Printer:
i3 MK2S Rafts:
No Supports:
No Resolution:
.20 or .30 Infill:
10% fast honeycomb at 90* offset Notes:
Print with PLA or PLA+
Print with firewall flat on print bed. For a solid firewall, make the bottom 11 layers solid if your software supports this.
The included gcode is with the following settings:
Layer height: .30 (works well with .20 also, but adds 1hr to print time)
Bottom solid layers: 11 (this is for a solid firewall when printed vertically)
Outline perimeter shells: 1
Top solid layers: 3
Infill: 10% fast honeycomb with 90 offset
Extruder temp: 210
Bed temp: 75*
Support material: Yes (probably not needed since it is only for the XT60 connector hole.
Post-Printing
Drill your own holes in the sides for barbecue skewers to pass through, since this differs for different designs.
Dispose of support material in XT60 pass through if desired. -
snow flake star 3D Print Model
Summary
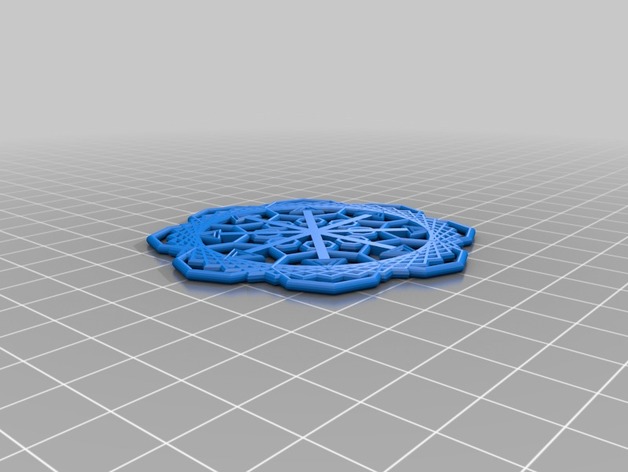
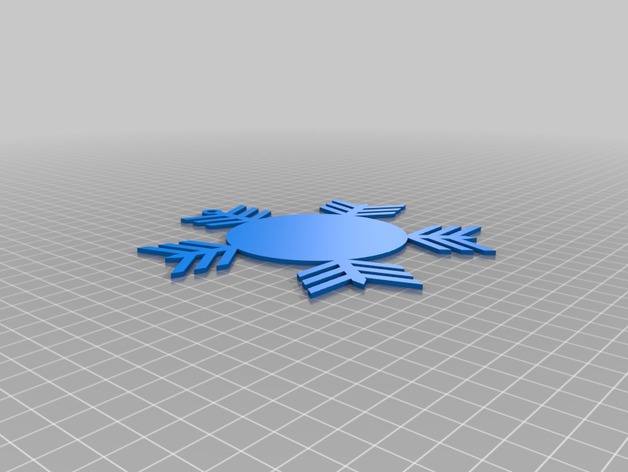
I created this star to use as a base for gluing a lithophane picture to, for gifting to friends -
Wolfenstein: The New Order | Grenade 3D Print Model
Summary
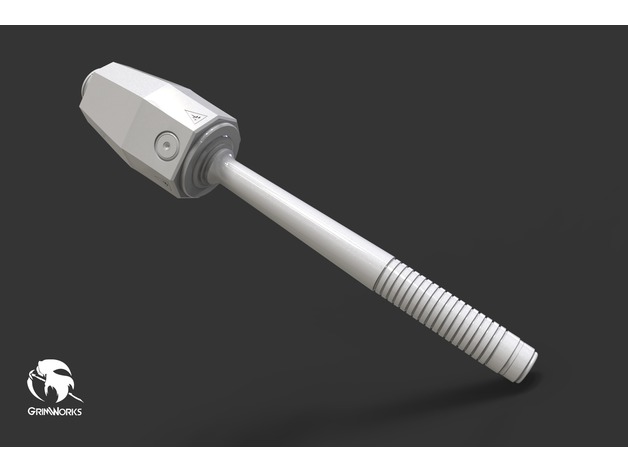
Wolfenstein: The New Order | Grenade
Inspired on the concept art of Axel Torvenius
Dimensions:
361 mm length
64 mm width
This is part of the 12 days of X’mas of Grimworks.
http://www.facebook.com/GrimworksMX
Have fun XD
See my profile here:https://www.myminifactory.com/users/AltairV -
Insect Cage V2 3D Print Model
Summary
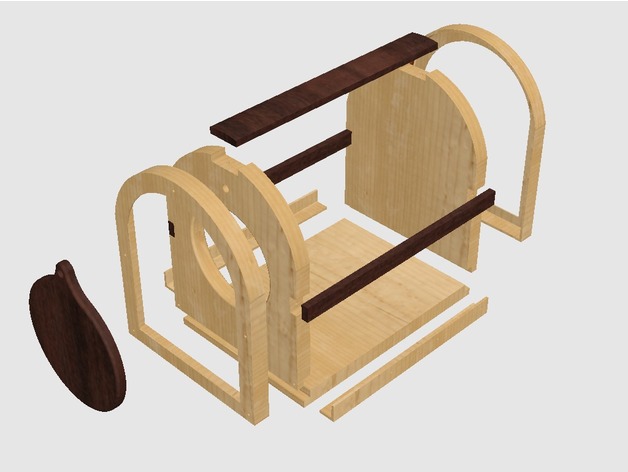
Insect cage for kids, Made to be printed on a 200mmx200mm bed
Screen goes under side and top struts, us a stapler to tack to bottom, small finishing nails to hold struts in place
Use flat thumb tacks to hold screen guard flashings in place. -
Hatchbox Filament Plug 3D Print Model
Summary
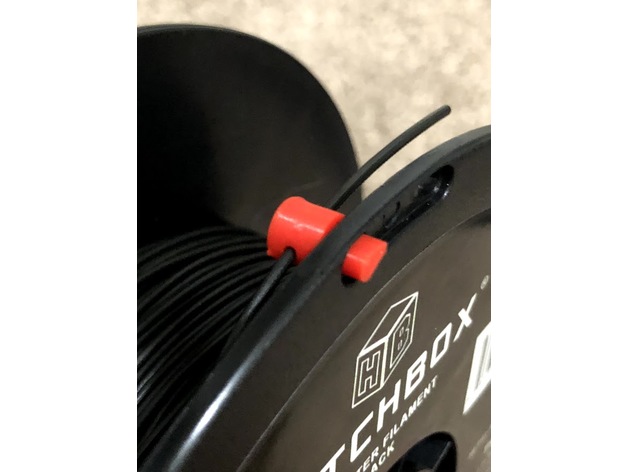
This plug was designed for Hatchbox 1.75 PLA may work with others.
I was using other “Clips” but they kept flying off so I designed this plug. It is pretty tight – so it has a better chance to not fall off. Note that not all holes in the reel are the same size. I found two on my test reel that are too small for the plug. If you can’t get it through the hole from the inside, insert it from the outside then try to insert it from the inside again.
Snip any melted/deformed filament from the end, insert the plug from the inside of the reel and thread the filament through the plug.
Print Settings
Printer:
Creality CR-10S Rafts:
Doesn’t Matter Supports:
No Infill:
100 -
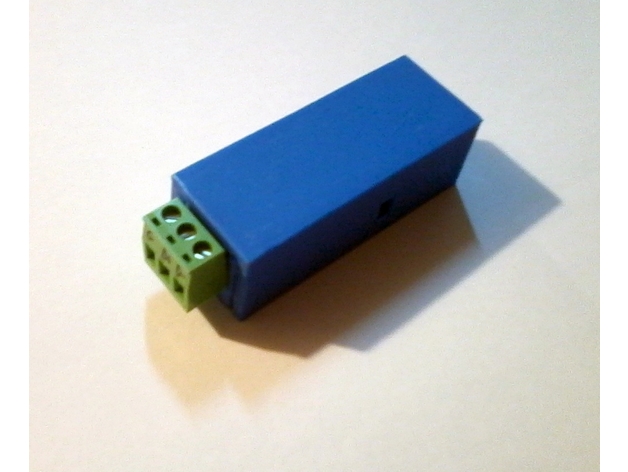
Case for PCB USB to RS485 3D Print Model
Summary
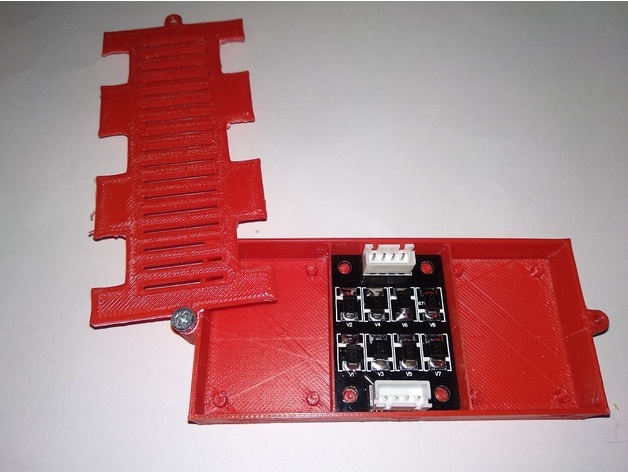
This box to house a small usb to rs485 converter. Box without holes, with side latches.
Print Settings
Printer:
RepRap(Marlin) Rafts:
Doesn’t Matter Supports:
Doesn’t Matter Resolution:
0.2 Infill:
30% + -

Cellular automaton snowflake in OpenSCAD 3D Print Model
Summary
This cellular automaton uses Stephen Wolfram’s rule that a filled cell stays filled and an unfilled one becomes filled if it has exactly one filled neighbor. -
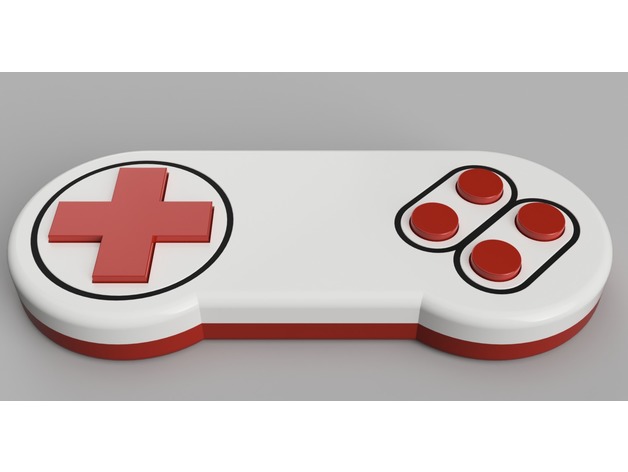
I2C Game Controller for Arduino / Raspberry Pi 3D Print Model
Summary
As part of my LED-Matrix Table project (uploaded soon) , I designed this game controller to control the table and to play games. It can be used as an input device for a wide variety of micro-controllers or raspberry pi computers.
Up to 8 controller can be used in parallel with the same control chip. The state of the eight buttons can be read by using the I2C protocol and therefore it only requires 4 wires for connection.
Additional Parts
The chip, included in the controller, is a PCF8574 on a small circuit board from Amazon (8€):https://www.amazon.de/gp/product/B06W564ZSD
And the pushbuttons are from Ebay (1.2€):http://www.ebay.de/itm/10-Stück-DIP-4-Mini-Drucktaster-Printschalter/272861590169
Additionally, you need a few wires for connecting the buttons to the PCF8574 chip and a 4-wire-cable with approx. 2 meter length to connect the controller to the raspberry pi.
Instructions
Print all parts 🙂
Cut out two perfboard pieces with a dimension of 40×40 mm each.
Solder 4 buttons on each perfboard, pay attention to the proper alignment (use the X button as reference, both perfboards require the same alignment)
Connect one pin of each button to the I2C port extender. Connect the other pin of each button to GND on the port extender circuit board.
Slide the two prefboards into their rails and use hotglue to fixate them (check if the align with the corresponding button holes as good as possible.
Connect the long cable to the port extender board. If you use the same board, you have to desolder the i2c connector on both sides.
Fixate the port extender board with some hotglue in the center of the controller as shown in the the pictures above.
Connect the other end to your arduino / raspberry pi and you are done.
Have fun! 🙂
Print Settings
Rafts:
No Supports:
No Resolution:
0.2 mm Infill:
15% Notes:
Multi-color
Multi-color printing of the front side of the controller can be achieved by pausing the print before layer 2 and 4 (0.2 mm layer height). Print layer 2 and 3 in a different color to achieve the colored inset, seen in the pictures above. -
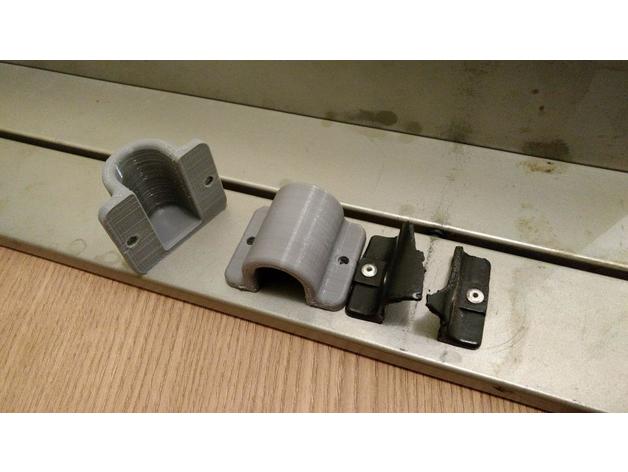
Camping_Table_Part 3D Print Model
Summary
Hi friends, I drew this piece to the camping table because mine broke over time, I hope it will be useful for everyone who comes down.
Print Settings
Printer:
FLSun Cube Rafts:
No Supports:
No Resolution:
0.2mm Infill:
30% Notes:
I did use ABS and 0.2mm layer high, but recommend 0.1mm to best finish. -
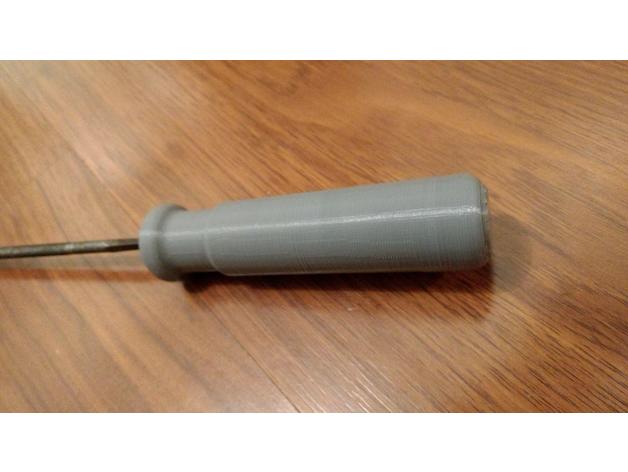
Generic_Handle_Tool 3D Print Model
Summary
Nice generic handle tool
Print Settings
Printer:
FLSun Cube Rafts:
No Supports:
No Resolution:
0.2mm Infill:
40% -
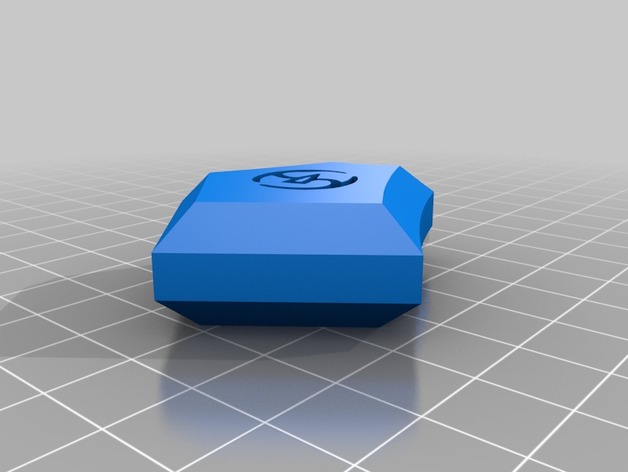
Samurai Soul Stone FFXIV 3D Print Model
Summary
Inspired by Titor’s collection of Soul Stones: https://www.thingiverse.com/thing:1694618 I finally got around to expanding on them. Here’s the Samurai. -
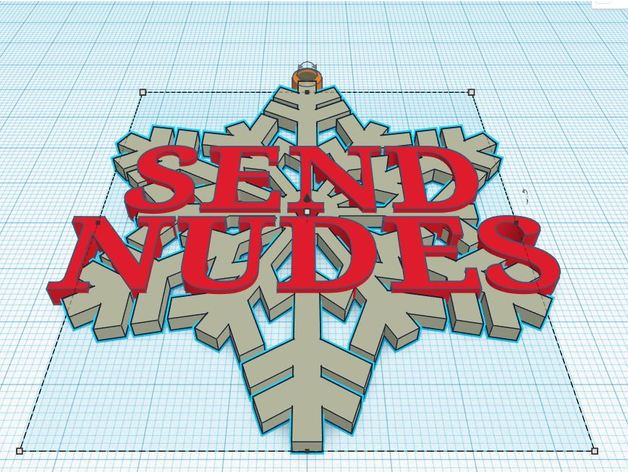
Send Nudes Snowflake Ornament 3D Print Model
Summary
What better way to bring the warmth of the holidays to someone you love than with an ornament for the tree. This remix of a snowflake simply added some basic text, and a loop for hanging. Enjoy!
Print Settings
Printer:
CR-10 Rafts:
No Supports:
No Resolution:
.1 Notes:
I had the most success at 220 filament at 55 bed, but it’s up to you and your PLA. Print it in white and paint the letters red or green for extra fest. Perhaps even a light coat of glue and glitter!
How I Designed This
Threw this inter Tinkercad and put in very little effort. -
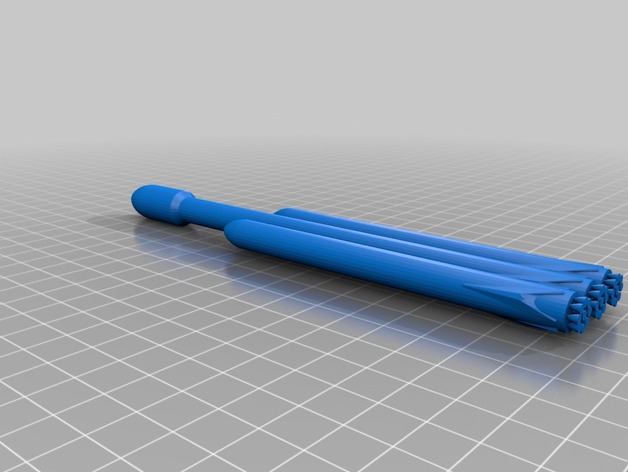
Falcon Heavy 3D Print Model
Summary
This is a simple falcon heavy model that doesn’t have to be printed in a ton of pieces and assembled.
Timelapse of this model being created and printed: https://youtu.be/–wyzDblfzI
The best way to build this is to print 1x – falcon heavy top.stl and 3x – falcon_heavy_engines.stl then glue them together
Flacon_heavy.stl is the complete model with engines attached -
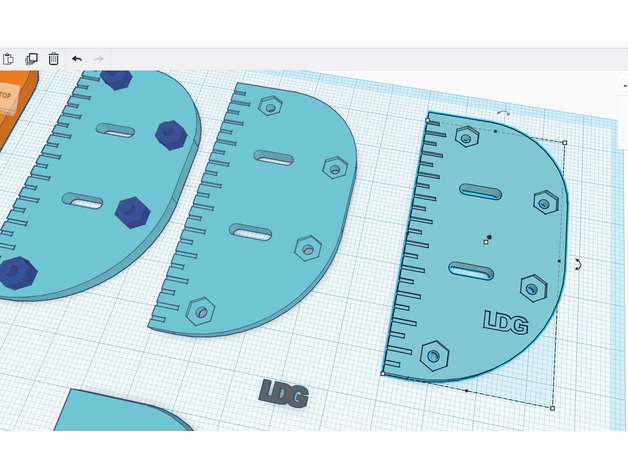
Barebow fingertab Plate 3D Print Model
Summary
Plate that can be added to the leather of an archery FInger tab. The regular stripes make it easier to use this tab for the stringwalking-technique.
4 designs: RH and LH medium-size, RH and LH small size.
(Small design only has 3 bolts) -
Clippy the Instant Noodles Pal 3D Print Model
Summary
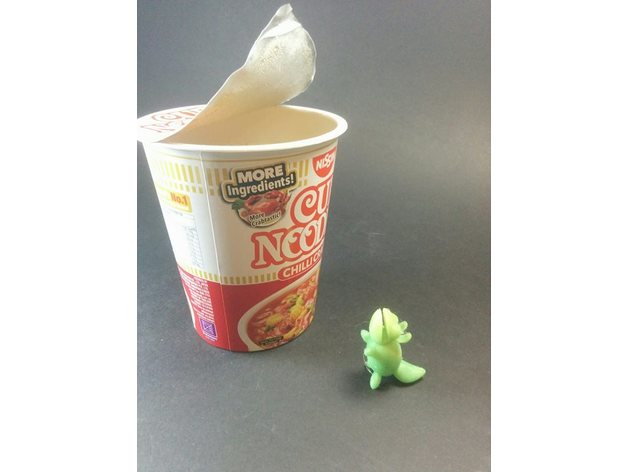
Clippy was born out of the eternal frustration of having to find heavy, flat and somewhat heat proof object to lay over an instant noodle cup while it is cooking.
While the first iteration of this was a simply clip, we decided to take it further to make it look cuter and double up as a fork holder so say hello to Clippy, everyone! =)
Have fun with Clippy! =)
(PS: This is not an endorsement to scoff down copious amounts of instant food, use with moderation!)
===
This model is not to be uploaded or sold in any form and is intended for personal use only.
Check out more of what we are up to over at our Facebook Page (http://www.facebook.com/FunbieStudios) or website (http://www.FunbieStudios.com)
Support us on Patreon – https://www.patreon.com/FunbieStudios -
NoseFrida Snotsucker Stand 3D Print Model
Summary
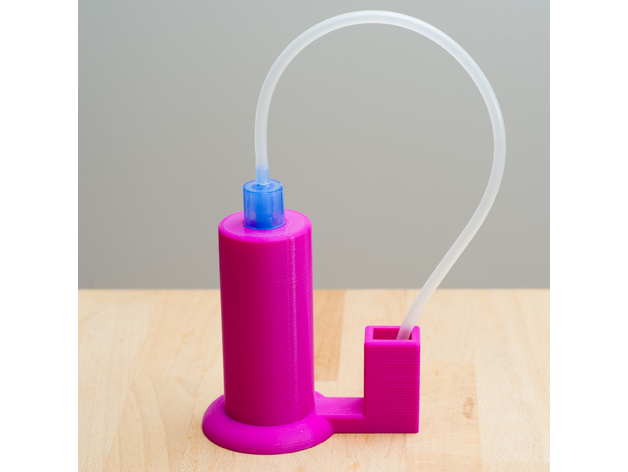
This is a stand to store the NoseFrida Snotsucker. The tube fits into the stand and there’s a sidecar to store the mouthpiece.
Print Settings
Printer Brand:
Prusa Printer:
Prusa Mk2 Rafts:
No Supports:
No Resolution:
.3 Infill:
20% -
Prusa i3 spool holder arm 3D Print Model
Summary
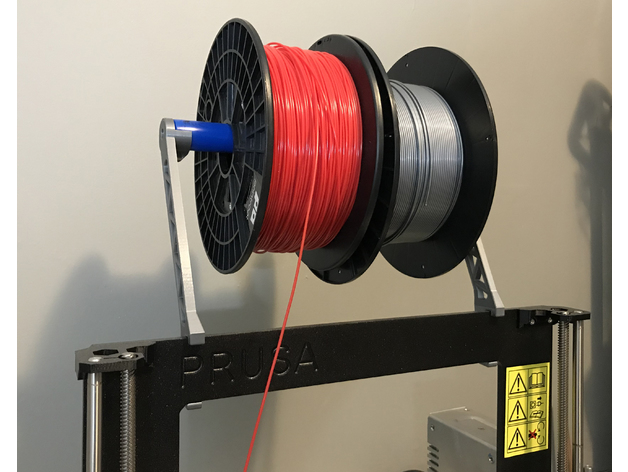
This is a spool holder for a Prusa i3 that will hold a 1/2 to 3/4 dowel or pipe allowing you to add another spool as well as easily changing spools without removing the arms. I used a piece of PEX piping I had sitting around the house for mine.
Print Settings
Printer Brand:
Prusa Printer:
Prusa Mk2 Rafts:
No Supports:
No Resolution:
.2 Infill:
20
How I Designed This
Designed in Fusion 360. -
Clippard Valve Cover 3D Print Model
Summary
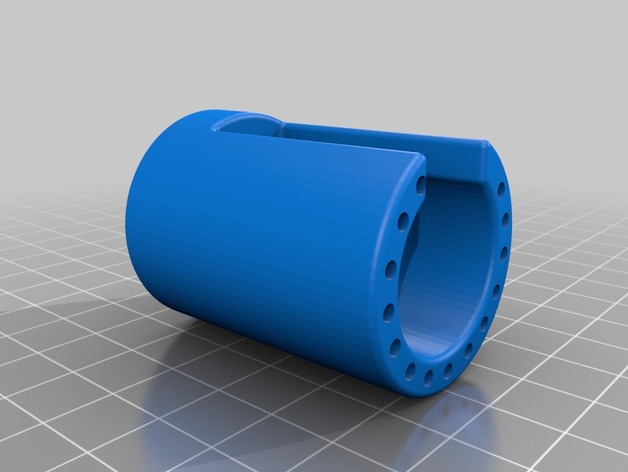
This is a valve cover for a EC-PM-05-6025-V (likely any EVP Proportional Electronic Valve) mounting to a 15490-5 manifold.
I haven’t tried this yet so it’s still experimental. -
Fidget Hand Roller/Spinner Toy 3D Print Model
Summary
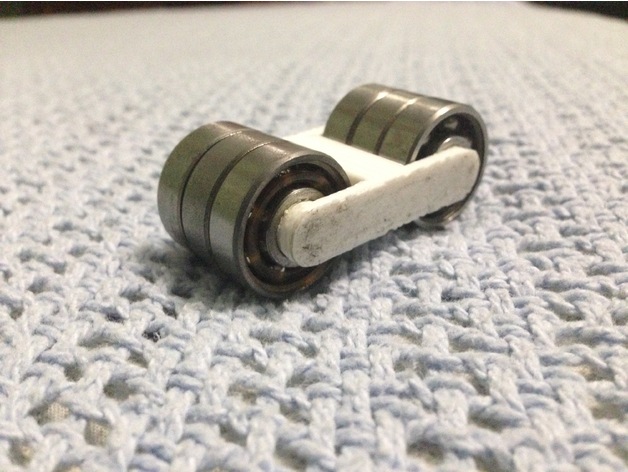
This is SUPER FUN to use and addicting. In my opinion it is better than a fidget spinner. Just find 6 608 bearings (fidget spinner bearings) and put them in. Then push the other plastic peice on the top to keep the bearings in. btw If you have small hands then it might be hard to play with it.
Also check out this video
l l
l l
V
How I Designed This
Made using Onshape.comCustom Section
-
The Octopus099 3D Print Model
Summary
aersgfbvsrgtzbf -
MK8 Dual Etruder Mount 3D Print Model
Summary
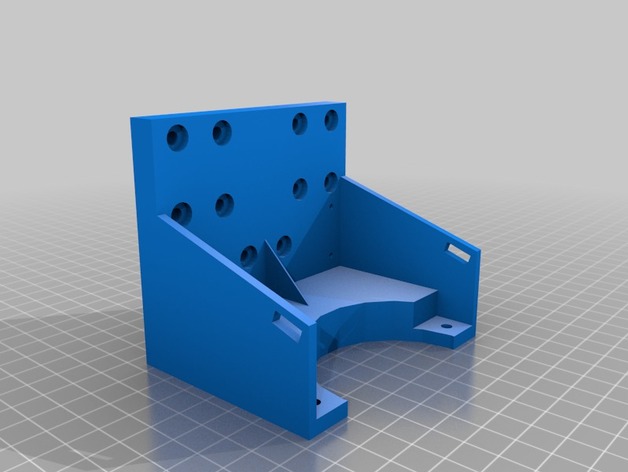
Dual extruder mount that I made for my Tronxy Prusa 3.
I wanted to keep all my original single extruder in tact for easy replacement so this one has the mountings for Hictop Linear Bearings which by the measurements are the same as my originals.
Print Settings
Printer:
Tronxy Prusa I3 PM802 Rafts:
No Supports:
No Resolution:
0.1 Infill:
30 Notes:
The X belt tensioners were later glued on as mountings are slightly off -
Geeetech i3 Hotbed adjustment nut 3D Print Model
Summary
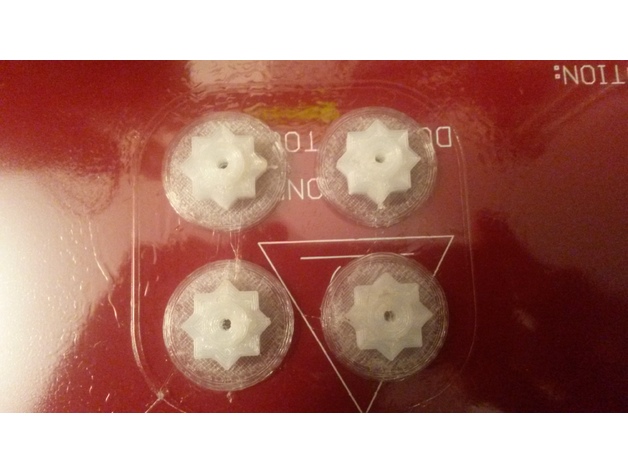
First thing printed !! The wingnuts to adjust the hotbed are not very confortable to turn, it is a two hands job, so the first thing I printed are these knobs. As I had only some nylon to print with, I added a .5mm skirt to make the piece stick better to the bed as in the first try it got loose and went moving around. I printed without supports, and when the print was high enough, I paused and drop the M3 nuts in, so the top side would have something to lay on. -
2×2 Dungeon Floor Tile 3D Print Model
Summary
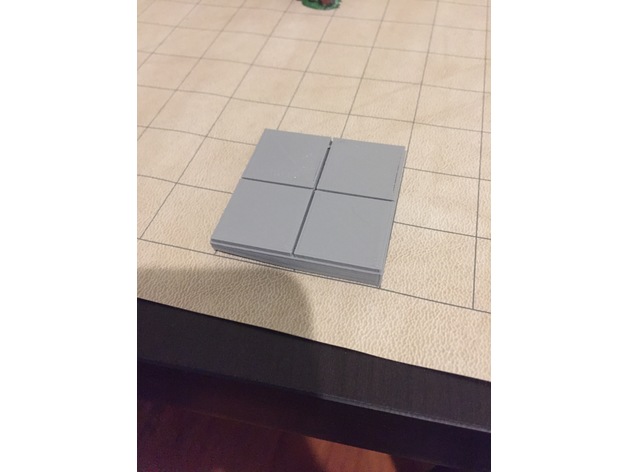
Rafts are encouraged so you dont damage the print removing it but not needed.
Print Settings
Printer Brand:
Wanhao Printer:
Wanhao Duplicator i3 Plus Rafts:
Yes Supports:
No Resolution:
.2 Infill:
20 -
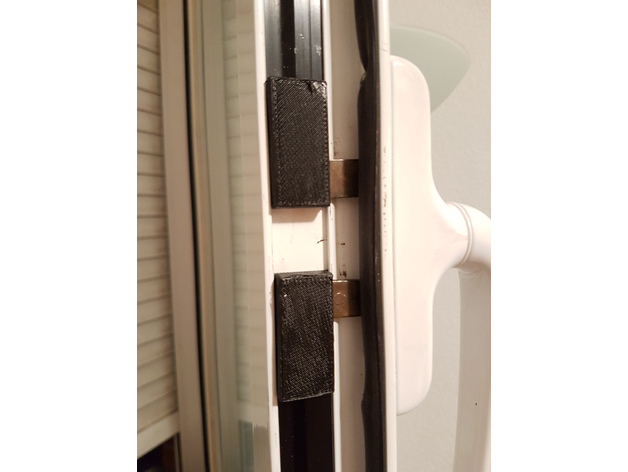
Replacement for the closing system of a PVC Window 3D Print Model
Summary
These are plastic replacements for a PVC window I had to repair.
Print Settings
Printer Brand:
Up! Printer:
Up Plus Rafts:
Yes Supports:
Doesn’t Matter Resolution:
0.25 Infill:
Maximum Notes:
Place the pieces carefuly NOT to put the Z axis of the printer along the axis of force, to ensure durability. -
3030 bowden motor mount 3D Print Model
Summary
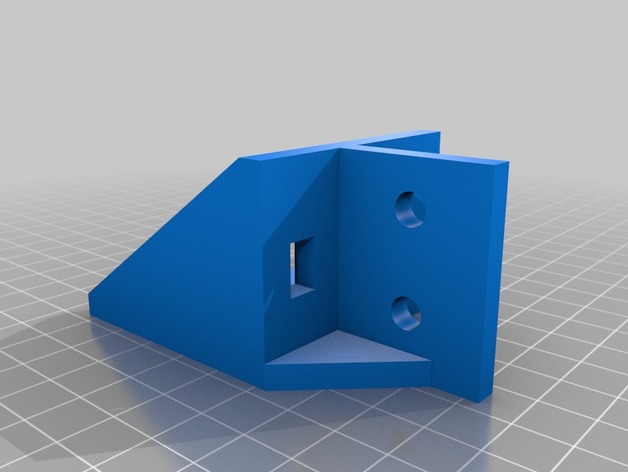
A remix of Thingiverse part 2565427 but for 3030 aluminum extrusion.
Added bracing and additional mounting holes for M6 bolts.
Print Settings
Printer:
Doesn’t matter Rafts:
No Supports:
No Resolution:
whatever cranks your handle (I used .16) Infill:
again, whatever floats your boat (I used 20%) -
Arduino 8-bit synth case 3D Print Model
Summary
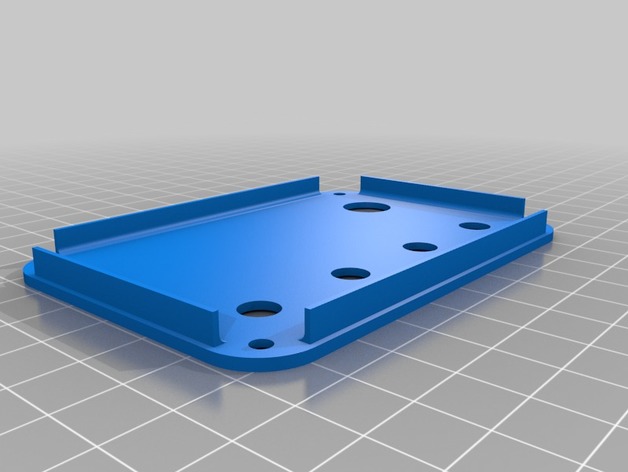
This case was designed after reading a new magazine called Hackspace. In this issue a man named Chris Ball shows how to turn an Arduino uno in to a 8-bit synth.
i like the uno basics kits you can get off Ebay and the Adafruit perma-proto, so i desgined this kit to house those.
holes for the pots and push button are included in design but have not put holes for audio jack and CH340 USB which will vary depending on what one you have.
You will need:
Adafruit perma-proto 1/2 size
CH340G USB TTL Serial Adapter Ebay 162766671421
Arduino Uno FULL kit UK – Ebay 162597203220
4x 10k linear potentiometers
470r resistor
100uF electrolytic capacitor
push button (12mm)
audio jack
Print Settings
Printer:
TronXY P802MA Rafts:
No Supports:
No Resolution:
any Infill:
15-20% -
Lamp Shade / Abat Jour 3D Print Model
Summary
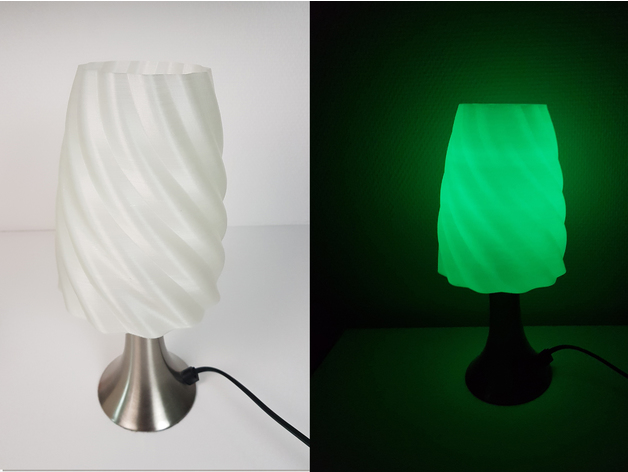
https://www.youtube.com/watch?v=TaMHD__nSLk&feature=youtu.be&t=416 -
40K chainsword V2 3D Print Model
Summary
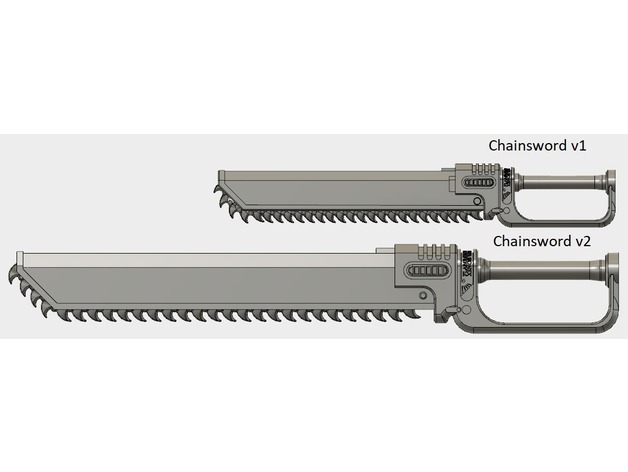
I have make some update on 40K chainsword V1 cosplay whit up the size of the chainsword and design so up can make chainsword bigger by add chainsword_3_v2.stl file. -
X-UAV Talon front skid 3D Print Model
Summary
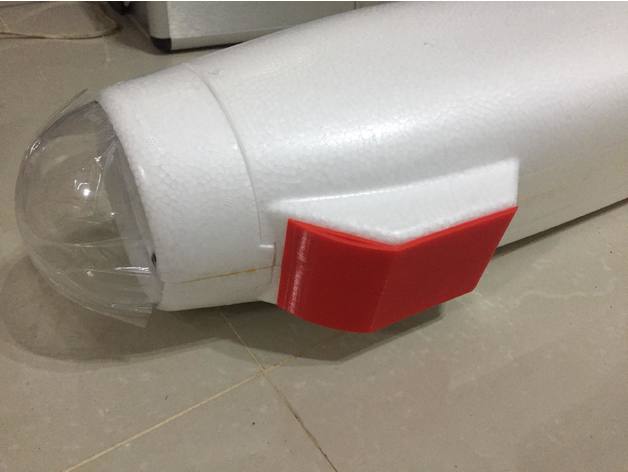
This front skid plate is intended to be installed on X-UAV Talon 1.7m with no front wheel. This will protect front part of the fuselage on landings. The front skid plate has an impact absorbing segment that is meant to absorb pressure on hard landings. To print, rotate the object then print on its side lying on the print bed. You may use ABS or PLA. To install, just apply foam safe glue on the surfaces to be bonded.
Print Settings
Printer:
ANet AM8 Rafts:
Doesn’t Matter Supports:
No Resolution:
0.2-0.4 Infill:
20-30% -
Sunflower Track Light ( see video for details ) 3D Print Model
Summary
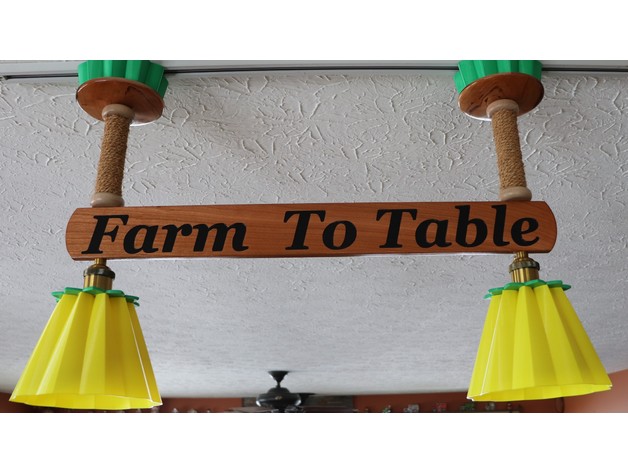
This is a lighting fixture that I recently made. The YouTube video showing the entire build https://youtu.be/6Kby5ZsPQHo . You could easily just make single fixtures using the parts. It was a fun project using many different materials. The printed parts fit standard light fixture hardware and only use LED bulbs so the shade does not melt. I used green and yellow Hatchbox PLA. -
Multi-drawer Components Cabinet 3D Print Model
Summary
Multi Drawer Components Cabinet
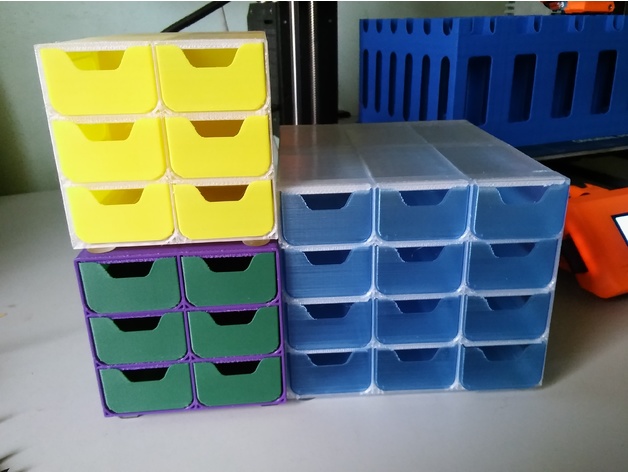
I designed this because I wanted a components cabinet (similar to those made by manufacturers such as Raaco and Akro-Mils) to store small parts (originally to organise all of my resistors to make it easier to find the one I wanted). There wasn’t anything on Thingiverse that completely met my needs, so I drew this up
I have deliberately made the walls of the cabinet carcase quite thin (1mm) as I found that some things on Thingiverse appear to be over engineered in this regard. The lip at the top-front of each drawer slot is to prevent the drawer being accidentally pulled completely out (raise each drawer at an angle to insert / remove). I rejected other retention methods – spring-clip, detents etc as they would complicate a simple design and require thicker walls. The cut-outs in the walls reduce the amount of material used and improve the aesthetic, especially with different coloured drawers.
The drawers are made with thin walls (0.5mm) and turn out to be quite flexible and tough. You can set minimum perimeters = 2, if you want more rigid drawers. The corners are radiused to make it easier to remove small parts (I hate it when a 3mm nut gets stuck in the corner and I have to resort to tweezers to get it out.). The drawers have a finger slot instead of any protruding handle – partly to give a clean aesthetic but mostly to avoid having to use any printing supports.
I’ve Printed the cabinet carcase in PETG and PLA (at 0.35mm layer height) after having massive fails with ABS (shrinkage, warping and stress cracking). Be warned! the largest size (5 x 6) that fits on my print bed takes a looooong time to print!! Approximately 25hrs (I’m still printing it as I post this). I’ve printed the drawers in PLA and ABS, PETG having failed at the radiused corner.
I haven’t put any feet on the cabinet (I use stick on rubber feet) so they can be epoxied together to form larger sizes if desired.
I drew this in SketchUp and have included the files for those who want to customise or change the design. The design is modular – copy however many of each type of drawer that you want, align them (precisely), group them and export to STL. The “Prototype with Hex Perfs.stl” drawings have a pretty hexagonal perforation infill to the openings but were not structurally sound, and were removed from the final design.
Print Settings
Printer Brand:
Prusa Printer:
i3 MK2S Rafts:
No Supports:
No Resolution:
0.35mm – Carcase, 0.2mm – Drawers Notes:
Printer – Prusa i3 MK2S
Print Settings – Cabinet Carcase – PLA and PETG (I think ABS would need a heated enclosure)
0.35mm layer height, no supports, 100% infill, minimum perimeters = 1.
Print Settings – Drawers – PLA, ABS
0.2mm layer height, no supports, minimum perimeters = 1, Extra perimeters if needed = True, Ensure vertical shell thickness = True, Avoid Crossing Perimeters = True, Detect thin walls = True -
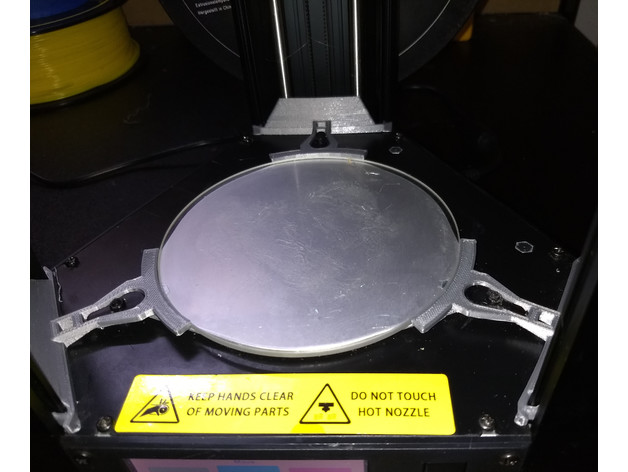
Monoprice Mini Delta Glass Clips 3D Print Model
Summary
These will hold a 120mm glass plate on the bed of your monoprice mini delta quite securely. You also get some nifty shields that prevent debris from falling into the bottom of your printer. This is a remix of 2 good designs on Thingiverse and I think they are better combined than separate. The reason is that this design doesn’t allow the clips to spin, which with previous glass clips on Thingiverse could allow the bed to get free mid-print. These are designed to hug the stock clips tightly, so they become a second point of contact and add to rigidity. You’ll want to clip the shield end of this part higher up on the rails, and then slide it down, you’ll probably have to wiggle it back and forth a bit to get it over the stock clips.DEFINITELY CHECK: Each time you re-install your glass plate, make SURE you can still hear the tact switches under the bed click if you press your fingers on the three spots where it goes to auto-level. I’m not responsible for any damages caused by the use of this print.
Print Settings
Rafts:
No Supports:
Yes Notes:
Printed with PLA -
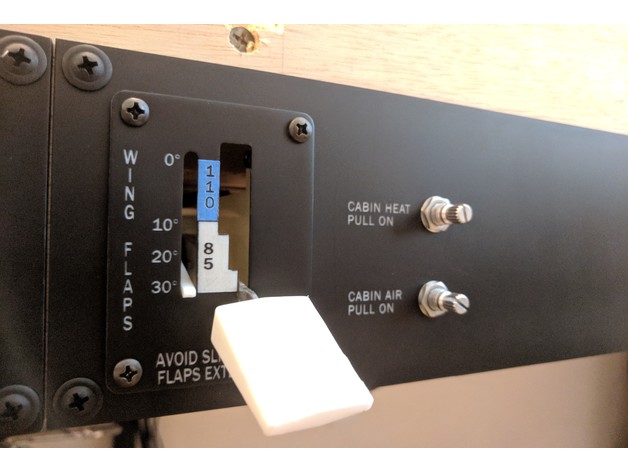
Cessna 172 Flight Simulator Panel – Flap Control 3D Print Model
Summary
Flap control with servo-actuated position indicator for a Cessna 172 flight simulator panel.
For more information, see the project details at https://github.com/allanglen/c172-flight-sim-panel.
For details about this part, see https://github.com/allanglen/c172-flight-sim-panel/tree/master/flap_control_panel. -
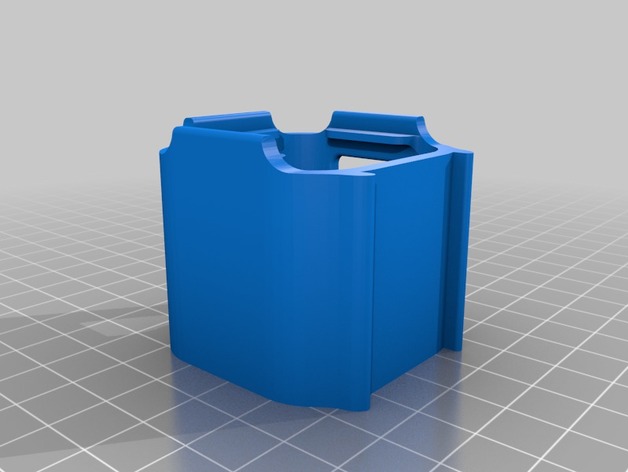
Swissknife : GoPro session mount 35degrees 3D Print Model
Summary
Gopro Mount for swissknife frame.
The bottom part can be attached with 2 zip ties to the top plate. -

Vintage Northrop Aircraft Sign Litho 3D Print Model
Summary
Here’s just a great looking old Northrop logo. The STL file should print out real nice too. Bar none, the greatest and most unsung WWII plane was built by Northrop, the P-61 Black Widow. It’s my favorite prop plane. MAAM is building one of the I think only THREE P-61’s left on the planet, and theirs will be the only airworthy one. It has one hell of an interesting story behind it too, look it up! I can’t wait to see that bad boy in the air! -

WWII Era Pratt & Whitney Aircraft Engines Sign Litho 3D Print Model
Summary
Here’s the world famous Pratt & Whitney Dependable Engines logo. I think this file turned out fine, and it should print nicely. I’m going to make at least a couple of these myself. I would have to think that the P & W radial engines are in the top five list of machines that we couldn’t have won the war without. Right up there with the Willys and the DC-3. They’re power houses, they sound great, and they are still running to this very moment the whole world over. It doesn’t get much better than that!
This is the last one of these I’m posting for now. I have 21 (!) more that I made and they’ll get uploaded throughout the week. -
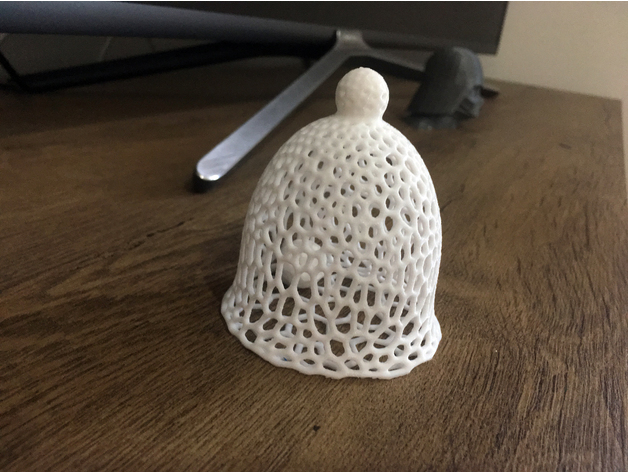
Christmas Bell – Voronoi Pattern 3D Print Model
Summary
My 2nd Voronoi christmas design.
https://www.instagram.com/p/Bc4RsixAvDA/?taken-by=tondanosek
fast christmas gift.
This one is special, because the ball is assembled to bell. 🙂
Print Settings
Printer Brand:
Prusa Printer:
i3 MK2S Rafts:
No Supports:
No Resolution:
0.2 mm Infill:
0% Notes:
Be sure that your bed preparation was done properly. Dont be affraid of big adhesion. This is important to get small ball on the right place.
For PLA
210/55 first layer
200/50 other layers (lower temp of nozzle because of stringing)
Retraction – 1.2 mm
Z lift – 0 mm
Perimeter speed – 30 mm/s
Non Printing moves – 200 mm/s
This settings will avoid stringing. -
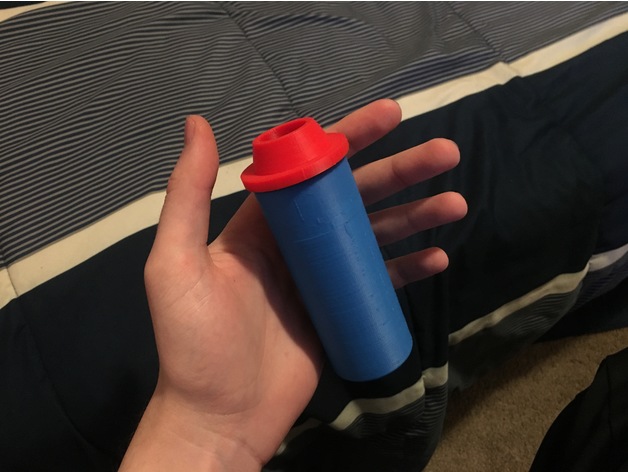
Reusable Sploof V2 3D Print Model
Summary
Designed with tight tolerances. Please let me know if there are any problems with the scaling. -
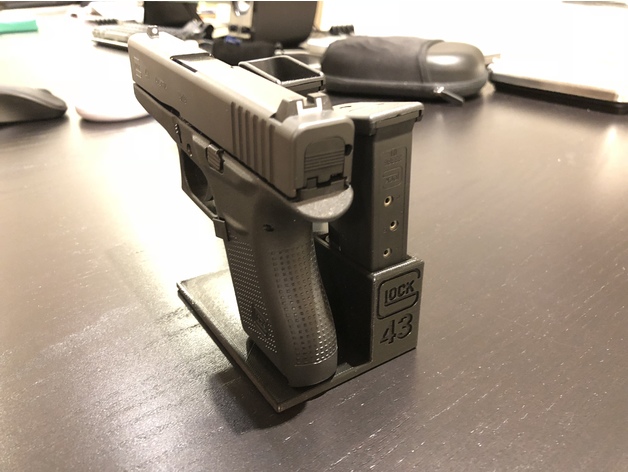
Glock 43 Pistol Stand 3D Print Model
Summary
Glock 43 pistol stand with two magazine slots. I also added the Glock logo and number “43” so you know which pistol this stand belongs to.
Print Settings
Printer Brand:
Prusa Printer:
i3 MK2S Rafts:
No Supports:
No Resolution:
0.2 Infill:
20
How I Designed This
Fusion 360 -
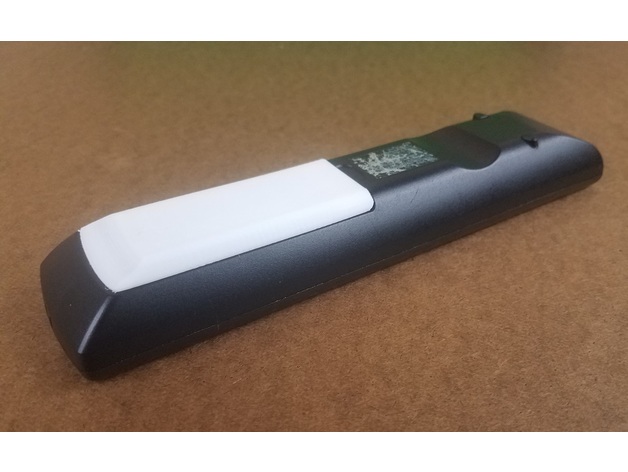
Replacement Battery Cover for PS3 Remote Control 3D Print Model
Summary
A replacement battery cover for the Playstation 3 remote control.
Print Settings
Rafts:
No Supports:
Yes Resolution:
.15mm Layer height Infill:
20%
Post-Printing
Support material can be removed without too much trouble with needle nose pliers. -
Nissan Pathfinder / Xterra / Frontier hood prop rod clip 3D Print Model
Summary
Replacement hood prop rod clip
Fits:
Frontier 2005-2017
Pathfinder 2005-2012
Xterra 2005-2015
I printed mine with small supports under the little clip legs, and it printed fine.
Hope this helps! -
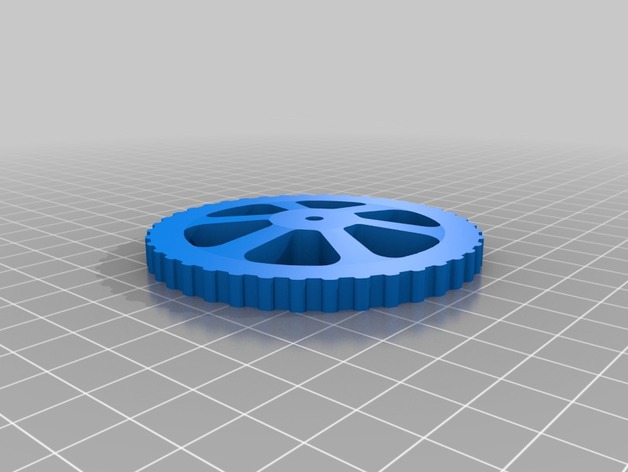
CR-10S Locking Bed Leveling Knob 3D Print Model
Summary
Inspired by orcusomega’s “Locking CR10/S4/S5 Bed Leveling Knob” (https://www.thingiverse.com/thing:2462249). This is a knob that you can insert an M4 lock nut into. The hole for the screw is not fully open. After printing there is a .4mm layer that you need to cut with a utility knife before use. No supports are necessary.
Quote from orcusomega’s notes:
“Requires a total of 8 M4 nylon locknuts. Remove the stock leveling wheels, and use one of the locknuts to keep the screw in place on the hot bed (being the nut all the way to the top,. making the screw stay in place without the need to hold the top with a screwdriver). Then replace the springs. Insert the remaining M4 locknuts into the wheels and thread them on – wala!” -
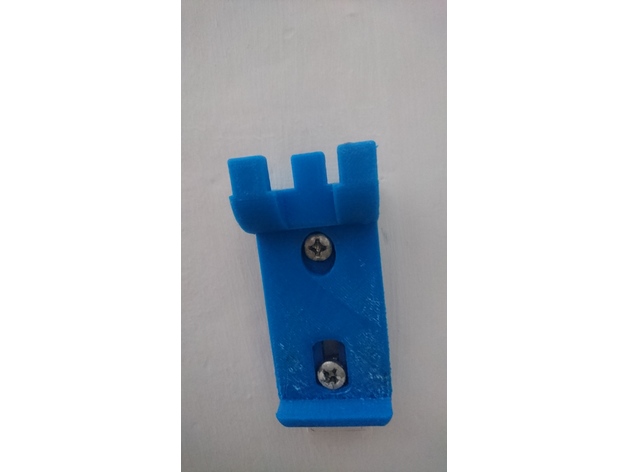
Soporte radiador 3D Print Model
Summary
Esto es el primer diseño que subo, necesitaba en casa un soporte para un radiador, y eso es lo que es.
En PLA acaba doblandose.
Recomiendo imprimir en ABS, de momento en ABS me funciona bien. -
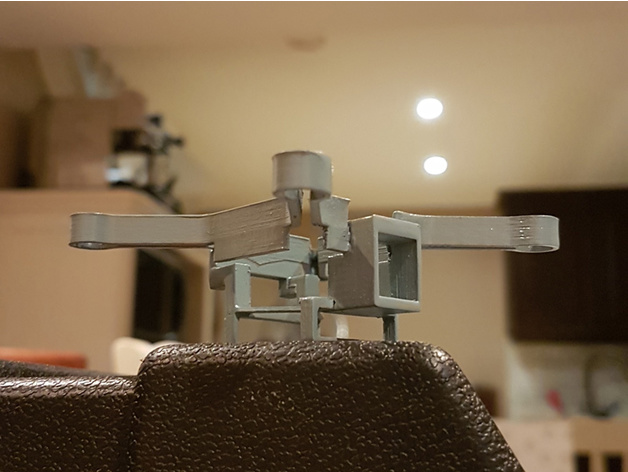
XL-RCM 10.0 PIXXY: Pocket drone / FPV quad Remix 3D Print Model
Summary
I chopped up the original model to print with no supports but some glue, a little sanding and patience are required. PLA
Print Settings
Printer:
Deegreen Rafts:
No Supports:
No Resolution:
100 μm Infill:
30% Notes:
I chopped up the original model to print with no supports but some glue, a little sanding and patience are required. PLA -
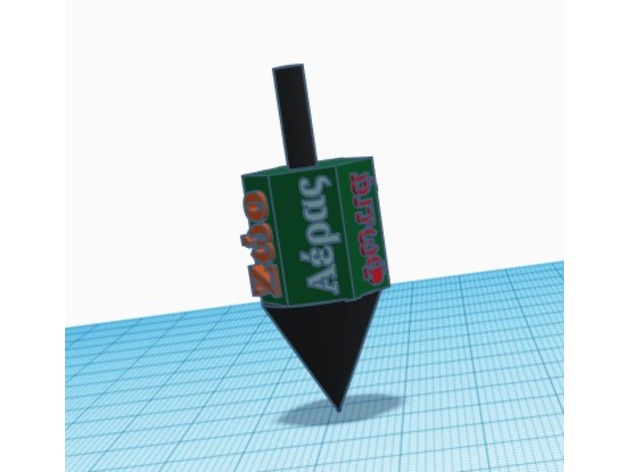
Greek Top 3D Print Model
Summary
This is a top with Greek writing on it
Ανδρας=Man
Φωτιά=Fire
Νερό=Water
Γη=Earth
Ζώο=animal
Αέρας=Air
How I Designed This -
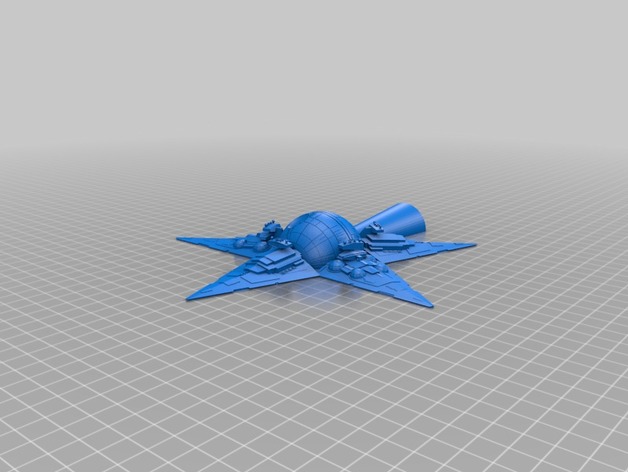
Christmas Tree DeathStarDestroyer 3D Print Model
Summary
I loved the “Ei9ht Star Wars Christmas Tree Star remix from Dantesgift” and, having printed one myself, wanted to make one for a friend. There were a few things I wanted to change though:
Some small parts were just too small to print, like the domes on the Imperial Star Destroyers
There were quite a few mesh errors, especially on the bottoms of the Interdictor Star Destroyers
I’m not a fan of the “Gladiator” Star Destroyers with the two points
I also wanted to learn TinkerCad (I usually use 123D) so decided to make my own version! I ended up with 3 variations, one with all Imperial Star Destroyers, one with all Interdictor Star Destroyers, and one with a mix of each.
Print Settings
Printer Brand:
Prusa Printer:
i3 MK2S Rafts:
No Supports:
No Resolution:
0.1-0.2 Infill:
10-20%
Post-Printing
Just glue the halves together with super/CA glue once printed.
How I Designed This
I sourced the Star Destroyers (this time using the Imperial II version which has a simpler bridge antenna) from dantesgift, and what looked like the original Death Star from kystopz89. Both Star Destroyers got some tweaks to simplify or adjust geometry that would be difficult to print at the intended scale, then they were brought together in TinkerCad.
There were a few mesh fixes to do after exporting to STL, the nasty ones handled by Microsoft’s online STL repairer and the rest using Meshmixer.
I hope you like them, and all credit to the designers of the models that went into this! -
TronXY X3A/X3 Fan Holder V5 3D Print Model
Summary
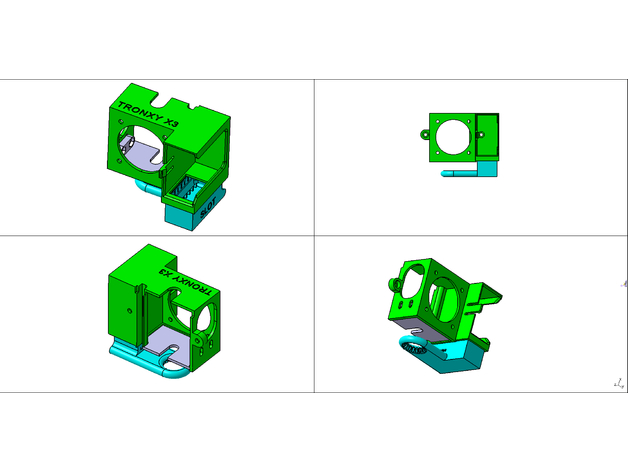
This is TronXY X3A/X3 Fan Holder V5.
For complete function you should to have fans 40x40x10 with 32mm connection size and 40x40x20 cyclone fan.
Part “TronXY_X3A_Fan_v5_Insert_SLOT” designed with support and it no need printing with support.
Part “TronXY_X3A_Fan_v5_Plate” can be or must be from aluminum or fiberglass (or some other thermoresistance) sheet with thickness 0.6–1.0 mm. -
Transcendence High Speed AP Revolver (3D Print Kit Gun) 3D Print Model
Summary
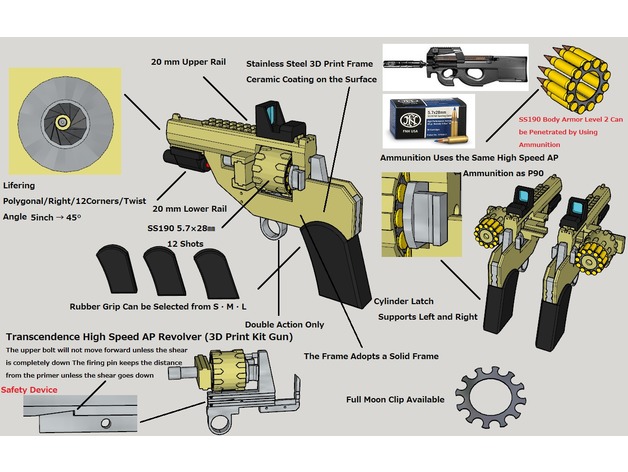
Other Open Placehttps://grabcad.com/library/transcendence-high-speed-ap-revolver-3d-print-kit-gun-1
Please spread and disperse the 3D data of this gun if possible
Please upload it to another 3D print data site
Please cooperate with liberalization of 3D print gun -
Filament guide for Prusa Anet Geetech CTC printers 3D Print Model
Summary
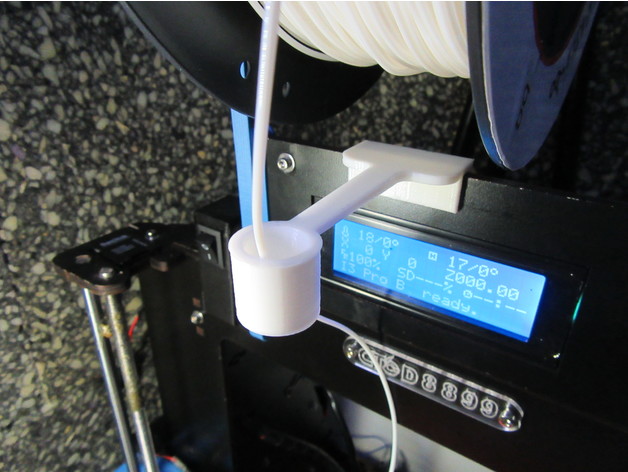
This is my version of filament guide based on this one:https://www.thingiverse.com/thing:1240326
A larger pipe will keep more straight the filament at the end of the reel, when the loops are smaller.
Suitable for printers:
Prusa
Anet
Geetech
CTC printers
…and many models with a frame 5mm width.
Feel free to adapt the files to your needs.
Thank you so much for you comments, like, download and collecting!
Print Settings
Printer Brand:
Prusa Printer:
Prusa Clone Rafts:
No Supports:
No Resolution:
0,2 Infill:
100% Notes:
For better results, use cooling fan. -
Gift tags 3D Print Model
Summary
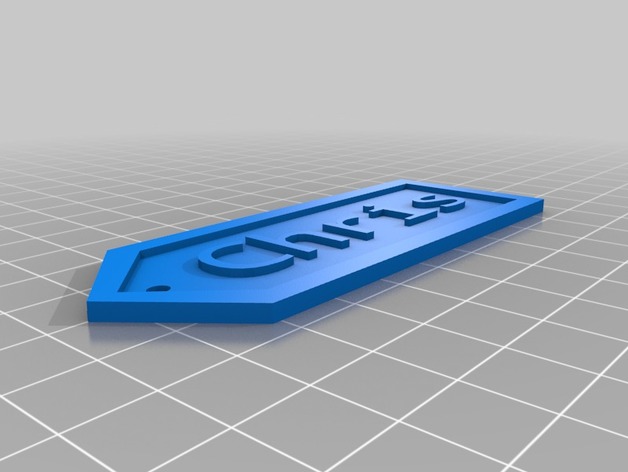
I don’t have alot of designs uploaded but Will upload more. Put the name or word that you want for the tag in the comments and i’ll create the design. Please upload pictures of your printed tags.
Thank You,The Creator
-
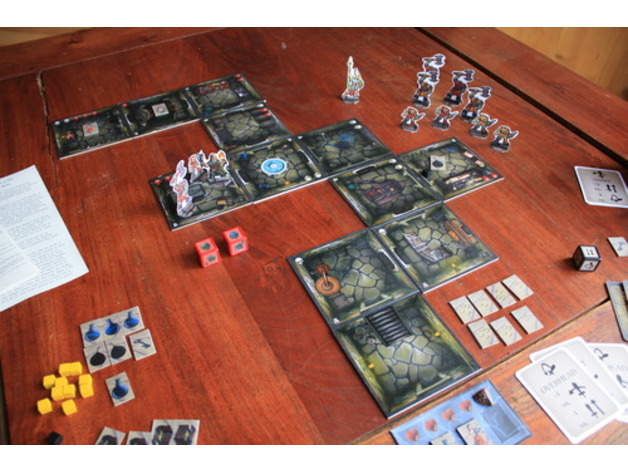
Dungeon in a Tin Board Game 3D Print Model
Summary
Dungeon in a Tin is a solo or cooperative dungeon-hack. Players descend into a dungeon randomly laid-out from a stack of tiles, fighting through the orc and goblin hordes to rescue the kidnapped maiden and collect treasure and glory. -
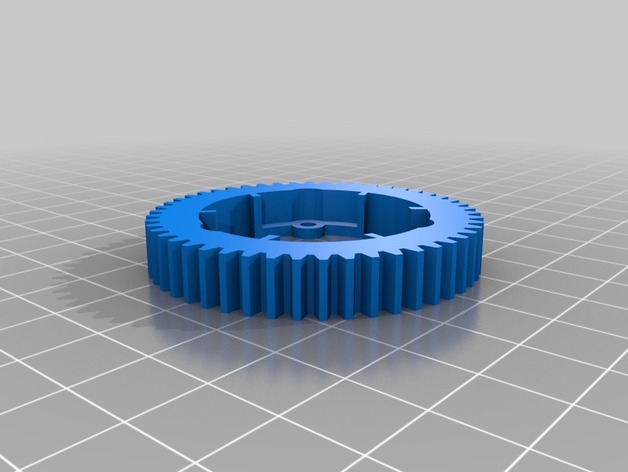
Traxxas X-Maxx Pinion 3D Print Model
Summary
* not tested in RC Car **
im waiting for nylon filament, maybe i make in ABS one to try, but nylon is my favorite.
i think 100 infill is a good idea, it must be strong for the 8s xmaxx.
in the modell i use a modified slipper clutch from the 6s. I think so become the pinion not too much power on it.
Module 1
54 T
50 T
46 T
26 T Motor
Print Settings
Printer:
Anycubic I3 Mega Rafts:
No Supports:
No Resolution:
0,1 Infill:
100 -
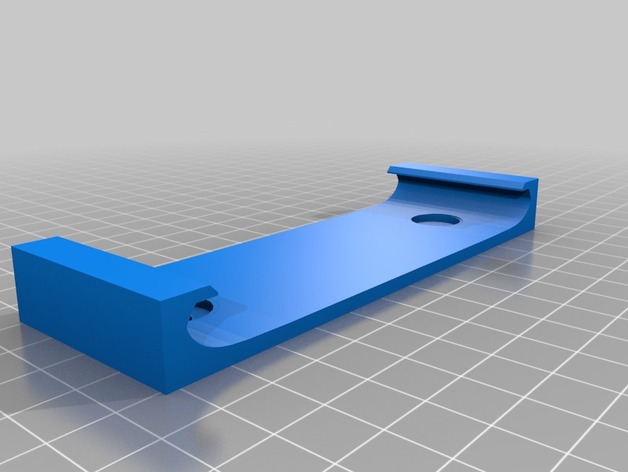
Thin Wall Mount Nexus 7 2013 3D Print Model
Summary
I customized the model “Nexus 7 (2013) Qi Wall mount” by hawker180 to remove the Qi stand and make it thinner as I am planning on sourcing energy through the usb port and wanted something that will keep the tablet closer to the wall.
Print Settings
Printer Brand:
Printrbot Printer:
Printrbot Plus Rafts:
No Supports:
No Resolution:
0.2mm Infill:
20% -
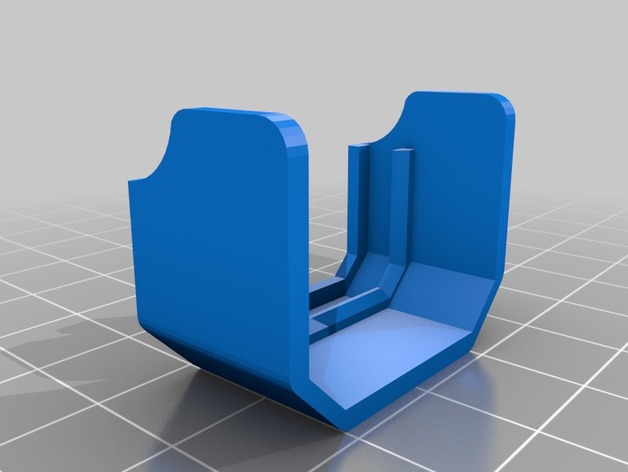
Motor cover for Peon 230 3D Print Model
Summary
The Peon 230 quadcopter frame designed by Tech2C is super nice but there’s no motor cover included in the files.
I wanted a motor cover that didn’t need screws, that’s why I designed this super simple cover that just slide on the arm.
Please note that this cover is only compatible with the “Peon230_Arm_v1” and NOT with the “Peon230_Arm_v1_22sizeMotor”
Print Settings
Printer:
Anet A8 Rafts:
Yes Supports:
No Resolution:
0.2 mm Infill:
100% Notes:
The fit with the arm should be tight, otherwise the cover could fall off the quadcopter while flying.
Post-Printing
Just remove the stringing and sand the raft. -
Pixel 2 XL + Spigen Slim Armor Dock 3D Print Model
Summary
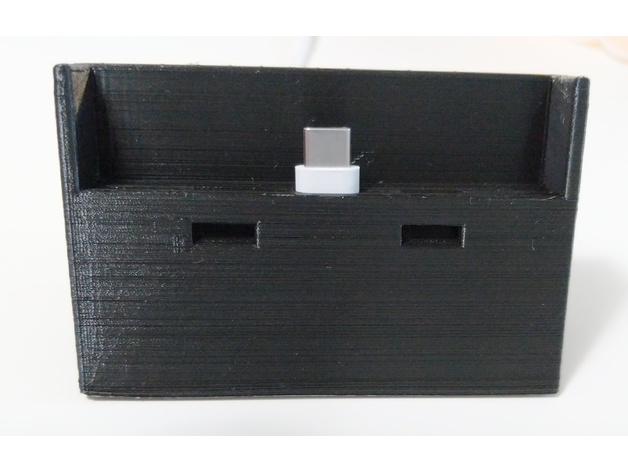
I made this for my Pixel 2 XL which lives in a Spigen Slim Armor, based on Screwyluie’s design for a Pixel XL stand (thus the unnecessary speaker ports). The Slim Armor needs a few mm all round, so the charging port sits about 2.25 mm forwards compared to the original. The insert is required to hold the charging cable in place – this is unchanged from Screwyluie’s original.
Print Settings
Printer:
Cocoon ModelMaker (Wanhao i3 Mini clone) Rafts:
No Supports:
No Resolution:
0.1mm Infill:
20% -
1:4 Wine Bottle 3D Print Model
Summary
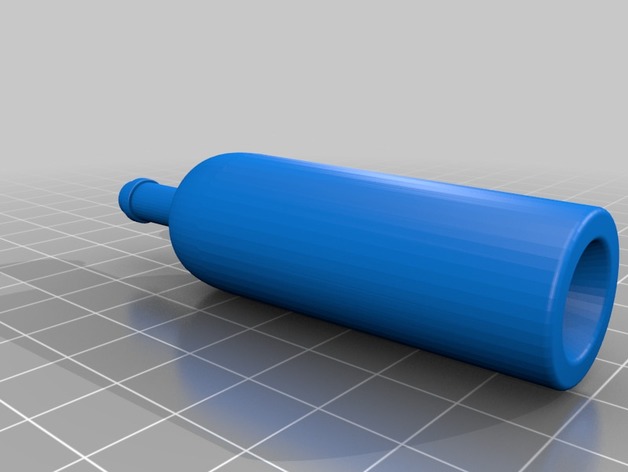
A replica of a wine bottle made at 1/4 the original size. Full body solid. Could paint or cut a piece of cork to fit the top opening. -
Mini Plastic Christmas Tree Leg 3D Print Model
Summary
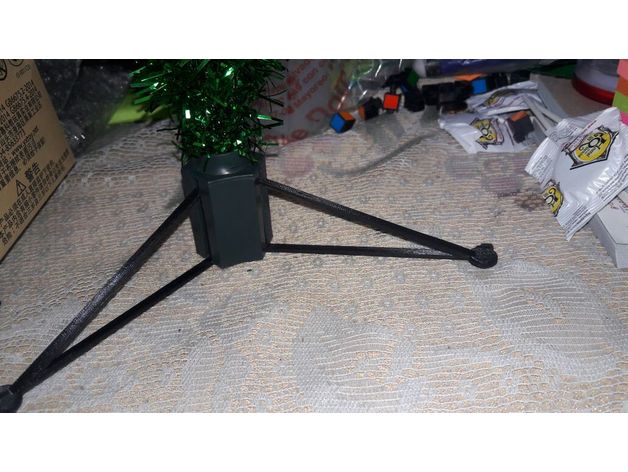
I made this for my Christmas tree. Because I lost the original legs.
The part that goes inside the tree is: 12.5mm x 40mm x 4mm
Print Settings
Printer:
Anet A8 Rafts:
Doesn’t Matter Supports:
No Resolution:
0.2 mm Infill:
20% -
Drink Coaster 3D Print Model
Summary
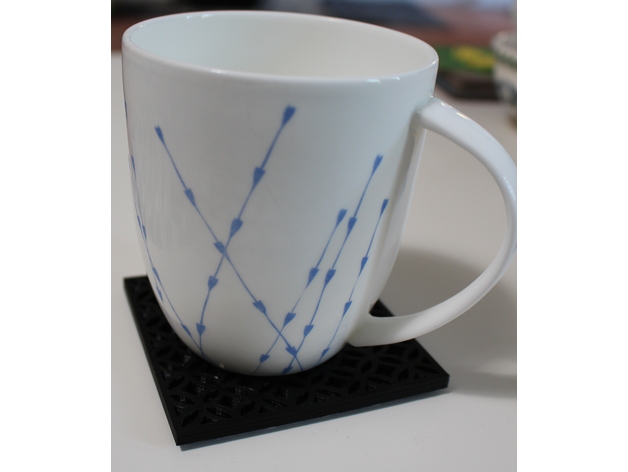
Drink coaster made to match the Bunnings Matrix Halo screen panel. The surface is slightly concave to prevent cups from sliding off (self centering!), and there are holes in the bottom for some rubber feet for grip. Cutting out the supports to put the feet in is a little tedious, but the resulting coasters are sturdy as!
Print Settings
Printer:
Cocoon ModelMaker (Wanhao i3 Mini clone) Rafts:
No Supports:
Yes Resolution:
0.1mm -
Planting on wall 3D Print Model
Summary
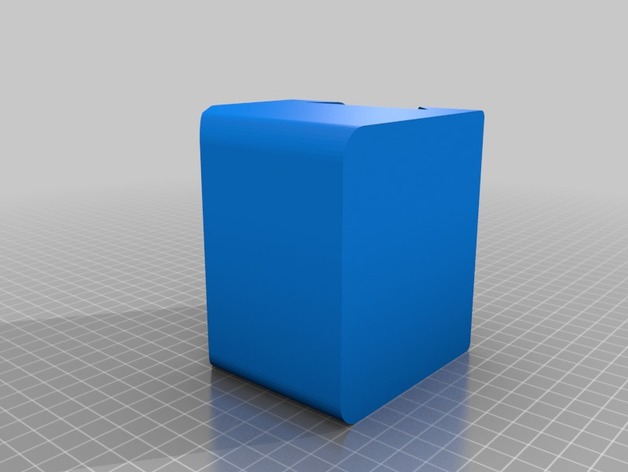
Do you want to plant small flowers and water it automatically ?.
This is the base container I designed as first serious design towards greener homes. Use a solid wooden wedge strip to fix this container and make an array of it.
I have provided a watering draft in form of small 4mm tubular section followed by a through and through recess. This recess is kept slightly above the lower edge of pot so that it wan’t get choked due to soil. The 4mm circular section slightly extend below the recess and will act as anti splashing. Keep the flow rate of water very low.
Additionally, you have to go for an arduino and hygrometer along with a pump and motor for automatic watering. To make this fully autonomous and ecofriendly, you may operate the electronis/electric motor on Solar cell.
Let me know if you make one and contribute towards ‘Greener home’
Print Settings
Printer:
Ultimaker clone extended (in making) Rafts:
Doesn’t Matter Supports:
Doesn’t Matter Infill:
60% min. Notes:
Use any water resistance polymer. No flexible polymer. No Nylon (nylon absorbs water) and becomes soft. -
Tevo Tarantula Power Supply Enclosure 3D Print Model
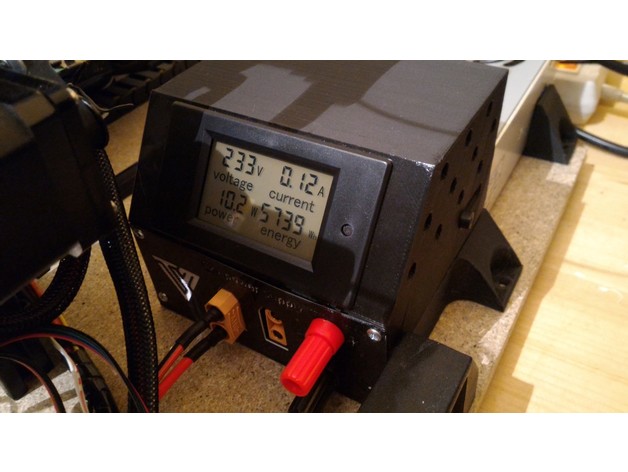
Summary
Designed to enclose the standard PSU outputs and fit a power meter.
The walls are only ~2mm thick, which make them fragile. This is due to my concern of using less material as possible.
I’ve used XT90 for 2 outputs, it’s oversized but I already had them 🙂
There is an “XT90 Holder” that you can screw on top of them with an M4 screw, but I didn’t needed it.
Fusion 360 file attached, feel free to modify/use it !
Parts needed :
1 Power Socket W/Fuse & Switch :https://fr.aliexpress.com/item/Free-Shipping-power-socket/476915963.html
1 Power Meter :https://fr.aliexpress.com/item/AC-80-260V-LCD-Digital-100A-Volt-Watt-Power-Meter-Ammeter-Voltmeter-110V-220V-free-shipping/32617343719.html
1 meter Black & Red 13AWG:https://fr.aliexpress.com/item/1meter-Black-1meter-Red-Silicon-Wire-Heatproof-Soft-Silicone-Silica-Gel-Wire-Cable-12AWG-13AWG-14AWG/32797523458.html
1 IEC 320 C13 Female Plug :https://fr.aliexpress.com/item/New-Wholesale-Price-Black-IEC-320-C13-Female-Plug-Rewirable-Power-Connector-3pin-Socket-10A-250V/32808416783.html
2 XT 90 :https://www.aliexpress.com/item/5Pair-XT90-XT-90-Gold-Plated-Banana-Plugs-Male-and-Female-Antiskid-for-helicopter-Battery-esc/32460919234.html
2 Banana Plugs :https://fr.aliexpress.com/item/4Pcs-Lot-Speaker-Amplifier-Terminal-Binding-Post-4mm-Banana-Plug-Socket-Female-Connector-10pcs-lot/32739527467.html
Hardware
Terminals Connectors :https://fr.aliexpress.com/item/280Pcs-Assorted-Insulated-Spade-Crimp-Terminal-Electrical-Wire-Connector-Set-Red-Blue-Yellow/32810002612.html
6 Ring connectors #4 Blue
3 Ring connectors #4 Red
5 Female Spade Connector Red
Screws :
4 3×10 (front pannel)
1 M4x10 (side)
Schrink tubes :https://www.aliexpress.com/item/385pcs-heat-shrinking-tube-2-1-Shrinkage-ratio-black/32662765147.html
Print Settings
Printer:
Tevo Tarantula Rafts:
No Supports:
No Resolution:
0.2mm Infill:
20% Notes:
I’ve put a picture of the orientation that I used to print the top part (rotate 145°) to minimise bridging, but it’s not the only way to print it 🙂
For the front panel, I changed filament color manually at the beginning of the 3rd layer.There is a plug-in for Cura to do this and also a way to do it for S3D users… or leave it the same color 😉
Post-Printing
Parts needed
1 Power Socket W/Fuse & Switch :https://fr.aliexpress.com/item/Free-Shipping-power-socket/476915963.html1 Power Meter :https://fr.aliexpress.com/item/AC-80-260V-LCD-Digital-100A-Volt-Watt-Power-Meter-Ammeter-Voltmeter-110V-220V-free-shipping/32617343719.html1 meter Black & Red 13AWG :https://fr.aliexpress.com/item/1meter-Black-1meter-Red-Silicon-Wire-Heatproof-Soft-Silicone-Silica-Gel-Wire-Cable-12AWG-13AWG-14AWG/32797523458.html1 IEC 320 C13 Female Plug :https://fr.aliexpress.com/item/New-Wholesale-Price-Black-IEC-320-C13-Female-Plug-Rewirable-Power-Connector-3pin-Socket-10A-250V/32808416783.html2 XT 90 :https://www.aliexpress.com/item/5Pair-XT90-XT-90-Gold-Plated-Banana-Plugs-Male-and-Female-Antiskid-for-helicopter-Battery-esc/32460919234.html2 Banana Plugs :https://fr.aliexpress.com/item/4Pcs-Lot-Speaker-Amplifier-Terminal-Binding-Post-4mm-Banana-Plug-Socket-Female-Connector-10pcs-lot/32739527467.html
HardwareTerminals Connectors :
6 Ring connectors #4 Blue
3 Ring connectors #4 Red
5 Female Spade Connector RedSchrink tubes.
Screws :4 3×10 (front pannel)
1 M4x10 (side) -
75mm Filament Spool Adapter 3D Print Model
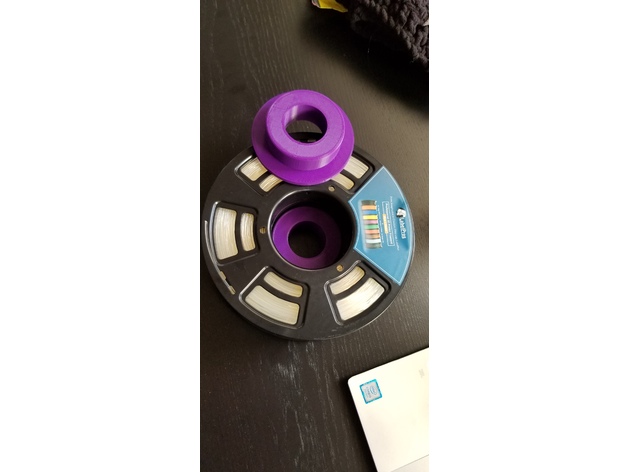
Summary
Adapts a spool with a 75mm center to fit on a Prusa without hitting the frame. I left the tolerances a bit large, however it works well and the spool turns smoothly.
Print Settings
Printer Brand:
Prusa Printer:
i3 MK2S Rafts:
Doesn’t Matter Supports:
No Resolution:
Low Infill:
15% Notes:
Printed in PLA, but really doesn’t matter as long as it fits.
How I Designed This
designed in Fusion 360 -
Customizable anti-backlash bowden coupling clip 3D Print Model
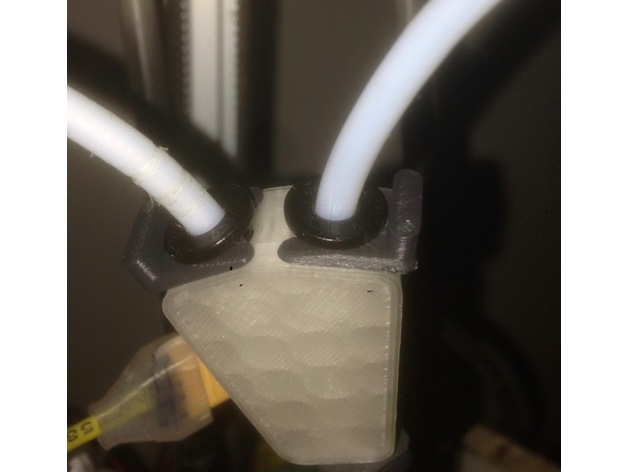
Summary
There are many designs like that, the one I picked for source is just the most pretty I used, it’s not that it was of particular value in terms of inspiration. Problem is all these designs are either wrong size or ugly and never customizable so I thought I’d solve that problem once for myself (and share here while I’m at it).
The dimensions of supplied stl is for all e3d couplings I have around, if you have different hardware, feel free to customize.
Note: for some reason customizer refuses to open now, so I can’t tell if it works well, but you can either use prebuilt .stl or download .scad and customize. I’ll check it again later and will either adjust it or remove WIP.
Print Settings
Rafts:
No Supports:
No -
WaterRocketLauncher 3D Print Model
Summary
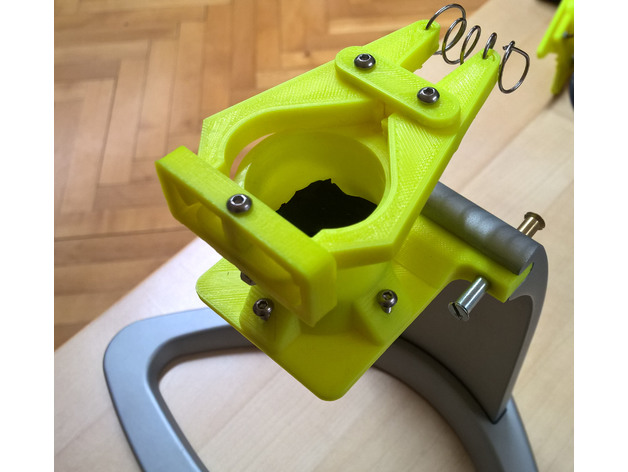
This is a WaterRocketLauncher for launching water bottles.
Print Settings
Printer:
Davinci 1.1 plus Rafts:
Doesn’t Matter Supports:
No Resolution:
0.3 Infill:
90-100% Notes:
WARNING!! Take care and wear at least safetyglasses when things get under pressure. It is hard to tell how much force a 3D-printed part will survive as this depends on your used material and printer settings. Be prepared for the case something breaks!
If you choose to mount it on a baseplate around 3-12mm thickness you dont need to print a baseplate (there are 3 different versions) and mostly no “VentilGuide”.
If your baseplate has under 5mm you may want to print out and use the “VentilGuide”
Depending on the thickness of your used baseplate and if you use a HolderExtension you may have to use longer screws than the stated M3x20.
A HolderExtension is needed if you cannot find a bottle suitable for the original length of the holder.
Baseplates, HolderExtendsion and VentilGuide are optional, you need at least the Holder, Clamp, StabilizationPlate, Stabilizer and Clip.
Take care to print the parts in the correct orientation, some .stl-Files need to be rotated to be printed correctly. (StabilizationPlate 90 degrees, Clamp 180 degrees)
Post-Printing
What you need
Printed Parts
Bicycle tube including the ventile
Screws (6xM3x20, 1xM3x25, 9xM3 Nut, 2xM3 Washer 3,2mm DIN125 )
Springs (two or if you have a long one cut it into two pieces)
Something to mount the rocketlauncher on, up to your creativity what you use
Maybe some pressure tube to get some distance between you and the launchpad 🙂
Preparation
Cut the bicycle tube the way that you get the ventile including a circle of tube around it that fits into the holder printed before.
Redrill the holes with a 3mm drill to ensure that the M3 screws fit into the holes Assembly
Put a spring on the ventile and place it into the holder. Depends on the spring you use, if you find it not stable, try to add a washer between the spring and the ventile/tube-part.
Mount the StabilizerPlate, Clamps, Stabilizer and Holder together as shown on the image. Don`t tighten the screws of the Clamps too much. It should move easy to securely launch the rocket later.
You can use some grease maybe if it is needed. Also it may be a good idea to use 2 nuts or some screwlock glue to prevent the nuts from loosening themselves due to clamp movement. -
4s10p 18650 battery holder for 14.4 volt with 1/4 inch bolt holes and tab slots 3D Print Model
Summary
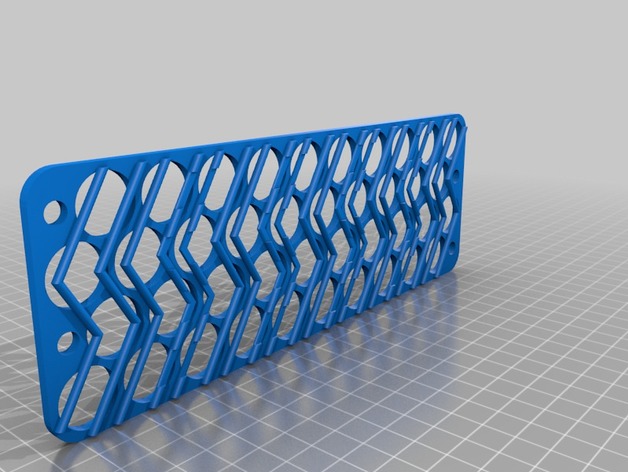
This is a 4s10p, 18650 battery holder for a 12 volts system (with a low voltage cutout and a DC-DC buck). Nominal voltage of 14.4 with a high of 16.8 volts. It holds 40, 18mm cells snugly.
I added a 1/4 inch bolt hole to bind everything together, mount to a case.
One of each file should be printed to get the tabbing and alignment correct. They’re labeled top and bottom, but they could be used the other way–top as bottom and bottom as top (or left side right side, etc).
Each staggered row should be tabbed down the middle with cells alternating anode – cathode – anode – cathode (in series) and bridged over the tabbing slots to the next row with the cells aligned the same as the previous (in parallel). If you don’t understand how this works, study up.
Built for my portable solar kit. -
“Batman Returns” Remote Batarangs 3D Print Model
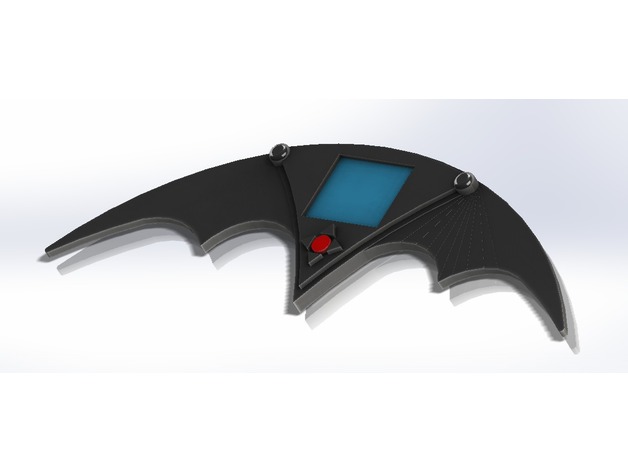
Summary
The Completely ridiculous use of a Batarang. Or at least just Ridiculous execution. Fun Design tho. -
Arkham Knight Style Beyond Batarang 3D Print Model
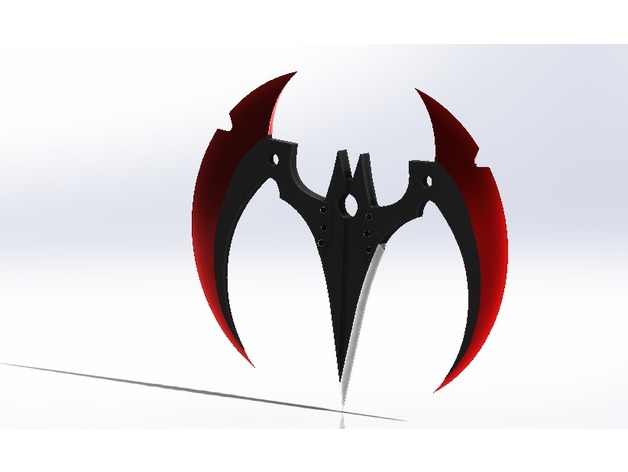
Summary
Based on the Arkham Knight Beyond Batarang. I love anything Batman Beyond -
cierre caja taladro würth 3D Print Model
Summary
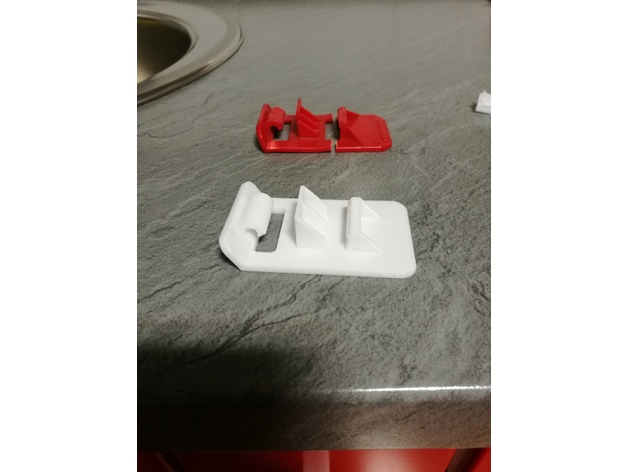
Es el cierre de la caja de un taladro de la marca Würth, esta impreso en PLA
Print Settings
Printer:
anet e10 Rafts:
No Supports:
Yes Resolution:
0.2 Infill:
17 -
Stand for metaform3d’s Starfury 3D Print Model
Summary
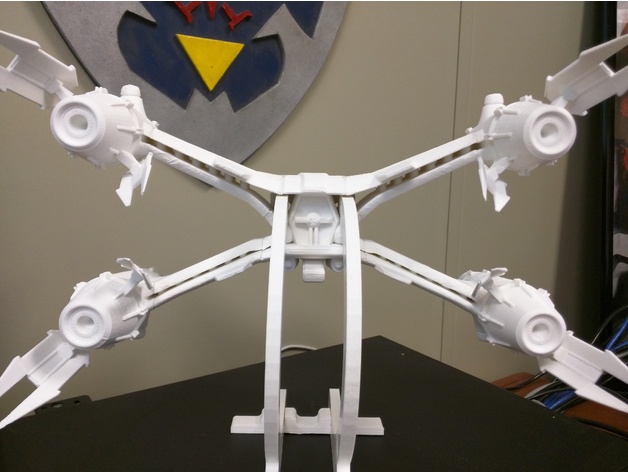
I made a quick stand for metaform3d’s amazing Starfury model. Once you attach the fins the only way to put it on a flat surface is on its nose, and I didn’t have any martini glasses handy.
I know it doesn’t attach the same way the cobra launch gantry would, but I wanted something a little more stylized. -
Heat Tower Test 3D Print Model
Summary
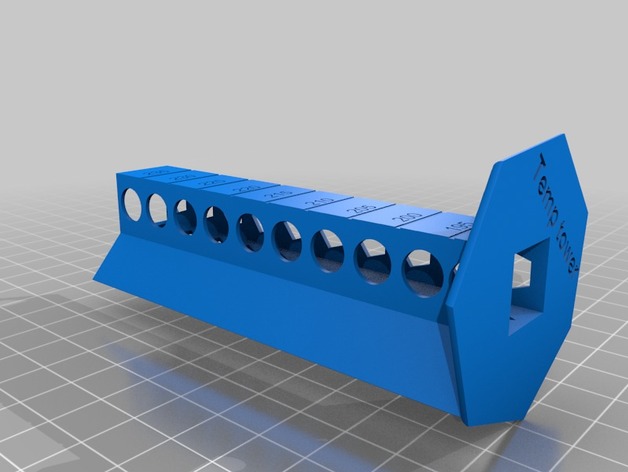
Temperature test to find the best temperature for your filament.
Have made a thin wall that you can break down to find the best welded team
So, if you do not get up the thin wall, you have to go in and set it to print thin walls
Simplify 3D: FFF Setup- Advanced-External Thin Wall Types = Allow single extrusion walls
Print Settings
Printer Brand:
Prusa Printer:
i3 MK2S Rafts:
No Supports:
No Resolution:
0,1000
How I Designed This
fusion 360 -
The Walking Dead – Abandoned Bus and Police Car 3D Print Model
Summary
Some additional vehicles to litter your road ways.
I added an additional removable-roof version of the bus so you can hide zombies, loot or your heroes in it. There are some bus seats too to scale and print ! -
12 Chinese Zodiac Animal Paper Clips (Part 1) 3D Print Model
Summary
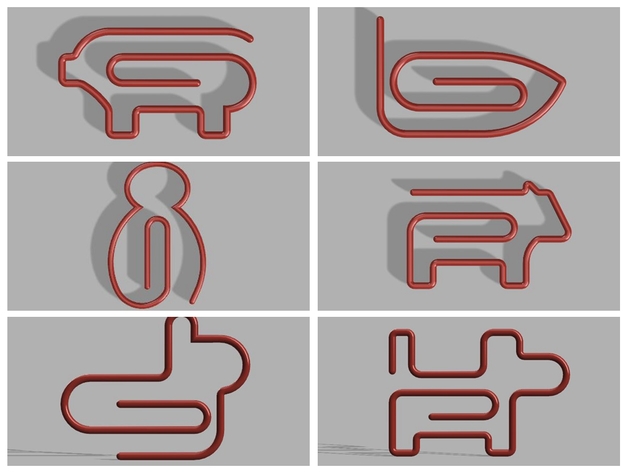
I have completed six of them. I found it hard to depict an animal shape with simple lines. Here they are. What do you think?
Pig
Rat
Monkey
Ox
Rabbit
Dog -

Santa ItNyang 3D Print Model
Summary
These days, I create the series of my own character, names “ItNyang”.
I hope this character becomes it! Like “It Girl”.
Nyang is usually used on cat.
ItNyang’s pronounciation is similar with Korean word “있냐”, meaning “Does it exist”
Specially, I create the christmas edition of ItNyang. The Santa ItNyang, sound like “Does Santa exist?” in Korean.
Enjoy the Christmas
Ho Ho Ho..
Print Settings
Printer:
CREATABLE D3 Rafts:
Yes Supports:
No Resolution:
0.5 Infill:
3% Notes:
Using 0.8mm Nozzle makes your printing more fast and big 🙂
How I Designed ThisBefore Sculpt
After Sculpt
-
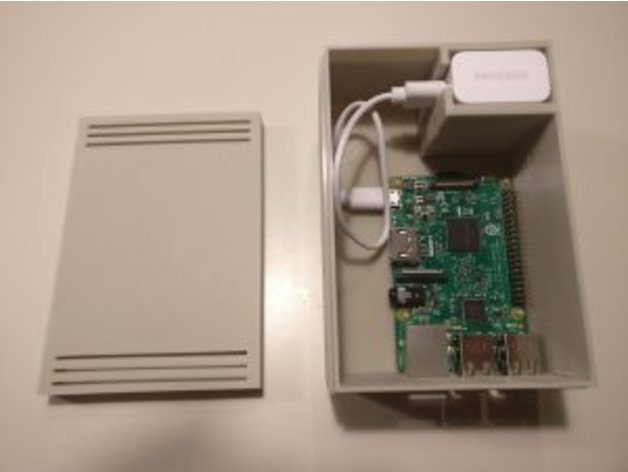
Single Unit Raspberry Pi case 3D Print Model
Summary
Iv built a single unit to house the raspberry pi and power adapter and cables, nice neat setup. -
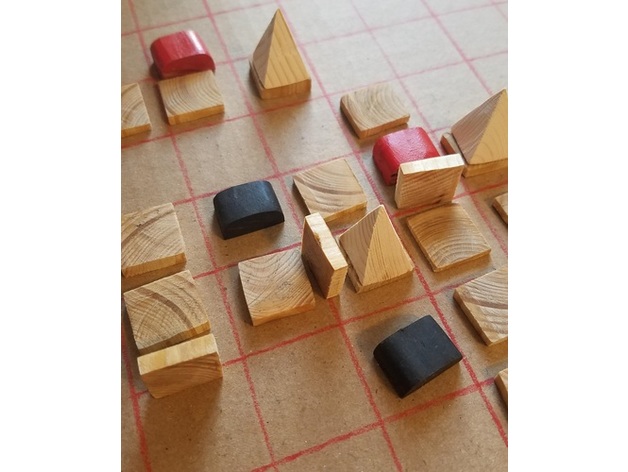
MALU Board Game 3D Print Model
Summary
MALU is an abstract strategy board game for 2 or 4 players. The objective of the game is to move both your pawns across the map to the other side of the board and exit the map. The first player to have both their pawns exit the map wins.
The mechanics of the game are simple enough that anyone can pick up and start playing, but the depth of skill and many possible strategies to employ, allows for seasoned players to truly be masters of MALU.
Each turn, a player must move their pawn and place a neutral tile onto the board. As you place your tiles, adjoining tiles create paths that your pawns can move along. As your pawn moves, you have the ability to pick up those tiles and reroute them to your advantage… either as a path to the other side or as a means to block your opponents. But be careful… if you get too close, your opponent can snatch those tiles away from you and use them for themselves! You can also place walls of ice and mountain peaks as obstacles or knock down walls for strategic advantages.
I have remixed 2 of dutchmogul’s vikings into the player pawn for this game