Summary
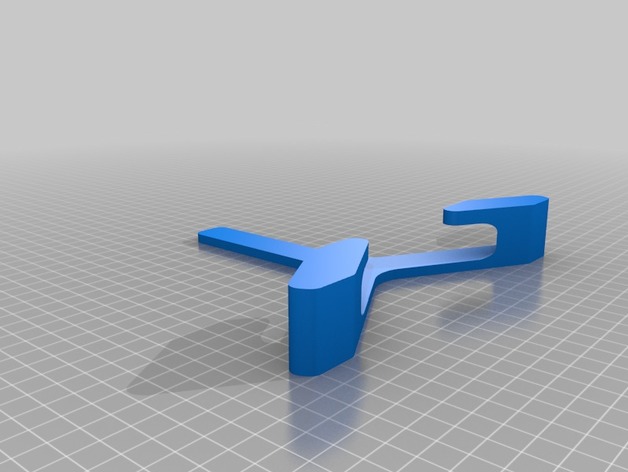
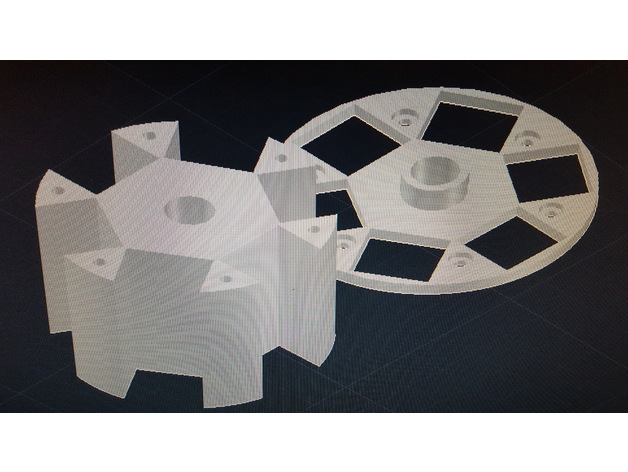
This is a permanent magnet motor or generator rotor. It uses a double stack of the popular sized ceramic magnets (1-7/8″ X 7/8″ X 3/8″) like these :https://www.harborfreight.com/pack-of-2-ceramic-block-magnets-97504.html for each of the 6 positions. There is a choice or either a rotor for a 8mm shaft or a 1/2″ shaft. Use #6 to 32 x 1/2″ bolts to attach the ends. Dimensions: 3.5″ diameter X 1.885″ length. Also added .25″ bearing stand-offs on both ends.
.01″ added to spaces for magnets and bolt holes to compensate for shrinkage of material.
Disclaimer: Disclaimer: Experiment at your own risk. Catastrophic failure of parts spinning at high speed can cause damage to property, injury, or even death.
Print Settings
Printer Brand:
Printrbot Printer:
Play Rafts:
Doesn’t Matter Supports:
No Resolution:
.2mm Infill:
20 – 30% has worked fine for me. You should consider more for 5000+ rpm’s Notes:
.8mm top and bottom layers
.8mm walls
I print in pla.
Author: Thingiverse
-
Permanent Magnet Motor/Generator Rotor 3D Print Model
-
Fan Housing with sensor mount 3D Print Model
Summary
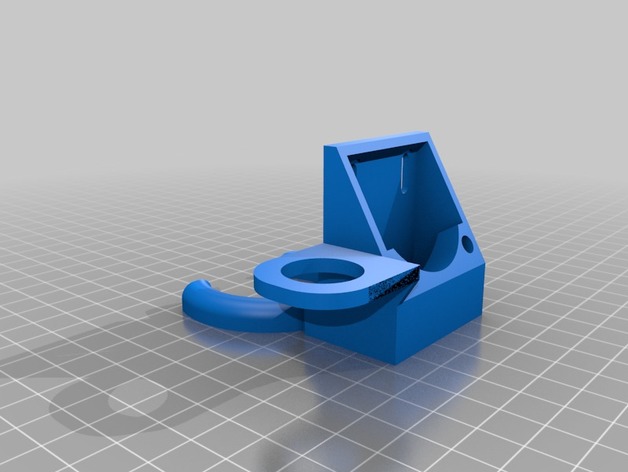
This is the 40mm cooling fan mount made by petitt57 modified with a mount for a 18mm abl sensor.
Visit the original here: https://www.thingiverse.com/thing:2271289 -
Tooth brush holder (screwless)- Zahnbürsten Halterung ( Schraubenlos) 3D Print Model
Summary
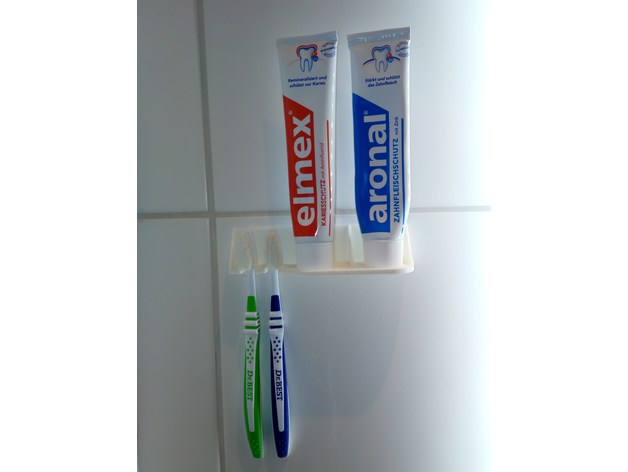
As you can see in the pictures, this is a screwless tooth-brush-holder for different types of brushes.
In my case, I decided to print names in the holder. If you would like to print your names, there is a creo .prt included. Otherwise, write me a message and I will prepare & send you the individual STL-files.
As an attachment, you can use Tesa Powerstrips (14x34mm max. 1Kg) -
Ferrari FXX pencil holder 3D Print Model
Summary
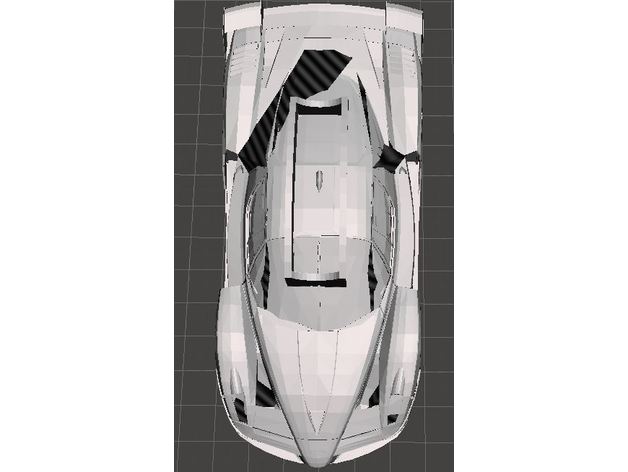
Yet another supercar pencil holder, and this time it is on a Ferrari FXX. Just an FYI, I have used 2 different soft wares and one says that it’s ready to print, and the other says its not…? But anyways, enjoy! -
FPV Helmkamera MK2 3D Print Model
Summary
Kamera:https://www.amazon.de/gp/product/B01CJ4FJ6O/ref=oh_aui_search_detailpage?ie=UTF8&psc=1
5,8GHz Sender:https://www.amazon.de/gp/product/B00O7JK5CI/ref=oh_aui_detailpage_o06_s00?ie=UTF8&psc=1
5,8GHz Antennen:https://www.amazon.de/gp/product/B06XKRXHB5/ref=oh_aui_search_detailpage?ie=UTF8&psc=1 -
18650 Slim single box mod 3D Print Model
Summary
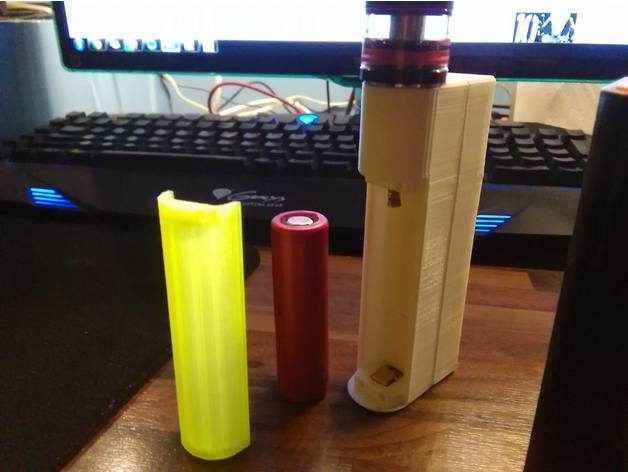
This is new version of single box mod.
Parts needed:https://www.fasttech.com/products/0/10011690/2013501-diy-spring-loaded-firing-button-for-mechanical-mod
-https://www.fasttech.com/products/0/10011689/3441401-510-connector-w-solder-ring-terminal-for-e
-cheap chinese voltmeter (check dimensions my is 11x23mm)
5x5x2mm magnets
5mm tact switch for switching woltmeter
Contacts for battery are made from brass sheet, bent and hot glued at the bottom.
Print Settings
Supports:
Yes Resolution:
0.15 Infill:
15% -
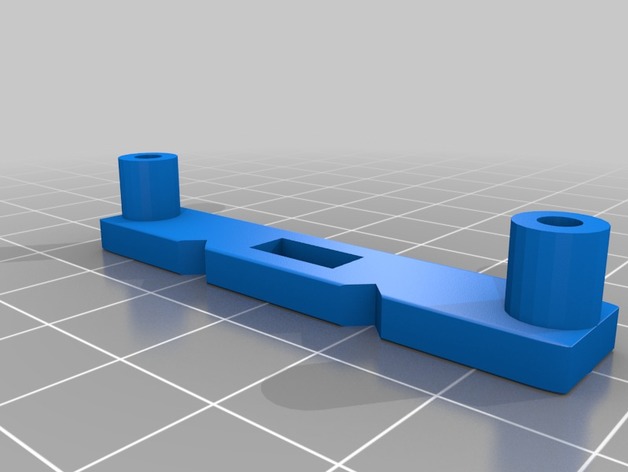
Mount plates for Subwoofer Amp 3D Print Model
Summary
Mounting plates for a Subwoofer power amp. Notches are for marking when positioning is critical.
Meant to fit this unit from Aliexpress:
https://www.aliexpress.com/item/TPA3116D2-Subwoofer-Digital-Power-Amplifier-100W-AMP-Board-Audio-Module/32803919773.html
Print Settings
Printer:
Folger Tech Prusa 2020 Rafts:
Doesn’t Matter Supports:
Doesn’t Matter Resolution:
.2mm layer height, .3mm nozzle Infill:
25% Notes:
Used PLA. -
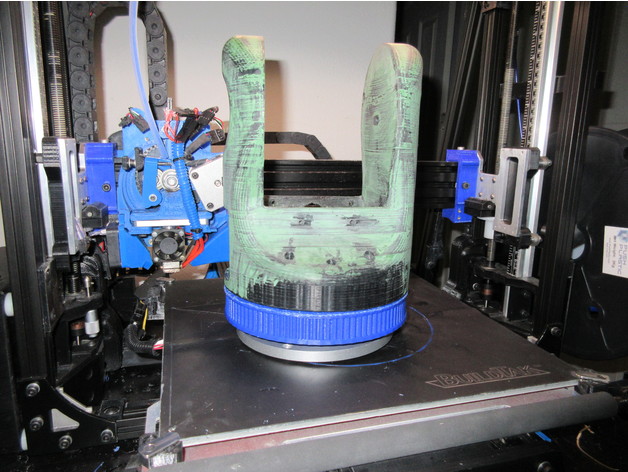
Turret Ring Slew Bearing base and main pulley for Moveo Robot Arm 3D Print Model
Summary
This is another modification based off of Labala’s excellent Moveo upgrade parts. This time I’ve bored out the main pulley for arm rotation and made a matching base for it. This uses an inexpensive 5.5″ (140mm) turntable bearing (I used this one specifically https://www.ebay.com/itm/1pc-new-5-5-140mm-Home-Hardware-Aluminum-Round-Lazy-Susan-Bearing-Turntable/122799616711?ssPageName=STRK%3AMEBIDX%3AIT&_trksid=p2060353.m2749.l2649) as well as 8 M4 trapazoid head bolts and nuts. 35mm – ish should work fine. You may need to go with phillips head ones in this instance to get proper countersink clearance.
Assembly instructions:
you will need the other half of the base, the motor mount, cover and belt tensioner from Labala’s project.
install the ring on the printed base, with the ring clearance extension down, make sure the bolts are tight. Consider using lockwashers here.
install the nuts in the pulley ring, and bolt it to the stock arm base using the stock bolts.
bolt the turntable slew bearing to the bottom of the pulley
Assemble the remaining base components.
Thats it, you now should have a robot arm you can bolt to a baseplate or something.
Future expansion plans will include some sort of mount for a 2 stage slip ring assembly (large outer 12 ring, smaller inner 24 ring maybe?
I’m printing the larger piece now, will post pictures when it’s done.
Print Settings
Printer Brand:
LulzBot Printer:
TAZ 5 Rafts:
No Supports:
Yes Resolution:
0.5mm nozzle, ABS (PLA might work better here) Infill:
15% infil, 7 shells. Notes:
This is going to require support for the mounting tabs and the slew ring recess. -
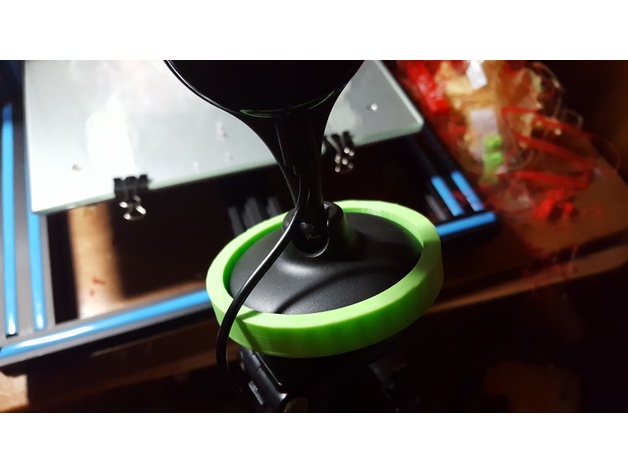
Tri-pod mount for camera 3D Print Model
Summary
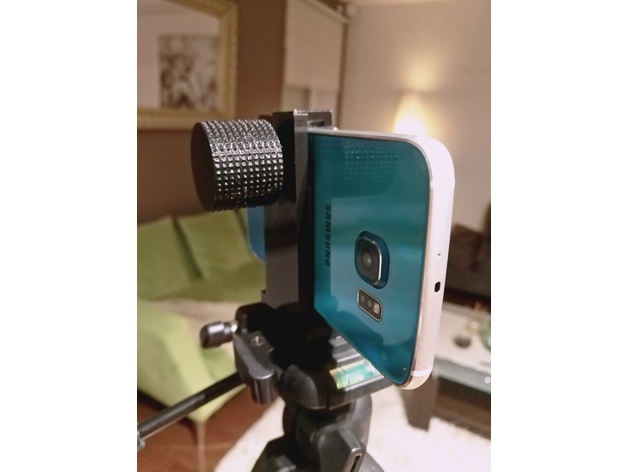
This is a tripod mount I made for a camera I got off amazon for $22.99. it screws onto my tri-pod and works well -
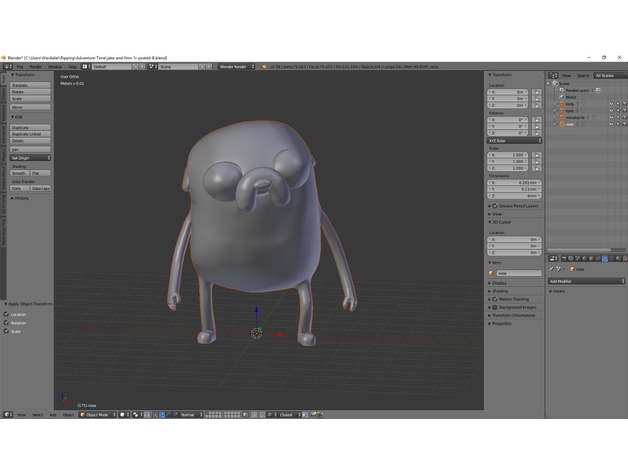
Jake the Dog v0.1R WIP 3D Print Model
Summary
DISCLAIMER:
I DID NOT CREATE THIS MODEL. THE TALENTED ARTISTS AT VICIOUS CYCLE DID. I TAKE ABSOLUTELY NO CREDIT FOR THIS WORK. PROPERTY OF LITTLE ORBIT. USED WITHOUT PERMISSION.
source: Adventure Time: Finn & Jake Investigations
i still have to finish the arms and mouth. also, i have to figure out which version (A or B) is more accurate. A has eyes w/ less white and more black while B has more white and less black frame. basically the edge loop i chose to crease is closer to the center of the eye in A and further from the center of the eye in B. i suspect B might be the right one, but i’ll sort that out after i finish the rest of the mesh.
still WIP. slices OK, but wait a bit if you want a final version that’s ready. -
Deluxe Game Controller Stand 3D Print Model
Summary
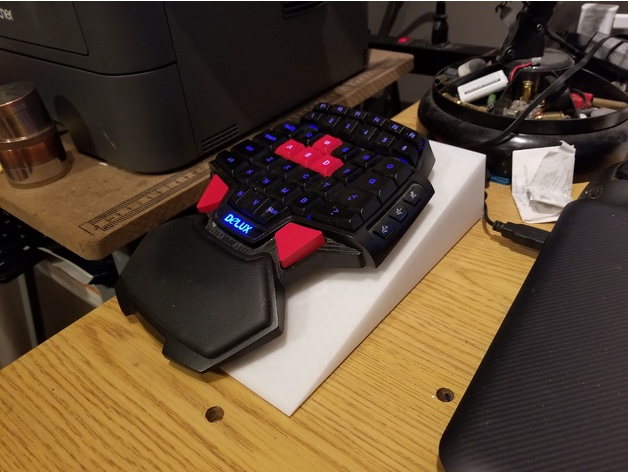
I play Mechwarrior Online and many of us use this small half-keyboard game controller from Delux. Pretty cool but it’s fairly flat so I decided to make a stand for it.
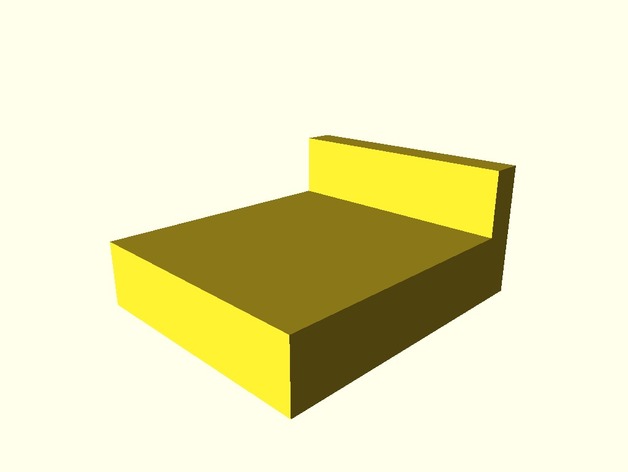
NOTE: Designed in inches…scale to 2540% to get it in MM’s
NOTE: For some reason Thingy put it on it’s side. Flip it UPSIDE down and print. No raft. No supports. No nothing…it’s just an empty box
Print Settings
Printer:
Creality CR-10 Rafts:
No Supports:
No Resolution:
.3 Infill:
10% Notes:
It’s in INCHES…so x2540% to get MM’s.
It’s on it’s side…flip it so it prints upside down.
That’s it…nothing else….
How I Designed This
Cubify Design
Buy on Ebay for $90….it’s current configuration is $4500…. -
Robot Slingshot game 1vs1 for Raspberry Pi 3D Print Model
Summary
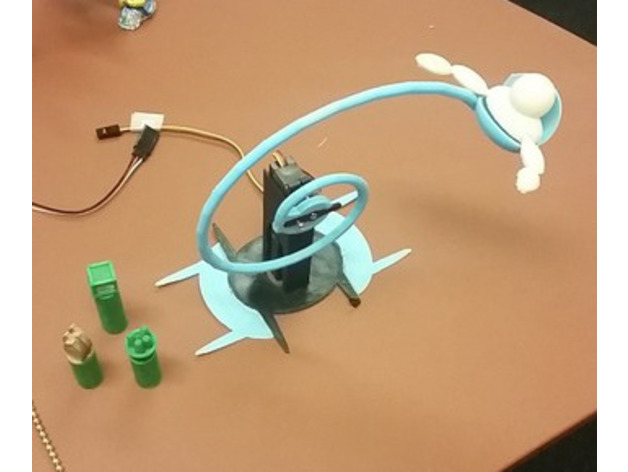
Build a robot game with your Raspberry Pi, battling with two players using your favorite slingshot ammo to shoot off crates and count points. The game works with a Raspberry Pi and a Mobile phone, Pad or any touch screen.
Play instructions:
Each player starts with 1p resource that they place in front of their own slingshot on top of the tower
Each player on their turn draws the sling and releases it, trying to hit the opponents resources. Before the turn place a new resource on your playing field, according to the game image
End of each throw count amount of resources on opponents field and add to your points
Points:
Corn, Barrel 1p
Leaf, Flour 2p
Gold crate 3p
Assembly: Print all parts, connect the spiral sling with a 9g micro servo, add additional screw to hold the servo better. Slide the servo inside the servo holder with the wire upwards. Adjust the servo when the servo is in middle position the sling cup is balanced horizontally.
Add 3mm / 4mm / 5mm Neodymium magnet balls if you want extra weight for the cannon balls.
Install instuctions GigaBrain Robot slingshot two player game
The Game is in BETA test mode, so leave feedback in comments.
Print Settings
Printer:
Creality CR-10 Rafts:
No Supports:
No Notes:
The slingshot stand is better with a support structure that you can leave on the print, it holds the stand better. -
Dual counter rotating hypercubes 3D Print Model
Summary
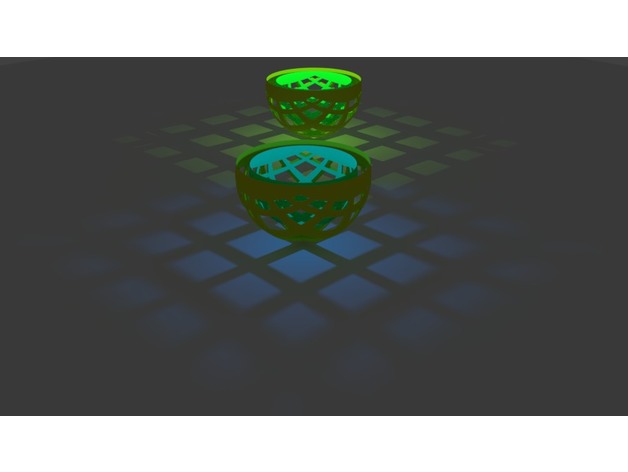
Same as prior invention, just doubled.https://youtu.be/XXxTkUtxEaU
Git repository:https://github.com/dsikar/OpenSCAD-Hypercube -
DJI Mavic Pro Foot L R and Rear Foot 3D Print Model
Summary
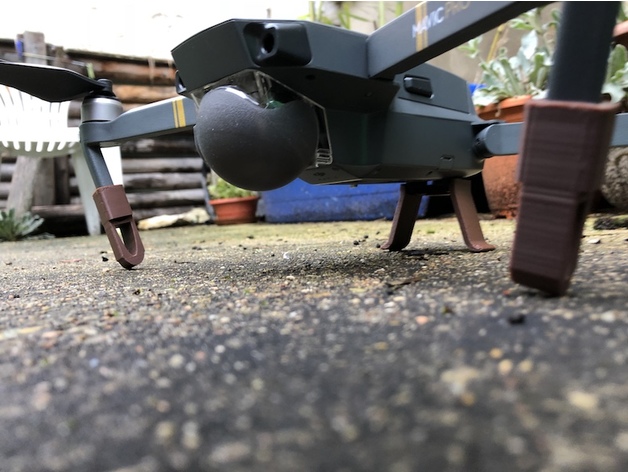
Foot extension for the drone DJI Mavic Pro.
No difference between right foot and left => front
and the back foot really easy to install…
Take off, landing by hand available on :https://cults3d.com/fr/modèle-3d/gadget/take-off-landing-by-hand-dji-mavic-pro
Print Settings
Printer Brand:
FlashForge Printer:
Creator Pro Rafts:
No Supports:
No Resolution:
0.18 -
Filament dispenser box 3D Print Model
Summary
Introduction
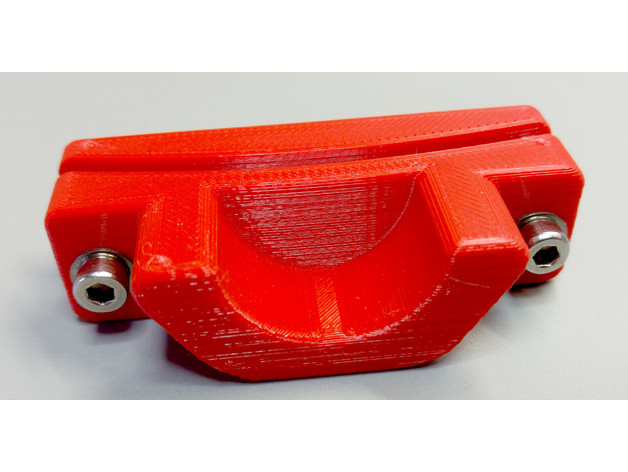
There are many filament spool holders available, with numerous geometries and types. However, all I tried so far worked with loose spools that I had to juggle around when switching filament. I wanted a simple system which serves as filament storage and allows easy access to the filament for use.
The idea as such is not new, there are similar designs available. This solution uses regular containers available at your local hardware store and a cheap plastic pipe. Additionally some pneumatic quick connectors, Teflon tube, M4 screws and zip ties are used.
My 3D printer is placed in an Ikea box with the filament dispensers on top. A feedthrough with an additional Teflon tube brings the filament inside. So far it’s been working great.
Required parts
Storage box (mine are approximately 370x270x270 mm)
Tube or similar (up to 25 mm diameter)
Pneumatic quick connectors + M5 nuts
Teflon tube
M4x20 screws + nuts
Zip ties (optional, to keep the spools in place)
Print Settings
Printer Brand:
Prusa Printer:
i3 MK2S Rafts:
No Supports:
No Resolution:
0.2 mm Infill:
20% Notes:
Printed in PETG, but PLA should also works just fine.
NOTE: The files must be rotated properly, NOT printed as shown. -
F-8 Crusader wall mount 3D Print Model
Summary
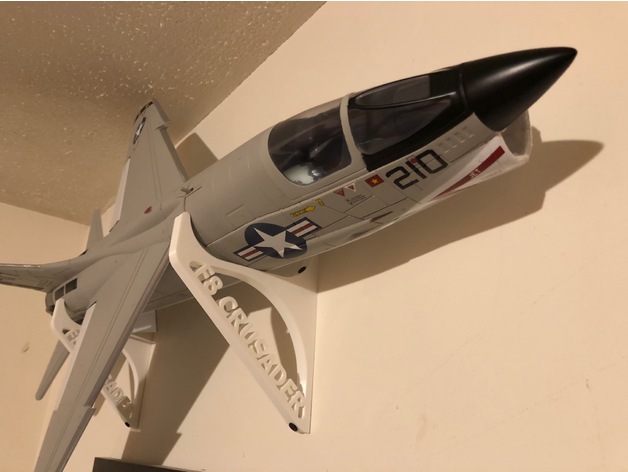
I was very impressed with the look of the new Freewing F-8 Crusader from MotionRC.com, so I made a quick wall mount to display it in my room.
The STL is only one piece, so you will need to print two or duplicate. I’ve included the STL file (one pieces) as well as gcode (two pieces) with the recommended print settings.
Feel free to remix. Enjoy!
JGplanes
Print Settings
Printer Brand:
Prusa Printer:
i3 MK2S Rafts:
No Supports:
No Resolution:
.20 Infill:
10 Notes:
I printed this with white Hatchbox PLA @ 200/60 degrees and light glue on the bed to keep the initial layers from warping.
Recommended
PLA+ @ 215/60 degrees
.20 layer height10% infill
4 top/bottom solid layers
3 perimeter shells
No support
No rafts
2 skirt outlines -
Xiaomi car dvr magnet mount 3D Print Model
Summary
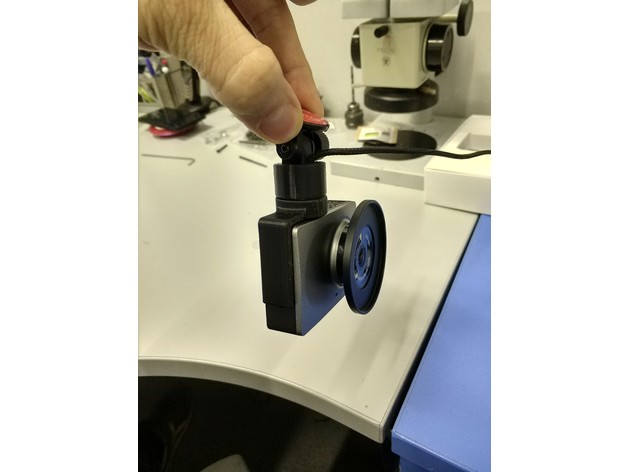
For this thing you need:
2pcs magnet disks 20x10x3
1pcs only micro usb connectorhttps://ru.aliexpress.com/item/WSKEN-Micro-USB-Magnetic-Charging-Cable-TPE-Aluminum-1M-Cord-Magnet-Charge-Cables-For-Samsung-Xiaomi/32736867339.html?spm=a2g0s.9042311.0.0.qFAIDo
1pcs magnet cablehttps://ru.aliexpress.com/store/product/Wsken-Micro-USB-Samsung-Huawei-Xiaomi/3018058_32830913642.html?spm=a2g0v.12010612.0.0.9db71caqrGMyq
Some of thin teflon cable like 24-25AWG
Glue to mount magnets and connectors.
Print Settings
Printer:
Anycubic Kossel Rafts:
No Supports:
Yes Resolution:
0.1mm layer Infill:
100% Notes:
Use supports carefull because model have internal channel for wire.
Print 100% infill with 0.1mm layer (or less than 0.1) -
Guide Fil pour DAGOMA NEVA 3D Print Model
Summary
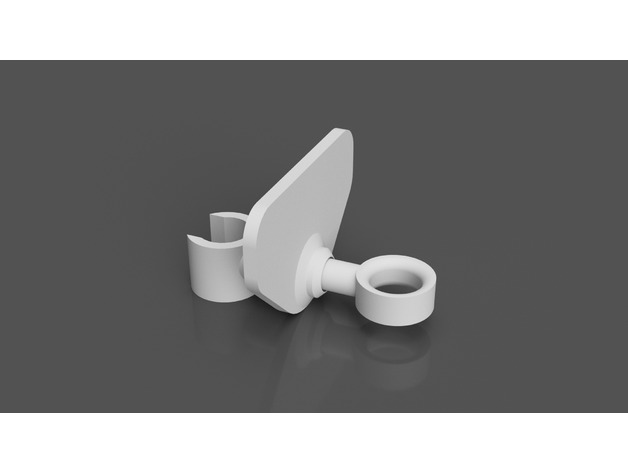
Passe fil pour éviter qu’il touche les guides et la courroie. Permet aussi d’éviter les boucles de fil. Ce fixe en bas sur les guides du coté de l’extrudeur. La partie haute et plate se met vers le bas pour permettre un petit mouvement rotatif léger. -
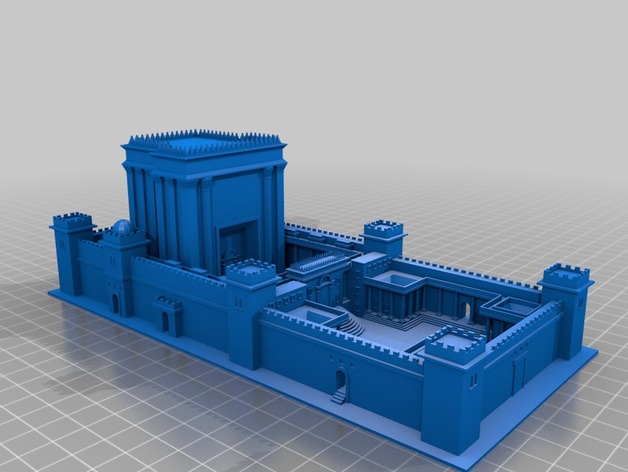
Herods temple (Second Temple in Jerusalem) 3D Print Model
Summary
Great model but the single-layer bottom is too flimsy. I added a 1mm bottom that’s it. -
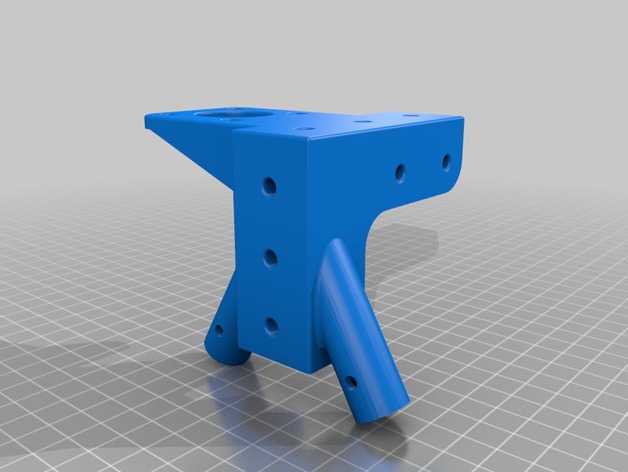
Left top corner for Tevo Tarantula upgrade 3D Print Model
Summary
I mixed it with the casual top left corner, if you want it for the right side too, just mirror it in your slicer 🙂
I did this beacuse when you add the top piece at the backside, you will lose about 3cm of build volume in your Z axies….
You can print it in this sice, it is a bit bigger than the orginal bracket, so it will fit easyer on your alluminium rods.
Print Settings
Printer:
Tevo Tarantula Rafts:
No Supports:
Yes Resolution:
0.2 Infill:
20 Notes:
I recomend to it print with support
Post-PrintingHow I Designed This
Mixed it in fusion 360 -
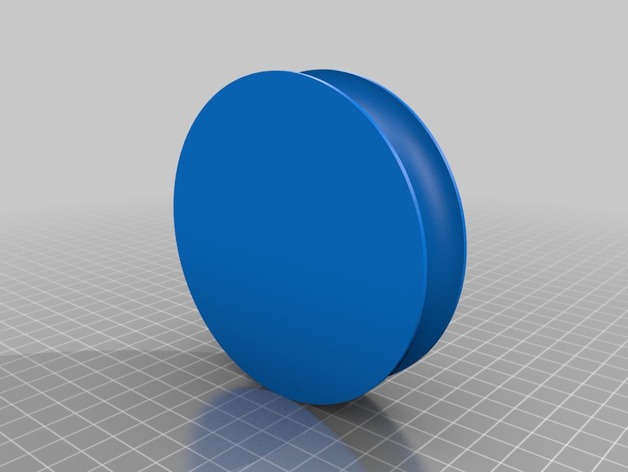
Rigid tube bending Kit 3D Print Model
Summary
for 13-19 mm rigid tubing.
dont forget to use high temperature filament when printing these. (ABS worked for me)
Print Settings
Printer Brand:
MK3 Printer:
Prusa i3 Rafts:
No Supports:
No Resolution:
.4 Infill:
15 -
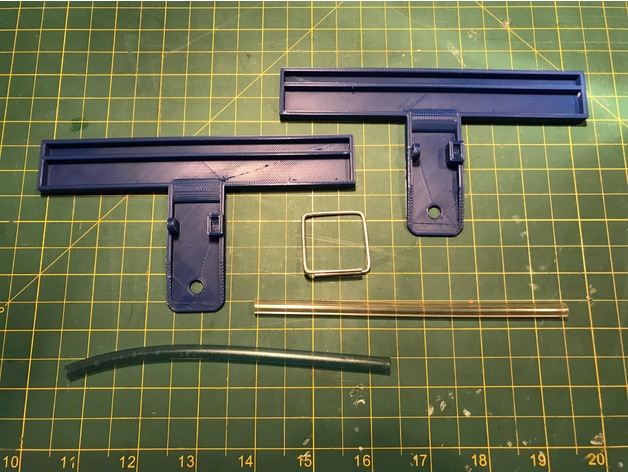
Bag-Clip 3D Print Model
Summary
my store-bought clip broke, so I made this one and used the spring and hoses from the original.
Print Settings
Printer Brand:
Ultimaker Printer:
Ultimaker 2 Rafts:
No Supports:
No Resolution:
.3 Infill:
30% -
base para luminaria 3D Print Model
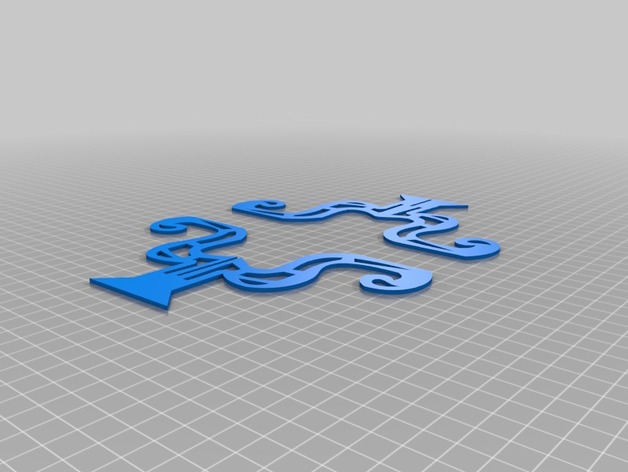
Summary
base para luminária no tamanho correto de 170 mmm
impresso em ABS A 225º sendo a primeira camada de 250º
100% de infill
Print Settings
Printer:
GTMAX H4 Rafts:
No Supports:
No Resolution:
0,1 Infill:
100 % Notes:
base para luminária no tamanho correto de 170 mmm
impresso em ABS A 225º sendo a primeira camada de 250º
100% de infill -
Guillotine for Guillotine 3D Print Model
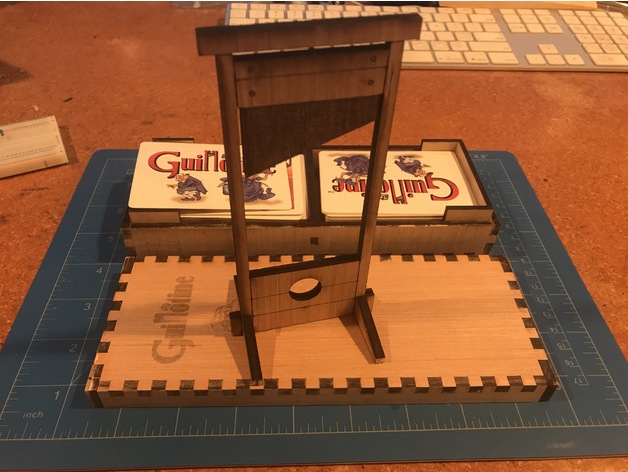
Summary
My cardboard Guillotine was well loved, so I made a new one to cut on my Glowforge.
Designed to be laser cut, made with 4.76mm Lowes plywood
Print Settings
Printer:
Glowforge Pro -
Fan mount for FatShark Transformer FPV Goggles 3D Print Model
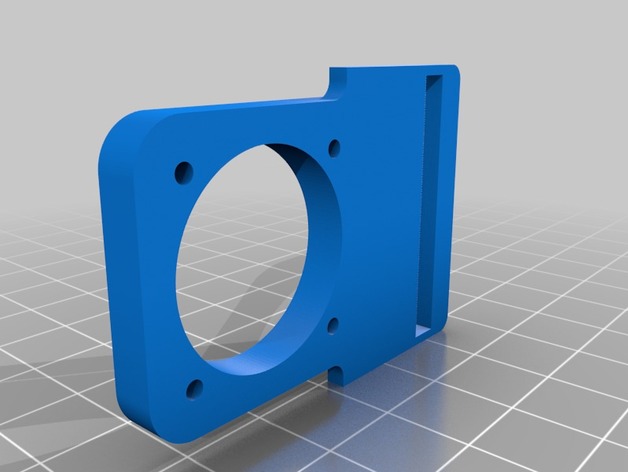
Summary
Simple design to add one or two fans to the FatShark Transformers. Everything is a tight fit but can be fitted without sanding depending on print quality.
Fans that i used on my Transformers
Braided cable sleeve i used.
https://www.amazon.com/gp/product/B073YL2CL6/ref=oh_aui_detailpage_o00_s00?ie=UTF8&psc=1
Wire connector
-
Abraham Lincoln Mierda / Shit 3D Print Model
Summary
Abraham Lincoln Mierda / Shit
La horrible cara de lincoln fue sacado en “Bust of Abraham Lincoln by TheNewHobbyist” https://www.thingiverse.com/thing:326000 Gracias TheNewHobbyist
The hideous face of Lincoln was brought out in “Bust of Abraham Lincoln by TheNewHobbyist” https://www.thingiverse.com/thing:326000 Thank you TheNewHobbyist
ATENCIÓN: quiero aclarar algo he recibido un email de esta empresa donde me pide una cuenta de paypal porque alguien de acá me dio una propina… estoy agradecido a esa persona, pero no me interesa el dinero… yo publico acá algunos de mis hobby solo para compartir porque de eso se trata de esta pagina una comunidad que comparten “cosas”.
Yo tengo la suerte de que soy uruguayo y no me falta nada (si fuera norteamericano estoy seguro que terminaría durmiendo bajo el puente de Brooklyn comiendo basura y muriéndome de hambre como muchos norteamericanos que lo viven…)
TODOS pero todos mis “cosas” pueden hacer lo que se le antojen… solo pido que mis frases no sea modificados pero si compartidos porque ese es mi deseo antes de morir.
La plata no me importa… una vez mas gracias a aquellos que quisieron poner algo.
Pero no lo hagan… Gracias
ATTENTION: I want to clarify something I received an email from this company where I asked for a paypal account because someone from here gave me a tip … I am grateful to that person, but I am not interested in the money … I publish here some of my hobby just to share because that’s what this page is about, a community that shares “things”.
I am lucky that I am Uruguayan and I do not need anything (if I were Northamerican I’m sure I would end up sleeping under the Brooklyn Bridge eating garbage and starving to death like many Northamericans who live it …)
ALL but all my “things” can do what they want … I just ask that my sentences are not modified but shared because that is my wish before I die.
Silver does not matter to me … once again thanks to those who wanted to put something.
But do not do it … Thank you
My Things:
George W. Bush Mierda / Shit – https://www.thingiverse.com/thing:2752518
Logo Fire and Fury – https://www.thingiverse.com/thing:2748397
ASUS – Frontal PC Cover – Standard V2.0 by (Faca & Mussy) – https://www.thingiverse.com/thing:2745518
Messi cara de mierda / Messi face of shit – https://www.thingiverse.com/thing:2741274
Donald Trump Shit / Mierda – https://www.thingiverse.com/thing:2741267
Letras – Letters Astrolight – https://www.thingiverse.com/thing:2739136
Better read to understand this / Mejor lean para entender esto – https://www.thingiverse.com/thing:2736391
Velas demoníacas / Demonic candles – https://www.thingiverse.com/thing:2725134
Chapa/Plate Montevideo (decoración/decor) – https://www.thingiverse.com/thing:2721633
Graffiti PENE / PENIS (+18) – https://www.thingiverse.com/thing:2720582
Graffiti Skateboarding no es un crimen / is not a crime – https://www.thingiverse.com/thing:2706960
Snoopy (for my friend Mussy) – https://www.thingiverse.com/thing:2706127
Logo FX the serie 1996-1998 – https://www.thingiverse.com/thing:2703174
Woodstock – https://www.thingiverse.com/thing:2702669
Graffiti Independecia de EEUU de Northamerica – https://www.thingiverse.com/thing:2695303
Graffitis John Lennon – https://www.thingiverse.com/thing:2688181
Botella de agua / Water Bottle – https://www.thingiverse.com/thing:2683618
Graffitis LEY / LAW – https://www.thingiverse.com/thing:2671260
Graffiti Anti-Norteamericanos – https://www.thingiverse.com/thing:2670526
Cartel Bebé a bordo / Sign Baby on Board – https://www.thingiverse.com/thing:2653304
Botones/buttons – https://www.thingiverse.com/thing:2644421
comics anti-Cumbia poster (humor) – https://www.thingiverse.com/thing:2634262
Logo GoPro – https://www.thingiverse.com/thing:2632151
Graffiti droga – https://www.thingiverse.com/thing:2630467
California Country FREE!!!!! / California Pais libre!!!!! / https://www.thingiverse.com/thing:2628526
Atari Jaguar logo – https://www.thingiverse.com/thing:2620148
Letras / Letters Autograf_PersonalUseOnly (trial) – https://www.thingiverse.com/thing:2601850
Logo de Fiat 500 del 2007 / Logo Fiat 500 of 2007 – https://www.thingiverse.com/thing:2599019
Fuji film el viejo logo / Fuji film old logo – https://www.thingiverse.com/thing:2598637
Lamborghini Egoista (HD) – https://www.thingiverse.com/thing:2597212
My Customized classic bike license plates – https://www.thingiverse.com/thing:2592552
My Customized Braille Alphabet (software translator) – https://www.thingiverse.com/thing:2564926
Logo y Puerta para USB / Logo and Door for USB – https://www.thingiverse.com/thing:2561413
Logo Luis Suarez 3D (Alvaro Cabeza) – https://www.thingiverse.com/thing:2547895
Graffiti para el baño / Graffiti for the bathroom – https://www.thingiverse.com/thing:2504063
Regla para Klonk – Rule for Klonk (Image Measurement) – https://www.thingiverse.com/thing:2451930
Raspberry Inside – https://www.thingiverse.com/thing:2446419
Sign EXIT – https://www.thingiverse.com/thing:2446123
Ferrari 458 GT3 Race Car (2014) – https://www.thingiverse.com/thing:2435527
The Cumparsita Keychain – https://www.thingiverse.com/thing:2262407
My Customized Lithopane (Charlie Manson) – https://www.thingiverse.com/thing:2239964
Cartel STOP para la puerta de su cuarto – Sign STOP for your bedroom door – https://www.thingiverse.com/thing:2053810
Pendants – Dijes “666” – https://www.thingiverse.com/thing:2044749
ASUS logo Fan Grill 120mm – https://www.thingiverse.com/thing:2044124
T-shirt of Charlie Manson – https://www.thingiverse.com/thing:2040035
Fan Grille – 120mm, 6 vanes, 4 rings, ASUS logo – https://www.thingiverse.com/thing:2033662
Logo Aguada (Basketball Uruguay) – https://www.thingiverse.com/thing:2012851
FedEx Logo (created for a friend mrtai308) – https://www.thingiverse.com/thing:2012598
Pendants – Dijes / Key hangers – Colgadores de Llaves “Estrella del diablo – Devil star” – https://www.thingiverse.com/thing:2008589
Keychain NO a UBER – https://www.thingiverse.com/thing:2005711
Logo Nirvana – https://www.thingiverse.com/thing:2000093
AntiCumbia Grafitis – https://www.thingiverse.com/thing:1998858
Anti-CUMBIA – https://www.thingiverse.com/thing:1994919
CR7 Nike Logo Design Cristiano Ronaldo (keychain) – https://www.thingiverse.com/thing:1993509
CR7 – Cristiano Ronaldo (keychain) – https://www.thingiverse.com/thing:1993404
Koelner Haie Logo V2 – https://www.thingiverse.com/thing:1984912
Koelner Haie Logo V1 – https://www.thingiverse.com/thing:1984870
Koelner Haie Logo (To the request of a friend) – https://www.thingiverse.com/thing:1984018
Uruguay Natural (keychain) – https://www.thingiverse.com/thing:1982931
Logo JAMES Uruguay – https://www.thingiverse.com/thing:1982855
Logo Conaprole – https://www.thingiverse.com/thing:1982812
Logo Topper – https://www.thingiverse.com/thing:1981807
ASUS – Frontal PC Cover – Standard – https://www.thingiverse.com/thing:1981556
Logo SONY (Taken from original vector) – https://www.thingiverse.com/thing:1981376
Logo Meccano – https://www.thingiverse.com/thing:1981356
Logo 3D MTV – https://www.thingiverse.com/thing:1980111
Flag of Uruguay – https://www.thingiverse.com/thing:1979984
Logo HBO – https://www.thingiverse.com/thing:1905703 -
Bolt from “Iron Giant ” 3D Print Model
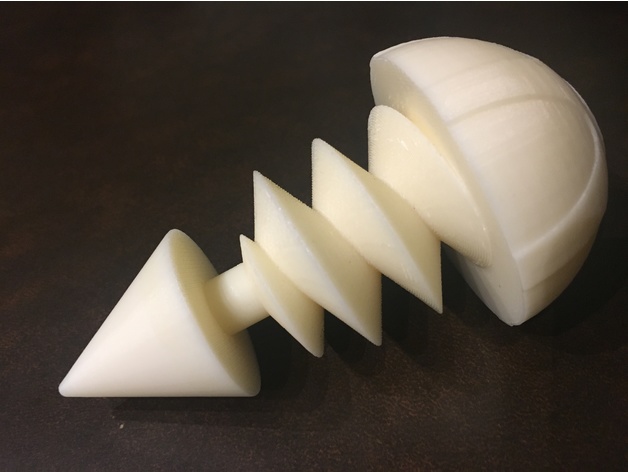
Summary
My son was a fan of the movie. I thought printing the bolt from the Iron Giant’s ear would be a neat experience for him. I took a little artistic liberty with how the thread terminated in the image. It didn’t sit well that the thread helix appears to turn into a ring instead of terminating at a chamfer or spiraling inward. -
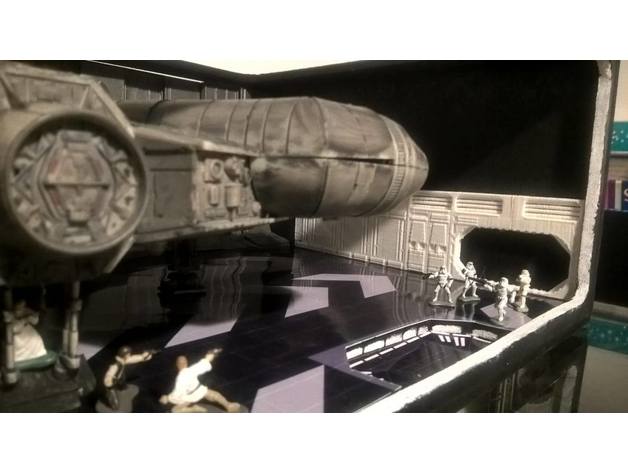
SCI-FI Movie SW – Collumm and Door 3D Print Model
Summary
Here are 4 parts that I make to put into my diorama.
Collumms, Wall, and Door from Death Star I from Star Wars: A New Hope.
Hope you enjoy.
Print Settings
Printer:
3D Clonner Rafts:
No Supports:
No Resolution:
0,250 Infill:
10% -
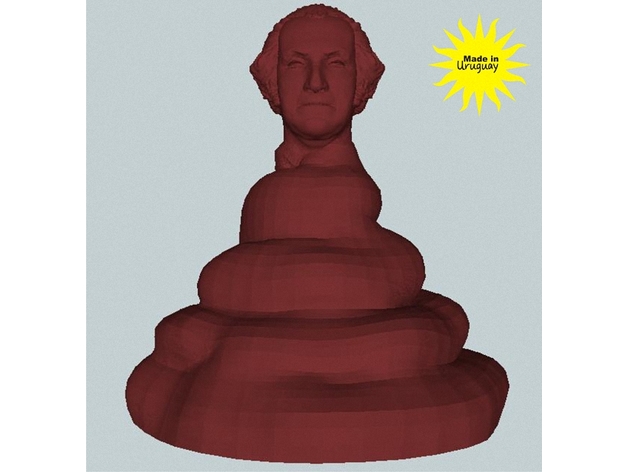
Washington Mierda / Shit 3D Print Model
Summary
Washington Mierda / Shit
La cara fea y gay de Washington fue sacado en “Washington Bust by tychodin” https://www.thingiverse.com/thing:2512787 Gracias tychodin
The ugly and gay face of Washington was pulled in “Washington Bust by tychodin” https://www.thingiverse.com/thing:2512787 Thank you tychodin
ATENCIÓN: quiero aclarar algo he recibido un email de esta empresa donde me pide una cuenta de paypal porque alguien de acá me dio una propina… estoy agradecido a esa persona, pero no me interesa el dinero… yo publico acá algunos de mis hobby solo para compartir porque de eso se trata de esta pagina una comunidad que comparten “cosas”.
Yo tengo la suerte de que soy uruguayo y no me falta nada (si fuera norteamericano estoy seguro que terminaría durmiendo bajo el puente de Brooklyn comiendo basura y muriéndome de hambre como muchos norteamericanos que lo viven…)
TODOS pero todos mis “cosas” pueden hacer lo que se le antojen… solo pido que mis frases no sea modificados pero si compartidos porque ese es mi deseo antes de morir.
La plata no me importa… una vez mas gracias a aquellos que quisieron poner algo.
Pero no lo hagan… Gracias
ATTENTION: I want to clarify something I received an email from this company where I asked for a paypal account because someone from here gave me a tip … I am grateful to that person, but I am not interested in the money … I publish here some of my hobby just to share because that’s what this page is about, a community that shares “things”.
I am lucky that I am Uruguayan and I do not need anything (if I were Northamerican I’m sure I would end up sleeping under the Brooklyn Bridge eating garbage and starving to death like many Northamericans who live it …)
ALL but all my “things” can do what they want … I just ask that my sentences are not modified but shared because that is my wish before I die.
Silver does not matter to me … once again thanks to those who wanted to put something.
But do not do it … Thank you
My Things:
Abraham Lincoln Mierda / Shit – https://www.thingiverse.com/thing:2752527
George W. Bush Mierda / Shit – https://www.thingiverse.com/thing:2752518
Logo Fire and Fury – https://www.thingiverse.com/thing:2748397
ASUS – Frontal PC Cover – Standard V2.0 by (Faca & Mussy) – https://www.thingiverse.com/thing:2745518
Messi cara de mierda / Messi face of shit – https://www.thingiverse.com/thing:2741274
Donald Trump Shit / Mierda – https://www.thingiverse.com/thing:2741267
Letras – Letters Astrolight – https://www.thingiverse.com/thing:2739136
Better read to understand this / Mejor lean para entender esto – https://www.thingiverse.com/thing:2736391
Velas demoníacas / Demonic candles – https://www.thingiverse.com/thing:2725134
Chapa/Plate Montevideo (decoración/decor) – https://www.thingiverse.com/thing:2721633
Graffiti PENE / PENIS (+18) – https://www.thingiverse.com/thing:2720582
Graffiti Skateboarding no es un crimen / is not a crime – https://www.thingiverse.com/thing:2706960
Snoopy (for my friend Mussy) – https://www.thingiverse.com/thing:2706127
Logo FX the serie 1996-1998 – https://www.thingiverse.com/thing:2703174
Woodstock – https://www.thingiverse.com/thing:2702669
Graffiti Independecia de EEUU de Northamerica – https://www.thingiverse.com/thing:2695303
Graffitis John Lennon – https://www.thingiverse.com/thing:2688181
Botella de agua / Water Bottle – https://www.thingiverse.com/thing:2683618
Graffitis LEY / LAW – https://www.thingiverse.com/thing:2671260
Graffiti Anti-Norteamericanos – https://www.thingiverse.com/thing:2670526
Cartel Bebé a bordo / Sign Baby on Board – https://www.thingiverse.com/thing:2653304
Botones/buttons – https://www.thingiverse.com/thing:2644421
comics anti-Cumbia poster (humor) – https://www.thingiverse.com/thing:2634262
Logo GoPro – https://www.thingiverse.com/thing:2632151
Graffiti droga – https://www.thingiverse.com/thing:2630467
California Country FREE!!!!! / California Pais libre!!!!! / https://www.thingiverse.com/thing:2628526
Atari Jaguar logo – https://www.thingiverse.com/thing:2620148
Letras / Letters Autograf_PersonalUseOnly (trial) – https://www.thingiverse.com/thing:2601850
Logo de Fiat 500 del 2007 / Logo Fiat 500 of 2007 – https://www.thingiverse.com/thing:2599019
Fuji film el viejo logo / Fuji film old logo – https://www.thingiverse.com/thing:2598637
Lamborghini Egoista (HD) – https://www.thingiverse.com/thing:2597212
My Customized classic bike license plates – https://www.thingiverse.com/thing:2592552
My Customized Braille Alphabet (software translator) – https://www.thingiverse.com/thing:2564926
Logo y Puerta para USB / Logo and Door for USB – https://www.thingiverse.com/thing:2561413
Logo Luis Suarez 3D (Alvaro Cabeza) – https://www.thingiverse.com/thing:2547895
Graffiti para el baño / Graffiti for the bathroom – https://www.thingiverse.com/thing:2504063
Regla para Klonk – Rule for Klonk (Image Measurement) – https://www.thingiverse.com/thing:2451930
Raspberry Inside – https://www.thingiverse.com/thing:2446419
Sign EXIT – https://www.thingiverse.com/thing:2446123
Ferrari 458 GT3 Race Car (2014) – https://www.thingiverse.com/thing:2435527
The Cumparsita Keychain – https://www.thingiverse.com/thing:2262407
My Customized Lithopane (Charlie Manson) – https://www.thingiverse.com/thing:2239964
Cartel STOP para la puerta de su cuarto – Sign STOP for your bedroom door – https://www.thingiverse.com/thing:2053810
Pendants – Dijes “666” – https://www.thingiverse.com/thing:2044749
ASUS logo Fan Grill 120mm – https://www.thingiverse.com/thing:2044124
T-shirt of Charlie Manson – https://www.thingiverse.com/thing:2040035
Fan Grille – 120mm, 6 vanes, 4 rings, ASUS logo – https://www.thingiverse.com/thing:2033662
Logo Aguada (Basketball Uruguay) – https://www.thingiverse.com/thing:2012851
FedEx Logo (created for a friend mrtai308) – https://www.thingiverse.com/thing:2012598
Pendants – Dijes / Key hangers – Colgadores de Llaves “Estrella del diablo – Devil star” – https://www.thingiverse.com/thing:2008589
Keychain NO a UBER – https://www.thingiverse.com/thing:2005711
Logo Nirvana – https://www.thingiverse.com/thing:2000093
AntiCumbia Grafitis – https://www.thingiverse.com/thing:1998858
Anti-CUMBIA – https://www.thingiverse.com/thing:1994919
CR7 Nike Logo Design Cristiano Ronaldo (keychain) – https://www.thingiverse.com/thing:1993509
CR7 – Cristiano Ronaldo (keychain) – https://www.thingiverse.com/thing:1993404
Koelner Haie Logo V2 – https://www.thingiverse.com/thing:1984912
Koelner Haie Logo V1 – https://www.thingiverse.com/thing:1984870
Koelner Haie Logo (To the request of a friend) – https://www.thingiverse.com/thing:1984018
Uruguay Natural (keychain) – https://www.thingiverse.com/thing:1982931
Logo JAMES Uruguay – https://www.thingiverse.com/thing:1982855
Logo Conaprole – https://www.thingiverse.com/thing:1982812
Logo Topper – https://www.thingiverse.com/thing:1981807
ASUS – Frontal PC Cover – Standard – https://www.thingiverse.com/thing:1981556
Logo SONY (Taken from original vector) – https://www.thingiverse.com/thing:1981376
Logo Meccano – https://www.thingiverse.com/thing:1981356
Logo 3D MTV – https://www.thingiverse.com/thing:1980111
Flag of Uruguay – https://www.thingiverse.com/thing:1979984
Logo HBO – https://www.thingiverse.com/thing:1905703 -
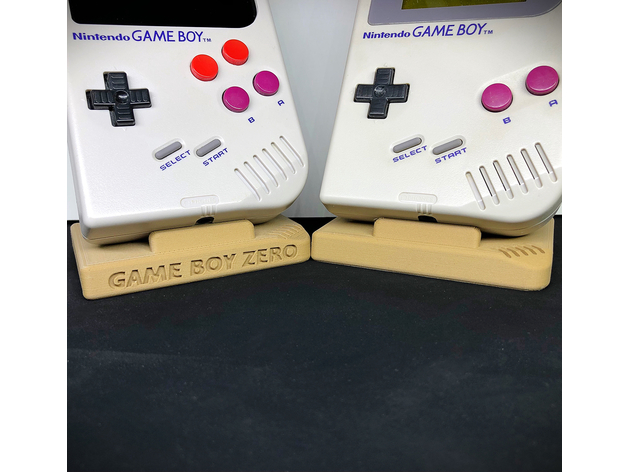
Game Boy Zero and Game Boy (DMG-01) Display Stands 3D Print Model
Summary
I made these for displaying my Game Boy (DMG-01) and Game Boy Zero collection. There are two versions: with and without “Game Boy Zero” text debossed on the front of it. Pretty happy with how it turned out!
You can purchase one printed in wood-fill PLA from here: http://market.sudomod.com/game-boy-display-stand/
For more Game Boy Zero and related stuff check out http://www.sudomod.com.
You can follow me on Instagram to see other things I’m working on: http://www.instagram.com/sudomod_wermy
Print Settings
Printer:
Raise3D N2 Rafts:
No Supports:
No Resolution:
0.15mm Infill:
15% Notes:
Woodfill PLA is my favorite material to use in printing these, but about anything should look nice. -
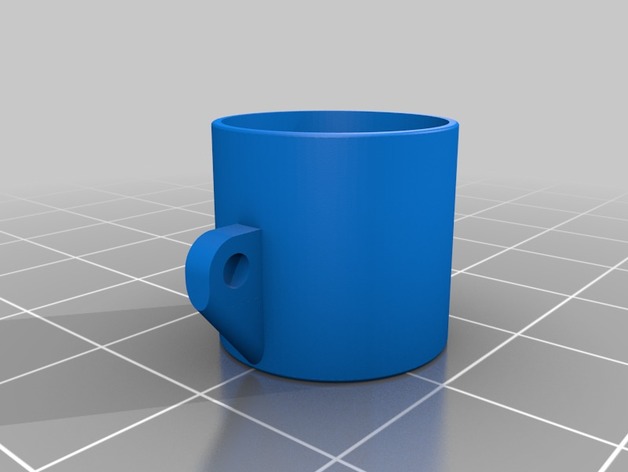
Keychain Chapstick Lid 3D Print Model
Summary
Chaptstick lid with small 2mm keychain hole,
2mm is good for smaller keychain loops, and will not fit larger sizes.
I made this after washing my chapstick in with my clothes one too many times..
15.5mm outside diameter with 14.5mm inside.
14.5mm long in total, with a 2mm(12.5mm total) distance from cap.
Will make one for larger keyhole if requested (:
Print Settings
Printer Brand:
Prusa Printer:
i3 MK2S Rafts:
Doesn’t Matter Supports:
Yes Resolution:
2mm, or 1mm Infill:
none needed, personally I use 20% Notes:
Raft only if you have adhesive problems.
Support if bridging a small hole is problematic.
Infill not typically used in such a small print.
Post-Printing
using a small drill bit, knife, or pen you can clear the support around/in the 2mm hole quite easily.
How I Designed This
DesignSpark Mechanical 2.0, a great free cad software, only one I bothered learning lol. -
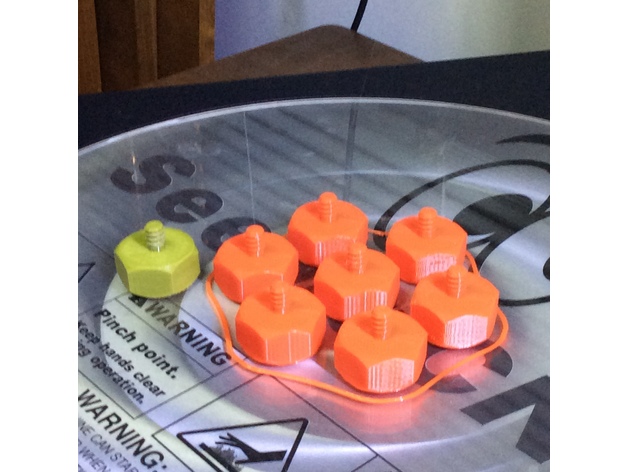
Seemecnc Artemis Box Screws 3D Print Model
Summary
Removable bolts (screws) for the “shiny new” and “industrial strength” Artemis printer. I used the “Nut Job” program and adjusted the parameters as needed. This is the third print on this printer and it is beyond expectations. The following are parameters for Mikes “nut job” scad file.
/ [Bolt and Rod Options] /
//Head type – Hex, Socket Cap, Button Socket Cap or Countersunk Socket Cap (ignored for Rod)
head_type = “hex”;//[hex,socket,button,countersunk]
//Drive type – Socket, Phillips, Slot (ignored for Hex head type and Rod)
drive_type = “socket”;//[socket,phillips,slot]
//Distance between flats for the hex head or diameter for socket or button head (ignored for Rod)
head_diameter = 25;
//Height of the head (ignored for Rod)
head_height = 12;
//Diameter of drive type (ignored for Hex head and Rod)
drive_diameter = 5;
//Width of slot aperture for phillips or slot drive types
slot_width = 1;
//Depth of slot aperture for slot drive type
slot_depth = 4;
//Surface texture (socket head only)
texture = “exclude”;//[include,exclude]
//Outer diameter of the thread
thread_outer_diameter = 6.75;
//Thread step or Pitch (2mm works well for most applications ref. ISO262: M3=0.5,M4=0.7,M5=0.8,M6=1,M8=1.25,M10=1.5)
thread_step = 1.8;
//Step shape degrees (45 degrees is optimised for most printers ref. ISO262: 30 degrees)
step_shape_degrees = 45;
//Length of the threaded section
thread_length = 7;
//Countersink in both ends
countersink = 2;
//Length of the non-threaded section
non_thread_length = 1.8;
//Diameter for the non-threaded section (-1: Same as inner diameter of the thread, 0: Same as outer diameter of the thread, value: The given value)
non_thread_diameter = 5.75; -
Benchy Vehicles 3D Print Model
Summary
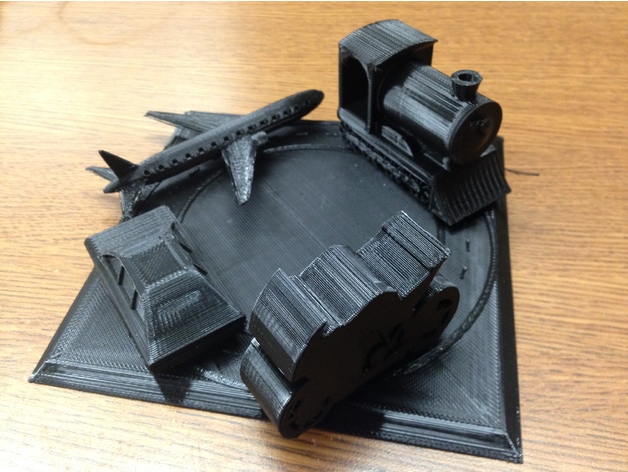
A few of my classmates and I were tasked to design a torture test-type project, and after seeing and analyzing the Benchy Boat, we decided to base our test off of that. Each of us made 1 model; a plane, a train, a car, and a motorcycle.
Plane: High Resolution, Symmetry, Surface Details, Cylindrical Shapes, Overhang Surfaces,
and Bridging
Train: Symmetry, Horizontal Faces, Surface Details, Cylindrical Shapes, and Bridging
Car: Smooth Overhanging Curved Surfaces, Symmetry, Surface Details, Low Slope Surfaces,
Large Horizontal Holes, and Slanted Small Holes
Motorcycle: Symmetry, High Resolution, Surface Details, and Small Horizontal Holes
We also designed a base for all 4 pieces to snap into, which had tested Low Slope Surfaces, First Layer Details, and High Resolution.
There were no major issues in printing, only minor details that show what the printers are capable of. For the plane, the wings were very thin, and didn’t print completely solid. The train only failed slightly with the open part in the back. It was used to test the bridging, and mostly worked, only becoming a little bit stringy. The car was mostly fine, but the details on the license plate were lost, and it was hard to read (it was supposed to say “Benchy”). The bike printed fine, but a few of the horizontal holes weren’t as detailed as they were supposed to be. The base worked, the letters on the bottom printed fine and the base was very solid.
NOTE: We didn’t get a chance to take pictures of the bike. Sorry. -
C Battery Eliminator 3D Print Model
Summary
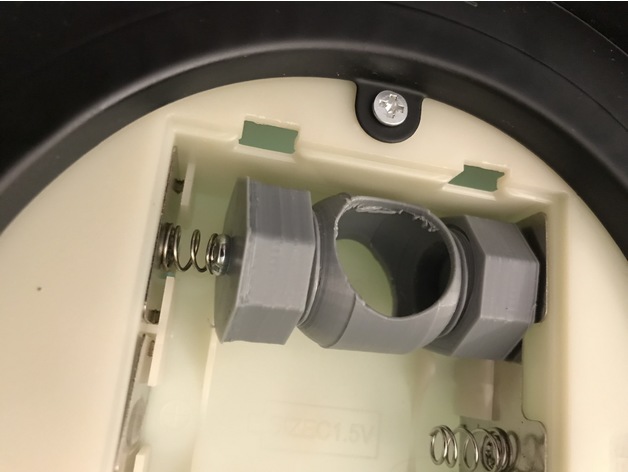
In the past, I’ve had some devices which required C batteries, mostly LED lights. I’d use a large dowel rod and a screw, but with 3d printing no need to get the dowel…
Using these devices for auxiliary lighting could continue to use quite a few batteries. My lamp, for example, requires 3 C batteries, at 1.5 volts each equals 4.5 volts, or close enough to use a USB 5v power supply. Even with multiple batteries, many of these devices wire the batteries in series, so you only need to make two connections, one to the positive, and one to the negative side.
To attach the wire (to both sides, I’m using an M3 12mm screw with a nut
To replace one battery print one body and two caps (one for each end). The bottom of the body I added a removable circle to assist with bonding to the build plate.
I’d recommend printing in high-quality mode, I didn’t need supports or rafts. 20% infill worked fine for me.
Print Settings
Rafts:
No Supports:
No Infill:
20 -
Pegboard Holder 3D Print Model
Summary
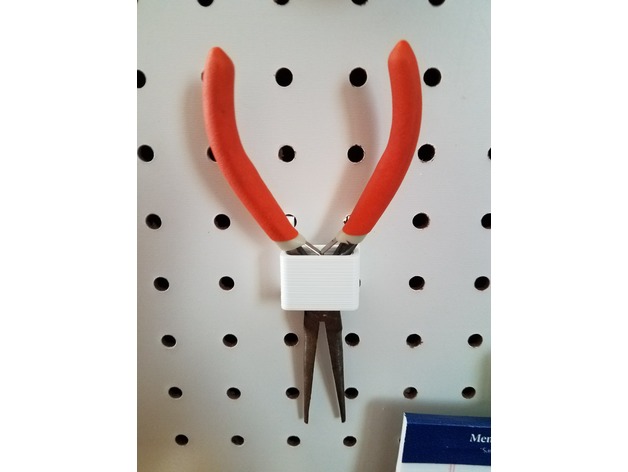
This holder can fit on most pegboard. It is able to hold calipers, wrenches, scissors, needle-nose pliers and so much more.
Print Settings
Rafts:
No Supports:
Yes -
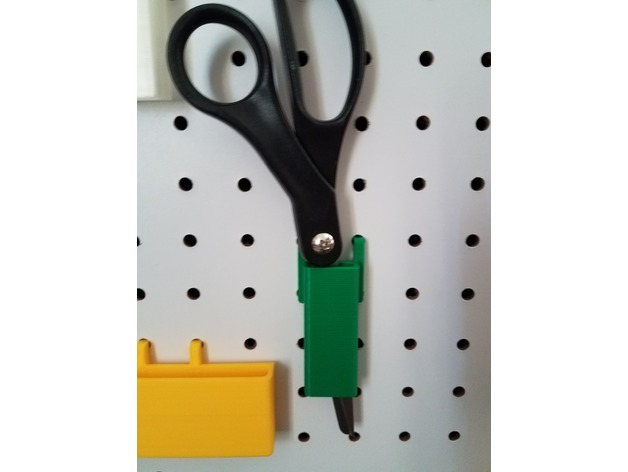
Long Pegboard Holder 3D Print Model
Summary
This Pegboard holders is longer to keep scissors, long wrenches, calipers and more straight
Print Settings
Rafts:
No Supports:
Yes -
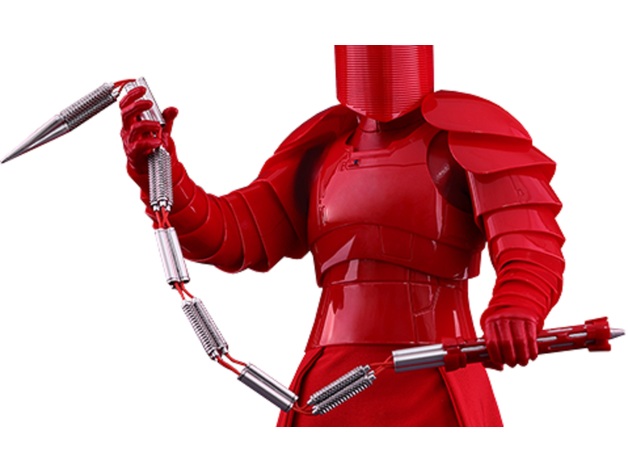
Praetorian Whip/Sword 3D Print Model
Summary
Praetorian Guard whip Sword. Work in progress the handle is coming soon -
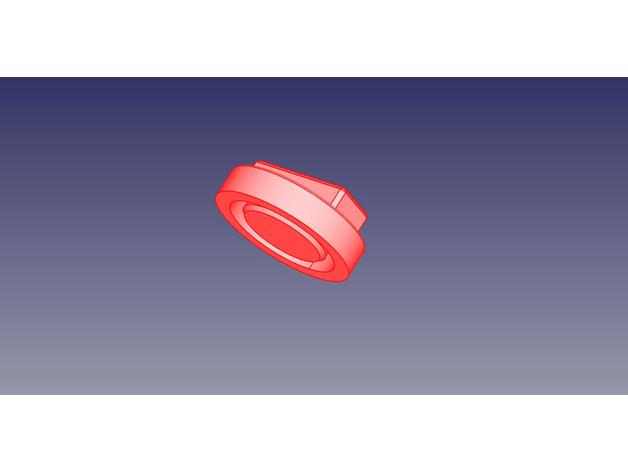
BMW Jack Pad for Walmart Torin 2-Ton Hydraulic Trolley Jack 3D Print Model
Summary
I don’t know if this is going to work,use it at your own risk,if it works,please let me know. -
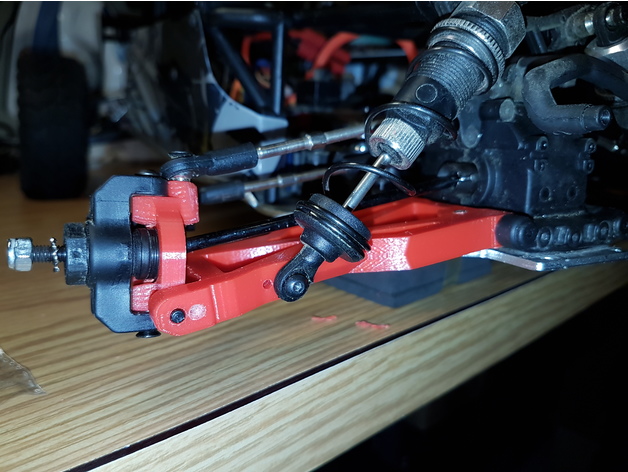
Vandal/Desert Fox Steering Knuckle 3D Print Model
Summary
I bought a Hobbyking Desert Fox buggy for my son… and then a Quanum Vandal for myself,
While out doing donuts in the snow my son struck something and broke the lower control arm and steering knuckle. The parts are backordered and experience tells me that they may be months off…. so I decided to design my own replacement part.
This part should fit the Desert Fox and Vandal… as well as a few other makes/models (VTX)
Print Settings
Printer:
Malyan M150 Rafts:
No Supports:
Yes Resolution:
0.1mm Infill:
Solid (100%) Notes:
I printed this part with the upper control arm boss on the bottom.
My M150 had trouble printing the supports for the sides of the boss, but I let it run and it came out as a usable part.
The PLA is holding up so far.
Post-Printing
I drilled out the control-arm pin hole to suit the pin and the other three holes I drilled and tapped to 3×0.5 to suit the existing bolts.
How I Designed This
I designed this part in AutoCAD 2007.
Tried to stay as close to the original part as possible. -
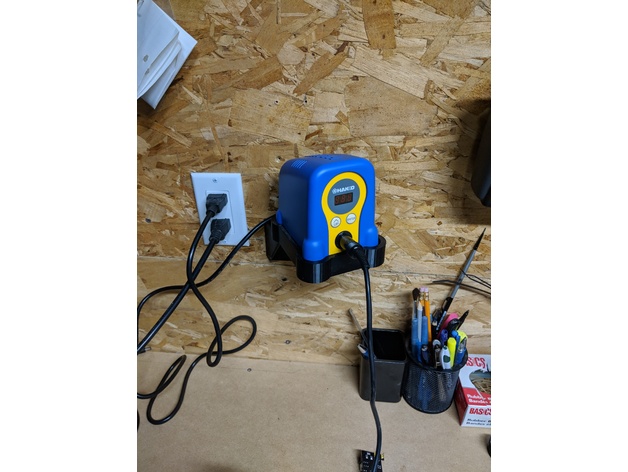
Hakko FX-888D support 3D Print Model
Summary
I made this to hang my Hakko soldering station to clear space on my bench. The support have a 30 degrees angle from the wall. -
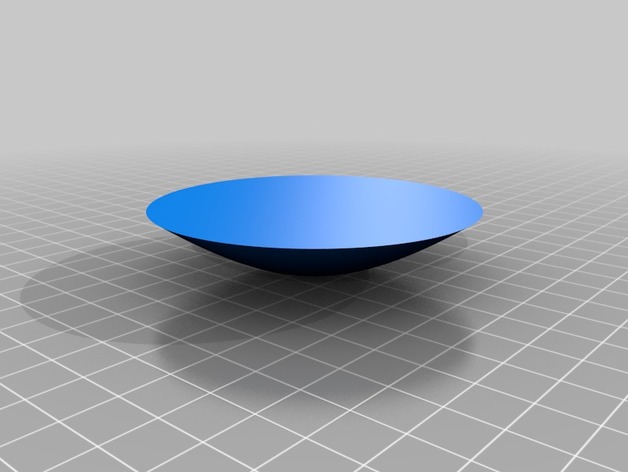
hyperbolic solid 3D Print Model
Summary
This is a hyperbolic curve rotated around its transverse axis to make a solid.
Both horizontal and vertical shapes are in the OpenSCAD script.
Horizontal gives the desired results with rotate_extrude, but the vertical axis shape is fun and possibly useful.
This solid was designed to be part of a multi-reflector cassegrain style antenna design for 122GHz amateur radio inspired by Paul Wade W1GHZ’s writeup. Link below!
Find out more about the 3D printable 122GHz antenna system at:https://github.com/Abraxas3d/122GHz
And here is Paul Wade’s writeup:http://www.w1ghz.org/antbook/conf/Multiple_reflector_antennas.pdf
How I Designed This
OpenSCAD Script
//Hyperbolic Solid in OpenSCAD
//by Michelle Thompson @abraxas3d
//A hyperbola is the set of all points where the difference
//in the distance from intstwo fixed po is a constant.
//What we are after here is the positive half of a hyperbola.
//We then rotate it around its transverse axis in order
//to make a hyperbolic surface.
//This hyperbolic surface is then 3D printed in order to
//provide a prototype subreflector for a microwave cassegrain
//antenna system for radio experimentation.
//equation for a hyperbola is (x^2)/(a^2) – (y^2)/(b^2) = 1
// x = a sec(angle)
// y = b tan(angle)
// angle varies from 0 to pi/2
//a and b are the dimensions of the box that defines the
//asymptotes of the hyperbolic curve.
a = 40; //affects height of the vertex above origin and how tall shape ends up.
b = 40; //radius
//resolution variable in OpenSCAD. Higher numbers mean smoother surface.
$fn = 200;
max_angle = 45; //affects how tall the shape ends up.
angle_resolution = 0.5;
//granularity should match the length of the polygon vector
//before we add the two finishing points that complete a closed curve.
granularity = max_angle/angle_resolution;
//Depending on the behavior desired, one might want either
//a vertical or a horizontal hyperbolic curve.
//choose which one here.
//set horizontal to true for horizontal (creates the right shape when rotated).
//set horizontal to false for vertical (creates an interesting shape when rotated).
horizontal = true;
//For horizontal case:
//we are defining functions that make a vector of points.
//each point is a vector in and of itself in the form [x,y]
//the vector of points follows a horizontal hyperbolic curve.
//the independent variable is the angle from 0 to max_angle.
//we use concat() to build the vector of points as long as
//we do not exceed the max_angle. we increment by angle_resolution
//and then calculate a new set of points.
//secant is the reciprocal of cosine
function horiz_hyper(angle) = angle < max_angle ? concat([[btan(angle), a(1/(cos(angle)))]], horiz_hyper(angle + angle_resolution)) : [];
//For vertical case:
//we are defining functions that make a vector of points.
//each point is a vector in and of itself in the form [x,y]
//the vector of points follows a vertical hyperbolic curve.
//the independent variable is the angle from 0 to max_angle.
//we use concat() to build the vector of points as long as
//we do not exceed the max_angle. we increment by angle_resolution
//and then calculate a new set of points.
//secant is the reciprocal of cosine
function vert_hyper(angle) = angle < max_angle ? concat([[ a(1/(cos(angle))) , btan(angle)]], vert_hyper(angle + angle_resolution)) : [];
if (horizontal == true) {
//we have a hyperbolic curve, but it needs to be closed so
//that we can turn it into a polygon and then rotate to get a solid.
//uncomment this block for checks
/*
//check the length of the vector
echo(len(horiz_hyper(0)));
//check the last entry
echo(horiz_hyper(0)[granularity – 1]);
//check the y value from the last set of points.
echo(horiz_hyper(0)[granularity – 1][1]);
//check entire list of points.
echo(horiz_hyper(0));
*/
//get the y value from the last set of points.
replace_horiz = horiz_hyper(0)[granularity – 1][1];
//add two points to the curve to close it, using concat().
//first, stay at current y value, but set x to zero so that
//we come across to the y axis to make the top of the polygon.
//then, drop straight down to where we started.
full_set_horiz = concat(horiz_hyper(0), [[0, replace_horiz]], [[0,a]]);
//show the polygon we created.
/
translate([0, 0, 0]) polygon(full_set_horiz);/
//use rotate_extrude to rotate the 2d polygon and make it a 3d shape.
//translate moves it to origin. Set -a to 0 if you want it to be at
//its calculated position!
translate([0, 0, -a]) rotate_extrude(angle = 360, convexity = 10) polygon(full_set_horiz);
} else {
//we have a hyperbolic curve, but it needs to be closed so
//that we can turn it into a polygon and then rotate to get a solid.
//uncomment this block for checks
/*
//check the length of the vector
echo(len(vert_hyper(0)));
//check the last entry
echo(vert_hyper(0)[granularity – 1]);
//check the x value from the last set of points.
echo(vert_hyper(0)[granularity – 1][0]);
//check entire list of points.
echo(vert_hyper(0));
*/
//get the x value from the last set of points.
replace_vert = vert_hyper(0)[granularity – 1][0];
//add two points to the curve to close it, using concat().
//first, stay at current x value, but set y to zero so that
//we come across to the x axis to make the top of the polygon.
//then, drop straight down to where we started.
full_set_vert = concat(vert_hyper(0), [[replace_vert, 0]], [[a,0]]);
//show the polygon we created.
/
translate([0, 0, 0]) polygon(full_set_vert);/
//use rotate_extrude to rotate the 2d polygon and make it a 3d shape.
rotate_extrude(angle = 360, convexity = 10) translate([0, 0, 0]) polygon(full_set_vert);
} -

Carrying Handle 3D Print Model
Summary
This handle is large enough for a large hand size. This is my first design so if it is a little wonky I am sorry. -
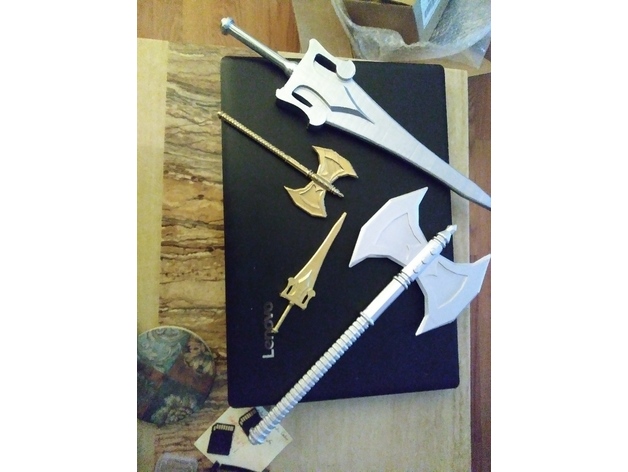
HE-MAN BATTLE AXE 3D Print Model
Summary
THIS IS OUR VERSION OF HE-MANS BATTLE AXE BASED ON THE 80s ACTION FIGURE & CARTOON. WE HAVE CHALLENGED OURSELVES TO DO 3 NEW DESIGNS, PRINT & POST VIDEOS ON YOUTUBE A WEEK IN 2018. WE WILL BE PUTTING THEM UP HERE WITHIN COUPLE WEEKS OF VIDEOS P’OSTING. IF YOU LIKE THIS MODEL PLEASE CHECK OUT OUR YOUTUBE CHANNEL “A SKEWED VIEW 3D” SUBSCRIBE & RING THE BELL AS WE WILL HAVE ALOT OF CONTENT COMING OUT THIS YEAR. EVENTUALLY WE WILL BE DOING PROP SIZE VERSIONS OF OUR MODELS BUT AS IT IS TAKEN ALL OUR TIME TO DO 3 NEW ONES A WEEK THAT WILL BE DOWN THE LINE. THANK YOU FOR YOUR INTEREST & HAVE A WONDERFUL DAY. GOD BLESS
Print Settings
Notes:
WE DO NOT ASSUME TO TELL ANYONE HOW BEST TO PRINT ON THEIR PRINTERS. PRINT HOWEVERS BEST FOR YOU TO WHATEVER SCALE YOU WANT IT AT. WE USUALLY PRINT AT 200 MICRONS WITH SPEED BETWEEN 60-80MM -

iPhone 8 Plus Bumb Case with Two Wolves Howling to Apple 3D Print Model
Summary
Case Bumper for an iPhone 8 Plus with the design f two wioves howling.
Print Settings
Printer Brand:
Prusa Printer:
i3 MK2S Rafts:
Yes Supports:
No Resolution:
15 mm Infill:
20 mm -
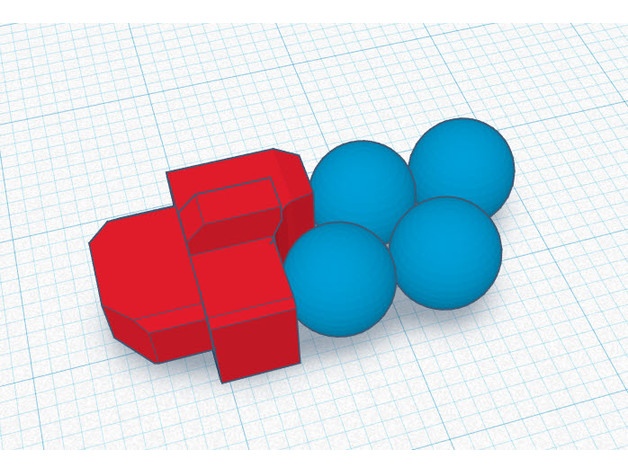
BB follower for Celcius AKM magazine 3D Print Model
Summary
Basically, this BB follower is designed for Celcius AKM magazine and it is good to bolt stop function enhancement. After print, you don’t need to modify it, but it is depend on print quality. Before assembly, please test compatibility of the follower. -

Mmagnetic holder Li-Ion battery 18650 3D Print Model
Summary
Magnetic holder
holder: Li-Ion battery 18650 – 3 pcs.
magnet: D 8 (mm) x h 3 (mm)
PLA / ABS
0.2 mm -
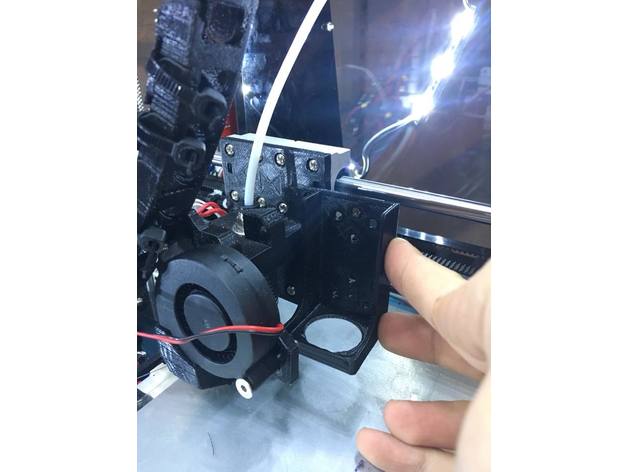
Anet A8 Laser bracket / Mount (Fits to E3D bracket) IN PROGRESS 3D Print Model
Summary
Anet A8 Laser bracket / Mount (Fits to E3D bracket) IN PROGRESS
I bought an laser to mount on my Anet a8.
But than i would need to take of my hotend, and recalibrate it every time.
Therefor i designed this bracket which i can mount next to my E3D V6.
I made this one for my 2.5W laser. -
Replacement Piano Key 3D Print Model
Summary
This is the Sharp Or Flat Key to a toy piano. We bought it at a thrift store for $3 it needed two keys, the replacement works great. -
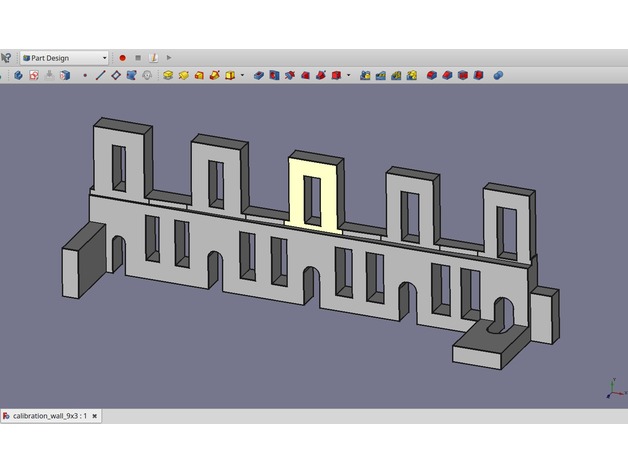
Calibration Wall 9×3 mm 3D Print Model
Summary
This part has tabs and holes.
The center tab of the row of 5 is supposed to be exactly 9×3 mm in size. Same for the hole in this tab. The two tabs to the left and to the right are smaller and bigger with increments of 0.2mm. The holes to the left and to the right have increments of 0.1mm.
There are three extra tabs down on the build plate, all of them exactly 9×3 but in different orientations.
If you print two, try one of the 9x3mm tabs to fit in the holes. You will see if your printer generates holes too small or too big. If so, chances are that walls are also too thin or too fat.
In Cura the parameter to compensate for this is called ‘horizontal expansion’. A negative value is needed, if holes are too small.
This test assumes that scaling is already correct. E.g. a 100mm rod is 100mm long. Plus minus a few tenths of a mm.
If you only print one, you can easily break away one of the three outer tabs, or cut away one end. -
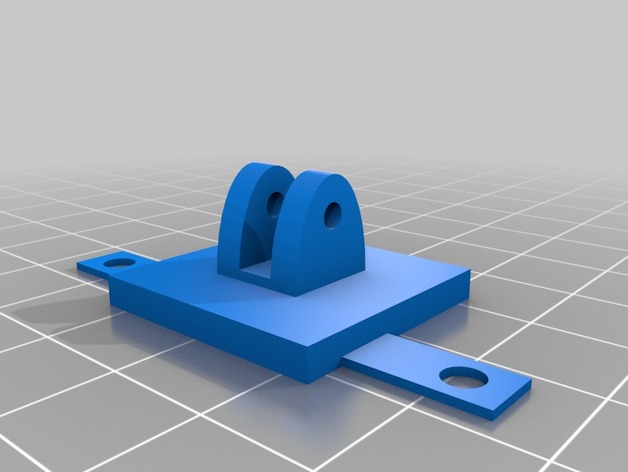
Lulzbot Mini Raspberry Pi V2 Camera Mount 3D Print Model
Summary
I used the files from Pschwamb to help develop a way to mount my Raspberry Pi Camera V2 inside my Lulzbot Mini. I added some mounting tabs on his base that fit the whole spacing on the mini. I have uploaded pictures of the camera installed. I ran the ribbon cable thru the small window on the left side of the machine. I am also added a screenshot of the camera view it gives. I should note that for the screenshot I am also using my LED light I have uploaded on thingiverse if you are interested in having some light inside the machine.
Print Settings
Printer Brand:
LulzBot Printer:
Mini Rafts:
Doesn’t Matter Supports:
Doesn’t Matter Resolution:
0.2 Infill:
30% -
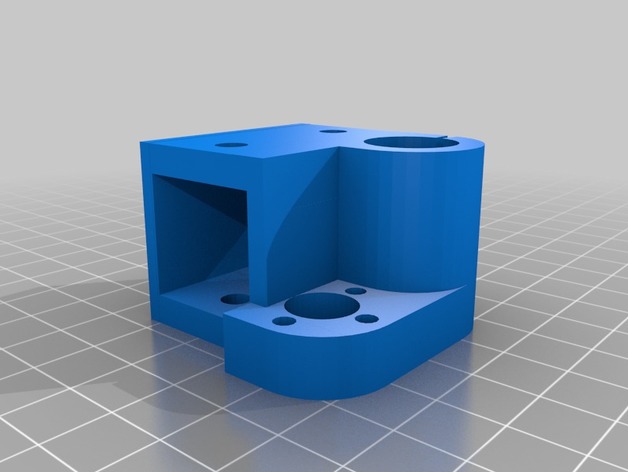
AM8 Z Axis Single Bearing 3D Print Model
Summary
I’ve broke a few of these trying to slide it onto the 2020 v-slot extrusion. The back of it also rubs against the 2040 vertical extrusions. I removed some of the material from the inside to allow it to slide onto the 2020 easier and removed some from the back so it didn’t rub on the 2040 vertical extrusions.
Mirror the part for the opposite side.
Print Settings
Printer:
AM8 Rafts:
No Supports:
No Resolution:
.2 Infill:
80% -
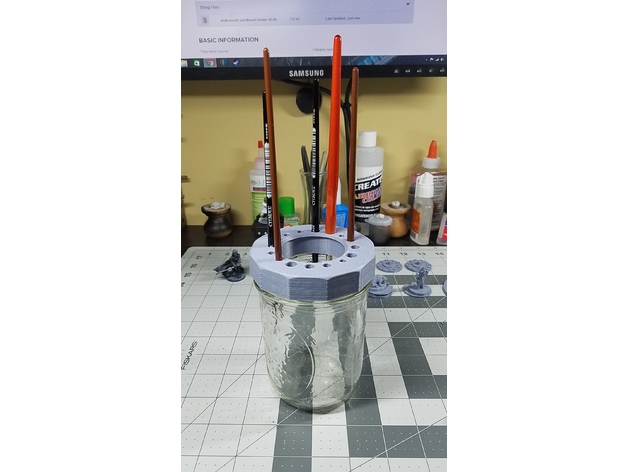
MASON JAR PAINTBRUSH HOLDER 3D Print Model
Summary
Idea taken from GW’s water pot — Designed to wash your brushes in, the water pot uses a widemouth mason jar and features a lid which holds up to 16 brushes of various sizes, allowing them to rest in the water without flattening and bending their bristles on the bottom of the pot.
Print Settings
Printer:
SINDOH 3DWOX DP200 Resolution:
.2 -
BMW 6 Series (F06) RedBull Adapter 3D Print Model
Summary
This is an adapter for the BMW 6 Series (F06) cup holder so it will fit a normal RedBull can it also includes a BMW logo inside 😉
Print Settings
Printer Brand:
Prusa Printer:
Prusa Mk2 Rafts:
Doesn’t Matter Supports:
Doesn’t Matter Resolution:
I printed at 0.2mm layer height Infill:
I printed at 20% infill -
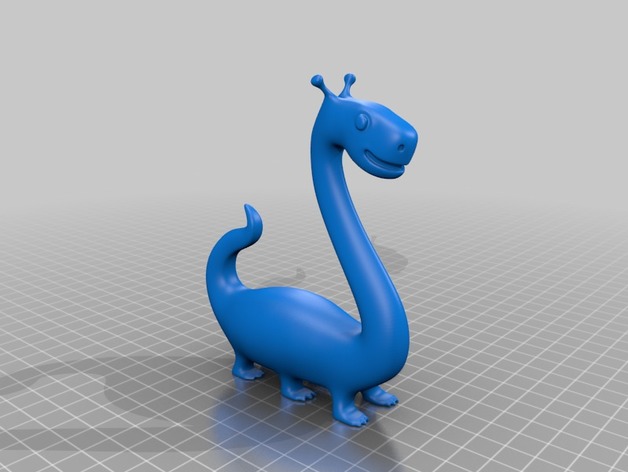
Nessie – Cute Loch Ness Monster 3D Print Model
Summary
Nessie – Cute Loch Ness Monster.
Sculpt Practice in Blender. -
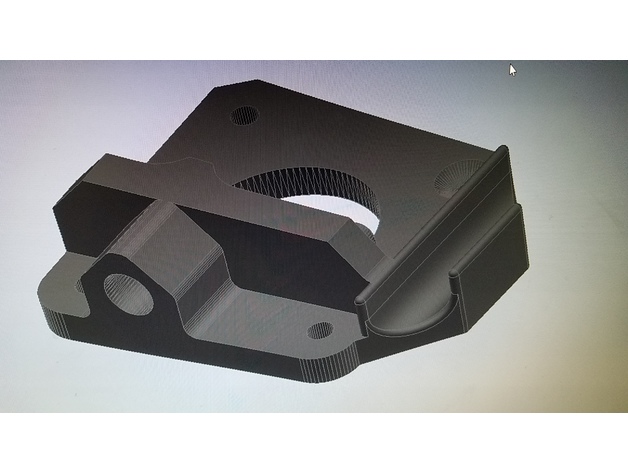
Extruder_Bracket_PTFE_Insert_Remix 3D Print Model
Summary
This is joshvv’s original with a simple wire holder added. -
Dodge Charger Galaxy S8 Otterbox Defender Phone Holder 3D Print Model
Summary
So I got sick of my phone not having a place to sit in the car. I tweaked the heck out of the awesome design that TTTurner68 did. I will update after I print it out.
It should allow you to slide the phone in from the front, built it in 5 pieces to allow it to breakaway neater and fit together solidly. It should work on 2015-2017 Dodge Chargers at the very least and sits solidly in the whatever that thing is next to the gear shift.
Please feel free to comment, critique, remix. I’m still learning this and can use all the input I can get. -
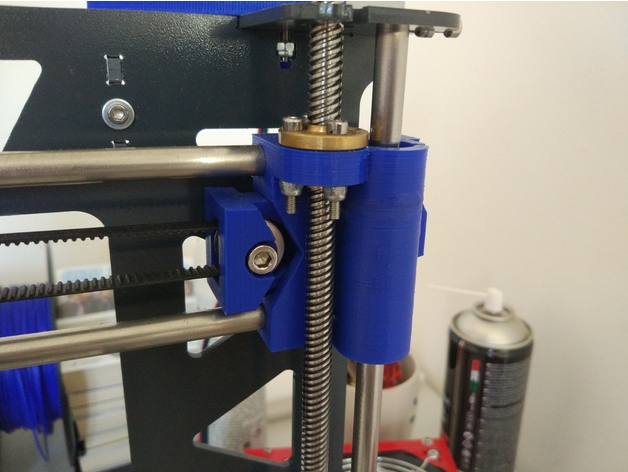
Prusa Steel X axis with tensioner and 8mm leadscrew support 3D Print Model
Summary
This X axis for the Prusa steel frame features a convenient single screw belt tensioner and supports 8mm leadscrews.
You need some M3 screws and nuts to mount the leadscrew nuts in place, a M4 screw and nut for the tensioner and a M5 screw and nut for the toothed idler, I use a cheap aliexpress toothed idler with a M5 bore.
Prints without supports.
Print Settings
Printer Brand:
Prusa Printer:
Prusa Steel Rafts:
Doesn’t Matter Supports:
No Resolution:
0.3-0.25 Infill:
25-30% -
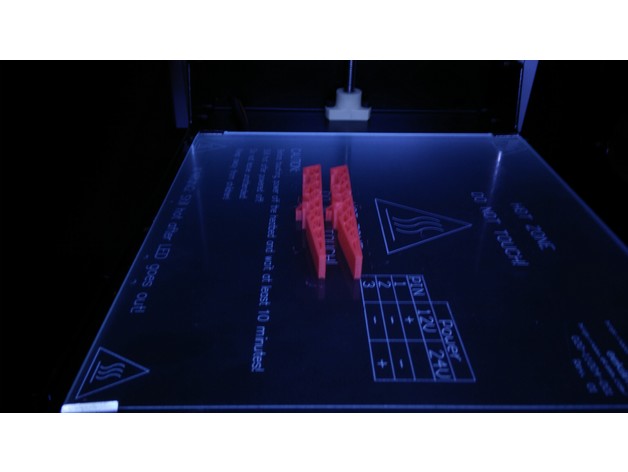
Clothes peg 3D Print Model
Summary
I guess it would have been cheaper to buy new clothes pegs, but I wanted to reuse the spring, so I 3D-printed it. -
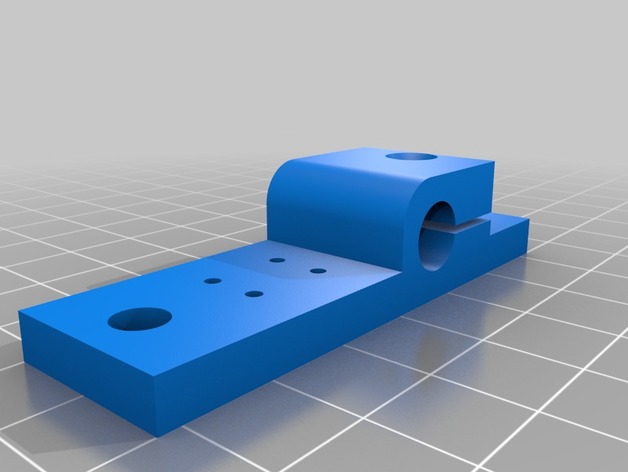
Y axis completely 3D Print Model
Summary
This is a complete construction of the Y axis on the 40×20 nut 5 A profile. The motor is a NEMA 17 with 22 mm flange, dimensions 42.3×42.3×39.2 mm, without shaft. The shaft is 22.6 mm long and has Ø 5 mm. The assembly mountet with M5x12mm screws 12 pieces, M3x12mm countersunk screws 4 pieces (motor mount), M3x24mm 1 piece and 2 self-tapping screws Ø2mm x10mm 2 pieces. The assembly of the motor must be carried out after mounting the mounting on the A-profile.
This is a very compact design that does not need any extra parts when using hot bed mount ANET and other 3D printers.
The idea of the development was, as economical as possible, to use the space and get by with a few parts. -
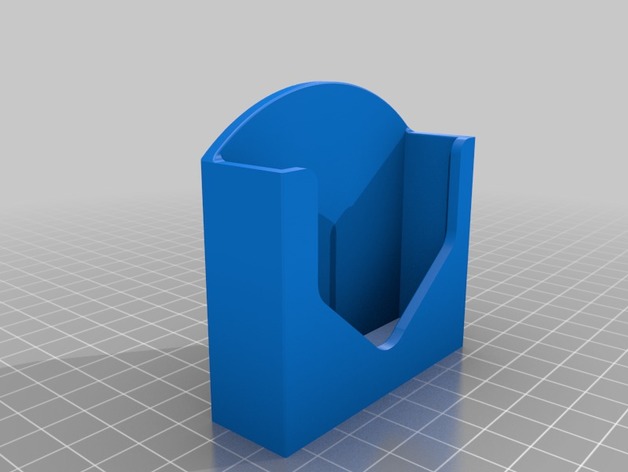
HK Diversity Receiver Mount to Ground Station Power Supply 3D Print Model
Summary
Bought Hobby King ground station power supply with HK Diversity Receiver
Power supply comes with two mounting brackets for single receiver and none for diversity one.
So I made one. Will post picture when printed. -
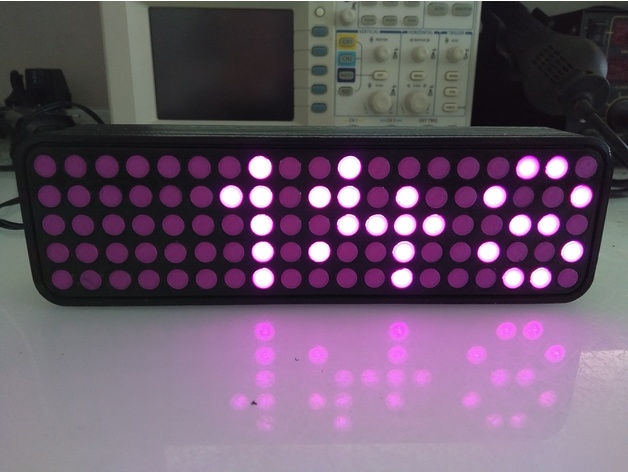
LOL Clock redesign 3D Print Model
Summary
This is a remake of robaux’s LOL Clock (https://www.thingiverse.com/thing:2219658). A new back piece 18mm thinner than the original has holes for the power socket and buttons.
A new circuit design has been done that uses two LED constant current drivers and five MOSFETs row drivers. There are two PCBs. One to hold all the LEDs (board is cut in half so that it can go in the case) and the second board holds the Arduino Mini, DS1307 RTC, DC-DC Buck convertor, Constant current LED drivers/shift registers and some buttons to set the time.
All Eagle files and Arduino sketch have been included along with the new back STL file. I made my boards using the toner method. The board contains SMD components because that is what I had on hand.
……………………………
To set the time:
Press the MODE button, the hours will flash 5 times a second
Use the UP and DOWN buttons to set the hours
Press the MODE button, the minutes will flash 5 times a second
Use the UP and DOWN buttons to set the minutes
Press the MODE button and the normal time mode is shown. (denoted by the colon separator flashing once a second). -
Jupiter 3D Print Model
Summary
Hello fellow space travelers
Here is a 140mm diameter Jupiter. Enjoy!
Print Settings
Printer:
Maker Select V2 Rafts:
Yes Supports:
No Resolution:
.02mm Infill:
100% Notes:
I would recommend a raft since there is not much surface area on the printbed.
You may need to add supports at the very bottom depending on how well your printer handles overhangs.
Post-Printing -
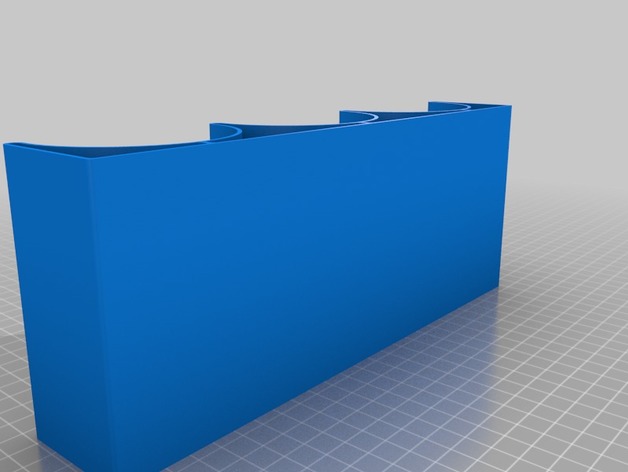
Beer Bomber Holder (Horizontal) for Shelves 3D Print Model
Summary
Scared Sh*tless that your precious cellar beers are going to decide to roll off the shelf one day, well preemptively maximize their entropy with this horizontal beer caddy. Also good for tight spaces in the fridge. 3″ diameter and 4″ long, meant for 22oz bombers but can hold anything smaller obviously.
Print Settings
Printer:
D300VS Rafts:
Yes Supports:
No Resolution:
0.2 / 0.4 mm h/w Infill:
100% with 3 loops -
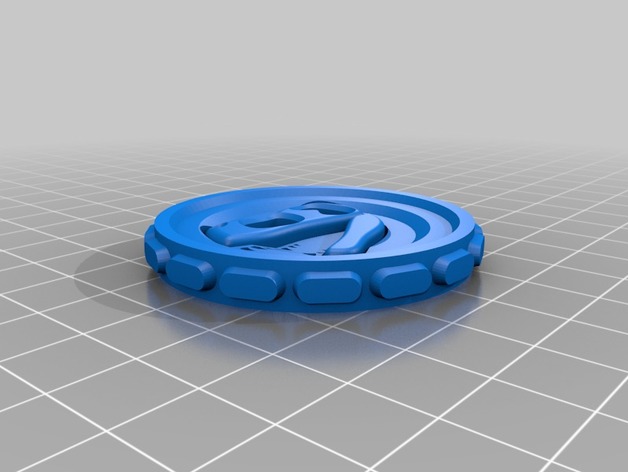
DinosaurNothlit’s Maker Coin 3D Print Model
Summary
It’s my maker coin. It’s the thing I use to test filaments and such. I don’t really care if other people use it (why else would I post it here, after all?), but it’s worth noting that it’s a lot more fun to design your own! -
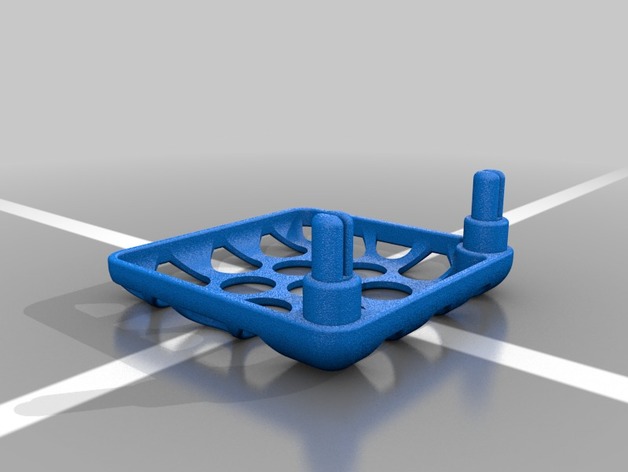
40mm Fan Grille 3D Print Model
Summary
Fan shroud for a 40mm fan. After destroying two fans I decided it was time to protect the third one. -
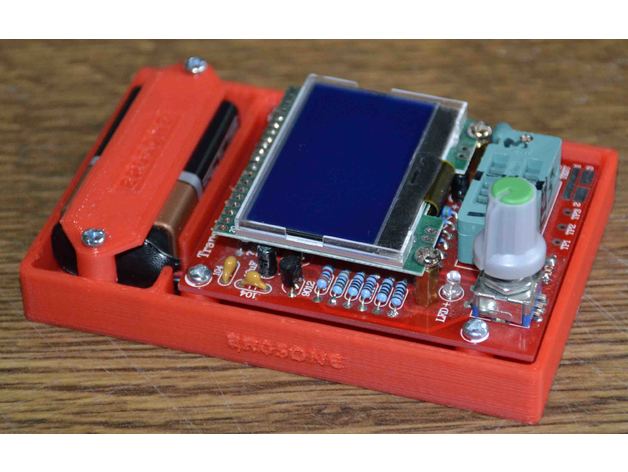
Component tester mounting for type: Hiland DIY M12864 3D Print Model
Summary
Requires to drill and tap to M3
4 off M3 x 10mm screws
2 off M3 x 15mm screws
OR
Small self tappers
Printer Anet A6
200 degrees nozzel, 50 degrees bed
50mm/sec speed, infill 20%, print flat side down.
Print Settings
Printer:
Anet A6 Rafts:
Doesn’t Matter Supports:
Doesn’t Matter Resolution:
.2 Infill:
20% -
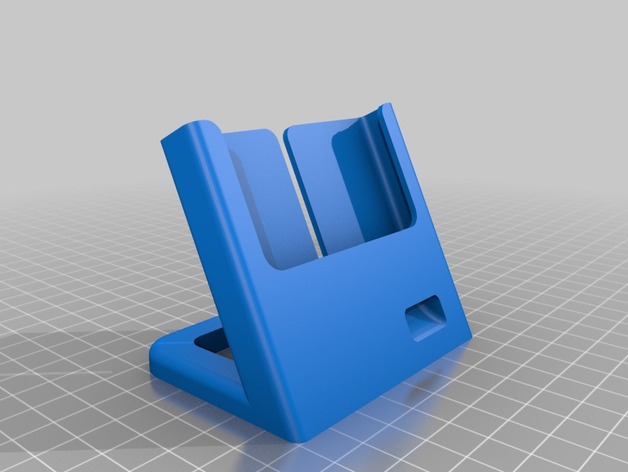
iPhone6 dock for Fairtec cable and Tech21 cover 3D Print Model
Summary
Created an iPhone6 dock that is compatible with Fairtec charging cable and Tech21 cover.
Print Settings
Printer:
Creality CR10 Rafts:
No Supports:
No Resolution:
0.2mm Infill:
20% -
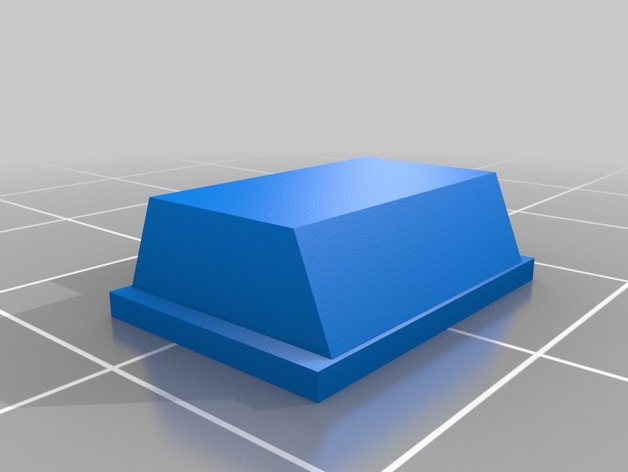
Clip for AT&T Slimline phone 3D Print Model
Summary
This replaces that little clip that both ensures the phone hangs up and holds it to the wall. It’s easy to break off the little nub that the phone hangs on. -
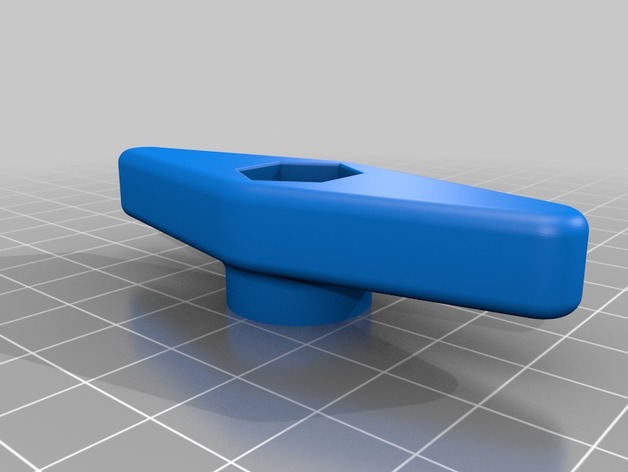
M8 Handle 3D Print Model
Summary
M8 Handle. Enjoy
Print Settings
Rafts:
Doesn’t Matter Supports:
Doesn’t Matter Resolution:
.1 > .2 Infill:
35% > 100% -
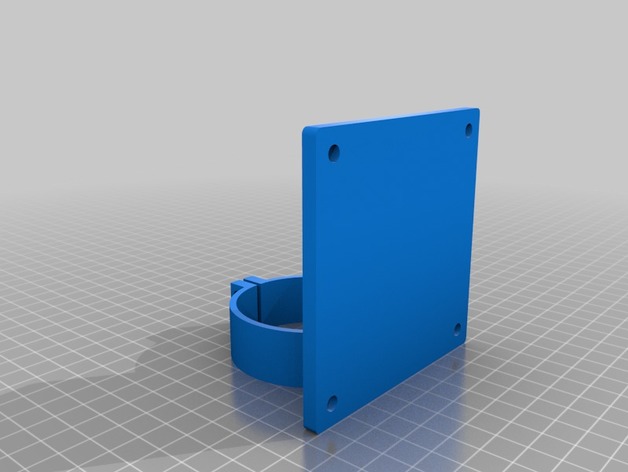
VESA Poll Mount 3D Print Model
Summary
This is a VESA poll mount for 56mm / 2.18″ poll and 75 or 100 VESA plates. It was built for to hang my Intel NUC computer on the back of my display. -
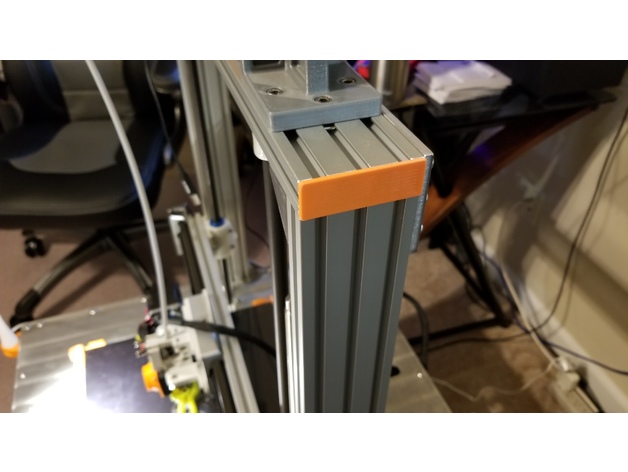
Aluminatus Extrusion End Covers 20mm x 60mm 3D Print Model
Summary
Removed the lines and made it smooth on the outside.
Printed in ABS
.2 Layer height -
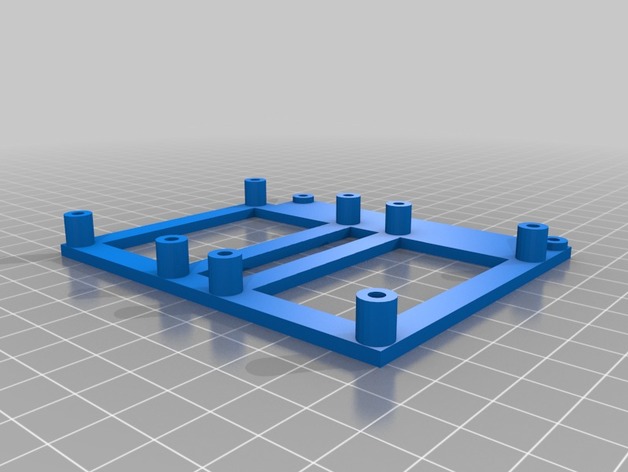
yet another Dual DMOS holder 3D Print Model
Summary
Another Dual DMOS holder for the bigger DMOS Version like this: https://www.amazon.de/gp/product/B0714JXQT7/
fits into existing holes -
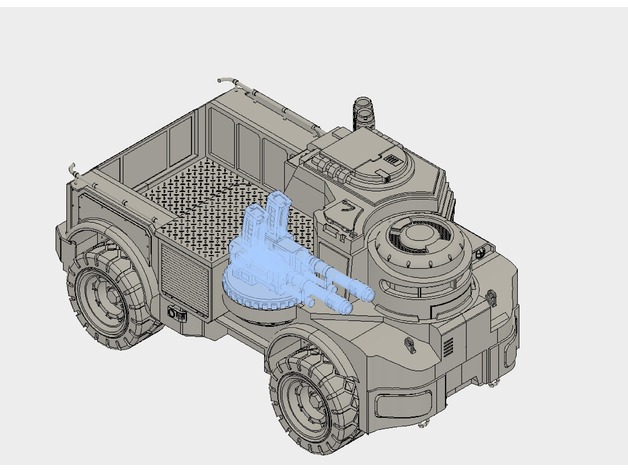
Twin-linked autocannon for Genestealer Cults Galyat Truck 3D Print Model
Summary
Weapon option to the Genestealer Cults Galyat Truck available at https://www.thingiverse.com/thing:2736962
Print base, cannon 1 and cannon 2 for the complete assembly. -
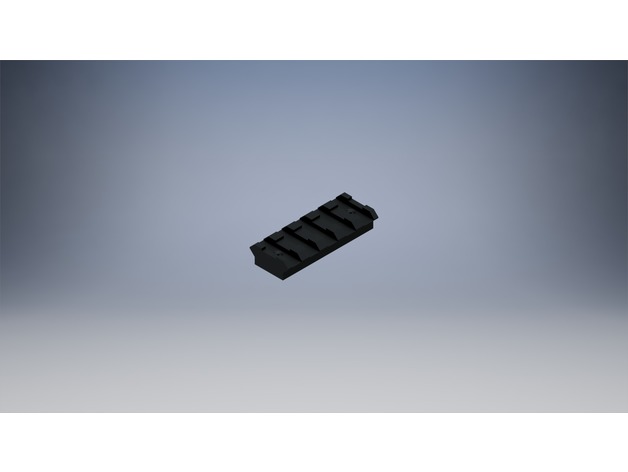
Nerf top mount rails 3D Print Model
Summary
Nerf top mount rails… should be compatible with Worker mod top mount rails
e.g. https://www.amazon.com/Worker-15-Slot-Picatinny-Mount-Printed/dp/B0767G117B/ref=sr_1_8 -
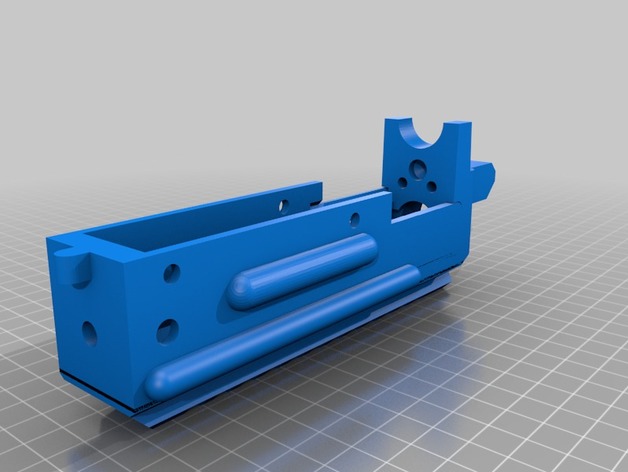
Ruger 10/22 Dummy Receiver (PROP) 3D Print Model
Summary
This is only a prop and does not work on a real firearm. I’m using it on a futuristic looking prop gun.
!Don’t forget to CHECK OUT my other designs and FOLLOW my daily KooKoo uploads, Enjoy 😉 -
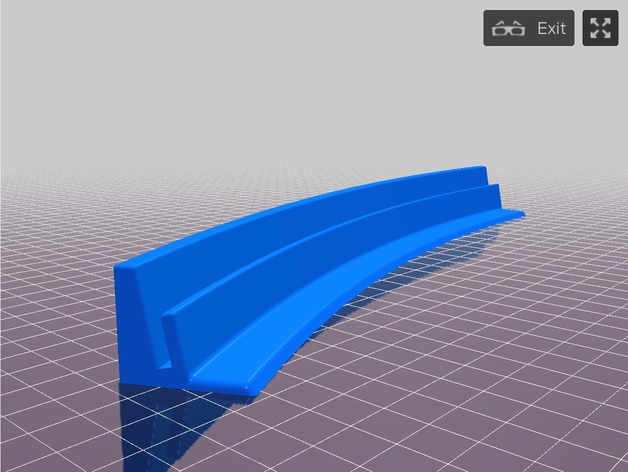
Playing Card Holder 3D Print Model
Summary
This handy holder sits nice and stable and will hold up to 20 (15-17 average) playing cards depending on size. With its subtle curve and slight rear tilt, it holds the cards at an optimal angle and keeps your hand out of view of prying eyes. I use these for playing “Tick” or “Arizona Rummy”. -
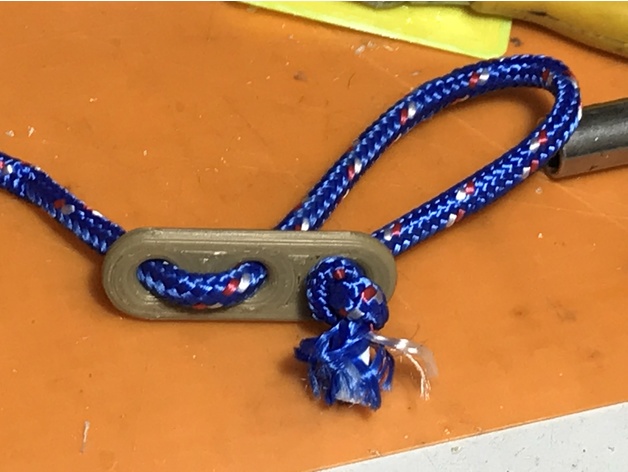
Geoffs Tent Rope /Guy wireTensioner 3D Print Model
Summary
simple – but very useful, print 1 or a set of 12 -
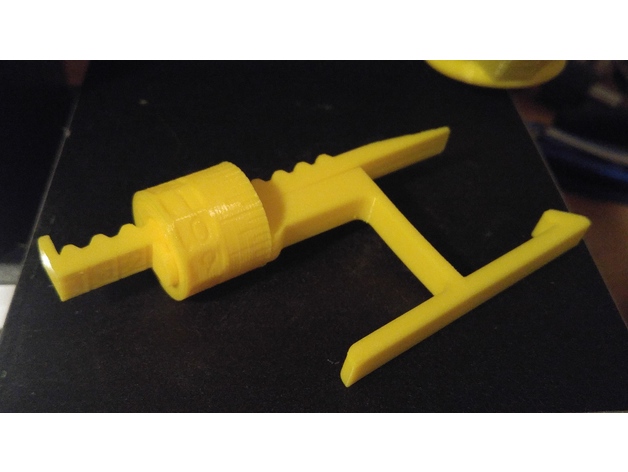
MPSM Fully Adjustable Z Spacer (MP Select Mini) 3D Print Model
Summary
Fully Adjustable Z Spacer
MP Select Mini
By Wiley Kyoto
This Z spacer is designed to give you continuous adjustment from 1mm to 5mm. If you want to switch between the stock bed and glass bed, you don’t have to adjust your print bed and then re-level it. If the beds already level, just adjust the spacer for the change in height to account for the glass thickness. Also If you change nozzles, the new one might be slightly longer or shorter, so just adjust the Z offset accordingly. I gave the Bracket a slight bend so it keeps constant pressure to hold it firmly in place.
My Print Setup:
PLA
210/60C
No Supports
0.175mm Layer Height
1.4mm Wall Thickness
1.05mm Top and Bottom Thickness
Orientation – Lay the AdjArm and Bracket flat on their sides. Put the AdjDial on one of the flat ends (I had numbers near the top).
Assembly:
Put the AdjDial on the Bracket, in the groove next to the indicator mark, with the numbers closest to the outside edge.
Insert the sloped edge of the AdjArm through the AdjDial, with the threads of the AdjArm facing away from the Bracket.
Keep pressure pushing the AdjArm into the AdjDial as you start to turn the AdjDial clockwise. Keeping in mind that the thread is reversed thread, such that turning the AdjDial clockwise will wind the AdjArm farther in.
Set the AdjDial to roughly the right spot (See Reading the Dial).
Make sure the head position of the printer is a good couple centimetres in the +Z direction, to prevent damage to the Z limit switch.
Insert the assembled spacer through the vertical slot in the back of the printer tower, snapping it into place on the Z Bearing Block(Black Plastic Block with metal rods running vertically through it), which you can see through the vertical slot. You should hear and feel a solid click as it snaps securely into place, pushing forward firmly on the top lever of the spacer should help it snap into place.
Make final adjustments the the AdjDial but homing the printer and checking the fit with a piece of paper under the nozzle.
Reading the Dial:
Note – the readings won’t have absolute accuracy as it depends on the exact placement of the Z Limit switch, but the relative accuracy should be great.
The AdjArm has 4 notches, with numbers 1 to 4 next to them. These represent whole mm steps.
The AdjDial has 40 notches, every 4 notches are numbered .0 through .9. These represent decimal mm steps. Each notch is a 0.025mm step.
The Bracket has one indicator notch which lines up with the notches on the AdjDial to indicate where to read the setting.
When the outside edge of the Bracket is lined up with the first notch(next to the 1) on the AdjArm and the .0 setting on the AdjDial is centred on the indicator notch, the spacer is set to 1.0mm.
When the AdjArm is all the way into the AdjDial, and the AdjDial is set to .0, the spacer is set to 5.0mm.
The spacer can be set less than 1mm but at some point (around 0.7mm on my printer) the limit switch will slip off the end of the spacer and effectively act as 0mm offset.