Summary
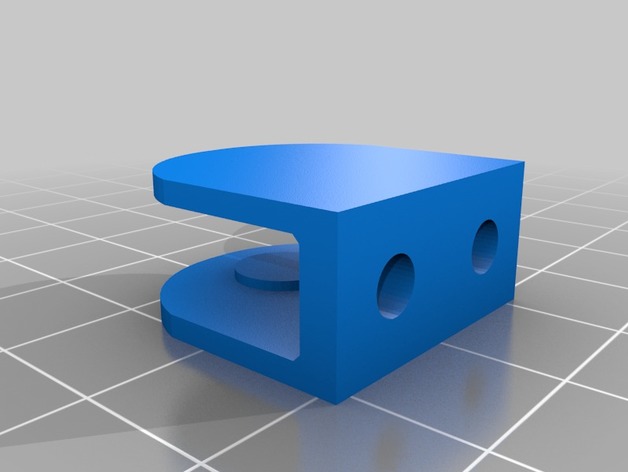
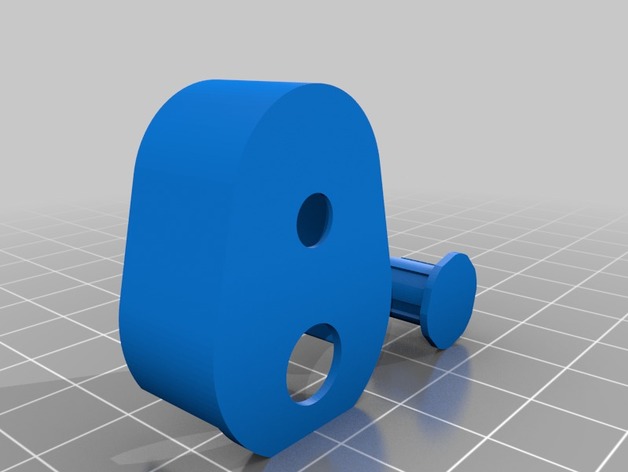
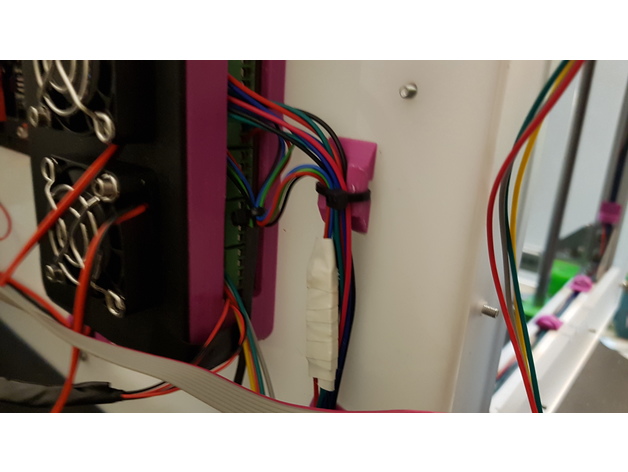
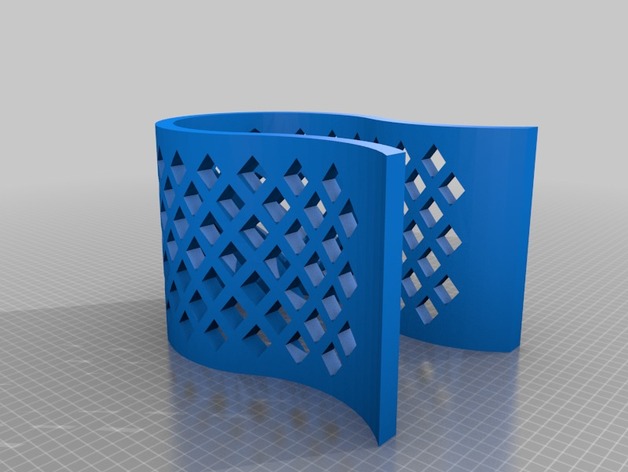
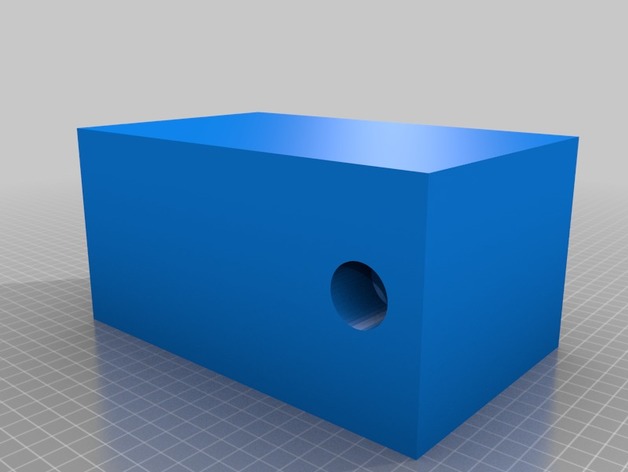
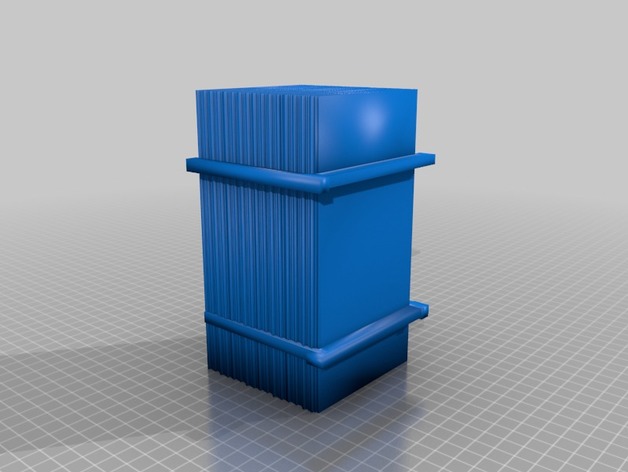
Friction fit fan mount with air channels and clearance for 40mm heat sink stuck on the end of Z axis stepper. Mounting holes designed for 40mm fan. Print with mount side down. There are minimal supports needed.
Print Settings
Printer:
Anycubic I3 Mega Rafts:
Yes Supports:
Yes Resolution:
0.2 Infill:
20
Post-Printing
Author: Thingiverse
-
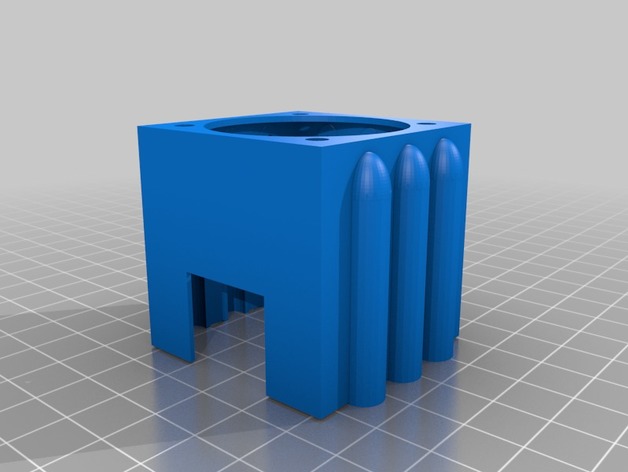
Anycubic I3 Mega X axis Fan stepper fan mount with heat sink clearance 3D Print Model
-
scx10 fuel tank mount 3D Print Model
Summary
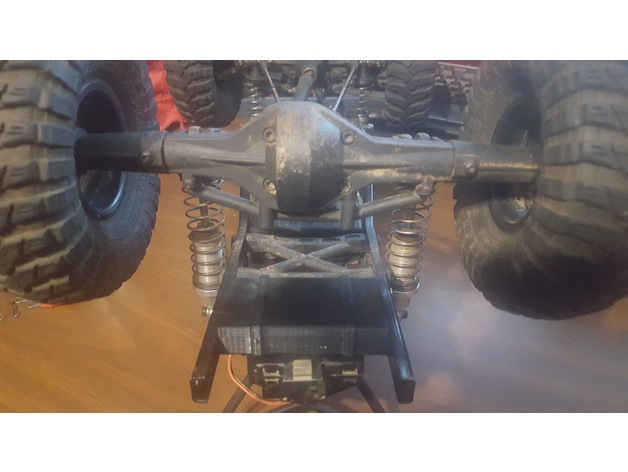
I made this after moving my battery to the front and realizing there wasn’t really a place for my esc. It slides between the frame rail and uses the lwb holes that are already in the chassis and 2 m3 screws. It will not work with a lwb scx10. -
Mastercrafted Wolven Silver Sword – The Witcher 3D Print Model
Summary
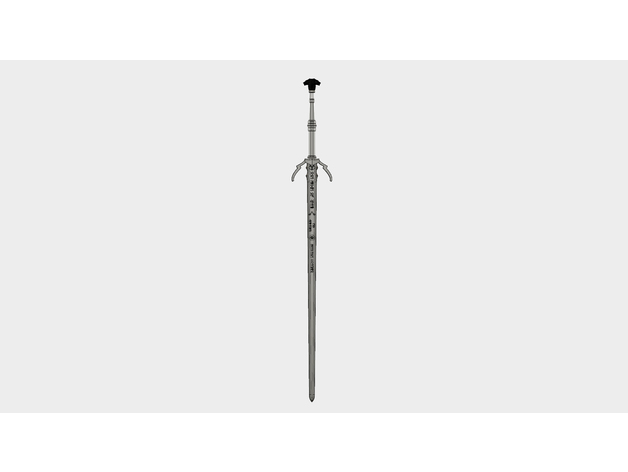
Every budding Witcher needs their trusty twin swords, and here we have the Mastercrafted Wolven Silver sword from the Witcher 3. (Steel available at https://www.thingiverse.com/thing:2761042)
Being scaled to the lore and the game files, the hilt is just over 12″ long, and the blade a further 38″. A pair of holes are present down the blade in order to house two 2.5 x 1m long carbon fibre cores and keep everything together. These are designed to poke slightly out of the blade and into the hilt for truer centering. A second hole also runs down the length of the hilt and into the blade in order to contain a 1/8″ x 3/8″ steel core.
The grip is designed so that you can wrap a 3mm thick leather cord around them and have a true look to the game designs.
The runes read “One made of silver” / “for creatures” as a callback to an in-game quote, as well as “Valentine Costumes” (my cosplay brand) – if you wish I am willing to customise this file with your own text or different runes (price dependant on changes) – please feel free to contact me if you’re interested in this service.
Due to common transportation issues with large blades such as this, it is designed to come apart where the blade and hilt meet. If you attach the hilt to the aforementioned metal core, you can then drill a 5mm hole in the core at the point where a hole features in the top of the blade (Blade_2 file), and then use a 5mm binding screw to hold it all together.
Please feel free to use / modify this model as you wish, but credit is always appreciated.
Now get out there and kill some monsters
Print Settings
Notes:
Supports only necessary on the pommel, but possibly advised on the grips also -
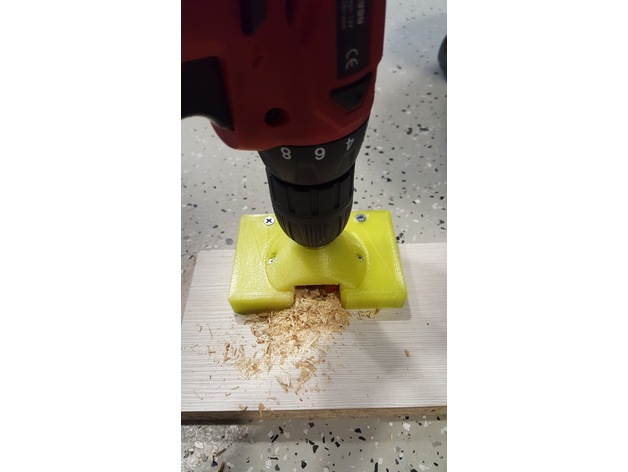
Tool for mounting of furniture door 3D Print Model
Summary
petg
Print Settings
Rafts:
Yes Supports:
Yes Resolution:
0,2 Infill:
50 -
Creality Ender 4 strain relief 3D Print Model
Summary
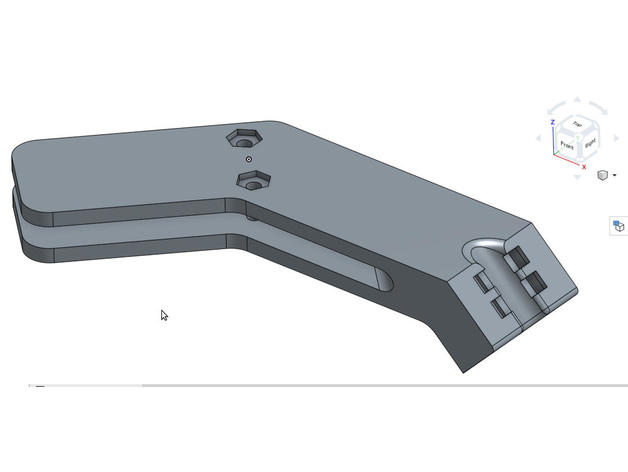
I wanted a strain relief bracket which didn’t interfere with the bed levelling screws – instead, one that clamped the bed carriage would be ideal using m3 hardware
The one I made is v1. This is version 2, featuring an angle to avoid screws contacting the bed, nut retainer insets and slightly narrowed. I reduced the diameter of the cable channel to get a tighter cinch with the cable ties.
To complete, use two m3 10mm or 12mm bolts and nuts to clamp the carriage, and two small cable ties, just push them through.
Print Settings
Printer:
Creality Ender 4 Rafts:
No Supports:
Doesn’t Matter Resolution:
0.32mm Infill:
20 Notes:
To print, rotate onto its side, it shouldn’t need supports though a brim may help. If using PLA, print it slightly hotter than normal (PLA+ settings) to increase interlayer bonding. Printed 215-220 deg C to increase strength.
Infill doesn’t really matter, 3 perimeters / 1.2mm wall is what I used, it’s more than enough.
How I Designed This
Designed in Onshape from scratch, if you want to edit it the link is here:https://cad.onshape.com/documents/2d61c918ed37344b6f5f4652/w/5cc150713efcf0918f92af5e/e/7c914fb3f0feff55238d9b94 -
Pen Plotter 3D Print Model
Summary
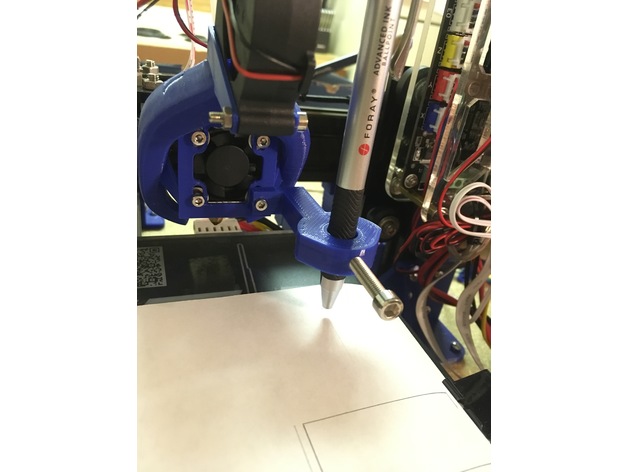
This is an attachment made to turn your 3D printer into a 2D pen plotter. The bracket simply bolts onto the bottom right corner of the hot end fan. I designed this pen plotter so that it fits around a radial fang mount. A 5mm bolt is used to hold the pen in place and a lock nut can be press fit in the inside of the pen hole. The bracket is capable of holding pens up to the size of a typical sharpie. I have attached the STL, along with the solidworks part file incase anyone wants to remix this part. -
dino shoes 3D Print Model
Summary
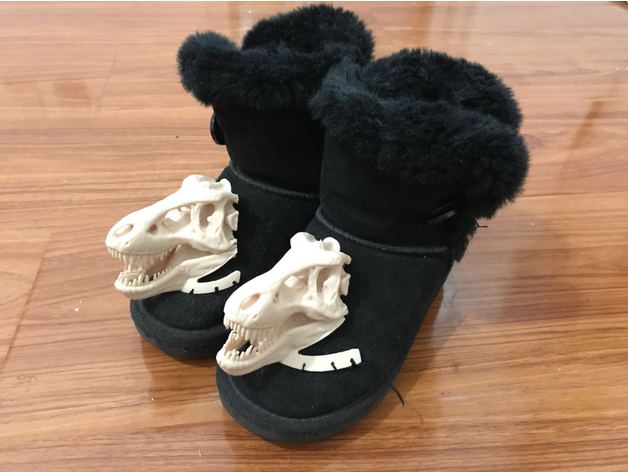
i creates this for my 5-year old’s crazy shoe day.. they are remixed from the original t-rex skeleton by makerbot
Print Settings
Printer:
corexy Rafts:
No Supports:
Yes Resolution:
.25 Infill:
20% Notes:
you need to use supports in s3d as they are easy to break away. 0.1 resolution will be best but 0.25 is also fine.
the skulls are attached to the shoe using either string or hot glue -
15 mm thru-axle to 9 mm QR front adaptor 3D Print Model
Summary
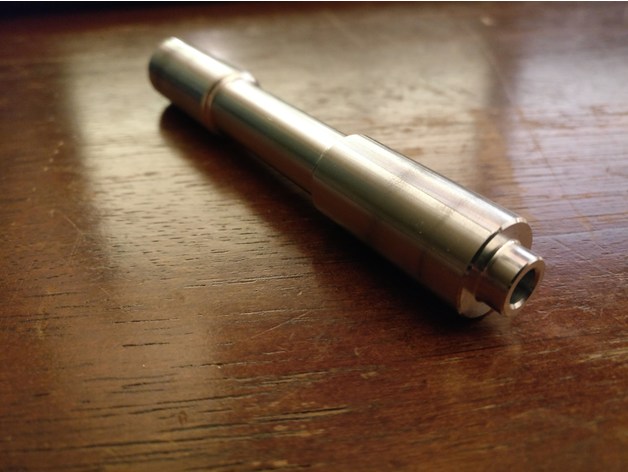
NOT FOR 3D PRINTING.
Machining is probably best for this.
Measurements taken from the adaptor that comes with Shutter Precision/Exposure QR15 dynamo hubs.
It’s a bit of a loose fit to the nominal 15 mm ID on the hub. You can certainly make it to better tolerances. I just copied what I measured. -
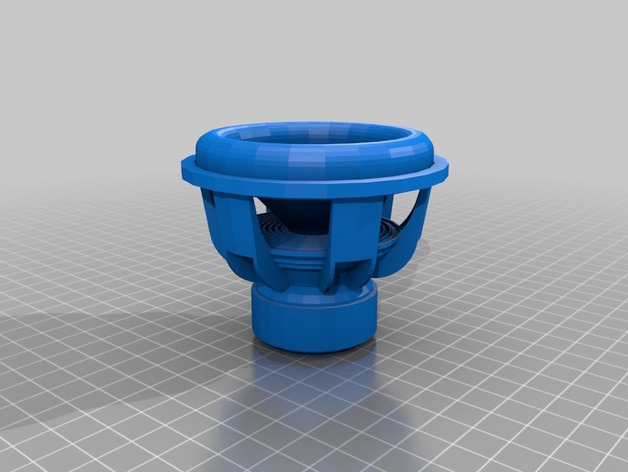
sundown zv5 15 in the works 3D Print Model
Summary
in the works sundown audio zv5 15 woofer
Print Settings
Printer:
tronxy p802ma Rafts:
No Supports:
No Resolution:
normal -
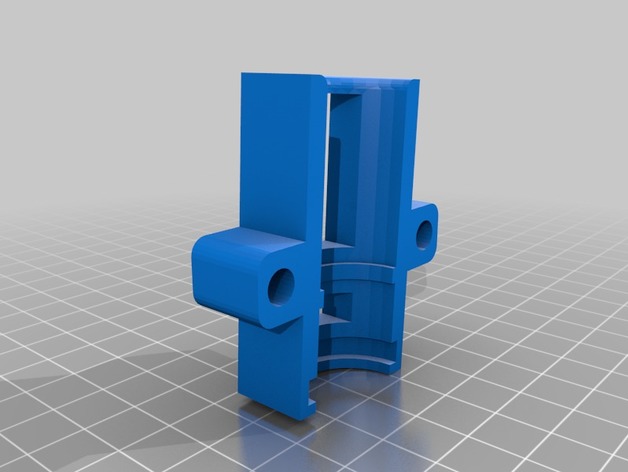
Kettler Racer GT Armholder 3D Print Model
Summary
This is a replacement Part for the Spinning Bike from Kettler
This is for the right side, for left just mirror the hole part
Have fun!
Print Settings
Rafts:
Yes Supports:
Yes Resolution:
0.2 Infill:
100 -
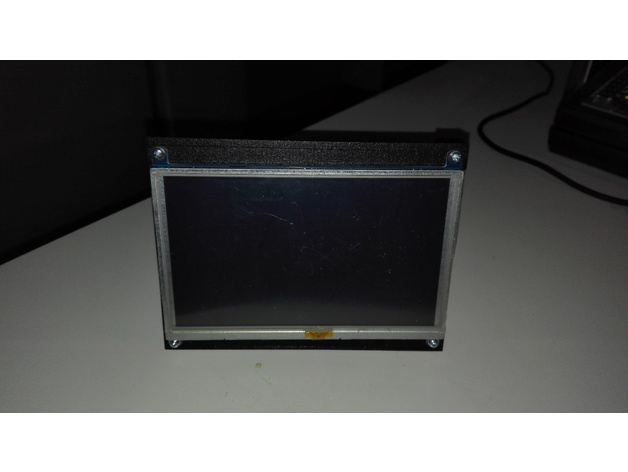
Waveshare 5in LCD Stand 3D Print Model
Summary
Just a simple stand for a Waveshare 5in LCD (B) display -
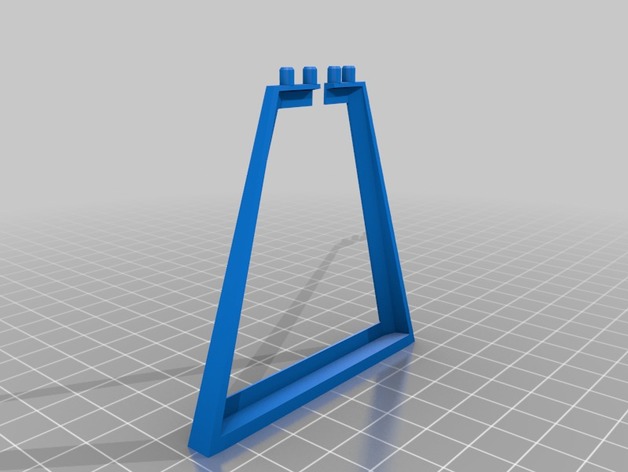
Drone Holystone Skids (large) 3D Print Model
Summary
This Skids can be used to install a Actioncam under the Holystone Drone.
(Create white Thinkercad) -
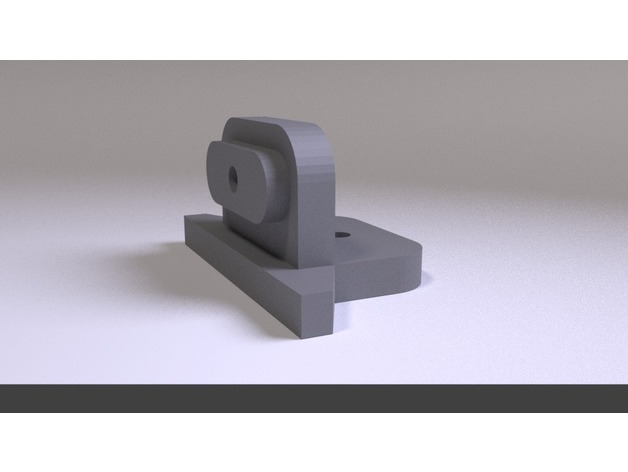
Anet Filament Spool Rack Bracket A8 / A2 3D Print Model
Summary
This bracket is designed for the Anet filament rack. The oval extrusion on the side of the bracket will fit snugly inside the oval cutout on the standard Anet filament rack. This was designed to mount on top of the Anet A2, however could be used for a wall or other type of mounting.
Print Settings
Printer Brand:
Prusa Printer:
Prusa Clone Rafts:
Doesn’t Matter Supports:
Yes Resolution:
.2 Infill:
28% or higher Notes:
1.6mm wall thickness -
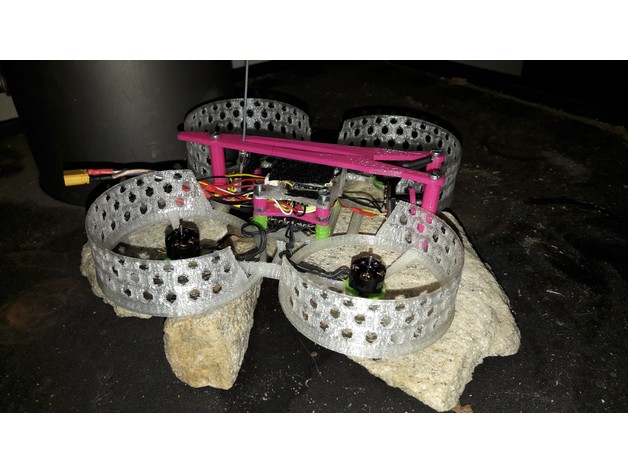
Micro quadrocopter frame – semiducted – Beecheese frame V4 3D Print Model
Summary
Enjoy my new 3d design for a brushless micro quadrocopter. It uses 2.5 inch propeller and 2S lipo at dys 7000kv 1104 motors. The AUW of the micro quadcopter is around 170grams using a 850mah battery pack. The flightcontrolboard is flashed with betaflight 3.3 at standart PID settings. Only rates adjusted.
I could not do a full speed test, but it seems to have quite some power.
It should be around 150 grams per motor with 2S and the 2540 tribalde props.
If you have some flexible filament you may print the tpu motor mounts to reduce vibrations on your frame. For me this worked quite good.
You may also try to print the short standoffs using tpu. In addition i mounted my fc board onto slices of “oropax” earplugs. This works quite well.
It will fit M3 screws for the frame standoffs and the 30mm flightboards. (10x)
Use M2 screws for the flight boards with a diameter of 20mm or 16mm (4 – 12x)
I have also added a tiny bit screwdriver, in case you have troubles reaching the cam mount, you might find it usefull.
I would be very happy to see your make and get some feedback 🙂
Build and first testflights:https://youtu.be/CC2rdLjDmQU
Components:
Motors
DYS 1104 7000KVhttps://goo.gl/mGteyH (link to quadrocopter-teile.at)
Props:
Gemfan flash – 2540 – tribladehttps://goo.gl/qYrMwk (Link to banggood.com)
ESC
Racestar 4 in 1 12A using DSHOT 600https://goo.gl/CWm5G1 (Link to banggood.com)
Recommended flightcontrol
Omnibus F4 with OSDhttps://goo.gl/3BXv5Z (link to banggood.com)
FPV cam/transmitter combo – TX05 (great image quality for its size, very leightweight)https://goo.gl/tX1n3Q
5V active Buzzer (take it, if you dont want to search your quad for hours and hours.)https://goo.gl/ud4U5G (Link to banggood.com)
Further you need:
Transmitter and receiver of your choice. I use the Flysky I6 with SBUS modhttps://goo.gl/GwRqK4 (Link to banggood.com)
FPV goggle of your choice.
I use the Kylin Vision with Eachine DVR mod:https://goo.gl/1OyqmI
Print Settings
Printer Brand:
MakerBot Printer:
MakerBot Replicator (5th Generation) Resolution:
0,3 Infill:
45% Notes:
for a complete set you need:
PLA:
1x quadrocopter frame
3x standoff long
4x standoff short
1x tx03 cam mount
TPU:
8x standoff very short (optional PLA)
4x TPU motor mount -
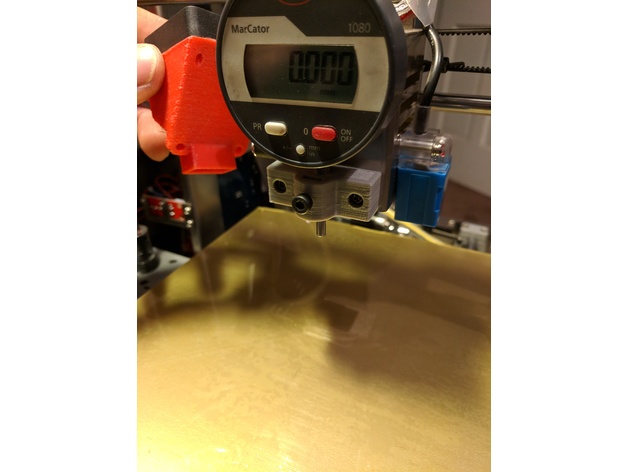
Mount for dial indicator on Zonestar P802QA 3D Print Model
Summary
This is a mount for the newer Zonestar P802QA with the fan shroud. Just remove the 2 M3 screws from the shroud and install the mount there for bed leveling. You might need two M3x20 and a M4 screw and nut -
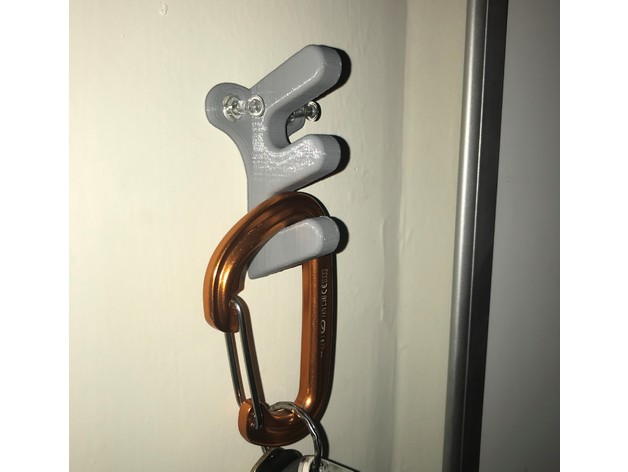
Thumbtack Key Hook 3D Print Model
Summary
Keyhook that is mounted with thumbtacks.
Print Settings
Printer:
Anet A8 Rafts:
No Supports:
No Infill:
20% -
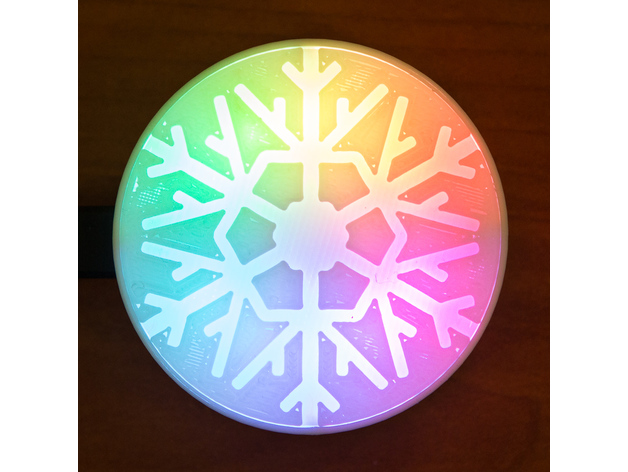
Temperature Sensitive Snowflake 3D Print Model
Summary
Since snowflakes are often seen as a pictograph for temperature so too is this one! Full R->G->B sweep from 15C-35C (60F-95F) and haptic mode control.
While its rotation and loop based rendering are certainly a standout feature I also I wanted to see how BlocksCAD went at building something functional that also included non-symmetric components. Was impressed with it simplicity and ease of understanding.
Everything friction fits together. The board should snap onto the mounting lugs and the diffuser requires a little pressure to seat it into the base. For the diffuser white PLA works great, smoothing the LED light. The diffuser is very thin in parts (3 layers @ 0.2mm) to allow more passage of light in the snowflake pattern. Excuse the under extrusion on my diffuser 😉 Support is only required for the internal battery compartment, easy to remove.
Inside is a battery or USB powered Adafruit Circuit Playground (code enclosed). There are many styles and sizes of lithium ion battery that can be used but the BlockCAD file has parameters for altering the battery size – another powerful feature. So long as the battery fits in the footprint of the overall design, which can also be set with parameters should you wish to enlarge the light projection area.
The default code has a few modes, starting with aforementioned temperature mode. Tapping the snowflake will take you through a few other pretty modes (see https://www.youtube.com/watch?v=Be5zCj8a_cM ) and finally to OFF. But all this is easily editable in the code, including the temperature range. Likewise, you could edit the diffuser pattern to be anything!
Print Settings
Printer Brand:
Wanhao Printer:
Wanhao Duplicator i3 V2 Rafts:
No Supports:
Yes Resolution:
0.2 Infill:
20% -
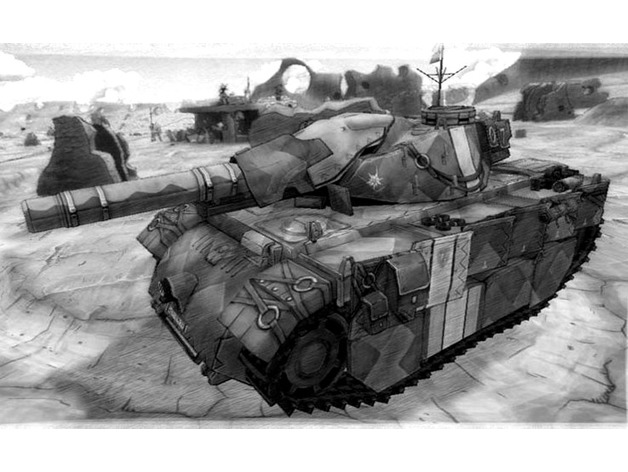
The Edelweiss 3D Print Model
Summary
Hey guys it’s your boy タイガーエース1945 here to announce that from now on this page will be 100% anime 100% of the time! Please head on over to the world at war group to vote on your favorite tank-waifu to be ma………………………………..but seriously though, I had Valkyria Chronicles in my steam library for about 2 years now and I finally found the time to beat it. If you guys haven’t played it’s a Japanese game set in an alternate earth WW2 where you play as a militia group defending their home country Gallia (Poland/Belgium) against a military invasion from The Empire (Germany) on one side and espionage/political takeover by The Federation (Russia/Allies) on the other. Aside from the Anime components of the story (Honestly the most boring parts) the game not only focuses on but handles quite well some of the more touchy subjects of the war that are commonly ignored by most games. The game-play is a combination of turn based, first person shooter, and Real time strategy. I honestly don’t know how to explain it better but it’s a whole bunch of fun…… no I’m not being paid to say this, I actually liked the game…..
I probably won’t be doing much of these fantasy tanks in the future, but this one was allot of fun to make and allowed me to practice modeling techniques that aren’t usually used. Probably won’t be doing any more stuff from the game either…….but if for some crazy reason one of you motivated individuals would like to I don’t know write some board game rules or something shoot me a PM, I would love to help ………
Currently contains all Upgrades to the Edelweiss that change the in-game model
Standard Barrel (Gun-1)
Barrel Protector (Gun-2)
Reinforced Barrel (Gun-3)
Extended Barrel (Gun-4)
Standard Hull (Hull-1)
Additional Armor (Hull-2)
Reinforced Body (Hull-3)
Reinforced Armor (Hull-4)
Standard Armor (Armor-1)
Frontal Armor (Armor-2)
Turret Armor (Armor-3)
Gun Barrel Armor (Armor-4)
All vehicles made from scratch
Please join my group http://www.thingiverse.com/groups/the-world-at-war/topics
Please view my other packs https://www.thingiverse.com/TigerAce1945/designs
vidja game- http://store.steampowered.com/app/294860/Valkyria_Chronicles/
(SEGAr plz no sue) -
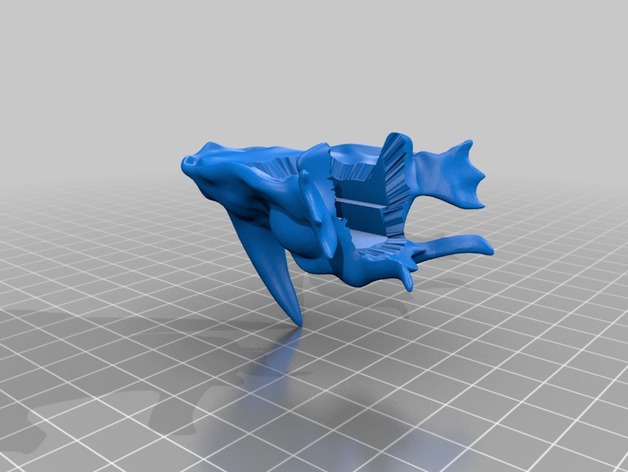
Tarusk Pez Head 3D Print Model
Summary
Model is based on the Tarusk familiar from the Unexpectabled DnD campaign on Twitch.
Print Settings
Printer Brand:
PowerSpec Printer:
PowerSpec 3D Pro Rafts:
Yes Supports:
Yes Resolution:
0.25 Infill:
10%
Post-Printing
Assembly
Previous pez dispenser head has to cut and the new head is placed ontop. Do not try to pry the existing head off, it will break the connecting pieces. Lower jaw is attatched by openning the dispenser and sliding it around the inner shaft then pressing down. Additional sanding will be needed to make sure it fits tightly. Crazy glue will be needed for both pieces.to attach to the dispenser. -
Nara (F Gnome Rouge) 3D Print Model
Summary
a female gnome rouge for D&D named nara -
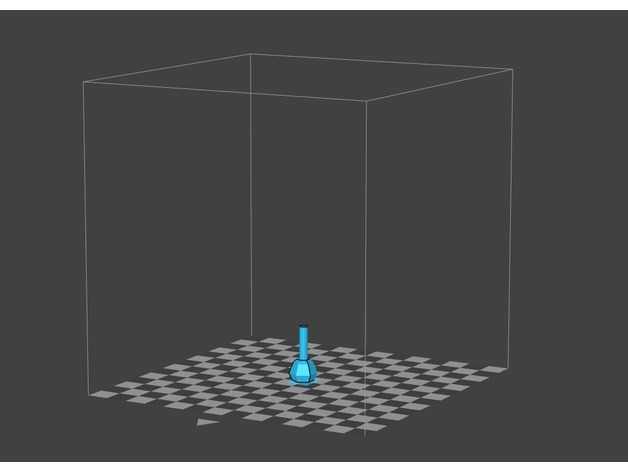
Hubsan H501S thumb stick for controller 3D Print Model
Summary
Hi,
This is my first 3d project.
I hope it will fit
I printed it on PP3Dp printer using UP! Studio.
After loading it to application gives a message that model has been enlarged (last image)
TregarthOverview and Background
Thumb Stick
Lesson Plan and Activity -
GMADE GOM Motor Cover 3D Print Model
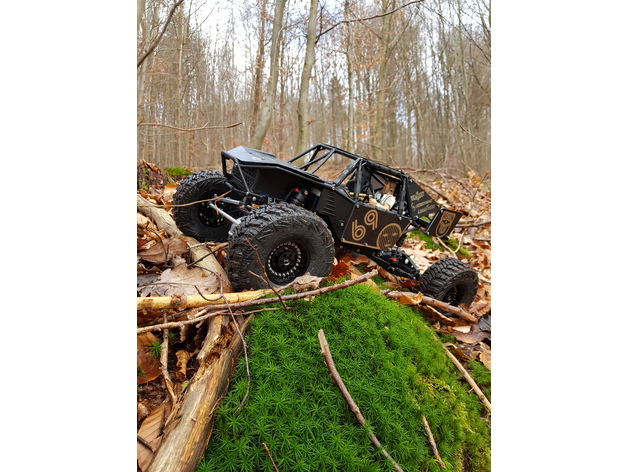
Summary
This part is to hide the Motor, Servo and ESC on your GMADE GOM. It´s designed to hold an on/off switch from a Hobbywing 1080 ESC.
Print Settings
Printer:
XYZ DaVinci Pro E3D V6 Rafts:
No Supports:
No Resolution:
0,1 Infill:
100 -
World of Warcraft Akama 3D Print Model
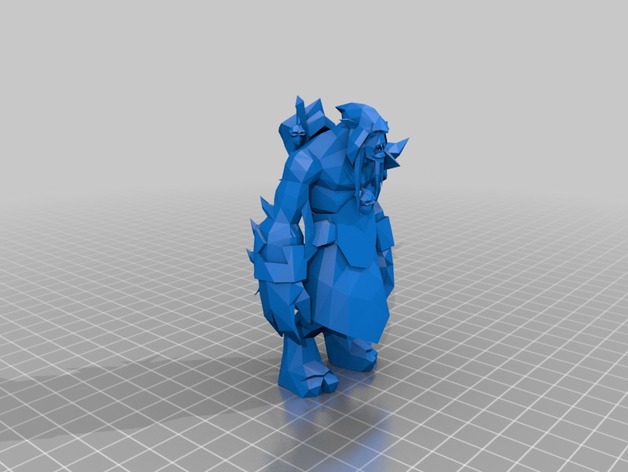
Summary
World of Warcraft Akama.
Walk through available here, http://followalongwith.us/as_we_print_wow_toons.html. -
World of Warcraft Ammunae 3D Print Model
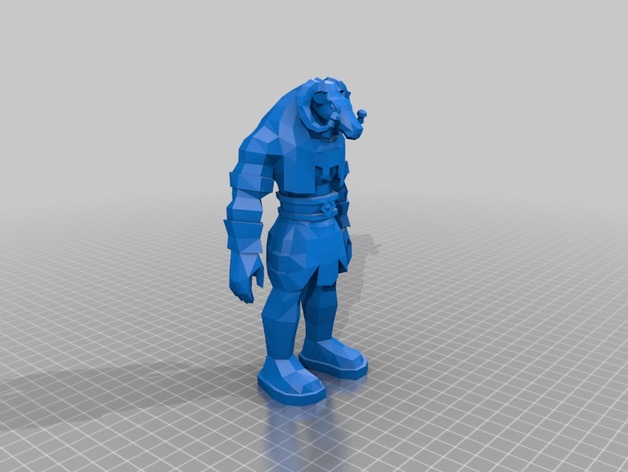
Summary
World of Warcraft Ammunae.
Walk through available here, http://followalongwith.us/as_we_print_wow_toons.html. -
Nintendo Switch Joycon Strap Holder Tandem Dock 3D Print Model
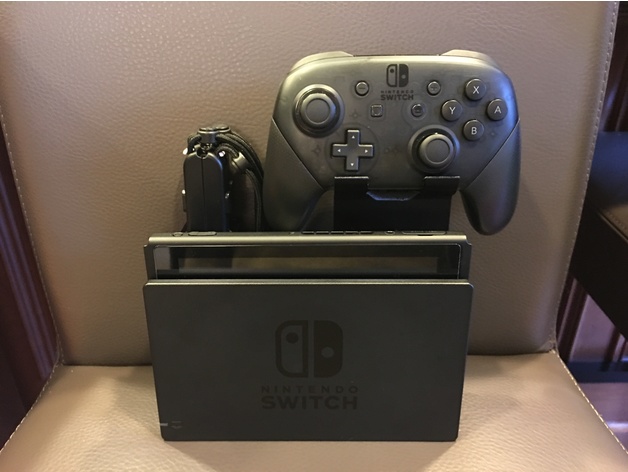
Summary
Remix of the Joycon Strap Dock Holder (https://www.thingiverse.com/thing:2178294). The original ‘double’ dock conflicted with the Pro Controller Holder I am using, so I created a tandem dock to hold both sets of Joycon Straps back-to-back rather than side-to-side. I also remixed (https://www.thingiverse.com/thing:2764173) the Pro Controller Holder to slide to the right more to allow clearance for the Joycon Strap Dock.
Print Settings
Printer Brand:
Ultimaker Printer:
Ultimaker 3 Rafts:
No Supports:
Yes Resolution:
0.2 -
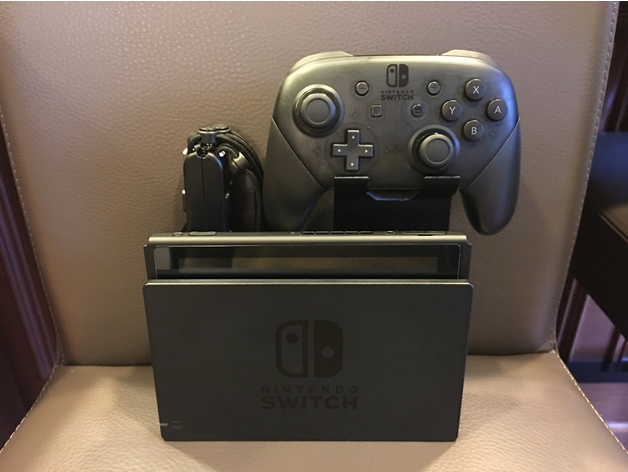
Nintendo Switch Pro Controller Holder (Compact Lower Support) 3D Print Model
Summary
Remix of Nintendo Switch Pro Controller Holder (https://www.thingiverse.com/thing:2539004) with a compact lower support to allow it to slide right more for clearance for other dock accessories. I also remixed (https://www.thingiverse.com/thing:2764148) the Joycon Strap Dock Holder to sit tandem, so all both attachments can be used simultaneously.
Print Settings
Printer Brand:
Ultimaker Printer:
Ultimaker 3 Rafts:
No Supports:
Yes Resolution:
0.2 -
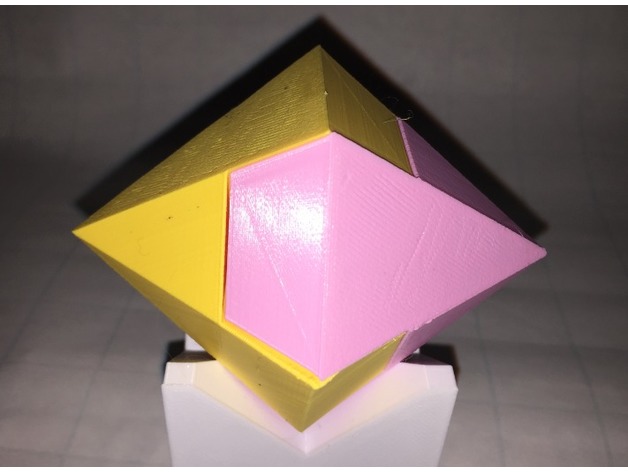
Diamond, Dodecahedron, Kawai Joint 3D Print Model
Summary
A diamond or, rather, a dodecahedron of 12 congruent triangular faces. It is derived from the cube-based Kawai half-cube joint. Two copies make a nice-looking diamond. It can also be assembled with a half-cube. It makes an appealing desktop toy. I think kids may love it for its aesthetic values. It is easy to print without any support or raft. Have fun!
Print Settings
Rafts:
No Supports:
No Resolution:
.1 to .2mm Infill:
10-25%
Post-Printing -
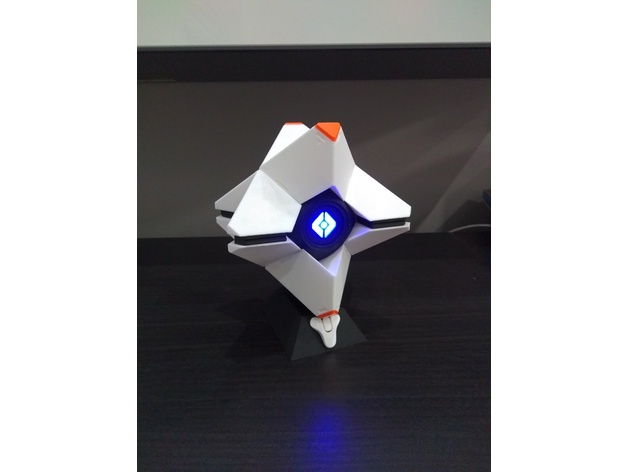
Large Destiny Ghost Remixed Parts 3D Print Model
Summary
I printed a Ghost for a friend’s birthday but ended up remixing various parts:
The Destiny logo is now separate from the stand so you can print it in 2 colours. There are locating pins to help align the parts.
The lens now has a half sphere on the rear to properly diffuse the light from the LED.
The front and rear bodies are adapted to hold together with magnets.
The front body and rear dial are adapted for 8 petal LED tealights.
The horn has been re-oriented to print flat on the bed.
Someone else had remixed the bodies and dial for 8 petal tea lights and magnets, but the STLs were broken and had been remeshed to a much lower resolution, so I decided to re-make these based on the originals. (When importing existing STLs into TinkerCad, it seems to help if you import them at 1000% scale, then scale them back down after import. This preserves a lot more detail when TinkerCad remeshes the model. Microsoft 3D Builder is also really good at fixing up STLs exported from TinkerCad.)
You’ll need 6mmx1mm magnets for the body halves.
Thanks to the original model authors, and I hope you find these useful! 🙂
Print Settings
Printer Brand:
Prusa Printer:
i3 MK2S Rafts:
No Notes:
That stand is fine at 0.2mm resolution, but print the logo as high as you can – I used 0.05mm. Everything else was printed at 0.15mm. Supports were used inside the body and dial. -
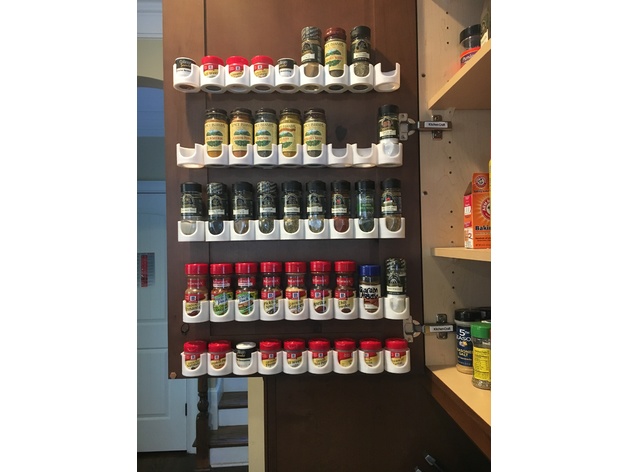
Parametric Spice Rack 1,4,6,&7 3D Print Model
Summary
Just like original.
Only changes were I made a single, 4 hole, 6 hole and 7 hole racks. -
mobile e-cig holder 3D Print Model
Summary
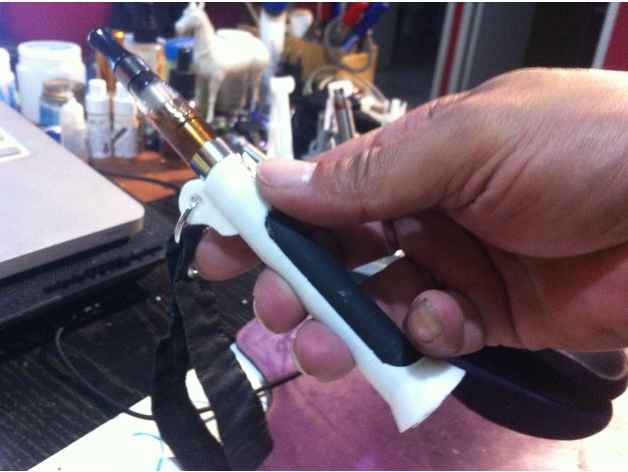
As I was working outside today I realise that the fixed stand was not very usefull as I was moving qiet much, so I decided to creat this one e-cig holder that I can hook where ever I want or lay it on the table without dirting it or even put it in my pocket safely (I think) I also made prints in the back for the hergonomy. Hope You’ll like it. Enjoy. -
Ikea Stuva Corner Support 3D Print Model
Summary
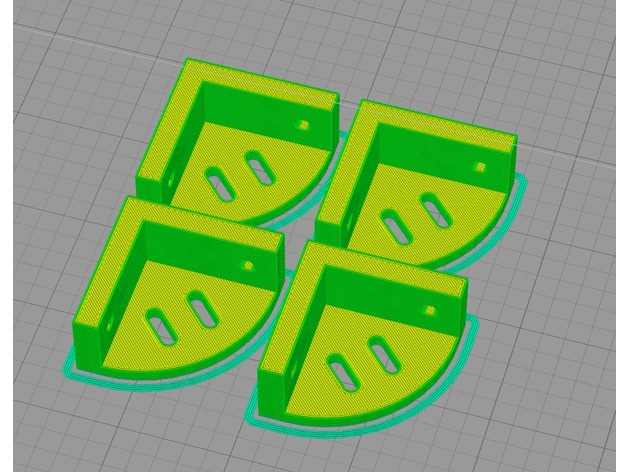
Dies ist ein Remix von https://www.thingiverse.com/thing:1373102.
Verändert wurde die Tiefe der Winkel sowie die zwei zusätzlichen befestigungspunkte.
Die Winkel sind mit der Bodenplatte / Deckel bündig.
Print Settings
Printer:
Anet A8 Rafts:
Doesn’t Matter Supports:
Doesn’t Matter Resolution:
0.2 Infill:
40~50% Notes:
~ Printer Settings ~
Filament: PLA
Size: 1.75mm +-0,2mm
Nozzel: 0,4mm
Primäre Schichthöhe: 0,2mm
Obere Schicht: 5-6
Untere Schicht: 5-6
Kontur: 2
Infill 40~50%
Stütze: Keine
Extruder: 205°c
Heizbett: 65°c
(4x Ikea Stuva Corner Support )
Druckzeit: 1 hour 32 minutes
Rohfadenlänge: 9846.1 mm
Plastikgewicht: 29.60 g (0.07 lb)
Post-PrintingHow I Designed This
Desiged in SketchUp -
Filament Spool Hub with Print In Place Bearings 3D Print Model
Summary
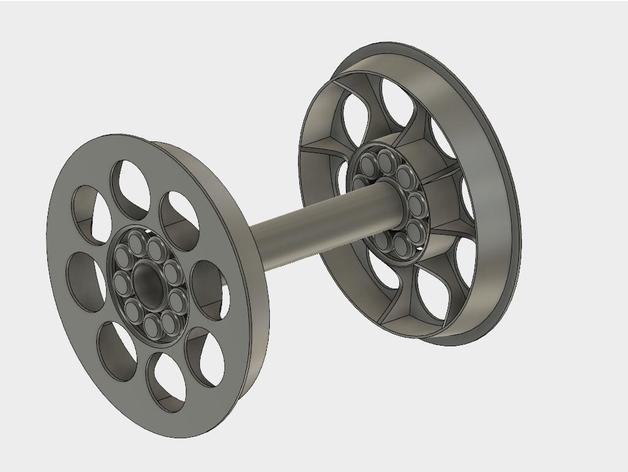
Hubs to hold your spool in typical 8mm spool holders with print-in-place roller bearings.
Print Settings
Printer Brand:
Prusa Printer:
Prusa Clone Supports:
No Resolution:
I used 0.2 with a 0.3mm nozzle Infill:
N/A Notes:
The two hubs should be printed with the “flat” side down. You may need to use a raft if you get a lot of “Elephant Foot” on your first layer. The prints I have made usually needed to have a few of the roller bearings broken free so everything turns freely. If you have trouble with the bearing sticking together, try lowering the extruder temp and/or reducing the filament flow rate a bit.
I included a cover for the M8 nuts typically used. For these, pause the print at 6.8mm and drop the nuts in, then let it finish.
Post-Printing
Assembly:
Press the hubs into the spool with the spacer between them on the threaded shaft. Snug up lightly with the knobs and place in holder. -
IKIEA Sekond Lamp Shade 3D Print Model
Summary
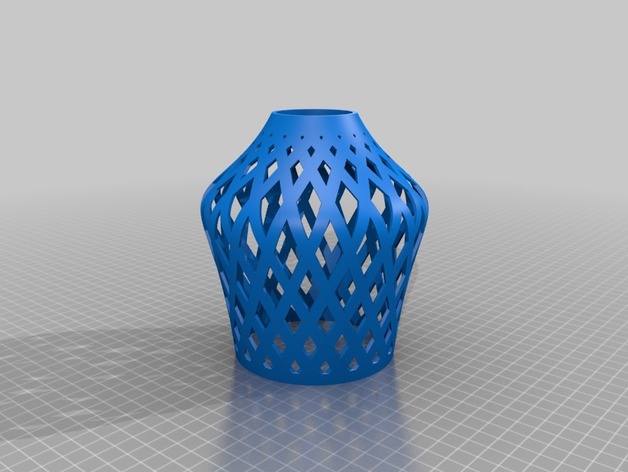
We highly suggest you use a LED bulb for this as heat from a regular bulb may pose a fire hazard!!!
This was Printed at .1mm layer height and took about 28 hours at “75mm/s”
Print Settings
Printer Brand:
PowerSpec Printer:
Ultra 3D Supports:
Yes Resolution:
.1mm Infill:
100 -
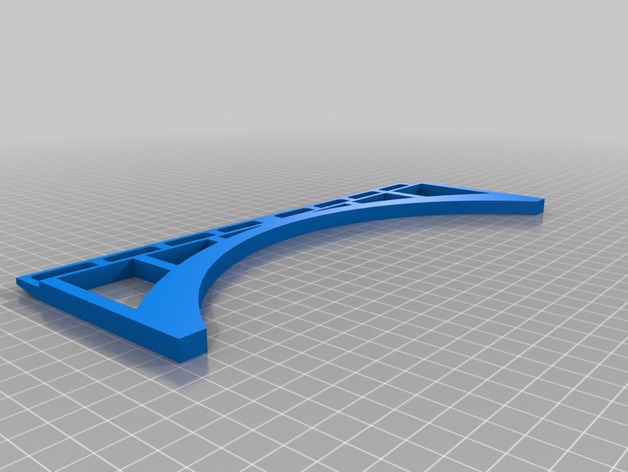
Bridge 3D Print Model
Summary
Its 10 inches long, .30 inches wide and 3.76 inches tall. Need to print it two times and you can use foam poster board for the road base.
Print Settings
Printer Brand:
MakerBot Printer:
MakerBot Replicator+ Rafts:
Yes Supports:
Yes -
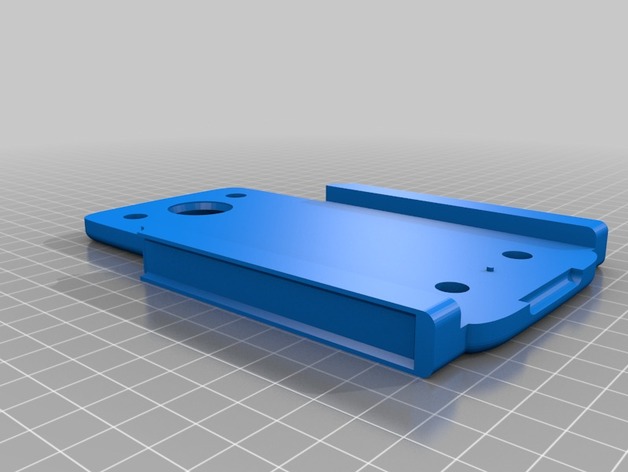
Joy-Con Grip Moto Mod 3D Print Model
Summary
Since Nintendo came out with their voice chat app I wanted to make a grip that can hold my phone. Decided to use magnets to create sort of a Moto Mod for the Z series phones.
It uses 4 8x3mm cylindrical magnets to hold the phone in place. To attach the Joy-Cons I took the rails off of the grip that came with the system. I had to pre-drill holes so I could screw the rails in place.
Enjoy!
Print Settings
Printer Brand:
Prusa Printer:
Prusa Mk2 Rafts:
Doesn’t Matter Supports:
Yes Resolution:
0.2 mm Infill:
20% Notes:
I’m sure you can use whatever resolution and infill you want but you do need supports for the area where the rails go. -
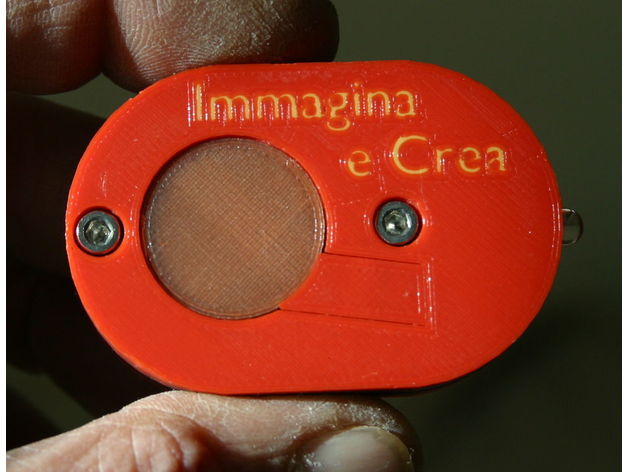
MMMT – Multi material Mini Torch 3D Print Model
Summary
This torch are printed with graphene material, colored pla and phosphorescent pla.
The graphene material is very dirty but does not conduct current in the insulating parts.
Battery is a Duracell 2450 (3V)
Printed with IeC 9/12 Veloce (first prototype) with “9 ways flux capacitor” – 4 materials in print -
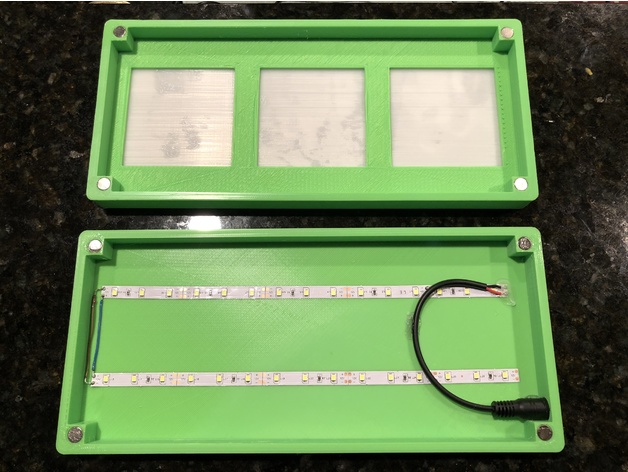
3 Panel Lithophane 3D Print Model
Summary
I printed my panels at 74.7mm x 74.7mm to get them to fit with a small amount of friction in the frame.
LED lights I usedhttps://www.amazon.com/gp/product/B00MHLIFO8/ref=oh_aui_detailpage_o02_s00?ie=UTF8&psc=1
Magnets I usedhttps://www.amazon.com/Magnets-Refrigertor-Stainless-Whiteboard-Multi-Use/dp/B078LX554X/ref=sr_1_1_sspa?ie=UTF8&qid=1516375131&sr=8-1-spons&keywords=8x1mm+magnets&psc=1 -
MUMM-RAS SWORD 3D Print Model
Summary
THIS IS OUR VERSION OF MUMM-RAS SWORD FROM THE 80s THUNDERCATS CARTOON & TOYS. WE HAVE CHALLENGED OURSELVES TO DO 3 NEW DESIGNS, PRINT & POST VIDEOS ON YOUTUBE A WEEK IN 2018. WE WILL BE PUTTING THEM UP HERE WITHIN COUPLE WEEKS OF VIDEOS POSTING. IF YOU LIKE THIS MODEL PLEASE CHECK OUT OUR YOUTUBE CHANNEL “A SKEWED VIEW 3D” SUBSCRIBE & RING THE BELL AS WE WILL HAVE ALOT OF CONTENT COMING OUT THIS YEAR. EVENTUALLY WE WILL BE DOING PROP SIZE VERSIONS OF OUR MODELS BUT AS IT IS TAKEN ALL OUR TIME TO DO 3 NEW ONES A WEEK THAT WILL BE DOWN THE LINE. THANK YOU FOR YOUR INTEREST & HAVE A WONDERFUL DAY. GOD BLESS -
Shopsmith Pro Planer Safety Key 3D Print Model
Summary
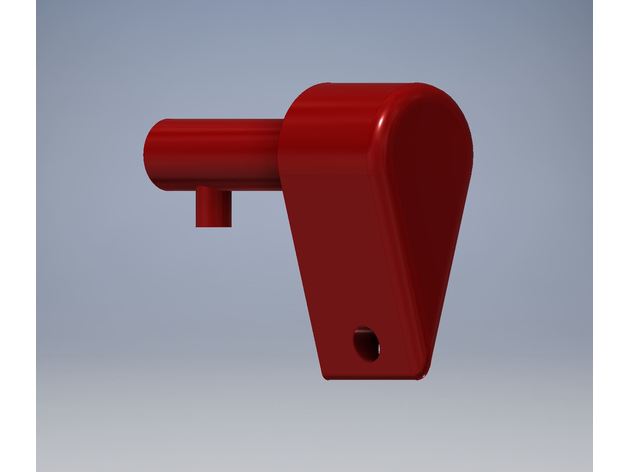
Safety key for the Shopsmith Pro Planer. You may have to scale it down slightly (1% or less) in the X and Y axis (not Z) for a perfect fit. -
c-bot / d-bot multi-purpose x carriage 3D Print Model
Summary
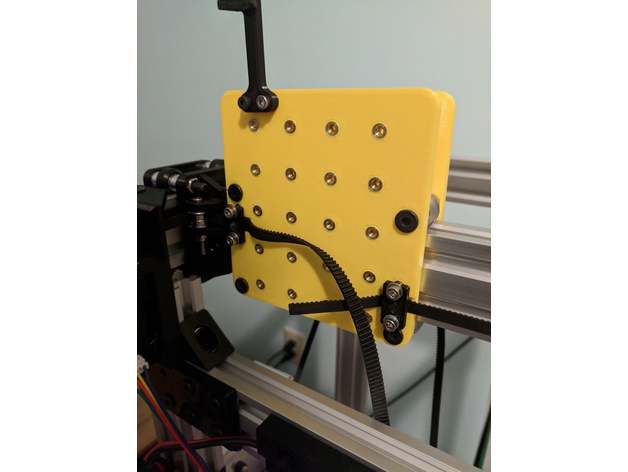
The main idea behind this plate is to allow me flexibility in what tool I put on the x-carriage, where I put fans and other sensors etc. I’m planning to create a few parts which are based on this plate.
At present I’m just printing this plate twice and using for both sides. Technically over-kill but you never know ( quad extruder anyone? )
To use this plate you will need heat-set inserts. Either from Lulzbot or McMaster. I have set the spacing to be 20mm center to center and they should be just the right size to take these inserts. The lulzbot guys did a nice write-up demonstrating how to put them in.
You will also need the following:
4 x mini-v wheel kits ( either delrin or polycarb )
4 x 6mm spacers
4 x 6mm eccentric spacers
4 x M5 45mm
4 nylock nuts ( or regular and thread lock )
For each plate, 26 heat-set inserts ( see above for link options )
I’m still messing around with the extruder mounts. The titan large diameter gear screws around with the spacing so it sticks out kinda far which could make the hotend subject to moving during rapid transitions.
Also note, this is a work in progress. I’ve assembled it and done movement tests but have not used it for anything serious. Any thoughts or ideas on improvements or changes would be welcome. I plan to make a laser engraver mount and going to try a cnc mill later.
The c-bot you see in the photos is a small form factor so I can iterate on this kind of stuff without taking my main printer down so the plate looks huge 😉
Print Settings
Printer:
c-bot Rafts:
No Supports:
No Resolution:
.2mm Infill:
20-50% Notes:
Using kisslicer I use 3.25 perimeters. At 20% infill and the perimeters this plate feels plenty stiff using PETG. Use your best judgment there.
No overhangs or nut captures so no supports are necessary -
KIRITOS DARK REPULSER 3D Print Model
Summary
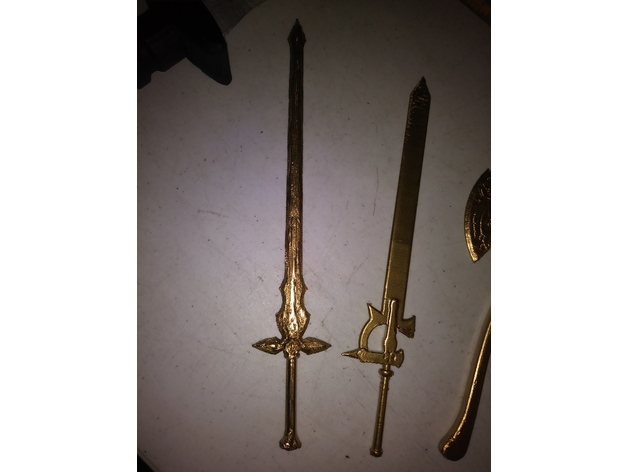
THIS IS OUR VERSION OF KIRITOS DARK REPULSER FROM SWORD ART ONLINE ANIME. WE HAVE CHALLENGED OURSELVES TO DO 3 NEW DESIGNS, PRINT & POST VIDEOS ON YOUTUBE A WEEK IN 2018. WE WILL BE PUTTING THEM UP HERE WITHIN COUPLE WEEKS OF VIDEOS POSTING. IF YOU LIKE THIS MODEL PLEASE CHECK OUT OUR YOUTUBE CHANNEL “A SKEWED VIEW 3D” SUBSCRIBE & RING THE BELL AS WE WILL HAVE ALOT OF CONTENT COMING OUT THIS YEAR. EVENTUALLY WE WILL BE DOING PROP SIZE VERSIONS OF OUR MODELS BUT AS IT IS TAKEN ALL OUR TIME TO DO 3 NEW ONES A WEEK THAT WILL BE DOWN THE LINE. THANK YOU FOR YOUR INTEREST & HAVE A WONDERFUL DAY. GOD BLESS -
Tiny Teddy Bear 3D Print Model
Summary
My First thing on Thingiverse.
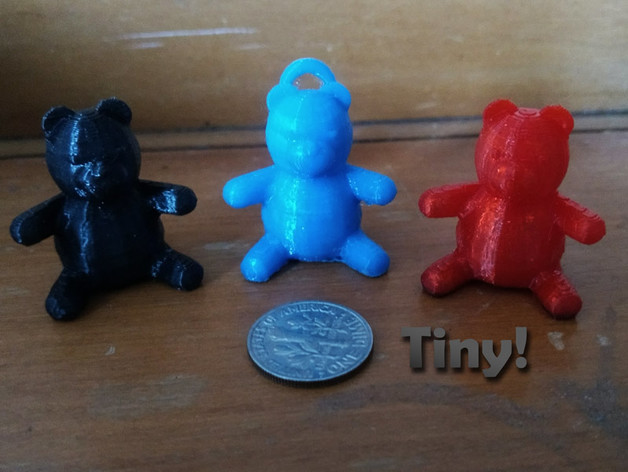
I decided to print this from my IMVU product (http://www.imvu.com/shop/product.php?products_id=31938983) for my youngest son, then ended up printing a bunch of them. I want to build an army!
You can print with or without a loop for hanging on the Christmas tree. I printed it in PLA. Supports are needed.
Show me your army!
Print Settings
Printer Brand:
FlashForge Printer:
Finder Rafts:
No Supports:
Yes Infill:
15% -
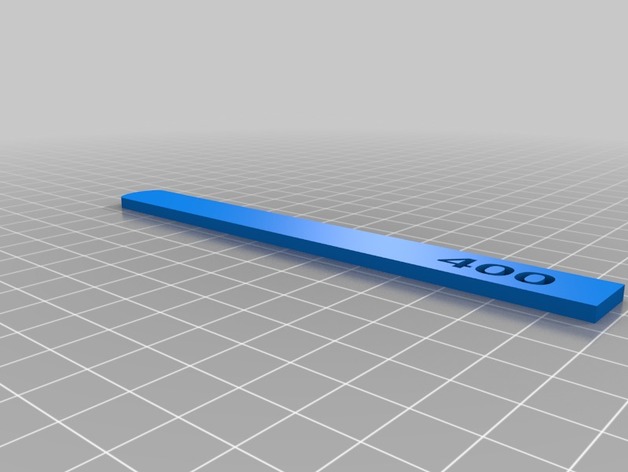
Sanding sticks with engraved grit size 3D Print Model
Summary
Sanding sticks with grit size engraved designed for gunpla hobby.
Print Settings
Printer:
Dremel 3d40 Rafts:
Doesn’t Matter Supports:
No Resolution:
0.1 Infill:
80 -
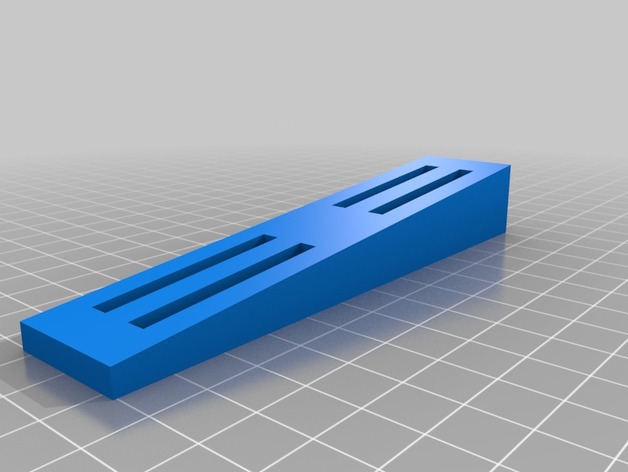
doorstop wedge 3D Print Model
Summary
well… its a wedge thing. to keep a door open. or whatever else you may need it for.
flip it over and lay it flat for simple printing without support. -
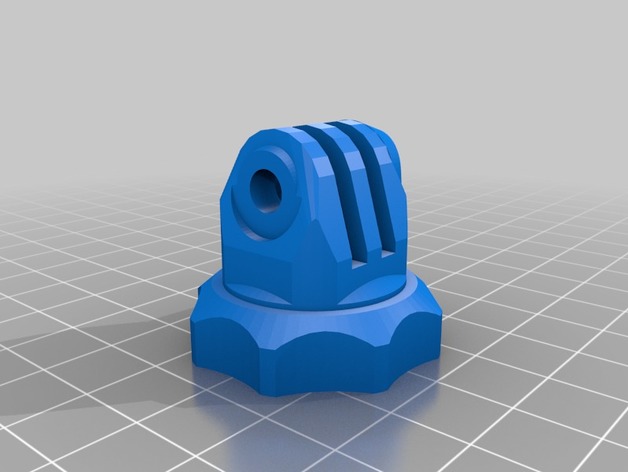
GoPro Tripod Adapter with 6mm thread 3D Print Model
Summary
Remix from https://www.thingiverse.com/thing:1238967
now comes with 6mm thread. -
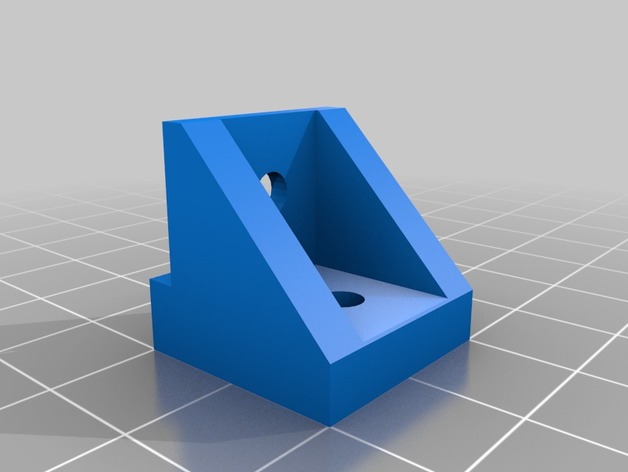
3.5″ hard drive mount to a flat surface 3D Print Model
Summary
These mounts will fasten a 3.5″ hard drive to a flat surface. They are inspired by tkbletsc’s hard drive brackets (https://www.thingiverse.com/thing:2352211), using the heights and sizes in his model, but created from scratch in TinkerCAD. The ledge lifts the HDD appx 6mm from the surface for cooling. The screw holes are 4mm internal diameter, and will fit standard hard drive screws.
This is the first model I have created and uploaded. I needed some hard drive mounts for an arcade machine project. All the other mounts I found where too large and would take too long to print, so I created this. Each mount is only about 2g and prints in around 15 mins (according to Cura 3.1 with a 0.2 layer height and 20% infill). -
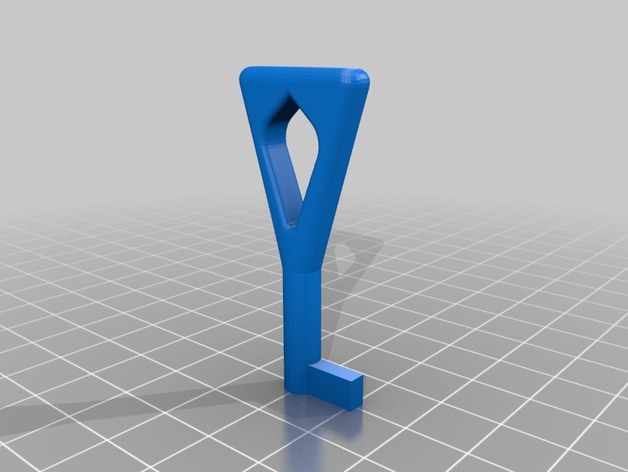
Key for electrical fuse cabinet 3D Print Model
Summary
It’s a key that should fit the standard fuse cabinets (in Norway at least). Print it massive, and use it carefully not to break it in the keyhole. I had one in ABS that i used for a while. -
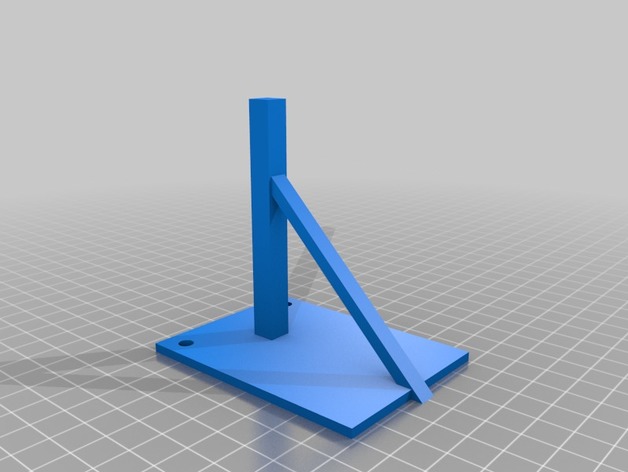
MG Wall Mount 3D Print Model
Summary
Simple, wall-mounted stand for MG Gundams
Print Settings
Printer:
Monoprice Select Mini V2 Rafts:
Doesn’t Matter Supports:
Yes Resolution:
0.3 Infill:
40% -
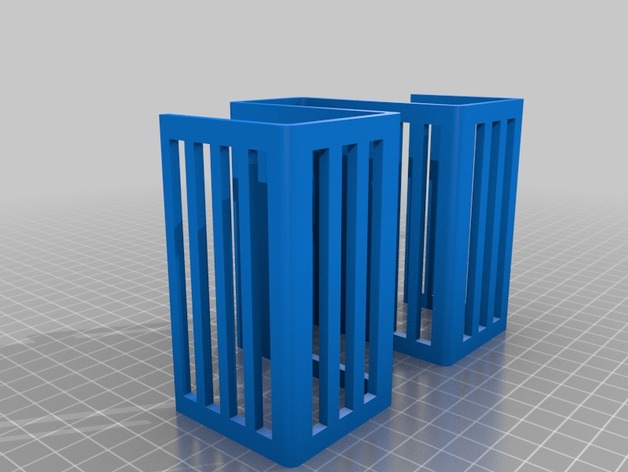
Sink caddy 3D Print Model
Summary
Needed a holder for my sponge and scrub brush in the kitchen sink. I wanted something that would hold both out of the way and free up my limited counter space.
Print Settings
Rafts:
No Supports:
No Infill:
10% -
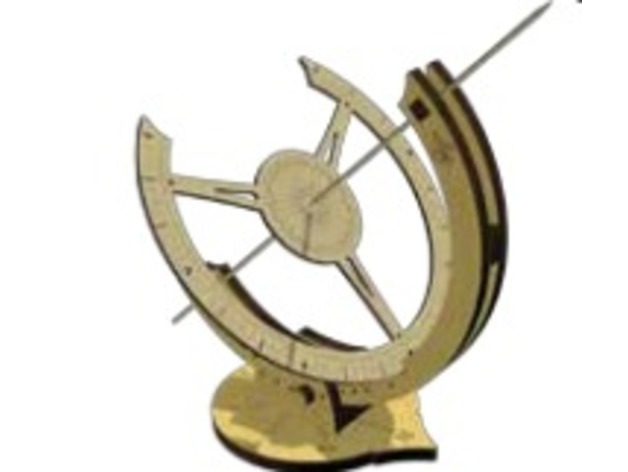
Equatorial solar clock type desktop for laser cutting 3D Print Model
Summary
Equatorial solar clock type desktop. The latitude of each country in the adjustment of the base is regulated. Order of laser cutting. tags: manipulative astronomy, latitude, rotation, translation, earth tilt, shadow inclination summer and winter
Print Settings
Printer:
none – laser cut Notes:
490 x 217 mm board size
How I Designed This
based on this model. Assembly instructions almost equal to these http://www.abong.com/pro…/sundial/sundial-instructions.pdf -
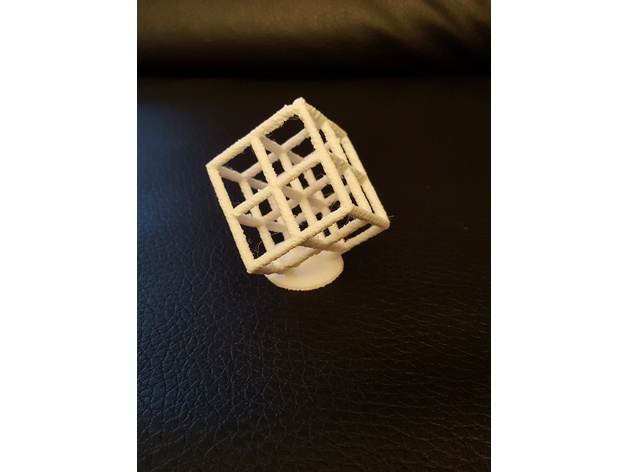
Cube art 3D Print Model
Summary
Nice print, took an hour and 15 min at 0.5 scale. I,m a beginner and this is an easy print.
Thanks for sharing!
Print Settings
Printer:
Vertex K8200 kit Rafts:
No Supports:
No Resolution:
0.25mm Infill:
25% Notes:
original download: https://www.thingiverse.com/thing:1850320 -
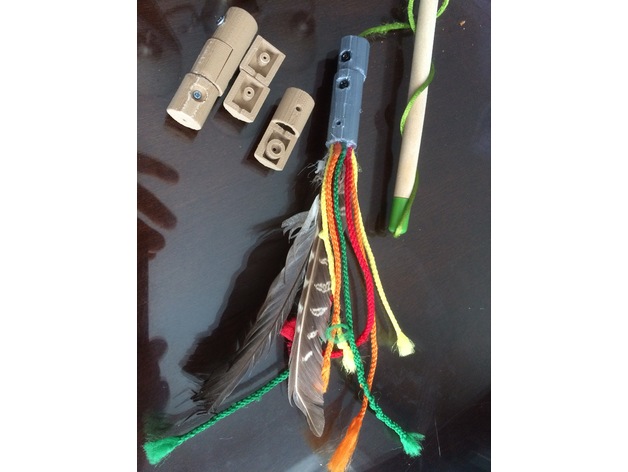
Cat toy magnetic link 3D Print Model
Summary
I made this magnetic link and toy adapter for my cat. He likes to destroy all things feather very quickly and toys don’t last very long. I am sure I am not alone. In order to refurbish cat toys this adapter can be placed at the end of the string of the destroyed toy. Feel free to attach strings and feathers to the second link (you may use hot glue and a screw can secure it) and as you prefer you may glue the parts or use screws for reusing the adapter. The magnets are from HFT to keep it cheap. I made the link magnetic to give my cat the chance of enjoying his catch and when done to steal it from him for a new chase.
Magnets:https://www.harborfreight.com/10-piece-rare-earth-magnets-67488.html
Print Settings
Rafts:
Yes Supports:
Yes Resolution:
0.2 mm Infill:
30-50% Notes:
Since the base has minimal platform contact a rim and supports help against possible warping. Should print in 60 mins. -
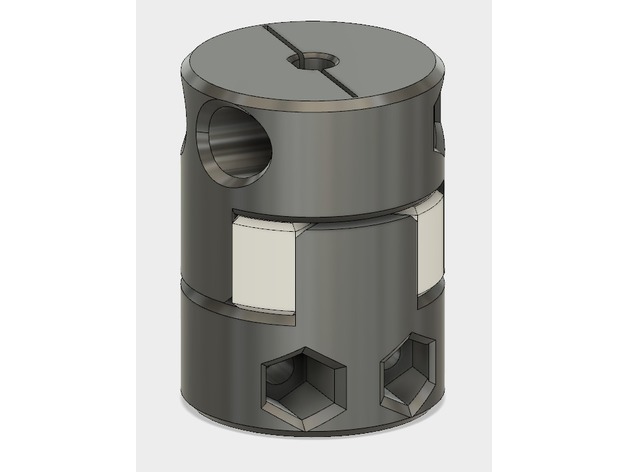
Flexible Shaft Coupler 5mm to 8mm 3D Print Model
Summary
Flexible Shaft Coupler – for 5mm Shaft with flat to 8mm Shaft. Print the coupler end pieces from PLA or ABS, the flexible insert with NinjaFlex/TPU, etc. Designed for 4mm screws and nuts to clamp to the shafts.
Print Settings
Rafts:
Doesn’t Matter Supports:
No Resolution:
0.2mm Infill:
40-80% for shaft clamps, 35% for flexible insert -
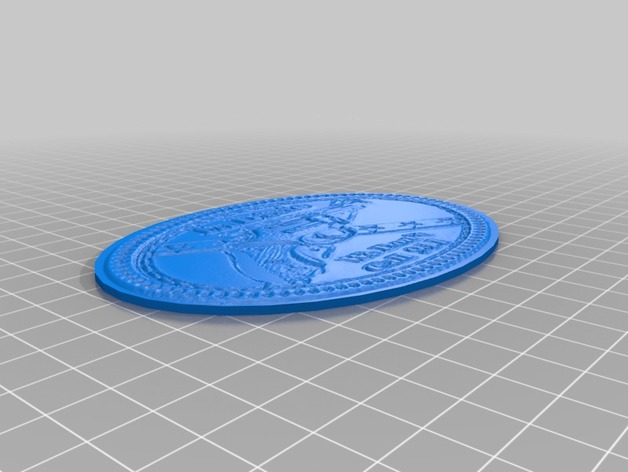
Dixie pride 3D Print Model
Summary
Based off a scan of a belt buckle. This was an oval .ply with a rectangle border. Had to use meshmixer/ lab to clean background, add oval base, remesh. Not perfect but not bad. -
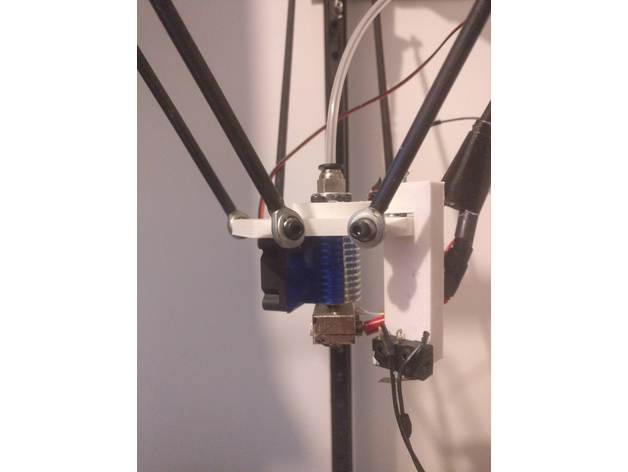
Autolevel mount for V6 delta printers 3D Print Model
Summary
Why
This is a quick design for an autolevel probe that should fit most Delta effectors like the Anycubic Kossel, FLsun etc. etc.
The probe is specifically made to support Delta printers with effectors that clamp the top end of a bowden V6 extruder. It’s probably too short for a V5 hotend.
Features
Fits most Delta effectors
Designed to match the e3d v6 hotend in length
Uses standard M3 mounting hardware (nut and bolts)
Uses standard endstop switch
Instructions
Print it in PETG with multiple walls and slow speed to get the strongest part.
Print without a fan to get the strongest part.
No supports required
If you encounter inconsistent bed leveling, your effector may not be entirely level. Mount the probe closer to the center, or upgrade to a hotend-mounted autolevel probe.
Open Source
As always the original design file (fusion360) is included, so feel free to improve it (or learn from it)! -
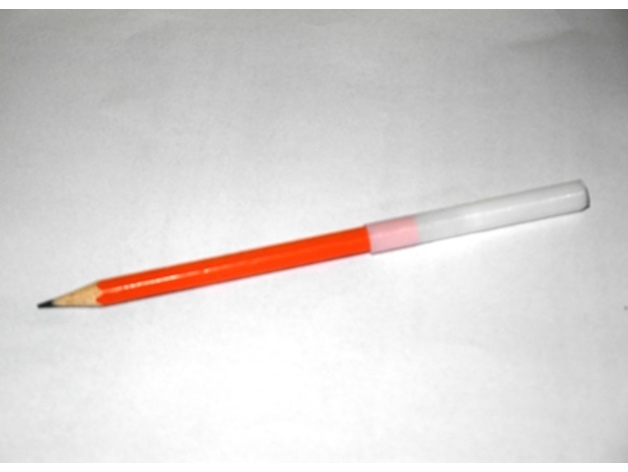
Pencil Extender 3D Print Model
Summary
Have you had any time problems writing with too short pencils, this might be your solution!
For bigger pencils just scale it up in your slicer!
If you have any ideas for improvement just write them into the comments.
If you love my makes, don’t hestate to click the follow button or like this thing!
Print Settings
Printer:
Flsun Cube Rafts:
Yes Supports:
No Resolution:
0.15 Infill:
20% -
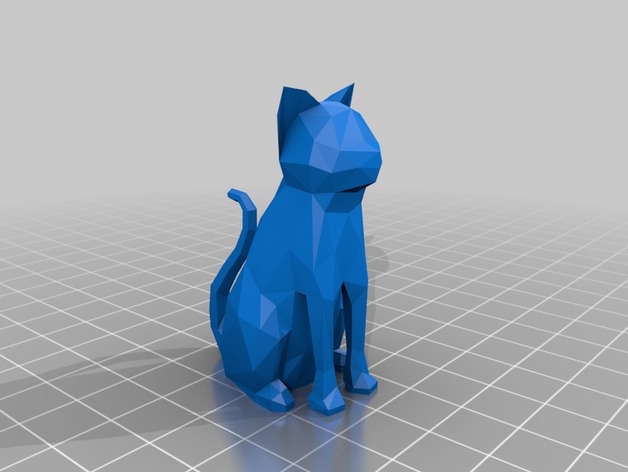
Polygonal Cat 3D Print Model
Summary
Just a small little cat I made in sketchup really quick
Print Settings
Rafts:
Doesn’t Matter Supports:
Yes Resolution:
.15 or .2 Infill:
20% Notes:
I’ve only tried it with supports and a raft, but I’m not sure it really needs them, feel free to experiment -
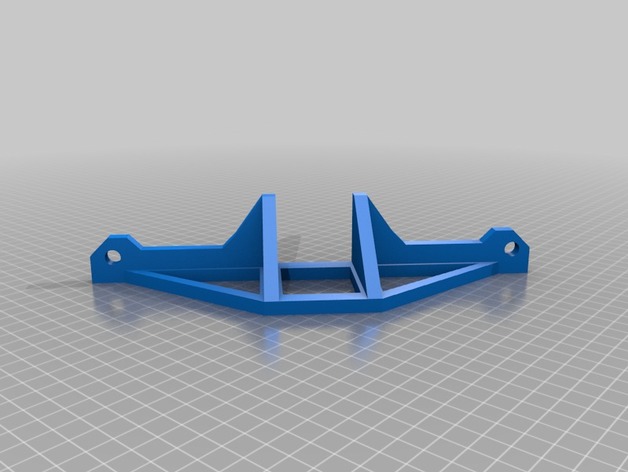
Anet A8 Front Brace – Lower Bolt Holes 3D Print Model
Summary
I needed a front brace for my A8. All the models that I found here didn’t fit. For some reason the holes for the bolts were too high for my machine. So I made a design with the center of the bolt holes lowered to at about 14mm above the bottom.
How I Designed This
Designed in TinkerCAD. -
Expo Dry Erase Marker set magnetic holder 3D Print Model
Summary
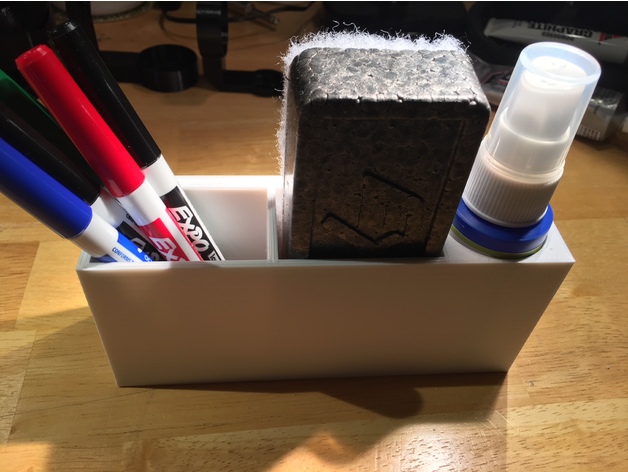
I have a whiteboard without a marker tray. I bought the small Expo dry erase marker set that you see in the pictures from Amazon and wanted to be able to have a magnetic holder to keep it in that I could attach to the dry erase board. Pretty simple design, but it works for my needs. Hopefully it’s useful to someone else.
Marker set:https://www.amazon.com/gp/product/B00006IFIM/ref=od_aui_detailpages00?ie=UTF8&th=1
Magnets:https://www.amazon.com/gp/product/B00CS5OV0U/ref=oh_aui_search_detailpage?ie=UTF8&psc=1
E6000 Craft Adhesive:https://www.amazon.com/gp/product/B004BPHQWU/ref=oh_aui_detailpage_o00_s01?ie=UTF8&psc=1 -
Cartesian One v2 3D Print Model
Summary
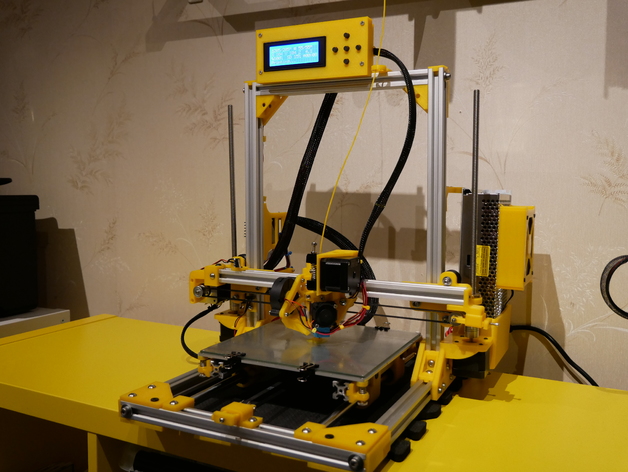
This is a my take of an Cartesian printer that should be relatively easy to build and easy to get good and consistent print quality. The Cartesian One is based on 2020 aluminium v-slot extrusion, some mini wheels and a lot of 3D printed parts. You should have access to a printer when building this one!
Some parts can be easily changed due to the modular design. You can change the extrusion lengths to get a bigger bulid plate, taller printer, different smooth rods etc.
On my build I have used 12mm smooth rod for the Y-axis, but it is simple to adapt it to 8mm smooth rods by replacing a few printed parts.
I decided to 3Dprint as many parts as possible including the 2020 corners https://www.thingiverse.com/thing:2502931. I even printed the gantry plates and the spacers to keep cost and waiting time for shipments down. A few components are coming from the AM8 project and from some of the AM8 remixes. The x-carriage is a new version of my thing, https://www.thingiverse.com/thing:2469435 ,just using wheels instead of bearings.
2020 extrusions for my build with a 220 x 220 build plate: (will obviously depend on your own build plate and the build height you would like)
3 pcs. 300 mm (X)
2 pcs. 385 mm (Z)
2 pcs. 380 mm (Y)
You will need one more v-slot for the x-carriage. Probably best to cut that one to exact length when you have the other components printed and mounted. (On my printer it was 370mm).
Tap the both ends of the y-extrusion, bottom end of the z extrusion and the top x-crossbar extrusion for M5 bolts.
I used some 2020 extrusion (1 pc 144mm and 2 pcs 214mm) for the base plate for the bed as well, but you could use something else. (The width between the smooth rods can be adjusted within a wide range and it should be easy to reuse something you have in stock)
You will need 20 teeth pulley and idler for X to clear the wheels on the x-carriage. You may use 16 or 20 teeth for Y belt. (16 teeth recommended).
300mm T8 lead screws with nuts
A lot of M5 bolts and t-nuts…
Wheels used in my build: https://www.banggood.com/3D-Printer-FlatV-Type-Plastic-Pulley-Concave-Idler-Gear-p-1038551.html type 2 -
Corner for 0.75 inch OD tubing 3D Print Model
Summary
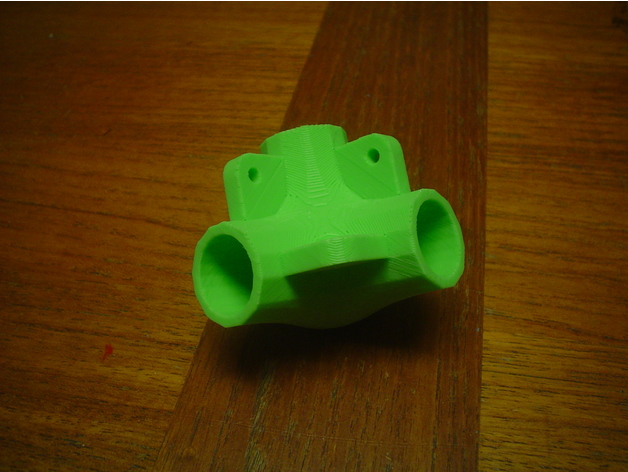
A corner for making boxes from 0.75″ OD tubing.
One version with ears for mounting side panels. The other version without
Epoxy the tubing in.
Made with Mathematica and OpenSCAD. -
E-Flite Timber Snow Skis 3D Print Model
Summary
E-Flite Timber Snow Skis
Video: https://www.youtube.com/watch?v=Nn0KLkLK3VE
Summary
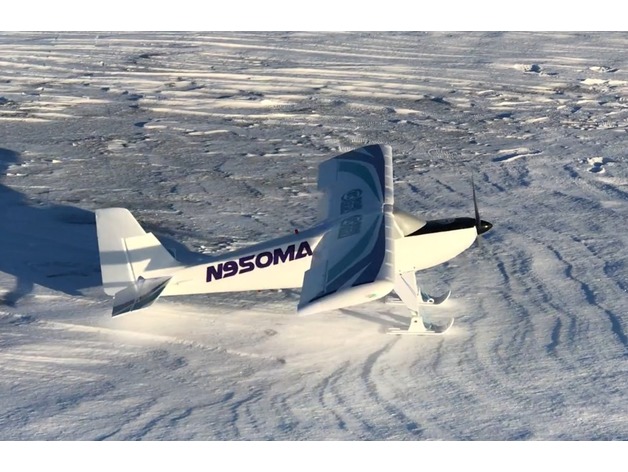
The E-Flite Timber is a fantastic little STOL plane that comes with big bush wheels and floats for flying off water. Many people use those floats for flying off snow as well, but I wanted skis. There are some options out there, but none of them meet all of these (in my opinion critical) criteria:
Easy to print without supports
Stock fit and finish (no modification to the plane)
Allow for limited travel of the skis to handle rougher terrain
Able to print all 3 skis at once (on an 8×8 print bed such as i3 style)
Does not negatively affect flying characteristics
Lightweight
These skis were made a little wider than many options, so that they could be shortened a bit and still have tons of surface area. They also fit on the stock axle with the stock landing strut with no modification, and have limited travel to navigate the terrain. They include a loop to hook a rubber band to, to keep the tips up while flying and landing.
I included the “test” files that we used when designing these. They are what we used to check fitment and travel of the ski. You can use them to test tolerances of your printer and determine whether or not you need to scale the model for it to fit well–without wasting plastic on the whole ski.
Printing
I printed these with .8mm nozzle at .2mm layer height, 20% infill, 2 shells top/bottom/sides. YMMV but this gave me a very strong part that was still plenty lightweight.
Preparation
I use warm (a bit cooler than boiling) water to soften the tip of the ski, and then use the front of a frying pan to shape the ski tip. Dip the ski into the water so that the tip is in the water basically up to the rubber band arch. Place the ski “right side up” inside the frying pan, and slide the tip into the edge of the pan to shape the front of the ski. Others have used heat guns and pringles cans with good effect, but I find the water to be more controlled as far as where the heat is going, and the frying pan gives a good shape.
You will also want to shape the front of the rear ski slightly so that it doesn’t catch on the snow. Do not bend the rear ski up much, or it will strike the empennage. The two holes go in front, and the grooves go down.
Installation
The fronts should be relatively self explanatory. Remove the stock lock nut, slide the wheels off, put the wheels somewhere safe, slide the ski on, and then secure with the lock nut. Attach a rubber band to the arch on the ski, and then secure the other end to the landing struts where they meet the fuselage.
For the rear, remove the 3 screws holding the rear wheel on, remove the cover plate and wheel and place them in the same safe spot as the front wheels, and then use the stock screws to secure the rear ski where the cover plate used to be. the screws should be able to countersink down into the model. -
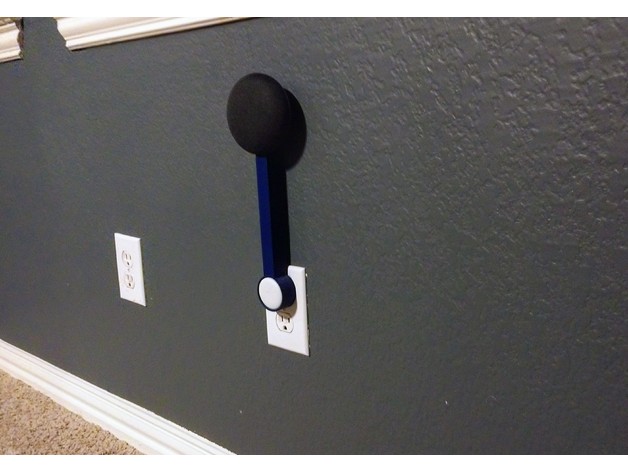
Another Google Home Mini Outlet Mount 3D Print Model
Summary
Let your Google Mini soar while completely hiding the cord! No tools or hardware required, though you can use a screw to better anchor the printed part. If you have dogs, curious cats, kids, or are just clumsy I would HIGHLY recommend using a screw to prevent damage to you wall, speaker, and/or the printed part. I may add a spacer to print for even better stability while using a screw.
The cord folds nicely in to the open area between the outlet and the speaker, just insert the mini b end, plug adapter, and slowly fold the cord in to the opening. Be careful to not bend the cable too tightly so as to not stress the internal wires.
Print Settings
Supports:
Yes Infill:
30-60% Notes:
Make sure to use strong filament, even printed solid PLA is a bit weak for this.
How I Designed This
Wanted something that raised my mini away from the floor, completely hid the cord, and elegantly held the speaker. After finding Jakewk13’s design and seeing an image of something like what I wanted, credit to DannyG72 for the concept, I came up with this! -
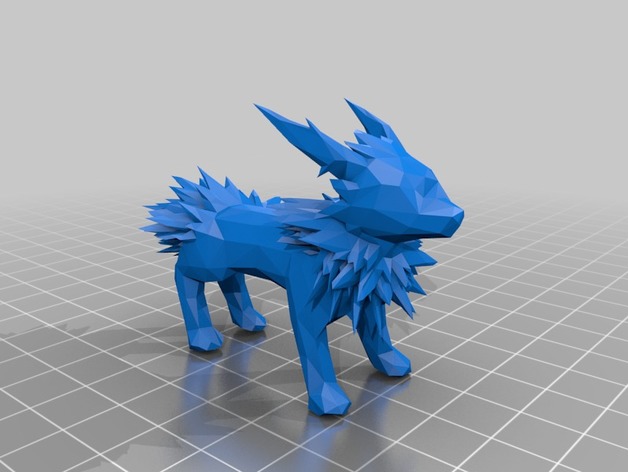
Complicated Low Poly Jolteon 3D Print Model
Summary
Yeah I may Have went crazy on the spiky fur, I am sorry, but I still would LOVE to see your guys’ makes! -
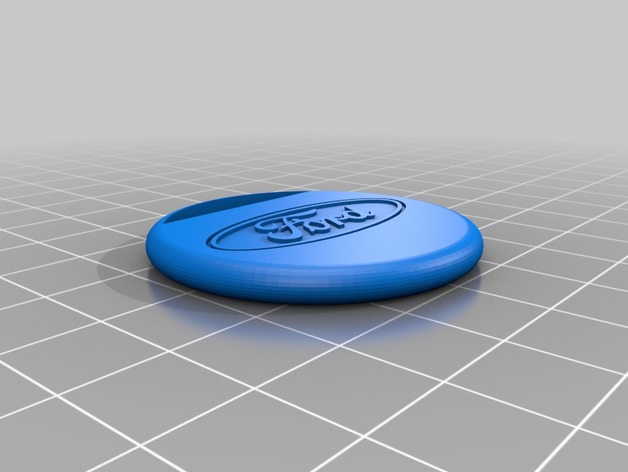
Small simple ford keyring 3D Print Model
Summary
just a small keyring i designed in fusion,
print at 100% infill, with logo facing up, comes out great, no support needed -
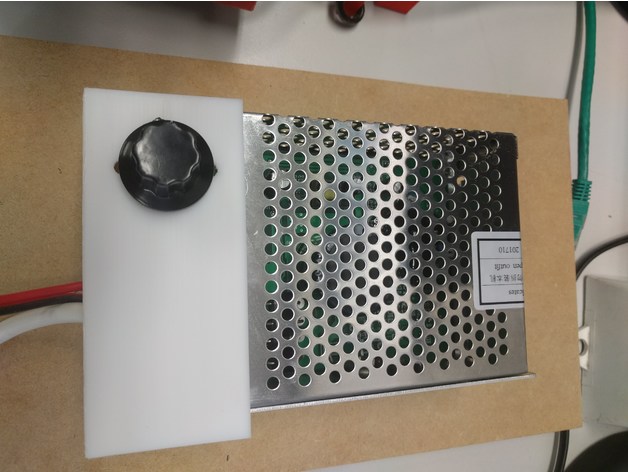
Power supply cover for ER11 spindle 3D Print Model
Summary
A remix of “loading_username” very nice PSU Cover,
This one can be screwed down/mounted.
Cheers Rob. -
2020 Antivibration Stand for Delta Corners 3D Print Model
Summary
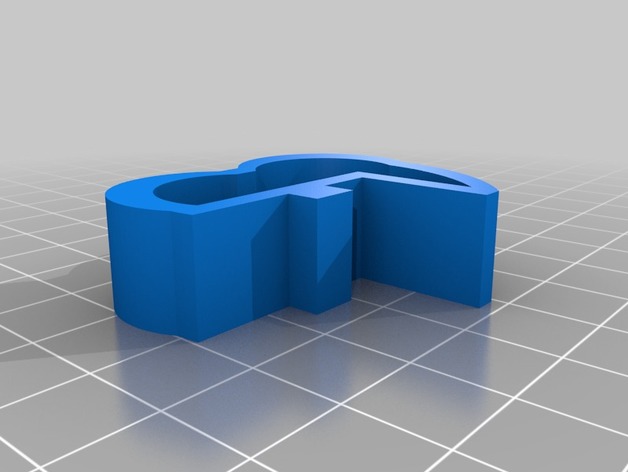
tried using Shepard48’s 2020 antivibration stand on my delta but due to its height even with 4 on each side it still moved about more than i liked. i edited the original so they can now be used right up to the ends of the 2020 extrusions and therefore get the most stability out of just 6 total, 2 under each corner.
used SemiFlex TPU at 100% infill with a 0.4mm nozzle and following the recommended maximum print speeds
Print Settings
Printer Brand:
RepRap Printer:
RepRap Kossel XL Rafts:
No Supports:
No Resolution:
0.4 Infill:
100 -
Landwheel Charger Dock 3D Print Model
Summary
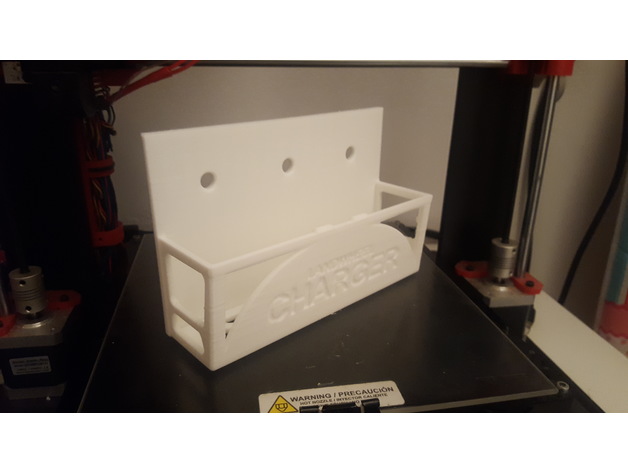
Landwheel battery charger wall mount
Added 45º version with supports
Print Settings
Printer Brand:
Prusa Printer:
Prusa Clone Rafts:
Doesn’t Matter Supports:
Yes Resolution:
0.3 Infill:
20% -
Rock-solid E3D V6 mount for CR-10 with 12mm ABL sensor support 3D Print Model
Summary
Since I would like to change my CR-10 hotend to a more reiable one in terms of clogging (my PTFE tube alway melts after printing ABS at 250 degree) I’ve decided to go for an original E3D V& hotend. OK, it’s not the cheapest solution but in terms of construction it really convinced me since the PTFE tube is to going straight down to the heated block but ends in the cold zone of the hotend.
So I waas looking for a mount that allows me to attach my new hotend to my CR-10 and lets me add an ABL sensor in addition. Unfortunately I could not find any that was working for me. Some were too bulky, some had some construction issues and some simply did not support ABL or the ABL holder was too weak.
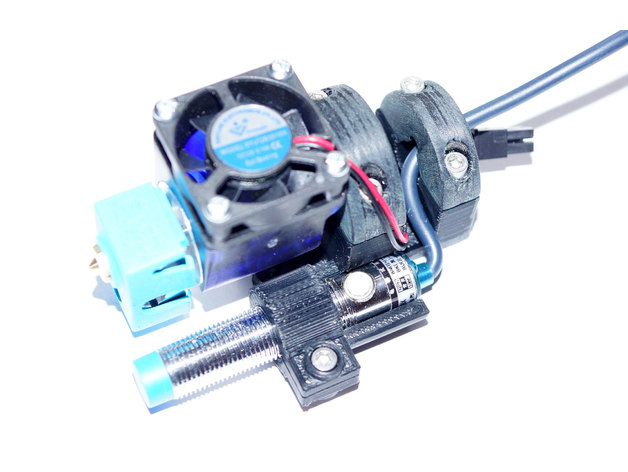
Therefore I’ve started to build one from scratch which can be found attached. It fits very well to the CR-10 plate and is easy to print (just print the STL files as they are. The mount.STL migh need some supports to be printed well).
Also the construction is rock-solid – no shaky ABL sensor and no movement of the whole construction.
The ABL Sensor has been placed as close as possible to the nozzle so measurement discrepancies should be as low as possible if the bed is a little uneven. For ABL I’ve used the following capacitive sensor: Heschen LJC12 A3–5-Z/BX.
Print Settings
Printer:
Creality CR-10 Rafts:
No Supports:
Yes Resolution:
0.2 mm Infill:
30% Notes:
Use ABS because of hotend temperatures. Some supports might be needed for mount.stl.
How I Designed This
The mount had been designed in 123D Cad. Used the sensor and the E3DV6 hotend as reference and also did some trial and error when designing the whole mount.
The first design was paying attention to get the sensor as close to the hotend as possible and to have a minimalistic design – anyway, it failed because the sensor was not getting close enough to the bed.
The second approach was much better since the sensor height was perfect now and a cable clamp had been added. However, when trying to mount it to my CR-10 I’ve noticed that the roller screw was preventing the attachment of the mount.
1st attempt2nd attempt
-
Staffa nema17 48 mm estruso 3030 3 3D Print Model
Summary
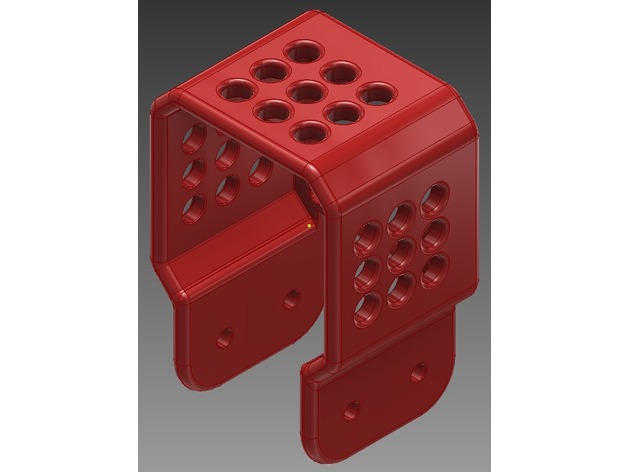
Staffa nema 17 per estruso 3030
Altro https://www.thingiverse.com/thing:2755114
Altro https://www.thingiverse.com/thing:2755366 -
Rocket Memorial 3D Print Model
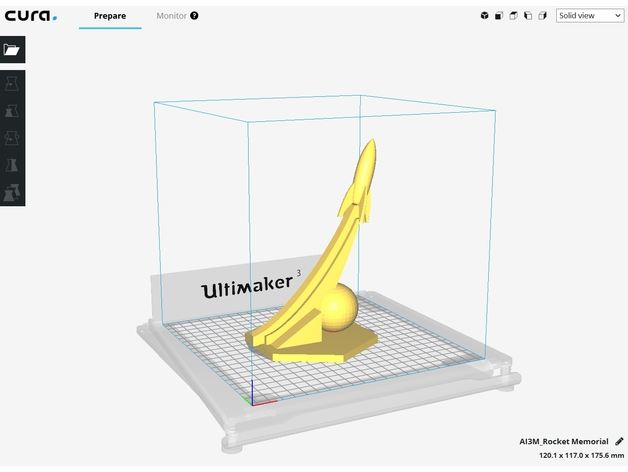
Summary
I wanted to make a russian style influenced memorial for my desk 🙂 It´s a remix from SJ627 Rocket Storage – https://www.thingiverse.com/thing:454192
How I Designed This
My first File
I did this in tinkercad and i hope you like it 🙂 -
Meat Pounder 3D Print Model
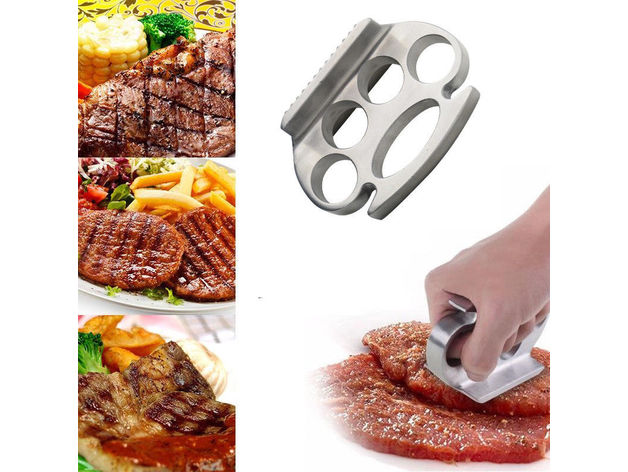
Summary
I saw this online and I just had to have one lol 😉
!Don’t forget to CHECK OUT my other designs and FOLLOW my daily KooKoo uploads, Enjoy 😉
Print Settings
Rafts:
No Supports:
No Resolution:
0.2 Infill:
25-35% Notes:
5 Shells Min -
Dicegamon Board Game 3D Print Model
Summary
Move your dice around … and then off … the board before your opponent does the same.
Set-up – You will need the 8-on-a-side Backgammon board supplied or a regular board shortened. Each player will need 12 dice (in a different color or style) and an additional two dice. Each player sets up their dice as in Figure 1 – On the far side of the board, in front of their opponent.
Moving – On a player’s turn they roll the two movement dice. The numbers that come up are the type of dice that may be moved. If doubles are rolled two pieces may each be moved or one piece moved twice (no stopping between moves). When doubles are rolled the player also gets to take an additional turn.
Dice indicated for movement may travel a number of spaces equal to or less than the value of that die. A die may always be placed on a column containing your own dice. Dice may only land on a column with opponent’s dice if their die is of equal or greater value than all the dice in that column.
You will need to print the Board twice -
Arkham Door Sign 3D Print Model
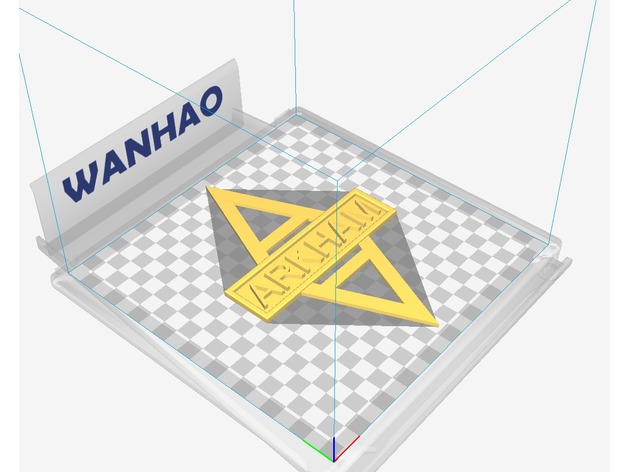
Summary
Hey Thingiverse,
after about a year of being a leech I am going to start contributing. This is the first of many I hope. I am very new to designing and working with 3d software so please forgive any errors. Please let me know if you have any issues printing and I will try my best to correct the model and repost.
This Arkham door sign is something I was looking for but couldn’t find. I hope you guys enjoy it.
Print Settings
Printer Brand:
Wanhao Printer:
Wanhao Duplicator i3 Plus Rafts:
Yes Supports:
No Resolution:
0.06 Infill:
100% Notes:
Print temp 190 c
Build plate temp 70 c
flow 104%
cooling 100% after bottom layer
How I Designed This
Fusion 360
I am very new to this and have started using fusion 360. Loving it so far. I have designed a few things that I hope to post soon. -
GoPro NVG Mount (Emerson Bracket) 3D Print Model
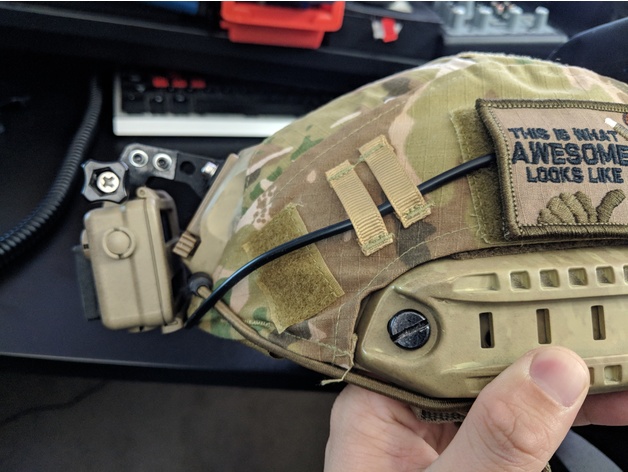
Summary
This is a Go-pro mount based on an Emerson NVG bracket (link below) to make a low cost, durable mount similar in style and positioning to the Brainexploder NVG mount (a touch overpriced on Shapeways).
Print the parts, assemble body + left/right plates with M3 screws and nuts. Mount this assembly to the bracket with M4 screws and nuts.
https://www.aliexpress.com/item/Tactical-Airsoft-Paintball-Fast-Helmet-Mount-NVG-Mount-Adapter-High-Quality-Outdoor-Hunting-Combat-Helmet-Accessory/32666867986.html?spm=2114.search0104.3.65.2mO1DF&ws_ab_test=searchweb0_0,searchweb201602_3_10152_10151_10065_10344_10130_10068_10547_10342_10343_10340_10548_10341_10084_10083_10139_10615_10307_10059_10314_10534_100031_10604_10103_10142,searchweb201603_40,ppcSwitch_5&algo_expid=45654ac3-db07-45a0-b95b-809b6d007090-9&algo_pvid=45654ac3-db07-45a0-b95b-809b6d007090&priceBeautifyAB=0 -
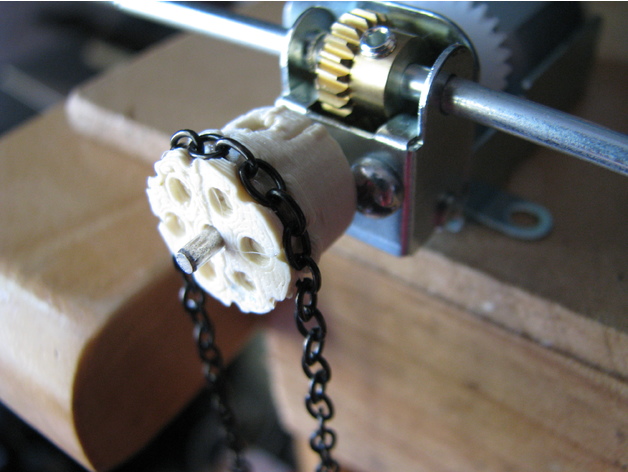
Parametric Chain Link Drive Pulley 3D Print Model
Summary
I had a desire to make some small chain drives for some of my models, but wanted to use some classic chain link style chair rather than proper chain drive chain. I had a look on thingiverse and discovered that nobody else had made a model for this. So, after scratching around with a pencil to work out what parameters I needed, I jumped on OpenSCAD and came up with two parametric models. This one has a neck, holes and nut slots for screwing it onto a shaft while the other is just a disk with the chain recesses which can be more easily adapted to other pulley body designs.
The chain size and number of link pairs determines the size of the pulley. So the important variables to fiddle with are;
Llength: This is the outside length dimension of a single linkLwidth: This is the outside width dimension of a single linkLthickness: This is the diameter of the link “wire”
N: The number of chain link pairs around the pulley. Please note this is pairs of links not the number of single links.
The pulley neck size is controlled by the following parameters;
Pwidth: Width of the pulley main drum which the chain recesses are cut into.PstemD: This is the diameter of the pulley attachment neck. There is nothing to stop you putting dimensions in here that can’t accommodate the retaining screw or the shaft. We leave that to you, the user, to figure something sensible.PneckL: This is the desired neck length
AxleD: This is the axle diameterScrewD: This is the retaining screw diameter
There are a bunch of other parameters that you may wish to tweak too;
Ptol: Is the printing tolerance. It is used to provide a bit of space around the chain profile so that chain will fit into the recess despite a bit of spread from the extruded plastic.PtolThk: This is a printing allowance for the “radially” orientated link thickness. This allows a bit of extra on either side of the link slot so any sagging of the printed filament can be easily removed or at least won’t interfere with the link sliding into the slot.Wclr: On either side the the tangential link is a cutout slot. This parameter just controls the size of this slot.
CutD:There are some very stylish decorative holes in the end of the pulley. This parameter controls the diameter of these.CutN: This controls the number of these extremely stylish holes.
Hopefully this is all clear enough.
I feel the model will work well for larger chains where the printing tolerances are less of a factor in the final printed shape.
I trust this will be useful to you. -
Tablet Stand / Tripod (works with Samsung Tab A 8.0 2017) 3D Print Model
Summary
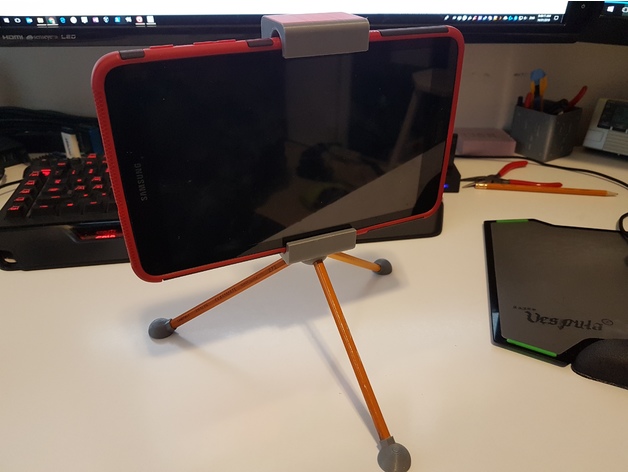
A tripod holder and stand for my son’s Samsung Tab A 8.0 (2017). It uses standard #2 pencils ;), cut to the same length, as legs. This fits around the rubber/plastic case for the tablet. It is currently holding tightly due to the press fit of the dovetail joint.
I used the Tablet Tripod Mount by lynce9956 as inspiration for my design. My son liked his design but wanted a few things different so we redesigned it from scratch. If you print yours at a finer resolution than I used, 0.32 mm layer height, the dovetail joint might fit a bit loser. My suggestion would be to add an elastic band in the dovetail area such as what was done by lynce9956. They used two eye screws and a rubber band to create tension to hold it closed.
Print Settings
Printer Brand:
Prusa Printer:
i3 MK2S Rafts:
Doesn’t Matter Supports:
Yes Resolution:
0.4 Notes:
I printed this in a really rough layer height as my son was being impatient and just wanted this stand to use his tablet as a camera. The large layer lines meant the fit was just slightly tight, but this worked well as I didn’t have to add any springs or elastics to tension it around the tablet. I printed this laying on it’s side so that the layers would help increase the strength. (i.e. the layer are parallel to the stress).
How I Designed This
Designed in Fusion 360
Fairly simple design. My son told me what he wanted and I translated that to a printable object. -
PC Cooler Powered Turbine 3D Print Model
Summary
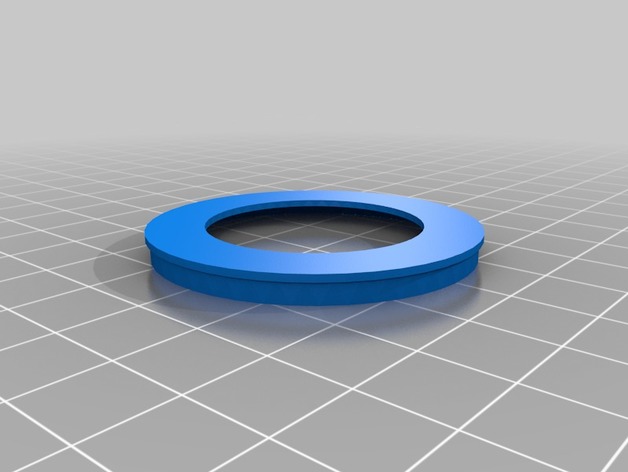
This is still a WIP. the idea is to have a PC cooler Trowing air through a duct in to the Combustion chamber so that it works just like a real turbine. but instead of fuel, were adding compressed air.
How I Designed Thisinitial design.
-
Combination Lock – work in progress 3D Print Model
Summary
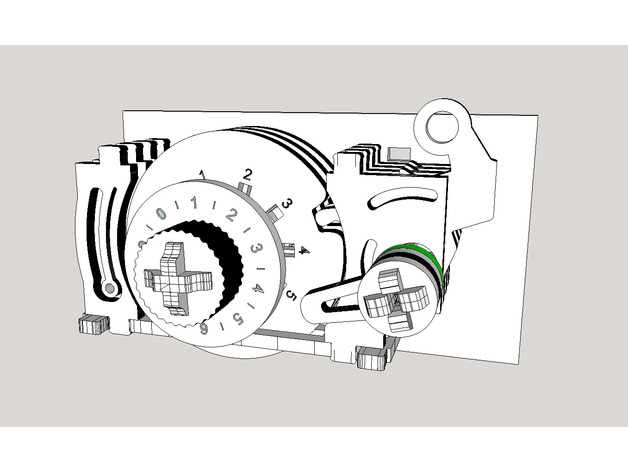
This is my attempt at reverse engineering the combination lock created by UGears for their wood safe (https://ugearsmodels.com/safe.html).
I assumed 4mm laser-cut plywood ot MDF, but a simple proportional resize of the DXF will adjust the plans to other thicknesses.
It should be fairly functional by now but I don’t have access to a laser cutter in the next few months so I will leave it here as it is so anybody can rework it and integrate it on their projects.
As an assembly guide and visual aid you can Google for the official UGears’ user guide PDF.
As I drew all components using only intuition and visual acumen, you can’t really use the code tables displayed in the manual, but I believe a similar one can be extrapolated by toying around with the SketchUp model I provided. -
Sprint Car Wing 3D Print Model
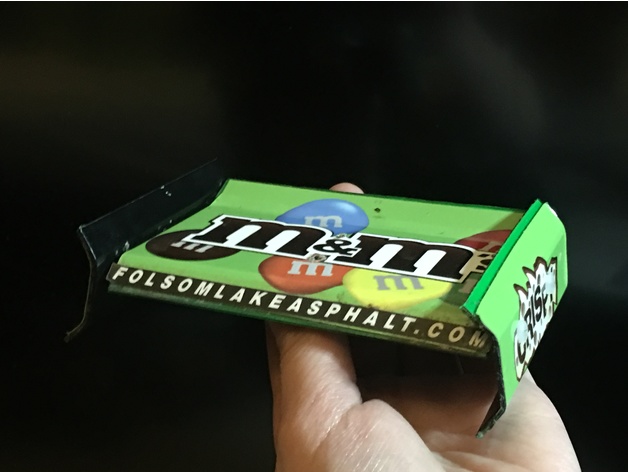
Summary
My uncle is big in RC cars as a hobby and when he found out I had a 3D printer he wanted me to make him a custom wing. I think it turned out good for my first time designing something.
Print 1 Middle Wing and 2 Side Wings. -
Maslow CNC Bosch POF 1200 AE Z Adjust Mount 3D Print Model
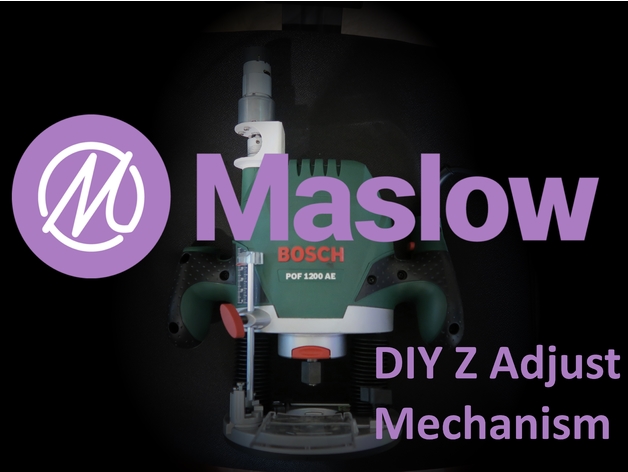
Summary
This is a motor mount and lead screw nut mount for the Bosch POF 1200 AE, using the Maslow CNC Z adjust motor to drive it.
The lead screw i used: http://bit.ly/2FzCfZK
The coupler i used: http://bit.ly/2EGimiv
Print Settings
Printer:
Anet A6 Rafts:
No Supports:
Yes Resolution:
0.3mm Infill:
10% Notes:
Print it how you like, its just there to stop the motor from turning and doesnt have to be THAT strong at all. -
Zero Motorcycles Keychain 3D Print Model
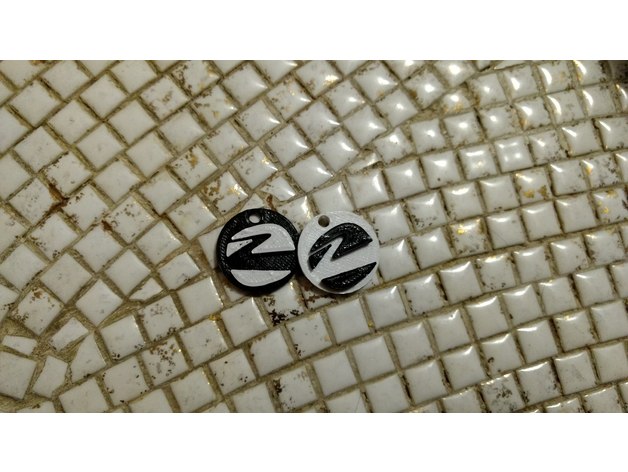
Summary
This keychain is about the size of a quarter and prints in under 20 minutes! For all the Zero Motorcycle riders out there!
Print Settings
Printer Brand:
Robo 3D Printer:
R1 ABS + PLA Model Rafts:
Yes Supports:
No Notes:
Layer 14 is where I paused and changed filaments for the two-color print.
How I Designed This
This keychain was the first 3D design I ever made — in 2016!! I took an EPS copy of the logo and converted it to SVG, then brought it into Tinkercad. I made the quarter-sized circle, and layered the logo over it, then punched out the hole. This is version 2, I’ve cleaned up the underside a little so that it prints better.