Summary
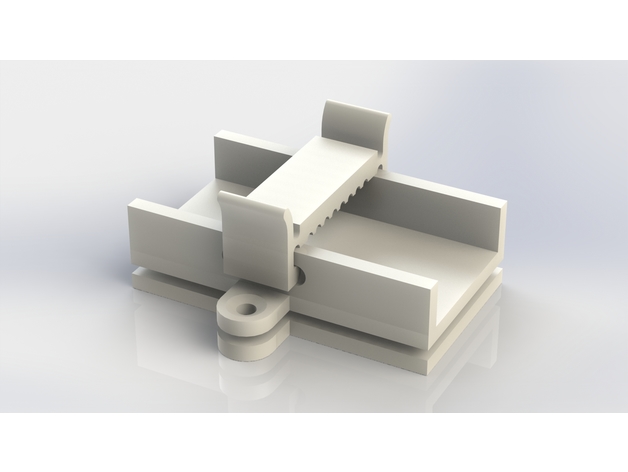
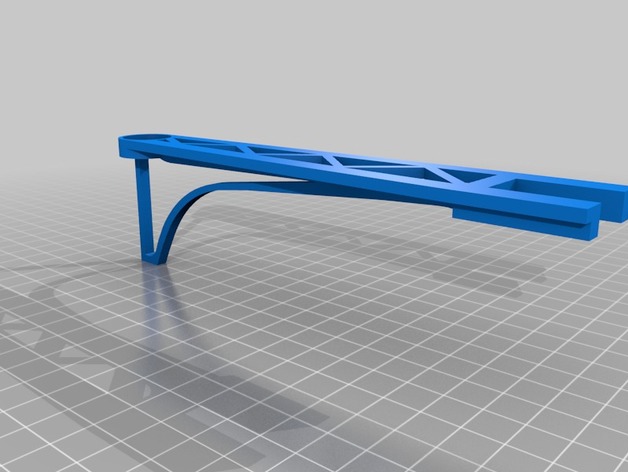
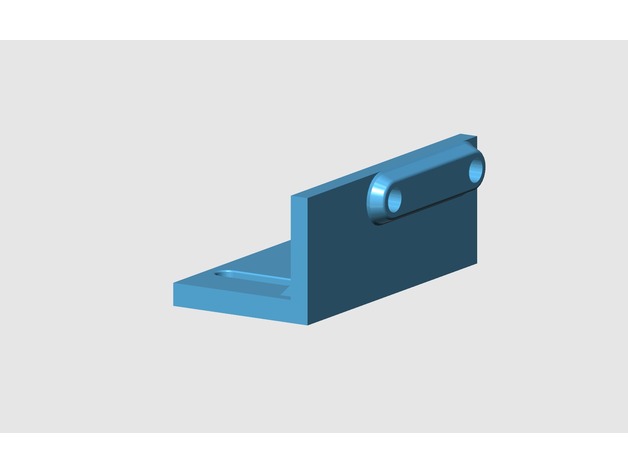
Wanhao d7 new limit switch 3D print model.
I have created this mount to install a mechanical end stroke instead of the optical one.
https://www.cgtrader.com/3d-print-models/hobby-diy/mechanical-parts/wanhao-d7-new-limit-switch
Category: Free 3D Models
Free 3D models ready to be used in your CG projects such as films, visualizations, games, VR etc. All 3D Models and Free 3D Print Models are available for download in several formats including .MAX, .STL, .FBX, .3DS, .C4D, .OBJ, .BLEND, .DWG, .DXF, .LWO and much more. If you’re in search of high-quality Free 3D assets, we have a huge library of 3d models for all your needs. Also you can visit 3D Models and 3D Print Models category.
-
Wanhao d7 new limit switch 3D print model 3D Print Model
-
BitX40 Ergonomic Enclosure 3D Print Model
Summary
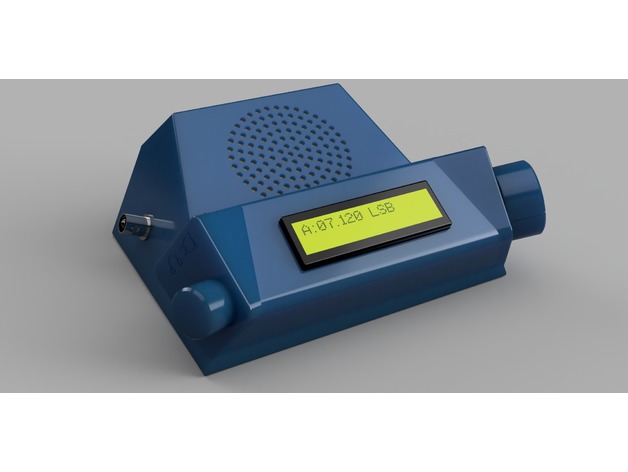
This is yet another enclosure for VU2ESE Ashar Farhan’s BitX40 transceiver. It’s different from other boxes because it’s ergonomically more efficient–the volume and tuning dials are positioned for ease of use and the speaker is tilted up towards the operator’s head. It’s small and has a much larger heat sink to accommodate 100% duty cycle transmissions that digital modes require.
Print Settings
Printer Brand:
Prusa Printer:
Prusa Mk2 Rafts:
No Supports:
No Resolution:
Normal or Optimal (.20 or .15mm) Infill:
20% Notes:
These models have supports built-in where required and can be easily knocked out after printing. I’ve printed these parts successfully in PLA and PET.
Post-Printing
Parts & Assembly
The model is composed two halves for the case: a base that holds the circuit board and the bottom feet using M3 screws and a top. There are also four chamfered holes on the base that attach the top case using M3 flat head screws. The base is also marked “FRONT” and “BACK” for proper positioning of the top case and the board. The bottom feet can additionally be fitted with silicone rubber feet.
The volume on/off pot and tuning pot that come in the BitX40 kit will fit but their shafts require trimming so the vol and tuning knobs will fit. The Vol knob is nylon and can be trimmed using a knife, but I had to use a Dremel grinder to cut down and dress the shaft of the Tuning pot. You should cut the length of the shaft to about 15mm and flatten about 10mm of that. Use caution to ensure that when you are cutting and grinding that you don’t burn out the bearings of the pot. Alternatively, you can use a pot from your own junk box.
The Raduino slides into a slot at the bottom. My design is meant to allow it to be affixed to the inside of the top case with small self-tapping screws, but when I printed it in blue translucent PET, there was insufficient area to support screws, so I ended up hot gluing the LCD module to the case and using screwed standoffs between the LCD and the Arduino modules to hold them in place.
You can also use hot glue to fix the a 65mm dia. speaker over the grille area. Mine was recovered from an old clock radio.
Because I intend to use my BitX40 on JT-65 and WinLink, I needed to replace the small heatsink over the final TX transistor with one that would allow it to handle the 100% duty cycle that digital modes usually demand. I bought a “DIY Cooler Aluminum Heatsink Heat Sink Chip 1002510mm for IC LED Power Transistor” at Aliexpress. I fastened it to the box with small nylon zip ties.
In his BitX40 instructions, Farhan mentions that you can use one of the small earphone style audio jacks for headphones, so that when you plug in the headphones it cuts out the speaker, but leaves out specific instructions “as an exercise to you”. I found a circuit that worked for me. -
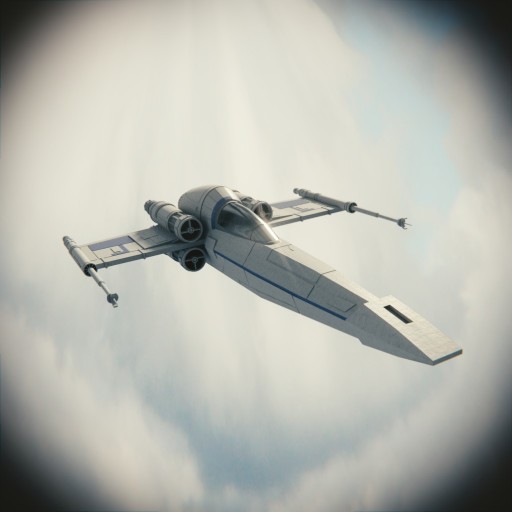
Star Wars: Z-95 Headhunter Free 3D Model
Medium detailed model of a Z-95 Headhunter. Everything is parented to empty (Z-95 Headhunter). The model is totally free to use, but the Star Wars copyright belongs to Disney.
-
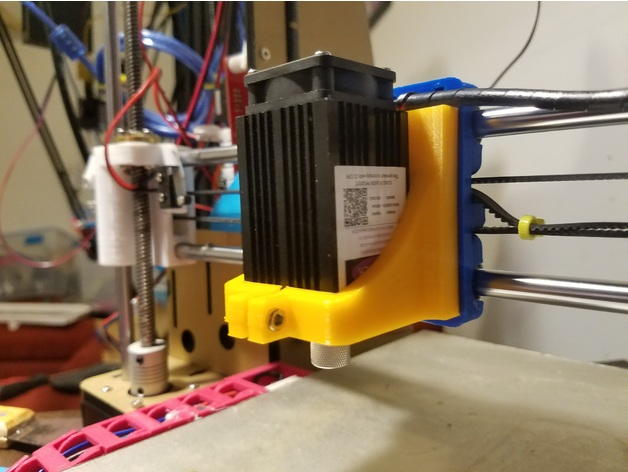
Laser Mount for Prusa i3 Rework X Carriage 3D Print Model
Summary
Mount for Laser (https://www.aliexpress.com/item/500mw-405NM-focusing-blue-purple-laser-module-engraving-with-TTL-control-laser-tube-diode-protective-googles/32562052620.html)
Compatible with the X Carriage from the Prusa i3 Rework – https://www.thingiverse.com/thing:119616
Print Settings
Supports:
No Infill:
10% -
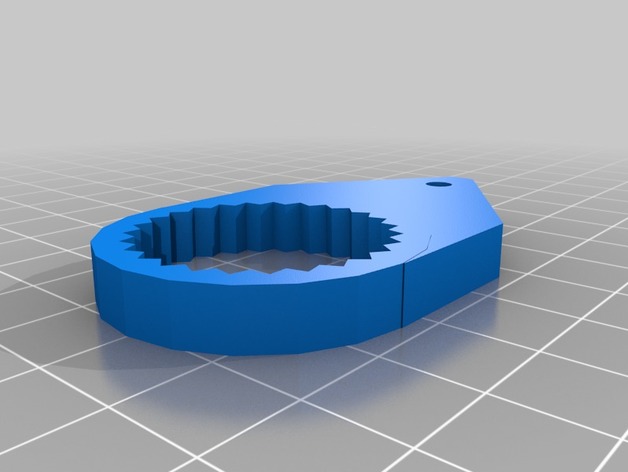
Twist Off Bottle Opener 3D Print Model
Summary
Modeled in tinkercad. SImple design but it works; wife had a hard time opening bottles. Took a few tries to get the ID right on the grip. Have fun. -
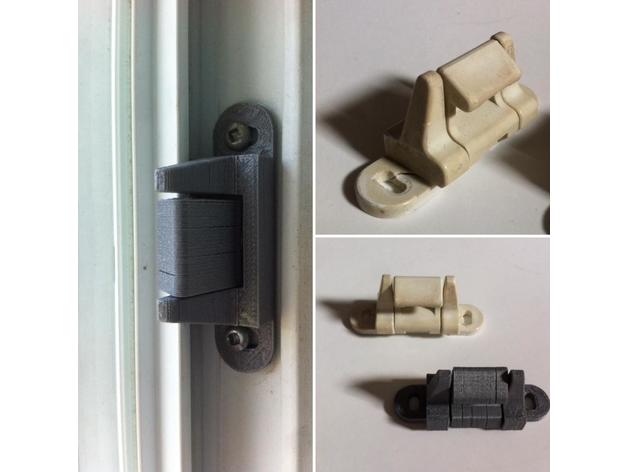
Sliding Window Latch 3D Print Model
Summary
replacement part. Assembly required.
Post-Printing
Assembly
You will need:
(1) compression spring coil 1/4″ X 0.038″
(1) slotted spring pin 1/8″
(2) screw
(1) hot glue or else
1- place the finger part over the vice jaws, that are slightly open
2- push firmly the slotted spring pin into the hole, and hit it with an hammer to push it in place (centered)
3- I use UV resin to stick the spring coil onto the finger. Hot glue should work to.
4- Press the spring coil with the base, then engage the slotted spring pin.
5- screw the assembly in place and enjoy having a safer home! 🙂
How I Designed This
Design with Autodesk Inventor. -
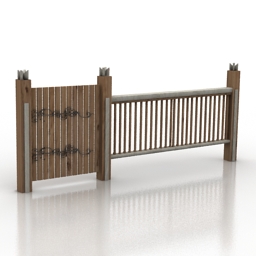
Fence 3D Model
Additional Info: Fence gate N280817 – 3D model (*.gsm+*.3ds+*.max) for exterior 3d visualization.
-
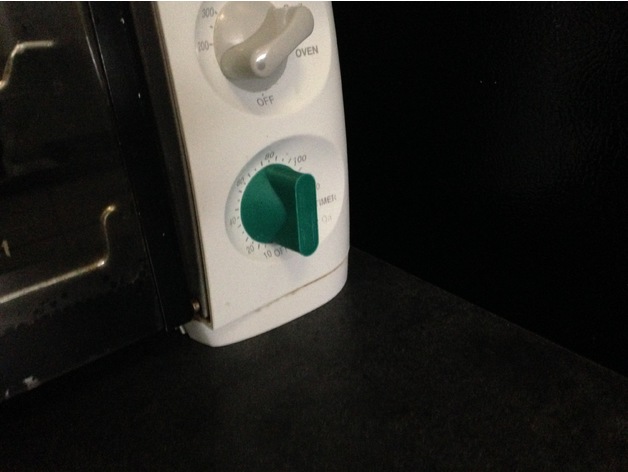
Replacement Oven Dial Knob 3D Print Model
Summary
I get really attached to my kitchen items. Each one has been carefully chosen at the time of purchase to fulfill a specific purpose and my heart breaks when, after decades of use, a small part either disappears or just craps out, rendering the whole thing unusable.
Well, I’m not gonna let that happen to my beloved Toastmaster toaster oven, doggone it! So, the timer knob popped off and never really fit on again. So, I pulled out the calipers, dusted off the ol’ 3D printer and came up with this thing. Fits perfectly. Lovely, even.
If you found this useful, it would bring me great joy to see your work – so be sure to share. 🙂
Or, better yet, please feel free to dump a bitcoin or two here (you can spare a bitcoin, can’t ya?):
1Py3TUeR8noBN2giHyFV1GfB6x3Kh2WEVv
… include a note to the effect of “Hi 3E8, thanks for the Toastmaster dial thing… my life is infinitely better on account of it and please accept this paltry amount in gratitude”.
You’re welcome! (in advance) 😀
Also, feel free to peruse my other submissions which are almost as varied as they are many:
http://www.thingiverse.com/3E8/designs
Enjoy! -
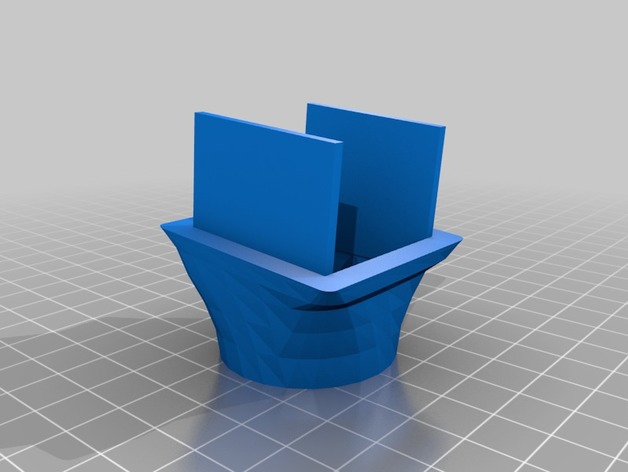
FT Simple Soarer Custom Motor Mount 3D Print Model
Summary
Custom motor mount for the Simple Soarer. This gives the Simple Soarer a much more aerodynamic front end.
IMPORTANT NOTE:
This has a 5 degree down tilt built in so make sure you put it with the motor wire hole on the top.
Print Settings
Rafts:
No Supports:
No Infill:
15% -
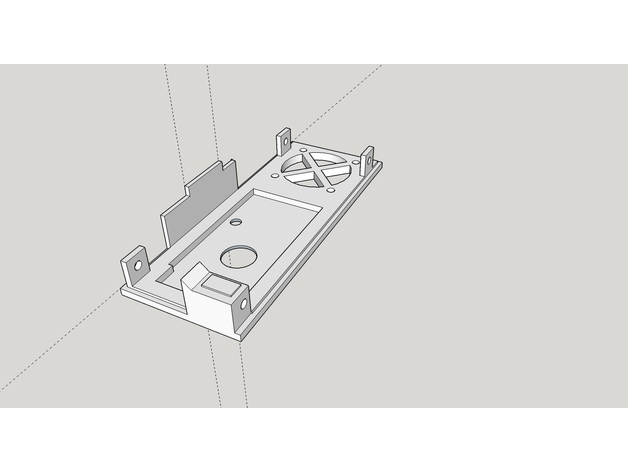
Case for Chorus RF Laptimer 3D Print Model
Summary
https://youtu.be/UfGwfbJc-js
Videotutorial completo del montaje de un cuentavueltas basado en el proyecto Chorus RF Laptimer de voroshkov, con la PCB de J.R.Reis. Cuentavueltas basado en la lectura del vtx que llevamos en nuestros drones. Material necesario, soldaduras, programación de arduino, configuración del modulo bluethoot, uso de la aplicación EXCLUSIVA para android y test del proyecto. No se detalla el esquema electrónico dando por hecho que trabajaremos sobre una PCB específica. De momento solo funciona con ANDROID. Se están buscando desarrolladores para iOS.
ACLARACIÓN DEL MONTAJE: El par de pines que hay al lado del buzzer son para cerrar/abrir (mediante jumper) la alimentación hacia los siguientes módulos desde el que tiene la batería. El modulo que queda a la izquierda del grupo debe de tener puenteado con un jumper los pines TX y RX ( del grupo de 4 pines abajo izquierda)
Si tenéis alguna duda, por favor hacérmelo saber en los comentarios del vídeo. Entre todos podemos aportar para hacer mas completo este videotutorial
HC-06
COMANDOS PARA EL MODULO BLUETHOOT (desde arduino IDE)
AT+BAUD8 – cambia el baud rate a 115200
AT+NAMEnombreelegido – sustituye “nombreelegido” por el nombre que quieras poner
AT+PINxxxx – sustituye “xxxx” por el PIN numérico que elijas
HC-05
Adaptador TTL: https://goo.gl/2RCeD2
solo cuatro cables necesarios; RX, TX, +5V y GND
(TX-RX cruzados)
Hay que conseguir entrar en el modo AT2 (pulsar el boton al conectar al TTL y soltar) parpadeo de led 1/seg
Ventana de comandos a 38400 baudios (Ambos NL & CR)
Introducimos:
AT+UART=115200,1,0
AT+NAME=NOMBRE
el pin será 1234
Con esa configuración funcionan perfectamente
Partir siempre de la configuración original
MATERIAL:
RX5808: https://goo.gl/f3nrkt
Arduino: https://goo.gl/SWZoyv
Modulo Bluethoot HC-06: https://goo.gl/yj4M19
Buzzer activo: https://goo.gl/E1DFay
BEC regulable. https://goo.gl/VhiGfR
Pines M-H 2.54: https://goo.gl/dcyU1B
HERRAMIENTAS
SOLDADOR: https://goo.gl/zMaVgp
BASE SILICONA: https://goo.gl/uBBGxT
FTDI: https://goo.gl/uZa7et
LINKS:
Proyecto original: https://github.com/voroshkov/Chorus-RF-Laptimer
Proyecto arduino (.zip): click en “clone or download”
IDE arduino: https://www.arduino.cc/en/Main/Software
APK android: https://github.com/voroshkov/Chorus-RF-Laptimer/blob/master/Android/ChorusRFLaptimer/app/ChorusRFLaptimer-release.apk
APK Maikel rf laptimer: próximamente…
Canal JLO fpv: https://goo.gl/t6yq5Q
Grupo de TELEGRAM: https://goo.gl/RDRACS
Comunidad de Facebook: https://goo.gl/qFVj8A
Instagram: https://goo.gl/1KCvPR
Print Settings
Printer:
STEEL PRUSA i3 Rafts:
Doesn’t Matter Supports:
No Resolution:
0,2 Infill:
40% -
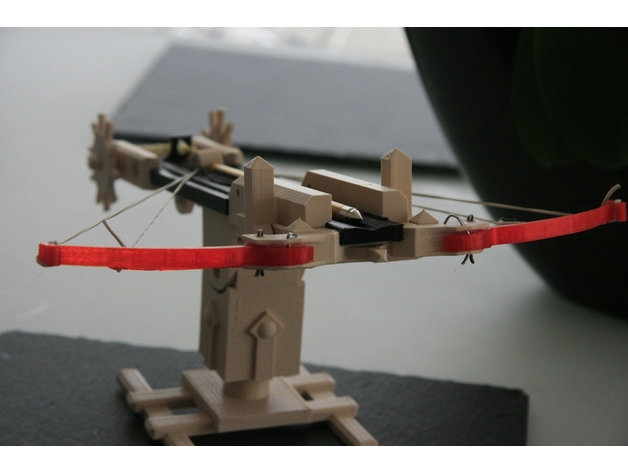
game of thrones crossbow 3D Print Model
Summary
It’s a replica of the crossbow in
Season 7 episode 4 of the game series of thrones
The total dimensions are: length / 261.731mm, width / 242.832, height121.001.they can rotate 360 degrees, crossbow arms can close exactly as in serial
DO NOT FORGET TO VIEW AND RESTORE THE PROJECTS FROM MY PROFILE
have fun
Print Settings
Printer Brand:
MakerBot Printer:
MakerBot Replicator+ Supports:
No -
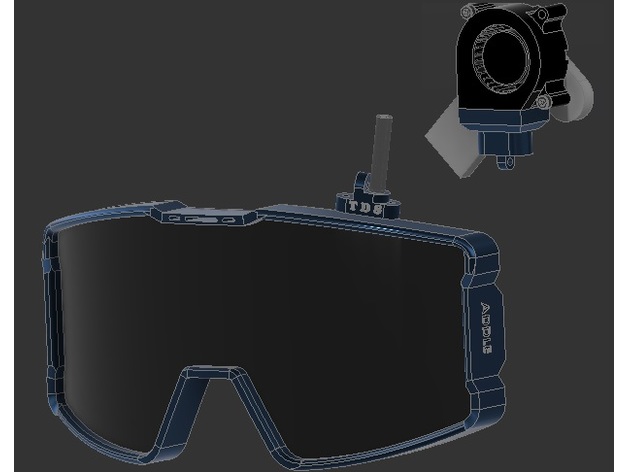
TDS Airsoft google cooling fan adapter 3D Print Model
Summary
An adapter for a standard 3d printer blower fan to two goggle mounts to immediately defog your goggles (or cool anything that needs cooling!)
requires .25in flexible tubing, a blower fan, and zipties
This is a little bit of a work in progress, the airblade in the goggle side probably needs adjusting be sure to leave me some feedback!
Like and Follow TDS Airsoft on Facebook for more stuff like this! -
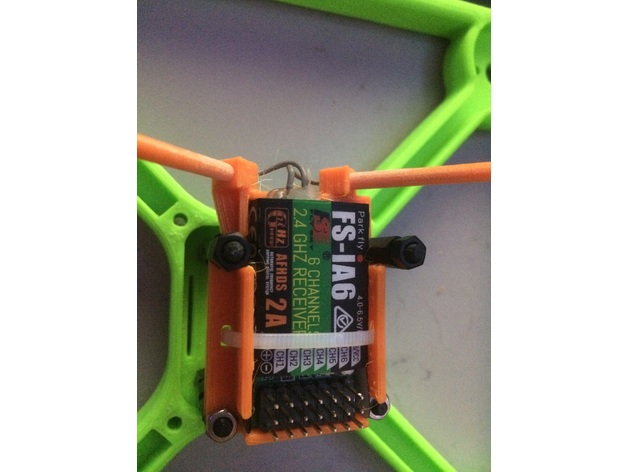
30.5 X 30.5 MM Mount for FS-iA6 Reciever w/ Antenna Tubes 3D Print Model
Summary
Receiver mount and antenna tubes for FlySky i6 Receiver, the FS-iA6. Designed to fit on the 30.5 X 30.5MM Mounting standard. I printed the antenna tubes one at a time vertically with 6 lines of raft, and then tapered the ends with sandpaper by hand for a tight fit into the base. Recommend 100% infill. .20mm layer height. -
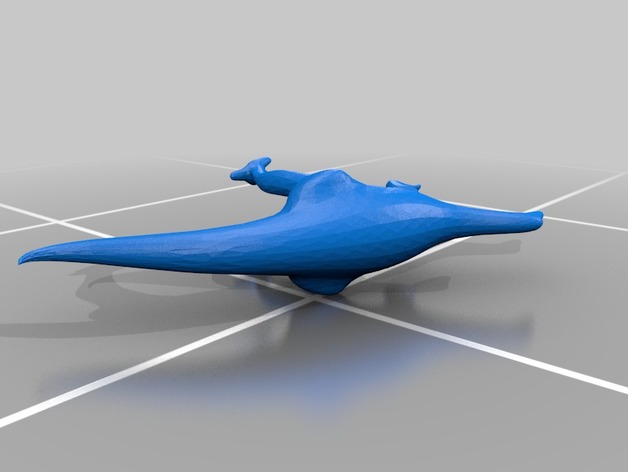
Dinosaur 3D Print Model
Summary
A simplistic dinosaur model capable of standing on its own. This is a good model for painting or practicing post production tactics, due to its relative simplicity.
Print Settings
Printer:
Monoprice Mini Rafts:
Yes Supports:
Yes Resolution:
0.06 Infill:
30% Notes:
It is suggested to print this on its side for optimal results
Post-PrintingHow I Designed This
Blender
I designed this in blender with the aide of a mirror modifier, and a subdivision surface at the end to smooth things over. -
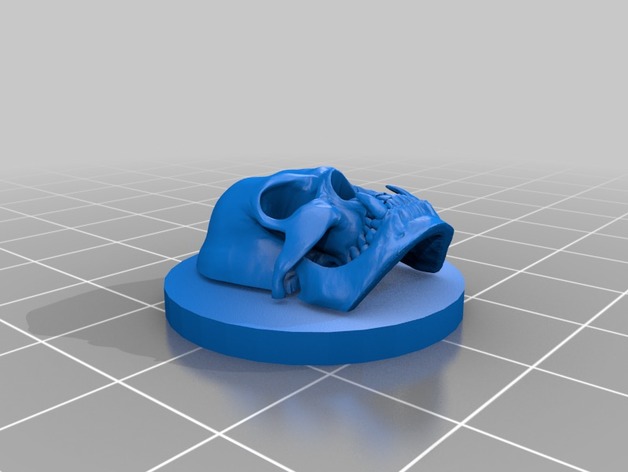
Orc Skull Death Marker 3D Print Model
Summary
On a 25mm base for tabletop gaming, replace an orc miniature with this when the creature hits 0 hp. It’s dead not prone. -
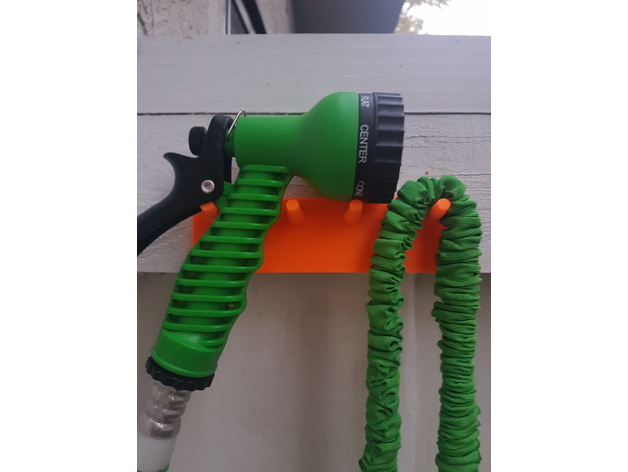
Little hose support 3D Print Model
Summary
I designed this to hang my garden hose out of the ground.
I has 4 little hooks bended up and two holes for screws.
Printed with PLA in my QIDI printer, took about an hour and I didn’t need any support.
Including the source files if anyone wants to modify it.
Print Settings
Printer:
Qidi Rafts:
Doesn’t Matter Supports:
No
How I Designed This
Using 3D Studio Max 2015 -
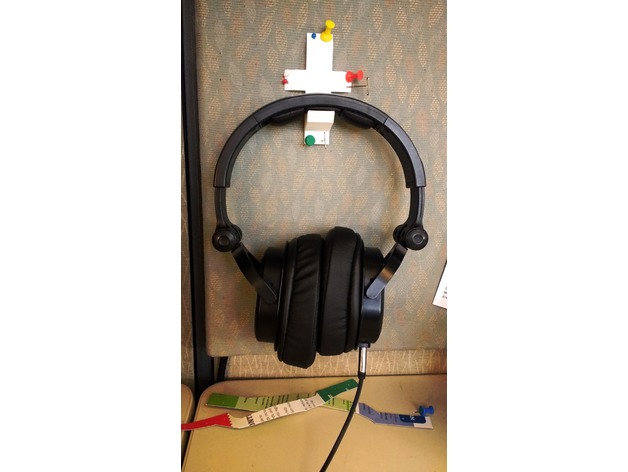
Headphone holder 3D Print Model
Summary
Headphone holder, using a corkboard for mounting 🙂
it’s one of those odd things that probably won’t do most people any good but i love it.
Print Settings
Printer:
Monoprice mini v2 Rafts:
No Supports:
Doesn’t Matter Infill:
20% -
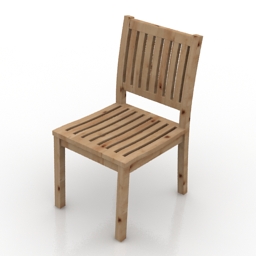
Chair 3D Model
Additional Info: Chair N010817 – 3D model (*.gsm+*.3ds) for interior 3d visualization.
-
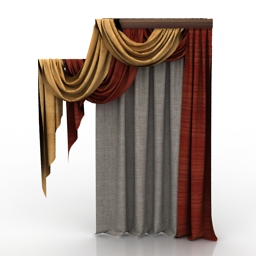
Curtain 3D Model
Additional Info: Curtain N140617 – 3D model (*.gsm+*.3ds) for interior 3d visualization.
-
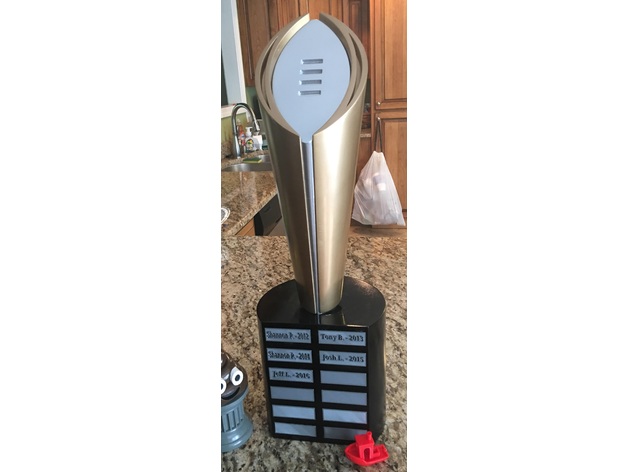
Base with Name Plates 3D Print Model
Summary
Base is designed at 62% scale. So trophy will need to be printed at 62% scale and base at 100%.
Link to Name Plates: https://www.tinkercad.com/things/cfAT1RvVRy2-name-plates. I printed the name plates upside down at .1 and issues a color change at .7. Name plates should press-fit to allow removal of the blanks.
Print Settings
Printer Brand:
Prusa Printer:
i3 MK2S Rafts:
No Supports:
No Resolution:
.20 Infill:
10% -
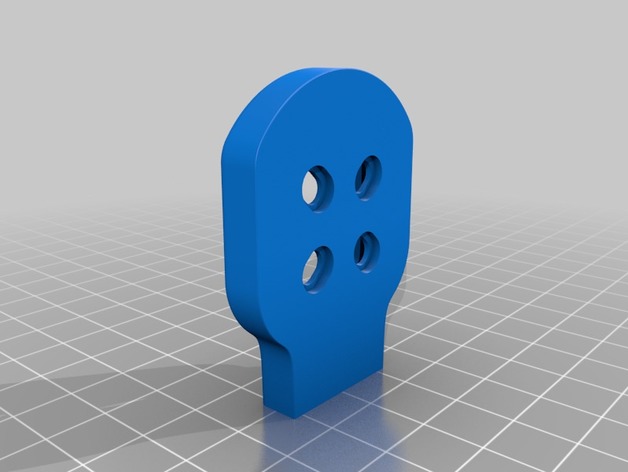
Epiquad 210x – arm protectors 3D Print Model
Summary
The rock solid carbon fiber plates of the Epiquad can handle a lot, but I like a bit of protection for indoor flying. So I created these arm protectors voor de 210x version.
I printed this with TPU with at least 50% infill and 3 lines for wall. This is how you get a nice bumper that can handle some scratches from concrete.
EpiQuad 210x Low Rider Edition – https://droneracingparts.nl/epiquad210x
Also check my other protectors and mounts for the EpiQuad.
Print Settings
Printer:
Prima Creator P120 Rafts:
No Supports:
Yes Resolution:
0.2 Infill:50%
Notes:
I really like the zigzag supports of Cura. With these you can remove the support underneath the edge, in one simple move. -
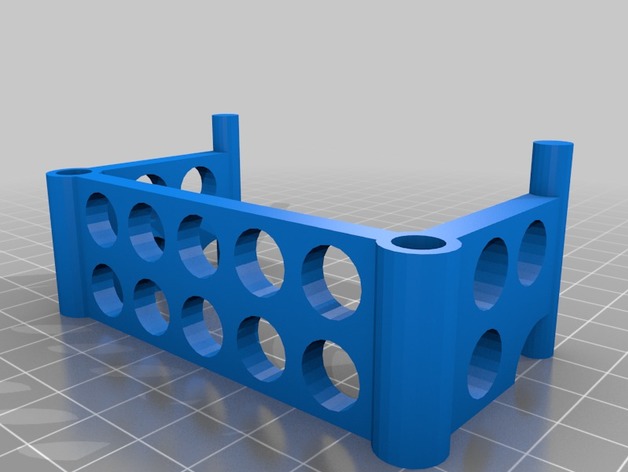
Wanhao Duplicator 4x Filament Alignment Bracket 3D Print Model
Summary
Filament alignment bracket to fit Wanhao Duplicator 4x -
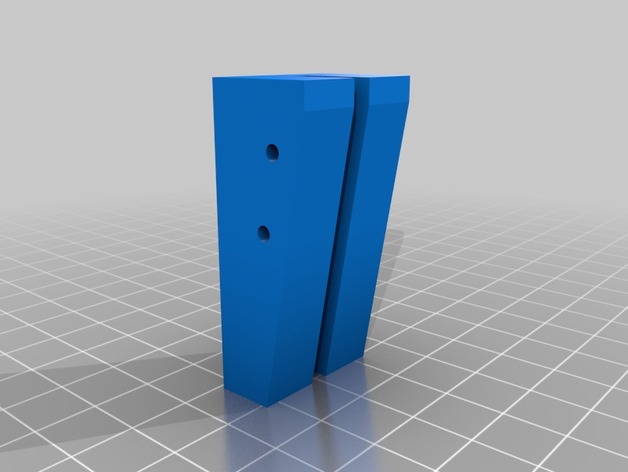
Caliper adapter to measure wider objects 3D Print Model
Summary
To measure a steel wire. Print 2.
Print Settings
Printer:
Tevo tarantula Rafts:
No Supports:
No Resolution:
0.2-0.25 Infill:
20% -
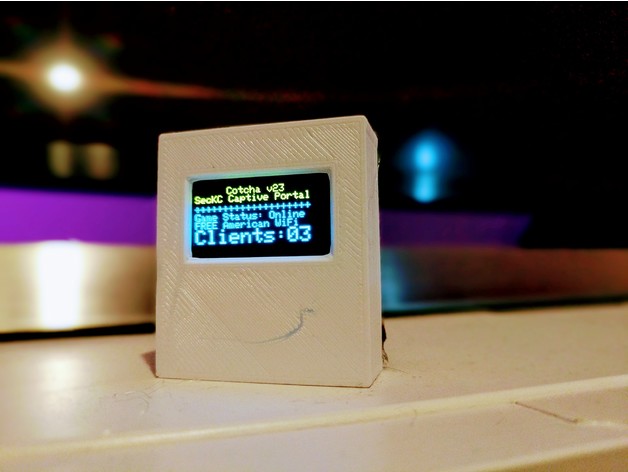
SecKC Cotcha Case 3D Print Model
Summary
Case for SecKC Cotcha for ESP8266 & SSD1306 (multicolor). See more at SecKC.org
Print Settings
Printer:
Monoprice MP Select Mini Rafts:
No Supports:
No Resolution:
.02 Infill:
10% Notes:
Bed 55
Nozzle 195
PLA 1.71mm
102% -
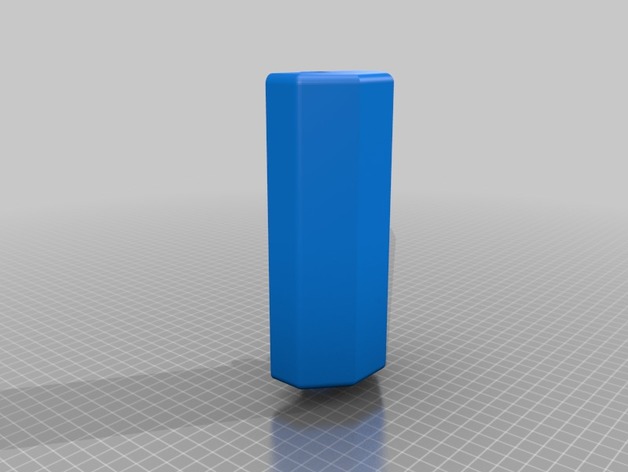
Magic chef replacement ice bucket 3D Print Model
Summary
Replacement ice “bucket” for my magic chef ice maker. Mine cracked and started leaking rusty water from the motor and the alternative is $20-30 (37 from Amazon/prime)
Not quite at the final design, but will update when I am. Designed it as two parts because it’s just beyond a 200mm bed. The long this party was the easiest to cut off and make assemblable. Just bolt with a 40(?)mm m3 bolt, nut and locking washer.
Print Settings
Printer:
Da Vinci Rafts:
No Supports:
Yes Resolution:
0.2mm Notes:
Supports will probably help. 0.2 or lower, but you will want to acetone/vapor polish to make it (more) food safe. Do all this at your own risk, I take no responsibility, etc. -
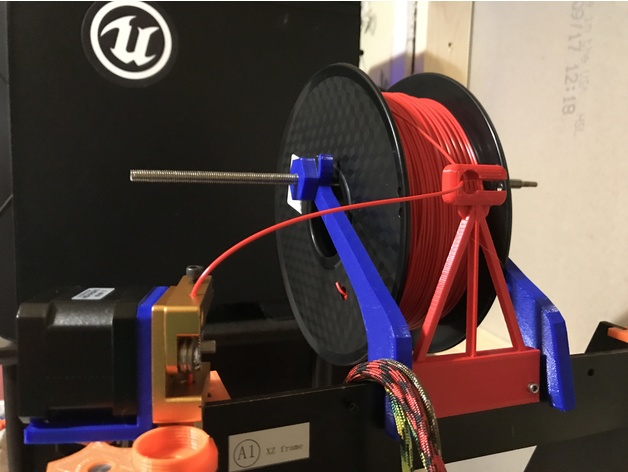
CTC Filament Guide 3D Print Model
Summary
This is a simple filament guide. This can be placed in front of the spool in order to keep the process simple.
Print Settings
Printer:
CTC Prusa I3 Rafts:
No Supports:
Yes Resolution:
.3mm Infill:
50% -
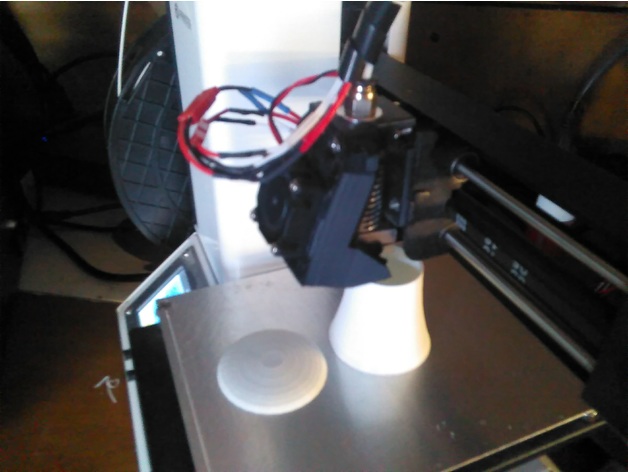
Monoprice Select Mini E3D 30mm single fan hotend and nozzle cooling 3D Print Model
Summary
I wanted to upgrade my MP select mini (V1) with an e3d hot end, but couldn’t find a holder for it that didn’t require an additional new fan. The closest I could find was Toolboxx’s upgrade for a single fan, but that still assumed I would be switching out the fan for a 40mm fan. So I did a simple remix.
All the 3D printed parts you need are included. You will need 2 M3x15mm screws and M3 bolts. -
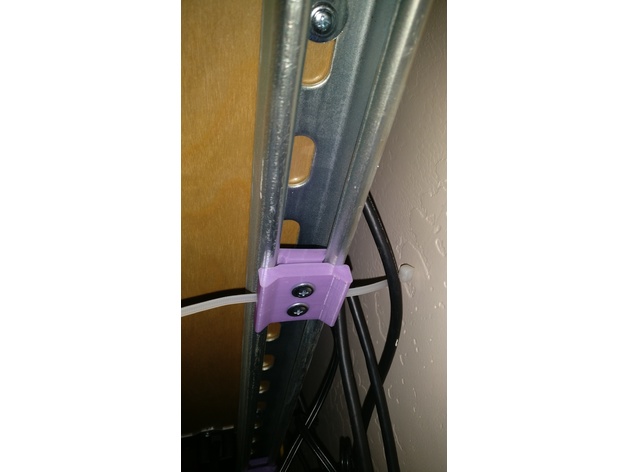
UniStrut Zip Tie Attachment 3D Print Model
Summary
Screws: http://www.homedepot.com/p/Everbilt-8-3-4-in-Lath-Sharp-Point-Screw-1-lb-Box-215-Pack-116102/205142852
Zip-Ties: https://www.lowes.com/pd/Utilitech-800-Pack-8-in-Nylon-Cable-Ties/999971176 -
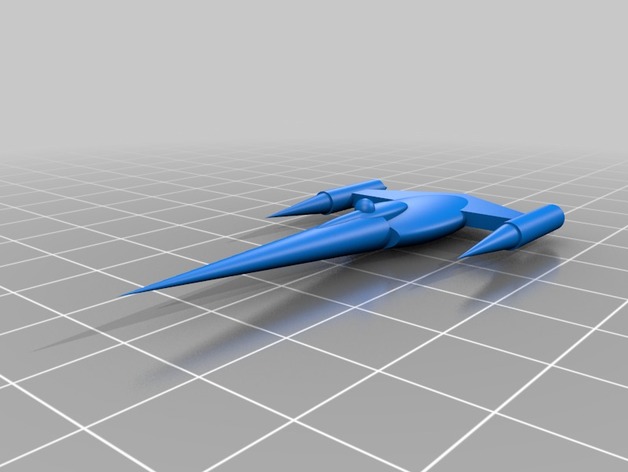
N-1 Starfighter 3D Print Model
Summary
The N-1 Starfighter, a sleek starfighter that’s eco friendly, the signature of the Naboo military, flies on a small base. -
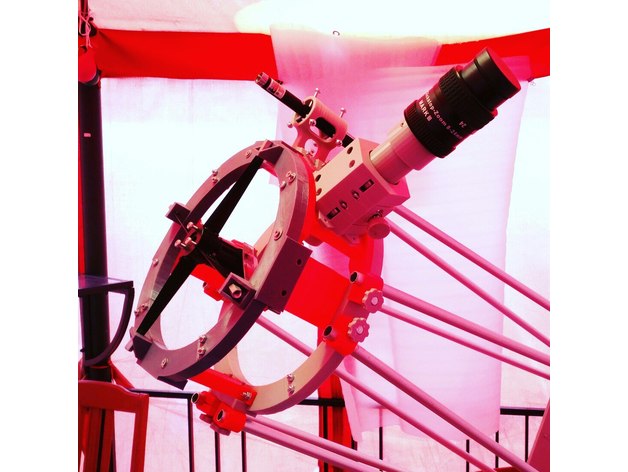
ABSFCS-1.25 focuser 3D Print Model
Summary
ABSFCS-1.25″
Crayford focuser… The version .. 0.1b
will be upgraded
624zz bearing 6
bolts M4 25mm 4
bolts M3 30mm 4
nuts M3 4
bolt M4 70+mm 1 -
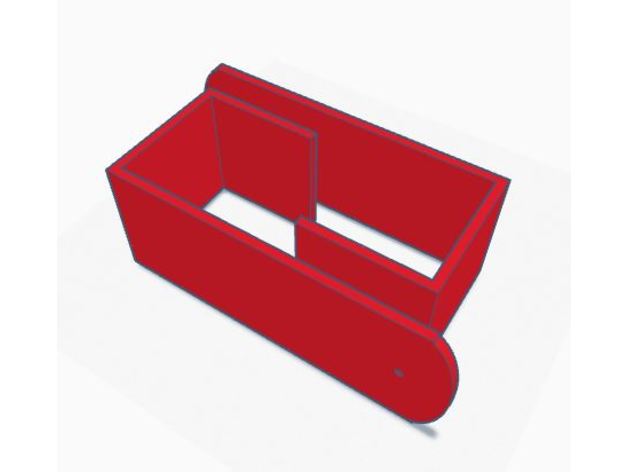
Office divider calendar hangers 3D Print Model
Summary
I needed a way to hang a large calendar from an office divider. I printed 2 of these with holes to put hooks into. You could also use Velcro. Created in Tinkercad
Print Settings
Printer:
Anet A8 Rafts:
Yes Supports:
No Resolution:
.15 Infill:
50%
Post-Printing -
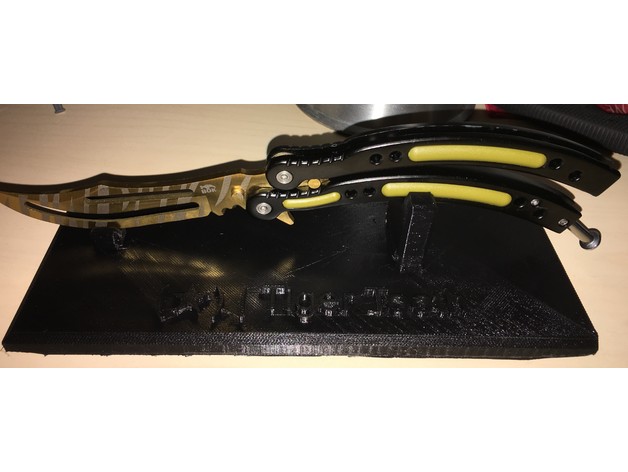
CSGO Butterfly Knife Stand 3D Print Model
Summary
A small stand for my Butterfly Knife replica Tiger Tooth.
I know my print looks bad, but you can do it better 😀
BTW I added a clean one without the Name.
Enjoy
Print Settings
Printer Brand:
Prusa Printer:
Prusa Clone Rafts:
No Supports:
No Resolution:
100 micron Infill:
14% -
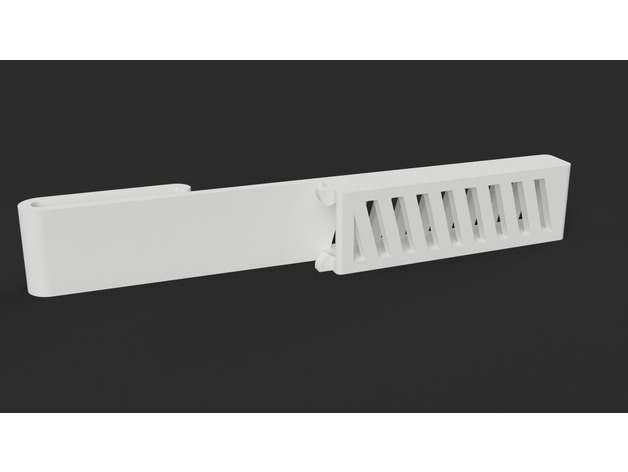
Bundeswehr Besteck Halter 3D Print Model
Summary
This is a belt holster for german Bundeswehr cutlery. It snaps right in.
Print Settings
Printer:
Creality CR-10 Supports:
No Resolution:
0.2 Infill:
20% Notes:
Janbex White PLA 1.75 @ 190°C – 60°C Buildplate
Post-Printing
Free Snaps
The springy bits of the design may be stuck to the main body, so you have to cut them free.
To be able to print with no supports, the file is split into two parts, they have to be glued together afterwards. I have made very good experiences with using regular superglue. -
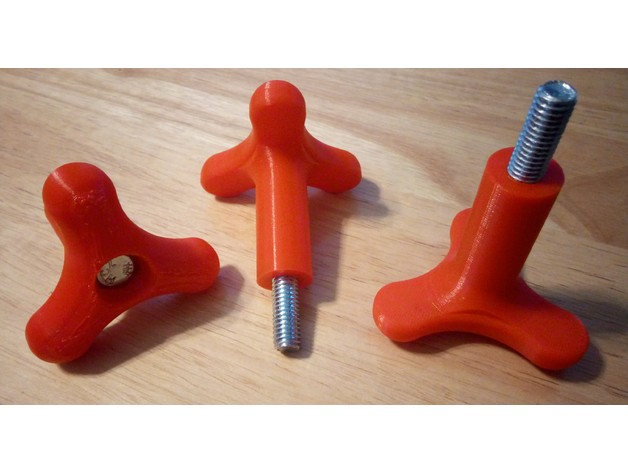
Celestron C8 Tripod Bolts 3D Print Model
Summary
These are customized “Smooth n’ Curvy” knobs designed for mounting my Celestron 8″ GPS telescope to its tripod. They use 3″ long 3/8″ bolts, leaving 1″ protruding from the knob. Depending on your printers dimensional accuracy, you may have to ream the hole out with a 3/8″ drill bit so you can press the bolt in. Recommend flipping the model so knob side is down and printing with supports.
Print Settings
Printer:
Monoprice Maker Select Rafts:
Doesn’t Matter Supports:
Yes Resolution:
.2mm Infill:
20% Notes:
Recommend printing with at least 3 walls so you can ream if needed with a 3/8″ drill bit. -
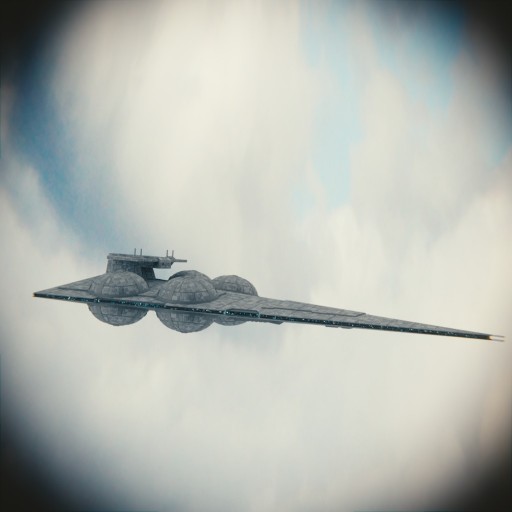
Star Wars: Immobilizer 418 Free 3D Model
Medium detailed model of a Immobilizer 418 cruiser, also known as “Interdictor Cruiser” or “Interdictor”. Everything is parented to empty (Immobilizer 418). The model is totally free to use, but the Star Wars copyright belongs to Disney.
-
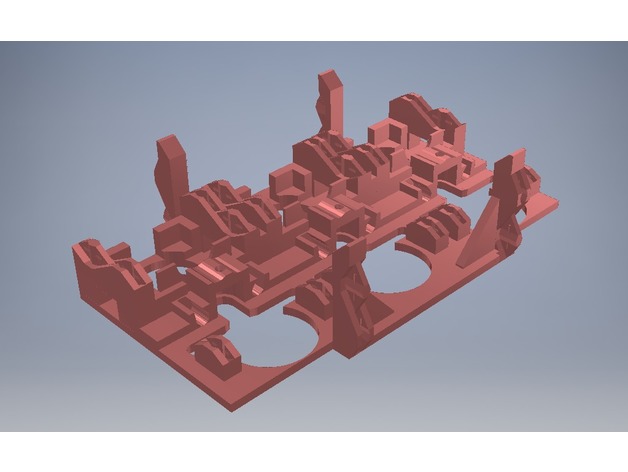
RepRap Snappy jhead platform triple extruder 3D Print Model
Summary
I took the jhead extruder mount and patterned it so that two more extruders can be added. I’m not 100% happy with how the extruders stick out, so the part will probably be modified after a little testing. -
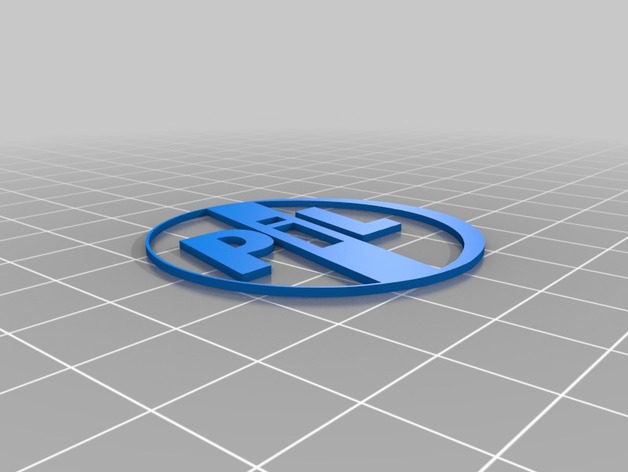
Big Collection Of Random Band Logos 3 3D Print Model
Summary
This time it’s random band logos. I included the .SVG files I used to create the .STL files with. As always feel free to use this in anyway you please and if you come up with a great design please take all the credit. Just doing this to pass the time.
If you have a suggestion or request, leave it in the comments. I’ll get to it as fast as I can -
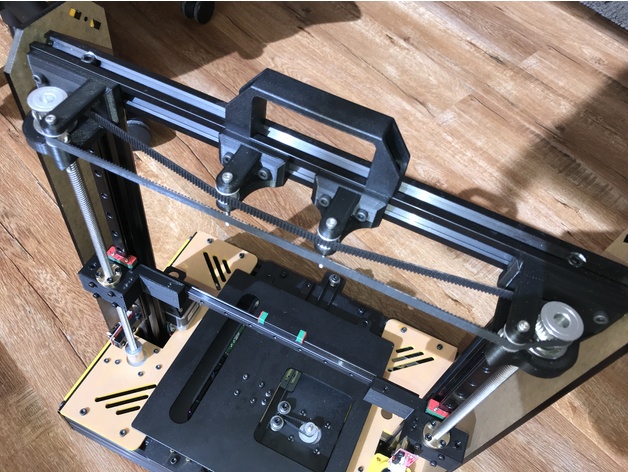
Prusa i4 Single Stepper Belt Driven Z Axis Modification 3D Print Model
Summary
Never one to just assemble the kit, here is one of the modifications I’m making to my Prusa i4 before I have it up and running.
Required parts:
2 x GT2 Timing Gear Pulley 30 Tooth Bore 8MM
2 x 608Z Flange Bearing
8 x M5 bolt
8 x T-Nut for 20×20 TSlot
4 x M3 bolts at least 20mm long
2 x GT2 Timing Gear Pulley 16 Without Teeth Bore 3MM
2 x GT2 Timing Gear Pulley 16 Tooth Bore 3MM
2 x Anti Backlash Spring Loaded Nut for 8mm Threaded Rod Lead Screws
1 x Bearing Block KFL08
1 x A 6R51M345060 GT2 Belt
Print Settings
Rafts:
Doesn’t Matter Supports:
Yes Resolution:
0.2mm Infill:
15% Notes:
I didn’t add supports in the horizontal holes -
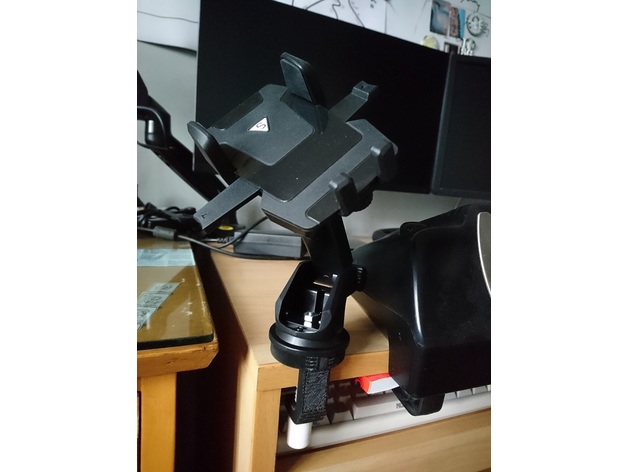
G-Clamp for replacing smartphone holder suction cup 3D Print Model
Summary
It is designed to replacing the suction cup of a smartphone holder.
You will need to remove the suction cup and use an M6 screw and bolt to fix it to the holder.
Please use the screw and clamp protector from the original design.
Print Settings
Printer Brand:
Ultimaker Printer:
Ultimaker 2 Extended Rafts:
Yes Supports:
Yes Resolution:
0.15mm Infill:
20% Notes:
Notes:
Resolution and infill don’t matter much. -
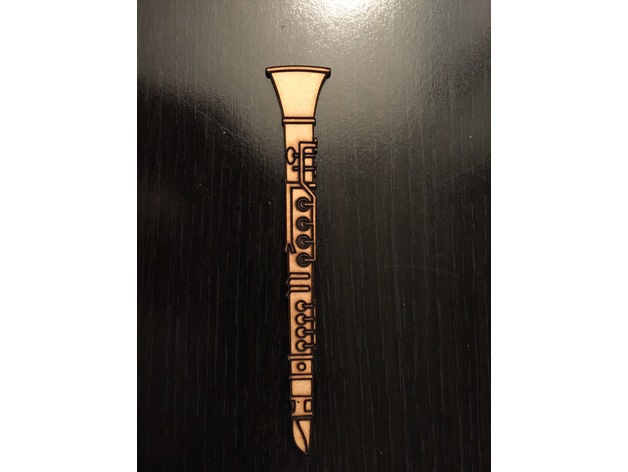
Clarinet (Laser Cut) 3D Print Model
Summary
I had designed this clarinet for someone. I thought to share it also with the Thingiverse community. -
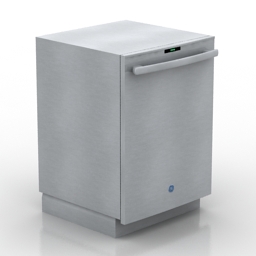
Dishwasher 3D Model
Additional Info: Dishwasher GE Profile N300517 – 3D model (*.gsm+*.3ds) for interior 3d visualization.
-
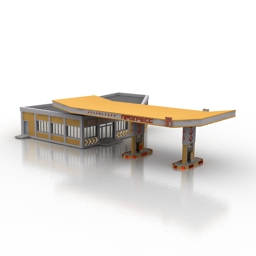
Gas station 3D Model
Additional Info: Gas station building N010817 – 3D model (*.gsm+*.3ds) for exterior 3d visualization.
-
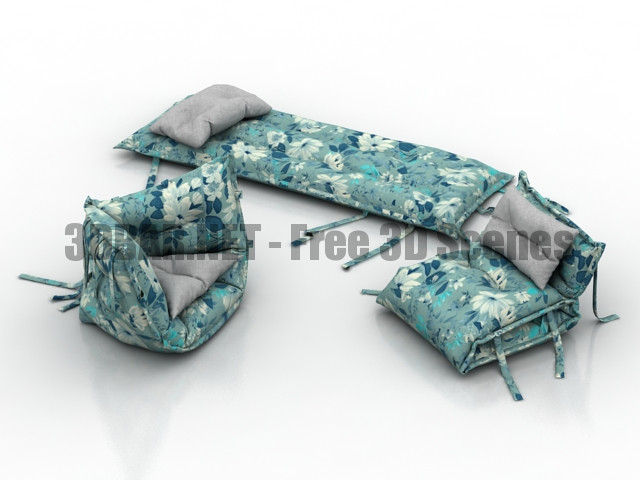
Inflatable mattress bed armchair chair 3D Collection
Inflatable mattress bed armchair chair 3d Models
-
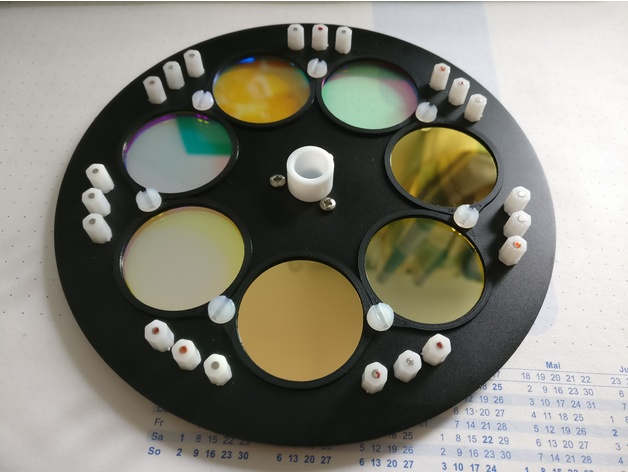
Starlight Xpress Filter Ring 36mm 3D Print Model
Summary
You can use it with the Starlight Xpress filter wheel inset for Ø 36 mm unmounted filters. It reduces reflexions.
Print Settings
Printer Brand:
Prusa Printer:
i3 MK2S Rafts:
No Supports:
No Resolution:
0.05 -
Wall Shelf support 3D Print Model
Summary
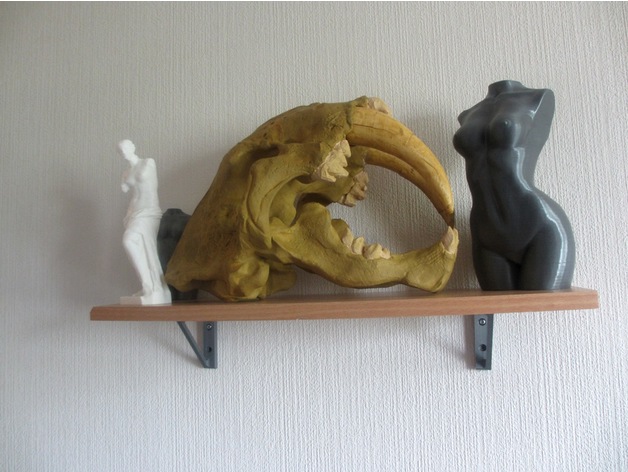
This is a shelf support in several sizes for actual use.
Because FDM 3D prints are (much) weaker in the Z-axis, the design was made to be printed horizontally. For this reason the diagonal brace has only the thickness necessary to be an effective support without interfering when mounting the support.
Print with a decent infill and shells this is actually quite strong.
Please use screws with FLAT heads, not the conical ones that are used for wood.
Conical screw tend to split the prints apart.
Screws to be uses are of the 4 mm variety with a 8 mm screw head.
Print Settings
Printer:
Mankati, Creatbot Rafts:
No Supports:
No Resolution:
0.15 Infill:
30%-90% Notes:
Print this in PLA, ABS, PETG or any other strong material.
Do NOT use materials like woodfill, bronzefill or similar materials if you need the parts to be strong. -

Royal Standard de Liege 3D Print Model
Summary
Le logo du Standard de Liège retravaillé sur Cinema 4D pour avoir une face arrondie et une autre face de maintien 🙂
Designed for Manon :* -
Creality Ender-2 Z-axis stabilizer mount v2 3D Print Model
Summary
New version.
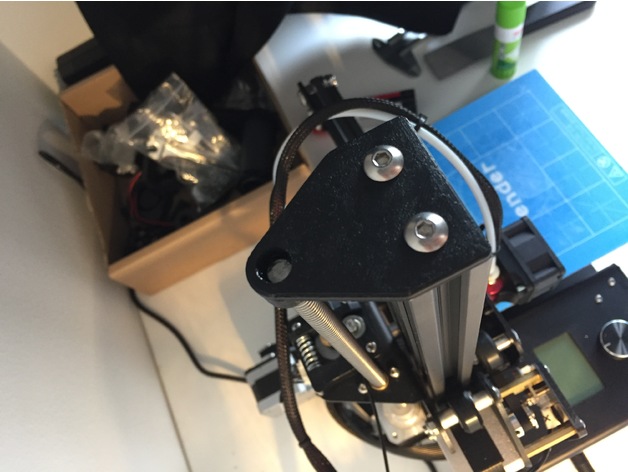
This is a Z-axis leadscrew stabilizer for Creality Ender-2.
Print, drill out the main hole with a 8-9mm drill bit, it might be a good idea to use some grease as well when installing it. Before you tighten the screws, move the Z axis to the top to position the stabilizer correctly.
Print Settings
Printer:
Ender-2 Rafts:
No Supports:
No Resolution:
.15 Infill:
100% Notes:
Use either 100% infill or lower infill and thick walls, I used 25% infill and 1.6mm walls -
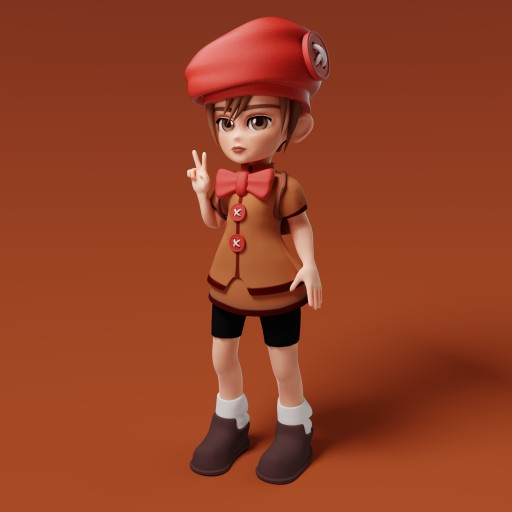
Tuff Girl Free 3D Model
I made this character based on kouotsu character “Tuff Girl” (http://kouotsu.deviantart.com/).
-
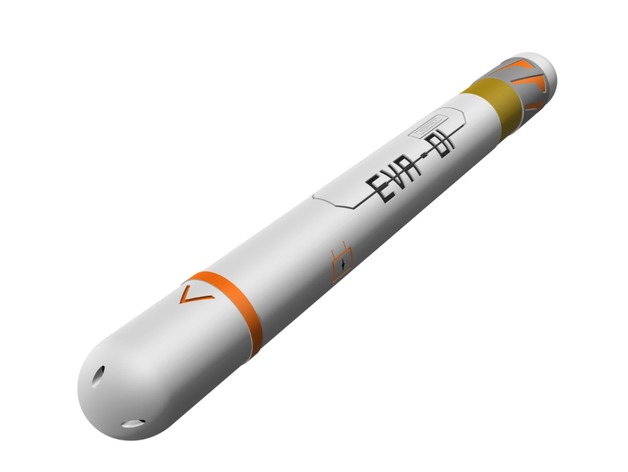
Entry Plug (Evangelion) 3D Print Model
Summary
I redesigned my old entry plug and added a lot of the missing features and text the old one was lacking. This one should also print much better. My printer is currently out of order, so I can’t print it, but when I do I will post pictures. -
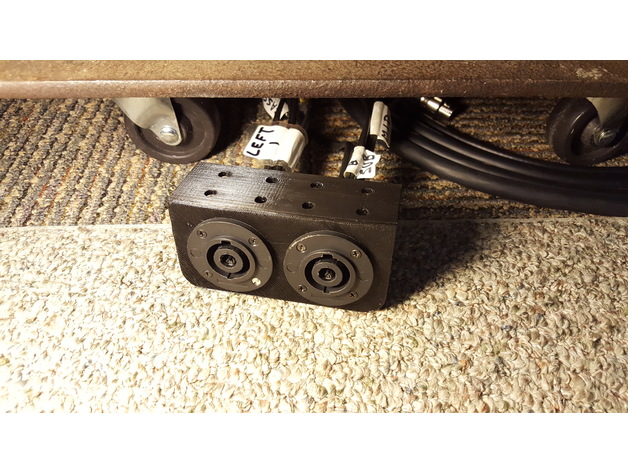
Speakon flange bracket (double) 3D Print Model
Summary
I needed to move my amp rack back a couple feet but the cables weren’t long enough, my solution was to move my speakon connectors from the back of the rack to the front as the individual speaker leads were easier to lengthen than the 8 conductor speakon cable.
The bracket was made in tinkercad in less than ten minutes but the printing took four hours.
It fits the 8 conductor speakon flanged outlet nicely.
The sound system was featured in this article, https://kioskfan.wordpress.com/2013/08/26/designing-a-crossover-exposes-more-faults-than-solutions/
Print Settings
Printer:
DMS DP5 Rafts:
No Supports:
No Infill:
22% Notes:
Cheap PLA, it’s just a bracket. -

Pottery Wheel Parts 3D Print Model
Summary
These are pottery wheel parts. If you a DIY type of guy, check out the video for additional parts and “how to” make the entire pottery wheel.
Parts List:
608zz skateboard bearings:https://www.amazon.com/Skateboard-Bearings-Double-Shielded-Silver/dp/B002BBGTK6/ref=sr_1_1?ie=UTF8&qid=1503715409&sr=8-1&keywords=608zz+skateboard+bearings
12v Power Supply:https://www.amazon.com/dp/B009ZZY28M/ref=sxbs_sxwds-stvp_1?pf_rd_m=ATVPDKIKX0DER&pf_rd_p=3171424582&pd_rd_wg=KsTjz&pf_rd_r=FJH1Z8RP89RMPC2E4V4H&pf_rd_s=desktop-sx-bottom-slot&pf_rd_t=301&pd_rd_i=B009ZZY28M&pd_rd_w=S2aVT&pf_rd_i=12v+power+supply&pd_rd_r=ANXS2D9KED3Z223VQXK0&ie=UTF8&qid=1503715560&sr=1
The motor I found in a old printer. Here it is on ebay to give you an idea of what I took it out of:http://www.ebay.com/itm/C9029-60027-HP-Motor-OfficeJet-Pro-8500-Deskjet-9800-Range-/370638757036
Diode:
Found one in scrap electronicsCustom Section
-
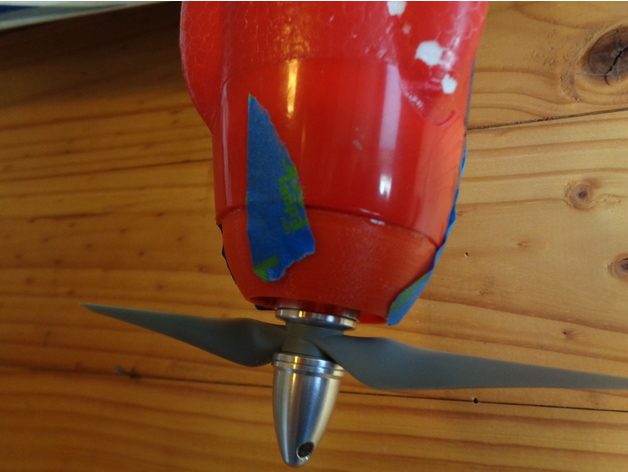
EFX racer cowl 3D Print Model
Summary
I crash my EFX racer a lot and broke the plastic prop spinner.
Rather than make or buy another spinner, i made a cowl extension.
There is a good gap for motor cooling, but its not so big as to create heaps of drag.
There is tape on mine because the glue is still drying.
Print Settings
Printer:
Malyan M150 Rafts:
Doesn’t Matter Resolution:
0.2mm Infill:
100% Notes:
Needs support around the bottom, for the lip. -
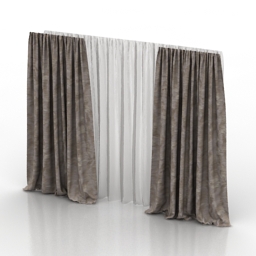
Curtain 3D Model
Additional Info: Curtain N280717 – 3D model (*.gsm+*.3ds) for interior 3d visualization.
-
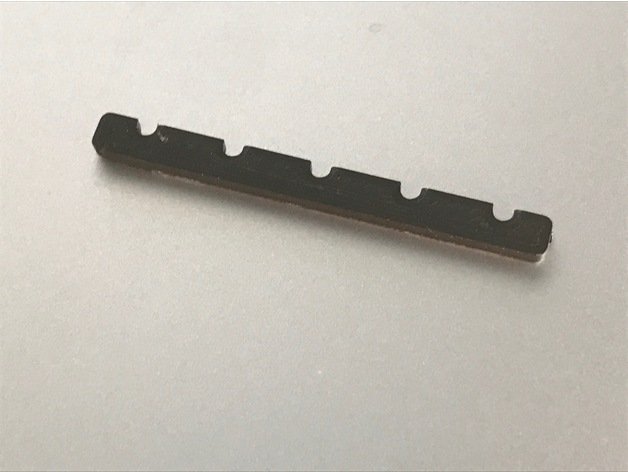
VW Tiguan air vent bar 3D Print Model
Summary
This is a common problem where the air vent bar breaks when a phone support is used on air vent ant the bar breaks.
I used 50% in fill to give it added strength and ABS to print.
Print Settings
Printer:
13 Mega anycubic Rafts:
No Supports:
No Resolution:
0.1mm Infill:
50% Notes:
This is a common problem where the air vent bar breaks when a phone support is used on air vent ant the bar breaks.
I used 50% in fill to give it added strength and ABS to print.Overview and Background
Due to my sons vent bar breaking, he designed replacement.
I printed it
Lesson Plan and Activity
Materials
ABS, 50% in fill for strength. -
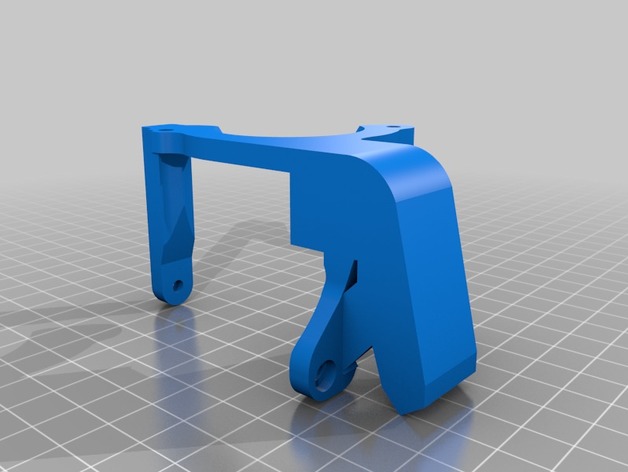
26mm Reach-Around Fan Duct Adjusted for Volcano 3D Print Model
Summary
Remix (a rather janky one) of the 26mm Reach-Around Fan Duct from https://www.thingiverse.com/thing:2192480 to extend the ducts down 10mm for a volcano hotend. -
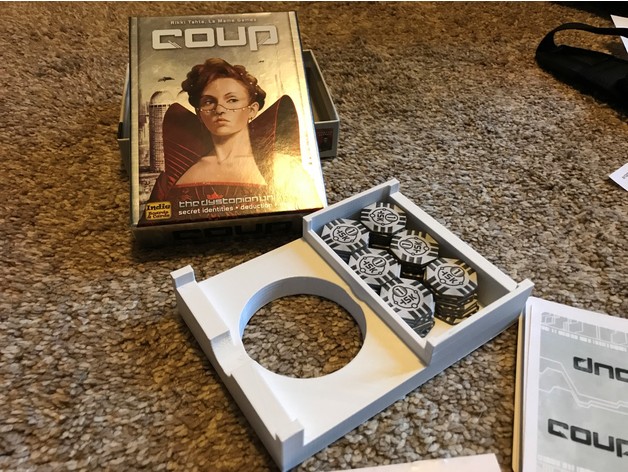
Coup Box Insert 3D Print Model
Summary
This is a one piece box insert for the Coup card game. It fits easily in the box and does not fall out when tipped. Overall dimensions are 143 x 102 x 29 mm.
The design was made from scratch using Sketchup but was heavily influenced by borderjs’s two piece design. Thanks for the great idea!
The original source file is included if you want to tinker with it.
Print Settings
Printer:
Anet A8 Rafts:
Doesn’t Matter Supports:
No Resolution:
.25 Infill:
20 Notes:
Support is not needed if printed flat. Infill and resolution are up to you.
How I Designed This
SketchUp -
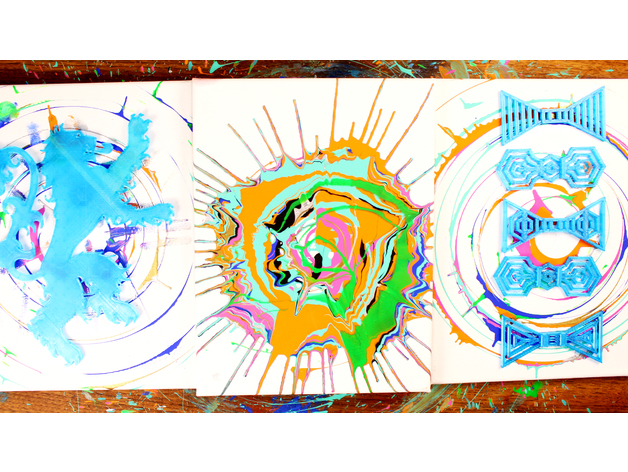
Cuadro abstracto – Herramientas de Pintura 3D Print Model
Summary
The instructions in the video are in Spanish, but if you go to the min 1:15 the audio stops and the steps are self-explanatory.
Espero que les guste este proyecto de arte que hice con mi impresora 3D. Todas las herramientas que necesitan las pueden encontrar aquí.Si te gusta el video considera suscribirte a mi canal de YouTube. Es gratis y cada semana tengo un par de proyectos. Muchas gracias por ver el video y Saludoshttps://youtu.be/hNcxmoSv2QU
-
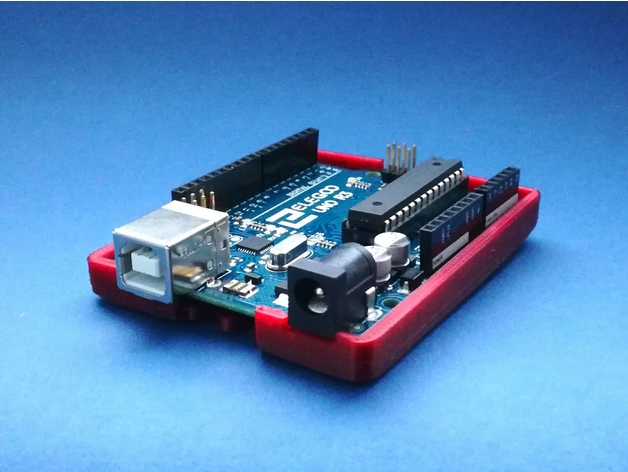
Arduino UNO Spring Case 3D Print Model
Summary
This is a protective cover I made for my Arduino UNO. The springs allow it to stretch around the board and stay in place.
Enjoy! -
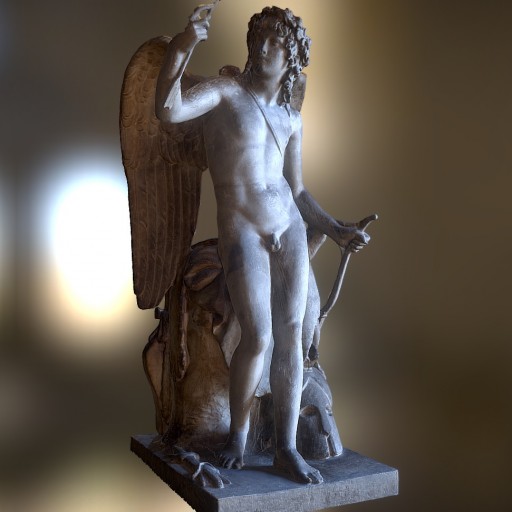
Cupid Triumphant Free 3D Model
Cupid Triumphant, 1814, Bertel Thorvaldsens, plaster, height 144 cm. Thorvaldsens Museum (Copenhagen, Denmark). Made with ReMake and ReCap from AutoDesk.
-
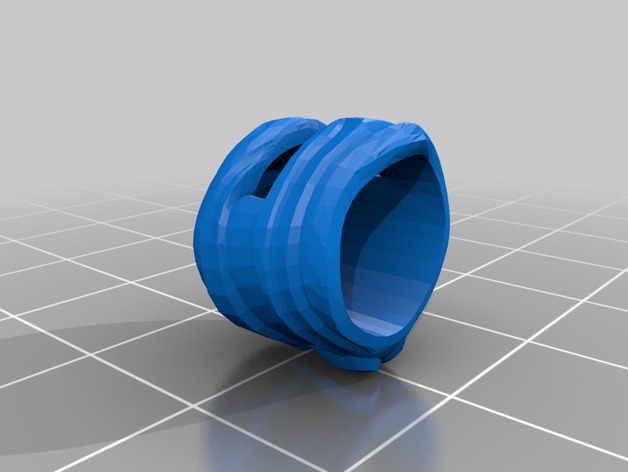
Ninjago Mask 3D Print Model
Summary
This is the Ninjago mask at original minifigure scale. This WILL work for a jumbo minifigure, but will require scaling to 410% if you plan on removing it from the blank_head. -
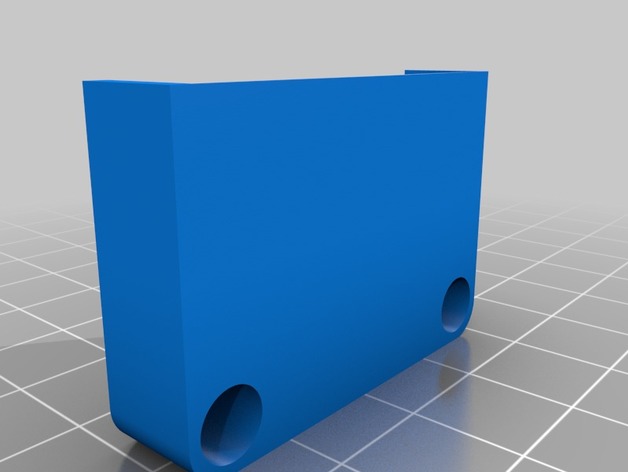
Monoprice Ultimate Cooling Duct 3D Print Model
Summary
Works with the Monoprice Ultimate and Duplicator 6 stock fan.
I decided to take a different approach to cooling…..I actually removed the shroud entirely! The problem with using typical style ducts in the first place is that no matter how open you make it, there’s always backdraft on your fan blades, meaning the pressure finds the path of the least resistance, and while one of those paths is your duct hole(s), some of them aren’t Using any style duct, if you feel behind the fan blades, you can feel this backdraft. -
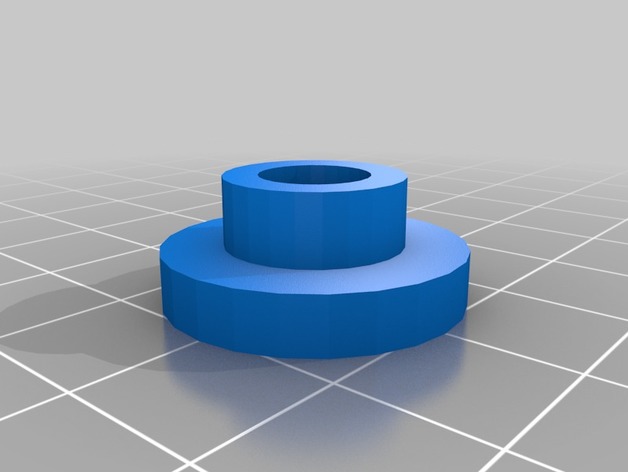
sim racing ssequential shifter upgrade 3D Print Model
Summary
sim racing DIY build . 3d prints to upgrade the sequential shifter -
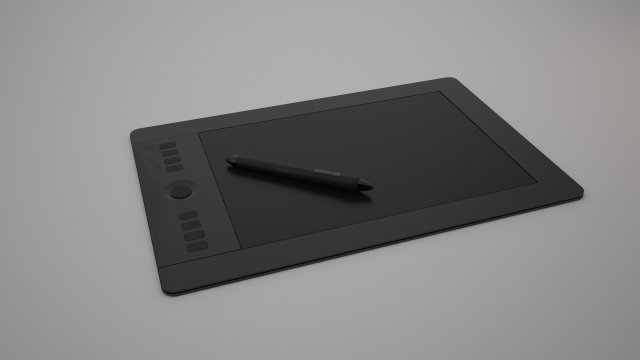
Wacom Intuos Pro Tablet S Free 3D Model
Wacom Intuos Pro Tablet SV-Ray RenderIncluding V-Ray Studio Set-Up
-
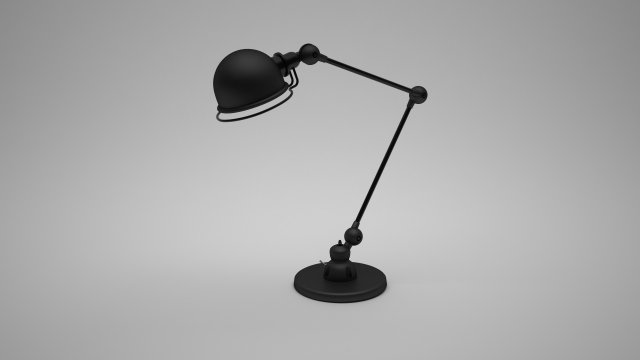
Jielde Bureau Lamp Free 3D Model
Jielde Bureau LampRigged by IK Chain in C4DV-ray renderV-Ray render set-up Studio Included for your own rendersPlease follow on instagram to show your gratitude!@Brusher105
-
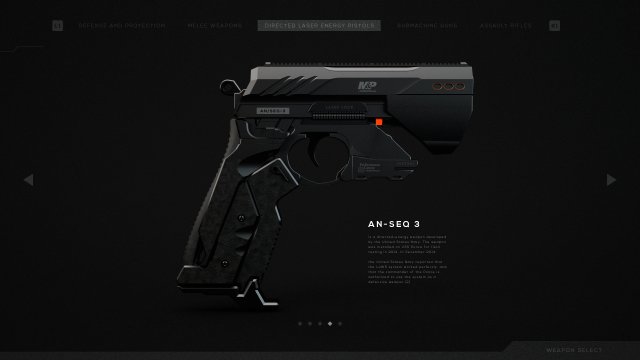
Scifi Laser Pistol Free 3D Model
Scifi Gun PistolPlease follow on instagram to show your gratitude!@Brusher105
-
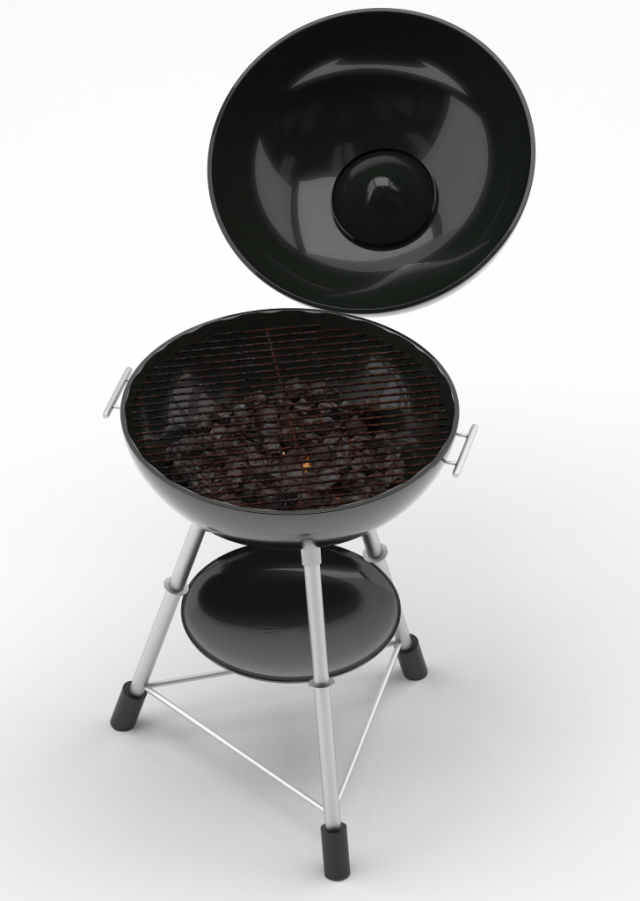
Barbeque BBQ Free 3D Model
Barbeque Low-PolyRendered in V-RayIncludes a V-Ray Studio Set-upPlease follow on instagram to show your gratitude![B]@Brusher105[/B]
-
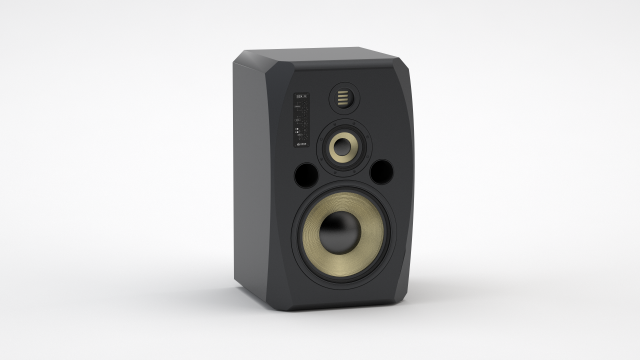
ADAM S3X-V Speaker Free 3D Model
ADAM S3X-V SpeakerPlease follow on instagram to show your gratitude![B]@Brusher105[/B]
-
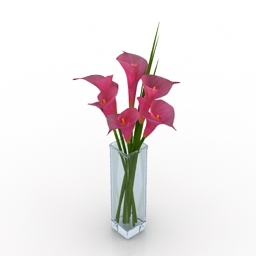
Flowers 3D Model
Additional Info: Vase flowers N310517 – 3D model (*.gsm+*.3ds) for interior 3d visualization.
-
Can Coca Cola 3D Model
Can Coca Cola 3D Model
-
Window 3d model
Window 3d model
-
Luxury sun chair 3d model
Luxury sun chair 3d model
-
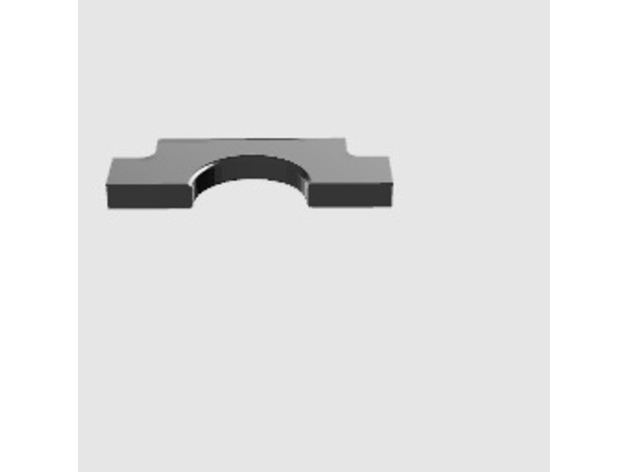
Plate 3D Print Model
Summary
I found that my rubber bands were failing (cause they were old) on the sharp edge of the plate, so I have added a fillet around the curve to remove the sharp edges -
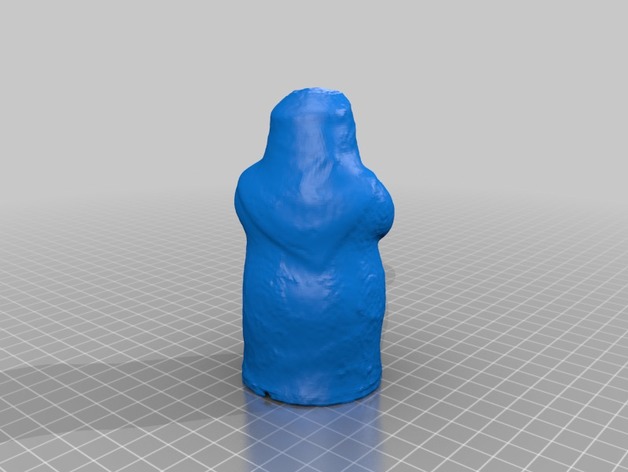
Arabian Pepper Shaker – Male 3D Print Model
Summary
Scanned with the MakerBot Digitizer Desktop 3D Scanner