Summary
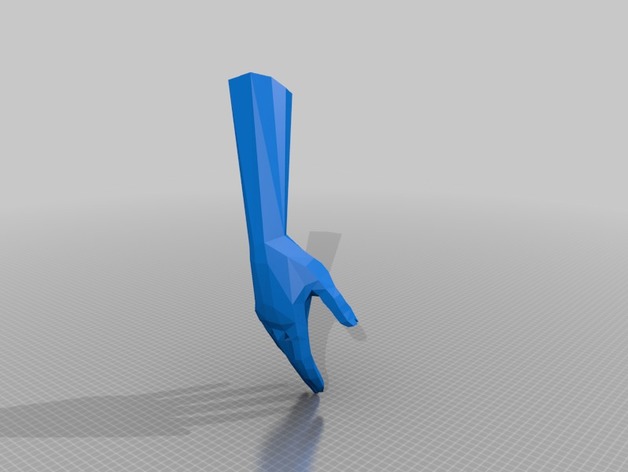
cuchillas de predator funcionales lo nunca viste para la impresion 3d
material adicional=cinta elastica y belcro
leed el archivo del bloc de notas que dice ller importante se os explicaran un par de cosillas a tener en cuenta.
pasaos por mi canal de youtube a partir del 8/9/2017 para ver el “3d reviw”
mi canal:https://www.youtube.com/channel/UC_qQQCfLqemEyeDy8zRWBDg
Category: Free 3D Models
Free 3D models ready to be used in your CG projects such as films, visualizations, games, VR etc. All 3D Models and Free 3D Print Models are available for download in several formats including .MAX, .STL, .FBX, .3DS, .C4D, .OBJ, .BLEND, .DWG, .DXF, .LWO and much more. If you’re in search of high-quality Free 3D assets, we have a huge library of 3d models for all your needs. Also you can visit 3D Models and 3D Print Models category.
-
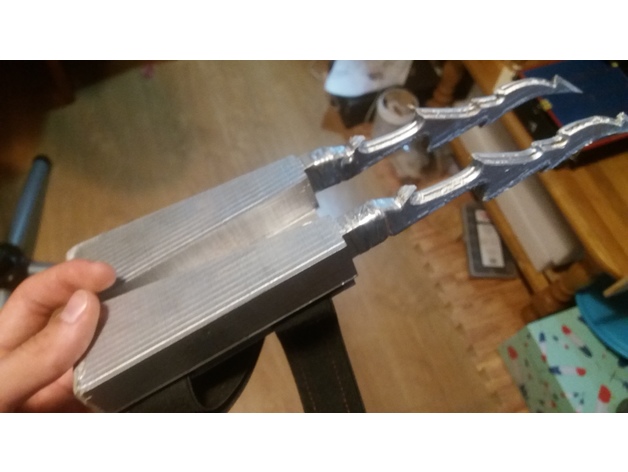
predator functional knives 3D Print Model
-
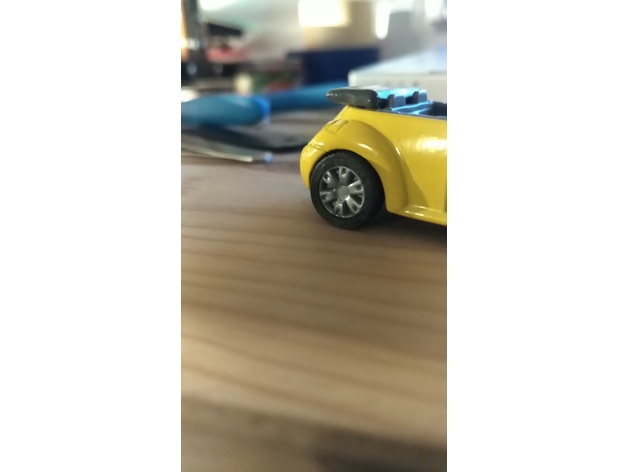
Tire for siku car 3D Print Model
Summary
I have made tires for small Siku modell cars. Tested with Siku 1056, VW Beatle Cabrio.
My little son has lost the original tires and the printed replacement was a pleasure for him 🙂
Printed with FlexiSMART TPE-Filament!
Print Settings
Printer:
Creality CR-10 Supports:
No Resolution:
0,06 Infill:
100 Notes:
FlexiSMART TPE
How I Designed This
Designed with FreeCAD -
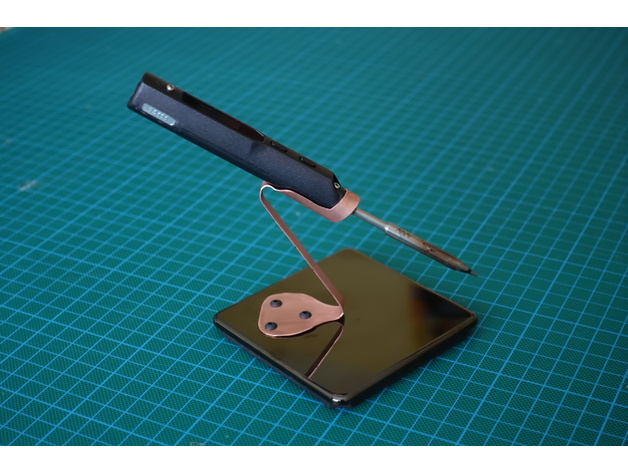
TS100 Soldering Iron Stand 3D Print Model
Summary
This is a Soldering Iron Stand intended for the TS100 Soldering Iron and is made from a copper water pipe.
The design is provided as an SVG file which should be printed out and the selected template cut out and wrapped around the pipe and then cut out of the copper. See the video https://youtu.be/K7X_7fUIjKI for details.
How I Designed This
Autodesk Fusion 360 and ExactFlat
I used Fusion 360 for the desing of the stand.Inspiration for the iron holder can from a ring spanner so that was used for the initial angles and holder shape.
As the design was applied to a tube I needed to flatten this and used the ExactFlat add-in for fusion to do this.
The template produced by ExactFlat wasn’t quite the correct size, probably due to differences in paper sizes. Inkscape was used to size it, tidy up the design and produce variations.Overview and Background
Looking for a stand for my TS100 Soldering iron I found inspiration from a spanner and converted a piece of copper water pipe into the stand.
I used a off cut from a copper water pipe of 15mm diameter and just over 150mm in length and a paper template to show me where to cup the pipe.
Once cut to shape certain parts were unrolled. There is no reason that the template can’t be used on a flat sheet and then the front part that holds the soldering iron rolled up.
Materials Needed
What was used
I used a piece of copper tube 15mm in diameter and approximately 150mm in length.
Once cut and shapped I mounted it on a Black Nickel electrical blanking plate. Anything with a bit of weight could ne used, such as a piece of wood or perspex. -
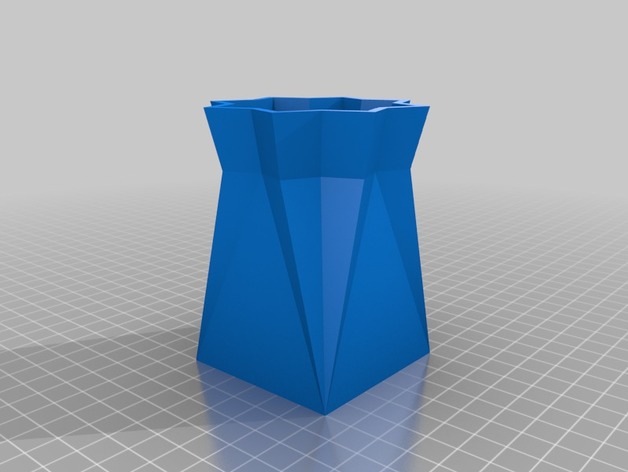
Folded Container 3D Print Model
Summary
Desktop container in origami folding appearance.
Print Settings
Rafts:
Doesn’t Matter Supports:
No Resolution:
Higher the better! -
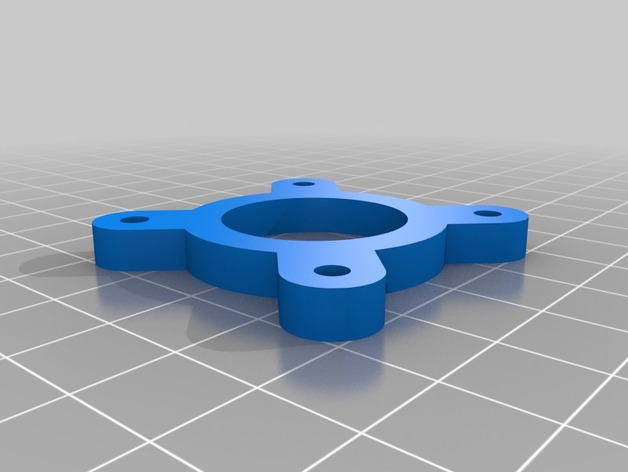
3D Printer XY Motor Parts for the M-Project 3D Print Model
Summary
3D Printer XY Motor Parts for the M-Project -
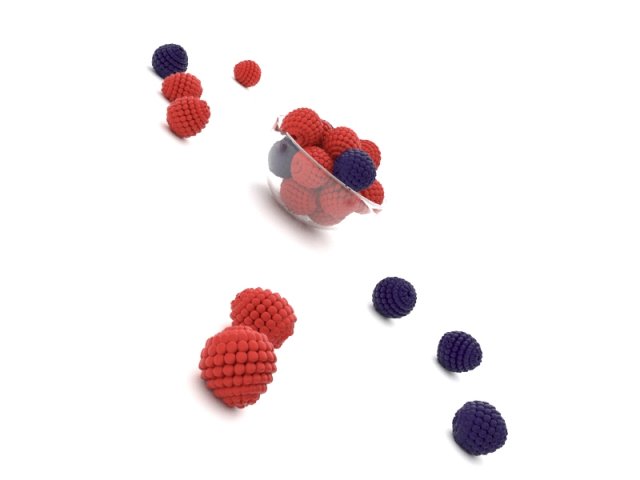
Blueberry Bowl Free Free 3D Model
Blueberry Bowl free 3D modelFree Blueberry Bowl 3D model ready for Virtual Reality (VR), Augmented Reality (AR), games and other real-time apps.Blueberry Bowl 3D model FREE!——————————Polygons: 1,110,904Vertices: 1,120,818—————————File formats:- 3dmax 2013 – Vray 2.40- OBJ- FBX- DAE- 3DS——————————-Enjoy!
-
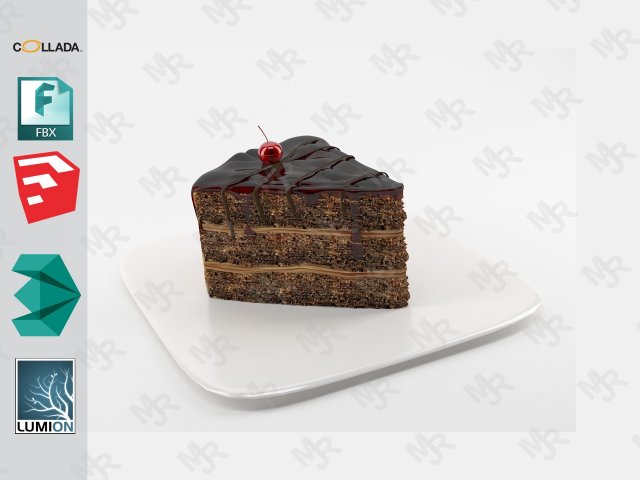
Slice of chocolate cake Free Free 3D Model
Slice of chocolate cake free 3D modelSlice of chocolate cake 3D modelSlice of chocolate cake 3D model ready for Virtual Reality (VR), Augmented Reality (AR), games, Postproduction, Photomanipulation and other real-time apps.Slice of chocolate cake 3D model!Materials in 3DS Max & Sketchup included.Models already preloaded in lumion 6, just copy and paste on your computer or import it from the included scene.——————————Polygons: 24285Vertices: 24281—————————File formats:- 3dmax 2013 – Vray 3.40- OBJ- FBX- DAE- 3DS-Sketchup 2013 V-Ray 3.40-Lumion 6 (as “.x DirectX format”)——————————-Enjoy, it’s FREE!
-
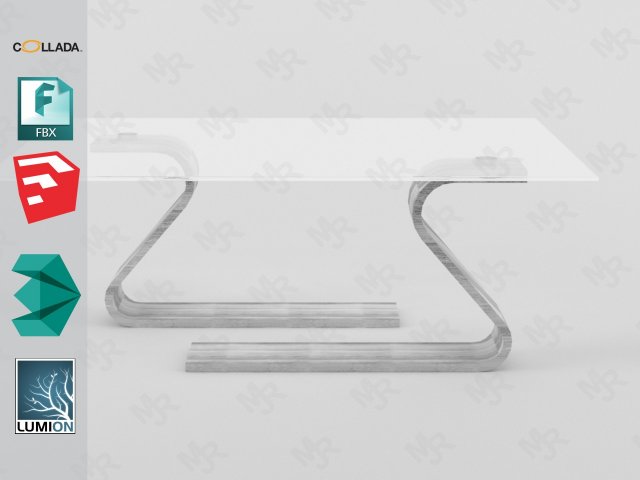
Modern Table 1 Free VR – AR – low-poly Free 3D Model
Modern Table 1 free low-poly 3d model ready for Virtual Reality (VR), Augmented Reality (AR), games and other real-time apps.Modern Table 1 3D modelModern Table 1 3D model ready for Virtual Reality (VR), Augmented Reality (AR), games, Postproduction, Photomanipulation and other real-time apps.Modern Table 1 3D model!Materials & Textures in 3DS Max, Sketchup & Lumión included.Models already preloaded in lumion 6, just copy and paste on your computer or import it from the included scene.——————————Polygons:282Vertices: 352—————————File formats:- 3dmax 2013 – Vray 3.40- OBJ- FBX- DAE- 3DS-Sketchup 2013 V-Ray 3.40-Lumion 6 (as “.x DirectX format”)——————————-Enjoy, it’s FREE!
-
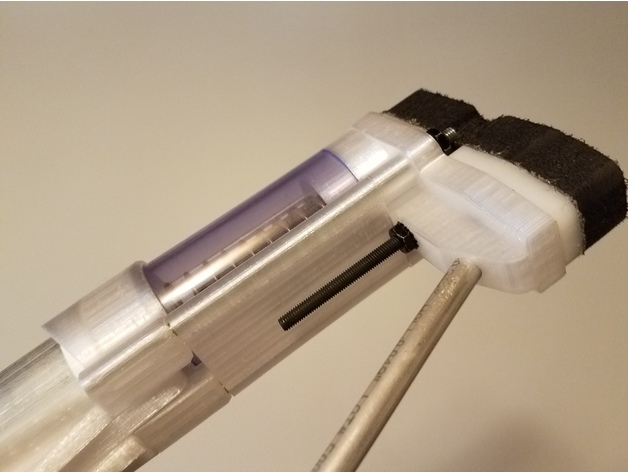
Caliburn – Lower Stock Reinforcement 3D Print Model
Summary
This is a reinforcment part for https://www.thingiverse.com/thing:2376150.
I printed my Caliburn in PETG, which is more flexible than the PLA the designer intended the blaster to be printed in. The stock_alt2 part would be spread apart by the clear tube at the end when the threaded rods were tightened, enough to reduce catch’s reliability. Rather than print an entire new blaster in PLA, I made this part which keeps the threaded rods and stock_alt2 from spreading.
Print Settings
Printer:
D300VS Rafts:
No Supports:
No Resolution:
.2mm Infill:
20% Notes:
Rotate so it is standing vertically before printing -
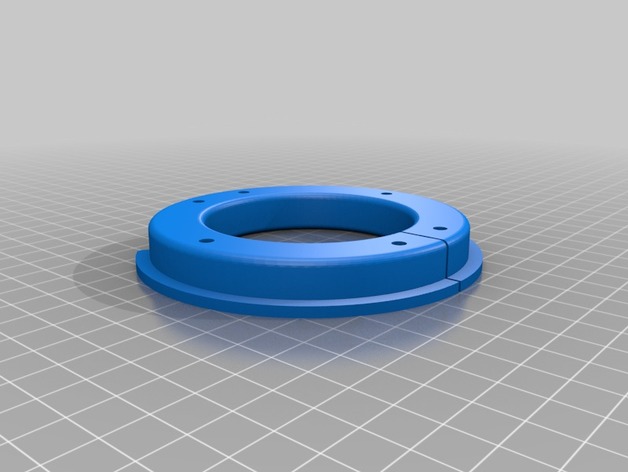
Audi B5 S4 Drive Shaft Center Bearing Support 3D Print Model
Summary
Audi B5 S4 Drive Shaft Center Bearing Support
Just something to pack out the rubber webbing in the center support on the drive shaft and firm things up.
Pretty much only fits in there one way so easy to figure out.
Hardware:
6pcs M4 x 40mm Bolt
6pcs M4 Lock Nut
12pcs M4 Washer -
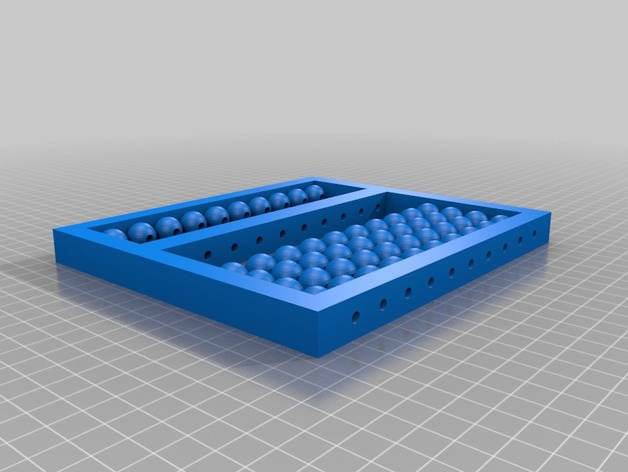
Abacus for the Blind 3D Print Model
Summary
A soroban abacus for the blind with spherical beads. There is extra spacing to make it more identifiable tactically. It has ten rows, so ten places. Can go up to one billion.
Required materials:
50 Abacus Bead
1 Abacus Frame
10 bamboo skewers
Glue
Print Settings
Printer:
Monoprice Maker Select V2 Rafts:
No Supports:
No Resolution:
0.2 Infill:
20%
Post-Printing
Thread bamboo skewers through beads and frame as seen in “Abacus for the Blind.” Glue in place. Remove excess. -
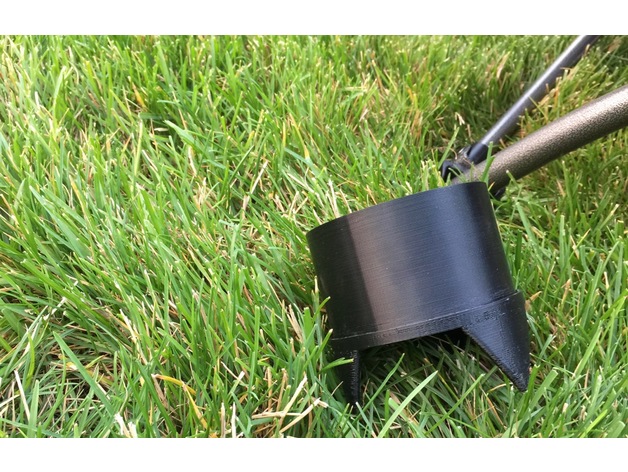
Ground Mount Cup Holder 3D Print Model
Summary
Got some event chairs and they didn’t have a cup holder so I made some that mount on or into the ground.
The 2 files top and bottom sections make printing simple and a bit of epoxy to join them after printing. -
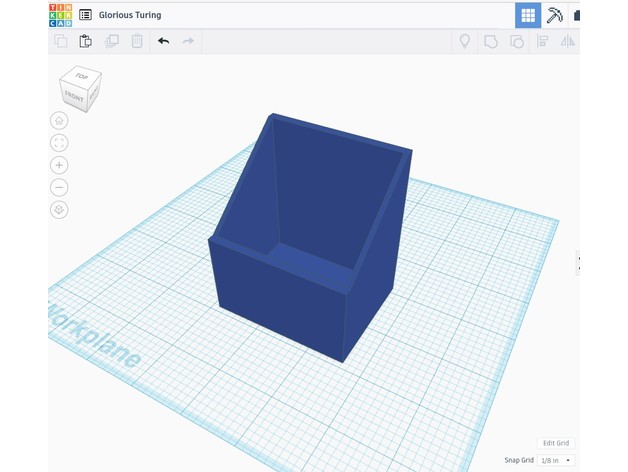
TV Remote Holder 3D Print Model
Summary
Tired of having all my remotes lying around, so threw this together in Tinkercad. Print as many as you need and super glue them together. Change the width in Tinkercad to fit a particular remote. Doesn’t need rafts or supports.
Print Settings
Printer Brand:
FlashForge Printer:
Creator Pro Rafts:
No Supports:
No Resolution:
Std Infill:
Default 15% -
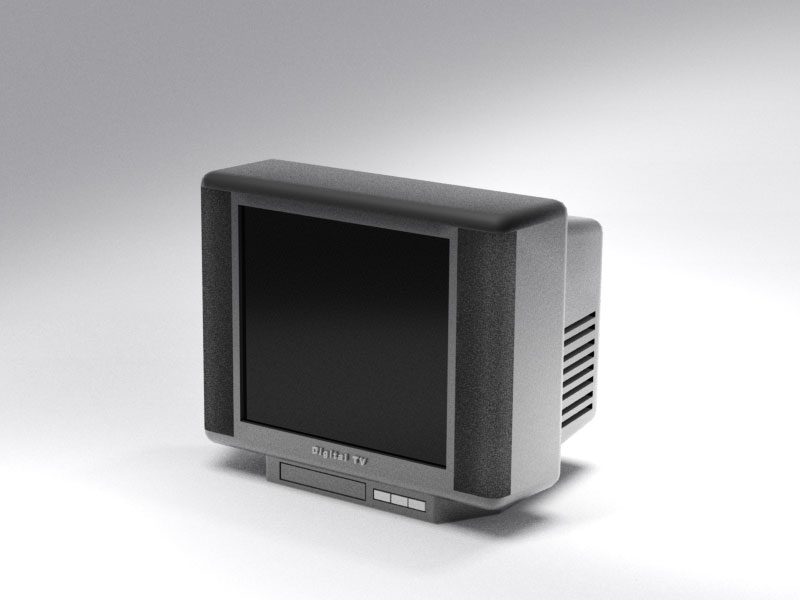
Armchair 3D Model
Additional Info: Armchair dental N020917 – 3D model (*.gsm+*.3ds+*.max) for interior 3d visualization.
-
Flower 3D Model
Additional Info: Flower N170617 – 3D model (*.gsm+*.3ds) for interior 3d visualization.
-
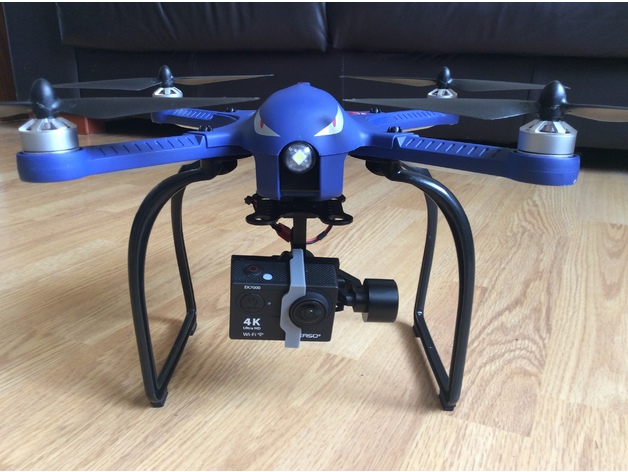
Bugs 3 drone Walkera gimbal mod 3D Print Model
Summary
This simple but effective mod allows you to fit a Walkera G2D gimbal to the stock camera mount fitting beneath the battery.
Allows for quick and easy fitting and removal of the gimbal.
I used this clip to secure my Akaso EK700 camera …. https://www.thingiverse.com/thing:1795933
And this is the landing gear I use ….. https://www.amazon.co.uk/gp/product/B06VV21JYF/ref=oh_aui_detailpage_o00_s00?ie=UTF8&psc=1
I had to drill the screw holes a bit wider in this landing gear as they didn’t quite line up with the Bugs 3.
First test with the gimbal fitted ….. https://www.youtube.com/watch?v=FKtRV4nx8h4&feature=youtu.be
Gimbal mount adapter :
Fix the adapter to the gimbal mounting plate with 2 screws and nuts (see pictures above).
Gimbal power :
I used the balance port from the stock battery to power the gimbal.
Remove the female connector and middle wire from a 2s lipo balance expansion cable and splice it to the cable with the 2 pin female connector that comes with the gimbal. -

Best of the Week: 8/28/17 3D Print Model
Summary
My collection of the best Things posted for the week of 8/28/17:https://www.thingiverse.com/LoboCNC/collections/best-of-the-week-8-28-17
This is the second week of my experiment with crowd-sourced curation. I’ve looked at every single Thing posted from 8/28/17 through 9/3/17 and selected what I think are the best Things according the criteria listed below. This posting here is sort of a meta-Thing to help people find this collection. Let me know what you think of this idea in the comments section.
If you like this concept, please “Like” this Thing to help others find it. You can also “Like” the collection itself. And if you really like this idea, create your own Best of the Week collection. I’ve tagged this with “BOTW” and “Curation” and would encourage others to use the same tags.
Post-Printing
My Selection Criteria
What I look for:
Things that are unique
Things that are well executed
Things that are of general interest
Things that are well presented
Things that make me smile
What I pass over:
Cover images that are a rendering (i.e.: no photo of a real print)
Accessories for very specific products (e.g.: for GoPro Hero, Samsung Galaxy 7, etc.)
Things based on copyrighted material
3D printer parts (just too many, too specific and too boring) -
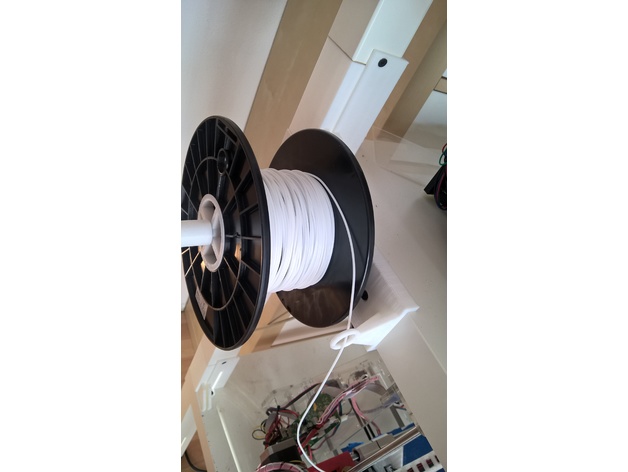
Filament Mount for LACK table 3D Print Model
Summary
Hy there,
i have mounted my Printers on IKEA Lack tables and now the Filament can easy Mount on the left or right side of the table.
Print Settings
Printer Brand:
Prusa Printer:
Prusa Clone Rafts:
No Supports:
No Resolution:
.2 Infill:
10 -
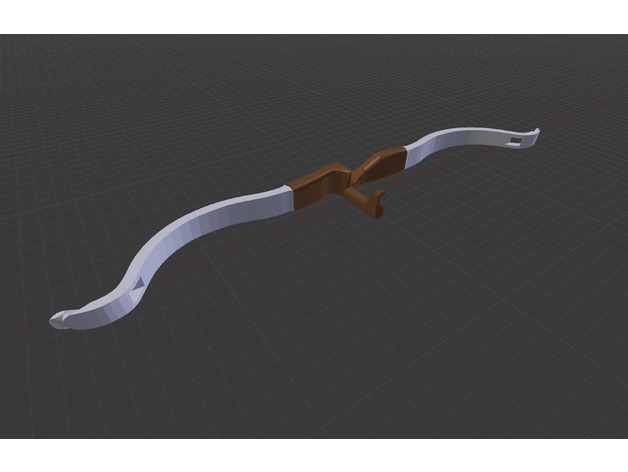
Recurve Bow v2 3D Print Model
Summary
I redesigned the limbs for this bow to be a bit more traditional while still accommodating a rubber band. And I added a guard/rest so you don’t get snapped by the band. -
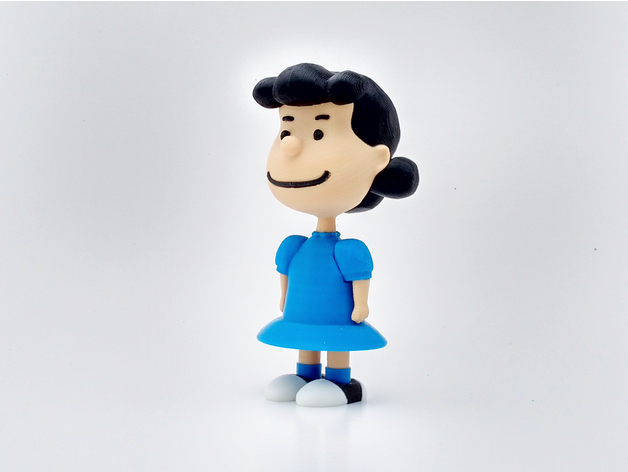
Lucy van Pelt 3D Print Model
Summary
Lucy van Pelt, from the comic strip Peanuts by Charles Schulz.
Lucy is characterized as a “fussbudget”, crabby, bossy and opinionated girl who bullies other characters in the strip, particularly Linus and Charlie Brown. While she is not exactly cold-hearted, she can be quite antagonistic, often playing the villain role in a number of stories
The model is in proportion to my Charlie Brown model:https://www.thingiverse.com/thing:2510789
No supports are required. If you have the proper filament colors, no painting is needed.
The model is 140mm tall.
Enjoy!
Print Settings
Printer:
FlashForge Creator X Rafts:
Doesn’t Matter Supports:
No Resolution:
.2mm Infill:
10% Notes:
See below for helpful printing and assembly tips.Building the model
Colors (there are no multiple printed pieces)
Black:
l_hair_right
l_hair_left
l_eyebrows
l_eyes
l_mouth
l_shoes_middle
..
Beige or Flesh:
l_head_top
l_head_bottom
l_arm_left
l_arm_right
l_legs
..
White:
l_shoes_front
l_shoes_back
..
Blue:
l_dress
l_shoulder_right
l_shoulder_left
l_socks
..
Any color (hidden pieces)
l_pins
.. Printing and assembly tips
Printing tips
1-As with most of my models, no supports are required.
2-Be sure to clean any first layer squish if you have any problem joining parts. The parts should fit nicely when printed cleanly or with a slight first layer squish.
3-I did not require any rafts or brims for any of the parts.
..
Assembly tips:
1-The eyebrows are small and print well but if for some reason you have an issue inserting them into the head (over-extrusion or a squish that cannot be cleaned) simply flip them over and put them in with the flat side facing out.
2-The left/right eyes are interchangeable. There is an up/down positioning of each eye. If it does not look right when inserted just rotate the eye piece for a better fit.
3-The left/right shoulders look similar but are slightly different, so take care when connecting them to the dress.
4-The leg holes in the dress should be positioned toward the back.
5-The left/right shoe parts are not interchangeable but are easy to distinguish which is left and right.
5-Refer to the assembly diagram for putting the model together. The model is meant to be glued. -
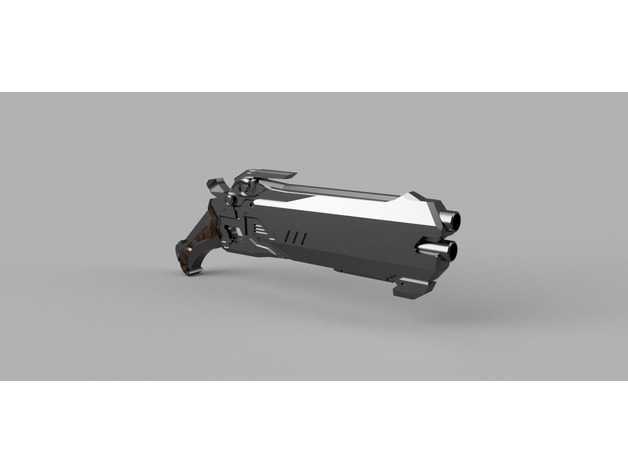
Reaper’s Hellfire Shotguns 3D Print Model
Summary
This is Reapers Hellfire Shotguns from the game Overwatch modelled using Fusion 360. It is not scaled properly and requires manual scaling. -
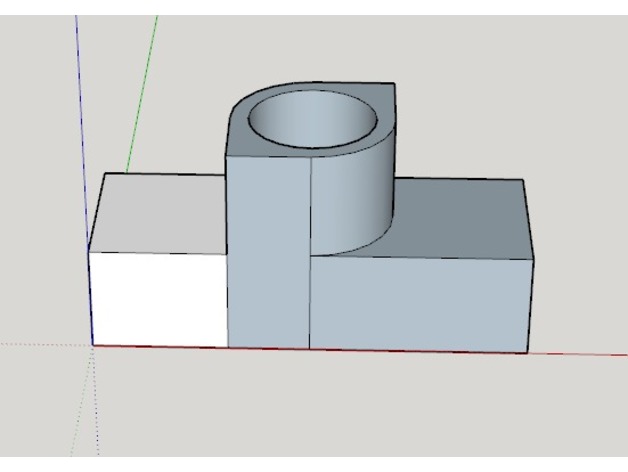
Magpul MOE Slot Bolt 3D Print Model
Summary
Bolt to attach accessories to Magpul MOE Slot hand guard -
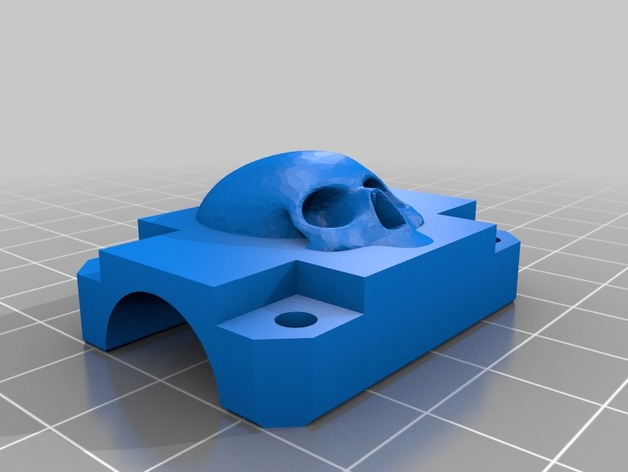
HyperCube XY LM8UU Bearing Clamp With Skull 3D Print Model
Summary
Added a nice skull on the Hypercube XY bearing clamp
Print Settings
Printer:
Homemade Printer Resolution:
0.2 Infill:
100 -
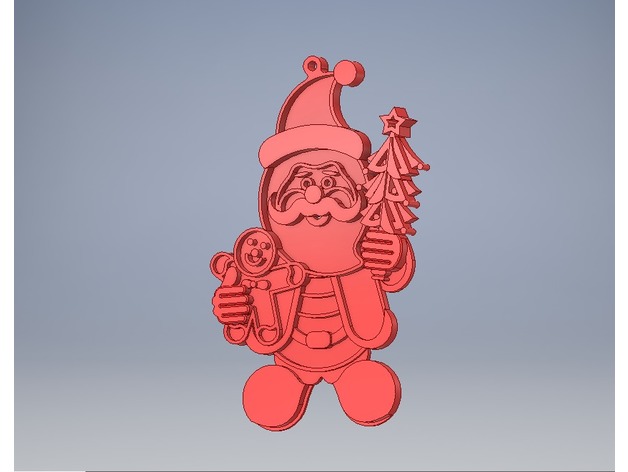
Santa & Gingerbread Man 3D Print Model
Summary
Santa Claus with Gingerbread Man 3D printed decoration for Christmas -
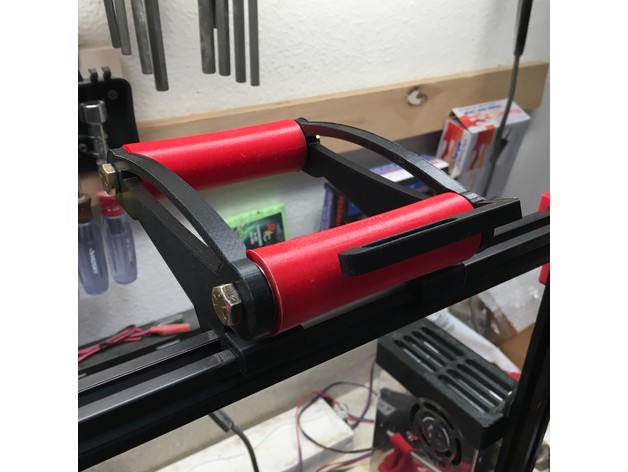
Spool Holder V2 – Quick Change 2020 Edition 3D Print Model
Summary
This is a remix of “New Prusa i3 MK1 & MK2 Spool Holder V2 – Quick Change” (https://www.thingiverse.com/thing:1768975) by IsmaelPR1 (https://www.thingiverse.com/IsmaelPR1/about).
I really liked his design, and am printing one for my Prusa MK2S, but I wanted a matching holder for my Tevo Tarantula. I remixed this so the holder can hang on a 2020 extrusion. There’s a provision for M4 screws to mount it to the back of the extrusion.
PLEASE NOTE: This was remixed from his 90mm holder. For the 140mm rollers and accessories, please visit his thing.
I have included IsmaelPR1’s 90 mm rollers and m8 rods, though I used 5/16″ bolts for mine.
Print Settings
Printer Brand:
Prusa Printer:
i3 MK2S Rafts:
No Supports:
No Resolution:
.2mm Layer Height Infill:
none Notes:
Easy print. Print the spools as shown. For more details visit the original thing at https://www.thingiverse.com/thing:1768975
Post-Printing
Simple Install
Used 608 bearings and 5/16″ bolts that I had in my shop. clamp it on to the top of your rig and add a couple of m4 bolts and T-nuts. That’s it!
Happy Printing! -
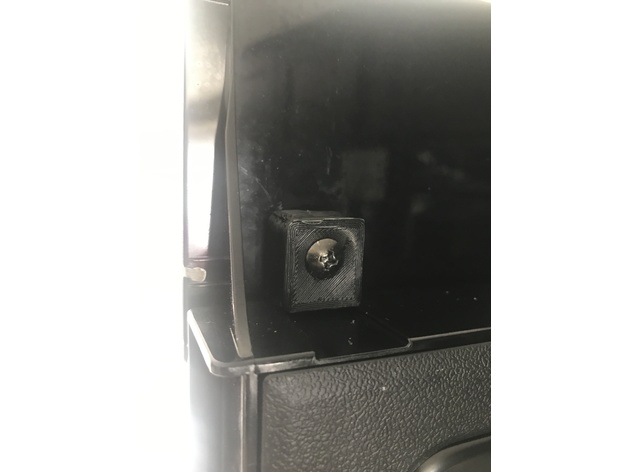
Samsung Microwave handle bracket 3D Print Model
Summary
My samsung microwave handle broke while opening the door. the inside bracket, which is part of the interior door panel, where the screw goes is super flimsy. this slips right over the original screw hole and you can use the original screw to secure it.
printed in ABS
Print Settings
Printer Brand:
Wanhao Printer:
Wanhao Duplicator i3 V2 Rafts:
No Supports:
No Resolution:
.2 Infill:
100% -
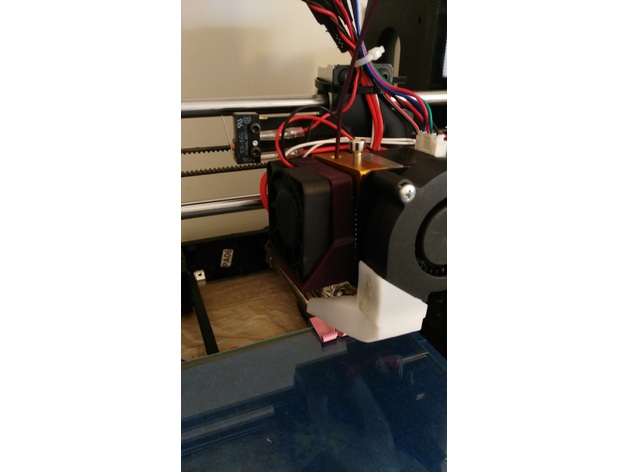
Anycubic prusa i3 – left side motor fan support 3D Print Model
Summary
This is a 40mm fan support for the extruder motor.
With this design you can cool the motor and keep the hotend protected from the fan air flow.
You can screw the fan with the support to the motor (with M3 bolts) or you can use neodymium magnet (4mmx2mm) and insert them in the holes. This second option offer a better access to the filament when you have to change it.
Print Settings
Printer Brand:
Prusa Printer:
Prusa Clone Rafts:
No Supports:
No Resolution:
0.2 Infill:
20-30% -
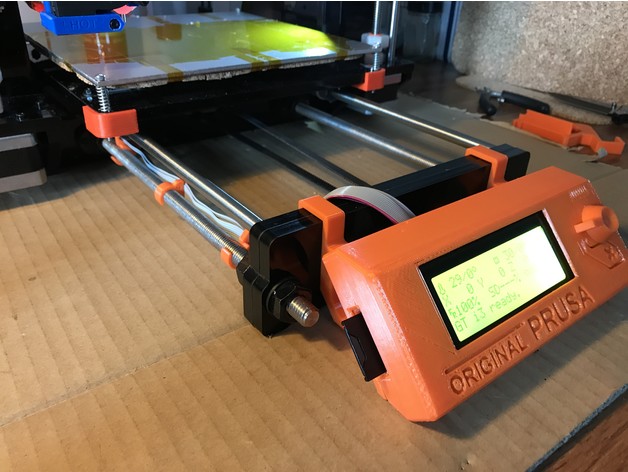
Geeetech i3 Pro B LCD holder 3D Print Model
Summary
This is a modification of original Prusa LCD holder for Geeetech i3 Pro B (acrylic). While original Prusa has LCD mounted on front of the printer on two rods, i3 Pro B has LCD mounted on top of the printer. I moved LCD to the front as well and modified LCD holder to fit on two layers of 8mm acrylic there.
LCD supports (A and B) has been modified to fit i3 Pro B.
LCD cover and LCD knob is the same as original Prusa https://github.com/prusa3d/Original-Prusa-i3/tree/MK2/Printed-Parts/stl
LCD cable holders are resized to fit threaded rod Geeetech has (mine on i3 has 9.5mm outside diameter, original Prusa use 10mm rods).
The assembly is the same as original -http://manual.prusa3d.com/Guide/6.+LCD+assembly/300
The rotary encoder and reset button on i3 are too long, it’s necessary to cut reset button by about 5mm and encoder rod by about 7mm so it fits to LCD cover. Measure twice before cutting, the length might depend on which Chinese clone you have.
Print Settings
Printer:
Geeetech i3 Pro B Rafts:
No Supports:
No Resolution:
0.2mm Infill:
20% Notes:
printed in PETG -
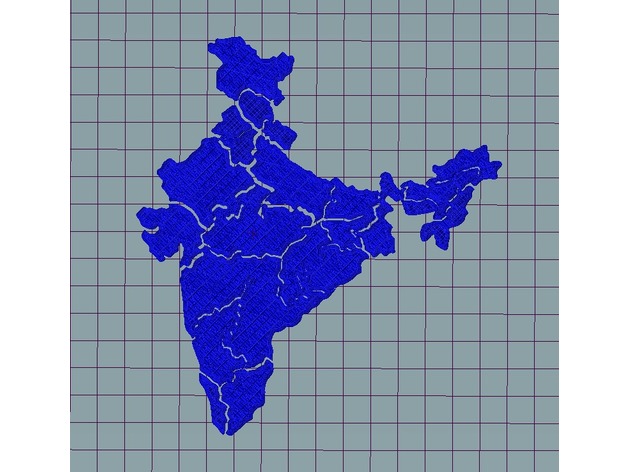
India Map Puzzle 3D Print Model
Summary
Just a puzzle of the India Map, illustrating the states/regions of the country.
Provided complete stl (not tested but should be fine).
Check out the World Map Puzzle here: https://www.thingiverse.com/thing:2412659
Check more designs here: http://www.thingiverse.com/2c2know/designs -
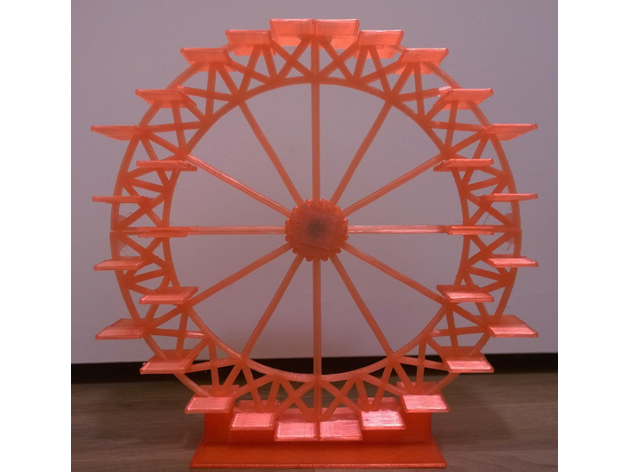
Ferris Wheel with Platforms (24cm diameter) 3D Print Model
Summary
This is a 24cm-diameter ferris wheel. It is designed to sit in a fixed position, and it has 60 platforms (30 on each side), each 2.5cm square. The platforms can be used to put figurines or anything else that can fit.
There are four distinct types of pieces. You need 4 each of the two orientations of the quarter wheel, and 1 each of the stand, male wheel connector, and female wheel connector.
Post-Printing
The included pieces are sufficient to make the ferris wheel stand up on its own. However, to increase the stability, I added small pieces of velcro to the flat sides of the wheel pieces. I also made room for you to insert a 1/2-inch ceramic magnet into the wheel connector to increase the connecting force and make the two pieces less likely to break apart.
How I Designed This
I designed all of the parts using FreeCAD. I am grateful to the FreeCAD community for their help in learning how to use their wonderful software. -
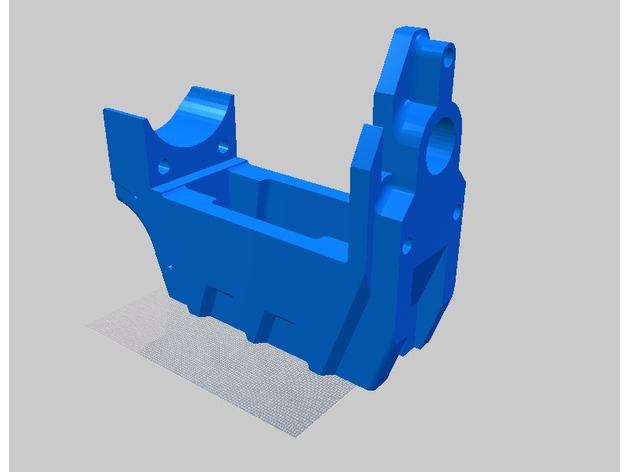
Plain Caliburn Magwell 3D Print Model
Summary
This is a Caliburn magwell section without any words, so you can add your own words or markings there.
*You might notice the letter outlines in the preview but it shouldn’t show up in the print, toggle Thingview to confirm. -
Naza Mount for QAV 180mm quadcopter 3D Print Model
Summary
An organised mount for Naza with the new version PMU/LED combo. Also has a provision for two 1.65mm brass power rails in place of a power distribution board as well as a camera mount for an Eachine MC-02 AIO camera. You will need 300mm of brass for the power rails, 4 m3x10-12mm bolts, naza m lite or v2 with the combined PMU/LED and an mc 02 camera or similar.
This was designed on the clone frame available from ebay for around 10USD. When built with 2403 2300kv motors, FVT little bee 20a esc’s and a 1300mah 3s 30c pack you can expect flight times between 6 and 10 minutes.
Print Settings
Printer:
Tronxy a3 Rafts:
No Supports:
Yes Resolution:
~.08 Infill:
10-100% Notes:
This is a fairly easy print, no special settings required aside from support for a couple of sections which could be cut out post printing if you choose. The PMU is a very tight fit and is intended to have a clear diffuser between it and the frame. The PMU’s plastic case and heat shrink must be removed for it to be installed. A dab of rubber cement or something similar will be required to keep the PMU and FC in place. All wires can be run under the FC and attached to the rails for a very clean install.
Post-Printing
The longitudinal holes for the power rails will likely need reaming as they are designed with very tight tolerances for a friction fit. -
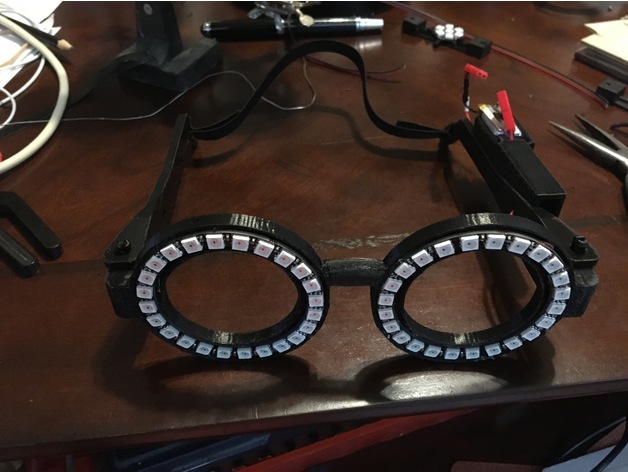
24 LED Neopixel Glasses for Arduino nano 3D Print Model
Summary
This is a remix of 4 existing files in order to make a pair of self contained Neopixel glasses using two 24 LED Neopixel rings, and an Arduino Nano processor.
I tried to hide the wiring inside the frames as much as possible, the bridge between the two rings is hollow for that purpose. Unfortunately one side is heavy, so I added an elastic to the back to keep the glasses on securely.
If you decide to use a different processor, you can mirror the left arm and add what you need instead of trying to remove the box on the right arm used to house the Arduino Nano.
Needed to build:
3D printed parts, – Print one -Glasses new, one left arm, one right arm, and 2 pins
2x 24 LED Neopixel rings- by Adafruit or on Ebay
1 foot – 3 conductor ribbon cable
1/8 inch drill – to clean out the holes in the arm for the arduino wires
3/16 inch drill – to clean out the holes for the arm pins
7.2v LI battery, or a battery of your choice that will run the processor and LEDs (I used 2 3.7v 180mah batteries in series)
connector for the battery
Nailfile emery board – to sand the edges that will be close to the face, and to round the pins so they are easier to move.
soldering iron
hot glue gun
Arduino Nano with no pins.
You will also need to program the Arduino Nano with the code. You will need the Adafruit_NeoPixel library. I reduced the brightness in the code so that you don’t burn out the Arduino 5v regulator. They are still bright enough. Solder the tx wire to pin D3.
The code is from Adafruit.
Credit: Glasses frame:
Harry Potter Glasses – with hinges
by sivar2311, published May 26, 2013
Arduino holder:
Arduino Nano Mount
by tjbn, published May 22, 2017
Pins:
Pin Connectors V3
by emmett, published Nov 5, 2012
Print Settings
Printer:
Anet A8 Supports:
Yes Resolution:
0.15 Infill:
35% Notes:
I used support only when touching the buildplate for the Glasses rings, This makes it easier to use the holes for the arms
The arms need support everywhere. I| use ZigZag, 5mm support line distance. -
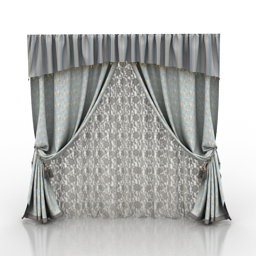
Curtain 3D Model
Additional Info: Curtain N120617 – 3D model (*.gsm+*.3ds) for interior 3d visualization.
-
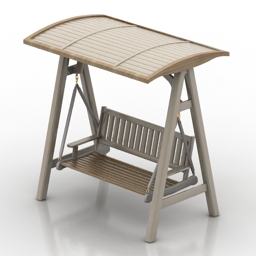
Swing 3D Model
Additional Info: Swing N060817 – 3D model (*.gsm+*.3ds) for exterior 3d visualization.
-
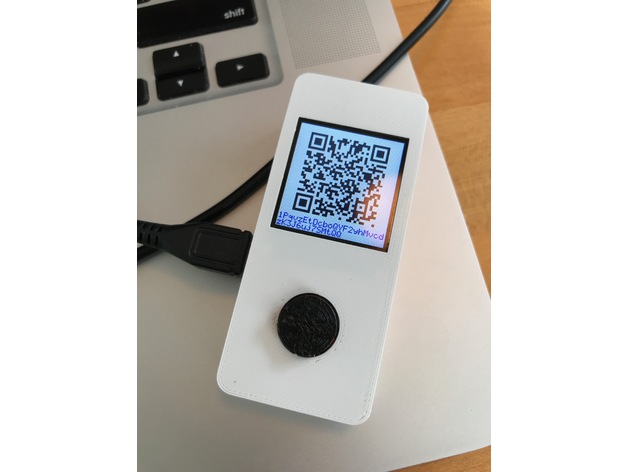
Pi-Zor: a bitcoin cold wallet 3D Print Model
Summary
The is a case for the Raspberry Pi that is intended to be used as a Bitcoin hardware cold wallet. Note that this will never be as secure as a wallet using a secure element, like a Ledger Nano. The project’s namesake, the Trezor, doesn’t have a secure element, but is still more secure since its designed by security minded professionals, rather than a DIY project using a Pi Zero. The plus side, is you build it yourself so you know what’s in there, and if you take precautions, then you can probably keep this secure.
See my first explorations into this concept here: http://www.allaboutjake.com/pi-offline-crypto-wallet/
I am currently working on software for the Pi to expose an Electrum wallet on the Pi using the a menuing system on the LCD. This will include the signing of transactions using the QR codes and the PiCamera for input and the LCD for output.
If you find this useful, or you’d like to donate to the future development of this system, send some satoshi to the following address: 1PqvzEtDcboQYF2yhMvcdzK3J6uj7SMtQQ
Bill of materials
Raspberry Pi Zero (I’m using a W for development, but a non-W is better for a cold wallet)
1.44 ST7735 based LCD: http://r.ebay.com/b7ZpxI
5-Way Tactile Switch: http://r.ebay.com/U5YHC6
5MP Pi Camera: http://r.ebay.com/igagFy
Screws (M2.5×12 for the outside, M2.5×4 for the Pi inside.)
How I Designed This
I used OnShape to develop the case. Its kind of a tight fit, but the case does close.
The “middle plate” part is an unintended consequence of not having the right screws. I’m looking to get some M2x2 waver head screws for mounting the parts to the case.
I chose the 128×128 LCD specifically because it was 30mm wide and had more pixels than OLED displays used by other projects. (see http://hackaday.io/project/9564-rpi-zero-wifi-enabled-hardware-password-manager for one such project that uses OLED). More pixels are desirable for QRCode bandwidth.Future Possibilities
Some ideas on how this may evolve:
A PCB “bonnet” that holds the LCD, and 5-way switch, and maybe some extra hardware
A real-time clock module to remember the time
A lipo battery? (Its already pretty tight in there, not sure if I can fit it without making the case bigger)
Move to buttons (similar to http://hackaday.io/project/9564-rpi-zero-wifi-enabled-hardware-password-manager). The 5-way switch was quick and easy, but I think buttons would be better.
Inspiration
Things that inspired this project, but not specifically a remix
The initial inspiration for this project was the awful “Taken 3” movie where Liam Neeson uses a fictional device to download the GPS history from a car. (I don’t recommend this movie). See the frame cap below to see the device.
Other projects to make a Pi Zero-sized user interface to the Pi Zero include:
http://hackaday.io/project/9564-rpi-zero-wifi-enabled-hardware-password-manager
https://www.thingiverse.com/thing:1193350
Many GameBoy-like systems like PiGrrl, etc.I do have a very particular set of skills, skills I have acquired over a very long career.
-
Malayan M180 Carriage MK3 3D Print Model
Summary
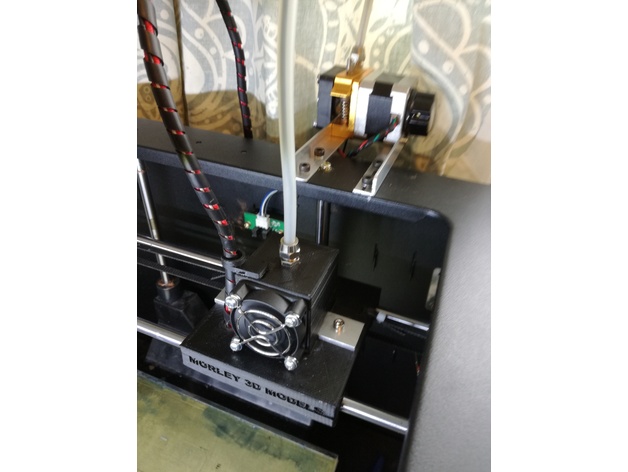
This is my MK3 carriage for a single extruder for the Malayan M180.
I removed the left hand extruder, except for the fan, and thirmister (for some reason it will not work if you remove this) and used the right hand heating block and the filament guide.
You will also need, a 60mm long hot end extruder guide, and a length of aluminum bar 90mm long by 4mm thick. This is the heat sink and mount for the hot end extruder. Drilled and tapped in the centre to M6 with two 6mm mounting holes to attach to the carriage.
I used some M4 brass threaded inserts but you could use nuts and bolts.
I also use M3 inserts to mount the fan.
You will have to adjust the Z axis stop sensor to level the bed, as the heating block protrudes slightly than on the original carriage.
For the filament drive I used a metal Bowden type, which is cheaply available on EBay etc.
and used the left hand fan to cool the stepper motor. This was then fitted to the printer casing above the filament spool, using some scrap aluminum angle.
The whole thing took about 4hrs to complete and set up but the results are worth it.
It is much easier to load filament, the prints are great and I can now reach higher temperatures.
Print Settings
Printer:
Malyan M180 Rafts:
Yes Supports:
Yes Resolution:
High Infill:
50% Notes:
Takes about 17hrs to print -
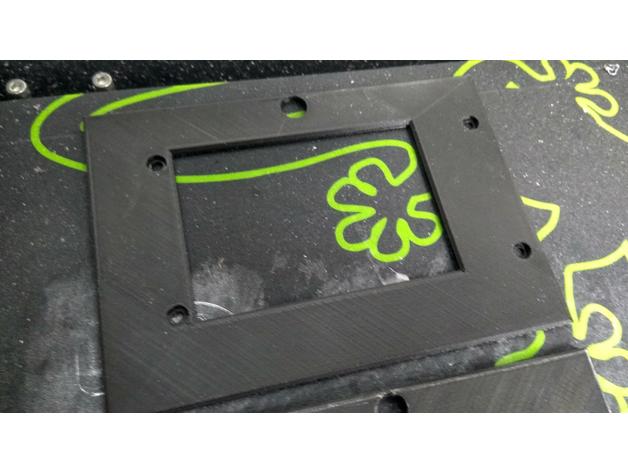
East3D Gecko Low-Profile Front Panel Screen Bezel 3D Print Model
Summary
It is a low profile screen bezel designed for East3D Gecko. -
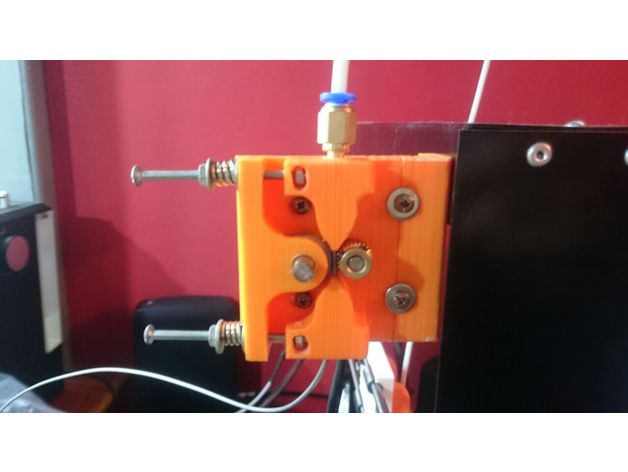
mk8 3D Print Model
Summary
material utilizado PLA, funciona perfecto, tornillo M3 50mm de largo, 4 tuercas M3, 4 arandelas, 2 resortes, ruleman, engranaje de bronce, nema 17, conector neumático Ø4mm con rosca de M5
Print Settings
Printer:
lazimaker Supports:
Yes Resolution:
0.3 Infill:
20% -
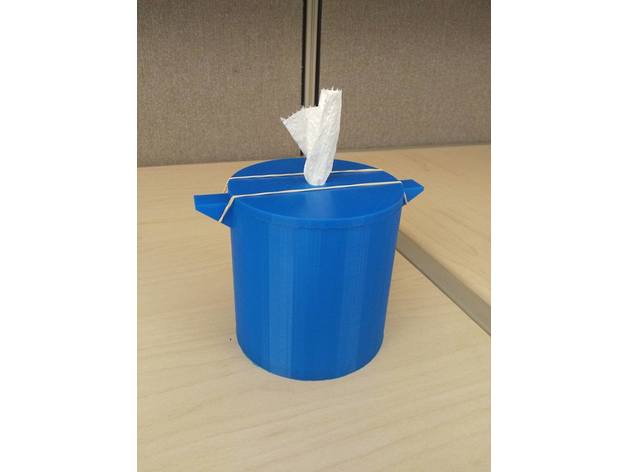
Tissue Holder 1.0 3D Print Model
Summary
This tissue jar is able to take a toilet paper and dispense it as tissues. This will save you lots of money. It’s designed to fit some of the biggest toilet paper rolls, so it shouldn’t matter what brand/ size you use. The lid is held on with a rubber band. You can print this without any support. That being said I printed the lid top up and used support to get the desired print finish on top. I had to use supports in this case.
Print Settings
Printer:
Anet A8 Rafts:
No Supports:
No Resolution:
0.16mm Infill:
10% Notes:
At a 60mm/s speed using Cura it takes about 18 hours for the jar and 6 hours for the lid. -
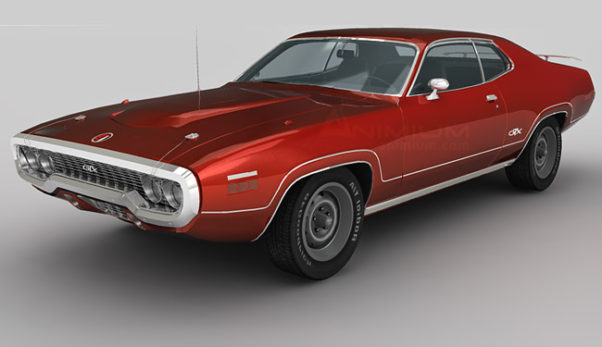
Plymouth GTX 3d model
Realistic 3d model of Plymouth GTX 3d model, detailed 2 door saloon, high-performance classic muscle car.
-
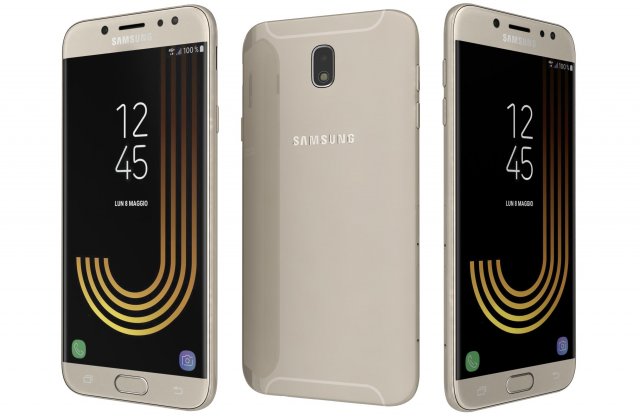
Samsung Galaxy J7 2017 Gold Free 3D Model
Samsung Galaxy J7 2017 GoldThe materials are available in the Max file format with V-Ray, mental ray and Standard (Scanline) materials. All other file formats are mesh only and will require material reapplication.High quality textures, perfect for extreme close-ups and high resolution renders.The preview images were rendered on 3ds Max 2011 with V-ray 2.0.Native format is 3DS Max 2011You can make the Poly count higher by the Mesh-smooth and Turbo-smooth level.Includes V-Ray materials and textures only in 3ds Max format.A file without V-Ray shader is included with standard materials.The .3ds and .obj formats are geometry with texture mapping coords. No materials attached.Textures format JPEG.Original file format (3DS Max 2011)Big size textures included.3D max file included Standard materials and Vray-materials.Hi-poly model with mesh-smooth and Turbo-smooth modifier.All the materials are named.Geometry Only (Polygonal)This 3d model objects and materials have the correct names and stripped the texture paths.NOTE: V-Ray is required for the V-Ray 3ds Max scene and Studio setup is Not included.I Hope you Will Like My All Products.Thanks For Buying.Note: Enjoy with this Model Because Celebration of Eid-ul-Azha.Only Eid Days… 🙂
-
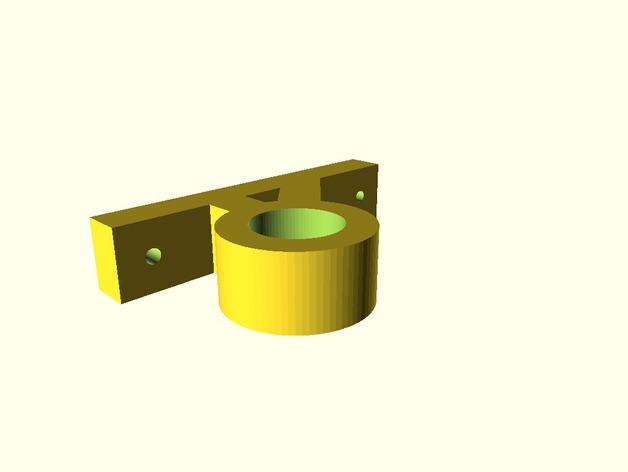
Customizable Curtain Rod Hanger / Wall Mount 3D Print Model
Summary
This is a customizable curtain rod hanger. There are a couple other hangers around, but i wanted one that i could adjust as needed.
Enjoy! -
Athlon argos shim 3D Print Model
Summary
Zero stop shim for athlon athlon argos btr 6-24×50 ffp. they go under the scope cap, shim from .20″ to .38″ -
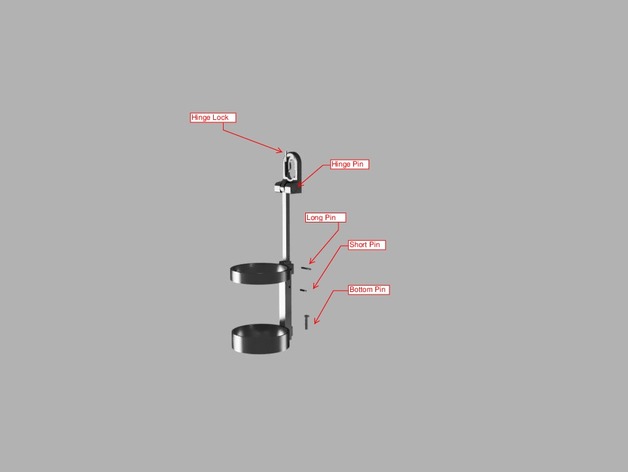
Sand Bottle Holder for Clickgear Golf Cart 3D Print Model
Summary
This is a much improved rework of www.thingiverse.com/thing:1718939. It is designed to hold the large sand bottles that a lot of courses use on carts but attaches to the attachment points on a Clickgear push cart. My original design just wasn’t strong enough to stand up to the weight of a full sand bottle and the rigors of bouncing over the ground. This needs to be printed in a strong material – I used Polycarbonate and previously used Nylon, both of which are strong enough (and both can be challenging to print). I prefer the PC. In PC this is plenty strong and has been in use on my cart for quite a while with no problems. The picture also shows the assembly – all the pins are press fit and the design requires no other hardware.
Print Settings
Printer:
Flashforge Creator Pro Rafts:
Doesn’t Matter Supports:
Doesn’t Matter Notes:
Print in a strong material like Polycarbonate -
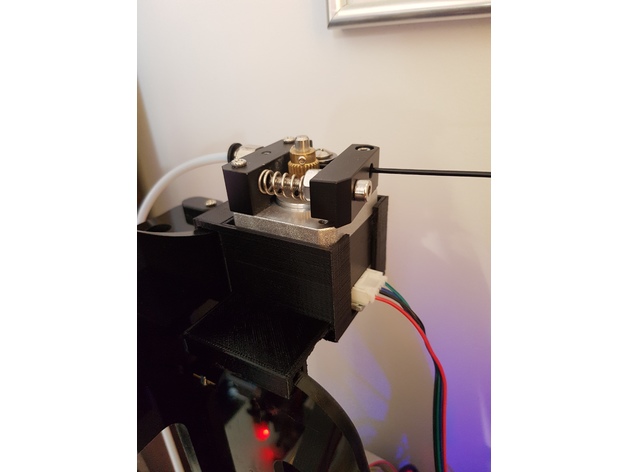
Full Bowden suite Infitary M508 + Bltouch 3D Print Model
Summary
This includes V6 E3D hotend mount, extruder mount and bltouch mount that has been calibrated for hotend height (depends on the hotend you bought, may need further customisation for bltouch mount)
Requires redrilling block for X endstop to match the hotend holder (Used the Anet A8 upgrade by Nicolaferrara82)
The extruder mount doesnt use screws, just sits comfortably between a 3 points on top of “left” (looking straight at it – See pictures) above Motherboard. Can be tightened in design, but I like that it isn’t that snug. You will put it under wing of Z axis top rod holder then slot in place.
Print extuder mount with supports! -
Chair 3D Model
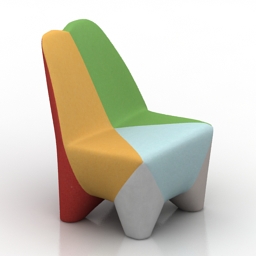
Additional Info: Chair Binta Moroso N070817 – 3D model (*.gsm+*.3ds) for interior 3d visualization.
-
Player 3D Model
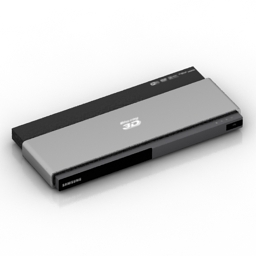
Additional Info: Player 3D Blu-Ray Samsung 4K BD-F7500 N010617 – 3D model (*.gsm+*.3ds) for interior 3d visualization.
-
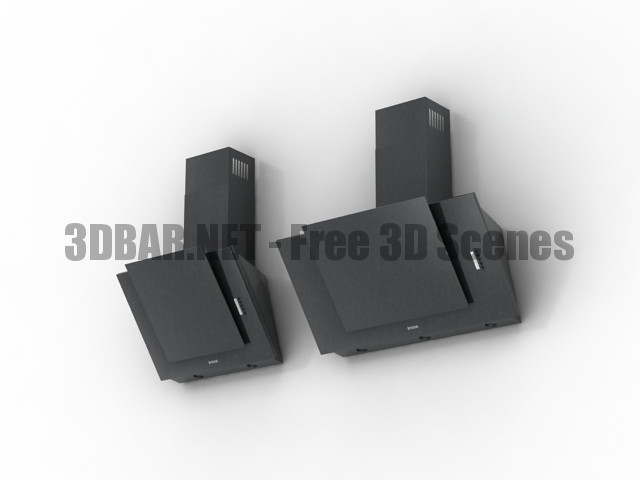
ELEYUS Titan A 750 60 BL 90 BL Kitchens Hood 3D Collection
ELEYUS Titan A 750 60 BL 90 BL Kitchens Hood 3d Models
-
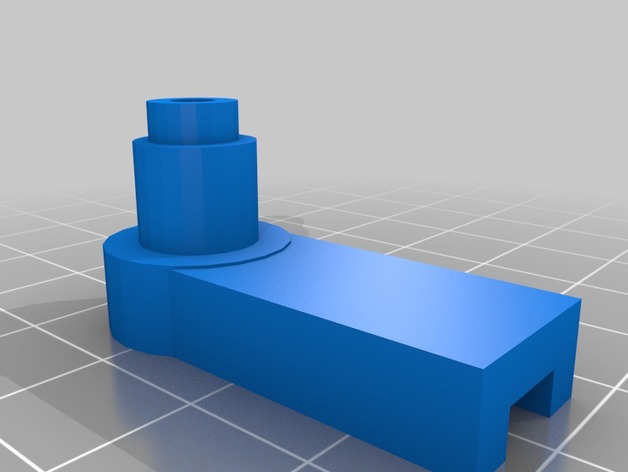
Apache Camper (pop up) door turn button 3D Print Model
Summary
This is door turn button (the piece that you turn down to keep the top door linked to the bottom door once the camper is up).
It is my first design and probably a little rough but it works.
Print Settings
Printer Brand:
Up! Printer:
Up Mini
Post-Printing
You’ll need to remove the infill or not. Works just as fine. -
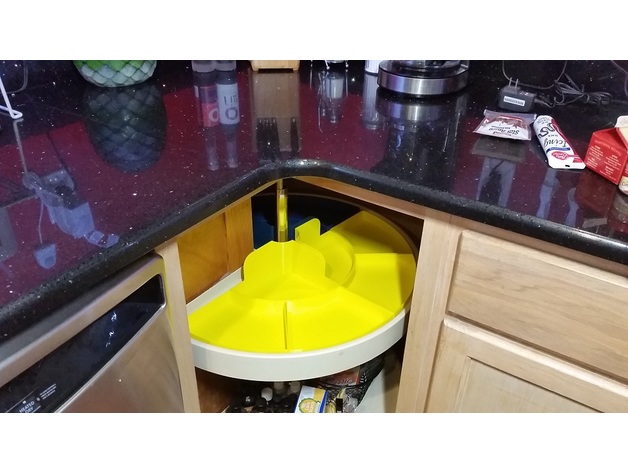
Lazy Suzan Organizer 3D Print Model
Summary
A Lazy Suzan Organizer. The pictures are pretty self explanatory.
I am open to design suggestions. For example, I was considering making a stack-able version of the inner wedge.
Enjoy!
Print Settings
Printer Brand:
Rostock Printer:
Rostock MAX V2 Rafts:
Doesn’t Matter Supports:
No Resolution:
Nozzle – 0.4 Layer – 0.2 Infill:
50% Notes:
Requires a fairly large print bed. The printer requires at least a 215 mm bed. -
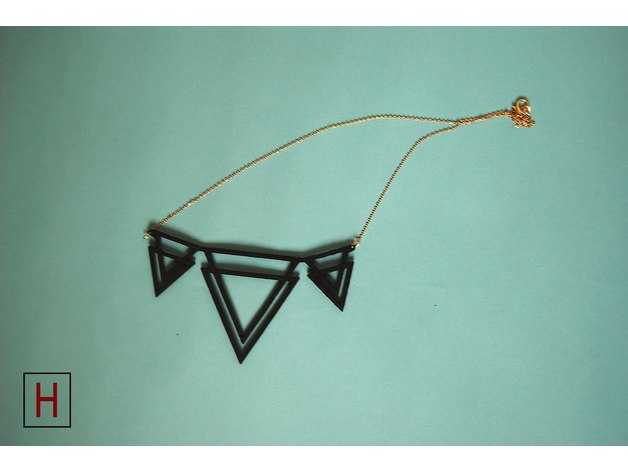
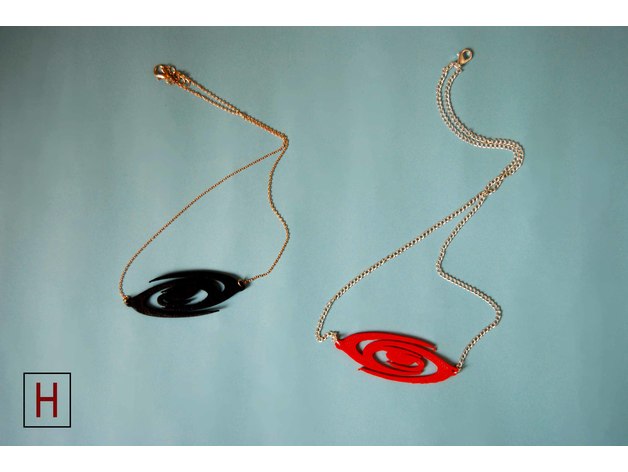
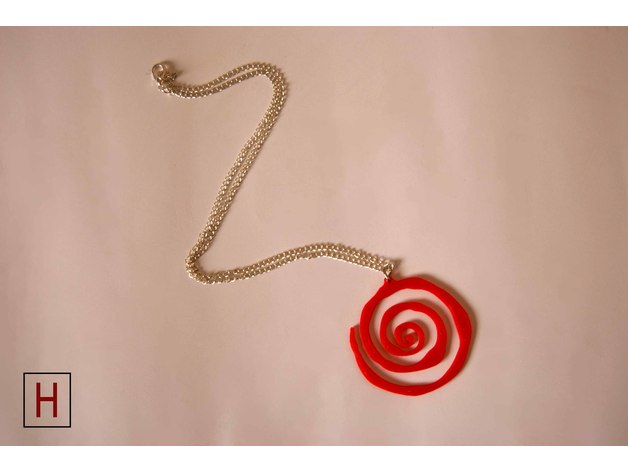
Necklace – Double deltas 3D Print Model
Summary
http://horizonlab.co/2017/09/01/necklace-double-deltas/ -

Stump and trunk Free 3D Model
Stump and trunk made in a forest in Belgium. This is my first attempt of natural feature and some other are coming. These could be use in a game or animation. Made with ReCap and ReMake from AutoDesk.
-
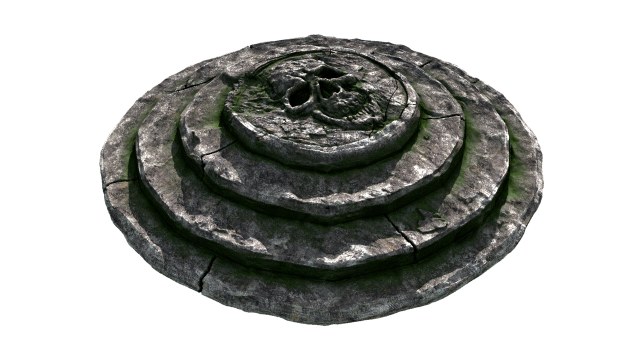
Stand stone Free 3D Model
The archive includes a low-poly model (which can be smoothed and increased in detail with the DISP card)Textures 8192×8192:Deffuse, ao, normal, spec, roughness, disp
-
Nerdhaus Poker Chip 3D Print Model
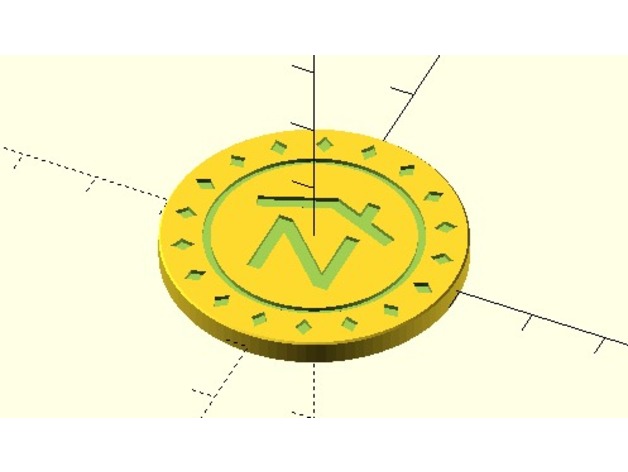
Summary
A parameterized poker chip, with a large symbol embossed in the center and a smaller symbol repeated around the edge.
Download the SCAD file and use a dingbat font for a larger selection of symbols — we use that technique to generate quick and dirty game tokens for RPGs and board games, tool. -
LED, battery, switch clip-on light 3D Print Model
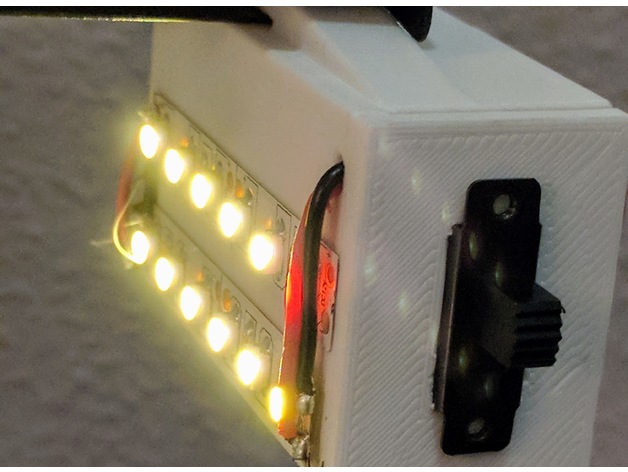
Summary
This is a battery holder for a 9-volt battery with a switch and LEDs to light up a Monoprice Select Mini 3D printer. To complete the light, you’ll need:
LED strip lights
Switch
Battery connector
9v battery
The hole for the switch may need to be resized to match the size your switch.
Once put together, just slide it onto the end of the Z-axis arm, and switch it on. Using a battery, there’s no need to tap into any other wires. -
Double badge holder 3D Print Model
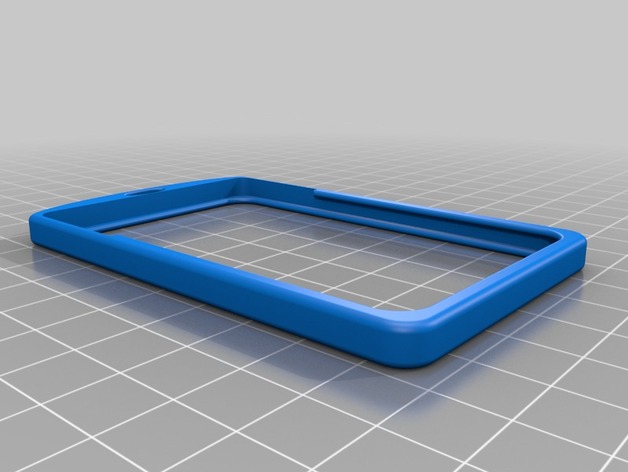
Summary
Yet another badge holder. It’s the vanilla “RFID badge holder” design, but not as cool as https://www.thingiverse.com/thing:1869475 which prints with bed-up supports. Mine wants needs internal supports, which mean you should get real friendly with your slicer.
Having done that, the supports peel out and leave an awesome badge holder. It is roomier, letting me use both an RFID card and a second plastic identity card. The edges are nicely rounded, it comes off very smooth with no post-processing required. -
Foot for V-Groove Aluminum Extrusion 3D Print Model
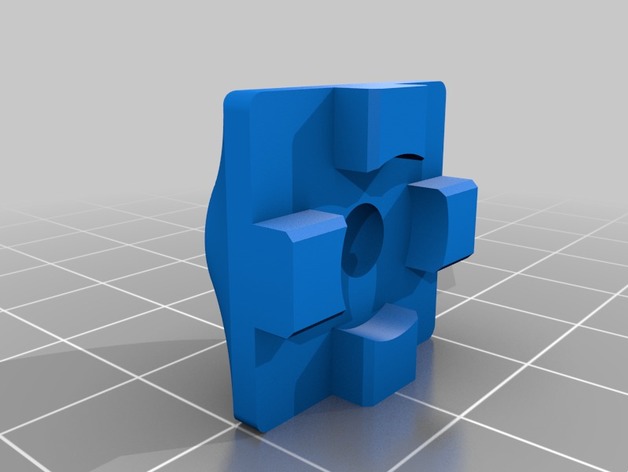
Summary
I made this so that I could have little footies on my 2020 aluminum extrusions I bought from Inventables -
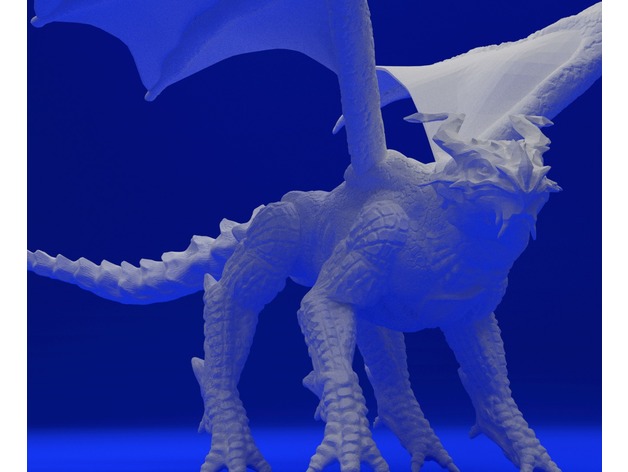
Dragon 3D Print Model
Summary
Dragon, sculpted on Zbrush, the blue render was done with the 200K poly model. There was a 1M poly model but the file was too large (80mb). -
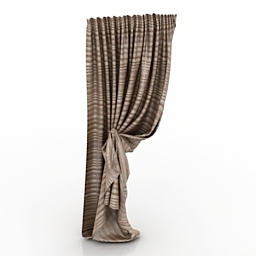
Curtain 3D Model
Additional Info: Curtain 1 N260617 – 3D model (*.gsm+*.3ds) for interior 3d visualization.
-
Presto Pegasus Symmetry R5 part: Shock-proof GoPro Session Mount (V2) 3D Print Model
Summary
This is a 3D printing file for Presto Pegasus Symmetry R5’s accessory part: Shock-proof GoPro Session Actioncam mount. (Fits both GoPro Session & GoPro 5 Session)
This is not a original stock design but optimised for TPU printing (designed by Symmetry R5 pilot C.N. OH aka Ryan FPV). It has a shock-proof feature which will protect your GoPro Session even more. 20mm spacer may be needed to screw the session mount tightly.
This GoPro mount is compatible with Presto Pegasus Symmetry series frames.
It is mounted with only two M3 screws on Symmetry R5 frame. No strap is required.
Recommended to print with TPU with 100% scale.
This file is free to use except for commercial use.
This file is designed/provided by Ryan FPV -
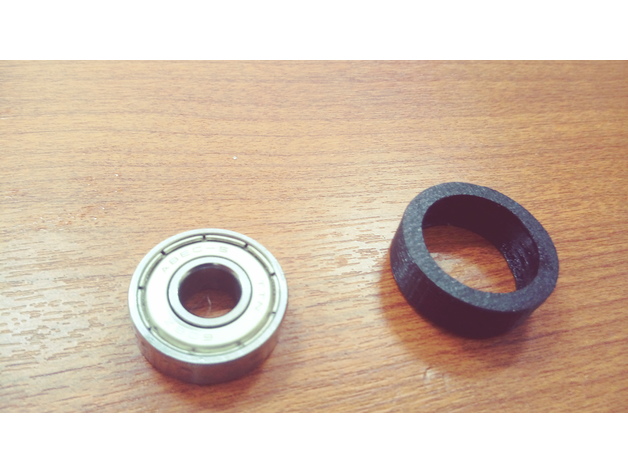
608ZZ rubber or tire 3D Print Model
Summary
When you need transform a 608zz bearing into a tire or simply add to it some rubber for 3d carriage application or make the bearing can roll over an alluminium profile, you can use this thing. It’s a rubber with the dimmensions of the 608 bearing. You can use the solid work model to modify it in accordance to your need.
IMPORTANT: You must use flexible filament.
Remember for flex fil:
print SLOW speed (no more 30mm/s)
No retract
Enjoy it!
Print Settings
Printer Brand:
Prusa Printer:
Prusa Clone Rafts:
Doesn’t Matter Supports:
Doesn’t Matter Resolution:
0.2mm Infill:
40% -
Cable Carrier 3D Print Model
Summary
Common use snap-fit cable carrier with enclosed top.
Print Settings
Printer Brand:
Prusa Printer:
Prusa Clone Rafts:
No Supports:
Doesn’t Matter -
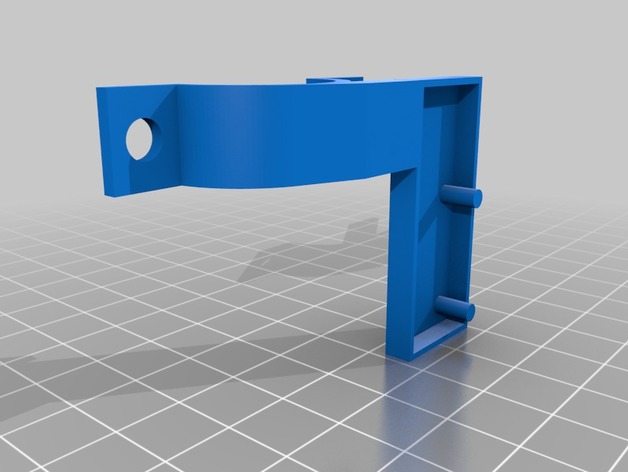
MPCNC EndStop Mount 3D Print Model
Summary
I bought physical switch endstops and didn’t like any of the existing versions. So I made my own from scratch. The End Stops sit snuggly into the trays using pegs to hold them straight. You could drop a tab of hot glue to hold VERY securely if you like.
I used this End Stop
Print Settings
Printer Brand:
Prusa Printer:
i3 MK2S Rafts:
No Supports:
Yes Resolution:
.15 Infill:
20% Notes:
I had to use supports at first, because I did not pay any attention to how it might need to be printed. If you have good cooling and are an overhang master, maybe you can go without. If you do use supports, I had them stood away from the model by .2 mm so they were easy to detatch
Post-PrintingY-Axis Top
X-Axis Top
Bottom Ring for both
How I Designed This
Used Fusion 360
This uses nuts and bolts to assemble, used #6 thread in my case because it’s what I had. -
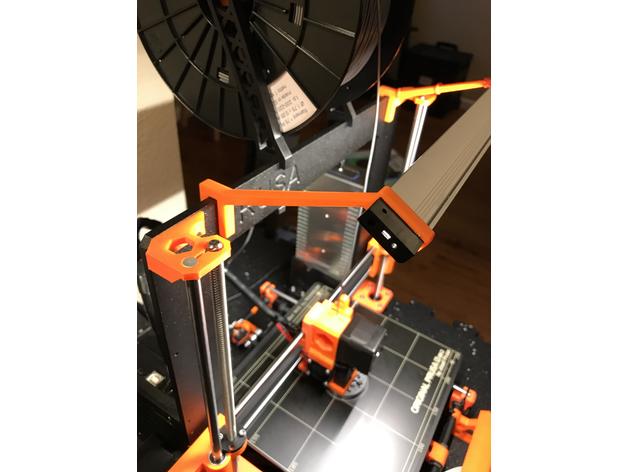
Prusa i3 MK2/MK2S Light Bracket 3D Print Model
Summary
I designed this light bar bracket in Fusion 360 for my i3 MK2S. it its a nice tight fit over the plastic end caps of the light bar but moves more freely once over the extruded aluminum. The light bar used is the following: https://www.lowes.com/pd/Utilitech-11-8-in-Plug-in-Under-Cabinet-LED-Light-Bar/1000033647
The light is activated by waving your hand underneath. It is also dimmable if you hold your hand under the sensor. Once the desired brightness is achieved, move your hand.
Print Settings
Printer:
Reality CR10 Rafts:
No Supports:
No Resolution:
0.3 mm Infill:
25% -
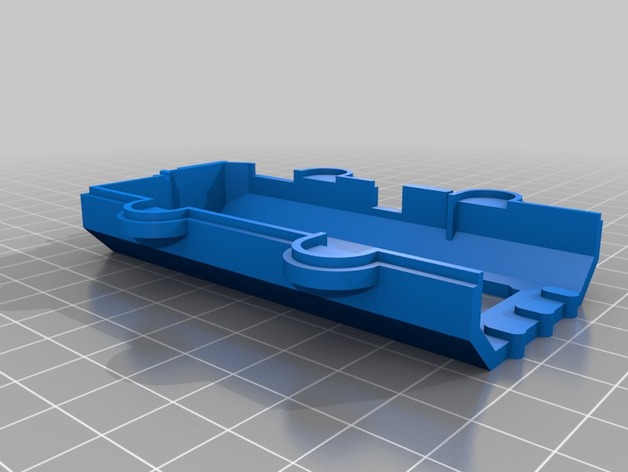
SmartExtruder Cover (Not SmartExtruder+) 3D Print Model
Summary
I own two original SmartExtruders and one SmartExtruder+. I’ve figured out the SmartExtruder+ is great because and only because it’s held on by screws instead of clips. They are about the same as far as performance goes, but it’s nice to have more extruders dedicate for different nozzle diameters.
Anyway, anyone who owns one of these 5th Gens or had owned one would understand the frustrations of the clip-on extruder covers. Mine are holding on to dear life by my extruder holder or painters’ tape, since it’s readily available.
The part is self explanatory so there are little words to say about this part, other than I’ve put in about 2 weeks of work on this, but it’s not quite right yet. Measurements were taken and modeled with and without the back-cover for assembly for accuracy, before and after printing. Printed parts were checked under a microscope then the model was adjusted accordingly. Well, I hadn’t finished it yet, but it’s roughly 90% accurate.
Other work got in the way and I hadn’t worked on this for a couple months and decided to release this to all of you. If it works for you, GREAT! If it doesn’t, I hope someone can finish it, make improvements and share it.
It’s best to print this at 0.3mm resolution and print it solid. 0.2mm is better but that’s a lot of time spent for an incomplete part that may or may not work. There aren’t any features there that require 0.2mm resolution. 0.4mm prints faster but I feel it’s not fine enough for this application.
I’ve printed only PLA but it hasn’t quite fit JUST right so I have no idea what will happen at the hot-end.
Enjoy.
Print Settings
Printer Brand:
MakerBot Printer:
MakerBot Replicator (5th Generation) Rafts:
No Supports:
No Resolution:
0.3mm Infill:
50%+ -
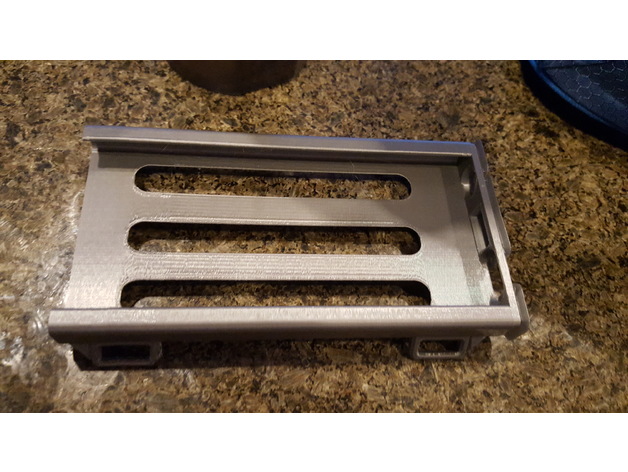
Samsung S6 Arm band case (with phone case) 3D Print Model
Summary
This is a arm case for the Samsung Galaxy s6 (with an external case). It has 4 loops to attach elastic so that it can be worn on the arm.
Print Settings
Printer Brand:
Prusa Printer:
i3 MK2S Rafts:
No Supports:
No Resolution:
0.4 nozzle, 0.20 layer Infill:
20% Notes:
Added Brim for adhesion -
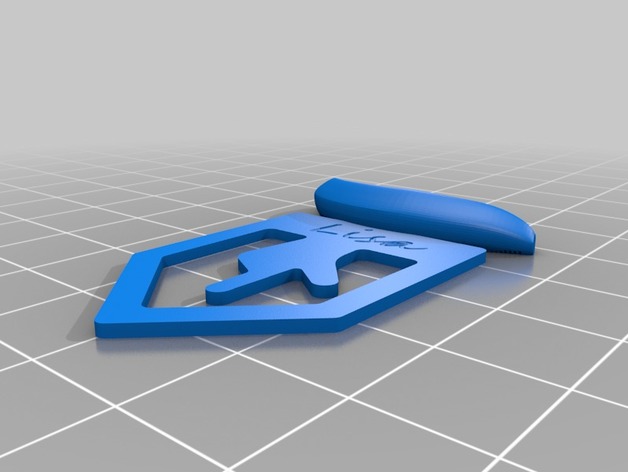
Banana Page Tracker 3D Print Model
Summary
add a banana on the page tracker so that i look more interesting 🙂 i also emboss name on the page tracker for customization. -
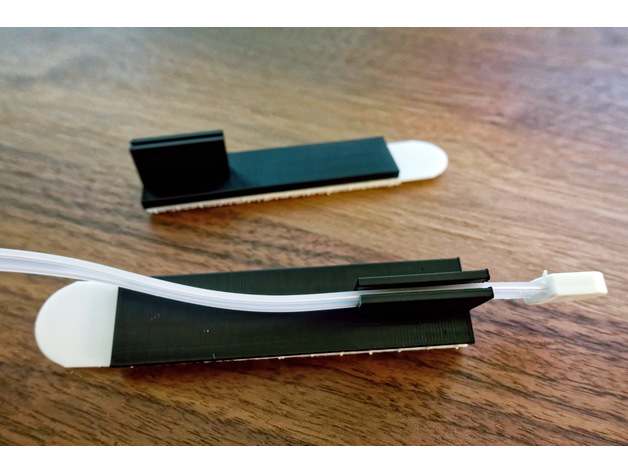
Dipole antenna holder 3D Print Model
Summary
I have tried securing dipole antennas to furniture forever. This solves that problem. It’s designed to adhere to 3M Command large picture hanging strips (http://bit.ly/2iEa3NP). -
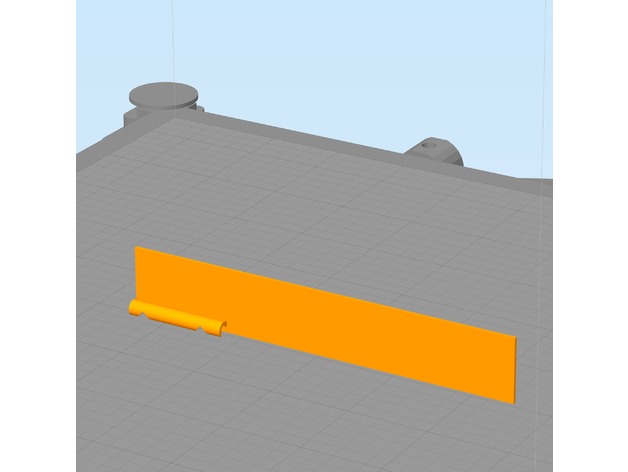
E-Step Calibration Jig (3mm filament) 3D Print Model
Summary
Trying to hold calipers or a ruler next to my filament while marking it for E-Step Calibration isn’t always easy, especially if your printer is in an enclosure. This jig has 2 notches. The lower notch is at 100mm the upper notch is at 120mm. Snap the filament channel onto the filament and lower the jig until it touches the top of the extruder. Then use a fine point marker to mark inside the V slots as shown in the photo. This jig requires your printer to be reasonably dialed in. You can use calipers to inspect the printed part for accuracy. I have found this tool to be quite handy.
E-Step calibration guides can be found in many places, I follow this: http://reprap.org/wiki/Triffid_Hunter%27s_Calibration_Guide#Measure
This is designed to be printed with the filament channel facing downward and a wide brim. The model was also designed to print with a .5mm nozzle but should print fine with smaller nozzles. The brim secures it to the build platform. Remove the brim after printing. See photos for usage.
Print Settings
Printer Brand:
LulzBot Printer:
TAZ 6 Rafts:
No Supports:
No Resolution:
.2 mm Infill:
none Notes:
This is designed to be printed with the filament channel facing downward and a wide brim. The model was also designed to print with a .5mm nozzle but should print fine with smaller nozzles. The brim secures it to the build platform. Remove the brim after printing. See photos for usage.