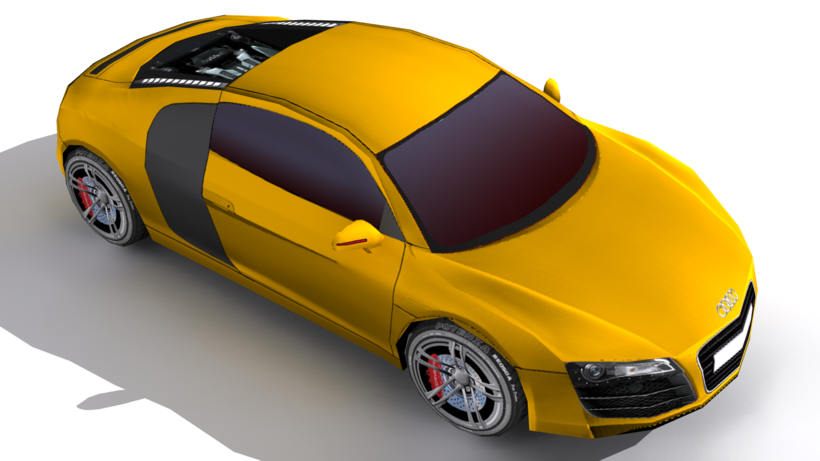
It is a low poly model of Audi R8. Made specifically to be used in mobile games. Photo-realistic texture to look like real. Textures created in 6 different Colors.
Category: Free 3D Models
Free 3D models ready to be used in your CG projects such as films, visualizations, games, VR etc. All 3D Models and Free 3D Print Models are available for download in several formats including .MAX, .STL, .FBX, .3DS, .C4D, .OBJ, .BLEND, .DWG, .DXF, .LWO and much more. If you’re in search of high-quality Free 3D assets, we have a huge library of 3d models for all your needs. Also you can visit 3D Models and 3D Print Models category.
-
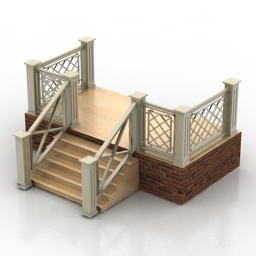
Porch 3D Model
Additional Info: Porch Stair Fence N051217 – 3D model (*.gsm+*.3ds) for exterior 3d visualization.
-
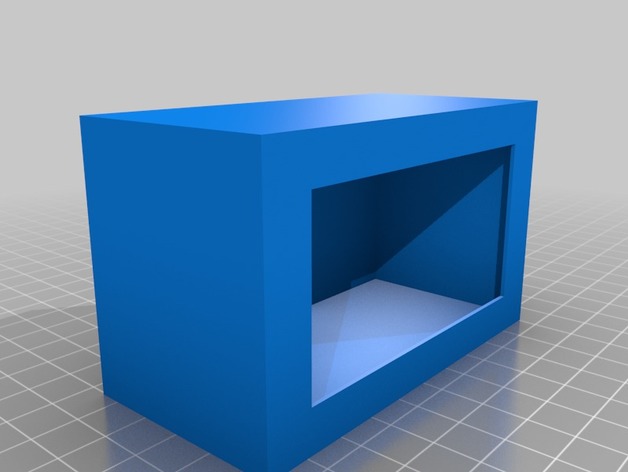
Housing for KKmoon DC 12V 24V 4-20 mA Signal Generator 3D Print Model
Summary
This is my first design. Its just a housing for the KKmoon DC 12V 24V 4-20 mA Signal generator.
I didnt print it yet since im waiting for my printer to arrive. I might have to tweak it a little.
Maybe someone owns that thing too and wants to use a housing aswell -
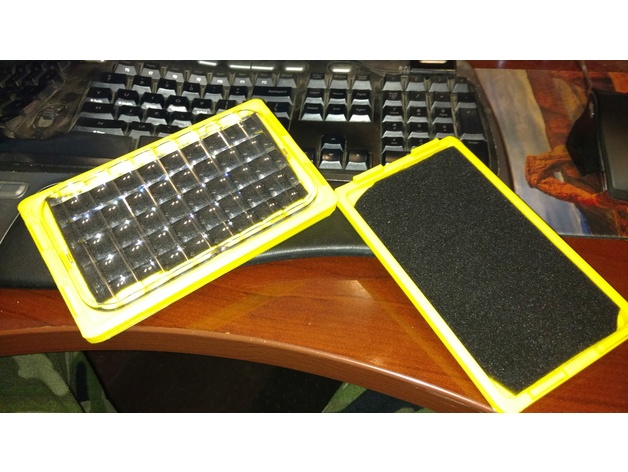
GoLight RadioRay LED Lens Case 3D Print Model
Summary
I purchased a set of GoLight RadioRay LEDs for my truck and I also got the Flood Lens set for both of them. These lens are really nice but I prefer the focus beam generally so these lens need a safe home while gettin tossed around in my old beat up truck.
So I designed this case and if I print it twice, I have a case for each lens 😉
There isn’t much special about this except that it works exactly as I wanted. The only post printing suggest I would have is to add some thin foam to ensure the lens doesn’t get scratched while in the case however the lens do not move around much as is. Still, I added the foam since I get enough packaging foam things shipped in so I had something that was perfect already 🙂
Print Settings
Printer Brand:
LulzBot Printer:
TAZ 5 Rafts:
No Supports:
No Resolution:
.25 Infill:
15% Notes:
This is a “box” with no details so no need to get super fancy on your resolution; just whatever prints the fastest for you.
I went with PLA because it has a greater chance for dimensional accuracy and my PEI sheet is finally giving up on me with bubbles at 100C so ABS just isn’t working out so well however even with a few bad prints in ABS, the case still performed well.
I recommend a low infill simply because this will hold up due to size and shape.
I used 1.5mm perimeter and top/bottom and that may be more than it needed. Honestly I wouldn’t be surprised if I could set this under my truck’s tire and run it over and it’ll still hold up. Might test that out with a failed job later 😀 -
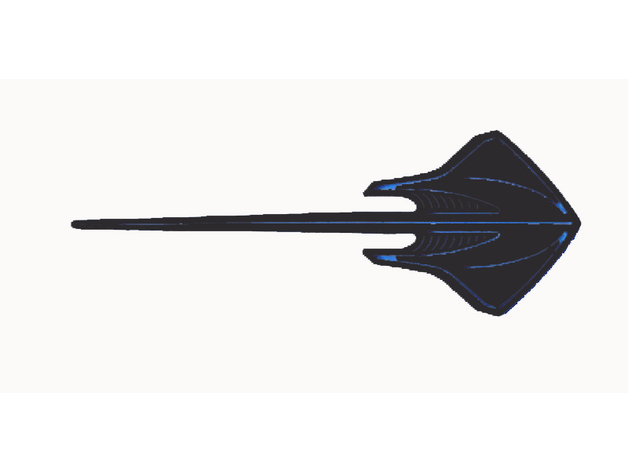
C7 Stingray Corvette badge 3D Print Model
Summary
C7 Stingray Corvette badge
please like, follow and enjoy
If you enjoy my models please follow me to keep up with all the new models i post.
My models take a lot of time and work to make.
please consider supporting my work on Patreonhttps://www.patreon.com/saintmythi
Print Settings
Printer:
ScrapBot Rafts:
Doesn’t Matter Supports:
No Resolution:
any Infill:
any -
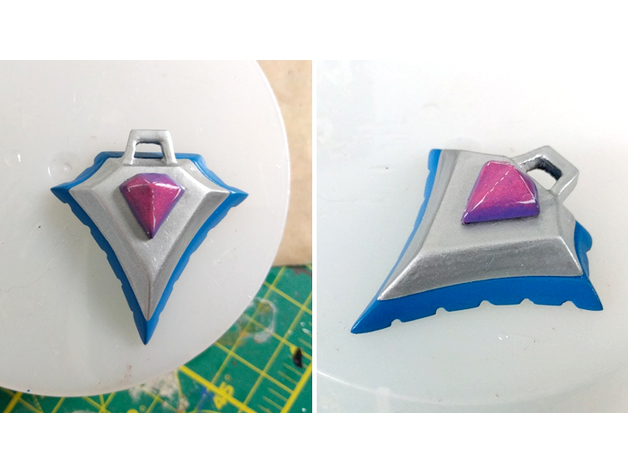
Null Talisman 3D Print Model
Summary
I scaled the original model to better match the in-game icon. The top part was moved to the middle portion instead of the bottom I also split it into 3 parts to make it cleaner for painting. -
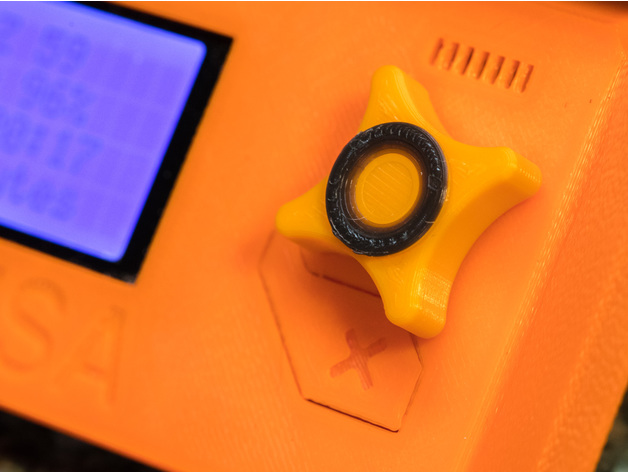
Prusa i3 Mk2 Ergonomic Control Knob 3D Print Model
Summary
I wanted a better knob for the control panel on my Prusa i3 MK2, but none that I found on Thingiverse were quite what I wanted. I designed this version with two main advantages over others. First, it has a four-point star shape that comfortably accommodates your right thumb for navigation without looking away from the screen (with a recessed center area for clicking the current selection). And second, the back side has a flexible socket patterned after the original Prusa knob, which makes installation much easier than a simple hole on the back. In the sample shown, I changed filament near the end so that I’d have a contrasting ring in the center button area.
Print Settings
Printer Brand:
Prusa Printer:
Prusa Mk2 Rafts:
No Supports:
No Resolution:
0.15 Infill:
35% Notes:
Because this part is relatively small, I opted for much more infill than I normally use on larger items. The 35% infill provided plenty of support for the concentric rings at the top. A smaller infill percentage might work just fine, but I haven’t tried it.
Due to the fine detail on the first layer, I found it helpful to print layer 1 at half the speed of the normal, already slower first layer. Also, a layer of glue stick on the build platform helped the details stick well. Once the second layer started, I cranked the speed back up to 100%, and the printing was easy after that. -
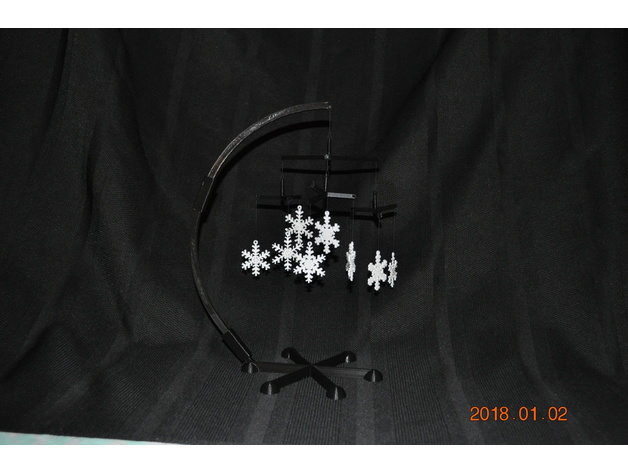
SnowFlake Mobile – Desktop or Free Hanging 3D Print Model
Summary
This is a snowflake mobile created in BlocksCAD. This can be either a desktop mobile or a (simpler) free hanging mobile.
It uses the “earring” snowflakes from https://www.thingiverse.com/thing:2728193 for the snowflakes.
The xml files used to create the geometry in BlocksCAD are also provided.
PRINT INSTRUCTIONS FOR DESKTOP MOBILE:
suggestion: white snowflakes
print 9 “earring” snowflakes from https://www.thingiverse.com/thing:2728193
suggestion: black mobile pieces
print 3 small arms
print 1 large arm
print 1 base
print 1 lower arm
print 1 upper arm
print 1 connector straight
print 1 connector curved
ASSEMBLY INSTRUCTIONS FOR DESKTOP MOBILE:
I used heavy duty black thread to connect the snowflakes to the arms.
Attach 3 snowflakes to outer ends of the arms of the small arm using black thread. The distance between the top of the snowflake and the small arm should be about 1 to 5 cm. Repeat for the other two small arms. Varying the thread lengths provides a more esthetic display.
Attach the center of one of the small arms to one of the outer end of one of the arms on the large arm using black thread. This thread length should be about 2 cm. Repeat for the other two small arms
Attach the center of the large arm to the hole in the top of the large arm using black thread. The length should be about 2 cm.
Assemble the straight end of the lower arm to the base using the straight connector.
Assemble the upper arm (& snowflakes) to the lower arm using the curved connecter.
NOTE WELL:
The small arms and large arms will not hang level with random snowflakes with different weights. The thread length has an insignificant impact on whether the arms hang level.
ENGINEERING INSTRUCTORS: A student challenge would be to compute the equilibrium position of the small arm based on the weight of the individual snowflakes attached. It would be considered cruel and unusual punishment to ask students to compute the equilibrium position of the entire assembly.
OPERATION:
No batteries required.
The slightest breeze will set the mobile in motion when thread is used.
put it near a heating register and the air currents will set it in motion
when all else fails:
— gently spin the top of the center large arm
— or blow on it
PRINT INSTRUCTIONS FOR FREE HANGING MOBILE:
suggestion: white snowflakes
print 9 “earring” snowflakes from https://www.thingiverse.com/thing:2728193
suggestion: black mobile pieces
print 3 small arms
print 1 large arm
ASSEMBLY INSTRUCTIONS FOR FREE HANGING MOBILE:
Attach 3 snowflakes to outer ends of the arms of the small arm using black thread. The distance between the top of the snowflake and the small arm should be about 1 to 5 cm. Repeat for the other two small arms. Varying the thread lengths provides a more esthetic display.
Attach the center of one of the small arms to one of the outer end of one of the arms on the large arm using black thread. This thread length should be about 2 cm. Repeat for the other two small arms
Attach a long piece of black thread to the center of the large arm.
Hang the assembly at a convenient location. -
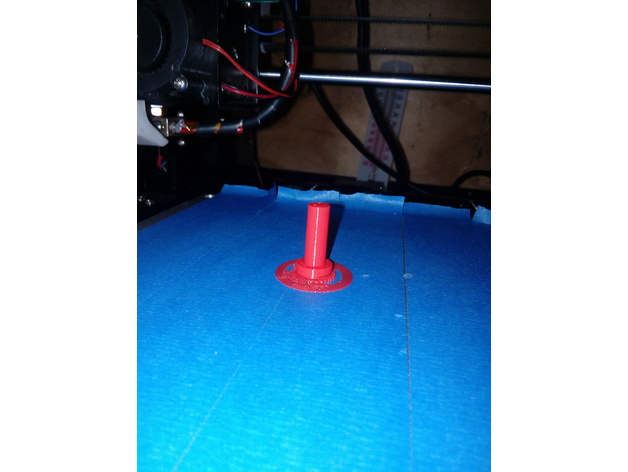
herf dart repair 3D Print Model
Summary
for nerf darts to repair the rear damage caused by miss load
printed in pla
use your own printer settings
inserts in to back of dart
tested on a modulas regulator
flywheel blaster
Print Settings
Printer Brand:
Prusa Printer:
Prusa Mk1 Rafts:
Doesn’t Matter Supports:
No Infill:
20% -
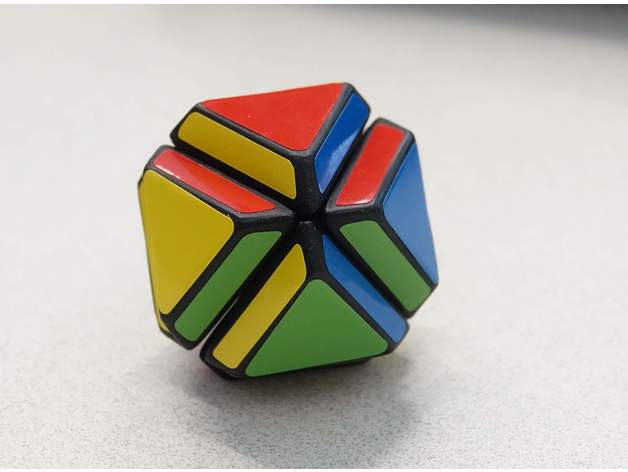
RCP Truncated Dueling Tetra Jr. 3D Print Model
Summary
Note: this puzzle requires a 24mm mini 2×2 to build. The print files are simply glued onto that puzzle.
Print Settings
Printer Brand:
LulzBot Printer:
Mini Rafts:
No Supports:
No Resolution:
.2 Infill:
20%
Post-Printing
I recommend sanding the surfaces smooth before gluing. Not only will this make the puzzle look great, but it will also help the stickers stay put.
The puzzle pictured has been printed in PLA and sanded through to 1500 grit. -
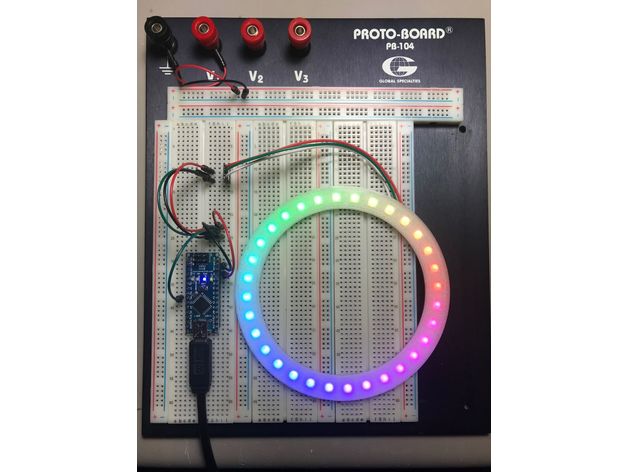
Customizable NeoPixel Ring 3D Print Model
Summary
Want a special NeoPixel ring, but cannot get right size or they do not have your favorite RGBWW chip? Create your own!
……………………
This customizable NeoPixel ring consists of holder, which is used as a jig to assemble individual NeoPixel breakout boards (like these https://www.amazon.com/gp/product/B01K4HCVDC) and also as a case to hold chips together and protect them from damage. Second part is a an optional cover, which can completely enclose ring in plastic and can be glued together with the holder.
Using this principle, you can create more complex custom shapes, but that’s beyond this simple guide.
……………………
For soldering individual chips breakout boards together I recommend using thin tinned copper wire (not stranded) and thin soldering tip. It looks daunting at first but with all boards aligned and soldering with one piece of continuous wire goes really quickly and you can get it done under 10 minutes. Then use thin (midget) cutting pliers to cut wires between data (middle) pads on each board. Attached pictures should help to explain the whole process (good observer can see I also cut wire between + and – pads which is totally unnecessary, I just got carried away …)
……………………
Ring is designed in OpenSCAD for extrusion width 0.5 mm and layer height 0.2 mm. I strongly recommend to regenerate STL files for different values because of very thin walls. 100% infill recommended, no supports required. Print with clear filament (tested with PETG).
……………………
Source file is included. If you remix, please also share your source file.
Print Settings
Printer Brand:
FlashForge Printer:
Creator Pro Rafts:
No Supports:
No Resolution:
0.2 mm Infill:
100% Notes:
Extrusion width 0.5 mm. -
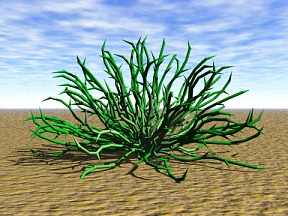
Weed 09 Free 3D Model
Free Model of 3DPlants.com “Plant Model Libary CD?s” and Downloadable Model Sets! This Model also available on CD…with UV mapped textures! More Info?s, Preview Images, Shop and Downloadable Texture Sets or a “Seamless Natural Texture CD” you find directly at 3DPlants.com!
-
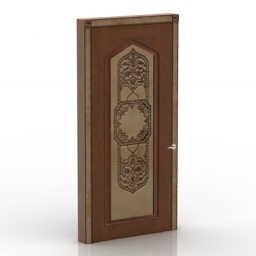
Door 3D Model
Additional Info: Door asian N051217 – 3D model (*.gsm+*.3ds) for interior 3d visualization.
-
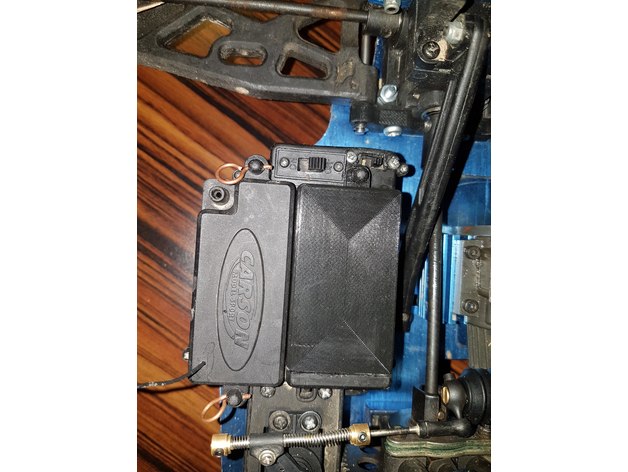
CARSON Battery cover 3D Print Model
Summary
Carson thor 1:8 truggy replacement battery cover.
Dont know why but I need to scale it to 1000% in Cura. Fits perfect I print it with PLA.
Print Settings
Printer:
ANYCUBIC I3 MEGA Supports:
Doesn’t Matter Resolution:
0.1 Infill:
15 -
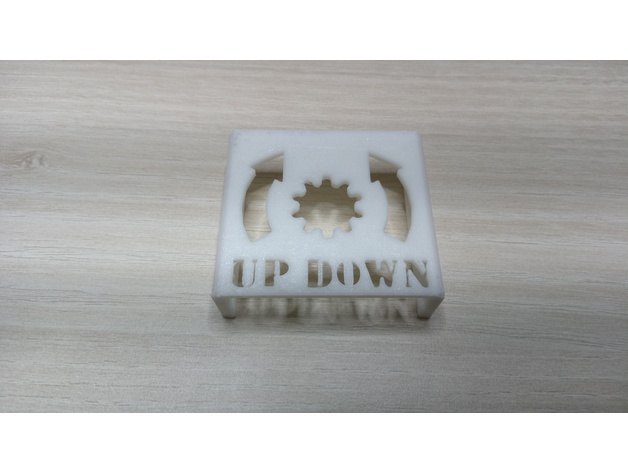
Bed leveling reminder for CR-10, CR-10 mini etc (2040 aluminium) 3D Print Model
Summary
I changed the direction of the arrows.. 🙂
I made this model in sketchup and also uploaded the .skp file so you can edit it. Maybe some resize is necessary.
Print Settings
Printer:
CR-10 mini Rafts:
No Supports:
No Resolution:
0.2 Infill:
20% -
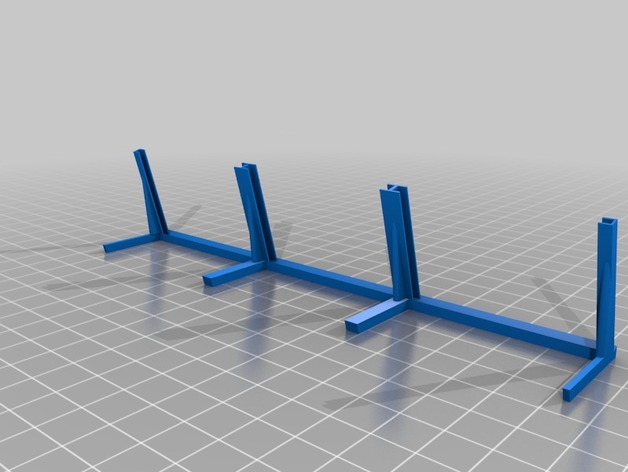
Polaroid Photo Stand 3D Print Model
Summary
Photo stand for 3 Polaroid mini 8, size 54 x 85.
Light and easy to print
Print Settings
Printer:
CR-10 Rafts:
No Supports:
No Resolution:
0.28 Infill:
15 -
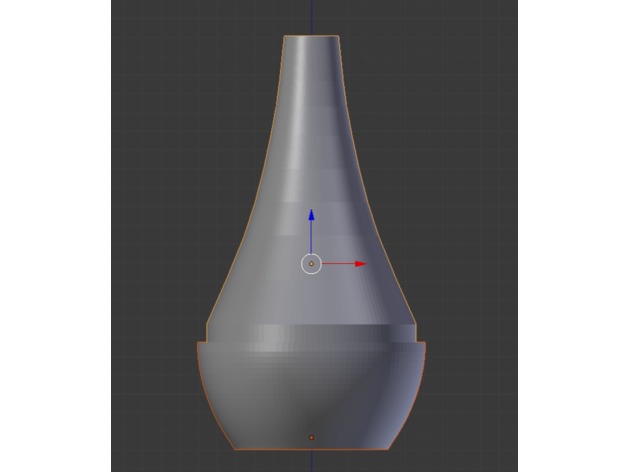
Trombone and Trumpet Mute 3D Print Model
Summary
Trombone and trumpet mute in 2 parts.
You can glue each part to another or drill one or two holes and use a screw.
This mute was made based on an image of a real mute.
The purpose of this mute is to make the volume lower. Use it to make your neighbors happy!
Print Settings
Printer Brand:
Ultimaker Printer:
Ultimaker 2 Extended Rafts:
No Supports:
No Resolution:
0.5 Infill:
40 Notes:
Trombone mute in 2 parts.
You can glue each part to another or drill one or two holes and use a screw.
This mute was made based on an image and size of a real mute.
The purpose of this mute is to make the volume lower. Use it to make your neighbors happy! -
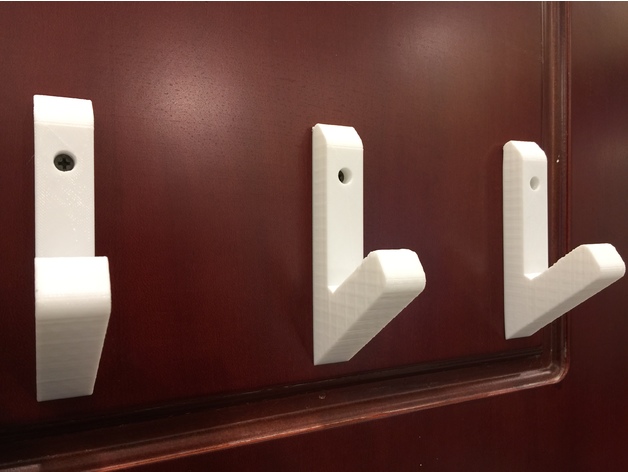
Clothes hanger “Jacket ON! Jacket OFF!” 3D Print Model
Summary
I needed a thing to hang my jackets on after come home. so i made some versions.
no supports or rafts needed.
you can glue them or screw them on the wall.
if you print it and find it usefull please let me know.
cheers°
Print Settings
Printer:
Anycubic i3 MEGA Rafts:
No Supports:
No Resolution:
0,3mm layer is enough Infill:
20% enough – 50% for smoother look/stronger -
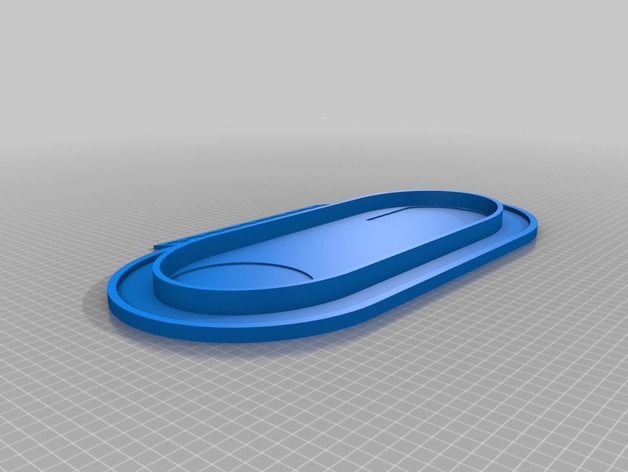
FFG Star Wars Dice Arena v2 3D Print Model
Summary
Inspired by a Dice Tower posted by the Staggering Dragon on Facebook here is my take on a FFG Star Wars Dice Arena.
This file is a free download. Please note that it is listed as “non-commercial”. Neither you nor I are allowed to buy or sell physical copies of this 3D model. You are allowed (and encouraged) to print copies for your own personal use. If you have been re-directed to this file from a source other than my site on thingiverse.com they have done so without my permission. Thank you for respecting the rights of the original copyright holder.
Print Settings
Rafts:
Doesn’t Matter Supports:
Yes Resolution:
.2 Infill:
20% Notes:
For the Towers, print with support. The tray has no overhang so its a mute point.
Post-Printing
Feel free to glue the Towers to the tray. -
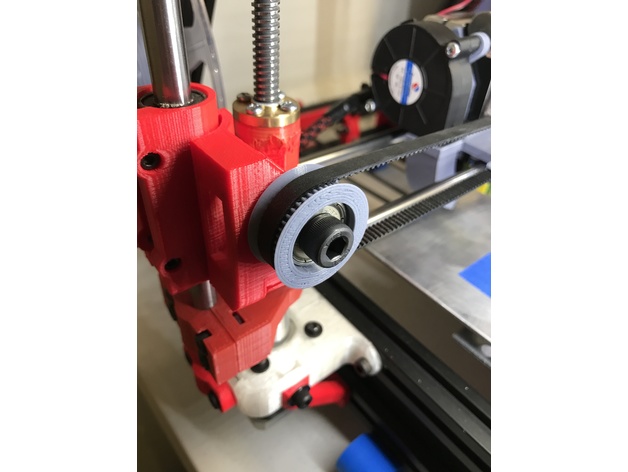
GT2 Idler Pully with chamfered edge 3D Print Model
Summary
46 Teeth. GT2 with 2mm spacing. Designed for a 608 Bearing.
Some designs available have a chamfer, some designs available have two parts that press together. I could not find a design that had both so I made one.
Includes a spacer so that it will not rub on a frame if applicable. -
Time Turner 3D Print Model
Summary
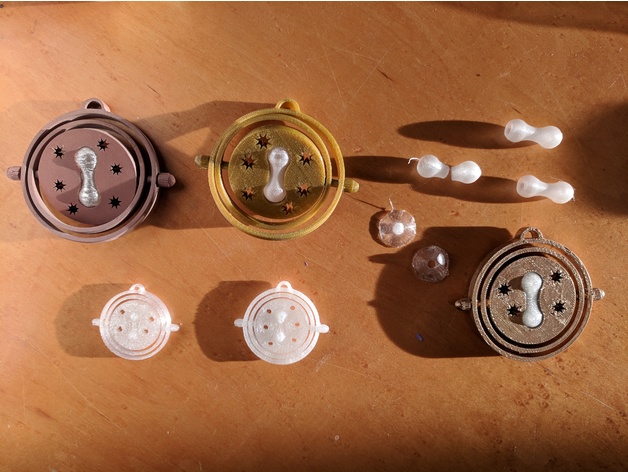
Harry Potter style Time Turner. You have the option of printing an immobile design in one piece or two. You can also print a mobile design. This was originally intended to be an ornament and so is only about 20mm across. It scales well to 200%. You may not get an intact print at 100% scale (see print settings). Right now the mobile designs inner ring moves a bit so I’m working on a flanged model.
I printed with a variety of filaments including petg, PLA, polysmooth, colorfab copper.
Print Settings
Notes:
Scaling
I use Simplify 3d to slice and I couldn’t get it to fill the rings at 100% scale. This probably has to do with my nozzle dimeter of 0.4mm and extrusion width but I’m not sure. It would fill in at 110% scale. So the smallest items pictured are 110% scaled. I scaled all my mobile prints at 200% with modification for the hour glass and pins as below.
Infill
I used 100% infill on all prints scaled at 110%. I used 30% infill on larger single piece designs and the star piece for the mobile design. I used 100% infill for the rings and pins for the mobile design.
Hour glass
For designs with a separate hour glass, I printed in vase mode using a clear PETG for one and Polysmooth clear for another. For one piece designs, I printed using the same clear materials and then painted. For 200% scale prints, I printed the hour glass at 197% scale to provide a snug fit. I used an attached 10 shell skirt. If you print in vase mode, the hour glass will be fragile and you will have to carefully adjust your temperature and extrusion multipliers to get the best adhesion. You can see a few failed hour glasses in my picture.
Pins
These are tiny. I used rafts and supports at 100% infill. Consider scaling to 195% in the cross section to facilitate fit. Scale the long axis to that of your base design.
Post-Printing
Non-mobile
If you print a non-mobile one piece design, printing in a clear material and then painting makes for a nice look. The gold painted large sample is a one piece made from petg. For two piece designs you can use a clear material for the hour glass and your preferred color for the body and rings.
Mobile
Print the hour glass clear and the rings and stars in your preferred material. I’d suggest using a drill bit to regularize the holes in the rings and the stars. You may have to sand the pin slightly.
Assembly
I used cyanoacrylate glue sparingly in the pin holes on the stars. You can do one side and then the other. The hour glass can be placed and then have a small amount of CA glue to hold it in place. -
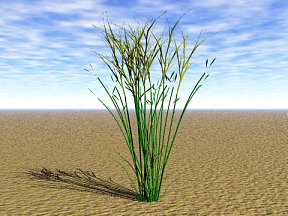
Weed 08 Free 3D Model
Free Model of 3DPlants.com “Plant Model Libary CD?s” and Downloadable Model Sets! This Model also available on CD…with UV mapped textures! More Info?s, Preview Images, Shop and Downloadable Texture Sets or a “Seamless Natural Texture CD” you find directly at 3DPlants.com!
-
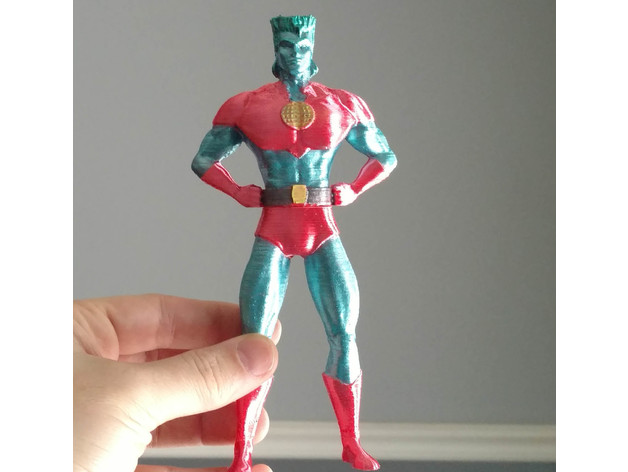
Captain Planet 3D Print Model
Summary
Captain Planet is back, and he’s a little miffed.
Supports are needed. Painted with acrylics. 180mm tall when finished. -
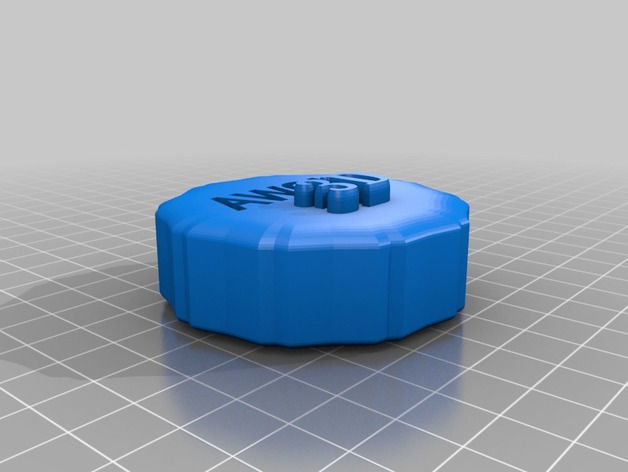
Maker Coin 3D Print Model
Summary
Just a bit of fun, its the first thing that I have designed and was done so in TinkerCad
Print Settings
Printer:
Anet A8 Rafts:
Doesn’t Matter Supports:
No Resolution:
0.2 Infill:
35% -
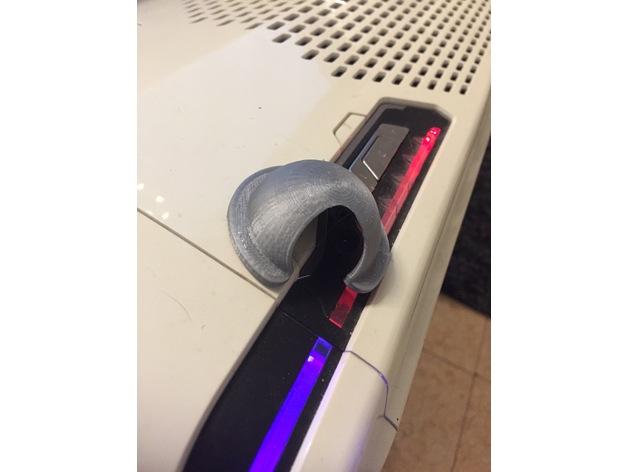
PC Cat Proofing 3D Print Model
Summary
My new kitten keeps stepping on the power switch on my PC, so I made this Cover for the PC power button.
!Don’t forget to CHECK OUT my other designs and FOLLOW my daily KooKoo uploads, Enjoy 😉 -
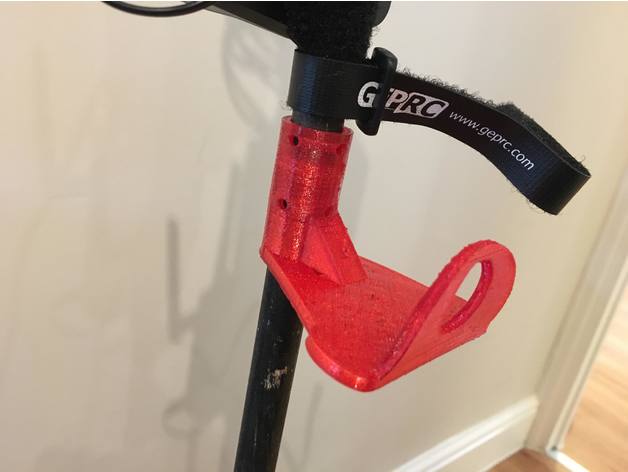
FPV Googles Holder 3D Print Model
Summary
I designed this to hold my googles to the pole of my ground station. The googles sit in there quite nicely and can be strapped in position more firmly with a battery strap.
Printed in TPU with 10% fill. -
Leica Rangefinder Polarized Filter Holder 3D Print Model
Summary
This is a polarized filter holder I designed and printed for my Leica M6 and M9 rangefinder cameras. It holds a 77MM polarized filter and fits on the end of my 50mm f/2 Summicron lens. Filter thread diameter: 77mm, Lens diameter end: 47mm. Clearances permits pressure fits of filter and on lens and can be removed easily so no screws, clamping, or other scratch inducing mechanisms are necessary! I’ve please a slot on the outside of the flange so that the filter effect can be seen while twisting the filter within the ring. The holder is small enough to clear the focusing square in the viewport – so focusing obstruction. This same design could be adapted easily for for other lens sizes. I designed in in Fusion 360.
Printing note: I printed it with the lens side (small diameter) facing the bed and used support.
Print Settings
Printer Brand:
Prusa Printer:
Prusa Mk2 Rafts:
No Supports:
Yes Resolution:
0.2mm Infill:
40% Notes:
Printed using PLA -
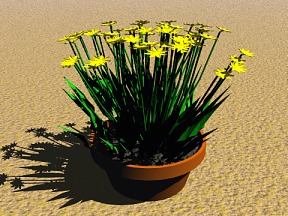
Flower 10 Free 3D Model
Free Model of 3DPlants.com “Plant Model Libary CD?s” and Downloadable Model Sets! This Model also available on CD…with UV mapped textures! More Info?s, Preview Images, Shop and Downloadable Texture Sets or a “Seamless Natural Texture CD” you find directly at 3DPlants.com!
-
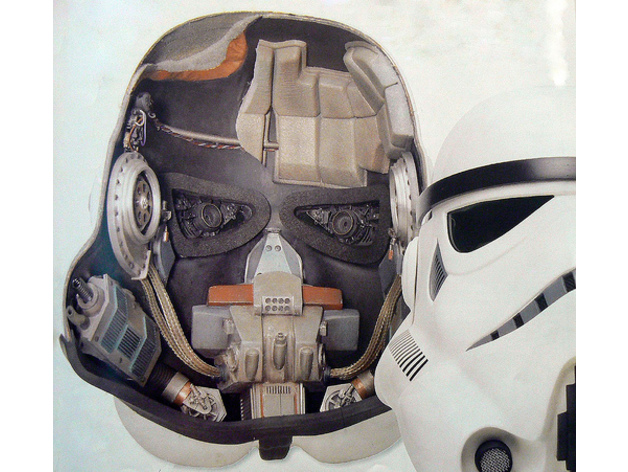
Stormtrooper Helmet Interior Gear (Star Wars) 3D Print Model
Summary
Hi Guys,
As a New Year gift for all of you, this is the Gear and devices inside a Stormtrooper helmet from Star Wars.
My work is based on the first two pictures and several others over the net.
This has been already printed and added to my TK helmet, the kit has enough space to add small fans, speakers and a mic.
Sorry I didn’t make an assembly manual, but the pictures and common sense will help you out (the force will guide you, LOL) to install the pieces once printed.
Wish the best for you and your families.
Kind Regards.
Straeker!!
Post-Printing
For the assembly, You’ll need a small piece of plastic rugged electrical conduit, normally it came in orange color.
also a sink water hose, the ones that came with a steel mesh, cut the connectors, retire the rubber hose and use only the mesh. -
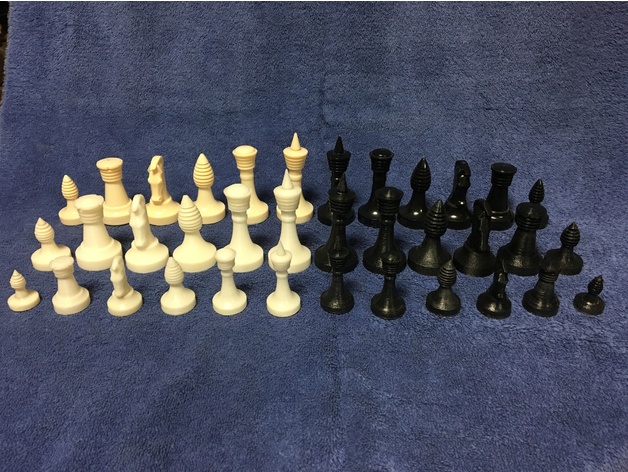
Star Trek – Ganine Classic Chess Set: King 3D Print Model
Summary
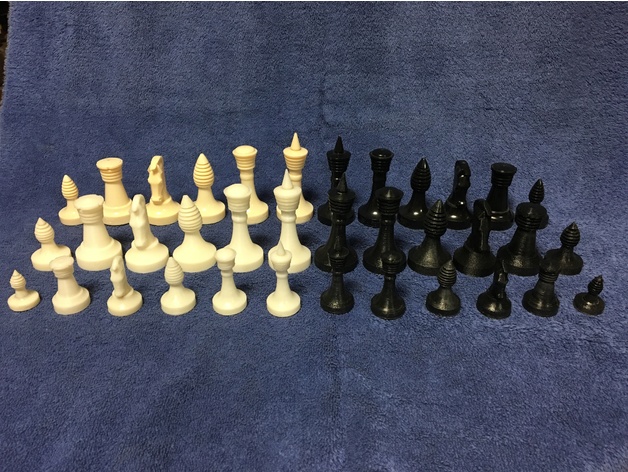
The cover photo shows 3 set; original in the back, full size print in the middle row and 70% prints in front.
In each of these uploads, I have included photos which show the printed piece, a 70% sized print (which actually fit under the attack boards) and an original piece, for comparison. For the Bishops and Pawns, when stacking the rings on the base part, I found it useful to drill a hole in the centers to run a length of filament up the center for stability and alignment. I also found that a product called “Plastruct Plastic Weld” works wonders on ABS plastic! It melts ABS, so I could even use it to smooth out the surfaces after assembly, although my wife calls it “stinky glue” so use it in a well ventilated area!
It will take some time to complete a set, but I think the results are worth it. Enjoy! -
Star Trek – Ganine Classic Chess Set: Queen 3D Print Model
Summary
The cover photo shows 3 set; original in the back, full size print in the middle row and 70% prints in front.
In each of these uploads, I have included photos which show the printed piece, a 70% sized print (which actually fit under the attack boards) and an original piece, for comparison. For the Bishops and Pawns, when stacking the rings on the base part, I found it useful to drill a hole in the centers to run a length of filament up the center for stability and alignment. I also found that a product called “Plastruct Plastic Weld” works wonders on ABS plastic! It melts ABS, so I could even use it to smooth out the surfaces after assembly, although my wife calls it “stinky glue” so use it in a well ventilated area!
It will take some time to complete a set, but I think the results are worth it. Enjoy! -
Ultrasonic Cleaner Small Parts Cup 3D Print Model
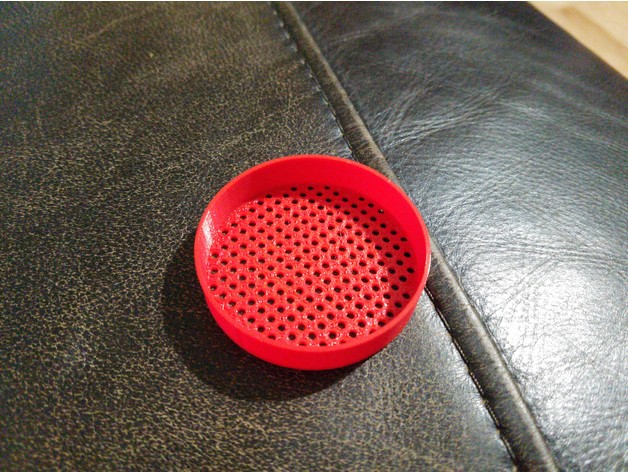
Summary
This is a cup that I use in a large ultrasonic parts cleaner when trying to clean small parts. The dimensions are 50mm x 11mm and the small holes are 2mm in diameter. This works great for cleaning small parts like pins and wafers from locks (what I use it for). I’ve used this in mineral spirits and simple green chemicals (printed in PLA) without issue. -
野村一晟卡片盒 – 戰場最強 挑戰勝利 3D Print Model
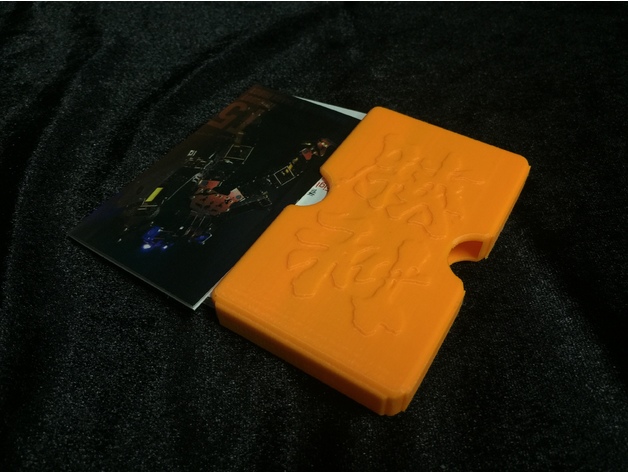
Summary
早兩日見到報導,日本瘋傳的賽艇海報,字體由高中老師野村一晟設計,真係神級,向大師致敬,立刻用咗大師的字體,設計了卡片盒。唔知有冇人想要? -
Mi Drone Stick Cover with Clip 3D Print Model
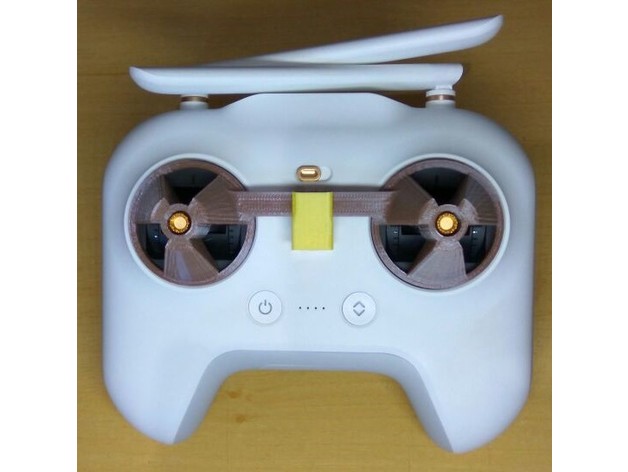
Summary
English: Mi Drone Stick Cover with Clip
Portuguese: Protetor de Stick (manche) com clip (grampo) de fixação para o MI Drone
Print Settings
Printer:
Anet A8 Rafts:
No Supports:
Yes Resolution:
0.2 Infill:
10 -
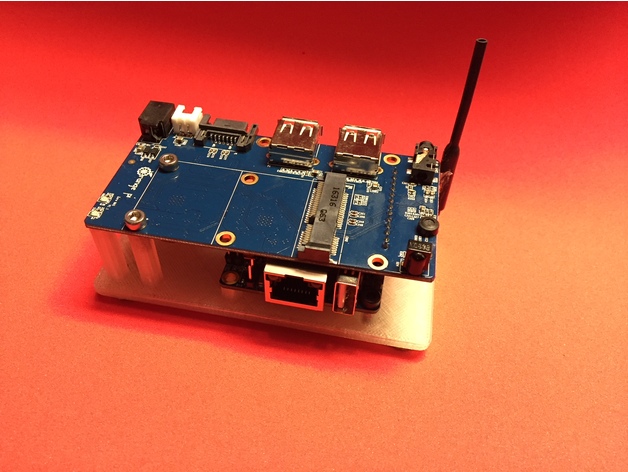
Orange Pi Zero NAS (minimal) 3D Print Model
Summary
A minimalistic open mount for the Orange Pi Zero NAS.
Print Settings
Printer Brand:
MakerBot Printer:
MakerBot Replicator 2 Rafts:
No Supports:
Doesn’t Matter Resolution:
.25 Infill:
10% -
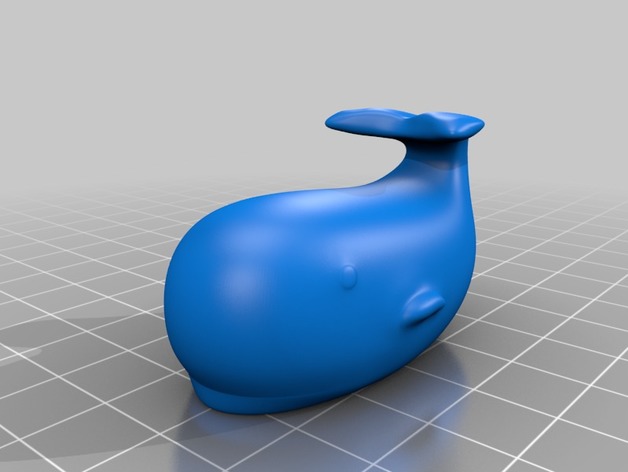
Cute Whale 3D Print Model
Summary
Cute Whale Model. When you print this you will need supports for the tail portion. -
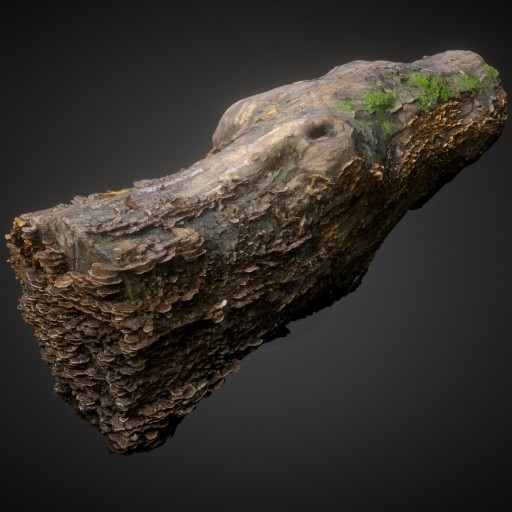
Decayed wood trunk with mushroom Free 3D Model
Decayed wood trunk with mushroom, Louvain-la-neuve, Belgium. Made with ReMake and ReCap from AutoDesk.
-
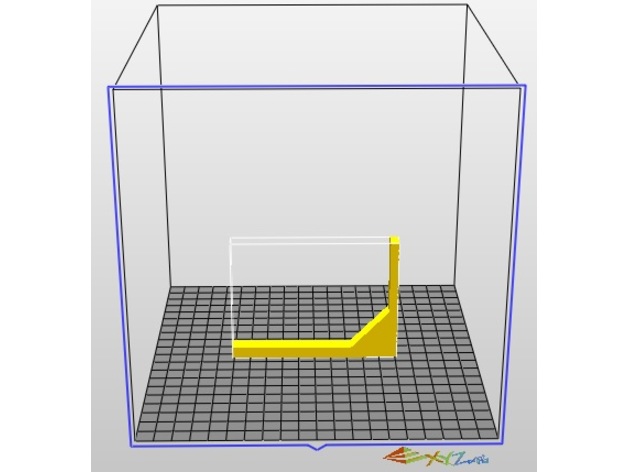
FT 90 Degree Tool 3D Print Model
Summary
I decided to make a simple little tool which helps keep your angle straight when you glue your foam board together to make sure that it’s at 90 degrees on the A or B fold. for Flitetest or other foam board planes. I hope you find this little tool useful -
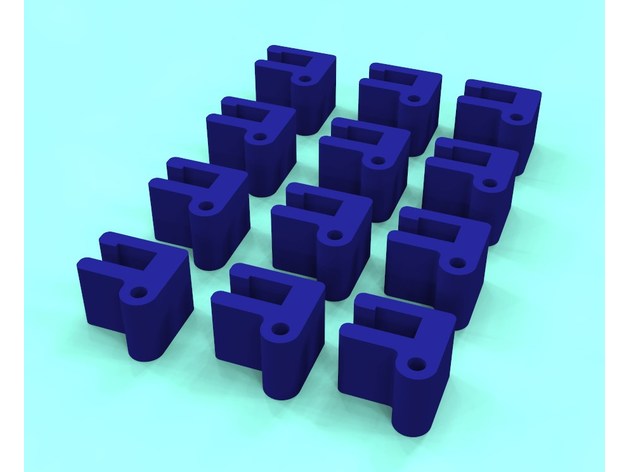
Filament roll retaining clip 3D Print Model
Summary
I designed these to hold 1.75mm filament to the edge of the reel to avoid bending the filament as when you use the holes on the edge of the reels. These are designed for the specific brand I use(3D spark) so they may not fit your particular reels. Try the single part first before printing the 12 x nest of parts,
I will also leave a STEP file so people can adjust the gap to fit their needs as they see fit.
I found that using 2 of they per reel worked best.
Print Settings
Printer:
tevo tarantula Rafts:
No Supports:
No Resolution:
0.2mm Infill:
20%
Post-Printing
If the hole is a little small, use a 2mm or 5/64″ drill to clean out the hole. -
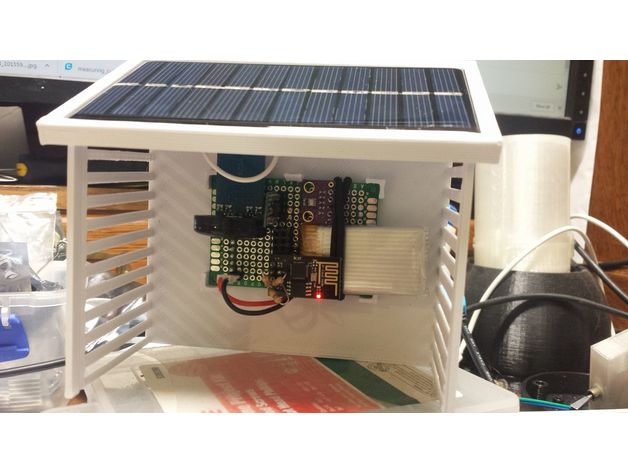
Solar weather station 3D Print Model
Summary
An outdoor temperature sensor enclosure. Cover still needs to be designed. Fits 60mm x 80mm circuit boad, Using a 60mm x 110mm solar panel, ESP-01, Lithium charger with low voltage protection and a 600mah lipo. -
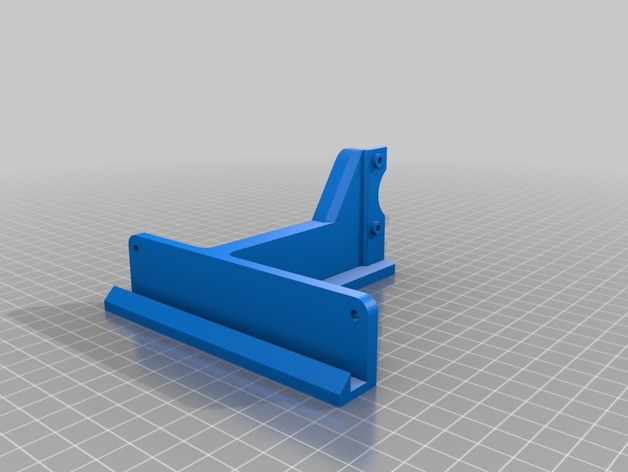
Y axis structural reinforcement 3D Print Model
Summary
Reinforcement well edited not like the other one that had sharp edges and ugly shapes.
You must need longer M3 screws to tight the motor or just edit the STL to match your preferences.
Print Settings
Printer:
anet a8 Rafts:
No Supports:
Yes Resolution:
0.2 Infill:
25% -
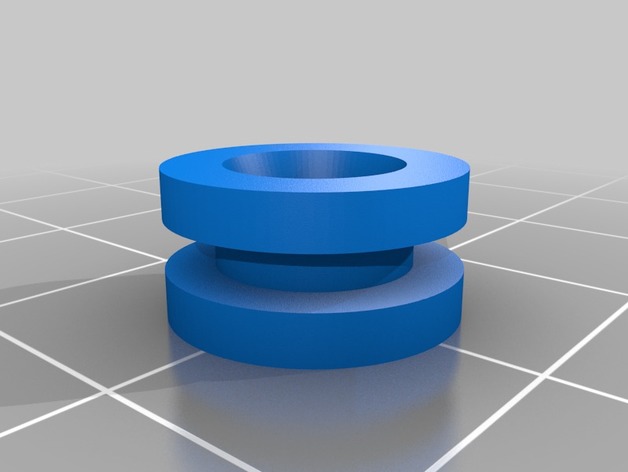
Cable Grommet – Parametric 3D Print Model
Summary
Parametric Cable Grommet to put into electronic boxes where you want don’t a flexible cable to fatigue
Allows Full Parametric Adjustment of all sizes
Cable Hole size inc Tolerance
Overall Size and Thickness
Chassis Wall Thickness
External Cable Exit Chamfer
Print Settings
Printer:
Creality Ender 2 Rafts:
No Supports:
No Resolution:
0.2 -
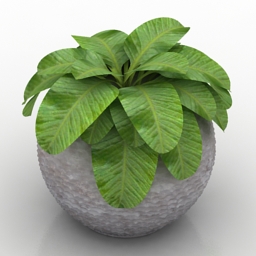
Vase 3D Model
Additional Info: Vase flower N231117 – 3D model (*.gsm+*.3ds) for interior 3d visualization.
-
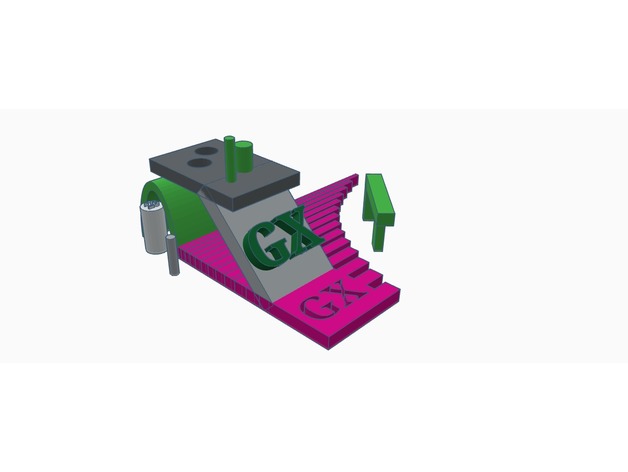
GX – Playground Style Benchmark 3D Print Model
Summary
Simple benchmark
try to print with or without brim
Test accuracy of your printer
Easy and fast way to test your 3d printer
Contains lot of small parts -
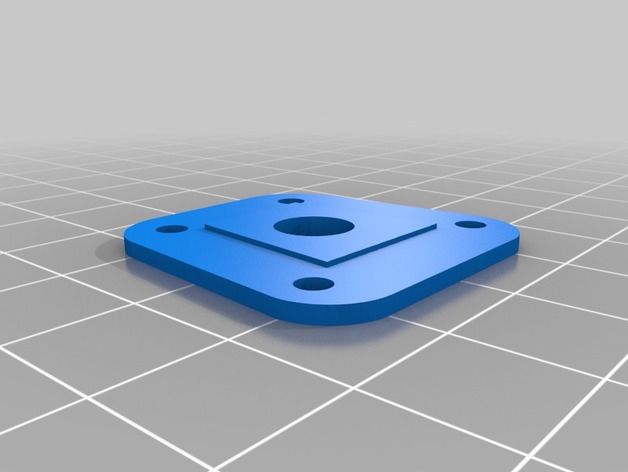
Support – Safety Switch – Base TX Video 3D Print Model
Summary
Tampa de fixação do braço, DJI, HF e similares para suporte do Safety Switch para Pixhawk e suporte do transmissor de vídeo TX. -
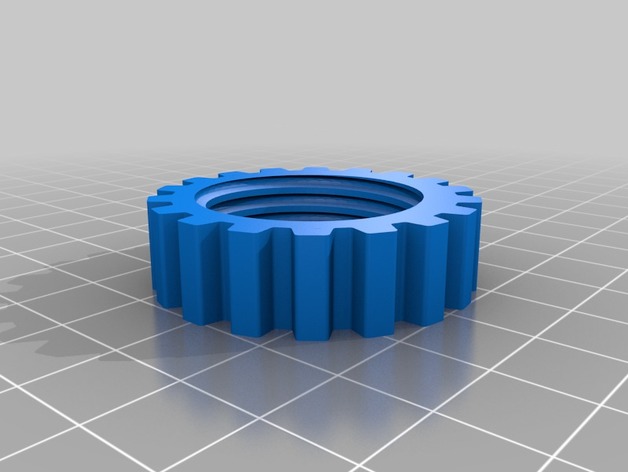
bottle connecting coupling 3D Print Model
Summary
I needed to connect 2 bottles together so I cut this out of my water filter.
!Don’t forget to CHECK OUT my other designs and FOLLOW my daily KooKoo uploads, Enjoy 😉
Print Settings
Rafts:
No Supports:
No Resolution:
0.2 Infill:
25% Notes:
5 Shells -
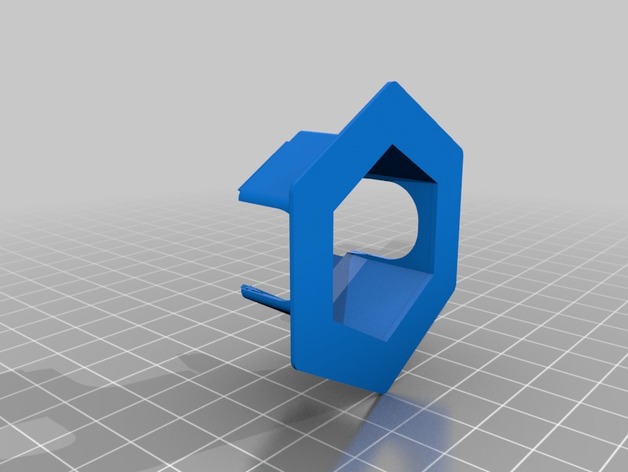
GraviTrax compatible piers 3D Print Model
Summary
These pillars (or technically, bridge piers) have been designed and printed because my son got an amazing new toy from Ravensburger: GraviTrax marble run. And of course, during the holidays, we needed more piers to get the marble run built the way we wanted.. we needed.
So here they are: Extra piers to support the original GraviTrax hexagonal base plates.
Optimized for printing time, not for beautiful design. Needed them desperately!
Print Settings
Printer:
Anet3d A8-B Rafts:
No Supports:
No Resolution:
0.2 Notes:
Print with big end down! (Use/play with big end at top)
I print them with the Cura settings:
PLA
Wall line count = 3
Top/bottom count = 3
First layer:
0.3mm height at 200% line width
210°C
30mm/s
Remaining layers:
0.2mm height, 0.4mm width (=nozzle diameter)
190°C
60mm/s print speed, except:
outer walls: 30mm/s
Post-Printing
Play. Maybe some sanding could be required to smoothen the foot (small end) not to brak the original GraviTrax cardboard “play ground”
How I Designed This
First real thingi with Fusion 360
As a hobbyist, I downloaded Fusion 360 some time ago and applied for the educational/hobbyist 1-year license. But then almost did nothing with it.
Ravensburger’s GraviTrax cried for home made parts, and so I started drafting something like the original pier plates, only 3 times as high. Printed an eternity. We needed more, and faster, so I started a new one only applying plasitc where absolutely needed.
Here you are! -
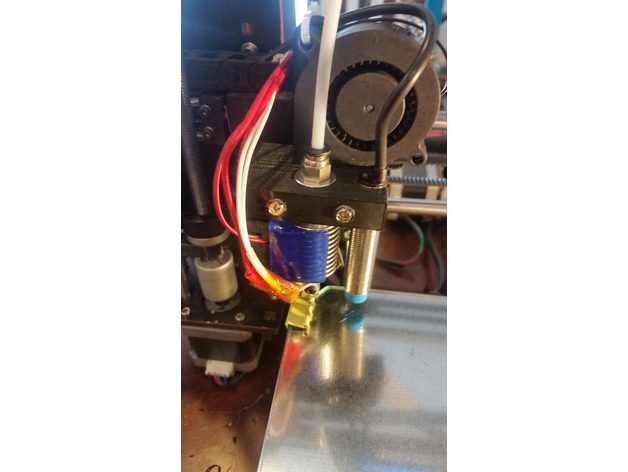
CTC PRUSA i3 Pro B Bowden Drive with Autoleveling 3D Print Model
Summary
My CTC hotend broke and I was without a 3D printer. Luckily I am in the process of building a HEVO and therefore I had the mount, hotend, extruder, retainer and duct already on hand. By drilling two extra holes and removing a little plastic near the X endstop flag in the mount, I made it fit the CTC carriage perfectly. Again, since my printer was down, I didn’t design this in CAD and just modified the piece I had by hand and then created the STL for thingiverse so no guarantees that it will fit. I left a bridge in there for support that you will have to break out and I put in two mounting options; one way the way I mounted it by drilling holes, and another for mounting it with M3 brass fittings to lower the mount closer to the bed. The HEVO mount has the proximity probe spot already, so I figured I should add that sensor as well.
If you are ready for a double mod, keep reading…
Items Needed:
Soldering Iron
several connectors
connector wires (from breadboard)
Arduino IDE
an extra Arduino as ISP to update the bootloader on the CTC Aduino
Marlin firmware
BOM:1 x 5V NPN M12 inductive sensorhttps://www.aliexpress.com/item/M12-4mm-detection-5VDC-NPN-NO-LJ12A3-4-Z-BX-5V-cylinder-inductive-proximity-sensor-switch/32553311139.html?spm=2114.13010608.0.0.iDrnoz
3D Printer Accessories V6 J-Head Hotend RepRap Extruder for 1.75mm Filament, Direct Feed or Bowden. w/ 0.4mm Nozzle, 12V fan, and 3ft PTFE Bowden Tube
ALPTAhttp://a.co/9PxYSl48.5″ x 8.5″ galvanized 28ga metal plate to place between the hotbed and glass plate. This ensures that the sensor is triggered properly. Without it you will need to either not use glass or you are going to be very close to the nozzle level. Ferrous metals are the best at triggering proximity sensors, that’s why I didn’t use aluminium.
8.5″ x 8.5″ x 0.880″ glass plate. I prefer to print on glass.
Extruder of your choice (e.g. find one on thingiverse)
ProcessPrepare and install your material for your heat bed. Cut the galvanized plate with some metal shears to size. IMPORTANT: make sure the metal does not short out any contacts on the heated bed. You need to cut around those areas!.
Get the glass plate from your a hardware store. They will cut it to size if you ask nicely. You need the corners angled to have room for the screw heads.
Prepare and install the J hotend and proximity sensor with the extruder mount, retainer and duct from the HEVO project.
Solder the 5V and Ground connections to the board. I chose to use add a connector for easy disconnect.
Make a backup of the original settings. These were mine:
15:07:46.286 : echo:Hardcoded Default Settings Loaded
15:07:46.286 : echo:Steps per unit:
15:07:46.287 : echo: M92 X78.74 Y78.74 Z2560.00 E105.00
15:07:46.287 : echo:Maximum feedrates (mm/s):
15:07:46.287 : echo: M203 X400.00 Y400.00 Z2.00 E45.00
15:07:46.287 : echo:Maximum Acceleration (mm/s2):
15:07:46.287 : echo: M201 X1400 Y1400 Z100 E80000
15:07:46.287 : echo:Acceleration: S=acceleration, T=retract acceleration
15:07:46.287 : echo: M204 S1400.00 T5000.00
15:07:46.287 : echo:Advanced variables: S=Min feedrate (mm/s), T=Min travel feedrate (mm/s), B=minimum segment time (ms), X=maximum XY jerk (mm/s), Z=maximum Z jerk (mm/s), E=maximum E jerk (mm/s)
15:07:46.287 : echo: M205 S0.00 T0.00 B20000 X13.50 Z0.30 E5.00
15:07:46.287 : echo:Home offset (mm):
15:07:46.287 : echo: M206 X0.00 Y0.00 Z0.00
15:07:46.287 : echo:PID settings:
15:07:46.287 : echo: M301 P19.86 I1.00 D98.93Upgrade your bootloader. Here is how to do it:
Time to download, configure and install Marlin. Use the GEEETECH example in the examples folder as a base. I attached my Configuration.h file here for reference with auto leveling enabled: https://www.thingiverse.com/download:4494314 . Using this config will consume 94% of the memory. So there is hardly anything left for additional features.
Last but not least make sure you adjust the z-axis in the LCD until you get the nozzle in the correct location (mine was -0.25). Then make sure you save your settings.
*ANOTHER BENEFIT of UPGRADING YOUR FIRMWARE**
The CTC is over-extruding (at least mine was). In Cura I had set the correction in the start script, but with the new firmware I changed the E stepper from 105 to 95 in the configuration.h, so no more start code fix needed! -
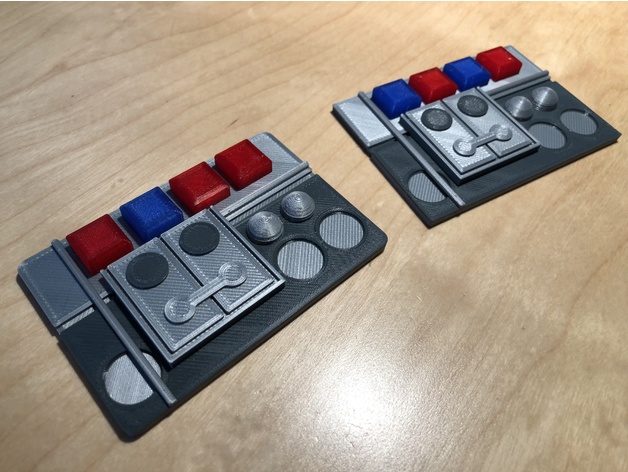
Hoth Badges 3D Print Model
Summary
Hoth Badges for Leia and Han. 4-color version designed for the Prusa i3 MMU. -
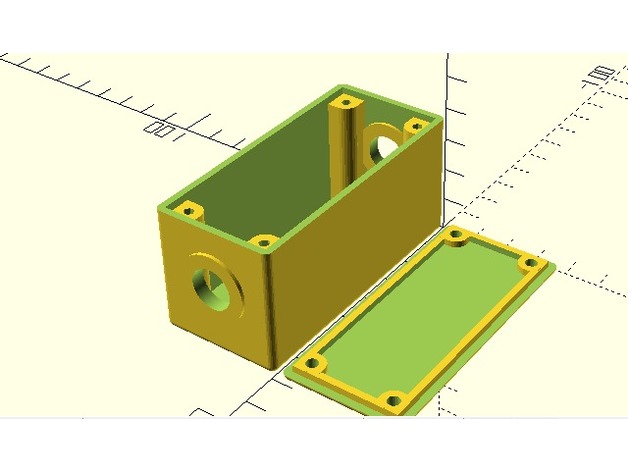
Customizable Project Box With Lid Screws and 2 Holes 3D Print Model
Summary
I added a couple holes in each end. I was going to put some barrel jacks in them. Go ahead and put whatever you want into those holes.
Print Settings
Printer Brand:
Prusa Printer:
i3 MK2S Rafts:
No Supports:
No Infill:
100 Notes:
ABS @ 230
bed at 80
100% infill
print speed 60
How I Designed This -
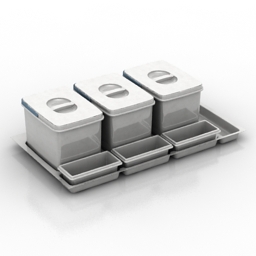
Container 3D Model
Additional Info: Container kitchen Practico 900 H50 N241116 – 3D model (*.gsm+*.3ds) for interior 3d visualization.
-
YABR – Your Arduino Balancing Robot 3D Print Model
Summary
These are the 3D-parts for the famous YABR Selfbalancing Robot, which you can find at http://www.brokking.net/yabr_main.html
All kudos and many thanks go to J. Brokking for his comprehensive building manual and the videos!
Print Settings
Printer Brand:
Prusa Printer:
i3 MK2S Rafts:
No Supports:
No Resolution:
0,2 mm -
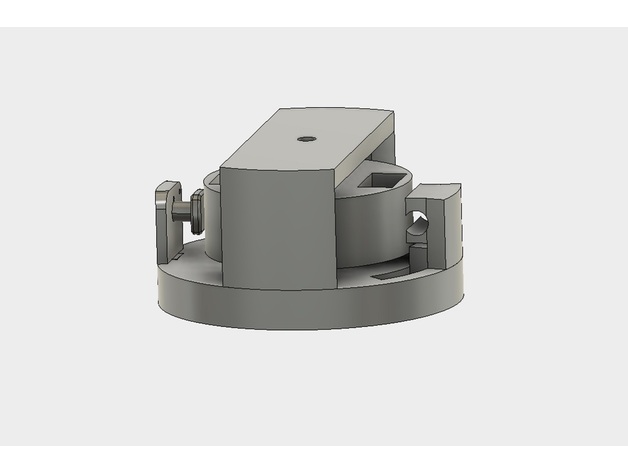
Mini Pulse Motor 3D Print Model
Summary
This was a fun engineering project to make a very small pulse motor. I included three configurations but it should be noted that configuration three was the one that worked. -
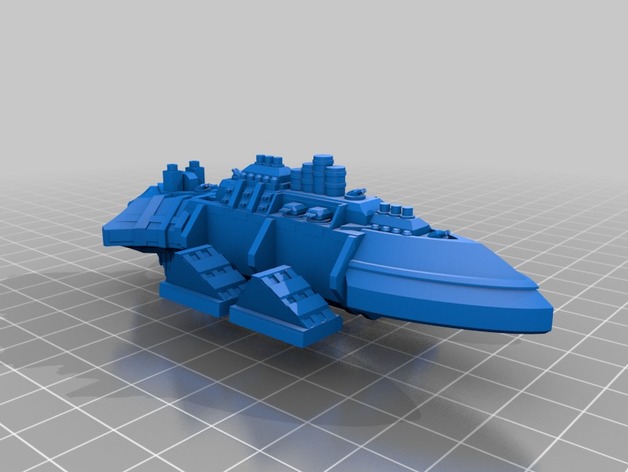
Abyssal Grand Cruisers 3D Print Model
Summary
Grand cruisers, appropriate in scale for your favorite space battles game. -
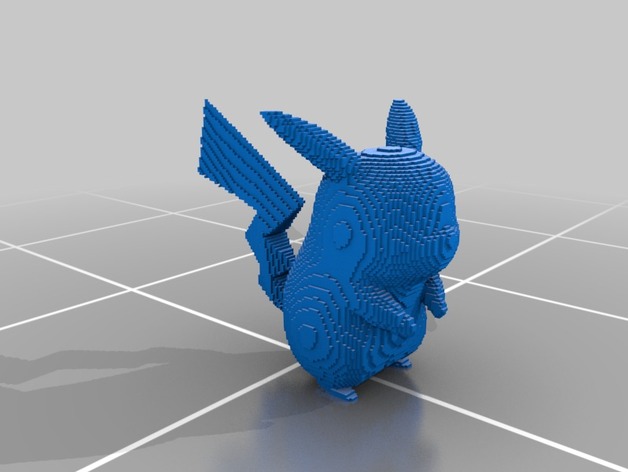
Blocky Pikachu 3D Print Model
Summary
This is a cute little Pikachu made of dozens of tiny blocks.
Print Settings
Printer Brand:
Prusa Printer:
i3 MK2S Rafts:
No Supports:
Yes Infill:
10 -
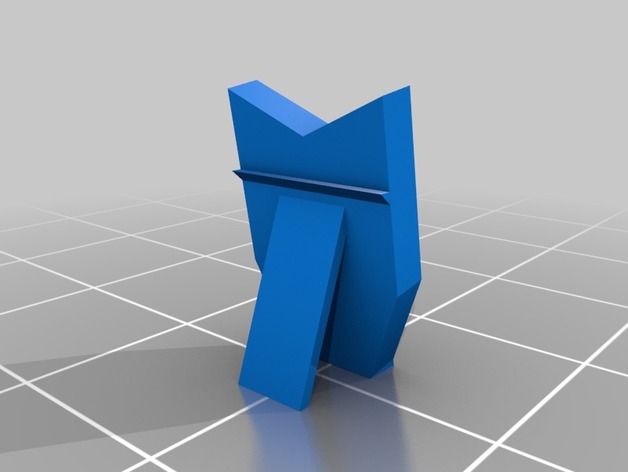
Simple holder 3D Print Model
Summary
Easy, simple and fast to make. A basic holder for Phones, models, …
Print Settings
Printer Brand:
Wanhao Printer:
Wanhao Duplicator i3 Plus Rafts:
Doesn’t Matter Supports:
Doesn’t Matter Resolution:
0.2 Infill:
10% Notes:
You can use any Settings you want. -
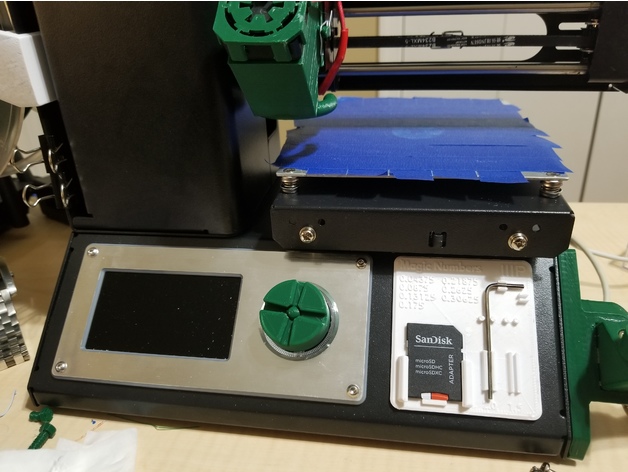
Menu Knob thing for MPSM Select Mini V2 3D Print Model
Summary
I was looking around for a knob for my V2 Select Mini but all the ones were for the V1 which has a different size middle thing so they didn’t work.
I found one but the design dimensions were sloppy and not that tight so I made my own based on the dimensions of that one but slightly smaller so it’s a very tight fit.
After printing it will take a bit of pressure to pop it onto the printer but after it’s on there it feels like it’s one piece with the printer. No glue or anything needed.
I printed mine in eSun PLA+ @210C and no heated bed. Print came out very nice.
Print Settings
Printer:
Monoprice Select Mini Rafts:
No Supports:
No Resolution:
0.2 or 0.1 Infill:
20% -
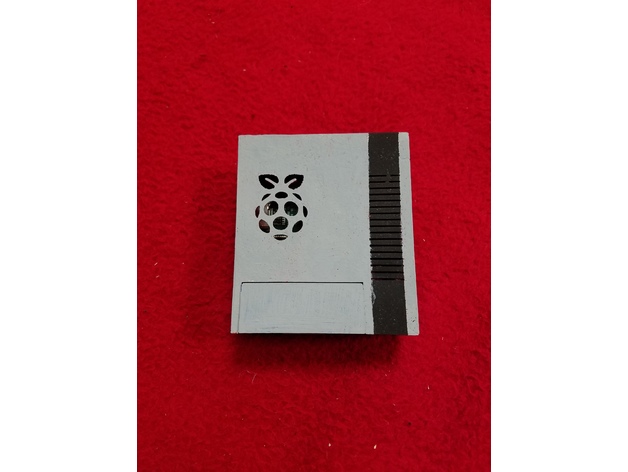
BabyNES RasPi B+ case remix 3D Print Model
Summary
Shoutout to jrebeiro for the design!
I originally wanted to add a spare 30mm fan to the top of this case. And while it is possible with a raspberry pi 3, it isn’t really necessary. After doing some reading online, it doesn’t seem like I could ever get the Pi hot enough to cause performance issues. So I opted to add another vent instead. The Raspberry Pi cutout sits just above and slightly off-center from the Pi’s processor. I didn’t want to damage the integrity of the original design, and to be honest I prefer how this looks.
Happy printing!
Print Settings
Rafts:
No Supports:
No Resolution:
.2 Infill:
20 Notes:
Printed in PLA
205 print temp
70 bed temp
Post-Printing
There are 4 holes that run from the bottom of the case almost to the top.
I stuck in pieces of 1.75 mm filament and broke them off and then extruded extra filament into the holes and smoothed it with my fingers.
It won’t create an unbreakable seal, but it will allow you to pick up the case without it falling apart.
Painted with acrylic paint.
(Not to perfect color/paint area specifications for you nit-pickers out there) -
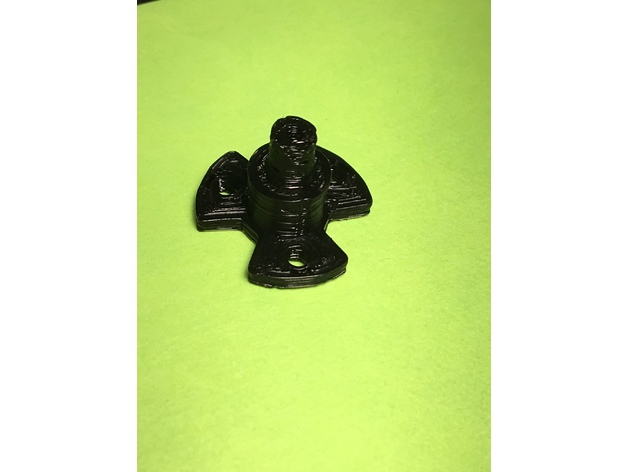
E-Flite UMX Prop Adapter 3D Print Model
Summary
Replacement prop adapter for E-flite Ultra Micro (UMX) airplanes. Replaces EFLU4067, this should work on any UMX airplane which uses the 180-size brushless motor. This will still break in the event of a crash, protecting the rest of the aircraft.
This is set up to run just the prop, length has been adjusted so no spinner/backplate are required.
Holes should be good to go, the 3 mounting holes may need slight enlargement – I do this by just twisting an X-acto knife around in there a couple of times.
Print Settings
Printer:
XYZ Da Vinci Mini w Rafts:
No Supports:
No Resolution:
0.2mm Infill:
50% Notes:
Printed with XYZ Da Vinci Mini w at 0.2mm layer height, 50% infill, +10C temperature (black PLA) and 40mm/sec retract speed. I highly recommend using a brim to ensure that this stays level and true.
How I Designed This
Designed in eMachineShop. -
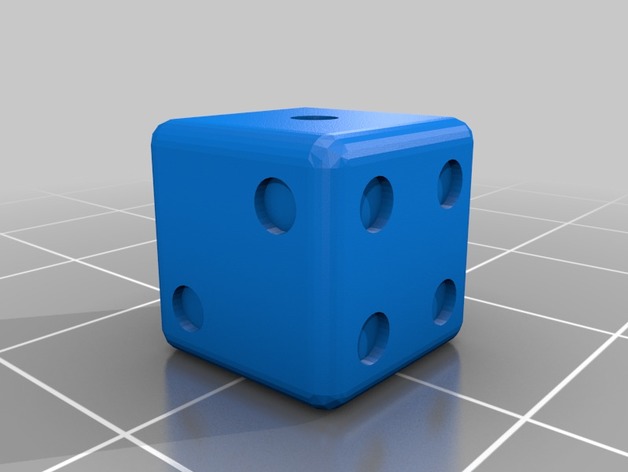
Dice 3D Print Model
Summary
This is my very first thing I created on my own. Just a dice with 6 sides and 0.5 mm deep holes. -
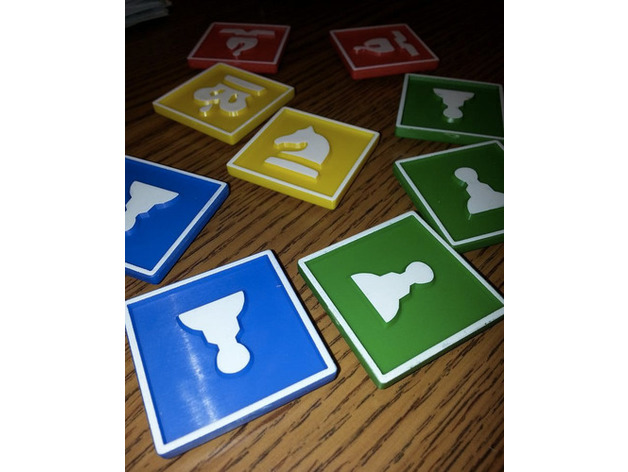
Tile Based Chess Pieces 3D Print Model
Summary
I made these Tile based Chess pieces when I herd about Tile Chess. -
Vacuum cleaner 3D Model
Additional Info: Vacuum cleaner Dyson dc45 N231117 – 3D model (*.gsm+*.3ds) for interior 3d visualization.
-
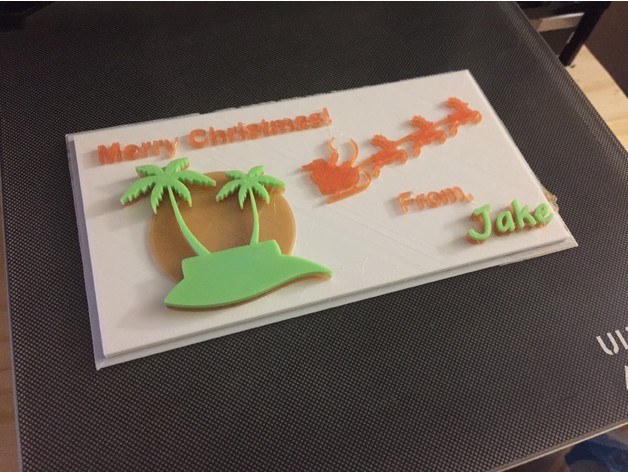
Christmas Card 3D Print Model
Summary
Christmas Card tropical theme with name blank! Great gift idea for friends and family! -
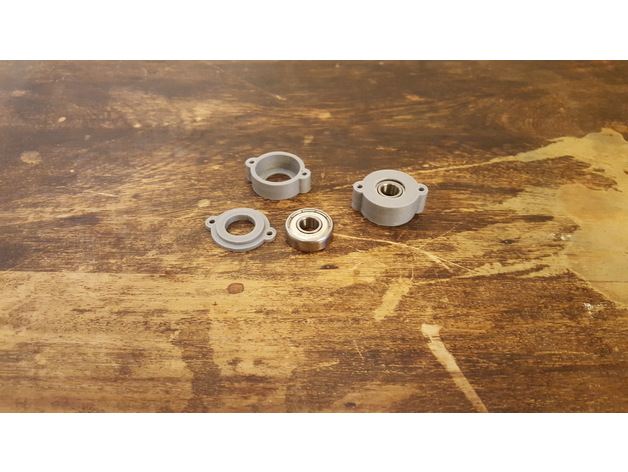
608Z bearing holder 3D Print Model
Summary
Bearing holder for 608ZZ 22mm x 7 mm. bore =8mm
printed in ABS 0.2mm resolution -
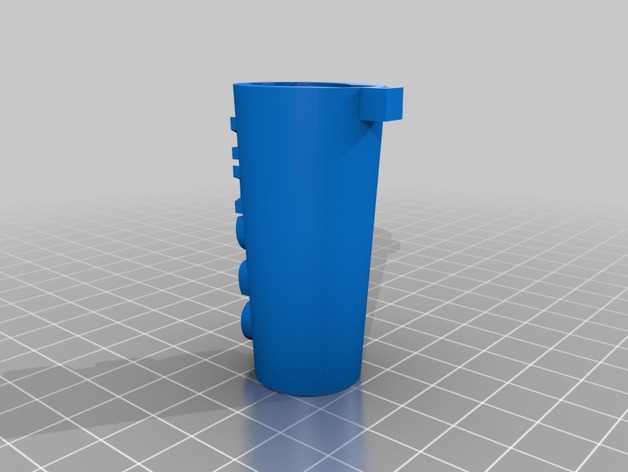
LIGHTER CLIPPER MEDIUM 3D Print Model
Summary
LIGHTER CLIPPER MEDIUM !!!!ATTENTION, SCALE TO 1.035!!! -
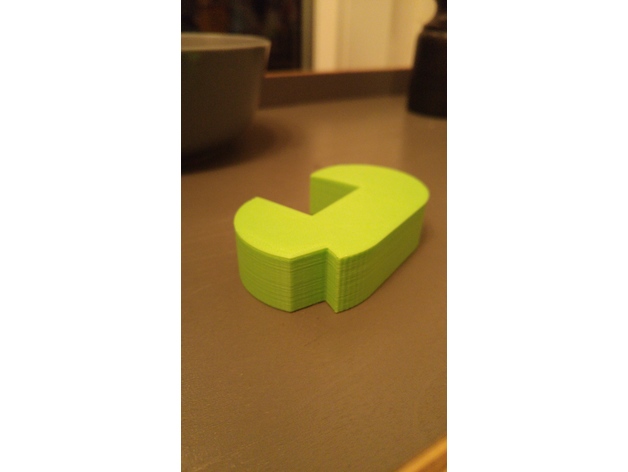
C-Clip 3D Print Model
Summary
Mein Geschirrspüler kennt nur “auf” oder “zu” und deshalb entwarf ich zur Lödung des Problems einen Klipp, der die Klappe anlehnen lässt. Das Geschirr lüftet jetzt ab und ich kann es direkt in den Schrank räumen. -
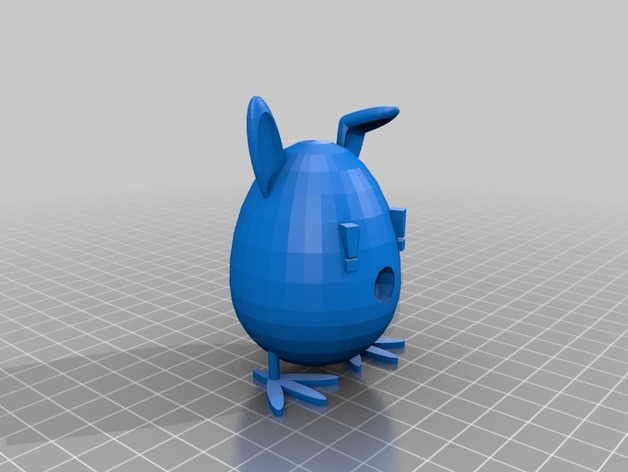
Egg Man 3D Print Model
Summary
Wanted to design a new creature and thought of something weird, so BAM!
How I Designed This
First….
I went into tinkercad, and used the objects from Extras, and started putting random stuff together until it looked cool and weird -
Christmas Crip – Part 1 Free 3D Model
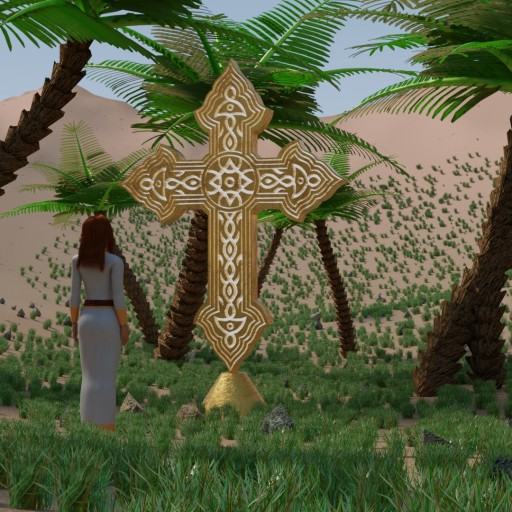
Hello guys, I decided to make a christmas Crip in Blender (it’s crhistmas time). But there is a lot of work and so I “swap” every year a part of the crip on Blendswap. Here is Part 1 now. The part contains the desert terrain (with river, palms, gras and rocks), a cruzifix and the first person (a woman with a base rig, the eyes are from pivottiago2012 here in Blendswap – www.blendswap.com/blends/view/86997, the woman can close and open the eyes with shape keyes). All textures are included. I hope you have fun with this. A happy new year for all.
-
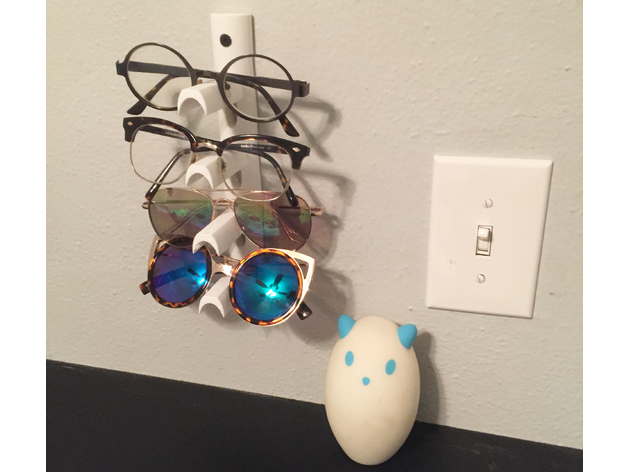
Eye glasses holder – Wall mounted 3D Print Model
Summary
Fiance asked for a modified version to be mounted on the wall- thus I share this remix. -
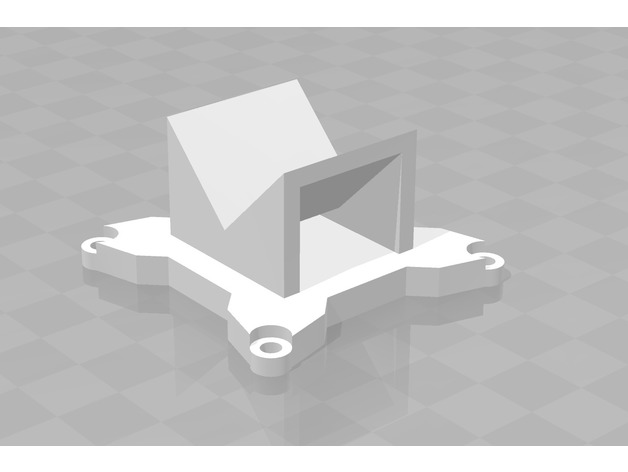
Skull & Drones Hooligan/Ultra Gopro Mount For Gopro/Gopro Session 3D Print Model
Summary
Mount for any gopro (non session) style camera that is designed to be screwed onto the top plate of a Skull & Drones Hooligan or Ultra. -
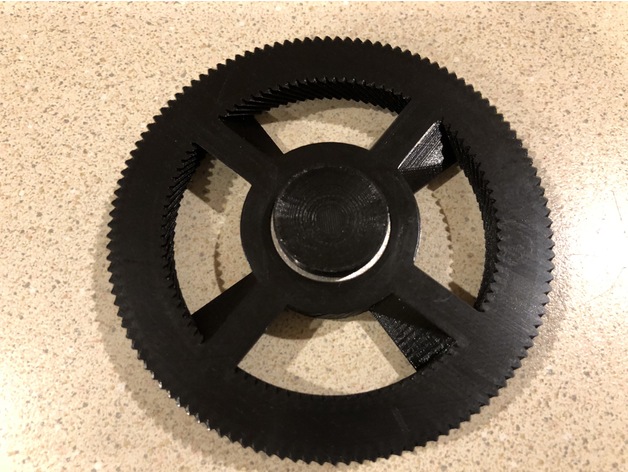
Twisted Gear Spinner 3D Print Model
Summary
Spinner takes a standard 608 bearing (22×7) Here are some bearings I have had good luck with.
Print Settings
Printer:
Creality CR-10 Rafts:
No Supports:
No Resolution:
0.1mm Infill:
100% -
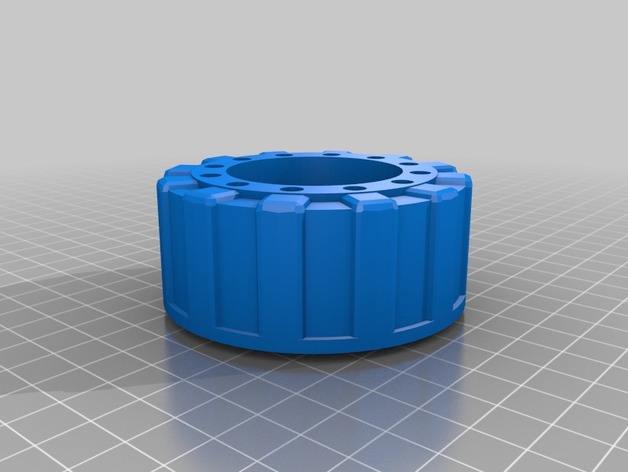
Toy Tire 3D Print Model
Summary
Lost one of the tires for this Battat Take Apart Crane Truck:http://www.battatco.com/collections/battat/take-apart-crane-truck
This design is about the same size, and looks fairly similar.