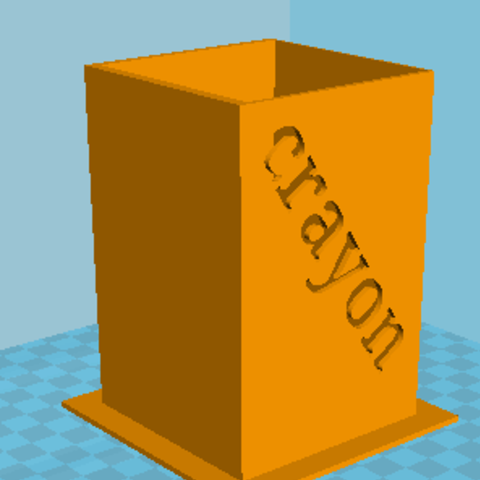
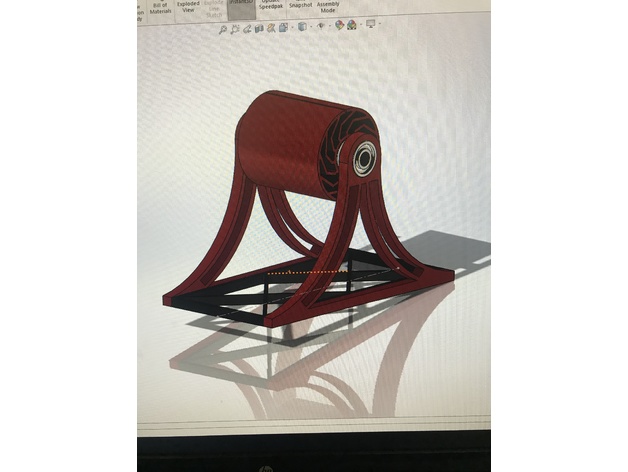
Summary
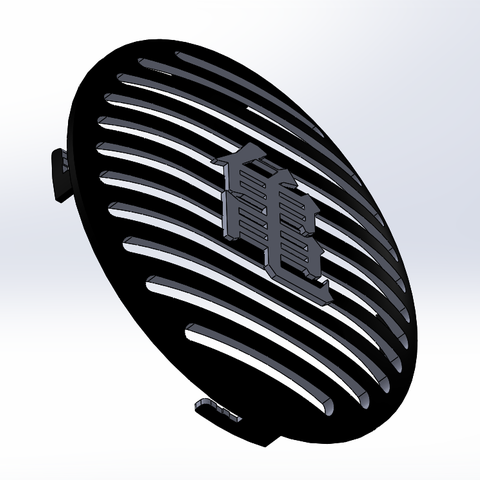
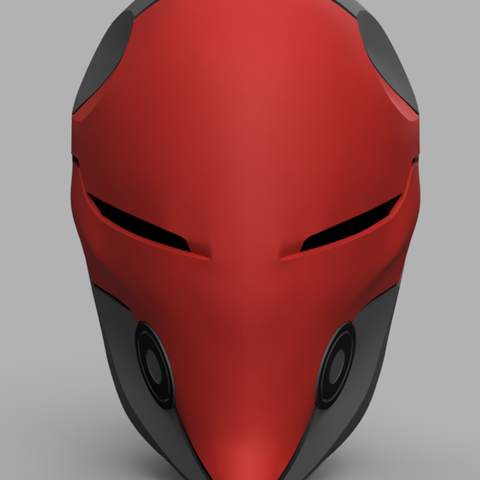
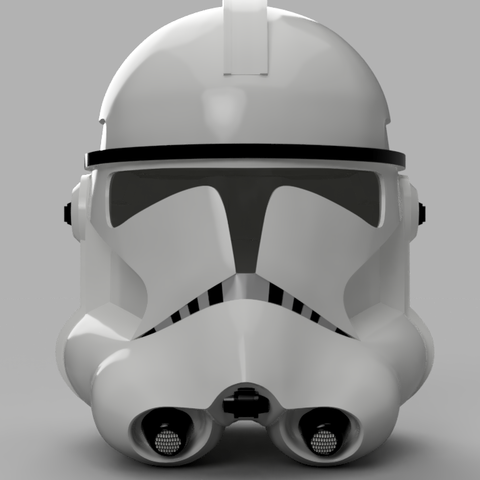
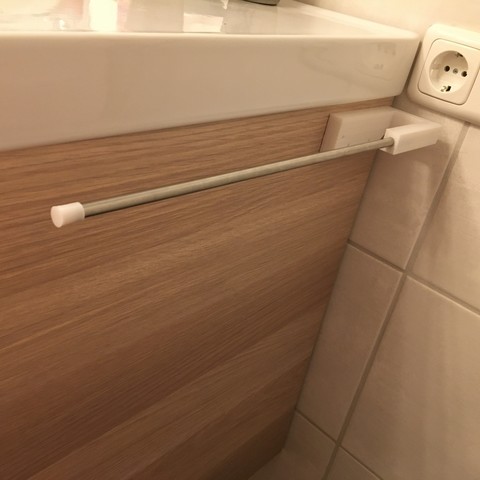
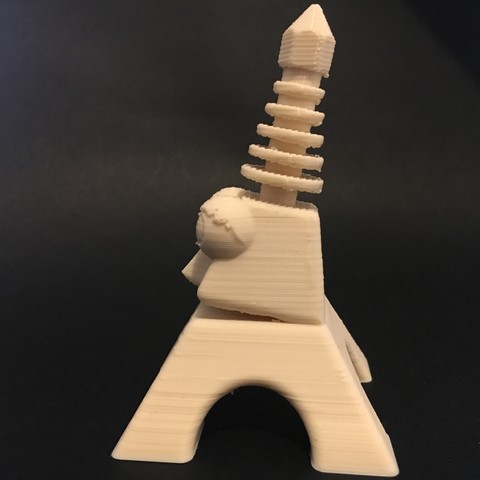
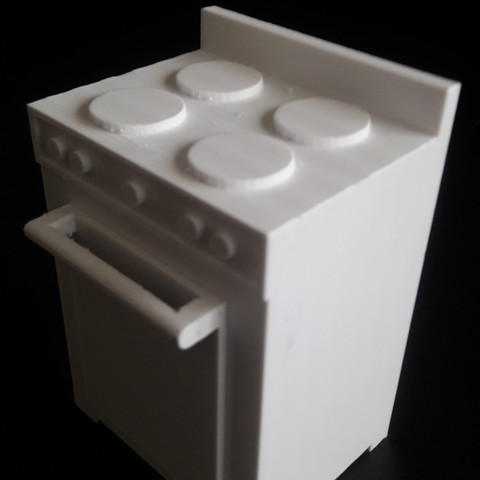
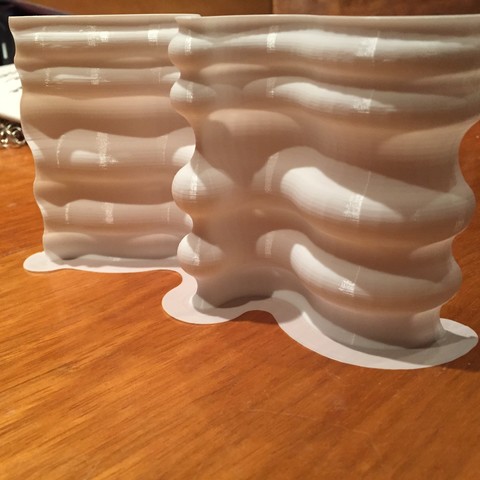
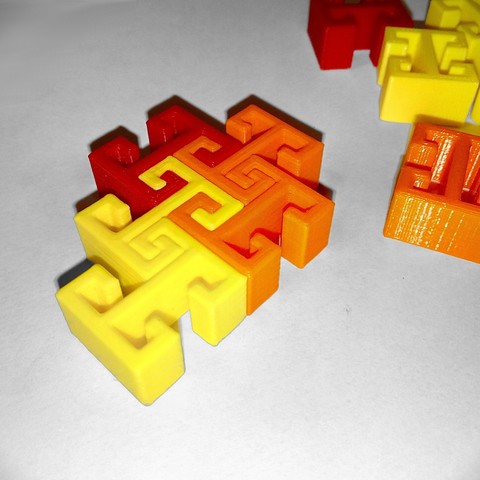
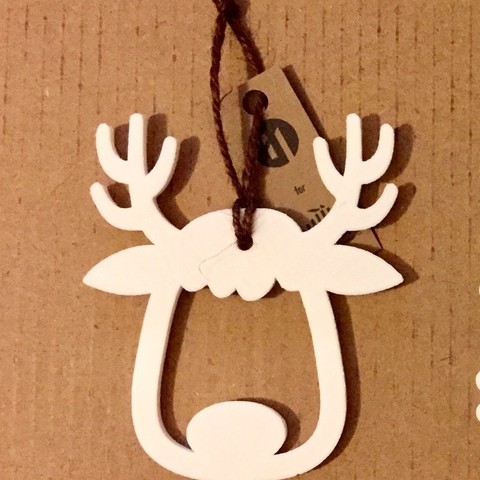
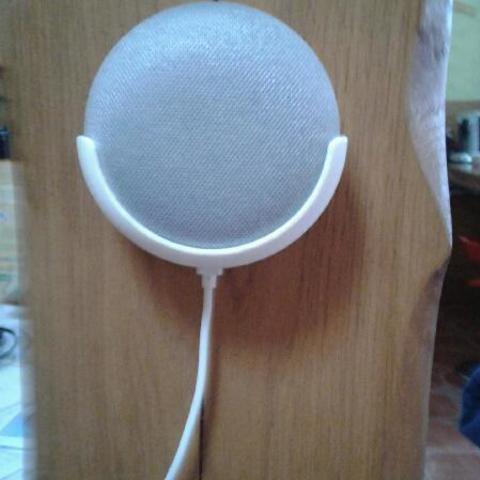
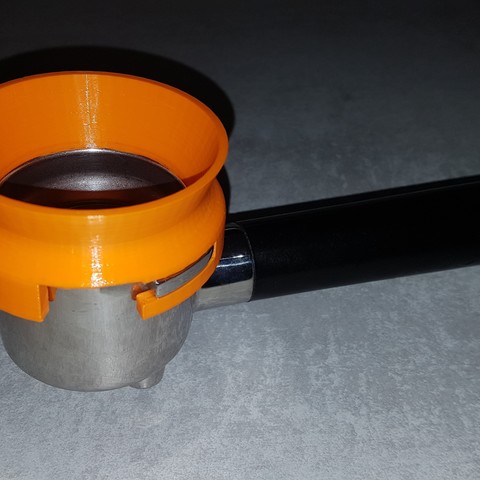
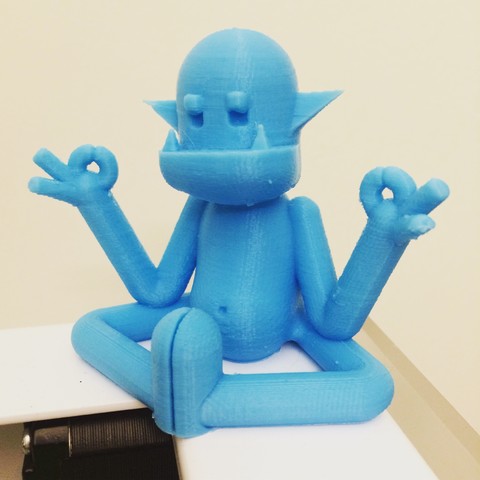
I chopped up the original model to print with no supports but some glue, a little sanding and patience are required. PLA
Print Settings
Printer:
Deegreen Rafts:
No Supports:
No Resolution:
100 μm Infill:
30% Notes:
I chopped up the original model to print with no supports but some glue, a little sanding and patience are required. PLA
Category: 3D Print Models
Premium & 3D Print models ready to be 3d printed. 3D Print Models and Free 3D Print Models are available for download in several formats including .STL, .3DM, .OBJ, .3DS, .DAE, .SKP, .BLEND, .DWG, .DXF, .STEP and much more. If you’re in search of high-quality 3D printed assets, we have a huge library of 3d print models for any of your needs. Also you can visit 3D Models and All 3D Models category.
-
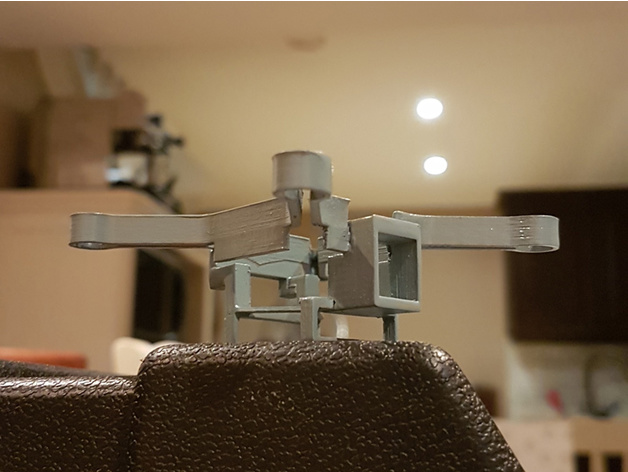
XL-RCM 10.0 PIXXY: Pocket drone / FPV quad Remix 3D Print Model
-
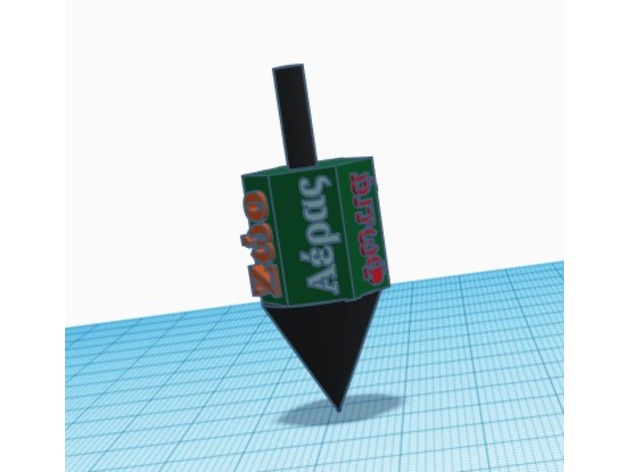
Greek Top 3D Print Model
Summary
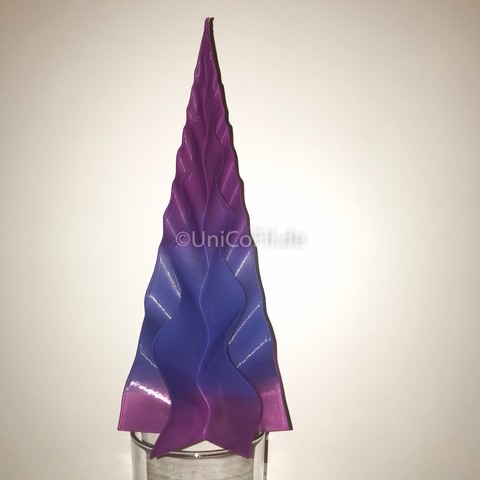
This is a top with Greek writing on it
Ανδρας=Man
Φωτιά=Fire
Νερό=Water
Γη=Earth
Ζώο=animal
Αέρας=Air
How I Designed This -
Christmas Tree DeathStarDestroyer 3D Print Model
Summary
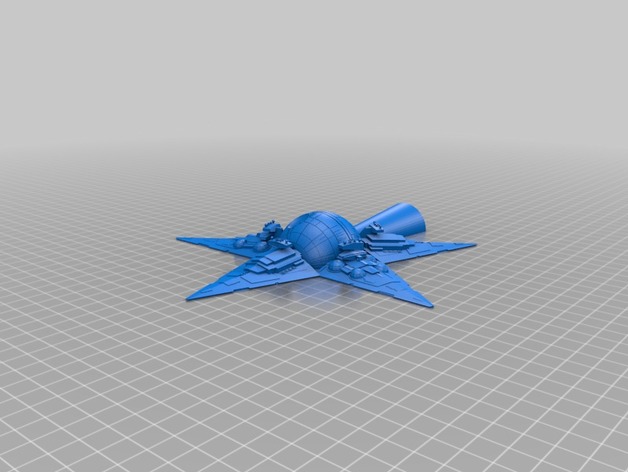
I loved the “Ei9ht Star Wars Christmas Tree Star remix from Dantesgift” and, having printed one myself, wanted to make one for a friend. There were a few things I wanted to change though:
Some small parts were just too small to print, like the domes on the Imperial Star Destroyers
There were quite a few mesh errors, especially on the bottoms of the Interdictor Star Destroyers
I’m not a fan of the “Gladiator” Star Destroyers with the two points
I also wanted to learn TinkerCad (I usually use 123D) so decided to make my own version! I ended up with 3 variations, one with all Imperial Star Destroyers, one with all Interdictor Star Destroyers, and one with a mix of each.
Print Settings
Printer Brand:
Prusa Printer:
i3 MK2S Rafts:
No Supports:
No Resolution:
0.1-0.2 Infill:
10-20%
Post-Printing
Just glue the halves together with super/CA glue once printed.
How I Designed This
I sourced the Star Destroyers (this time using the Imperial II version which has a simpler bridge antenna) from dantesgift, and what looked like the original Death Star from kystopz89. Both Star Destroyers got some tweaks to simplify or adjust geometry that would be difficult to print at the intended scale, then they were brought together in TinkerCad.
There were a few mesh fixes to do after exporting to STL, the nasty ones handled by Microsoft’s online STL repairer and the rest using Meshmixer.
I hope you like them, and all credit to the designers of the models that went into this! -
TronXY X3A/X3 Fan Holder V5 3D Print Model
Summary
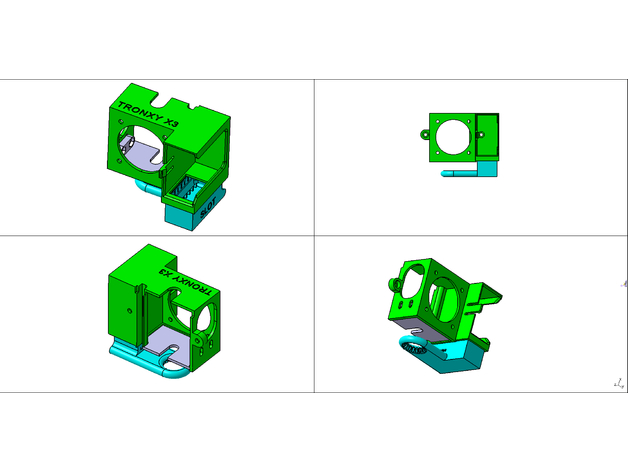
This is TronXY X3A/X3 Fan Holder V5.
For complete function you should to have fans 40x40x10 with 32mm connection size and 40x40x20 cyclone fan.
Part “TronXY_X3A_Fan_v5_Insert_SLOT” designed with support and it no need printing with support.
Part “TronXY_X3A_Fan_v5_Plate” can be or must be from aluminum or fiberglass (or some other thermoresistance) sheet with thickness 0.6–1.0 mm. -
Transcendence High Speed AP Revolver (3D Print Kit Gun) 3D Print Model
Summary
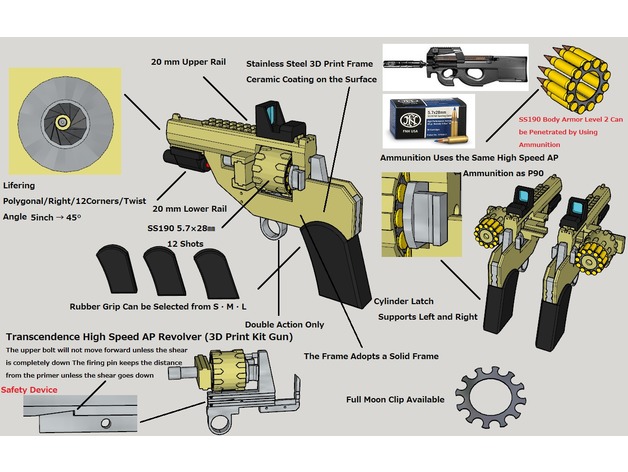
Other Open Placehttps://grabcad.com/library/transcendence-high-speed-ap-revolver-3d-print-kit-gun-1
Please spread and disperse the 3D data of this gun if possible
Please upload it to another 3D print data site
Please cooperate with liberalization of 3D print gun -
Filament guide for Prusa Anet Geetech CTC printers 3D Print Model
Summary
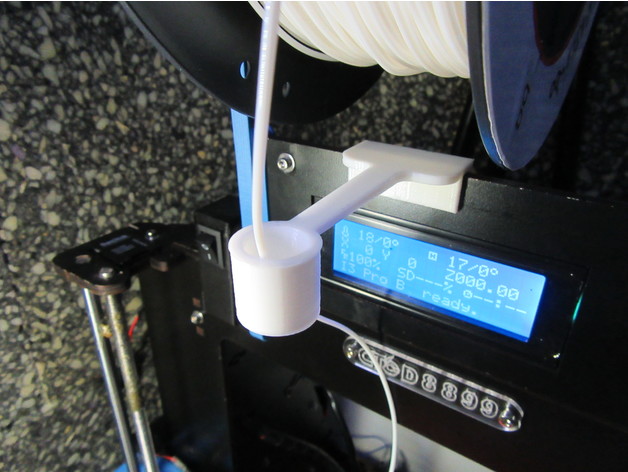
This is my version of filament guide based on this one:https://www.thingiverse.com/thing:1240326
A larger pipe will keep more straight the filament at the end of the reel, when the loops are smaller.
Suitable for printers:
Prusa
Anet
Geetech
CTC printers
…and many models with a frame 5mm width.
Feel free to adapt the files to your needs.
Thank you so much for you comments, like, download and collecting!
Print Settings
Printer Brand:
Prusa Printer:
Prusa Clone Rafts:
No Supports:
No Resolution:
0,2 Infill:
100% Notes:
For better results, use cooling fan. -
Gift tags 3D Print Model
Summary
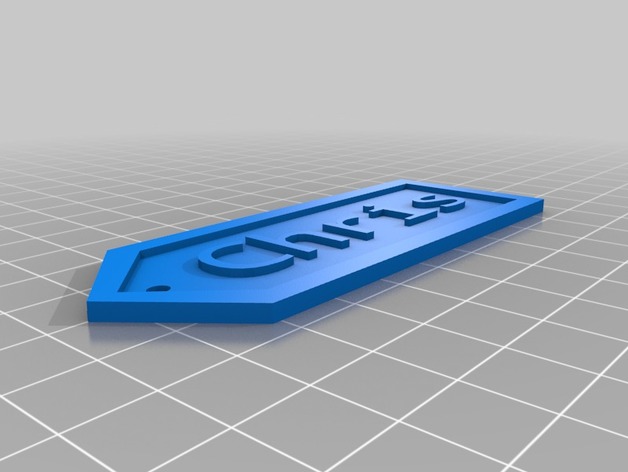
I don’t have alot of designs uploaded but Will upload more. Put the name or word that you want for the tag in the comments and i’ll create the design. Please upload pictures of your printed tags.
Thank You,The Creator
-
Dungeon in a Tin Board Game 3D Print Model
Summary
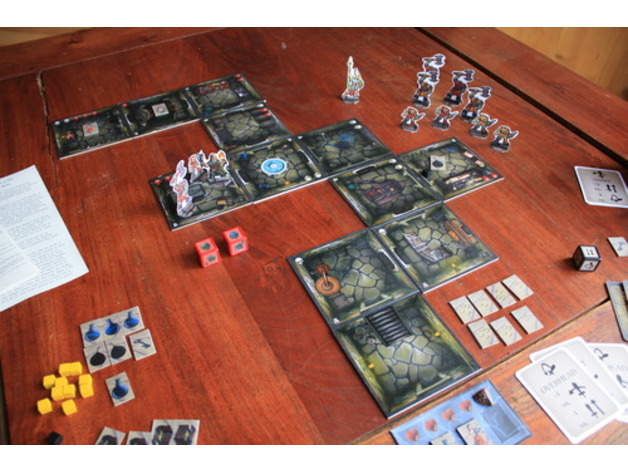
Dungeon in a Tin is a solo or cooperative dungeon-hack. Players descend into a dungeon randomly laid-out from a stack of tiles, fighting through the orc and goblin hordes to rescue the kidnapped maiden and collect treasure and glory. -
Sculpture of Brezhnev 3D Model
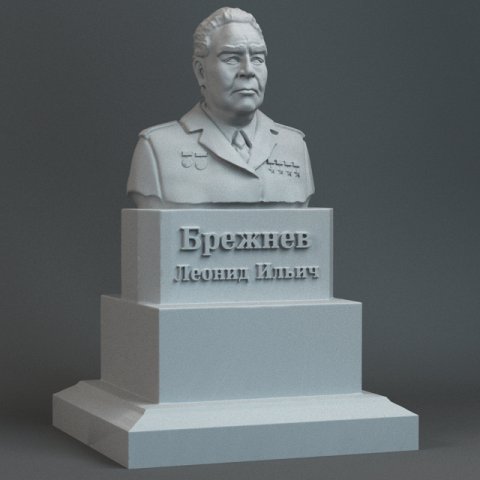
Sculpture of the bust of Leonid Brezhnevheight 110 mm494,000 polygons
-
Snowman cute 3D Model
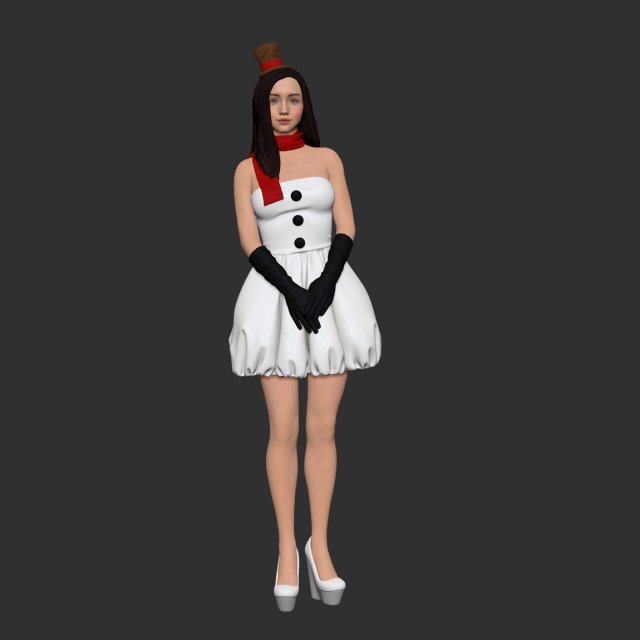
Figure for 3D printing. With a height of 180 mm. Texture format PNG 4096*4096. Formats OBJ. No shell.poly 500014vert 249999
-
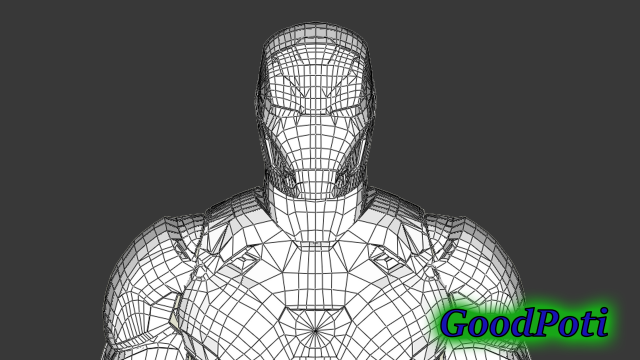
Costume Iron Man Mark46 3D printing 3D Model
Costume Iron Man Mark46 3D printingThe suit itself is divided into parts, for convenient printing.File format:OBJ.Soon the 3Ds formats will be loaded as well as STLThe Mark 46 has a different and unique design to its predecessors. It has a trapezoid-shaped indent design stationed around the circular chest RT. Like the Mark 45, its armor colors have more red than gold. It has several miniature arc reactors placed around the body, which allowed Stark to see 360-degree panorama view. The helmet design is similar to Mark 45 but it has a few new different indentations to the forehead. The armor uses the F.R.I.D.A.Y. O.S. like the Mark 45.
-
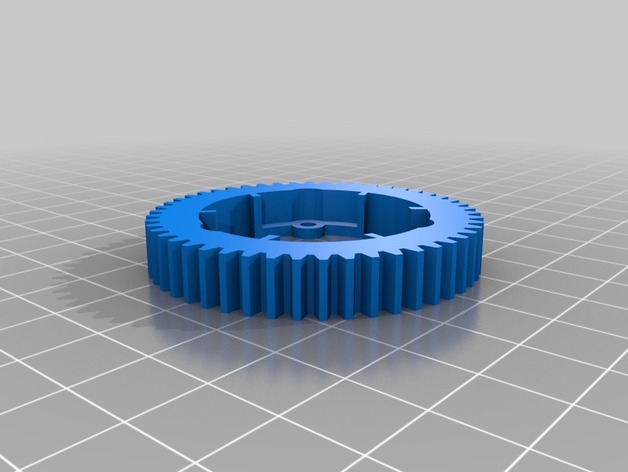
Traxxas X-Maxx Pinion 3D Print Model
Summary
* not tested in RC Car **
im waiting for nylon filament, maybe i make in ABS one to try, but nylon is my favorite.
i think 100 infill is a good idea, it must be strong for the 8s xmaxx.
in the modell i use a modified slipper clutch from the 6s. I think so become the pinion not too much power on it.
Module 1
54 T
50 T
46 T
26 T Motor
Print Settings
Printer:
Anycubic I3 Mega Rafts:
No Supports:
No Resolution:
0,1 Infill:
100 -
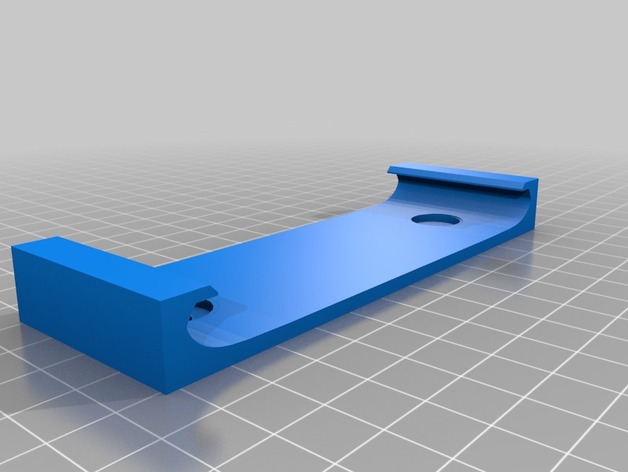
Thin Wall Mount Nexus 7 2013 3D Print Model
Summary
I customized the model “Nexus 7 (2013) Qi Wall mount” by hawker180 to remove the Qi stand and make it thinner as I am planning on sourcing energy through the usb port and wanted something that will keep the tablet closer to the wall.
Print Settings
Printer Brand:
Printrbot Printer:
Printrbot Plus Rafts:
No Supports:
No Resolution:
0.2mm Infill:
20% -
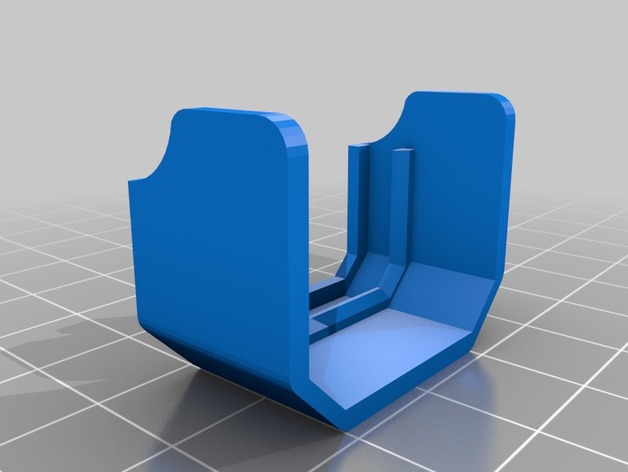
Motor cover for Peon 230 3D Print Model
Summary
The Peon 230 quadcopter frame designed by Tech2C is super nice but there’s no motor cover included in the files.
I wanted a motor cover that didn’t need screws, that’s why I designed this super simple cover that just slide on the arm.
Please note that this cover is only compatible with the “Peon230_Arm_v1” and NOT with the “Peon230_Arm_v1_22sizeMotor”
Print Settings
Printer:
Anet A8 Rafts:
Yes Supports:
No Resolution:
0.2 mm Infill:
100% Notes:
The fit with the arm should be tight, otherwise the cover could fall off the quadcopter while flying.
Post-Printing
Just remove the stringing and sand the raft. -
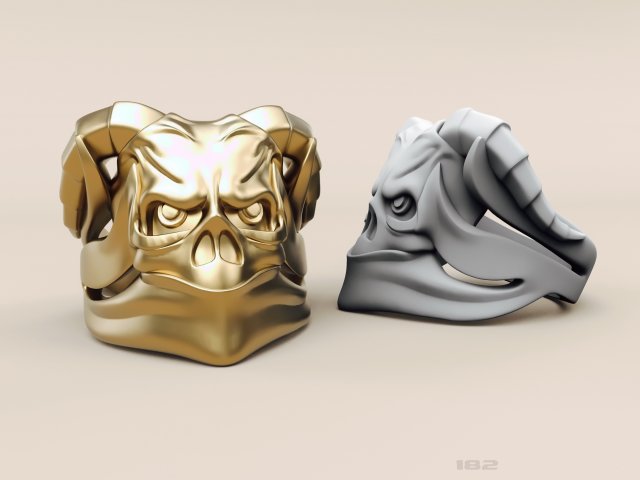
Ring skull with horns 3D Model
The model can be used for production, for casting and machining.STL model is ready for prototyping on CNC and 3D PrintingHigh quality modelweight in gold 21,00 gramweight in gold silver 14,00 gramin archive two files, one heavy the other lightexclusive design developed by me
-
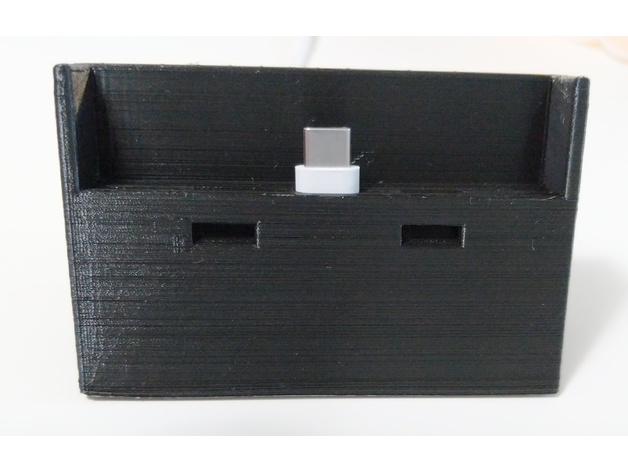
Pixel 2 XL + Spigen Slim Armor Dock 3D Print Model
Summary
I made this for my Pixel 2 XL which lives in a Spigen Slim Armor, based on Screwyluie’s design for a Pixel XL stand (thus the unnecessary speaker ports). The Slim Armor needs a few mm all round, so the charging port sits about 2.25 mm forwards compared to the original. The insert is required to hold the charging cable in place – this is unchanged from Screwyluie’s original.
Print Settings
Printer:
Cocoon ModelMaker (Wanhao i3 Mini clone) Rafts:
No Supports:
No Resolution:
0.1mm Infill:
20% -
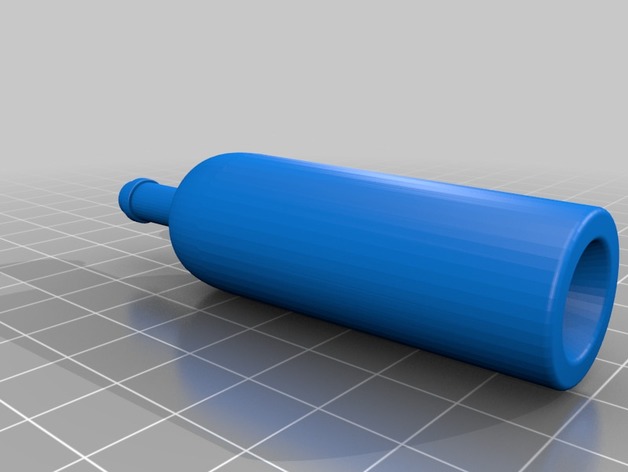
1:4 Wine Bottle 3D Print Model
Summary
A replica of a wine bottle made at 1/4 the original size. Full body solid. Could paint or cut a piece of cork to fit the top opening. -
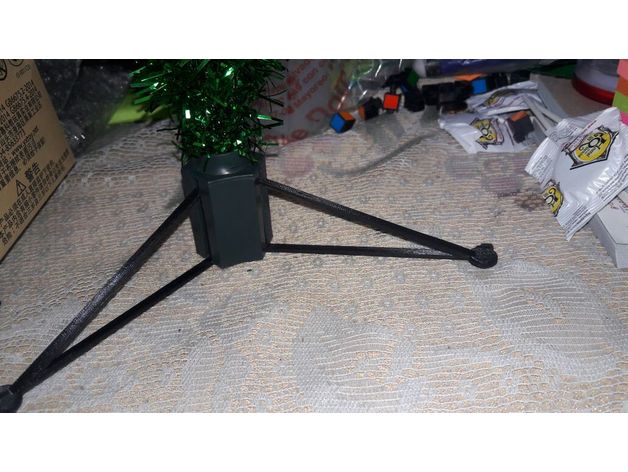
Mini Plastic Christmas Tree Leg 3D Print Model
Summary
I made this for my Christmas tree. Because I lost the original legs.
The part that goes inside the tree is: 12.5mm x 40mm x 4mm
Print Settings
Printer:
Anet A8 Rafts:
Doesn’t Matter Supports:
No Resolution:
0.2 mm Infill:
20% -
Drink Coaster 3D Print Model
Summary
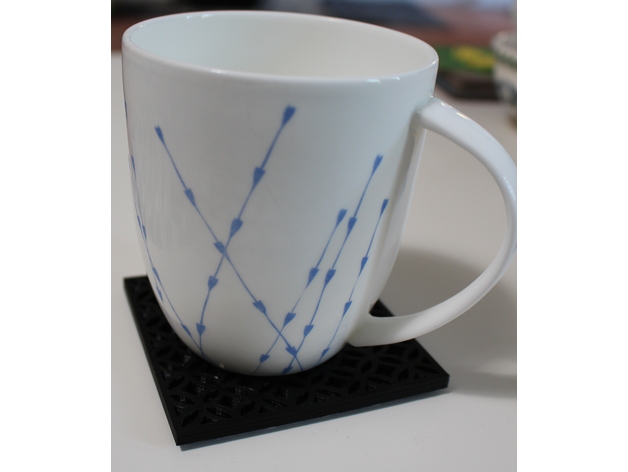
Drink coaster made to match the Bunnings Matrix Halo screen panel. The surface is slightly concave to prevent cups from sliding off (self centering!), and there are holes in the bottom for some rubber feet for grip. Cutting out the supports to put the feet in is a little tedious, but the resulting coasters are sturdy as!
Print Settings
Printer:
Cocoon ModelMaker (Wanhao i3 Mini clone) Rafts:
No Supports:
Yes Resolution:
0.1mm -
Planting on wall 3D Print Model
Summary
Do you want to plant small flowers and water it automatically ?.
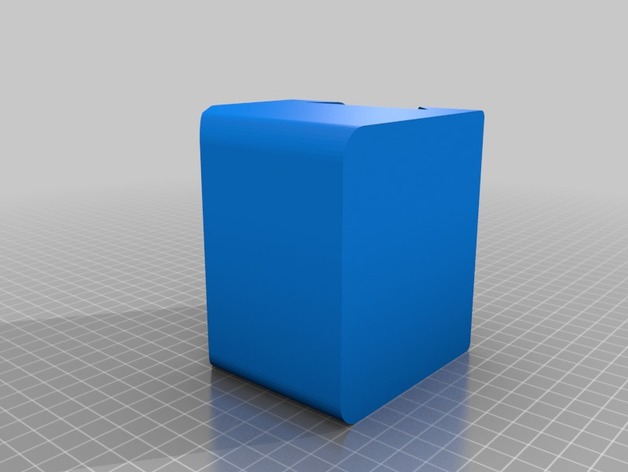
This is the base container I designed as first serious design towards greener homes. Use a solid wooden wedge strip to fix this container and make an array of it.
I have provided a watering draft in form of small 4mm tubular section followed by a through and through recess. This recess is kept slightly above the lower edge of pot so that it wan’t get choked due to soil. The 4mm circular section slightly extend below the recess and will act as anti splashing. Keep the flow rate of water very low.
Additionally, you have to go for an arduino and hygrometer along with a pump and motor for automatic watering. To make this fully autonomous and ecofriendly, you may operate the electronis/electric motor on Solar cell.
Let me know if you make one and contribute towards ‘Greener home’
Print Settings
Printer:
Ultimaker clone extended (in making) Rafts:
Doesn’t Matter Supports:
Doesn’t Matter Infill:
60% min. Notes:
Use any water resistance polymer. No flexible polymer. No Nylon (nylon absorbs water) and becomes soft. -
SOLO FINGER PEN 3D Print 3D Model
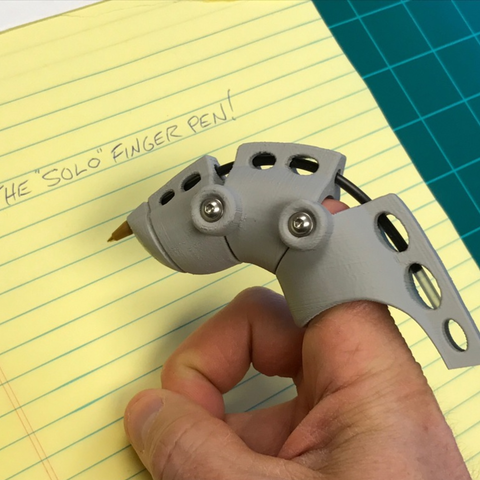
This mechanical finger can be very fun to play with, but can eventually be used as a prosthesis for someone with missing one thumb or other fingers. Additional pieces needed: a flexible stylus insert “BIC”. Four (4) M3 x 10mm screws with washers. Other small screws can be replaced.3D PRINTING PARAMETERSBrand of the printer:MakerBotprinter:Replicator MakerBot 2Xboats:YesSupports:YesResolution:0.02Filling:25%Remarks:Support is a must. I positioned the models at an angle that worked well for me.I recommend 3 shells for the thickness of the wall.PostpressSome cleaning will be required, depending on the type of media used.
-
Russian rock musician Leader of the groups Leningrad and Ruble 3D Model
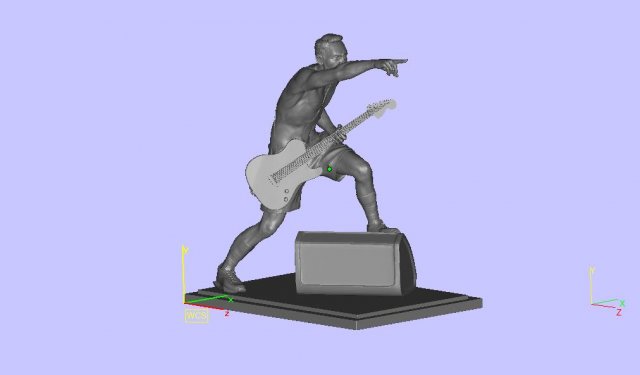
Russian rock musician, film actor, TV host and artist. Leader of the groups “Leningrad” and “Ruble”.
-
Yevgeny Petrosyan Petrosyants 3D Model
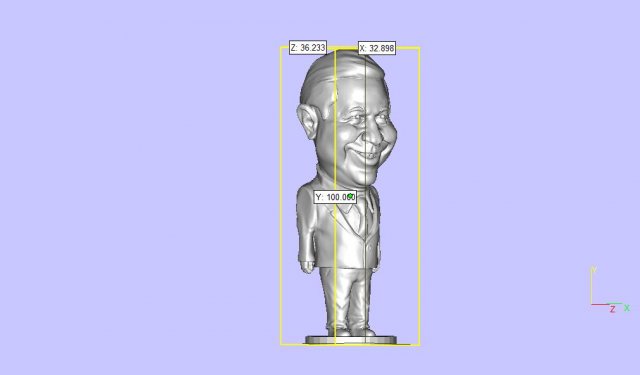
Yevgeny Petrosyan (Petrosyants) [1] (born September 16, 1945, Baku, Azerbaijan SSR, USSR) is a Soviet and Russian variety artist , writer-humorist and TV presenter. People’s Artist of the RSFSR [3] [4] (1991)
-
Phone support 3D Print 3D Model
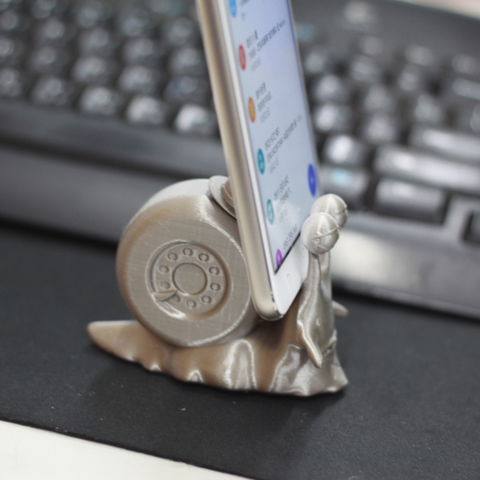
Phone support to a piece of snail3D PRINTING PARAMETERSPhone support to a piece of snailAvailable formats upon request: .c4d, .obj, .fbx, .ma/.mb, .lwo/.lws, .3ds, .3dm, .dxf/.dwg, .stl.
-
Tevo Tarantula Power Supply Enclosure 3D Print Model
Summary
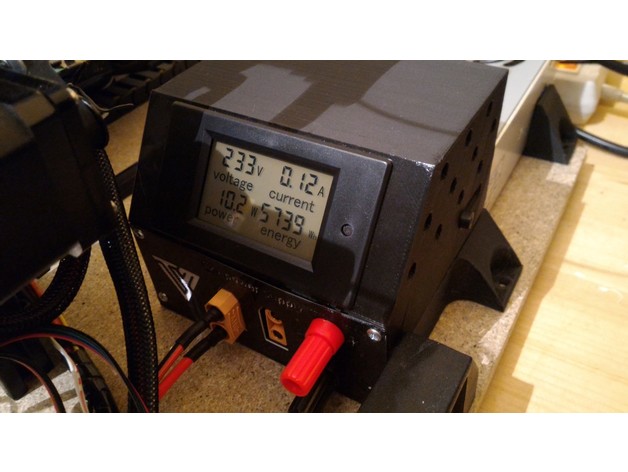
Designed to enclose the standard PSU outputs and fit a power meter.
The walls are only ~2mm thick, which make them fragile. This is due to my concern of using less material as possible.
I’ve used XT90 for 2 outputs, it’s oversized but I already had them 🙂
There is an “XT90 Holder” that you can screw on top of them with an M4 screw, but I didn’t needed it.
Fusion 360 file attached, feel free to modify/use it !
Parts needed :
1 Power Socket W/Fuse & Switch :https://fr.aliexpress.com/item/Free-Shipping-power-socket/476915963.html
1 Power Meter :https://fr.aliexpress.com/item/AC-80-260V-LCD-Digital-100A-Volt-Watt-Power-Meter-Ammeter-Voltmeter-110V-220V-free-shipping/32617343719.html
1 meter Black & Red 13AWG:https://fr.aliexpress.com/item/1meter-Black-1meter-Red-Silicon-Wire-Heatproof-Soft-Silicone-Silica-Gel-Wire-Cable-12AWG-13AWG-14AWG/32797523458.html
1 IEC 320 C13 Female Plug :https://fr.aliexpress.com/item/New-Wholesale-Price-Black-IEC-320-C13-Female-Plug-Rewirable-Power-Connector-3pin-Socket-10A-250V/32808416783.html
2 XT 90 :https://www.aliexpress.com/item/5Pair-XT90-XT-90-Gold-Plated-Banana-Plugs-Male-and-Female-Antiskid-for-helicopter-Battery-esc/32460919234.html
2 Banana Plugs :https://fr.aliexpress.com/item/4Pcs-Lot-Speaker-Amplifier-Terminal-Binding-Post-4mm-Banana-Plug-Socket-Female-Connector-10pcs-lot/32739527467.html
Hardware
Terminals Connectors :https://fr.aliexpress.com/item/280Pcs-Assorted-Insulated-Spade-Crimp-Terminal-Electrical-Wire-Connector-Set-Red-Blue-Yellow/32810002612.html
6 Ring connectors #4 Blue
3 Ring connectors #4 Red
5 Female Spade Connector Red
Screws :
4 3×10 (front pannel)
1 M4x10 (side)
Schrink tubes :https://www.aliexpress.com/item/385pcs-heat-shrinking-tube-2-1-Shrinkage-ratio-black/32662765147.html
Print Settings
Printer:
Tevo Tarantula Rafts:
No Supports:
No Resolution:
0.2mm Infill:
20% Notes:
I’ve put a picture of the orientation that I used to print the top part (rotate 145°) to minimise bridging, but it’s not the only way to print it 🙂
For the front panel, I changed filament color manually at the beginning of the 3rd layer.There is a plug-in for Cura to do this and also a way to do it for S3D users… or leave it the same color 😉
Post-Printing
Parts needed
1 Power Socket W/Fuse & Switch :https://fr.aliexpress.com/item/Free-Shipping-power-socket/476915963.html1 Power Meter :https://fr.aliexpress.com/item/AC-80-260V-LCD-Digital-100A-Volt-Watt-Power-Meter-Ammeter-Voltmeter-110V-220V-free-shipping/32617343719.html1 meter Black & Red 13AWG :https://fr.aliexpress.com/item/1meter-Black-1meter-Red-Silicon-Wire-Heatproof-Soft-Silicone-Silica-Gel-Wire-Cable-12AWG-13AWG-14AWG/32797523458.html1 IEC 320 C13 Female Plug :https://fr.aliexpress.com/item/New-Wholesale-Price-Black-IEC-320-C13-Female-Plug-Rewirable-Power-Connector-3pin-Socket-10A-250V/32808416783.html2 XT 90 :https://www.aliexpress.com/item/5Pair-XT90-XT-90-Gold-Plated-Banana-Plugs-Male-and-Female-Antiskid-for-helicopter-Battery-esc/32460919234.html2 Banana Plugs :https://fr.aliexpress.com/item/4Pcs-Lot-Speaker-Amplifier-Terminal-Binding-Post-4mm-Banana-Plug-Socket-Female-Connector-10pcs-lot/32739527467.html
HardwareTerminals Connectors :
6 Ring connectors #4 Blue
3 Ring connectors #4 Red
5 Female Spade Connector RedSchrink tubes.
Screws :4 3×10 (front pannel)
1 M4x10 (side) -
75mm Filament Spool Adapter 3D Print Model
Summary
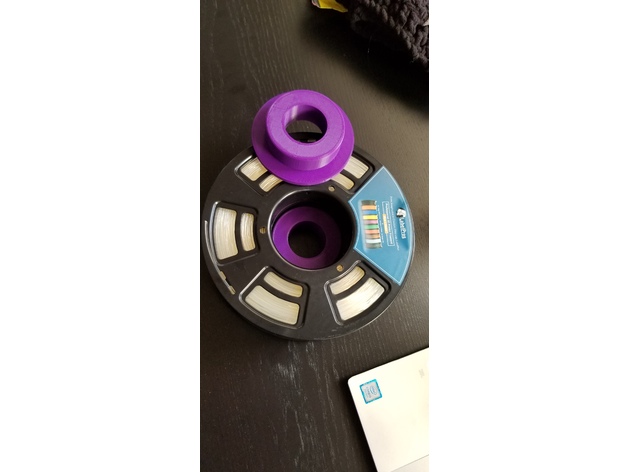
Adapts a spool with a 75mm center to fit on a Prusa without hitting the frame. I left the tolerances a bit large, however it works well and the spool turns smoothly.
Print Settings
Printer Brand:
Prusa Printer:
i3 MK2S Rafts:
Doesn’t Matter Supports:
No Resolution:
Low Infill:
15% Notes:
Printed in PLA, but really doesn’t matter as long as it fits.
How I Designed This
designed in Fusion 360 -
Customizable anti-backlash bowden coupling clip 3D Print Model
Summary
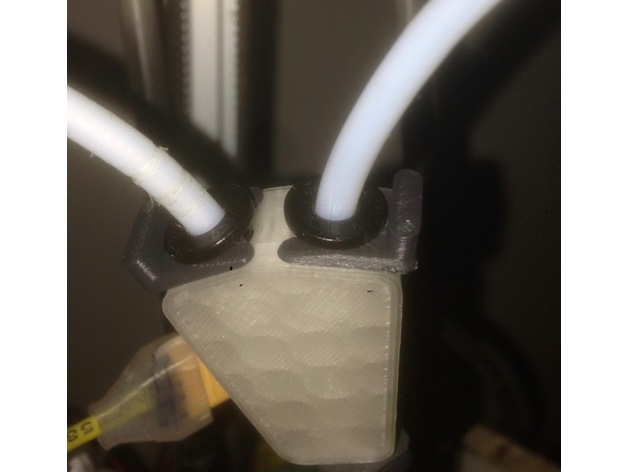
There are many designs like that, the one I picked for source is just the most pretty I used, it’s not that it was of particular value in terms of inspiration. Problem is all these designs are either wrong size or ugly and never customizable so I thought I’d solve that problem once for myself (and share here while I’m at it).
The dimensions of supplied stl is for all e3d couplings I have around, if you have different hardware, feel free to customize.
Note: for some reason customizer refuses to open now, so I can’t tell if it works well, but you can either use prebuilt .stl or download .scad and customize. I’ll check it again later and will either adjust it or remove WIP.
Print Settings
Rafts:
No Supports:
No -
WaterRocketLauncher 3D Print Model
Summary
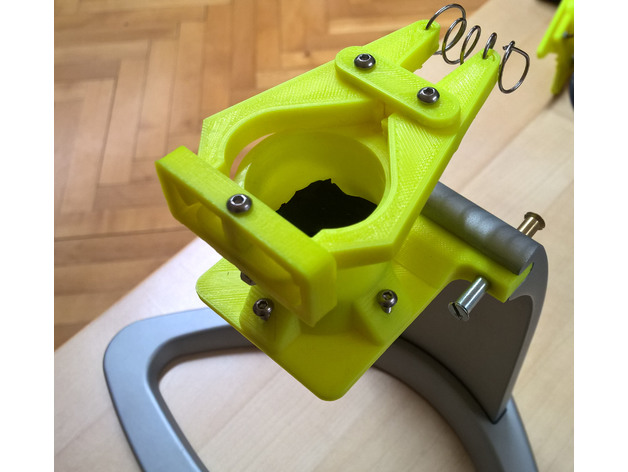
This is a WaterRocketLauncher for launching water bottles.
Print Settings
Printer:
Davinci 1.1 plus Rafts:
Doesn’t Matter Supports:
No Resolution:
0.3 Infill:
90-100% Notes:
WARNING!! Take care and wear at least safetyglasses when things get under pressure. It is hard to tell how much force a 3D-printed part will survive as this depends on your used material and printer settings. Be prepared for the case something breaks!
If you choose to mount it on a baseplate around 3-12mm thickness you dont need to print a baseplate (there are 3 different versions) and mostly no “VentilGuide”.
If your baseplate has under 5mm you may want to print out and use the “VentilGuide”
Depending on the thickness of your used baseplate and if you use a HolderExtension you may have to use longer screws than the stated M3x20.
A HolderExtension is needed if you cannot find a bottle suitable for the original length of the holder.
Baseplates, HolderExtendsion and VentilGuide are optional, you need at least the Holder, Clamp, StabilizationPlate, Stabilizer and Clip.
Take care to print the parts in the correct orientation, some .stl-Files need to be rotated to be printed correctly. (StabilizationPlate 90 degrees, Clamp 180 degrees)
Post-Printing
What you need
Printed Parts
Bicycle tube including the ventile
Screws (6xM3x20, 1xM3x25, 9xM3 Nut, 2xM3 Washer 3,2mm DIN125 )
Springs (two or if you have a long one cut it into two pieces)
Something to mount the rocketlauncher on, up to your creativity what you use
Maybe some pressure tube to get some distance between you and the launchpad 🙂
Preparation
Cut the bicycle tube the way that you get the ventile including a circle of tube around it that fits into the holder printed before.
Redrill the holes with a 3mm drill to ensure that the M3 screws fit into the holes Assembly
Put a spring on the ventile and place it into the holder. Depends on the spring you use, if you find it not stable, try to add a washer between the spring and the ventile/tube-part.
Mount the StabilizerPlate, Clamps, Stabilizer and Holder together as shown on the image. Don`t tighten the screws of the Clamps too much. It should move easy to securely launch the rocket later.
You can use some grease maybe if it is needed. Also it may be a good idea to use 2 nuts or some screwlock glue to prevent the nuts from loosening themselves due to clamp movement. -
4s10p 18650 battery holder for 14.4 volt with 1/4 inch bolt holes and tab slots 3D Print Model
Summary
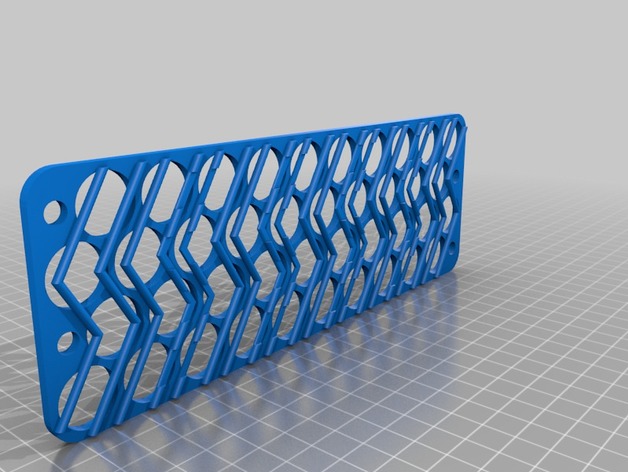
This is a 4s10p, 18650 battery holder for a 12 volts system (with a low voltage cutout and a DC-DC buck). Nominal voltage of 14.4 with a high of 16.8 volts. It holds 40, 18mm cells snugly.
I added a 1/4 inch bolt hole to bind everything together, mount to a case.
One of each file should be printed to get the tabbing and alignment correct. They’re labeled top and bottom, but they could be used the other way–top as bottom and bottom as top (or left side right side, etc).
Each staggered row should be tabbed down the middle with cells alternating anode – cathode – anode – cathode (in series) and bridged over the tabbing slots to the next row with the cells aligned the same as the previous (in parallel). If you don’t understand how this works, study up.
Built for my portable solar kit. -
“Batman Returns” Remote Batarangs 3D Print Model
Summary
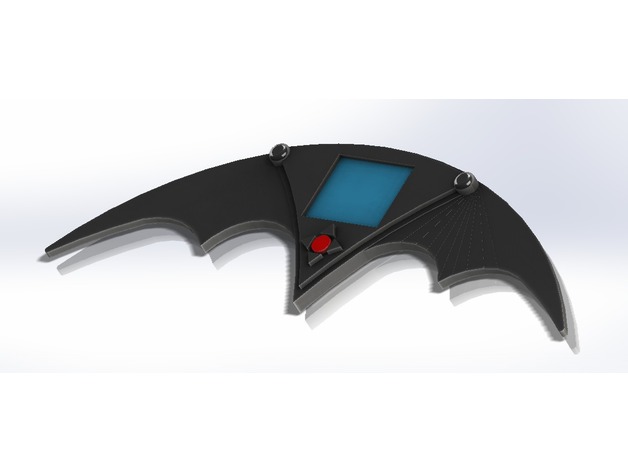
The Completely ridiculous use of a Batarang. Or at least just Ridiculous execution. Fun Design tho. -
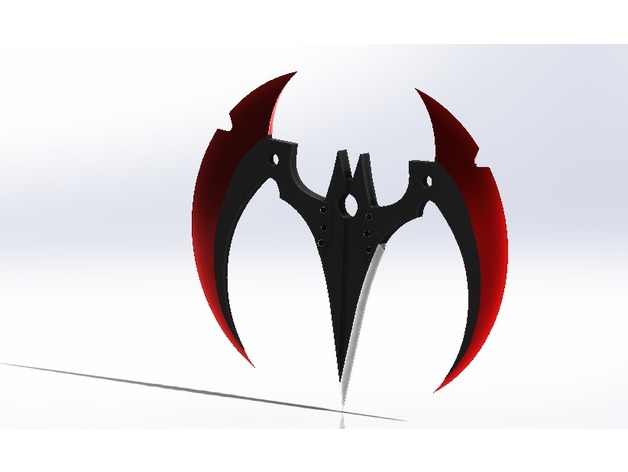
Arkham Knight Style Beyond Batarang 3D Print Model
Summary
Based on the Arkham Knight Beyond Batarang. I love anything Batman Beyond -
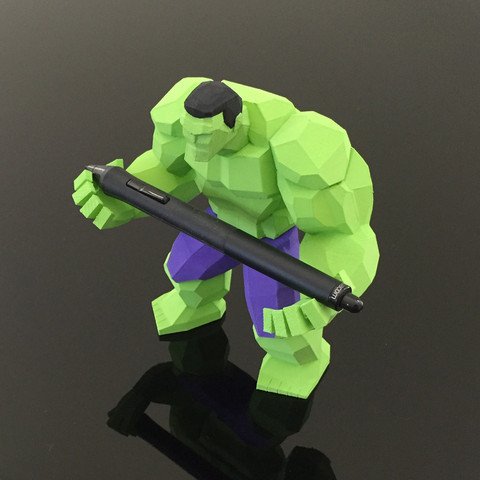
Low-Poly Hulk 3D Print 3D Model
3D PRINTING PARAMETERSLow Poly Hulk- 6 “tall (153.6mm)- Multi-part Assembly (Head, Body, Arms, Hands, Thighs, Feet, and Cylinders)- The Low Poly Hulk shown in the photos was printed on a Makerbot 2 duplicator at 200 micron PLA filament. The head was printed at 100 microns.- I recommend printing ‘Head_Front’ for a better facelift on the face, but if this orientation is not stable on your print bed, then use ‘Head_Up’.- All parties need support except the upper feet and legs. The body will have a minimum of support.- Before painting the acrylic paint, I sprayed Adhesion Promoter by Duplicolor. These are not required for acrylic painting on these parts.- Acrylic paints: Apple pie (green), purple, black, and white- After painting, I super-glued hands on the arms, feet to the thighs, and the head of the body.- I used neodymium magnets to connect the arms and upper legs of the joint body. The magnets are 9 mm in diameter and 4 mm thick. If you do not have these magnets, I understood ‘Cylinders’ to connect the pieces. Choose which tolerance is the best solution for your 3D printing.- I have provided screenshots to show the orientation of each part on the platform of the 3D printer.
-
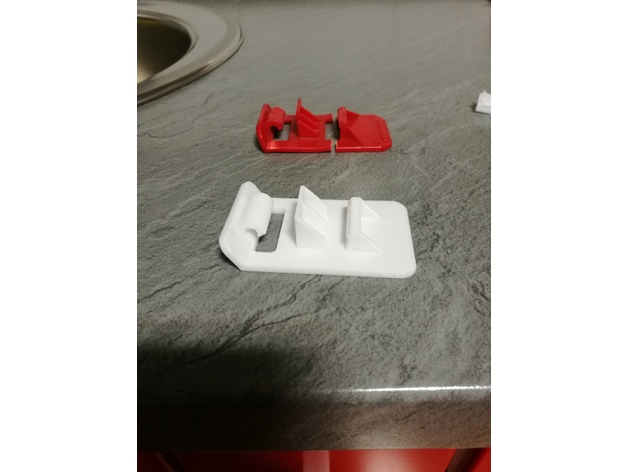
cierre caja taladro würth 3D Print Model
Summary
Es el cierre de la caja de un taladro de la marca Würth, esta impreso en PLA
Print Settings
Printer:
anet e10 Rafts:
No Supports:
Yes Resolution:
0.2 Infill:
17 -
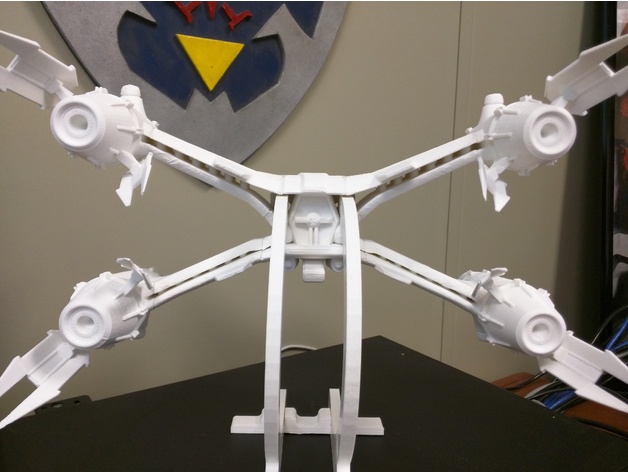
Stand for metaform3d’s Starfury 3D Print Model
Summary
I made a quick stand for metaform3d’s amazing Starfury model. Once you attach the fins the only way to put it on a flat surface is on its nose, and I didn’t have any martini glasses handy.
I know it doesn’t attach the same way the cobra launch gantry would, but I wanted something a little more stylized. -
Heat Tower Test 3D Print Model
Summary
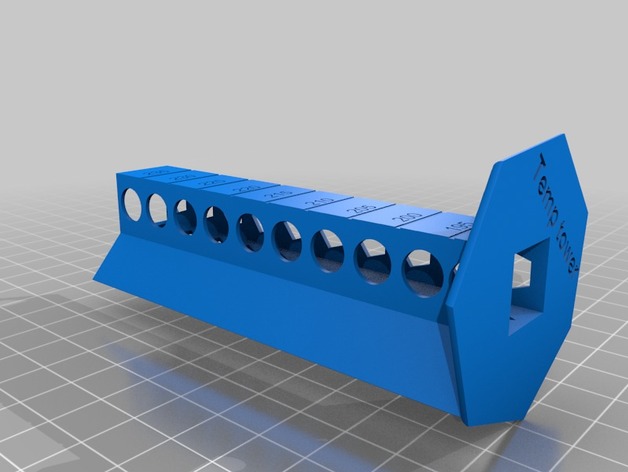
Temperature test to find the best temperature for your filament.
Have made a thin wall that you can break down to find the best welded team
So, if you do not get up the thin wall, you have to go in and set it to print thin walls
Simplify 3D: FFF Setup- Advanced-External Thin Wall Types = Allow single extrusion walls
Print Settings
Printer Brand:
Prusa Printer:
i3 MK2S Rafts:
No Supports:
No Resolution:
0,1000
How I Designed This
fusion 360 -
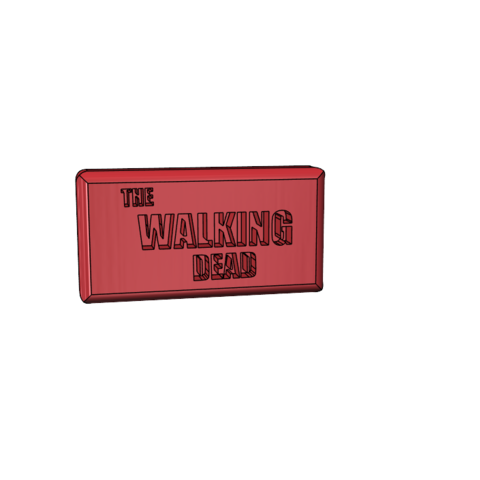
The Walking Dead – Abandoned Bus and Police Car 3D Print Model
Summary
Some additional vehicles to litter your road ways.
I added an additional removable-roof version of the bus so you can hide zombies, loot or your heroes in it. There are some bus seats too to scale and print ! -
12 Chinese Zodiac Animal Paper Clips (Part 1) 3D Print Model
Summary
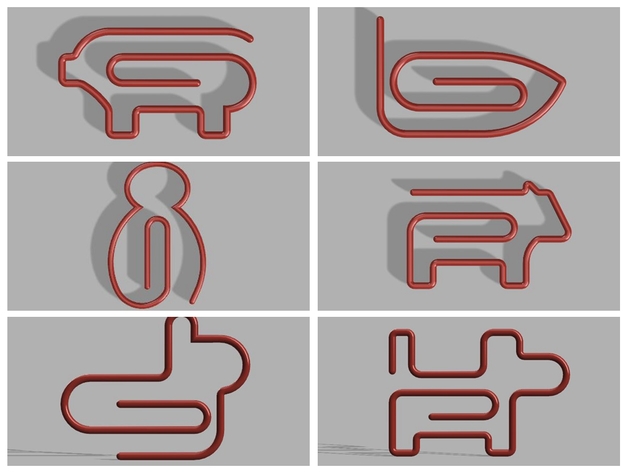
I have completed six of them. I found it hard to depict an animal shape with simple lines. Here they are. What do you think?
Pig
Rat
Monkey
Ox
Rabbit
Dog -
Santa ItNyang 3D Print Model
Summary
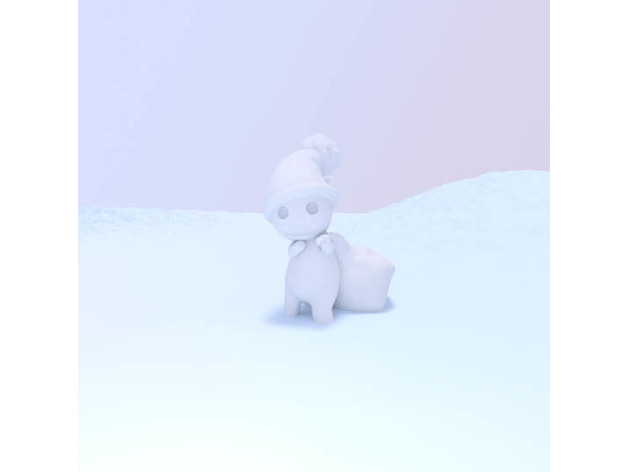
These days, I create the series of my own character, names “ItNyang”.
I hope this character becomes it! Like “It Girl”.
Nyang is usually used on cat.
ItNyang’s pronounciation is similar with Korean word “있냐”, meaning “Does it exist”
Specially, I create the christmas edition of ItNyang. The Santa ItNyang, sound like “Does Santa exist?” in Korean.
Enjoy the Christmas
Ho Ho Ho..
Print Settings
Printer:
CREATABLE D3 Rafts:
Yes Supports:
No Resolution:
0.5 Infill:
3% Notes:
Using 0.8mm Nozzle makes your printing more fast and big 🙂
How I Designed ThisBefore Sculpt
After Sculpt
-
Single Unit Raspberry Pi case 3D Print Model
Summary
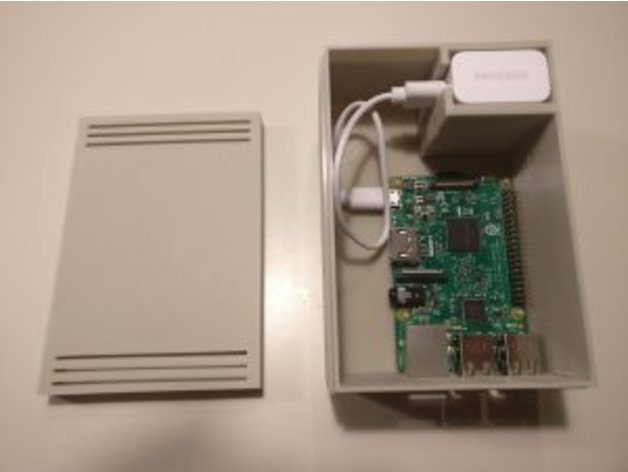
Iv built a single unit to house the raspberry pi and power adapter and cables, nice neat setup. -
MALU Board Game 3D Print Model
Summary
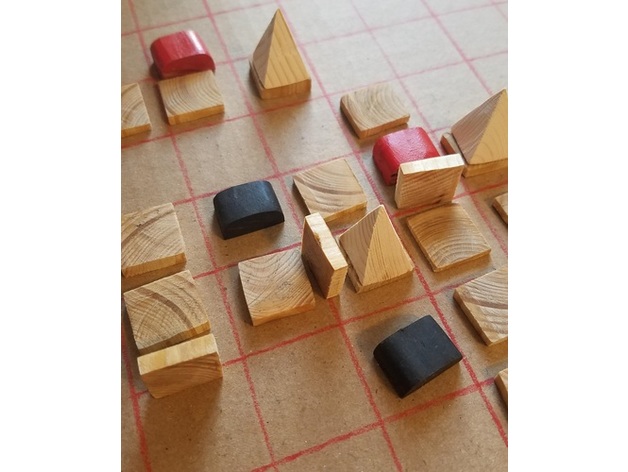
MALU is an abstract strategy board game for 2 or 4 players. The objective of the game is to move both your pawns across the map to the other side of the board and exit the map. The first player to have both their pawns exit the map wins.
The mechanics of the game are simple enough that anyone can pick up and start playing, but the depth of skill and many possible strategies to employ, allows for seasoned players to truly be masters of MALU.
Each turn, a player must move their pawn and place a neutral tile onto the board. As you place your tiles, adjoining tiles create paths that your pawns can move along. As your pawn moves, you have the ability to pick up those tiles and reroute them to your advantage… either as a path to the other side or as a means to block your opponents. But be careful… if you get too close, your opponent can snatch those tiles away from you and use them for themselves! You can also place walls of ice and mountain peaks as obstacles or knock down walls for strategic advantages.
I have remixed 2 of dutchmogul’s vikings into the player pawn for this game -
Mobile soldering iron STC T12 case 3D Print Model
Summary
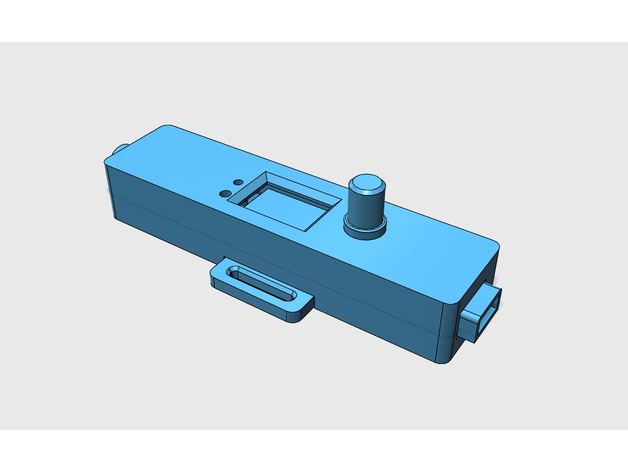
I wanted a soldering iron to be used on the field, so battery powered but still with controlled temperature and under 20USD and so bought the STC T12 DIY kit which looks to be ok for the job.
After a bit of searching I couldn’t find a case for it that suited my intended use and I went ahead and made one that I think is reasonable ergonomic.
I’ve used an XT60 connector for the battery powering the iron but you can use other connectors type if they fit the socket and hot glue them in place.
Print Settings
Printer Brand:
Prusa Printer:
Prusa Clone Rafts:
Doesn’t Matter Supports:
Doesn’t Matter Resolution:
0.1-0.2 mm
Post-Printing
For the battery connector socket I’ve premade supports in the form of a 0.8mm wall that needs to be removed after printing. -
WLANThermo Mini V2.5 Case – Variant Crow 3D Print Model
Summary
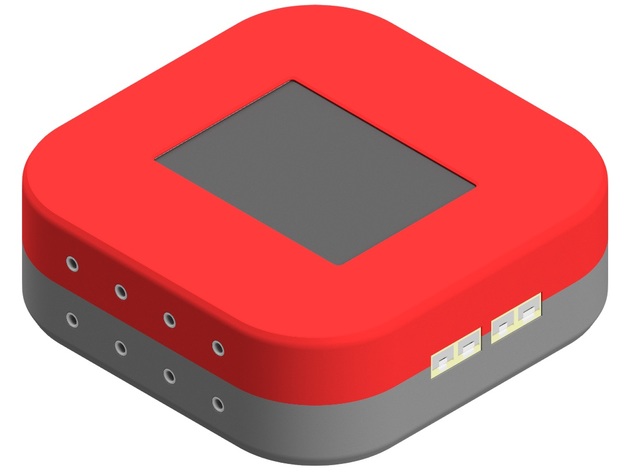
Der beliebte Mini Gehäuse von Crow Design in der Version 2.5 zum selber drucken.
Das Gehäuse oder Einschweißmuttern können hier bestellt werden:https://www.wlanthermo-shop.de/
Further Information:https://www.wlanthermo-shop.de/https://crow.n-metal.de/https://www.grillsportverein.de/forum/threads/wlanthermo-mini-3d-druck-gehaeuse-fuehleraufnahme-variante-crow.262108/ -
Prusa I3 Mk2/S Filament guide and light holder 3D Print Model
Summary
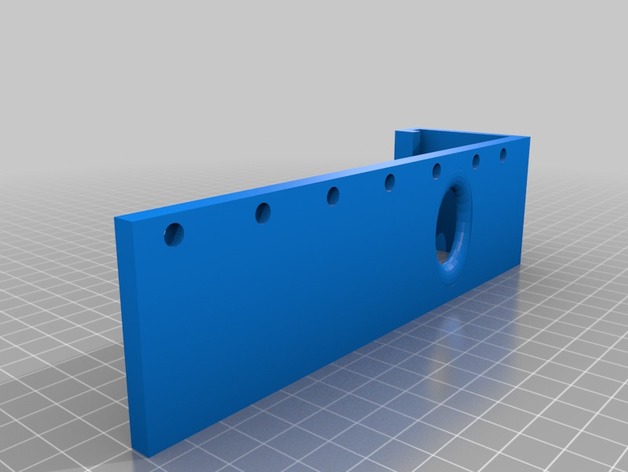
I have been running into problems with new rolls where the filament would spring of and get tangled. I was going to print one of the many filament guides available, but decided to make this. I use a Yorkville music stand light to light up the build plate when printing. Its pretty bright for its size, and you can power it off a spare usb port on the raspberry pi (assuming you use one for octoprint, but any usb port will work). I use the light both for checking in remotely and for the time lapses I create with octoprint. I initially had the light clipped to the frame of the printer but wanted to bring the light arms more forward to take care of some shadows. the holes in the side allow tie wraps to keep the power cord out of the way.
The light I use can be found here: https://www.long-mcquade.com/12870/Band/Metronomes_Tuners_Stands/Yorkville_Sound/Dual_Music_Stand_Lite.htm -
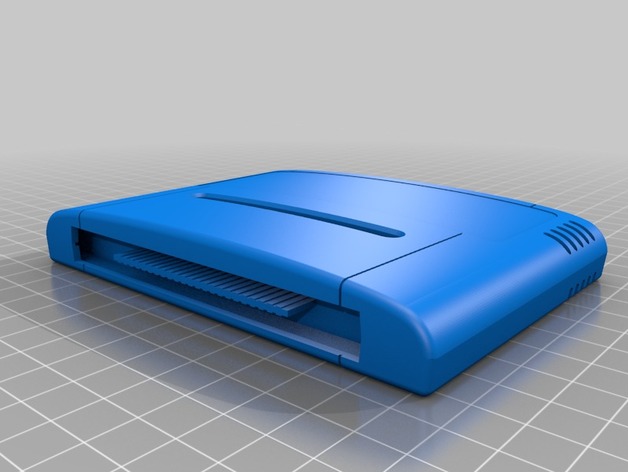
Super Famicom Cartridge (Super Nintendo PAL cartridge) 3D Print Model
Summary
Just a redraw of a Super Nintendo cartridge (PAL version) to print some keychains
How I Designed This
It’s a remake of https://www.thingiverse.com/thing:1396153