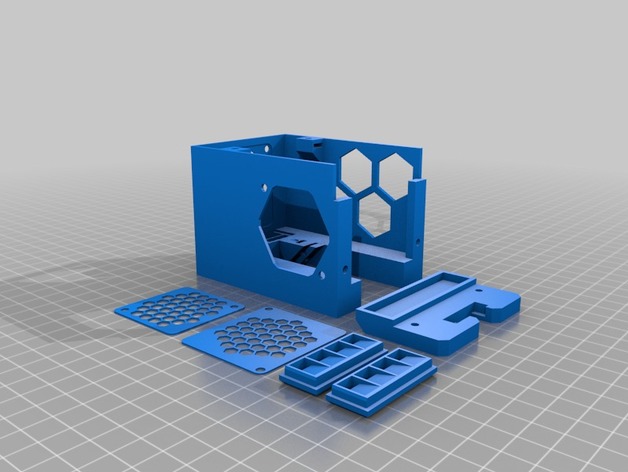
Download Free 3D Model Anycubic i3 Mega partfan monstrosity 3D Print Model
Summary
Boxy, but good (enough).
This is an attempt to get partfan coverage from both/all sides, while retaining the original plate mount to the bearings. After several attempts I gave up in disgust with the quest to design something elegant, and just settled for monstrous and temporary: I am a little bit over trying to modify the mega’s existing hotend, so this is simply a temporary means of getting better part cooling while I print components for an entirely different printer.
I may eventually revise this later, but it will likely be in a version that completely replaces the megas hotend compartment right back to the X carriage bearings.
It’s not pretty, and despite having a COD LED inside it to illuminate the nozzle it’s almost impossible to see underneath the ducts anyway, and the LED reaaaaaly needs a trimpot to turn the light down a little. So consider the COB LED slot completely optional. I also soldered the connections to it so they exit *towards8 the leds light emitting surface, so the slots I allowed for solde blobs may not be big enough for your standard lazily soldered fat blobs of solder and a wire direction change… maybe, maybe not.
The top bolt on the partfan doesnt fit, due to an oversight, so mine runs with it missing.
LED COB 26x16mm has a heatsink stuck to it’s metal side:
heatsink 14x14x6mm (7x1mmVanes, typically sold in combination with an even smaller one for use on raspberry pi)
The partfan outlets just click in, helps if you put the short end thats closest to the actual partfan in first, and then force the further edge in last.
No supports, bridging sucks a bit on the partfan outlets, but it doesnt create enough surface roughness to pull the airflow onto the heatsink, so it’s ok. You could try flipping them, maybe use supports, and make the airflow surface nice and smooth by printing as the top face.
The partfan fan is a 5015 blower, some are stronger than others. I picked the strongest I had.
The heatsink fan is still the stock 4010
None of the nuts require a print-pause now, but it is designed for square M3 nuts… which you may not have. Gluing in a hex nut would also work. I use glue to lightly tack several of them in just to make assembly easier.
PLA, 0.4mm nozzle, 20% infill … pretty standard (not really important)
1.2mm walls (IS important; or your bridging will suck and all of the basic design assumptions are for that thickness)
It’s annoyingly close to the print, and ugly.. but it is a slight partfan improvement.
dealwithit.jpg
Categories: 3D Print Models, All 3D Models, Free 3D Models
Sorry, comments are closed for this item.


