Tag: anycubic

  • Anycubic Photon Back Fan Vent Mount 3D Print Model

    Anycubic Photon Back Fan Vent Mount 3D Print Model

    Summary
    Back Vent for the Photon Anycubic printer to extract fumes from the machine.
    2mm thick base, Pipe connector external diameter is 57.5mm (2.5 Inch)
    It has a 2.5 Inch connector.
    Print Settings
    Printer:
    Anycubic I3 Mega
    Rafts:
    Doesn’t Matter
    Supports:
    Doesn’t Matter
    Infill:
    20% minimum
    Notes:
    You will need to sand/file the holes before installing to ensure proper fit.
    Post-Printing

    How I Designed This
    Fusion 360

  • Anycubic i3 Mega IGUS RJM-01 Bearing Adapter 3D Print Model

    Anycubic i3 Mega IGUS RJM-01 Bearing Adapter 3D Print Model

    Summary
    These bearing adapter can mount the IGUS RJM-01 (and maybe the RJMP-01) bearings on the ultrabase printbed. The design has been optimised to fix the bearing without squeezing it to much, so the bearing will not be deformed. the printbeds height remains the same as with the stock bearings. The design will be tested during the next days/weeks, hopefully there will not be the need to insert retaining rings to hold the bearing in place. Current design allows the use of a single bearing, maybe i will upgrade it to a double bearing version after the basic design is tested. For the current test, i used 0.15 layers of nx2 pla from extrudr, which actually sticks like hell on the ultrabase printbed (; (200°C, 60°C).

  • Holder Autoleveling Sensor Anycubic Kossel 3D Print Model

    Holder Autoleveling Sensor Anycubic Kossel 3D Print Model

    Summary
    It’s a simple box to hold the Anycubic Autoleveling Sensor.

  • Temperature display mount for Anycubic 4Max 3D Print Model

    Temperature display mount for Anycubic 4Max 3D Print Model

    Summary
    Simple temperature display mount for Anycubic 4Max, it is mountable on the aluminum profiles, up or down side behind the Plexiglas door, there is enough room in the enclosure for the senor wire to mount the display upside down.
    If you are lucky enough like me you might have spate T-Nut bolts from the kit otherwise just search for 4mm T-Nut bolts.
    Credit: I got the housing from user selmo here: https://www.thingiverse.com/thing:761721 modified the inner part and holes for easy printing.
    The sensor I used is at least 10 years old, but you can still buy it here:https://www.aliexpress.com/item/LCD-Digital-Tank-Water-Meter-Detector-Thermometer-Electronic-Fish-Tank-Water-For-Aquarium-Drop-Shipping-Support/32799423978.html
    Print as you wish, no supports needed.

  • Anycubic I3 Mega Digital Dial support  3D Print Model

    Anycubic I3 Mega Digital Dial support 3D Print Model

    Summary
    A remix between 2 great designs.
    ltlowe design was too short, x9x9x9x9x9 was for a different dial…
    Will soon post a photo of the real deal.
    Print Settings
    Printer:
    Anycubic I3 Mega Rafts:
    Doesn’t Matter Supports:
    Yes Resolution:
    .28 Infill:
    10 Notes:
    Just print 🙂

  • Anycubic Kossel Heated Bed Mounts 3D Print Model

    Anycubic Kossel Heated Bed Mounts 3D Print Model

    Summary
    I had trouble for whatever reason with the original not being able to be tightened. I removed the slot groove to allow it to tighten and adjust twist as well as adding a hold-down feature.
    Print Settings
    Printer:
    Anycubic Kossel Rafts:
    No Supports:
    Yes Resolution:
    .2 Infill:
    100%

  • Anycubic Kossel Back Cable Holder 3D Print Model

    Anycubic Kossel Back Cable Holder 3D Print Model

    Summary
    Cable Holder for Delta kossel, prevent jamming cause by cable during printing
    using M5 and T nuts M5

  • Anycubic I3 Mega X axis Fan stepper fan mount with heat sink clearance 3D Print Model

    Anycubic I3 Mega X axis Fan stepper fan mount with heat sink clearance 3D Print Model

    Summary
    Friction fit fan mount with air channels and clearance for 40mm heat sink stuck on the end of Z axis stepper. Mounting holes designed for 40mm fan. Print with mount side down. There are minimal supports needed.
    Print Settings
    Printer:
    Anycubic I3 Mega Rafts:
    Yes Supports:
    Yes Resolution:
    0.2 Infill:
    20
    Post-Printing

  • Anycubic i3 Mega partfan monstrosity 3D Print Model

    Anycubic i3 Mega partfan monstrosity 3D Print Model

    Summary
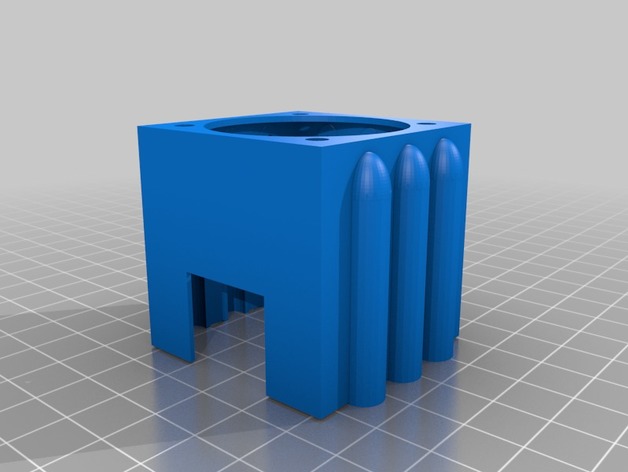
    Boxy, but good (enough).
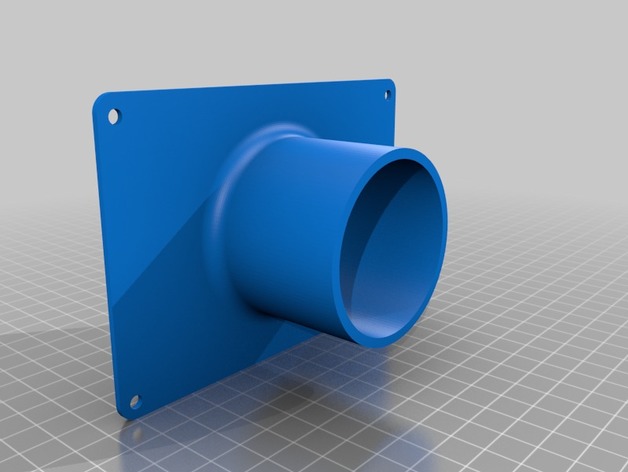
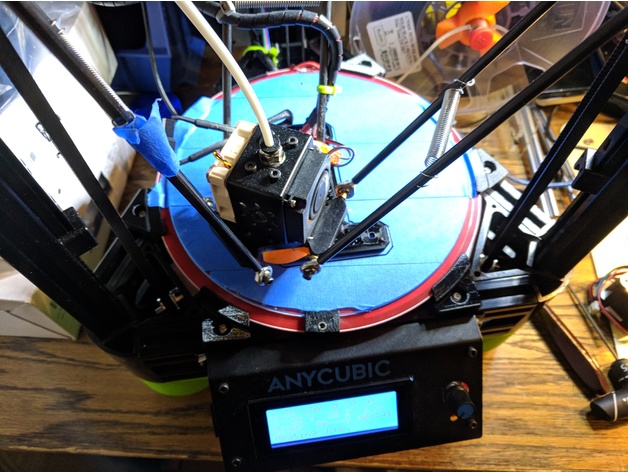
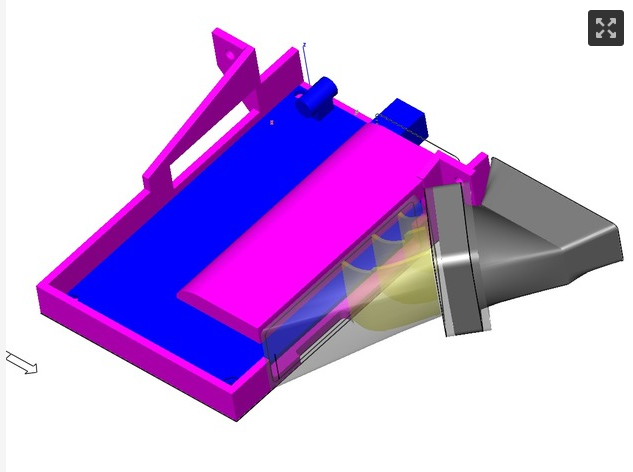
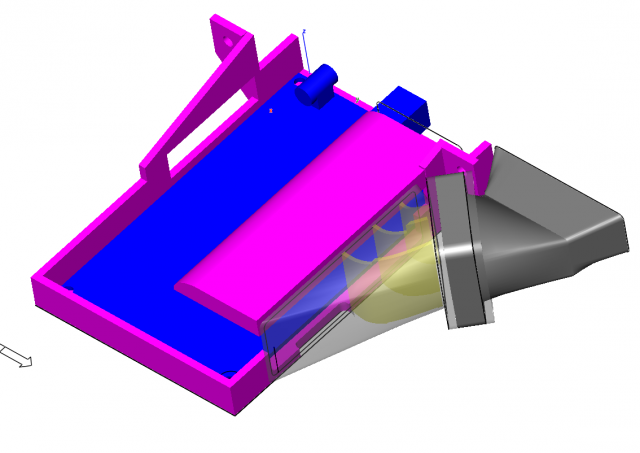
    This is an attempt to get partfan coverage from both/all sides, while retaining the original plate mount to the bearings. After several attempts I gave up in disgust with the quest to design something elegant, and just settled for monstrous and temporary: I am a little bit over trying to modify the mega’s existing hotend, so this is simply a temporary means of getting better part cooling while I print components for an entirely different printer.
    I may eventually revise this later, but it will likely be in a version that completely replaces the megas hotend compartment right back to the X carriage bearings.
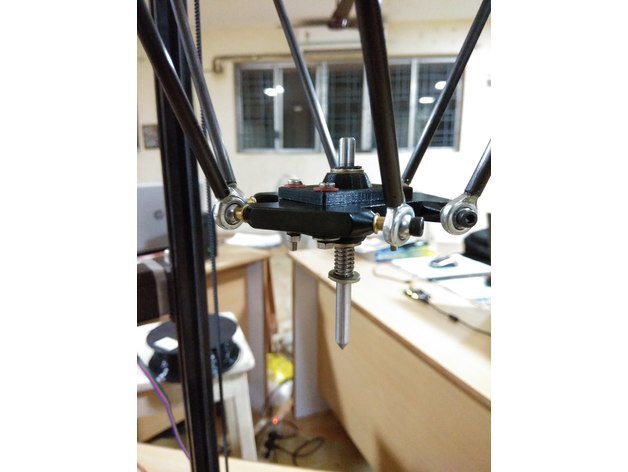
    It’s not pretty, and despite having a COD LED inside it to illuminate the nozzle it’s almost impossible to see underneath the ducts anyway, and the LED reaaaaaly needs a trimpot to turn the light down a little. So consider the COB LED slot completely optional. I also soldered the connections to it so they exit *towards8 the leds light emitting surface, so the slots I allowed for solde blobs may not be big enough for your standard lazily soldered fat blobs of solder and a wire direction change… maybe, maybe not.
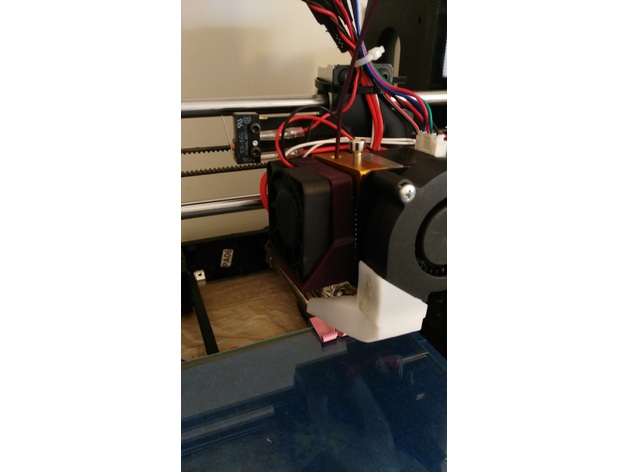
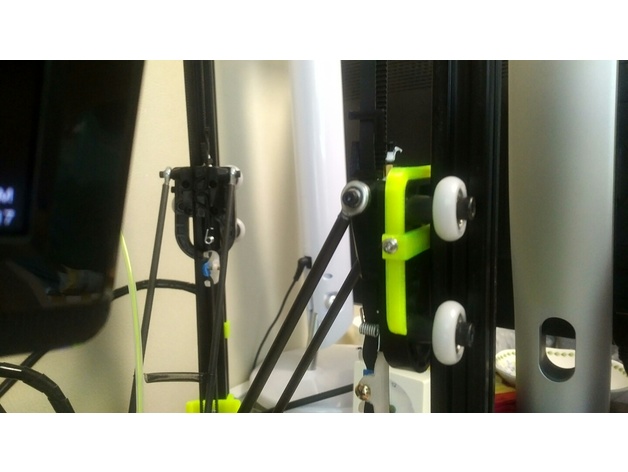
    The top bolt on the partfan doesnt fit, due to an oversight, so mine runs with it missing.
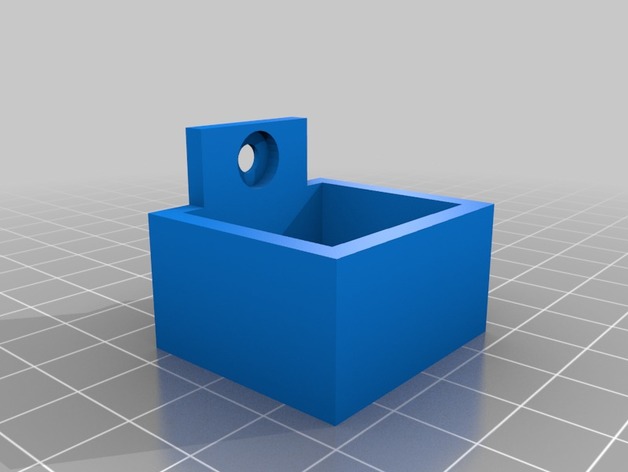
    LED COB 26x16mm has a heatsink stuck to it’s metal side:
    heatsink 14x14x6mm (7x1mmVanes, typically sold in combination with an even smaller one for use on raspberry pi)
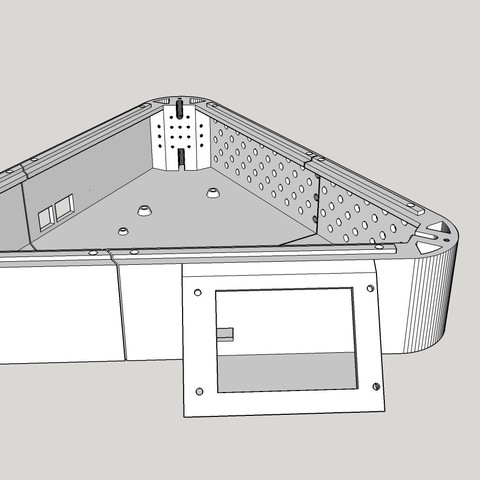
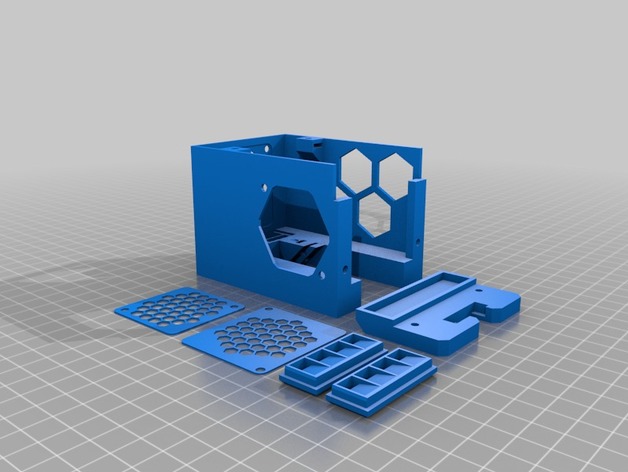
    The partfan outlets just click in, helps if you put the short end thats closest to the actual partfan in first, and then force the further edge in last.
    No supports, bridging sucks a bit on the partfan outlets, but it doesnt create enough surface roughness to pull the airflow onto the heatsink, so it’s ok. You could try flipping them, maybe use supports, and make the airflow surface nice and smooth by printing as the top face.
    The partfan fan is a 5015 blower, some are stronger than others. I picked the strongest I had.
    The heatsink fan is still the stock 4010

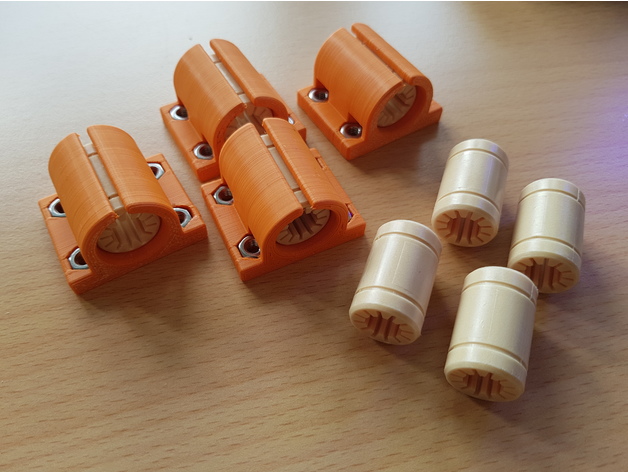
    None of the nuts require a print-pause now, but it is designed for square M3 nuts… which you may not have. Gluing in a hex nut would also work. I use glue to lightly tack several of them in just to make assembly easier.

    PLA, 0.4mm nozzle, 20% infill … pretty standard (not really important)
    1.2mm walls (IS important; or your bridging will suck and all of the basic design assumptions are for that thickness)
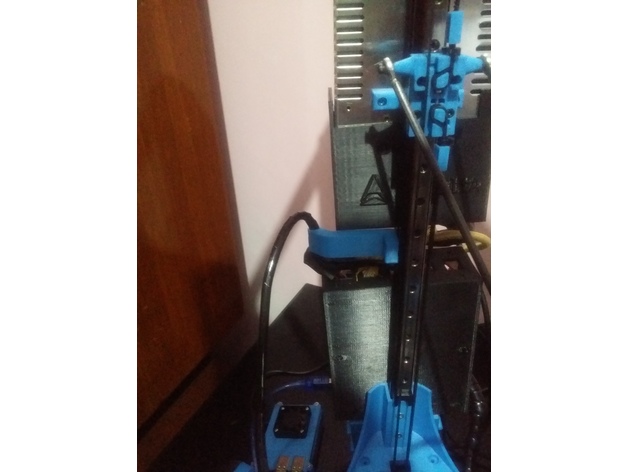
    It’s annoyingly close to the print, and ugly.. but it is a slight partfan improvement.
    dealwithit.jpg

  • ANYCUBIC END EFECTOR FOR PCB PRINTING 3D Print Model

    ANYCUBIC END EFECTOR FOR PCB PRINTING 3D Print Model

    Summary
    Get ready with all the parts along with the additional requirements on each parts. Assemble the part according to the sketch on the lower left corner on the sketch image. Place the copper plate on the working area. Upload the gcode file for PCB plotting. After the process is done you get a PCB, where you can solder the remaining electronic devices to get a circuit board.

    Materials Needed
    Requirements
    Shaft. Dimension: 6mm (Diameter), Material: Stainless Steel(SS), Length: 8cm
    Circlips. Inner Diameter: 5mm , Qty: 2
    Metal Washers: Inner Diamerter: 6.5mm, Outer Diameter:12. Qty: 3
    Spring: Inner Diameter: 6mm
    Shaft Holder. (3D Printed). File Attached as: Upper_part.stl
    M3 SS Bolts. Qty: 4
    Metal Washers. Inner Diameter :3mm Qty: 4
    Fiber washers. Inner Diameter: 3mm Qty: 4
    Spring Washers. Inner Diamerter: 3mm. Qty: 4
    M3 Nuts. Qty: 4
    Preparation
    Making Parts Ready
    1: The File attached under the name of Upper_part.stl must be printed before we start assembling stuffs (Two of such parts is needed). This might take a moment but please be patient.
    2: After the Parts have been successfully printed, We need to calibrate the hole of 6mm which s there right on the middle of the work-piece. For this Take the 6mm shaft and heat it a little ( The Process which was used meanwhile was placing the Shaft on the Drill, Rotating it at its maximum speed and Applying Sandpaper on its Surface. This Process will not only heat he shaft but also will smooth the shafts surface.) The heated shaft is inserted in the hole so that the shaft moves through the hole with less resistance.
    3: Making Circlip Slots, Mark 10mm and 50mm from one side of the rod (Let this side be named as A and other be B) Make the slots for the Circlip slots on those marked points. The method which we used was placing the shaft on the drill and then placing a hacksaw blade on the marked line)
    4: Sharpening the Shaft, the other side of the shaft i.e B has to be sharpen. We used an angle grinder with a buffing blade, placed the shaft with some constant angle and rotated the shaft.
    5: Ready the copper plate, The copper plate of required dimension was sliced out and one face of it is perfectly sketched with black sketch pen.

    Assembling Parts
    Gather your Tools
    Bolt both the 3D printed part, sandwiched between the bed. Apply Fiber washer below bolt head and Metal Washer right before spring washer and nut. Rest of the part should be assembled as the sketch image attached.
    Feel free to ask any doubts regarding the assembly.

  • Anycubic kossel delta mainboard mod Free 3D Model

    Anycubic kossel delta mainboard mod Free 3D Model

    i made this to replace the original as it wasnt very good. i have designed a fan housing link for files are in video discriptionmain board housing https://youtu.be/EgR-f-XFoqEfan housing https://www.youtube.com/watch?v=2kAePRxTiFs

  • Anycubic prusa i3 – left side motor fan support 3D Print Model

    Anycubic prusa i3 – left side motor fan support 3D Print Model

    Summary
    This is a 40mm fan support for the extruder motor.
    With this design you can cool the motor and keep the hotend protected from the fan air flow.
    You can screw the fan with the support to the motor (with M3 bolts) or you can use neodymium magnet (4mmx2mm) and insert them in the holes. This second option offer a better access to the filament when you have to change it.
    Print Settings
    Printer Brand:
    Prusa Printer:
    Prusa Clone Rafts:
    No Supports:
    No Resolution:
    0.2 Infill:
    20-30%

  • Kossel Delta Plus Top Cover Spool Holder fits 240mm dia bed 3D Model

    Kossel Delta Plus Top Cover Spool Holder fits 240mm dia bed 3D Model

    A selection of files to print out a top cover and a Spool holder for Filerment. I used 10mm Steel Balls and the original metal tube that came with printer.you can watch a vieo of this on youtube at https://youtu.be/ygXfRRJV29c

  • Anycubic Kossel Delta Plus fan housing 3D Model

    Anycubic Kossel Delta Plus fan housing 3D Model

    fan housing fits my mainboard mod and uses a standard 40mm 12v fan which will plug into spare socket on main board

  • Anycubic i3 Mega Spool Stand Filament Guide 3D Print Model

    Anycubic i3 Mega Spool Stand Filament Guide 3D Print Model

    Summary
    Quite often, when I moved the printer around, filament would come spiraling off the spool. This helps keep it on the spool.

  • Anycubic Kossel Delta Plus Corner Fills fits 240mm dia version 3D Model

    Anycubic Kossel Delta Plus Corner Fills fits 240mm dia version 3D Model

    This is a project in progress these corner fills fit nice and have vent holes to allow air to flow. cut outs under neath to allow cables to run up side rails. they just clip in place.watch video here https://www.youtube.com/watch?v=bf_wpQ3e2GE

  • Kossel Delta Plus bed clamps fits 240mm dia bed 3D Model

    Kossel Delta Plus bed clamps fits 240mm dia bed 3D Model

    clamps for securing hot bed and glass in place on anycubic kossel delta plus or simular with 240mm dia glass bed

  • Anycubic Plus bed clip for 240mm bed and glass

    Anycubic Plus bed clip for 240mm bed and glass

    Summary
    JamesWhite made a great bed mount that surpassed the original 6 mounting blocks that were provided with the Anycubic Linear Plus Kit. My version (03/21/2017) came with a 240mm aluminum heated build platform and 240mm glass plate. I just knocked down the tab a bit with Sketchup so they’d both fit without sitting higher. Admittedly, I don’t have any skills with design or these cad apps, so this is just a tweak.
    If one were so inclined, adding a few bulges or tangs to the last 1-1.25mm at the top would likely hold the glass in place without the need for the top clips. I don’t think this would even protrude too far from the edge, just far enough to put a touch of pressure on the glass.
    Thanks, JamesWhite.
    Print Settings
    Printer:
    Anycubic Linear Plus Rafts:
    Doesn’t Matter Supports:
    No Resolution:
    .2-.4 Infill:
    30% Notes:
    You could probably up the infill a hair, but this seems strong enough. I just printed it and did a test fit before I printed the rest. Should work well for my needs.

  • anycubic delta carriage tightener

    anycubic delta carriage tightener

    Summary
    For those who have stripped thread bolt hole for carriage tightener, use this.
    I didn’t measure size of carriage precisely, but this works for me.
    The hole is 3mm dia.
    애니큐빅 델타 캐리지에 있는 조임장치에 볼트가 헛돌아서 만든 부품입니다.
    Print Settings
    Printer:
    anycubic delta kossel Rafts:
    No Supports:
    No Resolution:
    0.25 Infill:
    100