Summary
Let me start by thanking and giving credit to RAY_Design for the original idea and design.https://www.thingiverse.com/thing:2813569
Printing instructions:
Print all parts in the orientation provided in the files
In body color:
Body: print with support, feet sticking up.
Arm: print two with support, lying on the side (for strength around socket hole), socket hole down. That way the rough spots from the support material are on the inside and less visible.
Antennae: print two with a brim. They are very small, and without a brim, they might not stick to the print bed.
I printed all these pieces in one batch with support and brim.
White:
Collar: print without support, upside down
Eye: print two
Arm Ring: print two
You can print all these pieces in one bath, no support, no brim.
I made a few changes in this remix:
Uses 40% less material for the body when printed feet up: You still need to print with support, but there’s a lot less of it because of the cone shaped interior
Openings to route the power cable back into the body and out between the legs, for a neater look. You can coil up extra cable inside the body.
One piece arms: my version needs to be printed with support, but the rough spots will all be on the inside, where there aren’t very visible. Some sanding is required. On the plus side, no seam in the middle of the arm, and a stronger socket. You can still use the arms from the original design if you prefer – they are interchangeable.
Arm pins attached to the body
Collar rests in a groove on the body for a snug fit. I recommend glueing it to the body anyway.
Opening for the mute button (although still not easily reachable)
A built-in base in the body for the Home Mini to rest on, for a more stable fit
I used superglue to attach the eyes and the antennae to the Google Home Mini. If you rather not do that, you can skip that step – it still looks cute without it.
Print Settings
Rafts:
No
Supports:
Yes
Resolution:
High detail (for the arms at least)
Infill:
20%
Notes:
Body and arms need support. I recommend printing the antenna, arms, and body with a brim. The body probably doesn’t need it, but I wasn’t gonna risk it, and I printed all the green pieces in one batch.
This is a very large piece. I printed everything with “High Detail” for the best appearance. It takes about 24 hours to print all pieces at that resolution.
Post-Printing
Sanding the arms
I printed the arms lying down, with the pin hole facing down, for extra strength around the pin hole. Support is required in that orientation. But it will be on the inside of the arm, facing the body, so not very visible. After pulling off the support material, I sanded it smooth with fine sand paper.
How I Designed This
I started by looking at and printing RAY_design’s design (https://www.thingiverse.com/thing:2813569), and then recreated it from scratch in OpenScad. I took measurements from an official Android figuring (shown on the left in the 2nd picture), and scaling it up by a factor of 2.22.
I gave the interior of the body a cone shape so that you can print it upside down (for a smooth finish of the bottom and legs) with minimal support. Even so the cone means that extra material is needed to fill the area around the cone, it is a lot less than printing support material to fill the entire body to support a flat bottom.
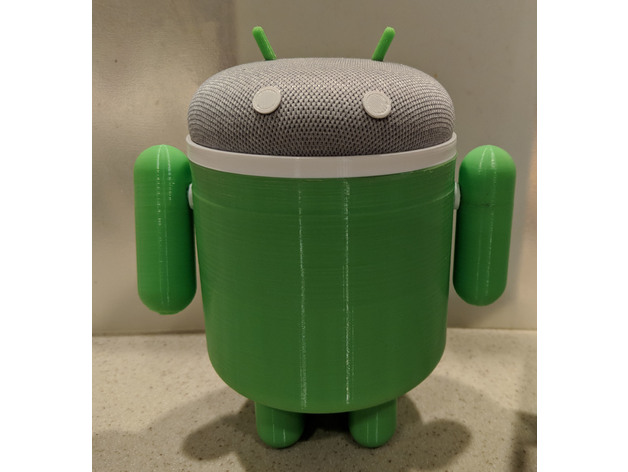
Android Body for Google Home Mini 3D Print Model