Summary
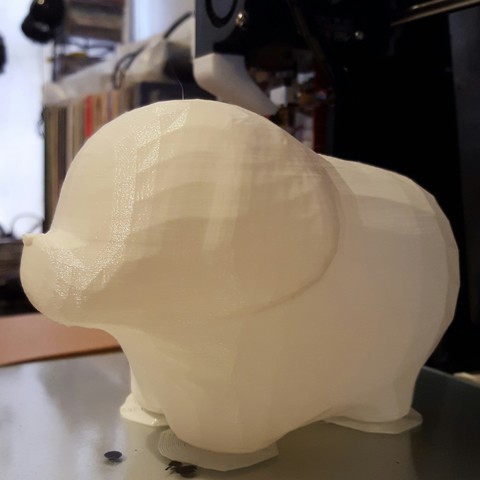
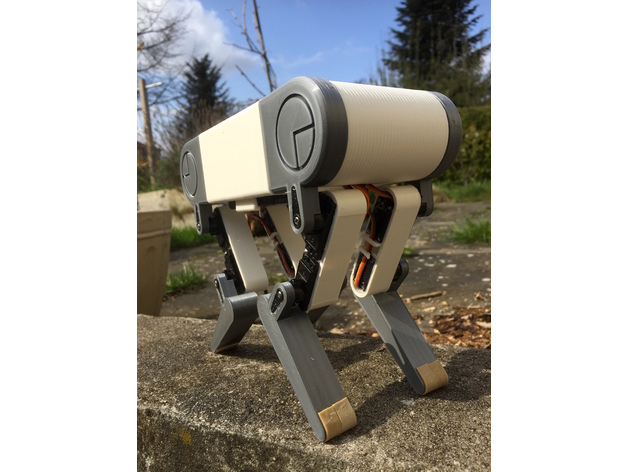
This is a new version/design of a simple quadruped robot. The robot should be easy to print on a hobby grade printer (the one depicted was print on a Prusa I3Mark2). The assembly doesn’t requires screws/bolts , the parts click-fit together (0.3mm of tolerance).
For the electronics you will need 8 servos (9G.) a microcontroller a servo controller and power. The model in the picture use the following:
Ada fruit Feather (https://www.adafruit.com/products/2829)
Adafruit 8 channel Servo FeatherWing (https://www.adafruit.com/products/2928)
4xAA Batteri holder (https://www.adafruit.com/products/830)
8x MG90S High Speed Micro Servo Metal Gear
The robot was designed using OnShape, a browser based parametric CAD software package. You are free to copy/customise the project. The link to the project is: https://cad.onshape.com/documents/0accd1a24676e15bf99fd11e/w/0962067c20c6b1476c426a1c/e/33ba89d76935e0f2094cbde6
You can read more about other quadruped bots at my blog at www.burningservos.com and on twitter @ronaldxjt.
I’ll add a link here to an Instructable I’m currently working on.
Category: 3D Print Models
Premium & 3D Print models ready to be 3d printed. 3D Print Models and Free 3D Print Models are available for download in several formats including .STL, .3DM, .OBJ, .3DS, .DAE, .SKP, .BLEND, .DWG, .DXF, .STEP and much more. If you’re in search of high-quality 3D printed assets, we have a huge library of 3d print models for any of your needs. Also you can visit 3D Models and All 3D Models category.
-
Quadruped Robot
-
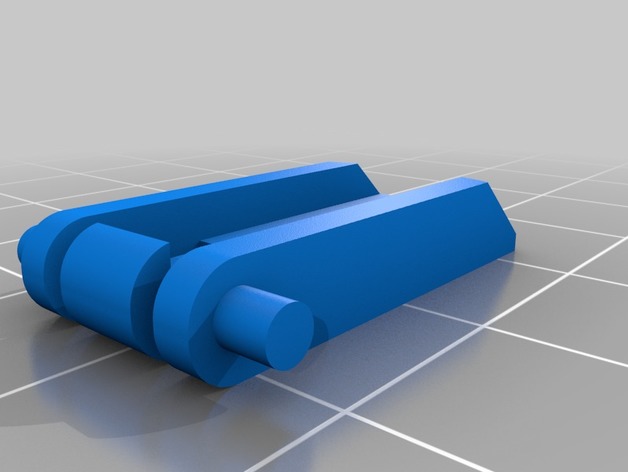
Redgragon Keyboard Foot
Summary
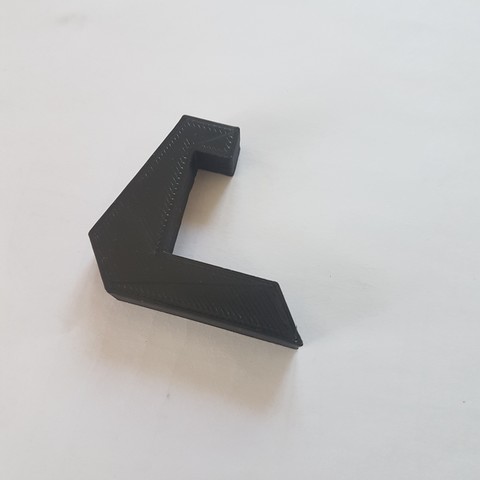
Leg (foot) for Redragon Karura K502 keyboard.
Print Settings
Printer:
Anet A8 Rafts:
No Supports:
No Resolution:
.1 Infill:
50% Notes:
Printed in PLA
Post-Printing
File pins
File or sand the side of the pins to make it easier to insert into the keyboard. -
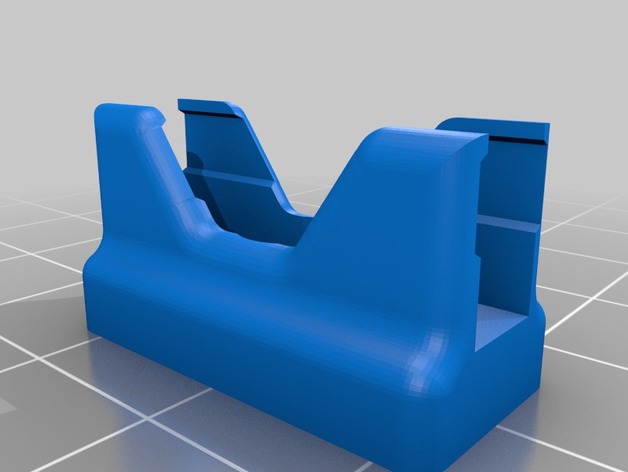
Driver bit holder for WORX cordless hammer drill
Summary
This is a driver bit holder for WORX cordless hammer drill.
How I Designed This -
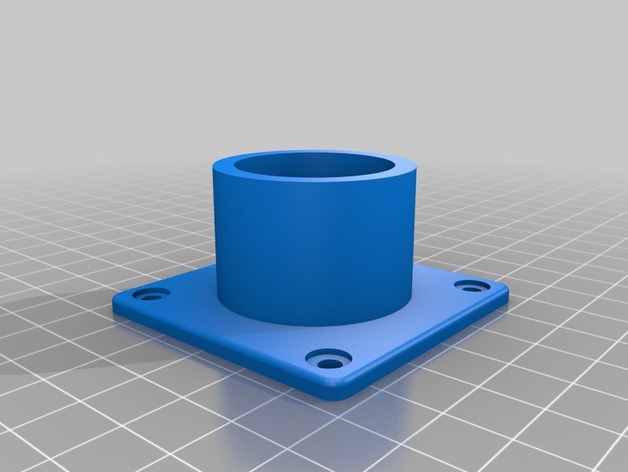
12 V Surface Mount Plate
Summary
This is a remix of http://www.thingiverse.com/thing:995385, I was in the same situation with having a 12 volt adapter that will not recess into the wall of an RV but had trouble with the original files and really didn’t need the larger diameter circle in the back. This version needs no supports and should print easily. I included the .mix file as well if you needed it.
Print Settings
Printer Brand:
Prusa Printer:
Prusa Mk2 Rafts:
No Supports:
No Resolution:
0.15mm Infill:
20% -
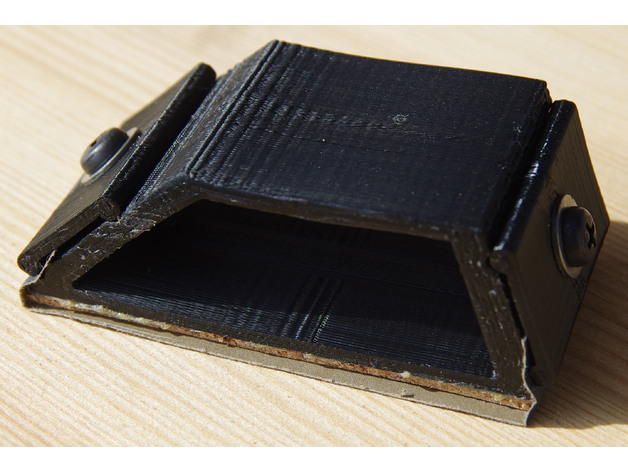
parametric sanding block sandpaper holder
Summary
A customizable sanding block designed to economize by not requiring much extra length of sandpaper to wrap around and clamp in place. Default dimensions are small, but you can make it whatever size you like. You can also customize the end angles. The clamping pieces are printed inside, in close enough proximity that they don’t tip over during printing, and probably stick lightly to the inside of the block. I was able to pry them off easily with a screwdriver afterwards.
Vitamins required: 2 M5 bolts (around 1.5-2cm long) and 2 M5 square nuts. Wing bolts might be nice if you have them, otherwise you’ll need a screwdriver to install the sandpaper. Or use hex-head bolts and print out a pair of knurled knobs. If you want to make a soft pad on the bottom, you can use some self-adhesive felt or cork, or glue on a piece of denim from old jeans. -
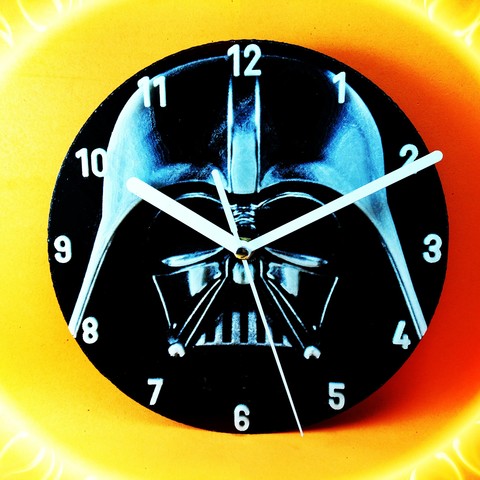
Reloj de Darth Vader
Reloj de Darth Vader(Star Wars)
Recomiendo poner filamento que brilla en la oscuridad o simplemente filamento blanco!!
un buen filamento es fundamental para darle ese toque de profesionalidad,
cualquier duda o si queréis que suba mas diseños de relojes ponérmelo en comentarios…
pronto subiré mas modelos de reloj!!! -
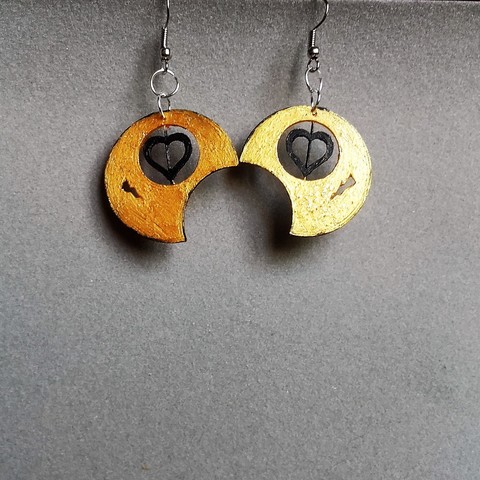
boucle d’oreille coeur rond
voici des boucles d’oreilles que j’ai créée, il y a quelques mois et que je viens de remettre au goût du jour.
-
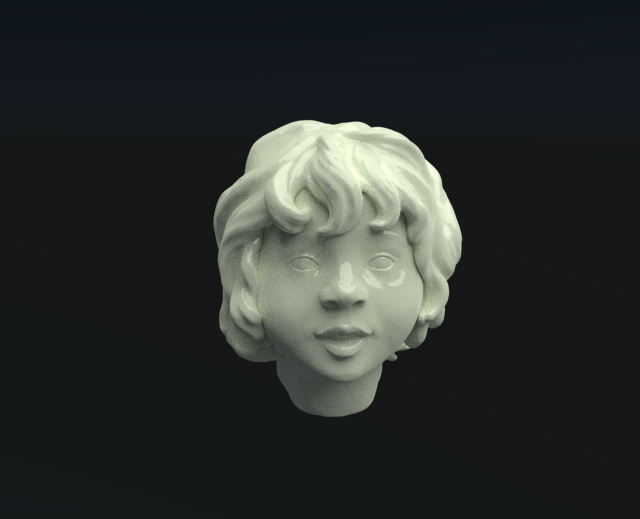
Girls head 3D Model
This is high poly head of little girl.
File contains one mesh object.
Meters was used like units and it is about 15 cm in hight.
Render performed in cycles and part of presentation is just screenshots.
Native format is .blend. -
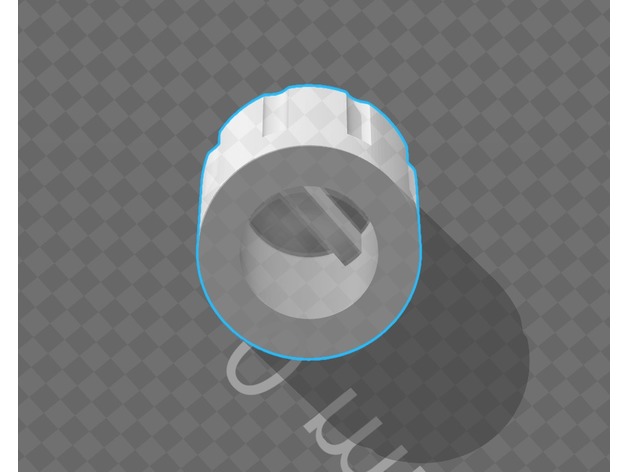
Potentiometer knob with round socket and turner bar
Summary
Add 2 new setting to llegoff’s original scad’s code:
Option for round socket or flatted socket
Option to add a bar at the top of the knob that will catch onto the potentiometer’s shaft to make sure it won’t slip.
Print Settings
Printer:
Raiscube Rafts:
No Supports:
No Resolution:
0.2mm Infill:
0% -
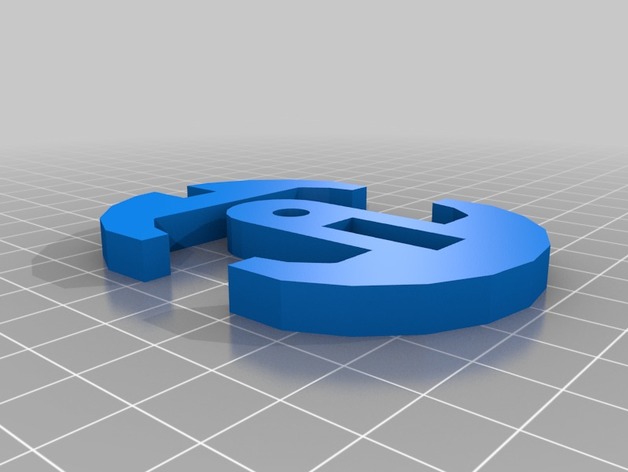
Weight Bearing Keychain Grappling Hook
Summary
Ok, so the two piece hook didn’t actually survive my weight for long. The simpler flat hook did however, and it seemed like it could do so indefinitely. I weigh about 200 lbs. and was swinging around a bit so a couple extra lbs. of centrifugal force too. Tied to 3mm Kevlar line. Don’t actually use this for anything life threatening, obviously.
Printed with PLA 100% infill, a raft is a must because it warps so much while printing. The two piece file is included if anyone wants to improve on it, it broke at the slot so a larger hook with more material around that area may help, but the goal was to make a weight bearing grappling hook that was as small as possible.
Print Settings
Printer Brand:
MakerBot Printer:
MakerBot Replicator 2 Rafts:
Yes Supports:
No Resolution:
0.3mm Infill:
100% -
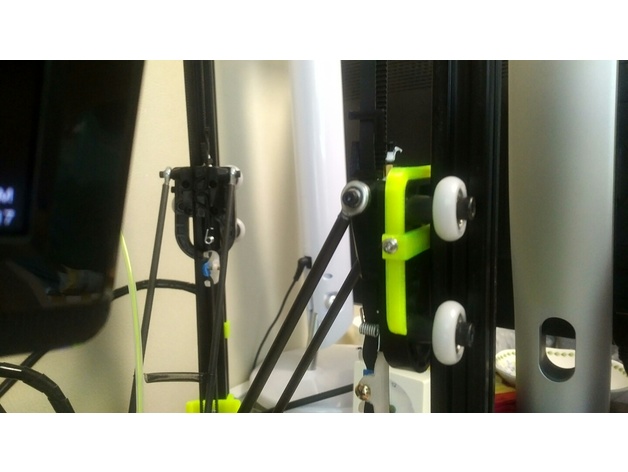
anycubic delta carriage tightener
Summary
For those who have stripped thread bolt hole for carriage tightener, use this.
I didn’t measure size of carriage precisely, but this works for me.
The hole is 3mm dia.
애니큐빅 델타 캐리지에 있는 조임장치에 볼트가 헛돌아서 만든 부품입니다.
Print Settings
Printer:
anycubic delta kossel Rafts:
No Supports:
No Resolution:
0.25 Infill:
100 -
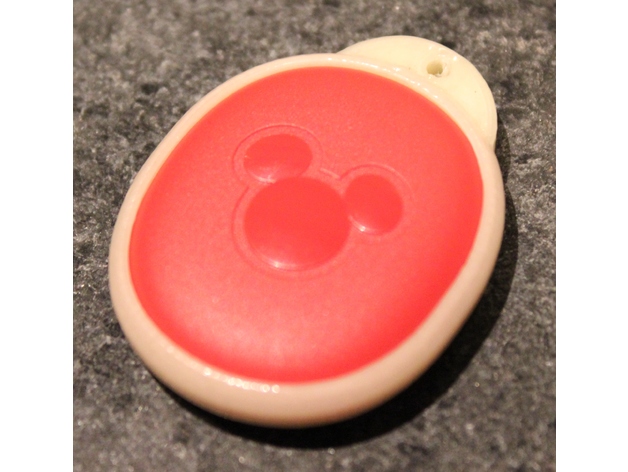
Magic Band 2 Keeper
Summary
This is for the newer “magic band 2” for the Disney parks, which use the removable center piece. While you can buy keepers from Disney, we wanted something smaller for my daughter Annie’s charm bracelet. The print is fairly easy and quick, once you get the setting right, and, if printed with accurate dimensions, seems to pop pretty securely onto the “icon”. Disclaimer: this has not yet been field tested!
Print Settings
Printer Brand:
Printrbot Printer:
Printrbot Simple Metal Rafts:
Yes Supports:
No Resolution:
0.4mm nozzle, 0.2mm layers Infill:
100% Notes:
I use 85% flow rate for dimensional accuracy. 0.1mm gap between raft and piece.
Post-Printing
Steam for about 2 minutes in acetone mist (gently heated) to give a nice glossy finish. Paint to desired color with fingernail polish or spray laquer. -
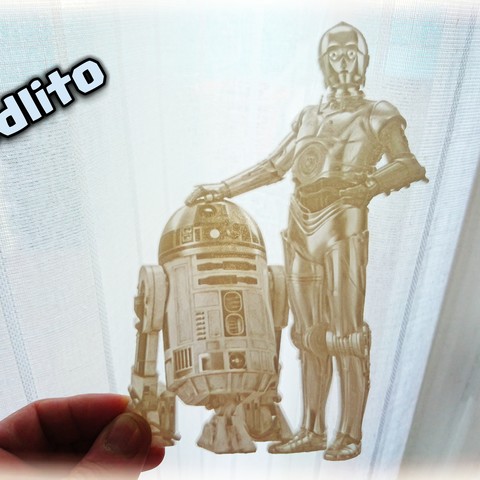
Lithophane R2D2 AND C3PO
En esta ocasion quiero compartir una litofania de los androides de la saga star wars R2-D2 y C-3PO
-
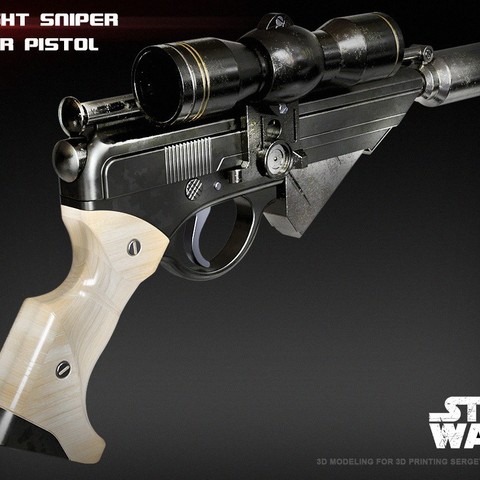
X-8 Night Sniper
The X-8 Night Sniper was a model of blaster pistol manufactured by BlasTech Industries that featured a computerized scope and silent mode operation.[1] The bounty hunters Latts Razzi[4] and C-21 Highsinger[3] were known to use such pistols during the Clone Wars.[3][4] Lando Calrissian also used an X-8 Night Sniper during his time as a smuggler, and used it to fight the henchmen of the crime boss Azmorigan on the planet Lothal.[2]http://starwars.wikia.com/wiki/X-8_Night_Sniper
-
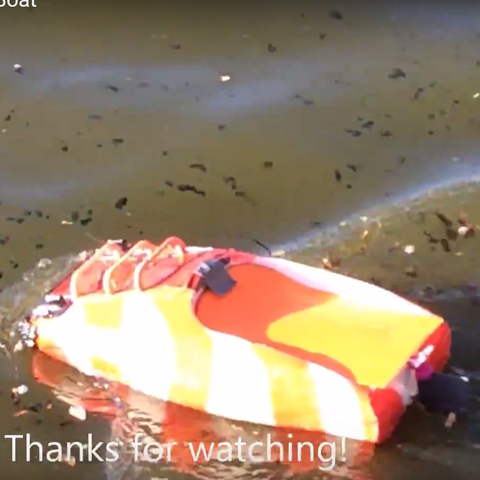
3D Printed Bait / Camera / Tug Boat
This is designed to give anglers and camera operators a useful fast stable platform in rough conditions – designed as a tug also to tow underwater submersible camera vehicles. Its 3D printed of course!
-
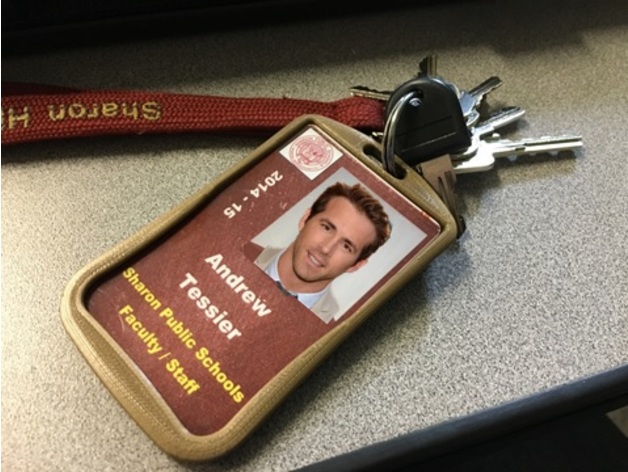
SHS ID Badge Holder
Summary
Standard ID Badge Holder. We’re Sharon High School, so I naturally engraved it with SHS.
Yes, that is the Star Wars Font.
If your printer is any good at bridging you should have little problem printing it.
ID slides in from the top and fits pretty snug but is pretty easy to swap out. -
Penny Press head
Summary
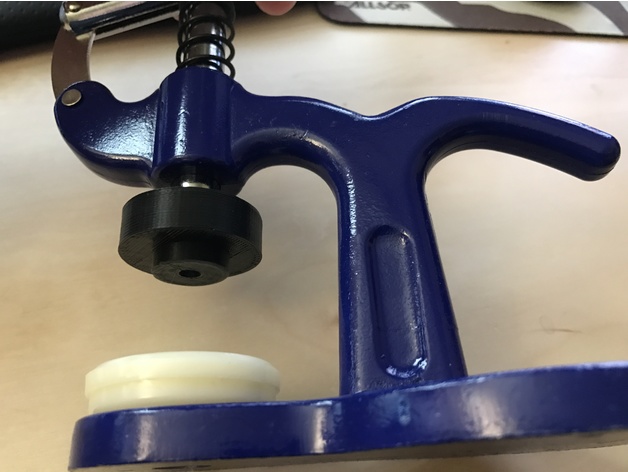
This is a head for my Watch Back Press set (I have one from Ruihua).
Since I was making a batch of tri-spinners that take pennies, I needed a reliable way to press them into position before gluing so I designed this to screw into the top of my press and use a standard flat end from the press itself to get the pennies in. The hole down the middle was just right to self-tap into the screw on the press.
The head is slightly smaller than the penny, but will provide consistent pressure.
Print Settings
Printer:
Reach 3D Rafts:
No Supports:
No Resolution:
0.2 mm Infill:
30% Notes:
I didn’t get the axis right on export, so you will have to spin it to put the big side down.
I am sure you can play with the settings. I was a bit worried about cracking so I put the fill up to 30% which got me through 78 pennies with no issues, but it may work with lower infil percentages. -
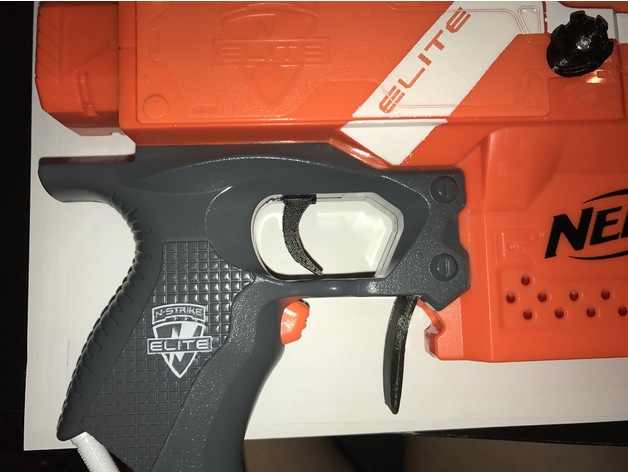
Nerf Stryfe Microswitch Trigger
Summary
Yo,
I built the AutoStryfe mod kit by kitsune109(/thing:2245550) and wanted to have a nice pistol trigger and some more space for the microswitch. So I took the Nerf Stryfe Trigger V1 by bkbstar21, modded it a little bit and glued the P36 Airsoft Trigger by Big-E to it. (thanks to you guys!)
This trigger will only work if you put in a microswitch in a Nerf Stryfe!
cheers
Print Settings
Printer Brand:
Prusa Printer:
Prusa Clone Rafts:
No Supports:
Yes Resolution:
0.2 Infill:
100 Notes:
For me the print fitted out of the printer.
No sanding needed. -
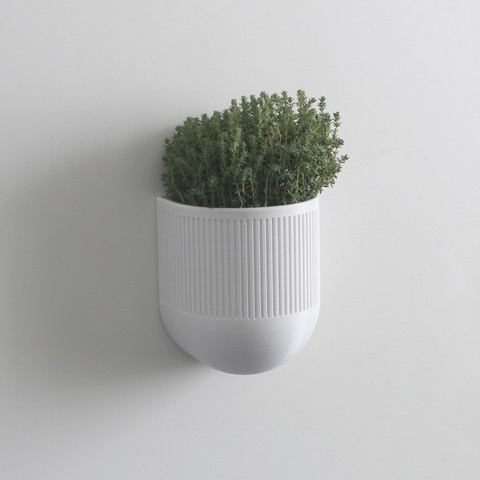
3D printed smart planter
Filaments.directory has teamed up with renowned 3D designer Augustin Flowalistik to create a 3D printable planter that will change the way you think about the potential of 3D printing. This functional device is equipped with an IoT module that will monitor the humidity of your plant’s soil, while also sprucing up the look of your home.
-
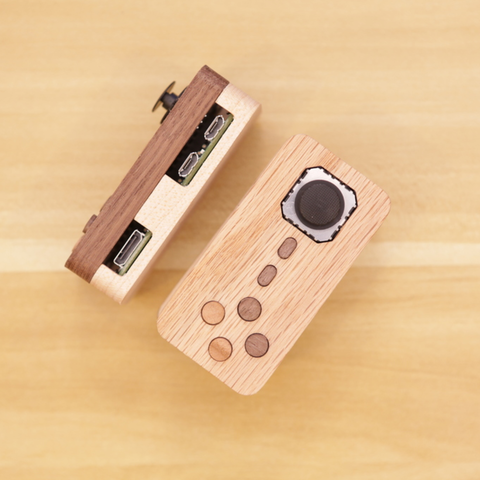
Case for Adafruit Joy Bonnet – Raspberry Pi Zero W
All–In-One Retro Game Controller & Console
The Adafruit Joy Bonnet is a tiny add-on for the Raspberry Pi W that features a 2-axis joystick and 8 buttons. It’s great for making retropie projects. In this tutorial, we’ll learn how to use the Othermill Pro to mill a case out of wood. We’ll also walk through the design process. -
One-hand adapter for Nintendo Switch’s Joy-Cons
The purpose of this adapter is to allow a player to use both Joy-Cons with a single hand comfortably. Its design is based on Breath of the Wild’s Sheikah Slate.
-
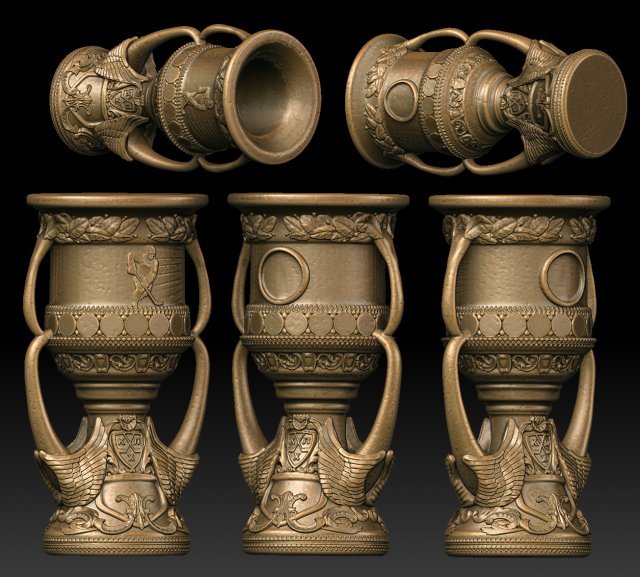
Cup khl 3D Model
cup khl gagarin hockey league fight kontinental sport trophy ice winner playoff silver season
-
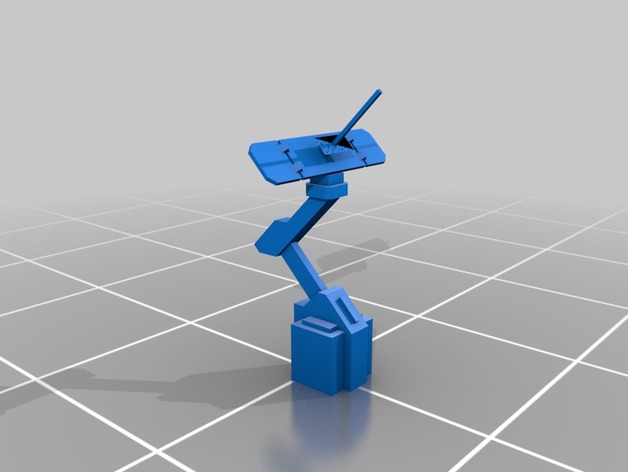
Planetary Annihilation Titans Radar
Summary
This is the Radar from Planetary Annihilation Titans, ripped straight from the game files. Comment if you have a request or post it on my group page. I will upload it within 2 days max. -
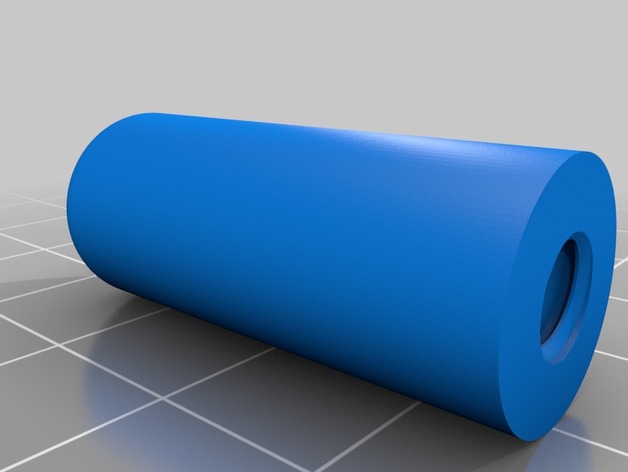
Cub Cadet Deck Height Adjustment Button
Summary
Designed for my Cub Cadet HDS 2155 on which the deck height button had long been broken. Its a simple cylinder with a chamfer(.125″ if I remember correctly) on the top and 1/4-20 threads .75″ deep. This was modeled in Fusion 360.
Print Settings
Printer Brand:
Prusa Printer:
Prusa Clone Rafts:
No Supports:
No Resolution:
.12 Infill:
100% -
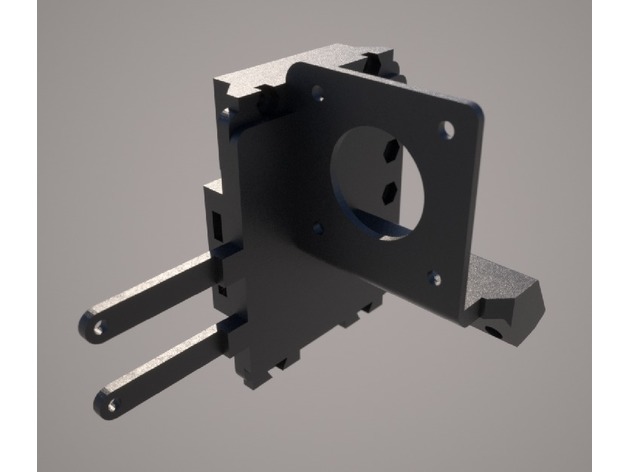
Graphite Bushing E3D Titan Carriage for HyperCube
Summary
I would like to use Graphite Bushing on my newly built HyperCube, so I make one.
This mounts the E3D Titan with a Stepper Motor. You will also need an end stop, 2x 81130 graphite bushing, some M3x15 screws and M3 nuts, and super-glue or something that can stick everything together. Since I make it in separated part to print them more easily.
This is still a WIP
Print Settings
Printer:
MakerOne Rafts:
No Supports:
No Resolution:
0.2mm Infill:
25%
How I Designed This
Using SketchUp -
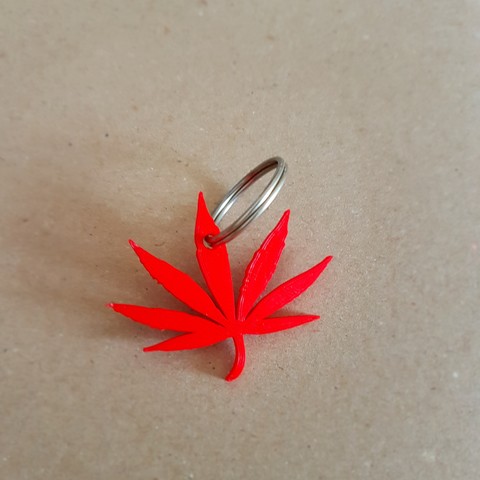
Feuille de cannabis porte clé
Taille X(mm)=57.32
Taille Y(mm)=47.52
Taille Z(mm)=3.0
Le temps d’impression est de 14 minutes.
Il faudra 0.85 m de filament 3d0 ce qui fait 3 gramme. -
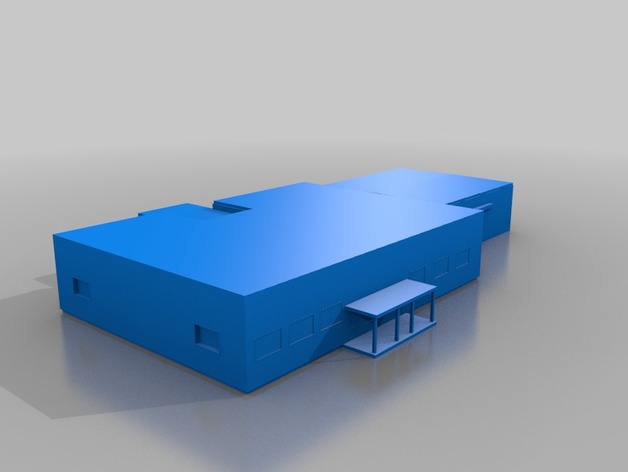
I-Building
Summary
Campus project
Print Settings
Printer Brand:
MakerBot Printer:
MakerBot Replicator -
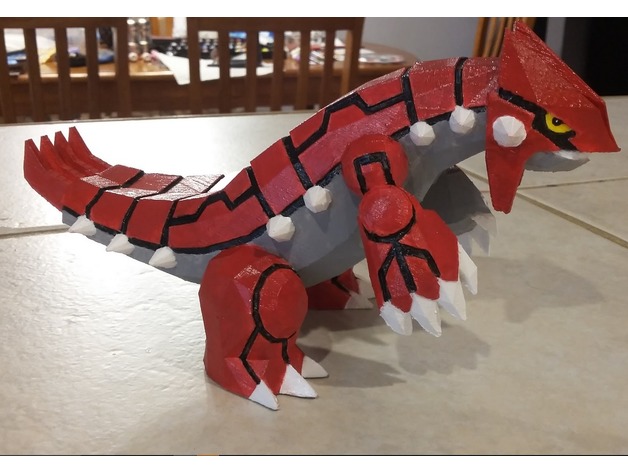
Pokemon Groudon
Summary
I did not create this 3D Model. I downloaded it from:
http://roestudios.co.uk
I did however have to run it through makeprintable.com in order to print with Simplify3D 🙂
Here is the license information:
The file you are about to download was produced by Nintendo/GameFreak, and they are the legitimate copyright holders. How you use any of the downloaded files is up to you BUT your usage MUST conform to USC 17 Section 107 and must NOT violate international copyright/intellectual property law, or the copyright/intellectual property law of the United States, the United Kingdom, Japan, your own country of residence, and any other member states, the key points of which are summarized here:
You must not use this file in any way which generates a profit for yourself or anyone else. This includes re-distribution on sites such as MegaUpload, Mega, Dropbox and MediaFire. ‘Mirroring’ of any files contained within this download is expressly prohibited without permission from RootOfEvilStudios
You must attribute Nintendo and Gamefreak in any visual or digital (including rendered/modeled/traced images) reproduction, with the text “Pokemon is Copyright Gamefreak, Nintendo and The Pokémon Company 2001-2013” in a clear and visible font
DEVIANTART: THE LAST POINT IS LEGALLY BINDING. YOU MUST ADD THE COPYRIGHT NOTICE “3D model data is Copyright Gamefreak, Nintendo and The Pokémon Company 2001-2013” TO YOUR IMAGE DESCRIPTION
ONE FINAL TIMEYou must credit Gamefreak, Nintendo and The Pokémon Company in ANY reproductions of ANY of the downloaded files.
Print Settings
Printer Brand:
Prusa Printer:
Prusa Mk2 Rafts:
No Supports:
Yes Resolution:
.15 Infill:
Variable… Notes:
I printed this guy in Simplify3D using 100% infill for the feet, tail, and a bit of the underbelly; and then 15% for the rest. That way, it will stand up. -
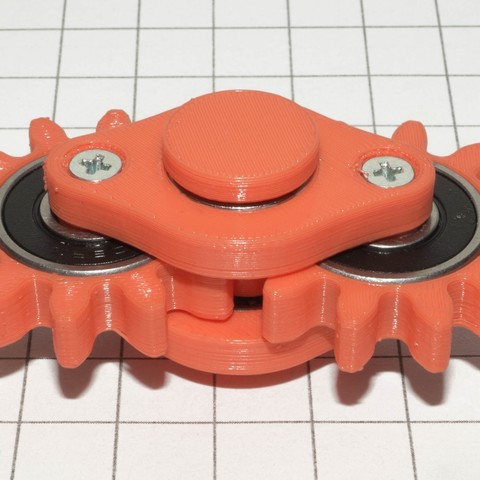
RC10 inspired spinner
Summary
inspired by the front wheels of the vintage RC10. Uses a 608 bearing for the main bearing, and 608 inner races for the weights, or whatever fits. -
T-Wrench
Summary
this was designed for the wheel nuts and slipper clutch nut the most Team Associated cars -
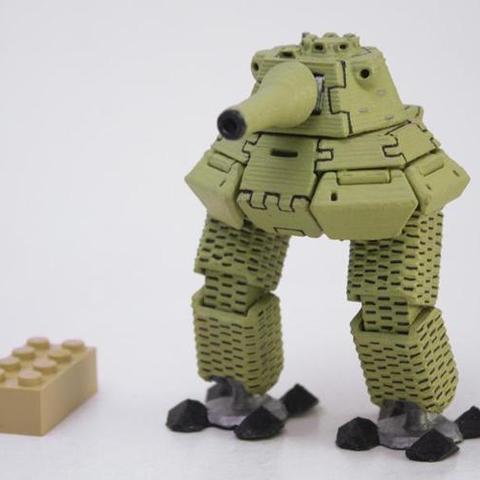
Gerzer II tankoped
Panzerkampfgeher Gerzer II (Pz.Kpgh. Gerzer II) Tankoped – a mech and tank combined – designed to engage enemy armored vehicles. Details include: commanders cupola, gunner’s periscope, rangefinders, driver’s view port, main cannon, radio antenna, Zimmerit paste texture on legs, towing rings, escape hatches, exhaust and cooling vents Double knee joints so it can hull down, gun swivels, turret rotates 360, ball joint articulation.
-
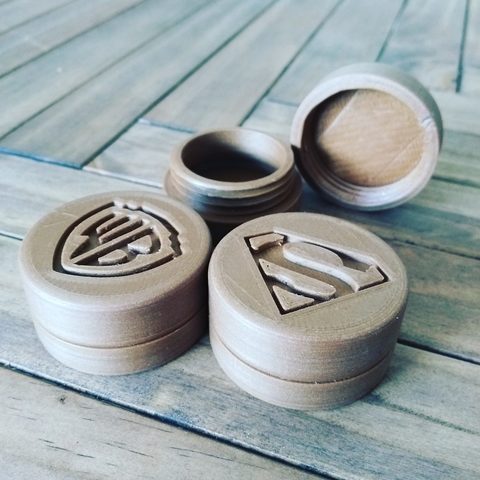
La Petite Boîte Warner Bros & Superman
La Petite Boîte se décline à volonté. Ici, Superman et Warner Bros.
-
![Roberto [Futurama]](https://3dhunt.co/static/2017/04/4f3ea3d54d5eed87b522a3559bfffd70.png)
Roberto [Futurama]
Roberto is finally here! I actually modeled this one a bit ago but I knew it would be very hard to print at a reasonably small scale on my FDM printers. And I knew an SLA printer was heading my way for review, so I waited and it was well worth the wait.
-
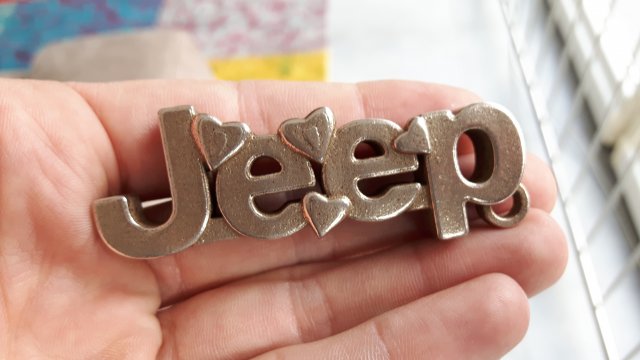
Jeep Keychain 3D Model
Jeep Keychain 3D printable model. Hollow.
I printed it on https://www.shapeways.com/product/JG2WLELE5/jeep-car-keychain?optionId=62347492 in Stainless Steel. You can print in other materials too.
Width7.3 cm
Height3.0 cm
Depth1.1 cm
Multiple files included. You can scale it as you like,but always check the printability in
appropriate software. -
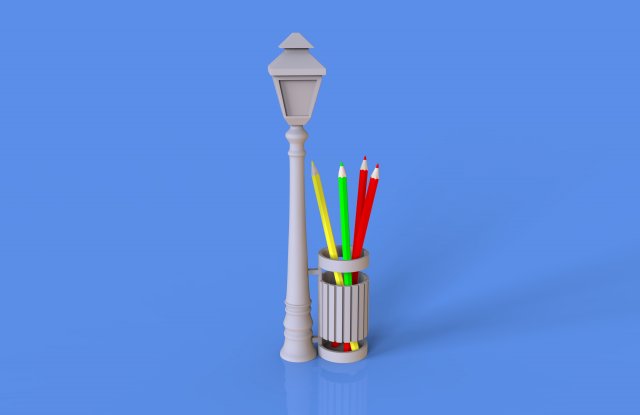
Street Lamp and Bin Pencil Pen Holder 3D Model
Street Lamp and Bin Pencil Pen Holder printable model for your desk at home or in office.
For stability purpose the Head lamp must be glued to its base. The Pencil holder is composed from 3 parts.
Printed in strong and flexible plastic on shapeways.com
Measurements are in preview render. -
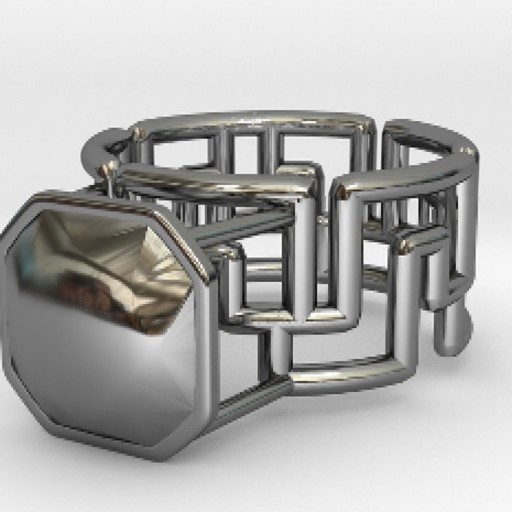
Classical Greek Curve Ring 17.53mm with Flanders Gem
Classical Greek Curve Ring 17.53mm with Flanders Gem – this item has been created using the Blender app “Fluid Designer for 3D Printing” created by Microvellum and available at www.fluiddesigner.co.uk. The gem has been taken from the Blender add-on JewelCraft.
N.B. If printing in silver/gold/etc scale and allow for shrinkage. -
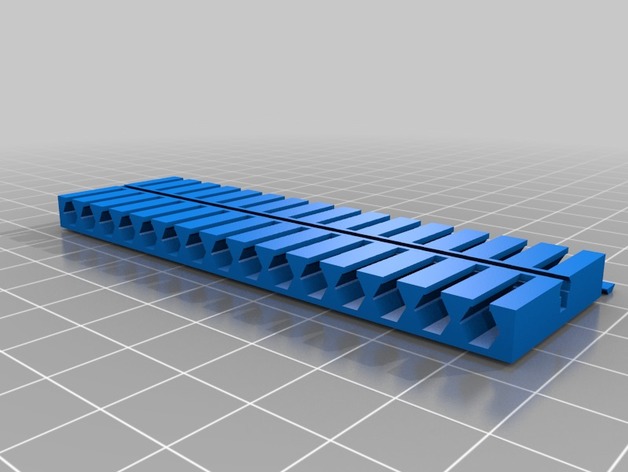
Micro Driver Magnetic Holder
Summary
Micro Driver Magnetic Holder (version 6) uses add-during-print (15) 2x5mm disc magnets.
My favorite precision bit set came with (3) junky 10-bit holders. I didn’t like that. This holds up to 30 micro screwdriver bits efficiently with easy release.
Prusu .15mm ‘optimal’ settings (modified infill for 2%) for PLA print (large face to the bed).
WARNING. I PROVIDE NO WARRANTY FOR THIS PRINT PROCESS: MAGNETS ADDED DURING PRINT. [USE ONLY NON-FERROUS HOT ENDS & NOZZLES]
VERY IMPORTANT PROCESS NOTES:
See notes on print settings.
Assembled dimensions:90.5mm x 27.2mm x 6mm
Version Information:
1.0 Initially holds 40 bits. Unprintable with conventional FDM printers.
1.3 Stacked more densely. Still un-extrudable.
2.0 Realigned bit holder to have a single flat back. Holds 20 bits.
3.0 Mirrored along X-axis allowing 40 bits. Simplified to 30 total.
4.0 Subtle redesign allowing for faster travel in several G-code settings.
5.0 Added magnetic mounts in center strip, unprintable. Revised documentation process.
6.0 Refined magnetic strip to include notches indicating pause position and ‘locking’ cap.
Print Settings
Printer Brand:
Prusa Printer:
Prusa Mk2 Rafts:
No Supports:
No Resolution:
.2mm Infill:
2% Notes:
WARNING. I PROVIDE NO WARRANTY FOR THIS PRINT PROCESS.
[USE ONLY NON-FERROUS HOT ENDS & NOZZLES]
VERY IMPORTANT:
This iteration requires a pause during print to insert the 15 disc magnets into the center holders before the lip is extruded above. This can be visually noted by the notches located at the top of where your magnets should rest. ENSURE YOUR MAGNETS ARE FULLY UNDER THE EXTRUDED LAYERS BEFORE PROCEEDING. Once you have inserted the magnets and confirmed that your extruded will not collide with them, resume the print.
Post-Printing
Add the ‘locking’ cap to finalize the magnets position, add a dot of hot glue (or other adhesive) if desired. -
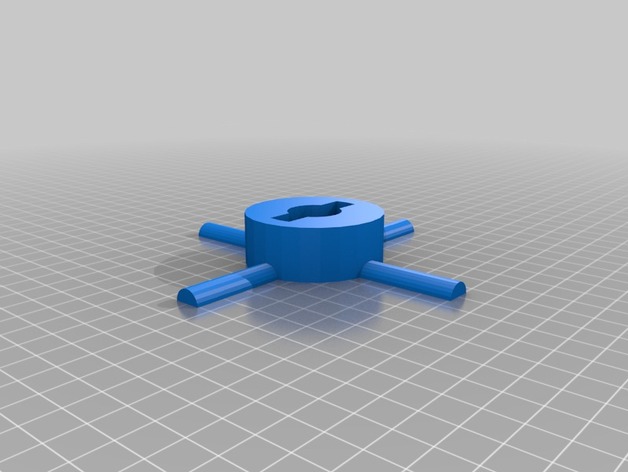
Floor Fast Lock Mount for Lixit bird food and water dish
Summary
This is a fast lock floor mount for my Lixit Corporation Food and Water dishes that normally mount to the cage wall and twist lock in and out. I love the dishes so I made mounts to move them everywhere I want my bird to be. I’m not sure if I’m allowed to put the actual dish link on here but I’ll paste it in and see.https://www.amazon.com/gp/product/B0002DIYVC/ref=oh_aui_detailpage_o07_s00?ie=UTF8&psc=1
Print Settings
Printer:
Hictop Prusa I3 Rafts:
No Supports:
Yes Resolution:
.3 Infill:
10 Notes:
I printed with Supports Touching Build Plate. -
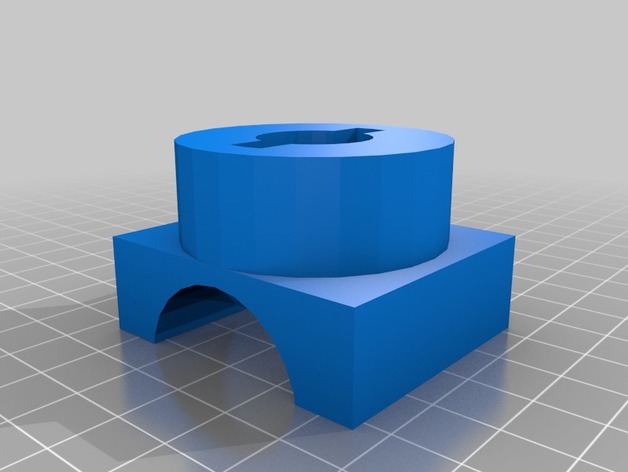
Bird Exercise Bike Bowl Fast Lock Mount
Summary
This is an exercise bike mount for my birds fast lock food dish. I like to feed him and exercise so I made a mount for his dish on the bike. A link to the dish which I love is below.
Print Settings
Printer:
Hictop Prusa I3 Rafts:
No Supports:
Yes Resolution:
.3 Infill:
10 -
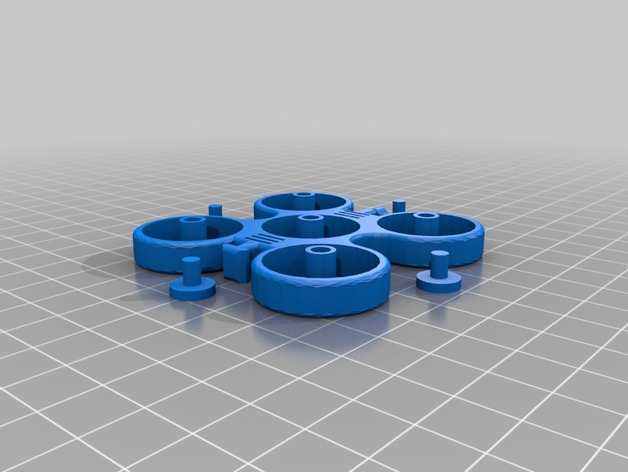
Mon-Mon Drone Fidget Spinner V2 (smaller)
Summary
Smaller newer version of Mon-Mon Drone Fidget Spinner. (same bearing specs) -
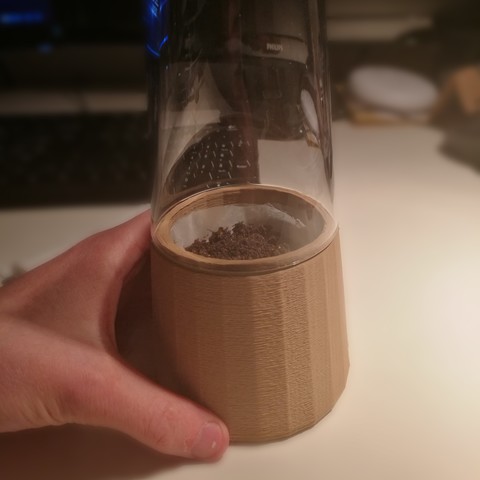
Mini serre pour plantation
Il vous suffi de rajouter un peu de terre, un verre par dessus, et attendre que ça pousse !
-
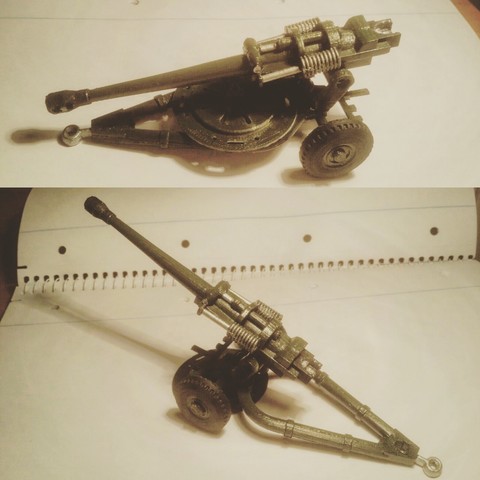
L118 light gun 1/72 scale model
Scale model of a L118 Light Gun, divided in pieces for easy printing in FDM machine, I have also included a full solid version of the model in case you would like to slice it in others ways or use other method of printing.
-
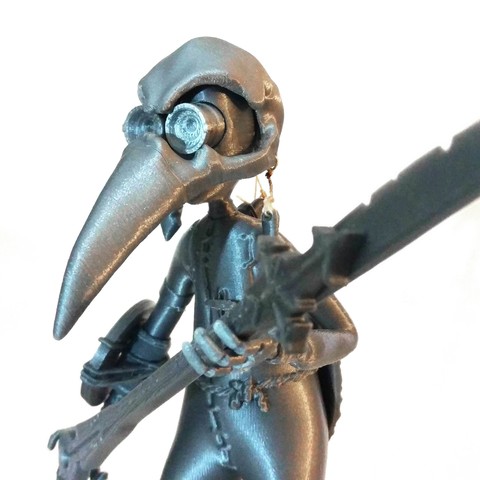
7, from the movie 9
The feathers are heated and bent a little to give them some depth, and they’re attached to the skull using thread. The “earrings” (call them what you will) are also attached to the skull using thread.
-
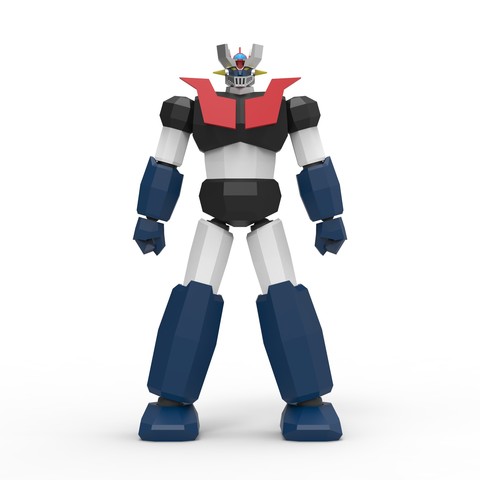
Low Poly Mazinger Z v2
Mazinger Z (a 1970’s manga series also known as Tranzor Z in the US), was the first robot that inspired me when I was a child. The story of a hero piloting a giant robot to battle giant monsters was so cool. I especially liked how Mazinger Z emerged from the dam when the hero flew in with the Hover Pilder to dock onto its crown.
-
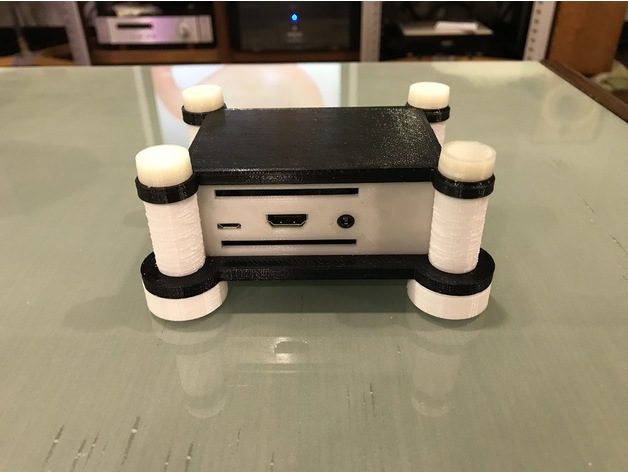
Raspberry Pi 3 model B case
Summary
I use Raspberry Pi as my digital audio player. So I like Raspberry Pi has a Hi-End audio machine look case.
It is easy to assembly, just look pictures you will know how to.
Note: you need prepare 8 pcs M3 screw for top and bottom cover.
Print pillar.stl 3 pcs + pillarUSB.stl 1 pcs; pillarUSB.stl must fix to USB connector side.
Print top-cap1.stl, top-cap2.stl *4 pcs
Others print 1 pcs.
Print Settings
Printer Brand:
RepRap Printer:
RepRap Ord Bot Hadron Rafts:
No Supports:
No Resolution:
0.1mm Infill:
30%
Post-Printing -
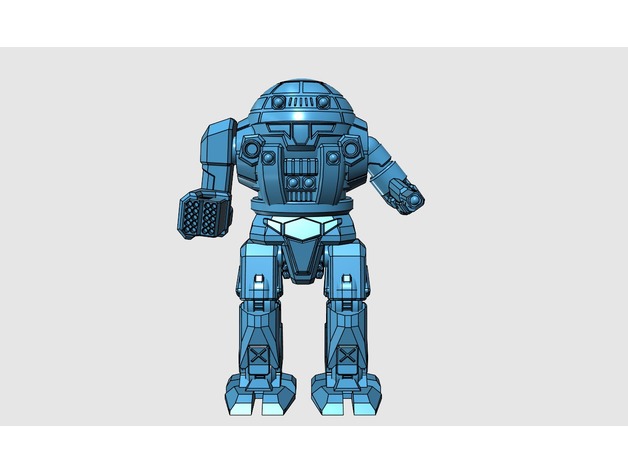
MWO Style Imp
Summary
I one saw a post in the mechwarrior forums talking about how the Imp was too ugly to be added to the game.
This is my response
This design was made using Autodesk 123D design. -
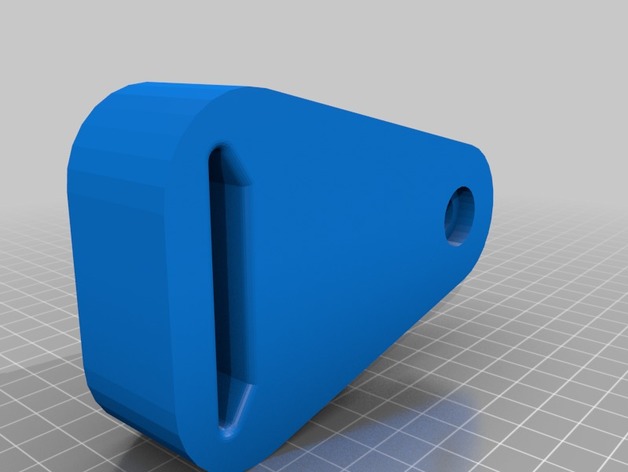
Jungle Jym Bucket piece022_837
Summary
I created this as the original Jungle Jym Backyard Playground piece needed for the bucket module broke.
Print Settings
Printer:
Anet A8 Rafts:
Doesn’t Matter Supports:
No Resolution:
0.3 Infill:
25% -
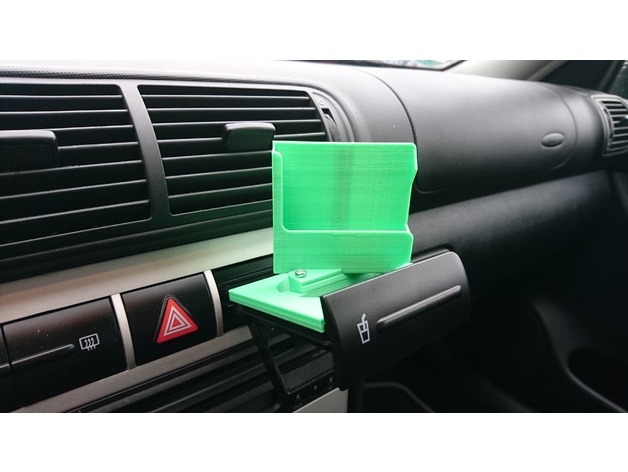
Mobile holder for Cupholder Seat Leon 1M (till 2006) Z5 Compact
Summary
Mobile holder for my Seat Leon 1M. Fits perfect in the Cupholder to store my phone
Use two M3x16 with matching nuts to screw it together. -
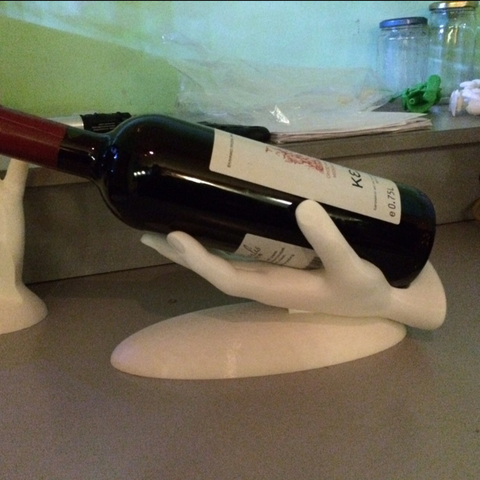
Wine Hand
This is a hand for wine holding. Both parts printed with witbox @200 microns. Supports are needed in the outer face of the hand.
-
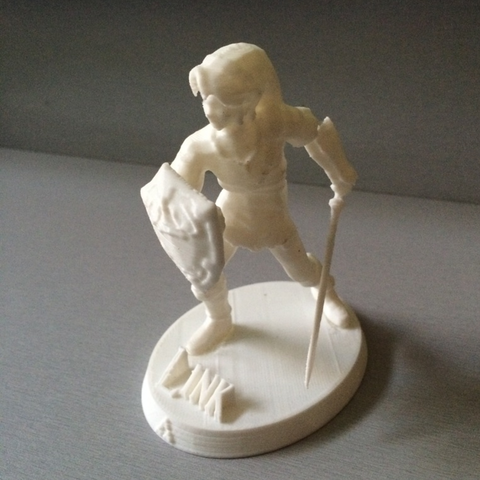
Link Model
Nice model but I had problem with non manifold and normal faces. I solidified it with meshmixer and added a base. I made two version one big and one small (they have different bases). Printed with witbox@200microns
-
Test Tube Rack
Summary
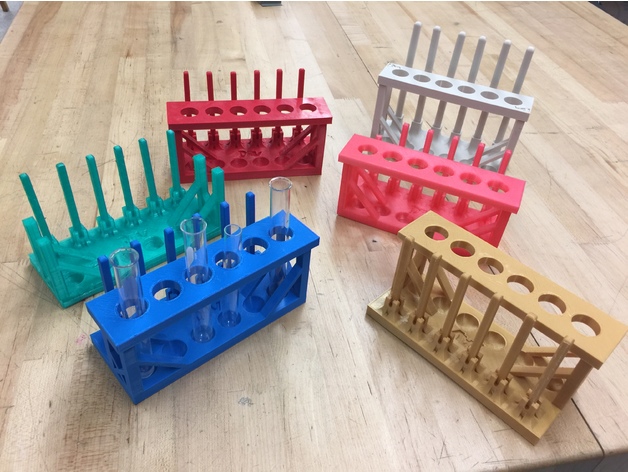
The science department at our school did not like the test tube racks they were using. They found them cumbersome and annoying to use, so we created this new design.
The parts of the test tube rack are printed separately, and they are all detachable. If one of the drying rods snaps, you can either remove it and replace it, or you can print a drying rod sleeve and fit it snugly over the broken stub of the drying rod.
Two test tube racks can be stored compactly by interlocking them within each other. The drying rods on both test tube racks can be inserted simultaneously into the other rack’s holding rack (the top piece with six large holes), making two test tube racks take roughly the same amount of space as one.
PARTS:
1 Test Tube Rack Bottom Piece
1 Test Tube Rack Top Piece
6 Test Tube Rack Drying Rods
However many Drying Rod Sleeves are needed
Print Settings
Printer:
Dremel Idea Builder Rafts:
Yes Supports:
No
Post-Printing
Sanding is sometimes needed if the raft is difficult to remove.Overview and Background
Limitations and obstacles
10cm x 20cm print plate
Had to accommodate for risk of drying rods breaking
Had to create multiple prototypes, taking suggestions from the science department each time
First prototype was too big; had to make it smaller
Should the drying rods be printed separately from the bottom piece or printed as a part of it? We began with a detachable drying rod design in our first prototype, decided to try printing the drying rods as part of the bottom piece in our second prototype, and upon realizing this design was prone to breaking, we reverted to a detachable design in our final product.Had to create a test tube rack in which multiple sizes of test tubes could fit
Image taken from Solidworks (right: first prototype; left: second prototype)
Lesson Plan and Activity
1) As a class, students discuss and think of products that the science department needs or would like (ex. test tube stirrer, cellular model, etc.)
2) Students divide into groups and each group chooses a product
3) Each group creates an initial design for their product and asks teachers throughout the science department for feedback and suggestions on their design
4) Update the existing design and create a new prototype based on the teachers’ suggestions
5) Ask teachers throughout the science department for more suggestions
6) Repeat steps 4 and 5 until a satisfactory final product is created
Materials Needed
3D printer
3D printer filament
3D design software (such as Solidworks) -
Focus ST Pedal Spacer
Summary
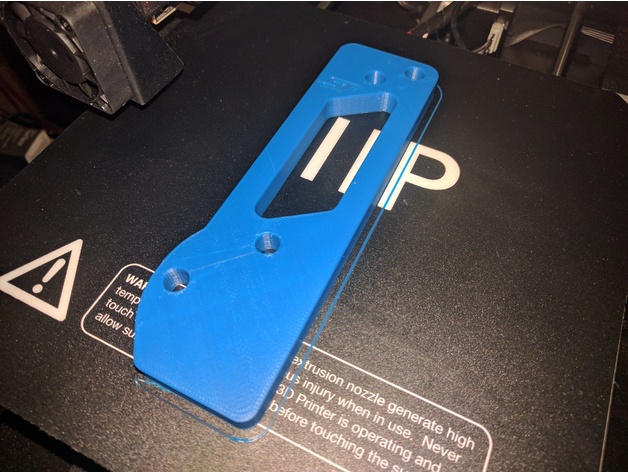
The Focus ST acceleration pedal default position is highly recessed. This spacer moves the pedal forward to put it more in line with the other pedals. The 9.6 mm thickness should install with the default hardware. I designed it based on a 2017 Focus ST, but it should fit any Third Generation Focus (2012 to now).
You MUST use ABS or similar that has a higher glass transition temperature. Using a low transition temperature material (like PLA) can fail when typical temperatures are reached in hot cars.
Print Settings
Printer Brand:
Wanhao Printer:
Wanhao Duplicator i3 V2 Rafts:
No Supports:
No Resolution:
0.2mm Infill:
60 Notes:
I used 40% infill which seems to work, but I think 60%+ would be better suited for this.
ABS or similar should be used. -
Wanhao Duplicator 6 Filament Runout Sensor
Summary
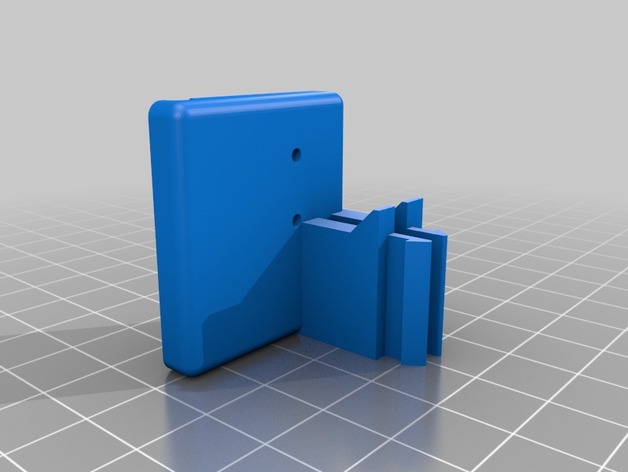
This is a bracket to mount an nc microswitch sensor on a Wanhao Duplicator 6/Monoprice Maker Ultimate to detect when filament runs out. To be able to use this feature you will need to install a custom Marlin firmware that was developed for the D6/MU:
https://github.com/1bigpig/Marlin
After installing the firmware, all you need to do is connect an nc microswitch to the board and mount it to the printer using this bracket.
For the microswitch you’ll need to get one with a similar design to the one in my pictures if you want it to fit perfectly without any modifications.
To connect the sensor to the board you’ll need a “JST XH 2.5-3 Pin” connector and connect that to the open J9 analog plug on the printer (using the two outermost pins) and connect those wires to the two outermost pins on the microswitch. The printer will automatically detect this once it’s plugged in and pause the printer when there is no filament keeping the microswitch closed.
Print Settings
Printer Brand:
Wanhao Printer:
Duplicator 6 Rafts:
Doesn’t Matter Supports:
No Resolution:
.15 Infill:
20% Notes:
You can print both of these upright without needing to use any support (there are two small support columns built in that will easily snap off) -
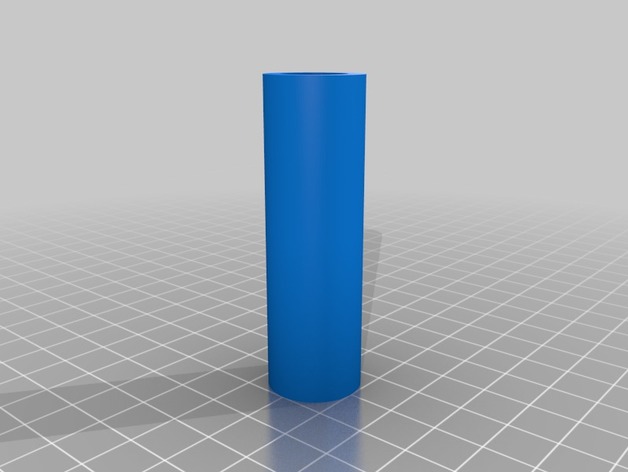
Knock Box Wood Dowel Stick
Summary
This is a remix stick for the Knock Box designed by DonJorhe. I broke my stick so i decided to design one that will fit a 13mm wood dowel. Just print 2.
Print Settings
Printer:
Maker Select V2.1 Rafts:
No Supports:
No Notes:
Need to print 2 sticks. -
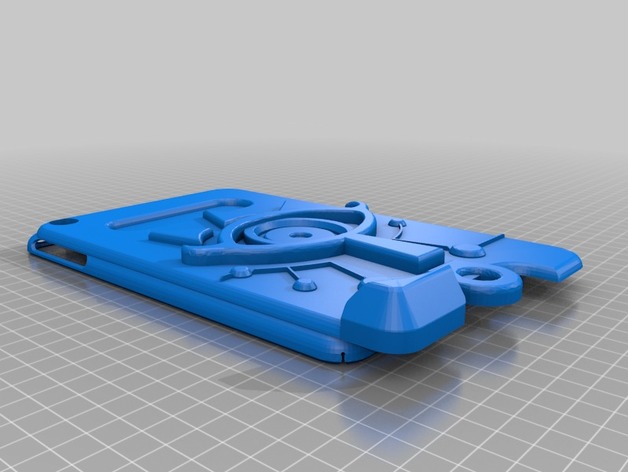
Shiekah Slate(iPad Mini case)
Summary
My first thought when I saw the Sheikah Slate. A Sheikah Slate iPad was an obvious next step for any fans of both Zelda and Apple.
Print Settings
Printer Brand:
MakerBot Printer:
MakerBot Replicator (5th Generation) Rafts:
Doesn’t Matter Supports:
Yes Resolution:
Doesn’t matter Infill:
Doesn’t matter
Post-Printing
For post-printing I would recommend making a silicone mould of the case an using another, stronger material. If you are like me, and can only print in PLA, you know how brittle PLA can be and how short lived a PLA case will be. -
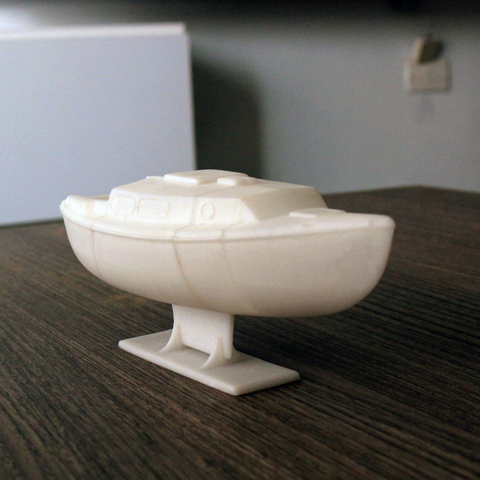
Sailboat Scale Model Esc: 1:43, based on Westerly Tiger 25
Sailboat model in scale 1:43, based on the blueprint of Westerly Tiger 25, an english sailboat. It’s going to be a present for my dad,right now the model is missing some parts and need alignments guides, also some parts are a bit to thin, but overall it’s a easy print. I am expecting to release a paid version of this model once it’s totally complete, I am even thinking in releasing latter a printed kit with metal and wood details.
-
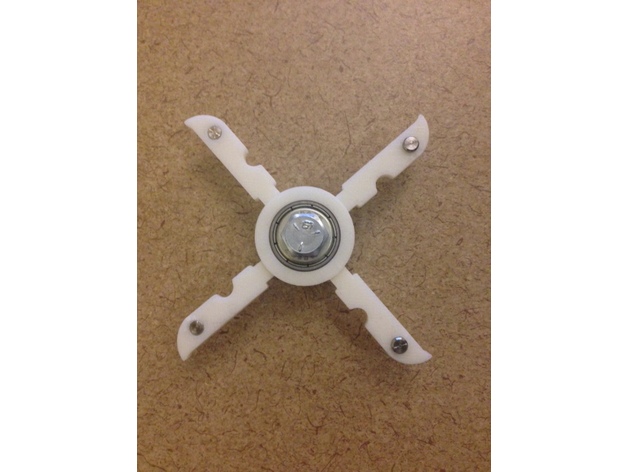
Naruto Fidget Spinner
Summary
This fidget spinner is based off the design of Zabuza’s sword in the anime show Naruto. The 4 swords connect into a bearing holder. The pins in the swords add weight to the spinner and prolong the spin time. -
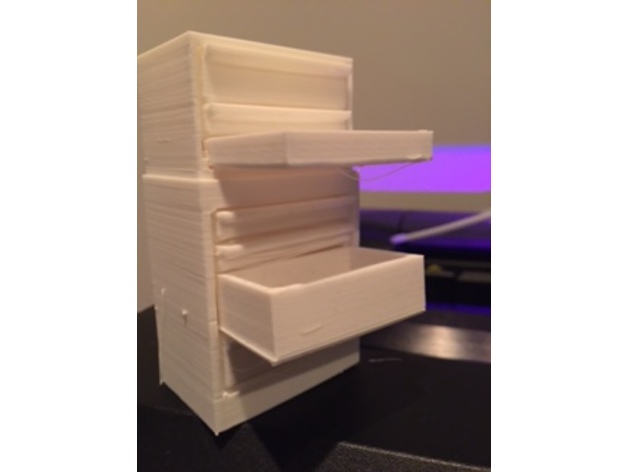
tool chest for RC cars/trucks
Summary
3d tool chest for RC car/truck 1/10 scale garage.
Print Settings
Printer Brand:
MakerBot Printer:
MakerBot Replicator 2 Rafts:
Doesn’t Matter Supports:
Doesn’t Matter
How I Designed This
3dc on my iPhone -
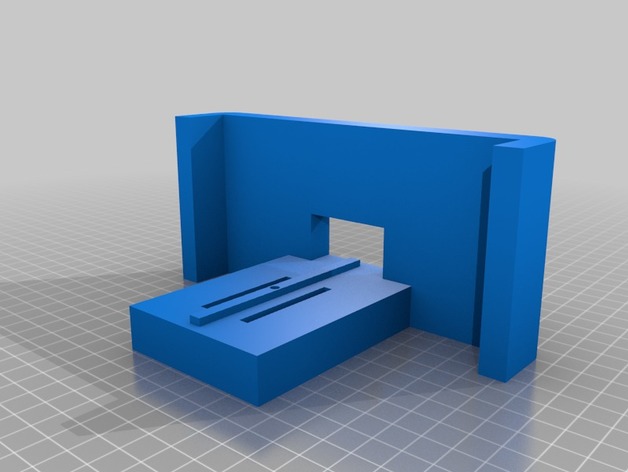
Adjustable Phone Stand
Summary
Hi this is my 2nd print. It might be a little bulky but I’ve used it myself and it works quite nicely. This one works best with phones that are about 14.5 cm in length. Any shorter is fine as well though I think it might wobble a little. Also a small bit of filing might be needed to fit some of the parts , nothing too complicated though
Main – This is the main body of the stand
Mount – This is the mount that is supposed to slide into the base of the main body
Pole ( Optional ) – This is actually really optional . I personally used something I got from a Lego set but this one works as well . I’ve not tried it yet but I bet you could cut a small part of the stick of a Chupa Chup Lollipop and use it as well . -
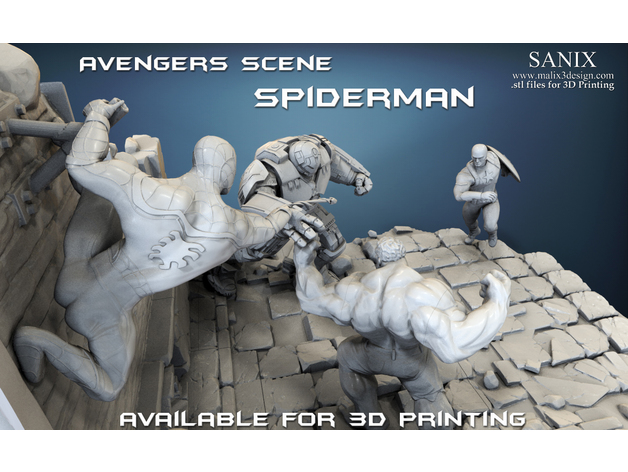
Avengers scene – SPIDERMAN / 3D Printable Model
Summary
About 37 hours of modeling and here it is the result, Avengers Scene -SPIDERMAN , 3D printable 1:13 scale model is a model ready for printing all settings included indifferent to the type of printer used, high quality poly allow printing a wonderful detailing, you can download four files absolutely free test, fully model can be found here: www.malix3design.com
Print Settings
Printer Brand:
Ultimaker Printer:
Ultimaker 2 -
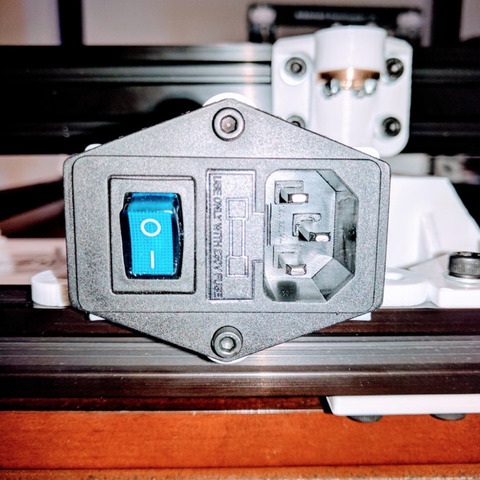
Switch Box with screw mounts
I couldn’t find the same IEC outlet/switch Spuada uses with a blue switch. I found a flanged version on Ebay so I added 2 mounting holes to the bracket.
-
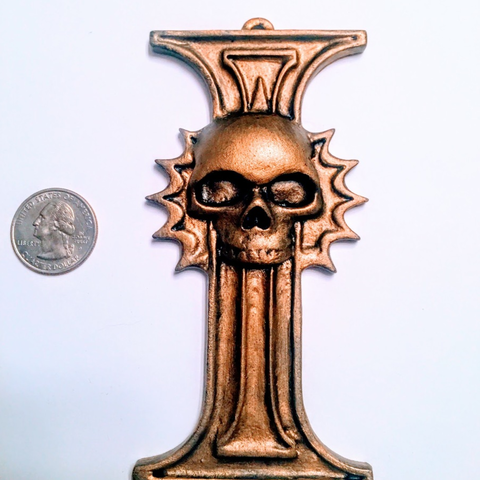
Inquisitorial Rosette – WH40K
This was remixed to add a skull that matched the rest of the armor build.
-
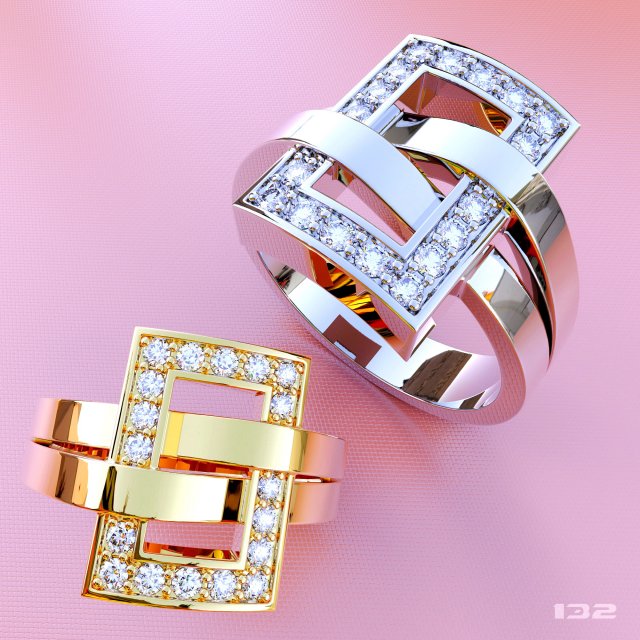
A womans belt ring 3D Model
The model can be used for production, for casting and machining.
STL model is ready for prototyping on CNC and 3D Printing
High quality model
weight in gold 9,600 gram
weight in gold silver 6,400 gram
Number of stones 18
Size of stones 1,50 mm -
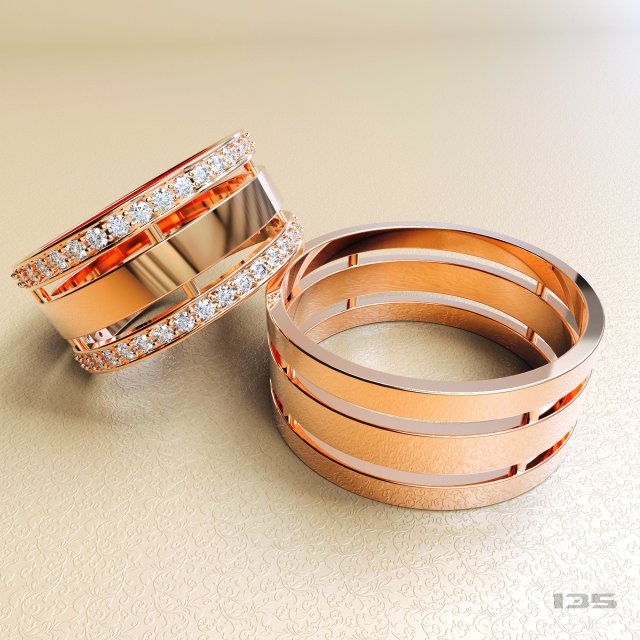
Wedding rings with stones 3D Model
The model can be used for production, for casting and machining.
STL model is ready for prototyping on CNC and 3D Printing
High quality model
weight in gold 12.200 gram
weight in gold silver 8.300 gram
Number of stones 78, size
Size of stones 1,25 mm