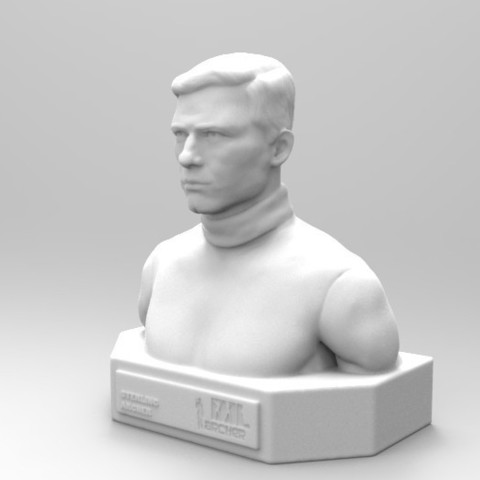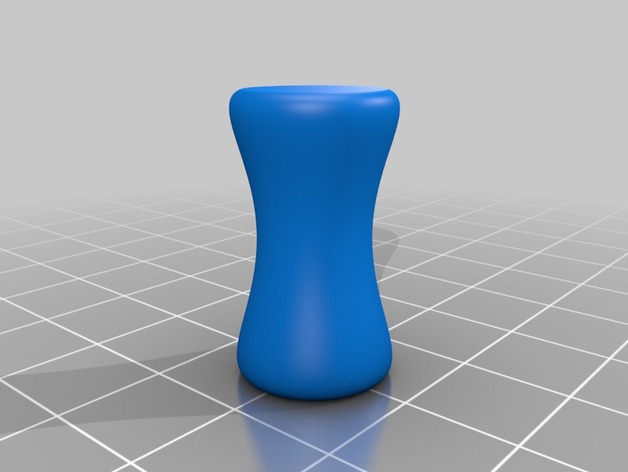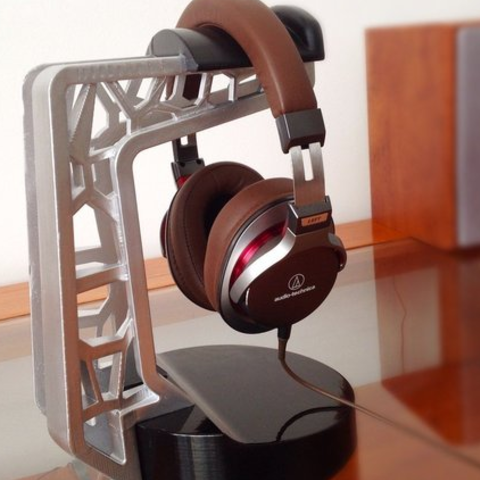
Support de casque simple à imprimer et à monté
Category: 3D Print Models
Premium & 3D Print models ready to be 3d printed. 3D Print Models and Free 3D Print Models are available for download in several formats including .STL, .3DM, .OBJ, .3DS, .DAE, .SKP, .BLEND, .DWG, .DXF, .STEP and much more. If you’re in search of high-quality 3D printed assets, we have a huge library of 3d print models for any of your needs. Also you can visit 3D Models and All 3D Models category.
-
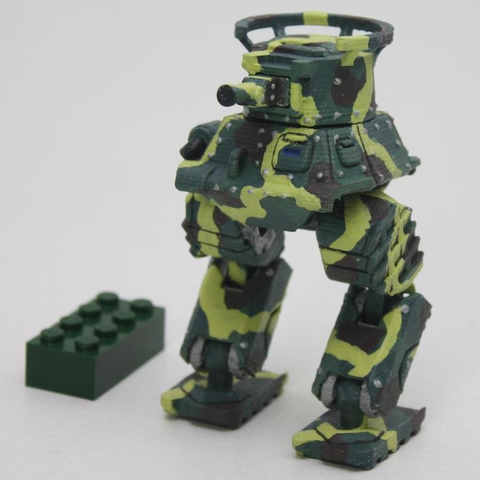
Kitengu tankoped 3D Print Model
Tankoped – a mech and tank combined – designed for infantry support.
-
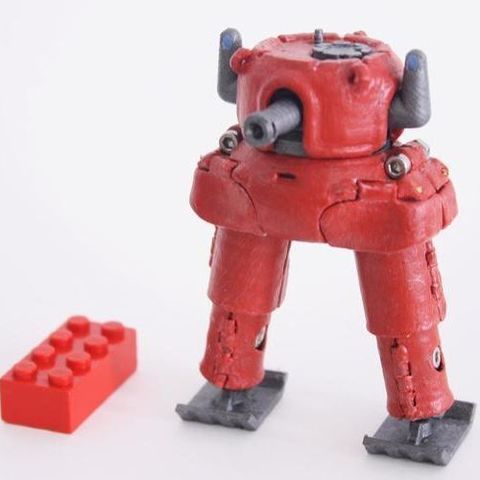
Hjalzer tankoped 3D Print Model
Tankoped – a mech and tank combined. Designed as a scout robot that was upgraded with bolt on armor
-
Cut Out 3D Print Model
Summary
It looks like I cut my name out of the actual project! I hope you like it!!!!!! -
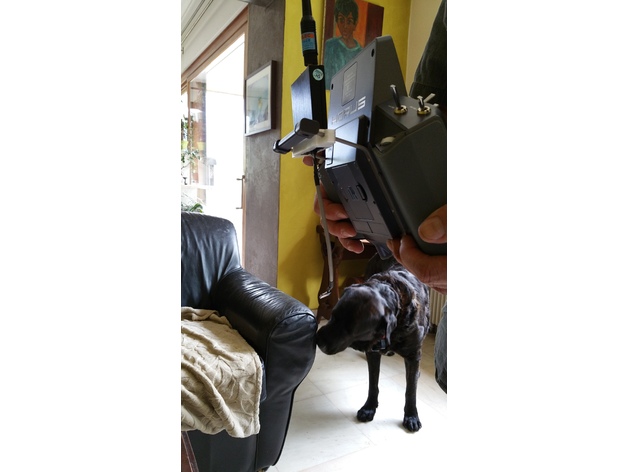
Frsky Horus x12s Mount for Rlink Transmitter 3D Print Model
Summary
printed with flex filament
Print Settings
Printer:
tevo tarentula Rafts:
Doesn’t Matter Supports:
Yes Infill:
30 Notes:
printed with flex filament -
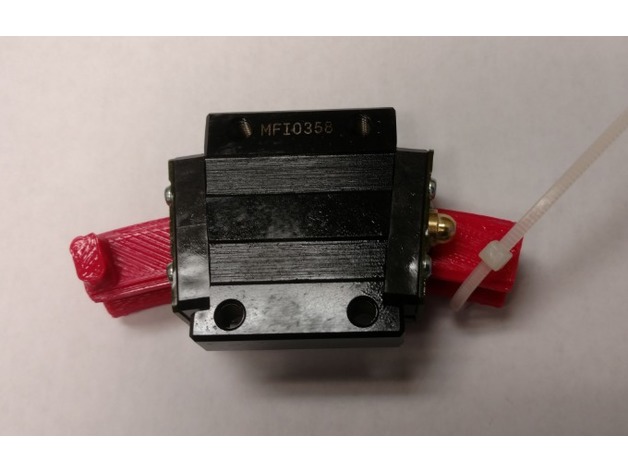
Shipping insert for THK brand HCR 15A 150R 3D Print Model
Summary
Doubt anyone would need this, but what the heck. I printed at 99% scale
Shipping insert for THK brand curved rail cart HCR 15A 150R
https://tech.thk.com/en/products/pdfs/en_a01_318.pdf -
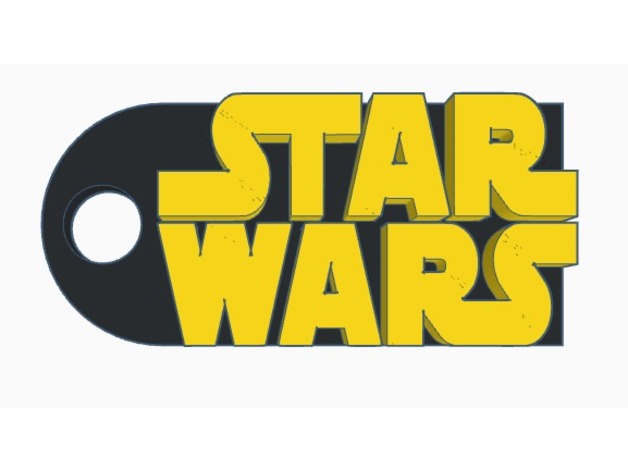
Star Wars Keychain | Tinkercad Import Lesson 3D Print Model
Summary
A Thingiverse search for “star wars keychain” brings up a couple results but they have some small flaws (too flimsy, hole not positioned well, etc.) I’m trying to fix those issues with this simple design. The keychain looks best printed in multiple colors (If your printer allows pauses, switch out the filament color once it starts printing the logo.) May the 4th be with you!Overview and Background
Originally this was just a quick, fun little project for Star Wars day. However, I then realized that many students may not know about the Import feature of Tinkercad, and it could make a great learning experience. This lesson assumes students have been introduced to the basics of Tinkercad. The focus of this lesson is to:
a) learn to vectorize images
b) use the Tinkercad Import feature
c) design a keychain around their chosen artwork
I’ll be using the Star Wars logo as an example, however, students may use any clip art or logo of their choosing.
Lesson Plan and Activity
Step 1: Choose an Image
Do a quick google image search for whatever you’re going to include on your keychain. Usually a logo or clipart is best, so try including those words in your search. For more precise results, try using the “tools” tab to search for transparent images, and large ones with a high resolution. Then choose and download your image as a .jpg or .png.
Search for your imageSet to
Here’s the logo I chose
Step 2: Vectorize
Now you’ll take your downloaded .jpg or .png and convert it to a vector image (.svg.), since a vector is the only type of image file Tinkercad can accept. There are a number of free online vectorizers you can use, but my favorite is https://www.vectorizer.io/ and that’s what I tend to use. It has fairly good instructions and is relatively intuitive, so just follow their directions and you should be just fine. Download your converted image as an .svg. Step 3: Import Logo to Tinkercad
Go to https://www.tinkercad.com/ (if you’ve never used Tinkercad, watch this video first: https://www.youtube.com/watch?v=KCaenAGeK_Q It is a bit outdated, so sorry!), open a workspace, and name it. Click the “Import” button.
Import button
This will open a window, asking you to choose a file. Select your .svg you created before. Then change your dimensions to something reasonable, such as 20 mm. Your logo should now be imported.
Logo imported!
Step 4: Design the Keychain
Personally, I like to work in inches, so click “edit grid” and convert to inches.
Insert a ruler somewhere into your workspace. Now we can rescale our logo to inches. I suggest making it .2″ thick, and then scaling so that you keep approximately the same ratio for the sides, but no dimension is more than 2″. For the Star Wars logo, 1.75″ by .75″ seemed best. Now we can go on to build the keychain itself.
Scaling Logo
Step 5: Designing the Keychain
Of course, there are many ways to go about this, but here is the one I used. Insert a rectangle the size of your logo, but .1″ high. Then insert a cylinder, also .1″ high, with the diameter of the shorter side of your rectangle. Place the rectangle so the it is “inside” the circle, and cuts the circle in half. Then group these 2 shapes.
Base keychain: only 2 shapes!
Now put in a hole. Insert a cylinder with a diameter of .25″ and .1″ high. Place it in the rounded edge you just created and group to form a hole. (Snap grid helps with this!)
Step 6: Add the Logo
Finally, you can drag your logo back in and center it on your base keychain. Once again, group, and you’re all finished! You just created a custom keychain with your very own image! High five!
All finished!
Materials Needed
Software
Tinkercad
Slicer/Host software of your choice Physical
3d printer
Keyrings
Black and Yellow filament (preferable)
Skills Learned
Tinkercad
Tinkercad Import
Image Conversion
Duration of Lesson
30 minutes- 1 HourFurther Learning
Dual Color Printing
Teach the students how to pause a print and switch out the filament using g-code commands in slic3r! https://www.youtube.com/watch?v=sk1aP6MQEhc Negative Image
Instead of having the image extruded out of a thin keychain, try making the base keychain .2″ thick and an 1/8″ larger in the other directions. Change the logo to a hole, .1″ thick and .1″ raised from the plane. Center it in the base keychain and group!
Negative Extrude
Conclusion
I hope this guide was helpful! I had a blast making it and poured a bunch of time into it, so please support me by liking it, and upload your own designs as remixes. Thanks for checking it out, and happy Star Wars day! -
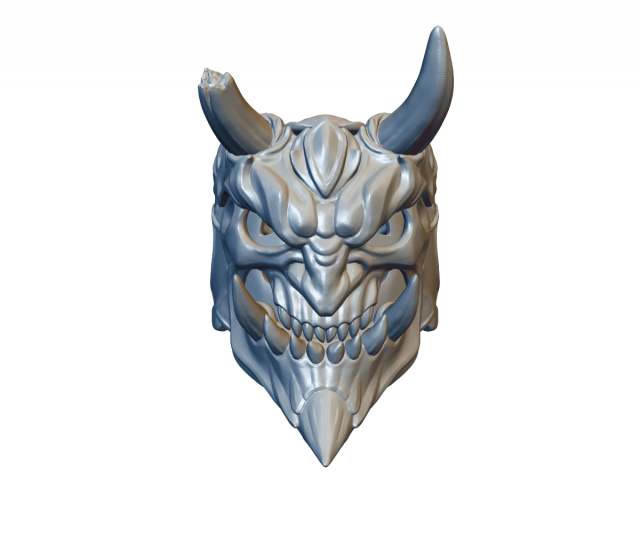
Demon ring 3D Model
Demon ring.
File contains one mesh object.
977668 faces.
diameter 2.25 cm
From horn to chin approximately 3.3 cm
Native format is .blend. -
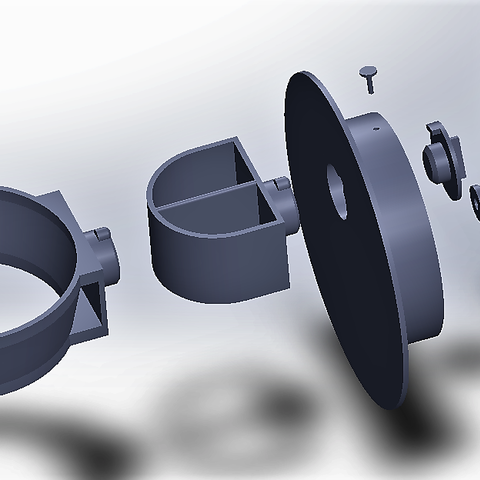
Support sèche cheveux et, ou support lisseur 3D Print Model
Ayant deux ados a la maison la salle de bain et devenu un champs de bataille…sèche cheveux et lisseur ont trouver support a leur pieds…
-
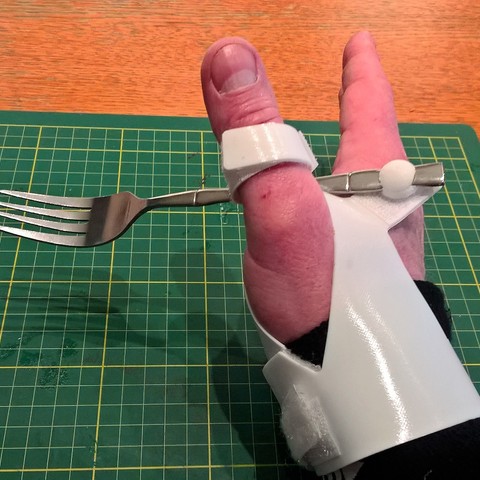
Prothese main droite 3D Print Model
Suite a un accident de tronçonnage, un proche c’est retrouver avec une partie de la main amputer.Après plusieurs essais j’ai créer cette prothèse pour l’aider pendant ces repas.(c’est ma main sur les photos….)
-
Multi-Color Spiral Spinner 3D Print Model
Get hypnotized with our multi-color Spiral Spinning Fidget toy. We installed some 608 bearings to allow the spinner to smoothly spin round, and round, and round, and…
-
Multi-color Bedham’s Disk 3D Print Model
Bedham’s Disk…”is named after the English newspaper-man and toymaker Charles Benham, who in 1895 sold a top painted with the pattern shown. When the disk is spun, arcs of pale color, called Fechner colors or pattern-induced flicker colors (PIFCs), are visible at different places on the disk. Not everyone sees the same colors.” Thanks, Wikipedia! We used 608 bearings to give it a smooth spin.
-
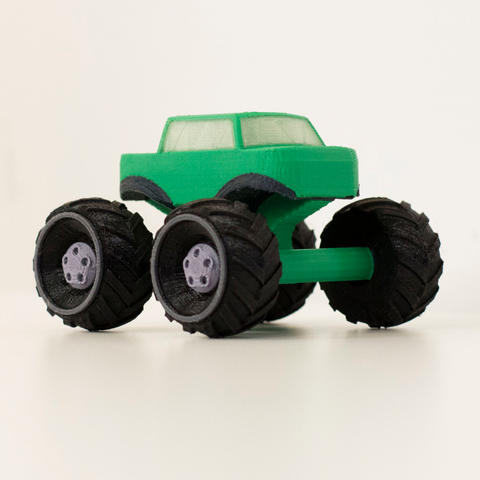
Multi-color Mini Monster Truck 3D Print Model
SUNDAY SUNDAY SUNDAY! Crush some mini cars and pull off some mini backflips on this amazingly fun mini MONSTER TRUCK. Printed with a suspension, this truck can take bumps with no problem!
-
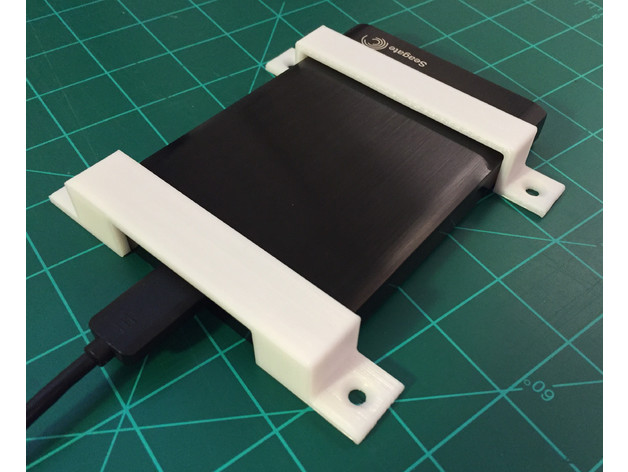
Seagate Backup Plus mounting brackets 3D Print Model
Summary
Use these brackets to mount your Seagate Backup Plus external hard drive under your desk or against any flat surface. The holes are countersunk to fit a #8 screw. See drawings for dimensions. -
Pentomino 3D Print Model
Summary
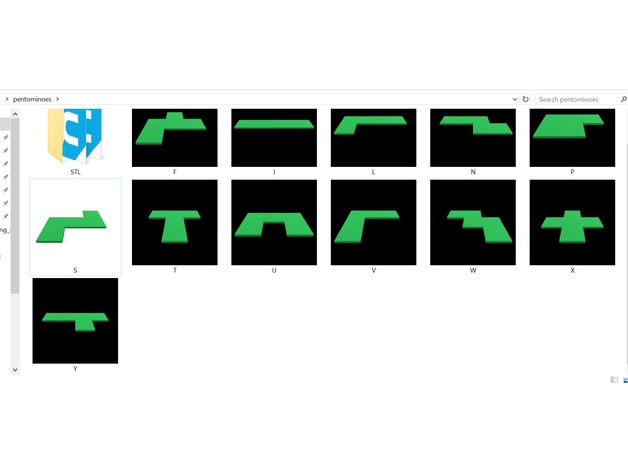
Pentomino is the set of puzzle pieces made by joining five identical squares.
There are a total of 12 unique conformations of the shapes, excluding rotation and reflection.
It is a 2-player game, and is played on a 8×8 grid.
each player takes turn to lay down a piece, any piece, on the gird without overlapping any of the previously laid pieces.
The play who fails to lay a piece legally loses; or IOW, the last play who successfully put down a piece wins.
Further reading:https://en.wikipedia.org/wiki/Pentomino
(Each square is 20mm x 20mm x 2mm) -
Glasses Wall Mount – 5 Piece 3D Print Model
Summary
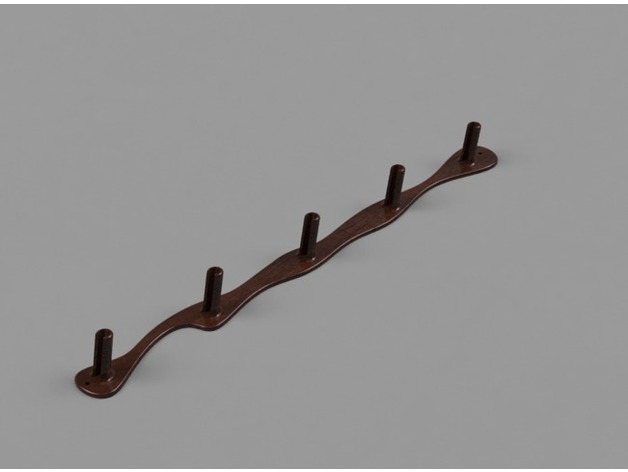
Here’s a wall mount for 5 pairs of sunglasses or eyeglasses. The holes for mounting are 2mm in diameter and work well for most small nails or even a thumb tack. The 5 pegs are each 7mm wide at their widest point and point upwards a few degrees to keep the glasses in their spot.
I designed and rendered in Fusion 360, and have provided the STEP files in case you’d like to make any changes of your own.
You’ll see 3 STL’s ready for printing. The one labeled “1 Pc” is meant to be printed in one piece but will not fit most printers. It is 250mm long.
The other two, labeled “Top Split” and “Bottom Split” are meant to be broken down and printed on smaller printers. The longer of the two is still roughly 160mm Long. There is one dovetail-style snap joint meant to fit the two together, with a tolerance of .25mm. You may need to play with it or force it, depending on your printer.
I’ll iterate and change this item as needed. -
Lutron Caseta Bridge Holder 3D Print Model
Summary
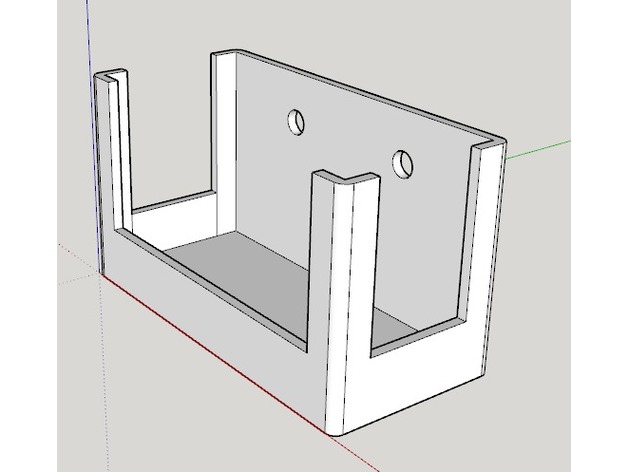
A holder for the Lutron Caseta Smart Bridge.
Designed to mount on the wall. Pics coming once I have a chance to print it. -
Grille évacuation dia100mm 3D Print Model
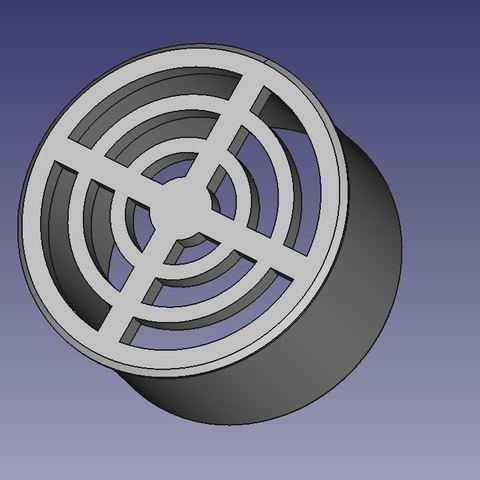
Une grille d’évacuation qui est conçue pour rentrer dans un tuyau de diamètre 100.
-
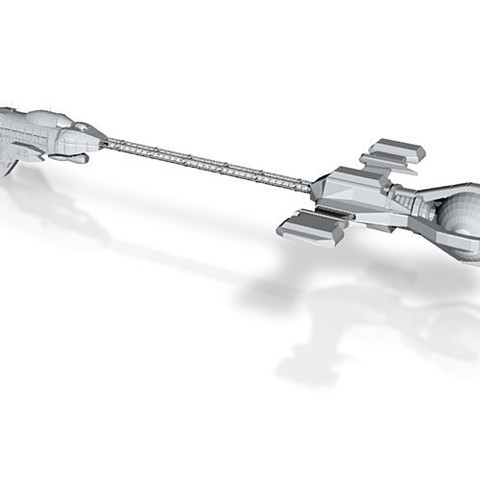
Event Horizon remixed 3D Print Model
A remixed model of the Event Horizon splitted in 3 parts for easy printing.
Middle part can be printed solid or hollow. for hollow use dual extruder with PVA as support. -
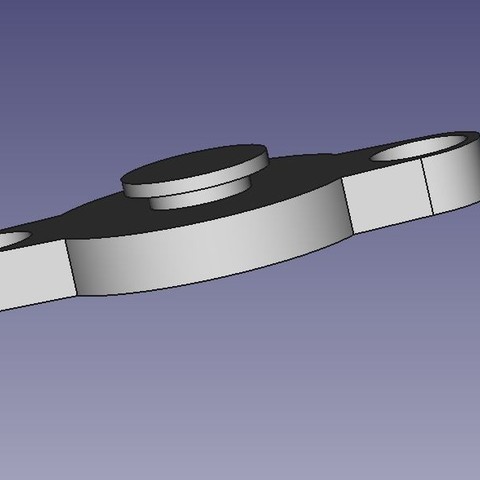
Support feux claas 3D Print Model
Support pour feux de travail sur tracteurs CLAAS notamment Arion 400 Tier 4F
-
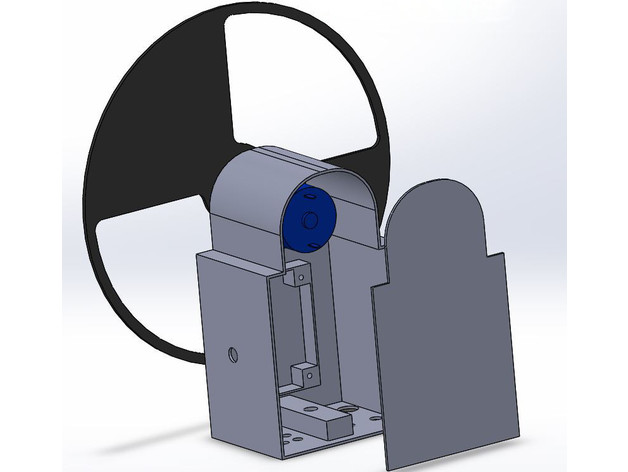
Lightpainting Interval Exposure Tool 3D Print Model
Summary
This is a tool designed to be used in long exposures. It spins a disc with open segments in front of a camera lens to interrupt a long exposure in intervals. This creates a unique look in light trails and any other technique used in lightpainting.
This tool uses a geared 12V dc motor with around 720RPM with a standard PWM controller.
The controller potentiometer knob is mounted outside the box along with a power plug and a switch for power. The discs are separated to be printable but need at leas 300×200 print area.
The slit disc right is actually a little wrong, it should have been mirrored. I realized this after i printed and glued them together, but left them as they are because this creates a slight irregularity that adds character and makes the pattern look less artificial.
Example images show which type of disc created which type of effect.
Detailed instruction for this technique will be published soon and I will add a link here once they are. -
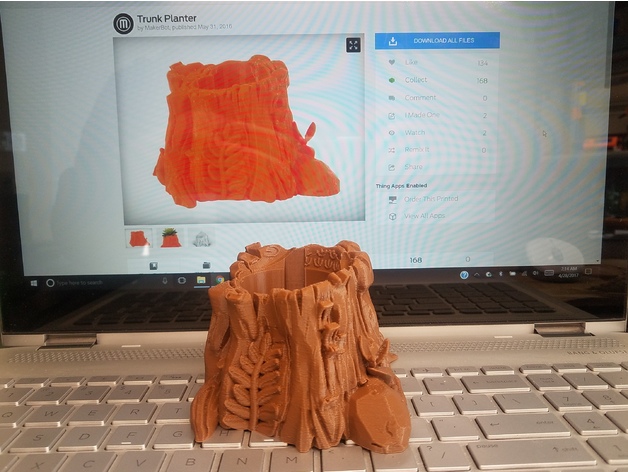
Trunk for Smiling Owl night light 3D Print Model
Summary
Printed a pink Smiling Owl (https://www.thingiverse.com/thing:1320992) for my wife that looked like it would make a good night light. So, I took this cool Trunk Planter for a cactus (https://www.thingiverse.com/thing:292837), modified it to fit an LED lamp from Ikea (http://www.ikea.com/us/en/catalog/products/50302670/), and further modified it to tightly hold on to the Smiling Owl. Voila! Pink reading light. It’s much too bright for a night light. A lower wattage LED, or variable brightness LED, would make it better for a night light. Still, looks great and my wife is happy. I also painted the stump to highlight some details.
Print Settings
Printer Brand:
Prusa Printer:
Prusa Clone Rafts:
No Supports:
No Resolution:
0.2mm Infill:
15% Notes:
Printed on my Hictop Prusa i3 (3DP18) using Inland Brown PLA and JustPLA Pink PLA.
Post-Printing
Painting
Just a touch of paint on the leaves, rocks, and butterfly
How I Designed This
Modified STL
Used 123D Design to fill in the planter’s top opening then used the Smiling Owl (enlarged by 0.4mm) as a cut-out on the stump. Cut a cylinder for housing the LED and rectangles for routing the power cable. -
Ipod touch 5th generation case 3D Print Model
Summary
Sonrisa = smille -
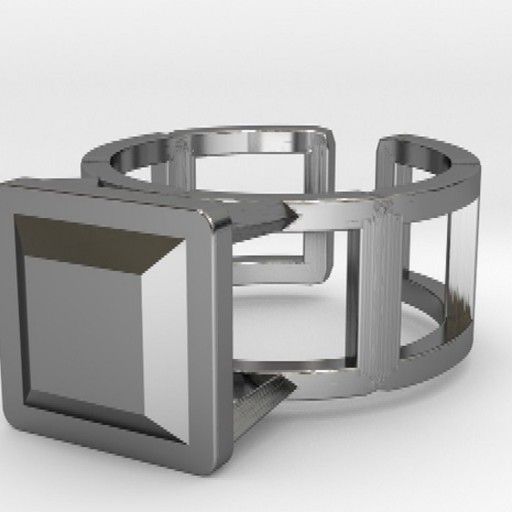
Square Wire Ring 17.53mm with Square Gem 3D Print Model
Square Wire Ring 17.53mm with Square Gem – this item has been created using the Blender app “Fluid Designer for 3D Printing” created by Microvellum and available at www.fluiddesigner.co.uk. The gem has been taken from the Blender add-on JewelCraft.
N.B. If printing in silver/gold/etc scale and allow for shrinkage. -
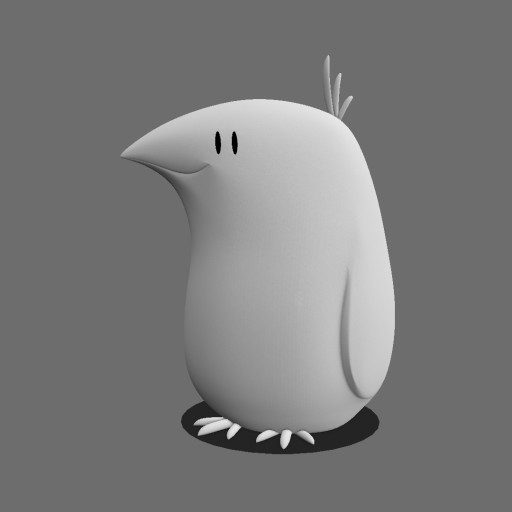
BIRB (3D printable cartoon bird) 3D Print Model
A bird I made ready for 3D print. It’s supposed to be looked at from one side only, as if it were a 2D cartoon.
-
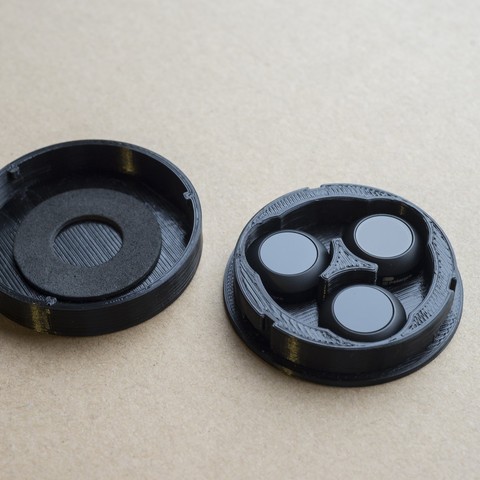
Mavic Pro Polarpro filters case (3 pcs) 3D Print Model
A compact case for three PolarPro filters (21,2 mm ext. diameter) used in Mavic Pro.
-
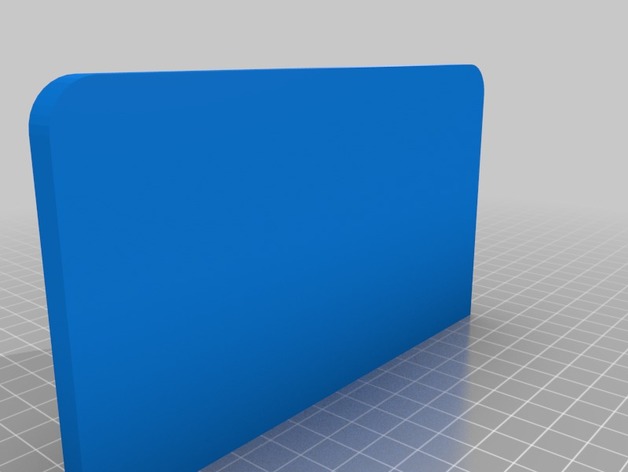
Beta Delta Casing 3D Print Model
Summary
Code Files for 3D printed casing for a raspberry pi and motion sensor circuit combination. -
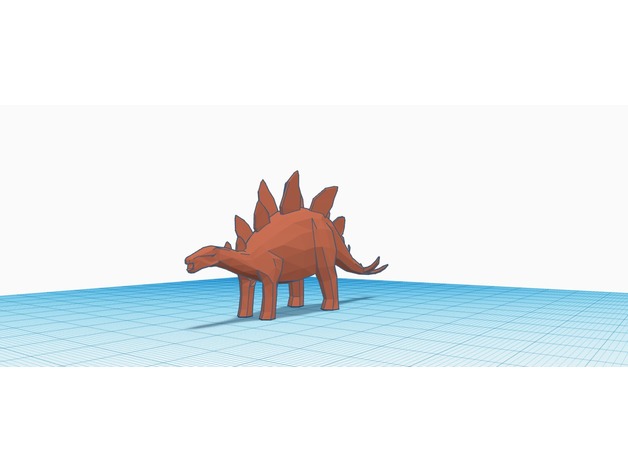
Low Polly Stegosaurus 3D Print Model
Summary
This is a model of a stegosaurus from the game Jurassic Park: operation genesis. -
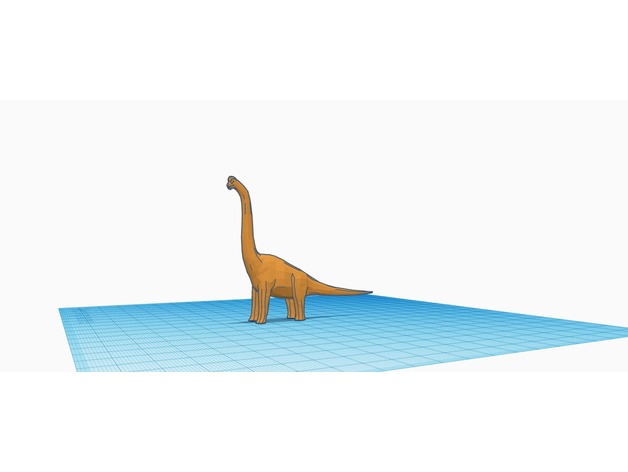
Low Polly Brachiosaurus 3D Print Model
Summary
This is a model of a brachiosaurus from the game Jurassic Park: Operation Genesis. -
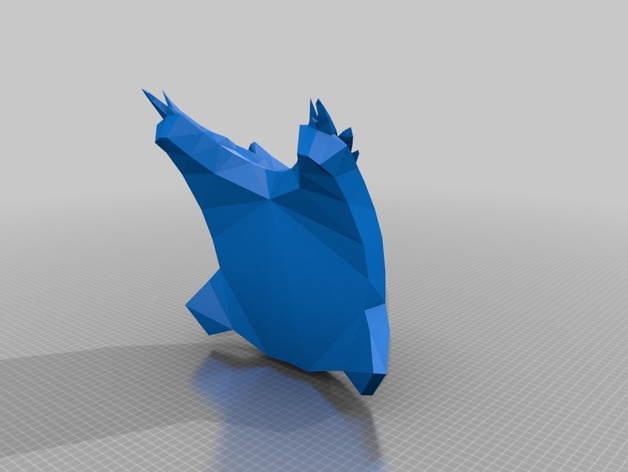
crest_of_alpha_lupi_male_chest_armor front plate 3D Print Model
Summary
Crest of Alpha not to scale and not in finished form, can remix or fix how every you like! -
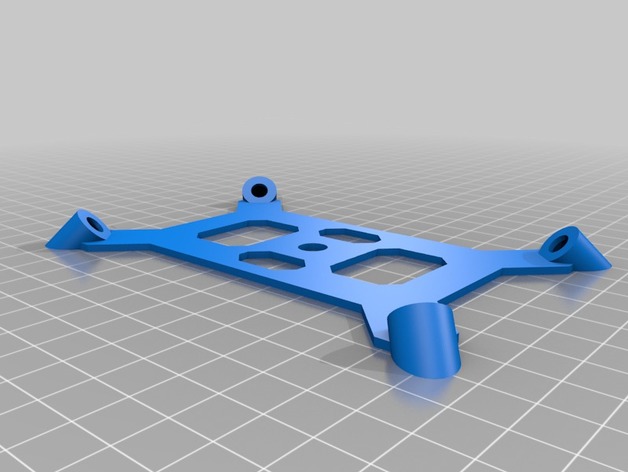
Pixhawk 2.1 Cube Vibration Isolating Mount 3D Print Model
Summary
This is a vibration isolating mount for Pixhawk 2.1 the Cube flight controller.
The top plate has screwholes if you wish to screw your FC to the mount, or you can use adhesive.
Note: This is made for a larger frame 800 mm craft, it’s fairly large.
I’m working on one with a smaller footprint, and I’ll post it when I do.
I was going for lower profile on this.
Autodesk 123 & .stl files included
Print Settings
Printer Brand:
Prusa Printer:
Prusa Mk2 Rafts:
Doesn’t Matter Supports:
Doesn’t Matter Resolution:
Fine Infill:
35
Post-Printing -
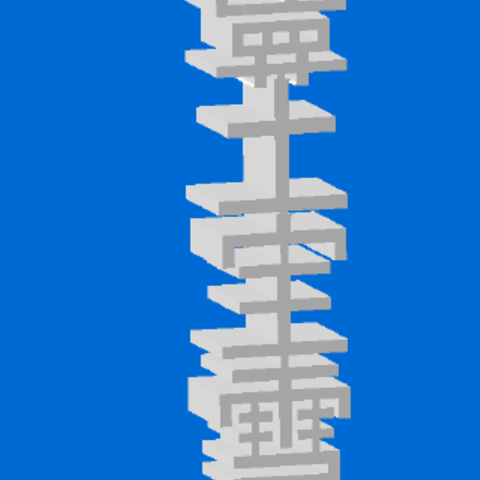
TOTEM PORTE BONHEUR CHINOIS PERSONNALISABLE 3D Print Model
Envie d’attirer la chance et d’écarter le mauvais sort ?
-
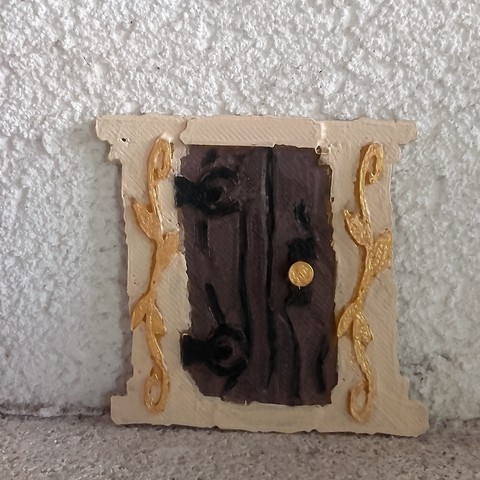
porte mignature 3D Print Model
j’ai créé une porte miniature pour une décoration originale….
À la demande de ma fille qui voulait plein d’objet miniature pour décorer sa chambre.
bientôt la suite -
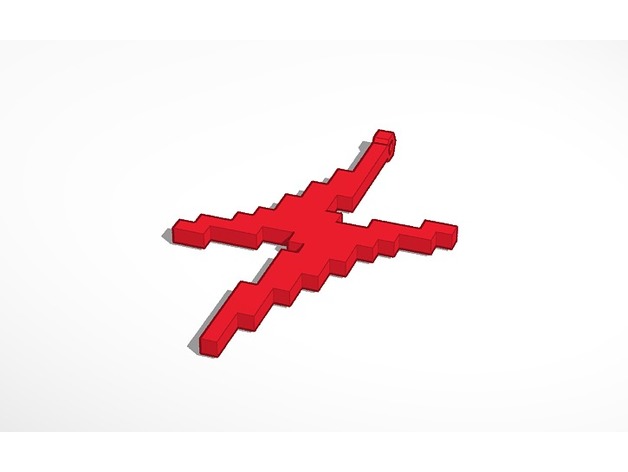
Bolt Pendant (Pixelated) 3D Print Model
Summary
Just a simple pendant that I designed for fun! 🙂
Print Settings
Printer Brand:
MakerBot Printer:
MakerBot Replicator 2 Rafts:
Yes Supports:
No -
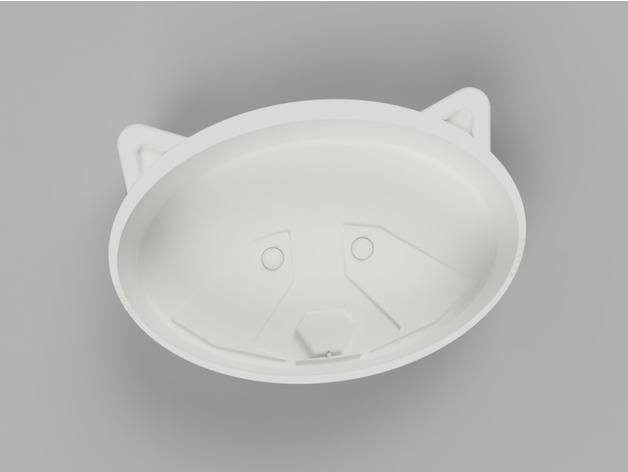
Tanuki Trinket Tray v1 (Small) 3D Print Model
Summary
Too many people said that the last Thing looked too much like Hello Kitty, or a cat, not a raccoon. Cute…but not a raccoon. Here’s a link to that Thing:
http://www.thingiverse.com/thing:2272760
That was also a remix of a cute little bowl.
This Thing is based on a raccoon, a specific picture of a raccoon, which is shown in the pictures. I’m learning to improve my seeing and drawing skills – getting perspective, distances, whitespace, and lines correct. Part of the design process is “seeing” things correctly, so you can get the proportions correct.
Funny enough, I didn’t do a very good job measuring what a bowl, even a small bowl, should be size-wise, so this is not a bowl – it’s a dish. I will be making a new version that will be a larger, cat-food (or raccoon-food!) bowl. I’ll also be making another version of the larger bowl with “wings” that will secure the bowl to my back porch railing, so the raccoons may eat the food, but not steal the bowl.
If you’d like to see a new, different, tweaked version, please let me know in the comments!
Print Settings
Printer Brand:
FlashForge Printer:
Creator Pro Rafts:
No Supports:
No Resolution:
Medium Infill:
30% Notes:
I haven’t printed this yet, but there are no overhangs, so it should just print. I will share pictures of the printed Thing once it has finished printing!
Post-Printing
As with any 3D printed object, you may need to clean out the inside of the bowl. Sandpaper?
How I Designed This
I designed this Tanuki Trinket Tray from scratch, using Fusion 360, clean-up in Netfabb 2017, and sliced for printing using Simplify3D. As reference, I used a picture of a raccoon, a bowl I had laying around, and my digital calipers. Reference Raccoon -
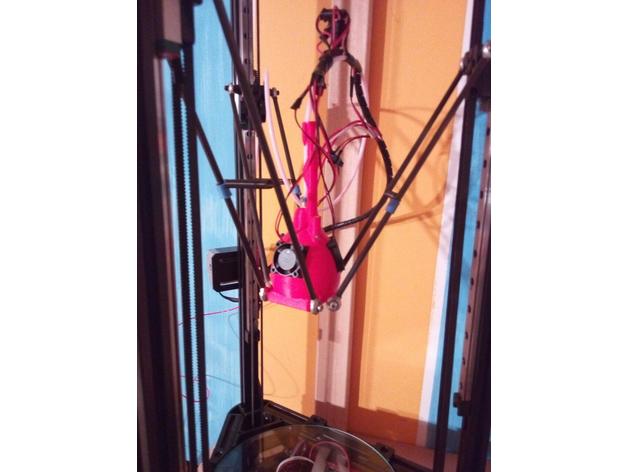
Pear2 effector 3D Print Model
Summary
This effector were inspired by Kirill91’s one (http://www.thingiverse.com/thing:1569106), designed for E3D-V6.
I wanted one for E3D-V5 (and E3D-V5 clones), and this is an improved version of http://www.thingiverse.com/thing:2208759.
Pay attention: I used small axial fan (http://tinyurl.com/l3kpx46), 25mm X 25mm X 10mm.
I also used some magnets (3mm diameter per 3mm height, from www.supermagnete.it) to join diffuser (“diffusore”) with base. This should simplify assembly and disassembly, without any nuts.
A good idea would be to add some kapton all around aluminium hot block in order to insulate it.
The project is still work-in-progress: even though it is simple to dismantle, compared with V1 version, there should some issues concerning total hotend lenght, depending on your nozzle lenght.
However Pear Effector works very good by now!
Suggestions are welcomed, remix as you like (Solidworks 2016 version)!
Print Settings
Printer:
kossel mini Rafts:
No Supports:
Doesn’t Matter Resolution:
0.1 Infill:
20 Notes:
Supports may be needed to print diffuser -
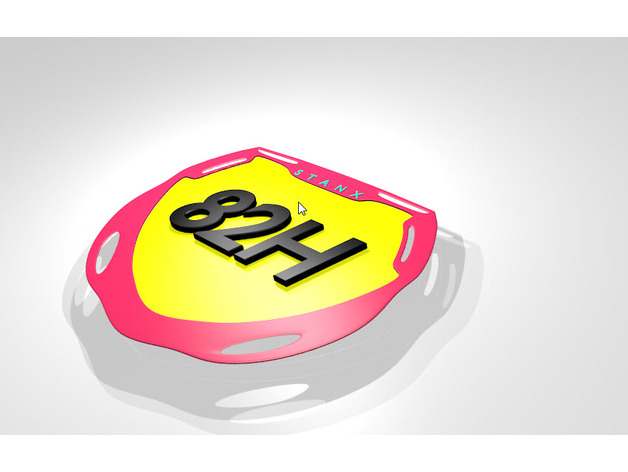
bmx plate front 3D Print Model
Summary
hi,
my first 3d blender object for thingiverse.
BMX plate.
if correction needed or OBJ/STL needed tell me 🙂
2 blend versions :
1 all assembly object (*.blend)
1 all disassembly object (*.blend) -
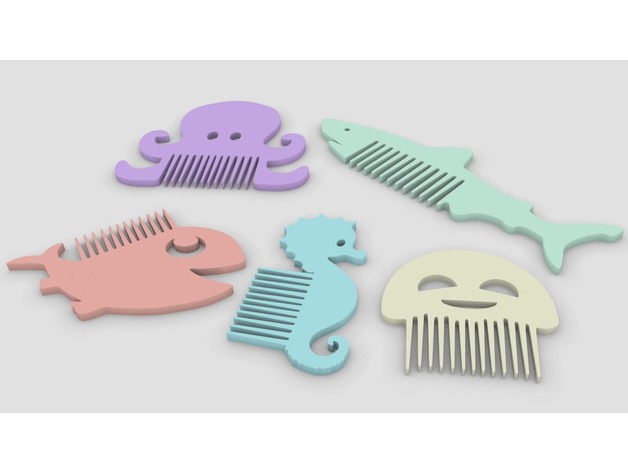
Fantasy combs ocean – Peignes fantaisie océan 3D Print Model
Summary
The amazing shark comb from faberdasher (http://www.thingiverse.com/thing:384599) felt very lonely, so I made him a little family ! The family will possibly expand in the future…
Le peigne requin de faberdasher (http://www.thingiverse.com/thing:384599) se sentait très seul, alors je lui est fait une petite famille ! Il est possible que la famille s’agrandisse à l’avenir… -
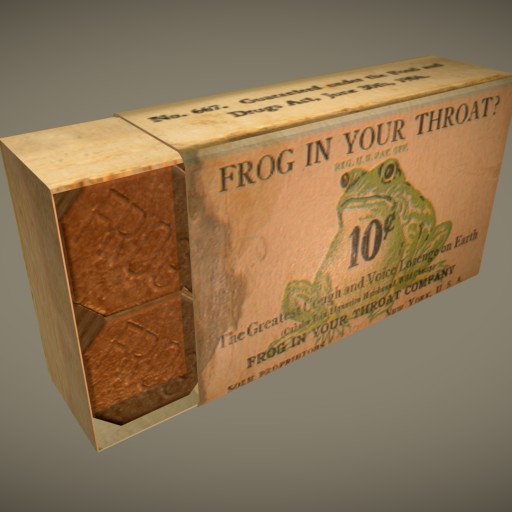
Frog In Your Throat 3D Print Model
Frog in Your Throat is a cough drop company from the late 1800s – early 1900s
Reference textures from here – http://kozmicdreams.com/froginyourthroat.htm -
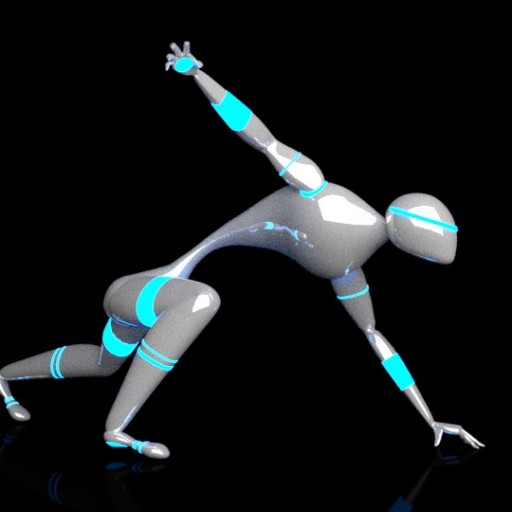
Robot 3D Print Model
its a very simple robot, it’s not rigged. So it’s maybe not my best creation so far XD but i just started using blender and i would like to know what you guys think about it, so if u have any suggestion please leave a comment 🙂
-
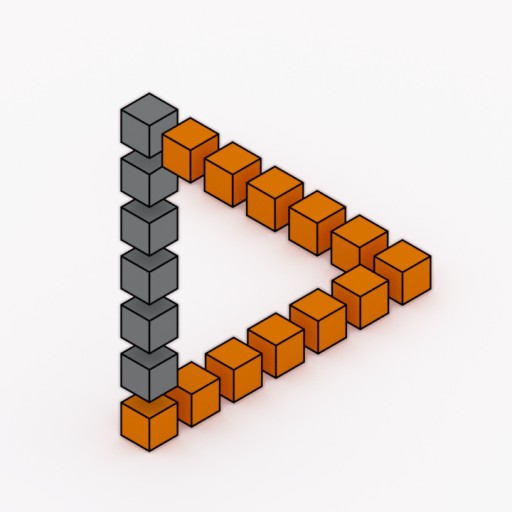
PENROSE TRIANGLE(IMPOSSIBLE TRIANGLE) 3D Print Model
THE IMPOSSIBLE TRIANGLE . TRY IT FOR YOUR REFERENCE. COMMENTS AND CRITICS WELCOME
-
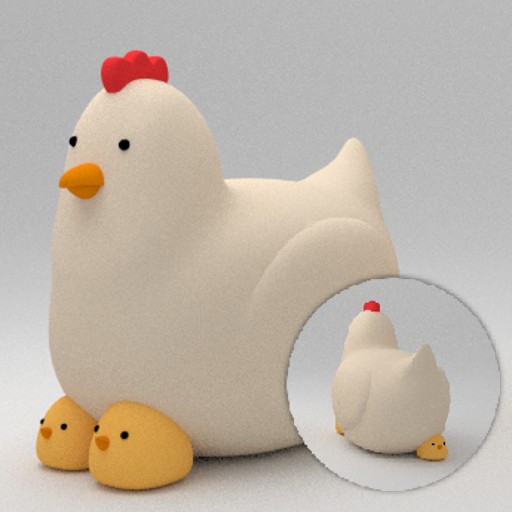
Hen and chicks (Cycles + 3Dprint-ready) 3D Print Model
A hen taking care of its shy chicks. It’s all a booleaned mesh, ready for 3D print.
Very hen much chicks. -
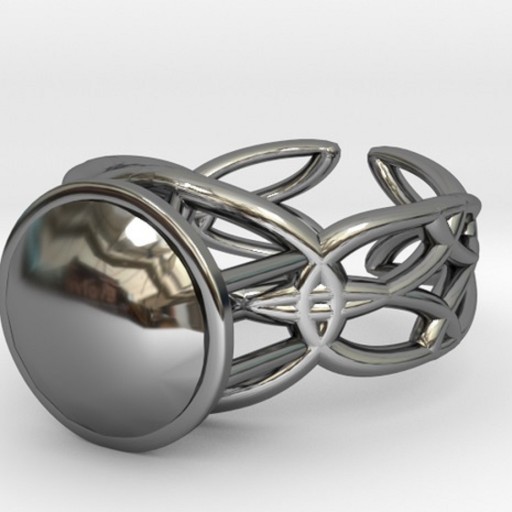
Enneper Curve Ring 17.53mm with Round Gem 3D Print Model
Enneper Curve Ring 17.53mm with Round Gem – this item has been created using the Blender app “Fluid Designer for 3D Printing” created by Microvellum and available at www.fluiddesigner.co.uk. The gem has been taken from the Blender add-on JewelCraft.
N.B. If printing in silver/gold/etc scale and allow for shrinkage. -
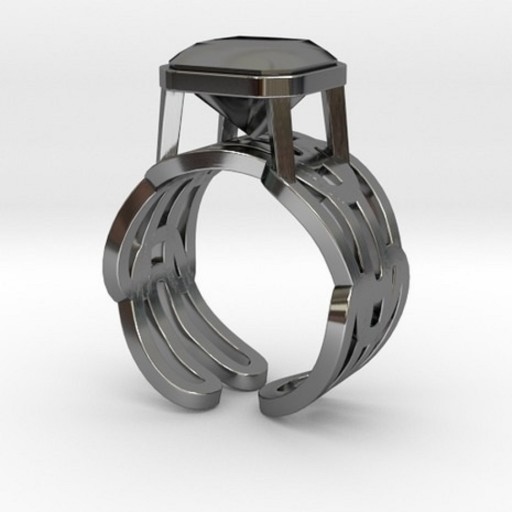
Brunnian Link Curve Ring 17.53mm with Radiant Gem 3D Print Model
Brunnian Link Curve Ring 17.53mm with Radiant Gem – this item has been created using the Blender app “Fluid Designer for 3D Printing” created by Microvellum and available at www.fluiddesigner.co.uk. The gem has been taken from the Blender add-on JewelCraft.
N.B. If printing in silver/gold/etc scale and allow for shrinkage. -

Vault Tech Boy form Fallout 3D Print Model
I needed a model for 3d printing so i threw one together real quick. I did not include the materials or the background objects in the 3d print just the character model.
-
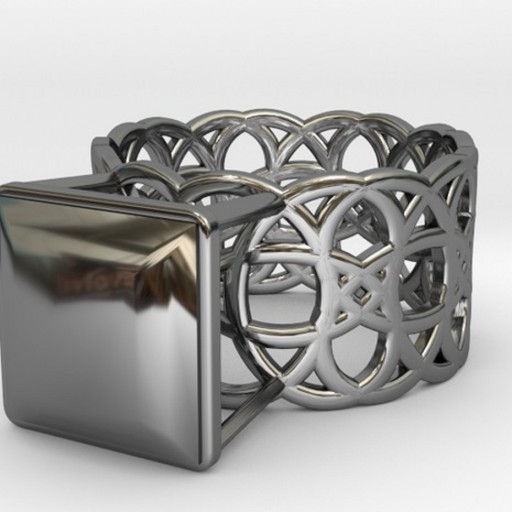
Celtic Knot Ring 4-Leaf 17.53mm with Princess Gem 3D Print Model
Celtic Knot Ring 4-Leaf 17.53mm with Princess Gem – this item has been created using the Blender app “Fluid Designer for 3D Printing” created by Microvellum and available at www.fluiddesigner.co.uk. The gem has been taken from the Blender add-on JewelCraft.
N.B. If printing in silver/gold/etc scale and allow for shrinkage. -
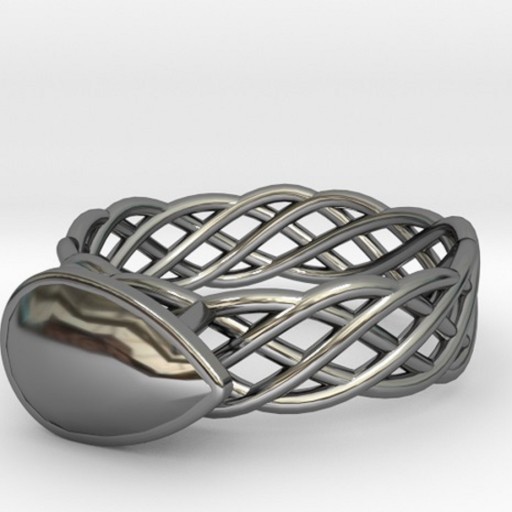
Torus Knot Plus Ring 17.53mm with Pear Gem 3D Print Model
Torus Knot Plus Ring 17.53mm with Pear Gem – this item has been created using the Blender app “Fluid Designer for 3D Printing” created by Microvellum and available at www.fluiddesigner.co.uk. The gem has been taken from the Blender add-on JewelCraft.
N.B. If printing in silver/gold/etc scale and allow for shrinkage. -
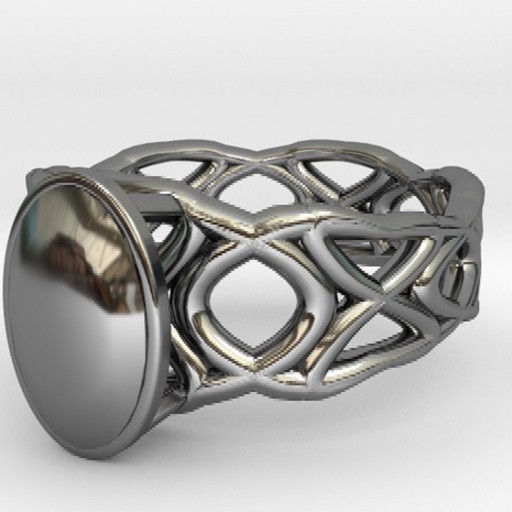
Tennis Seam Curve Ring 17.53mm with Oval Gem 3D Print Model
Tennis Seam Curve Ring 17.53mm with Oval Gem – this item has been created using the Blender app “Fluid Designer for 3D Printing” created by Microvellum and available at www.fluiddesigner.co.uk. The gem has been taken from the Blender add-on JewelCraft.
N.B. If printing in silver/gold/etc scale and allow for shrinkage. -
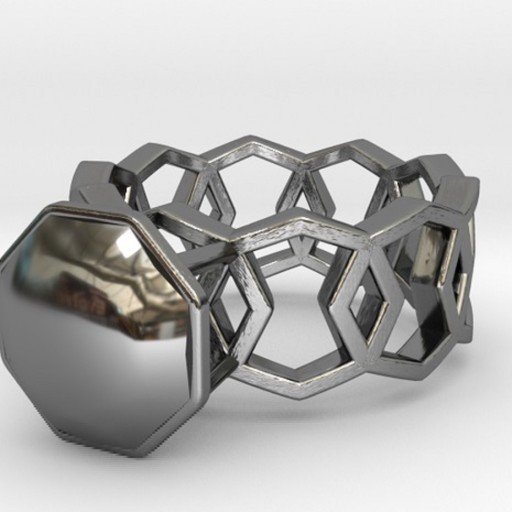
Octagonal Wire Ring 17.53mm with Octagon Gem 3D Print Model
Octagonal Wire Ring 17.53mm with Octagon Gem – this item has been created using the Blender app “Fluid Designer for 3D Printing” created by Microvellum and available at www.fluiddesigner.co.uk. The gem has been taken from the Blender add-on JewelCraft.
N.B. If printing in silver/gold/etc scale and allow for shrinkage. -
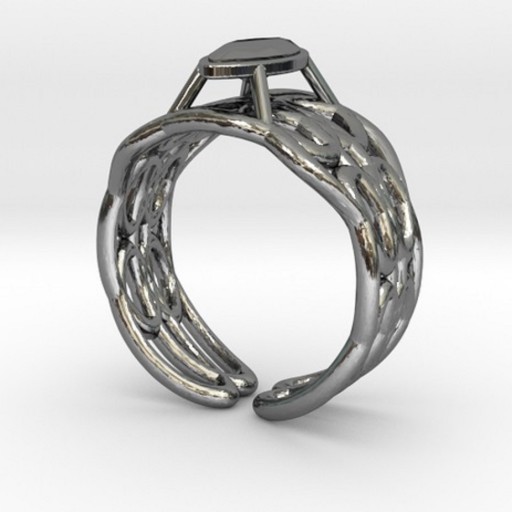
Cylindrical Helix Curve Ring 17.53mm with Marquise Gem 3D Print Model
Cylindrical Helix Curve Ring 17.53mm with Marquise Gem – this item has been created using the Blender app “Fluid Designer for 3D Printing” created by Microvellum and available at www.fluiddesigner.co.uk. The gem has been taken from the Blender add-on JewelCraft.
N.B. If printing in silver/gold/etc scale and allow for shrinkage. -
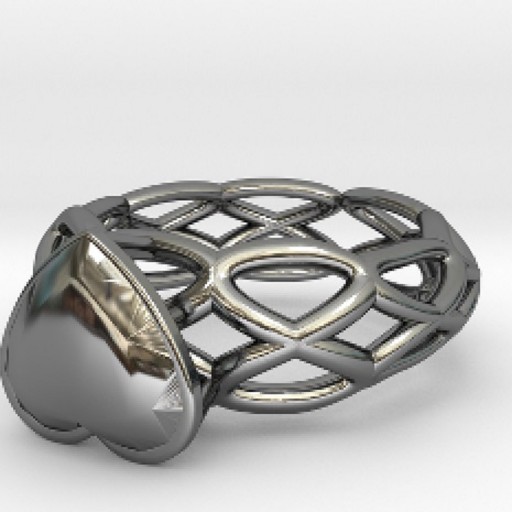
Archytas Curve Ring 17.53mm with Heart Gem 3D Print Model
Archytas Curve Ring 17.53mm with Heart Gem – this item has been created using the Blender app “Fluid Designer for 3D Printing” created by Microvellum and available at www.fluiddesigner.co.uk. The gem has been taken from the Blender add-on JewelCraft.
N.B. If printing in silver/gold/etc scale and allow for shrinkage. -
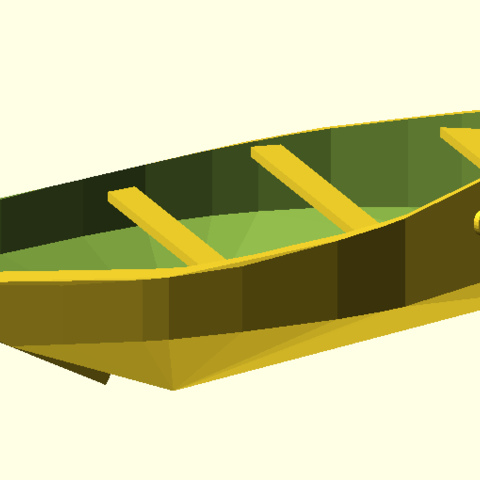
canot breton misainier 3D Print Model
canot réalisé d’après des cotes reprises d’un misainier à tape-cul du “chasse-marée”sur logiciel “openscad” en plusieurs fichiers(coque,bancs,gouvernail) mais sans le gréement.
Le but était de savoir si l’on pouvait réaliser une coque de bateau sur openscad pour l’association -
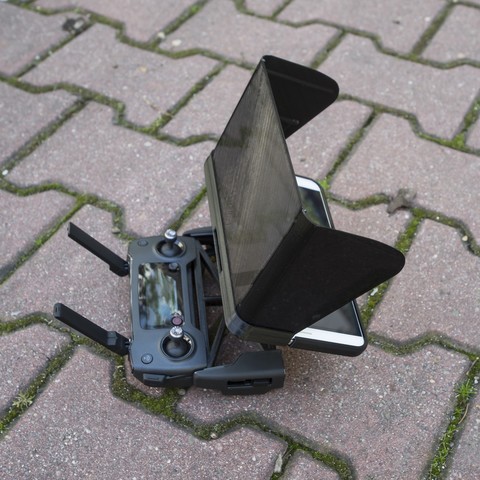
Mavic Pro remote tab holder +screen shade / Honor X2 / MediaPad X2 3D Print Model
This lightweight tablet holder will fit only if rubber “teeth” of remote clamps have been trimmed (height 8,5 – 9mm).
It’s designed to exactly match Huawei Honor X2 / MediaPad X2 tablet.
You will also need GoPro thumb screw to link both pieces. -
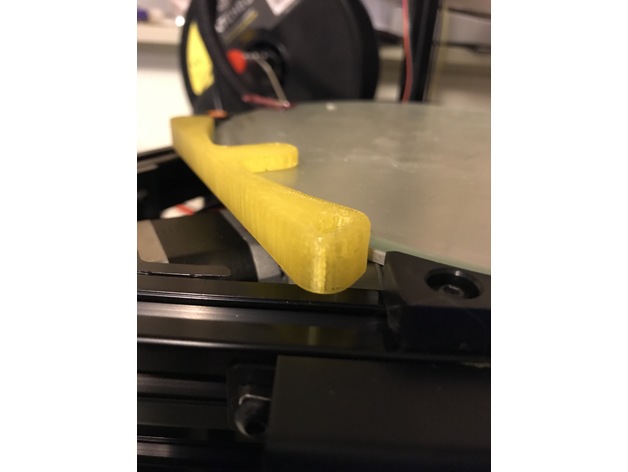
Anycubic Plus bed clip for 240mm bed and glass
Summary
JamesWhite made a great bed mount that surpassed the original 6 mounting blocks that were provided with the Anycubic Linear Plus Kit. My version (03/21/2017) came with a 240mm aluminum heated build platform and 240mm glass plate. I just knocked down the tab a bit with Sketchup so they’d both fit without sitting higher. Admittedly, I don’t have any skills with design or these cad apps, so this is just a tweak.
If one were so inclined, adding a few bulges or tangs to the last 1-1.25mm at the top would likely hold the glass in place without the need for the top clips. I don’t think this would even protrude too far from the edge, just far enough to put a touch of pressure on the glass.
Thanks, JamesWhite.
Print Settings
Printer:
Anycubic Linear Plus Rafts:
Doesn’t Matter Supports:
No Resolution:
.2-.4 Infill:
30% Notes:
You could probably up the infill a hair, but this seems strong enough. I just printed it and did a test fit before I printed the rest. Should work well for my needs. -
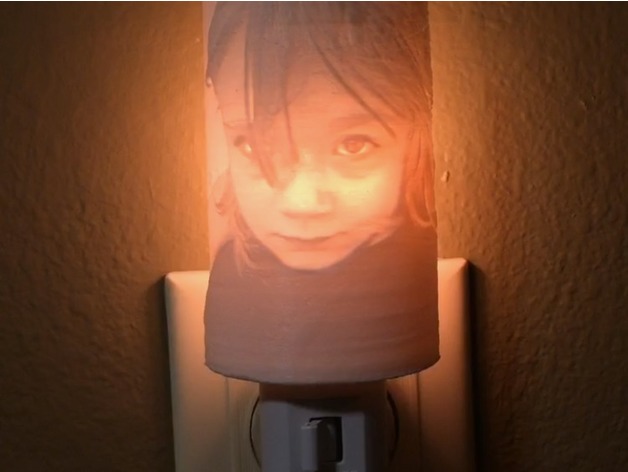
Lithophane Night Light adapter (remix)
Summary
This is a slight remix of poor_red_neck’s Lithophane Night Light adapter. I used his guide to create mine. I used all of the same settings as him, except in the model settings on http://3dp.rocks/lithophane/ I set the curve to 160. This makes the lithophane wrap around the light more.
I remixed his adapter, adding more curve to fit the new shape of the lithophane as well as adding a bit of support to the wings that slide around the light. -
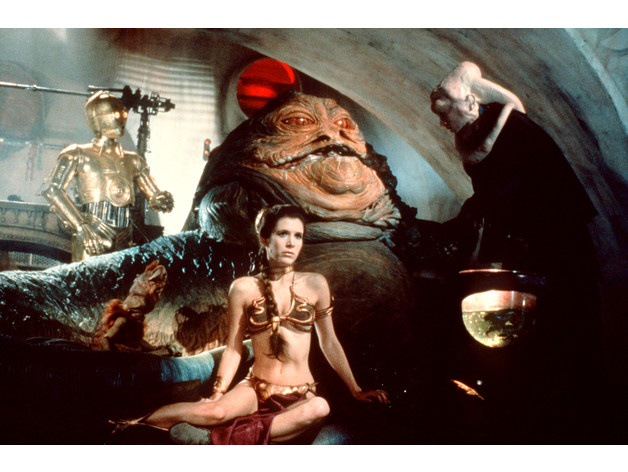
Princess Leia Slave scene Lithophane
Summary
I had never heard of “lithophanes” before seeing them here on Thingiverse. Having found them, and having printed several myself, these things are amazing! This is my contribution to this awesome art form – the (in)famous Princess Leia slave scene in the Jabba the Hutt throne room. I couldn’t decide which pose looked better, so I did both.
Ever since I discovered 3d printing, I have been searching high and low for a good, high quality model of this scene. If anyone has a model, or knows where I can find one… PLEASE let me know!
How I Designed This
This was rendered via the 3dp.rocks/lithophane web site. -
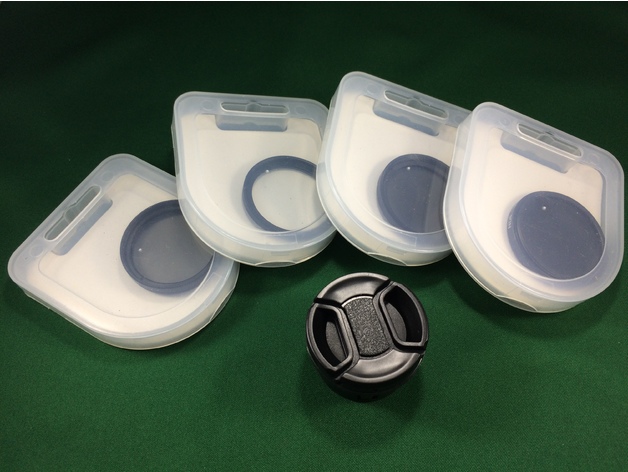
Filters (37mm) and Adapter box for DJI Phantom 3 Standard
Summary
This box is to hold a set of 37mm filters and adapter for my DJI Phantom 3 Standard. The sets come with an adapter and four filters UV, ND4, ND8 and CPL with thickness 6mm, 6.5mm, 6.5mm and 8 mm respectively.
Print Settings
Printer:
Anet A8 Rafts:
No Supports:
No Resolution:
0.2 Infill:
15% -
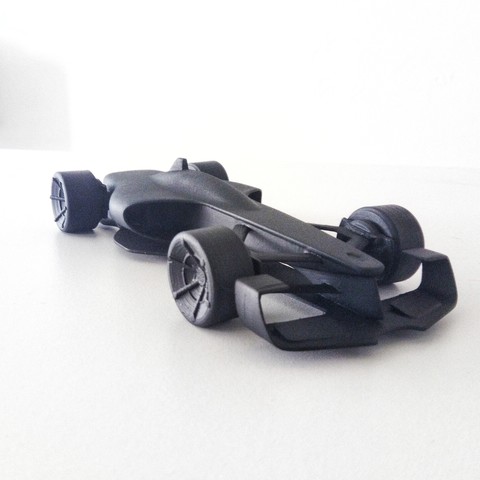
RS 2027 Formula 1 concept scale model (esc: 1/24)
The RS 2027 Vision formula one concept is the interpretation of how Renault sees the future of F1 in ten years, the car looks amazing.
-
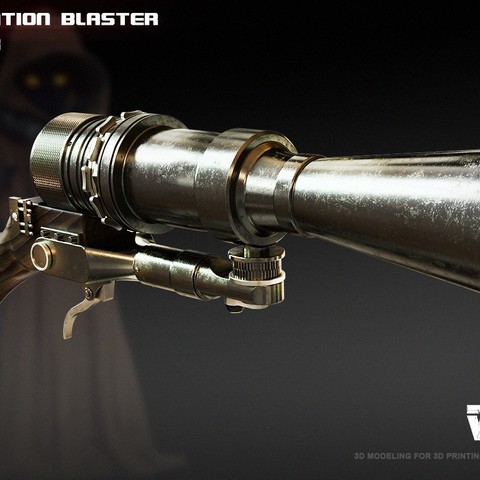
Ion blaster- Jawa ionization blaster
“We’re doomed!” ―Droid response to seeing an ionization blaster[src] Ion blasters, or ionization blasters, were any handheld weapons that fired ion energy instead of blaster bolts. They were commonly used in response to droids and other technology on the battlefield. http://starwars.wikia.com/wiki/Ion_blaster/Legends
-
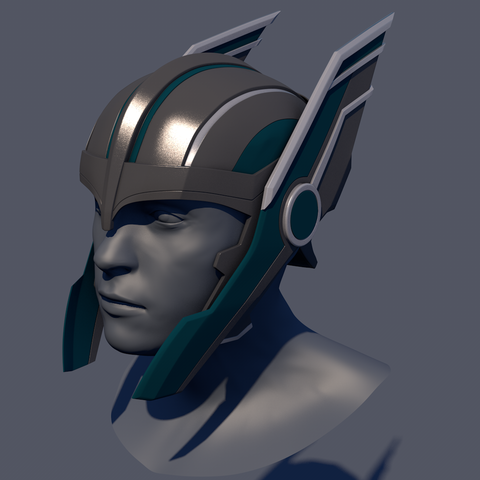
Thor Ragnarok Helmet
This is Thor’s helmet in Thor Ragnarok. This was designed from the little we seen it in the trailer, but I feel I managed to get it pretty close.
-
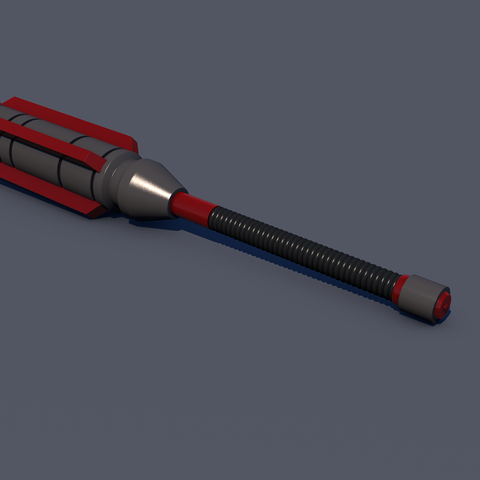
Thor Ragnarok Mace
This is Thor’s mace in Thor Ragnarok. This was designed from the little we seen it in the trailer, but I feel I managed to get it pretty
-
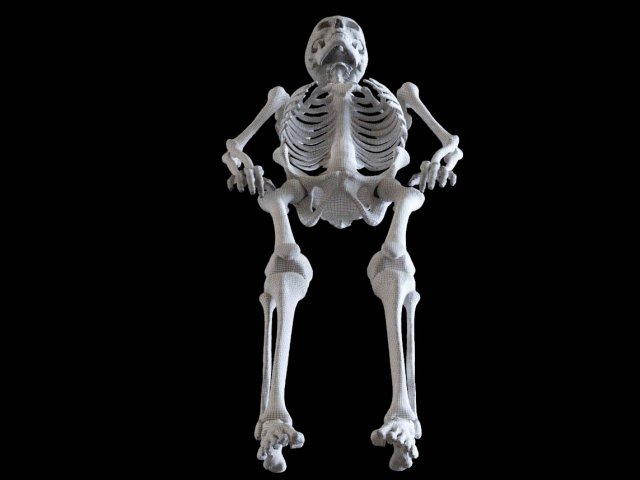
Polygonal skeleton 3D Model
The polygonal model of the bone skeleton of an adult female in full size. Compound (37 elements). Only quad-geometry, without textures, displacement maps, bump, etc., is 3d-printable.
Polys:
Skull – 58 680
Jaw – 5 928
Hypoglossus – 736
Cervical vertebrae:
Atlant – 928
Axis – 616
Vertebra cerv III – 436
Vertebra cerv IV – 530
Vertebra cerv V – 624
Vertebra cerv VI – 624
Sternoclavicular-scapular complex – 11 215
Stern – 1 059
Clavias (2) – 1 342
Scapula (2) – 8 848
Torso – 28 043
Arm: (2) 25 118
Humerus – 936
Ulna – 1 180
Radius – 1 096
Wrist – 9 320
Leg: (2) 29 828
Femur – 4 215
Tibia – 2 844
Fibula – 1 529
Pedis – 5 830 -
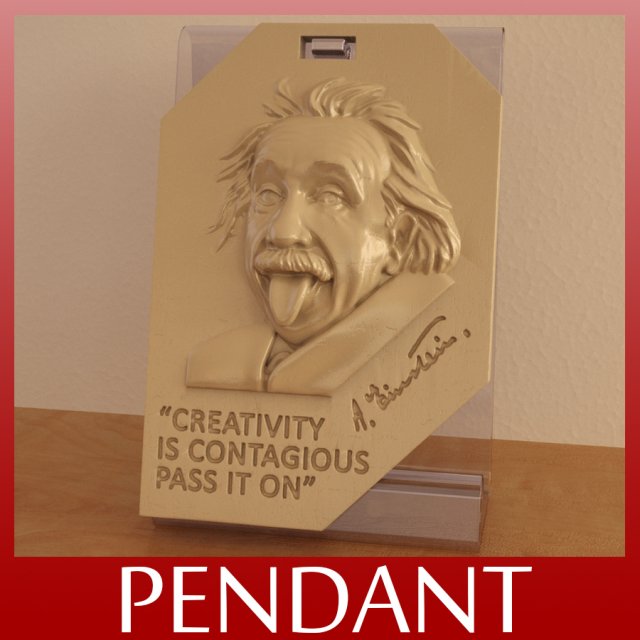
ALBERT EINSTEIN PENDANT FOR FANS 3D Model
This is best gift for Albert Einstein fans, you can download rescale if you want and print for decorative or jewelry printing
-
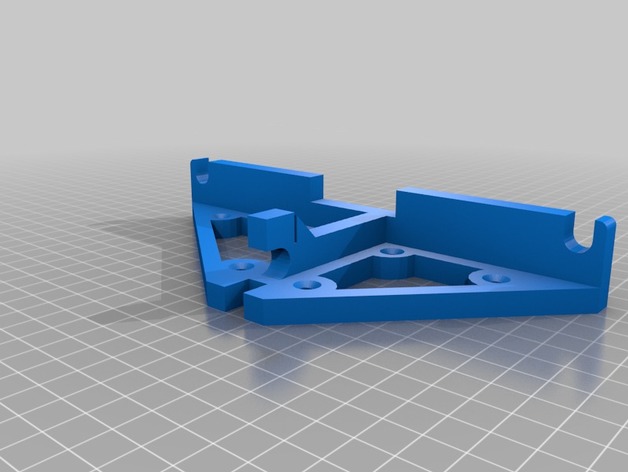
Anet A6 Back Frame Brace with Screwholes
Summary
This is a Remix of the back frame brace from http://www.thingiverse.com/thing:1912107
I put some screw holes in it. -
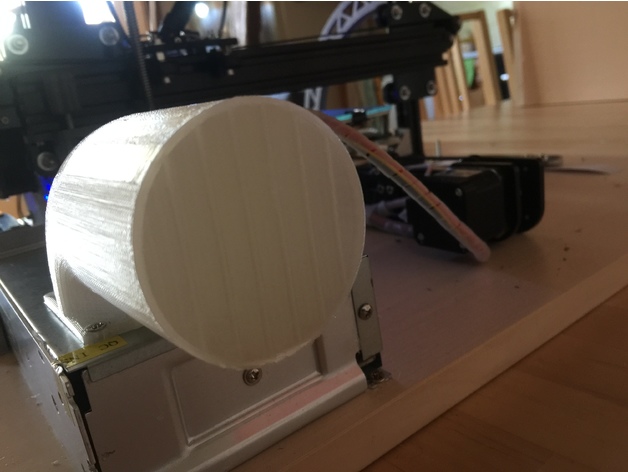
Fan silencer with 60mm hose adapter (beta)
Summary
Works as a car muffler to reduce noise on a fan… i use it on my Tevo Tarantula PSU fan and it works quite nicely .
i do not have a dB meter so if someone has one and decide to print this i’ll be pleased to add the dB values in the description
Can also fit a 60mm hose if needed -
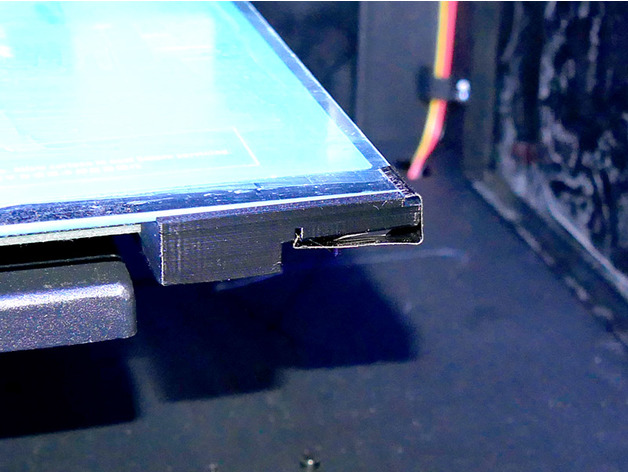
Imageframe glasholder 18x24cm with included spring
Summary
This a simple solution for picture-frame glasplates. I don’t want to cut the glasplates from the
buyable image frames (24x18cm is a standard size in Germany – costs around 1-2EUR/piece) and so
screwable solutions don’t work good and bulldogclamps need too much place. Here are 4 corners
(marked with FR, FL, RR and RL – FrontRight, FrontLeft, RearRight and RearLeft),
attached to the corner screws under the bed (you need additional 4 x M3 nuts and fitting washers).
The glasplate will be attached with the four springs delivered with the frame.
Because there are several springsolutions I’ve added the Sketchup-file – so change
the mounting, if you need another one.
Print Settings
Printer Brand:
FlashForge Printer:
Creator Pro Rafts:
No Supports:
Yes Resolution:
mid Infill:
std Notes:
use ABS (its mounted directly to the bed)
Post-Printing
4 x M3 nuts and fitting washers
How I Designed This
Sketchup -

Hex nut Spinner
Summary
This is remix of next page http://www.thingiverse.com/thing:2246964
What-the-Hex (pick-a-weight) Fidget Spinner by Lucina
I’m just a little repair code. For example you can notice how. This was my first attempt at getting to know the code in OpenScadu. -
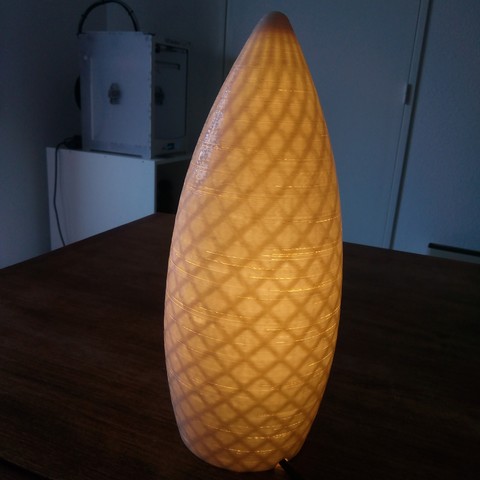
Lampe London
Connaissez-vous le 30 St Mary Axe à Londres ?
Ce bâtiment en forme de “cornichon” vitré et l’un des symboles de la City de Londres.
Ma lampe s’inspire du design de ce bâtiment, en dévoilant sa spécificité une voir la lumière allumée.
Le fichier permettent d’imprimer le support de douille est fourni avec. -
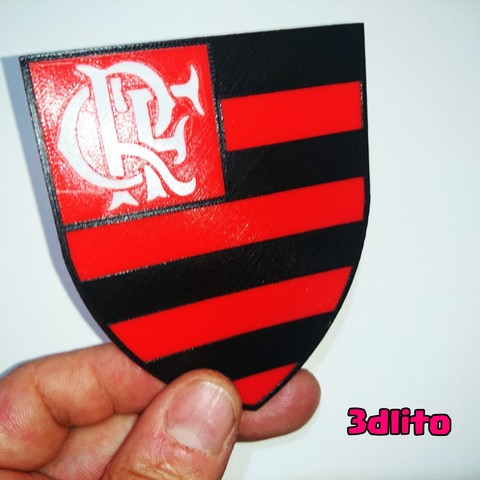
Escudo Flamengo 3 colores
Escudo equipo de fútbol de brasil flamengo en tres colores con un extrusor
-
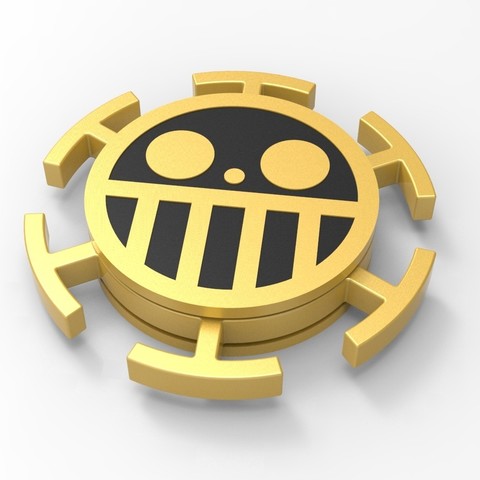
Hand Spinner One Piece
Vous rongez vos ongles ?
Vous ne savez pas quoi faire de vos doigts ?
Vous êtes fan de One Piece ?
Ce hand Spinner Trafalgar Law est fait pour vous 😉
Il ne vous reste plus qu’à fixer les éléments et le roulement entre eux.
D’autres modèles disponibles sur mon profil. -
PRETTY Necklaces
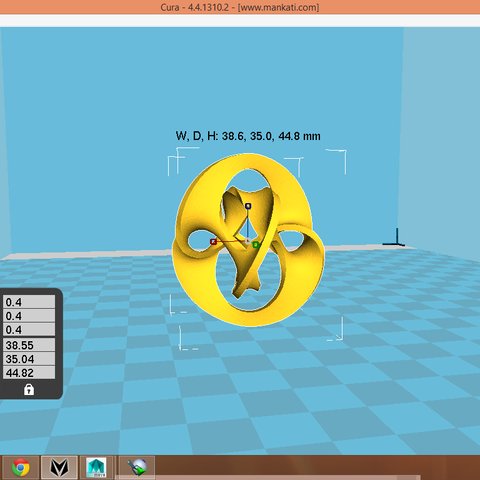
This beautiful necklace twisted in a way that is very special and different way to have not yet been published, but this product so you’ll be the first to try it
-
Custom Ghost Code Website
Summary
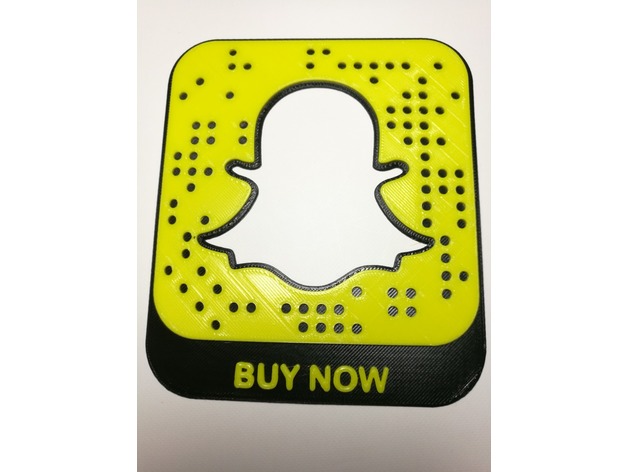
This is a 3d printed Snapchat code. The code will scan and direct to a website. For scalability high contrast is necessary. In one color it can be used for decorative purpose only.
These codes have been produced by CustomGhostCodes.com.
Print in Black filament and switch to yellow filament after the 1mm layer has finished. This will produce a scannable code.
Getting your own code:
If you want to use your own code, there are a few steps to achieve this.
Download your Snapcode SVG from Snapchat
Go into your favorite design program and pull the SVG into a model.
Export to a .STL file
Slice with your printer settings.
Add pause code to switch filament color.
Those are all the steps and you can produce your own code.
If you want this process done for you check out www.CustomGhostCodes.com
They will create your STL or complete the entire process for you.
Print Settings
Printer Brand:
SeeMeCNC Printer:
Rostock MAX v2 Rafts:
No Supports:
No Resolution:
.2 Infill:
30% Notes:
For this print to be scannable it must be printed in two colors. To achieve dual colors, the filament must be switched after the 1mm layer. This is done by entering pause code in the g-code. -
Wombot Front Y Axis cover
Summary
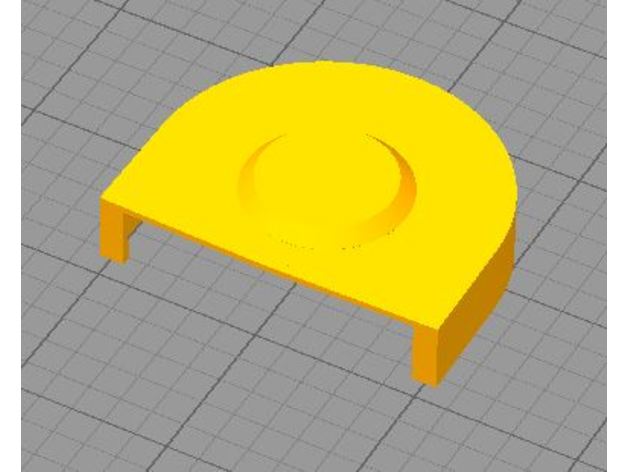
Wombot front Y axis cover, to fit over existing plastic cover, this cover prevent and dust from getting into bearing. -
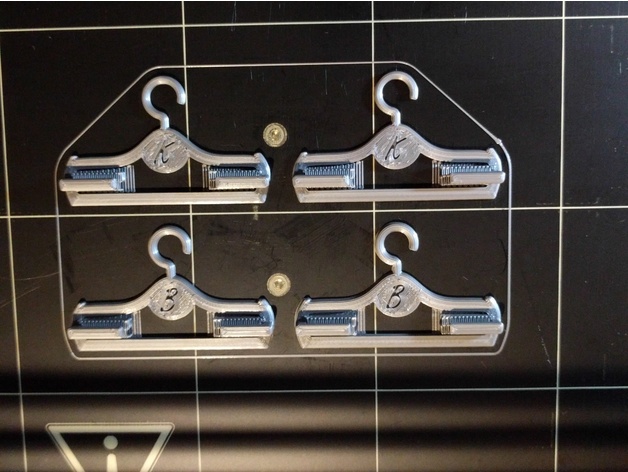
Barbie Clothes Hanger
Summary
This is a close replica of the original Barbie Clothes Hangers that come with Barbie accessories like the “Barbie Style Ultimate Closet”.
I’ve included three designs. A plain hanger, Barbie’s Hanger and Ken’s Hanger (Or Kendal’s for that matter).
Print Settings
Printer Brand:
Prusa Printer:
Prusa Mk2 Rafts:
No Supports:
Yes Resolution:
.15-.20 Infill:
20% Notes:
I was able to print four of these at one time in 43 minutes. -
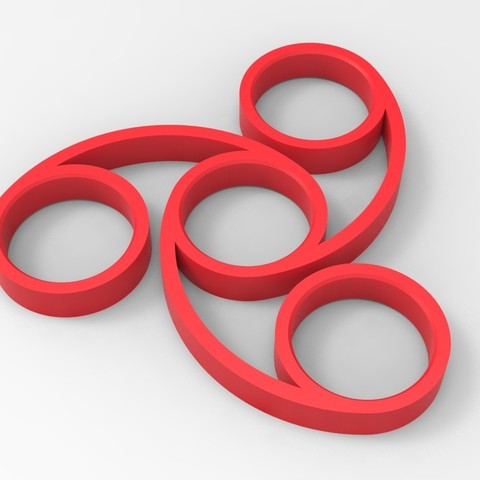
Hand Spinner
Vous rongez vos ongles ?
Vous ne savez pas quoi faire de vos doigts ?
Ou vous voulez juste avoir un objet design et classe pour épater vos collègues ou vos amis ?
Le hand Spinner est fait pour vous 😉 Il ne vous reste plus qu’à clipser les roulements
D’autres modèles disponibles sur mon profil. -
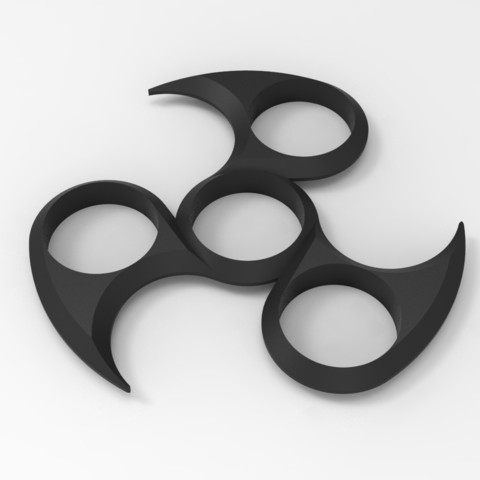
Hand Spinner
Vous rongez vos ongles ?
Vous ne savez pas quoi faire de vos doigts ?
Ou vous voulez juste avoir un objet design et classe pour épater vos collègues ou vos amis ?
Le hand Spinner est fait pour vous 😉 Il ne vous reste plus qu’à clipser les roulements
D’autres modèles disponibles sur mon profil. -
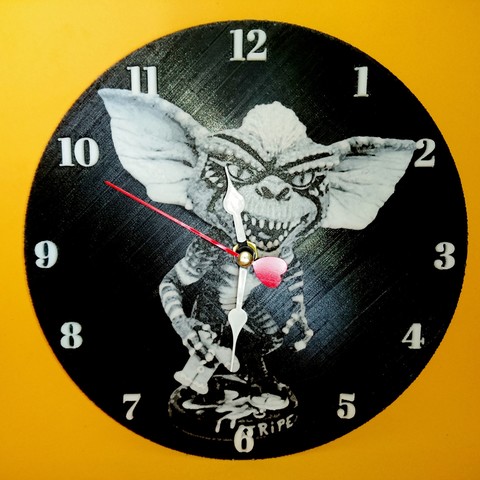
Reloj Gremlins Stripe 3D
Reloj de pared del malo de los Gremlins Stripe
la parte de abajo en negro 8 capas y cambiar a filamento blanco para el resto de las 29 capas… -
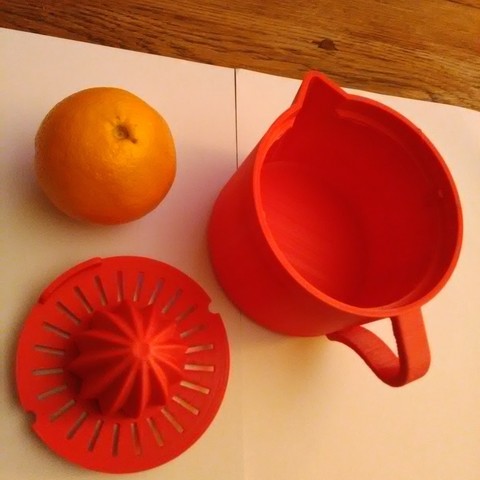
Presse orange
définition d’un presse orange & citron avec grand reservoir
en 2 pièces pla chromatik, pour réaliser vos cocktails vitaminés. -
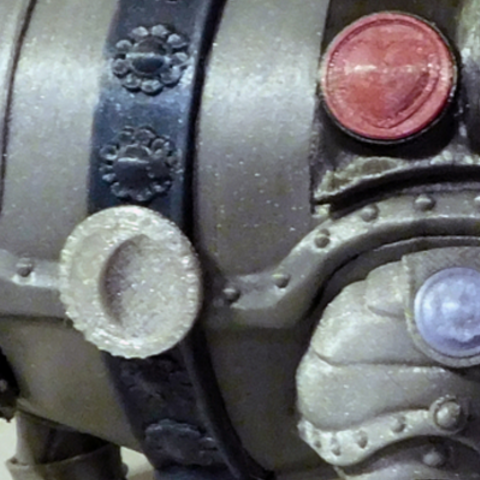
Sir PIgglesby Right Flower Belt V2 (Untested)
A user had pointed out that the right hand flower belt did not fit as well as it could. Whilst I haven’t had any other reports regarding this piece, I had a quick look (whilst taking a break from wiring:-)) and have uploaded what I hope is an improvement.
-
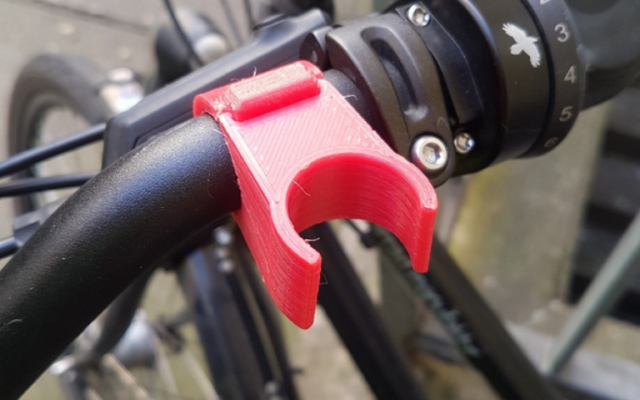
Fixture 3D Model
Bottle holder on the bicycle. Ready for 3D printing.
– 3dmax file
If there are problems with 3d model, please correct it.
Have a nice shopping! -
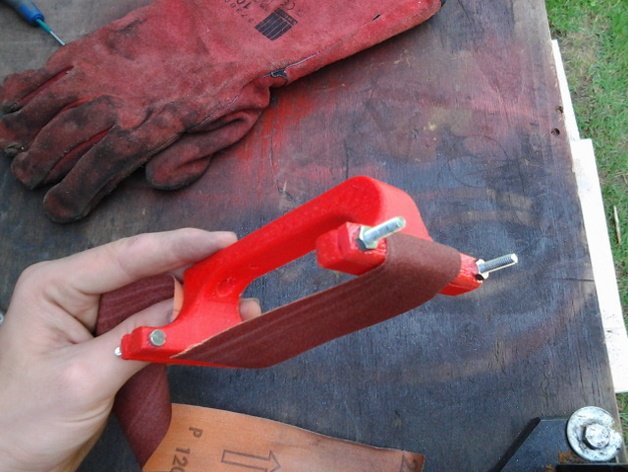
Grinding machine 3D Model
Grinding machine for 3D printing.
– 3dmax file
If there are problems with 3d model, please correct it.
Have a nice shopping!