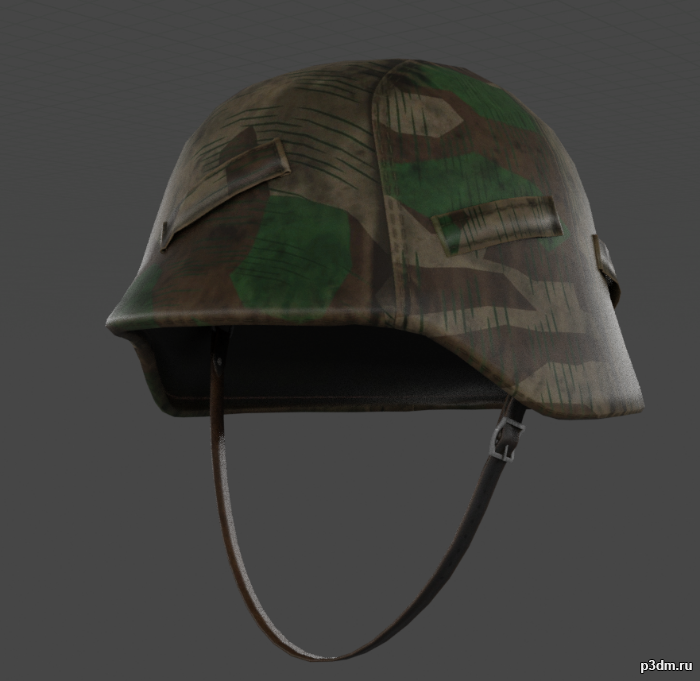
A M40 Stahlhelm with Splittertarn Helmet cover. This was the standard camouflage of the Wehrmacht during the 2nd World War and Soldiers often made these helmet covers from unused Shelter-halfs.Needed this for a side-project, decided to upload here, it’s very simple.
Tag: with
-

TIE Interceptor with interior 3D Model
Высокодетализированная модель TIE Interceptor-a, прямо из известной студии. Предназначалась для съёмки крупным планом.
-
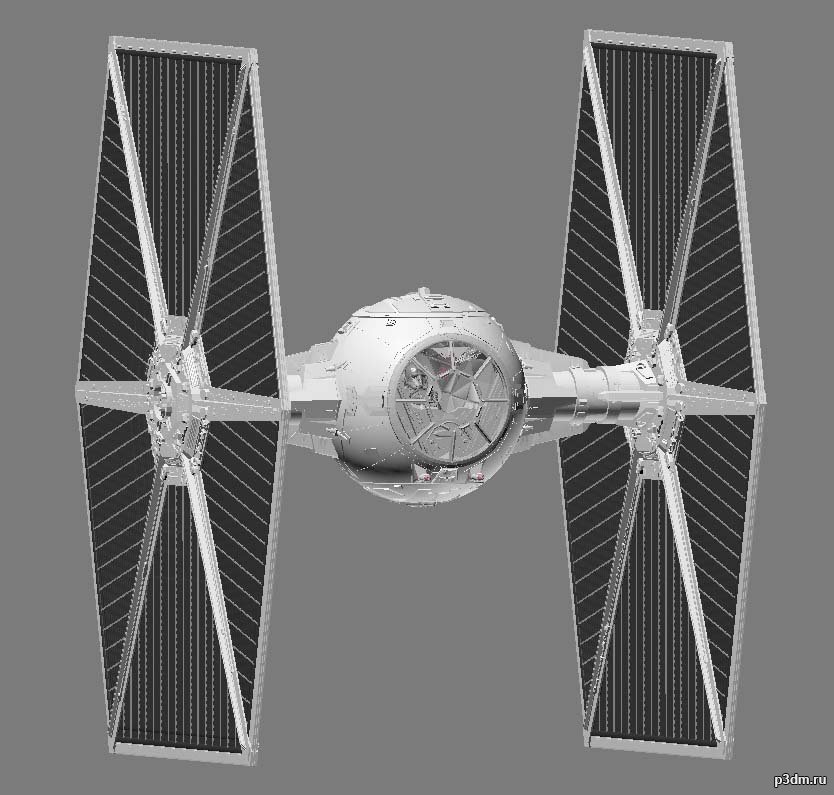
TIE Fighter Two with interior 3D Model
Высокодетализированная модель TIE Fighter-a, прямо из известной студии. Предназначалась для съёмки крупным планом.
-

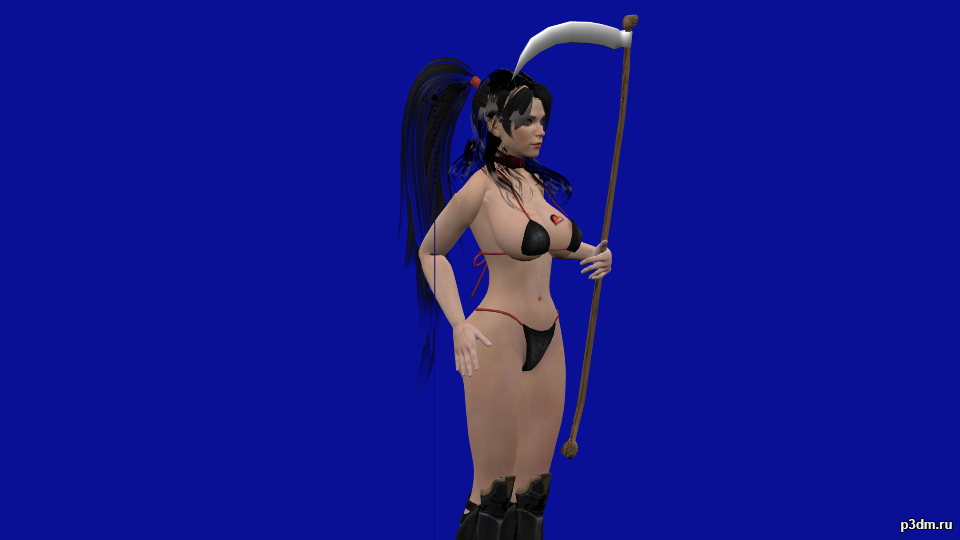
Lili with all Outfits – Psychonauts 2 3D Model
Formats of model/Textures – /.fbx/.gltf/.tga2k/TexturesExtracted and converting by me.This model and textures are the property of Double Fine and Xbox Game StudiosDeveloped by Double FineAll Rights Reserved.
-
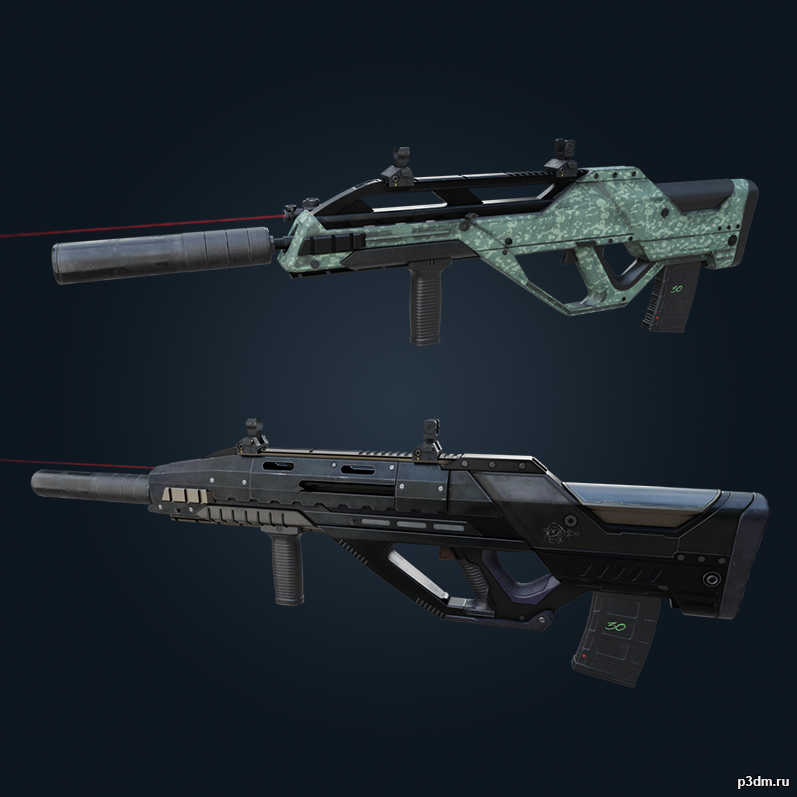
Spear .308 (with skins) – Rainbow Six Siege 3D Model
Additional laser, suppressor, default barrel and vertical grip models are included. (Laser beam in thumbnail from Custard’s ARX200 Assault Rifle publication, not a R6 Siege asset.)Also includes the Sharp Vendetta (3D) and Ectoplasm weapon skins.The assets included in this publication are property of Ubisoft. This release have no relation with the company previously mentioned and all credits belong to the respective artists and owners.
-
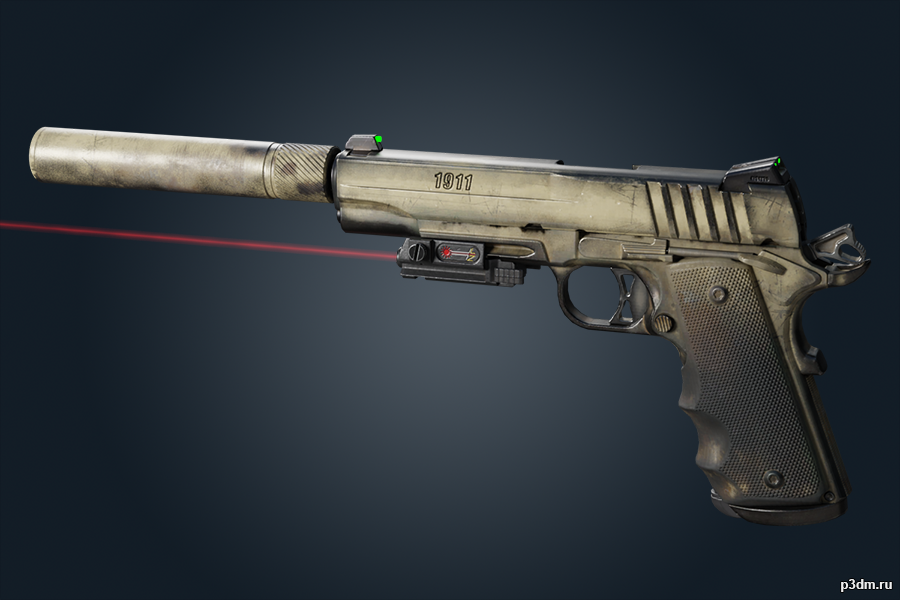
1911 TACOPS (with skins) 3D Model
Yay, first R6 Siege model on the site (since Luxox?) with correct original mesh normals!Additional small laser and suppressor models are included. (Laser beam in thumbnail from Custard’s ARX200 Assault Rifle publication, not a R6 Siege asset.)Also includes all skins (recolors, not ‘3D’ skins) of 1911 TACOPS as of Y6S1.3 + the current seasonal skin.The assets included in this publication are property of Ubisoft. This release have no relation with the company previously mentioned and all credits belong to the respective artists and owners.
-

CR-56 AMAX (with some attachements) 3D Model
Attachments included: VLK 3.0x Sight + XRK Zodiac S440 + Muzzle Break + Horizontal GripNote that the materials were setup in a way to incorporate the unique MW 2019 textures such as the cmask which plays in some way with the roughness map for example. You can try to play with the materials if you want but hopefully based on the screenshot you can see the final result looks really close to the in-game render.To keep things non-destructive when swapping out the stock barrel with the XRX Zodiac long barrel, I’ve utilized a mask modifier on the base gun mesh to hide the stuff including the stock 30 round mag, but you can just as easily go to vertex groups and select the magazine mesh and de-assign it from the ‘HIDE’ vertex group.
-
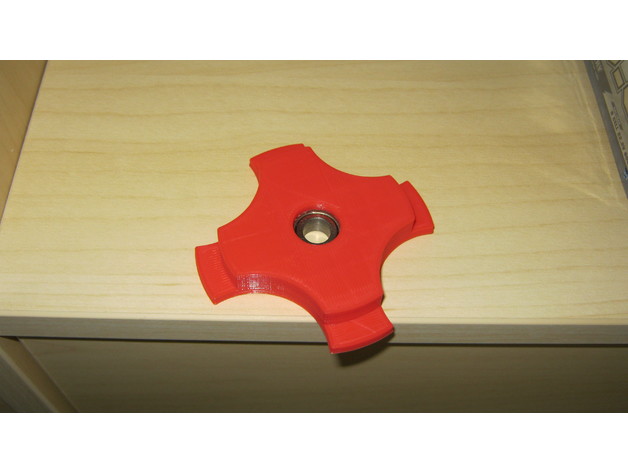
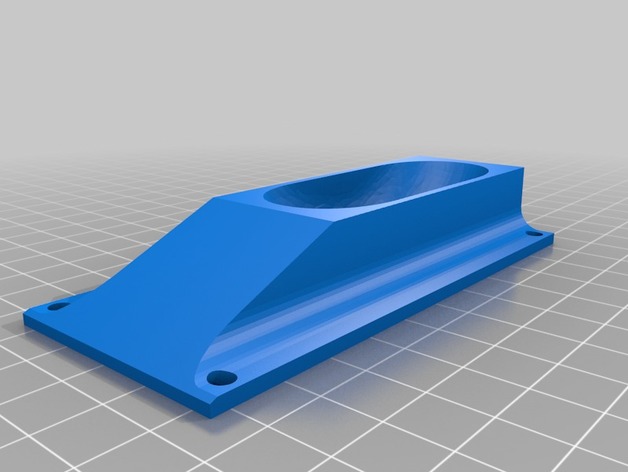
Filament Holder 56mm with Bearing 608Z 3D Print Model
Summary
Filament Holder for 56mm Hole with 605Z Bearing
Layer high 0,2mm
Print Settings
Printer:
CR10S
Rafts:
No
Supports:
Yes
Infill:
15% -
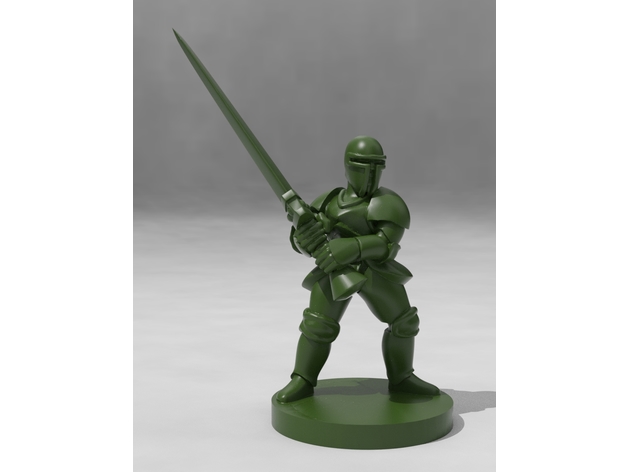
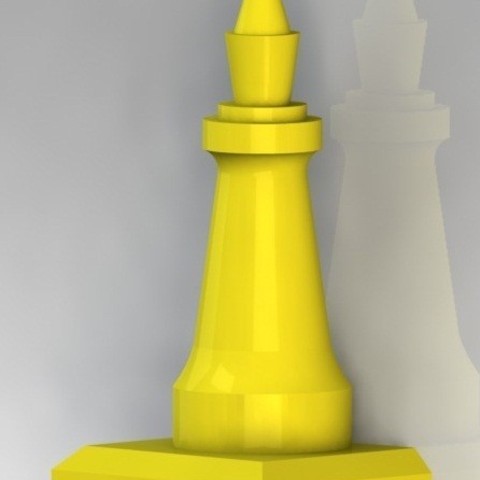
Armored Knight with Greatsword 3D Print Model
Summary
In the late Medieval period, during the early to mid Renaissance, the heavily armored knight was the king of the battlefield. While they rarely wielded massive great wedges of steel like this, he’s certain to at least intimidate any giants or dragons he quests against, seeking to rescue his kingdom’s princess! Little does he know she’s already rescued herself, she’s no shrinking violet… -
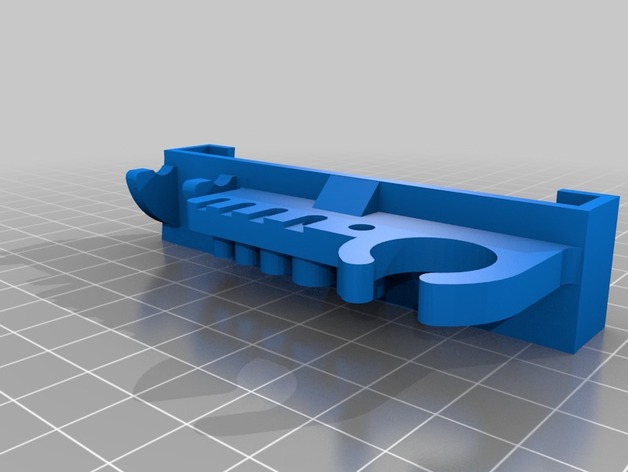
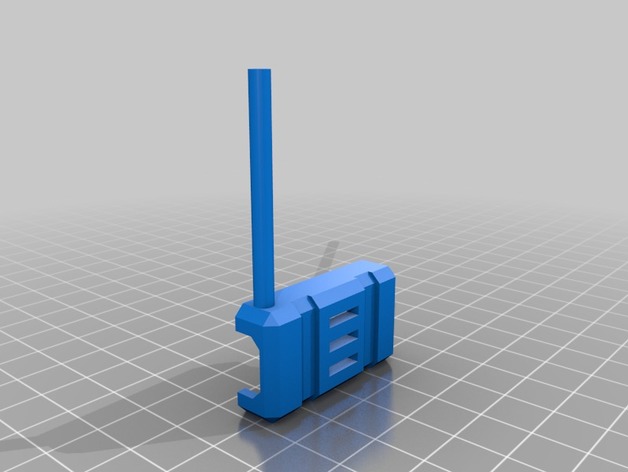
a8 slide on tool holder with wrench 3D Print Model
Summary
A remix of 2 different tool holders, fits every tool that came with the a8 except the wire cutter and doesn’t require screws. -
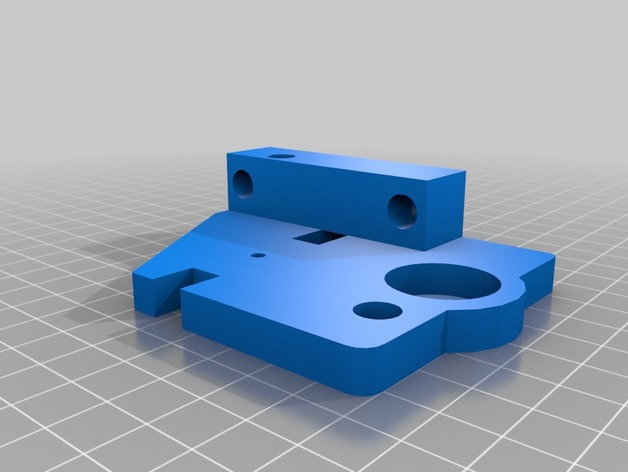
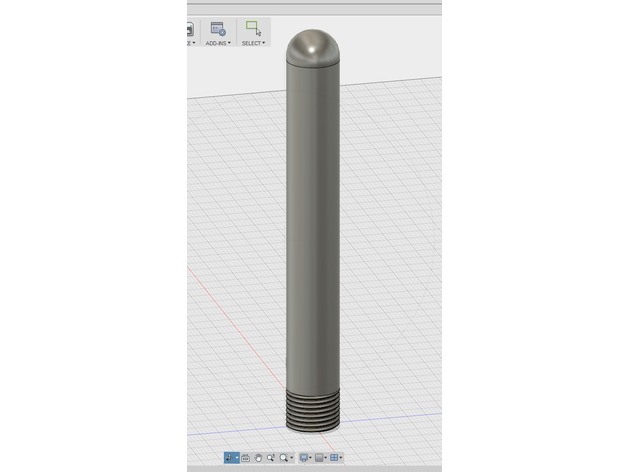
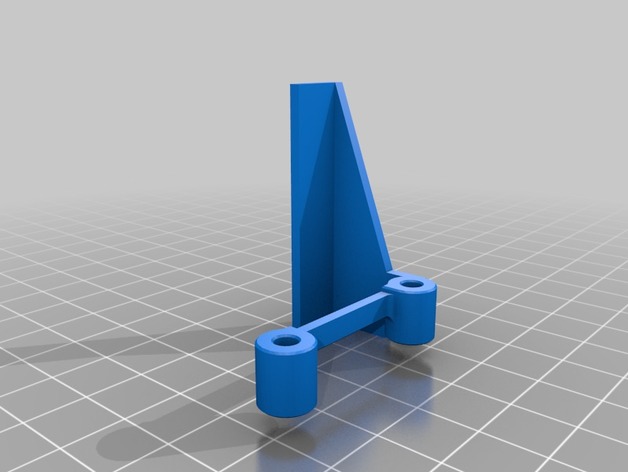
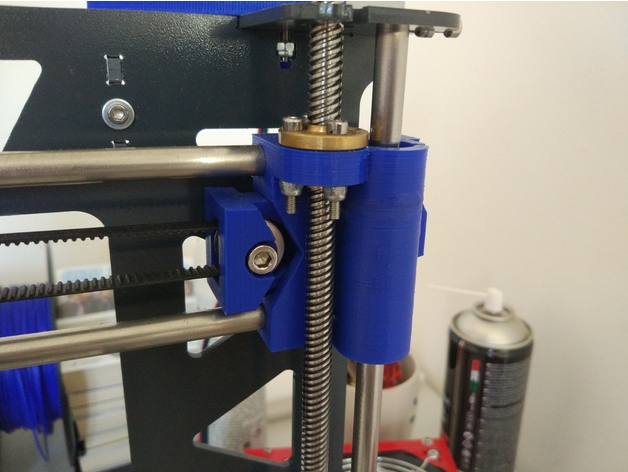
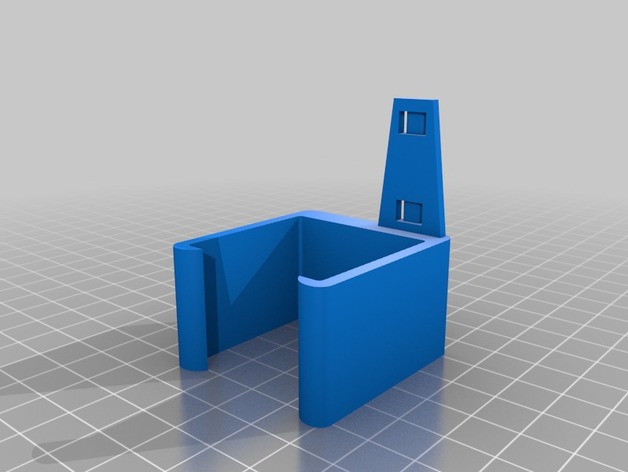
Geeetech i3 Pro B Top Z Bracket with M8 Support. 3D Print Model
Summary
Have some left over M8 all-thread after upgrading to lead screws? This might be the perfect up-cycle option for them
Print Settings
Printer:
Geeetech i3Pro B
Rafts:
Doesn’t Matter
Supports:
No
Resolution:
.2
Infill:
30 -
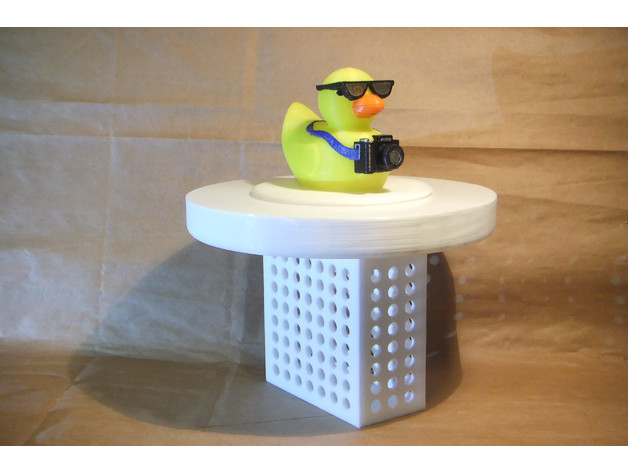
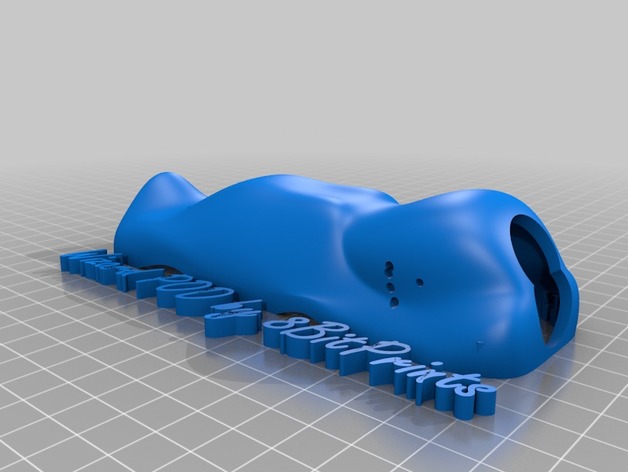
3″ Pool Chlorinatior with Tourist Duck Lid 3D Print Model
Summary
I needed a chlorinator for use with 3″ tablets, but Tixhyl’s version is designed for the smaller (1″?) tablets. I liked the design, though, so… why reinvent the wheel? Simply rescaling the existing model wouldn’t work, though, because that would have changed the size and shape of the holes. So… I loaded Sketchup and redrew the design from scratch, with the adjusted dimensions.
Not being satisfied with that, though, I thought this needed a lid, and nothing looks better floating in the pool than a rubber duck. Unfortunately, I am not too good at organic modeling yet, so I borrowed 3DprinterOS’s totally awesome Tourist Duck. I did the merge for this in Blender, just because blender imports, and works with, existing STLs a lot easier than does Sketchup.
After printing, I painted the colored portions of the duck with Plaid Folk Art Multi-Surface acrylic paints.
Another Sketchup Model – Debunking the Myth that Sketchup is Useless in 3D Printing
Print Settings
Printer Brand:
TEVO
Printer:
Tarantula
Supports:
Yes
Resolution:
0.2 – 0.3
Infill:
5-10%
Notes:
This needs to be able to float, so it is best to print the chlorinator with about 5% infill to make it as light as possible. The lid needs supports enabled and can be printed with between 5-10% infill. I printed every thing at 0.3mm layer height, simply because I wasn’t too concerned about overall appearance, but of course 0.2mm for the lid would look much better. As for supports, I used Cura’s “tree supports” just because they looked like hands holding the duck’s head. Of course, for large flat areas, like the underside of the lid, “tree supports” are not ideal, unless maybe you turn on “support interface” as well. If I did it again, I’d stick with standard support settings.
For the lid, I printed the lower half in white and then switched to yellow as soon as the duck portion started. At the 0.3mm layer height I used, this was at layer 111, but your mileage may vary, so you may want to double check that layer view before deciding where to swap colors. -
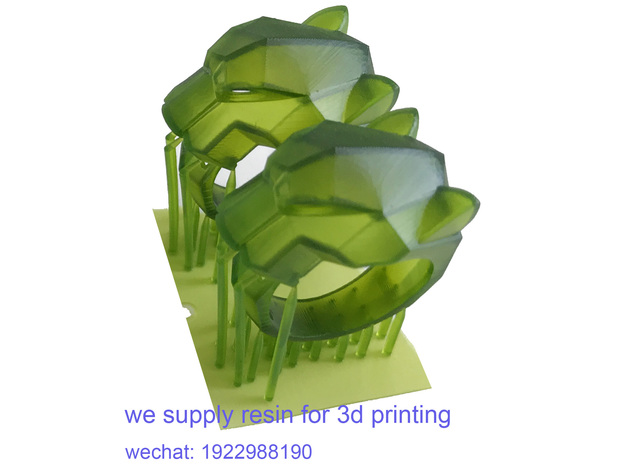
leepard ring with supports 3D Print Model
Summary
It is a ring with supports built already.
We are a factory produce non-casting and casting resins for various DLP LCD SLA 3D printers.
If you need resin material,contact us to get some any time:
[email protected]
wechat:1922988190
skype: +86 15216873412
Print Settings
Printer:
Jamghe DLP printer
Rafts:
No
Supports:
Yes
Notes:
slice 0.05mm,exposure time 2.8s/layer,material: Jamghe casting resin green color.
Post-Printing -

Mad Hatter with base 3D Print Model
Summary
I added a base to tie the model together and for added stability since the Hatter is a little top heavy.
Full model and instructions:https://www.thingiverse.com/thing:2902243
The base is flat without indents for the feet or mushroom. Simply position the original model as per the photos and glue it down.
Enjoy! -
esc cover with rx antenna tube 3D Print Model
Summary
Imported existing esc cover into fusion 360, converted to a BRep and added an antennna tube for my rx antennas.
Fusion 360 source at: https://a360.co/2HUtSfT
Orient the stl in your slicer to position the antenna tube at a 45 degree angle to the horizontal, and print with supports in TPU. Use mirror in your slicer to print for the arm on the opposite side. -
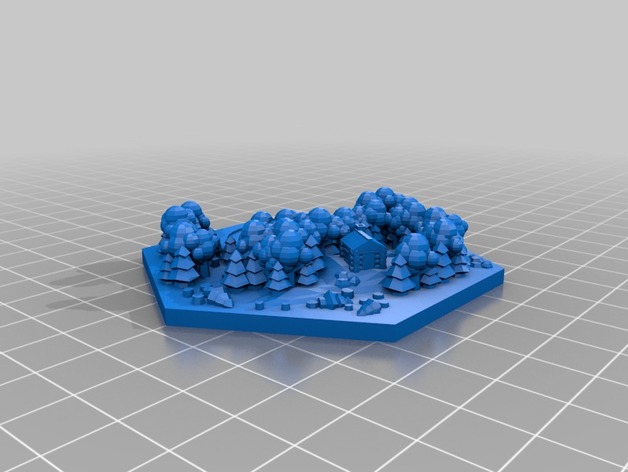
Wood tile with Yeti 3D Print Model
Summary
I decided to hide a Yeti in one of Dakanzia’s wood tiles. I’m going to print one of these for my board and hopefully it turns out good.
I’m not sure how this will turn out so if someone prints one let me know, i’ll report back if it goes good when I get a chance. I hid his hands in some trees, hopefully the printer doesn’t have issues with the angles of his arms.
I grabbed the yeti from here (https://www.thingiverse.com/thing:2401220)
The wood tile from here (https://www.thingiverse.com/thing:2525047)
Hope you like. -
Potentiometer with 2 Tactile Switches 3D Print Model
Summary
This is a set of widgets to incorporate two switches into a potentiometer. The potentiometer shaft can be moved side to side to activate one or other of the switches, or axially to activate both switches at the same time. I created it for use in my electric (synth) guitar: https://youtu.be/sHcr7bk1pW0 -
Arduino Uno Rev3 with Ethernet Shield XL-case 3D Print Model
Summary
This design features extra space for battery or circuitry. It requires 40mm M3 screws. Only three screws are used because there is no space left to accommodate the countersink between the pin slot and the screw hole.
Print Settings
Printer:
Geeetech i3 Pro B
Rafts:
No
Supports:
No
Resolution:
0.2
Infill:
20 -
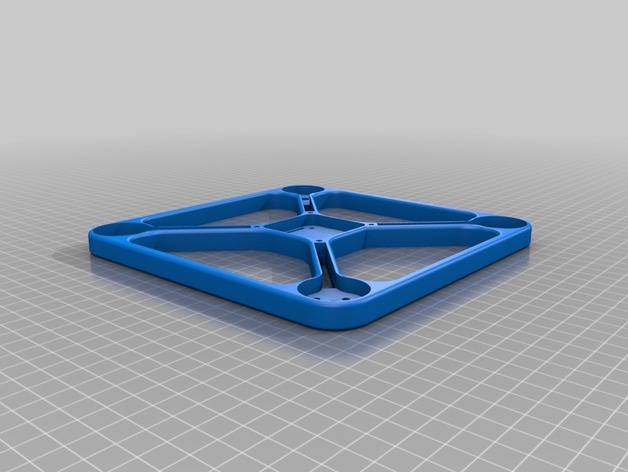
Viper X210 FPV Quadcopter Frame with bigger esc slits 3D Print Model
Summary
basically this is the same frame but i made room for bigger escs as in the original frame my escs would be clipped by the props. i’ve deppend the slits where the escs go witch makes the frame even more fragile if you print in pla.
Print Settings
Rafts:
Doesn’t Matter
Supports:
Doesn’t Matter
Notes:
i recommend you stick to the settings of original Viper X210, and also avoid pla as i have now shattered my frame on one of the support arms.
How I Designed This
3d builder
i used windows 10’s 3d builder and subtracted out the slots for my escs. -
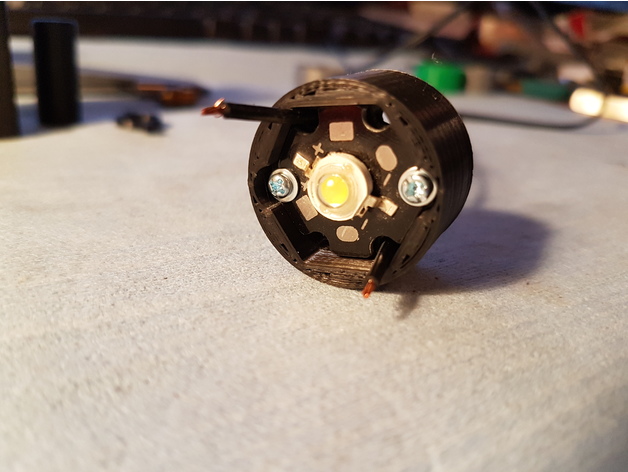
Diode/LED with HeatSink Holder 3D Print Model
Summary
Hello! Here is my Diode-LED with HeatSink holder.
I do not know what heat can be released by the diode but you should print it in ABS or PETG ( or others Thermal resist material ).
The Diode is fixed with 2 M2X12mm Screws and nuts ( Screws on pictures have 19mm )
It need support ( I put 80° Overhang Angle Support ) just to have the support needed…
Have a nice day!
Print Settings
Printer Brand:
TEVO
Printer:
Tarantula
Rafts:
No
Supports:
Yes
Resolution:
0.18
Infill:
100% -
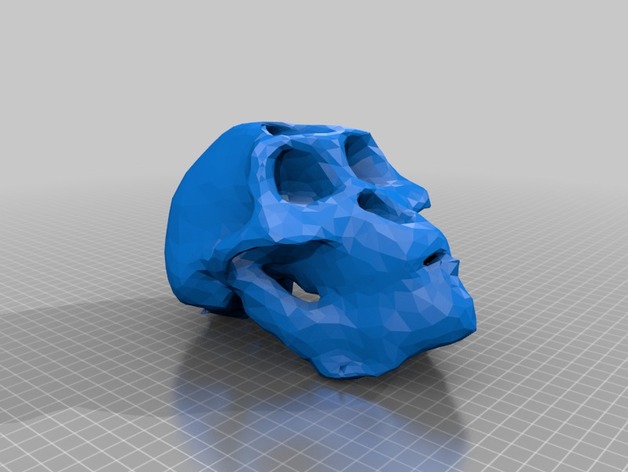
Australopithecus afarensis skull (with jaw) 3D Print Model
Summary
Australopithecus afarensis skull (with jaw) 3D scanned with Kinect and Skanect. For educational use. Made from replica.
Print Settings
Printer:
Anet A8
Rafts:
Yes
Supports:
Yes
Resolution:
0.2
Infill:
10% -
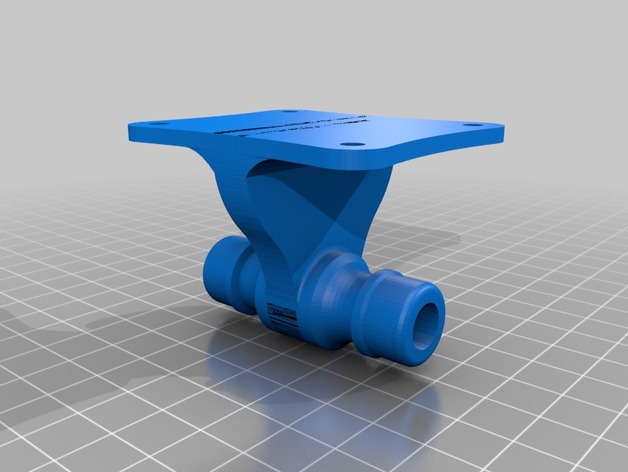
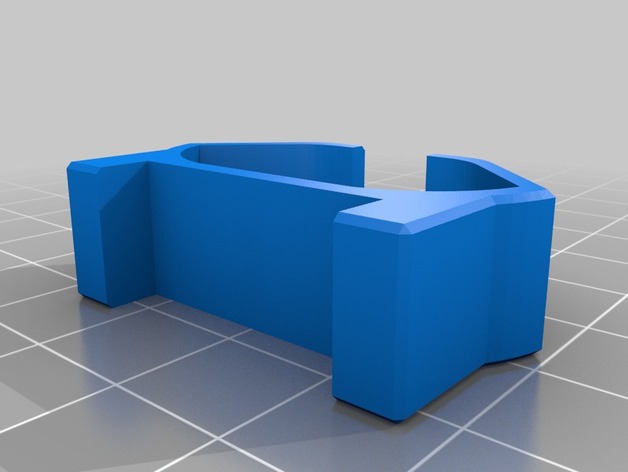
Gardena connector with wall mount 3D Print Model
Summary
Gardena connector for mounting on a wall.
Print with connector upright! (Not as displayed here.)
The model includes support on the nut, but needs support on the rest of the model.
Dry-tested. -
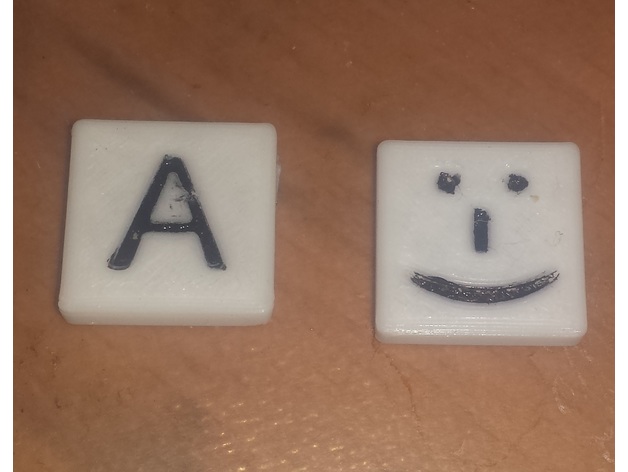
Game Tile with Letter 3D Print Model
Summary
This is intended to make custom/replacement tiles for games like Bananagrams.
If you want a full set of the game you should buy it, to avoid piracy.
You can adjust the letter and lettersize variables to make your desired tiles, or all of them if a different sized tile is desired.
I painted the groves to increase contrast. -
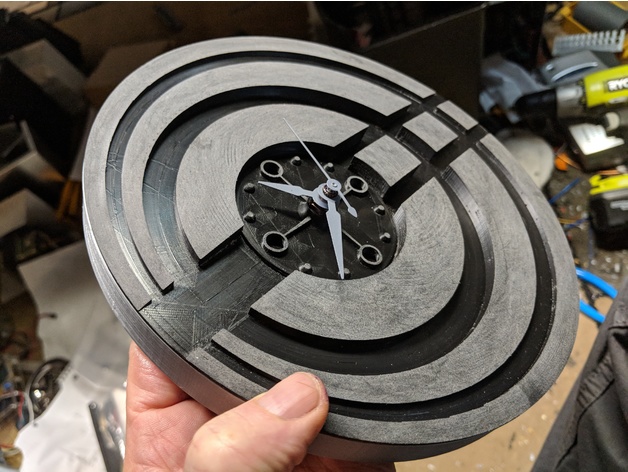
Modern quartz clock with magnetic mounts 3D Print Model
Summary
This clock has the logo for the company I work for incorporated into the clock face.
The clock movement can be purchased here :https://www.amazon.com/gp/product/B00N639EUU/ref=oh_aui_detailpage_o02_s00?ie=UTF8&psc=1
The magnets are 12mm round by 3mm deep, also bought on Amazon.
Designed using Fusion 360.
Print Settings
Printer:
Creality CR-10
Rafts:
No
Supports:
No
Resolution:
.16
Infill:
20%
Notes:
Hatchbox silver PLA for the out ring, face is black APLA sanded post print for the mat finish. -
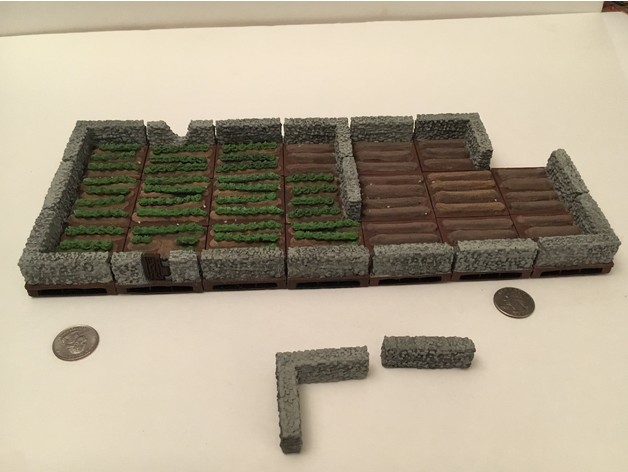
Field Stone Wall Tiles with Openlock 3D Print Model
Summary
Many miniature 2×2 inch stone walls surrounding lettuce and unplanted field. Different corners and side stone walls to handle whatever orientation is wanted for the fields. Includes a corner and straight stone wall that can just be placed on existing tiles as well with no bases. Has one tile with a wooden gate and another that has fallen creating an opening.
There are two sets of tiles for every design. One design is compatible with the openlock system and the clips can be found for free. The second set is also 2×2 inches in size with 3mm bases and can be placed on bases with similar dimensions. I call these top caps.
Free clips are in the link provided below.https://www.thingiverse.com/thing:2343306
The original fields with no walls can be found here and matches perfectly the walled field tiles provided.https://www.thingiverse.com/thing:2846214
Print Settings
Printer Brand:
PowerSpec
Printer:
PowerSpec 3D Pro
Rafts:
No
Supports:
No
Resolution:
0.2
Infill:
15% -
EggBot suction cup holder enlonged for table tennis’s ball with sources 3D Print Model
Summary
I’ve made it to print on table tennis’s balls. It is suitable for JJrobots Sphere-o-bot kit’s suction cup and has size enough to hold table tennis’s balls. -
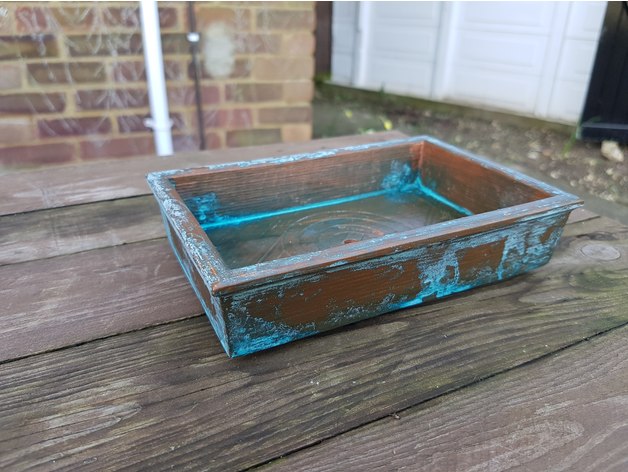
Rectangular Modern Bonsai Pot – No Support Print, With Drainage Holes 3D Print Model
Summary
Easy Printable Bonsai Pot Series
Pot 2 – Rectangular Modern Bonsai Pot
A simple, circular bonsai pot with drainage hole.
Why?
These pots are designed to be easily printed without supports.
There are a lot of bonsai pot designs that have no way of orienting them for printing without supports.
By splitting the pot into two pieces, feet and body, you can easily print both without support and have a great looking pot at the end of it.
Feet
Print the foot model 2 times as downloaded, and 2 times mirrored (this should be easily accomplished in your slicing software)
Print Settings
Printer Brand:
Tinkerine
Printer:
Ditto Pro
Rafts:
No
Supports:
No
Resolution:
0.3mm
Infill:
10%
Notes:
Print 4 copies of the feet, 2 of them mirrored, and glue to the base. They are designed to be glued right up to the edges.
Scale up or down as needed.
How I Designed This
Fusion 360 -
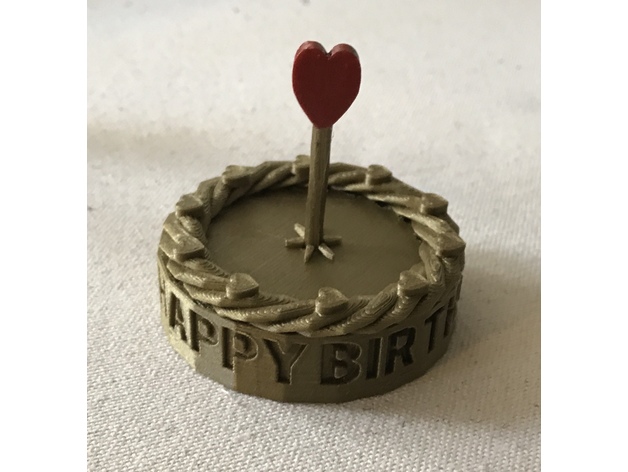
Birthday Cake with Heart Candle 3D Print Model
Summary
Birthday cake for a friend of mine, inspired by this Thing. Designed in TinkerCad, using the Text Ring customizer to create the letters, which were then debossed into the side of the cake. “Icing” on the cake was created with the Twisty Ring custom shape, topped with the Hearts on a Circle custom shape. The “Candle” is the Twisted Polygon custom shape, topped with a basic shape heart.
Print Settings
Printer:
SnapMaker
Rafts:
No
Supports:
No
Resolution:
0.2
Infill:
10%
Notes:
Printed with Amolen Bronze PLA.
The “candle” prints separately from the cake and is inserted in the cake afterwards. I did it this way because this was going to be mailed to a friend and I wanted to avoid having to box it up.
Post-Printing
Optional: painting
I wanted the heart to stand out a bit more, so I painted it with nail polish. Worked like a charm. -
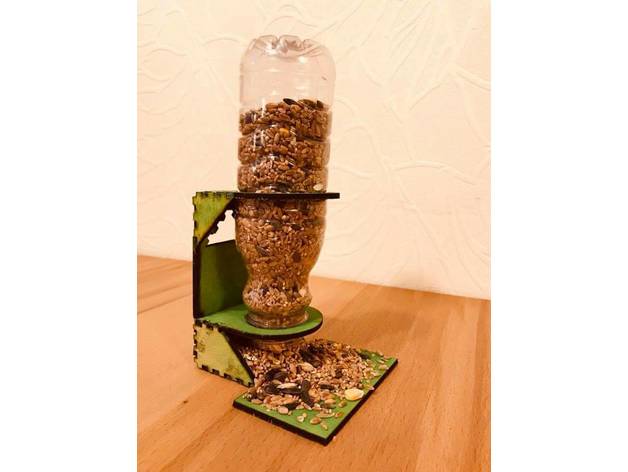
DIY Bird Feeder with a bottle 3D Print Model
Summary
Easy-to-make bird feeder, that can be made with kids.
To attach the parts together use some strong waterproof glue -
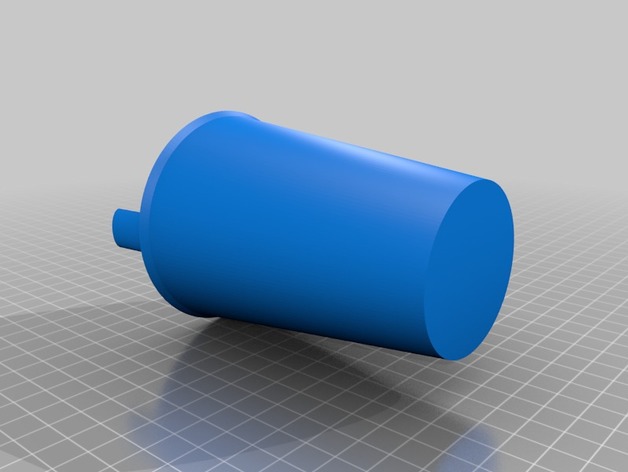
Test Tube with Threaded Cap 3D Print Model
Summary
My attempt at a little test tube container with threaded cap.
Print Settings
Printer Brand:
Creality
Printer:
CR-10S
Rafts:
No
Supports:
Yes
Resolution:
0.2
Infill:
100 -
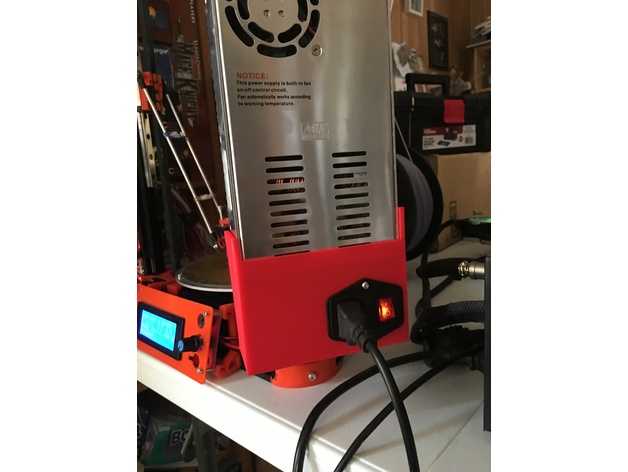
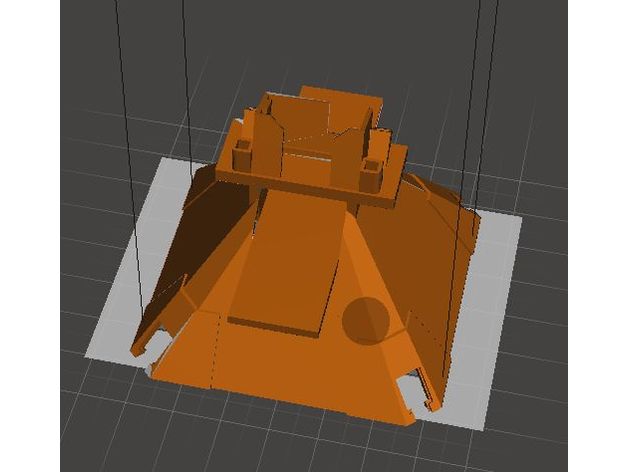
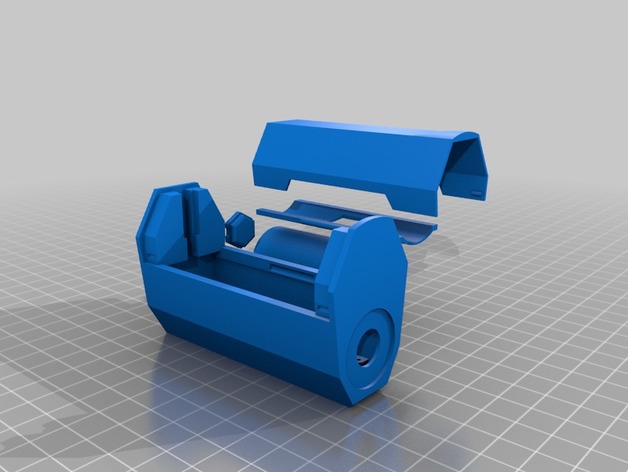
Mean Well 360W 12V Power Supply Cover with Fused Switch 3D Print Model
Summary
This is a cover that snaps onto a MW-360-12 power supply, it has a hole for mounting a fused switch and socket module, and the back is open for easy access to wiring.
My FLSun Kossel Mini (printer in pic) came with a no-name generic power supply and one of the first upgrades I made was to replace it with a Mean Well supply. There are numerous mounting options on Thingiverse, I used: “Customizable PSU bracket” (https://www.thingiverse.com/thing:1646026) by rmoro to mount it on the side.
It has holes on the right side to fasten to power supply, but it didn’t line up exactly on mine, and the piece stays attached nicely enough from the ridges on the sides.
Print Settings
Printer Brand:
Creality
Printer:
CR-10
Rafts:
No
Supports:
No
Resolution:
0.2 mm
Infill:
10% lines -
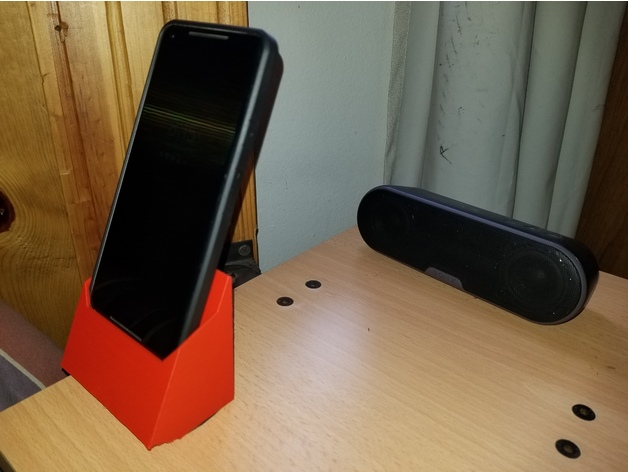
Phone Stand/Charger – Pixel 2 with Trianium XL Case Wallet 3D Print Model
Summary
This stand & charger is for the Pixel 2 XL as it is fitted with the Trianium Wallet case (available on Amazon and Ebay). It uses the charger and cable that comes with the phone. It is best to CA (super glue) the cable end in the phone once you’ve adjusted it to the proper mating height. -
Linear rail carrier holder for BLV with igus TWE-04-12 3D Print Model
Summary
I had serious problems with the mgn12H rails from Aliexpress and bought some
350 mm T-linear rails from igus : (TS-04-12) and they are alright for the Z-Axis – didnt try X or Y !
Combined with their TWE-04-12 carrier it is only usable with a new 2020_left/right_holder from the BLV_mod -
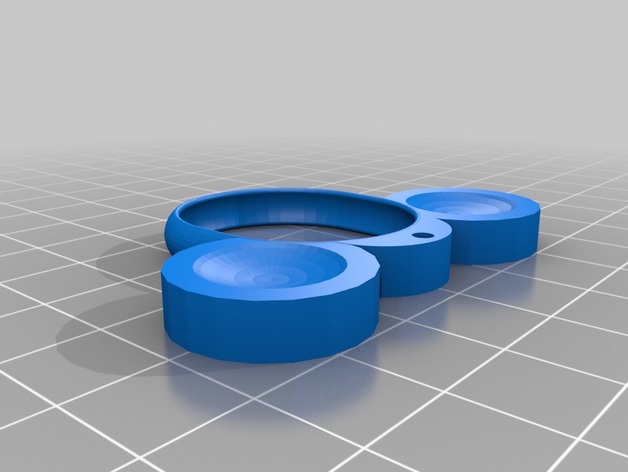
Laser holder with synta adapter 3D Print Model
Summary
Not exactly remixed but certainly heavily influenced by mianzel’s laser holder, I’ve redrawn all of the geometry in fusion 360, thickened everything up, now the rings have a cross section of 10mm and the upright and bed are solid pieces, the holes in the rings are designed to have threaded inserts melted into them but you could probably hand tap as well, I used M3 rivet nuts I found on Amazon, printed at 30% infill in a black pla but will be attempting in a petg as well -
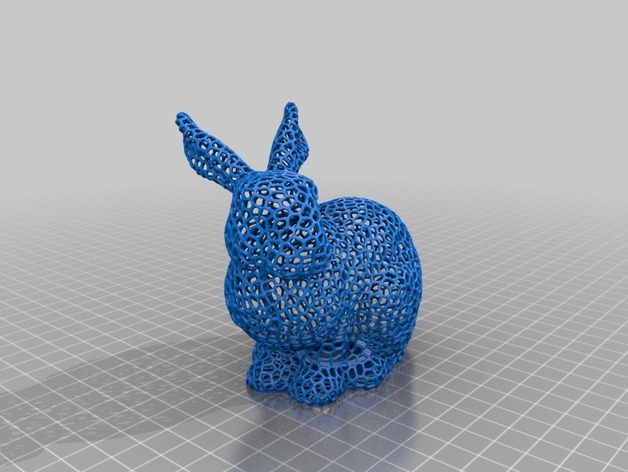
Voronoi Easter bunny fixed with opening 3D Print Model
Summary
This is a Remix of the Voronoi Easter bunny fixed.
I’ve simplified it so it can be edited in TinkerCad and the added a locking mechanism (Remix of: https://www.thingiverse.com/thing:1173662) so it can be filled with goodies – and they can be taken out without destroying the Bunny. Sorry, Enzi1984, I liked your Idea but I hate to “kill” my prints 😉
His make: https://www.thingiverse.com/make:325019
All credits go to the original creators of the models, I’ve only added them together.
When printing the “inner” part make sure to reduce the size a bit, depending on the tolerances of your printer.
If someone could clean up the model a bit I’d be grateful. This is my first design and I’m still fighting with the Details.
Print Settings
Printer:
Anet A8
Rafts:
No
Supports:
No
Resolution:
0.1 or 0.2 mm
Infill:
none
Notes:
when printing the inner part of the lock make sure to reduce the size a bit, depneing on the tolerances of your printer. For me 95% seem to work fine. -
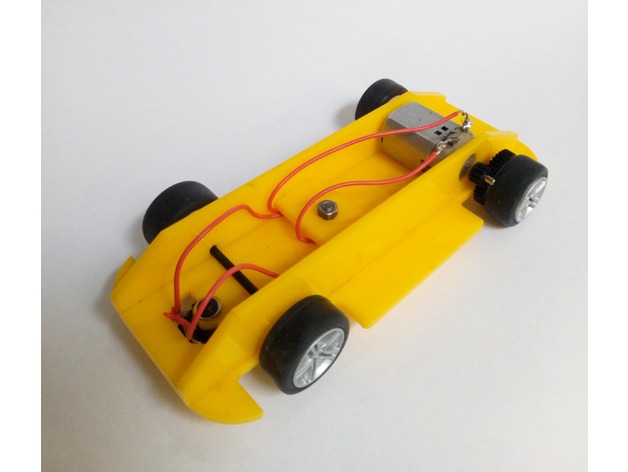
Scalextric chassis with transverse motor rear wheel drive 3D Print Model
Summary
scalextric chassis using the alternative gears to produce a transverse motor position. This set up will allow for shorter chassis to be built if required but you are set on the width.Standards
NGSS
Overview and Background
trying out some simpler versions of the 90 deg drive system for a year 7/8 club and came up with this.
Lesson Plan and Activity
no lesson plan included
Materials Needed
acrylic
4mm bolt
scalextric parts pack -

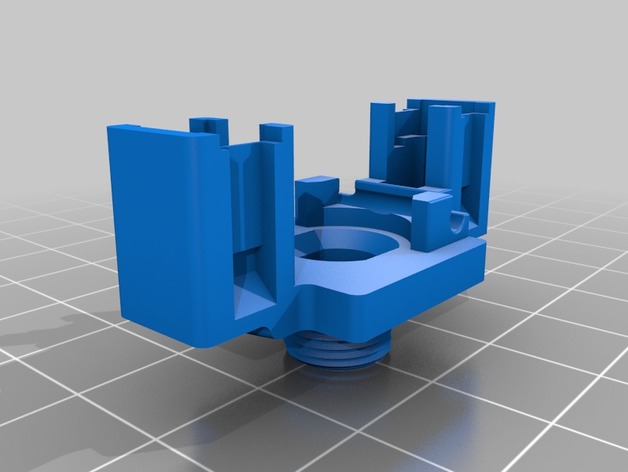
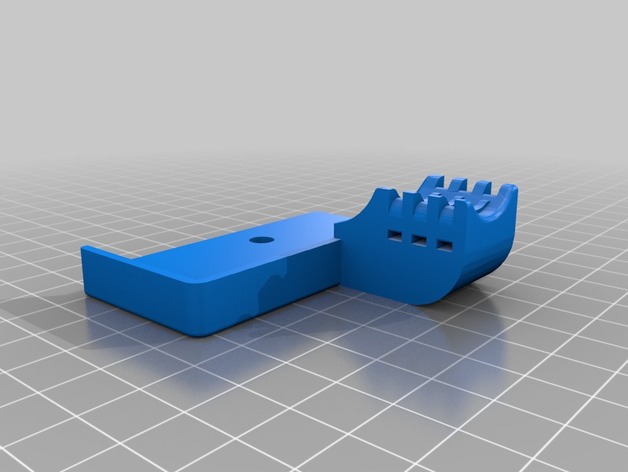
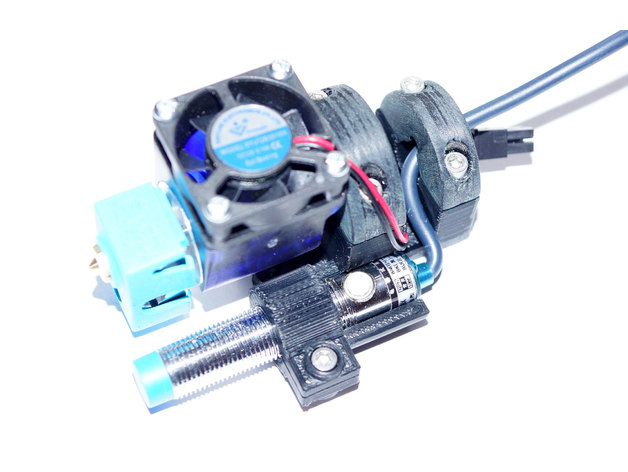
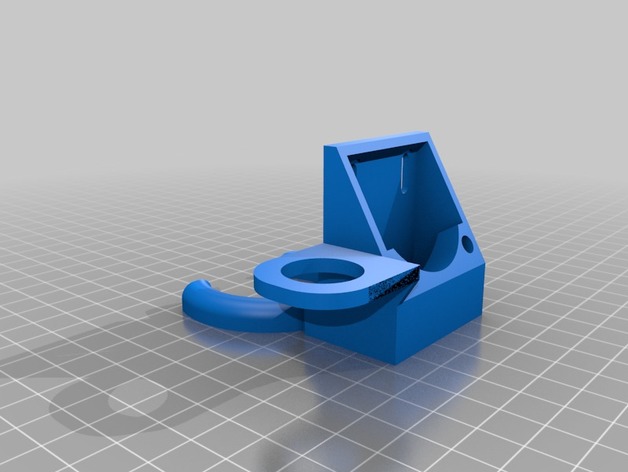
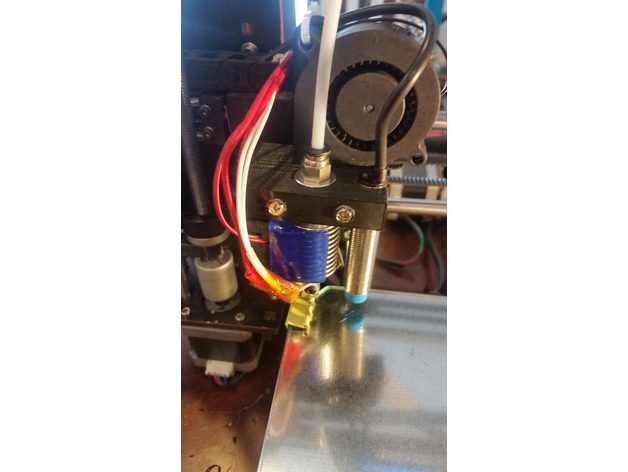
Removable Extruder Fan Holder A8 with Z probe 3D Print Model
Summary
This design allows you to easily replace your filament by manually removing the extruder fan.
The extruder fan sits on on sliding slot, and to remove it you just need to pull it up.
I have add a Z-Probe ring if you have a sensor..
This is a remix from petiz ( https://www.thingiverse.com/thing:2822215 )
What you need to know:
print the design
remove the heatsink and fan cover
use the same two 50mm screws to put the mount in place
add the Z-Probe
simply slide the fan in!
Feel free for comments and photo if you make it
Print Settings
Printer:
Anet A8
Rafts:
Doesn’t Matter
Supports:
No
Infill:
15% – 20% -
Lamp/holder for led bulb GU10 with adjustment 3D Print Model
Summary
This is holder for GU10 led bulb with diameter 110mm. This have ball type adjustment. -
Delta 5 – with voltage regulator and heat sink 3D Print Model
Summary
Just trying to add a voltage regulator, and some heat sinks I bought 😀 -
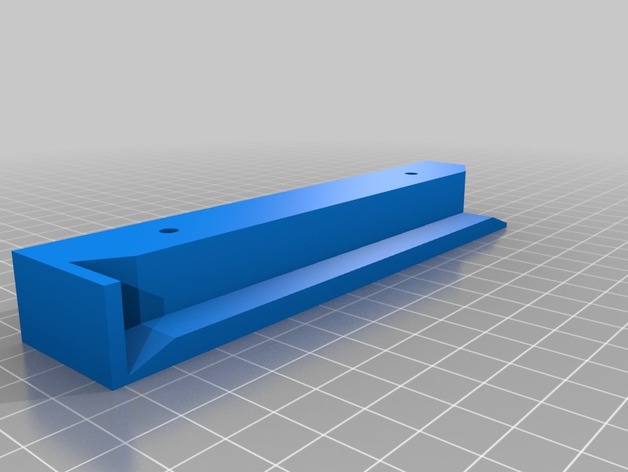
Slim Wireless Keyboard Rack with backstop – Remix 3D Print Model
Summary
The original design my user ‘drou’ inspired me to create a simple variation for a project at my office. The intent was to truncate the height of the rack to accommodate a slim keyboard design. Second, I needed a stopper at the back of the rack in order to keep the keyboard from pushing all the way through and falling out the other side.
There is only one file, simply mirror this STL for the other side of your keyboard rack.
Will get some finished photos uploaded.
Original thing: https://www.thingiverse.com/thing:1456347/
Print Settings
Printer:
Anet A8
Rafts:
No
Supports:
No
Resolution:
.1
Infill:
10%How I Designed This
TinkerCAD -
Cooling Fan Spacer for A6 with lights 3D Print Model
Summary
The original fan spacer works great. I wanted some light down by the print nozzle, so I could watch the print without using a flashlight. I modified the spacer to add an area for LEDs. I stuck a small strip of LEDs on and wired them into the extruder fan power.
I’m quite happy with the result. Soldering into the existing fan wiring (while it was still on the printer) was a bit of a PITA. I didn’t want to completely undo the loom and remove the fan from the printer, so that’s how it had to be. Still, well worth it.
Print Settings
Printer:
Anet A6
Rafts:
No
Supports:
Yes
Resolution:
.2 mm
Infill:
100%
Notes:
I printed at 100% infill. Once you print the walls, there’s not much left on the inside I figured why not. Print with supports and a brim. Print in the orientation shown on the model here. Its minimal support and it comes off very easily.
Post-Printing
LEDs
I bought a meter long strip of 12v LEDs for about $1. I cut off a 45mm section and attached it to the bottom of this part. I soldered on servo wire, and then soldered those wires to the power leads going to the extruder fan. For extra security, I put some Kapton tape around the LED strip as well (also to cover up the exposed solder points). -
Childrens’ cup with built in straw 3D Print Model
Summary
A small cup with a built-in straw for easy drinking. Make sure that you use a food-grade safe type of plastic like PLA. -
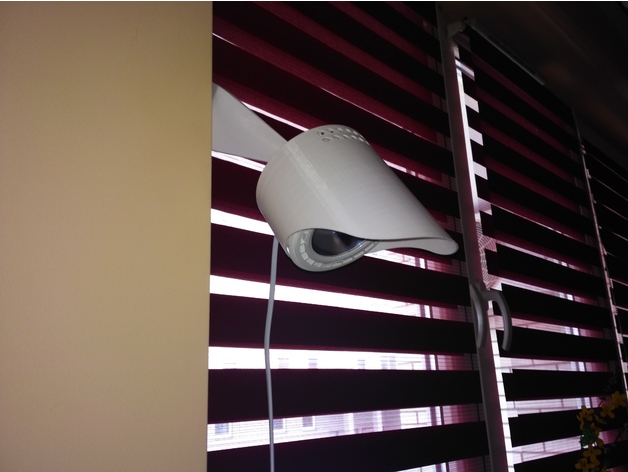
UDI U818A Cover with Camera Stand 3D Print Model
Summary
This is a remix of thingiverse UDI U818A Cover Mod.
Print Settings
Printer Brand:
MakerBot
Printer:
MakerBot Replicator 1
Rafts:
No
Supports:
No
Resolution:
0.2
Infill:
Not Applicable
Notes:
Printed on a FlashForge Creator Pro 2016 model. The corners are reinforced to improve attachment. This cover is modified to hold a whoop camera. -
Anet A8 simple-fast damper to use with front frame brace 3D Print Model
Summary
I remixed MarcoCammozzo’s Anet A8 simple-fast damper so it can fit it in my front frame brace by Leo_N https://www.thingiverse.com/thing:1857991
Print Settings
Printer:
Anet A8
Rafts:
Doesn’t Matter
Supports:
Doesn’t Matter
Resolution:
0.2
Infill:
30%Overview and Background
-

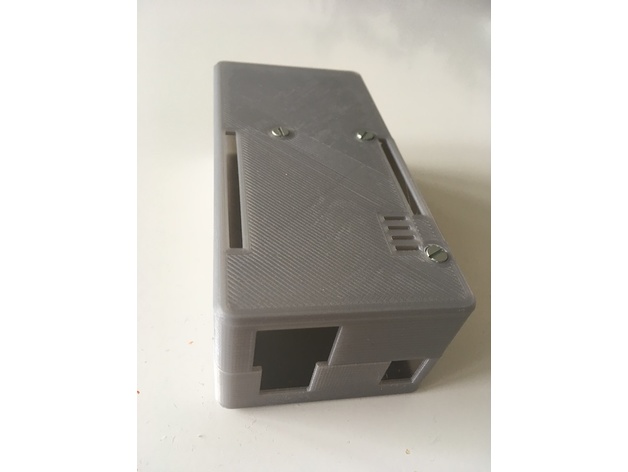
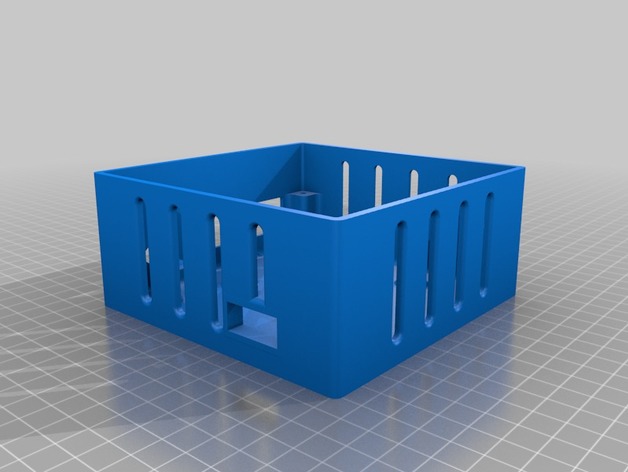
AM8 Electronics Case with 120mm Fan Cover 3D Print Model
Summary
I loved this design by feenix82, especially the internal cable management, but wanted it to fit the AM8 Misumi Extrusion Frame. I only adjusted the tabs here to fit the frame. After printing I realized I made the tabs a little too thin and the screw would bottom out, therefore you may need to add a washer under the screw head to prevent that. The cover with 120mm fan is awesome but for some reason my printer had issues printing the honeycomb pattern horizontally so I got rid of them. This may actually improve airflow as it’ll pull more air from the sides of the case and out the front. Who knows. Either way, I like that the motherboard and mosfet is enclosed and this should provide some much needed cable management.
Print Settings
Rafts:
No
Supports:
Doesn’t Matter
Resolution:
.2mm
Infill:
15%
Notes:
I printed with supports but many say you don’t need it. In my case it may have caused more issues as in trying to remove supports I broke some of the cable management loops inside and had to glue them. You’ll have to try it and see how it works with your printer. -
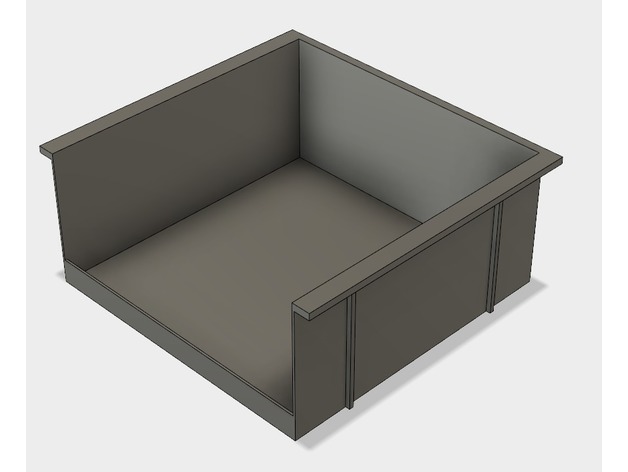
Storage bin with mount – for under bench etc 3D Print Model
Summary
Storage bin with mount that you can screw under a bench or something like that.
I made the holes for the screws for common tree screws 3,9mm X 40mm.
Print Settings
Printer Brand:
Creality
Printer:
CR-10S
Rafts:
Yes
Supports:
Yes
Resolution:
0.15
Infill:
20% -
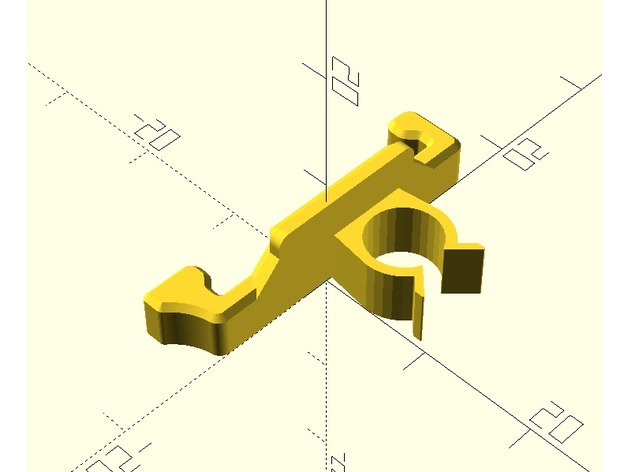
lock with wire clip for Creality Ender 2 wire chain 3D Print Model
Summary
I remixed the lock of the Ender Cable Chain by ninne (https://www.thingiverse.com/thing:2498801) with the clamp of the bowden wire clips by Evanrude (https://www.thingiverse.com/thing:2328449) to attach the hot bed cable to the chain. It prevents the hot bed calbe from scrubbing the chain and the power cable. -
TEVO Tornado Ultrabase Upgrade Remix with cable strain relief 3D Print Model
Summary
Clamps to attach Anycubic Ultrabase to the Tevo Tornado.
Added cable strain relief to the rear left part.
Remixed this https://www.thingiverse.com/thing:2782720 and this https://www.thingiverse.com/thing:2748197 things. -
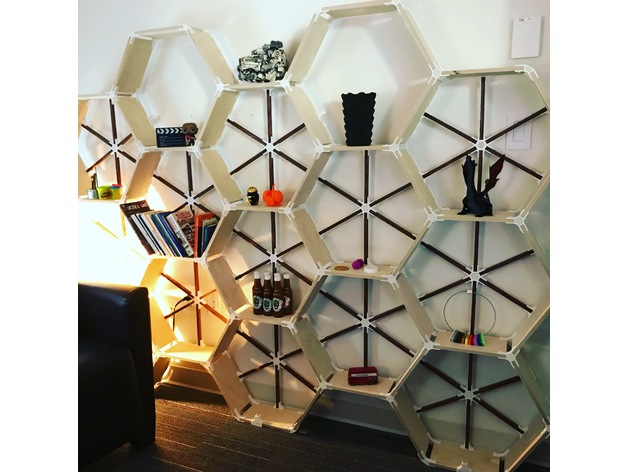
Hex-a-shelves (with other brackets as well) 3D Print Model
Summary
Brackets designed in Fusion360 to allow custom shelf design. I built a shelf for my office (see pictures) which was a huge hit.
Print Settings
Printer Brand:
Prusa
Printer:
i3 MK2S
Rafts:
No
Supports:
No
Resolution:
0.2mm
Infill:
30%
Notes:
Assembly instructions:
Please note before starting, it is best to assemble the pieces with it laying flat on the floor (like the shelf has fallen over) so that the back support brackets can be attached before standing it up. Without the back brackets, you will not have a very sturdy shelf and any weight added to it will result in tears… yours.
I chose to make a pretty hefty hex grid of shelves as you can see in the picture, but you can modify and make whatever design you want. My support brackets are only designed for the hex arrangement and if you alter, you may need to design and print some brackets depending on your design to help support it. There was quite a bit of printing to get this design. The bigger the shelf, the more you’ll be printing… I used 6 full 1kg spools of white filament by the time I was done.
The wood measurements for me below:
Main shelf length 240mm
Back support strip length 205mm, width 15mm. Orientate so you see the edge towards you.
Baltic Plywood Thickness 1/2 inch (or 12.5mm)
I used 1/2 inch white tipped screws for the construction. You only need to go in one side of the bracket, not both.
Printing the brackets, I decided not to have the top and bottom layers filled in. I chose a honeycomb pattern as it matched the overall design. You will need to experiment with your printer to get the strongest results. I used 9 perimeters, no top or bottom, and 30% infill. I printed on both my Prusa MK3 and MK2s.
Depth of shelf is up to you… I made mine 6” deep, that way I could get all the pieces I needed from 1 4’x8’ sheet of plywood. I used Baltic Birch as it has a nice edge after being cut. Don’t forget about the kerf (thickness) of the blade when making cuts to make sure you get accurate measurements. The depth of your shelf could be at least 8” before needing to print a middle bracket for support.
I stained the back support to give it extra contrast, up to you if you want to do the same.
If you use these brackets and post, please credit me @vfxsoup (for instagram) for my design. Initial inspiration came from looking at a design by martcaset on thingiverse. Good luck, it was a really fun project printing all the parts and putting it together. -
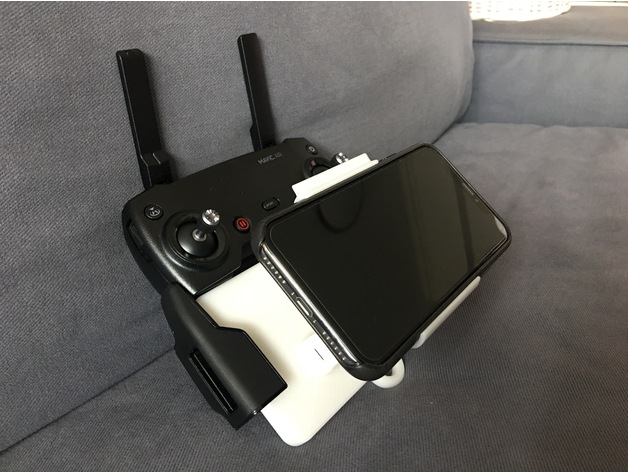
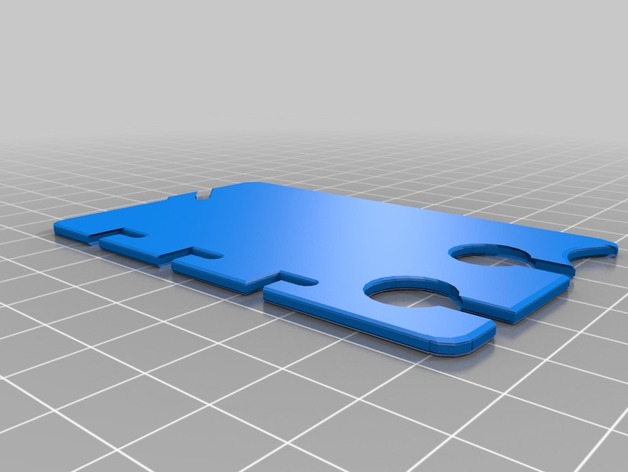
DJI Mavic Remote Control iPhoneX (with Apple Leather Case) Bracket 3D Print Model
Summary
DJI Mavic series remote control iPhoneX bracket
Suitable for Apple iPhoneX with Apple leather/silicon case -
Customizable Earbud-Wrap with Fast Release 3D Print Model
Summary
This earbud holder features:
Convenient flat storage when not in use
Business card size, credit card size, and custom sizes
Quick wrapping action
Even quicker release feature. The last loop with the audio jack holds the other loops in place. Release it, and you can release all the other loops instantly.
Two central holes so you can thread the cord through them to keep it handy while you are listening
An optional notch for the slide-off side of the winding
Customizable location of notch for windings relative to earbud holes
Customizable width of slots for the cord
Customizable size of earbud holes
Customizable corner rounding. Make the corners square, even.
If Thingiverse’s Customizer is working, this is your best bet for customizing. If not, open the file in OpenSCAD, change the preset to “Custom” and start playing with the other settings.
Not much in presets yet. The Default matches DavidPhillipOster’s thing that I mixed from. If you find settings that work well for a recognizable pair of earbuds, let me know and I’ll add them to the presets.
Want a feature added? Let me know.
I tried to restrict the ranges of the settings to ones that result in valid models. If you manage to break the model using Customizer, let me know.
Print Settings
Printer:
Monoprice Mini select Rafts:
No Supports:
No Resolution:
0.2 mm Infill:
15% Notes:
These print settings were suggested by DavidPhillipOster for his thing. I went with a heavier infill when the extra features result in thinner sections.
How I Designed This
Remix, OpenSCAD and Customizer
Started with Earbud-Wrap with Fast Release by DavidPhillipOster, added some features suggested by my son, and made it all Customizer friendly.
Owe a debt to Splines for OpenSCAD by teejaydub as well. -
LCD Knob with a thumb sub-knob 3D Print Model
Summary
As for many of us, the knob that came in the kit was not working properly and got lost on the second day (or night, not sure, not enough sleep).
I wanted a small knob, that would allow to quickly change the speed of the print (as I’m twitchy during the night prints, usually worse by 4 am).
I’ve added a finger-tip knob onto the knob, to allow for faster/lazier spinning of the dial.
If it works for you, I’m glad. If it doesn’t, don’t bill me for the fill.
PS: Feel free to adjust the height (Z) of the knob.
Original size was slightly exaggerated in order to accommodate for the bracket of the spool holder, which is a bit too close to the knob. -
Anycubic I3 Mega X axis Fan stepper fan mount with heat sink clearance 3D Print Model
Summary
Friction fit fan mount with air channels and clearance for 40mm heat sink stuck on the end of Z axis stepper. Mounting holes designed for 40mm fan. Print with mount side down. There are minimal supports needed.
Print Settings
Printer:
Anycubic I3 Mega Rafts:
Yes Supports:
Yes Resolution:
0.2 Infill:
20
Post-Printing -
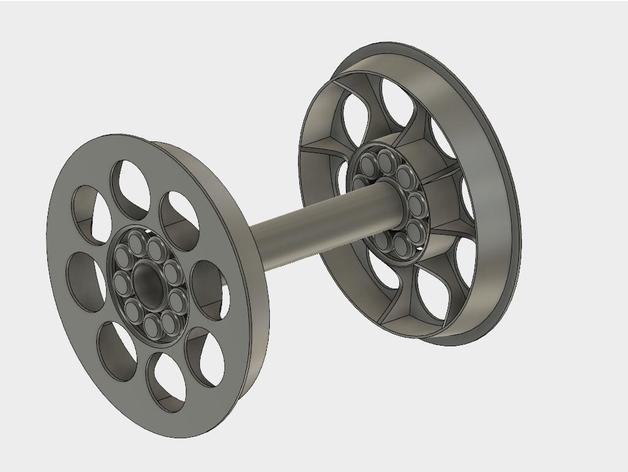
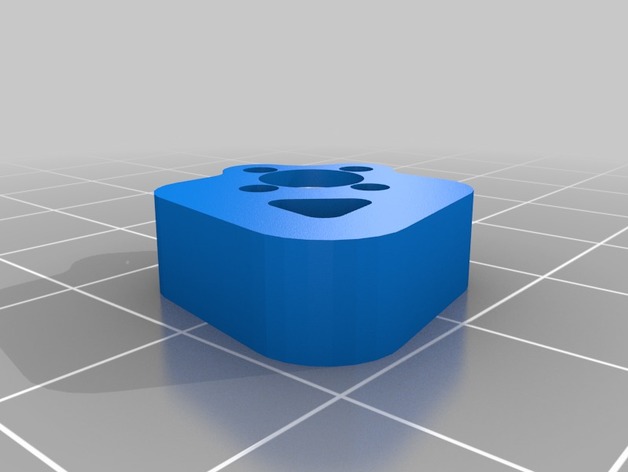
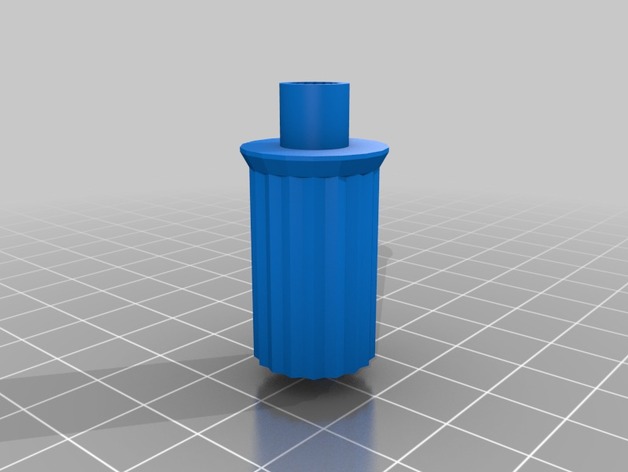
Filament Spool Hub with Print In Place Bearings 3D Print Model
Summary
Hubs to hold your spool in typical 8mm spool holders with print-in-place roller bearings.
Print Settings
Printer Brand:
Prusa Printer:
Prusa Clone Supports:
No Resolution:
I used 0.2 with a 0.3mm nozzle Infill:
N/A Notes:
The two hubs should be printed with the “flat” side down. You may need to use a raft if you get a lot of “Elephant Foot” on your first layer. The prints I have made usually needed to have a few of the roller bearings broken free so everything turns freely. If you have trouble with the bearing sticking together, try lowering the extruder temp and/or reducing the filament flow rate a bit.
I included a cover for the M8 nuts typically used. For these, pause the print at 6.8mm and drop the nuts in, then let it finish.
Post-Printing
Assembly:
Press the hubs into the spool with the spacer between them on the threaded shaft. Snug up lightly with the knobs and place in holder. -
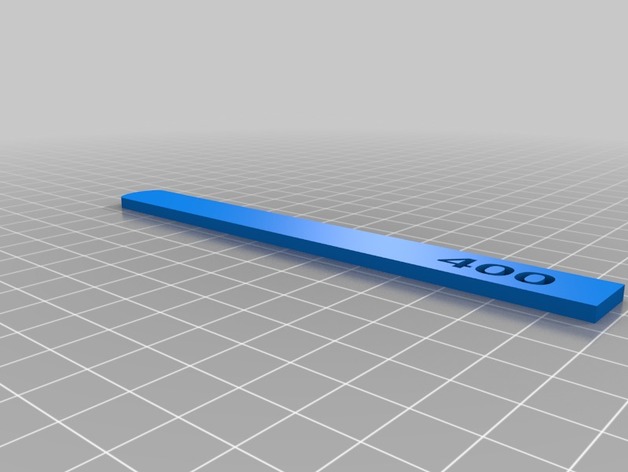
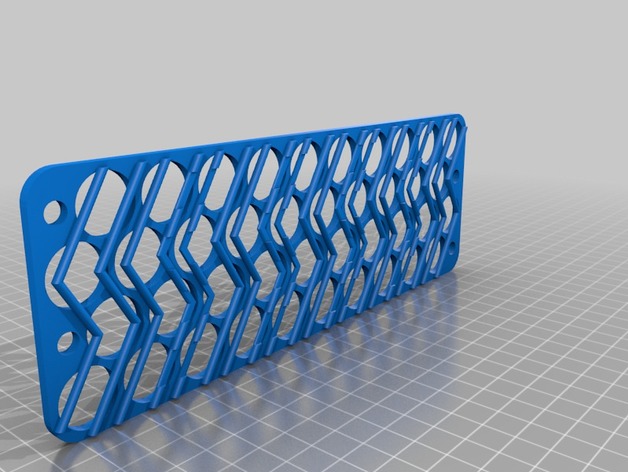
Sanding sticks with engraved grit size 3D Print Model
Summary
Sanding sticks with grit size engraved designed for gunpla hobby.
Print Settings
Printer:
Dremel 3d40 Rafts:
Doesn’t Matter Supports:
No Resolution:
0.1 Infill:
80 -

GoPro Tripod Adapter with 6mm thread 3D Print Model
Summary
Remix from https://www.thingiverse.com/thing:1238967
now comes with 6mm thread. -
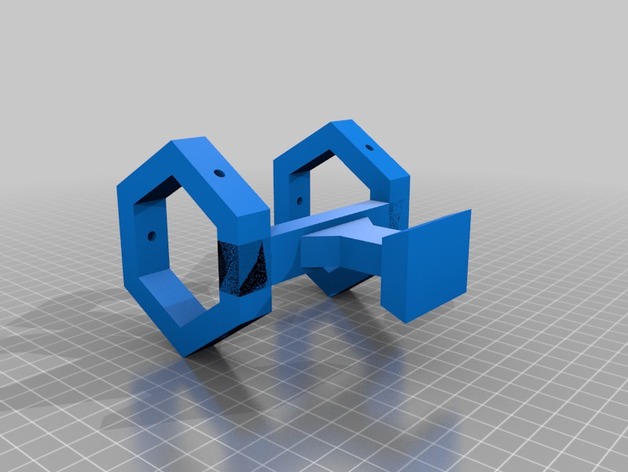
Rock-solid E3D V6 mount for CR-10 with 12mm ABL sensor support 3D Print Model
Summary
Since I would like to change my CR-10 hotend to a more reiable one in terms of clogging (my PTFE tube alway melts after printing ABS at 250 degree) I’ve decided to go for an original E3D V& hotend. OK, it’s not the cheapest solution but in terms of construction it really convinced me since the PTFE tube is to going straight down to the heated block but ends in the cold zone of the hotend.
So I waas looking for a mount that allows me to attach my new hotend to my CR-10 and lets me add an ABL sensor in addition. Unfortunately I could not find any that was working for me. Some were too bulky, some had some construction issues and some simply did not support ABL or the ABL holder was too weak.
Therefore I’ve started to build one from scratch which can be found attached. It fits very well to the CR-10 plate and is easy to print (just print the STL files as they are. The mount.STL migh need some supports to be printed well).
Also the construction is rock-solid – no shaky ABL sensor and no movement of the whole construction.
The ABL Sensor has been placed as close as possible to the nozzle so measurement discrepancies should be as low as possible if the bed is a little uneven. For ABL I’ve used the following capacitive sensor: Heschen LJC12 A3–5-Z/BX.
Print Settings
Printer:
Creality CR-10 Rafts:
No Supports:
Yes Resolution:
0.2 mm Infill:
30% Notes:
Use ABS because of hotend temperatures. Some supports might be needed for mount.stl.
How I Designed This
The mount had been designed in 123D Cad. Used the sensor and the E3DV6 hotend as reference and also did some trial and error when designing the whole mount.
The first design was paying attention to get the sensor as close to the hotend as possible and to have a minimalistic design – anyway, it failed because the sensor was not getting close enough to the bed.
The second approach was much better since the sensor height was perfect now and a cable clamp had been added. However, when trying to mount it to my CR-10 I’ve noticed that the roller screw was preventing the attachment of the mount.
1st attempt2nd attempt
-

Tablet Stand / Tripod (works with Samsung Tab A 8.0 2017) 3D Print Model
Summary
A tripod holder and stand for my son’s Samsung Tab A 8.0 (2017). It uses standard #2 pencils ;), cut to the same length, as legs. This fits around the rubber/plastic case for the tablet. It is currently holding tightly due to the press fit of the dovetail joint.
I used the Tablet Tripod Mount by lynce9956 as inspiration for my design. My son liked his design but wanted a few things different so we redesigned it from scratch. If you print yours at a finer resolution than I used, 0.32 mm layer height, the dovetail joint might fit a bit loser. My suggestion would be to add an elastic band in the dovetail area such as what was done by lynce9956. They used two eye screws and a rubber band to create tension to hold it closed.
Print Settings
Printer Brand:
Prusa Printer:
i3 MK2S Rafts:
Doesn’t Matter Supports:
Yes Resolution:
0.4 Notes:
I printed this in a really rough layer height as my son was being impatient and just wanted this stand to use his tablet as a camera. The large layer lines meant the fit was just slightly tight, but this worked well as I didn’t have to add any springs or elastics to tension it around the tablet. I printed this laying on it’s side so that the layers would help increase the strength. (i.e. the layer are parallel to the stress).
How I Designed This
Designed in Fusion 360
Fairly simple design. My son told me what he wanted and I translated that to a printable object. -
Fan Housing with sensor mount 3D Print Model
Summary
This is the 40mm cooling fan mount made by petitt57 modified with a mount for a 18mm abl sensor.
Visit the original here: https://www.thingiverse.com/thing:2271289 -

iPhone 8 Plus Bumb Case with Two Wolves Howling to Apple 3D Print Model
Summary
Case Bumper for an iPhone 8 Plus with the design f two wioves howling.
Print Settings
Printer Brand:
Prusa Printer:
i3 MK2S Rafts:
Yes Supports:
No Resolution:
15 mm Infill:
20 mm -
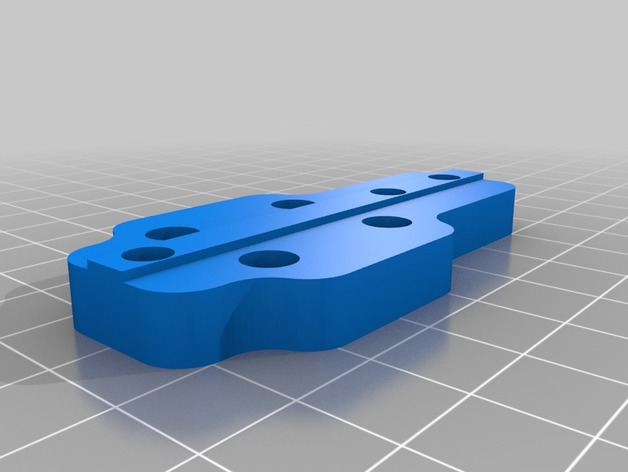
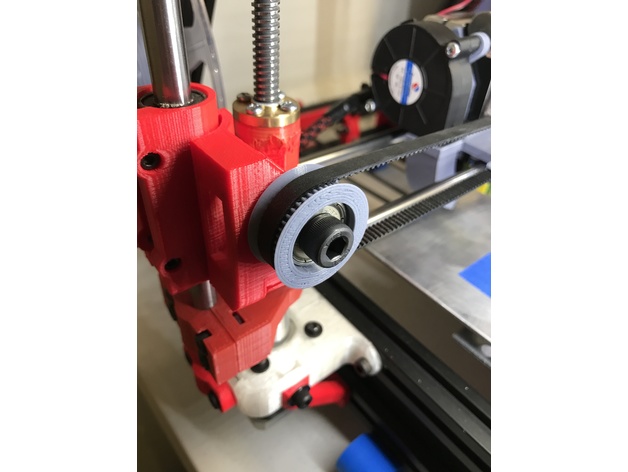
Prusa Steel X axis with tensioner and 8mm leadscrew support 3D Print Model
Summary
This X axis for the Prusa steel frame features a convenient single screw belt tensioner and supports 8mm leadscrews.
You need some M3 screws and nuts to mount the leadscrew nuts in place, a M4 screw and nut for the tensioner and a M5 screw and nut for the toothed idler, I use a cheap aliexpress toothed idler with a M5 bore.
Prints without supports.
Print Settings
Printer Brand:
Prusa Printer:
Prusa Steel Rafts:
Doesn’t Matter Supports:
No Resolution:
0.3-0.25 Infill:
25-30% -
GT2 Idler Pully with chamfered edge 3D Print Model
Summary
46 Teeth. GT2 with 2mm spacing. Designed for a 608 Bearing.
Some designs available have a chamfer, some designs available have two parts that press together. I could not find a design that had both so I made one.
Includes a spacer so that it will not rub on a frame if applicable. -
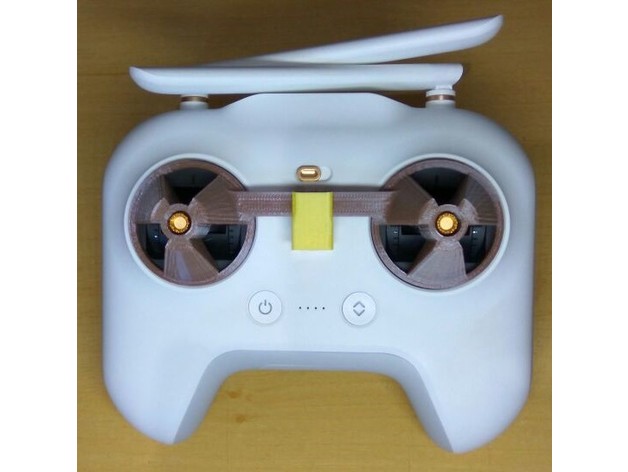
Mi Drone Stick Cover with Clip 3D Print Model
Summary
English: Mi Drone Stick Cover with Clip
Portuguese: Protetor de Stick (manche) com clip (grampo) de fixação para o MI Drone
Print Settings
Printer:
Anet A8 Rafts:
No Supports:
Yes Resolution:
0.2 Infill:
10 -
CTC PRUSA i3 Pro B Bowden Drive with Autoleveling 3D Print Model
Summary
My CTC hotend broke and I was without a 3D printer. Luckily I am in the process of building a HEVO and therefore I had the mount, hotend, extruder, retainer and duct already on hand. By drilling two extra holes and removing a little plastic near the X endstop flag in the mount, I made it fit the CTC carriage perfectly. Again, since my printer was down, I didn’t design this in CAD and just modified the piece I had by hand and then created the STL for thingiverse so no guarantees that it will fit. I left a bridge in there for support that you will have to break out and I put in two mounting options; one way the way I mounted it by drilling holes, and another for mounting it with M3 brass fittings to lower the mount closer to the bed. The HEVO mount has the proximity probe spot already, so I figured I should add that sensor as well.
If you are ready for a double mod, keep reading…
Items Needed:
Soldering Iron
several connectors
connector wires (from breadboard)
Arduino IDE
an extra Arduino as ISP to update the bootloader on the CTC Aduino
Marlin firmware
BOM:1 x 5V NPN M12 inductive sensorhttps://www.aliexpress.com/item/M12-4mm-detection-5VDC-NPN-NO-LJ12A3-4-Z-BX-5V-cylinder-inductive-proximity-sensor-switch/32553311139.html?spm=2114.13010608.0.0.iDrnoz
3D Printer Accessories V6 J-Head Hotend RepRap Extruder for 1.75mm Filament, Direct Feed or Bowden. w/ 0.4mm Nozzle, 12V fan, and 3ft PTFE Bowden Tube
ALPTAhttp://a.co/9PxYSl48.5″ x 8.5″ galvanized 28ga metal plate to place between the hotbed and glass plate. This ensures that the sensor is triggered properly. Without it you will need to either not use glass or you are going to be very close to the nozzle level. Ferrous metals are the best at triggering proximity sensors, that’s why I didn’t use aluminium.
8.5″ x 8.5″ x 0.880″ glass plate. I prefer to print on glass.
Extruder of your choice (e.g. find one on thingiverse)
ProcessPrepare and install your material for your heat bed. Cut the galvanized plate with some metal shears to size. IMPORTANT: make sure the metal does not short out any contacts on the heated bed. You need to cut around those areas!.
Get the glass plate from your a hardware store. They will cut it to size if you ask nicely. You need the corners angled to have room for the screw heads.
Prepare and install the J hotend and proximity sensor with the extruder mount, retainer and duct from the HEVO project.
Solder the 5V and Ground connections to the board. I chose to use add a connector for easy disconnect.
Make a backup of the original settings. These were mine:
15:07:46.286 : echo:Hardcoded Default Settings Loaded
15:07:46.286 : echo:Steps per unit:
15:07:46.287 : echo: M92 X78.74 Y78.74 Z2560.00 E105.00
15:07:46.287 : echo:Maximum feedrates (mm/s):
15:07:46.287 : echo: M203 X400.00 Y400.00 Z2.00 E45.00
15:07:46.287 : echo:Maximum Acceleration (mm/s2):
15:07:46.287 : echo: M201 X1400 Y1400 Z100 E80000
15:07:46.287 : echo:Acceleration: S=acceleration, T=retract acceleration
15:07:46.287 : echo: M204 S1400.00 T5000.00
15:07:46.287 : echo:Advanced variables: S=Min feedrate (mm/s), T=Min travel feedrate (mm/s), B=minimum segment time (ms), X=maximum XY jerk (mm/s), Z=maximum Z jerk (mm/s), E=maximum E jerk (mm/s)
15:07:46.287 : echo: M205 S0.00 T0.00 B20000 X13.50 Z0.30 E5.00
15:07:46.287 : echo:Home offset (mm):
15:07:46.287 : echo: M206 X0.00 Y0.00 Z0.00
15:07:46.287 : echo:PID settings:
15:07:46.287 : echo: M301 P19.86 I1.00 D98.93Upgrade your bootloader. Here is how to do it:
Time to download, configure and install Marlin. Use the GEEETECH example in the examples folder as a base. I attached my Configuration.h file here for reference with auto leveling enabled: https://www.thingiverse.com/download:4494314 . Using this config will consume 94% of the memory. So there is hardly anything left for additional features.
Last but not least make sure you adjust the z-axis in the LCD until you get the nozzle in the correct location (mine was -0.25). Then make sure you save your settings.
*ANOTHER BENEFIT of UPGRADING YOUR FIRMWARE**
The CTC is over-extruding (at least mine was). In Cura I had set the correction in the start script, but with the new firmware I changed the E stepper from 105 to 95 in the configuration.h, so no more start code fix needed! -
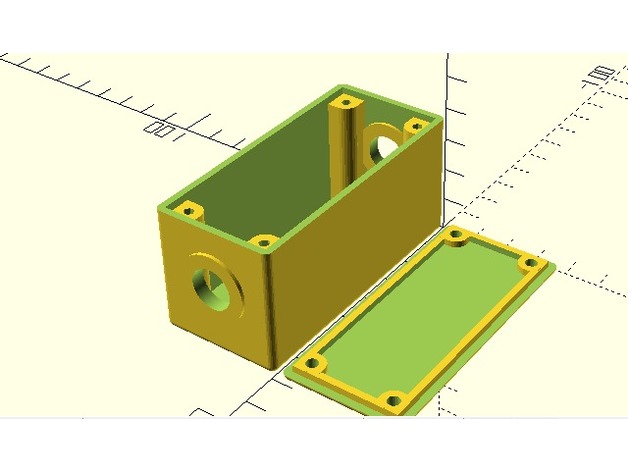
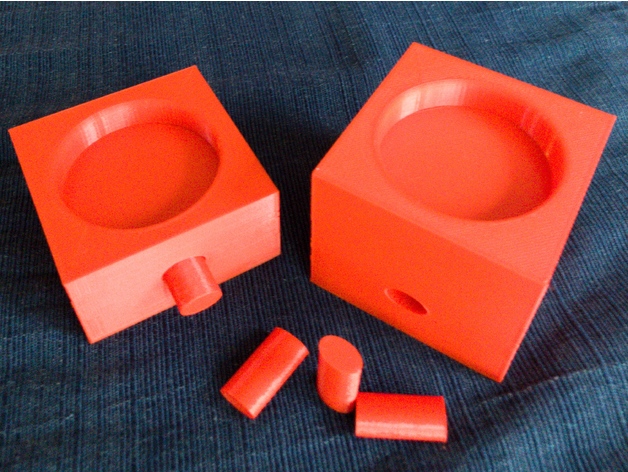
Customizable Project Box With Lid Screws and 2 Holes 3D Print Model
Summary
I added a couple holes in each end. I was going to put some barrel jacks in them. Go ahead and put whatever you want into those holes.
Print Settings
Printer Brand:
Prusa Printer:
i3 MK2S Rafts:
No Supports:
No Infill:
100 Notes:
ABS @ 230
bed at 80
100% infill
print speed 60
How I Designed This -
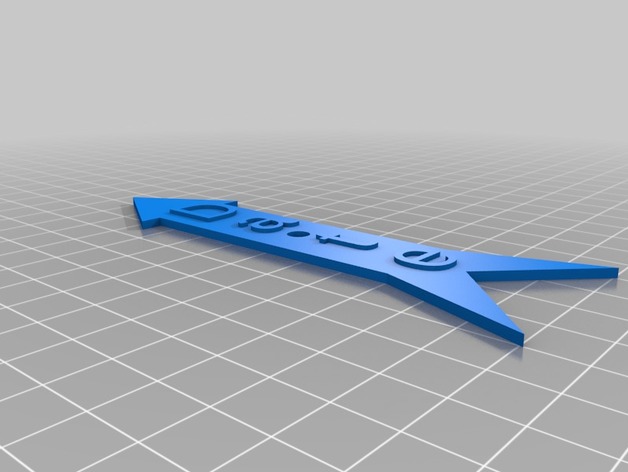
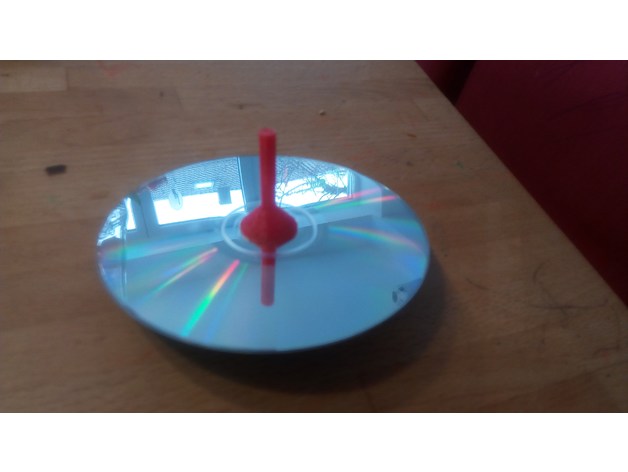
Spinner Arrow with Words 3D Print Model
Summary
I needed a spinner to point to different items, and couldn’t find anything on thingiverse, so whipped this up.
You can modify the text and length, etc. in openscad. I suppose it’d be nicer if I made this customizable, so maybe I’ll come back to this at some point.
If you stop the print after layer 10, you can switch filament color, and the words will stand out more.
Print Settings
Printer Brand:
Prusa Printer:
Prusa Clone Rafts:
Doesn’t Matter Supports:
Doesn’t Matter Resolution:
.2 Infill:
10% Notes:
Very easy to print. The .STL file has “DATE” in it, but if you download (free) OpenSCAD, you can modify it to say whatever you want.
Post-Printing
None
I use large brims in general, so I just had to trim it a little to clean it up. -
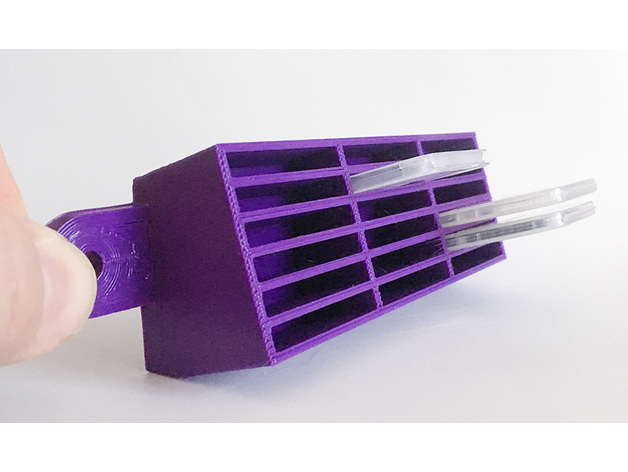
4s10p 18650 battery holder for 14.4 volt with 1/4 inch bolt holes and tab slots 3D Print Model
Summary
This is a 4s10p, 18650 battery holder for a 12 volts system (with a low voltage cutout and a DC-DC buck). Nominal voltage of 14.4 with a high of 16.8 volts. It holds 40, 18mm cells snugly.
I added a 1/4 inch bolt hole to bind everything together, mount to a case.
One of each file should be printed to get the tabbing and alignment correct. They’re labeled top and bottom, but they could be used the other way–top as bottom and bottom as top (or left side right side, etc).
Each staggered row should be tabbed down the middle with cells alternating anode – cathode – anode – cathode (in series) and bridged over the tabbing slots to the next row with the cells aligned the same as the previous (in parallel). If you don’t understand how this works, study up.
Built for my portable solar kit. -
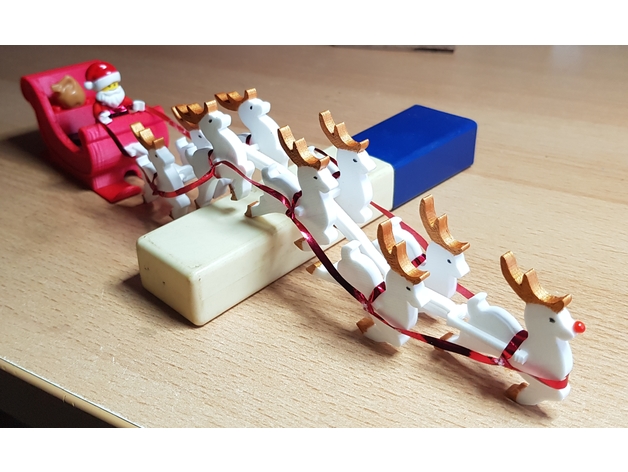
Chain Harness for Santa Sleigh with Reindeer and Lego minifigures 3D Print Model
Summary
This was already a fantastic design, but I’ve made another harness for the reindeer. This one allows for a reindeer in front (Rudolph!, I glued a pinhead on the nose). Also, it is build of links that form a chain and allow some movement along the harness and you can vary the number of reindeer by adding or subtracting links. Just attach the Start Link to the sleigh and snap the links to it. (The reindeer still have to be glued to the links though).
I’ve added the files for the separate links as well as the collages I’ve used for the assembly with 9 reindeer.
Merry Christmas!
Print Settings
Printer Brand:
Ultimaker Printer:
Ultimaker 3 Rafts:
Doesn’t Matter Supports:
Yes Resolution:
.2 Infill:
20% Notes:
Alternatively, you can position the links with the t-shaped front down to the building plate. This will save a lot of support, though it might need a raft because it will get relatively tall. -
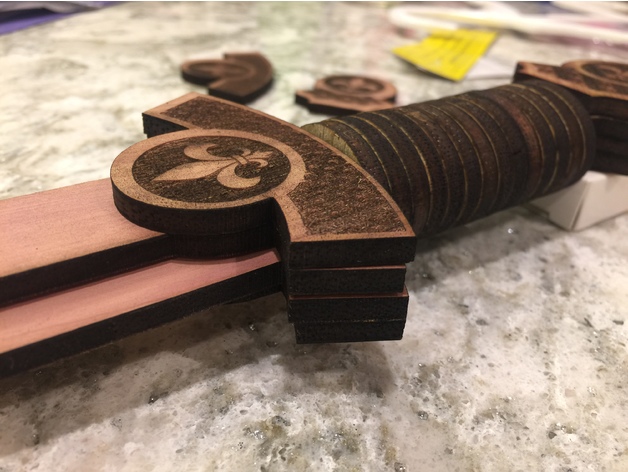
Laser Cut sword with a fluer de lis design 3D Print Model
Summary
This was designed with 5mm 3 layer plywood that I have. It works out to just over 0.19 inches. The plywood I have is 12 inches by 36 inches. -
SDHC/MicroSD card case holder with flanges 3D Print Model
Summary
This is a wall/rack mountable holder for the plastic cases SDHC/MicroSD cards come in. It’s designed to be screwed into the wall or onto the face of a 1RU rack panel. You could also foam tape it to whatever you want. It’s angled upwards to keep the cards from falling out easily, and the inside is tiered so that cards at the top stick out further than cards at the bottom. This makes it easier to remove the cards.
I have another similar design (“SD Card Holder with mounting flanges”) for SDHC cards without cases.
Prints easily with pretty much anything. I’m using cheap PLA and it works fine with no supports when oriented in the obvious direction (flange side down). The base of it is a big ol’ plastic rectangle so you’ll have the usual gotta-pry-it-off-the-bed issues you get with any piece with a wide base. You could use a raft if that’s an issue for ya.
It’s 171mm wide so on a Lulz Mini you have to orient it diagonally to fit and you might have to tighten up your skirt a bit to keep everything on the bed.
Print Settings
Printer Brand:
LulzBot Printer:
Mini Rafts:
No Supports:
No Resolution:
I did 0.3mm Infill:
20% worked Notes:
It’s 171mm wide so on a Lulz Mini you have to orient it diagonally to fit and you might have to tighten up your skirt a bit to keep everything on the bed. -
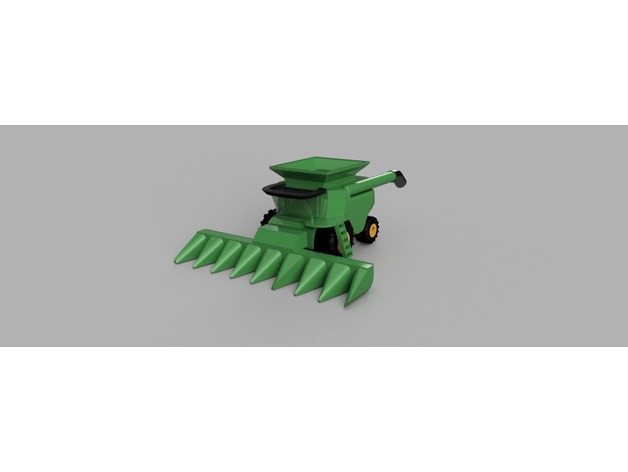
Combine Harvester with Corn Head 3D Print Model
Summary
If there was ever a work in progress, this combine harvester is it. A few hours of work went into this design, and it will likely require a few more. I would love to incorporate parts driven by drive wheels, gears, and chains in later revisions
I would love to hear back from users with what I need change, add etc to make this print better. I know tolerances are too tight on some surfaces, and will likely require some sanding at least to get items to fit. This project will also likely require some glue. I refer to part names by an “American” point of view – passenger side is meant to mean left according to driver (or Port Side).
This machine was very roughly modeled after the John Deere S690 combine (grain) harvester. I don’t have one of these at my disposal, so images from the internet are my best reference. -
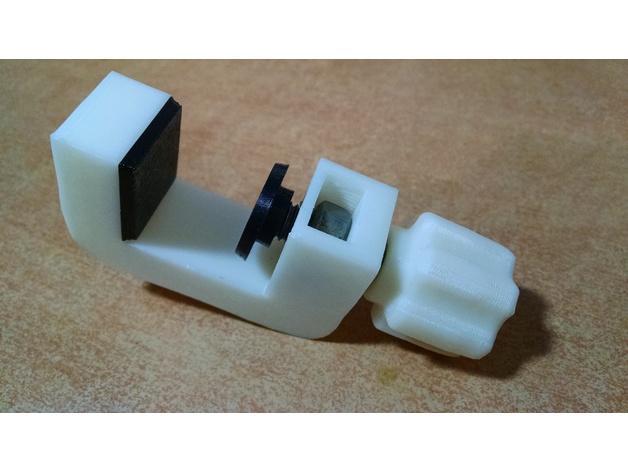
Nut&Bolt-based strong G-Clamp with flexible pads 3D Print Model
Summary
Needed a strong G-Clamp to fix things on the shelf. Existing g-clamp model knobs, weren’t as catchy and handy as I would like. Also I have flex filament sample, and decided to add flexible pads, so I recommend you to use plastan/elastan/flex plastic to print them.
Warning! I’ve used 40mm M8 bolt and nut (13mm width hexagonal head), that’s enough for my application. But In order to clamp narrower things, you need a longer bolt, than on my real pictures – more than 65mm M8, with hexagonal 13mm head.
SolidWorks assembly source included, feel free to customize it. Simplify3D factory files included as well.
Print Settings
Printer:
Anet A6 Rafts:
Doesn’t Matter Supports:
Doesn’t Matter Resolution:
0.2 Infill:
30% -
CR-10 Mini X-Axis cover with wire tie 3D Print Model
Summary
remix of a CR-10 part to fit a CR-10 Mini, shortened the wire tie that sticks out, also moved it out of the way of the plug for the x-axis motor. i opted to use higher infill in printing becasue the wire tie part broke off my first print as i was puting it on the machine.
Print Settings
Printer:
HICTOP CR-10 Mini Rafts:
No Supports:
No Resolution:
.15 Infill:
50% Notes:
printed 2 shells, 3 bottem/top layers, bottem/top 30mm/s, rest was printed at 60mm/s
How I Designed This
remixed using fusion 360 -
Wizard x220 POD with screw silos 3D Print Model
Summary
Haven’t gotten to print it yet but I have spent hours designing it in fusion. The dimensions are solid. There are “screw silos” to hold down the pod, insert a 3m nut into the area designed for it, screw the screw in from the bottom to hold it down. There are two versions, a 20mm stack and 30mm stack option. The camera holes were designed to offer up to 45 degree camera angle for a runcam swift 2 or similar casing. I would recommend printing in TPU semi flex, or nylon if your printer is calibrated well. There is very little margin left for error in printing when in a hard material. -
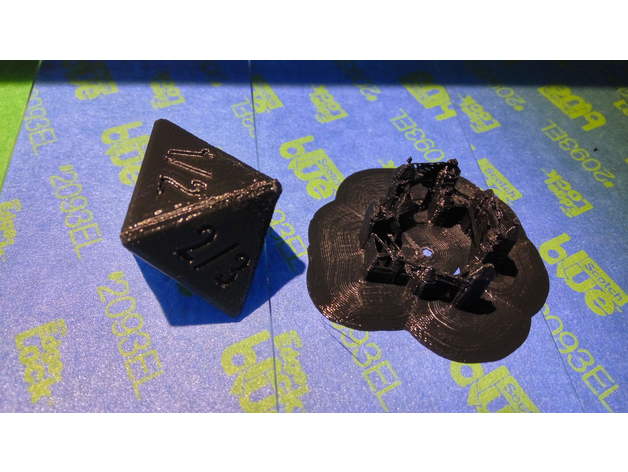
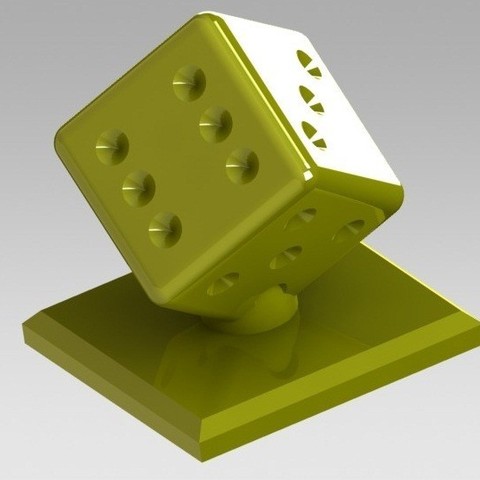
Tarmogoyf Dice with 8 face 3D Print Model
Summary
Tarmogoyf Dice. You will now be able to track his power/life. (As describe by my friend Alex, since I don’t know much about this myself)
The dice is easy to print, with shallow and smooth numbers making the support easy to remove, my support stayed on the print bed. Print with support in the shown position to avoid getting one face with a different finish, brim will help the support stays in place..
Print Settings
Printer:
Anet A8 Rafts:
Yes Supports:
Yes Resolution:
.1 Infill:
40%, to get some weight Notes:
On my setup, the dice is a little bit rounded on the opposite side of the fan at the start of the print. This is a case where a better fans duct would help, otherwise reduce speed, or print 2 at a time to let the plastic cool down.
Post-Printing
I would put some drops of paint (or nail varnish ?) in the number and wipe excess to get the numbers more visible.
How I Designed This
Designed in tinkercad, using Octagon shape generator with settings to the extremes to generate 2 pyramids and a middle plate. Letters are 0.5mm deep. -
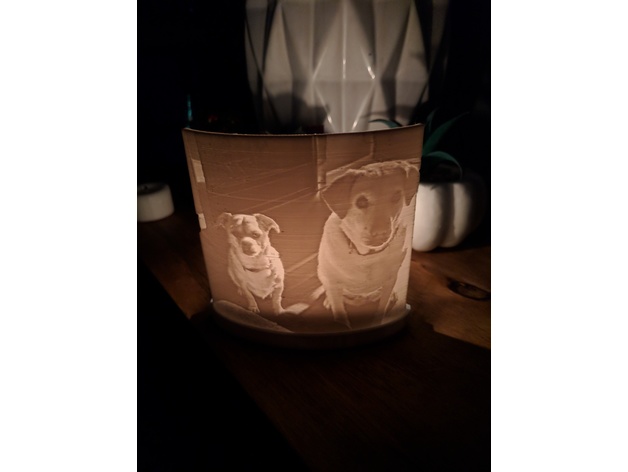
Lithophane Stand with Candle Holder 3D Print Model
Summary
This is a stand that holds a lithophane and a candle to make it glow. To make the lithophane, go to http://3dp.rocks/lithophane/
Settings for Lithophane:
Main page – Outer Curve
Image Settings – Positive Image
Holds a standard tea candle. Fit can be a little tight on some of the lithophanes, a little sanding makes it fit fine. Plus you can swap them for different images whenever you want!
Pretty new to 3D printing, so I’m open for feedback!
Hope you all like it!
Print Settings
Printer:
Monoprice MP Select Mini Rafts:
No Supports:
No Infill:
20 -
3 Inch wheel chocks, with mounting holes 3D Print Model
Summary
Scaled to fit 3 inch wheels and added mounting holes. -

3 Inch wheel chocks, with mounting holes 3D Print Model
Summary
Scaled to fit 3 inch wheels, and added mounting holes. -

3.5 Inch Wheel Chocks With mounting holes. 3D Print Model
Summary
I took Fireflynj wheel chocks and added mounting holes. -
SX350J vape mod with 26650 or 18650 adapter V2. 3D Print Model
Summary
SX350J vape mod with 26650 or 18650 adapter V2.
For YiHi SX350J Boxer mod by Ginger Vaper, just disassemble the mod and transfer everything (except lower battery connector) into this enclosure. This enclosure only use 1 battery (26650 or 18650) so you can charge the battery directly using USB port. -
Amiibo Stand System – With Connectors 3D Print Model
Summary
Amiibo were taking over the house, so I decided to do something about it!
First, I made a beautiful stand:
https://www.thingiverse.com/thing:2613221
Which was based on a fantastic guide:
https://imgur.com/gallery/P68cT
I went to print it out, and it was hilariously larger than the maximum size of my FFCP 2016.
So then, I did what any engineer would do: I sketched out a modular system!
Originally, as a test, I made a no-connector (connectorless?) system, that you could use to make your own base, using glue or tape to stick things together:
https://www.thingiverse.com/thing:2625743
That was cool, and it allowed me to test the blocks/modules to make sure they’d print right, look good, and hold Amiibo properly. I’m sure some folks will be happy with the connector-free modules, and will simply use super glue or tape to hold things together.
Me, I knew I wanted something with connectors. I like curves, but I realized that circles are fully symmetrical, and would allow rotation. These should go together perfectly at right angles, 180°, so I decided on a two-way keying system (because one-way is annoying) in the oval. You can connect these right-side-up or upside-down, but that’s about it. If you wanted something a little more fool-proof, I could probably do a system that had a softened (curved point) triangle, which would allow for only one real way (the other ways would not be at 90° angles). I could even put in an asymmetrical hole but, honestly, that’s just getting too confusing. Plus, these modules are symmetrical, so you can rotate them, and use them however.
There are six different types of modules, in three different heights.
The types of modules are: no holes, one hole, two corner holes, two opposite holes, three holes and four holes. Obviously, the “no holes” won’t connect to anything unless you’re willing to use glue, tape, or for something stand-alone. I promise I won’t judge you! Obviously, the other five modules are for connecting with the provided “rods.” The “tight rod” feels like a porn star name. It’s not. Printed at Medium (0.2mm) layer height, it’s a snug fit. You may have to clean up the end(s) a little bit, but in mine, I just had to give a little pressure and the rod slid into the hole no problem. If one side is tighter, press that side in manually first, and then slide the other module into the looser rod end. That should make things easier.
I was playing with a “max” sized height (maximum Z height of the FFCP 2016 edition), but realized most folks are going to want to start out with the low, medium and high designed here. I used the Fibonacci sequence (Golden Ratio), to design the heights, widths and lengths. I enjoy good design, and hope you find these visually appealing.
I will share my sketch later, so you can see how I originally intended for this to be used. It’s a free-form sketch, so don’t judge me or my artistic ability!
If you make one of these, please share a Make here. I love to see what people do with my Things. Seriously!
If you have a suggestion, comment or question, please leave a comment somewhere on this Thing. I try to take suggestions and make them a reality. One of the ideas I had originally was to make a two-by on the top, so you could have a larger margin/area to display some of the “fatter” Amiibo, while still looking good. I may share/print the “max” size items, but we’ll see how I feel. I think the three-tier system works fairly well, but at some point, when you get out to eight or nine wide, a fourth layer might make it look better than just the three. We’ll see.
< soapbox > As an aside, my brother took his life last week, and this is a way for me to keep busy before the funeral. I like to celebrate and enjoy life. If you aren’t enjoying what you’re doing, do something else. If you’re depressed, seek counseling. Suicide is never the answer. It leaves behind a metaphorical and physical mess that someone else has to clean up. Selfish and shitty. If you can’t stick around for yourself, stick around for friends, family, your pets, the nice cashier at the grocery store who always smiles at you, the waitstaff at your local restaurant, the police who will have to investigate the scene, and the coroner who will have to take you apart. Suicide sets in motion a huge series of events that you won’t have to be around to deal with. But none of those events are fun. Talk to someone. There are always options. < /soapbox > -
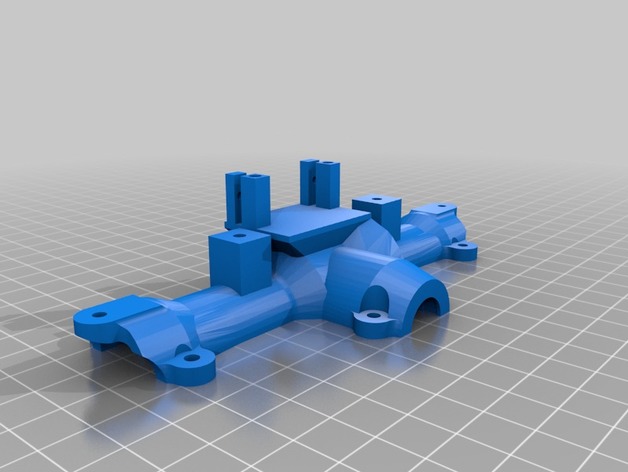
remix of MrCrankyface by Flyon20s axles middle axles with servo mounts 3D Print Model
Summary
I wanted to build an 8×8 Hemmt. I am new to 3d design so I didn’t want to get into designing gears so I found the mid axles and adapted them for leaf springs and made them longer because my vehicle is wide. I did not have room to put my servos on the frame so I added a mounting plate on the tops. they need tweaking because my turning radius is horrible. I was going to wait till got it working perfect. I will be posting the Hemmt frame and body soon.
Print Settings
Printer:
anet A8 Rafts:
No Supports:
No Resolution:
.02 Infill:
20% Notes:
I printed the half shafts at 100% just for extra strength might not be needed. -
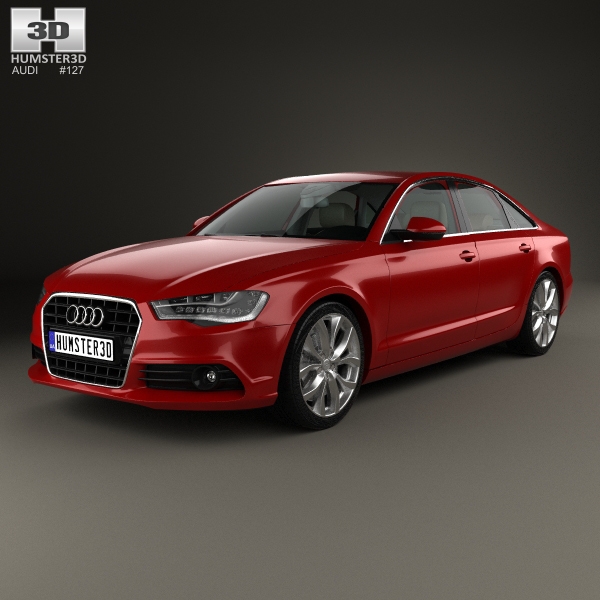
Audi A6 (C7) with HQ interior 2012 3D Model
The 3D model was created on real car base. It’s created accurately, in real units of measurement, qualitatively and maximally close to the original.Model formats:- *.max (3ds Max 2008 scanline)- *.max (3ds Max 2008 vray)- *.fbx (Multi Format)- *.obj (Multi Format)- *.3ds (Multi Format)- *.mb (Maya 8.5)- *.lwo (Lightwave 6)- *.c4d (Cinema 4D 11)* tire’s texture is not included in the set.* renders Are made in 3ds Max 2008 using vray 1.5 (studio environment is not included in the set)If you need any other formats we are more than happy to make them for you.The model is provided combined, all main parts are presented as separate parts therefore materials of objects are easy to be modified or removed and standard parts are easy to be replaced. If you experience difficulties with separating standard parts we are more than happy to give you qualified assistance.We greatly appreciate you choosing our 3D models and hope they will be of use.We look forward to continuously dealing with you.Sincerely Yours,Hum3D Team
-
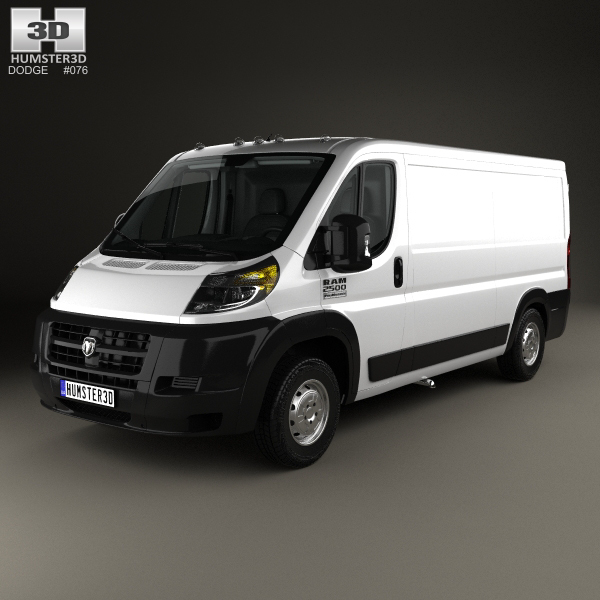
Dodge Ram ProMaster Cargo Van L2H1 with HQ interior 2013 3D Model
The 3D model was created on real car base. It’s created accurately, in real units of measurement, qualitatively and maximally close to the original.Model formats:- *.max (3ds Max 2008 scanline)- *.max (3ds Max 2008 vray)- *.fbx (Multi Format)- *.obj (Multi Format)- *.3ds (Multi Format)- *.mb (Maya 8.5)- *.lwo (Lightwave 6)- *.c4d (Cinema 4D 11)* tire’s texture is not included in the set.* renders Are made in 3ds Max 2008 using vray 1.5 (studio environment is not included in the set)If you need any other formats we are more than happy to make them for you.The model is provided combined, all main parts are presented as separate parts therefore materials of objects are easy to be modified or removed and standard parts are easy to be replaced. If you experience difficulties with separating standard parts we are more than happy to give you qualified assistance.We greatly appreciate you choosing our 3D models and hope they will be of use.We look forward to continuously dealing with you.Sincerely Yours,Hum3D Team
-
disney magic band 2 holder with ears 3D Print Model
Summary
kids don’t want to wear the disney magic band,
I found a design by GordonInnovations,
I add two ears, hope you like it. -
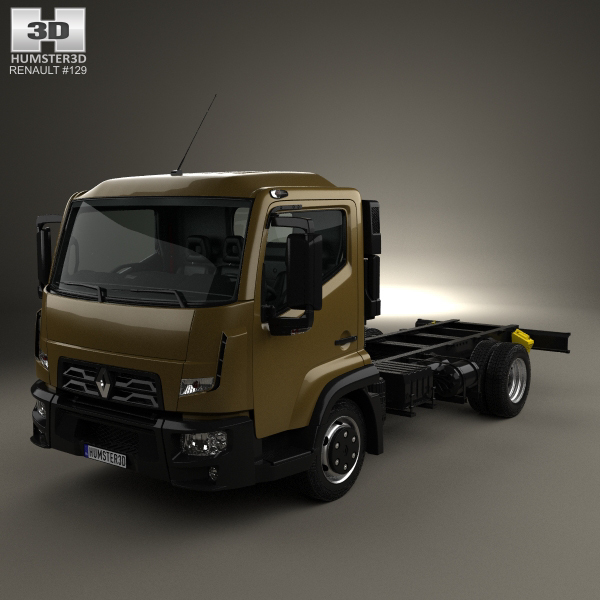
Renault D 7.5 Chassis Truck with HQ interior 2013 3D Model
The 3D model was created on real car base. It’s created accurately, in real units of measurement, qualitatively and maximally close to the original.Model formats:- *.max (3ds Max 2008 scanline)- *.max (3ds Max 2008 vray)- *.fbx (Multi Format)- *.obj (Multi Format)- *.3ds (Multi Format)- *.mb (Maya 8.5)- *.lwo (Lightwave 6)- *.c4d (Cinema 4D 11)* tire’s texture is not included in the set.* renders Are made in 3ds Max 2008 using vray 1.5 (studio environment is not included in the set)If you need any other formats we are more than happy to make them for you.The model is provided combined, all main parts are presented as separate parts therefore materials of objects are easy to be modified or removed and standard parts are easy to be replaced. If you experience difficulties with separating standard parts we are more than happy to give you qualified assistance.We greatly appreciate you choosing our 3D models and hope they will be of use.We look forward to continuously dealing with you.Sincerely Yours,Hum3D Team
-
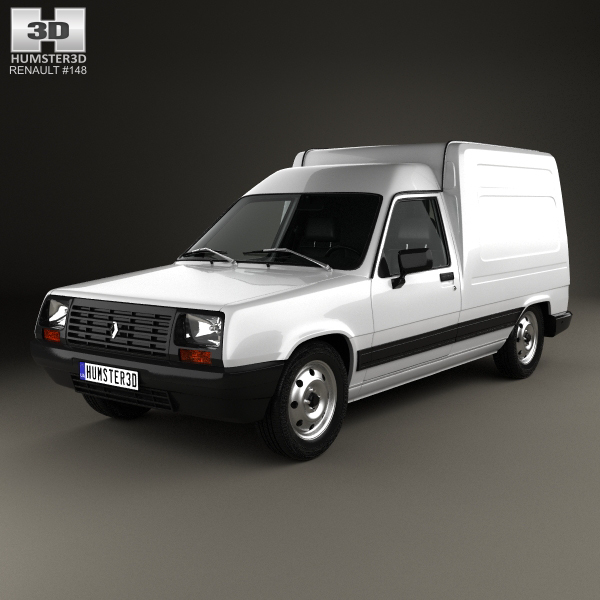
Renault Express with HQ interior 1985 3D Model
The 3D model was created on real car base. It’s created accurately, in real units of measurement, qualitatively and maximally close to the original.Model formats:- *.max (3ds Max 2008 scanline)- *.max (3ds Max 2008 vray)- *.fbx (Multi Format)- *.obj (Multi Format)- *.3ds (Multi Format)- *.mb (Maya 8.5)- *.lwo (Lightwave 6)- *.c4d (Cinema 4D 11)* tire’s texture is not included in the set.* renders Are made in 3ds Max 2008 using vray 1.5 (studio environment is not included in the set)If you need any other formats we are more than happy to make them for you.The model is provided combined, all main parts are presented as separate parts therefore materials of objects are easy to be modified or removed and standard parts are easy to be replaced. If you experience difficulties with separating standard parts we are more than happy to give you qualified assistance.We greatly appreciate you choosing our 3D models and hope they will be of use.We look forward to continuously dealing with you.Sincerely Yours,Hum3D Team
-
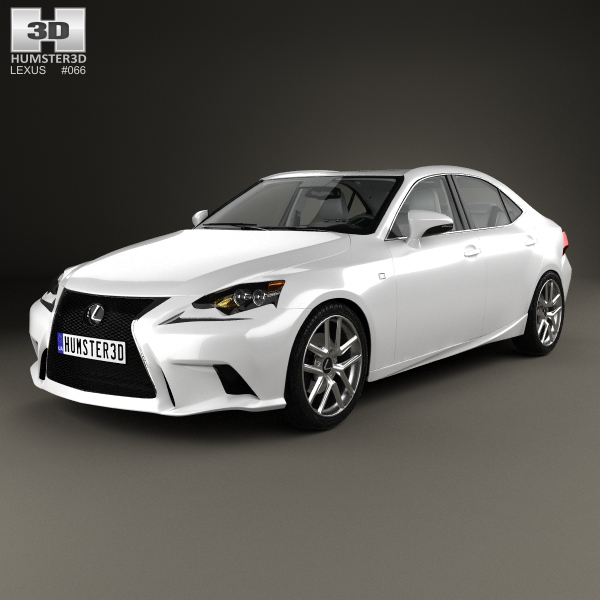
Lexus IS (XE30) F Sport with HQ interior 2013 3D Model
The 3D model was created on real car base. It’s created accurately, in real units of measurement, qualitatively and maximally close to the original.Model formats:- *.max (3ds Max 2008 scanline)- *.max (3ds Max 2008 vray)- *.fbx (Multi Format)- *.obj (Multi Format)- *.3ds (Multi Format)- *.mb (Maya 8.5)- *.lwo (Lightwave 6)- *.c4d (Cinema 4D 11)* tire’s texture is not included in the set.* renders Are made in 3ds Max 2008 using vray 1.5 (studio environment is not included in the set)If you need any other formats we are more than happy to make them for you.The model is provided combined, all main parts are presented as separate parts therefore materials of objects are easy to be modified or removed and standard parts are easy to be replaced. If you experience difficulties with separating standard parts we are more than happy to give you qualified assistance.We greatly appreciate you choosing our 3D models and hope they will be of use.We look forward to continuously dealing with you.Sincerely Yours,Hum3D Team
-
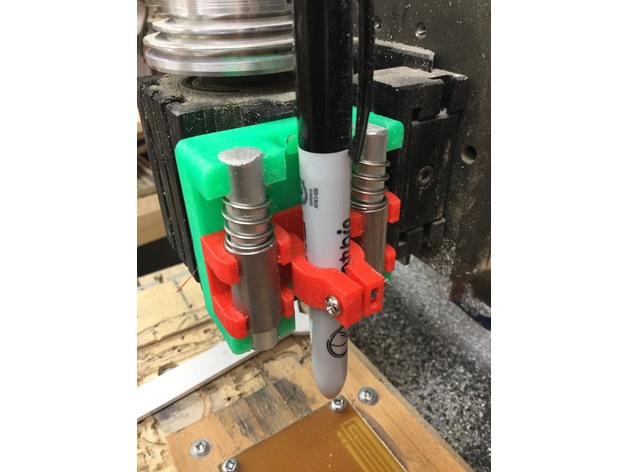
PCB Etching with 3D Printer Agitatior 3D Print Model
Summary
I made Tech2C’s Pen holder https://www.thingiverse.com/thing:2459624
I used it on my Milling machine to apply sharpie ink as an etch resist.
Then I used my 3D printer to heat and agitate the Ferric Chloride solution with the pcb in it.
GCODE
g1 y0 f4000
g1 y50
g1 y0 f200
g1 y50
make many copies of this. Takes about 15 seconds to execute.
You can see the sample pcb traces that I produced using this technique. I would increase the overlap of the sharpie lines and print twice to ensure a good resist. the thin lines were just one layer of sharpie. they worked but got a little undercut.
I will add a video later showing the etching setup.
I found that setting my bed temp to 100C kept the Ferric Chloride solution below the recommended 55C maximum with my plastic tray which is pretty thick.
If anyone has a great way to get pcb gerbers into Fusion 360, please message me or comment on this thing