Summary
Having trouble with your STOCK original root 2 cnc. Now it’s time to MODDERFY!!!
I’ve helped many people that run into problems with this model. If your having a problem with a part check these mods out.
DISAPPEARING Y RAIL MOD
The Y rods get pelted with stuff as you mill, most of it can be compacted by the carriages, but if you mill acrylic you have to keep them clean as you go or it could get nasty. A mod to fix this is to lengthen the side panels upwards. Take a 2×8 and and a 2×4 and make an L on each side. Connect these with 3 rows of 2×3’s to make a “bed frame” Sit the machine into it and use wood screws to screw the feet into the short section of the L from underneath. Now cut your waste board and screw it to the 2×3’s. Wide enough so it almost touches the inner sides of the panels. If you need a further hint check MAKER TR3E CNC out to understand the clue. Now the bars are hidden. You will have to cut a section out of the back 2×8 to accommodate the Y motors. Now the rails have disappeared!!
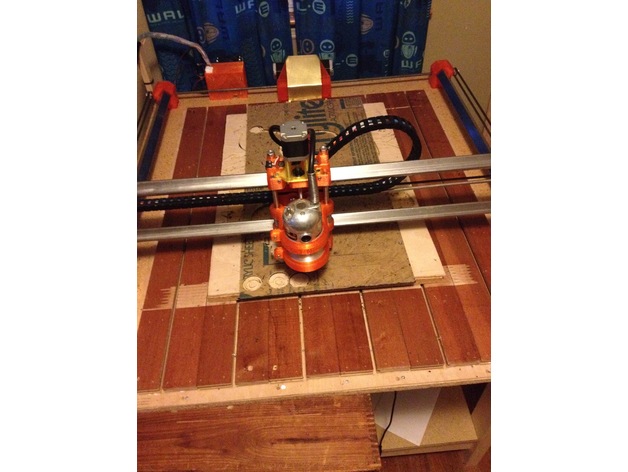
ANTI BACKLASH MOD
Check the photo. First insert 1 nut into the underside of the bottom spindle holder. Keep screwing until you are halfway to the other one. Use 2- 5/16 washers stacked, spring, 2 more washers. Put this on the screw. Now on the underside of the upper spindle holder put another nut. Hold both pieces tight together in your LAP ( yes take it off the machine, leave the smooth rods on.) Screw into and through the second nut. You shouldn’t be able to move them apart, and if you pull on the screw there is no jiggle or slop. It might take you an hour to get this right. You might even have to shave a little off the rod to start at a different spot when you screw it into the second nut. The spring can be found in the spring multipack at Home Depot. Stand in front of the threaded rod there and then turn around, it right there where all the gate hinge stuff is. When you have it right leave enough room at the bottom for one nut to fit snug against the bottom. Apply locktite to the threads of the nut and screw it on, leave overnight, throw the other nut away.
DIRECT DRIVE Z MOD
Props to Adrenaflo for designing this! Z axis repeatability pissing you off!! First do the anti backlash mod. Then undo the z axis motor, throw the mount away. Print the Modderfy.stl Screw your motor onto the mount. Screws can’t be hanging out the end. Now take the mounted motor and sit it on top. Throw the nuts that go on the top of the leadscrew away. Now mark where spindle and the rod meet and cut it. You will have to prop something under the screw so the assembly doesn’t fall through. Cut the rod where it stands and use a coupler here. You can make one out of 2 different sized clear tubing at home depot plumbing section and 3 zip ties. They will overlap each other and you won’t think you can do it but you got to push, scream if you have to. Now the motor is on. Move the side fins of the mount to where the holes will meet the crevices of where the smooth rods go. Use wood screws and screw it down, small little screws. Now go over to the board and flip the direction of the Z you have plugged in. THERE ARE NO NUTS ON TOP!!! Screw, coupler, motor, that’s it. Now apply general purpose lithium grease to the rod. Go into the firmware under configuration.h and change the Z steps to 2650. It could be anywhere from this number or a little higher lower, as each threaded rod looks the same but are not. In your favorite program move the the z axis a little up at a time till you reach the top. (If you didn’t do the anti backlash mod right you will have a problem.) Go up and down repeatedly to work the grease into the threads. You will have to apply grease periodically, make sure this is clean of chips before you start milling or there will be problems.
I want to use Fusion 360 to CAD, CAM, and make GCODE but there isn’t any post processor for this machine.
Use the cps file and either insert it manually into the directory where it will poll all the post processor selections or select personal and tell it where the file is. Select to use this for all operations. This is the menu where you go to give your gcode a name, look up higher and you will see something that looks like a directory structure, start clicking around up there and you will figure it out.
When I go to mill it acts fine then starts doing weird stuff, like shifting.
This is the most common problem, and the first point you will encounter of this is NOT like your 3D printer. You know that board that just hangs off your printer, probably doesn’t even have a fan on it, because it isn’t working very hard. Now it’s working double overtime, gonna die because now there is torque involved. When the chip gets too hot it will activate the thermal cutoff protection. Power will be lost to the motor for a second so the chip doesn’t melt. This will result in lost steps and hence a shifted mill. It’s not the big chip but rather the smaller chips surrounding it that the heatsink doesn’t touch. GO FIGURE, RIGHT. So you need a fan blowing on the board to keep it COLD. You also need to check your amps on the drivers and adjust the pots, max is too high. If you use the program to move the machine and you put your hand in the way and dies there isn’t enough power. It should be pushing against you like get out of my way I’m milling here!! You might have to upgrade your drivers to DRV8825. Set the pots to 1A max. There are plastic parts inside your nema 17 motors if they get too hot too long you will ruin them for good. If you want to do aggressive milling or mill thick pieces of wood, like thicker than 1/2 inch consider a nema 23 model.
POWER MOD
I want just a little more power from my nema 17’s. Mod the ramps board for 24 volt as seen on youtube. If you mill from an onboard screen and not a computer you will have to use a power plug to power the arduino, as the ramps will no longer give the arduino power, it will blow it up. Buy a 24v 10amp power supply. Upgrade the drivers to DRV8825 set at 1 amp for nema 17 and 3 amp for nema 23. Do not go higher on nema 17 or you will toast them! Position fan to blow across the width of the board, hooked directly to power supply. I just stick the wires into the ramps where the power goes in. Position heatsink fins to where they are in line with the current of wind from the fan. Use a big computer fan, make it cold. Do research, use common sense, and above all Nema 17’s are NOT some magic little motor that can power your car, they are meant for printers, scanners, and other machines that move parts around where torque is not involved. Yes they are fun and can do some milling, but if your not getting the result you were looking for use bigger motors. If they are getting too hot, then your abusing them and don’t expect them to last very long.
I will not be answering questions on this post. I’ve said all I want to. If you need additional help please join the Root 2 group and ask the community there. I made this post to help newbies and you might get directed here from the group to answer your question. I think this is better than repeatedly answering the same question over and over again. Pete Newberry made an awesome machine, which has been upgraded and improved from this first version. Please post any mods you make in the I made one so people have more visual clarification. And if you come up with a new mod please post it into the remix section. Help me Help others as you have been Helped. The mission of this post is to catalogue problems and make it a reference resource to help you understand and operate your machine more efficiently, with less hair pulling, and fewer headaches.
And remember this is the Root, your foothold, where you started from. How will you sprout from here? Share what you did to make it work for your purpose. Even if it meant designing a totally different kind of machine.