Summary
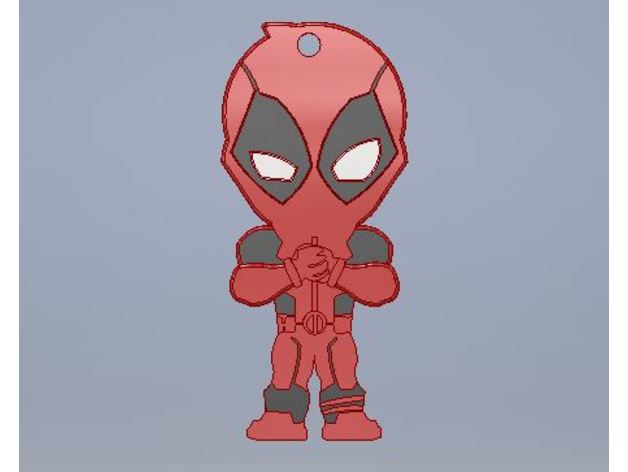
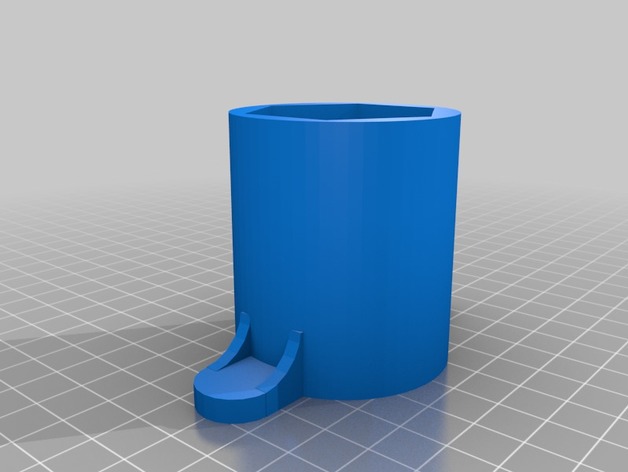
Jeton pour chariot type “Caddie” adapté pour les personnes souffrant d’arthrose et permettant d’accrocher la liste des achats.
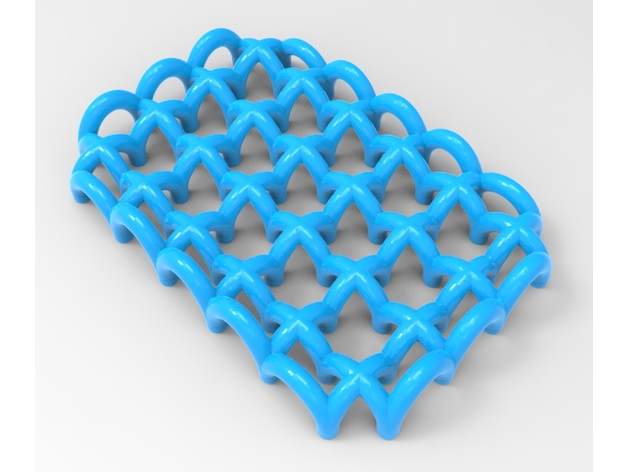
Des rivets permettent de réunir les jetons pour faire une chaîne de cœurs.
Author: Thingiverse
-
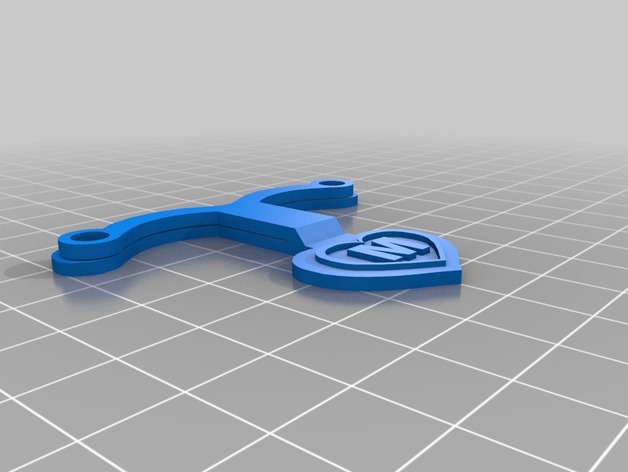
super jeton porte liste des achats 3D Print Model
-
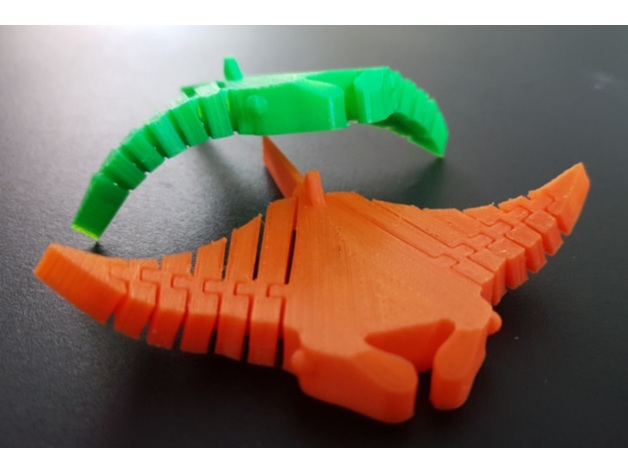
Manta the Flexy Ray 3D Print Model
Summary
Flex Manta
Print Settings
Printer:
I3 Mega
Rafts:
No
Supports:
No
Resolution:
0.1, 2 shells
Infill:
0%
Notes:
you may need the cooling tower to print the back fin -
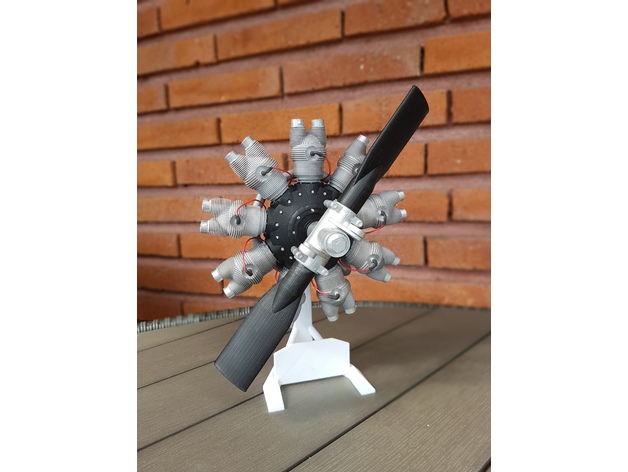
Radial engine 3D Print Model
Summary
You will need:
1 metal shaft that is 4.5 mm thick that can be used for the propeller, Super glue and hobby paint if you want to paint the engine.
The card that is on the engine stand can be designed as you wish. For example, if you want to add text with facts about radial engines or put on an image on it.
Print Settings
Printer Brand:
Wanhao
Printer:
Wanhao Duplicator i3 V2
Rafts:
Doesn’t Matter
Supports:
Yes
Resolution:
Highest
Infill:
30% -
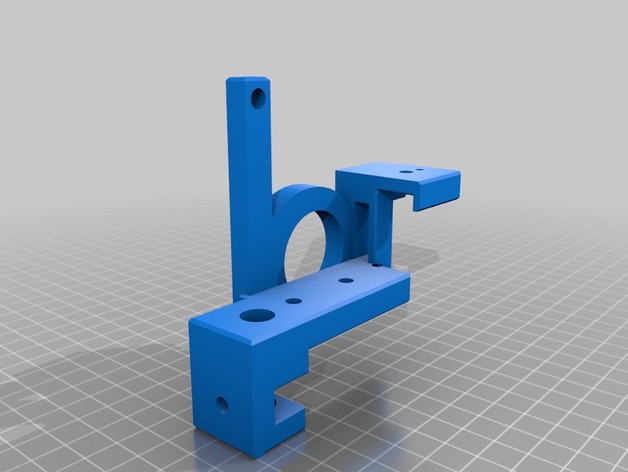
JM coil tattoo frame FINAL PRODUCT 3D Print Model
Summary
This is the final product of this design. USE HIGH DENSITY PLA or CARBON FIBER filament. Added bigger post wiring slot and thinner spring post and smaller frame thickness. Use 6-8 wrap coils. Designed as a liner machine. -
B9 Robot radar sensors (ears) 3D Print Model
Summary
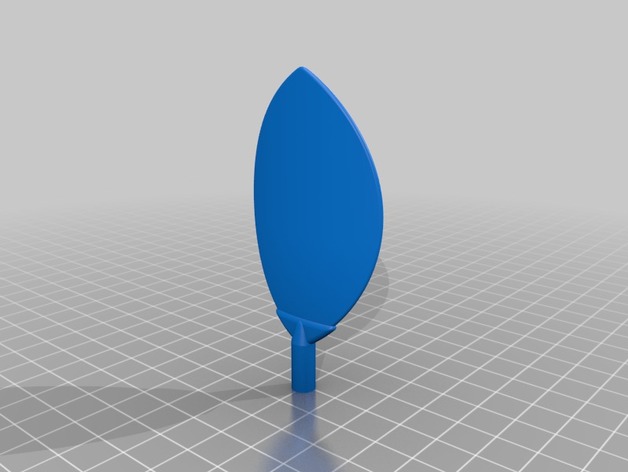
This is my first upload to Thingiverse. These are the parabolic radar sensors, more commonly referred to as ears, on the sides of the radar platform of the B9 robot’s head. They are scaled for a full size B9 replica. The sensors are a bit thicker than aluminum sensors would be, approximately 1/16 of an inch thick, for added durability necessary for printing in plastic. They already have the holes for the motor posts and the set screws. Best printed in PLA on the fine setting with a layer thickness of 0.1mm. More files to follow. Enjoy! -
Rapier/dagger filler piece 3D Print Model
Summary
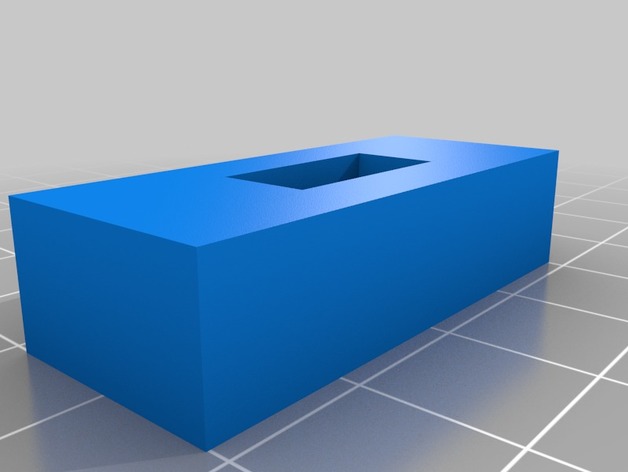
To be able to hold the blade to the guard/handle/pommel, a piece like this is needed. It has been tested and fits my dagger from dark wood armoury. Usually this piece is joined to guard, but this one has it without the guard so the guard can be added to designs.
However, it isn’t one size fits all, so consider printing just this piece out or finding some way to test it with the desired blade before trying to design guard with it. -
Burroughs B205 3D Print Model
Summary
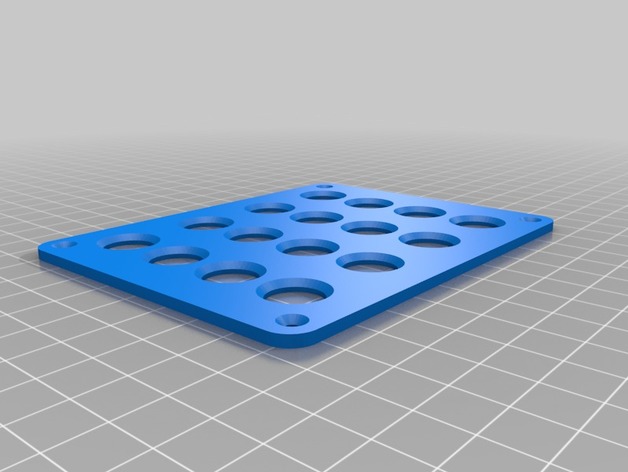
Burroughs B205 computer console was the one seen in many Sci fi shows of the 60’s and 70’s. There’s ten of them alone in the opening scenes of launch control in the first episode of lost-in-space. And of course there were two on the Jupiter itself.
These STL files are based from documentation from www.angelfire.com/scifi/B205/
My intent was to 3D print one (34 percent size fits on my Lulzbot) and use an Arduino to drive patterns to LEDS. I got started on the project but haven’t finished as of this writing.
Enjoy the files, and relive your childhood!
Changes from the original
1) Since the original was made in sheet metal, I found it necessary to beef up the main body for 3D Printing.
2) I took some liberties with the back panel and how it fits in. Nicer than how it was on the original box.
Printing: You will need supports for the main body.
Print the body on it’s back with supports.
Print all other parts flat on the print-bed
https://youtu.be/s4_lZgSgayw -
Ender 3 PSU Cover from CREALITY 3D 3D Print Model
Summary
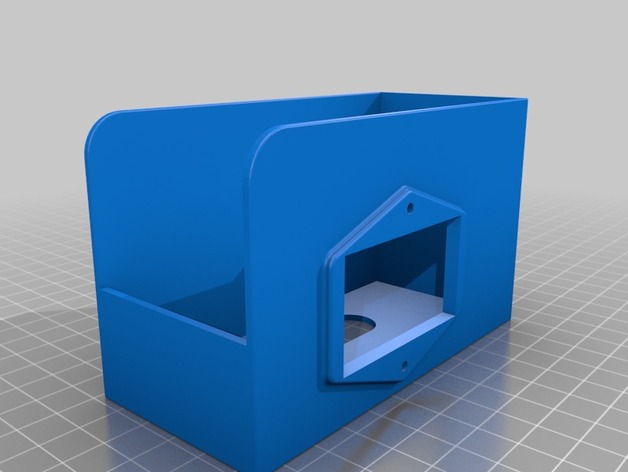
STL file from CREALITY 3D for the Ender 3 PSU.
They emailed me the file for a replacement PSU I will be getting. -
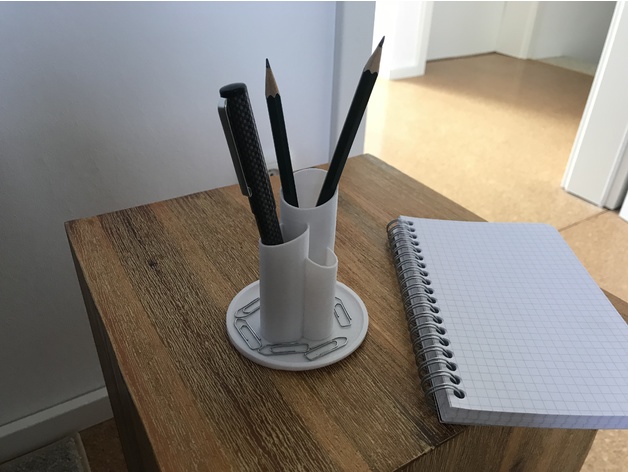
Desk Pencil-holder/ cup/ stand/ organiser 3D Print Model
Summary
Pencil holder to organise your desk!
Print Settings
Printer Brand:
Creality
Printer:
Ender 2
Rafts:
Yes
Supports:
No
Resolution:
0.15 mm
Infill:
25%
Notes:
Brim recommended -
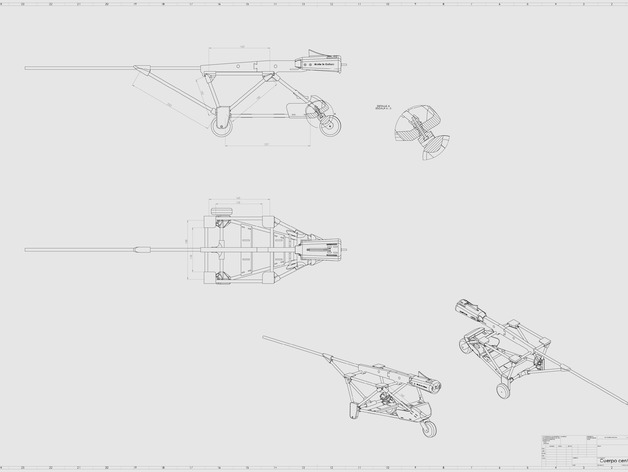
Ultraligero reciclado 3D Print Model
Summary
Este es un diseño de un ultraligero, construido con restos de otros aviones.
Las alas creo recordar que eran de un Skywalker al igual que la cola. Las varillas de union que forman el cuerpo son de una antena de television que el aire derribo.
Vuela muy bien.
Os dejo un videohttps://youtu.be/Y3n0PWQeTG4 -
Queen Chess Piece 3D Print Model
Summary
Learning how to create and edit 3D piece to print with the class. -
BlackPill Case 3D Print Model
Summary
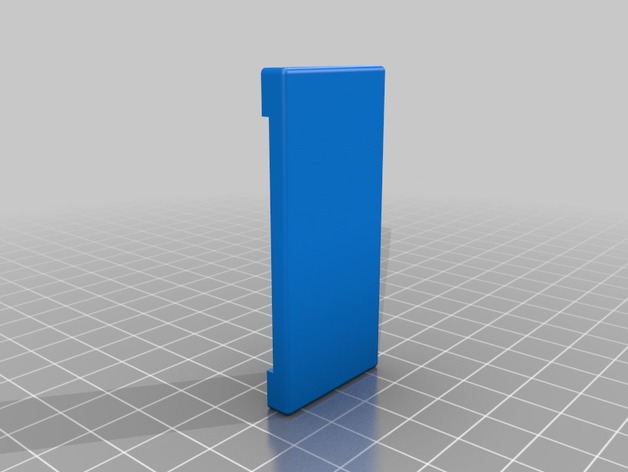
Minimal case for “Black Pill” STM32 based board.Overview and Background
Minimal design of case for “Black Pill” board only to cover PCB.
Lesson Plan and Activity
TBD: Holes for reset switch, pinouts -
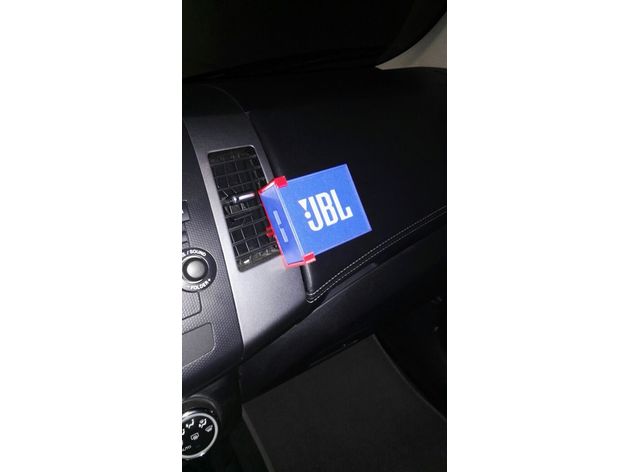
JBL clip 3D Print Model
Summary
Is just a simple clip for JBL Go, to use in the car.
Print Settings
Printer:
Monoprice mini
Rafts:
No
Supports:
No
Resolution:
0.2
Infill:
100% -
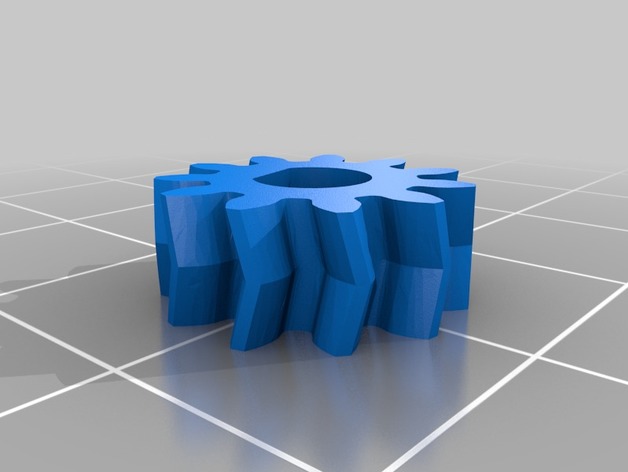
Pitan Geared Extruder (thinner tighter gears remix) 3D Print Model
Summary
These are the remixed gears I used in my Pitan make (https://www.thingiverse.com/make:493744) that are 5mm thick and have very tight D shaft and Hex Bolt Head fit. I ended up using Nylon because the small gear D shaft warbled out when I used PLA. Also as I mentioned in my make, I bought the hardware in bulk so send me a message if you would be interested in a set that includes the nuts, bolts, screws, washer, bearings (a 623 and two 695s or 625s), mk8 gear, spring, 3 meters of Nylon filament (enough to print gears twice), metal bowden groove mount, and some ptfe tube. -
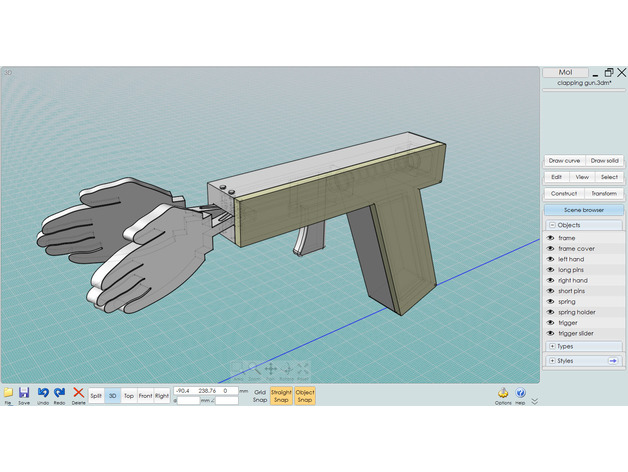
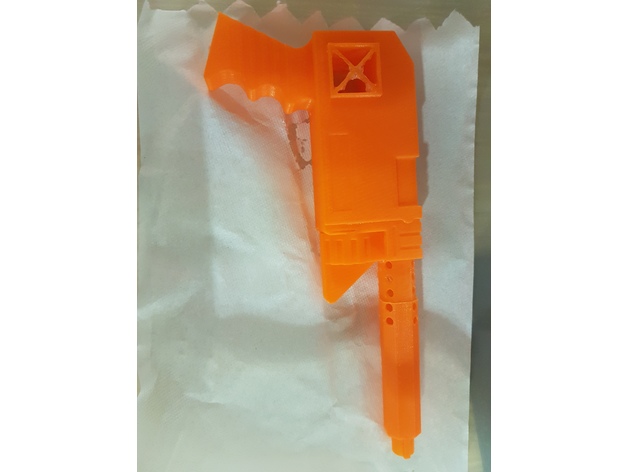
Clapping Gun 3D Print Model
Summary
This is a clapping gun. The pins can be any rod of size. The spring needs to fil with ample tension.
The STP file has design data -
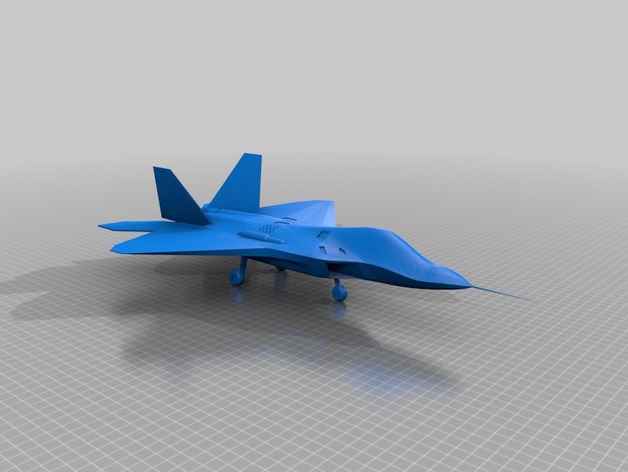
raptor 3D Print Model
Summary
ian
Print Settings
Printer Brand:
XYZprinting
Printer:
da Vinci 1.0 Pro 3in1
Rafts:
Yes
Supports:
Yes -
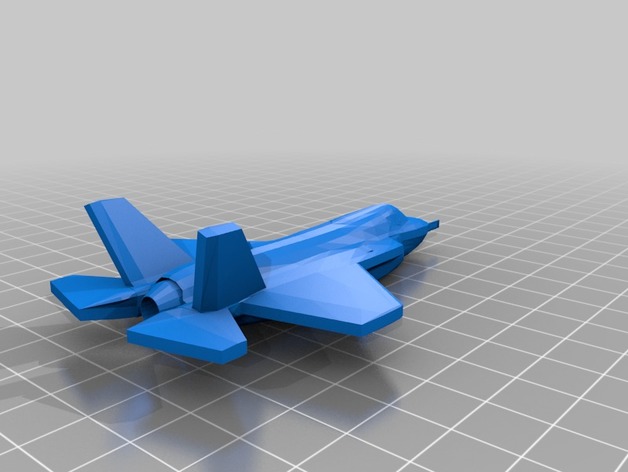
f35 lightning 3D Print Model
Summary
ian
Print Settings
Printer Brand:
XYZprinting
Printer:
da Vinci 1.0 Pro 3in1
Rafts:
Doesn’t Matter
Supports:
Doesn’t Matter -
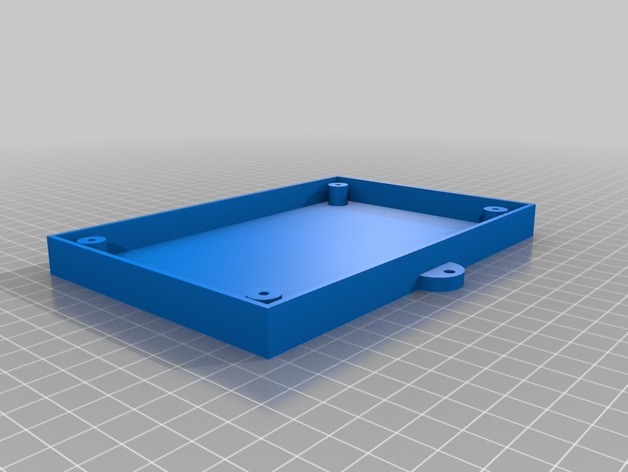
8 relay ethernet board 3D Print Model
Summary
Support mural pour la carte de 8 relais ethernet trouvable sur aliexpress
Post-Printing -
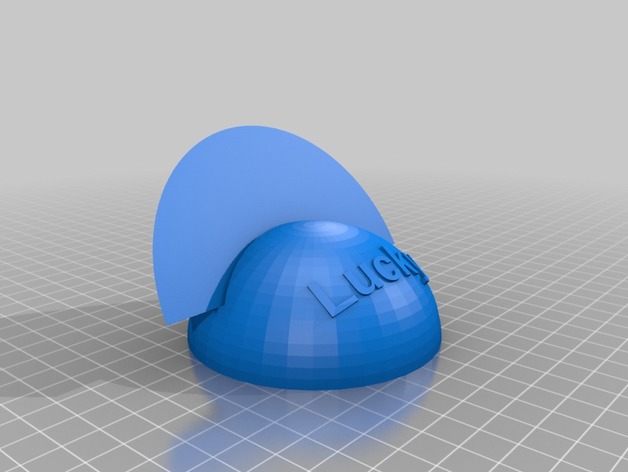
Card holders 3D Print Model
Summary
Realización de un sujeta cartas como ayuda técnica dejando las manos libres para personas con problemas de movilidad en las manos.
How I Designed This -
Hooye Metric Tap Case 3D Print Model
Summary
I bought a Hooye metric tap set off of Amazon and it needed a case.
For the three smallest taps, I made the case to fit the handles for small taps here:https://www.thingiverse.com/thing:1701162
Hopefully others will find it useful.
Amazon link for the tap set:https://www.amazon.com/gp/product/B071VKZ2DC/ref=oh_aui_detailpage_o06_s01?ie=UTF8&psc=1 -
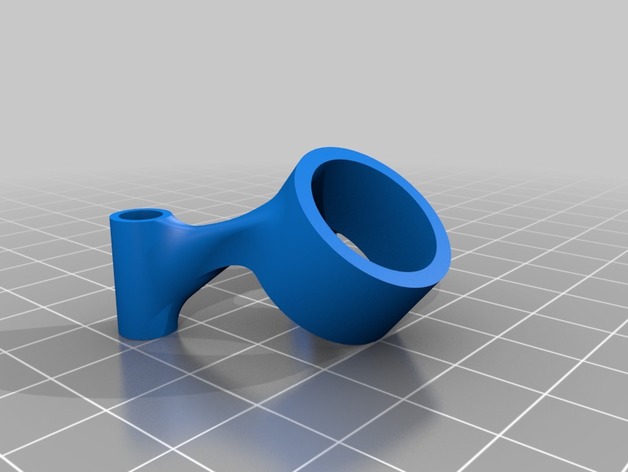
Featherlight AXII Mount 3D Print Model
Summary
An AXII mount for your Featherlight!
This mount is designed for the Featherlight, with 5mm OD standoffs spaced 30.5mm apart, but will work on any frame with a similar configuration.
Get your Featherlight here: http://falconmultirotors.com/featherlight5.html
Print Settings
Printer Brand:
Prusa
Printer:
Prusa Clone
Rafts:
No
Supports:
Yes
Resolution:
0.3mm
Infill:
100
Notes:
Print in TPU -
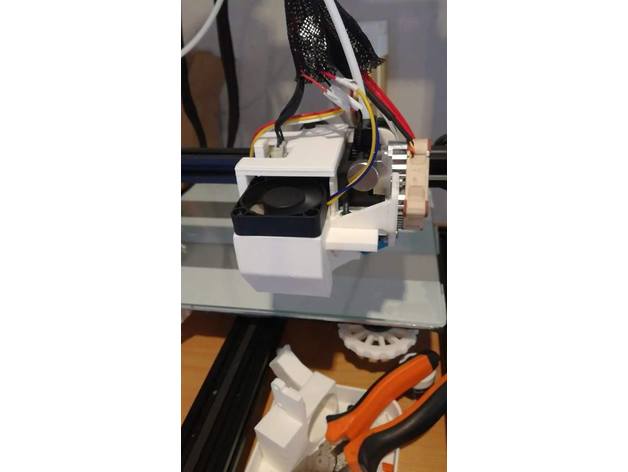
CR-10 Titan Aero Touch mi 3D Print Model
Summary
Voici une tête d’impression pour creality cr 10 avec titan aero et touch mi
Print Settings
Printer Brand:
Creality
Printer:
CR-10 Mini
Rafts:
Doesn’t Matter
Supports:
Doesn’t Matter
Resolution:
0.2
Infill:
20
Notes:
support pour le support ventilateur -
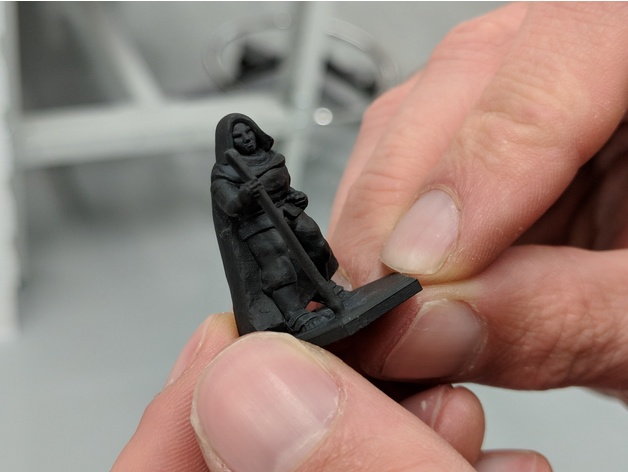
Witch/Wizard 3D Print Model
Summary
This is a model of a halfling witch. It would also work well with a wizard. I designed the original model in DesktopHero3D, and modified it using MeshMixer.
Printing
I’ve had a few prints using an Ultimaker 3 Extended, which were fairly successful, but I’ve recently tried on a FormLabs form 2 and the detail is incredible.
Attributions
backer71 (Muscled Arm Left)
backer71 (Muscled Arm Right)
Xenon472 (Basic hood)
backer71 (Male Head)
DeltaFoxtrotZulu (Platform Hex)
The licenses for the individual assets used are:
Muscled Arm Left (Creative Commons – Attribution)
left hand closed (Creative Commons – Public Domain Dedication)
thick neck (Creative Commons – Public Domain Dedication)
Muscled Arm Right (Creative Commons – Attribution)
Simple Tunic (Creative Commons – Public Domain Dedication)
right hand closed (Creative Commons – Public Domain Dedication)
Basic hood (Creative Commons – Attribution)
Male Short Pants (Creative Commons – Public Domain Dedication)
Male Head (Creative Commons – Attribution)
Male Sandals (Creative Commons – Public Domain Dedication)
gnarled staff (Creative Commons – Public Domain Dedication)
male body (Creative Commons – Public Domain Dedication)
Platform Hex (Creative Commons – Attribution – Share Alike)
cloak cape (Creative Commons – Public Domain Dedication)
cloak cape (Creative Commons – Public Domain Dedication) -
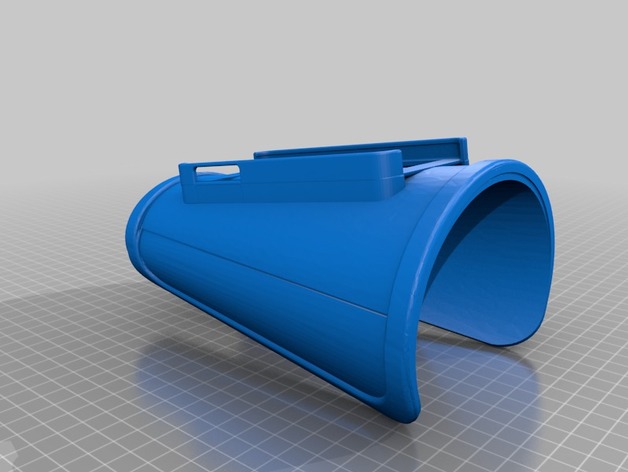
Touchscreen Bracer iPhone 5 Concept for Prosthetic Arm 3D Print Model
Summary
I wanted to make an easy touchscreen holder for kids (and adults) to easily have a phone accessible and thought a bracer/gauntlet would be the way to go.
I am still learning CAD so this is very rough, did I mention very rough concept? lol
How I Designed This
Design Tool
Tinkercad -
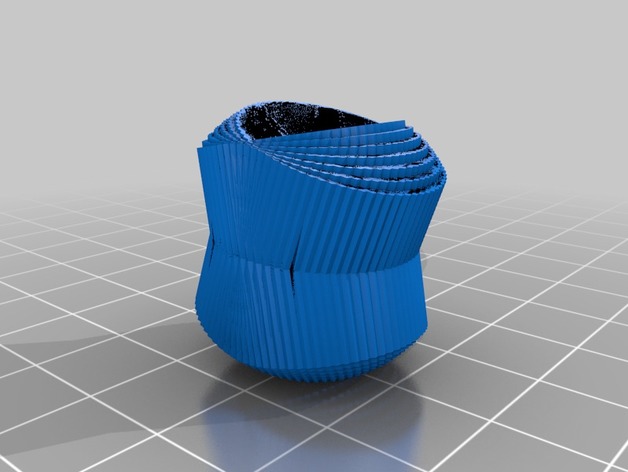
Art 1 3D Print Model
Summary
Just another piece of intricate interactive art
Print Settings
Printer Brand:
XYZprinting
Printer:
da Vinci miniMaker
Rafts:
Yes
Supports:
Yes
Resolution:
100%
Infill:
75%
Notes:
print with exactly 75% nail for best results and use a 0.4mm nozzle -
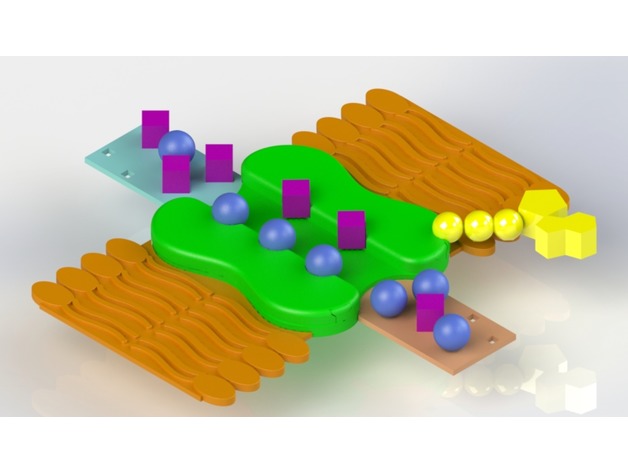
Active Transport Protein 3D Print Model
Summary
Although not actual size, this active transport model is the perfect tool for teachers to demonstrate to students how molecules are moved against their concentration gradients through a membrane and into a cell. This product represents the process of an active transport protein diffusing molecules from their low concentration to their high concentration.
The whole model consists of two concentration placement holders (one representing the cytoplasm inside the cell and the other representing the extracellular matrix outside the cell), two extensions of the membrane, a protein plate on which the protein halves rotate, two protein halves that are equipped with engravings that can bind to certain molecules, two plugs to secure the protein into place with the plate, an ATP than can break off into an ADP and a single phosphate, and, as well as, several pieces of two different type of molecules. -
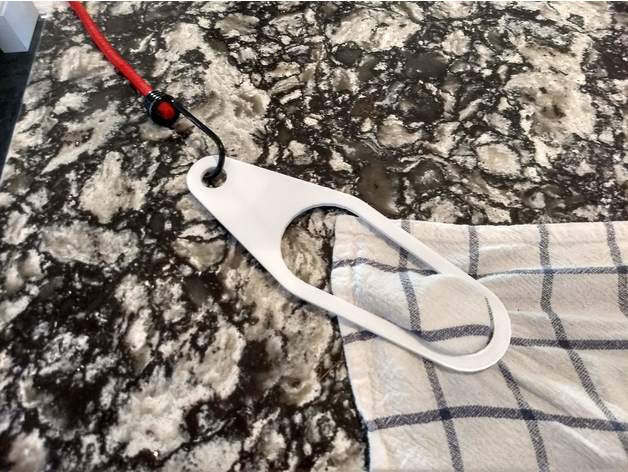
Sheet Screen Garter 3D Print Model
Summary
I was looking for some way of stretching a sheet to make a screen for a yard drive-in. Nothing came up so I thought I’d try something.
This hasn’t been tested in the yard yet but seems to hold a towel I tested it with. I’ll likely tweak it once I give it a go.
Created in AutoCAD because that’s what I’m familiar with.
Print Settings
Printer:
DIY HyperCube
Rafts:
No
Supports:
No
Resolution:
0.2
Infill:
50% -
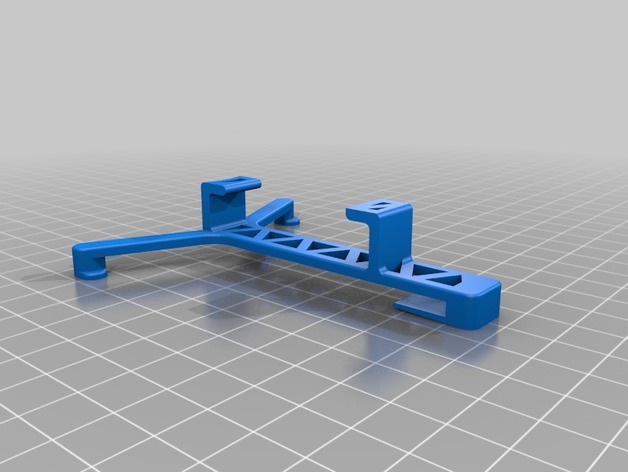
Electric Saint Helmet Goggle Clip 3D Print Model
Summary
Goggle clip for the Electric Saint helmet. Mine required some filing, but after that it clipped right on. -
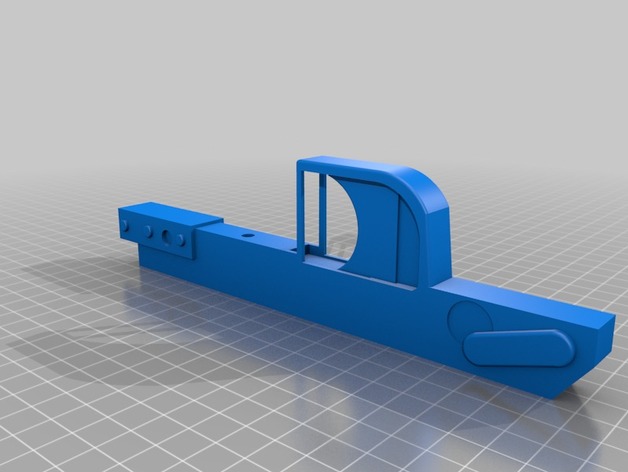
SE-14R trigger 3D Print Model
Summary
I tried to build the SE-14r blaster from rogue one as saved in the source material, but i broke the trigger and object titled (lower) by trying to fit them together. So i decided to open up 3D Builder and simply merge the two.
Print Settings
Printer:
Anycubic I3 Mega
Rafts:
Yes
Supports:
Doesn’t Matter
Infill:
25% -
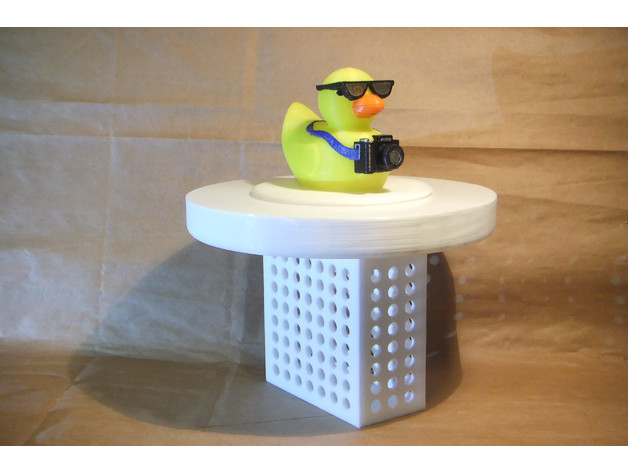
3″ Pool Chlorinatior with Tourist Duck Lid 3D Print Model
Summary
I needed a chlorinator for use with 3″ tablets, but Tixhyl’s version is designed for the smaller (1″?) tablets. I liked the design, though, so… why reinvent the wheel? Simply rescaling the existing model wouldn’t work, though, because that would have changed the size and shape of the holes. So… I loaded Sketchup and redrew the design from scratch, with the adjusted dimensions.
Not being satisfied with that, though, I thought this needed a lid, and nothing looks better floating in the pool than a rubber duck. Unfortunately, I am not too good at organic modeling yet, so I borrowed 3DprinterOS’s totally awesome Tourist Duck. I did the merge for this in Blender, just because blender imports, and works with, existing STLs a lot easier than does Sketchup.
After printing, I painted the colored portions of the duck with Plaid Folk Art Multi-Surface acrylic paints.
Another Sketchup Model – Debunking the Myth that Sketchup is Useless in 3D Printing
Print Settings
Printer Brand:
TEVO
Printer:
Tarantula
Supports:
Yes
Resolution:
0.2 – 0.3
Infill:
5-10%
Notes:
This needs to be able to float, so it is best to print the chlorinator with about 5% infill to make it as light as possible. The lid needs supports enabled and can be printed with between 5-10% infill. I printed every thing at 0.3mm layer height, simply because I wasn’t too concerned about overall appearance, but of course 0.2mm for the lid would look much better. As for supports, I used Cura’s “tree supports” just because they looked like hands holding the duck’s head. Of course, for large flat areas, like the underside of the lid, “tree supports” are not ideal, unless maybe you turn on “support interface” as well. If I did it again, I’d stick with standard support settings.
For the lid, I printed the lower half in white and then switched to yellow as soon as the duck portion started. At the 0.3mm layer height I used, this was at layer 111, but your mileage may vary, so you may want to double check that layer view before deciding where to swap colors. -
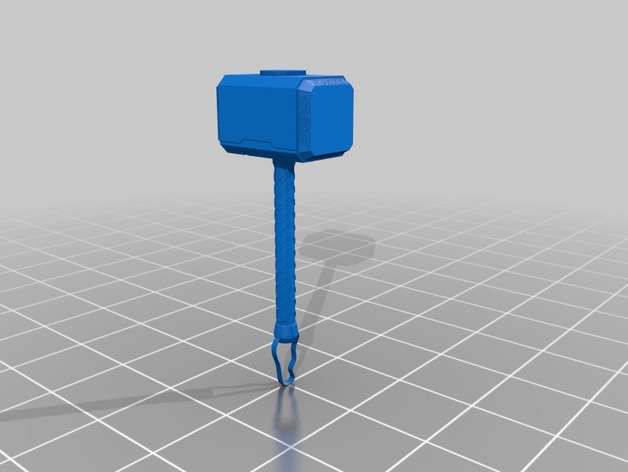
3D Printable Mjolnir (Thor’s Hammer) 3D Print Model
Summary
This is a miniature printable version of the Mjolnir. It is very, very, tiny. -
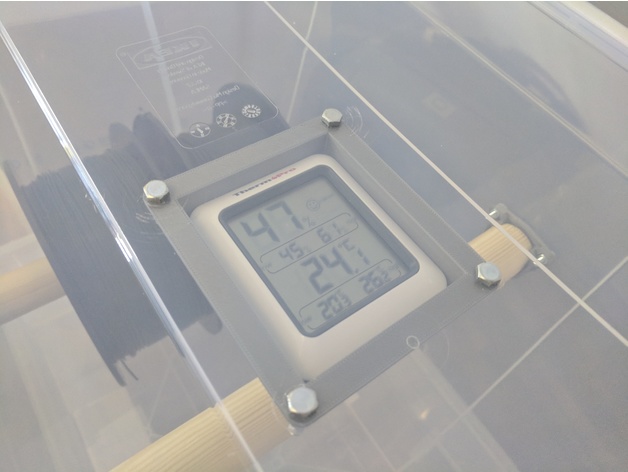
Hygropeter (ThermoPro TP-50) mount for Filament storage box 3D Print Model
Summary
Mount for one of the most common Thermo- / Hygrometers on Amazon.
Mounting holes mad for M5.
Battery compartment still accessible after mounting.
ThermoPro TP50 on Amazon: https://amzn.to/2s1PSuA
Print Settings
Printer Brand:
Prusa
Printer:
i3 MK3
Rafts:
No
Supports:
Yes
Resolution:
2mm
Infill:
20% -

Despacito 3D Print Model
Summary
Yespacito
Hold it up to a light source for a good meme. Haven’t tried printing yet so send a pic if y’all have.
Print Settings
Printer Brand:
Wanhao
Printer:
Duplicator 6
Rafts:
Doesn’t Matter
Supports:
No
Resolution:
Any resolution, but smaller layer height will give better detail on the Boi.
Infill:
50%-100%
Notes:
despacito
Post-Printing
despacito
despacito
How I Designed This
despacito
despacitoDespacito
despacito
despacito -
Double Extruder Helmet for OpenRC F1 car 3D Print Model
Summary
This is a modified version of the Helmet for OpenRC F1 car by tahustvedt for two color printing.
Print Settings
Printer:
Flyingbear P905x
Rafts:
No
Supports:
No
Resolution:
0.15
Infill:
20% -
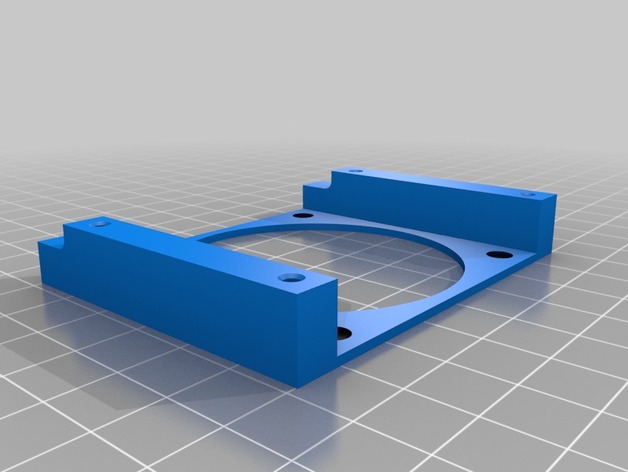
Amcrest NVR Fan Mount 3D Print Model
Summary
This is a fan mount for an Amcrest NVR unit NV4432E. Amcrest unit ships with only one fan and one bracket. Stock fan is loud. now you can install two quieter fans. Only a 10mm wide fan will fit on the one side. Fans are 60mmx60mmx10mm or 15mm -
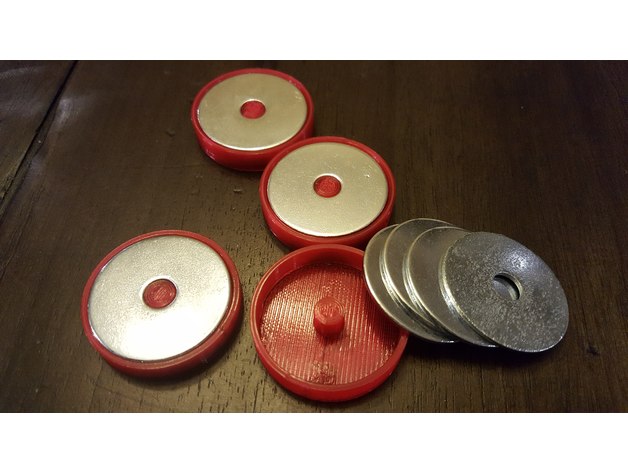
Pattern Weight from Washers 3D Print Model
Summary
I had some steel fender washers (inner diameter 0.25″, outer diameter 1.25″) and wanted to use them as weights for sewing patterns, so I whipped up this design in Fusion360 to make a little holder for them. Each holder fits 4 of washers I have. Be warned: It’s a tight fit and you’re unlikely to get your washers back without destroying the print.
I designed this to be printed at 0.2mm layer height and 0.5mm extrusion width.
Print Settings
Printer:
Creality Ender2
Rafts:
No
Supports:
No
Resolution:
0.2mm -
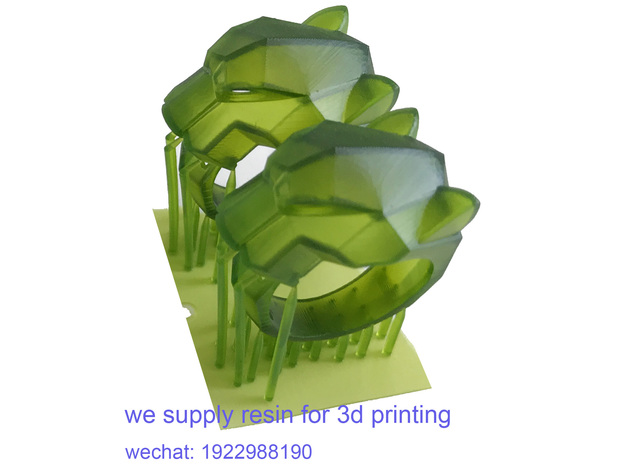
leepard ring with supports 3D Print Model
Summary
It is a ring with supports built already.
We are a factory produce non-casting and casting resins for various DLP LCD SLA 3D printers.
If you need resin material,contact us to get some any time:
[email protected]
wechat:1922988190
skype: +86 15216873412
Print Settings
Printer:
Jamghe DLP printer
Rafts:
No
Supports:
Yes
Notes:
slice 0.05mm,exposure time 2.8s/layer,material: Jamghe casting resin green color.
Post-Printing -
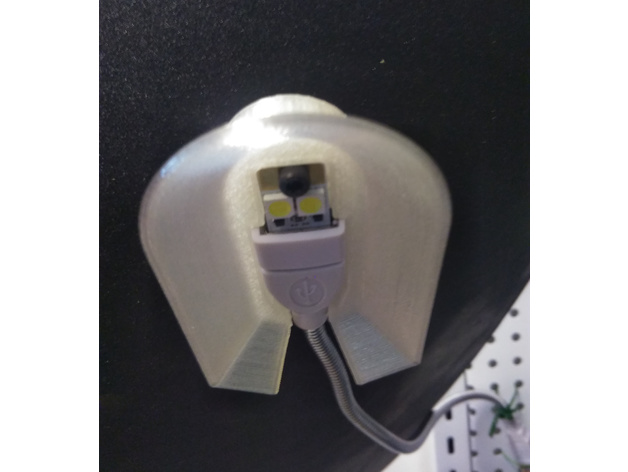
Simple USB Lampcase 3D Print Model
Summary
Designed for:
USBExtention Tube with Usb 2 bulb with M3 screw hole.
You can force the M3 screw into the printed hole( depending on the printer you might want to modify the hole)
Also please excuse the crappy photo quality 😛
Example of LED and USB Tube:
(Disclaimer: I do not receive royalty from these shops, nor am I making recommendation, just examples, anything similar will work)
LEDLamp: https://detail.tmall.com/item.htm?spm=a1z10.5-b-s.w4011-16538328951.66.5b42bf29cMTpOu&id=41300986048&rn=056775a5208ecb09f06e30ce695eae64&abbucket=17&skuId=3206025586110
USB Ext Tube: https://detail.tmall.com/item.htm?spm=a230r.1.14.55.2cab40be5mAAXJ&id=41286248566&ns=1&abbucket=15
Print Settings
Printer:
LM110
Rafts:
Doesn’t Matter
Supports:
No
Resolution:
0.2
Infill:
30% -
Asriel Dreemurr (Undertale) 3D Print Model
Summary
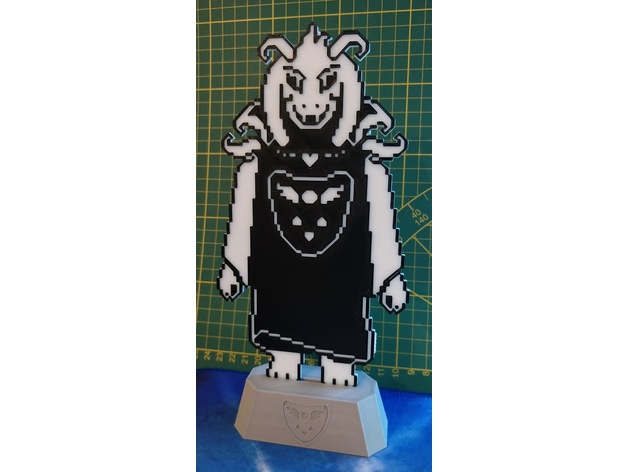
This is adult Asriel Dreemurr from Undertale, made by request from my girlfriend who loves the game.
Asriel just slides in the base (which is reversible, there is the Delta Rune or Flowey, you choose). It holds well, but if you want you can of course add a small dab of glue to hold it in place.
To print Asriel, you will need white and black filaments. Load the STL file in S3D (or Cura, but I don’t use it so I don’t know what the steps are) and go to the “advanced” tab. There, check “Stop printing at” and write 2mm. Save the Gcode as “Asriel 01.gcode” or whatever name you like 🙂
This is for the first part.
For the second part, you just have to uncheck “stop printing at” and check “start printing at” and indicate 2mm again. Save the gcode as “Asriel 02.gcode”.
Load some white filament in your printer and print “Asriel 01”. When it is finished, do not let the printer cool down and DO NOT move the bed at all, load black filament on your printer (don’t forget to purge the wite that is left in the hotend) and print “Asriel 02”. It will print directly on top of the white if you’ve followed the instructions correctly.
In this world, it’s print, or be printed!
Share your makes 🙂
Print Settings
Printer Brand:
Creality
Printer:
CR-10
Rafts:
Doesn’t Matter
Supports:
No
Infill:
100% -
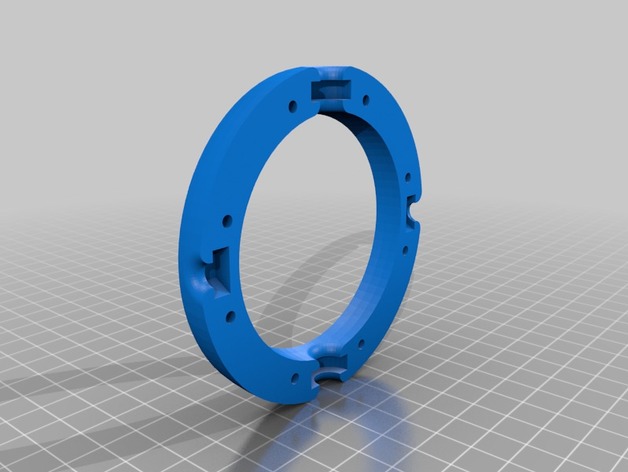
camera stabilizer 3D Print Model
Summary
BOM (name : qty)
M6 8.8 any length : 1
M3 20mm : 20
M3 nut: 20
optional 625zz bearing elsewise print the dummy -
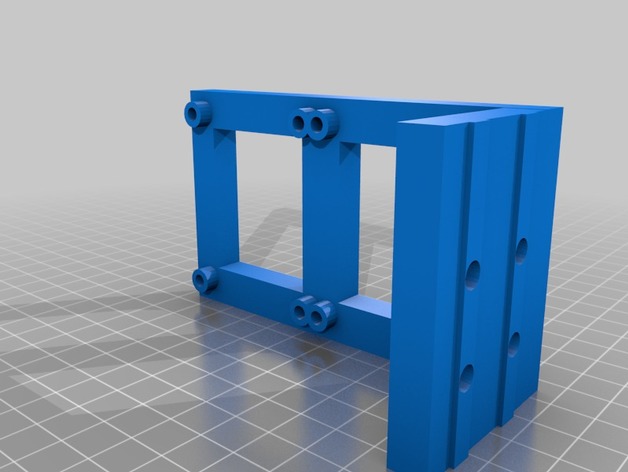
AM8 Duel Mosfets Mount (Or other 2040 Extrusion Frame 3D printers) 3D Print Model
Summary
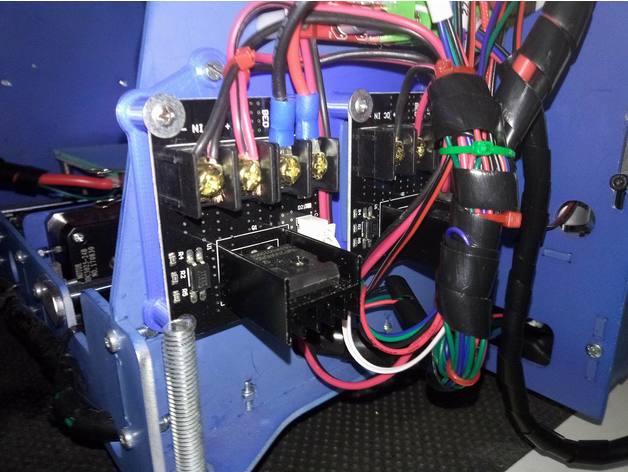
This is a duel mosfet mount for a am8 frame. Do to the the size of cheap eBay mosfet you might have to drill the holes out very little. This will work with any 2040 Frame printer. -
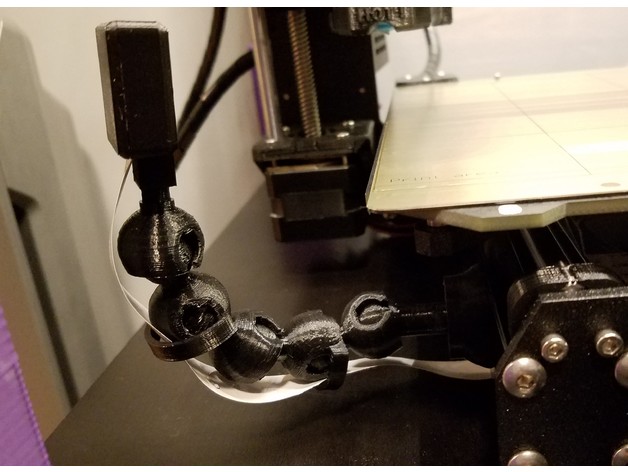
Prusa MK3 3030 Extrusion Mounted Pi Camera 3D Print Model
Summary
I liked the ball joint flexibility of MoonDoggy’s pi cam design but didn’t want to attach it to the x-axis. So I modded jltx’s hard feet design to attach a ball joint and modded the original camera case to allow the cable to come out from the bottom.
To install first attach the base and bit to the extrusion securely as indicated on the hard feet design. This can be anywhere you like on the printer extrusions. Next insert the ball link into the base and twist it slightly, it should be a tight fit as I had to use pliers. The rest is the same instructions as the cam design. You can use the original camera back on the new camera front. I hid the cam ribbon cable under the printer for tidiness. -
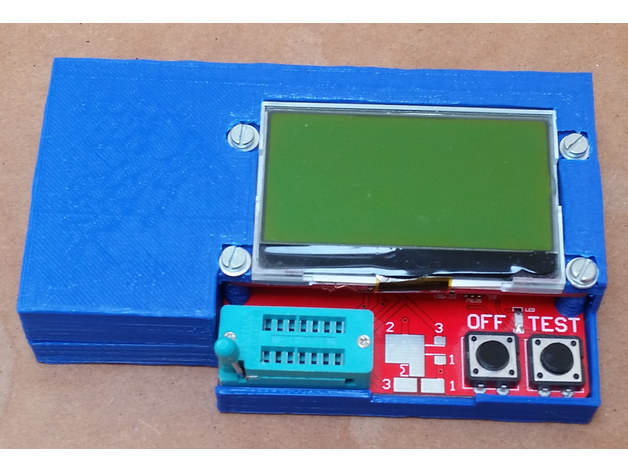
Fish8840 transistor tester box 3D Print Model
Summary
Yet another box for the fish8840 transistor tester.
This one uses M3 x 27 mm bolts to hold everything together, and includes a large box for a battery. I designed the box to hold this rechargeable battery
I’ve included the FreeCAD design file – have fun remixing!
This is my first design that I’ve published to thingiverse – I’d appreciate feedback. Thanks. -
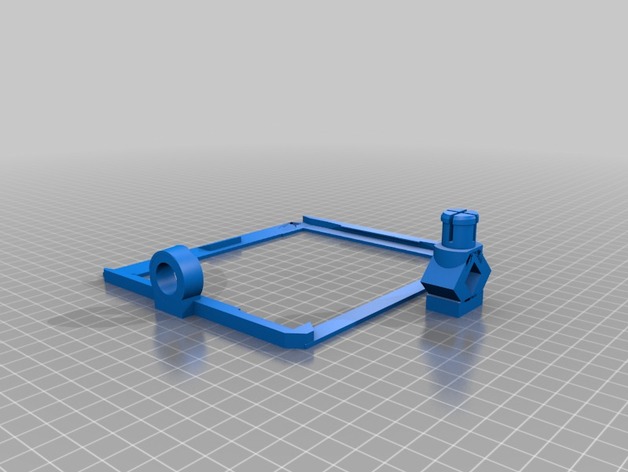
Phoropter Near Card Holder 3D Print Model
Summary
This item was created to provide a stable near card position on a standard phoropter near rod. Printing in two pieces allows for rotation around the pivot. The frame was designed to fit the OSU College of Optometry Near Cards, which can be purchased from the OSU College of Optometry (https://optometry.osu.edu/sites/default/files/PDFs/IMC_Materials_List_20170928.pdf). The design allows for multiple card insertion with visibility from each side as the card is rotated. Elimination of a standard phoropter attachment clip provides increased stability. -
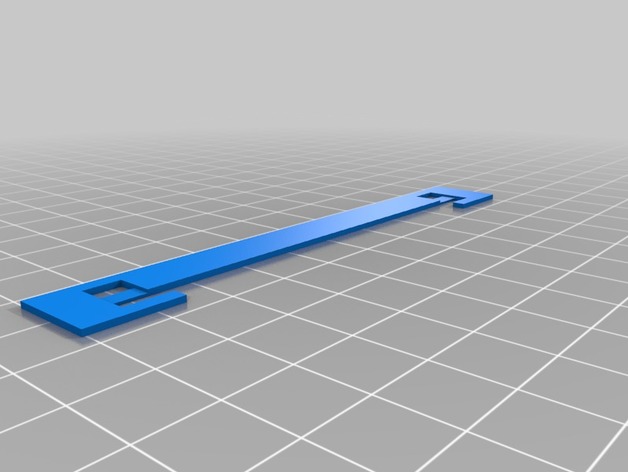
Binder strap stopper (2Hole Pitch80mm) 3D Print Model
Summary
Use this with Binder strap 2 hole type.
Print Settings
Printer:
Anet A8
Rafts:
No
Supports:
No
Resolution:
0.2mm
Infill:
100%
Notes:
ABS is used.
Suitable for Binder Strap (2 holes, 80mm pitch)
Post-Printing -
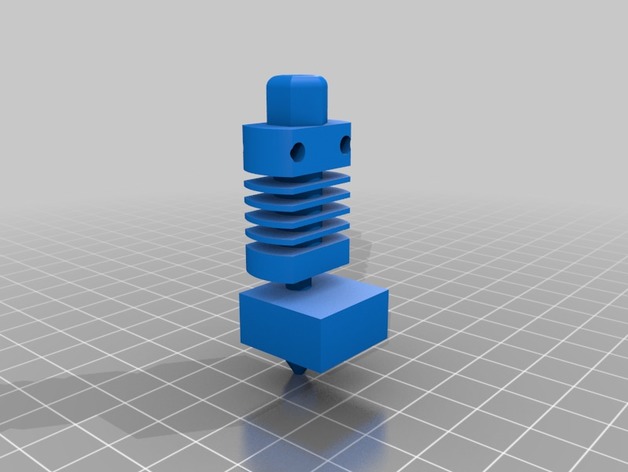
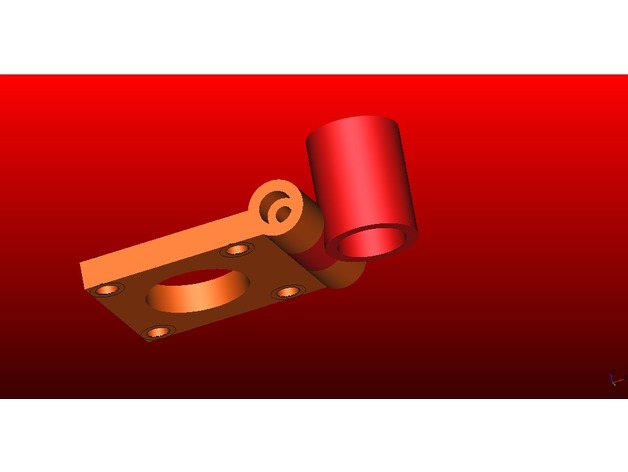
Cr-10 Hot End Model 3D Print Model
Summary
Just a mock up of the CR-10 Hot end
Using it to design a carriage for my custom printer using my spare cr-10 hot end -
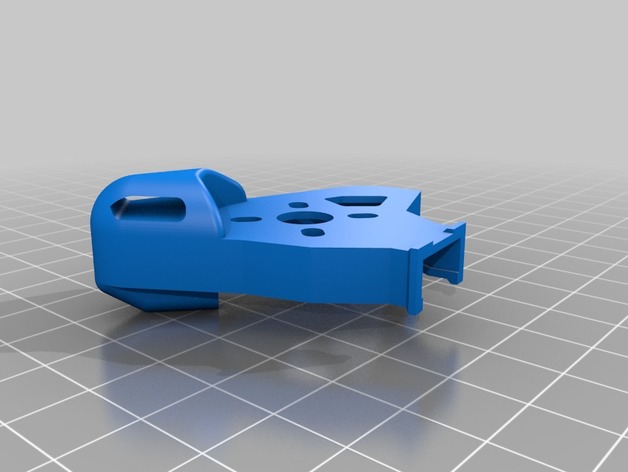
Raggio Lungo Heavy Duty Booties 3D Print Model
Summary
PROTECT THAT SEXY RAGGIO BOTTOM PLATE! These are an even heavier version of the Veloce Heavy Duty Booties, with larger front bumper area and dual landing skids underneath. The outside edge and tip of these booties is a thick shock absorber. There’s a slight channel for your motor wires, and a lip to hold a ziptie around them and the bootie. See photos.
Print Settings
Printer Brand:
Prusa
Printer:
Prusa Clone
Rafts:
Doesn’t Matter
Supports:
Yes
Resolution:
0.3mm
Infill:
Any
Notes:
See photos for recommended orientation and support locations. -
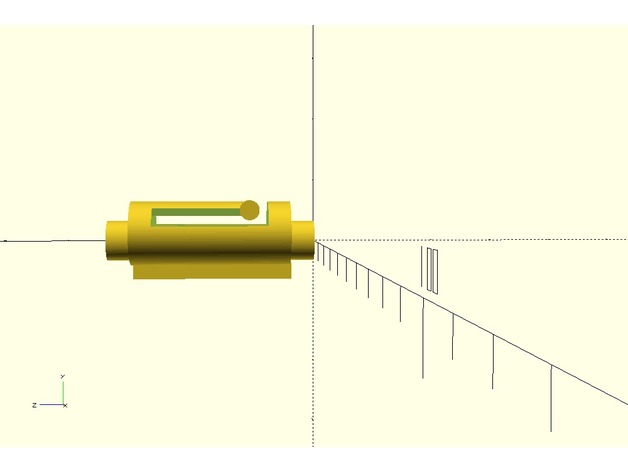
Venetial Blind Angle Cord Clip 3D Print Model
Summary
This is a clip that the venetian blind angle adjusting cords connect to. These clips are up in top and slid and clip into place on a ‘D’ shaped rod. When the clips rotate the cord wraps around these clips causing the blinds angle to change.
I printed this on a stock CR-10, horizontally with clip side up.
.1 layer height
100% infill
Support evrywhere
Brim
30 mm/sec
PETG for clip flexibilty
245c Noz
70c Bed
I have included the STL and the SCAD in case you need to modify for your application. -
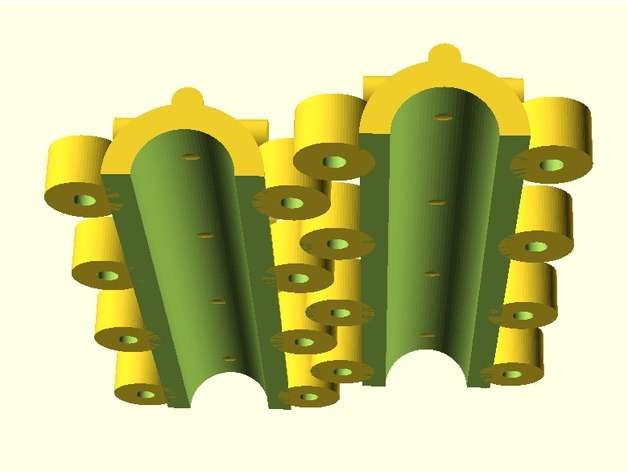
Tubular clamp 3D Print Model
Summary
My friend needed a clamp to fix a bird feeder support. I made this with multiple cylinders and used VincentD’s hex library to make the holes for the #8 nuts.
Print Settings
Printer:
Anet A6
Rafts:
No
Supports:
No
Resolution:
0.2mm
Infill:
40% -
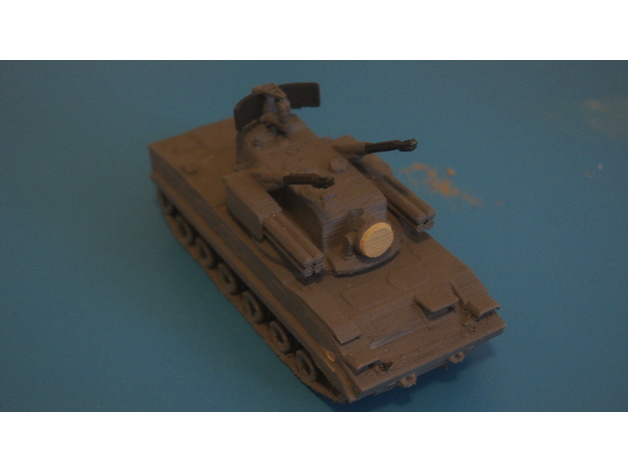
tunguska 3D Print Model
Summary
2k22 Tunguska
SA-19 Grison
https://en.wikipedia.org/wiki/2K22_Tunguska -
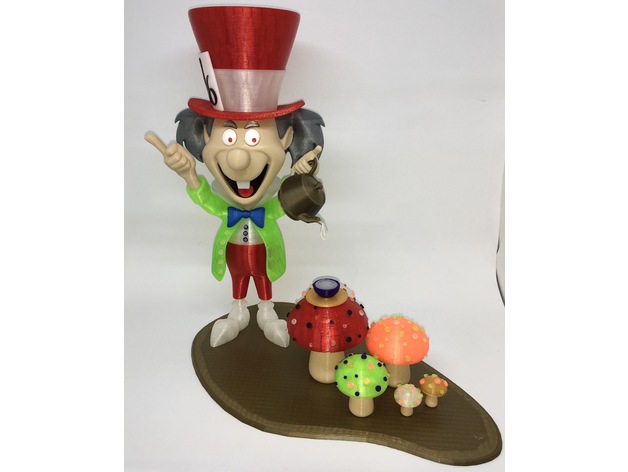
Mad Hatter Base 3D Print Model
Summary
Not a True Remix… but might be usefull for someone.
Following an idea from user @ wabah58, I just did a quick clean up, with 3DBuilder, of the Yogy bear base placeholders, the file is also from ReddadSteve (https://www.thingiverse.com/thing:2470853)
So its a simple Yogi Base without holes that you can scale at will!
Im printing it right now with 200% scaling on X and Y and left at 100% Scale on Z so it has the same height of the yogi base. At this size I will have space for a few more shrooms… -
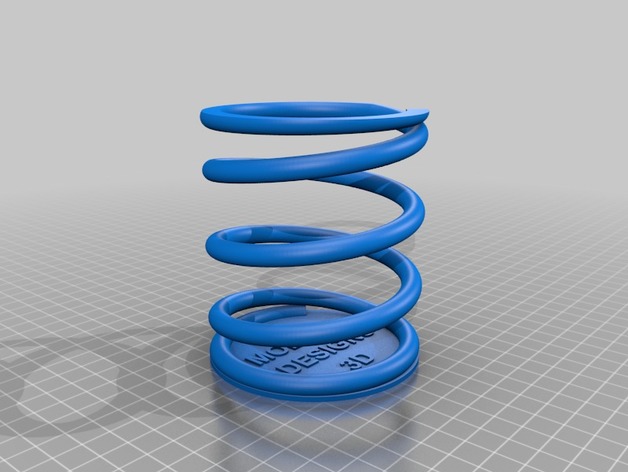
Coil Spring Pen Holder 3D Print Model
Summary
I recreated a coil spring pen holder I had came across. Just getting the file out for now, will edit all this stuff when I get a little more time. -
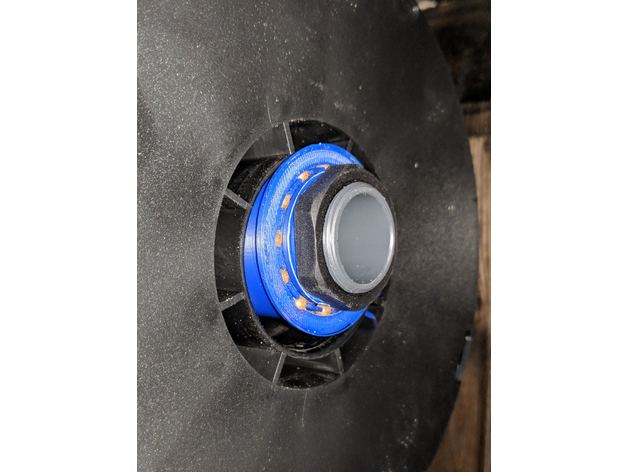
CR-10 Spool Holder 3D Print Model
Summary
I wanted a better spool holder, but didn’t want to completely do away with the stock bracket. This is essentially a sleeve bearing designed to fit over the stock 32mm pipe. It prints in four pieces (you need two dividers) and uses 32x 4.5mm steel BB’s. It can hold any filament spool with a center hole of 54mm or larger.
Print as upright cylinders, no supports. I recommend a brim as it’s not a ton of surface area to stick down. -
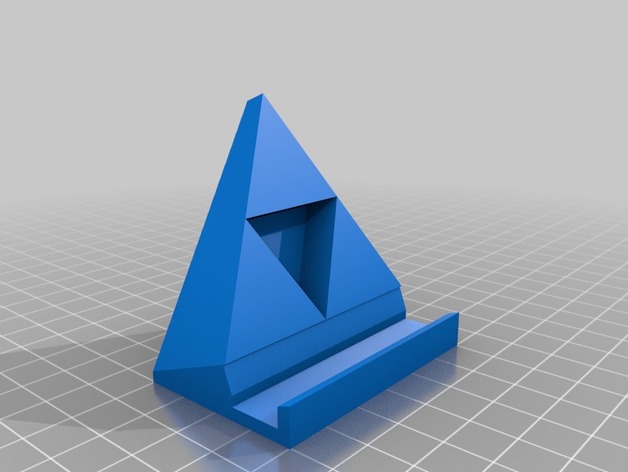
Triforce Smartphone Stand Revised 3D Print Model
Summary
This is a minor remix of Rem3_1415926’s Triforce Smartphone Stand. It replaces the inward-sloping shelf with a level shelf and lip — this may hold your phone better.
Thanks, Rem3, for the attractive design! -
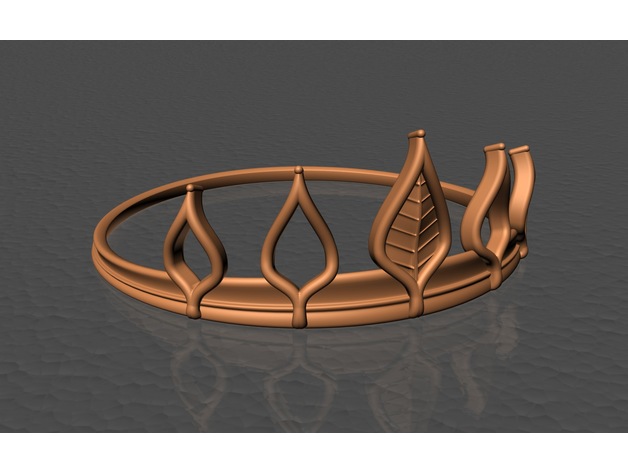
Crown 3D Print Model
Summary
Simple crown, printable without support.
I did not like any crown, i could find, so i desing my own.
Designed as a part of treasure, for child’s game/treasure hunt. There is an chalice in same design.
Enjoy. -
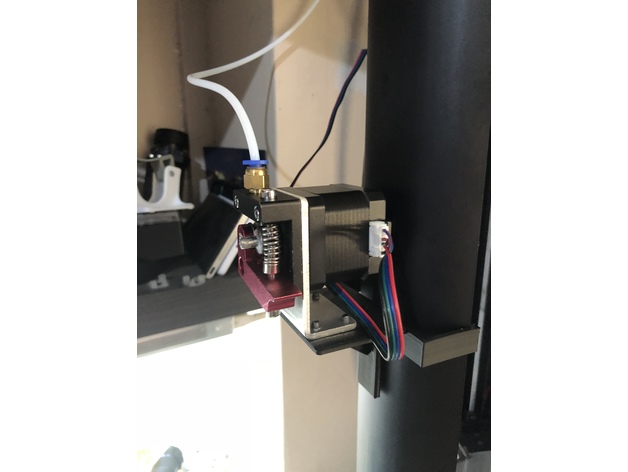
Stepper motor mount for FLSun QQ 3D Print Model
Summary
This is for folks who prefer shorter bowden tube & easier to load filament when the printer is position in a confined area. I use a little “bluetak” to make it less likely to slide along the side rail. -
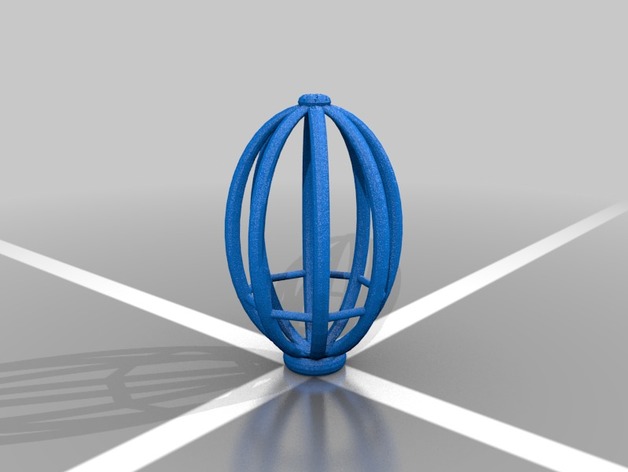
Fishing feeder cage 3D Print Model
Summary
This is a feeder cage for fishers.
Print it with brims around 1 cm.
You have to drill out the the top and bottom ends in order to get your fishing line through.
I used PLA because it is bio degradable, I printed this at 200 C / 60 C (bed) -
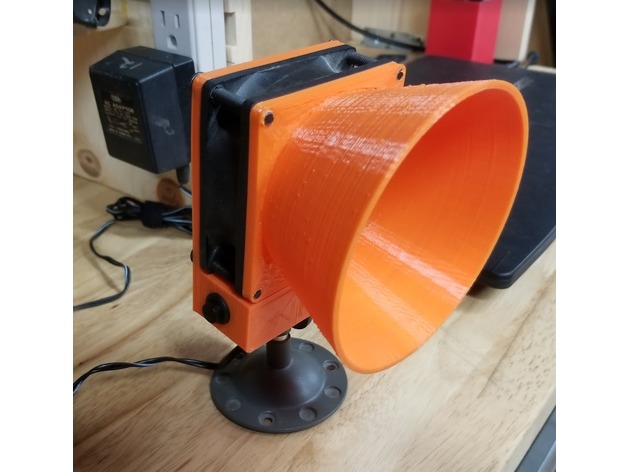
Fume Extractor 3D Print Model
Summary
Fume Extractor is probably a bit of a misnomer as all it really does is to accelerate the fumes away from your workspace while soldering.
I had an old ip camera type mount that uses a standard 1/4 20 camera tripod type bolt on the top. I just threaded it directly into a hole in the base of the fan holder.
The holes on the little funnel might be a bit on the small side, so you may need to ream them out with a drill bit. I used some M5 machine screws directly into the hood piece to hold it all together.
I Added a little 12 volt wall wart and a spst latching button switch with a 12.7mm hole.
Used it last night and it really helped to keep the soldering fumes from going right up my nose.
You do need to keep it a bit close to the work piece in order for it to function
If you really value your health and safety, you might want to search for other ones that actually hook up to a vent tube that would take the fumes completely away.
Print Settings
Printer:
AM8
Rafts:
No
Supports:
No
Resolution:
.28mm
Infill:
25%
Notes:
Pretty basic print. Nothing fancy. -
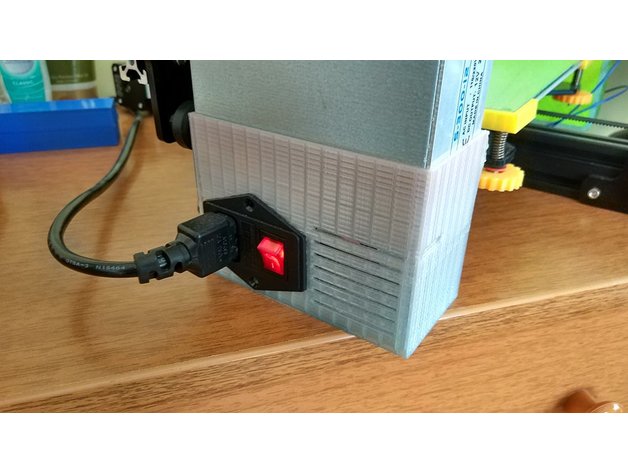
Tevo Tarantula PSU Vertical Cover 3D Print Model
Summary
This is a PSU cover for the standard TEVO Tarantula power supply. Adds protection as the cables and the terminals are not exposed and it makes the printer portable as the PSU is on the printer. Added grilles for cooling.
Screw it with the default 4mm screws and t4 nuts. You will also need a C14 male power supply connector with switch and fuse and screws/nuts for mounting.
My target was to make it use less material than other designs making it affordable.
Print Settings
Printer Brand:
TEVO
Printer:
Tarantula
Rafts:
No
Supports:
No
Resolution:
0.2mm
Infill:
25
Notes:
26 meters of plastic with wall and top/bottom thickness of 0.8mm.
16 meters of plastic with wall and top/bottom thickness of 0.6mm. -

Mad Hatter with base 3D Print Model
Summary
I added a base to tie the model together and for added stability since the Hatter is a little top heavy.
Full model and instructions:https://www.thingiverse.com/thing:2902243
The base is flat without indents for the feet or mushroom. Simply position the original model as per the photos and glue it down.
Enjoy! -
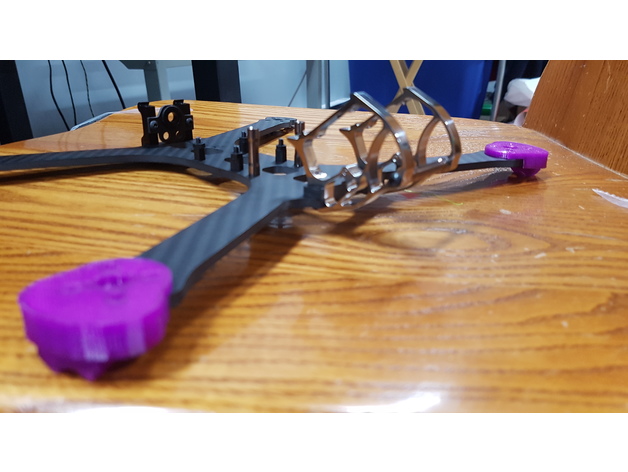
Armattan Chameleon Ti – Arm and soft Motor mount / landing gear 3D Print Model
Summary
this an flex protection for the end of the arm and btw , soft mount for your motor and landing gear
Print Settings
Rafts:
No
Supports:
No
Resolution:
.15
Infill:
45
Notes:
print in tpu -
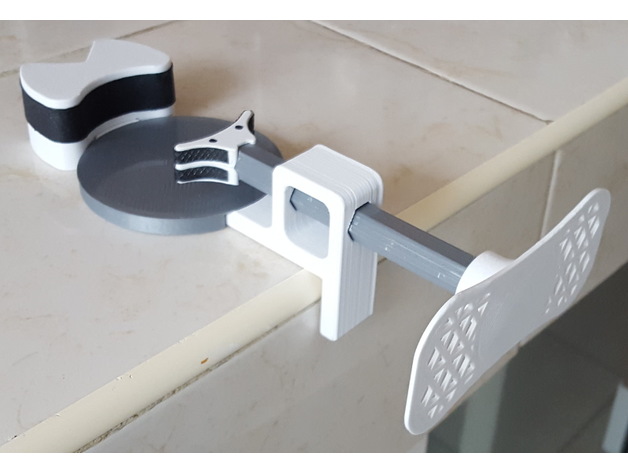
One hand pot opener 3D Print Model
Summary
Simple version of one hand pot opener. With his guide this print is suitable for beginner
Printed the actuator with PLA will allow it to be thermoformed.
Sencilla version de un aparato para abrir un pote con una mano. Con su guía, esta impresión es adecuada para principiantes.
Imprimir el actuator con PLA permite modificar su forma en agua caliente.
Simple version d’un ouvre-pot à une main. Facile à imprimer.
Imprimer l’actuator en PLA permet de modifier sa forme par thermoformage.How it works
Press the actuator with your hip to block the pot. Open it with your free hand
Oprimir el actuator con la cadera para bloquear el pote. Abrelo con su mano libre.
Presser l’actuator avec la hanche pour bloquer le pot. L’ouvrir avec la main libre. -
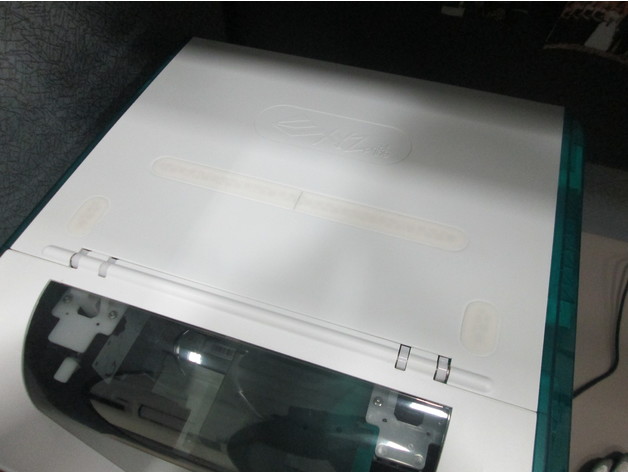
Da Vinci Jr _ DaVinci Jr Long Dust Plug 3D Print Model
Summary
I remixed ryanmac1911 filament plug and extended it to cover the long filament tube hole on the davinci jr. I then cut it in 2 pieces to it was printable on the davinci jr. Whenever my printer is not is use I removed the filament tube and cover all the holes on the top to keep the inside of my printer dust free!
Print Settings
Printer Brand:
XYZprinting
Printer:
da Vinci Jr. 2.0 Mix
Rafts:
No
Supports:
No
Resolution:
.2
Infill:
15% -
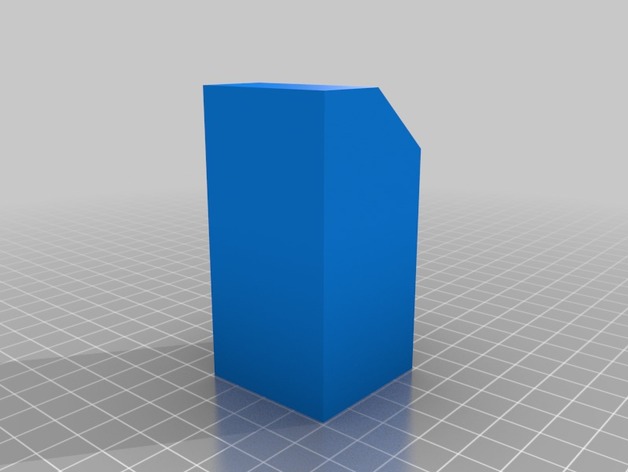
Boba Pouch Forms 3D Print Model
Summary
These are meant to be used as forms for Leather or Vinyl Boba style belt pouches. These printed forms are meant to replace the wood blocks used in Batninja’s Tutorial on the dented helmet: http://www.thedentedhelmet.com/showthread.php?t=8797
The hollow model is meant for vinyl pouches if they’re not holding their shape, you can leave this form in and still have functional pouches. Enjoy! If you make, please post! -
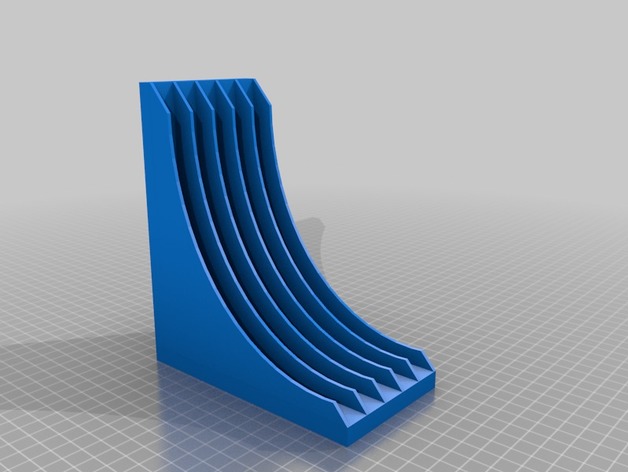
Small Xbox Game Rack 3D Print Model
Summary
A smaller version of my original Xbox game Rack. This model has space for only 5 games rather than 10. -
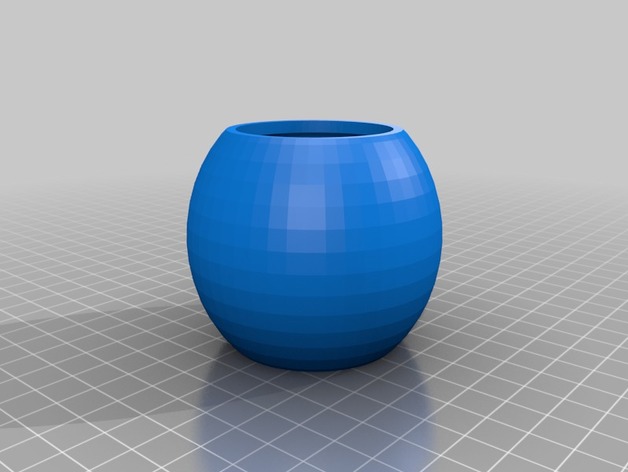
Plant Pot 3D Print Model
Summary
I designed this plant pot using Tinkercad.
Print Settings
Printer Brand:
Creality
Printer:
CR-10S
Rafts:
No
Supports:
No
Resolution:
0.15
Infill:
15% -
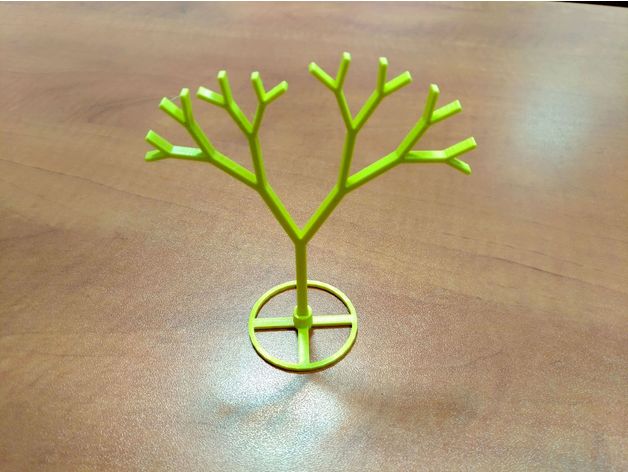
Parametric Fractal Trees 3D Print Model
Summary
This is a modified version of an OpenSCAD example by Torsten Paul. With the original one, after extruding, the objects suffered of some strange gapes especially when using higher angles.
I added a few parameters and other modifications to be able to generate 3D printable fractal trees needed for a student research project. The base is parametric too and can be generated with the same parameters as the trees.
Other options:
minimum and maximum angle of the branches
generating random trees or producing repeatable results at each build;
with height 0, the tree will be colored and not extruded
File description:
fractal_tree_module_recursion.scad – to generate custom fractal trees
tree base.scad – to generate custom bases for fractal treesPrint Settings
Rafts:
Doesn’t Matter
Supports:
Doesn’t Matter
Resolution:
0.2
Infill:
100%
Notes:
Material: PLA -
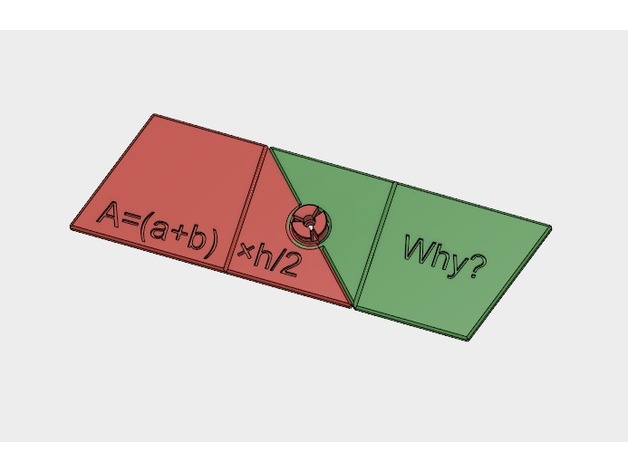
Trapezoid Area Formula, A= (a+b) × h /2, why? 3D Print Model
Summary
Trapezoid Area, A= (a+b) × h /2, why?
Given any trapezoid, if the parallel top and bottom are a and b, respectively, and the corresponding height (altitude) is h, the area is (a+b) × h /2. But why?
To see why, we take two congruent copies of a trapezoid and make a parallelogram with the same height and a base of (a+b). Such a parallelogram can be easily converted to a rectangle with a base of (a+b) and height (h, or width), and, accordingly, an area of (a+b) × h. Why do we have to divide that by 2? Well, it is because we want to know the area of the trapezoid. Of course, there are other ways to explain it. One way or the other, it goes back to what we know about rectangles or other shapes.
Two versions are provided to demonstrate the process behind A= (a+b) × h /2. The trapezoid is just a random one. Have fun.
Print Settings
Rafts:
No
Supports:
No
Resolution:
.1 to .2mm
Infill:
5-20% -
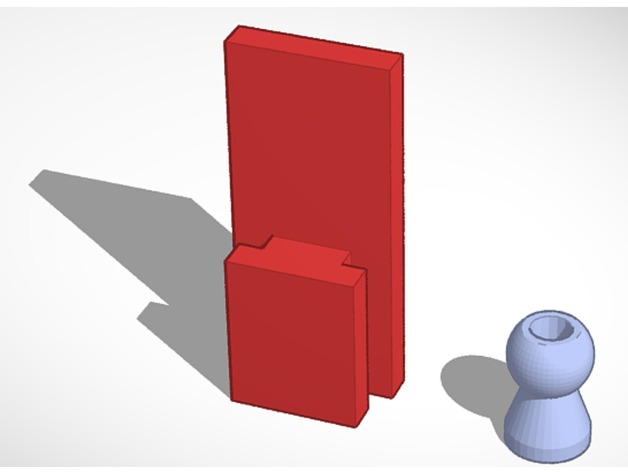
Earbud Organizer/Hanger 3D Print Model
Summary
I always have my earbuds laying around on my desk. I use them for work, to listen to music, for movies, games, etc. I like to keep things organized, so I roll them around my hand and try to keep them in one place on my desk. It doesn’t work well. I need to figure out how to store these things better (and I am not that fond of the cases that hold the earbuds here on Thingiverse… no offense, I just want something more permanent than a case.
I recently bought a phone/tablet stand on Amazon, and I noticed that I keep hanging my buds off that to keep them off the desk. The problem is that I then have to remove them to put my tablet or phone on the stand, and I have that problem with the earbuds laying around on the desk again. So, I took a look at the stand and realized that I could build a custom hanger on the back to hold my earbuds. Perfect!
I printed the Body first (less than an hour), got it to fit perfectly to my stand, then printed the support (7 minutes). Then, I promptly welded the support to the body… on the bottom instead of the top. Oops. I printed another support (another 7 minutes), and then welded that one on as well, and it worked out even better.
I’ve attached all of the files, including one that shows the final build. I’m fairly new to 3DP, so let me know if I did something wrong and I’ll try to fix it.
Enjoy!
Print Settings
Printer Brand:
FlashForge
Printer:
Creator Pro
Rafts:
Doesn’t Matter
Supports:
Doesn’t Matter
Resolution:
.2 mm
Infill:
15%
Notes:
There are several .stl files, each with a variation to give you options on how to print.
I printed each piece independently with the following files:
EarbudBody.stl and
EarbudSupport.stl
You can also print the pieces all together in one print (one support only):
Earbud Hanger-All.stl
Earbud Hanger-All-rotated.stl
You can also print the entire model pre-assembled (but you’ll need supports):
EarbudHanger.stlPost-Printing
Attaching the support to the body
If you print the pieces individually, you can permanently bind them using a Q-Tip and a bit of acetone. A drop on the bottom of the support is all you need to weld the pieces together. It’s very strong.
You may need to file the groove a bit to make it fit perfectly, and I got mine to fit exactly into the slot in my tablet/phone stand.
How I Designed This
Custom pieces: this is why I own a 3D printer
I created the .stl on Tinkercad, saved various different configurations of it, and printed it up. I found out that it fit nearly perfectly, and just needed a bit of post-print smoothing and filing to make it fit like a glove.Tinkercad layout of the holder
-
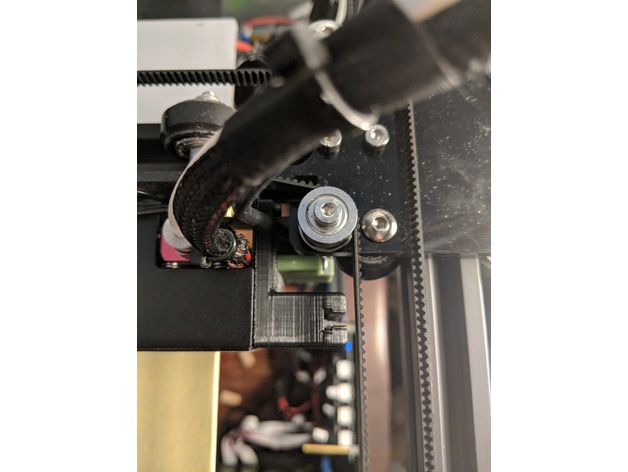
Creality Ender 4 Laser & Bed Leveling Sensor Mount 3D Print Model
Summary
I wasnt happy with the magnetic mounting for the laser on the ender 4, so i designed this to quickly mount and remove the laser when wanting to engrave stuff, without getting in the way of anything and allowing the bed leveling sensor to mount in the same spot. the holes for the mounting should be fixed, originally they were too small. please let me know if they are still too small.
when you get the ender 4 you should have a bunch of extra hardware. use the same type of screws that you used to mount the leveling sensor to mount the laser, by removing all the magnets from the laser and using the 2 center holes and screwing in the screws all the way.
you should now be able to slide the laser into the mount whenever you want to use the laser, and slide it out when done.
Print Settings
Printer Brand:
Creality
Printer:
Ender 4
Rafts:
No
Supports:
No
Resolution:
.2
Infill:
10%
Notes:
200C extruder
45c bed -
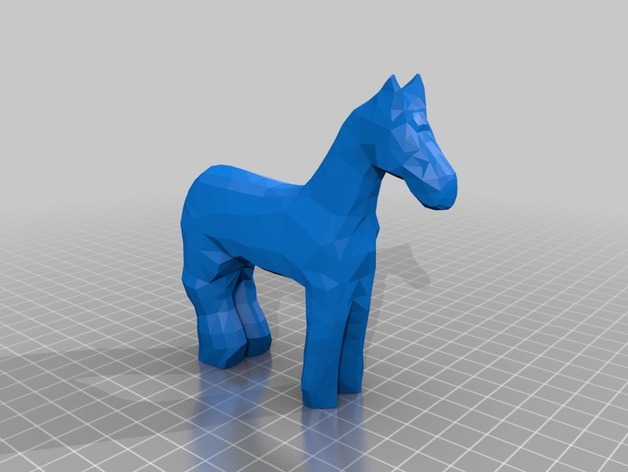
Blade Runner 2049 Wooden Horse 3D Print Model
Summary
This is a replica of the wooden horse from Blade Runner 2049. Includes the date engraving on the bottom. It was modeled in about 3.5 hours. Printed once and the date engraving was too thin so I widened the numbers but haven’t yet printed it again. I used a woodburner with a razor attachment to fix the engraving manually. Use a respirator if you do this. If you print it, let me know how it goes. This is my first gift back to this wonderful maker community who helped get me off the ground with dope projects. Thanks all. -
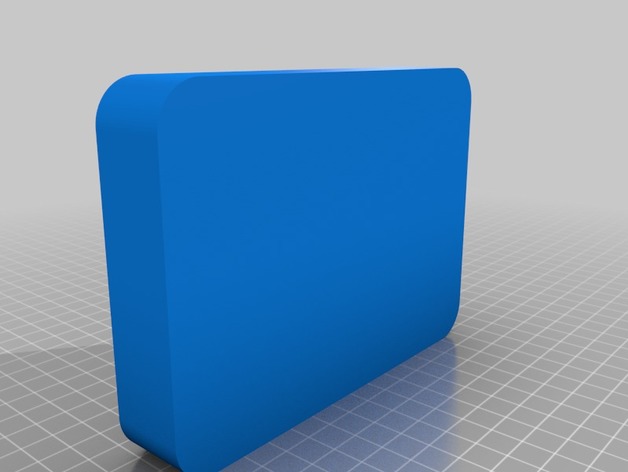
Simple FPV Inspired tool box 3D Print Model
Summary
This is just a simple tool box designed around the idea of keeping the amount of tools to minimum but still having enough with me for minor repairs.
This is geared towards FPV racing as the logo suggest.
Print Settings
Printer:
Hyper cube evo
Rafts:
No
Supports:
No
Resolution:
.100-.300
Infill:
50%
Notes:
Note the tool box printed in the pictures was printed @ 1.25 on the Z axis to make room for additional tools.
How I Designed This
fusion 360 -
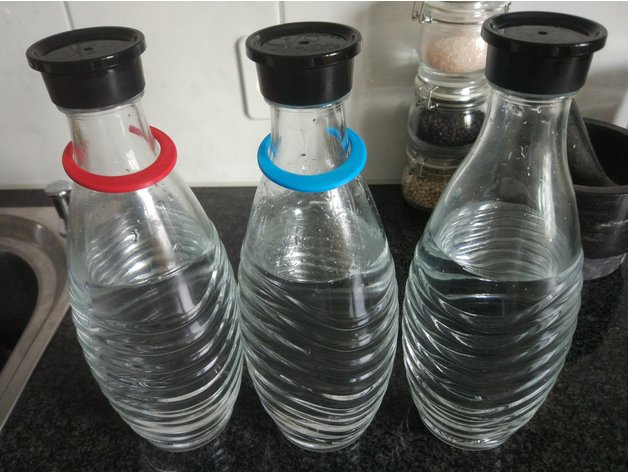
SodaStream bottle label 3D Print Model
Summary
Clip made to label SodaStream glas bottles.
Tested with PETG (red) and ABS (blue).
Print Settings
Printer:
MP select mini
Rafts:
Doesn’t Matter
Supports:
Doesn’t Matter
Resolution:
0.1mm
Infill:
30% -
Add light for Delta / Kossel 3D printer 3D Print Model
Summary
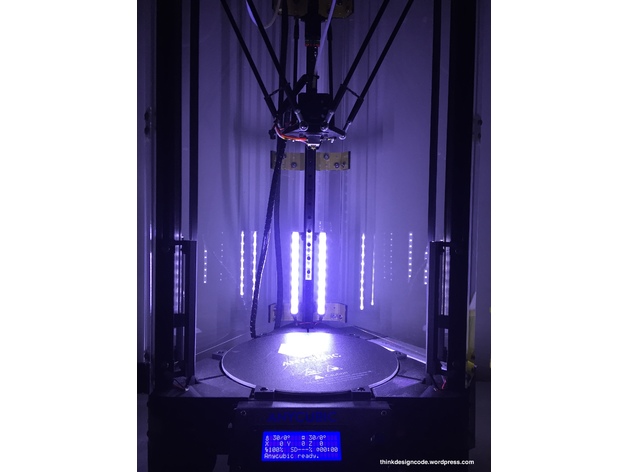
I decided to add LED for my Kossel 3d printer (My model is Anycubic Kossel Linear Plus) to make it easier for me to check if I need to print overnight.
Material:
6x LED stripes (12VDC, width: 1cm, length: 15cm each)
M3x10mm bolts and M3 T-nuts
Wires
Printed parts:
6x Part01
6x Part02
6x Part02_Mirror
I already show to you guys how to make it step by step in each picture. Just follow them and you can make it.
Here are all those steps:
Step 01: Using 12V LED stripe (1cm in width) and cut to 6 pieces (15cm each)
Step 02: Soldering all 6 LED stripes.
Step 03: Wire out all LED stripes.
Step 04: Make a small board to attach all LED stripes, 12VDC power supply and ON/OFF switch
Step 05: Connect and test all LED stripes.
Step 06: Using a piece of thick tape to cover all circuit board.
Step 07: Using M3 bolts and M3 T-nuts for the board.
Step 08: Attach the board to the frame (below the heated bed)
Step 09: Print 6xPart01, 6xPart02 and 6xPart02_Mirror to make 6 LED stripes holder.
Step 10: Using super glue to attach LED stripe into LED stripe holder (Part01). Remember to attach the Part02 and Part02_Mirror to Part02 before doing this step.
Step 11: Attach all LED stripes to 3d printer frame with M3 T-Nuts.
Step 12: Remove the heated bed and connect all LED stripes to the small board we’ve made before. For the 12VDC input, you can use directly from 3d printer power supply.
Step 13: For the ON/OFF switch, you can place it in front.
DONE!!!
Print Settings
Printer:
Anycubic Kossel Linear Plus
Rafts:
No
Supports:
No
Resolution:
0.2mm
Infill:
20%How I Designed This
-
R2D2 Google Home Mini Upright 3D Print Model
Summary
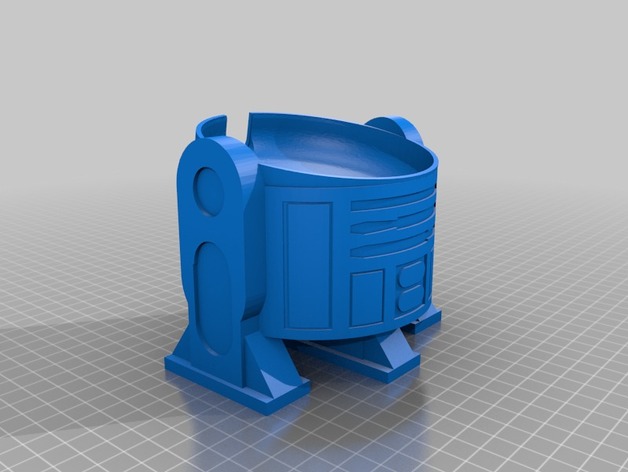
I really like the original design by Simomura, but found that I couldn’t see the top lights of the Google Home Mini when interacting with it. My Home Mini sits by TV, and the angle of the R2D2 angled the lights away from my viewing perspective.
Using TinkerCad, I was able to hack together a modified design that has R2D2 standing up vertically. I also changed the cup that the Home Mini sits in so that it angles slightly forward (rear is higher than the front).
Print Settings
Printer:
JG Aurora A3
Rafts:
Doesn’t Matter
Supports:
Yes
Infill:
10% -
Google AIY Vision Kit Box 3D Print Model
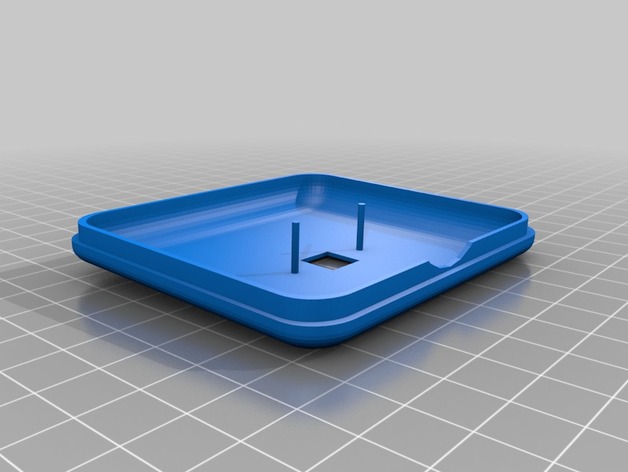
Summary
A printed box to replace the cardboard box for the Google Vision AIY kit.
Print Settings
Printer:
Tronxy P802
Rafts:
No
Supports:
No
Resolution:
0.2
Infill:
20 -
Honda Odyssey Hood Latch Clip 3D Print Model
Summary
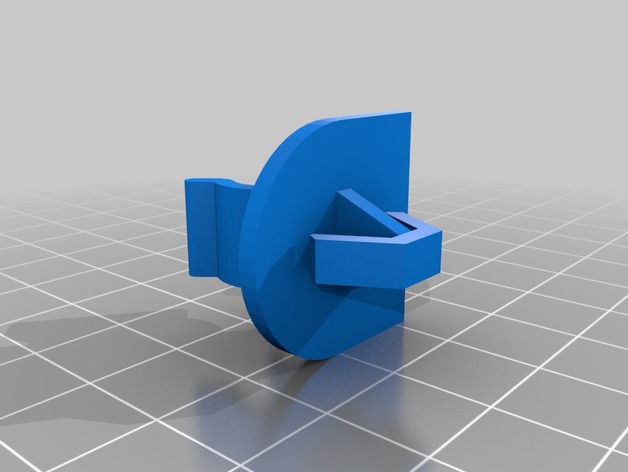
This is a replacement for the breakage-prone hood latch clip of the Honda Odyssey. To remove the old hood latch clip, just use pliers to compress the clip and pull it out. This one should pop in place with a snap and hold the hood latch bar no problem. I printed it in ABS, but PETG should work fine too. I also printed with supports and 100% infill.
Print Settings
Printer Brand:
Wanhao
Printer:
Wanhao Duplicator i3 Plus
Rafts:
No
Supports:
Yes
Resolution:
.2
Infill:
100% -
Star Trek DS9 Curry Class 3D Print Model
Summary
Also called a Shelby class, the Curry class was one of the ships in the Dominion War in DS9, it’s a weird design to be sure, so I had to do it. -
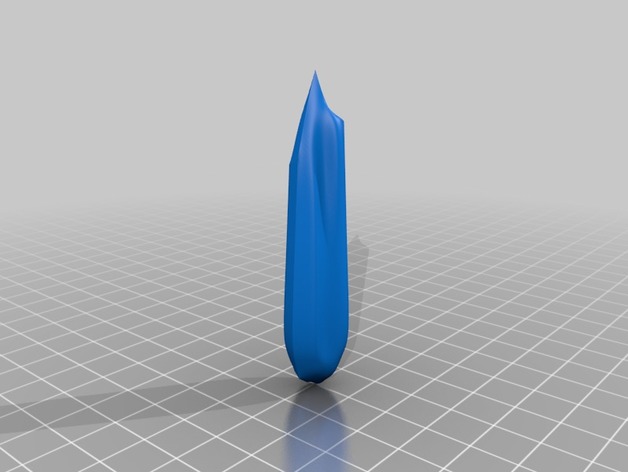
Saber Crystal 3D Print Model
Summary
This is a prop crystal for a light saber. Nothing fancy. There is one design for just the model. The second design includes supports. The ideal resin is a clear resin with a VERY small amount of dye added to create a translucent color. About 0.2 grams glow pigment per 100ml resin will give it a slight glow after exposure to light. Recommend UV protective coating to stunt curing of finished piece.
After post-cure cleanup, using sanding to polish (up to 4000 wet sand is adequate) for glass effect. Polishing with rotary tool and rouge bar not recommended due to temperature issues.
Print Settings
Printer:
Peopoly Moai
Rafts:
No
Supports:
No
Resolution:
50 Microns
Infill:
80% Cure for Moai -
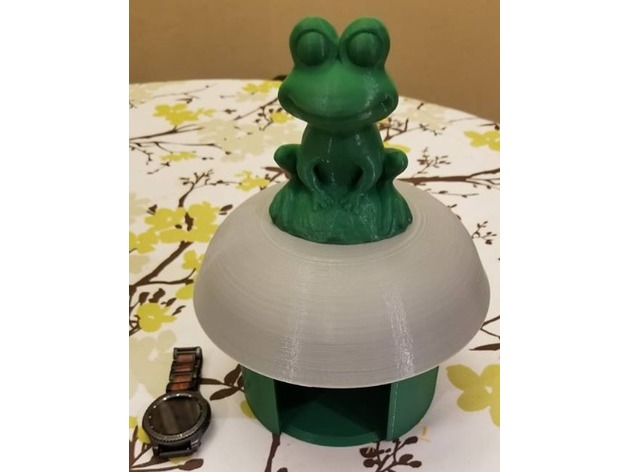
Simple Frog House 3D Print Model
Summary
Wife wanted a frog house so I fired up the (ok…its never “off” per say) CR10 S5
This is the frog I used and scaled up to fit my needs: https://www.thingiverse.com/thing:2136760
Base was printed at .2 and 3000mm/min @ 20% infill; no supports
Top was printed at .2 and 3000mm/min @ 20% infill; with supports
Attached frog with Gorilla glue
All printed in Solutech PLA
Sliced with S3D
Designed in AD Inventor
Print Settings
Printer Brand:
Creality
Printer:
CR-10S
Rafts:
No
Resolution:
.2
Infill:
20% -
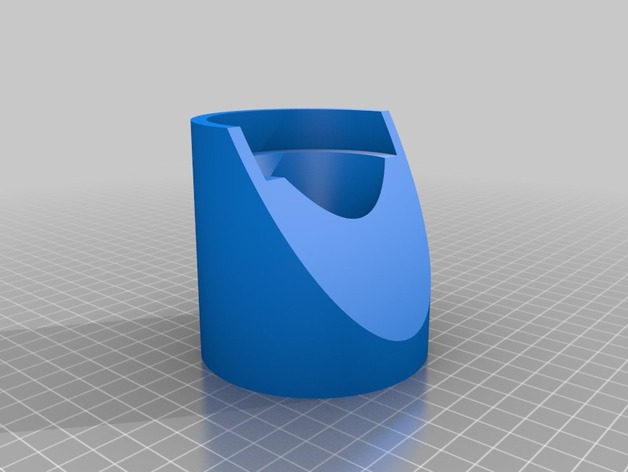
Iron Giant Bolt Stand 3D Print Model
Summary
A stand made in Microsoft 3d Builder for jeffarazzi’s Iron Giant Bolt -
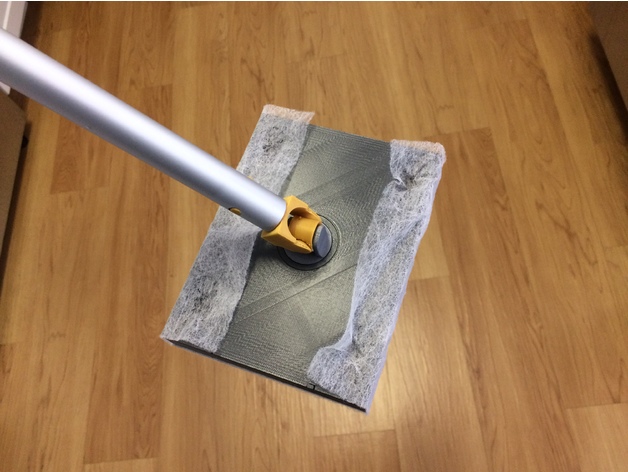
Square mopper that recycles clothes dryer sheets 3D Print Model
Summary
Made a box-style Swiffer that his narrower and lower in profile than the original Swiffer. You can use the original handle. Just like my previous version of this that uses binder clips, use a foam bottom from self-adhesive foam paper. There are instructions on how to do this on this posting:
https://www.thingiverse.com/thing:2688054
Print the HandleJoint.stl with support.
If you found this useful, it would bring me great joy to see your work – so be sure to share. 🙂
Or, better yet, please feel free to dump a bitcoin or two here (I’m trying to collect as many as I can before the apocalypse):
1Py3TUeR8noBN2giHyFV1GfB6x3Kh2WEVv
… include a note to the effect of “Hi 3E8, thanks for the box-style Swiffer thing… my life is infinitely better on account of it and please accept this small handful of bitcoins in gratitude”.
You’re welcome! (in advance) 😀
Also, feel free to peruse my other submissions which are almost as varied as they are many:
http://www.thingiverse.com/3E8/designs
Enjoy! -
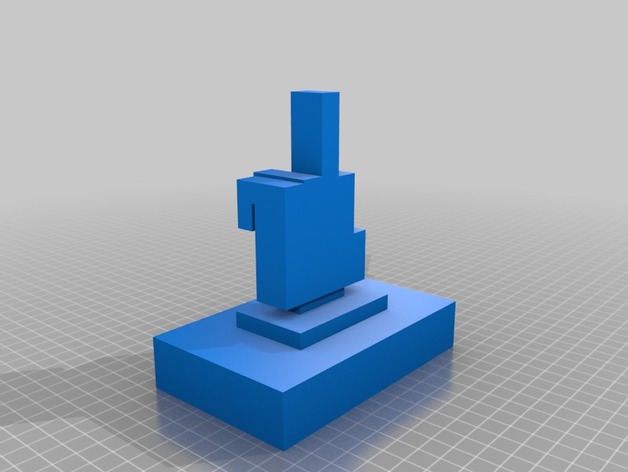
The Bird 3D Print Model
Summary
This thing was created for the sheer purpose of a practical joke to your fellow workers
Print Settings
Printer Brand:
MakerBot
Printer:
MakerBot Replicator (5th Generation)
Supports:
Yes -
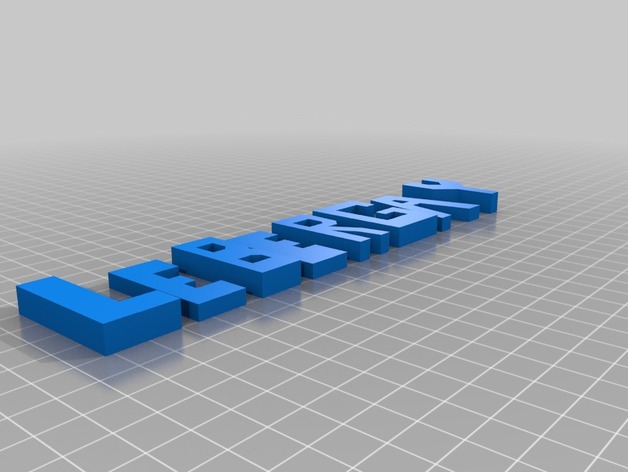
A Name 3D Print Model
Summary
This this is also a practical joke for workers, specifically ones names lebergay
Print Settings
Printer Brand:
MakerBot
Printer:
MakerBot Replicator (5th Generation)
Supports:
Yes