Download Free 3D Model E-Flite Timber Snow Skis 3D Print Model
Summary
E-Flite Timber Snow Skis
Video: https://www.youtube.com/watch?v=Nn0KLkLK3VE
Summary
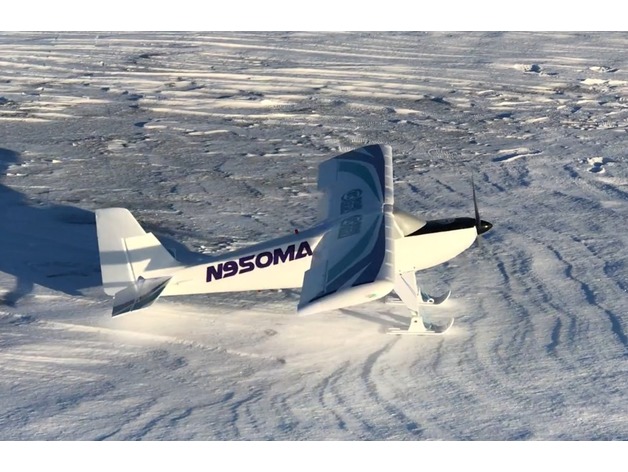
The E-Flite Timber is a fantastic little STOL plane that comes with big bush wheels and floats for flying off water. Many people use those floats for flying off snow as well, but I wanted skis. There are some options out there, but none of them meet all of these (in my opinion critical) criteria:
Easy to print without supports
Stock fit and finish (no modification to the plane)
Allow for limited travel of the skis to handle rougher terrain
Able to print all 3 skis at once (on an 8×8 print bed such as i3 style)
Does not negatively affect flying characteristics
Lightweight
These skis were made a little wider than many options, so that they could be shortened a bit and still have tons of surface area. They also fit on the stock axle with the stock landing strut with no modification, and have limited travel to navigate the terrain. They include a loop to hook a rubber band to, to keep the tips up while flying and landing.
I included the “test” files that we used when designing these. They are what we used to check fitment and travel of the ski. You can use them to test tolerances of your printer and determine whether or not you need to scale the model for it to fit well–without wasting plastic on the whole ski.
Printing
I printed these with .8mm nozzle at .2mm layer height, 20% infill, 2 shells top/bottom/sides. YMMV but this gave me a very strong part that was still plenty lightweight.
Preparation
I use warm (a bit cooler than boiling) water to soften the tip of the ski, and then use the front of a frying pan to shape the ski tip. Dip the ski into the water so that the tip is in the water basically up to the rubber band arch. Place the ski “right side up” inside the frying pan, and slide the tip into the edge of the pan to shape the front of the ski. Others have used heat guns and pringles cans with good effect, but I find the water to be more controlled as far as where the heat is going, and the frying pan gives a good shape.
You will also want to shape the front of the rear ski slightly so that it doesn’t catch on the snow. Do not bend the rear ski up much, or it will strike the empennage. The two holes go in front, and the grooves go down.
Installation
The fronts should be relatively self explanatory. Remove the stock lock nut, slide the wheels off, put the wheels somewhere safe, slide the ski on, and then secure with the lock nut. Attach a rubber band to the arch on the ski, and then secure the other end to the landing struts where they meet the fuselage.
For the rear, remove the 3 screws holding the rear wheel on, remove the cover plate and wheel and place them in the same safe spot as the front wheels, and then use the stock screws to secure the rear ski where the cover plate used to be. the screws should be able to countersink down into the model.
Categories: 3D Print Models, All 3D Models, Free 3D Models
Sorry, comments are closed for this item.


