Download Free 3D Model WaterRocketLauncher 3D Print Model
Summary
This is a WaterRocketLauncher for launching water bottles.
Print Settings
Printer:
Davinci 1.1 plus Rafts:
Doesn’t Matter Supports:
No Resolution:
0.3 Infill:
90-100% Notes:
WARNING!! Take care and wear at least safetyglasses when things get under pressure. It is hard to tell how much force a 3D-printed part will survive as this depends on your used material and printer settings. Be prepared for the case something breaks!
If you choose to mount it on a baseplate around 3-12mm thickness you dont need to print a baseplate (there are 3 different versions) and mostly no “VentilGuide”.
If your baseplate has under 5mm you may want to print out and use the “VentilGuide”
Depending on the thickness of your used baseplate and if you use a HolderExtension you may have to use longer screws than the stated M3x20.
A HolderExtension is needed if you cannot find a bottle suitable for the original length of the holder.
Baseplates, HolderExtendsion and VentilGuide are optional, you need at least the Holder, Clamp, StabilizationPlate, Stabilizer and Clip.
Take care to print the parts in the correct orientation, some .stl-Files need to be rotated to be printed correctly. (StabilizationPlate 90 degrees, Clamp 180 degrees)
Post-Printing
What you need
Printed Parts
Bicycle tube including the ventile
Screws (6xM3x20, 1xM3x25, 9xM3 Nut, 2xM3 Washer 3,2mm DIN125 )
Springs (two or if you have a long one cut it into two pieces)
Something to mount the rocketlauncher on, up to your creativity what you use
Maybe some pressure tube to get some distance between you and the launchpad 🙂
Preparation
Cut the bicycle tube the way that you get the ventile including a circle of tube around it that fits into the holder printed before.
Redrill the holes with a 3mm drill to ensure that the M3 screws fit into the holes Assembly
Put a spring on the ventile and place it into the holder. Depends on the spring you use, if you find it not stable, try to add a washer between the spring and the ventile/tube-part.
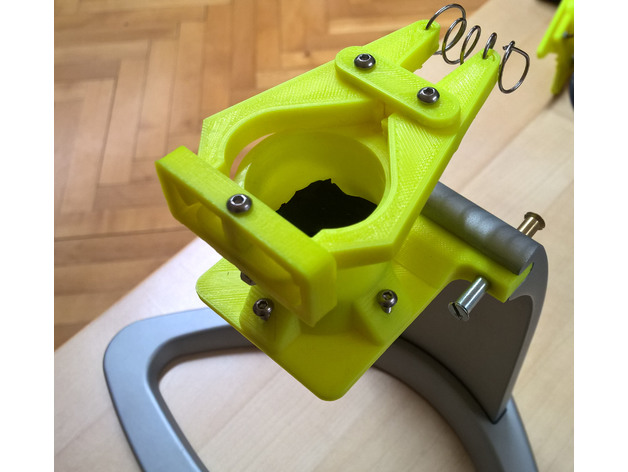
Mount the StabilizerPlate, Clamps, Stabilizer and Holder together as shown on the image. Don`t tighten the screws of the Clamps too much. It should move easy to securely launch the rocket later.
You can use some grease maybe if it is needed. Also it may be a good idea to use 2 nuts or some screwlock glue to prevent the nuts from loosening themselves due to clamp movement.
Categories: 3D Print Models, All 3D Models, Free 3D Models
Sorry, comments are closed for this item.


