Summary
I have had this rubber band launched rocket for as long as I can remember… at least 35 years. Unlike today’s toys, aside from the occasional rubber band replacements, this thing has stood the test of time! I thought I would share this piece of nostalgia with all of you.
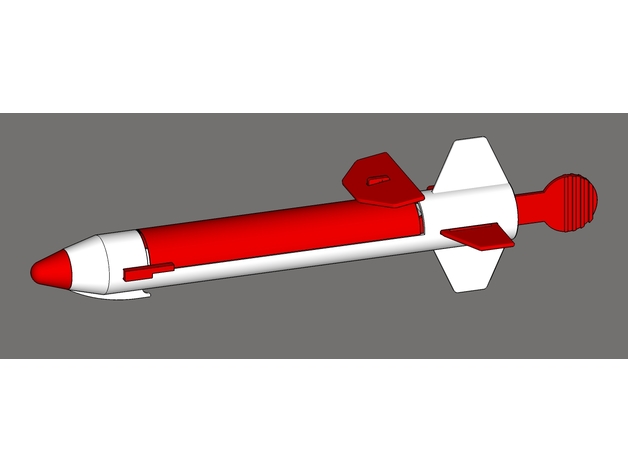
You can, of course, print your rocket in whatever color scheme you like, but the original was molded in red and white, as shown in the illustrations. The completed rocket is 245mm tall, including the grip. The main body itself is 195mm tall. What with the additions I’ve added to my Tevo Tarantula, I only have 170mm available on the Z axis. For this reason, I have provided two versions of the main rocket body. I highly suggest that you use the _1piece model if at all possible. If, like me, though, you can’t, you can print the _upper and _lower halves and glue them together.
ADDITIONAL PARTS NEEDED
You will need a few non-printed items to finish your model:
small snap swivel (the type used for fishing)
small parachute – if you don’t have a commercial parachute, this is an excellent tutorial on making one from a plastic bag
cotton string
rubber band, large
rubber band, medium
Print Settings
Printer:
Tevo Tarantula
Supports:
Yes
Resolution:
0.2mm
Notes:
All pieces should be printed in the orientation presented in the STL files with [Supports Everywhere] enabled. The only exception to the need for support is the launcher and the baydoor_fin. Furthermore, due to their small footprint, you should use a fairly large [Brim] – 7mm or so – for the grip and the stabilizer_fin. I recommend 100% infill, just for strength. I tried slicing with less infills and, honestly, the added amount of filament required and the additional time needed was not significantly different enough to warrant using anything less than 100%. I printed with a layer height of 0.2mm, but I don’t think that it too critical.
Post-Printing
**ASSEMBLING THE ROCKET**
Assembly is pretty straight forward as you can see from the assembly diagrams.
Hook the holes in the grip over the pins in the ejector, making sure that the hook is on top.
Slide a rubber band over the ejector so that it is around the rear section. Pull the rubber band up and loop it around the hook on the grip, running the rubber band through the notch of the ejector. This will pull the ejector up at a 90° angle. Make sure that the rubber band is not too tight or the door won’t stay closed during the rocket’s ascent.
Keeping the ejector/grip assembly straight, slide both pieces into the body from the rear. Once in the body, the ejector will snap back to a 90° angle. Don’t worry about that right now.
Slide the stabilizer fin into the slot in the rear – narrow end forward and two lines on top – making sure that it goes through the grip and out the slot on the other side. You will need to make sure that once the fin is through, you have one one of the raised lines on top of the fin on either side of the body. This is what keeps the fin in place.
Glue the nose cone to the front of the rocket.
Push the bay door fin down on to it’s mount on the bay door – narrow end forward. There is a small bump on either side of the mount that will keep the fin in place. You can glue this fin on for added security, if you’d like.
Insert the pins on the inner font of the bay door into their associated holes in the main body, being careful as you spread the legs so as not to break them.
Tie a 5 or 6 inch long piece of cotton string to the bay door mount where indicated in the diagram.
Attach a parachute, via a snap swivel, to the ejector where indicated on the diagram.
Lightly fold and wrap the parachute using standard rocketry procedures and place it in the front section of the ejector. I have included a PDF explaining how to pack the chute if you need it.
Press the ejector / parachute down into the rocket and close the bay door. Take the string that you tied around the mount earlier and bring it back past the top tail fin. For storage, to keep the bay door closed, simply wrap the string around the grip and tie it off.
**PREPARING THE LAUNCHER**
To prepare the launcher, you will need to cut your large rubber band so that you have one long piece.
Tie a knot in one end of the rubber band and slip the other end through one of the bottom holes on the launcher.
Thread the loose end of the band back through the top hole on the same side.
Pull the loose end through the top hole on the other side and back through the last bottom hole.
Tie a knot in the loose end of the rubber band.
Finally, pull the large loop so that the knot are firmly up against the plastic.
**LAUNCHING YOUR ROCKET**
Now you are all set for the fun part! With your parachute loaded, and the bay door closed, make sure the string is hanging loosely. Pull the free end of the string back past the top fin and hold it against the side of the grip – thumb on one side and forefinger on the other. Loop the hook at the front of the rocket on the rubber band on the launcher. Holding the grip in one hand and the launcher in the other, pull back and aim upwards. Let go of the grip and watch your rocket soar upwards.
**HOW IT WORKS**
The wind resistance against the bay door will keep the door closed as the rocket soars upwards. As the rocket slows, the wind resistance forcing down on the door lessens. As soon as the rubber band inside is able to overcome the force of the air rushing past the fin, the ejector will spring outwards, opening the bay door and ejecting to parachute. As the rocket begins to fall, the air will grab the parachute and pop it open, allowing your rocket to gradually, and safely, drift back down to earth.
HAPPY FLIGHTS