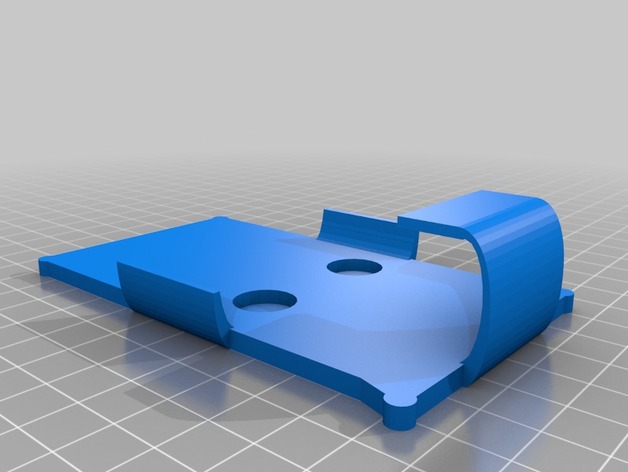
Download Free 3D Model Communicator Belt Holster 3D Print Model
Summary
The Star Trek TOS communicator made by The Wand Company is a great prop replica. The only downside to it is you can’t put Velcro on the back and wear it like they did in the show. They were nice enough to give you a pouch to put it in, but that just provides some protection if you pocket carry it. I like to use mine to listen to podcasts while puttering around the house. The speaker is not super loud so putting it in a pocket also means I won’t be able to hear it.
I decided to create a holster that could be worn on the belt that would capture the feel of the way the communicator is meant to be worn. This holster leaves the front of the communicator unobstructed so I can get the maximum sound from the speaker.
To make the holster you will need 2 neodymium magnets ½” x 1/8” disc shaped. I used M12x18DI from Apex Magnets. Also, you will need some black peel and stick felt which you can get at any craft store.
You need to 3D print the main holster. I print mine with the flat side on the print bed and with support type set to everywhere and fill amount at 10% (cura). This provides support for the bottom lip that keeps the communicator from falling. You will probably have to do some filing to smooth down the areas where the supports printed. Once that is done, super glue the 2 magnets into the holes in the holster. Note: determine the proper polarity of the magnets first by sticking them to the back of the communicator and make sure you glue them in the right way. Once the glue is dry cut a piece of felt and place it over the back to hide the magnets and keep the communicator from getting scratched.
Next you need a belt clip. I did not feel the need to re-invent the wheel on this, as there are a number of belt clips available on Thingiverse. I used this one: https://www.thingiverse.com/thing:35940 Maybe you are a serious cosplayer and already have a uniform with pants that has Velcro on it. I guess you could skip the belt clip and put Velcro on the back to attach the holster directly to your pants.
There are a couple of things you could also do if you are so inclined. The only element missing now is the Velcro rip sound when you remove the communicator. You could put a small piece of Velcro on the communicator near the top, high enough so it won’t interfere with the recharging base. Then you would get the appropriate Velcro sound when you call for that emergency beam up.
Print Settings
Printer:
Maker Select
Supports:
Yes
Resolution:
0.1
Infill:
50%
Notes:
My support setting in Cura is set to 10% for this print.
Categories: 3D Print Models, All 3D Models, Free 3D Models
Sorry, comments are closed for this item.


