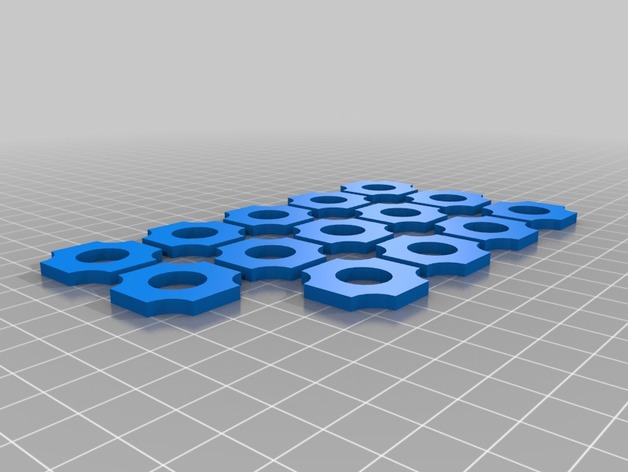
Summary
https://boardgamegeek.com/boardgame/208808/ok-play
Category: Free 3D Models
Free 3D models ready to be used in your CG projects such as films, visualizations, games, VR etc. All 3D Models and Free 3D Print Models are available for download in several formats including .MAX, .STL, .FBX, .3DS, .C4D, .OBJ, .BLEND, .DWG, .DXF, .LWO and much more. If you’re in search of high-quality Free 3D assets, we have a huge library of 3d models for all your needs. Also you can visit 3D Models and 3D Print Models category.
-
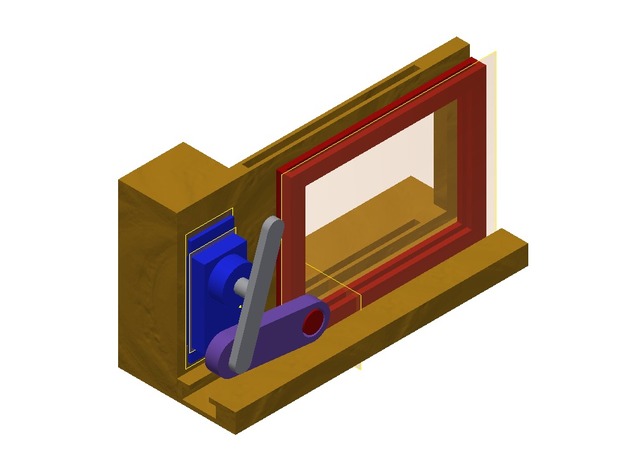
Rotary Linear Conversion using Stepper 3D Print Model
Summary
If one has to move something from rotation to linear. We had to shift something.. -
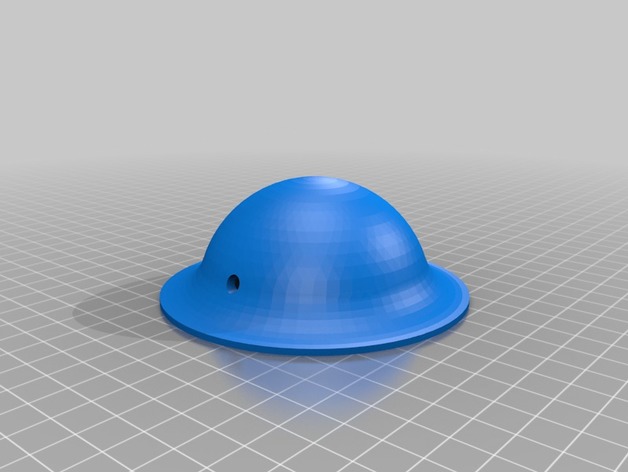
Ceiling junction box for pendant lamps 3D Print Model
Summary
A small junction box for the ceiling. I use it to hide the cables and screw terminal (luster terminal) that come out of the ceiling. This allows me to move the hanging lamp (pendant lamp) away from the hole in the ceiling while hiding its ugly connectors.
Cable hole: 5,2 mm
Diameter: 100 mm
Height: 38 mm
Video:https://youtu.be/qc448HdpeAg -
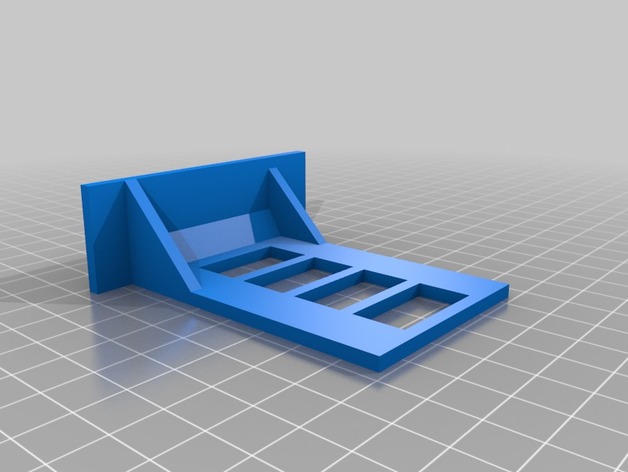
super cub battery holder system 3D Print Model
Summary
A system to hold a battery in place in a Super Cub. The tray holder goes in the top and the battery tray hooks onto the holder -
Programación_156e1165ef4ec4c71437432cb1a55135 3D Print Model
Summary
Mi robot es capaz de hacer:
Avanzar en diferentes sentidos, emitir sonidos, mover los brazos, evitar obstáculos, cambiar la expresión facial, seguir líneas, ser controlado por vía bluetooth.
Post-Printing -
box with hinged lid 100x70x25 3D Print Model
Summary
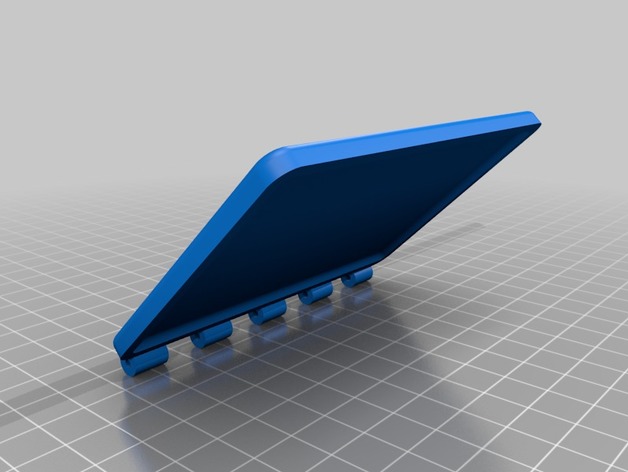
storage box with hinged lid requires a metal rod for pin. open holes with a drill bit if required.
supports will be needed for hinge -
Star Wars: YT-2000 Free 3D Model
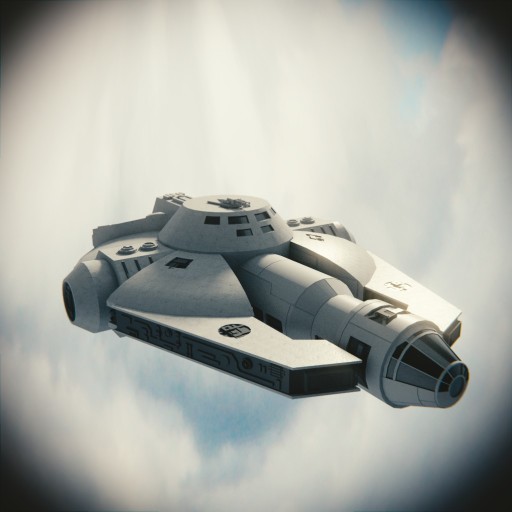
Medium detailed model of a YT-2000 transport. Everything is parented to empty (YT-2000). The model is totally free to use, but the Star Wars copyright belongs to Disney.
-
Laser cut Forest Frame w/ Squirrel 3D Print Model
Summary
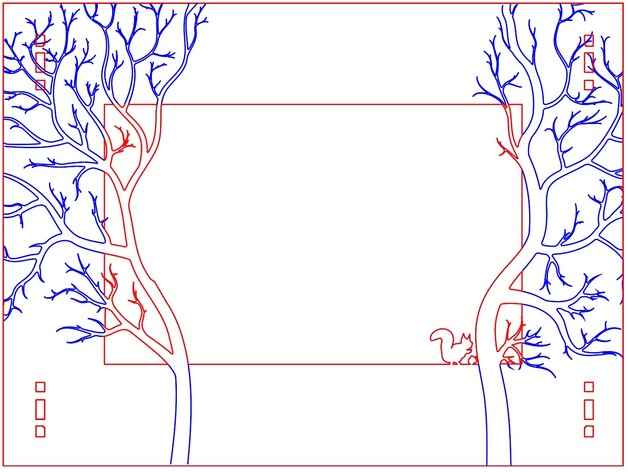
Remix of laser cut forest frame with the addition of a little squirrel and a nut
3 mm wood -
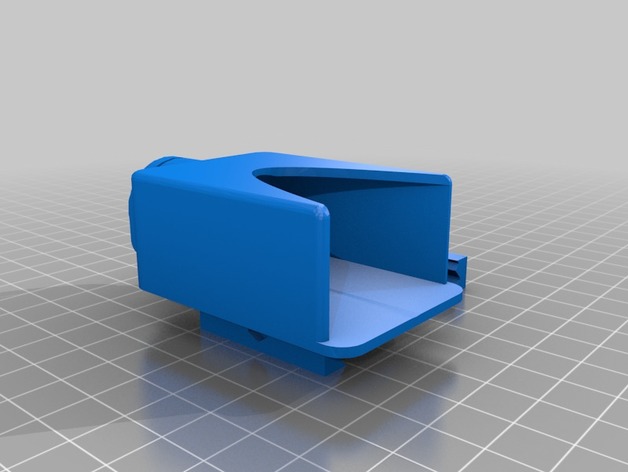
Runcam 2 Picatinny Rail Mpount 3D Print Model
Summary
This is a runcam 2 picatinny mount, you will have to get the bolt and nut yourself, I suggest going to a local hardware store and seeinbg what fits in this. -
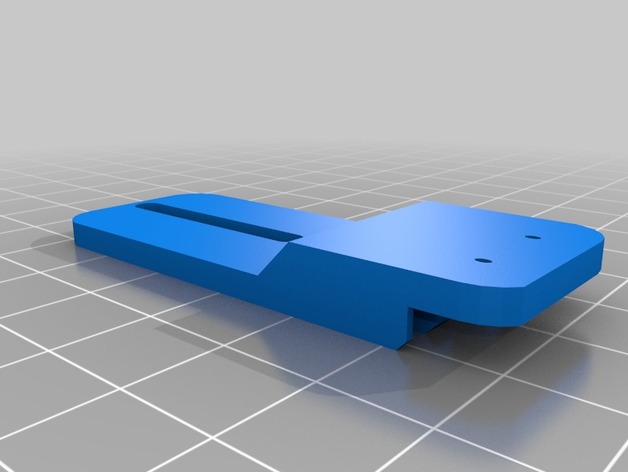
Adjustable endstop 3D Print Model
Summary
ok so I wanted to have an adjustable Z endstop for my tronxy X3 and seeing as how I couldn’t find one I liked and would really work with my X3 I went ahead and remixed one I found on here…. The third part of this I didn’t remix I have not printed any of this yet as my printers printing other items, But I’m hoping it will all work together to allow minor adjustments without any chance of messing things up.
Let me know if this works for you… I hope to be printing soon then mount it on the printer for test.
I forgot to rotate the mount for ease of printing so you’ll need to do that.
Print Settings
Printer:
tronxy X3 Notes:
normal printer settings should work good.
How I Designed This
this was fully done with tinkercad for ease and speed. -
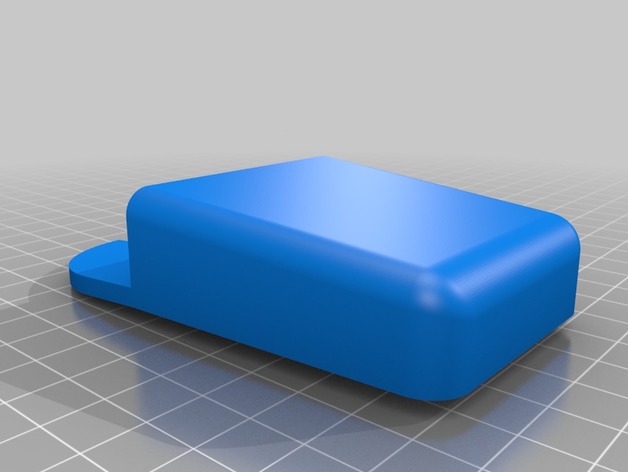
Whirlpool Designer Series (YET19DKXSW03) Freezer Door Shelf Part 3D Print Model
Summary
This is a freezer door shelf part for the Whirlpool Designer Series (YET19DKXSW03). When I moved into my new house all but 1 was broken (and even that one was broken a bit). I finally got around to designing and printing a replacement after about 3 months!
This is to be used with wooden dowels (purchase from any hardware store, I got mine from Home Depot). The diameter of the dowels were 12.1mm and the approximate length I cut them dowels to was 550mm.
You’ll have to print them with support and I recommend you print them standing on their side for maximum strength. It also gives you more than enough room to print 4 at the same time when they are standing on their side.
Print Settings
Printer Brand:
Prusa Printer:
Prusa Clone Rafts:
No Supports:
Yes Resolution:
.32 Infill:
25 -
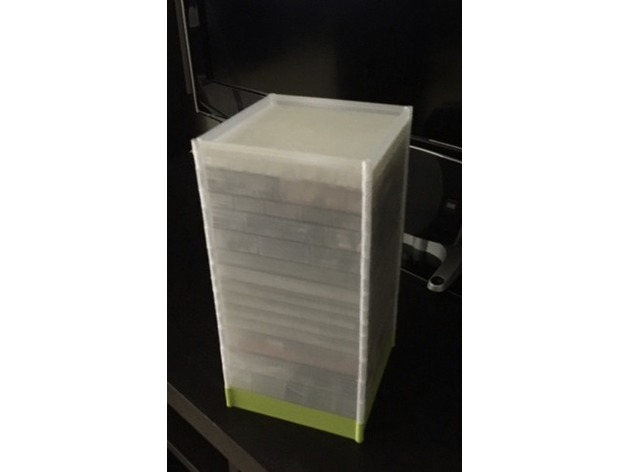
STACKABLE BINS ORGANIZER 3D Print Model
Summary
It was designed to keep my electronic parts organized. However, it could be used for different items as well. Hope you will find it useful in your household. -
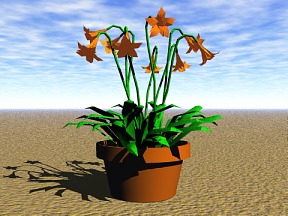
Flower 06 Free 3D Model
Free Model of 3DPlants.com “Plant Model Libary CD?s” and Downloadable Model Sets! This Model also available on CD…with UV mapped textures! More Info?s, Preview Images, Shop and Downloadable Texture Sets or a “Seamless Natural Texture CD” you find directly at 3DPlants.com!
-
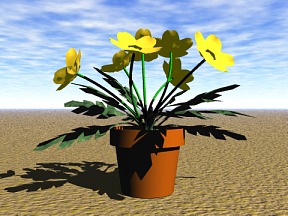
Flower 03 Free 3D Model
Free Model of 3DPlants.com “Plant Model Libary CD?s” and Downloadable Model Sets! This Model also available on CD…with UV mapped textures! More Info?s, Preview Images, Shop and Downloadable Texture Sets or a “Seamless Natural Texture CD” you find directly at 3DPlants.com!
-
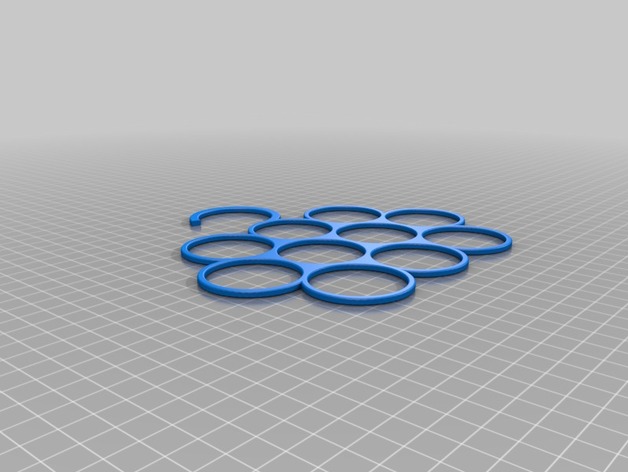
Scarf Hanger 3D Print Model
Summary
Designed a scarf hanger with my wife.
Print Settings
Printer:
Tevo Tarantula Rafts:
No Supports:
No Resolution:
0.2 Infill:
100 Notes:
preferably print 100% infill cause its only 3mm thick -
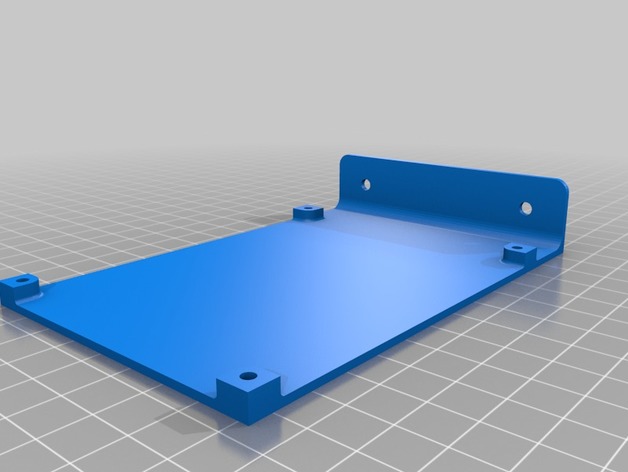
MKS GEN-L Adapter board 3D Print Model
Summary
for 2020 aluminum
Print Settings
Printer:
Tevo Tarantula Rafts:
No Supports:
Doesn’t Matter Resolution:
0.2-0.25 Infill:
30% -
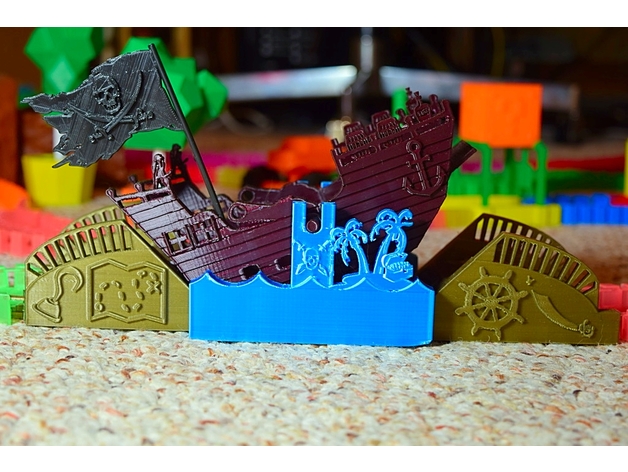
Pirate Ship Seesaw for Magic Tracks, Neo Tracks, and everything compatible 3D Print Model
Summary
All parts were printed in the position I uploaded them in.
I printed the ship in two parts due to having a small print bed. I included a single print ship file for those with a larger bed.
I printed one flag which provides sufficient weight to make the seesaw return to the original position after each car passes through. I included an optional second flag for the opposite side. I have not tested to see if this is too much weight for the seesaw to function normally.
Supports are required for all parts, but very little is necessary.
Works with Magic Tracks, Neo Tracks, and anything else compatible with these.
Print Settings
Printer:
Monoprice Select Mini Rafts:
Doesn’t Matter Supports:
Yes Infill:
10-15 -

Dibujo 3D AL PACINO 3D Print Model
Summary
Dibujo 3D AL PACINO
Imprimir las 3 primeras capas con filamento negro
de la 4 hasta terminar en filamento blanco…
respetar la altura de capa
0.2 mm la primera capa
0.1 mm la altura de capa
100 % relleno
velocidad 45 mm/s máximo
boquilla 0.4 mm
DRAWING 3D AL PACINO
Print the first 3 layers with black filament
From 4 until finished in white filament …
Respect layer height
0.2 mm the first layer
0.1 mm layer height
100% filler
Speed 45 mm / s maximum
Nozzle 0.4 mm -
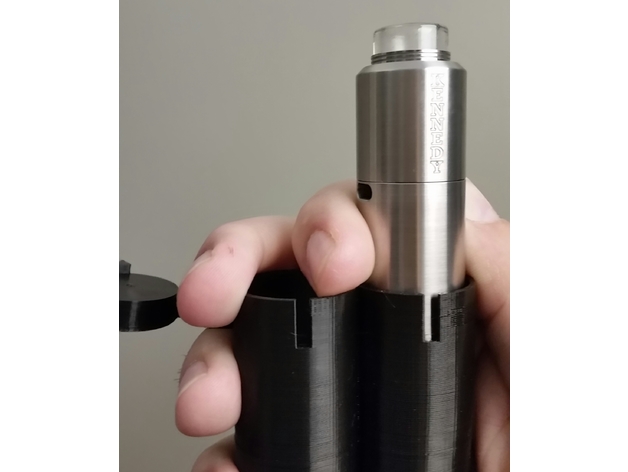
Double Barrel Mech Mod Tube 3D Print Model
Summary
This is a tube to hold your mech mods. it can hold 2 mech mods or one mech mod and batteries (make sure to put something between batteries, so they won’t discharge). I personally only use it for when I’m taking 2 mods out with me. Made to hold 2 24mm tube mods snugly. it looks like a double barrel shotgun and the sights double for a tab to open the top caps. I hope you enjoy this and please let me know if you can think of other vape related things that you’d like me to design.
I included one version with my @3MB13 Vapes logo and one version without any text
Print Settings
Printer:
Anet A2 Rafts:
No Supports:
No Resolution:
0.2 Infill:
100%
How I Designed This
Sketchup -
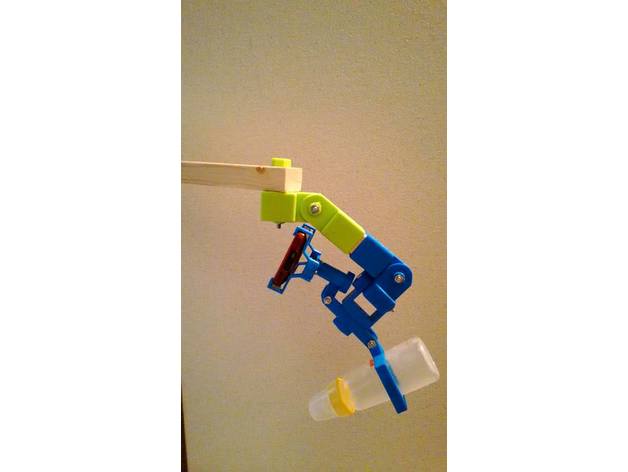
3D Printed Wood Arm Joints using 30mm x 40mm wood v0.7.0 3D Print Model
Summary
Attention: This project is released under the General Public License version 3.
There is no warranty for any problems that occurred using this project.
GPL v3:https://github.com/silvershell/printed-wood-arm-joints/blob/master/LICENSE
3D Printed Wood Arm Joints using 30mm x 40mm wood.
Scad files of models are generated with scad-builder.js and scad-builder-proj.js.
.scad and others are here.
GitHub:https://github.com/silvershell/printed-wood-arm-joints/tree/v0.7.0 -
72 hour jam beep boy case 3D Print Model
Summary
this is my entry for the summer 2017 jam
please do not download it until its finalized -
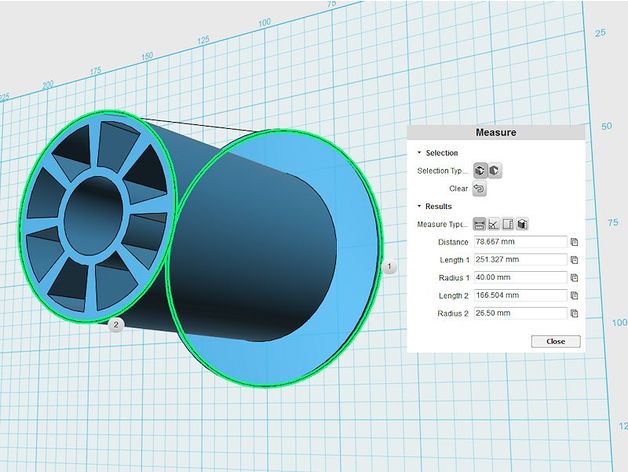
Omnistand 53mm spool holder with large 80mm flange 3D Print Model
Summary
A larger spool holder with a larger flange to prevent the filament roll running over the little flange on the one provided with the omnistand V1.36 by BaronWilliamshttps://www.thingiverse.com/thing:652415
Pretty simple print. Print with the flange at the bottom. -
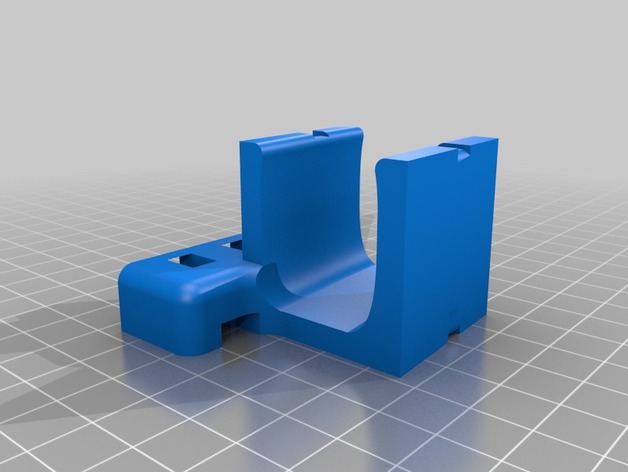
Cube Stereo Hybrid – Speed and Cadence Sensor 3D Print Model
Summary
Got a Cube Stereo Hybrid 120, a Full-Suspension E-Mountainbike.
The distance to the magnet on the spoke is much too large to get the BT smart speed and cadence sensor working with.
Sensor example: https://tinyurl.com/ycpqkn5g
Designed a base that is tightened with a zip tie to the frame and has the needed socket to install the sensor on it. So it uses the same magnet that is already in position for the Bosch motor and Bosch Intuvia / Purion display unit.
What you should have is a small flat rubber strip between the printed part and the frame to keep away any movements. Not too big and not too much, the 02_base.stl has only space for one side with 1mm thickness.
Print Settings
Printer Brand:
Prusa Printer:
Prusa Mk2 Rafts:
No Supports:
No Resolution:
0.3 Infill:
20% -
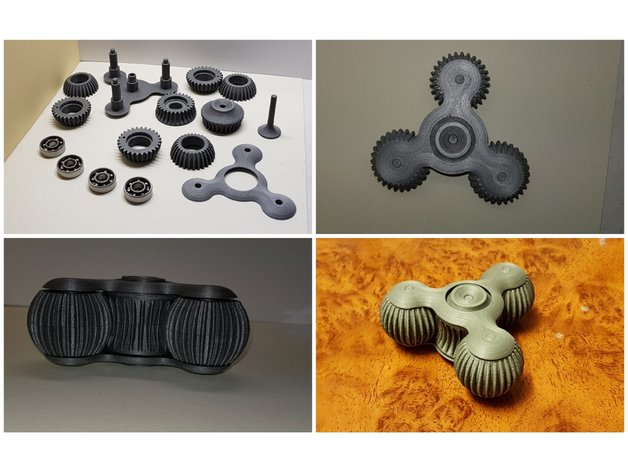
Spinner with massage balls 3D Print Model
Summary
ludique et relaxant
avec 4 roulements 608
suivre le montage avec les photos
Playful and relaxing
With 4 bearings 608
Follow the editing with the photos
NOP21
Print Settings
Printer Brand:
Ultimaker Printer:
Ultimaker 2 -
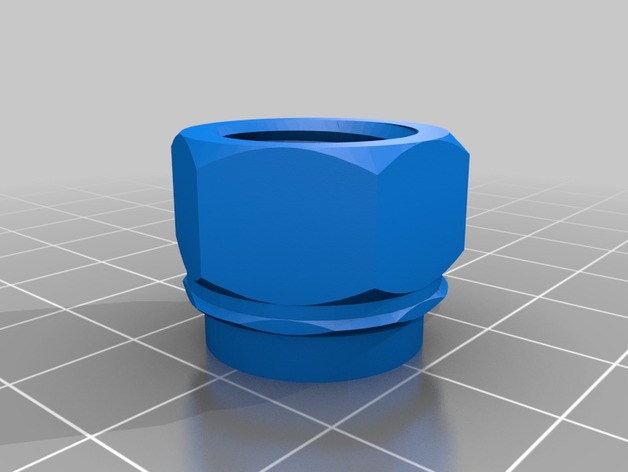
Colgate “Snap on tub to screw on travel” toothpaste transfer connector 3D Print Model
Summary
Inspired byhttps://www.thingiverse.com/thing:158910
andhttps://www.thingiverse.com/thing:800679
and especially this customizable one:https://www.thingiverse.com/thing:1972293
where I used it to create the bottom (screw to the small Colgate tube) and then added a snap on connection in tinkercad.
So this “thing” connects snap on Colgate big tubes to screw on Colgate little travel tubes.
It did not need supports. -
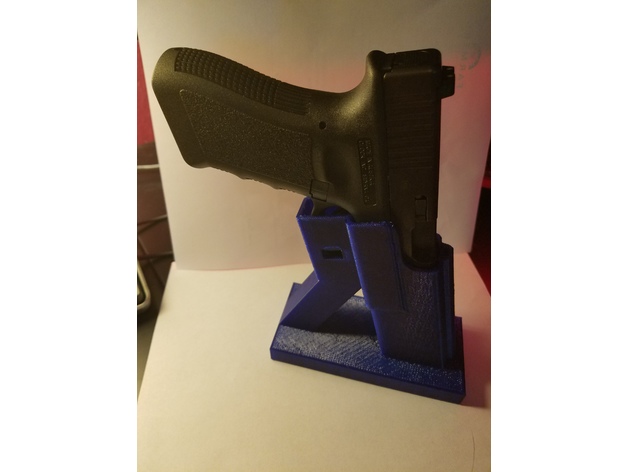
Glock Console Holster 3D Print Model
Summary
I wanted a way to carry my Glock 23 when driving but still have quick access should the need arise. This console holster fits horizontally inside the console with grip pointed toward the driver. Thanks to PrintedFirearm for the basic holster shape, this is a remix.
To adhere you can cut the thin piece of carpet at the bottom of the console to match the profile, then use double stick tape or glue to attach to the plastic console bottom. I’ll upload additional designs with a longer base to wedge fit, but wanted to upload the original design for people that have different size consoles.
v1 has about 10mm extra length for the gun barrel. I’ll upload v2 shortly customized to fit the Glock 23 exactly.
Printed with PetG, as I’ve had issues with PLA melting inside the console in the Texas heat.
Look here for additional (and soon to be revised) console trays, as well as other Tacoma and truck parts:
Console Trays https://www.thingiverse.com/thing:2260403
CargoTie Downs https://www.thingiverse.com/thing:2289782 -
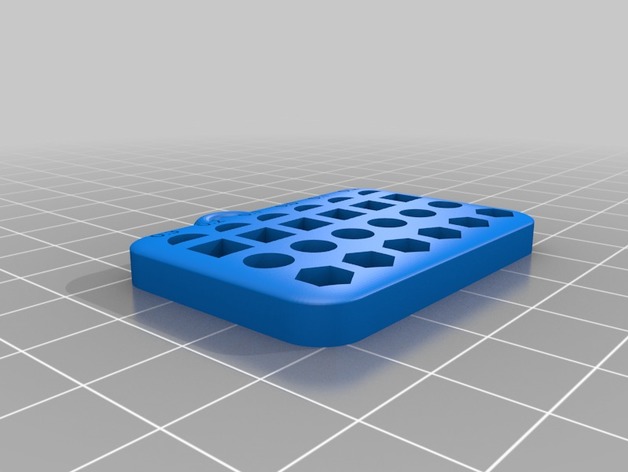
Tolerances – Margin Checking 3D Print Model
Summary
USE TWO SHELLS ONLY ON TOLERANCE BOARD –
With 0.4mm nozzle or above it will be similar to 100% infill and have slightly different results, print 100% infill later to compare results ####
Objects are designed to test the margins/tolerances of your 3D printer.
By knowing the tolerances your printer creates with, you can make adjustments int he model and get near perfect results.
Tolerance objects are small so they are quick to print and exist around the 5mm mark for checking (4.8 – 5.3 mm). Holes with consisting pins consist of Semi Circle, Square, Circle and Hex (for allen keys).
Print the tolerance board, to check tolerance of holes;
use vernier calipers to check the sizes of holes
use real time objects to see how they fit
print the ‘pins’ which fit the holes to see which one fits
Choose a set of ‘pins’ with handles for easy manipulation ;
“Tolerances-All_4_8.stl” – has pins of 4.8mm
“Tolerances-All_4_9.stl” – has pins of 4.9mm
“Tolerances-All_5_0.stl” – has pins of 5.0mm…
…”Tolerances-All_5_3.stl” – has pins of 5.3mm
Discover tolerances between Prints and real world objects and between two separate prints. This will allow for easy designing of functioning parts int he future.
Print Settings
Printer Brand:
MakerBot Printer:
MakerBot Replicator 2 Rafts:
No Supports:
No Resolution:
Any Infill:
compare 10%, 25% and 100% Notes:
Only use two shell layers for the board,
Video available on youtube
How I Designed This
Blender 3D -
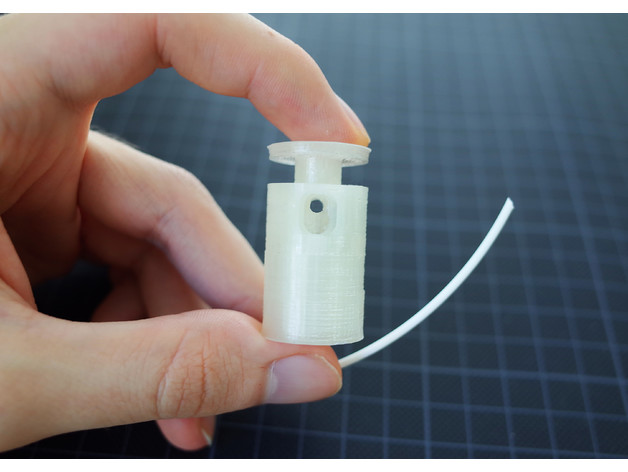
Filament Cutter 3D Print Model
Summary
This is my take on a useful tool.
It cuts 1.75mm filament in a 45° angle for a better grip when inserting it into the feeder gear.
Features:
• Works with a regular spring out of a pen.
• No screws are needed.
Prints without support.
The printer should be well calibrated before attempting this print, since it needes fine detail to work.
Additional Needed Parts:
1x Spring out of a pen
1x Three segments (15mm) of a 9mm snap-off cutter blade
Demonstration and Assembly: https://youtu.be/xb1yQvIPFL8 -
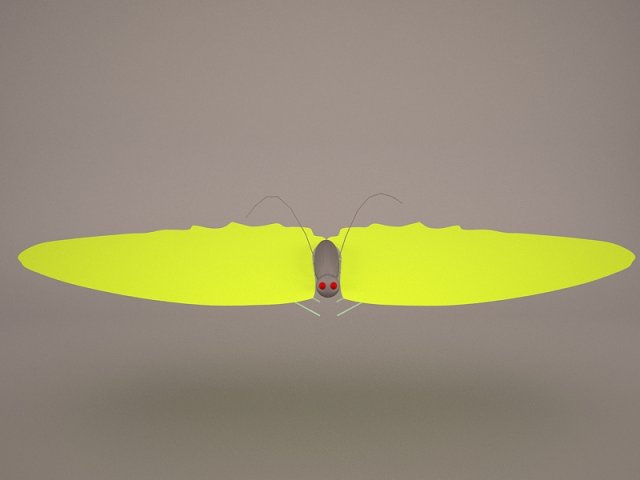
Butterfly Free 3D Model
butterfly moth insect monarch orange gold black yellow white spring flower low poly fly flying wings realistic real brightly color cheap
-
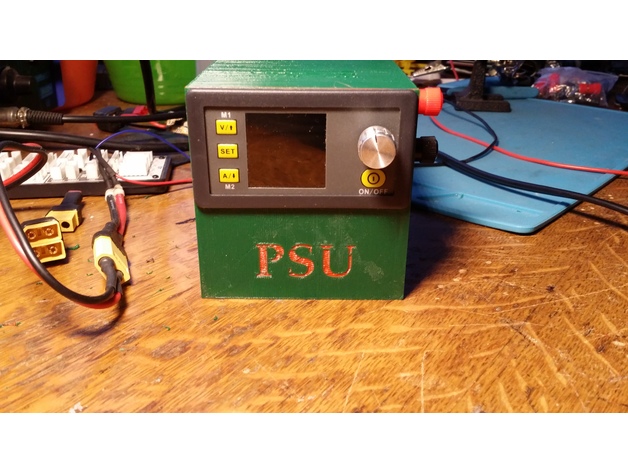
netzteil dps3005 + Switching Power 3D Print Model
Summary
https://www.banggood.com/DPS3005-32V-5A-Buck-Adjustable-DC-Constant-Voltage-Power-Supply-Module-Integrated-Voltmeter-Ammeter-p-1062474.htmlhttps://www.banggood.com/AC-DC-Inverter-100-240V-To-36V-5A-180W-Switching-Power-Adapter-Converter-Module-p-1161864.html -
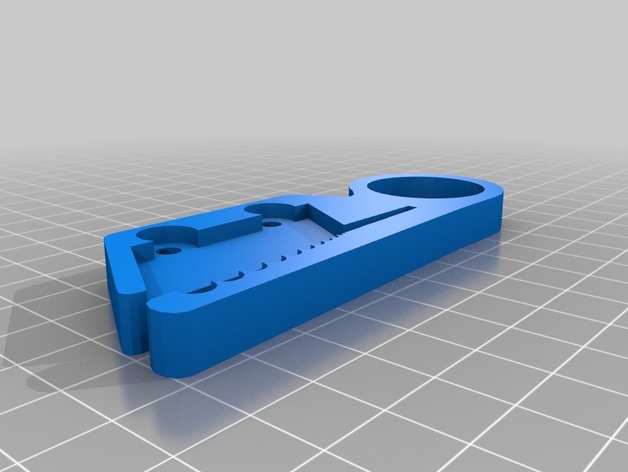
Wire Stripper (Cutter Blade) 3D Print Model
Summary
Wire Stripper (Cutter Blade)
You will need:
2x M4 5mm screw
2x M4 7mm nut -
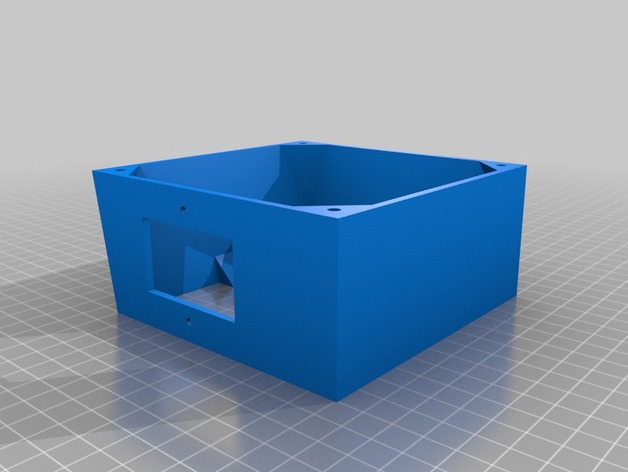
Wanhao i3 120mm PSU Fan Upgrade for Undermount 3D Print Model
Summary
I needed a 120mm fan upgrade for my Maker Select v2, as the stock fan makes a terrible grinding noise every time I turn the printer on. But, none of the options worked for me, because I have mounted my control box under the table my printer is on! So I flattened the top and increased the angle on the bottom to accommodate the 120mm fan.
This is an extended back cover for the Wanhao Duplicator i3 PSU (also rebranded as Monoprice Maker Select, Balco 3D Printer, Cocoon Create). This model allows you to use a 120mm fan instead of the noisy tiny internal one. The new fan will be mounted outside of the power supply, but it will be much more silent. It adds about 10mm of extra length to the bottom.
I don’t know if other versions of the printer have a different arrangement for the screw holes. This was designed for a v2.1 (v2 should be the same). Check compatibility for v1 and rebranded versions before printing.
The stock screws won’t work for this part. Use M3x8mm or longer to attach the cover to your PSU case. Screw holes aren’t countersunk (just counterbored), so choose screws with a flat top.
Print Settings
Printer Brand:
Wanhao Printer:
Wanhao Duplicator i3 V2 Rafts:
Doesn’t Matter Supports:
Yes Resolution:
0.2mm Infill:
10% Notes:
It should be aligned with the PSU screw holes facing the build plate, already. Enable supports for the IEC connector/power switch plate and wiring loom slot.
It’s not a must, but I recommend using 3 shells/solid perimeters for the holes where the fan mounts on, so when threading the screws the plastic doesn’t break.
Post-Printing
Installation guide
Unplug the power cord from the wall socket and from the printer. Safety first!
Unscrew the 4 black screws that hold the sheet metal back cover in place. Save them if you plan to reinstall the stock cover in the future (they are too short to work with this mod).
The cable loom going from the control box to the printer goes through a cut in the back plate and is held by a zip tie. Cut that zip tie to free the loom from the plate.
Disconnect the spade connectors going to the IEC power socket + switch combo. Notice the wire colors and location to reinstall them later in the correct position. Take a picture if necessary.
Disconnect the small fan from the power supply.
Unscrew the fasteners holding the socket/switch in place. You should be able to lift it off the plate (use a flat screwdriver as leverage if you need so to get it out).
Position the back cover and align it with the screw holes tapped in the case of the control box. Make sure the wire loom goes through the U-shaped cut-out provided.
Use M3x8mm or longer to attach the plate to the metal case.
Take the wires that were attached to the IEC connector/switch and guide them through the rectangular cutout provided (located on the top or sides, depending on the model you have printed). Re-attach the wires to the switch and screw it in back. You can reuse the stock screws that came with it (be gentle when doing this, you’re threading into plastic).
Take your 120mm fan and use the +12v and GND wires to connect it to the psu. If your fan has a molex connector (3 or 4 pin) you should be able to just plug the cable in to the existing connector you left coming from the power supply.
You may want to use some electrical tape or a drop of hot glue to secure the connection.
Align the fan with the mounting holes of the printed cover. Use M4x40mm screws or self-tappers of similar length to secure the fan to the cover. Make sure to tidy all the cables up inside so they don’t catch on the fan blades.
Enjoy your silent printer!
Extra
I recommend the addition of a fan grill to protect your fingers from the spinning blades. It is one of the drawbacks of having the fan exposed instead of inside the case. Be careful! -
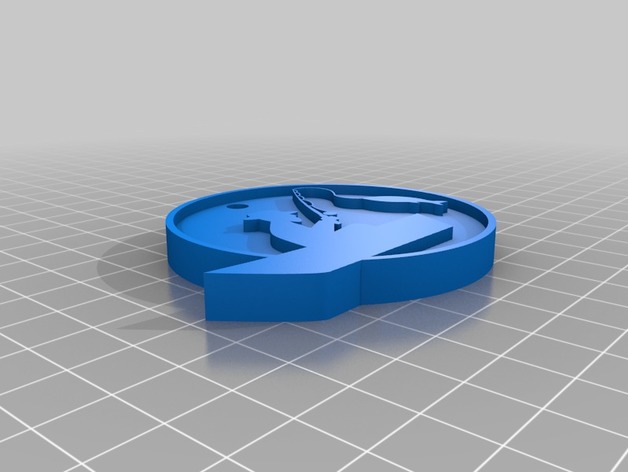
Llavero pescador 3D Print Model
Summary
Llavero hombre pescando. Solo diseñe, no probé imprimirlo.
Keychain fishing man. I only design, I don´t print it -
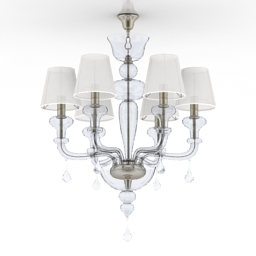
Luster 3D Model
Additional Info: Luster S110189_6 – 3D model (*.gsm+*.3ds) for interior 3d visualization.
-
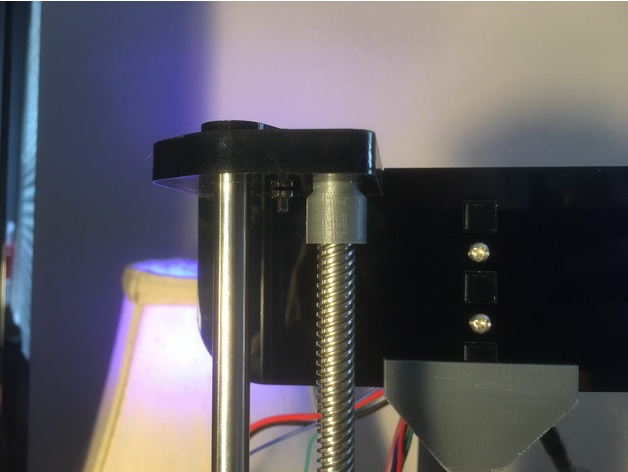
Anet A8 Z-Axis Rod Stabilizers 3D Print Model
Summary
These parts will improve the stability of your Z-Axis. Designed with very tight tolerances to pressure fit the rods yet spin freely on the frame. No need for bearings or screws. Just print two.
Print Settings
Printer:
Anet A8 Rafts:
Doesn’t Matter Supports:
No Resolution:
0.1mm Infill:
25% -
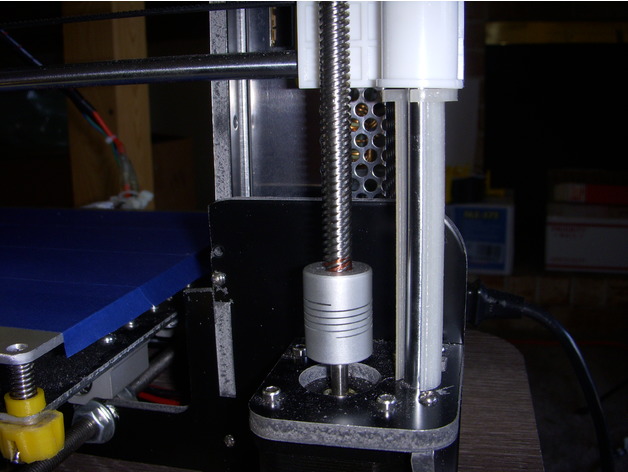
Anet A8 Z Axis Height Gauge 3D Print Model
Summary
A quick design of a thing used to help set and check the Z axis height. I rotated the object 90 degress so that the large diameter is at the bottom of the print I then multiplied it by 1 to print 2 each. -
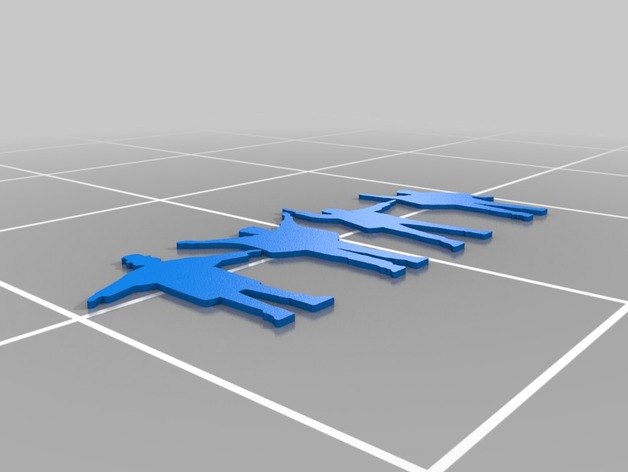
HELP ornaments 3D Print Model
Summary
Made for Christmas, but has many other uses. HELP that Beatle fan in your life with this wonderful set of the fab four. -
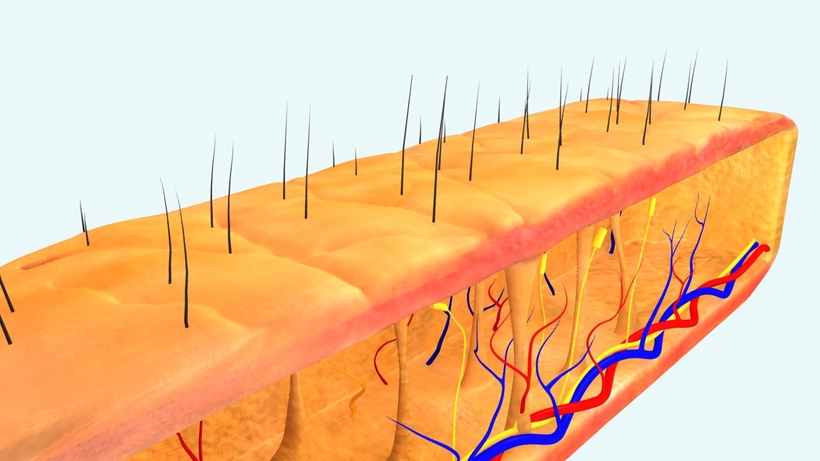
Free Under the skin medical 3D Model
under skin simulation with color and light and mentalray render
-
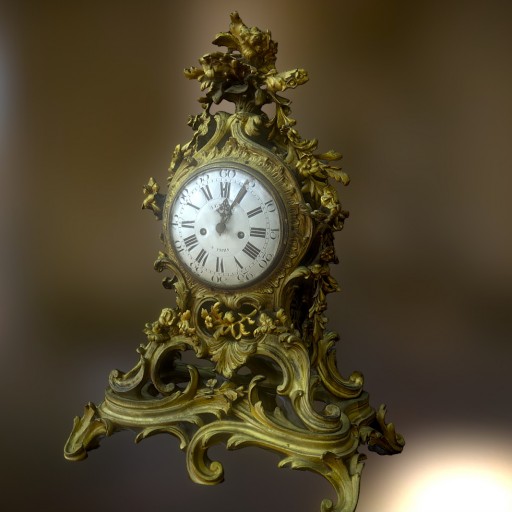
Pendule rocaille, style Louis XV Free 3D Model
Pendule rocaille, style Louis XV, Paris, 18th century, clockwork signed âThomas Parisâ, Glass remplaced and signed âLe Moyne à Parisâ, golden brass. Musée du Cinquentenaire (Brussels, Belgium). Made with ReMake and ReCap from AutoDesk.
-
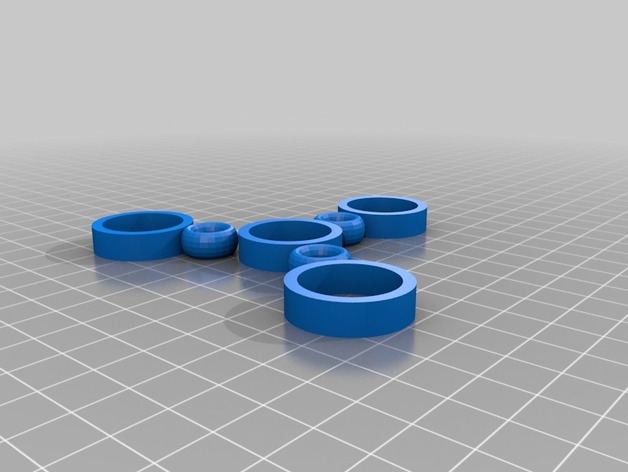
The Circle Spinner 3D Print Model
Summary
This is the first spinner I have made. I used tinkercad to design. -
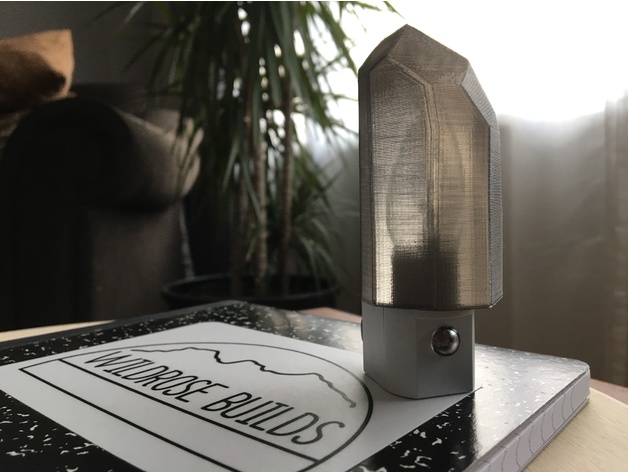
Quartz NightLight! 3D Print Model
Summary
This is a cover for a standard bulb night light. printed at .25mm layer height with transparent black pla filament. enjoy!
please check out the design and print timelapse video here: https://youtu.be/dlt9fiKnzGc -
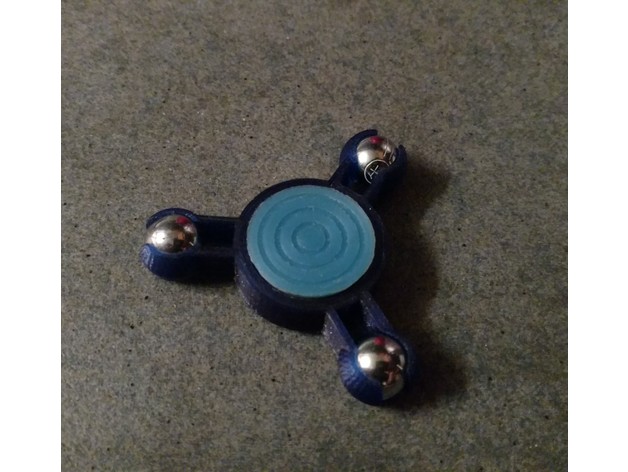
Micro Fidget Spinner 3D Print Model
Summary
This is a spinner I designed for my Neice
She is 5, so she has small hands.
Uses a 22mm bearing
The balls are 11mm / 7/16. Popular slingshot size.
I used Pachinko Balls
Cap is from https://www.thingiverse.com/thing:2403050
Print Settings
Printer:
Anet A8 with Titan Aero Rafts:
No Supports:
No Resolution:
0.1 Infill:
100% Notes:
I used a brim to help the cups adhere.
Super easy and fast to print -
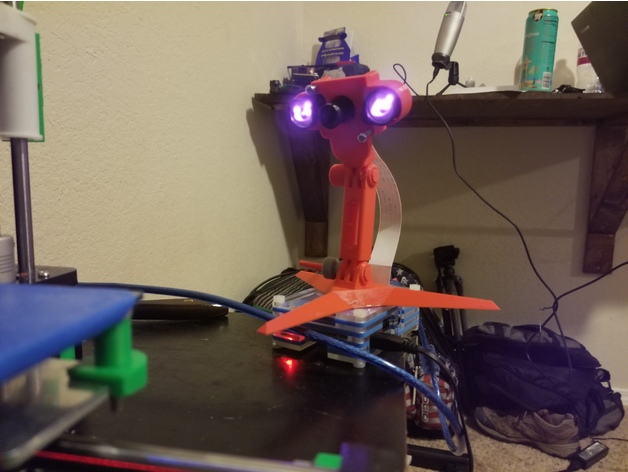
Raspberry Pi Night Vision Camera mount with Modular Mounting System attachment. 3D Print Model
Summary
I created this remix in order to mount my night vision Raspberry Pi camera onto the Modular Mounting system that I had previously printed.
The rest of the camera case can be found here: https://www.thingiverse.com/thing:1889356
The Modular Mounting System that it attaches to can be found here: https://www.thingiverse.com/thing:2194278
Print Settings
Printer:
Anet A8 Rafts:
Doesn’t Matter Supports:
No Resolution:
.2 Infill:
10% -
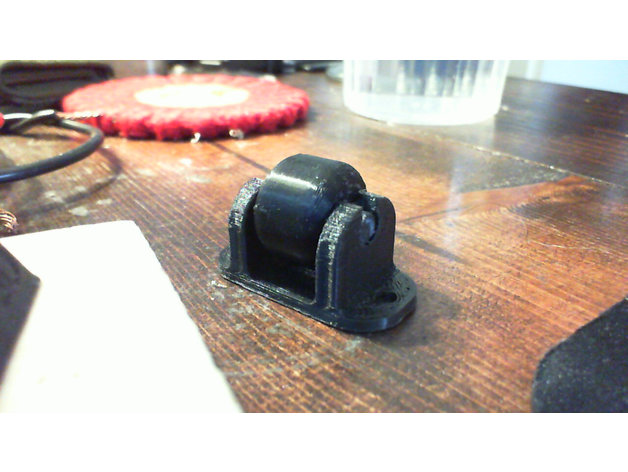
Low Profile Caster Wheel 3D Print Model
Summary
Designed these to be affixed to the bottom of a rolling box that is stored under a table. Print with 100% infill. The axle just needs to be tapped in with a gentle persuader once the wheel is in position of the hub. Don’t install the axle first even though it looks like you can snap it in. Uploaded the 3 parts as a set or as individual pieces.
Print Settings
Printer:
Anycubic Kossel Mini Rafts:
No Supports:
No Resolution:
.4 Infill:
100% -
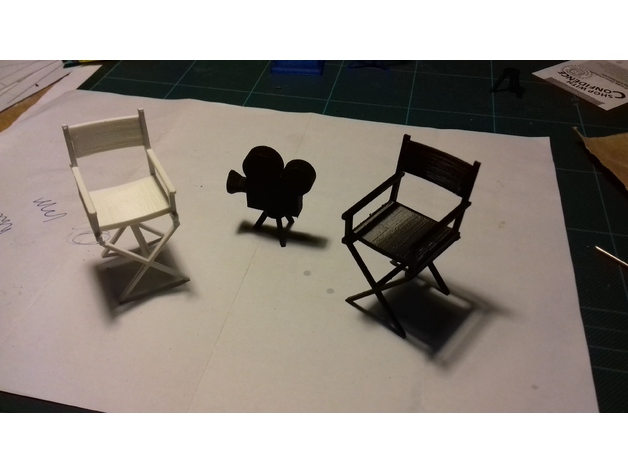
Cartoon Film Camera & tripod 3D Print Model
Summary
This is a (cartoon) print of a film camera, originally created as a wedding cake decoration for a film fan. The file contains both the camera and tripod but will need to be reoriented to print. The tripod will print without support if the round part is placed flat on the print bed. The camera needs support under the lens to print successfully. Initially printed in PLA. Layer height of 0.2 will work. -
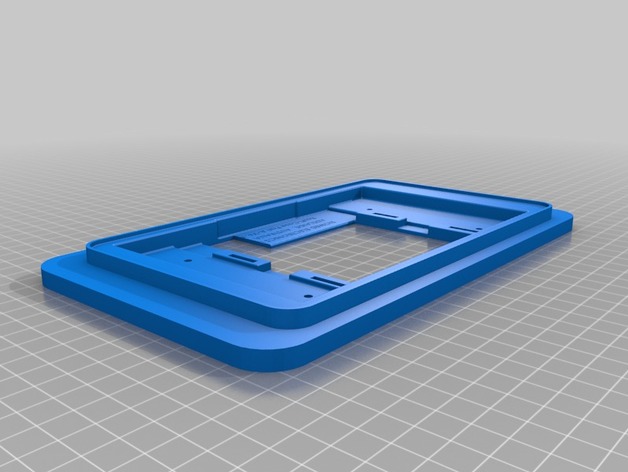
Raspberry PI with Screen adapter for InMoov back 3D Print Model
Summary
This is an adapter based on https://www.thingiverse.com/thing:1384316 that will hold the ras pi with the 7″ touchscreen in the back of the InMoov. -
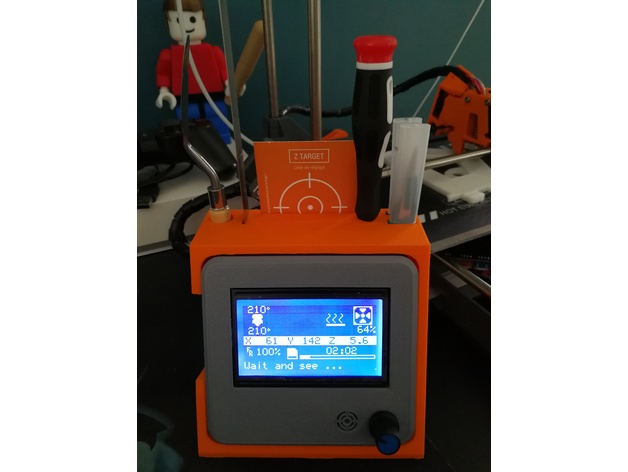
Support écran discoeasy200 3D Print Model
Summary
A LIRE AVANT DE PRINT !!!!!!!!!!!!!!!!!!!!!!!!!!!!!!!!!!!!!
Voici un support d’écran + porte accessoires pour dagoma discoeasy 200.
Je l’ai conçu pour mes accessoires, vérifier les cotes de toutes les fentes avant de l’imprimer pour ne pas dire après “ma spatule rentre pas” ou autre 😉
Je vous invite donc à le modifier a votre guise !
Il vous faudra imprimer les 3 éléments car le cache écran n’est pas celui de base mais est modifié pour un gain de place.
L’ouverture pour insérer la carte SD n’est pas très esthétique, je vous l’accorde, mais après plusieurs test, c’est le meilleur compromis pour la retirer sans problèmes.
Remplissage 17% suffisant
Support “partout” uniquement pour le gros support porte outil (orange)
Si vous avez des questions ou suggestions, n’hésitez pas 🙂 -
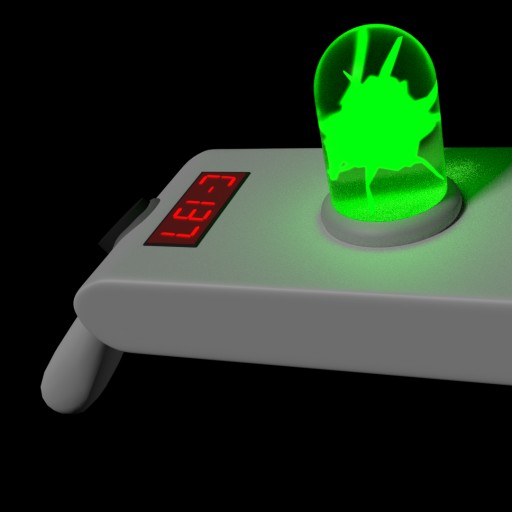
Rick and Morty Portal gun Free 3D Model
This is a Portal gun that I made solely based off pictures form the show. it is mid-poly
-
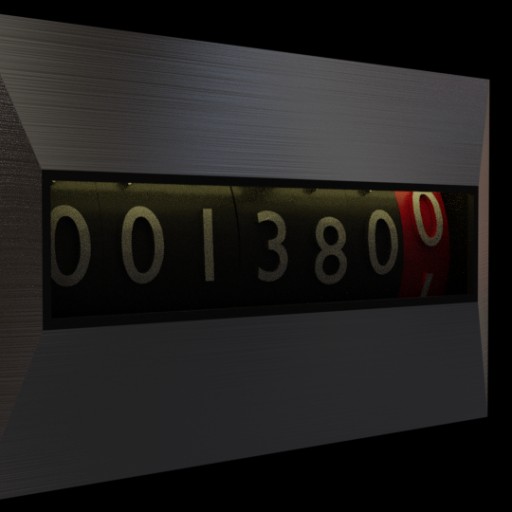
Animatable Odometer Free 3D Model
A short animation of this “device” running (way, way faster than it was intended to) here: https://youtu.be/6VcvdF9aMfc
-
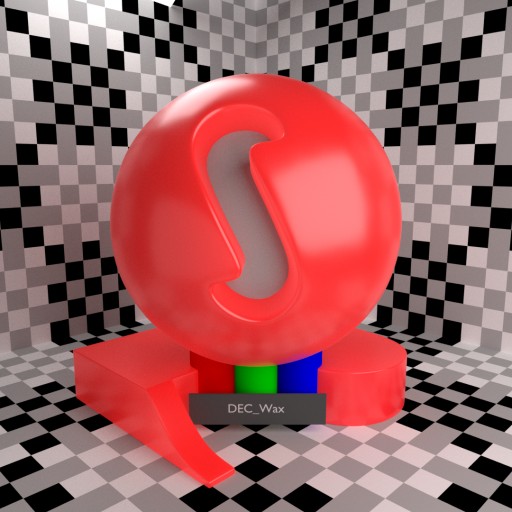
Simple Cycles Wax Free 3D Model
I wanted to create a simple wax shader without messing with Subsurface Scattering, so this is a simple additive shader of a Translucent and a Glossy/Diffuse mix. I think it came out pretty decently waxy and is ideally faster than an SSS wax, for basic candles or such. And hey, it’s free.
-
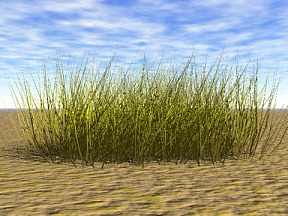
Weed 05 Free 3D Model
Free Model of 3DPlants.com “Plant Model Libary CD?s” and Downloadable Model Sets! This Model also available on CD…with UV mapped textures! More Info?s, Preview Images, Shop and Downloadable Texture Sets or a “Seamless Natural Texture CD” you find directly at 3DPlants.com!
-
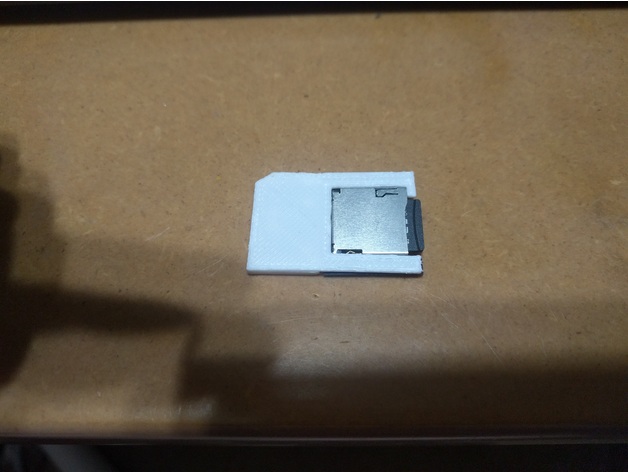
PS Vita Gamecard to SD case 3D Print Model
Summary
PS Vita Gamecard to SD card adapter case.
This finishes off your game card adapter so that it locks in and ejects like a real gamecard.
This is really thin, and requires all layers to be printed at 0.1mm to function correctly.
Print Settings
Rafts:
Yes Resolution:
0.1 -
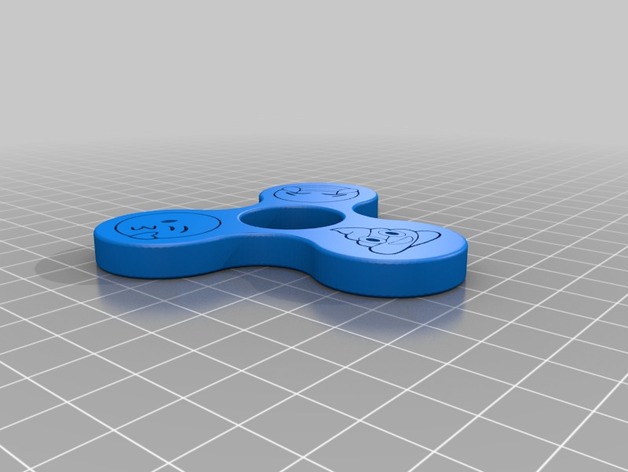
Emoji Spinner 3D Print Model
Summary
Add a 608 Bearing and caps if you wish 6 nickels are buried in the ends for weight (2 each hub) pause the print around layer 20 or pop them in as it prints. This was a request from a customer, I have a Sponge Bob coming next. Forgot to snap a completed pic so if you print one please post. She wanted Yellow with Blue caps looked nice!
Print Settings
Printer Brand:
Prusa Printer:
Prusa Clone Rafts:
No Supports:
No Resolution:
.2 Infill:
20% Notes:
Forgot to take a picture befroe giving to customer if you print one please post a pic! -
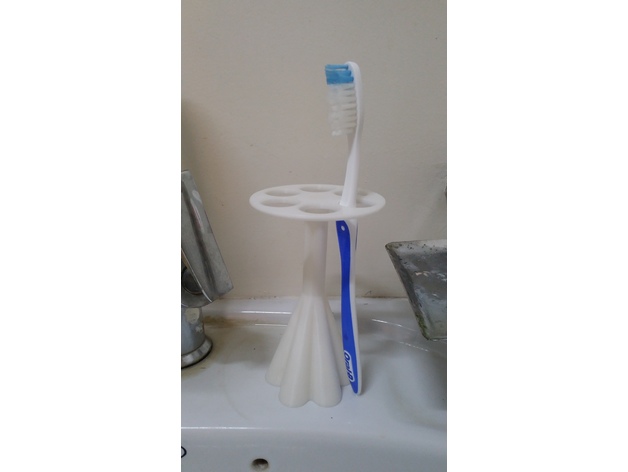
Toothbrush Holder for 6 brushes 3D Print Model
Summary
My toothbrush holder broke, so I designed and printed a new one. It can hold up to 6 brushes so also good for a family bathroom.
Print Settings
Printer Brand:
Prusa Printer:
Prusa Clone Rafts:
No Supports:
No Resolution:
0.3 Infill:
10% Notes:
You can even print at 0.2 or 0.1(though there’s not enough detail to warrant that resolution) and you can increase the infill if you want, too. -
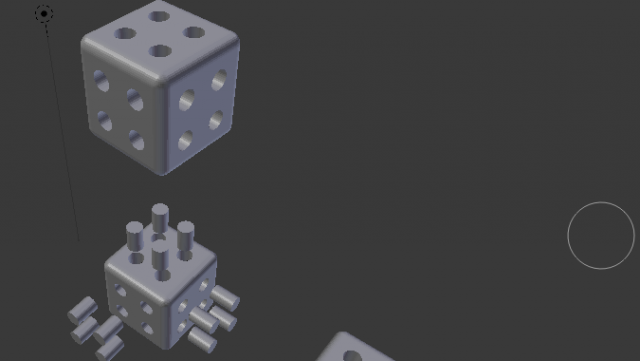
Cubo Ensamblado Free 3D Model
Se pueden construir miles de estos cubos y se pueden ensamblar mediante pernos, que permiten una rigidez excelente. Pudiendo construir en todas direcciones. El cielo es el límite de tu imaginación. Construye lo que quieras y construirás tu mente.
-
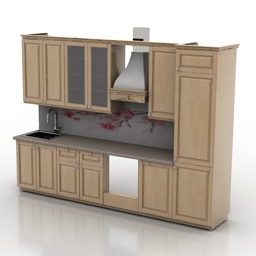
Kitchen 3D Model
Additional Info: Kitchen Nicolle Provance N030717 – 3D model (*.gsm+*.3ds) for interior 3d visualization.
-

Vase 3D Model
Additional Info: Vase roses N310517 – 3D model (*.gsm+*.3ds) for interior 3d visualization.
-
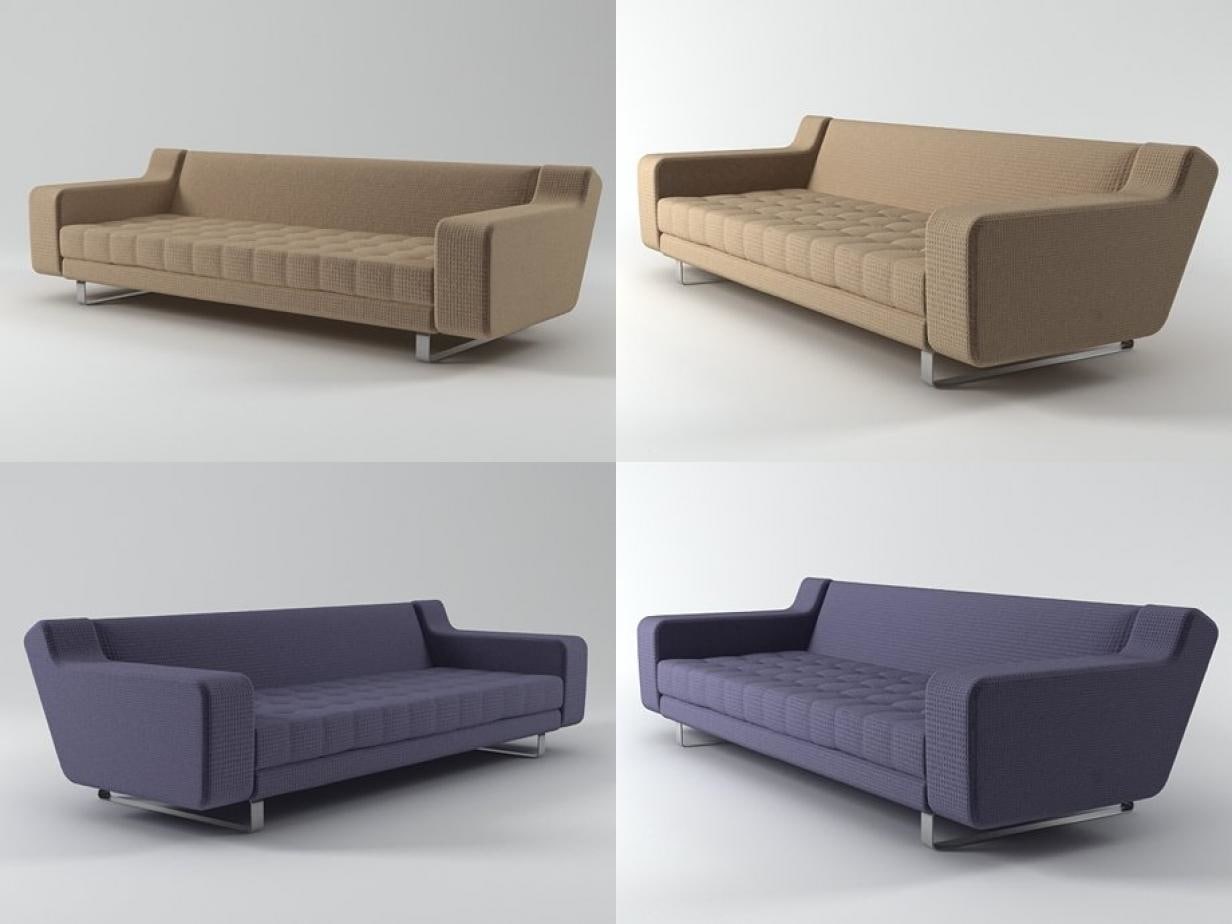
3-Seat Sofa Free 3D Model
3-Seat Sofa by N/A | 3d model produced by Design ConnectedThis 3d model is part of the highly acclaimed Design Connected collection featuring 6500+ carefully picked exclusive furnishings. Check out our full range of 3d models for more mid-century icons, contemporary classics and designer masterpieces.All Design Connected 3d models are originally created in 3ds Max and V-Ray renderer.Our in-house team of 3d artists handle all further remodelling, materials conversions and other adaptations to deliver best possible visual and technical quality of all the additional file formats and renderers we offer. Files units are centimeters and all models are accurately scaled to represent real-life object’s dimensions.Our models come as a single editable mesh or poly object (or as group for rigged models or where displace modifier has been used) properly named and positioned in the center of coordinate system. No lights, cameras and render/scene setup are included unless otherwise stated in the particular model’s description.AVAILABLE FILE FORMATS- Sketchup 8 or above – Autodesk 3ds Max 2011 or above– VRay– Mental Ray– Scanline- OBJ and FBX – Abvent Artlantis ADDITIONAL FILE FORMATS UPON REQUEST- Cinema4D R16 or above- ARCHICAD R16 or above- Autodesk 3ds – Rhinoceros – Autodesk DWG – Maya – Lightwave – Collada PRODUCT DESCRIPTIONBrand: N/A, Designer: N/ADesign Connected ID: 3970BEFORE PURCHASEWe highly recommend that you download few of our FREE 3D MODELS and test if they work well with your 3d software before making a purchase.ABOUT THE IMAGERYPreviews rendered in 3dsMax using VRay. Please note that the studio scenes and light and environment settings are not included.SUPPORTIf you have any questions about how to use Design Connected 3d models, please contact us via Support.Thank you for purchasing Design Connected models!
-
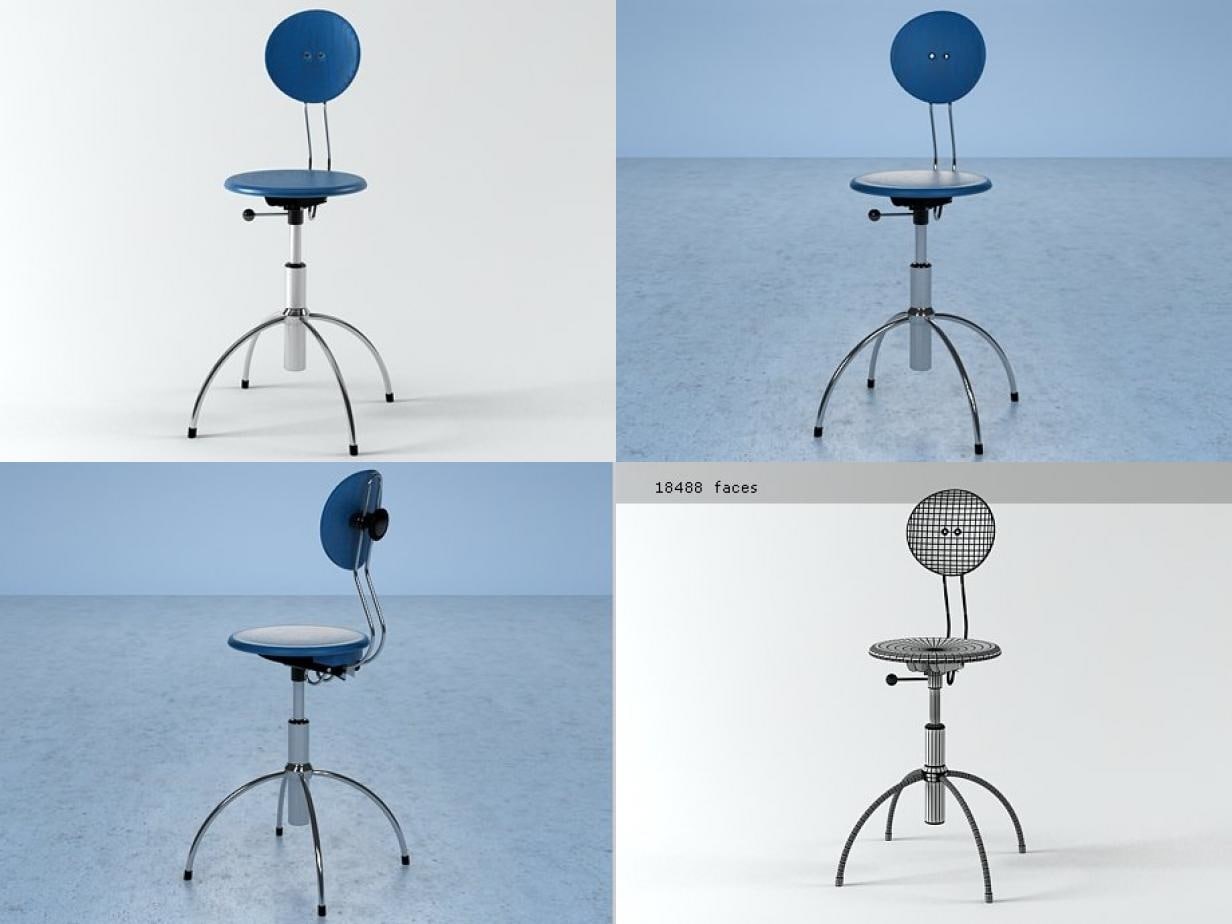
SE 41 Free 3D Model
SE 41 by Wilde+Spieth | 3d model produced by Design ConnectedThis 3d model is part of the highly acclaimed Design Connected collection featuring 6500+ carefully picked exclusive furnishings. Check out our full range of 3d models for more mid-century icons, contemporary classics and designer masterpieces.All Design Connected 3d models are originally created in 3ds Max and V-Ray renderer.Our in-house team of 3d artists handle all further remodelling, materials conversions and other adaptations to deliver best possible visual and technical quality of all the additional file formats and renderers we offer. Files units are centimeters and all models are accurately scaled to represent real-life object’s dimensions.Our models come as a single editable mesh or poly object (or as group for rigged models or where displace modifier has been used) properly named and positioned in the center of coordinate system. No lights, cameras and render/scene setup are included unless otherwise stated in the particular model’s description.AVAILABLE FILE FORMATS- Autodesk 3ds Max 2011 or above– VRay– Mental Ray– Scanline- OBJ and FBX – Abvent Artlantis ADDITIONAL FILE FORMATS UPON REQUEST- Cinema4D R16 or above- Sketchup 8 or above – ARCHICAD R16 or above- Autodesk 3ds – Rhinoceros – Autodesk DWG – Maya – Lightwave – Collada PRODUCT DESCRIPTIONBrand: Wilde+Spieth, GermanyDesigner: Egon EiermannDesign Connected ID: 2828BEFORE PURCHASEWe highly recommend that you download few of our FREE 3D MODELS and test if they work well with your 3d software before making a purchase.ABOUT THE IMAGERYPreviews rendered in 3dsMax using VRay. Please note that the studio scenes and light and environment settings are not included.SUPPORTIf you have any questions about how to use Design Connected 3d models, please contact us via Support.Thank you for purchasing Design Connected models!
-
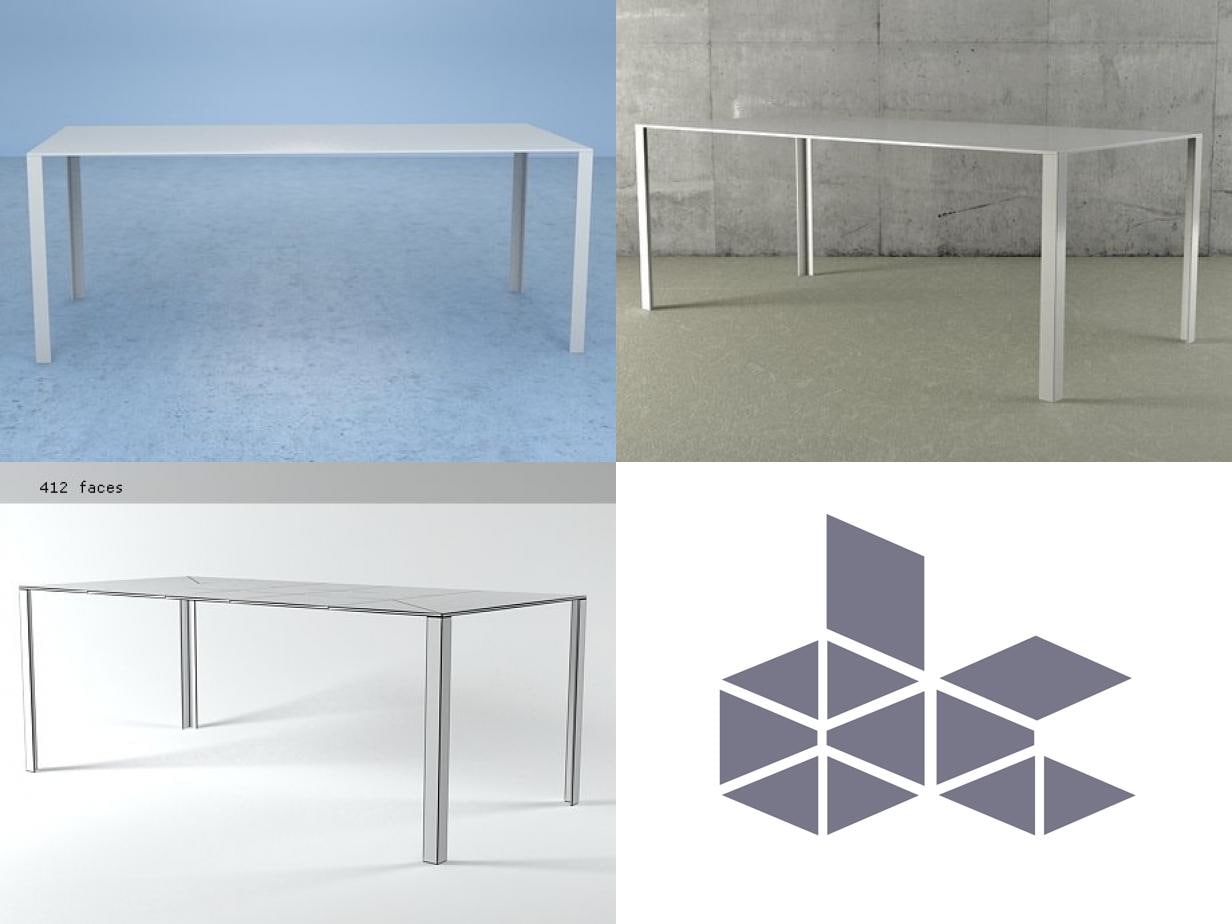
Less Free 3D Model
Less by Molteni & C | 3d model produced by Design ConnectedThis 3d model is part of the highly acclaimed Design Connected collection featuring 6500+ carefully picked exclusive furnishings. Check out our full range of 3d models for more mid-century icons, contemporary classics and designer masterpieces.All Design Connected 3d models are originally created in 3ds Max and V-Ray renderer.Our in-house team of 3d artists handle all further remodelling, materials conversions and other adaptations to deliver best possible visual and technical quality of all the additional file formats and renderers we offer. Files units are centimeters and all models are accurately scaled to represent real-life object’s dimensions.Our models come as a single editable mesh or poly object (or as group for rigged models or where displace modifier has been used) properly named and positioned in the center of coordinate system. No lights, cameras and render/scene setup are included unless otherwise stated in the particular model’s description.AVAILABLE FILE FORMATS- Sketchup 8 or above – Autodesk 3ds Max 2011 or above– VRay– Mental Ray– Scanline- OBJ and FBX – Abvent Artlantis – Autodesk 3ds ADDITIONAL FILE FORMATS UPON REQUEST- Cinema4D R16 or above- ARCHICAD R16 or above- Rhinoceros – Autodesk DWG – Maya – Lightwave – Collada PRODUCT DESCRIPTIONBrand: Molteni & C, ItalyDesigner: Jean NouvelDesign Connected ID: 2371BEFORE PURCHASEWe highly recommend that you download few of our FREE 3D MODELS and test if they work well with your 3d software before making a purchase.ABOUT THE IMAGERYPreviews rendered in 3dsMax using VRay. Please note that the studio scenes and light and environment settings are not included.SUPPORTIf you have any questions about how to use Design Connected 3d models, please contact us via Support.Thank you for purchasing Design Connected models!
-
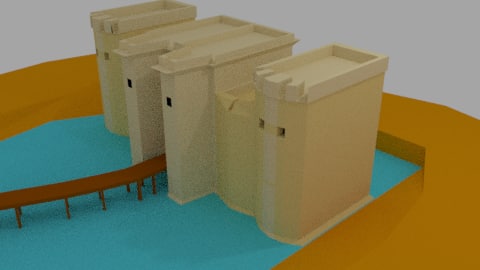
castle Free 3D Model
Medieval castle surrounded by water and only accessible by a small wooden brdge.Extremely lowpoly
-
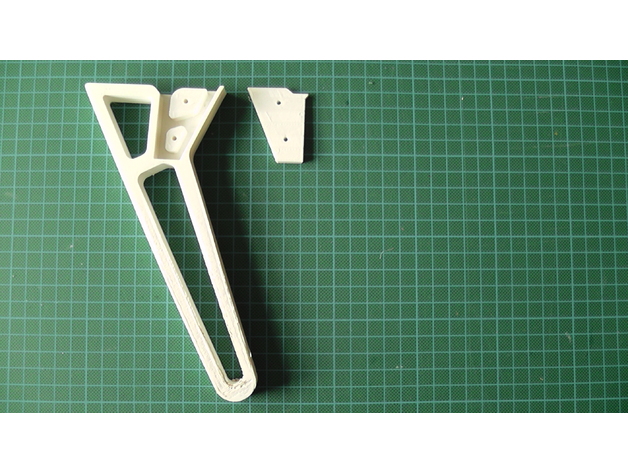
F450 Quadcopter Extended Legs 3D Print Model
Summary
Improved extended legs for an F450 style Quadcopter. These provide clearance for a camera gimbal to be slung beneath the quadcopter.
Video dedcription at: https://youtu.be/9Vwqu6JT6Z8
Print Settings
Printer Brand:
Prusa Printer:
Prusa Clone Rafts:
Doesn’t Matter Supports:
No Resolution:
0,2mm Infill:
Depends on number to top and bottom layers Notes:
These would look quite good with no top and bottom layers,so that the infil shows. It may be necessary to increase the infil amount to give a similar strength to a part with top and bottom layers. 3-4 outer layers are needed to give strength.
I used models of small discs intersecting with the bottom of the leg to prevent warping and increase adheasion to the print surface.
Post-Printing
I printed the legs in ABS and painted the inside to the part that connects to the 450 legs with acetone and left it to dry. I think this gives a bit more strength but that could be wrong.
How I Designed This
Designed in fusion 360 from imported photographs of the existing 450 legs. -
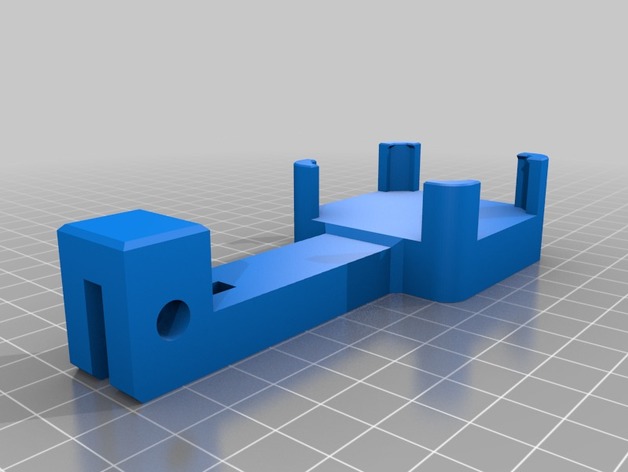
Dial Indicator Mount Prusa MK2 – modified 3D Print Model
Summary
some modification on the original design by slayer1551:https://www.thingiverse.com/thing:2308978
I liked the original design idea, but wanted it to be a bit different, namely:
turn the dial to face the front (!!)
center the hanging beam (which for some reason was offset)
reduce the hanging beam length – saving material, printing time and reducing torque on the print head
added some chamfer on the protruding tabs and on one side below for easier extraction from PEI print area
Print Settings
Printer Brand:
Prusa Printer:
Prusa Mk2 Rafts:
No Supports:
No Resolution:
0.2 Infill:
15% Notes:
you can probably print with even lower infill
Post-Printing
1 M6 bolt to secure the dial to the holder -
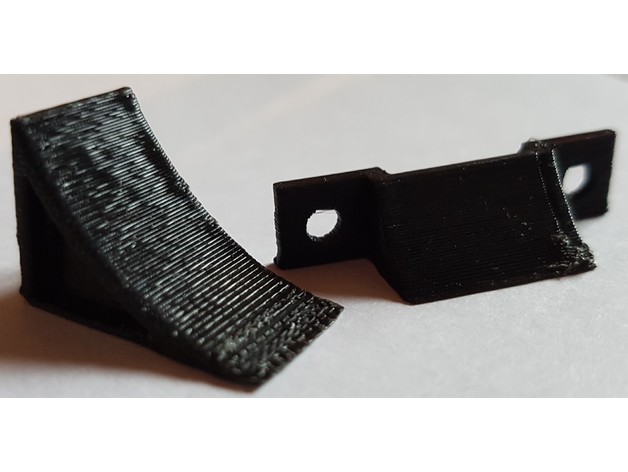
Hemmschuh 1:16 3D Print Model
Summary
Hemmschuh und Halter im Massstab 1:16
Print Settings
Printer:
Tronxy P802 -
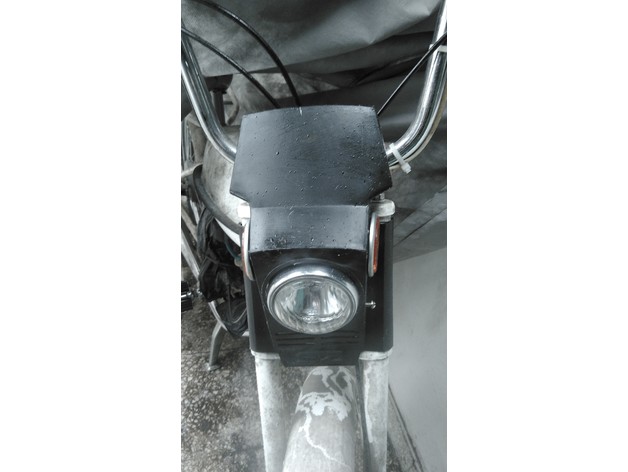
Riga 13 SZ Soporte Tablero 3D Print Model
Summary
Soporte para el “tablero” Riga 13 SZ
Print Settings
Printer:
Replikat M5 Extendida Rafts:
Doesn’t Matter Supports:
Yes Resolution:
0.2 Infill:
30 % Notes:
Nozzle: 0.4
PLA -
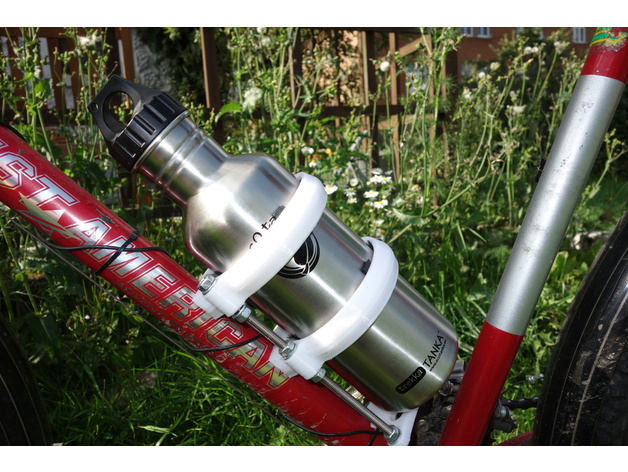
ECOtanka or SIGG Waterbottle holder for bike 3D Print Model
Summary
This is a easy to print bottleholder for Bikes. It fits for SIGG and ECOtanka bottles with the size of 1 litre. The holder is for bikes with 35mm frame diameter. But it fits also on a bit bigger or smaller one.
This holder is super stable! Use M6 bolts for fixing the parts.
Tape some foam or felt in the holder to get this thing very silent and safe for your bottle! -
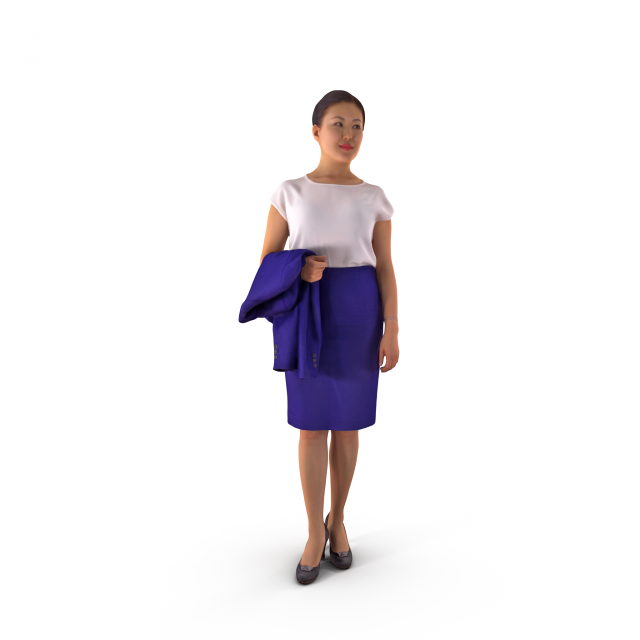
Business Woman Free 3D Model
3DCap creates ready-posed 3D human models for 3D visualization industry, unmatched in highest resolution and quality.Our team is a synergism of modern technologies and qualified 3D artists who work to bring 3D visualization into a new level.FEATURES- Full Body 3d model- Extremely clean- Smoothable- High quality UV map- High level of detail- High resolution textures- Real-world scale- Units: cmTEXTURES- Texture Resolution: 8192 x 8192- Normal Map- Diffuse MapFORMATS- 3D Studio Max 2010 or above and OBJ- Textures – TIFF 32bit
-
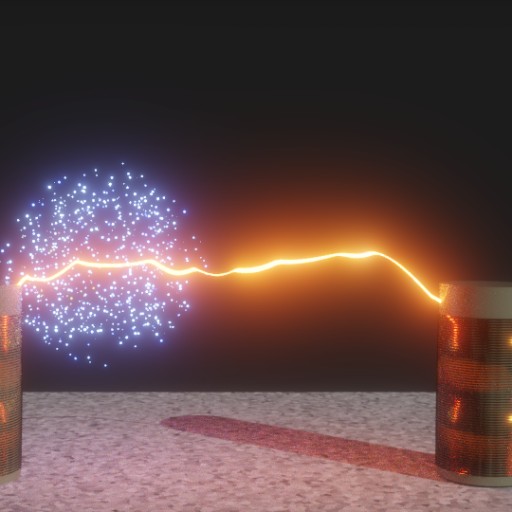
Mad Scientist’s Lab Gear Free 3D Model
Multi-pass demo here. https://www.youtube.com/watch?v=TOR15e2vXWM