High-high quality low-poly model of Tomograph, medical scanner for Magnetic Resonance Imaging in real size. May be used for render, games, VR or AR. Can be placed in hospital or laboratory interior or used for Sci-Fi games.Correct optimising topology of mesh, quads and tris only.This model contains 2 separate objects – tomograph and trolley. The trolley can move along guides and may be animated.There are 5 PBR-textures – Ambient Occussion, Diffuse, Normal, Glossines, Specular and Emmisive. All textures are 4096*4096Preview were render in Marmoset 3, not included.
Tag: Magnetic
-
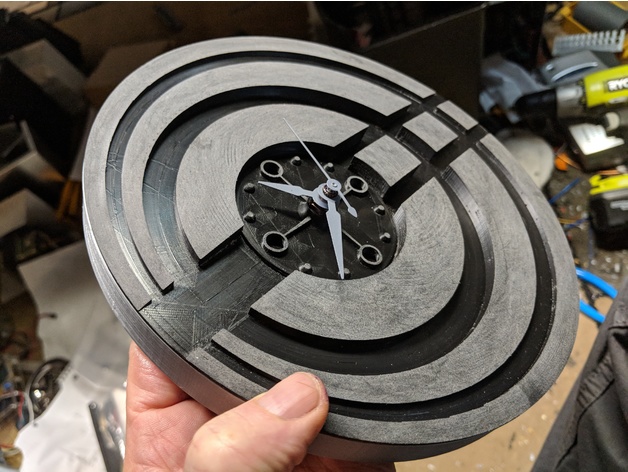
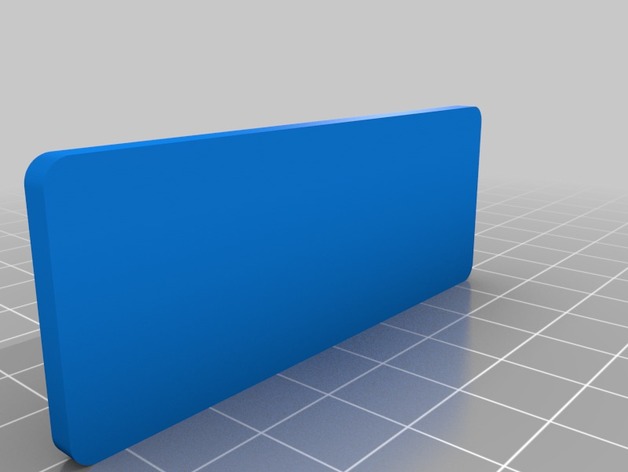
Modern quartz clock with magnetic mounts 3D Print Model
Summary
This clock has the logo for the company I work for incorporated into the clock face.
The clock movement can be purchased here :https://www.amazon.com/gp/product/B00N639EUU/ref=oh_aui_detailpage_o02_s00?ie=UTF8&psc=1
The magnets are 12mm round by 3mm deep, also bought on Amazon.
Designed using Fusion 360.
Print Settings
Printer:
Creality CR-10
Rafts:
No
Supports:
No
Resolution:
.16
Infill:
20%
Notes:
Hatchbox silver PLA for the out ring, face is black APLA sanded post print for the mat finish. -
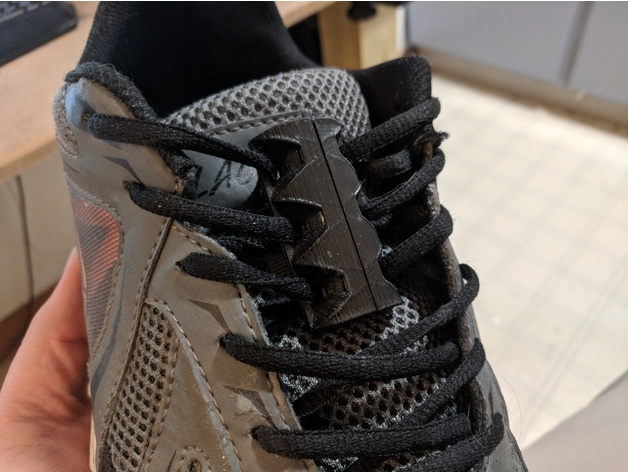
Magnetic Shoelaces 3D Print Model
Summary
I made these because I don’t lie tieing my shoes in the morning if anything I leave them tied and slip in and out of them. These are designed with a curve so they lay nicely against your foot. I print them at 50% infill for strength and at the medium quality setting for me that is 0.20 layer hight. I use three magnets on each side for max strength that is a total of six per foot and 12 total. As far as I know, these do not set off metal detectors, I have gone through one wearing them and it did not set it off.
I use 10x5mm Neodymium Magnet you can get 100 for $26.99 on eBay shipped from inside the US. -
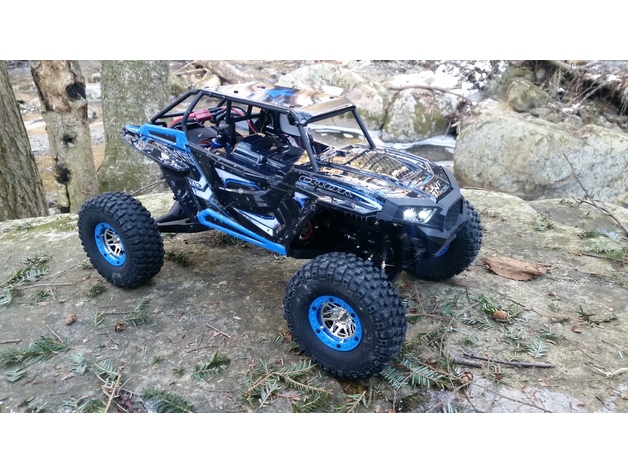
WLToys 10428B Magnetic Body Mount 3D Print Model
Summary
These parts mount to the WLToys 10428B RC vehicle to allow for quick access to the chassis without removing any screws. With a set of 1/2 inch x 1/8 inch N48 Neodymium magnets installed, this mount holds strong! Check out the video below for details:https://youtu.be/Ukx8tYVkOJ4
Print Settings
Printer Brand:
Wanhao
Printer:
Wanhao Duplicator i3 V2
Rafts:
No
Supports:
Yes
Resolution:
.2
Infill:
20%
Notes:
Printed .2 resolution and 20% infill. It’s plenty strong, and since it’s hidden, I’m not concerned with cosmetics. -
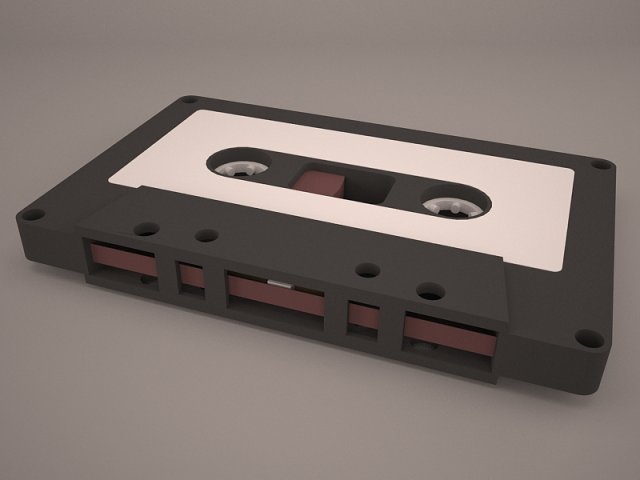
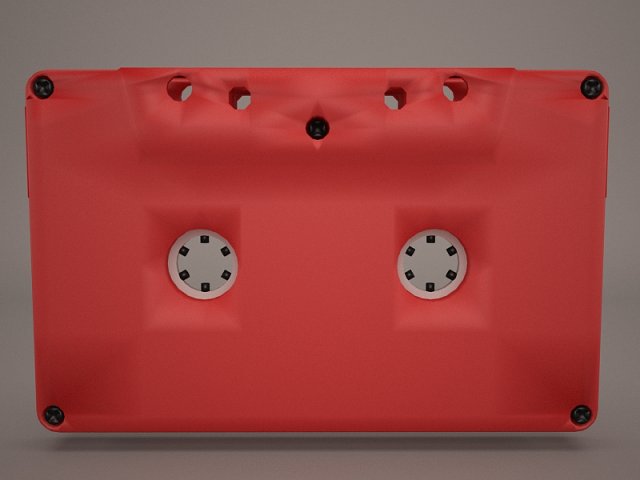
Cassetta Tape 3D Model
vintage old cassette tape scratch compact magnetic stereo record music radio sound audiotape audio retro
-
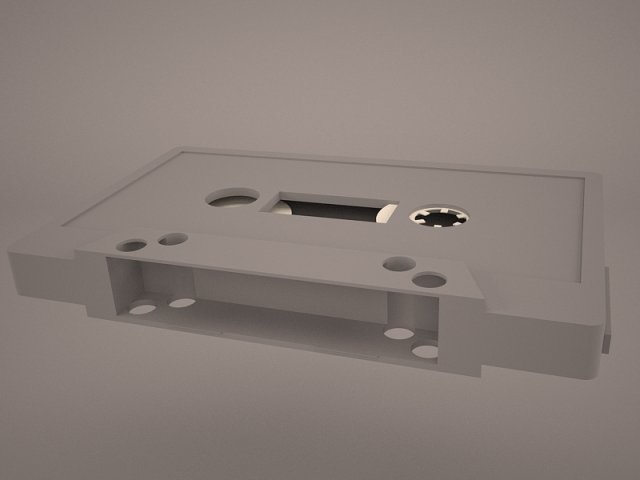
Cassetta Tape 3D Model
vintage old cassette tape scratch compact magnetic stereo record music radio sound audiotape audio retro
-
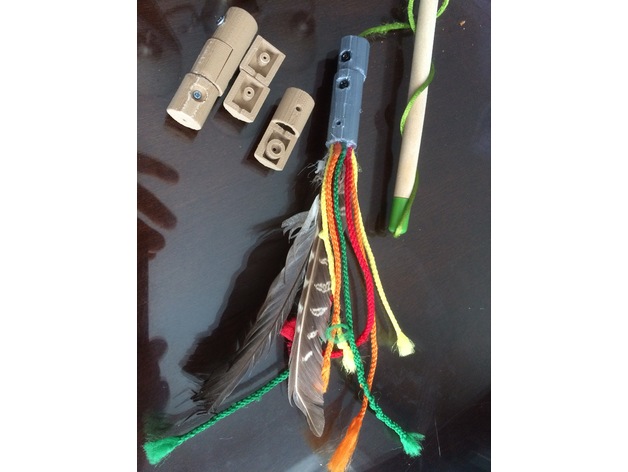
Cat toy magnetic link 3D Print Model
Summary
I made this magnetic link and toy adapter for my cat. He likes to destroy all things feather very quickly and toys don’t last very long. I am sure I am not alone. In order to refurbish cat toys this adapter can be placed at the end of the string of the destroyed toy. Feel free to attach strings and feathers to the second link (you may use hot glue and a screw can secure it) and as you prefer you may glue the parts or use screws for reusing the adapter. The magnets are from HFT to keep it cheap. I made the link magnetic to give my cat the chance of enjoying his catch and when done to steal it from him for a new chase.
Magnets:https://www.harborfreight.com/10-piece-rare-earth-magnets-67488.html
Print Settings
Rafts:
Yes Supports:
Yes Resolution:
0.2 mm Infill:
30-50% Notes:
Since the base has minimal platform contact a rim and supports help against possible warping. Should print in 60 mins. -
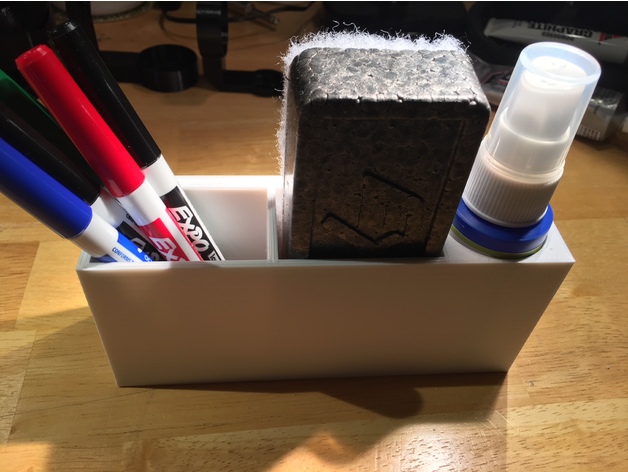
Expo Dry Erase Marker set magnetic holder 3D Print Model
Summary
I have a whiteboard without a marker tray. I bought the small Expo dry erase marker set that you see in the pictures from Amazon and wanted to be able to have a magnetic holder to keep it in that I could attach to the dry erase board. Pretty simple design, but it works for my needs. Hopefully it’s useful to someone else.
Marker set:https://www.amazon.com/gp/product/B00006IFIM/ref=od_aui_detailpages00?ie=UTF8&th=1
Magnets:https://www.amazon.com/gp/product/B00CS5OV0U/ref=oh_aui_search_detailpage?ie=UTF8&psc=1
E6000 Craft Adhesive:https://www.amazon.com/gp/product/B004BPHQWU/ref=oh_aui_detailpage_o00_s01?ie=UTF8&psc=1 -
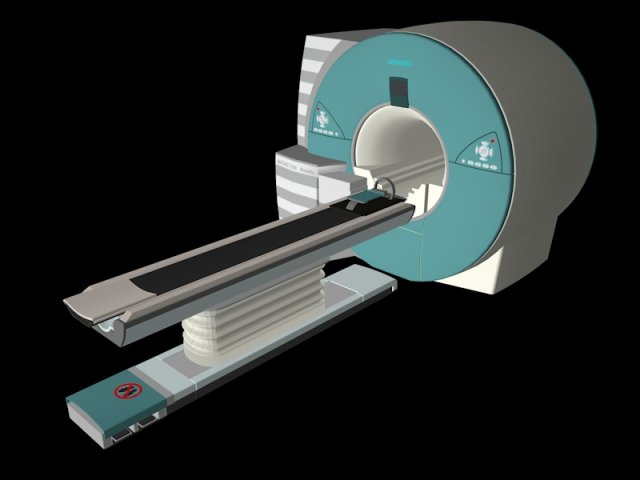
MRI CT SCAN 3D Model
—— 3d model of a MRI CT SCAN (AH 64 D) ——• Realistic model & textures based on siemens brand• High detail & clean mesh geometry• Fully UV textured• interior details included• Cinema 4D R13 Studio version is fully rigged
-
Magnetic 18650 Battery Case 3D Print Model
Summary
Magnetic Lid Battery case, holes are made for a 3mm x 1mm magnet.
case fits 3 18650 battery’s -
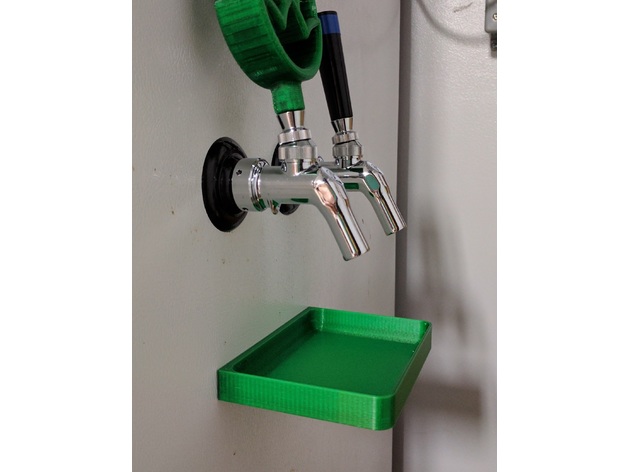
Magnetic Drip Tray 3D Print Model
Summary
A drip tray with magnets for attaching to the side of a fridge/kegerator.
I tried to keep the inside edges smooth with fillets to make cleaning easier. One thing I had about the metal ones is cleaning the corners so I tried to eliminate that with this one.
I printed it with PETG so it could be cleaned with hot water and not distort like PLA would.
Magnets are: 12.7mm (0.5″) diameter 3.2mm (0.125″) thickness
Print Settings
Printer Brand:
Wanhao Printer:
Wanhao Duplicator i3 Plus Rafts:
Doesn’t Matter Supports:
No Resolution:
0.25mm Infill:
35% Notes:
PETG or ABS preferred
Post-Printing
Add the magnets
I attached them with a small bit of epoxy on the magnet. It is a pretty tight fit so you don’t need much. -
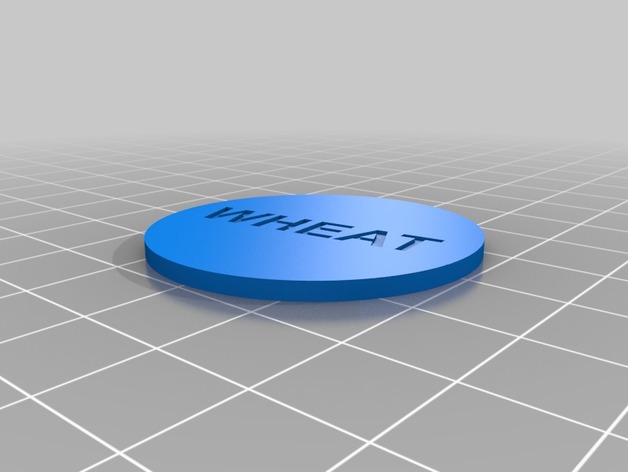
Magnetic Catan Tile Randomizing Tokens 3D Print Model
Summary
Made these since you can’t flip over and lay out the tiles randomly. Just turn a token over and start in the upper corner laying out the tiles. You’ll need 3 brick, 3 ore, 1 desert, 4 wood, 4 wool and 4 wheat. -
Cassetta Tape 3D Model
vintage old cassette tape scratch compact magnetic stereo record music radio sound audiotape audio retro
-
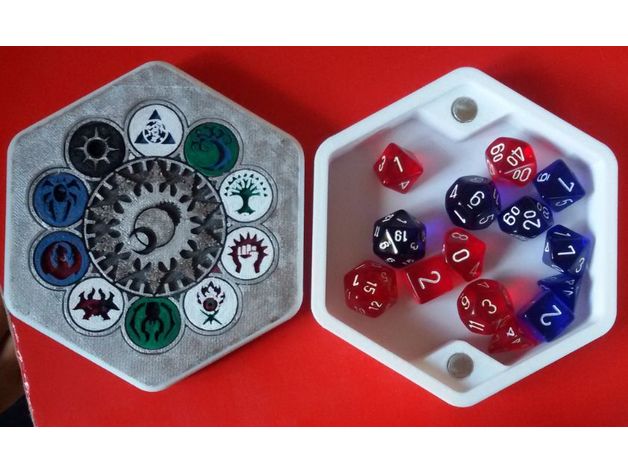
Ravnica Magnetic Dice Box 3D Print Model
Summary
A simple hexagonal dice box, with all ravnica’s guilds insert on top. It is remixed from another dice box but I can’t find it, please link it in the comments if you can.
It got 4 slot for standard round magnets, but printing it with default scaling makes it anyway a tight fit.
Many thanks to Wanna B. Drawings for her awesome work on painting it!
Print Settings
Printer:
Anet A8 Rafts:
No Supports:
No Resolution:
0.2mm Infill:
20-25% Notes:
I printed the top piece with 99.99% scaling, but should be fine with 100%, let me know. -
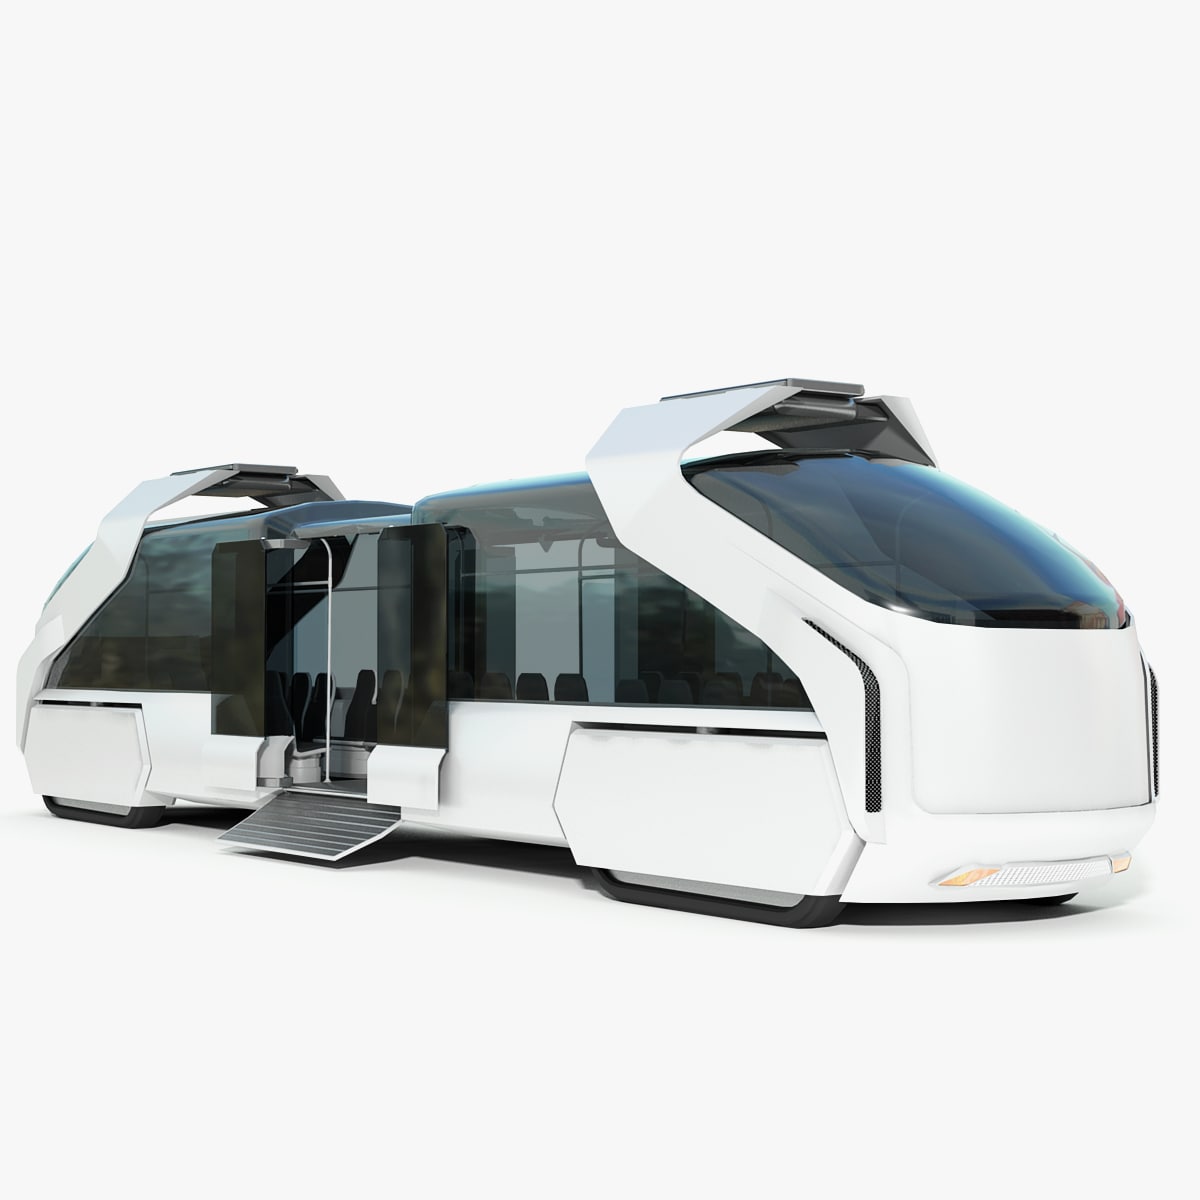
Hybrid Sci-Fi Train-Bus Concept 3D Model
Hybrid Sci-Fi Train-Bus Concept High quality 3d model, created in 3D Studio Max 2010 , with mental ray render and materials. The scale of the model is set to real world size (units – cm). The main objects are named and grouped correctly. The model contains the converted file format: .fbx, .obj, and .3DS with texture. Not all objects in the scene have unwrapped UVs. The environment object shown in the preview image is included with the scene file. The Hybrid Train-Bus is ready for use, just drop it and rendering.
-
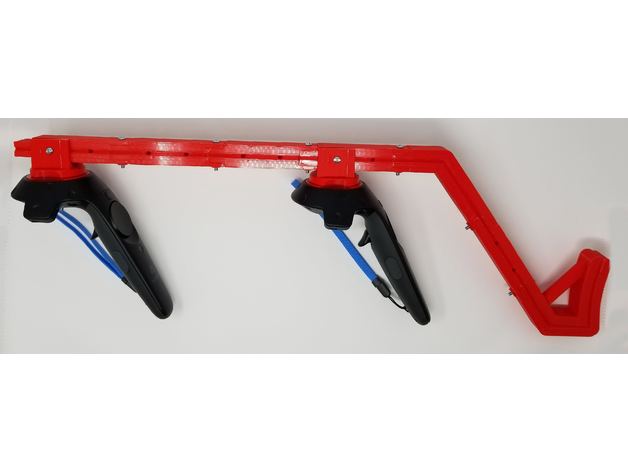
HTC Vive Gun Stock (magnetic, adjustable, easy print) 3D Print Model
Summary
While there are many existing variants of gun stocks available either for 3D printing, or purchase (on Etsy, eBay, etc.), I had some issues with the few ones I tried, thus I made my own version.
Is it better? How is it different from other designs?
There are few things I’d like to call out;
this design is easier to print – may not look as cool as a version made to resemble Picatinny rail, but the print time is significantly shorter, there’s no need to remove tricky supports, and the construction is very sturdy,
can be printed on small bed size – including Monoprice Select Mini! (which is what
I use 🙂 just make sure you rotate the longest pieces [rail, stock a, stock b] and decrease the brim size to 6 lines),
the stock is adjustable – the spacing between controllers, as well as controllers and arm support can be adjusted in 1.6″ – 2.4″ increments to make sure it fits you comfortable,
the shoulder support part is lower than the rail, which makes sure it doesn’t hit the headset during intense gaming sessions,
multiple sizes of magnets are supported – if you have some, chances are they may fit – and if not, you can either buy the ones I used, or leave me a message with the exact dimensions of your magnets (diameter, height) and I’ll make version for you 🙂 [absolute max would probably be around is 20mm x 10mm],
you can easily attach strap to have the accessory secured when not in use, or prevent it from falling when reloading in Onward while under fire 😉 Just guide the strap through one of the unused holes in the rail,
and, well, my design is tried 🙂 I printed out a number of versions, improving parts in between, making sure the tolerances are correct and everything fits properly and stays strong. Some of the other available designs that I tried had issues with tolerances and wouldn’t fit without manually trimming the parts after printing.
But you be the judge, and please let me know if you have any feedback 🙂
And most importantly, I hope you’ll have fun using it!
Parts to print:
2 copies (one for each controller): Controller – bottom
2 copies (one for each controller): Controller – top – select the variant for your magnet size
2 copies (one for each controller): Controller – mount – select the variant for your magnet size
5 copies: Rail
1 copy: Stock – A
1 copy: Stock – B
Required for assembly:
screw + nut, #8-32 x 1-1/2 in – quantity: 4
screw + nut, #8-32 x 1-1/4 in – quantity: 6
magnets – use neodymium, not ceramic disc (we need more strength than those can provide. Quantity depending on the size – see the “Controller – top” and “Controller – mount” part variants as reference (for a total of 12 or 14 magnets). The bigger the magnet (the stronger it is) – the better 🙂
Links to hardware (if you need to buy any):
screws: http://www.homedepot.com/p/Everbilt-8-32-Machine-Screw-Kit-800994/204331402
nuts and washers: http://www.homedepot.com/p/Everbilt-94-Piece-Stainless-Steel-Nut-and-Washer-Kit-803334/205949033
magnets:
http://www.homedepot.com/p/MASTER-MAGNETICS-0-7-in-Neodymium-Rare-Earth-Magnet-Discs-3-per-Pack-07047HD/202526369
http://www.homedepot.com/p/MASTER-MAGNETICS-1-2-in-Neodymium-Rare-Earth-Magnet-Discs-6-per-Pack-07046HD/202526367?keyword=neodymium+6+per+pack
if you head to Home Depot, you’ll find a selection of magnets in the aisle with machine screws and fasteners: http://imgur.com/QZAhJz9I recommend magnets: 0.472 x 0.118 inch (12 mm x 3 mm).
They’re available in Home Depot as well.
Hope you enjoy!
For other hobby projects, please visit my blog:http://www.BogdanBerg.com/
Print Settings
Printer:
Monoprice Select Mini Rafts:
No Supports:
Yes Resolution:
0.2mm – 0.3mm Infill:
20% Notes:
See provided screenshot for best printing orientation, and information on which pieces need support:http://imgur.com/4sP0OGc
Post-Printing
Gluing the magnets
To glue the magnets, you can either use Super Glue (cyanoacrylate), or epoxy. Make sure the surfaces are clean (no grease/oil from fingers) and additionally you can scorch the surface of magnets for better adhesion (i.e. with screwdriver).
Things to keep in mind:
Make sure the polarities are correct!
Really, I can’t stress this enough 🙂 Double and triple check before gluing. Also, use same polarities for mounts of both controllers, so they can be used interchangeably (this can be helpful if you need to swap them, for any reason).
Let the glue dry/cure fully – neodymium magnets are quite strong, and we don’t want them to pop out mid-game
And please refer to the photo of assembled stock for reference on how the pieces come to life together 🙂 Note that there’s one “Rail” piece between the “stock A” and “stock B” pieces. -
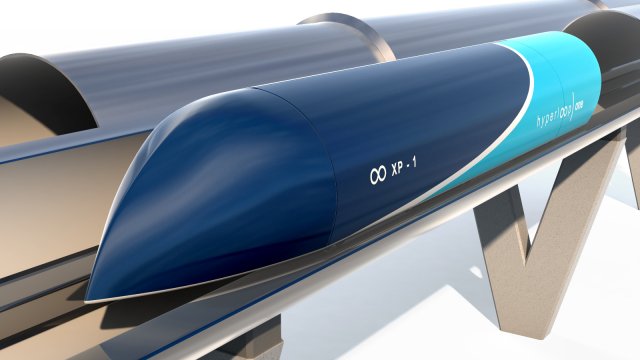
Hyperloop one XP-1 3D Model
High Quality 3d model Hyperloop one XP-1 transporter.Originally modelled in 3ds max 2014 Poly+Turbosmooth,well optimized and good topology with Unwrap UVWAlso included 3d model of Tunnel
-

Two compact cassette. Denon and Goldstar 3D Model
model of music cassette.Model is high accurate , high detailed, high quality good for extreme close up renderings.
-
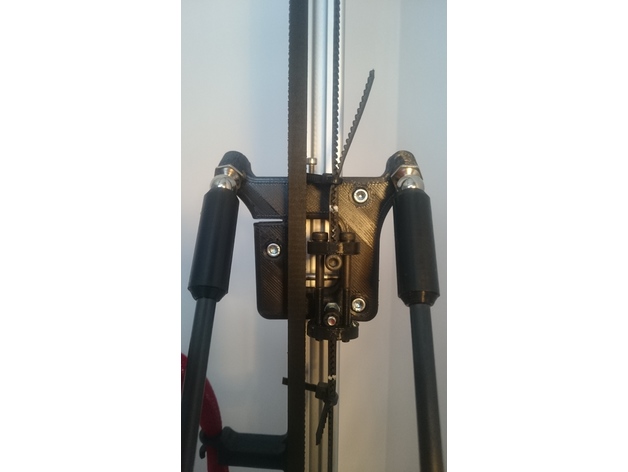
64mm Magnetic Carriages 3D Print Model
Summary
This is a remix of Hayden’s 2020 carriage. I like his idea because makes the carriage very light and has the advantage of fine belt tensioning.
The differences are:
64mm rod spacing to work with the 64mm 3xPiezo Magnetic Effector here https://www.thingiverse.com/thing:2361081
and 3mm holes for M3 bolts to work with Delrin V-Wheels from http://www.think3dprint3d.com and 20mm wide extrusions from Motedis Profile 20 I-Type slot 5 http://www.motedis.co.uk/shop/Slot-profiles/Profile-20-I-Type-slot-5:::999991_99999133.html or Misumi http://uk.misumi-ec.com/vona2/detail/110302684350/?HissuCode=HFS5-2040-%5B50-4000%2F0.5%5D&PNSearch=HFS5-2040-%5B50-4000%2F0.5%5D&KWSearch=HFS5-2040&Keyword=HFS5-2040&searchFlow=results2products&Keyword=HFS5-2040
They have the same wheel spacing so can also work with extrusions and 15mm diameter V-wheels from OpenBuilds or RobotDigg.com if you modify the hole size. I’ve attached CAD files for this. If you need other formats please let me know.
Per carriage, you will need:
3x Delrin V-wheels from www.think3dprint3d.com
2x 10mm ball studs from Haydn http://www.MagBallArms.com
3x M3x30 bolts.
10x M5 nylock nuts
6x M3 washers
2x M3x35 hex bolts for the belt tightener.
2x M3 nuts for the belt tightener.
1x M3x40 hex bolt for preloading the carriage wheels.
1x M3x20 hex bolt for the vertical post for the lower G2 belt attachment.
1x M3x15 bolt for upper belt attachment
1x M2.5×12 hex for fine end stop tunning
9x M3x4mm spacers http://www.ebay.co.uk/itm/142378241665
The spacers are to be placed between the bearings in each wheel. That helps a lot with wheel alignment.
Between every wheel and the carriage, there is one nylock nut and two washers. Is best to fit them first and measure all three with a caliper before you fit the wheels. This way you know all three wheels, when fitted, will be the same distance from the carriage. Nylock nuts can differ by as much as .4mm.
My Kossel is built with Robogigg metal corners and I’ve twisted the belt to run over the idler pulleys. They run very smooth this way.
Cable ties should not be necessary if part “b” and “c” are precisely printed.
Some of Robodigg f623zz bearings started being noisy after 6h of use so I’ve replaced them with some EZO made in Japan.
Enjoy! -

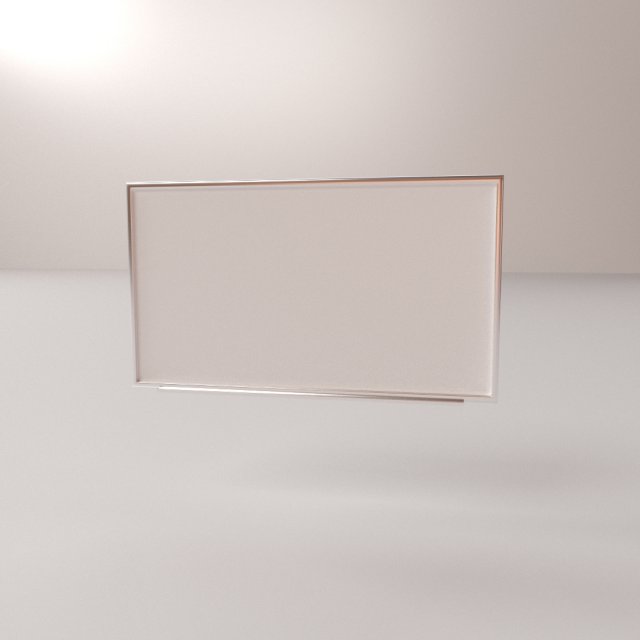
Whiteboard 3D Model
WHITEBOARD===============================- Modeled in Blender.- Preview image rendered using cycles.- All scene are included in .blend files.- Poly count are before sub division- Great for close up render.- All parts and materials are logically named.OTHER FORMATS=================- 3ds MAX- COLLADA (.dae)- Autodesk FBX- OBJ
-

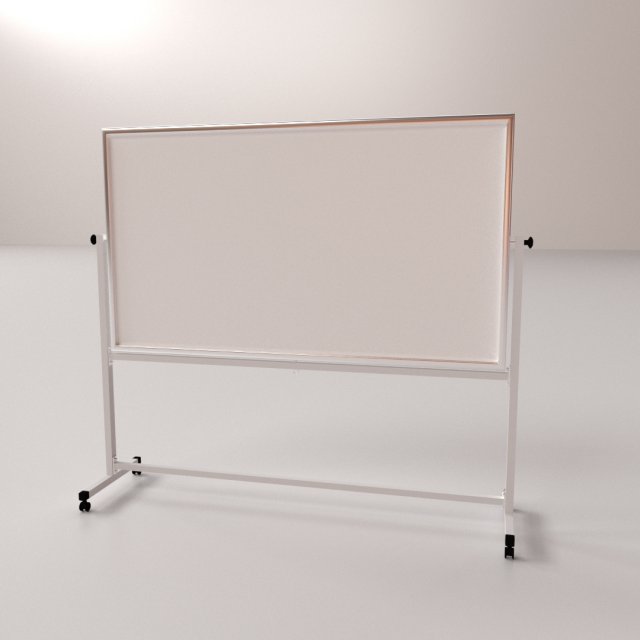
Whiteboard with stand 3D 3D Model
3D Model of Whiteboard with standThis ‘Whiteboard with stand’ is a high quality, photo real model that will enhance detail and realism to any of your rendering projects, detailed design that allows for close-up renders, and was originally modeled in 3DS MAX 2009 and rendered with V-RayAvailable in the following file formats:- 3ds Max 2009 with V-Ray 2.0- FBX 2009- OBJ 2009- 3ds 2009Turbosmooth is applied..- You can make the Poly count higher by the Meshsmooth and TurboSmooth level.- Colors easily modified- Highly detailed model- Just put model in your scene and render- Completely ready for use in visualization- Ideal for photorealistic visualizations- Ideal for close up- All scene files are included.- All scene images are from Vray.- All Materials are logically namedThe main format is in 3ds max 2009.Satisfaction GuarranteedThanks
-

3D model Whiteboard with stand 3D Model
WHITEBOARD WITH STAND===============================- Modeled in Blender.- Preview image rendered using cycles.- All scene are included in .blend files.- Poly count are before sub division- Great for close up render.- All parts and materials are logically named.OTHER FORMATS=================- 3ds MAX- COLLADA (.dae)- Autodesk FBX- OBJ
-
Whiteboard with stand 3D Model
WHITEBOARD WITH STAND
===============================
– Modeled in Blender.
– Preview image rendered using cycles.
– All scene are included in .blend files.
– Poly count are before sub division
– Great for close up render.
– All parts and materials are logically named.
OTHER FORMATS
=================
– 3ds MAX
– COLLADA (.dae)
– Autodesk FBX
– OBJ -
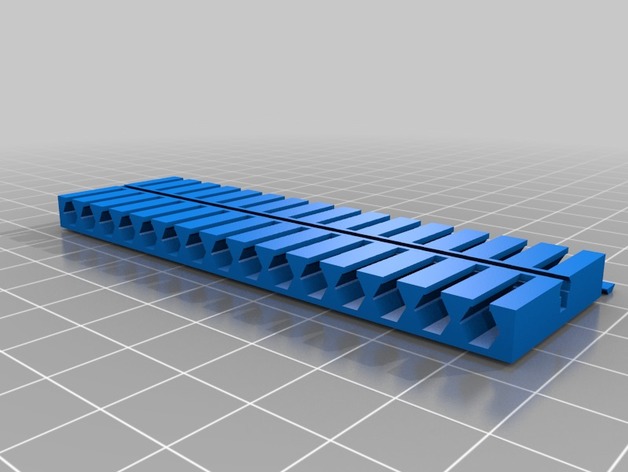
Micro Driver Magnetic Holder
Summary
Micro Driver Magnetic Holder (version 6) uses add-during-print (15) 2x5mm disc magnets.
My favorite precision bit set came with (3) junky 10-bit holders. I didn’t like that. This holds up to 30 micro screwdriver bits efficiently with easy release.
Prusu .15mm ‘optimal’ settings (modified infill for 2%) for PLA print (large face to the bed).
WARNING. I PROVIDE NO WARRANTY FOR THIS PRINT PROCESS: MAGNETS ADDED DURING PRINT. [USE ONLY NON-FERROUS HOT ENDS & NOZZLES]
VERY IMPORTANT PROCESS NOTES:
See notes on print settings.
Assembled dimensions:90.5mm x 27.2mm x 6mm
Version Information:
1.0 Initially holds 40 bits. Unprintable with conventional FDM printers.
1.3 Stacked more densely. Still un-extrudable.
2.0 Realigned bit holder to have a single flat back. Holds 20 bits.
3.0 Mirrored along X-axis allowing 40 bits. Simplified to 30 total.
4.0 Subtle redesign allowing for faster travel in several G-code settings.
5.0 Added magnetic mounts in center strip, unprintable. Revised documentation process.
6.0 Refined magnetic strip to include notches indicating pause position and ‘locking’ cap.
Print Settings
Printer Brand:
Prusa Printer:
Prusa Mk2 Rafts:
No Supports:
No Resolution:
.2mm Infill:
2% Notes:
WARNING. I PROVIDE NO WARRANTY FOR THIS PRINT PROCESS.
[USE ONLY NON-FERROUS HOT ENDS & NOZZLES]
VERY IMPORTANT:
This iteration requires a pause during print to insert the 15 disc magnets into the center holders before the lip is extruded above. This can be visually noted by the notches located at the top of where your magnets should rest. ENSURE YOUR MAGNETS ARE FULLY UNDER THE EXTRUDED LAYERS BEFORE PROCEEDING. Once you have inserted the magnets and confirmed that your extruded will not collide with them, resume the print.
Post-Printing
Add the ‘locking’ cap to finalize the magnets position, add a dot of hot glue (or other adhesive) if desired.