FURNITURE BRACKET
Tag: bracket
-
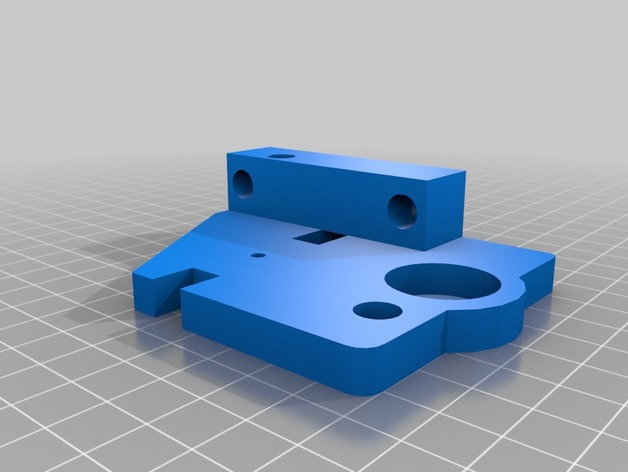
Geeetech i3 Pro B Top Z Bracket with M8 Support. 3D Print Model
Summary
Have some left over M8 all-thread after upgrading to lead screws? This might be the perfect up-cycle option for them
Print Settings
Printer:
Geeetech i3Pro B
Rafts:
Doesn’t Matter
Supports:
No
Resolution:
.2
Infill:
30 -
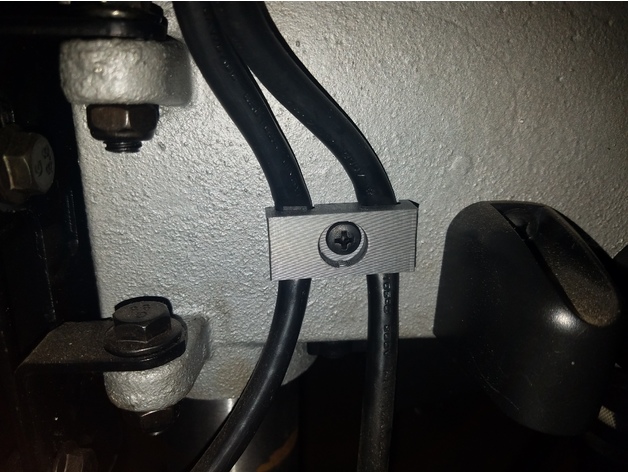
Ryobi Drill Press Power Cable Bracket 3D Print Model
Summary
This is a replacement for the dual power cable management bracket that comes with the 10″ ryobi drill press.
This was designed after the part that comes with the Ryobi 10 Inch with Laser (Model DP103L). It may or may not work with other ryobi drill presses.
https://www.homedepot.com/p/Ryobi-10-in-Drill-Press-with-Laser-DP103L/205503636
Print Settings
Printer Brand:
Prusa
Printer:
i3 MK2S
Rafts:
No
Supports:
Doesn’t Matter
Resolution:
.15mm
Infill:
30% -
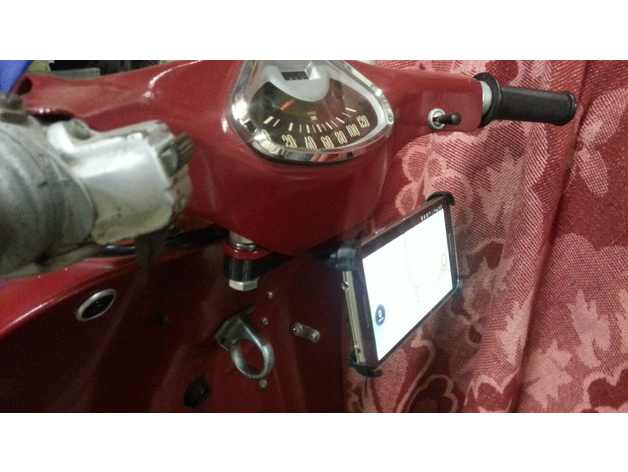
Samsung S5 Bracket for Heinkel Tourist Scooter 103 A1 & A2 (Windshield mount) 3D Print Model
Summary
I needed a way to hold my GPS when riding with my old Heinkel Tourist Scooter 103 A1.
I used the holder from here:https://www.thingiverse.com/thing:1114561 (Thanks For Sharing!) It’s a nice design, lightweight, yet sturdy.
I then designed an adapter for the windshield-holder on the scooter, to adapt to the S5 holder created by Sonmor.
I added the famous Heinkel logo on it. (just for show)
-Additionnel Parts-list-
You will need the following to assemble the whole thing:
2x M3 (16mm)
4x M3 Washers
2x M3 Bolts
2x M10 (40mm)
4x M10 Washers
2x M10 Bolts
-PrintStuff-
No need for supports, they are included.
PartII needs to be rotated so that the cylindres touch the buildplate.
Tested print on Prusa MKII.
-Material-
I advise to print in ABS as it’s sturdier, and UV-resistant. (NoFan, preferably a small brim to avoid warping of ABS)
-Assembly-
Remove supports from PartII. (they break off when twisting’em)
First assemble PartII and PartIII with the small M3 bolt’n screws.
Then use M10 bolt’n screws to attach to the windshield bracket.
Now clip the Samsung Galaxy S5 holder on it.
-Additional Idea-
I made an USB cable going from battery (with power adapter) to the underside of the handlebars .. so I don’t drain the S5 battery.
-Usage-
I put 4 small foam pieces in each corner of the bottom of the Samsung S5 holder, to keep the phone from shaking too much (oldtimer=vibrations), and avoid the risk of jumping out of the holder whiles driving.
That’s it.
I can only say how gratefull I am that people share stuff so others can change it. So if you’re keen to that principle, don’t go making money on what people share for free !
-enjoy- -
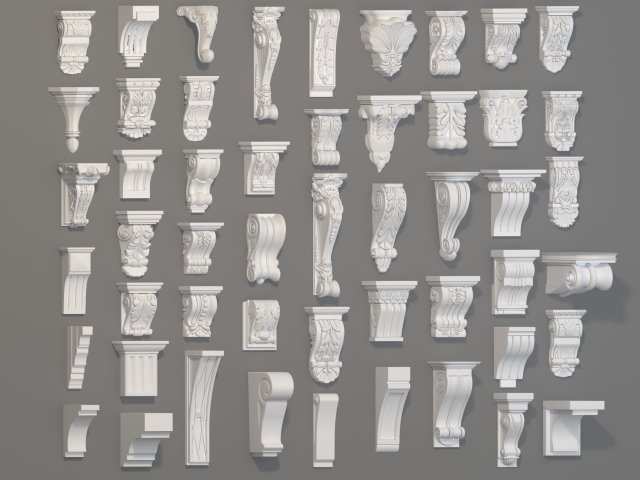
Corbels Collection -1 – 51 pieces 3D Model
51 piece corbelssome of models are triangulated (zbrush desimation master)include max(2015), fbx, obj and stl filesinclude Vray material and HDRI
-
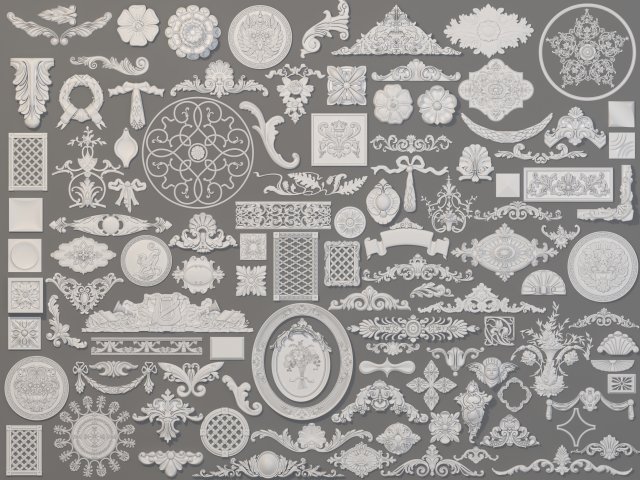
Carved Elements Collection -1 – 110 pieces 3D Model
110 piece carved elementssome of models are triangulated (zbrush desimation master)include max(2015), fbx, obj and stl filesinclude Vray material and HDRI
-
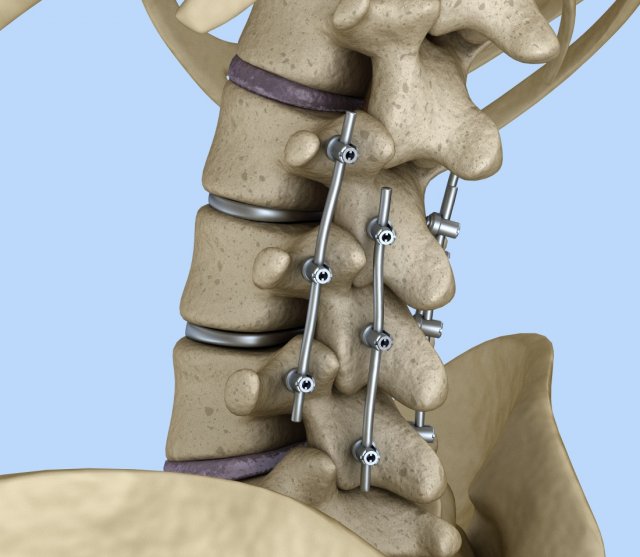
Spinal fixation system – titanium bracket 3D Model
Spinal fixation system – titanium bracket. Human Spine, spinal cord, sacrum and fixation system medically accurate high quality 3D model.Hi-Poly 3D model of human Spine with internal structure.Please use HDRi map (included) for reflections.Was used procedure materials for textures. If you want to use correctly colors and materials, please use max file.You can control polygons by using meshsmooth function .
-
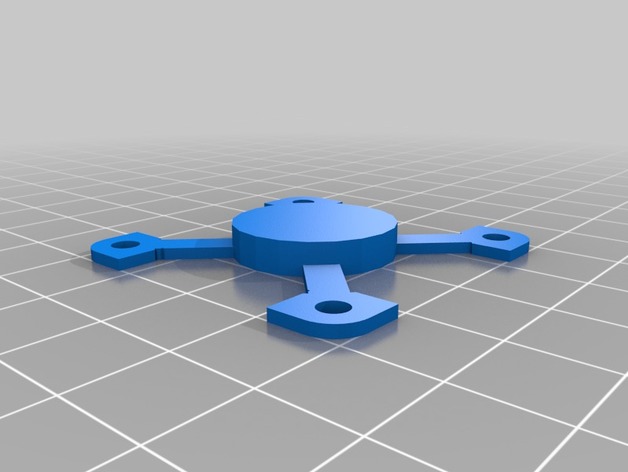
Minimalistic fan bracket / mount for 40mm fan on a nema 17 3D Print Model
Summary
I wanted to put a fan to a drive motor (nema 17), but do not have a lot of space for it, so I created this minimalistic fan bracket. Not ideal in any way, shape or form, but it does provide some cooling when there is little room for a fan.
Mount the bracket to a 40mm fan and glue the centre part with CA glue to the motor. Nothing more to it.
Print Settings
Printer:
Heavily modified mendelmax 2
Rafts:
No
Supports:
No
Resolution:
.250
Infill:
lots of it
Notes:
Print using a strong material and with lots of infill, since the arms are flimsy and need all the strength they can get. -
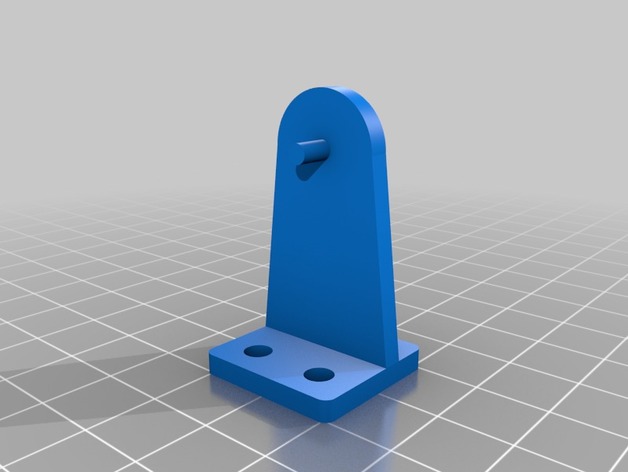
Blinds bracket 3D Print Model
Summary
I found a similar bracket on Thingiverse (https://www.thingiverse.com/thing:1890399) but I decided to make my own because:
1) the customizer wasn’t working:
/usr/local/bin/openscad/openscad: error while loading shared libraries: libCGAL.so.10: cannot open shared object file: No such file or directory
2) I wanted to add a truss to make the bracket stronger.
3) I enjoy making things in OpenSCAD…
NOTE: I did not use the referenced bracket OpenSCAD code so this is not a remix.
Print Settings
Printer:
XYZprinting Da Vinci 1.0
Rafts:
No
Supports:
Yes
Infill:
solidHow I Designed This
OpenSCAD… -
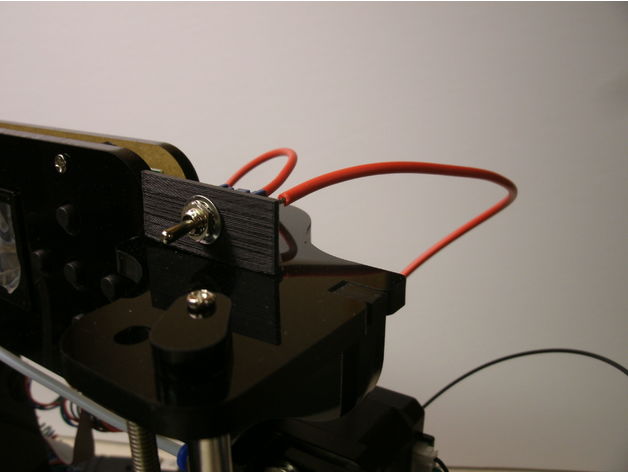
On-Off Switch Bracket 3D Print Model
Summary
I love my inexpensive 3D printer, but I hate the fact that to turn on or off my Startt 3D printer I had to remove transformer plug from rear of the printer. I designed a simple ‘L’ shaped bracket to support a $0.50(US) mini switch. Simply undo 2 screws at the top of 3D printer and secure the bracket.
Print Settings
Printer:
Startt
Rafts:
Doesn’t Matter
Supports:
Doesn’t Matter
Infill:
20%
Notes:
PLA filament 0.2mm layer -
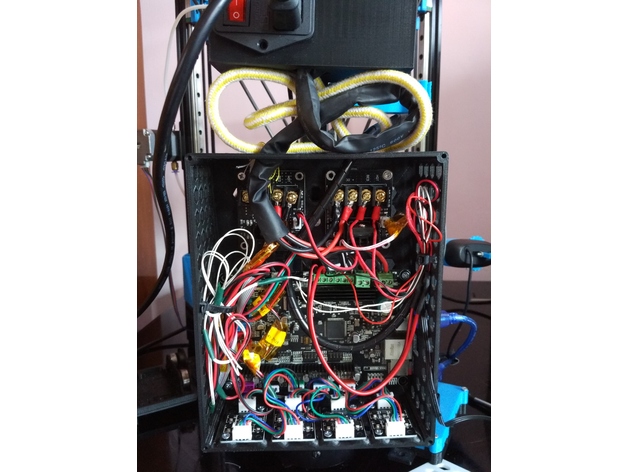
MKS SBASE 1.3 BOX include Dual Mosfet, Four TL-Smoother, and FAN 120mm and Bracket to Alumunium Profile 3D Print Model
Summary
This is MKS Sbase case the dimension is 200x160x63 need a larger printer to do that.
Support for dual mosfet and four TL Smoother
Cooling by 120 mm Fan
add three hole on center to mount to alumunium profile vertically
Print Settings
Printer Brand:
Prusa
Printer:
Prusa Clone
Rafts:
No
Supports:
No
Infill:
20 -
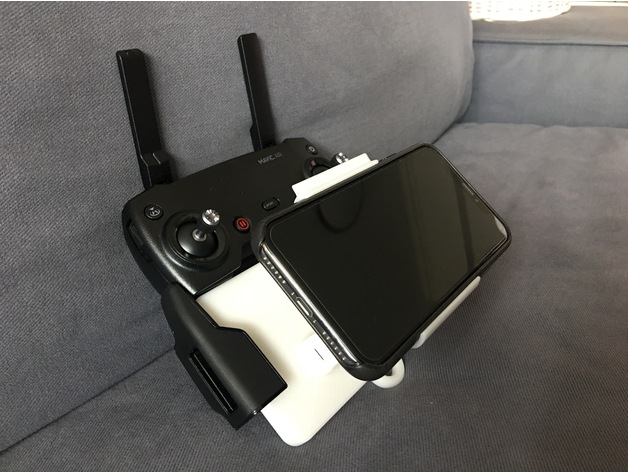
DJI Mavic Remote Control iPhoneX (with Apple Leather Case) Bracket 3D Print Model
Summary
DJI Mavic series remote control iPhoneX bracket
Suitable for Apple iPhoneX with Apple leather/silicon case -
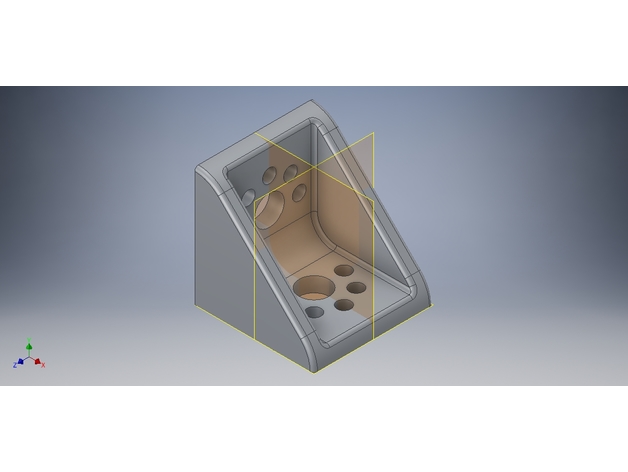
90 degree angle bracket for FTC Robotics 3D Print Model
Summary
Hello we are FTC team #9707. We have created this bracket for us with the Tetrix kit of metal parts designed for use in FTC Robotics competition. We designed this because we wanted a cheaper alternative to the metal ones that are commercially available. These cost between ten cents and one dollar each to make on a 3D printer. We hope you find these useful and if you have any questions or comments please let us know. -
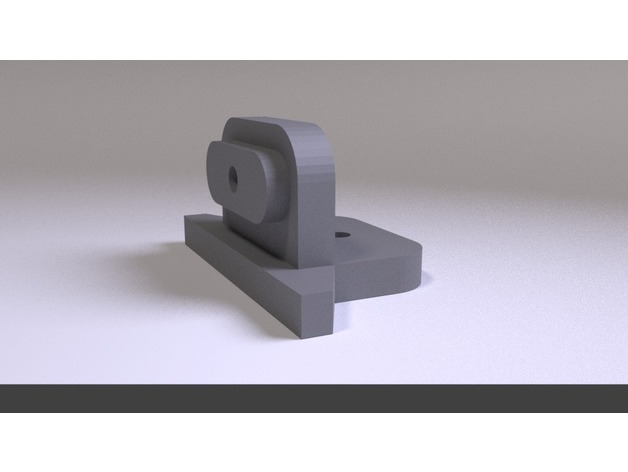
Anet Filament Spool Rack Bracket A8 / A2 3D Print Model
Summary
This bracket is designed for the Anet filament rack. The oval extrusion on the side of the bracket will fit snugly inside the oval cutout on the standard Anet filament rack. This was designed to mount on top of the Anet A2, however could be used for a wall or other type of mounting.
Print Settings
Printer Brand:
Prusa Printer:
Prusa Clone Rafts:
Doesn’t Matter Supports:
Yes Resolution:
.2 Infill:
28% or higher Notes:
1.6mm wall thickness -
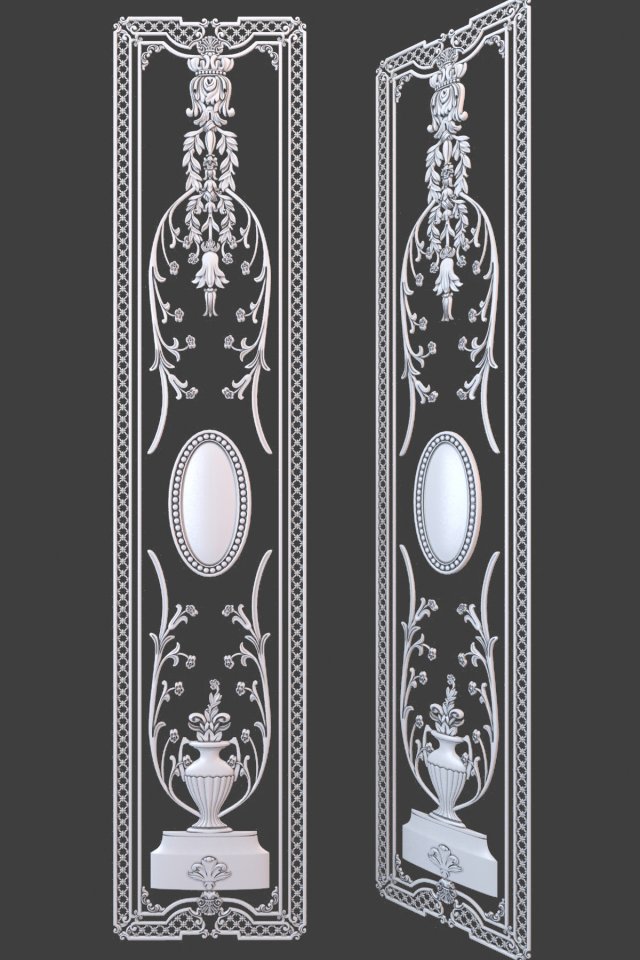
Architectural Elements 3D Model
– Photorealistic frame.- Executed in 3d max 2009.- All textures and materials needed for the rendering found in the archive.- Smoothing modifier is stored in the stack for convenience.-Gamma 2.2-Correction of textures and materials mood in 3d max, as well as tiling textures because of possible problems with the display of textures and materials in other programs distinct from 3d max and Vray-So there is an archive with de scene full studio tuned light.-For all questions with regards to the model, you can contact me through the administration of the site, if you want something to fix or correct, if something does not work
-
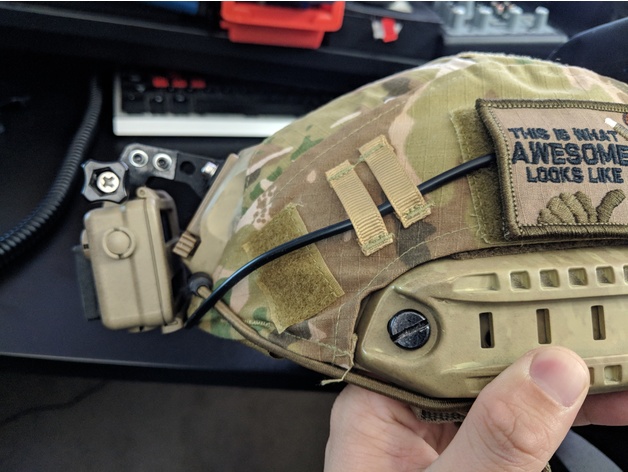
GoPro NVG Mount (Emerson Bracket) 3D Print Model
Summary
This is a Go-pro mount based on an Emerson NVG bracket (link below) to make a low cost, durable mount similar in style and positioning to the Brainexploder NVG mount (a touch overpriced on Shapeways).
Print the parts, assemble body + left/right plates with M3 screws and nuts. Mount this assembly to the bracket with M4 screws and nuts.
https://www.aliexpress.com/item/Tactical-Airsoft-Paintball-Fast-Helmet-Mount-NVG-Mount-Adapter-High-Quality-Outdoor-Hunting-Combat-Helmet-Accessory/32666867986.html?spm=2114.search0104.3.65.2mO1DF&ws_ab_test=searchweb0_0,searchweb201602_3_10152_10151_10065_10344_10130_10068_10547_10342_10343_10340_10548_10341_10084_10083_10139_10615_10307_10059_10314_10534_100031_10604_10103_10142,searchweb201603_40,ppcSwitch_5&algo_expid=45654ac3-db07-45a0-b95b-809b6d007090-9&algo_pvid=45654ac3-db07-45a0-b95b-809b6d007090&priceBeautifyAB=0 -
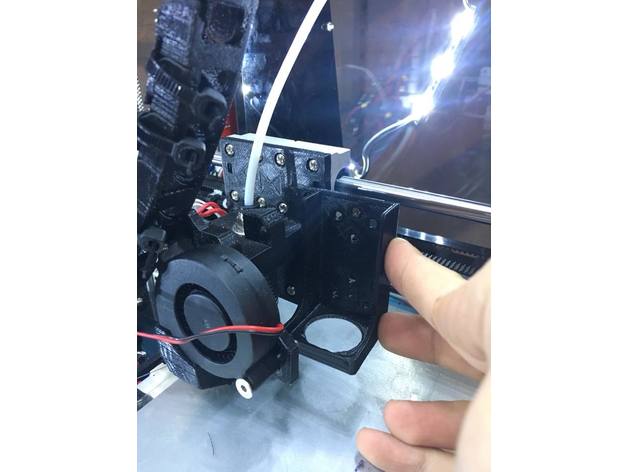
Anet A8 Laser bracket / Mount (Fits to E3D bracket) IN PROGRESS 3D Print Model
Summary
Anet A8 Laser bracket / Mount (Fits to E3D bracket) IN PROGRESS
I bought an laser to mount on my Anet a8.
But than i would need to take of my hotend, and recalibrate it every time.
Therefor i designed this bracket which i can mount next to my E3D V6.
I made this one for my 2.5W laser. -
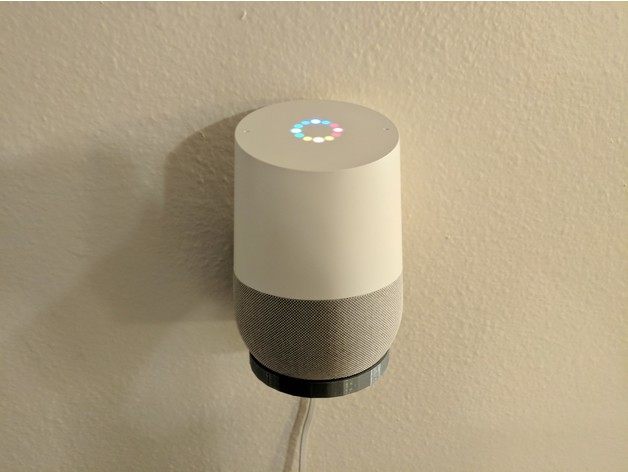
Google home wall mounting bracket 3D Print Model
Summary
This wall bracket works well.. Just dont over-tighten it because it will crack like in the picture.
Also, be sure that the cable is in place before screwing it down.
Print Settings
Printer:
Anet A8 Rafts:
No Supports:
No Resolution:
.2mm Infill:
20% Notes:
Easy print. -
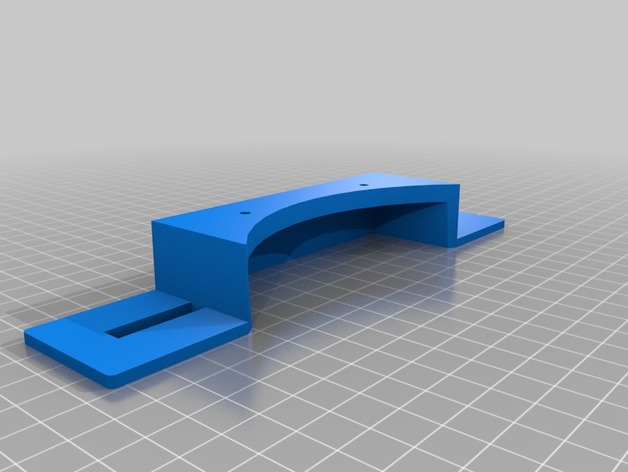
Jeep Wrangler Rubicon 10th Anniversary LED Fog Lights Bracket 3D Print Model
Summary
Made these to install some LED fog lights on my Rubicon with 10th anniversary bumpers. Holes for mounting the fog light to the bracket may need some adjustment (depending on the fog light type/brand), this can be easily done with a dremel tool or small drill.
Print Settings
Printer Brand:
Prusa Printer:
i3 MK2S Rafts:
No Supports:
Yes Infill:
100% -
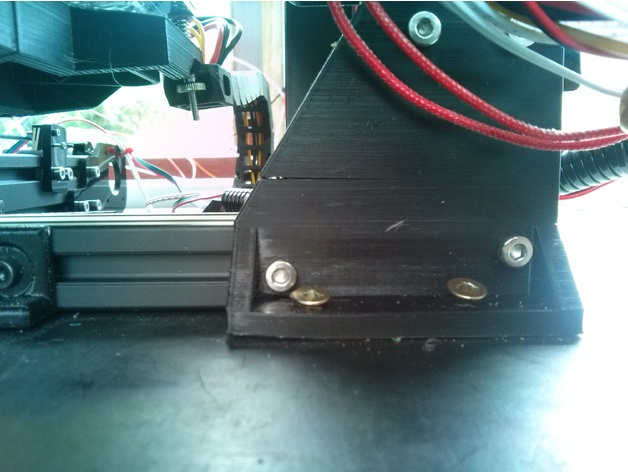
Tevo Tarantula Bottom Right Bracket 3D Print Model
Summary
Simple z axis strengthening bracket for bottom right hand corner
Print Settings
Printer Brand:
Prusa Printer:
i3 MK2 MMU Rafts:
No Supports:
No Resolution:
0.2 Infill:
25% -
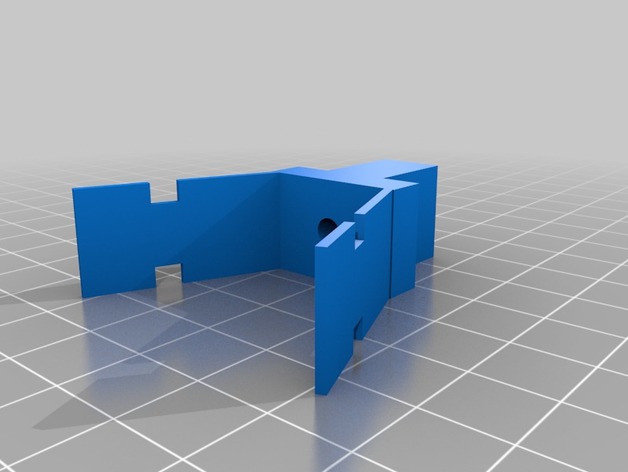
LED Light Bracket for Dept 56 House 3D Print Model
Summary
I didn’t like having to run the 120v cords into a bundle for our Department 56 Christmas village. It always seemed like a fire hazard.
I have designed this bracket to replace the original bracket and cord. I plan on attaching small LED lights to this and then wiring all this at 9-12 volts depending on how bright the lights end up being.
Print Settings
Printer:
Maker Select Rafts:
Yes Supports:
Yes Resolution:
.02 Infill:
25% Notes:
I did this with rafts and support, you probably don’t need the support but i did the raft because the wings are so thin. I have not printed without them.
Post-Printing
When I get finished with the project I will add more pictures and links to the material used to finish this out.
How I Designed This
I designed this in tinkercad. -
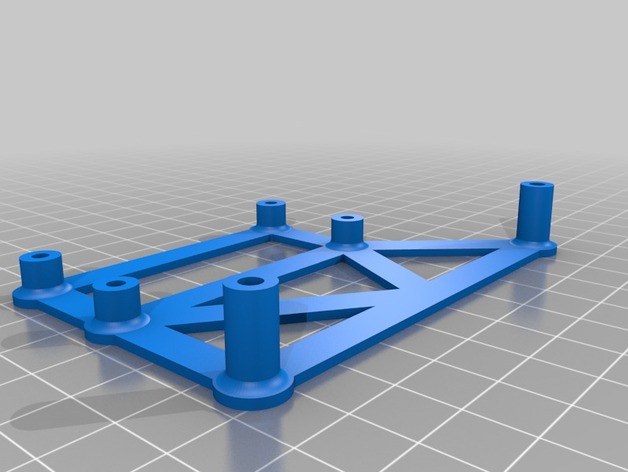
Raspberry Pi Zero (W) Mount Bracket for Anet A8 3D Print Model
Summary
Raspberry Pi Zero (W) Mount Bracket for Anet A8.
Remove the top two main board screws on the Anet A8 and replace the plastic distances with this mount bracket. Use four M3x8mm screws to secure the Raspberry Pi Zero to the mount bracket.
Print Settings
Printer:
Anet A8 Rafts:
Doesn’t Matter Supports:
Doesn’t Matter Resolution:
0.2mm Infill:
20% -
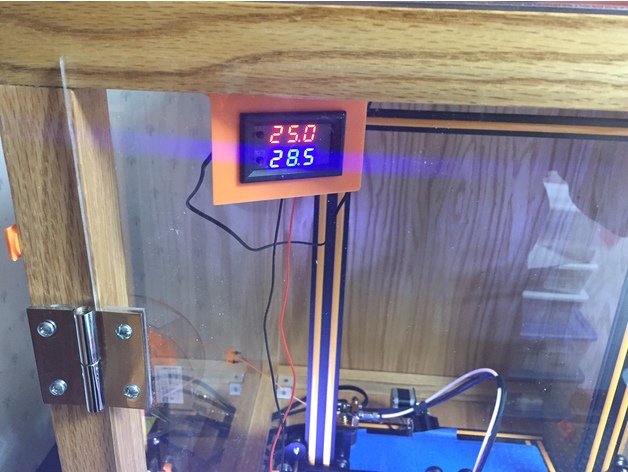
Mounting Bracket for Banggood Temperature sensor and fan control switch 3D Print Model
Summary
This is just a simple bracket to mount a Banggood temperature sensor and fan control switch I am using to monitor the temperature inside my CR-10 enclosure. It has a relay that can turn on a fan (non-PWM) base on the trigger temperature.
Link to the Banggood temperature sensor https://www.banggood.com/DC12V-50-110-Degree-LED-Digital-Thermostat-Temperature-Control-Smart-Sensor-Switch-p-1143380.html -

Hand Rail Bracket Hook 3D Print Model
Summary
This hook slides overtop of your handrail bracket. It provides great storage on the stairs for bags you need take on the go!
I scaled these hooks to my handrail brackets, but they should work fine if you scale them up or down to fit your handrail bracket sizes.
Holds up to 15 LBS!
Print Settings
Infill:
100 Notes:
I would recommend 100% infill if you have something heavy to hang.
I have tested this with up to 15 LBs and it holds it fine when using 100% infill.
How I Designed This
TinkerCAD.com -
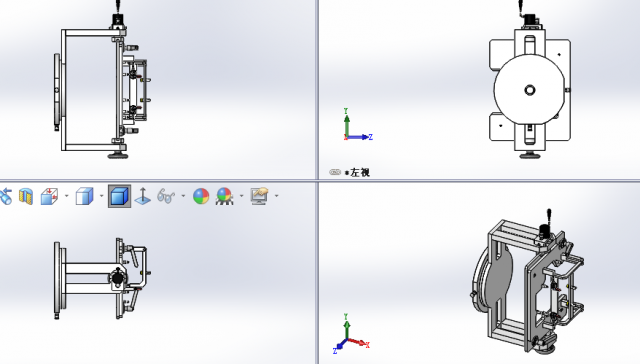
Manually rotating tool 3D Model
Manually rotating tool, which adjusts the station by manual rotation, while the position is recorded by encoder, while positioning fixture is used to locate the fixture.The agency USES low-cost, semi-automatic machines, with low cost and a welcome reference.This model is transformed into step and iges general model download, please refer to!Also includes 3d original files, welcome to download!if you like,you can paypal for you to get this models or if you have any questions also you can email to me.
-
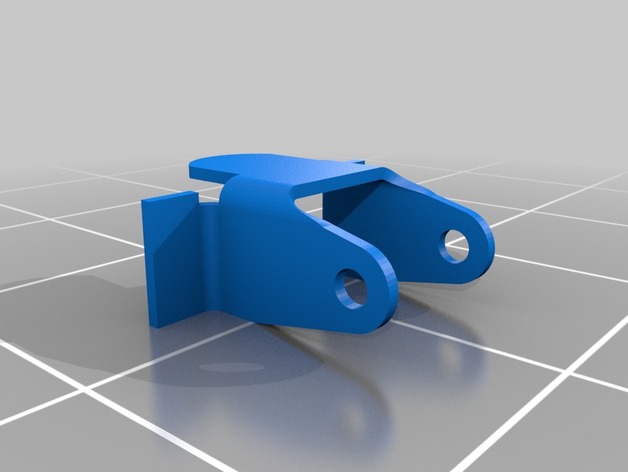
steering shock bracket 3D Print Model
Summary
custom design steering shock bracket for 97 ram 1500 4×4 -
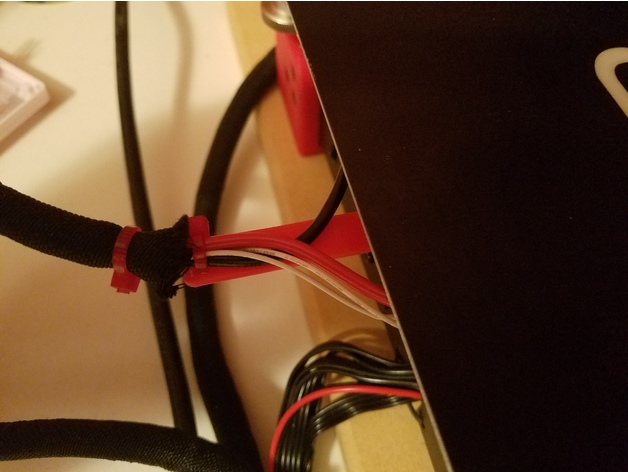
Monoprice Maker Select V2.1 Hot Bed Cable Bracket 3D Print Model
Summary
This is a bracket to help keep the hot bed wires from bending and hitting the build plate. It also keeps the wires low and away from a rear mounted part cooler when the extruder is near the rear of the build plate. The bracket is designed to work with the RepRap Champion Y Carriage Plate Upgrade for the Monoprice Maker Select / Wanhao Duplicator i3.
To install:
Place the bracket between the Y-carriage plate and the hot bed with the clips pointing down, near the hot bed wires. Hook the clip on the outside of the Y-carriage plate and slowly lift the end until the other clip clicks into place inside the Y-carriage plate cutout. It’s a tight fit so some trimming may be needed. Once the bracket is in place, lay the hot bed wires on top of it and use a small zip tie and the provide holes to secure them in place. Make sure the eyelet of the zip tie is on the upper side of the bracket to keep it from hitting the frame.
Print Settings
Rafts:
No Supports:
No Resolution:
0.2 Infill:
100% -
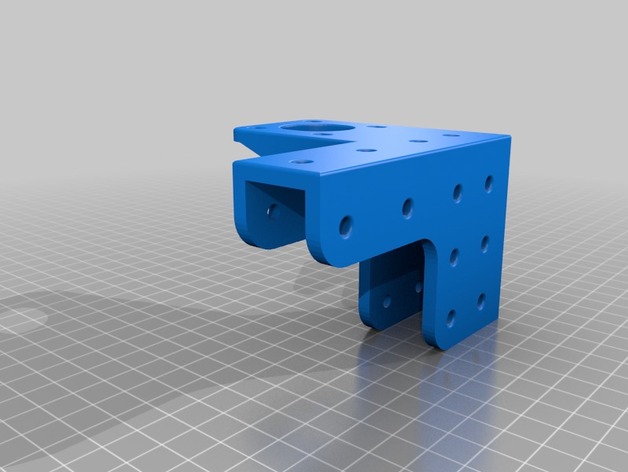
Modified R_Z_Top bracket 3D Print Model
Summary
Modified R_Z_Top bracket, moved the Stepper bracket to the far right to so that my ‘Oldham’ does not foul the X Carriage. -
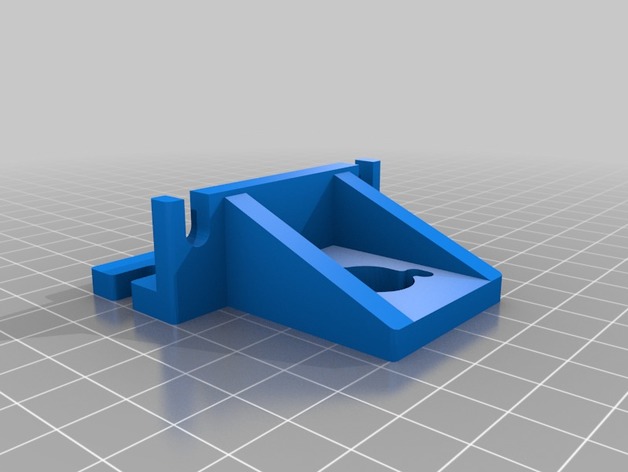
Hypercube Evolution Z-Nut Bracket v1.2 3D Print Model
Summary
Excellent Thing!
I had to remix mine to move the holes back about 3-4mm, works perfectly for my setup -
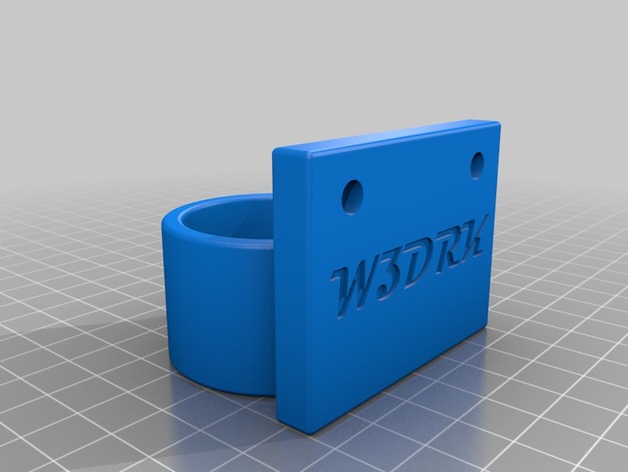
Berd-Air MAX Pump Bracket for Kossel Deltas 3D Print Model
Summary
I whipped this up to neatly mount my Bird-Air pump to the lower frame of my UltiBots Kossel D300VS delta. The bolt hole spacing is 40mm so the bracket can be fastened across the bottom pair of 2020 V-Slot rails with the air tube pointing forwards towards the effector “whip” mount.
Position the bracket on the “whip” side of the printer with the clamp portion of the bracket pointing down. Fasten bracket to the pair of 2020 V-Slot rails using two M5 x 10mm cap screws, then slide the pump into place and clamp with a M4 screw and nut. Take note the pump is slid into the clamp far enough to avoid obstructing the cooling holes! -
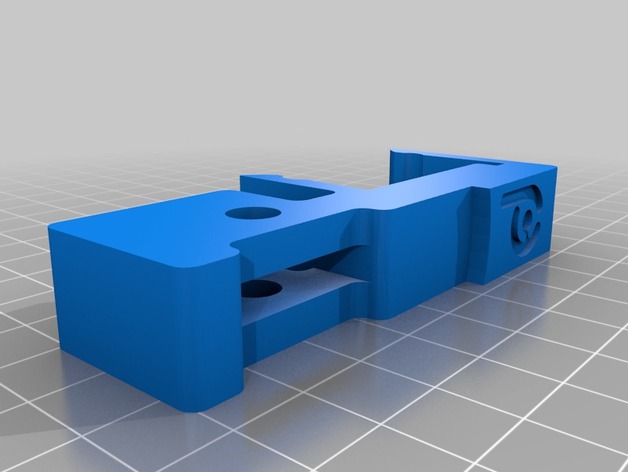
Peopoly Moai Dial Gauge Bracket 3D Print Model
Summary
This is a dial gauge bracket that friction fits on all sides of the build plate. The dial gauge can then be used to ensure the gap between build plate and vat is level on all sides.
The bracket has been designed around the digital dial indicator gauge available from Amazon and other places. It is available under several brand names, such as Neoteck and Wiysond. Here is a link to the Neoteck version on Amazon.
Simply attach the dial gauge to the btracket and secure tight to the bracket with an M6 bolt and nut. Then simply push the bracket onto the edge of the build plate at the required locations. Depending on how central your build plate is in relation to the vat you may need to adjust the bracket in or out slightly to ensure the tip is central on the vat top edges.
NOTE: You will need to adjust the Z Reset Position in the Advanced Menu to 60 to have the right position for the gauge to measure. Once the build plate has settled at the reset position attach the bracket, not before.
Print Settings
Rafts:
No Supports:
Yes Infill:
40% + recommended for strength in the flex arms. -
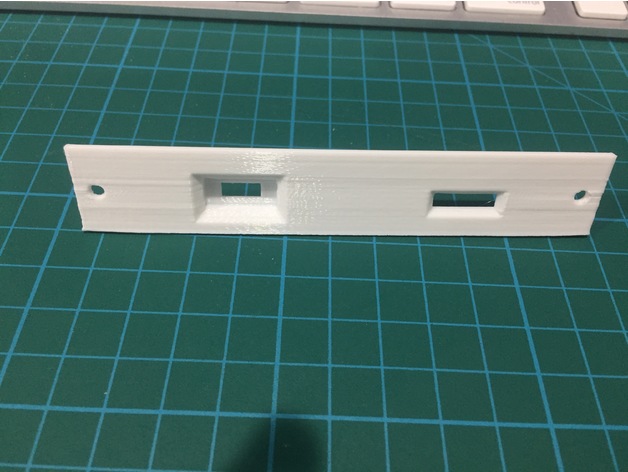
SCSI2SD Mac SE Bracket 3D Print Model
Summary
Macintosh SE expansion port mount for SCSI2SD v5
My SE has dual floppy drives, and I didn’t want to remove a floppy drive, or mount the SCSI2SD close to the CRT on top of the floppy drives.
Print Settings
Printer:
FF Creator Rafts:
No Supports:
Doesn’t Matter Resolution:
.2 Infill:
25% -
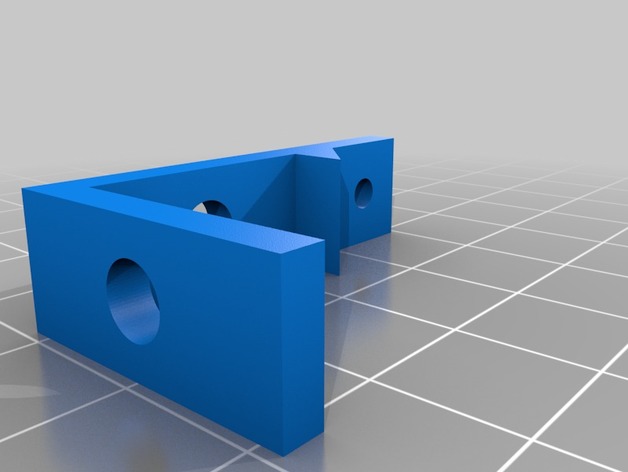
Heated Bed Bracket 3D Print Model
Summary
I needed a redone bracket for my 300×200 bed so I created this, as the aluminum extrusions I purchased were too long (for the bed). -
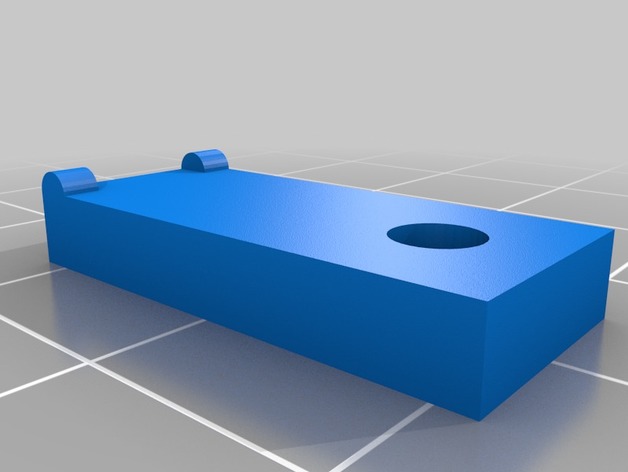
Taz 4 (or 5) Hot End Extruder Bracket Clamp 3D Print Model
Summary
I still use my Taz 4 which I bought in 2014. One thing that always annoyed me was the fact that the hot end assy holder which only has one screw at the top (for quick assembly) allows the weight of the extruder and hotend parts to allow the bracket to pull forward at the top corners of the bracket. I usually use some plastic clamps to pul the bracket back at the corners to the X-carriage and double bearing holder. I would be happier if the design used screws at the corners. The result of the corners pulling away from the carriage is some slop in the hotend which causes deviations and irregularities in the paths as the hot end changes direction. Some of that can be seen as patterns over a large flat surface. The clamps help some, but the entire system has play so you cannot get rid of all of it. Also, poor adjustment and leveling of the bed can make this issue worse.
Anyway, I have used some cheap plastic clamps from Harbor Freight but they pop off easily because of the geometry, and I decide to do something to improve the clamping.
The result is what you see here. It uses two different clamp pieces and a 6-32 x 1.25″ long machine screw and two #6 nuts (because that’s what I had). You could use M3 hardware of the same length. On each corner the existing outer top double bearing holder screw and washer is used to hold the shorter part of the clamp. It is a bit too short for my taste so I will get an M5-.5x15mm screw when I get a chance. The stock one is a bit short even though I recessed it into the clamp. But it works for now. Note that the long clamp has two bumps on one side that go against the extruder bracket. On the left side those two bumps actually straddle the gusset. The extra nut is to help keep the bracket straighter. As you can see it starts to tilt as it is tightened. You only need to tighten it enough to pull the bracket against the X-carriage; just lightly tightened. If I figure out something better, I will revise this. This design will fit both the V1 Budahschnozzle and V2 all metal extruder brackets. (The heights are different). You may need to clean up the holes with a .140″ and .130″, or close, bit to insert the screws more easily. I used a fairly high fill: 90%. I used ABS with a .5 nozzle, .20mm layers and slowed it down about 20% to get the parts to stick well.
There are other solutions involving a major overhaul to the X carriage parts, but this is a fairly easy improvement. -
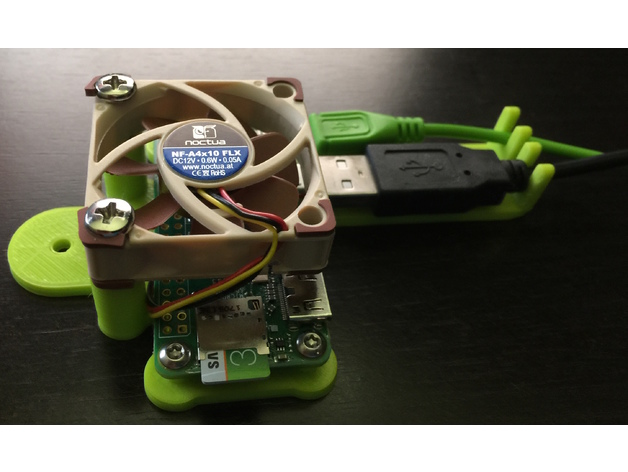
Raspberry Pi Zero wall mount bracket 3D Print Model
Summary
Due to a lack of space, I needed a way to mount raspberry pi zero on the wall. Hope you’ll find it useful for your project(s).
DC Fan dimensions: 40mm x 40mm. -
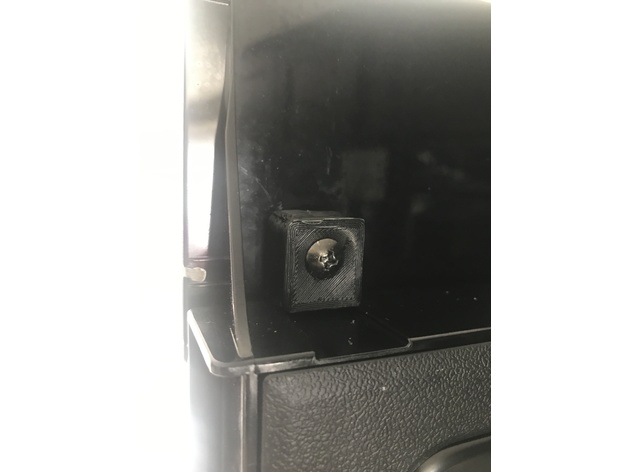
Samsung Microwave handle bracket 3D Print Model
Summary
My samsung microwave handle broke while opening the door. the inside bracket, which is part of the interior door panel, where the screw goes is super flimsy. this slips right over the original screw hole and you can use the original screw to secure it.
printed in ABS
Print Settings
Printer Brand:
Wanhao Printer:
Wanhao Duplicator i3 V2 Rafts:
No Supports:
No Resolution:
.2 Infill:
100% -
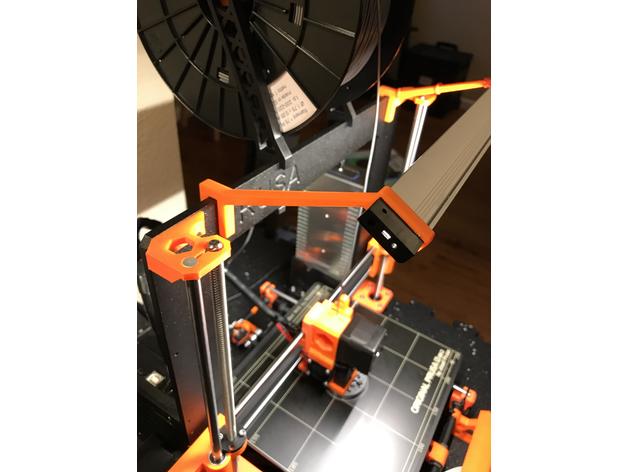
Prusa i3 MK2/MK2S Light Bracket 3D Print Model
Summary
I designed this light bar bracket in Fusion 360 for my i3 MK2S. it its a nice tight fit over the plastic end caps of the light bar but moves more freely once over the extruded aluminum. The light bar used is the following: https://www.lowes.com/pd/Utilitech-11-8-in-Plug-in-Under-Cabinet-LED-Light-Bar/1000033647
The light is activated by waving your hand underneath. It is also dimmable if you hold your hand under the sensor. Once the desired brightness is achieved, move your hand.
Print Settings
Printer:
Reality CR10 Rafts:
No Supports:
No Resolution:
0.3 mm Infill:
25% -
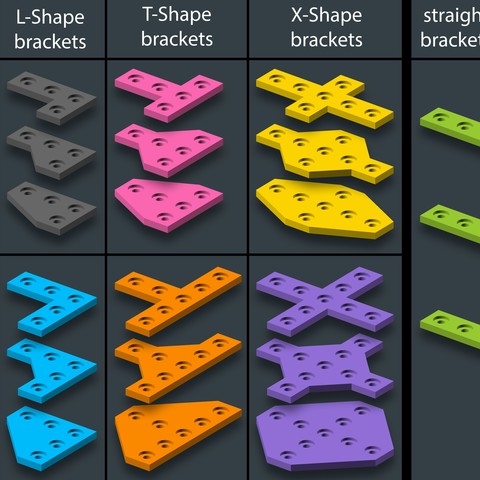
Customizable Plate Bracket for Aluminium Extrusion Profiles (Misumi 2020, 2040, 4040, …) 3D Print Model
This is a customizable 3d model that allows you to create and print aluminum extrusion brackets for different types and sizes of extrusion profiles.
-
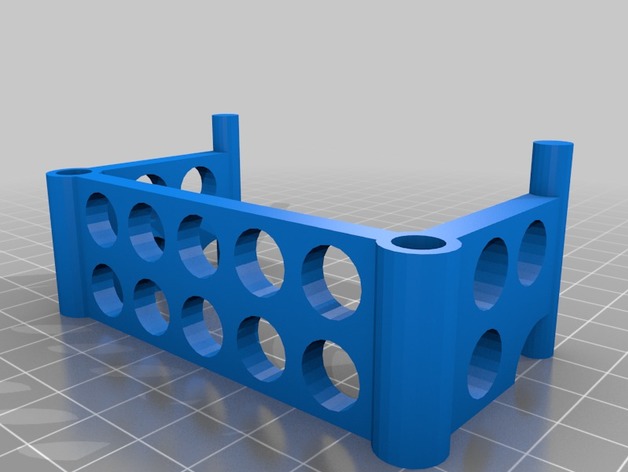
Wanhao Duplicator 4x Filament Alignment Bracket 3D Print Model
Summary
Filament alignment bracket to fit Wanhao Duplicator 4x -
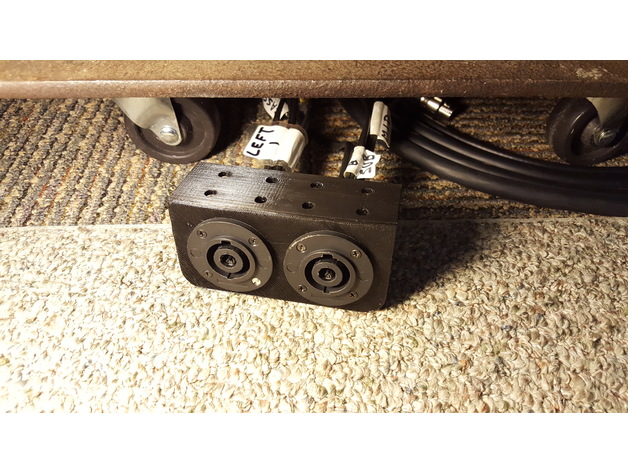
Speakon flange bracket (double) 3D Print Model
Summary
I needed to move my amp rack back a couple feet but the cables weren’t long enough, my solution was to move my speakon connectors from the back of the rack to the front as the individual speaker leads were easier to lengthen than the 8 conductor speakon cable.
The bracket was made in tinkercad in less than ten minutes but the printing took four hours.
It fits the 8 conductor speakon flanged outlet nicely.
The sound system was featured in this article, https://kioskfan.wordpress.com/2013/08/26/designing-a-crossover-exposes-more-faults-than-solutions/
Print Settings
Printer:
DMS DP5 Rafts:
No Supports:
No Infill:
22% Notes:
Cheap PLA, it’s just a bracket. -
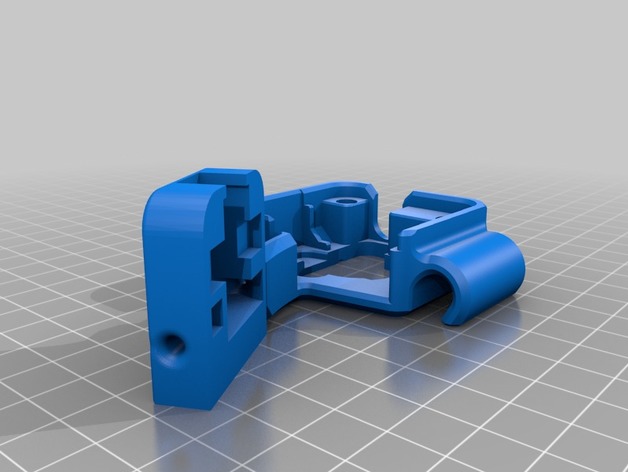
Cr-10 Filament Sensor Bracket 3D Print Model
Summary
PRINT:
NOTE: When using S3D slicer you must do: Mesh -> Separate Connected Surface
Otherwise you will get a hollow bits.
For Cura im not sure if you have this ability, please comment if you know how to fix the issue.
Sorry just my lack of design ability led to this issue.
I designed a Bracket to hold a filament run-out sensor i bought off ebay.
This gives my 3d printer the ability to sense when there is no more Filament left, and pauses the print.
It slips over the Extruder, and also has a cable holder integrated.
The design allows it so you can use a small amount of PTFE tube to make it easier for the filament to guide into the extruder motor.
Sensor i used:http://r.ebay.com/PxV1Jx
Connected to: Raspberry pi 3B
For setup: https://youtu.be/j7JfQXTf16U
Print Settings
Printer:
Creality Cr-10 Rafts:
No Supports:
Yes Resolution:
0.2 Infill:
10 Notes:
Supports settings:
Support pillar resolution: 2.5mm
Max overhang angle: 65 Degrees.
PRINT:
NOTE: When using S3D slicer you must do: Mesh -> Separate Connected Surface
Otherwise you will get a hollow bits. -
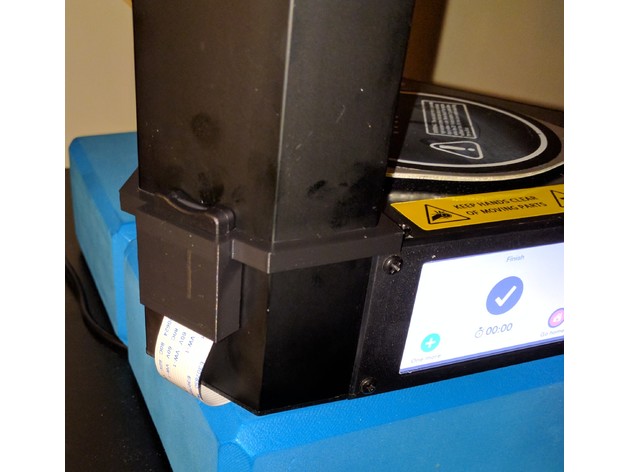
Monoprice Mini Delta SD Card Extender Bracket 3D Print Model
Summary
The SD card slot on the MP Mini Delta isn’t in a great position for easy access, so I purchased an SD card slot extender to move it to the front. This securely fastens it in place.
SD Card Extender: https://www.amazon.com/LANMU-Extension-Extender-MicroSDHC-Raspberry/dp/B01D9J8KQE
Print Settings
Printer Brand:
Prusa Printer:
i3 MK2S Rafts:
No Supports:
No Notes:
This is an extremely snug fit to ensure it’s secure when it clips on. If your machine over-extrudes, you may want to print scaled up 1-2% to make up for that. -
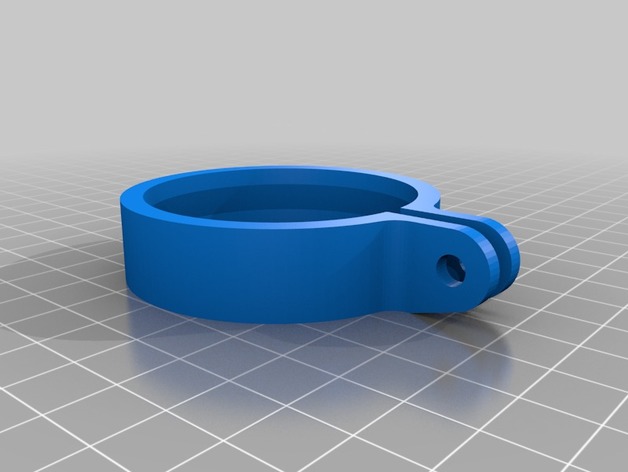
Antech Light to GoPro Bracket 3D Print Model
Summary
This is a bracket to adapt an Antech light (http://a.co/jfEcPOR) to a standard GoPro mount.
Print Settings
Printer Brand:
Tinkerine Printer:
Ditto Pro Rafts:
Yes Supports:
Yes Resolution:
0.2mm Infill:
80% Notes:
The default mount that came with the light did not seem strong enough to resist a mountain bike ride, which is what I need it for.
I included a cutout for the cable to exit towards the front, but there is actually enough space for it to go directly to the back between the “legs”, as shown on the pictures.
Post-Printing
After printing, I had to trim a bit the bottom face for the stop to fit in the grove between the cooling fins. Also, the fit was extremely tight; the GoPro mount was really bent at first. After a few days under stress, it looks like the bracket extended a bit and now the fit is perfect.
The model I uploaded has a slightly larger inner diameter and slightly thinner stop, so that should provide an easier fit (although not tested). -
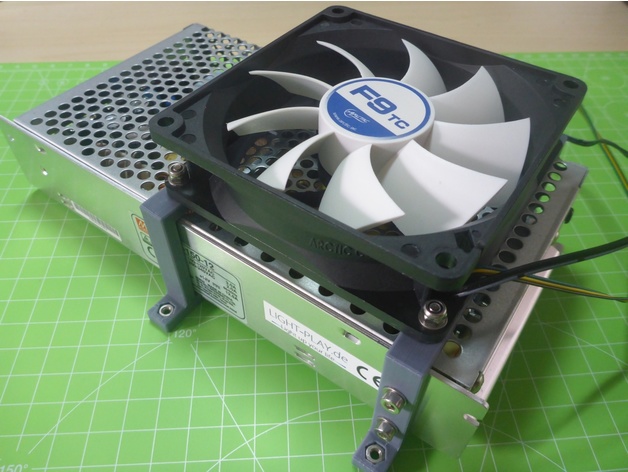
RS-150-12 Bracket / Fan Mount 92mm 3D Print Model
Summary
RS-150-12 bracket and fan mount for 92mm fan.
The front bracket (filename_F) has two mounting holes to secure the power supply (M3*8).
To attach it to the board, simply drop four M3 nuts into the holes.
Mounting Holes: 118,5mm x 82,5mm x 3,5mm -
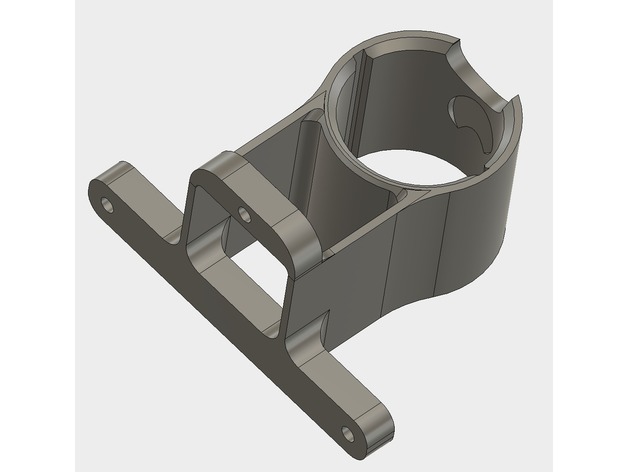
Dyson V8 accessory mounting bracket 3D Print Model
Summary
The Dyson V8 comes with 6 fittings (7 if you count the pipe) but only 2 places to hang them. My broom closet is rather small so I needed a way of mounting where I could choose the placement for each fitting. The mount has been designed so that the Dyson fittings hang from it.
Print Settings
Printer:
Anet A8 Rafts:
Doesn’t Matter Supports:
Yes Resolution:
0.2 Infill:
40% Notes:
Refer to the picture to see print orientation. The supports breaks out easily. Minor cleanup required but Dyson parts will fit directly as it comes from the 3d printer. I included the gcode if you trust the way I sliced it 😉 and are printing with PLA. Otherwise, use the stl and slice it yourself.
Post-Printing
Minor cleanup and removal of the supports. Best way to mount is to pilot drill a single hole to start and then screw the bottom of the bracket onto the wall. This will allow you to rotate till level and then pilot drill the top 2 holes and fix with appropriate screws. -
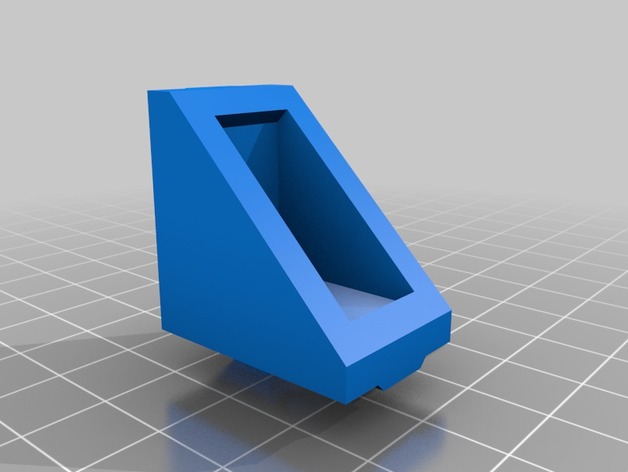
2020 Corner Bracket w/nut stop 3D Print Model
Summary
This is a 2020 corner bracket that has a built in stop for square nuts, which makes alignment easier when using them.
Created this because I’m using 8x8mm square nuts for my current d-bot build, and got sick of having issues with lining them up with my corner brackets so I made these to help me out.
Print Settings
Printer:
Custom Rafts:
No Supports:
No Infill:
100 Notes:
Put the face of the bracket on the print bed, and no supports are needed. I print at 100% infill since I’m using PLA and wanted rigidity. -
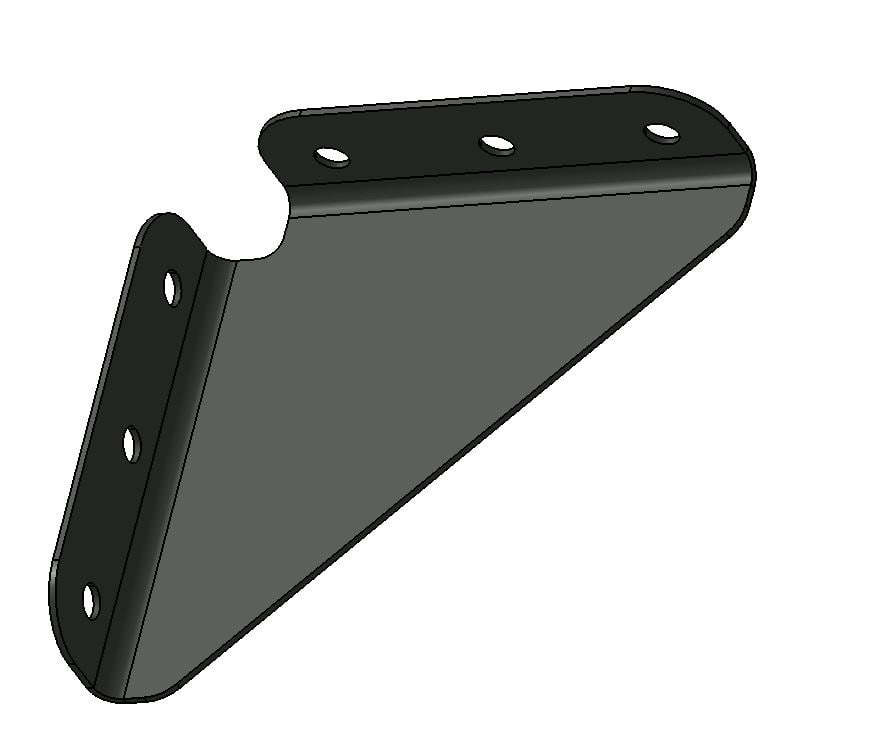
Stiffener Bracket 3D Model
Simple stiffener bracket made in Catia. This one is with two flanges and 3 number 10 fastener holes on each flange. I can provide any fastener size and hole count as required with the flange size adjusted accordingly. Likewise, I can also modify the sheet metal thickness as required (this one is .40 inch thick by default). The option of having a fully parametrized model is also available please contact me for more details.
-
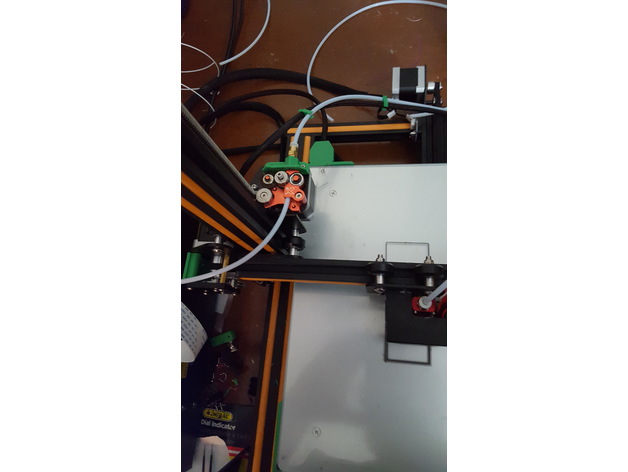
CR-10 Flexion bracket 3D Print Model
Summary
This is a bracket to let you put a flexion extruder on your CR-10. -
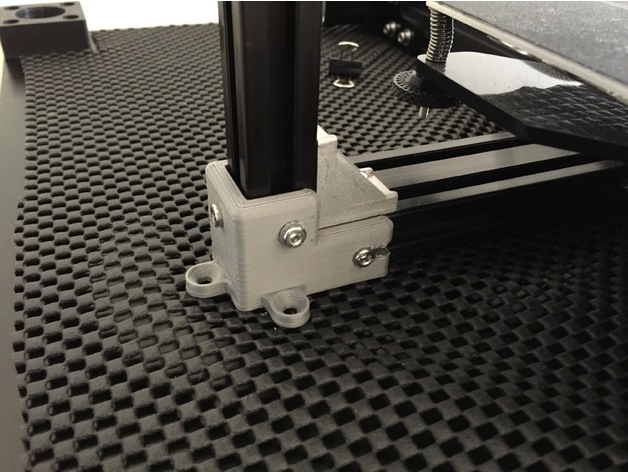
Tevo Tarantula bracket 3D Print Model
Summary
This bracket is to attach the left side of the Tarantula frame to a Lack table or other surface.
It attaches to the frame using 5 x M4 8mm screws and M4 T-nuts. 3 screws are then used to secure it to the surface.
Right hand bracket to come…… -
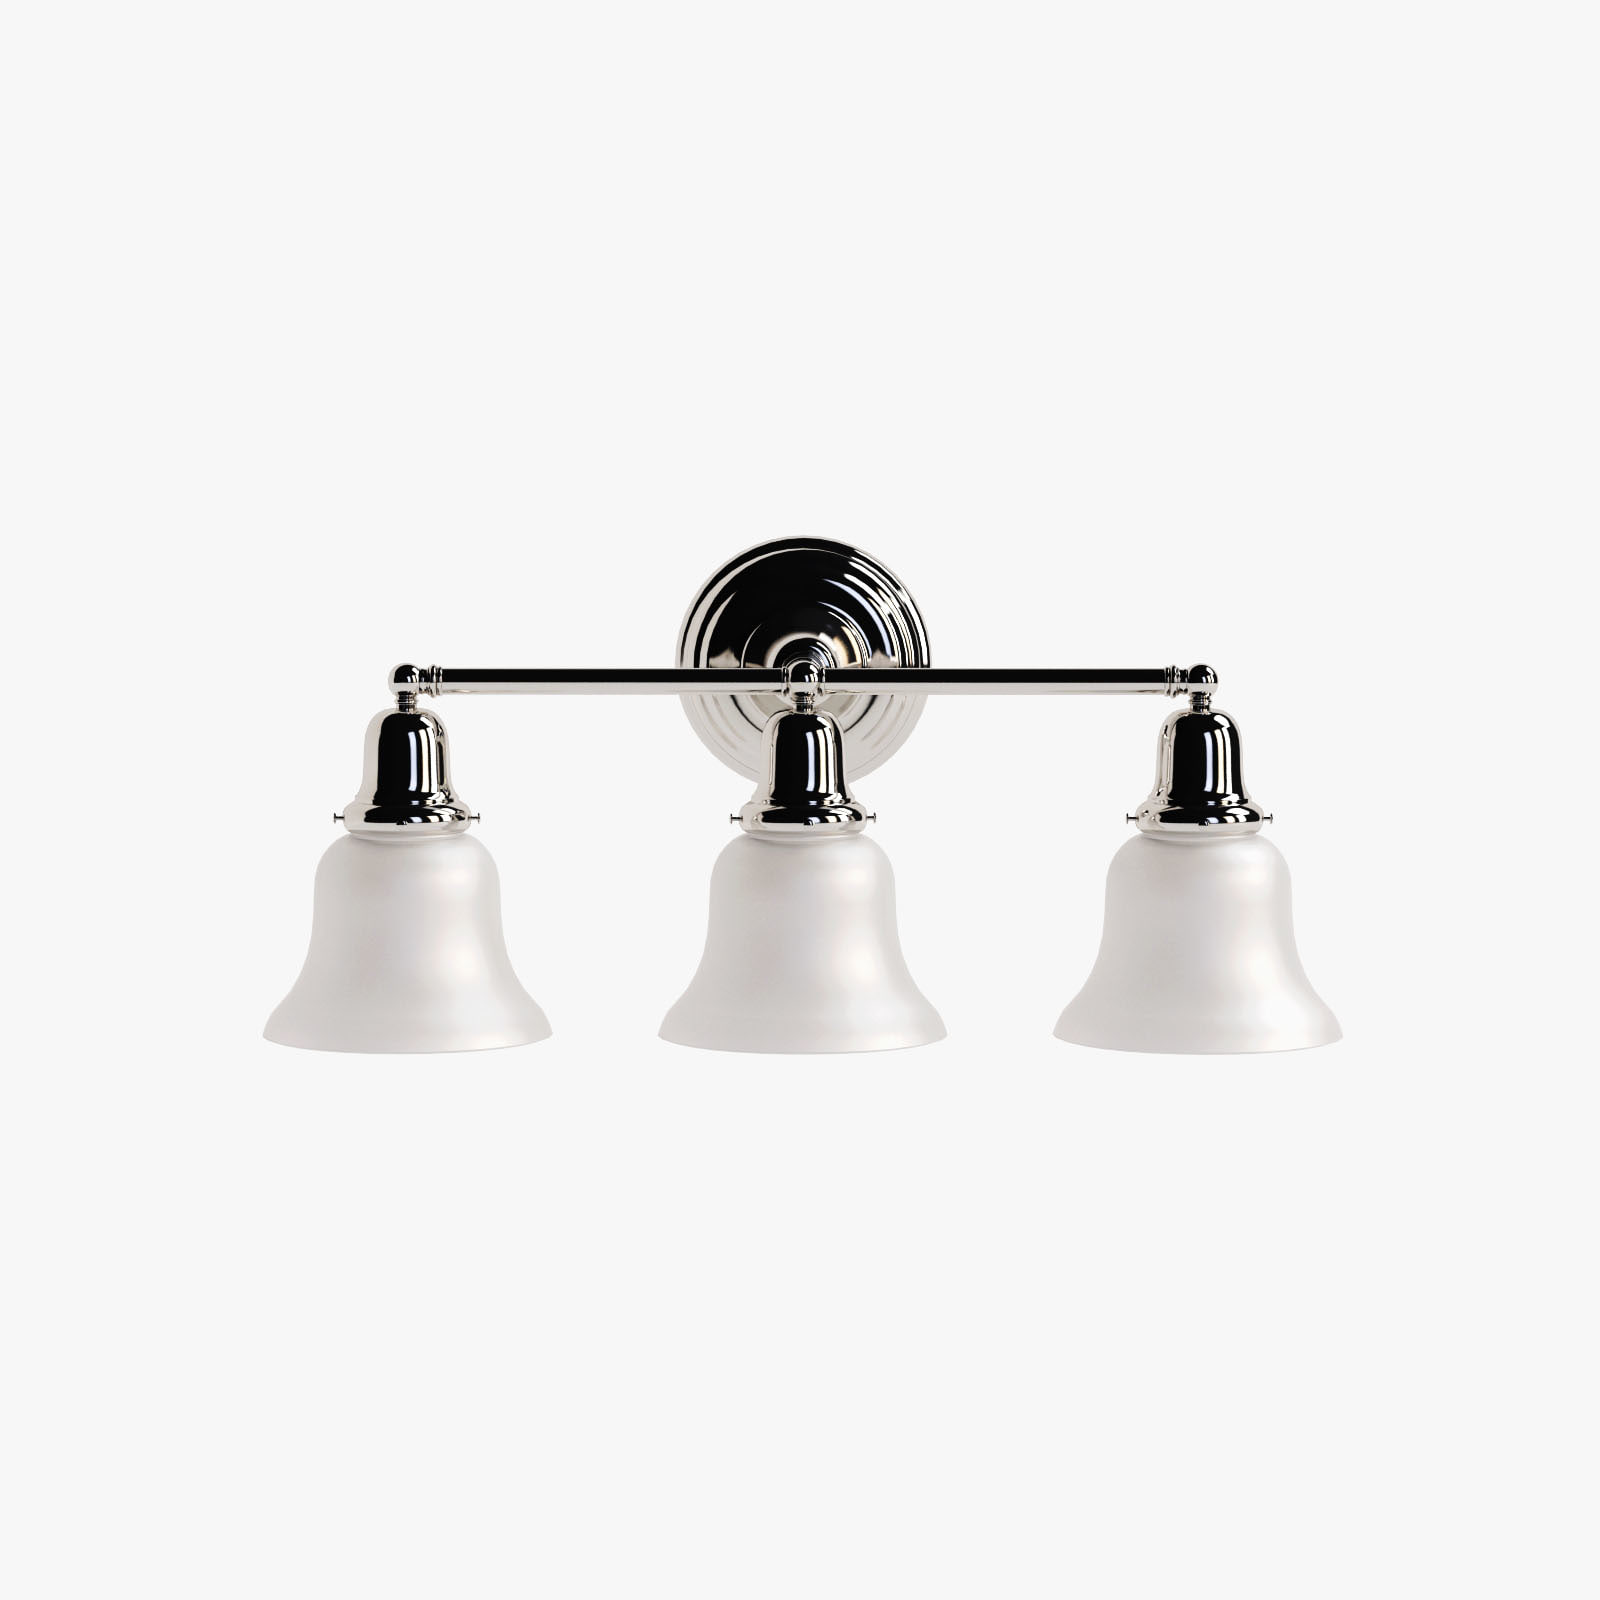
3 Light Bath Bracket 3D Model
Hudson Valley Edison Collection 3 Light Bath BracketArt. 583-PN-341PRODUCT DOES NOT CONTAIN STUDIO LIGHTING AND ENVIRONMENT
-
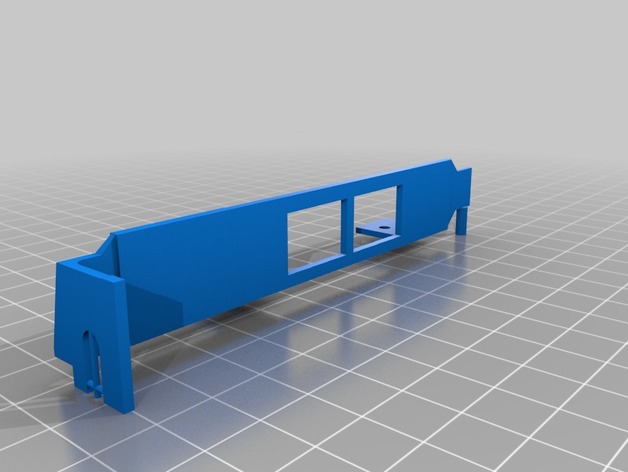
Dual Ethernet Port Bracket 3D Print Model
Summary
Created this for my dual ethernet port for IBM PCI express bracket.