Summary
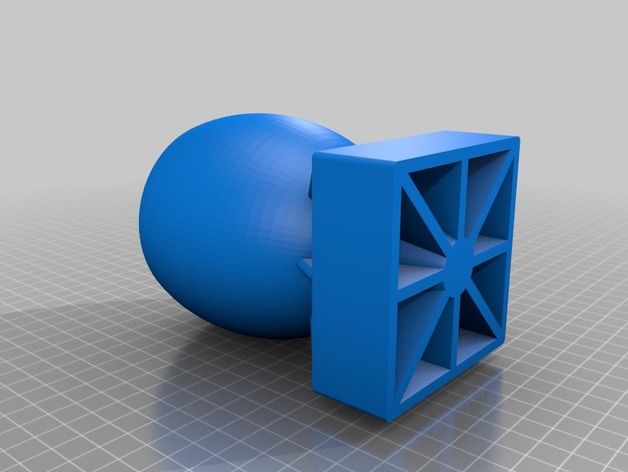
Friction-fit standard size toothbrush travel case. Fits toothbrushes smaller than ~19cm long. A 2mm hole has been added to the top to allow some airflow.
Print Settings
Printer:
UP Mini 2 Rafts:
No Supports:
Yes Resolution:
0.3 Infill:
13% Notes:
I used UP PLA. With 0.3, some banding on the curved end occurs, but looks great otherwise. Print both sides with the end up. Supports are needed for the inner and outer ridges on the friction-fit parts, but should not be necessary for the ends.
How I Designed This
Designed in Tinkercad.
Category: Free 3D Models
Free 3D models ready to be used in your CG projects such as films, visualizations, games, VR etc. All 3D Models and Free 3D Print Models are available for download in several formats including .MAX, .STL, .FBX, .3DS, .C4D, .OBJ, .BLEND, .DWG, .DXF, .LWO and much more. If you’re in search of high-quality Free 3D assets, we have a huge library of 3d models for all your needs. Also you can visit 3D Models and 3D Print Models category.
-
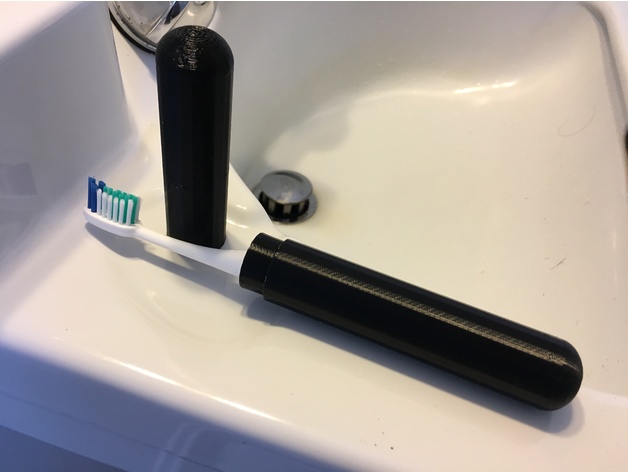
Toothbrush Travel Case 3D Print Model
-
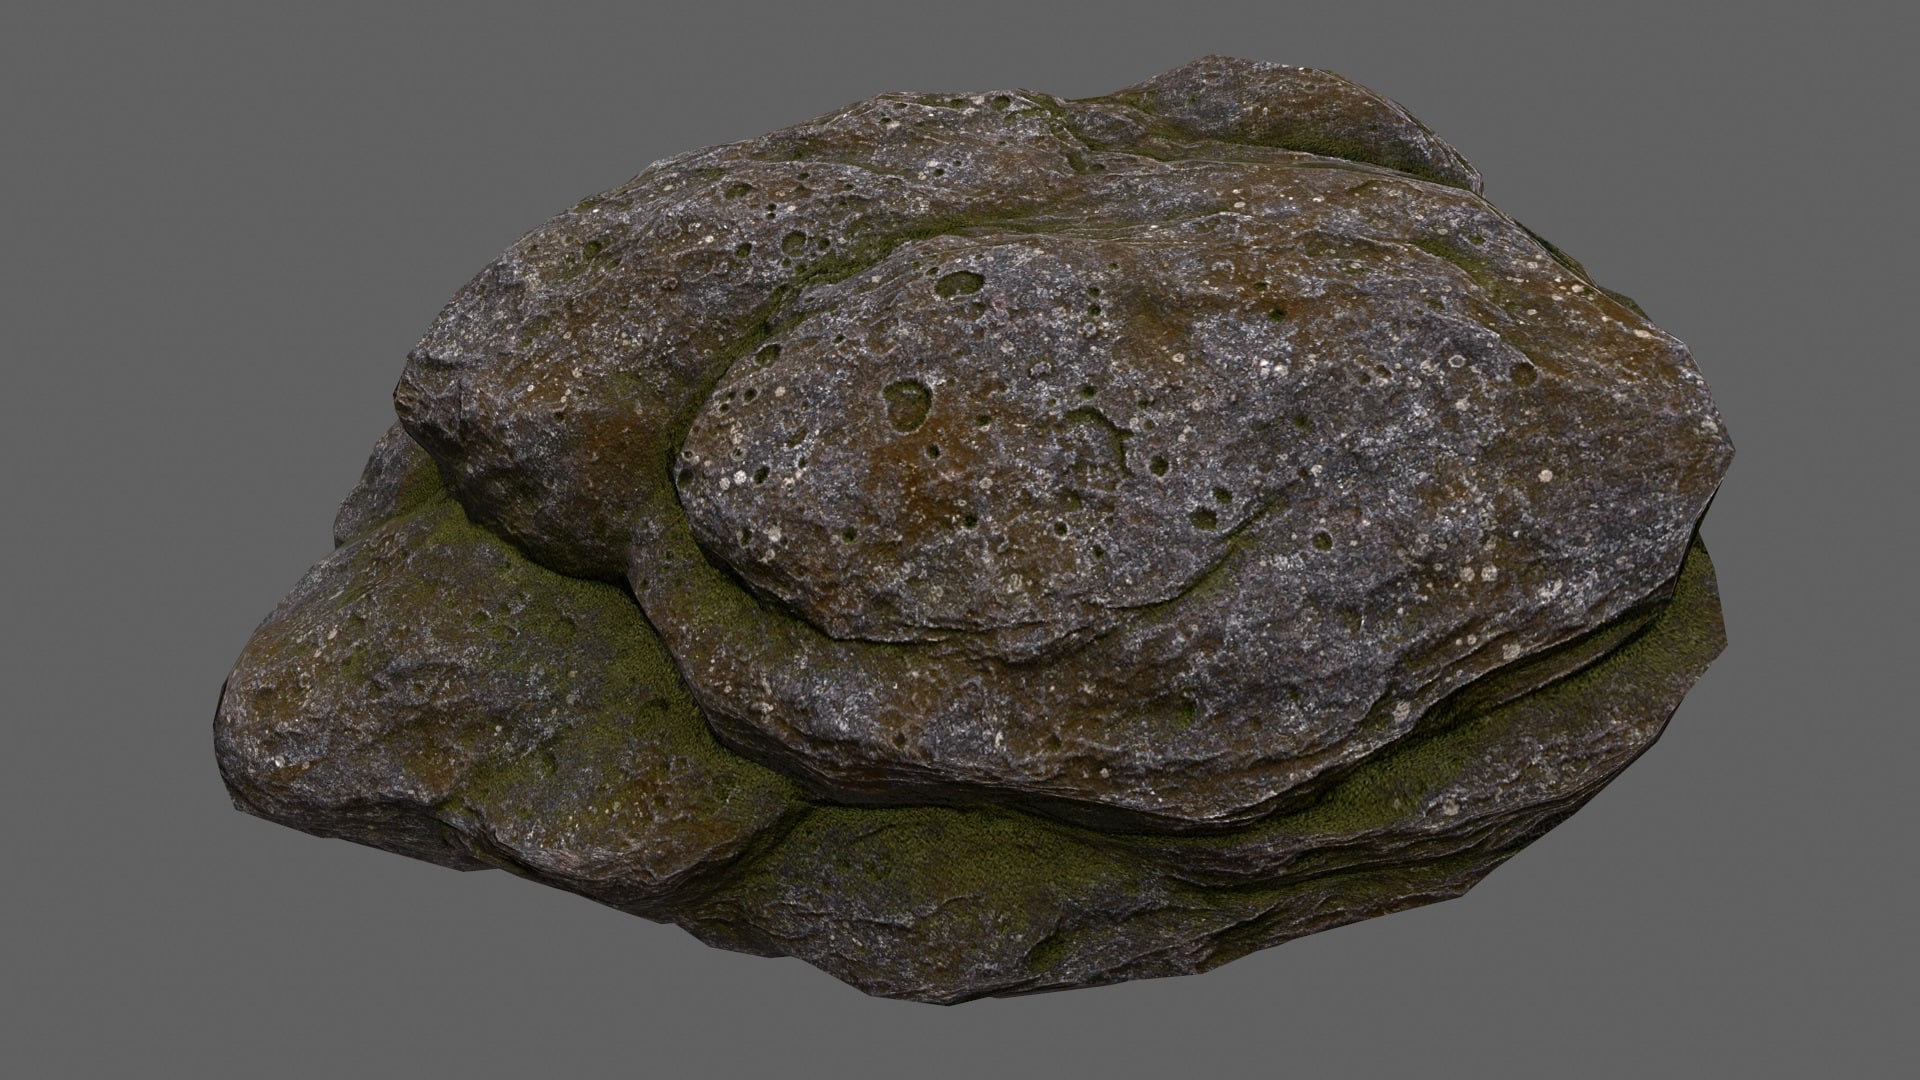
3D model rocks Free 3D Model
Rock_……………1922 POLYGON. ……963 VERTCES. 2048 * 2048Texture.obj , fbx , and blend format models.uv map:DF.SPEC. AO.NORMarmoset Rendergame ready.
-
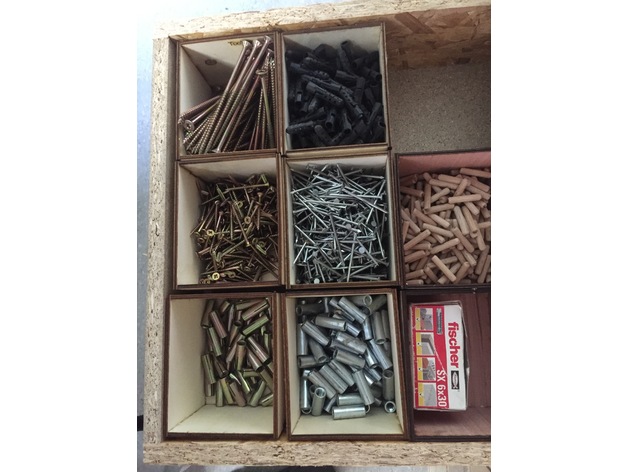
Toolbox ( for Screws ) 3D Print Model
Summary
Toolbox for my Screws and other small things ( L x B x H, 120mm x 100mm x 90mm )
How I Designed This
China 60W CO2 Laser, Speed 15mm/s, Laserpower 65%, 4mm poplar plywood -
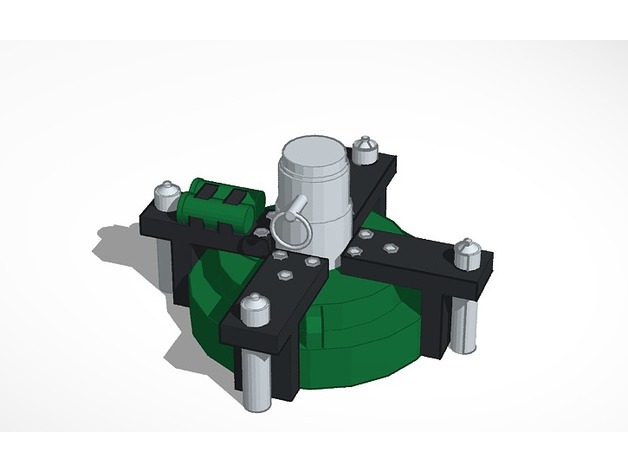
Cluster Charge | Rainbow 6 Siege 3D Print Model
Summary
This is a model of Fuze’s Cluster Charge from Rainbow Six Siege. Unfortunately I can’t print it yet because my 3D printer isn’t working, but once I fix it I will post a picture of the object printed and painted. Remember to give this a like and comment if you want to see anymore Rainbow Six Siege gadgets. -
Dremel Router Attachment 3D Print Model
Summary
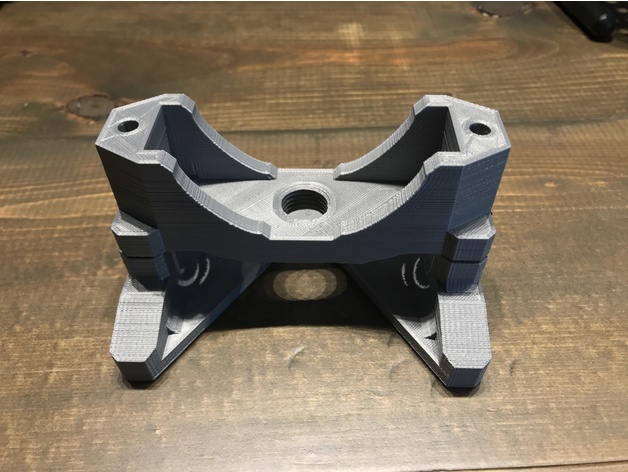
This is a remix of another design in which I added slopes to 90° edges to improve strength, added bolt recesses for better functionality, added measurement marks, and did some overall trimming to reduce material that did not contribute to strength. I printed this in true silver Hatchbox PLA. I personally have a Dremel 4000, but from what I have read, this will work on any Dremel with the same threading.
I would say a raft is essential to prevent lifting
x2 1/4″ bolts (4 in)
x6 1/4″ nuts
Print Settings
Printer Brand:
Prusa Printer:
Prusa Mk2 Rafts:
Yes Supports:
Yes Resolution:
.2 Infill:
15% Notes:
Raft is essential to prevent lifting. -
AM8 Tablet Holder 3D Print Model
Summary
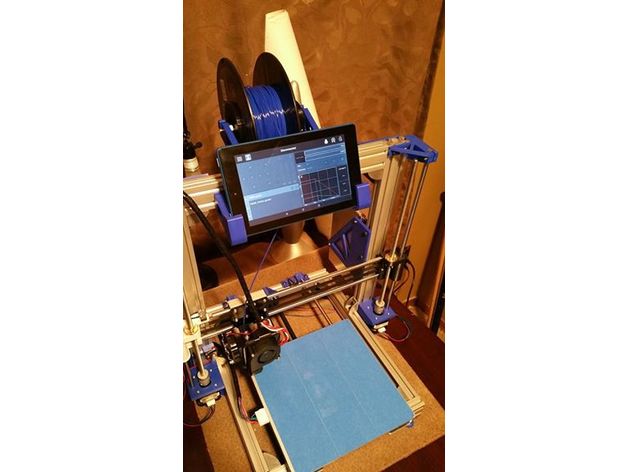
This is a tablet holder for the AM8. With Octoprint, you can replace your printer’s screen with a dedicated cheap/old tablet. This was designed with the Kindle Fire in mind, but it should work with many different tablets.
Print Settings
Printer:
Anet AM8 Rafts:
No Supports:
No -
Hunter Knife Handle Scales 3D Print Model
Summary
Let me open with a thank you to WinterHawk904 for his great Destiny knife model.
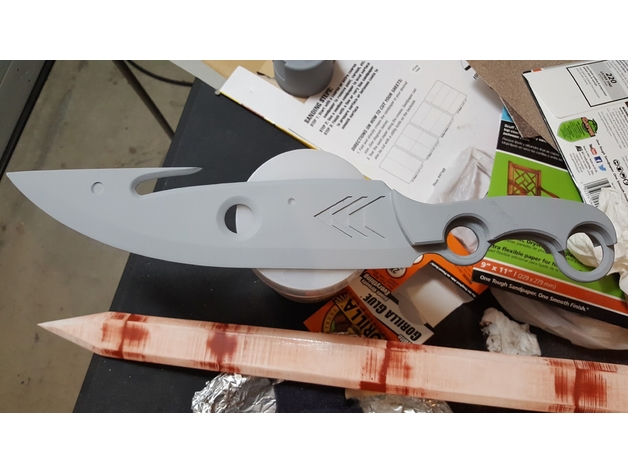
These are handle scales that would go on the sides of the handle to fill out the grip and protect the hand from kinetic shock and kinetic transfer down the steel of the blade and full length tang. They’re used a lot in knives of today, and seeing as how the knife hasn’t changed terribly much in function over all of recorded history, I set out to make some handle scales for this far future knife because it needed them (550 cord only goes so far!)
As an aside, I also made these handle scales because I split my knife into two pieces for printing…in about the middle of the handle (using Autodesk MeshMixer). This is about the right size for a 300×300 build plate. As noted by some other makers the cross section of the blade is too small (even for this HUGE knife) to just glue the ends together and be done with it.
Without there being much material to play with in the knife’s cross section (to create more complex joints) I opted for an outside approach to increase the gluing surface area…which meant handle scales. I tried to keep them consistent with the look, lines, and ‘appointment’ of the Hunter knife and I think I have!
Make sure you line up the front (lower) part of the handle scales with the natural line of the blade bevel – the rest should fall into place well.
Last but not least – I’m totally new to the world of 3D printing and 3D design. This is my first project to ‘give back’ to the community writ large for some really helpful, friendly people that have made 3D printing accessible and enjoyable! Thanks everyone!
Print Settings
Printer:
Creality CR 10 Rafts:
No Supports:
No Resolution:
.2 Infill:
30% Notes:
This is essentially a structural piece for those of you that split your blade in the middle of the handle like I did. So over-engineer it and make it tough! Used tetrahedral infill pattern in Cura for strongk-ness. -
CZS 3D Printer eccentricSpacer wrench 偏心塊板手 3D Print Model
Summary
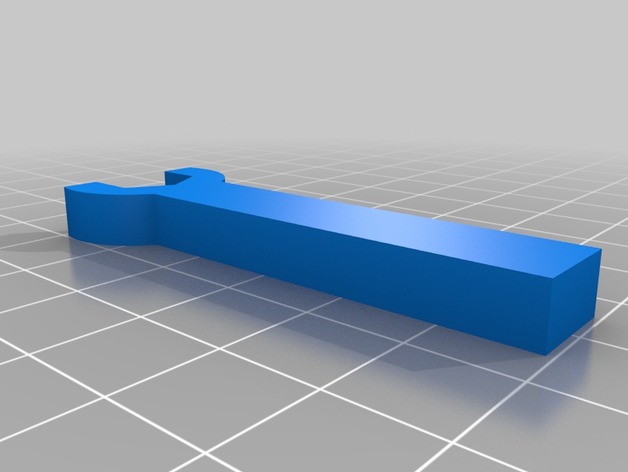
CZS 3D Printer eccentricSpacer wrench 偏心塊板手 -
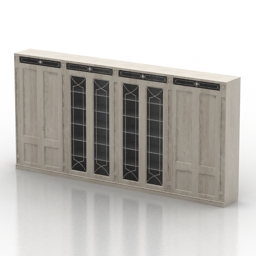
Cupboard 3D Model
Additional Info: Cupboard N220517 – 3D model (*.gsm+*.3ds) for interior 3d visualization.
-
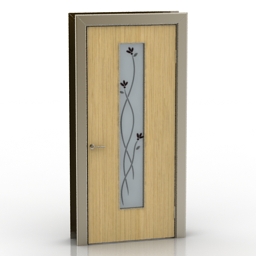
Door 3D Model
Additional Info: Door Framir Flora N050617 – 3D model (*.gsm+*.3ds) for interior 3d visualization.
-
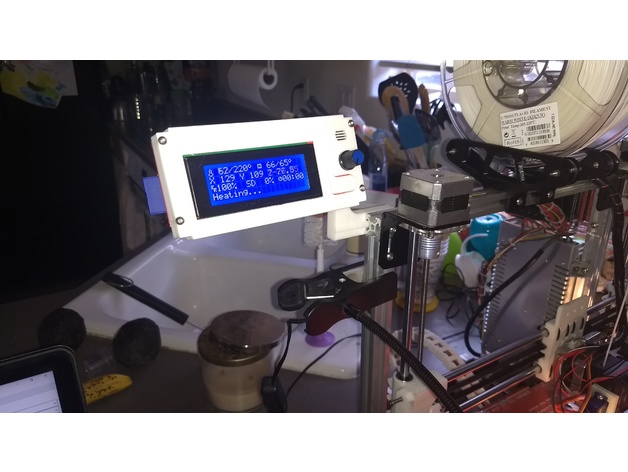
Folgertech 2020 i3 2004 Discount LCD Display Left Arm Mountable 3D Print Model
Summary
A remix of two other types of mounts. The best display front I have found plus a heavily modified arm to support it from the left side of my i3. Note the pictures provided where it uses two M5’s to mount it quite securely. Also note that the m3x30’s used to mount the screen use two sets of nuts, the first gives almost the perfect clearance for the soldered joints on the back and the latter hold it to the arm.
Print Settings
Printer Brand:
Prusa Printer:
Prusa Clone Rafts:
No Supports:
No Resolution:
300um Infill:
20% with 3 outer layers from 400um nozzle -
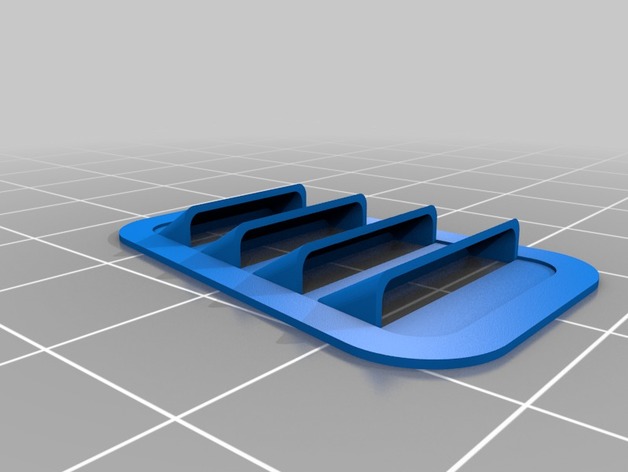
TRX-4 Parts 3D Print Model
Summary
Consolidated post of all my TRX-4 Designs. Development thread is http://www.rccrawler.com/forum/traxxas-trx-4/587308-trx-4-development-thread.html#post5729889 -
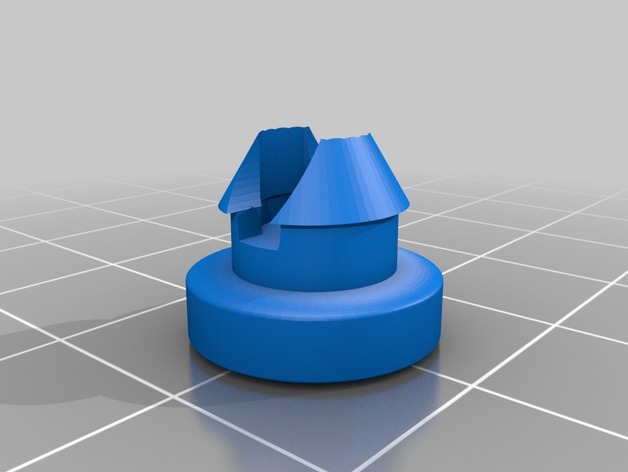
Nissan Altima Brake Pedal Bumper 3D Print Model
Summary
I Made this in tinkercad to fit a 97 Nissan Altima brake pedal bumper, The replacements are $10 a piece for a rubber version, I printed in pla and is working just fine. -
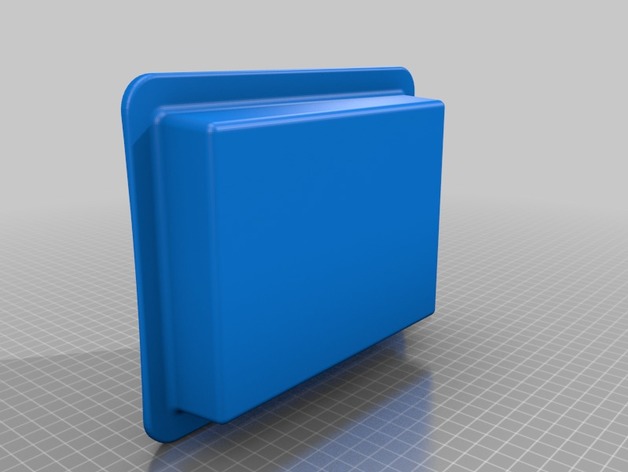
Bettery Box for Electric skateboard 3D Print Model
Summary
Just a simple box designed to fit on the booton of a curved bottom skateboard and home 2 3s 4500 maH batteries. I’m uploading the solidworks file so you can change the curve to your need -
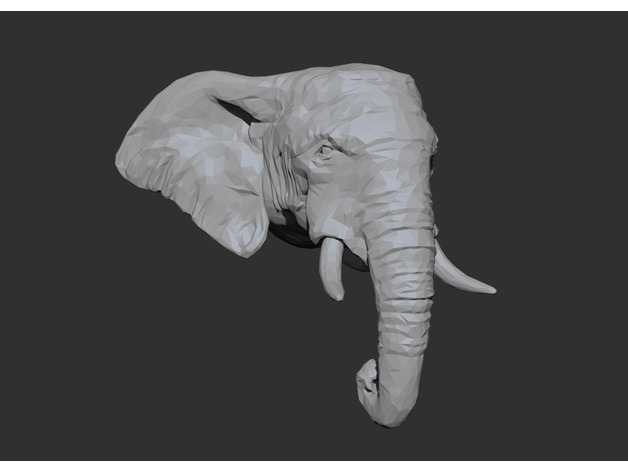
African Elephant Head – Low Poly 3D Print Model
Summary
Low poly version of a African Elephant’s head, for the low poly lovers and for everyone else.
If you would like to see more of my stuff, you can check my Instragram page here : https://www.instagram.com/ricardo.jfa/
Or my artstation here:https://www.artstation.com/artist/ricardo-jfa
How I Designed This
This one I sculpted in Zbrush a few months ago when I was doing daily sculpts everyday.
I did several animal heads, with this one being the first. -
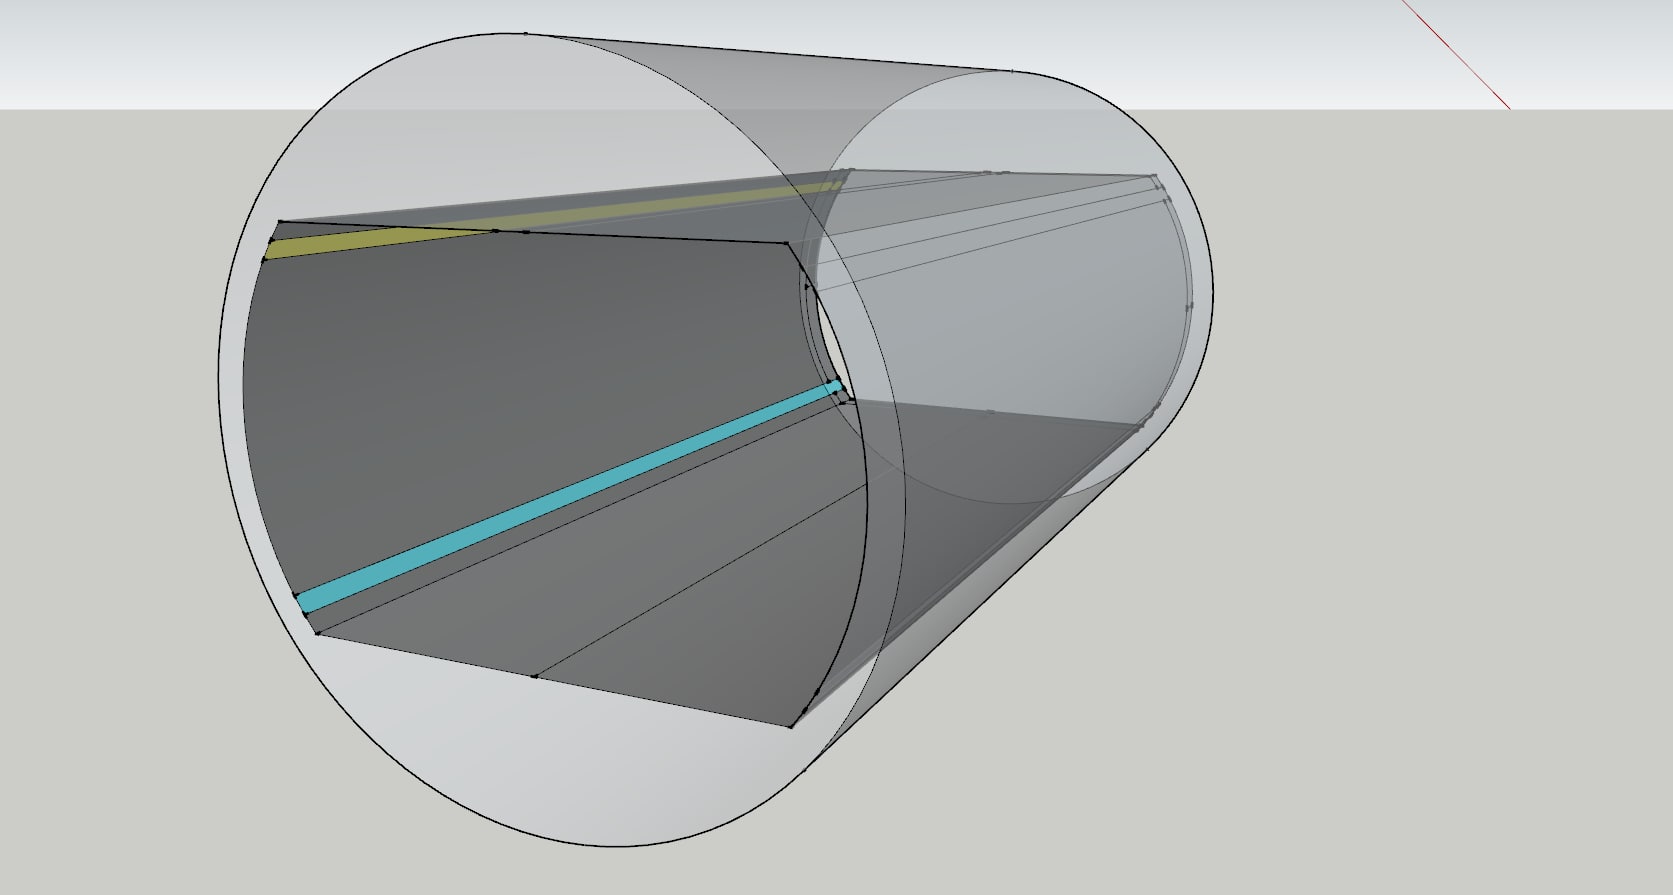
Sci-Fi ce_corridor3 (corridor) 3D model Free 3D Model
ce_corridor03 – corridor(ce_corridor03) for corridor connector(ce_corridor02).Maded with SketchUp 2015 Pro FBX Entities exported: -640 Faces -9 Materialsformats .3DS .DAE .FBX .OBJ
-
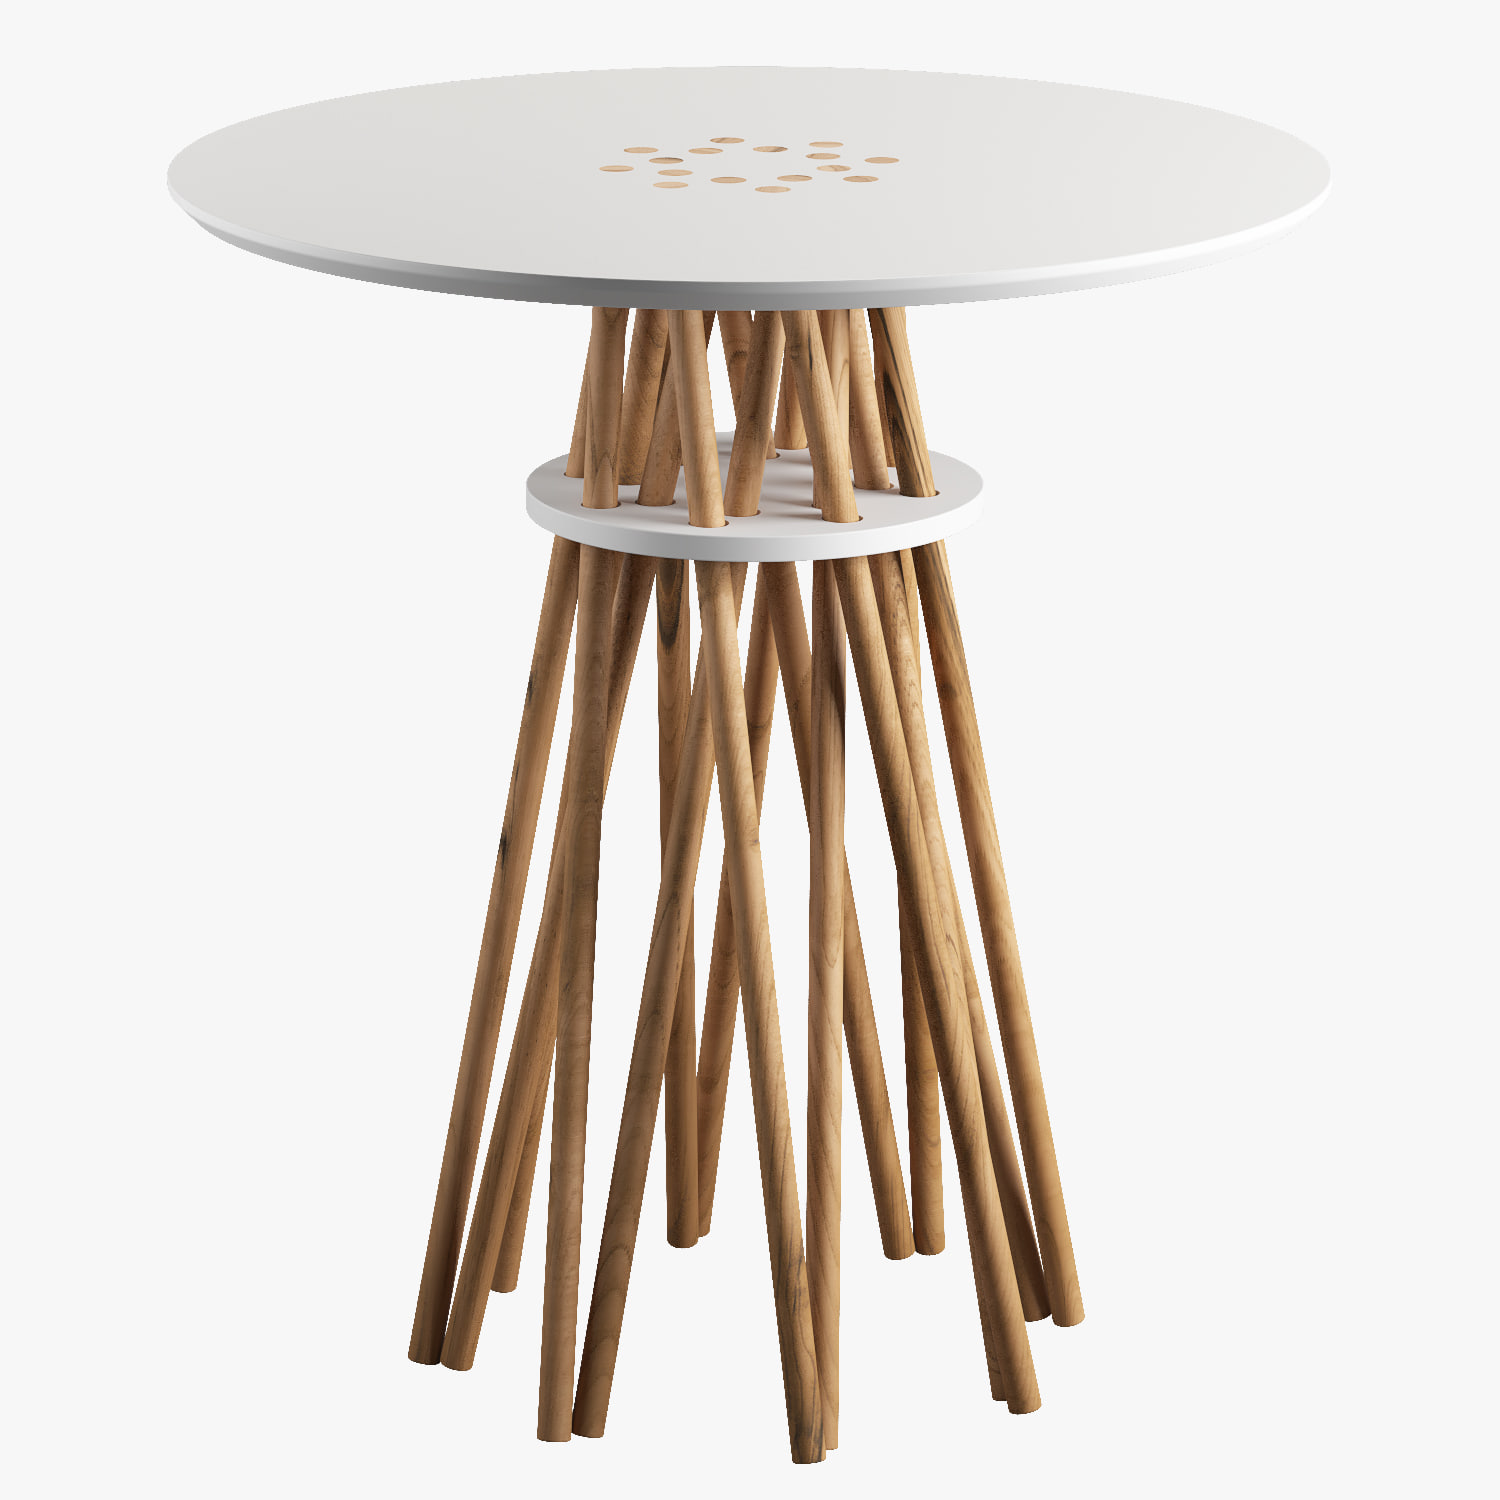
Side tables x 5 3D model Free 3D Model
Bundle TableSide Table, Nightstand, Lobby TableMaterials:DuPont Corian, American Hardwoods (Black Walnut, Hard Maple, or White Oak)Dimensions: 17 tall, 16 diameter toppolys: 7435; verts: 9571.
-
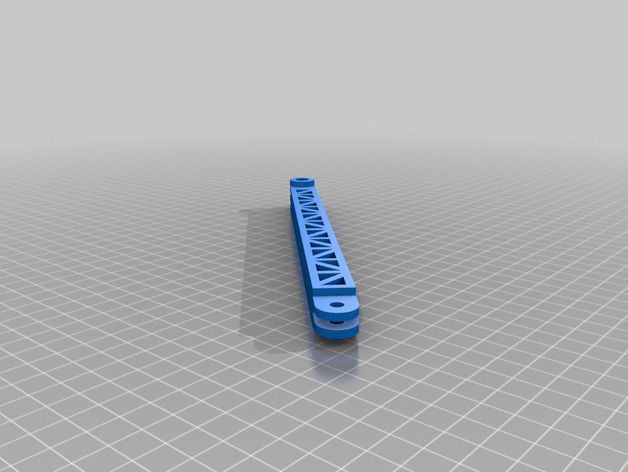
GoPro – Helmet Extensor 3D Print Model
Summary
GoPro – Helmet Extensor
Nozzle size – 0.3 mm
Layer height – 0.1 mm
Shell thickness – 0.6 mm
Fill Density – 60%
Bottom/Top thickness – 0.2 mm
Nozzle temp – 240°C (Material: ABS)
Bed temp – 83°C
Speed.
Travel – 150 mm/s
Bottom layer – 40 mm/s
Infill – 65 mm/s
Top/bottom – 40 mm/s
Outer shell – 40 mm/s
Inner shell – 55 mm/s
Support type – Everywhere
Estimated Time – 6 hs
Print Settings
Printer Brand:
Prusa Printer:
Prusa Steel Rafts:
No Supports:
Yes Resolution:
0.1 Infill:
60 -
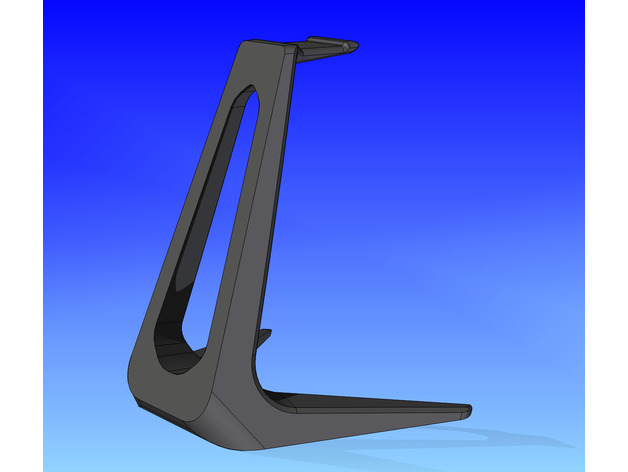
Headphone Stand – Easy Print 3D Print Model
Summary
Inspired by the cool looking Makerbot Headphone Stand, I have designed this version from the ground up.
It is “waaaay” easier to print and get looking good IMHO.
A little more agressive looking, with more resolved overhangs for better results.
Have fun, enjoy ; )
01-0.3 Resolution (0.2 Good compromise, 0.15 looks excellent)
No supports required
Infill > 10% (15% min recommended)
PLA – Works very well
ABS – Haven’t tried : (
2-3 Shells
3 Bottom Layers
3-4 Top Layers -
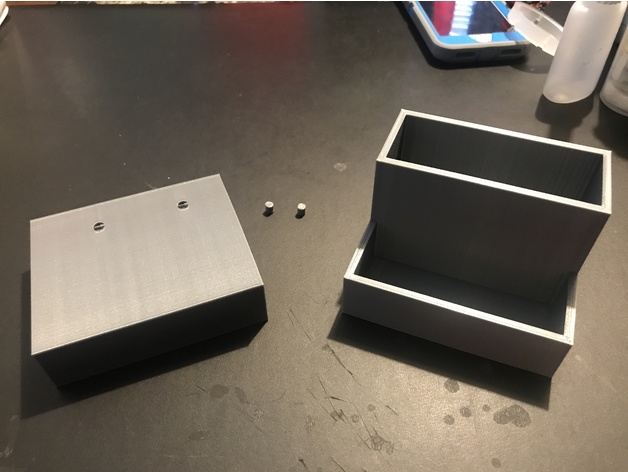
Simple Easy Slip-On Organizer 3D Print Model
Summary
This is a slip-on storage bin that does require pinning and gluing together. Pins are provided. The slip-on support is setup for a “1-by” board (3/4″ width). I use it to store my clippers and filament clips so they are readily available.
Print Settings
Printer Brand:
MakerBot Printer:
MakerBot Replicator+ Rafts:
Doesn’t Matter Supports:
No Resolution:
200 microns Infill:
10% Notes:
I use a raft but I am sure the 3D Print Masters will not need one. The STL is set so it will print without supports and it is compact on the build plate. -
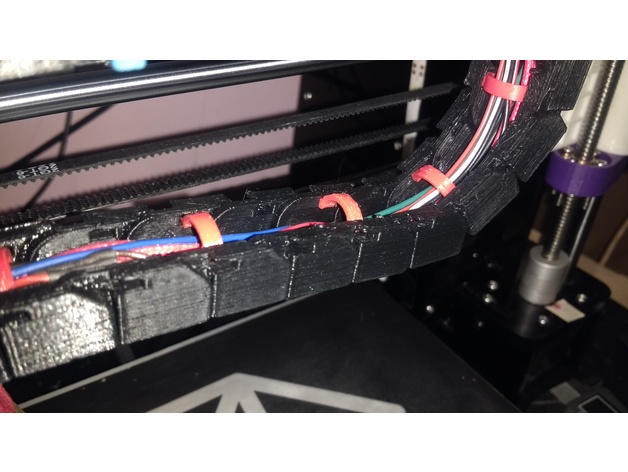
Linear Chain – Wire Tabs 3D Print Model
Summary
My Filament kept getting caught on the zip ties… this is my solution! -
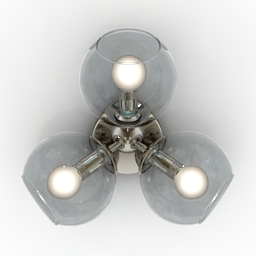
Sconce 3D Model
Additional Info: Sconce Donolux W111009-3 – 3D model (*.gsm+*.3ds) for interior 3d visualization.
-
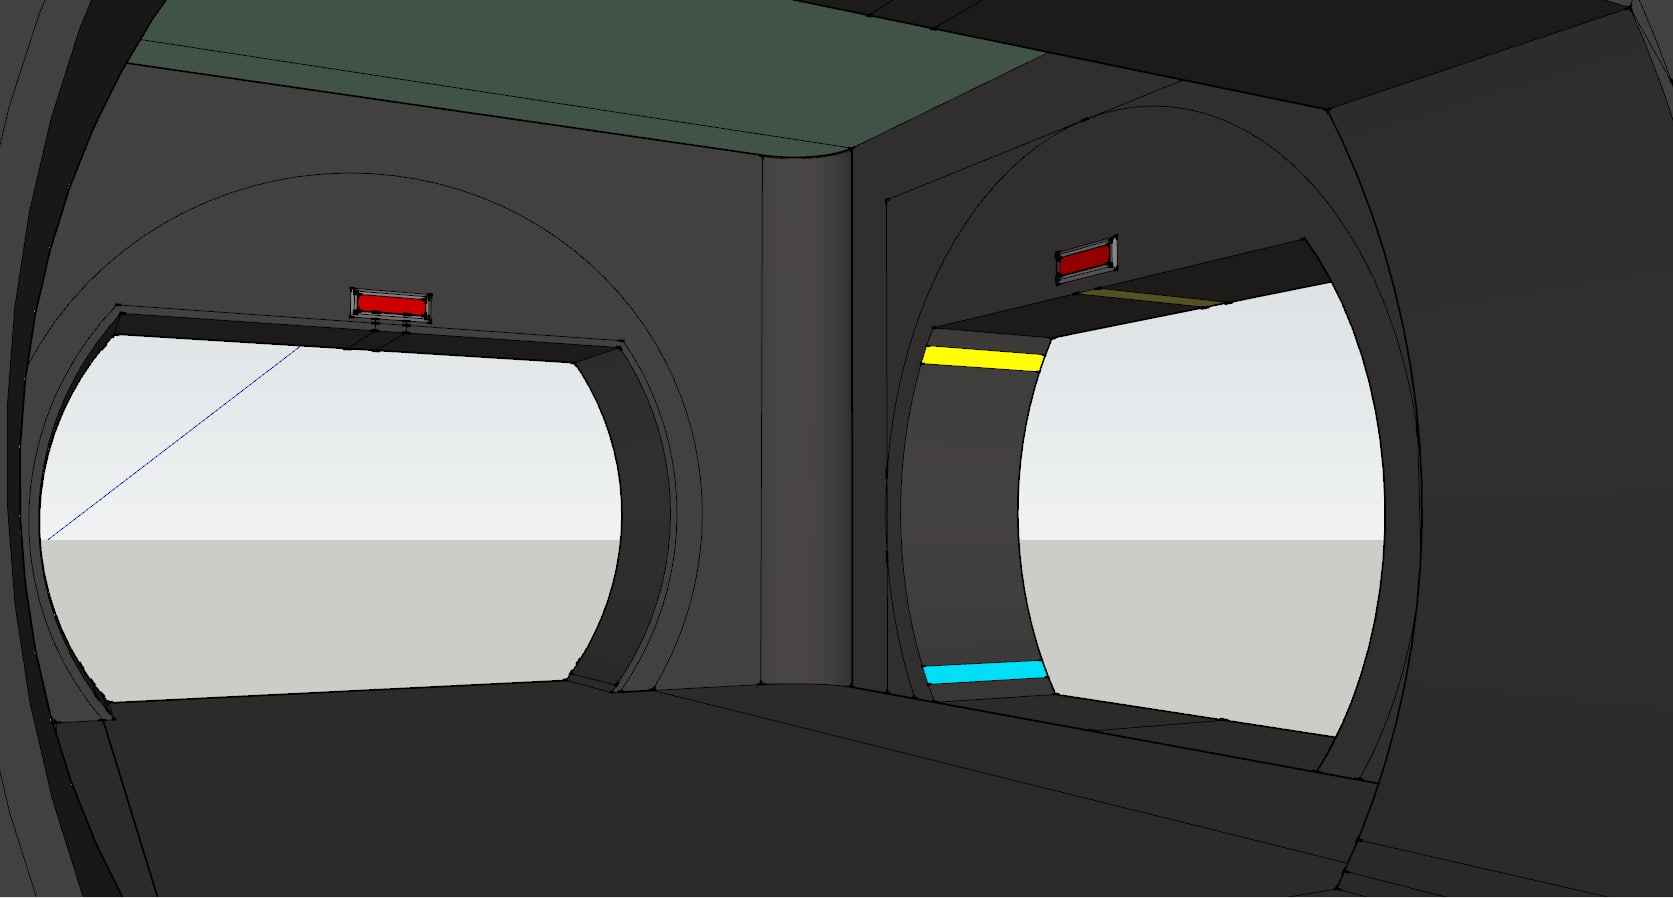
3D Sci-Fi ce_corridor2 (connector) model Free 3D Model
ce_corridor02 – connector for another ce_corridor’s. Maded with SketchUp 2015 Pro SketchUp processed: -584 Faces; -10 Materials; FBX Entities exported: -719 Faces; -10 Materials;formats .3DS .DAE .FBX .OBJ
-
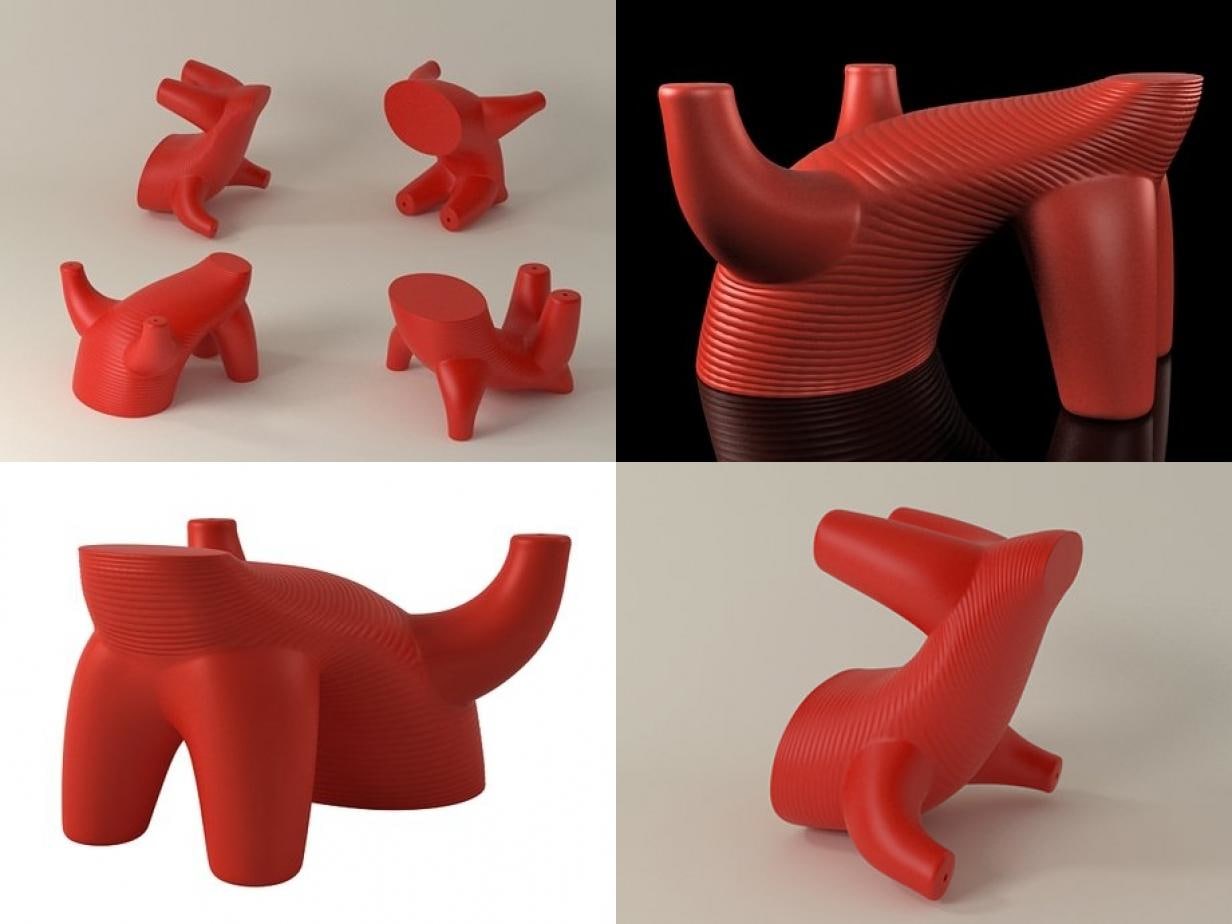
Mico 3D model Free 3D Model
Mico by Magis | 3d model produced by Design ConnectedThis 3d model is part of the highly acclaimed Design Connected collection featuring 6500+ carefully picked exclusive furnishings. Check out our full range of 3d models for more mid-century icons, contemporary classics and designer masterpieces.All Design Connected 3d models are originally created in 3ds Max and V-Ray renderer.Our in-house team of 3d artists handle all further remodelling, materials conversions and other adaptations to deliver best possible visual and technical quality of all the additional file formats and renderers we offer. Files units are centimeters and all models are accurately scaled to represent real-life object’s dimensions.Our models come as a single editable mesh or poly object (or as group for rigged models or where displace modifier has been used) properly named and positioned in the center of coordinate system. No lights, cameras and render/scene setup are included unless otherwise stated in the particular model’s description.AVAILABLE FILE FORMATS- Sketchup 8 or above – Autodesk 3ds Max 2011 or above– VRay– Mental Ray– Scanline- OBJ and FBX – Abvent Artlantis ADDITIONAL FILE FORMATS UPON REQUEST- Cinema4D R16 or above- ARCHICAD R16 or above- Autodesk 3ds – Rhinoceros – Autodesk DWG – Maya – Lightwave – Collada PRODUCT DESCRIPTIONBrand: Magis, ItalyDesigner: El Ultimo GritoDesign Connected ID: 2792BEFORE PURCHASEWe highly recommend that you download few of our FREE 3D MODELS and test if they work well with your 3d software before making a purchase.ABOUT THE IMAGERYPreviews rendered in 3dsMax using VRay. Please note that the studio scenes and light and environment settings are not included.SUPPORTIf you have any questions about how to use Design Connected 3d models, please contact us via Support.Thank you for purchasing Design Connected models!
-
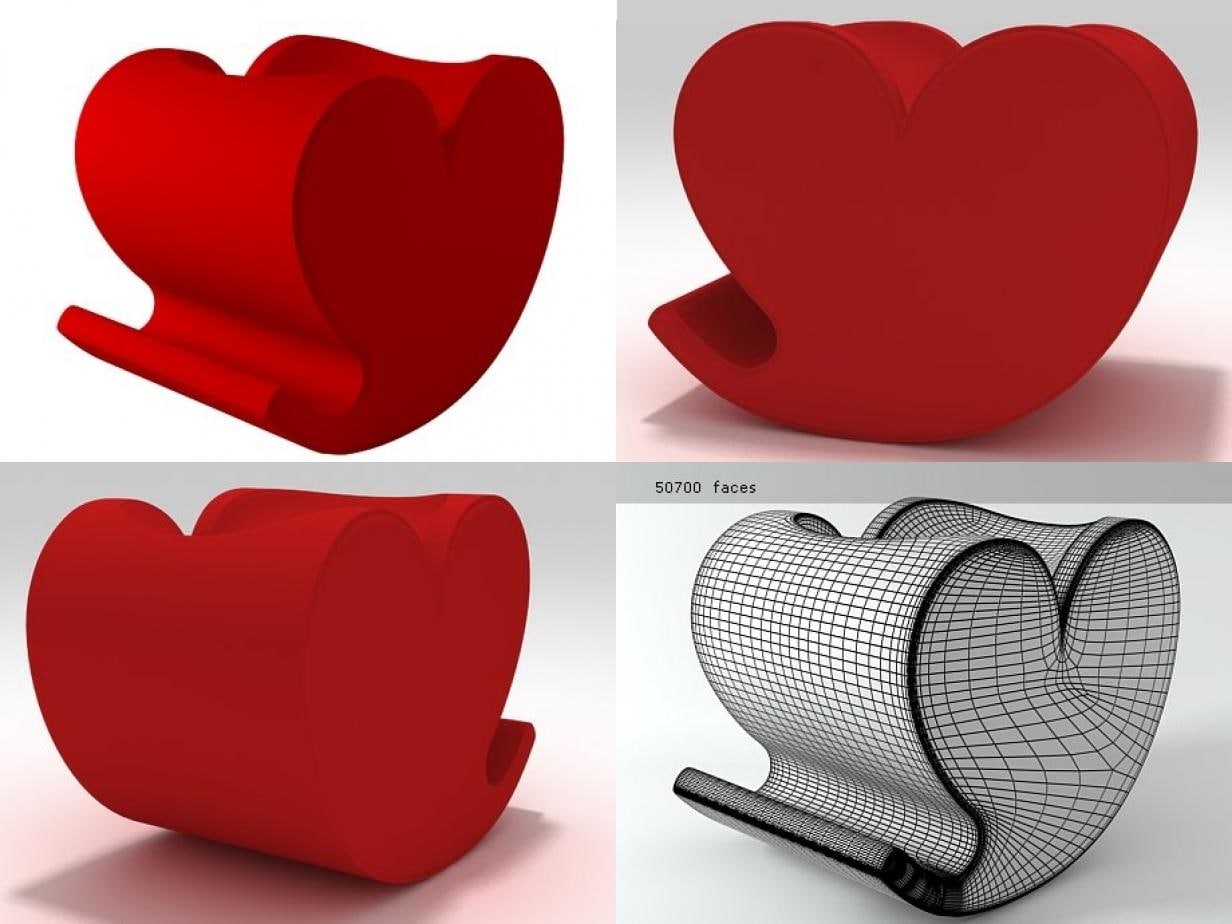
3D Soft Heart model Free 3D Model
Soft Heart by Moroso | 3d model produced by Design ConnectedThis 3d model is part of the highly acclaimed Design Connected collection featuring 6500+ carefully picked exclusive furnishings. Check out our full range of 3d models for more mid-century icons, contemporary classics and designer masterpieces.All Design Connected 3d models are originally created in 3ds Max and V-Ray renderer.Our in-house team of 3d artists handle all further remodelling, materials conversions and other adaptations to deliver best possible visual and technical quality of all the additional file formats and renderers we offer. Files units are centimeters and all models are accurately scaled to represent real-life object’s dimensions.Our models come as a single editable mesh or poly object (or as group for rigged models or where displace modifier has been used) properly named and positioned in the center of coordinate system. No lights, cameras and render/scene setup are included unless otherwise stated in the particular model’s description.AVAILABLE FILE FORMATS- Sketchup 8 or above – Autodesk 3ds Max 2011 or above– VRay– Mental Ray– Scanline- OBJ and FBX – Abvent Artlantis ADDITIONAL FILE FORMATS UPON REQUEST- Cinema4D R16 or above- ARCHICAD R16 or above- Autodesk 3ds – Rhinoceros – Autodesk DWG – Maya – Lightwave – Collada PRODUCT DESCRIPTIONBrand: Moroso, ItalyDesigner: Ron AradDesign Connected ID: 2793BEFORE PURCHASEWe highly recommend that you download few of our FREE 3D MODELS and test if they work well with your 3d software before making a purchase.ABOUT THE IMAGERYPreviews rendered in 3dsMax using VRay. Please note that the studio scenes and light and environment settings are not included.SUPPORTIf you have any questions about how to use Design Connected 3d models, please contact us via Support.Thank you for purchasing Design Connected models!
-
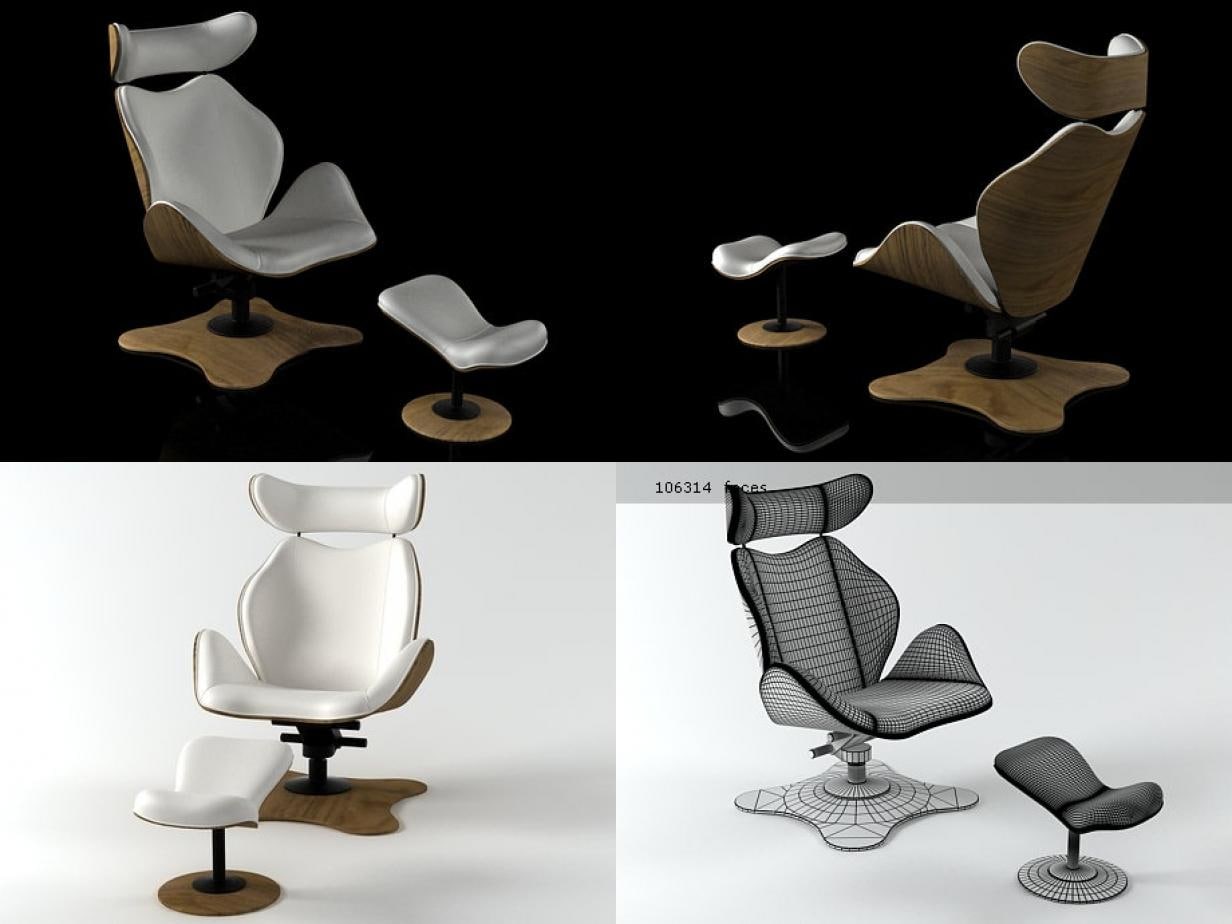
3D Tok Free 3D Model
Tok by Varier Furniture | 3d model produced by Design ConnectedThis 3d model is part of the highly acclaimed Design Connected collection featuring 6500+ carefully picked exclusive furnishings. Check out our full range of 3d models for more mid-century icons, contemporary classics and designer masterpieces.All Design Connected 3d models are originally created in 3ds Max and V-Ray renderer.Our in-house team of 3d artists handle all further remodelling, materials conversions and other adaptations to deliver best possible visual and technical quality of all the additional file formats and renderers we offer. Files units are centimeters and all models are accurately scaled to represent real-life object’s dimensions.Our models come as a single editable mesh or poly object (or as group for rigged models or where displace modifier has been used) properly named and positioned in the center of coordinate system. No lights, cameras and render/scene setup are included unless otherwise stated in the particular model’s description.AVAILABLE FILE FORMATS- Sketchup 8 or above – Autodesk 3ds Max 2011 or above– VRay– Mental Ray– Scanline- OBJ and FBX – Abvent Artlantis ADDITIONAL FILE FORMATS UPON REQUEST- Cinema4D R16 or above- ARCHICAD R16 or above- Autodesk 3ds – Rhinoceros – Autodesk DWG – Maya – Lightwave – Collada PRODUCT DESCRIPTIONBrand: Varier Furniture, GermanyDesigner: Ole Petter WullumDesign Connected ID: 2781BEFORE PURCHASEWe highly recommend that you download few of our FREE 3D MODELS and test if they work well with your 3d software before making a purchase.ABOUT THE IMAGERYPreviews rendered in 3dsMax using VRay. Please note that the studio scenes and light and environment settings are not included.SUPPORTIf you have any questions about how to use Design Connected 3d models, please contact us via Support.Thank you for purchasing Design Connected models!
-

3D Hvilestol med Skammel model Free 3D Model
Hvilestol med Skammel by Steen Østergaard | 3d model produced by Design ConnectedThis 3d model is part of the highly acclaimed Design Connected collection featuring 6500+ carefully picked exclusive furnishings. Check out our full range of 3d models for more mid-century icons, contemporary classics and designer masterpieces.All Design Connected 3d models are originally created in 3ds Max and V-Ray renderer.Our in-house team of 3d artists handle all further remodelling, materials conversions and other adaptations to deliver best possible visual and technical quality of all the additional file formats and renderers we offer. Files units are centimeters and all models are accurately scaled to represent real-life object’s dimensions.Our models come as a single editable mesh or poly object (or as group for rigged models or where displace modifier has been used) properly named and positioned in the center of coordinate system. No lights, cameras and render/scene setup are included unless otherwise stated in the particular model’s description.AVAILABLE FILE FORMATS- Sketchup 8 or above – Autodesk 3ds Max 2011 or above– VRay– Mental Ray– Scanline- OBJ and FBX – Abvent Artlantis – Autodesk 3ds ADDITIONAL FILE FORMATS UPON REQUEST- Cinema4D R16 or above- ARCHICAD R16 or above- Rhinoceros – Autodesk DWG – Maya – Lightwave – Collada PRODUCT DESCRIPTIONBrand: Steen Østergaard, Designer: Steen ØstergaardDesign Connected ID: 2780BEFORE PURCHASEWe highly recommend that you download few of our FREE 3D MODELS and test if they work well with your 3d software before making a purchase.ABOUT THE IMAGERYPreviews rendered in 3dsMax using VRay. Please note that the studio scenes and light and environment settings are not included.SUPPORTIf you have any questions about how to use Design Connected 3d models, please contact us via Support.Thank you for purchasing Design Connected models!
-
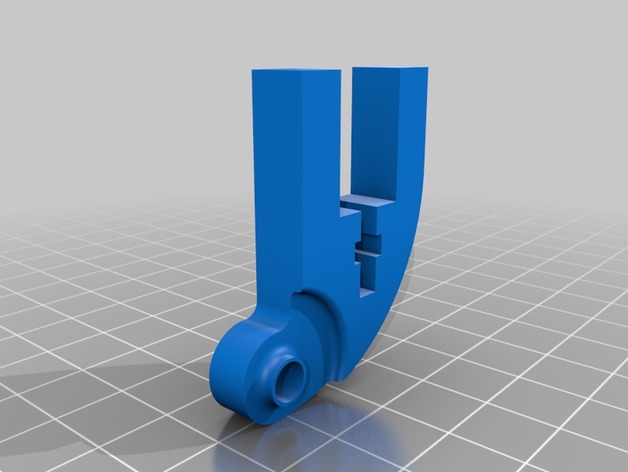
Anet A8 Y-Axis belt tensioner with Ø3mm and Ø5mm hole Zahnriemenspanner Umlenkung Y-Achse 3D Print Model
Summary
Neue Umlenkung für den Anet A8, zum Spannen des Zahnriemens, für Zahnriemenscheiben mit Ø5mm Bohrung oder Ø3mm Bohrung. Das zweite Teil muss gespiegelt gedruckt werden.
Attention: The second part must be printed mirrored. -
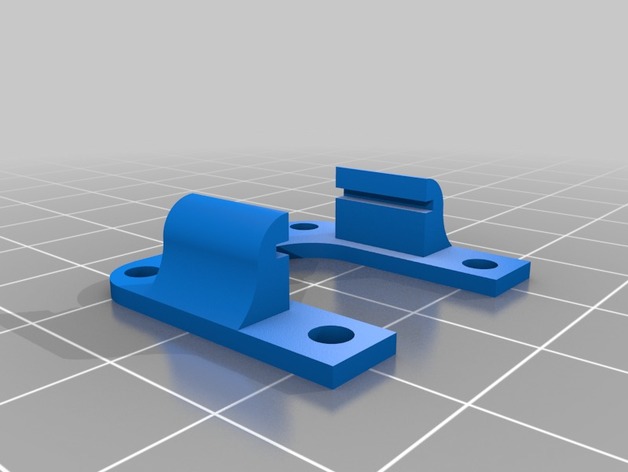
GR-12L SUMD 20mm x 20mm mount 3D Print Model
Summary
This is a 20mm x 20mm mount for the Graupner GR-12L SUMD receiver. The receiver, when removed from the shrink wrap, slides into the mount, allowing it to be installed at the top of the flight control stack.
Print Settings
Printer:
Monoprice Select Mini Rafts:
No Supports:
No Infill:
50
How I Designed This
Onshape -
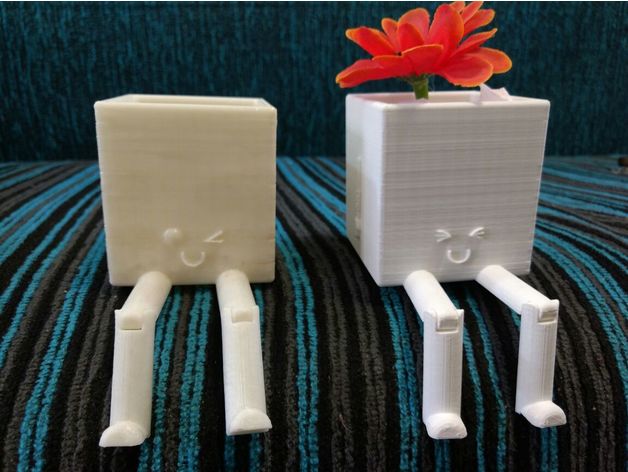
Kawaii Flower pot 3D Print Model
Summary
kawaii flower pot moving legs, its a funny decoration 🙂
Print Settings
Printer:
Prusa Mendel i3 Rafts:
No Supports:
No Resolution:
0.2 Infill:
20 Notes:
i made it in PLA and other in ABS
0.8 shell thickness
How I Designed This
Kawaii Flower pot
I made it at solid works -
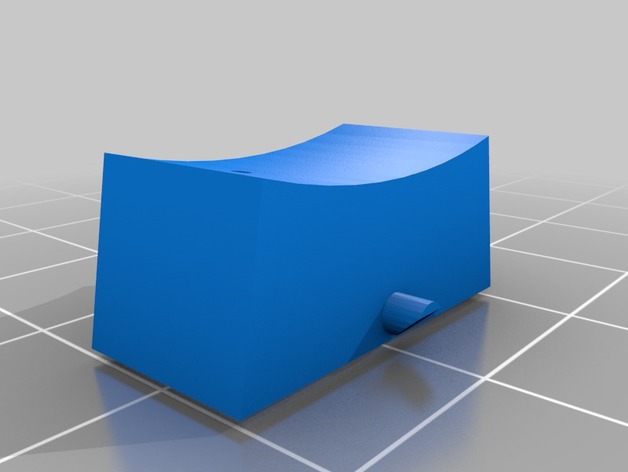
rocker switch 3D Print Model
Summary
In order not to throw away the multiple socket I made the tilt switches that had broken -
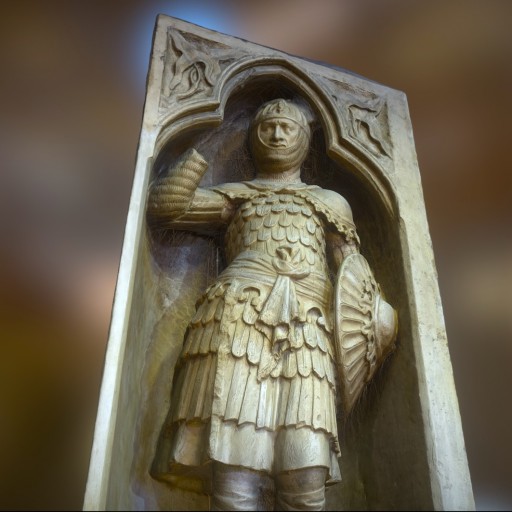
Knight in armor and with shield Free 3D Model
Relief Niche, Knight in armor and with shield, plaster cast, deposited in 1992. Dimensions: 148 x 71.5 x 43 cm. KASDep. 63/2 (ref: KAS2914/2). The original is found in the cathedral, midship, Reims Gothic, approx. 1250-60.The Royal Cast Collection (Copenhagen, Denmark). Made with Memento Beta (now ReMake) from AutoDesk.
-

character Free 3D Model
Skin shader sss, there are 2 other versions available for purchase, just follow link below if you wish
https://blenderartists.org/forum/showthread.php?339567-Blender-Market-Product-Launch-Production-level-Skin-Shader-Pack
Siggraph_2007_upperfloor
http://www.hdrlabs.com/sibl/archive.html
hod carrier/sleep/fun/cook/snowboarding/load counting/lawn mowing and edging/Gardening/mousekercising/music/napps/mover/shaker/helper/movies and tv/books/art/science/working with and for cowboy bob/doggies/cartoons/running wheel barrels full of mud and flying over them inverted from running into rock/animation/working scales and balances/ice cream/candy/tooth brusher/coffee-water/smoke/chain smoking good cigars/characters/Snow White/walt disney and crew/Sun/toodles/Moon/Stars/whatever/etc…
Eye pupils scaled by bone driver, loc. In bone head layer.
I enabled compositor, and replaced render layer with input image thumbnail.
Cheers
1 to base, kh,(sound of walki taki radios and static) Linda!
Yeah thats a 15 dollar fine, tommy left his shovel here dirty, in my mud tub.!
base to 1, 10/4 bill.
Mock up, dry stacked, 8x8x16 high test regulars. -
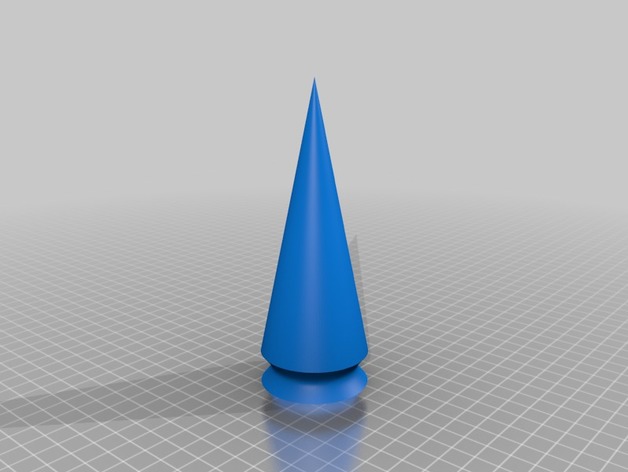
Junkrat Tire Spike (narrow) 3D Print Model
Summary
this is a narrow version of the spikes for a Cosplay RIP Tire. for the fat version, check my other files. -
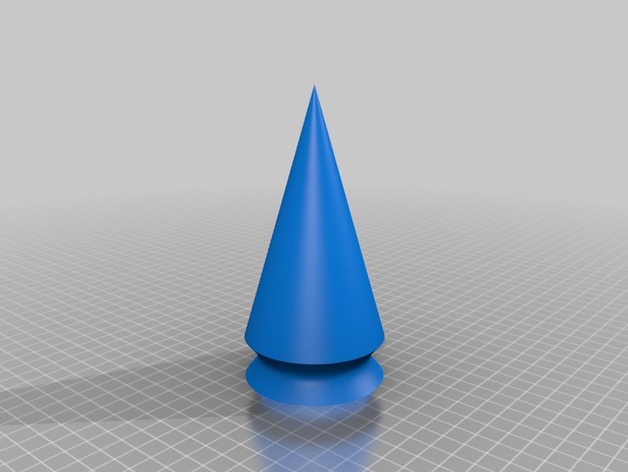
Junkrat Tire Spike (Fat) 3D Print Model
Summary
this is the fat version of the tire spikes on junkrat’s RIP Tire intended for cosplay. in my opinion this is the better looking of my 2 versions but uses double the time and material. -
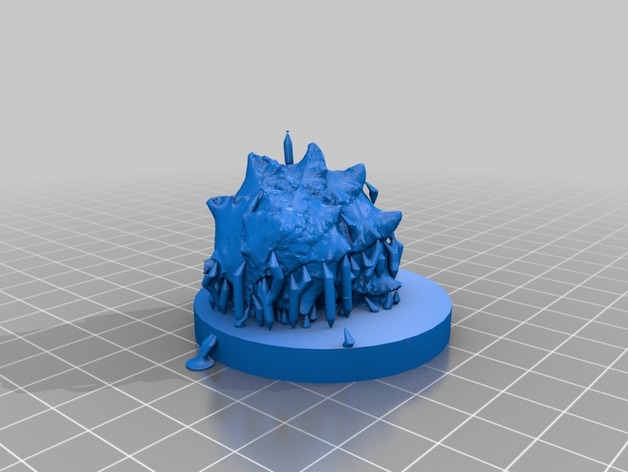
Pointy Shell 3D Print Model
Summary
A shell that I scanned using Photoscan pro.
Print Settings
Printer Brand:
Wanhao Printer:
Wanhao Duplicator i3 V2 Rafts:
Doesn’t Matter Supports:
No Infill:
10% Notes:
This includes supports added in meshmixer. The base is pretty wide and unchamfered, so I had some difficulty getting it off the printer. -
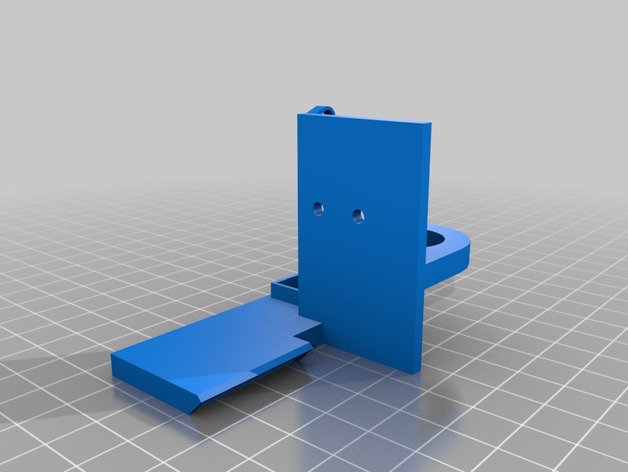
TronXY X3 Autolevel+5015 Fan Mount 3D Print Model
Summary
Since the TronXY X3 did not come with an autolevel/fan mount combo and desperately needed hotend cooling, I decided to make a mount that fit a 5015 Turbo cooler fan. This accomodates any 18mm autolevel probe, with x:-45 y:-5 when setting up the autoleveling portion of the firmware.
If you’re thinking about purchasing a TronXY X3, I highly recommend printing this first so you’ll have autoleveling and cooling ready to go.
If you’re looking for a good deal on one of these awesome printers, GearBest has them for $220.00 USD shipped: http://www.gearbest.com/3d-printers-3d-printer-kits/pp_436308.html?lkid=10991506 — Just use coupon code “GBTE”.
Print Settings
Printer:
Custom RepRap Rafts:
No Supports:
Yes Resolution:
0.2 Infill:
30 -
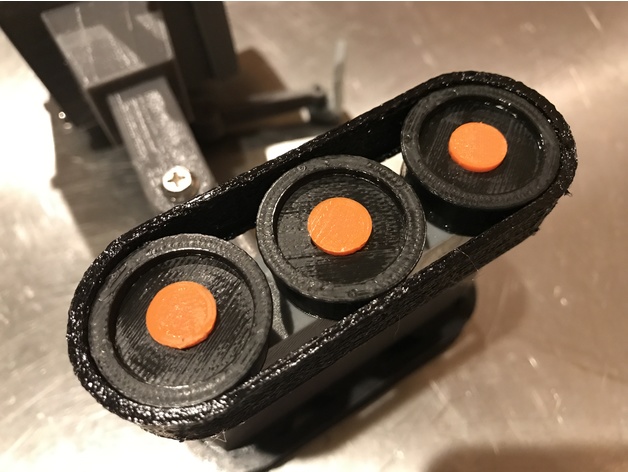
Butter Robot remix parts 3D Print Model
Summary
I liked the files jimbone provided but wanted a more screen accurate model. still not perfect, but simple Tinkercad created a few modifications. Lens is in three parts. outer printed in grey, mid printed in black and inner printed in light blue. also made some caps, that need to be glued (not press-on) for the orange part.
Print Settings
Printer Brand:
Robo 3D Printer:
R1 ABS + PLA Model Rafts:
No Supports:
No Resolution:
.2 -
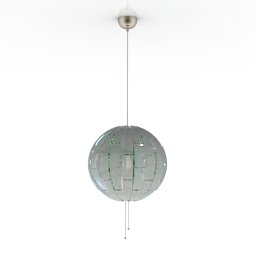
Luster 3D Model
Additional Info: Luster close – 3D model (*.gsm+*.3ds) for interior 3d visualization.
-
Q Stool 3D model Free 3D Model
Q Stool by Viteo | 3d model produced by Design ConnectedThis 3d model is part of the highly acclaimed Design Connected collection featuring 6500+ carefully picked exclusive furnishings. Check out our full range of 3d models for more mid-century icons, contemporary classics and designer masterpieces.All Design Connected 3d models are originally created in 3ds Max and V-Ray renderer.Our in-house team of 3d artists handle all further remodelling, materials conversions and other adaptations to deliver best possible visual and technical quality of all the additional file formats and renderers we offer. Files units are centimeters and all models are accurately scaled to represent real-life object’s dimensions.Our models come as a single editable mesh or poly object (or as group for rigged models or where displace modifier has been used) properly named and positioned in the center of coordinate system. No lights, cameras and render/scene setup are included unless otherwise stated in the particular model’s description.AVAILABLE FILE FORMATS- Sketchup 8 or above – Autodesk 3ds Max 2011 or above– VRay– Mental Ray– Scanline- OBJ and FBX – Abvent Artlantis ADDITIONAL FILE FORMATS UPON REQUEST- Cinema4D R16 or above- ARCHICAD R16 or above- Autodesk 3ds – Rhinoceros – Autodesk DWG – Maya – Lightwave – Collada PRODUCT DESCRIPTIONBrand: Viteo, AustriaDesigner: Danny VenletDesign Connected ID: 3866BEFORE PURCHASEWe highly recommend that you download few of our FREE 3D MODELS and test if they work well with your 3d software before making a purchase.ABOUT THE IMAGERYPreviews rendered in 3dsMax using VRay. Please note that the studio scenes and light and environment settings are not included.SUPPORTIf you have any questions about how to use Design Connected 3d models, please contact us via Support.Thank you for purchasing Design Connected models!
-
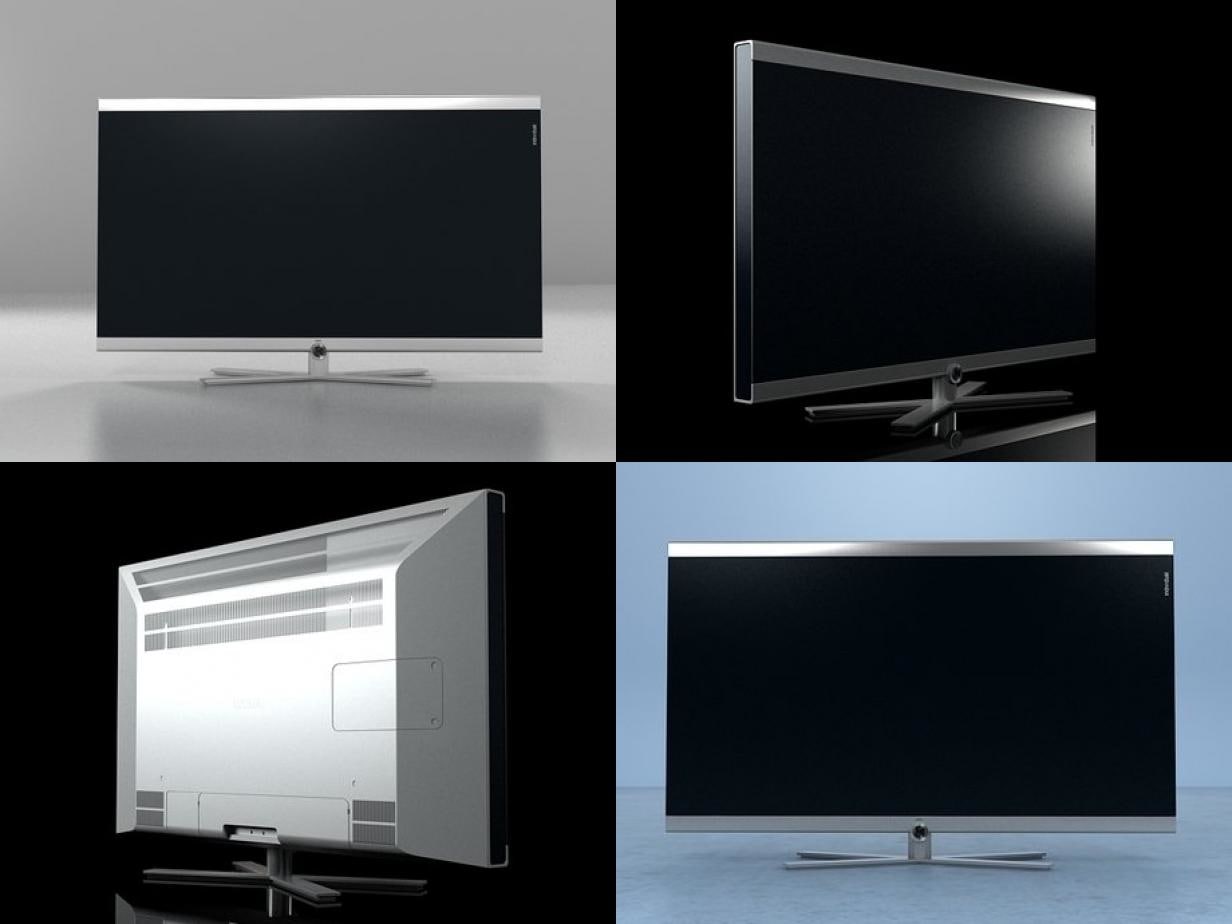
3D TV Individual 52 Compose Free 3D Model
TV Individual 52 Compose by Loewe | 3d model produced by Design ConnectedThis 3d model is part of the highly acclaimed Design Connected collection featuring 6500+ carefully picked exclusive furnishings. Check out our full range of 3d models for more mid-century icons, contemporary classics and designer masterpieces.All Design Connected 3d models are originally created in 3ds Max and V-Ray renderer.Our in-house team of 3d artists handle all further remodelling, materials conversions and other adaptations to deliver best possible visual and technical quality of all the additional file formats and renderers we offer. Files units are centimeters and all models are accurately scaled to represent real-life object’s dimensions.Our models come as a single editable mesh or poly object (or as group for rigged models or where displace modifier has been used) properly named and positioned in the center of coordinate system. No lights, cameras and render/scene setup are included unless otherwise stated in the particular model’s description.AVAILABLE FILE FORMATS- Sketchup 8 or above – Autodesk 3ds Max 2011 or above– VRay– Mental Ray– Scanline- OBJ and FBX – Abvent Artlantis – Cinema4D R16 or above– Basic materials- Autodesk 3ds ADDITIONAL FILE FORMATS UPON REQUEST- ARCHICAD R16 or above- Rhinoceros – Autodesk DWG – Maya – Lightwave – Collada PRODUCT DESCRIPTIONBrand: Loewe, GermanyDesigner: N/ADesign Connected ID: 3524BEFORE PURCHASEWe highly recommend that you download few of our FREE 3D MODELS and test if they work well with your 3d software before making a purchase.ABOUT THE IMAGERYPreviews rendered in 3dsMax using VRay. Please note that the studio scenes and light and environment settings are not included.SUPPORTIf you have any questions about how to use Design Connected 3d models, please contact us via Support.Thank you for purchasing Design Connected models!
-
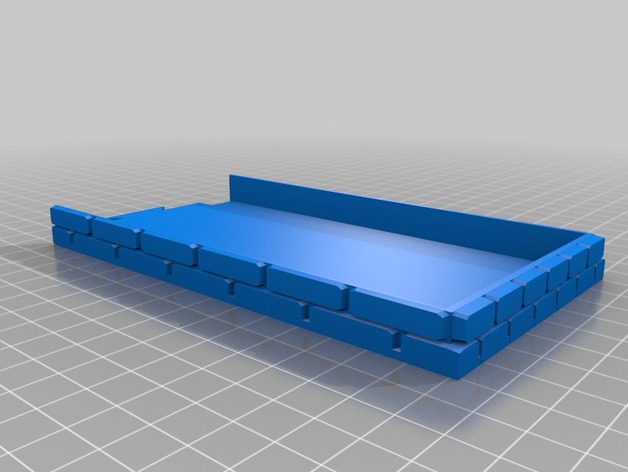
Dice Tower – Extended Draw Bridge 3D Print Model
Summary
Modified from the beautiful Modular Castle created by sablebadger. Extended draw bridge, suitable for those who are playing with lots of dice.
The original Design can be found here: http://www.thingiverse.com/thing:1657208 -
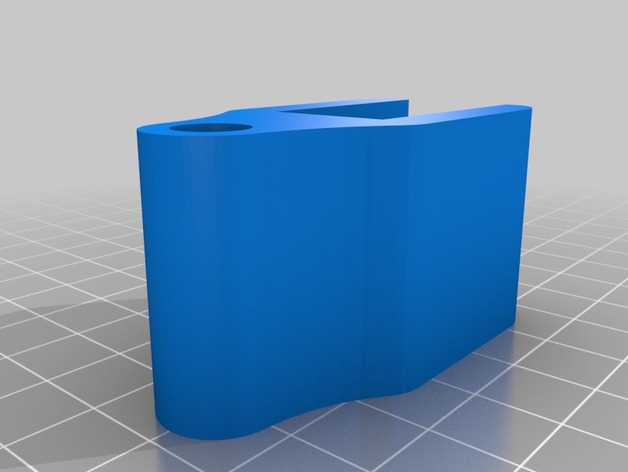
Lcd mount for Itopie 3D Print Model
Summary
This mount its for Itopie with 16mm frame.
For bracket i use this https://www.thingiverse.com/thing:587653 and for full lcd case i chose this https://www.thingiverse.com/thing:684778
You can mount any part of the structure, the two holes are 3mm so you can attach to the structure
Print Settings
Printer Brand:
Prusa Printer:
Prusa Clone Rafts:
No Supports:
No Resolution:
0.2 Infill:
40 -
Amazon Echo Dot Robo-Spider Base! 3D Print Model
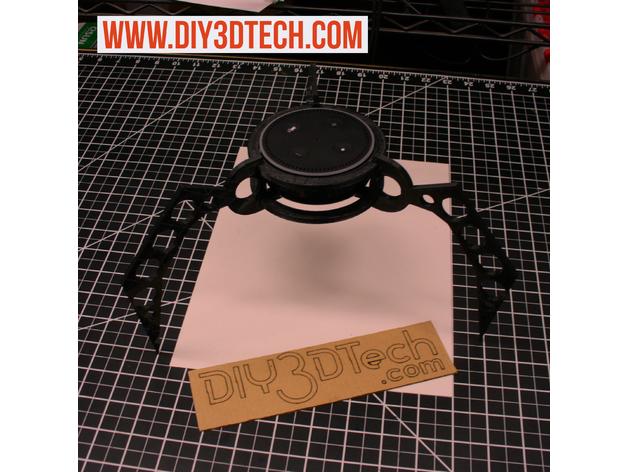
Summary
I was inspired to create this from the Sci-Fi movie Pacific Rim (http://amzn.to/2ue6p0M0) as to “Combat Monsters you have to build Monsters of you own”. The mode is rather straight forward and easy to print as well as providing a stark conversational look when as it is sure to be a conversation piece in any office or home! In addition it also offers many finishing option should not like the 3D printed look (which my wife doesn’t) as you can use a stone spray paint such this (http://amzn.to/2ue7gyw) which my wife even approves of or a lighter textured version such as this (http://amzn.to/2uewehx) to cover the layer lines. However any way you decide to go, this functional piece of art is sure to give you a smile (or scare) every day!
Also note you can use the holes in the legs to run the wire neatly (hidden feature of the design) providing for a clean seamless steam punk or reto-modern decor look!
Also, please follow us on Thingiverse and give this a like if this came in handy and for more information on this project, please visit us at http://www.DIY3DTech.com as well as subscribe to our YouTube Channel at http://YouTube.DIY3DTech.com along with a visit to our drone site and YouTube channel at http://video-drone.DIY3DTech.com
If you are looking for one of a kind swag shop for yourself or a Maker Geek friend, visit our swag shop at http://Swag.DIY3DTech.com for unique 3D Printing, Laser Cutting and CNC swag! Too, if you want a behind the scene look at what we are working on be sure to follow us on Instagram (https://www.instagram.com/diy3dtech/)!
Print Settings
Printer:
Any 200mm x 200mm printer will work Rafts:
No Supports:
No Resolution:
.3 or better you pick Infill:
10% Notes:
So this things assembles via pressure fit and while you can glue it, it is not required however to achieve this the interlocking slots are very tight and depending on the plastic you use may require some clean up with a bur tool (such as this: http://amzn.to/2uek6gg) as well as a small file set (such as this: http://amzn.to/2uexS2u) to achieve the required fit of the parts. -
Fader knob 3D Print Model
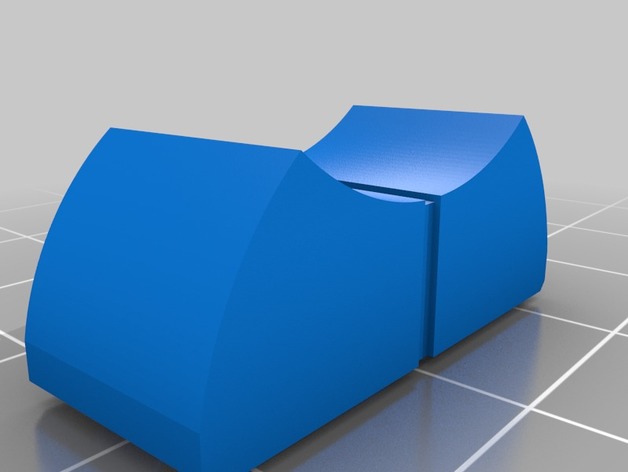
Summary
Had broken a couple of faders on my Phonic Summit mixer so I modeled this from the existing faders. I’m pretty sure this will fit other mixers as well with minor adjustments.
The center groove is meant to be painted white in oreder to easily align the fader to the underlying scale.
Print Settings
Printer Brand:
Prusa Printer:
Prusa Clone Rafts:
No Supports:
Yes Resolution:
0.15 mm Infill:
20% Notes:
There’s a lot of thin walls here so make sure that your slicer allows some overlap. Supports are necessary to fill the short distance btween the fader foot and the upper body. I use dense support in S3D slicer for best results.
Use ABS to allow for a little flexing. PLA is a bit too hard and will probably make the fitting difficult. -

Basic Covertec holder v4 3D Print Model
Summary
Version 4 of the covertec holder. Added additional material to reinforce the channel.
Print Settings
Printer Brand:
Prusa Printer:
Prusa Clone Rafts:
Doesn’t Matter Supports:
Yes Resolution:
0.15 Infill:
15 -
Boxy Saber Tooth Tiger 3D model Free 3D Model
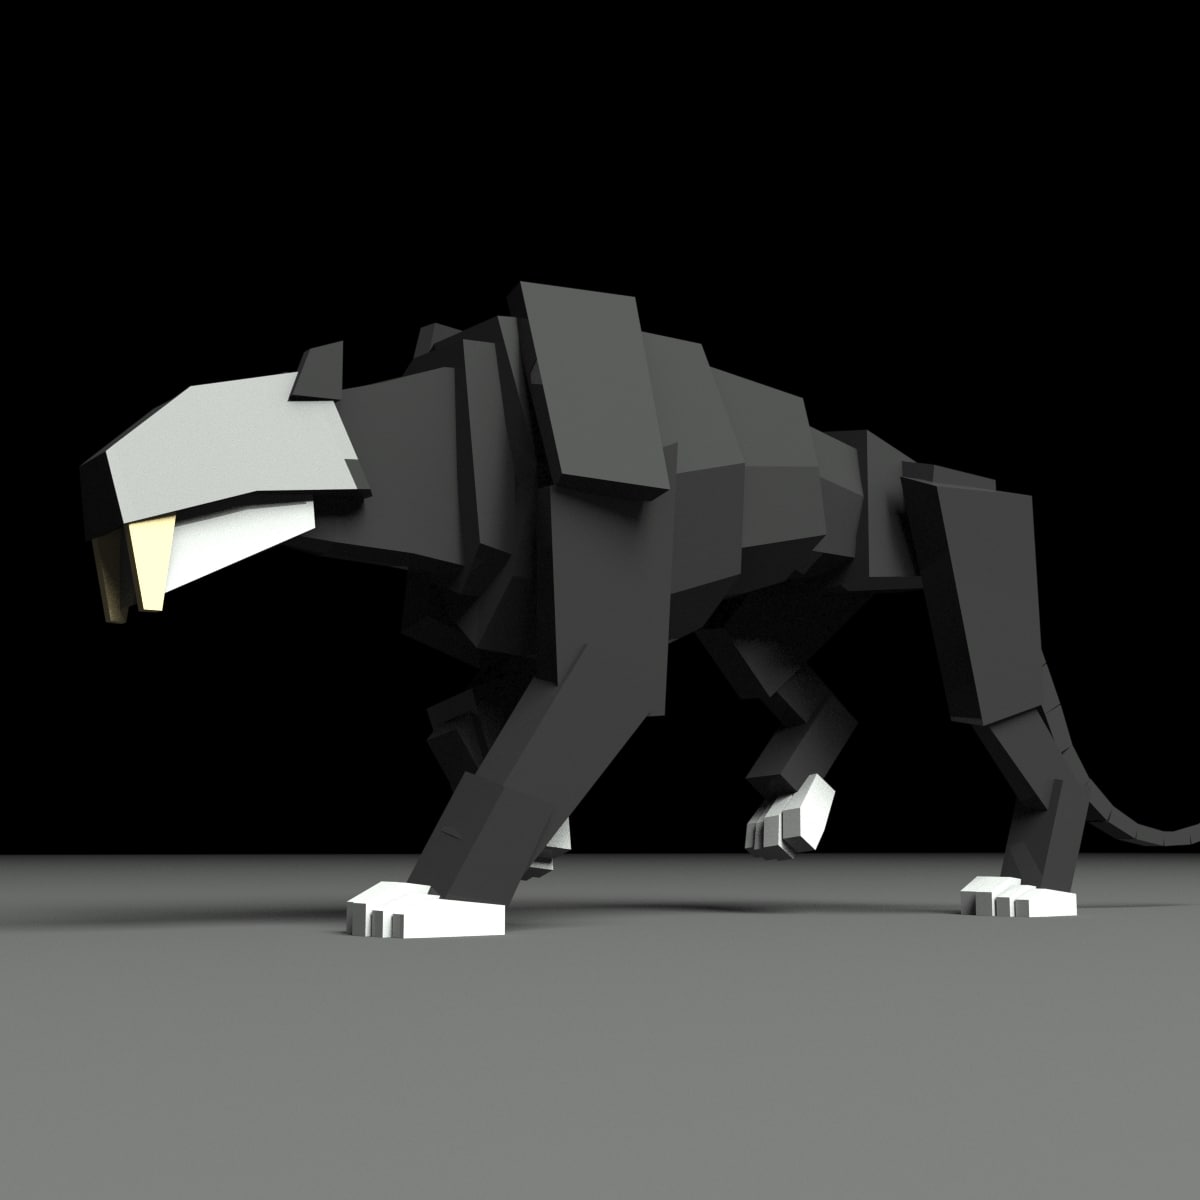
IntroductionBoxy Saber Tooth Tiger Maya Rig made by Truong.Technical InformationSoftware: Maya 2014 (or higher)Rigged using Advanced Skeleton.Maya scene files include:boxy_tiger_rig.ma: rigged tigerboxy_lighting.ma: reference this file into your animation scene and render, the lighting was setup already (mental ray). Use Render_cam for the best results.redshift lighting also included. How to videos?Issues and bugsIf you have any rig issues or further questions/ requests, feel free to contact me at my facebook page (search for Truong Cg Artist)Happy animating!Truong
-
Boxy Bird Maya Rig model Free 3D Model
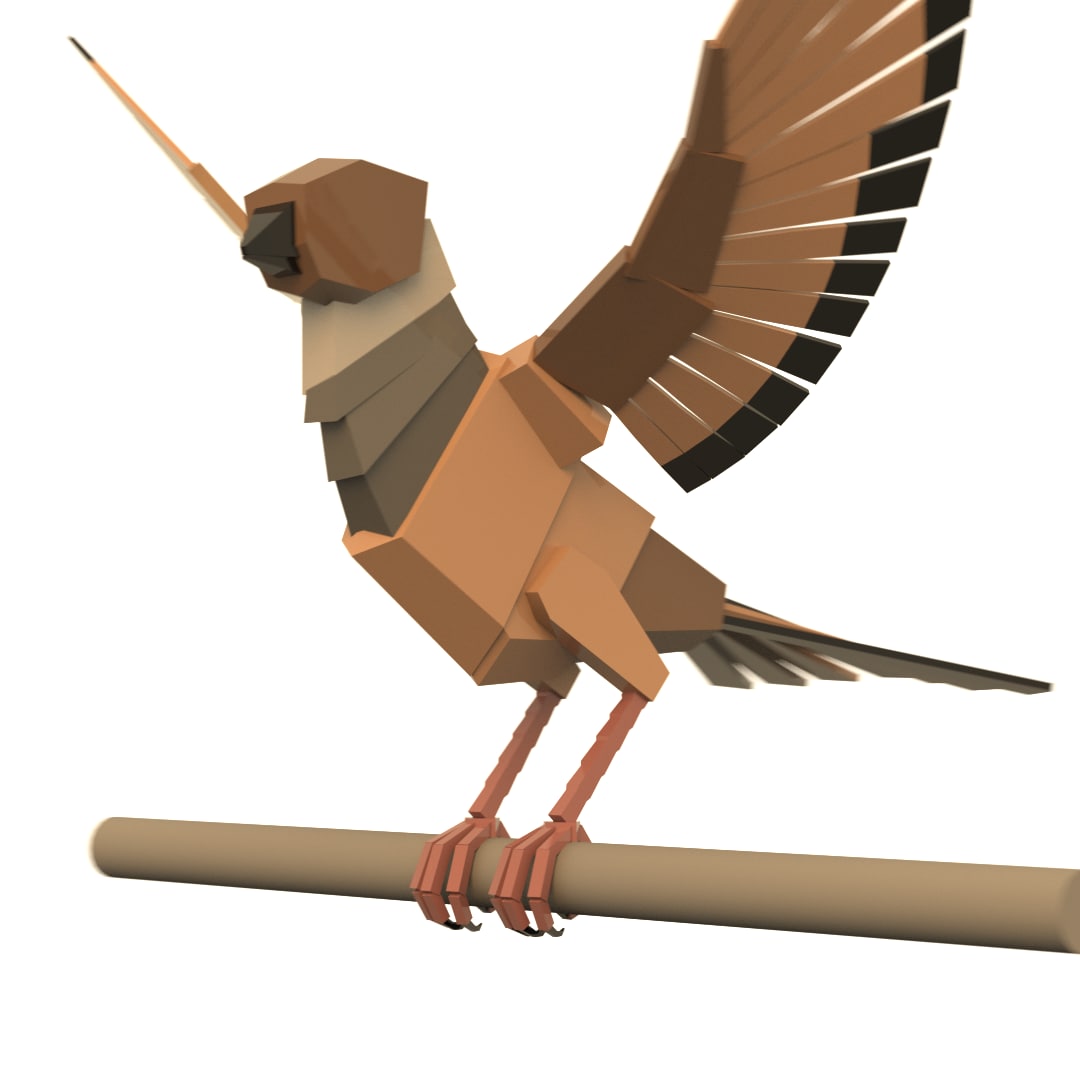
IntroductionBoxy Bird Maya Rig Maya Rig made by Truong.Technical InformationSoftware: Maya 2014 (or higher)Rigged using Advanced Skeleton.Issues and bugsIf you have any rig issues or further questions/ requests, feel free to contact me at my facebook page (search for Truong Cg Artist)Happy animating!TruongPlease click on my username for more products from me.
-
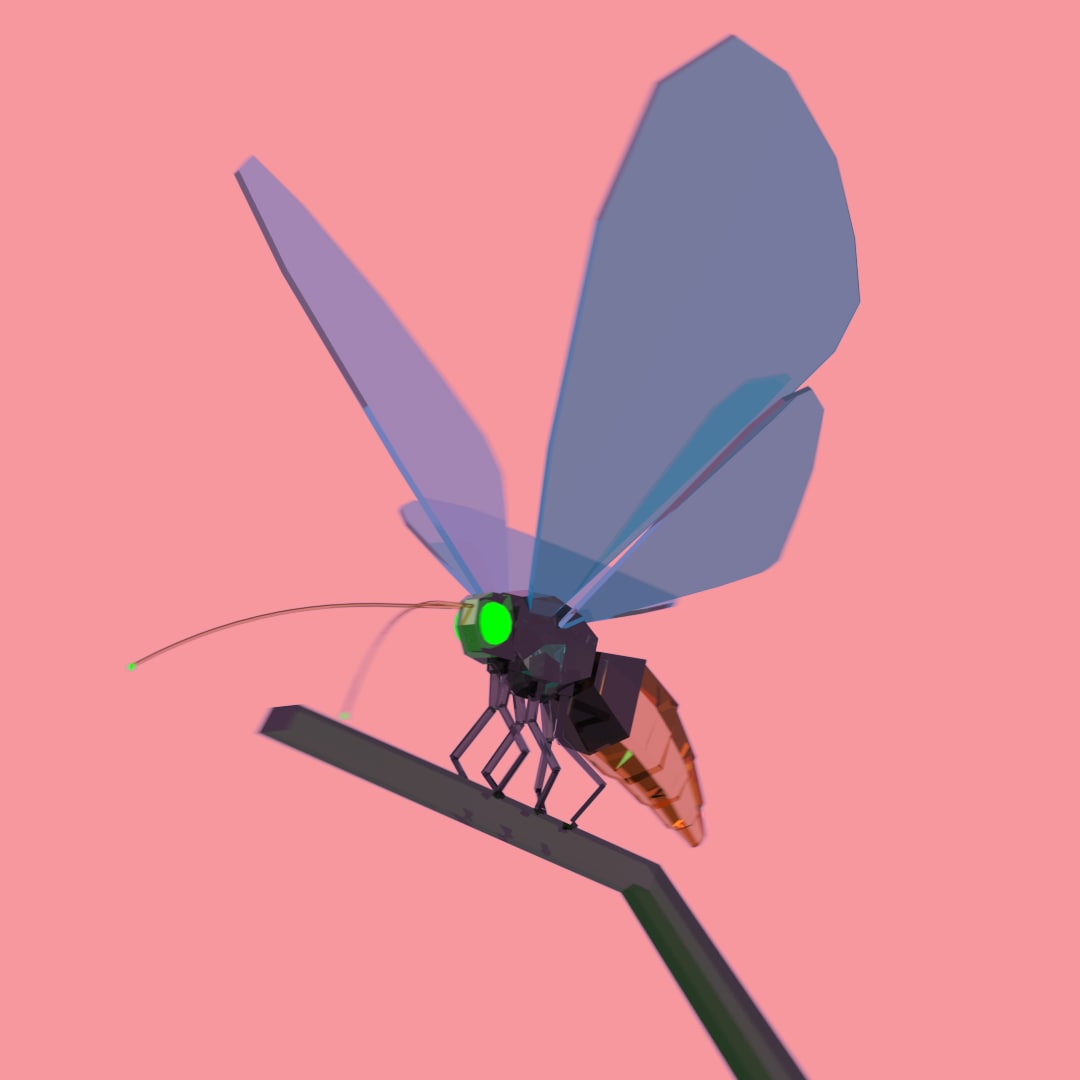
3D Boxy Butterfly Maya Rig model Free 3D Model
IntroductionBoxy Butterfly Maya Rig made by Truong.Technical InformationSoftware: Maya 2014 (or higher)Rigged using Advanced Skeleton.Issues and bugsIf you have any rig issues or further questions/ requests, feel free to contact me at my facebook page (search for Truong Cg Artist)Happy animating!TruongPlease click on my username for more products from me.
-
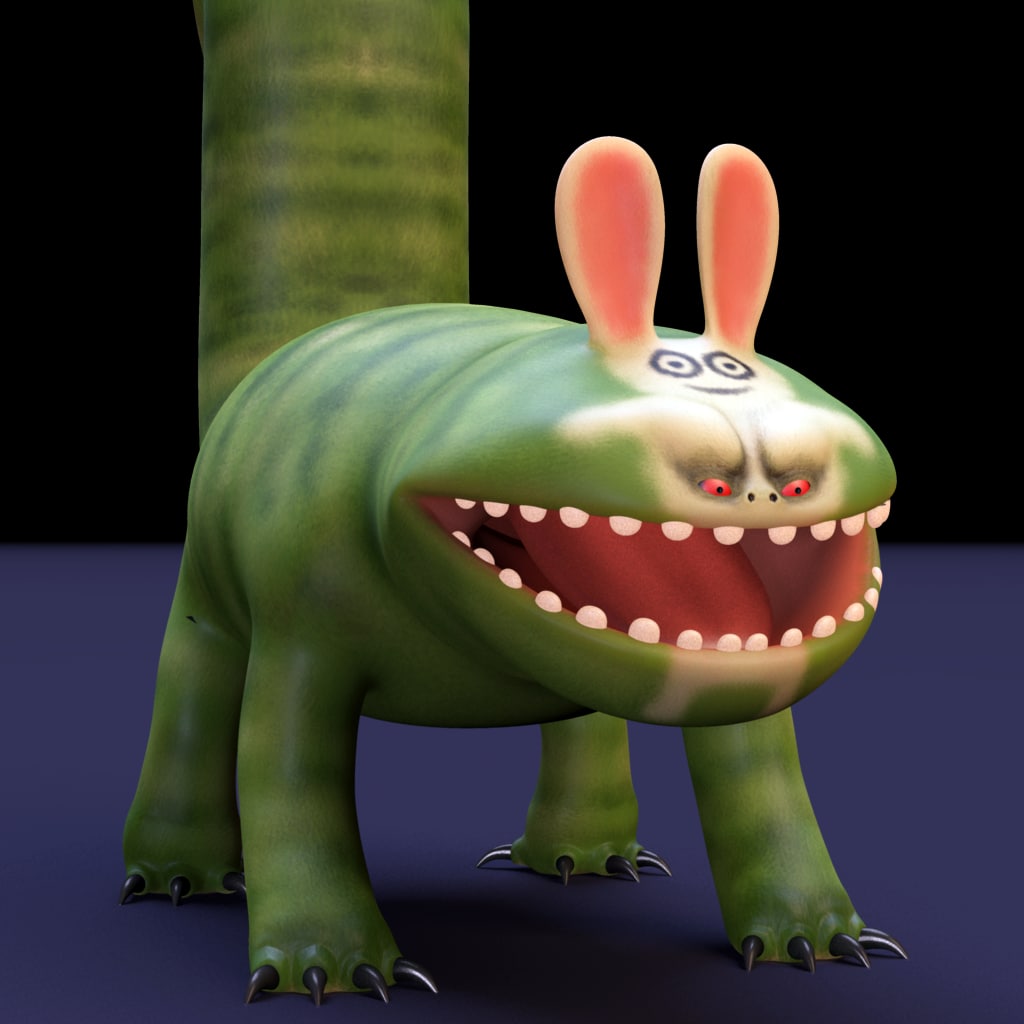
Bunny Eater Maya Rig 3D Free 3D Model
IntroductionBunny Eater Maya Rig done by Truong CG Artist.Modeled based on Big Bad Bunny Eater by Bobby ChiuFree to download and use for non-commercial purpose. Technical InformationSoftware: Maya 2012 (or higher)Rigged using Advanced Skeleton.Maya scene files include:eater.ma: the rigged bunny eater (blinn shader)eater_sss.ma: the same rig, but with SSS shader.eater_lighting.ma: reference this file into your animation scene and render, the lighting was setup already (mental ray). Use Render_cam for the best results.Remember to set project, so all the textures can be loaded automatically.Issues and bugsIf you have any rig issues or further questions/ requests, feel free to contact me at my facebook page (search for Truong Cg Artist)Happy animating!TruongPlease click on my username for more products from me.
-
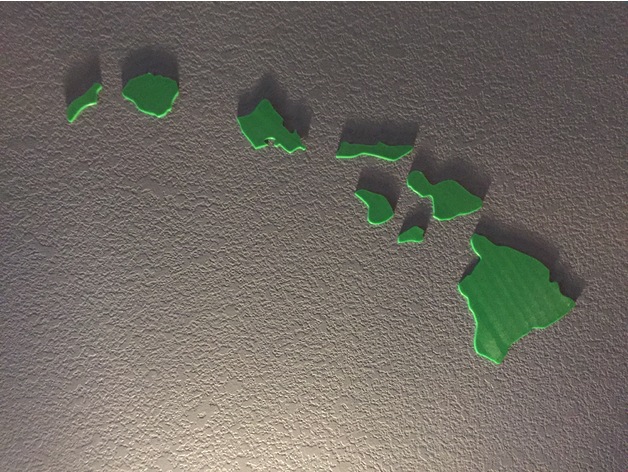
Hawaiian Islands Wall Art 3D Print Model
Summary
I designed this as a decoration for the wall. You can use double-sided take to paste the islands to the wall. I will fix the orientation of each island soon to make it easier for you guys. In the meantime, all you have to do is rotate each island 90 degrees. Please check out my other designs as you might like them.
Print Settings
Printer:
Anet A8 Rafts:
No Supports:
No Resolution:
0.15 – 0.2 Infill:
100%
How I Designed This
I used Fusion 360 to design this. -
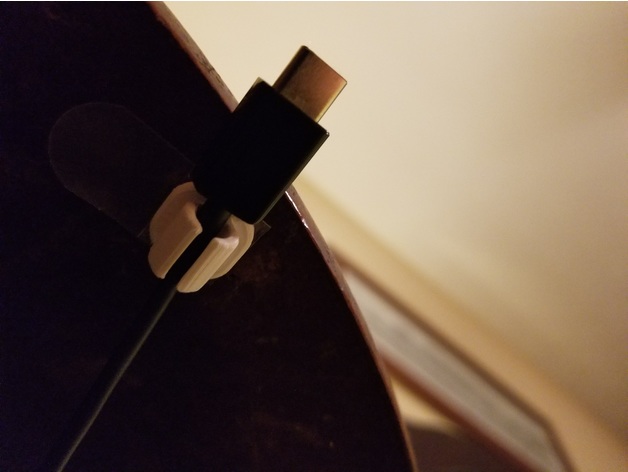
Wire Management Clip 3D Print Model
Summary
This is a simple wire clip, made to be stuck down to a table or the wall with some 3M double sided foam tape. Simply cut the tape down to the side of base of the clip (14×14 mm)
I personally use one under my bedside table to hold my USB-C cord, so when I unplug my phone, the cord doesn’t fall onto the floor. I also use one on my wall to hold my micro USB cable for my LG Tones. -
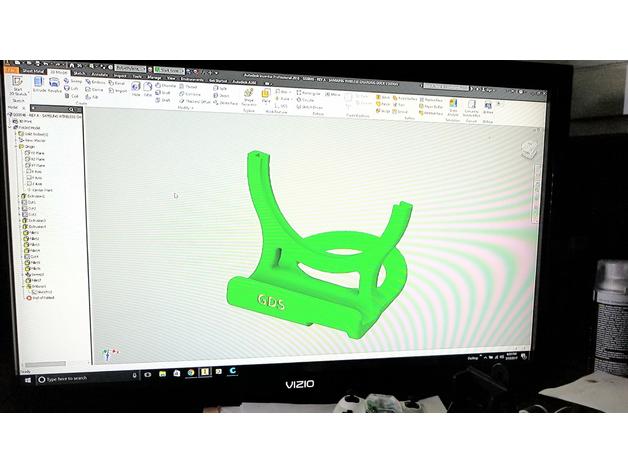
Samsung Galaxy S8 Wireless Charging Dock 3D Print Model
Summary
I was having issues finding a wireless charging stand with the OEM wireless charger, that would fit an S8 with my otterbox case. I came accross Rsavell’s phone stand, and modified it a bit. Also added a slot for the speaker, and more material in the middle. This gave it more strength but the drawback is it also increased the print time a bit.
Print Settings
Printer Brand:
Prusa Printer:
Prusa Steel Rafts:
Doesn’t Matter Supports:
Yes Resolution:
0.12 mm Infill:
25% Notes:
I printed it with ABS, it came out great. The scale was off a bit when I exported the STL. Rescale in your slicer software @ XYZ = 25.4 -
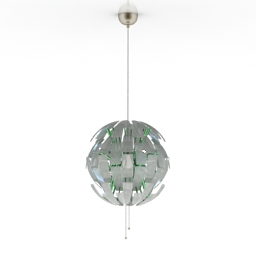
Luster 3D Model
Additional Info: Luster open – 3D model (*.gsm+*.3ds) for interior 3d visualization.
-
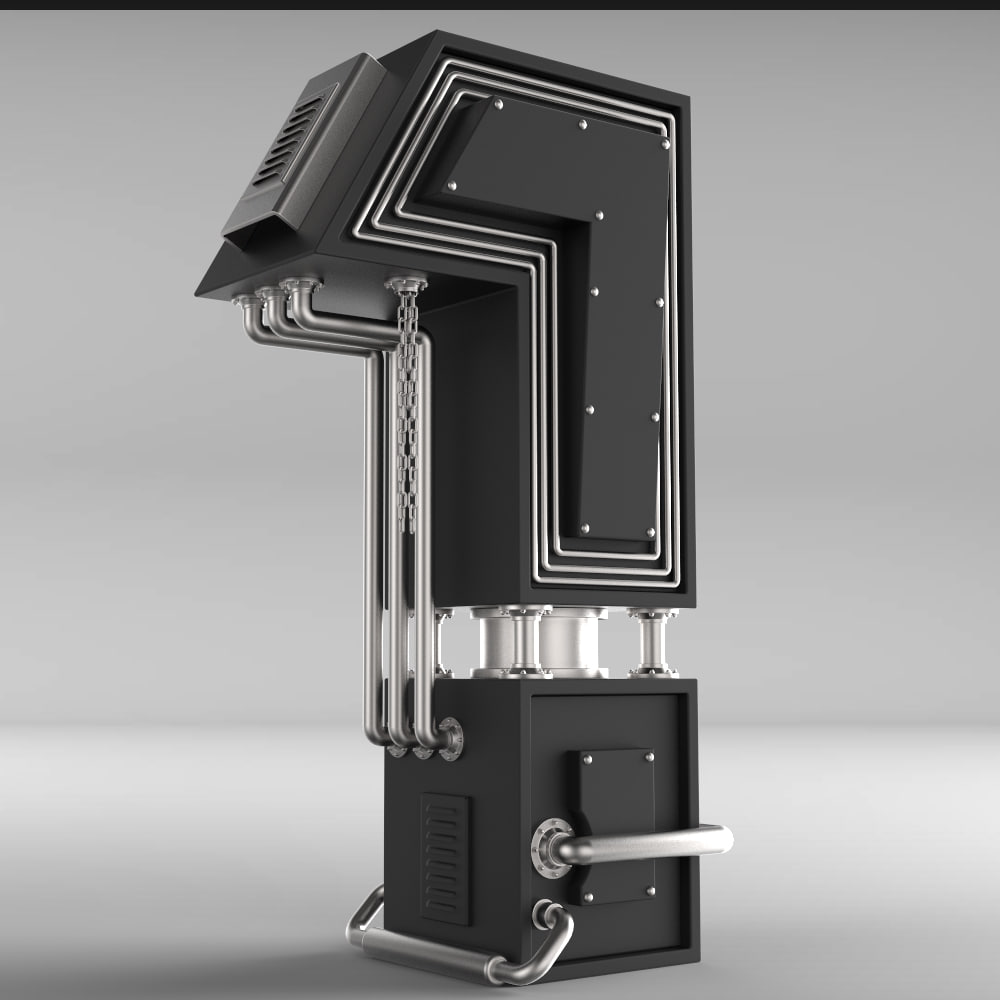
3D Typography 3D model Free 3D Model
– High quality 3D model- You can optimize the model’s polygon values as you like.- No plugin- This files is Perfect for advertising work and Motion design.
-
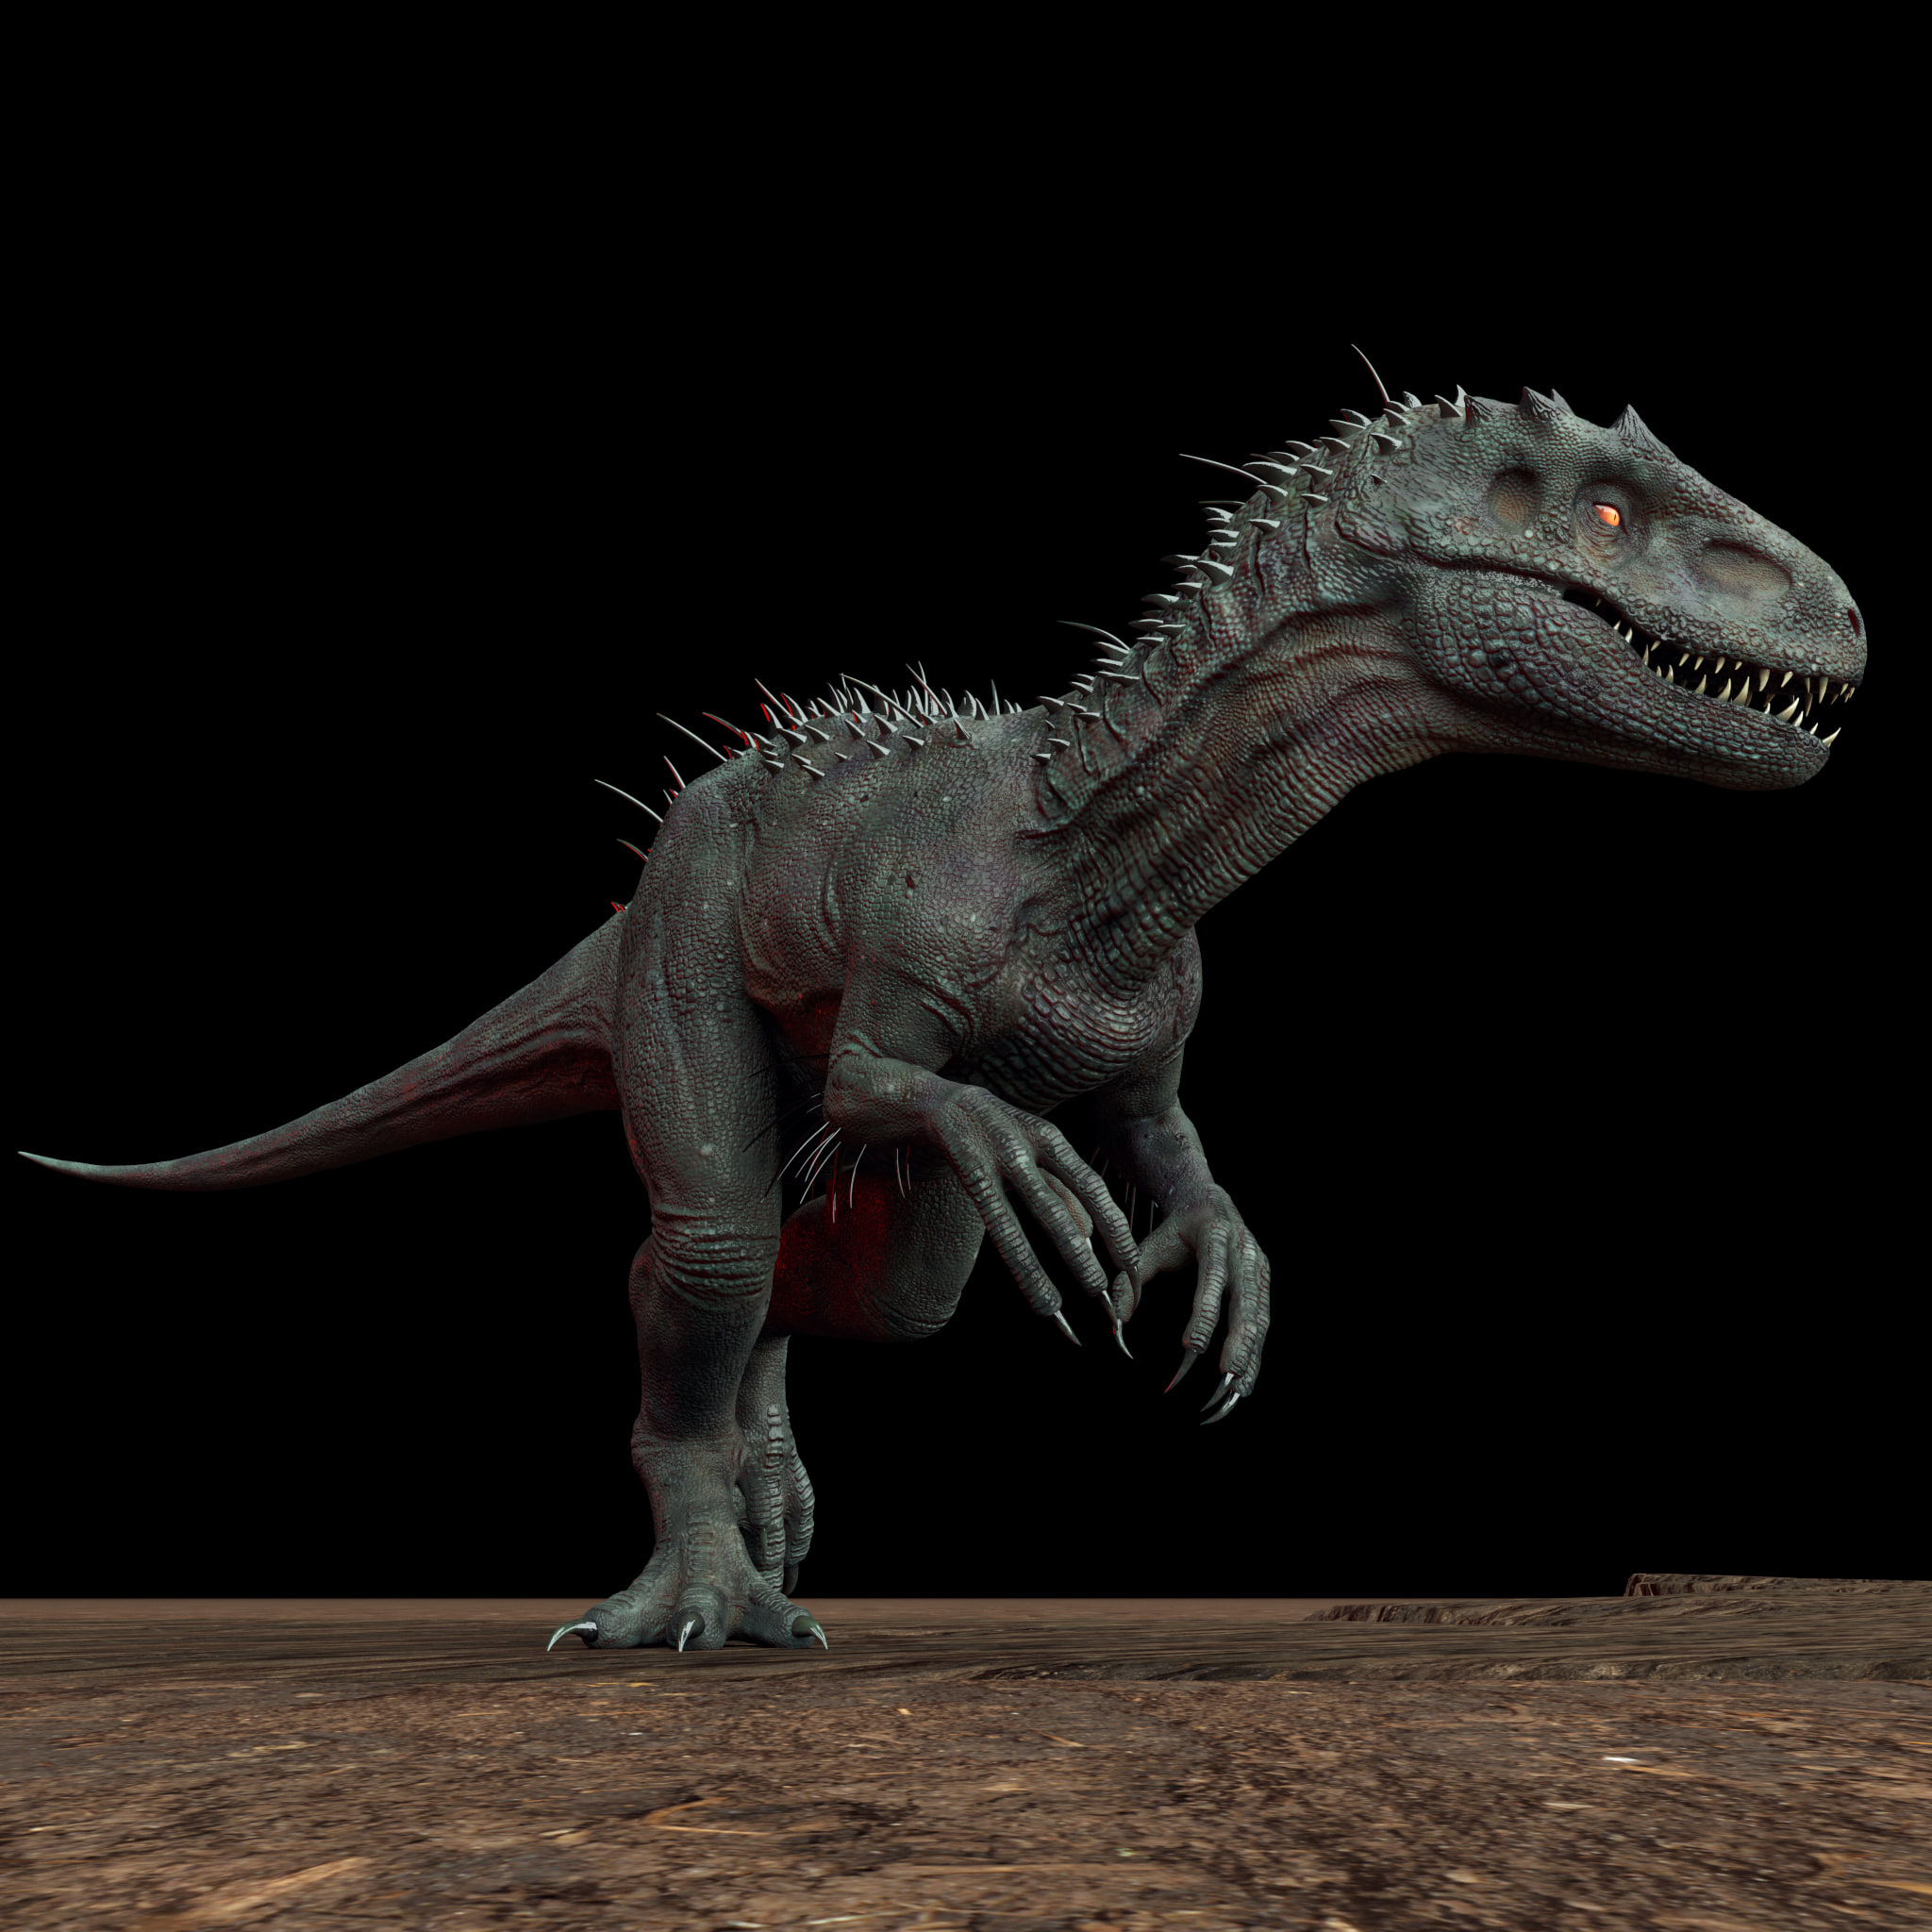
3D Irex Dinosaur Maya Rig Free 3D Model
Indominus Rex Maya Rig (fan art rig) made by Truong.Free to download and use for non-comercial purpose only, like animation practise, personal projects, demo reel, 11s club contest, etc. Technical InformationSoftware: Maya 2014 (or higher)Rigged using Advanced Skeleton.Maya scene files include:irex_rig.ma: the rigged dinosaurirex_lighting.ma: reference this file into your animation scene and render, the lighting was setup already (mental ray). Use Render_cam for the best results.Texture folder: all the texture files (color, normal, displacement, specular).Remember to set project, so all the textures can be loaded automatically.Remember to turn ‘visibility’ on for the ‘lens’ layer before rendering. It will make nicer eyes render.Issues and bugsIf you have any rig issues or further questions/ requests, feel free to contact me at my facebook page (search for Truong Cg Artist)Happy animating!Please click on my username for more products from me.
-
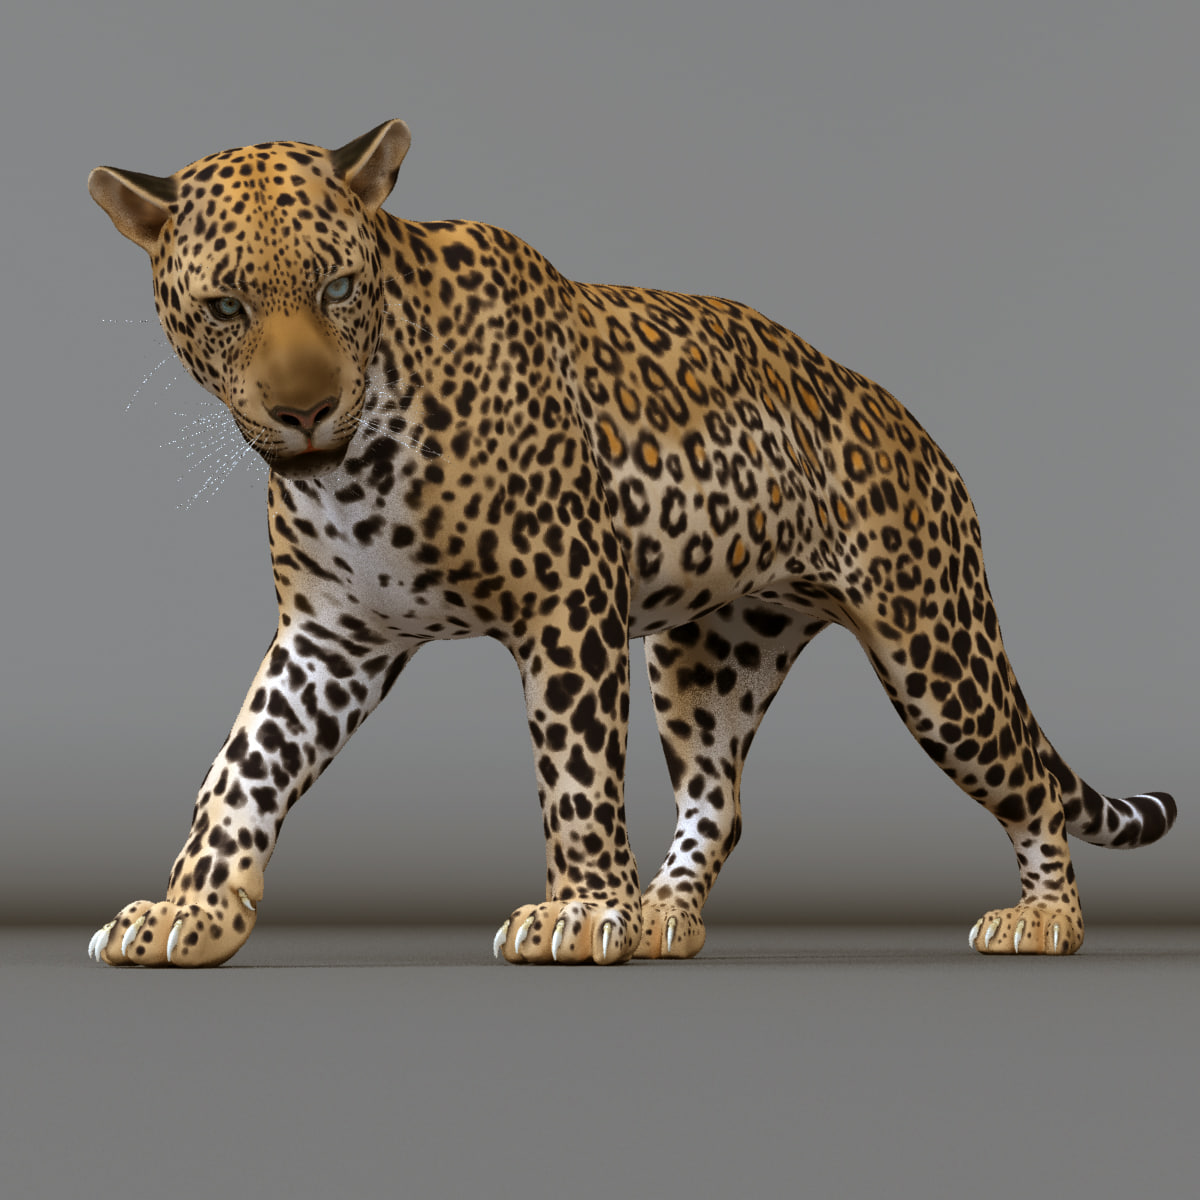
Leopard Maya Rig v2 3D model Free 3D Model
INTRODUCTIONLeopard Maya Rig made by Truong.Free to download and use. (animation reel, short film, video promotion, animation contest, etc). TECHNICAL INFORMATIONSoftware: Maya 2014 (or higher)Rigged using Advanced Skeleton.Maya scene files include:leopard.ma: rigged leopardleopard_lighting.ma: reference this file into your animation scene and render, the lighting was setup already (mental ray). Use Render_cam for the best results. Faces: 78282Vertices: 79829Texture folder: all the texture files (color, normal, displacement, specular).Remember to set project, so all the textures can be loaded automatically.Remember to turn ‘visibility’ on for the ‘lens’ layer before rendering. It will make nicer eyes render. Happy animating.TruongPlease click on my username for more 3d models from me. Thanks!
-
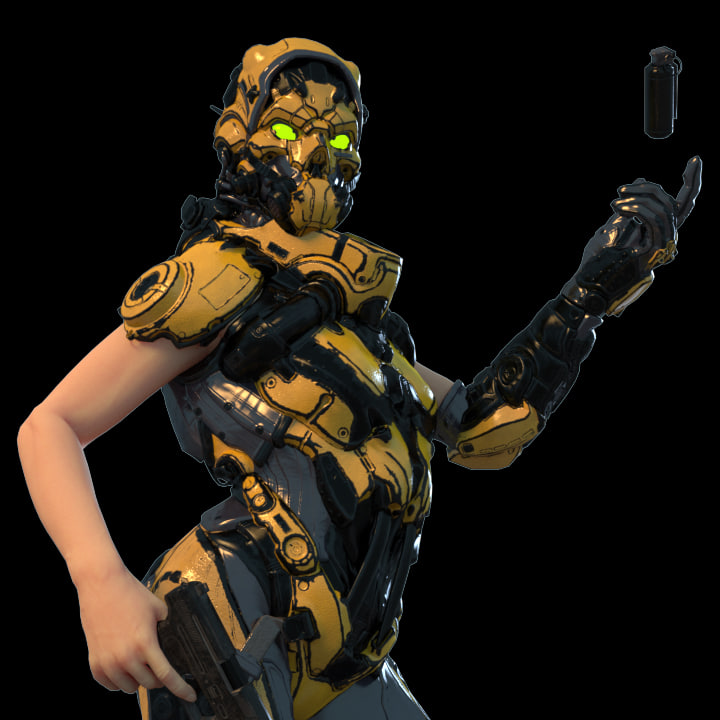
3D GDC FPS Female Maya Rig model Free 3D Model
GDC FPS Female model by Pavlovich Mike.Rigged by Truong Cg Artist. Free to download and use for non-comercial purpose only, like animation practise, personal projects, demo reel, 11s club contest, etc.Technical InformationSoftware: Maya 2014 (or higher)Rigged using Advanced Skeleton.Maya scene files include:gdc_rig.ma: the rigged charactergdc_lighting.ma: reference this file into your animation scene and render, the lighting was setup already (mental ray). Use Render_cam for the best results.gun & flashbang prop also included.Texture folder for all the texture files.Redshift folder for redshift rendering. Issues and bugsIf you have any rig issues or further questions/ requests, feel free to contact me at my facebook page (search for Truong Cg Artist)Happy animating!Truong Cg ArtistPlease click on my username for more products from me.
-
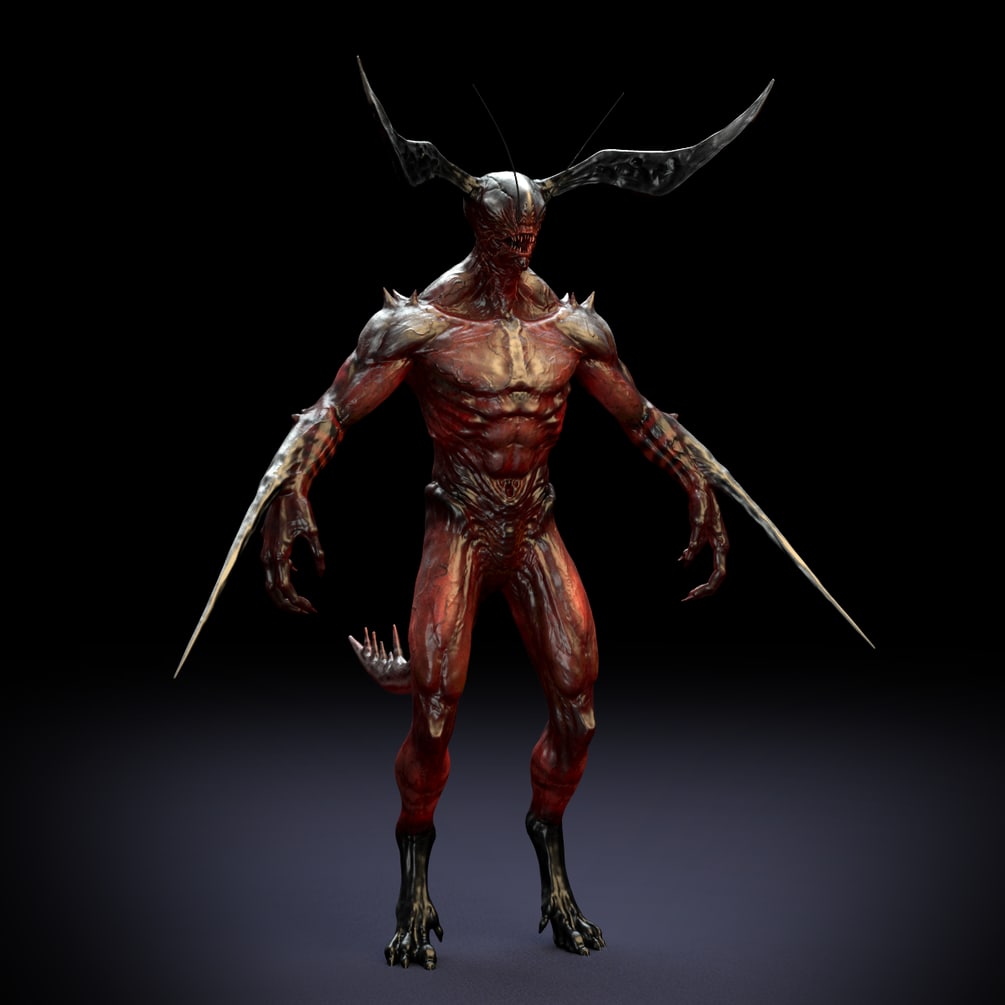
Demon (no eyes) Maya Rig 3D Free 3D Model
Demon Rig made by TruongUsed in my short film – Forsaken WarriorsTechnical InformationSoftware: Maya 2012 (or higher)Rigged using Advanced Skeleton.Maya scene files include:demon_noeyes_v2.ma : rigged demondemon_lighting: reference the rig here and start animating, the lighting was setup already (mental ray). Use Render_cam for the best results.Faces: 7669Vertices: 7698Texture folder: all the texture files (color, normal, displacement, specular).Remember to set project, so all the textures can be loaded automatically.How to render?Rig problemsIf you have any rig issues or further questions, feel free to contact me at my facebook page (search for Truong Cg Artist)Happy animating!TruongPlease click on my username for more products from me.
-
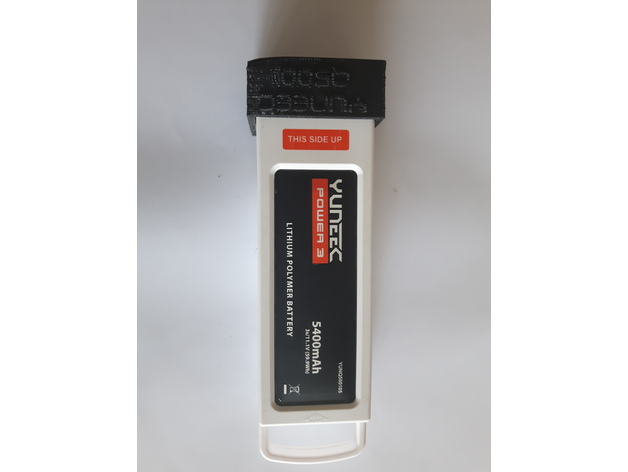
Yuneec Q500 Battery cover 3D Print Model
Summary
I made this cover for my Yuneec Q500 battery, so we could go through customs.
As airlines require that large capacity batteries terminals are covered, and I have a 3D printer, so I made this.
If needed and elastic around the battery will hold the cap on, but for me they fit perfectly.
Print Settings
Rafts:
No Supports:
No Infill:
100% Notes:
No Supports needed -
![Morty Smith [Rick and Morty] 3D Print Model](https://3dhunt.co/static/2017/07/bf30340ef5a1e8f1bdb0f969c54e2562.jpeg)
Morty Smith [Rick and Morty] 3D Print Model
Summary
Watch here: https://youtu.be/hX9XGU1L7OY
Last time I asked if there were any fans of Rick and Morty out there. It turns out there are! Rick got a lot of love, so let’s give him some company. He redeemed his voucher for a replacement Morty.
I created this model in ZBrush. I used ZSpheres to get the main body shape there. I modeled him in an A pose, then I moved his arms to get them in the right position. Then I just went through, extracted the areas where his clothes are, then I shaped and added details to the face.
After modeling I ran it through Meshmixer to plane cut the feet so he’ll stand normally. Then I also exported it in STL format from there. I printed it on my Wanhao D7 with FunToDo Snow White Resin.
Then my wife sanded and primed it. She used her airbrush to paint the skin colors on, then used paintbrushes and acrylic paints to paint everything else. Then we just super glued it to the base.
Printer: Wanhao D7
Filament: FunToDo Snow White Resin
Layer Height: 0.1mm
Supports: Yes -
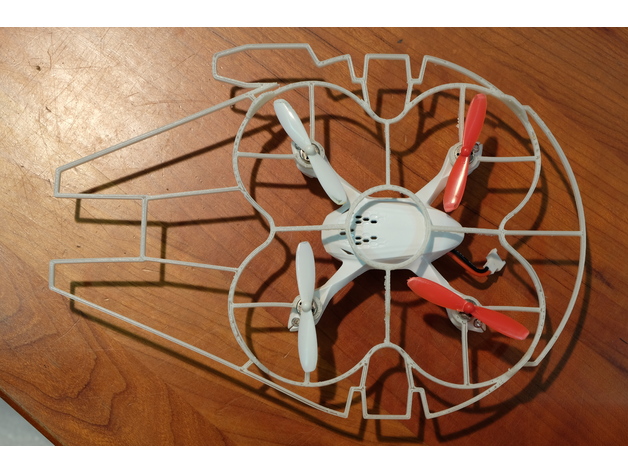
Hubsan X4 Millennium Falcon Shroud 3D Print Model
Summary
A quick print for making your Hubsan X4 ready for the Kessel Run!
Note: this does the opposite of improving speed and agility but it looks cool. -
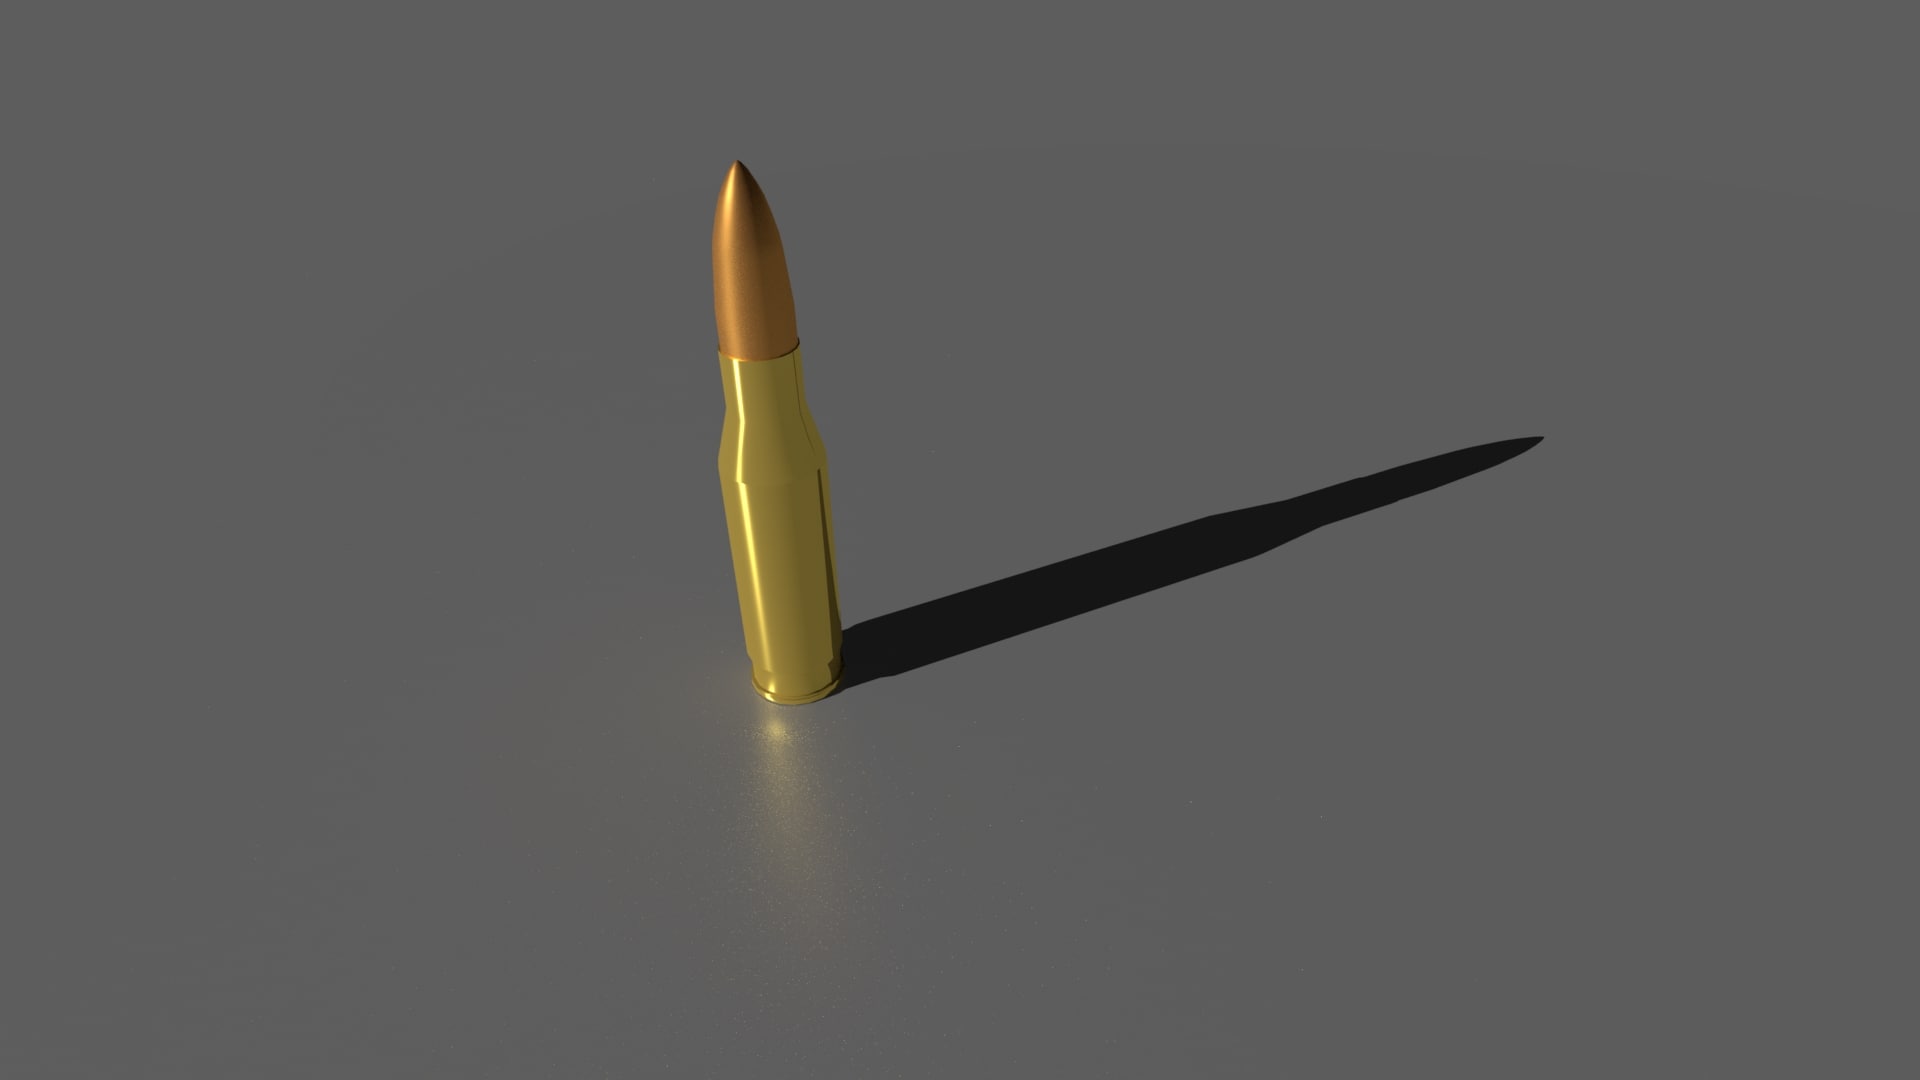
3D model 308 Winchester Free 3D Model
Overall Description:- Modeled in Maya after a .308 Winchester rifle round- File includes: The shown model, model shaders- Shaders that were used in the shaded preview image are included, but I encountered problems with reflections, so be careful. – You are able to separate the bullet from the casing so have fun with thatHope you enjoy my model!~ GrizzlyGhost
-
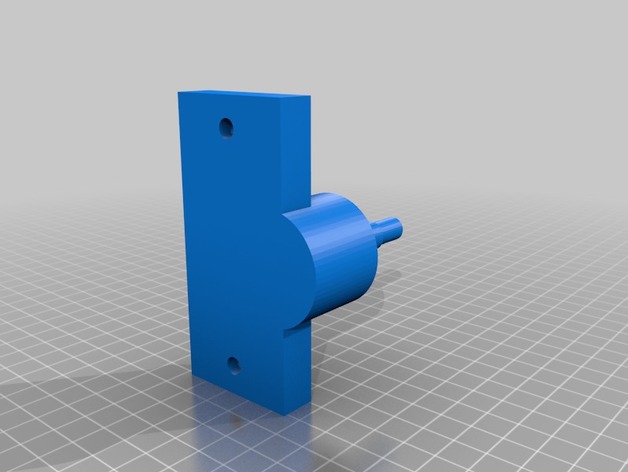
Harbor Freight Mini Mill Dimensioned Models 3D Print Model
Summary
Dimensioned model of HF mini mill parts to support CNC modification -
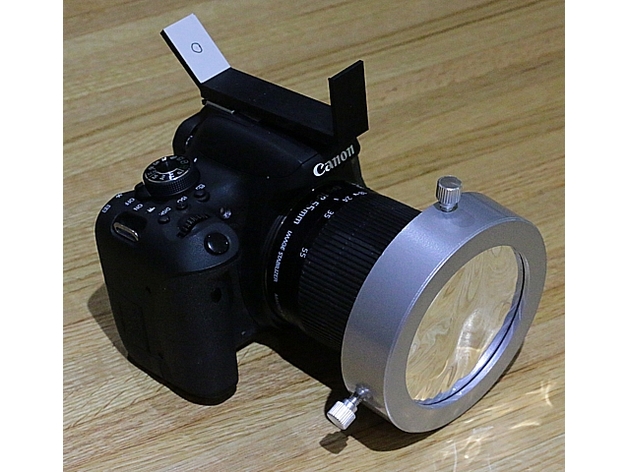
Solar Finder for hot shoe on camera for solar and eclipse photos 3D Print Model
Summary
If you plan on taking photos of the sun, especially during the eclipse of the sun, you don’t want to look through the viewfinder to locate the sun and burn your eyes out. So you need a “solar finder”. There are lots of these for telescopes, but this one fits in the hot shoe (where the flash goes) on your camera. The sun shines through a small hole in the front and makes a dot on the angled part. When the sun shines in the center of the circle, then the camera is pointed at the sun properly. You need to use a solar filter on the front of the camera so you don’t burn out your camera or worse, start a fire in it. Then you can try various exposure settings until you get a good photo. This is for use when the sun is not totally eclipsed. For totality, you would slip off the solar filter in front and hopefully you would have already pointed the camera in the proper direction. Only during totality, you can use the viewfinder.
Anyway, to make this, I printed using ABS with a 0.35mm nozzle, using 0.1mm layer thickness. After printing, cut out a piece of white 3×5 card to glue on the angled part. Then push a pin through the back of the angled part’s hole to locate the correct point on the card and draw a circle there. You might want to test it first outside with the sun (before drawing the circle) in case you had any warping problems printing this thing. You might have to use a fingernail file or 1 to 3 layer folded 120 grit sandpaper to sand off any excess ABS if it doesn’t quite fit your hot shoe (especially for the slots). Have fun taking solar photos with your camera!
Print Settings
Printer Brand:
LulzBot Printer:
TAZ 3 Rafts:
No Supports:
No Resolution:
0.1mm Infill:
20% Notes:
4 layers on top and bottom. 3 perimeters on walls. -
Torque Meter 3D Print Model
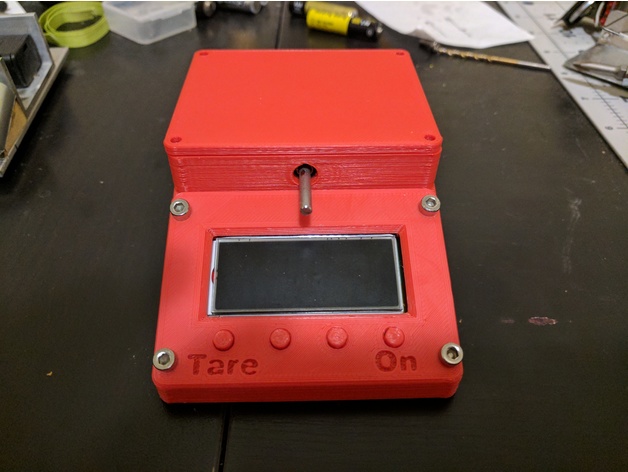
Summary
This a torque meter for indoor free flight models. It’s design is based largely on the Flite-Tork meter that was originally developed by Bill Gowen. This design is a work in progress, and I still need to upload the collar that mounts the 1/32″ wire hook to the 1/8″ shaft. I hope to have this uploaded in a day or two.
To build the meter you need 1 of each printed part, as well as the following components:
8 – M3 x 8 button or socket head screws (attaching screen mount and top)
2 – M2 x 25 (attaching load cell)
2 – 1/8″ stop collars
1 – 6-32 x 1/4″ set screw
1 – 6-32 x 1″ pan, truss, or button head screw
1 – 6-32 nut
1 – #5 or #6 washer
2 – R2 open bearing (eBay)
1 – 2xAAA battery holder with leads (eBay)
1 – TBBSC 200g scale (Amazon)
1 – ~3″ long piece of 1/8″ music wire
1 – 1/32″ music wire for hook
I would also recommend cutting the wires between the PCB and the load cell to add a connector. There isn’t enough room in the design to pass the load cell though the front wall. The other option is de-soldering the wires from the board, and re-soldering after the wires are passed through. More details to follow after I upload the last part in a day or two.
Print Settings
Printer:
Tevo Tarantula Rafts:
No Supports:
No Resolution:
0.2mm Infill:
25% -
Inductive Sensor Holder 18mm 3D Print Model
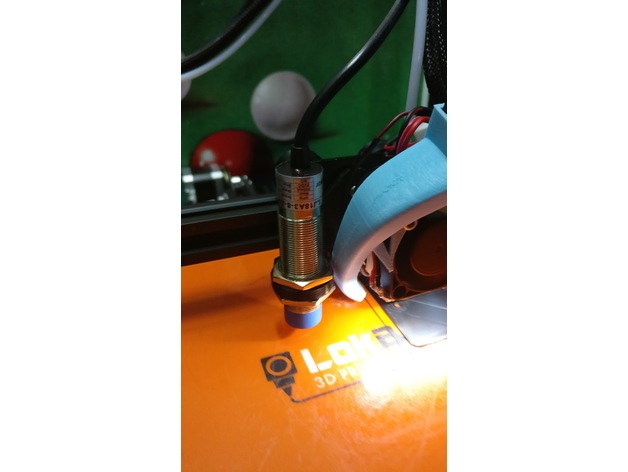
Summary
Support for inductive sensor to be used with autobed leveling.
This is for a sensor of 18mm.
Links for sensor:https://www.amazon.com/LJ18A3-8-Z-Approach-Sensor-Inductive-Proximity/dp/B008FZC8F2https://pt.aliexpress.com/store/product/M18-8mm-sensing-DC-5V-NPN-NO-LJ18A3-8-Z-BX-5V-cylinder-inductive-proximity-sensor/1162433_32719316657.html -
Printrbot Simple Wide Foot Print Foot Pegs 3D Print Model
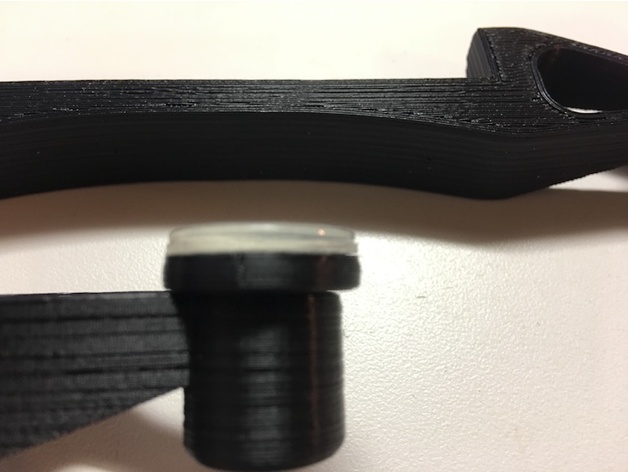
Summary
The original feet for https://www.thingiverse.com/thing:593072 were too big to insert in the bracket, because I did not have flexible filament. Originals probably fit snug, when printed with different filament.
Someone mentioned https://www.thingiverse.com/thing:280489 these scaled at 130%, however they were too big. Bottoms are 1″; I tried to use felt pads, but they slide to much.
So I created these and made them from stock PLA, they are 3/4″ or 20mm & they fit perfect & snapped into place. I added some rubber pads from Home Depot, and the now the printer does not shift around or move, and it is quietier.
Shout out to Thorped for the design on the foot bar, it is very durable and the best I have seen yet. Snaps into place and widens the stance. Highly recommend you print it, try all of the pegs and find what works best for you.
Print Settings
Printer Brand:
Printrbot Printer:
Play Rafts:
No Supports:
No Resolution:
2.0mm Infill:
50 Notes:
I use 50% infill on all of my parts for the printers. It may be overkill, but at least I don’t have to do it twice.
How I Designed This
Fusion 360
Took all of a few seconds to whip these up. -
Origami model Free 3D Model
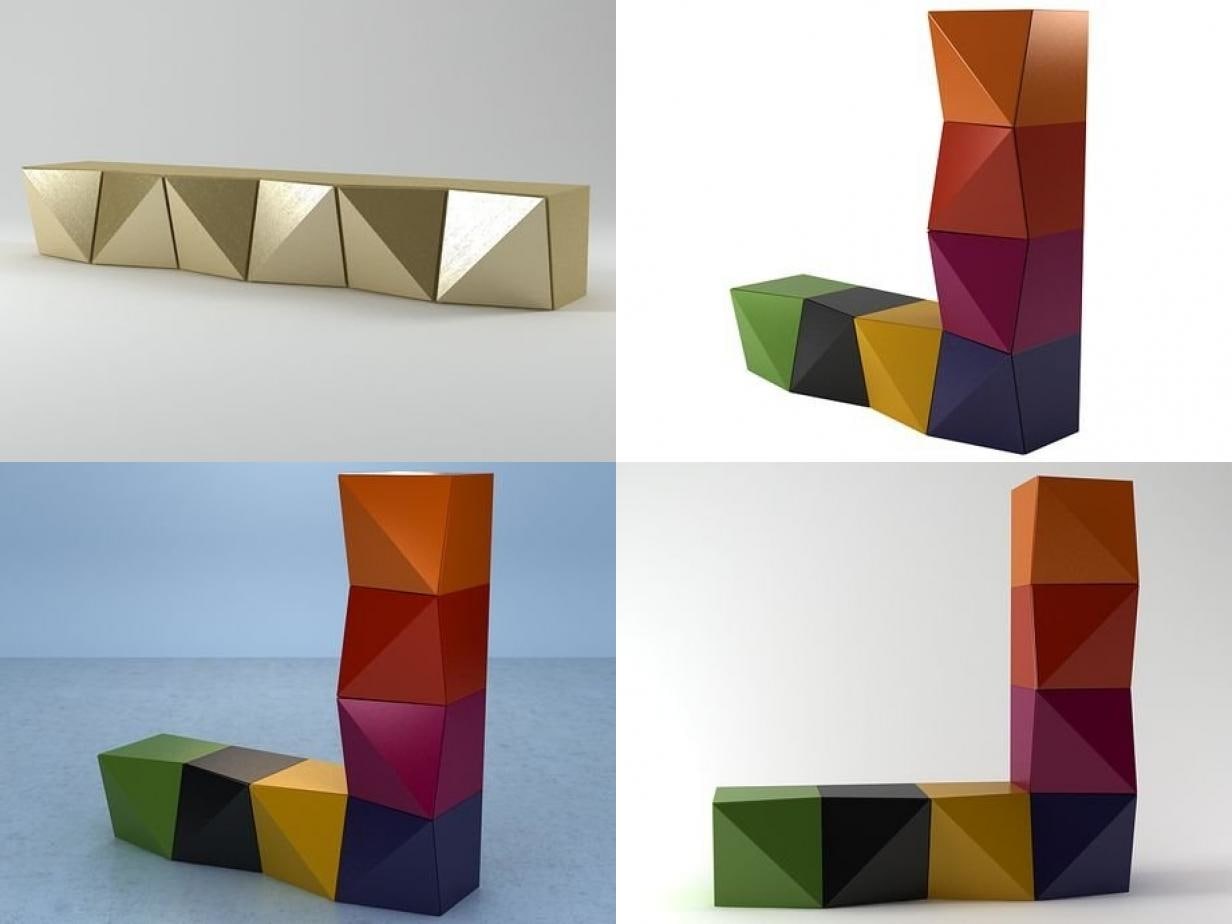
Origami by Reflex Angelo | 3d model produced by Design ConnectedThis 3d model is part of the highly acclaimed Design Connected collection featuring 6500+ carefully picked exclusive furnishings. Check out our full range of 3d models for more mid-century icons, contemporary classics and designer masterpieces.All Design Connected 3d models are originally created in 3ds Max and V-Ray renderer.Our in-house team of 3d artists handle all further remodelling, materials conversions and other adaptations to deliver best possible visual and technical quality of all the additional file formats and renderers we offer. Files units are centimeters and all models are accurately scaled to represent real-life object’s dimensions.Our models come as a single editable mesh or poly object (or as group for rigged models or where displace modifier has been used) properly named and positioned in the center of coordinate system. No lights, cameras and render/scene setup are included unless otherwise stated in the particular model’s description.AVAILABLE FILE FORMATS- Sketchup 8 or above – Autodesk 3ds Max 2011 or above– VRay– Mental Ray– Scanline- OBJ and FBX – Abvent Artlantis – Autodesk 3ds – Autodesk DWG ADDITIONAL FILE FORMATS UPON REQUEST- Cinema4D R16 or above- ARCHICAD R16 or above- Rhinoceros – Maya – Lightwave – Collada PRODUCT DESCRIPTIONBrand: Reflex Angelo, ItalyDesigner: Andrea LucatelloDesign Connected ID: 1710BEFORE PURCHASEWe highly recommend that you download few of our FREE 3D MODELS and test if they work well with your 3d software before making a purchase.ABOUT THE IMAGERYPreviews rendered in 3dsMax using VRay. Please note that the studio scenes and light and environment settings are not included.SUPPORTIf you have any questions about how to use Design Connected 3d models, please contact us via Support.Thank you for purchasing Design Connected models!
-
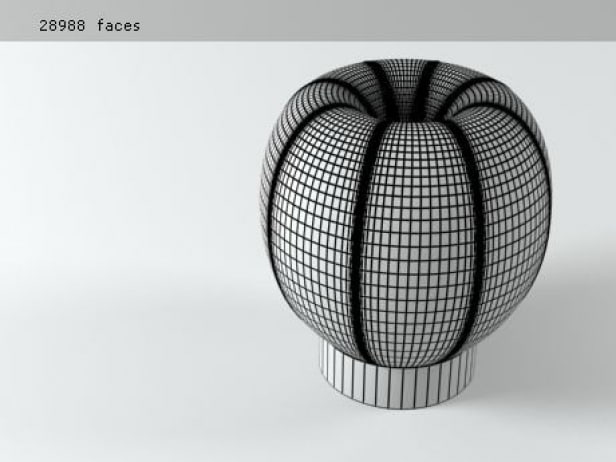
Q Stool 3D Free 3D Model
Q Stool by Viteo | 3d model produced by Design ConnectedThis 3d model is part of the highly acclaimed Design Connected collection featuring 6500+ carefully picked exclusive furnishings. Check out our full range of 3d models for more mid-century icons, contemporary classics and designer masterpieces.All Design Connected 3d models are originally created in 3ds Max and V-Ray renderer.Our in-house team of 3d artists handle all further remodelling, materials conversions and other adaptations to deliver best possible visual and technical quality of all the additional file formats and renderers we offer. Files units are centimeters and all models are accurately scaled to represent real-life object’s dimensions.Our models come as a single editable mesh or poly object (or as group for rigged models or where displace modifier has been used) properly named and positioned in the center of coordinate system. No lights, cameras and render/scene setup are included unless otherwise stated in the particular model’s description.AVAILABLE FILE FORMATS- Sketchup 8 or above – Autodesk 3ds Max 2011 or above– VRay– Mental Ray– Scanline- OBJ and FBX – Abvent Artlantis ADDITIONAL FILE FORMATS UPON REQUEST- Cinema4D R16 or above- ARCHICAD R16 or above- Autodesk 3ds – Rhinoceros – Autodesk DWG – Maya – Lightwave – Collada PRODUCT DESCRIPTIONBrand: Viteo, AustriaDesigner: Danny VenletDesign Connected ID: 3866BEFORE PURCHASEWe highly recommend that you download few of our FREE 3D MODELS and test if they work well with your 3d software before making a purchase.ABOUT THE IMAGERYPreviews rendered in 3dsMax using VRay. Please note that the studio scenes and light and environment settings are not included.SUPPORTIf you have any questions about how to use Design Connected 3d models, please contact us via Support.Thank you for purchasing Design Connected models!
-
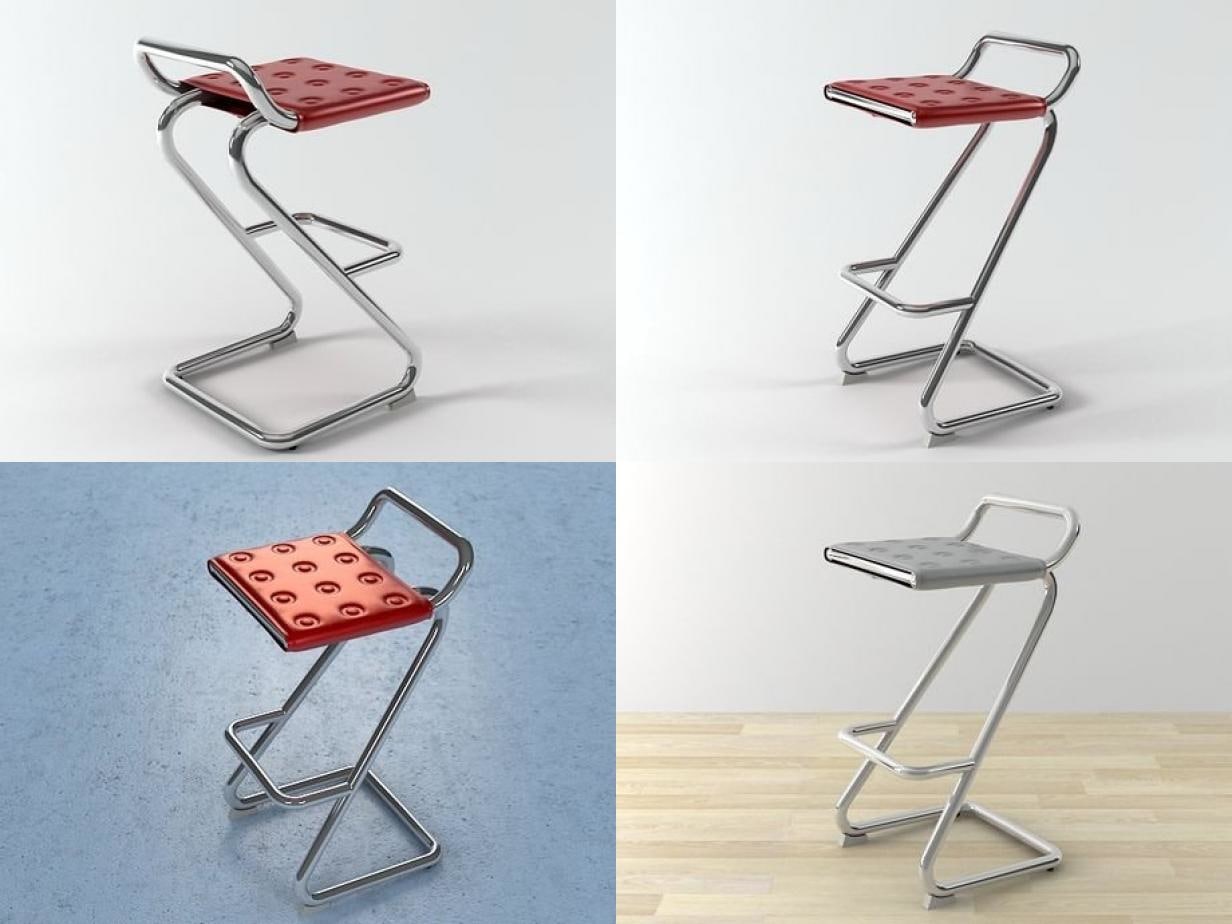
3D model Free barstool Free 3D Model
Free barstool by Kristalia | 3d model produced by Design ConnectedThis 3d model is part of the highly acclaimed Design Connected collection featuring 6500+ carefully picked exclusive furnishings. Check out our full range of 3d models for more mid-century icons, contemporary classics and designer masterpieces.All Design Connected 3d models are originally created in 3ds Max and V-Ray renderer.Our in-house team of 3d artists handle all further remodelling, materials conversions and other adaptations to deliver best possible visual and technical quality of all the additional file formats and renderers we offer. Files units are centimeters and all models are accurately scaled to represent real-life object’s dimensions.Our models come as a single editable mesh or poly object (or as group for rigged models or where displace modifier has been used) properly named and positioned in the center of coordinate system. No lights, cameras and render/scene setup are included unless otherwise stated in the particular model’s description.AVAILABLE FILE FORMATS- Sketchup 8 or above – Autodesk 3ds Max 2011 or above– VRay– Mental Ray– Scanline- OBJ and FBX – Abvent Artlantis ADDITIONAL FILE FORMATS UPON REQUEST- Cinema4D R16 or above- ARCHICAD R16 or above- Autodesk 3ds – Rhinoceros – Autodesk DWG – Maya – Lightwave – Collada PRODUCT DESCRIPTIONBrand: Kristalia, ItalyDesigner: Monica GraffeoDesign Connected ID: 3856BEFORE PURCHASEWe highly recommend that you download few of our FREE 3D MODELS and test if they work well with your 3d software before making a purchase.ABOUT THE IMAGERYPreviews rendered in 3dsMax using VRay. Please note that the studio scenes and light and environment settings are not included.SUPPORTIf you have any questions about how to use Design Connected 3d models, please contact us via Support.Thank you for purchasing Design Connected models!
-
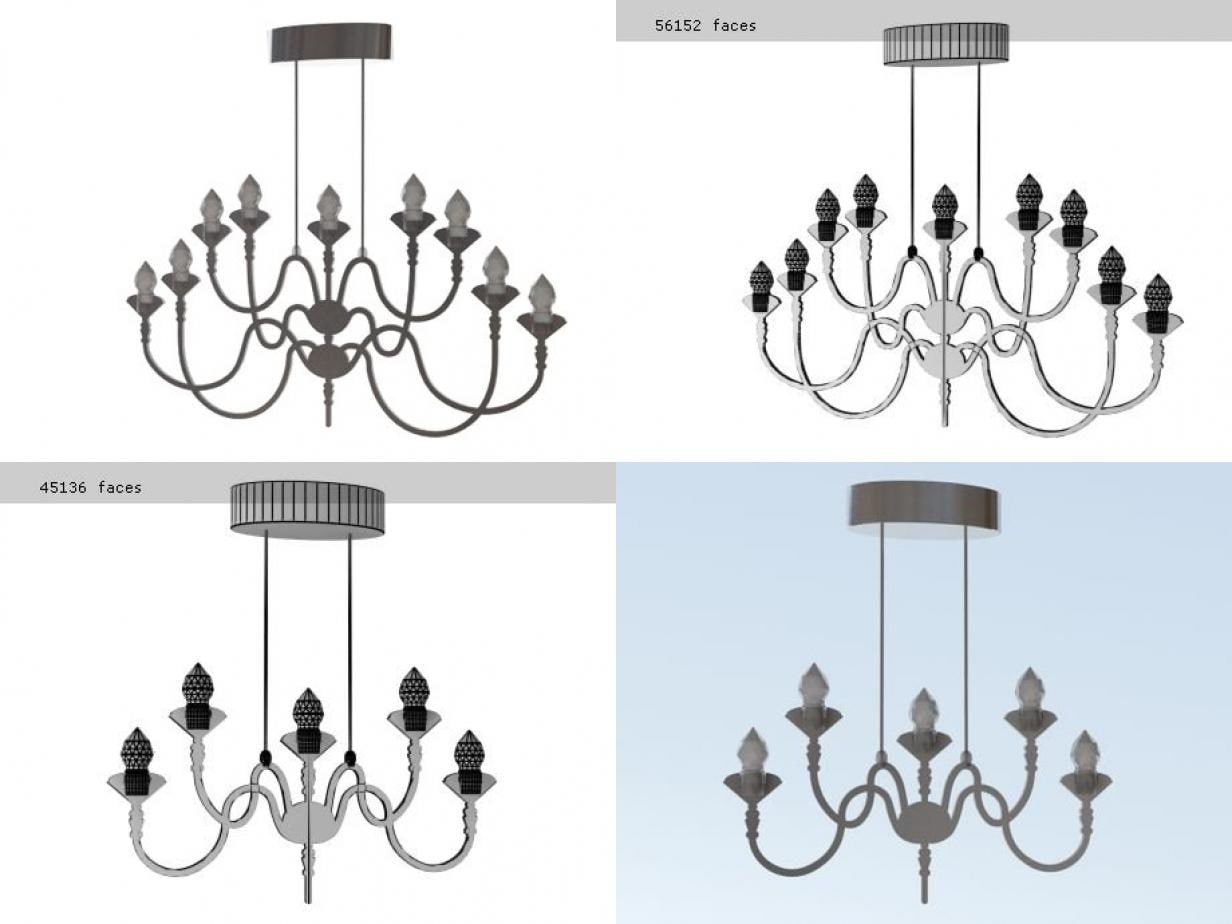
3D Edge pendant Free 3D Model
Edge pendant by Fabbian | 3d model produced by Design ConnectedThis 3d model is part of the highly acclaimed Design Connected collection featuring 6500+ carefully picked exclusive furnishings. Check out our full range of 3d models for more mid-century icons, contemporary classics and designer masterpieces.All Design Connected 3d models are originally created in 3ds Max and V-Ray renderer.Our in-house team of 3d artists handle all further remodelling, materials conversions and other adaptations to deliver best possible visual and technical quality of all the additional file formats and renderers we offer. Files units are centimeters and all models are accurately scaled to represent real-life object’s dimensions.Our models come as a single editable mesh or poly object (or as group for rigged models or where displace modifier has been used) properly named and positioned in the center of coordinate system. No lights, cameras and render/scene setup are included unless otherwise stated in the particular model’s description.AVAILABLE FILE FORMATS- Sketchup 8 or above – Autodesk 3ds Max 2011 or above– VRay– Mental Ray– Scanline- OBJ and FBX – Abvent Artlantis ADDITIONAL FILE FORMATS UPON REQUEST- Cinema4D R16 or above- ARCHICAD R16 or above- Autodesk 3ds – Rhinoceros – Autodesk DWG – Maya – Lightwave – Collada PRODUCT DESCRIPTIONBrand: Fabbian, ItalyDesigner: Alessandra BaldereschiDesign Connected ID: 3853BEFORE PURCHASEWe highly recommend that you download few of our FREE 3D MODELS and test if they work well with your 3d software before making a purchase.ABOUT THE IMAGERYPreviews rendered in 3dsMax using VRay. Please note that the studio scenes and light and environment settings are not included.SUPPORTIf you have any questions about how to use Design Connected 3d models, please contact us via Support.Thank you for purchasing Design Connected models!