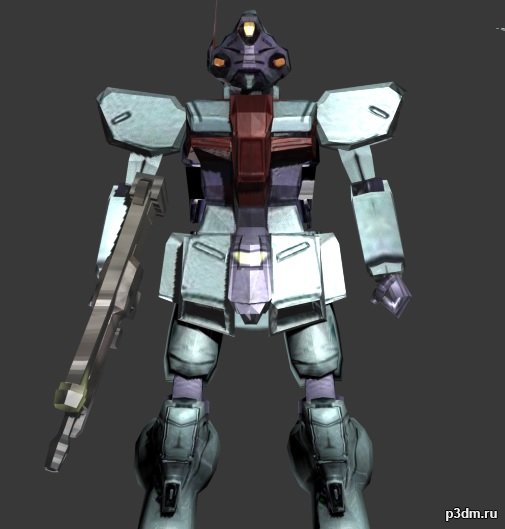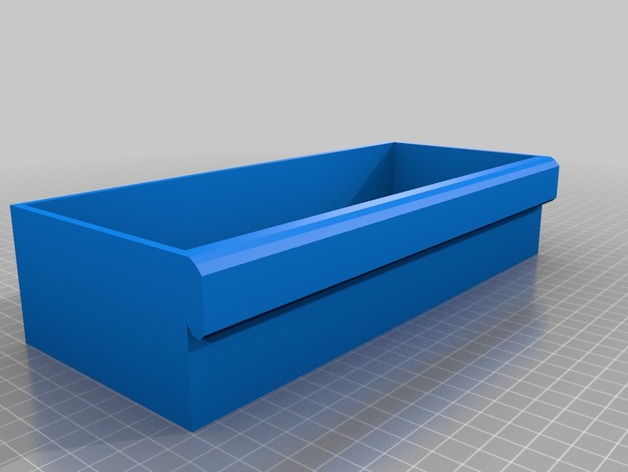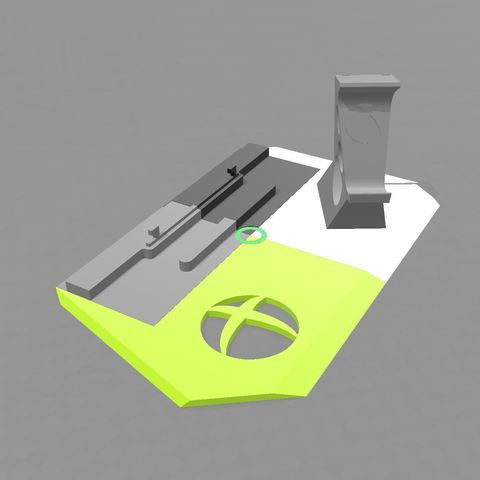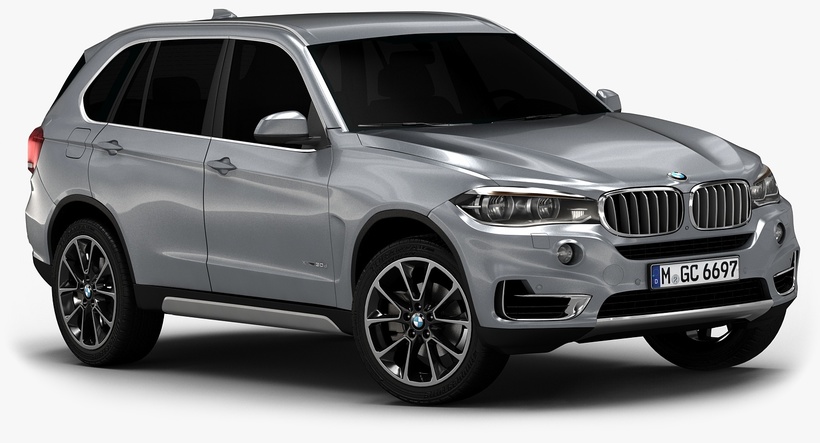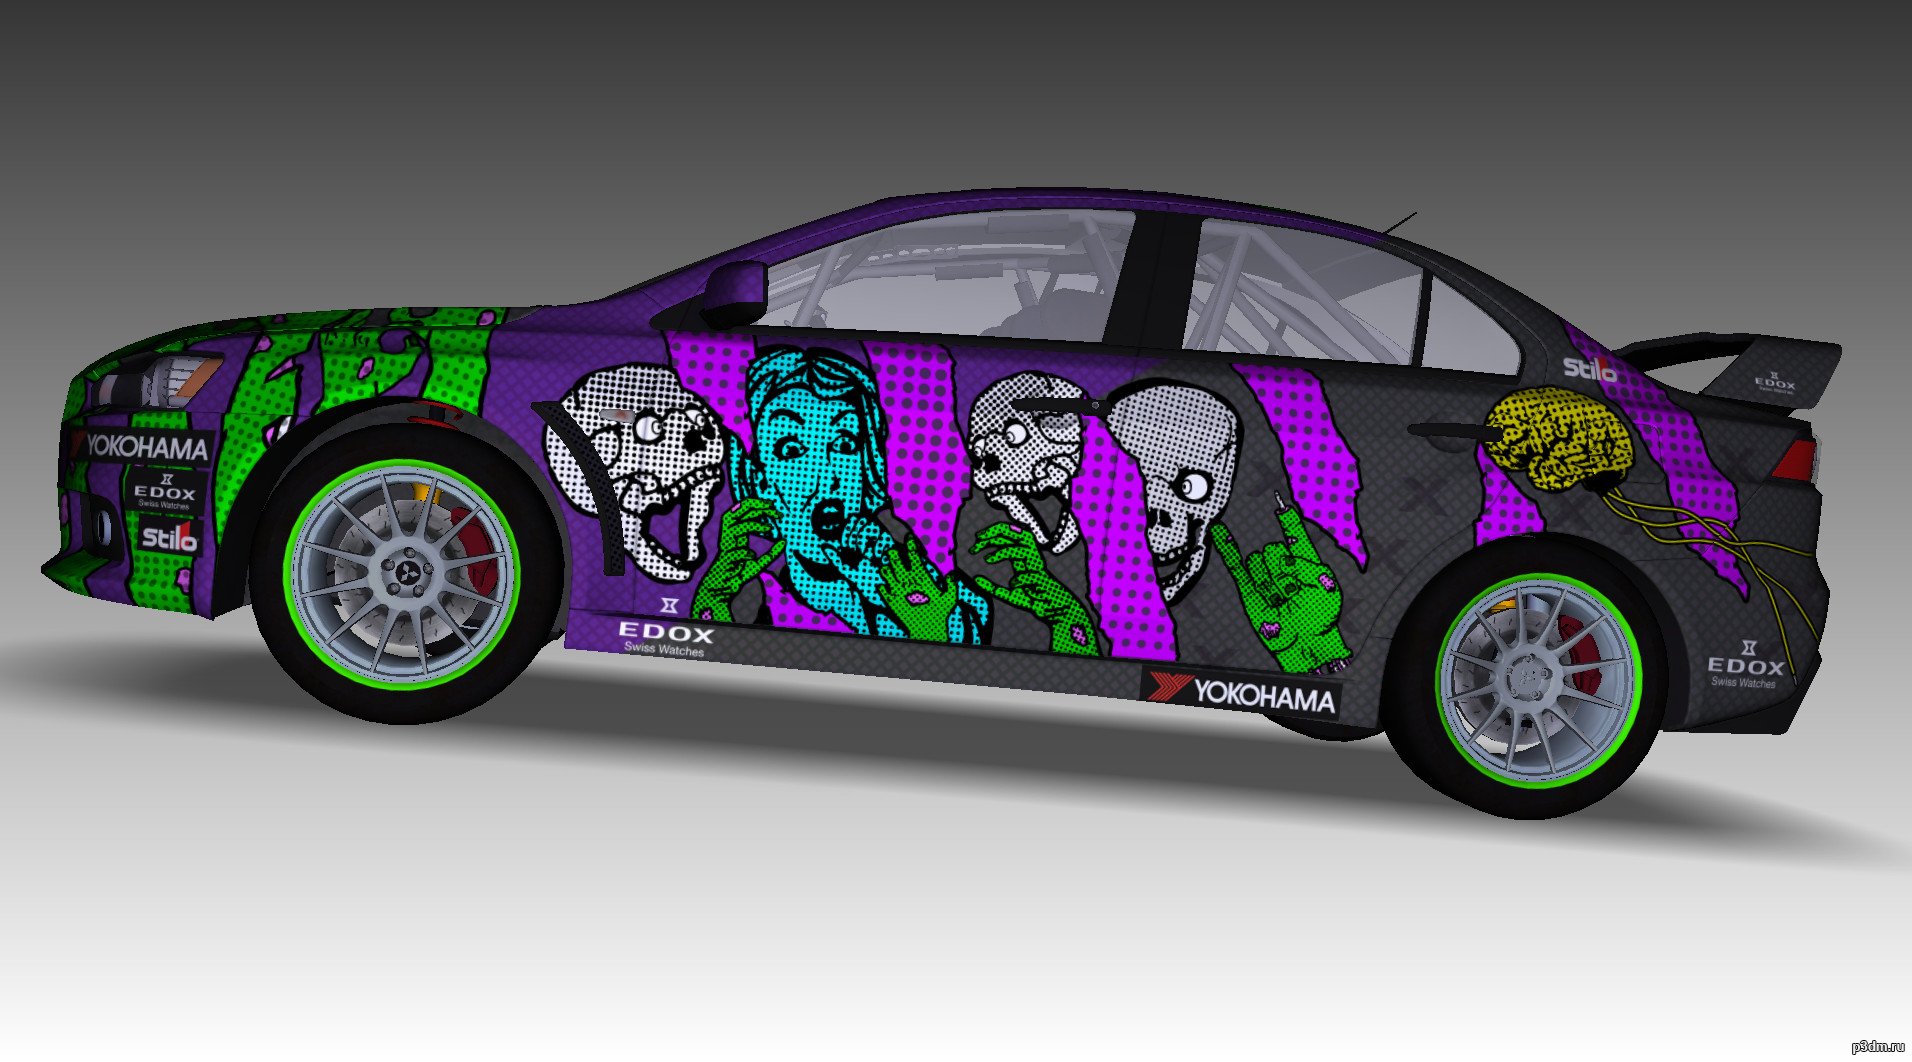
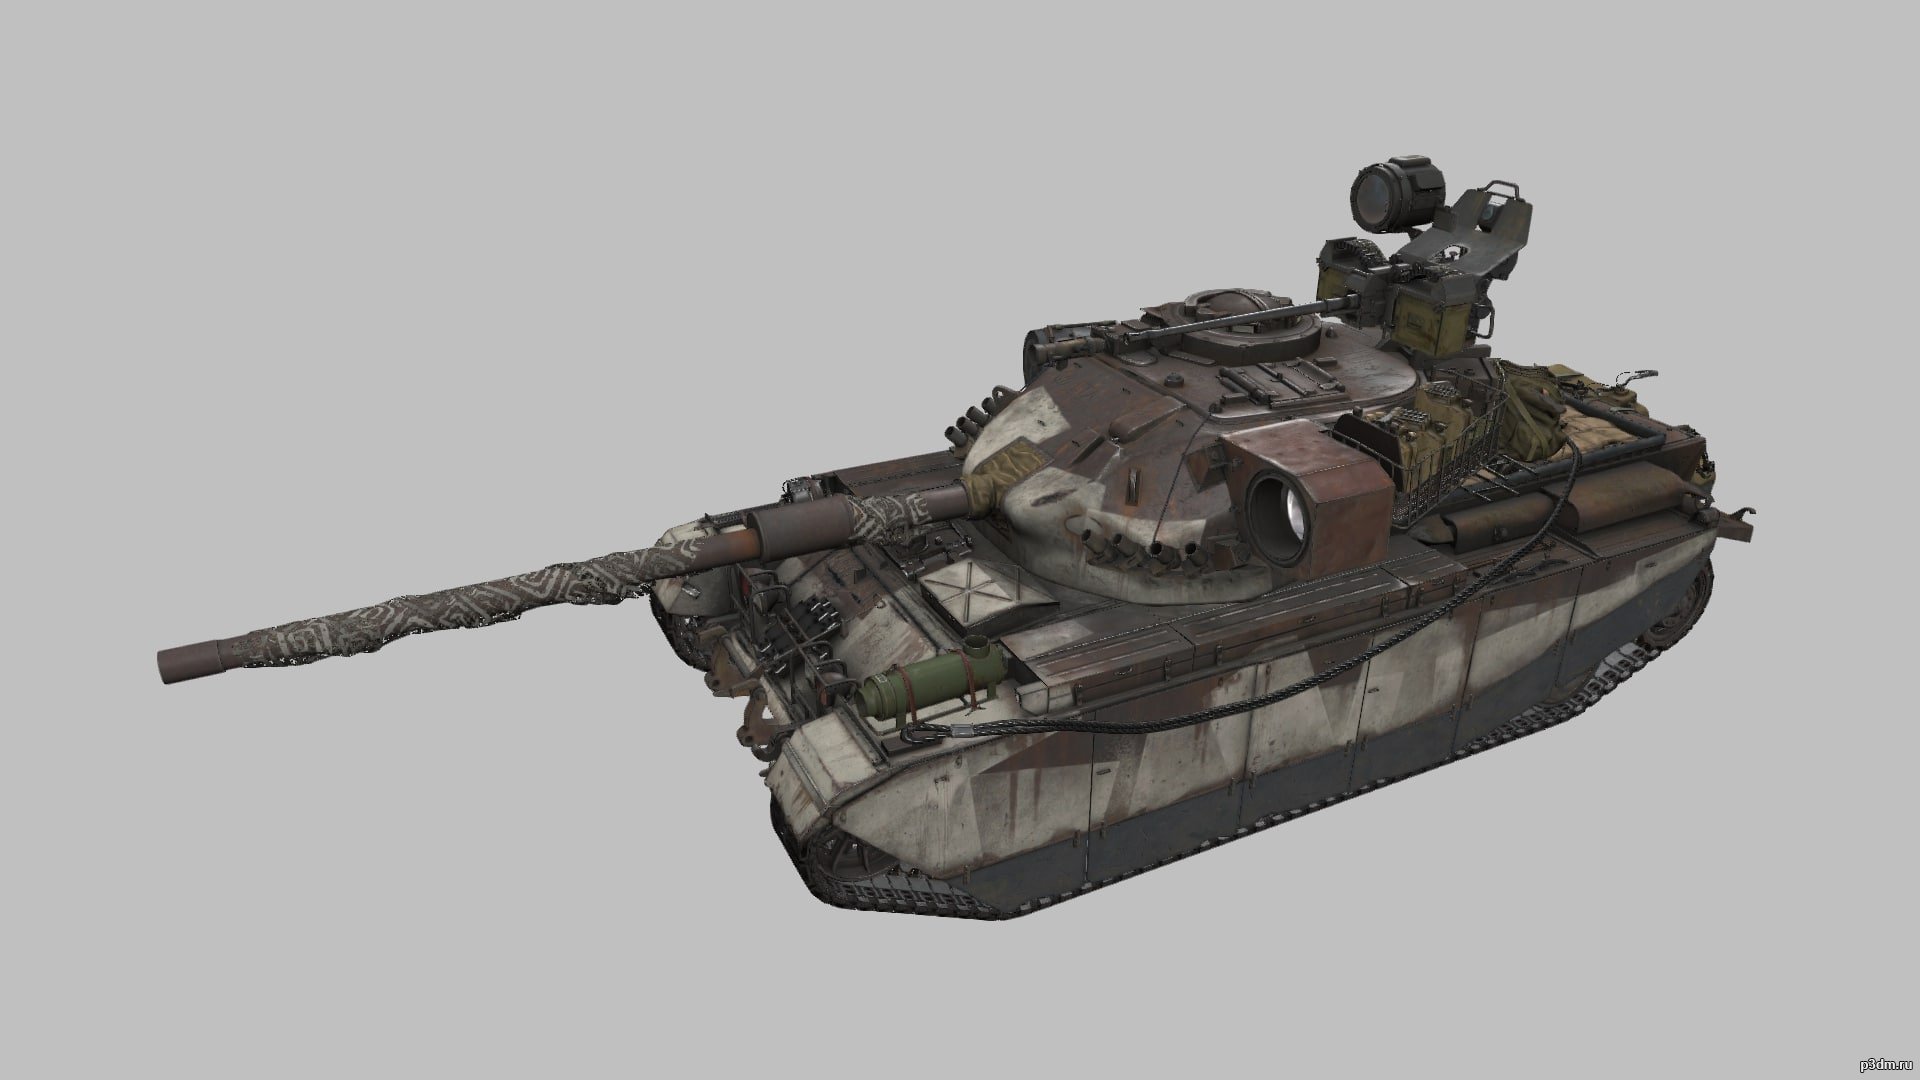
Centurion Action X Primipilus from world of tanksComment on what to add i’ll add it! (World of Tanks only)
Tag: x
-
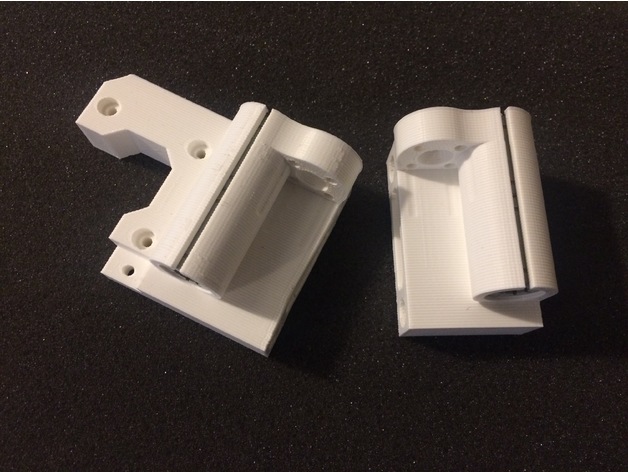
P3Steel X axis for Lead Screws 3D Print Model
Summary
I made this based on the Toolson design for the p3Steel. It will allow the use of a 8mm Lead Screw.
Print Settings
Printer Brand:
Prusa
Rafts:
No
Supports:
No
Resolution:
.2
Infill:
60% -
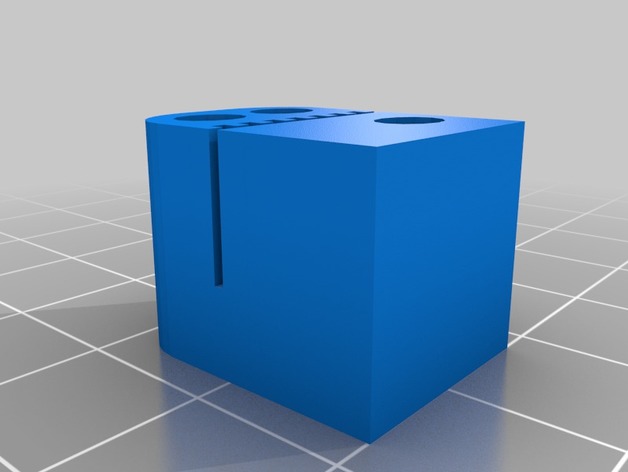
a8 x belt holder.stl 3D Print Model
Summary
A remix of Anet A8 prusa-i3 x-belt holder (6 holes) by Sjouke. I just basically removed the middle part because is thin and I didnt need it, and I made the belt space .2 mm thinner. Mirror the part in your slicer to print the other piece. -
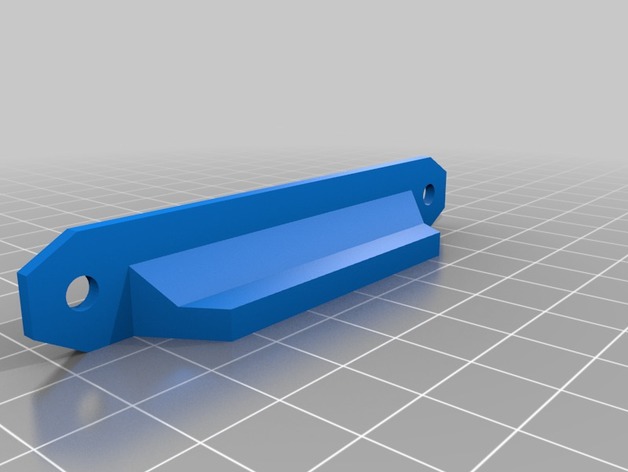
Prusa Lack Enclosure Door Handles for 20mm x 5mm x 2mm Magnets 3D Print Model
Summary
Using the source files from the Prusa Lack enclosure, I resized the magnet inserts for 20mm x 5mm x 2mm magnets, which were easier to find on eBay.
Print Settings
Printer Brand:
Prusa
Printer:
i3 MK3
Rafts:
No
Supports:
Doesn’t Matter
Resolution:
0.15 mm
Infill:
20% -
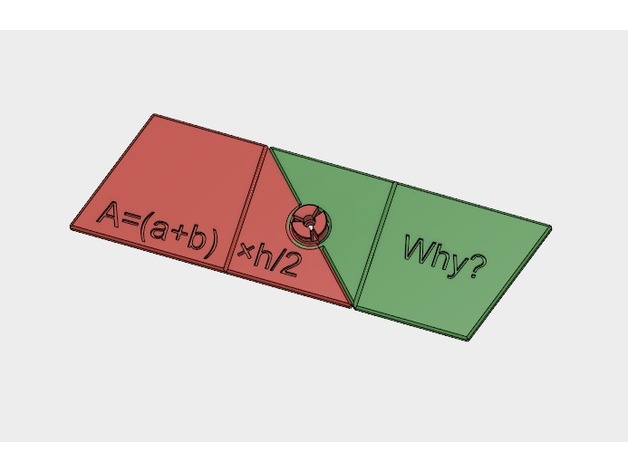
Trapezoid Area Formula, A= (a+b) × h /2, why? 3D Print Model
Summary
Trapezoid Area, A= (a+b) × h /2, why?
Given any trapezoid, if the parallel top and bottom are a and b, respectively, and the corresponding height (altitude) is h, the area is (a+b) × h /2. But why?
To see why, we take two congruent copies of a trapezoid and make a parallelogram with the same height and a base of (a+b). Such a parallelogram can be easily converted to a rectangle with a base of (a+b) and height (h, or width), and, accordingly, an area of (a+b) × h. Why do we have to divide that by 2? Well, it is because we want to know the area of the trapezoid. Of course, there are other ways to explain it. One way or the other, it goes back to what we know about rectangles or other shapes.
Two versions are provided to demonstrate the process behind A= (a+b) × h /2. The trapezoid is just a random one. Have fun.
Print Settings
Rafts:
No
Supports:
No
Resolution:
.1 to .2mm
Infill:
5-20% -
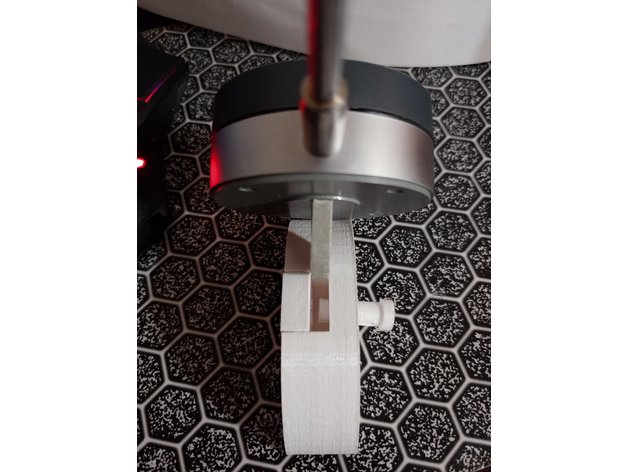
Dial Indicator X Axis Mount 3D Print Model
Summary
This is a mount I made to hold a dial indicator on my X-Axis of my Maker Select v2 (Wanhao Duplicator i3 V2) rails to check my bed for true. The part is held in place by a mix of tension and the magnets inserted into the holes in the back.
The magnets are the round “Buckyball” brand magnets, but any of their variants or even cylindrical magnets will work. Mine were measured and the holes sized to about 95% of that, so they are tight, but you should be just fine to use some sort of adhesive to hold in any type of magnet you want. One of the things that worked out well was I made the holes deeper than the diameter of the magnets, so they sit about .5 mm below the surface and never touch the rails.
The dial indicator is an ‘eoteck’ brand I found on Amazon and was oddly enough reviewed about a month later by AvE on YouTube (if you are a fan). It’s plenty accurate for 3D printing. I did verify this by buying a Mitutoyo gauge block and testing my calipers, then my calipers against my dial indicator.
Overall accuracy is such that I discovered my build plate was bowed a bit and has since been replaced. I don’t use this much, but when I did it was an incredible lifesaver.
The second piece by itself it due to me not accounting for the space needed between parts. I just sliced the parts out of the main body, but when assembling the hole was misaligned. This part should rectify that. I did end up using a very thin strip of masking tape to make the fit super tight to eliminate wiggle.
Thanks, and happy printing!
Print Settings
Printer Brand:
Wanhao
Printer:
Wanhao Duplicator i3 V2
Rafts:
No
Supports:
No
Resolution:
.2mm
Infill:
25%
Notes:
Should not need any supports when printing. Overhang droop in magnet holes is great for retention. The holes are about 95% the size of the magnets, so the tight is very snug. The pin will be tight at first but should loosen up.
The extra part is due to not accounting for the pieces being exact slices off the main body, and fitting together so well that the hole lines up. The “insert” was added to compensate for this. Included both files so you can modify either as needed. -
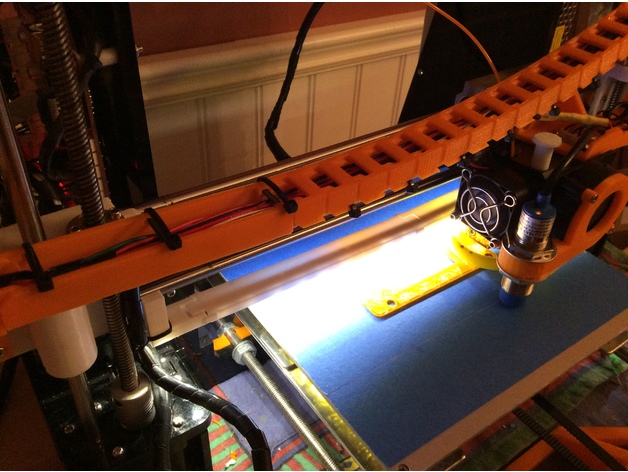
Anet A8 LED strip mount under X axis clip on remix 3D Print Model
Summary
This remix was remixed in Tinkercad to remove the screws. Assembly is the same, but instead of using screws, you just snap fit the brackets on. No screws needed!
😀 -
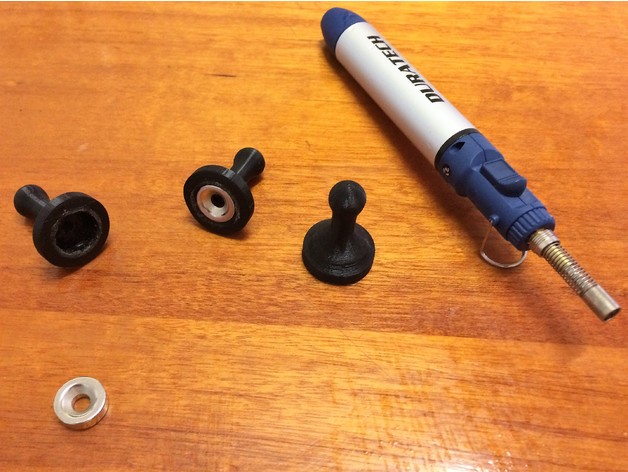
15mm x 5mm magnet holder 3D Print Model
Summary
15mm x 5mm magnet holder.
The hole for the magnet is a little undersized so the printed part can be heated a little (eg hot water if using PLA) and press fit. Or use some glue or if your magnet has a hole in center – a screw. I went with heating and press fit and its been solid.
i didn’t use any support when printing, the inside roof of the hole where the magnet goes is a fair span (15mm of unsupported distance) and so that particular surface wasn’t perfect but it worked fine and its behind the magnet anyway – doing this saves breaking out support material.
Print Settings
Printer:
aldi cocoon
Rafts:
No
Supports:
No
Resolution:
0.2mm
Infill:
no -
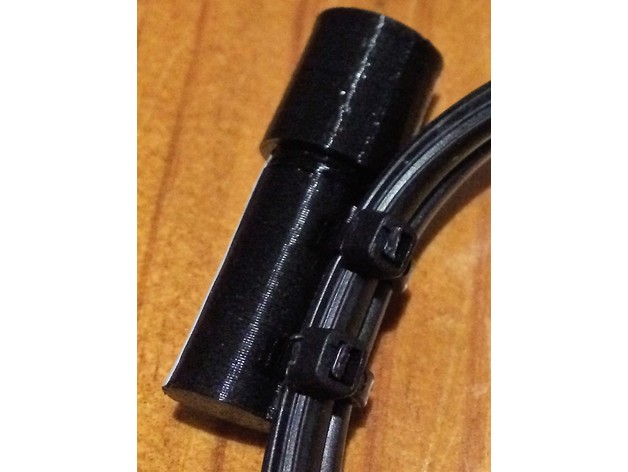
spare fuse holder 6 x 30mm 3D Print Model
Summary
Holds a spare 6x30mm fuse.
Use zip ties to connect it to a lead and you have a spare fuse ready to use for your equipment.
Print Settings
Printer:
aldi cocoon
Rafts:
No
Supports:
No
Resolution:
0.2mm
Infill:
80% -
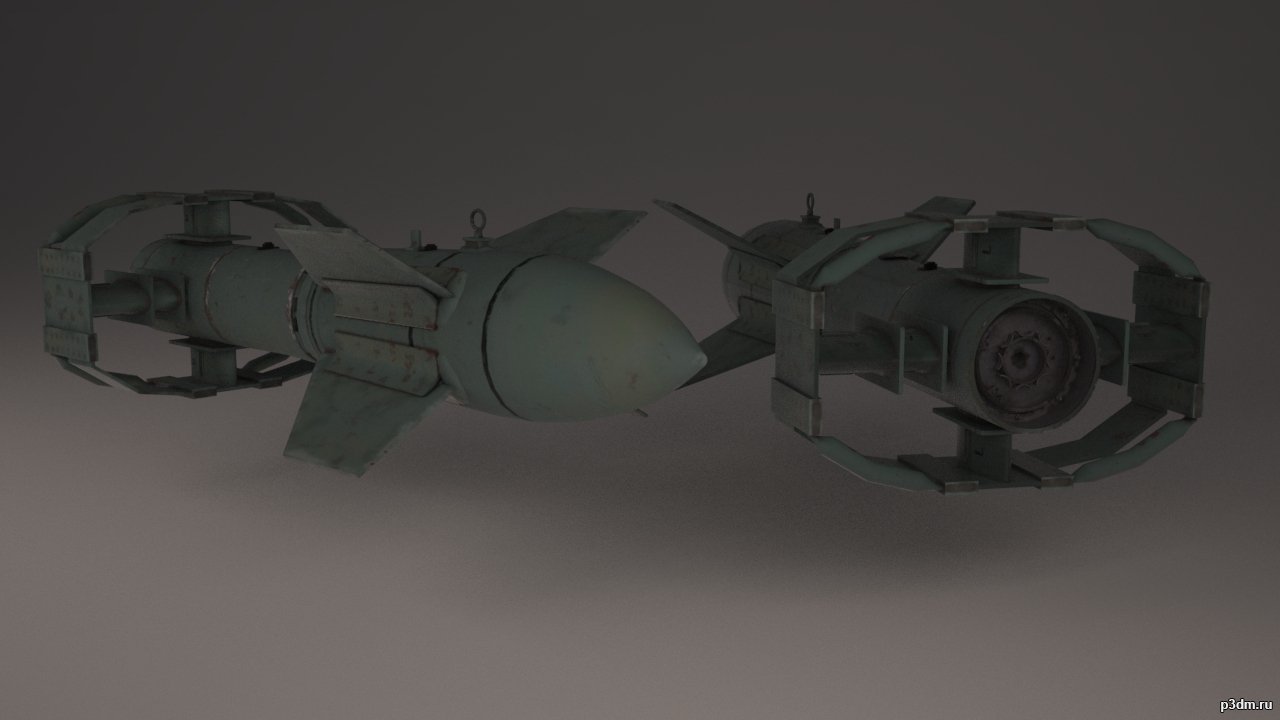
Fritz X Glidebomb 3D Model
“Fritz X was the most common name for a German guided anti-ship glide bomb used during World War II. Fritz X was the world’s first precision guided weapon deployed in combat and the first to sink a ship in combat.”-Wikipedia
-
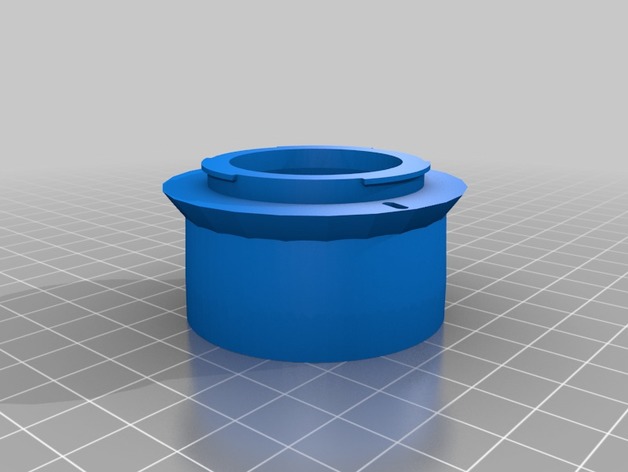
Fuji X mount revised extension tube 3D Print Model
Summary
After printing the original extension tube designed by IGFARM, I realized that at least on my X_T2, it didn’t lock into place on the camera. I widened the camera contact surface and put in the slot for the pin to lock it into place. I rotated the orientation that he had it in by 180 degrees, so the only support needed is for the top tabs.
Print Settings
Printer Brand:
Wanhao Printer:
Wanhao Duplicator i3 V2 Rafts:
No Supports:
Yes Resolution:
.1 Infill:
15% Notes:
I printed it on a Monoprice IIIP using PLA at 205 degrees with 100% cooling
Post-Printing
Redesigned faceMounted to my camera
How I Designed This
Not having spent the time to learn the better CAD programs, I did this redesign in Tinkercad. -
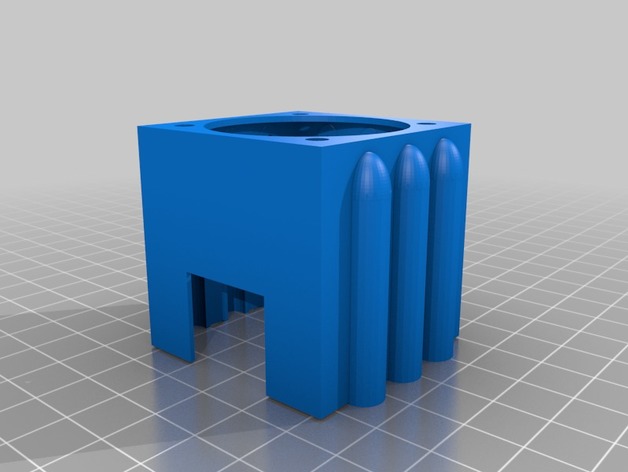
Anycubic I3 Mega X axis Fan stepper fan mount with heat sink clearance 3D Print Model
Summary
Friction fit fan mount with air channels and clearance for 40mm heat sink stuck on the end of Z axis stepper. Mounting holes designed for 40mm fan. Print with mount side down. There are minimal supports needed.
Print Settings
Printer:
Anycubic I3 Mega Rafts:
Yes Supports:
Yes Resolution:
0.2 Infill:
20
Post-Printing -
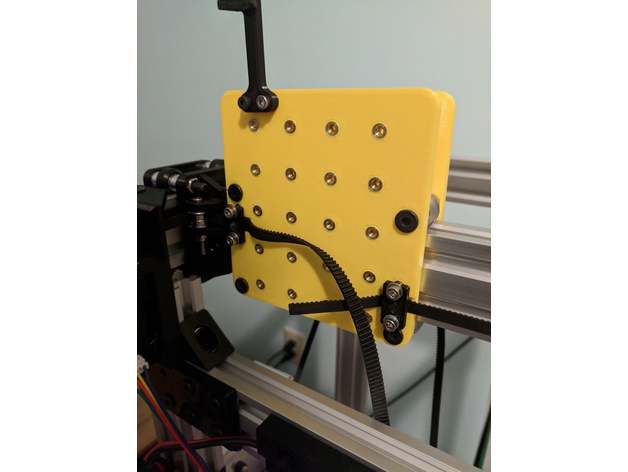
c-bot / d-bot multi-purpose x carriage 3D Print Model
Summary
The main idea behind this plate is to allow me flexibility in what tool I put on the x-carriage, where I put fans and other sensors etc. I’m planning to create a few parts which are based on this plate.
At present I’m just printing this plate twice and using for both sides. Technically over-kill but you never know ( quad extruder anyone? )
To use this plate you will need heat-set inserts. Either from Lulzbot or McMaster. I have set the spacing to be 20mm center to center and they should be just the right size to take these inserts. The lulzbot guys did a nice write-up demonstrating how to put them in.
You will also need the following:
4 x mini-v wheel kits ( either delrin or polycarb )
4 x 6mm spacers
4 x 6mm eccentric spacers
4 x M5 45mm
4 nylock nuts ( or regular and thread lock )
For each plate, 26 heat-set inserts ( see above for link options )
I’m still messing around with the extruder mounts. The titan large diameter gear screws around with the spacing so it sticks out kinda far which could make the hotend subject to moving during rapid transitions.
Also note, this is a work in progress. I’ve assembled it and done movement tests but have not used it for anything serious. Any thoughts or ideas on improvements or changes would be welcome. I plan to make a laser engraver mount and going to try a cnc mill later.
The c-bot you see in the photos is a small form factor so I can iterate on this kind of stuff without taking my main printer down so the plate looks huge 😉
Print Settings
Printer:
c-bot Rafts:
No Supports:
No Resolution:
.2mm Infill:
20-50% Notes:
Using kisslicer I use 3.25 perimeters. At 20% infill and the perimeters this plate feels plenty stiff using PETG. Use your best judgment there.
No overhangs or nut captures so no supports are necessary -
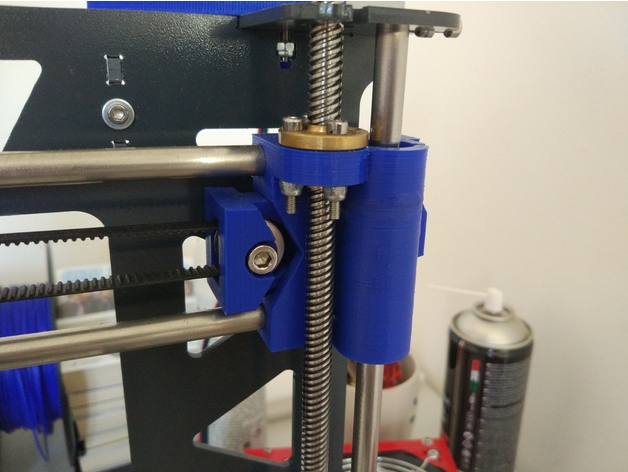
Prusa Steel X axis with tensioner and 8mm leadscrew support 3D Print Model
Summary
This X axis for the Prusa steel frame features a convenient single screw belt tensioner and supports 8mm leadscrews.
You need some M3 screws and nuts to mount the leadscrew nuts in place, a M4 screw and nut for the tensioner and a M5 screw and nut for the toothed idler, I use a cheap aliexpress toothed idler with a M5 bore.
Prints without supports.
Print Settings
Printer Brand:
Prusa Printer:
Prusa Steel Rafts:
Doesn’t Matter Supports:
No Resolution:
0.3-0.25 Infill:
25-30% -
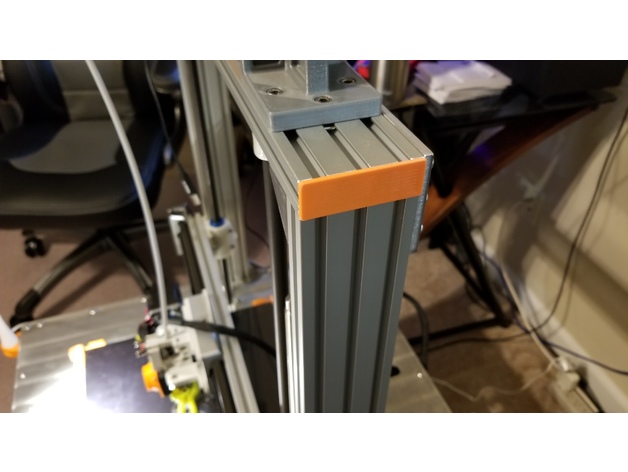
Aluminatus Extrusion End Covers 20mm x 60mm 3D Print Model
Summary
Removed the lines and made it smooth on the outside.
Printed in ABS
.2 Layer height -
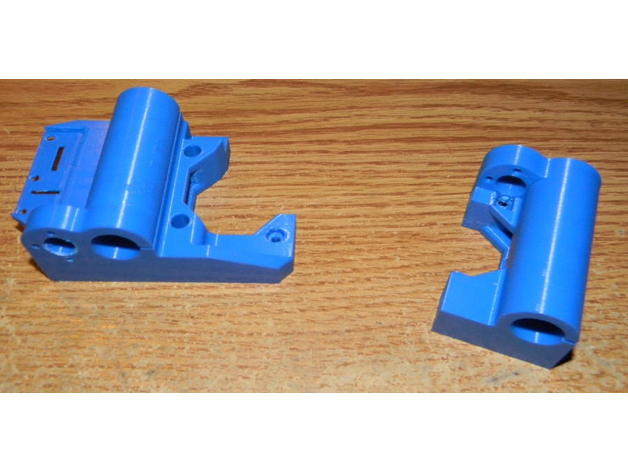
X Axis Ends Tronxy Zonestar P802 3D Print Model
Summary
Recently stumbled upon this terrific set of X-Axis ends for a P3Steel printer. (https://www.thingiverse.com/thing:2088585) Since the P3Steel uses the same 17MM spacing on the leadscrew and vertical smooth rods I wanted to print these for my old beater Tronxy P802M. The only problem is horizontal rod spacing. Most printers like the Anet and P3Steel have 45mm spacing between the X-axis horizontal rods. The Zonestar and Tronxy are 44mm. This would be a problem as I want to use my original carriage.
After looking at the above linked Thing I see the designer was kind enough to include the STEP files for his parts. This was just what I needed. After importing the STEP files into Fusion 360 modifying the rod spacing was a snap.
So as a courtesy to the original creator and to give back to the community here is my set of X-axis ends specifically for the Tronxy and Zonestar P802 printers.
The only change from the original Thing is to move the holes so they are 44mm apart on the horizontal carriage rods.
You will also print out the tensioner parts as detailed on the original Thing’s page (https://www.thingiverse.com/thing:2088585)
Print Settings
Printer:
Monoprice Mini Select Rafts:
No Supports:
Yes Resolution:
0.2mm Infill:
30% Notes:
Print with the top of the part facing down. Be sure to use supports. The automatic supports generated in Simplify 3D worked perfectly. -
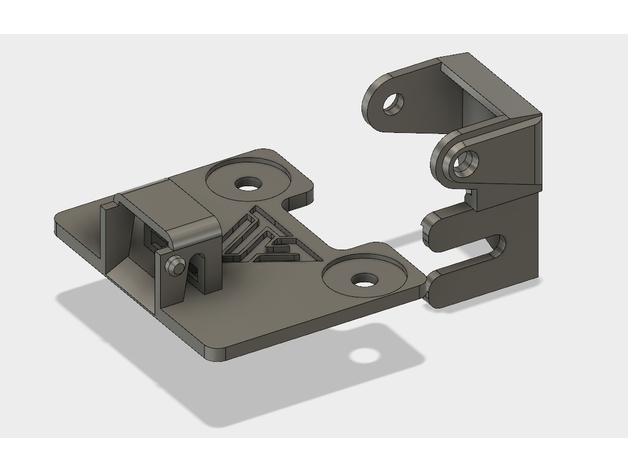
Tevo tarantula X Drag chain ends 3D Print Model
Summary
This drag chain ends are made to fit the Tevo Tarantula stock x carriage.
You can add connectors to easy connect a sensor or a layer fan with ribbon cables. It can be used for the heatsink fan and the thermistance. I haven’t checked if it could support the amperage of the hot end.
Fusion 360 file attached, feel free to use it !
Post-Printing
Materials Needed
You can find the chain on Amazon :https://www.amazon.com/TOOGOO-Plastic-Towline-Cable-Chain/dp/B00KBPQIBE/ref=sr_1_2
Or Aliexpress :https://www.aliexpress.com/item/Free-Shipping-10-x-20mm-10-20mm-L1000mm-Cable-Drag-Chain-Wire-Carrier-with-end-connectors/32733132867.html
the connectors (2X2pin & 2X3pin):https://fr.aliexpress.com/item/KF2510-Kits-50-sets-Kit-in-box-2p-3p-4-pin-2-54mm-Pitch-Terminal-Housing/32698994359.html
and ribbon cable (22awg is fine for layer fan and sensors, don’t use it for the hot end) :https://fr.aliexpress.com/item/20-meters-5Pin-Extension-Electric-Wire-Cable-Blue-White-Red-Green-Black-Led-Connector-For-RGBW/32220197329.html -
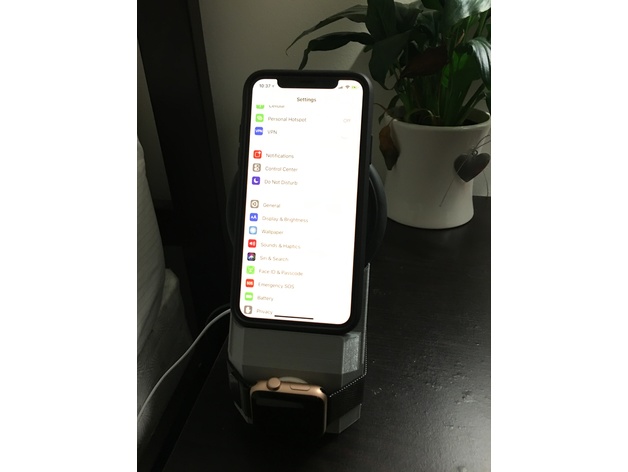
iPhone X and Apple Watch Wireless Charging Stand 3D Print Model
Summary
Vertical charging stand I designed in Fusion 360 to fit the Mophie QI Wireless charger and the Apple watch charger. Shown in the picture is an iPhone X and an Apple Watch charging at the same time. The iPhone X is encased in a Spigen Ultra Hybrid Case. The Mophie QI charger should also work with the iPhone 8/8 Plus but I haven’t personally tested them with my stand.
Print Settings
Printer Brand:
Prusa Printer:
i3 MK2S Rafts:
No Supports:
Yes Resolution:
0.3 Infill:
15% Notes:
Fast Honeycomb Infill
Printed at 75 mm/s
Extruder Nozzle 0.4mm
Total Print Time ~ 5hrs -
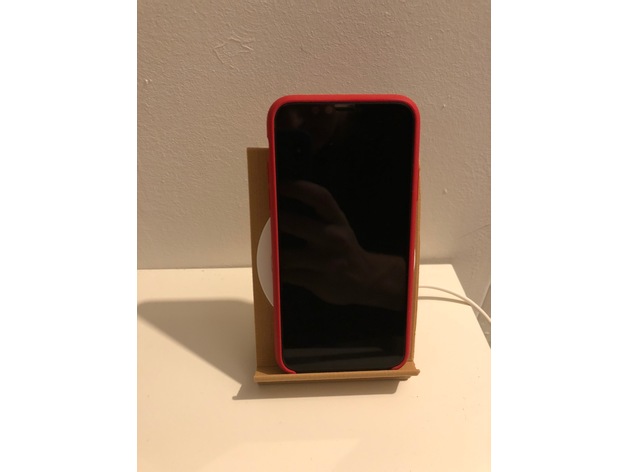
Apple iPhone X dock for IKEA RÄLLEN wireless charger 3D Print Model
Summary
[ REMARK: PICTURES ARE BEFORE POST-PRODUCTION ]
I had picked up my iPhone X (I was 2nd in line on friday morning, yay!). I bought the IKEA RÄLLEN wireless charger for €14,95 as it was by far the cheapest, but for both next to my bed and on my desk I wanted to be able to put my iPhone up in a dock, instead of laying it flat on the charger. So, I figured, why not make one myself?
It has been designed to be stable and solid, but be rather quickly printable and save some material. I printed it both in PLA and wood (I love the look / feel / finish) and both turned out great. It has too been designed specifically so the charger is located in the center of the iPhone. That way, even with a case like my Apple silicone case on it, it has no problem connecting and charging. I didn’t think it would be a problem until the charger ended up being too low in the prototype, which on the other end should quite well work for the smaller iPhone 8 (I’ll upload that one later).
My next design will be a separate Apple Watch dock that can be connected to this one, forming a modular solution and leaving the choice for either one or a combined dock. Keep an eye on my designs for this one in a few days! Hope you guys
Print Settings
Printer:
CraftBot+ Rafts:
Doesn’t Matter Supports:
Yes
Post-Printing
It needs some work to make the text on top look smooth, as well as the surfaces may need some post-production smoothening (differs per settings / printer ofcourse). -
CR-10 X & Y Tensionser Remix Kit 3D Print Model
Summary
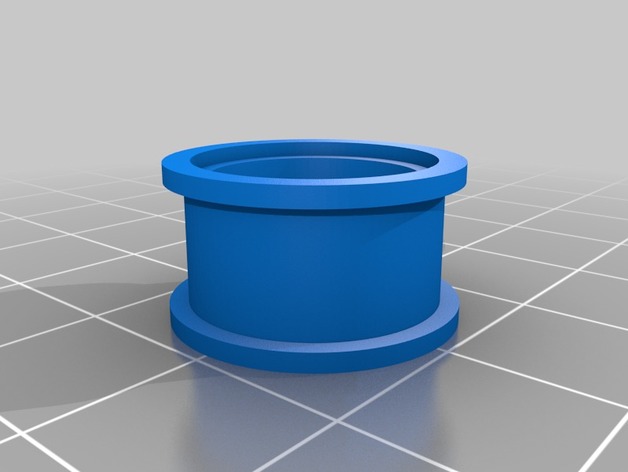
So I had some issues with both x and y tensionsers I found here and ended up redesigning some of the parts. After the parts are all printed and the existing pulley/tensioner assemblies, switch the bearings and add the bearing jacket and insert on each one. This is a work in progress so the parts are subject to change. -
Zonestar P802QR2 Simple X Belt 3D Print Model
Summary
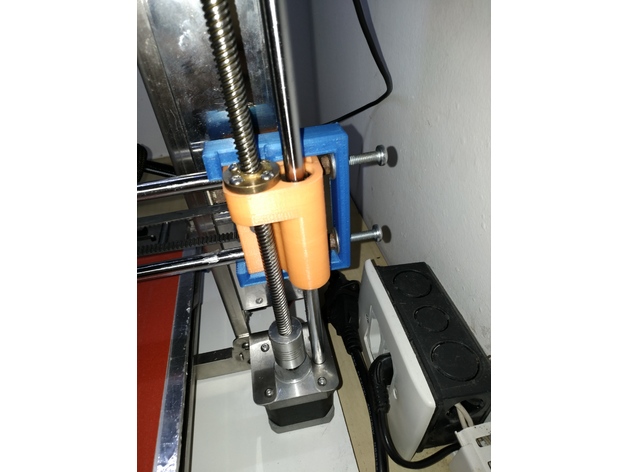
Furos adaptados para parafusos de 4,8mm ( o buraco têm cerca de 5,0mm)
Usei arruela e porcas do lado de dentro, para que ao apertar o parafuso force o metal da arruela e porcas e não o plástico.
Print Settings
Printer:
Zonestar P802QR2 Rafts:
No Supports:
Yes Resolution:
0,2 Infill:
40 -
Strv 103B X. 3D Model
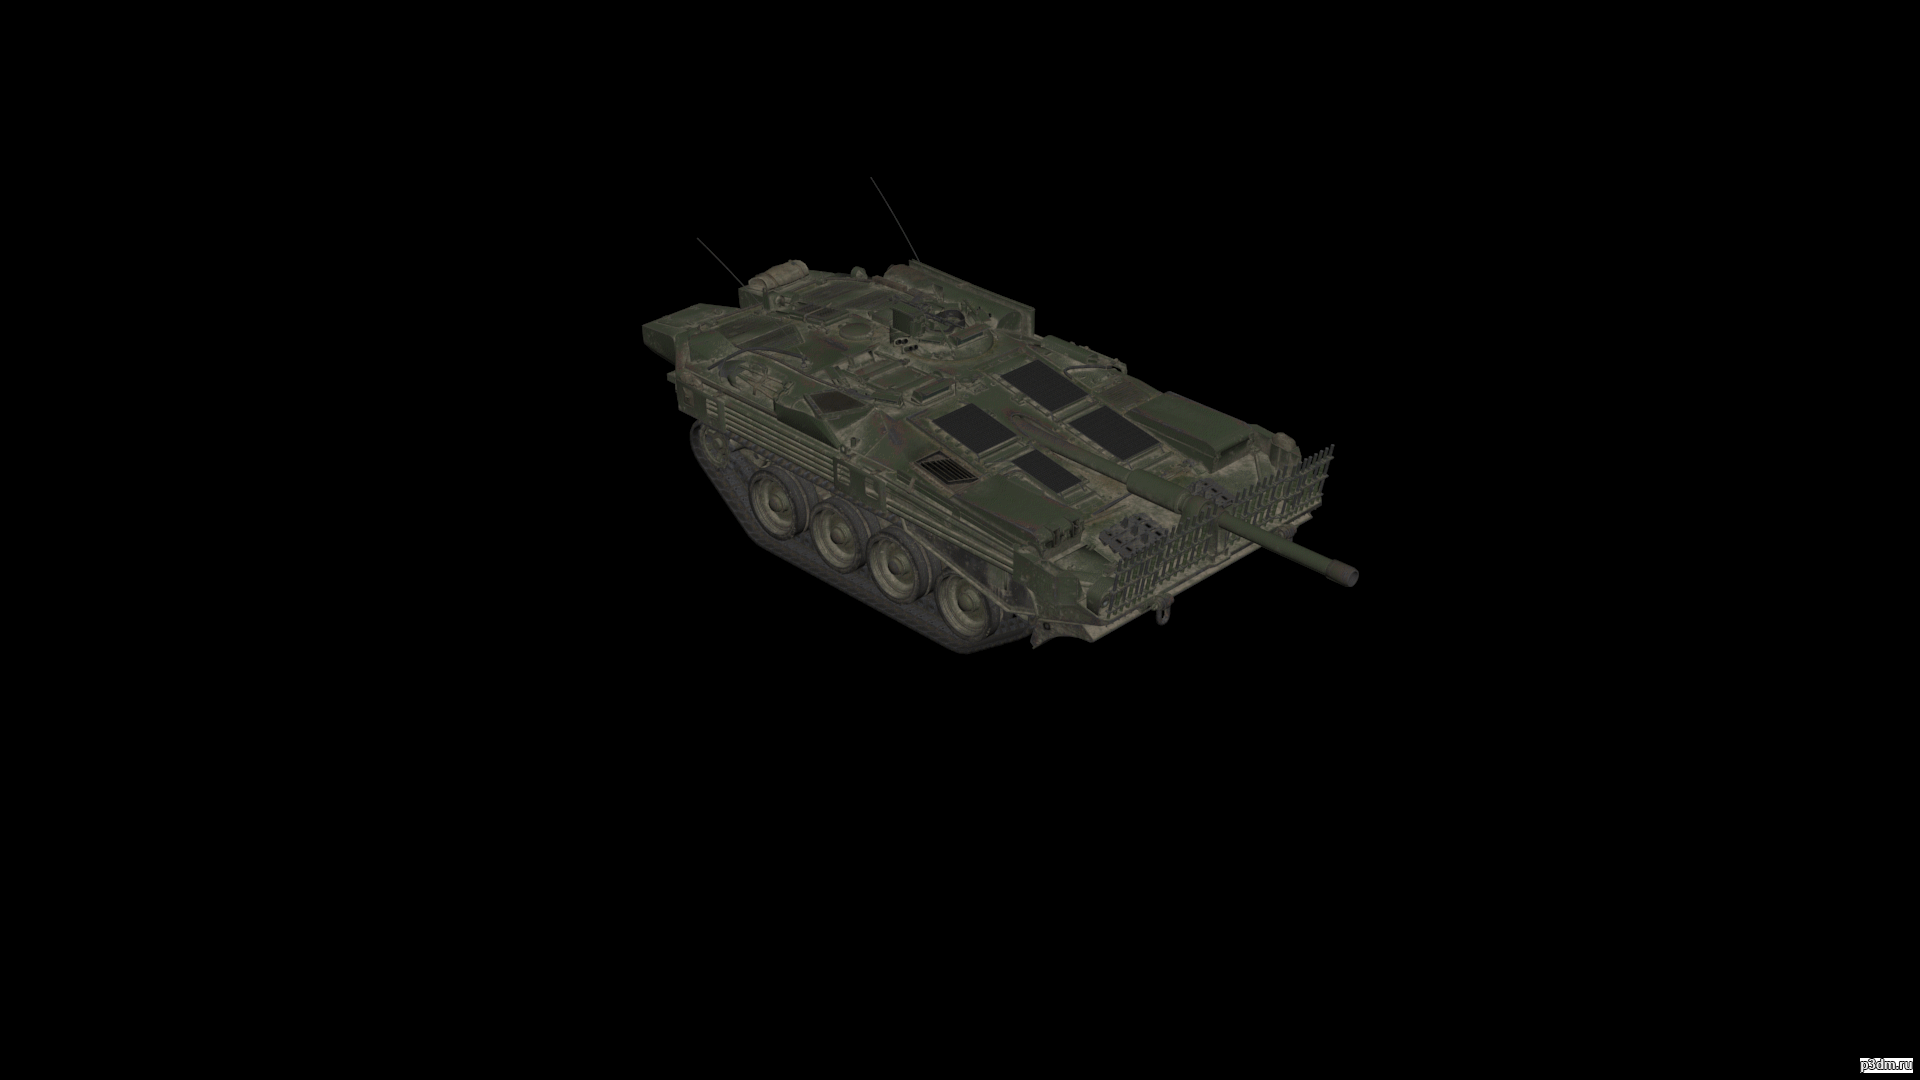
Какой танк (корабль) следующей? В коментах пишите какой танк (корабль) вы хотите увидеть.
-
BMW X5M(E70) & X6M(E71) V8 Engine 2010-2014 3D Model
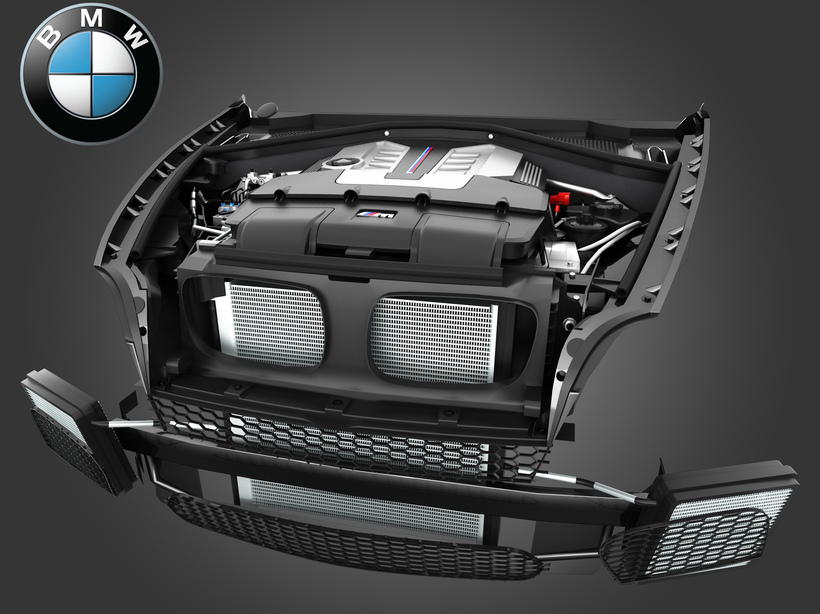
BMW X5M(E70) & X6M(E71) V8 Engine 2010-2014 Detailed 3D model of the underhood space, the external elements of the engine and the cooling system of charged crossovers BMW X5 M (E70) and X6 M (E71) 2010 – 2014. Middle-poly mesh. Model is great for use in game engines, mods for games, production of video content and advertising. The textures in the kit. You can greatly reduce the size by replacing three-dimensional radiators on the usual boxes with the texture of the radiator and replace the bolts and nuts on simplified models. – 107 objects – 6 textures (In “max” archives scenes)Polys: 25534 Tris: 41125 Verts: 33210- MAX (2014) – FBX (Multi Format) – OBJ (Multi Format)V-Ray Adv 3.00.03 Sampler: Adaptive DMC Antialiasing: Mitchell-Netravali Color mapping: Linear multiply Global illumination: Primary engine – Brute force Secondary engine – Light Cache
-
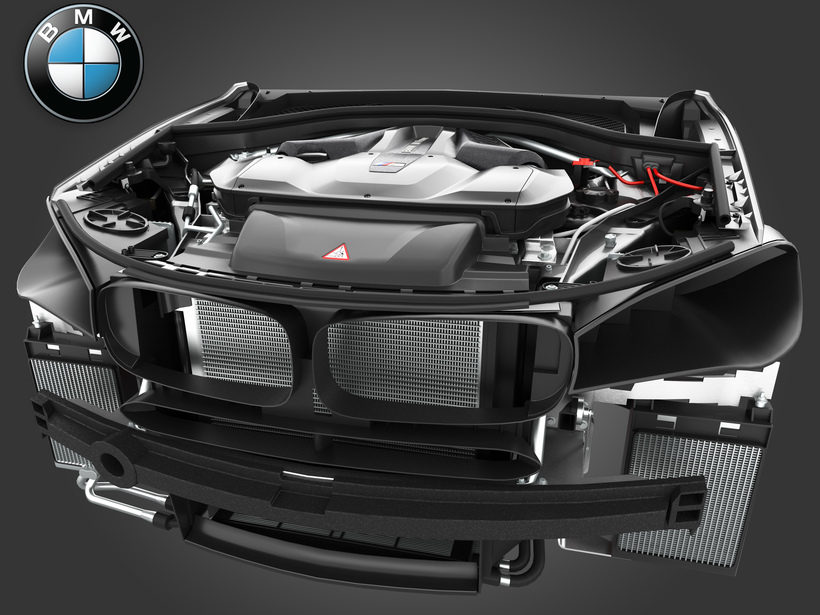
BMW X5M(F85) & X6M(F86) V8 Engine (Grey Metallic) 2015-2018 3D Model
BMW X5M(F85) & X6M(F86) V8 Engine (Grey Metallic) 2015-2018Detailed 3D model of the underhood space, the external elements of the engine and the cooling system of charged crossovers BMW latest-generation X5 M (F85) and X6 M (F86) 2015 – 2018. Middle-poly mesh. Model is great for use in game engines, mods for games, production of video content and advertising. The textures in the kit. You can greatly reduce the size by replacing three-dimensional radiators on the usual boxes with the texture of the radiator and replace the bolts and nuts on simplified models. – 152 objects – 12 textures (In “max” archives scenes)Polys: 43127 Tris: 81775 Verts: 48964- MAX (2014 & 2016) – FBX (Multi Format) – OBJ (Multi Format)V-Ray 3.40.01 Sampler: Adaptive DMC Antialiasing: Mitchell-Netravali Color mapping: Linear multiply Global illumination: Primary engine – Brute force Secondary engine – Light Cache
-
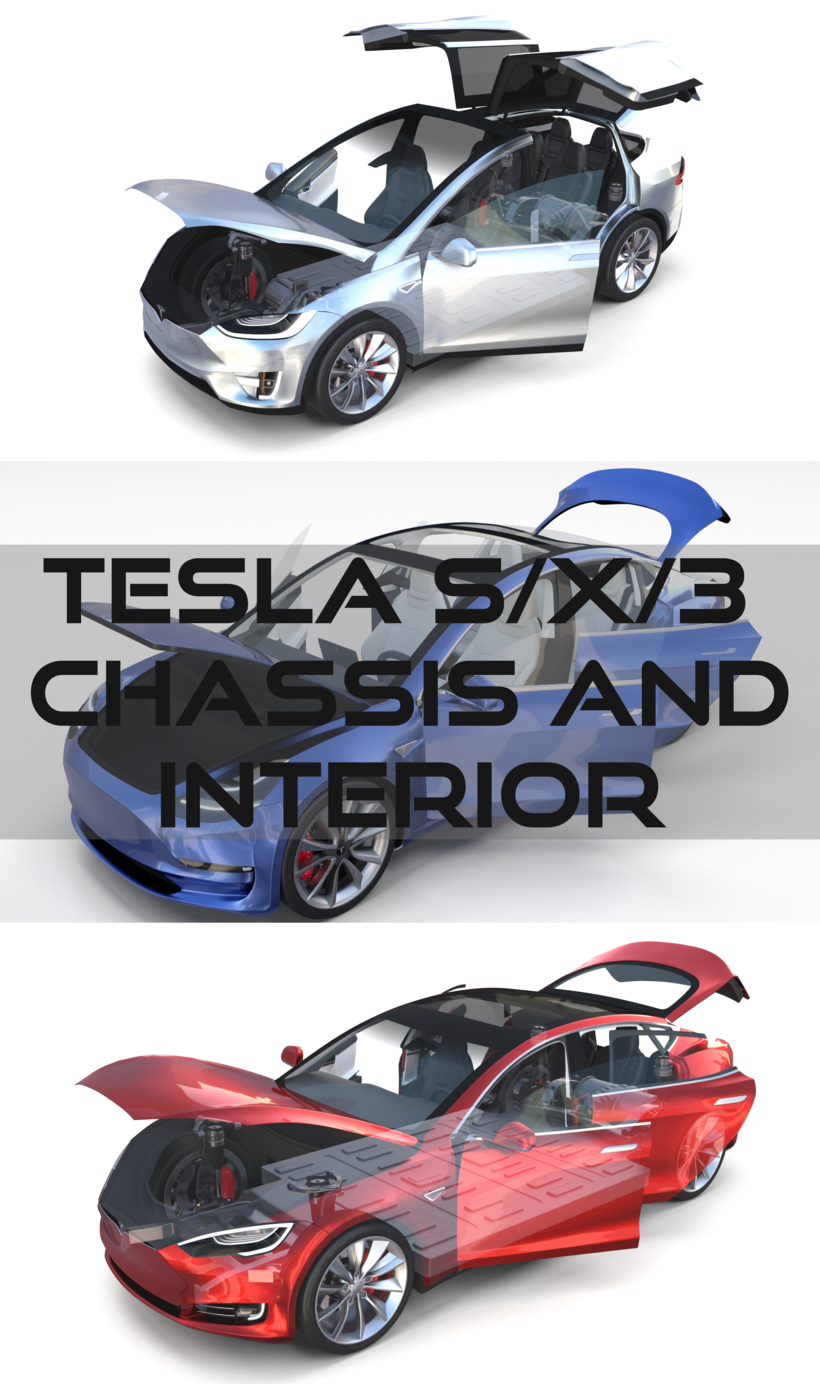
2017 Tesla S/X/3 Collection w chassis and interior 3D Model
Tesla 3D Model Collection consisting of the following:
-Tesla Model S (2016 Facelifted Model);
-Tesla Model X;
-Tesla Model 3;
All models come with HIGHLY DETAILED INTERIOR AND CHASSIS, WITH ENGINE, SUSPENSION AND BRAKES MODELED.
File formats:
-.blend, rendered with cycles, as seen in the images;
-.blend, rendered with cycles, with doors open, as seen in images;
-.blend, rendered with cycles, with a see-through of the chassis, as seen in the images;
-.obj, with materials applied and textures;
-.obj, with materials applied and textures and doors open;
-.dae, with materials applied and textures;
-.dae, with materials applied and textures and doors open;
-.fbx, with material slots applied;
-.fbx, with material slots applied and doors open;
-.stl;
-.stl with doors open;
Files come named appropriately and split by car and file format.
3D Software:
These 3D models were originally created in Blender 2,78-2.79 and rendered with Cycles.
Materials and textures:
The models have materials applied in all formats, and are ready to import and render.
The models come with multiple png image textures.
Preview scenes:
The preview images are rendered in Blender using its built-in render engine ‘Cycles’.
Note that the blend files come directly with the rendering scene included and the render command will generate the exact result as seen in previews.
Scene elements are on a different layer from the actual model for easier manipulation of objects.
General:
The models are built strictly out of quads and are subdivisable.
It comes in separate parts, named correctly for the sake of convenience.
For any problems please feel free to contact me.
Don’t forget to rate and enjoy! -
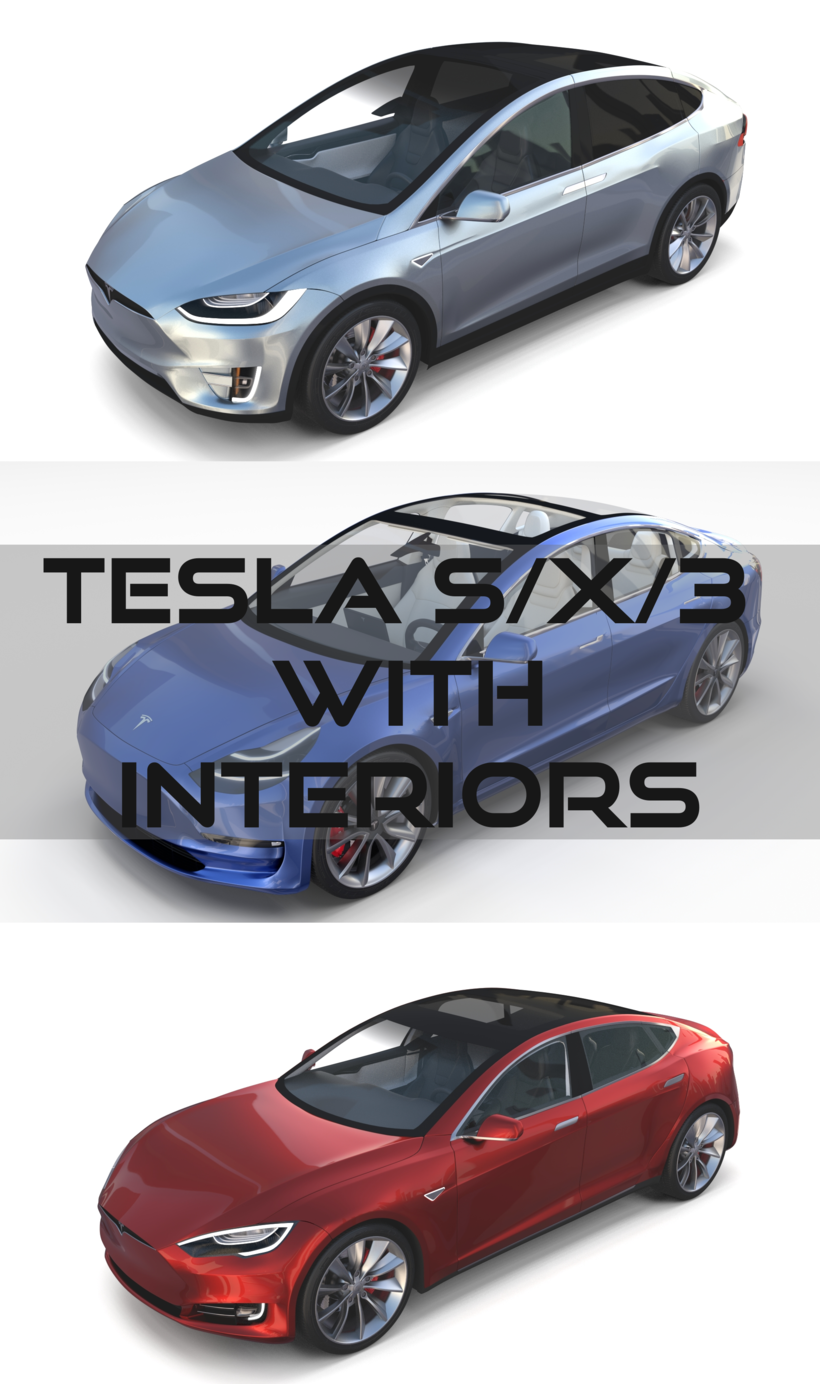
2017 Tesla S-X-3 Collection w interior 3D Model
Tesla 3D Model Collection consisting of the following:
-Tesla Model S (2016 Facelifted Model);
-Tesla Model X;
-Tesla Model 3;
All models come with HIGHLY DETAILED INTERIOR.
File formats:
-.blend, rendered with cycles, as seen in the images;
-.blend, rendered with cycles, with doors open, as seen in images;
-.obj, with materials applied and textures;
-.obj, with materials applied and textures and doors open;
-.dae, with materials applied and textures;
-.dae, with materials applied and textures and doors open;
-.fbx, with material slots applied;
-.fbx, with material slots applied and doors open;
-.stl;
-.stl with doors open;
Files come named appropriately and split by car and file format.
3D Software:
These 3D models were originally created in Blender 2,78-2.79 and rendered with Cycles.
Materials and textures:
The models have materials applied in all formats, and are ready to import and render.
The models come with multiple png image textures.
Preview scenes:
The preview images are rendered in Blender using its built-in render engine ‘Cycles’.
Note that the blend files come directly with the rendering scene included and the render command will generate the exact result as seen in previews.
Scene elements are on a different layer from the actual model for easier manipulation of objects.
General:
The models are built strictly out of quads and are subdivisable.
It comes in separate parts, named correctly for the sake of convenience.
For any problems please feel free to contact me.
Don’t forget to rate and enjoy! -
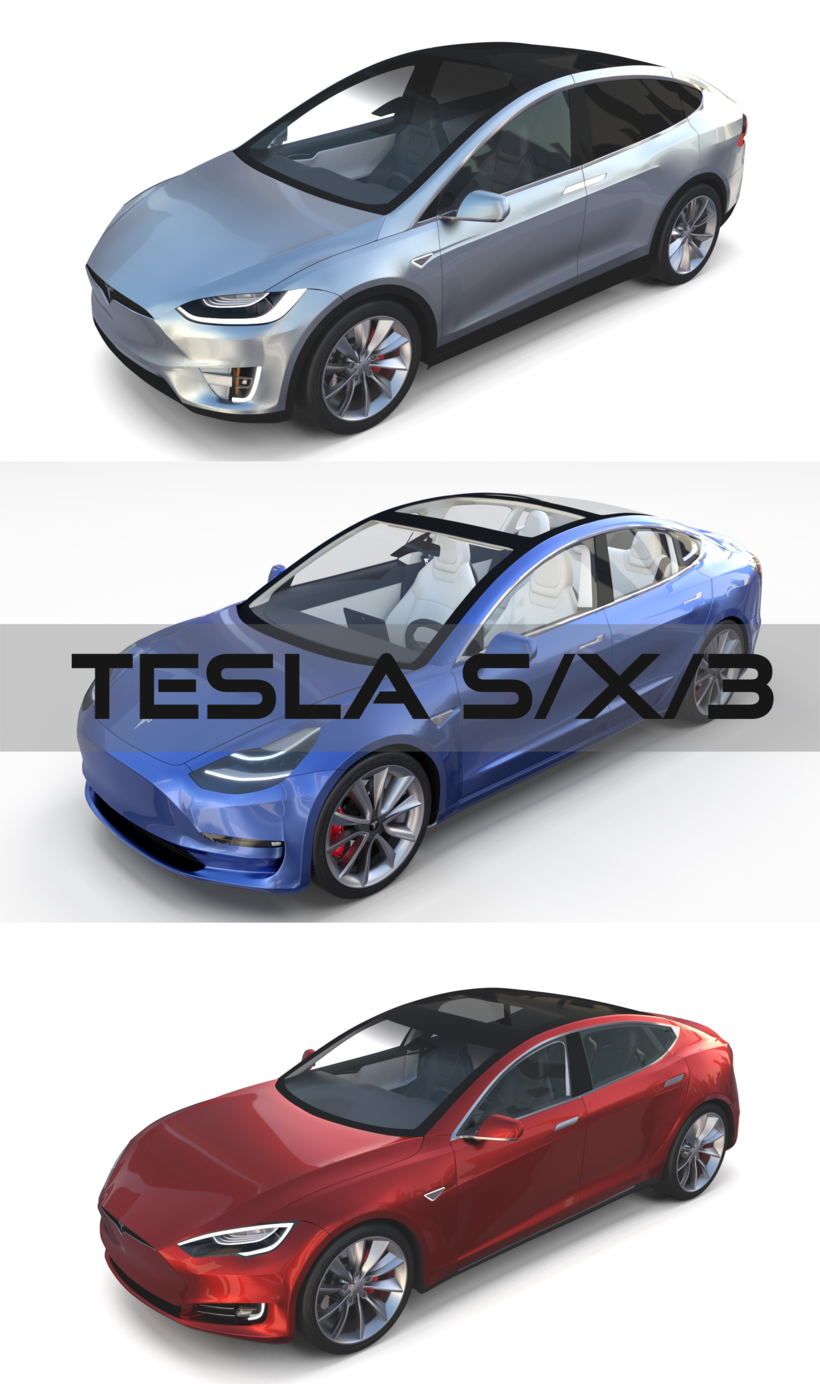
2017 Tesla S-X-3 Collection 3D Model
Tesla 3D Model Collection consisting of the following:
-Tesla Model S (2016 Facelifted Model);
-Tesla Model X;
-Tesla Model 3;
File formats:
-.blend, rendered with cycles, as seen in the images;
-.obj, with materials applied and textures;
-.dae, with materials applied and textures;
-.fbx, with material slots applied;
-.stl;
Files come named appropriately and split by car and file format.
3D Software:
These 3D models were originally created in Blender 2,78-2.79 and rendered with Cycles.
Materials and textures:
The models have materials applied in all formats, and are ready to import and render.
The models come with multiple png image textures.
Preview scenes:
The preview images are rendered in Blender using its built-in render engine ‘Cycles’.
Note that the blend files come directly with the rendering scene included and the render command will generate the exact result as seen in previews.
Scene elements are on a different layer from the actual model for easier manipulation of objects.
General:
The models are built strictly out of quads and are subdivisable.
It comes in separate parts, named correctly for the sake of convenience.
For any problems please feel free to contact me.
Don’t forget to rate and enjoy! -
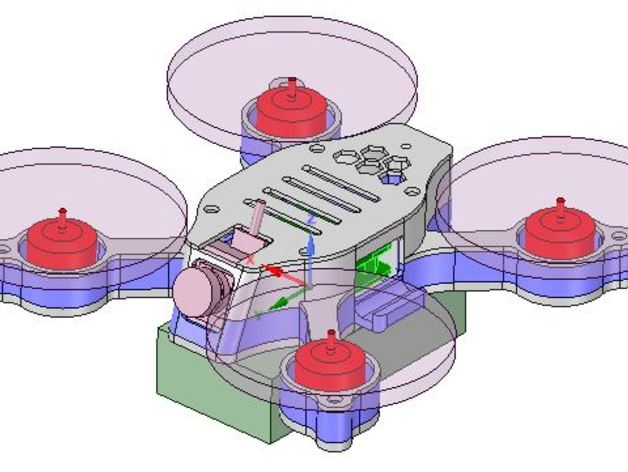
100 Sized True X Micro Quadcopter 3D Print Model
Summary
100 sized micro quad.
This was designed because of the protection it gives to the hardware components.
Inspired by other sandwich type quadcopters.
Designed with M3 nylon screws in mind.
The top layer needs to be tapped with a M3 screw or tap.
If you don’t want to tap the top layer you will need to drill out the hole so a nylon screw will fit through the whole assembly. M3x25 nylon screw will be needed to pass through whole assembly.
Frame weight is around 16 grams with recommended settings below.
FPV camera mount has yet to be designed. Currently I have just hot glued the camera in place.
Hardware supported.
Motors: 1104, 1105, 1106 brushless.
Props: Up to 2 inch props.
Flight Controller: 16 and 20 mm sized.
ESC: 4in1, 16 and 20 mm sized
FPV: Currently I only know that a Eachine lizard 95 FPV camera will fit.
Print Settings
Rafts:
Doesn’t Matter Supports:
Yes Resolution:
.1 Infill:
40% Notes:
Recommended to print in ABS as there is a snap fit connection between the base and the middle layer.
Also recommend to print with either a raft or a brim to prevent the arms from lifting off the bed mid print. -
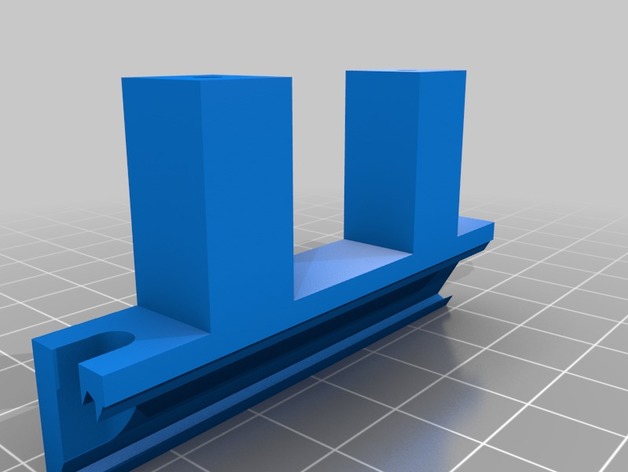
X Carraige LED Strip Holder – Wanhao i3 3D Print Model
Summary
I am running an aftermarket cooler which freed up the mounting holes used by the stock cooler. I searched for a while, but was unable to find an LED strip holder that fit the i3 Plus so I made one.
This should hold any standard width (~11mm) LED strip. There is no need to use adhesive as the strip should just slot in and be fairly secure.
Print Settings
Printer Brand:
Wanhao Printer:
Wanhao Duplicator i3 Plus Rafts:
Doesn’t Matter Supports:
No Resolution:
0.16mm Infill:
30 -
Tesla Model X Silver 3D Model
A very accurate model of a Tesla Model X. File formats:-.blend, rendered with cycles, as seen in the images;-.obj, with materials applied and textures;-.dae, with materials applied and textures;-.fbx, with material slots applied;-.stl;3D Software:This 3d model was originally created in Blender 2.79 and rendered with Cycles.Materials and textures:The model has materials applied in all formats, and is ready to import and render.The model comes with multiple png image textures.Preview scenes:The preview images are rendered in Blender using its built-in render engine ‘Cycles’. Note that the blend files come directly with the rendering scene included and the render command will generate the exact result as seen in previews.Scene elements are on a different layer from the actual model for easier manipulation of objects.General:The model is built strictly out of quads and is subdivisable.It comes in separate parts, named correctly for the sake of convenience.For any problems please feel free to contact me.Don’t forget to rate and enjoy!
-
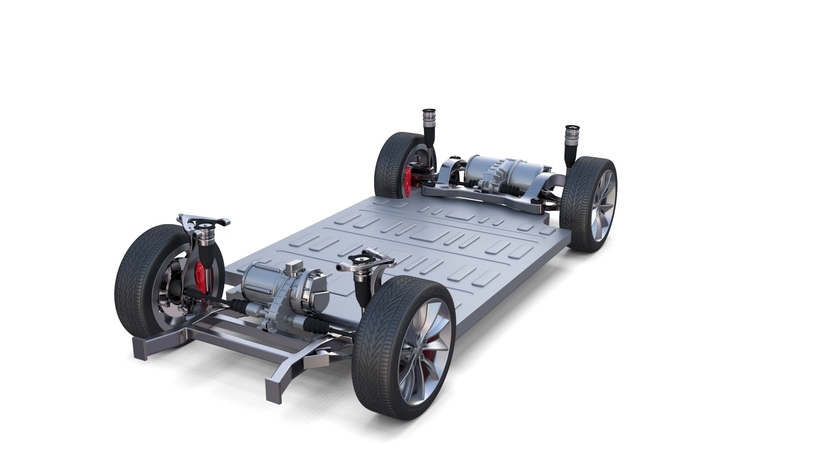
Tesla Model X P100D AWD Chassis 3D Model
A very accurate model of a Tesla Model X P100D AWD Chassis. File formats:-.blend, rendered with cycles, as seen in the images;-.obj, with materials applied and textures;-.dae, with materials applied and textures;-.fbx, with material slots applied;-.stl;3D Software:This 3d model was originally created in Blender 2.79 and rendered with Cycles.Materials and textures:The model has materials applied in all formats, and is ready to import and render.The model comes with multiple png image textures.Preview scenes:The preview images are rendered in Blender using its built-in render engine ‘Cycles’. Note that the blend files come directly with the rendering scene included and the render command will generate the exact result as seen in previews.Scene elements are on a different layer from the actual model for easier manipulation of objects.General:The model is built strictly out of quads and is subdivisable.It comes in separate parts, named correctly for the sake of convenience.For any problems please feel free to contact me.Don’t forget to rate and enjoy!
-
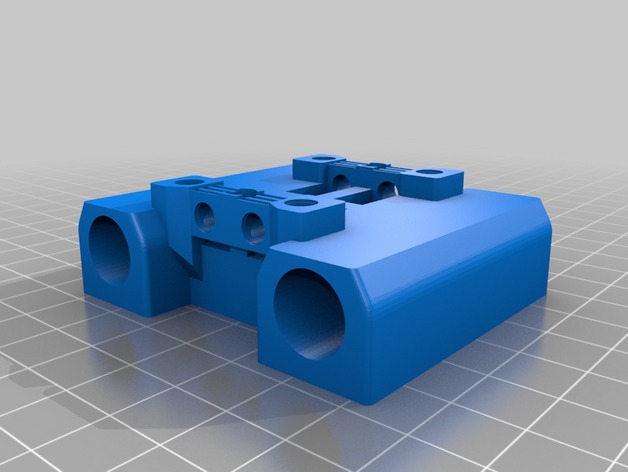
Hypercube Evolution X Carriage for 10mm igus Bushings 3D Print Model
Summary
X-carriage for use with Igus JSM-1012-10 bushings and 10mm aluminum or carbon fiber rod. -
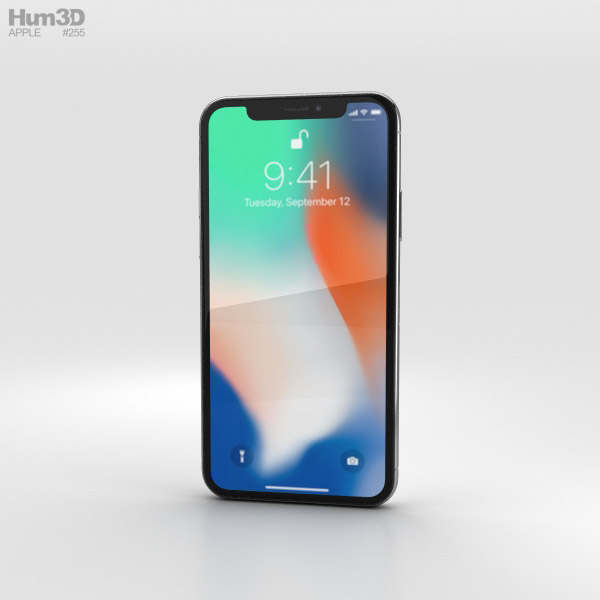
Apple iPhone X Silver 3D Model
The 3d model based on a real
phone, created according to the original dimensions.
All main parts of the model are separated objects. Therefore, you can easy change all materials. We provide several formats for each model, most of them available by default.
* images rendered with using V-Ray plugin (we don’t include lighting and environment to a set). -
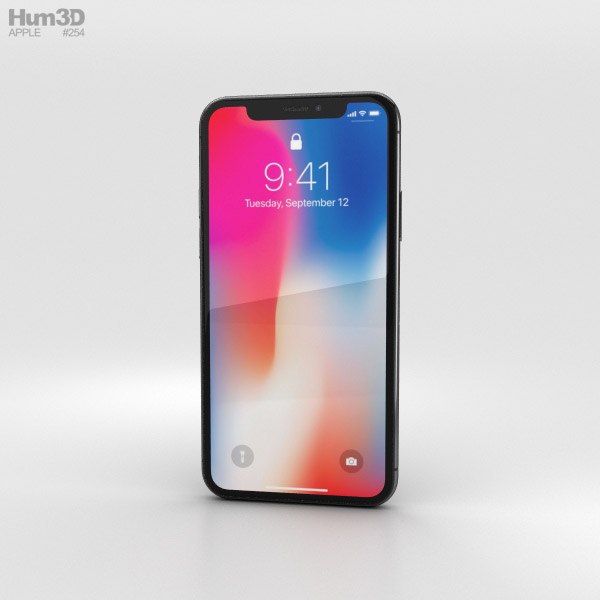
Apple iPhone X Space Gray 3D Model
The 3d model based on a real
phone, created according to the original dimensions.
All main parts of the model are separated objects. Therefore, you can easy change all materials. We provide several formats for each model, most of them available by default.
* images rendered with using V-Ray plugin (we don’t include lighting and environment to a set). -

Cessna Citation X 3D Print Model
Summary
Solid. Rocket. Boosters.
These are the words that best describe the engines on this beautiful bird. Claimed to be the fastest civilian aircraft in the world, this plane can eat up a mile of sky in just six seconds, crusing comfortably over Mach 0.90. Cessna went about designing this airplane in response to the reputation the Citation line held as a slower fleet of business jet aircraft. To compete with rival Learjet in the high-speed market, the Citation X was created. The aircraft was designed largely from scratch, a significant departure from the rest of the Citation line.
This was a really fun build. I’ve loved the look of this airplane for a long time and it was a pleasure designing. The sweeping curves on the underside of the fuselage were challenging to create, as were the highly swept winglets, which due to their thin profile may experience difficulties in printing. I will be running this through a series of previews and renders in an attempt to improve printing stability while not sacrificing accuracy to the real thing. Enjoy!
Print Settings
Printer Brand:
MakerBot Printer:
MakerBot Replicator (5th Generation) Rafts:
Yes Supports:
Yes Resolution:
0.1mm High Resolution Infill:
10% 0.4mm Diamond (fast) -
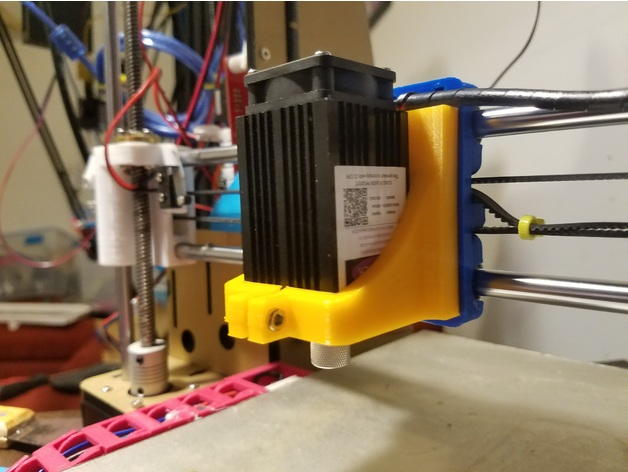
Laser Mount for Prusa i3 Rework X Carriage 3D Print Model
Summary
Mount for Laser (https://www.aliexpress.com/item/500mw-405NM-focusing-blue-purple-laser-module-engraving-with-TTL-control-laser-tube-diode-protective-googles/32562052620.html)
Compatible with the X Carriage from the Prusa i3 Rework – https://www.thingiverse.com/thing:119616
Print Settings
Supports:
No Infill:
10% -
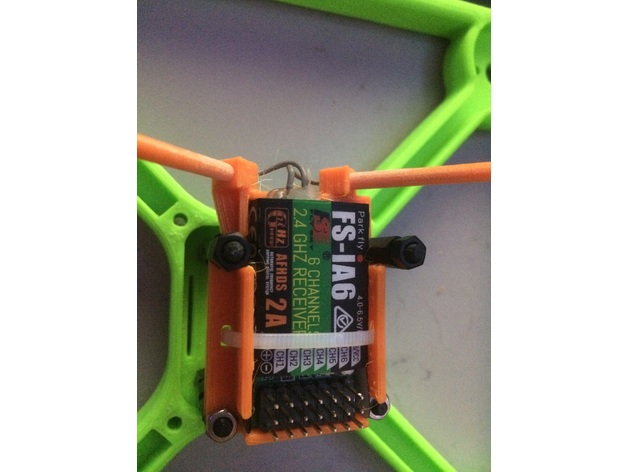
30.5 X 30.5 MM Mount for FS-iA6 Reciever w/ Antenna Tubes 3D Print Model
Summary
Receiver mount and antenna tubes for FlySky i6 Receiver, the FS-iA6. Designed to fit on the 30.5 X 30.5MM Mounting standard. I printed the antenna tubes one at a time vertically with 6 lines of raft, and then tapered the ends with sandpaper by hand for a tight fit into the base. Recommend 100% infill. .20mm layer height. -
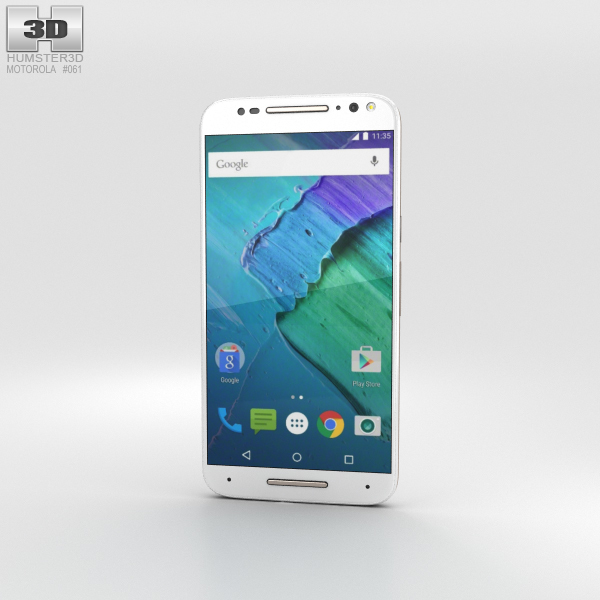
Motorola Moto X Style White 3D Model
The 3D model was created on real base. It’s created accurately, in real units of measurement, qualitatively and maximally close to the original.Model formats:- *.max (3ds Max 2008 scanline)- *.max (3ds Max 2008 vray)- *.fbx (Multi Format)- *.obj (Multi Format)- *.3ds (Multi Format)- *.mb (Maya 8.5)- *.lwo (Lightwave 6)- *.c4d (Cinema 4D 11)* renders Are made in 3ds Max 2008 using vray 1.5 (studio environment is not included in the set)If you need any other formats we are more than happy to make them for you.The model is provided combined, all main parts are presented as separate parts therefore materials of objects are easy to be modified or removed and standard parts are easy to be replaced. If you experience difficulties with separating standard parts we are more than happy to give you qualified assistance.We greatly appreciate you choosing our 3D models and hope they will be of use.We look forward to continuously dealing with you.Sincerely Yours,Hum3D Team
-
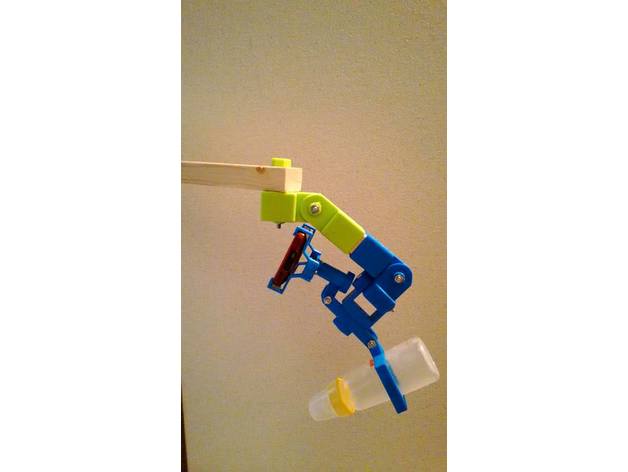
3D Printed Wood Arm Joints using 30mm x 40mm wood v0.7.0 3D Print Model
Summary
Attention: This project is released under the General Public License version 3.
There is no warranty for any problems that occurred using this project.
GPL v3:https://github.com/silvershell/printed-wood-arm-joints/blob/master/LICENSE
3D Printed Wood Arm Joints using 30mm x 40mm wood.
Scad files of models are generated with scad-builder.js and scad-builder-proj.js.
.scad and others are here.
GitHub:https://github.com/silvershell/printed-wood-arm-joints/tree/v0.7.0 -
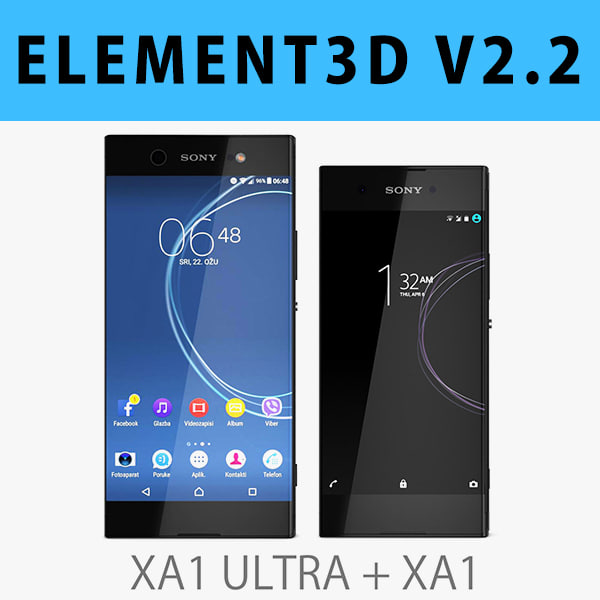
E3D – Sony Xperia XA1 + XA1 Ultra Black 3D Model
COLLECTION:1. Sony Xperia XA1 Black2. Sony Xperia XA1 Ultra BlackThis pack:Element 3D V2.2 ( All colors )models preset easy to use- 1 file OBJ High poly- 1 file OBJ standard- 1 file C4D R12 standard render- 1 file 3ds max 2012 standard material- E3D file full materials set up like previewsHow to use it?1. Open After Effects CC 2014 ( or higher) and create new composition ( You need Element3D V2.2 to use )2. Create new Solid layer and add Element effect. ( Effect/Video Copilot/ Element )3. Click Scene Setup4. Click on IMPORT inside Element3D scene setup5. Choose my .e3d preset for the model and press Open.If you dont see the model do not forget to right click on the model name and press Replace model then select the .obj model file in the respective models folder.
-
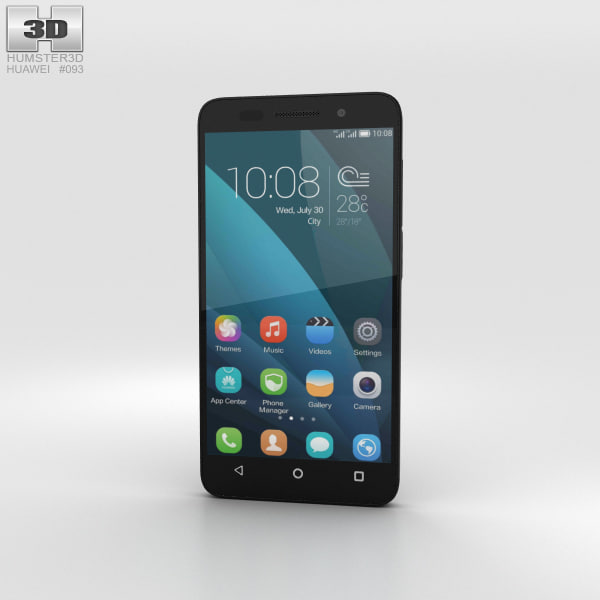
Huawei Honor 4X Black 3D Model
The 3D model was created on real base. It’s created accurately, in real units of measurement, qualitatively and maximally close to the original.Model formats:- *.max (3ds Max 2008 scanline)- *.max (3ds Max 2008 vray)- *.fbx (Multi Format)- *.obj (Multi Format)- *.3ds (Multi Format)- *.mb (Maya 8.5)- *.lwo (Lightwave 6)- *.c4d (Cinema 4D 11)* renders Are made in 3ds Max 2008 using vray 1.5 (studio environment is not included in the set)If you need any other formats we are more than happy to make them for you.The model is provided combined, all main parts are presented as separate parts therefore materials of objects are easy to be modified or removed and standard parts are easy to be replaced. If you experience difficulties with separating standard parts we are more than happy to give you qualified assistance.We greatly appreciate you choosing our 3D models and hope they will be of use.We look forward to continuously dealing with you.Sincerely Yours,Hum3D Team
-
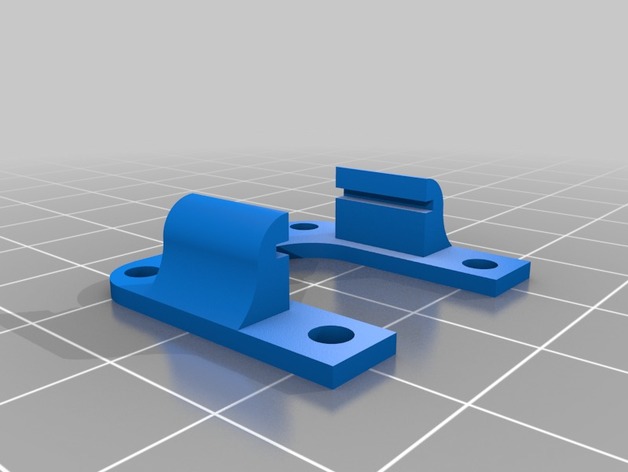
GR-12L SUMD 20mm x 20mm mount 3D Print Model
Summary
This is a 20mm x 20mm mount for the Graupner GR-12L SUMD receiver. The receiver, when removed from the shrink wrap, slides into the mount, allowing it to be installed at the top of the flight control stack.
Print Settings
Printer:
Monoprice Select Mini Rafts:
No Supports:
No Infill:
50
How I Designed This
Onshape -
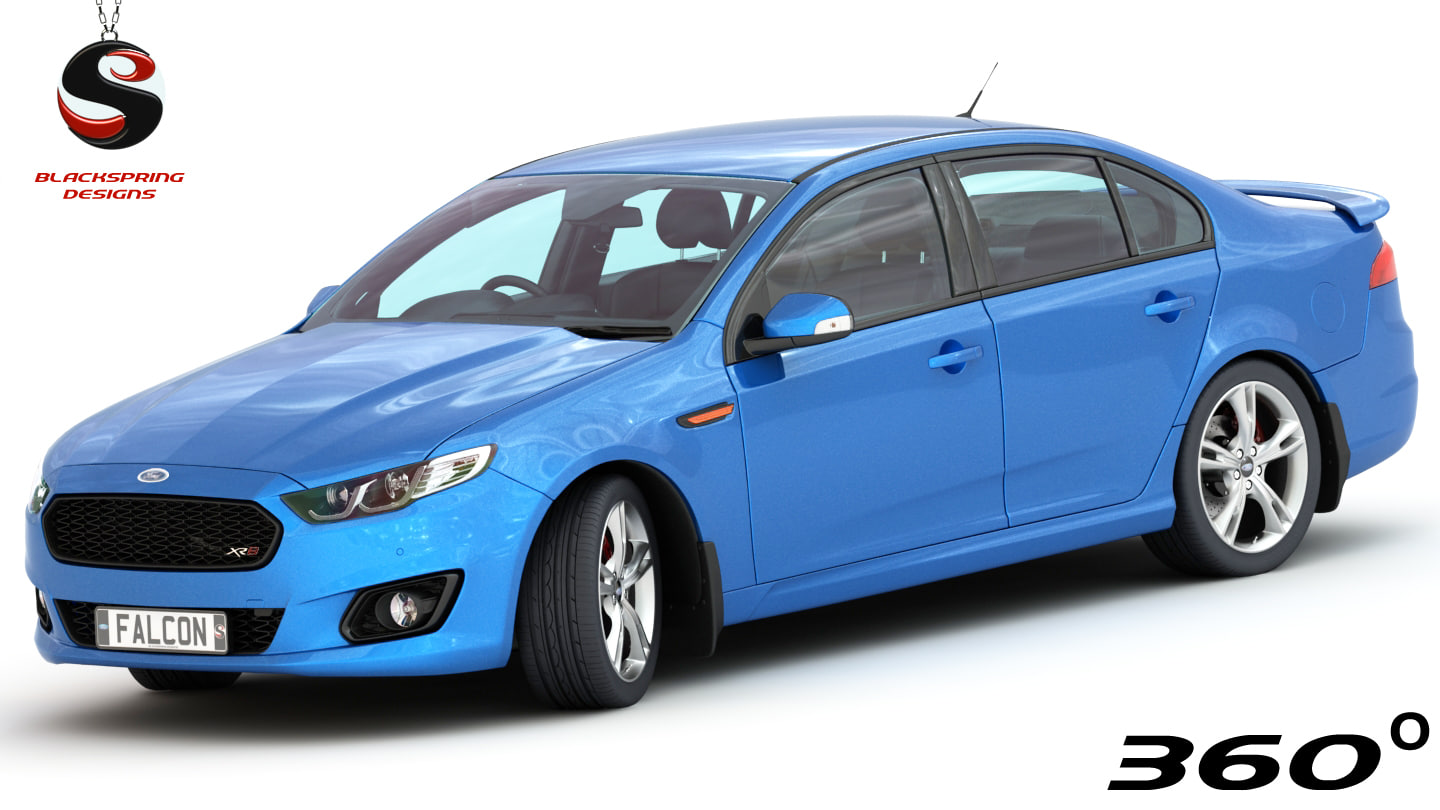
Ford Falcon 2015 XR8 (Low Interior) 3D Model
Great quality very realistic hipoly 3d model of Ford Falcon 2015 with textures and with the upper part of the interior.Turbosmooth modifier can be applied on most of car’s objects if you need to get higher polycount.The model presented in a large variety of different formats optimized for different applications (OBJs formats are Maya/Rhino/Cinema4D/Lightwave3D/Blender-optimized) and matches almost all applications.Geometry contains only quad-polygons. Every geometry part is grouped according to it’s materials. Geometry of a certain material has a color corresponding to this material so it is easier to select objects and groups.All of the lights are made with detailed geometry, not only with textures.All render settings and HDR are included inside the 3ds max file. Easy To change colors for materials.The summary polycount includes polycount of wheels. Approximate 4-wheel polycount in all models is 75 000 – 100 000All car gauges are presented with no geometry, but with texture only.All materials are in the slate material editor. All car materials are included even if they are not used in this particular car.The scene contains 2 (or sometimes more) default carpaint materials.The model is ready for 4K CloseUps and VR renders.Thank you very much for buying ‘BlackSpring Designs’ Team models!
-
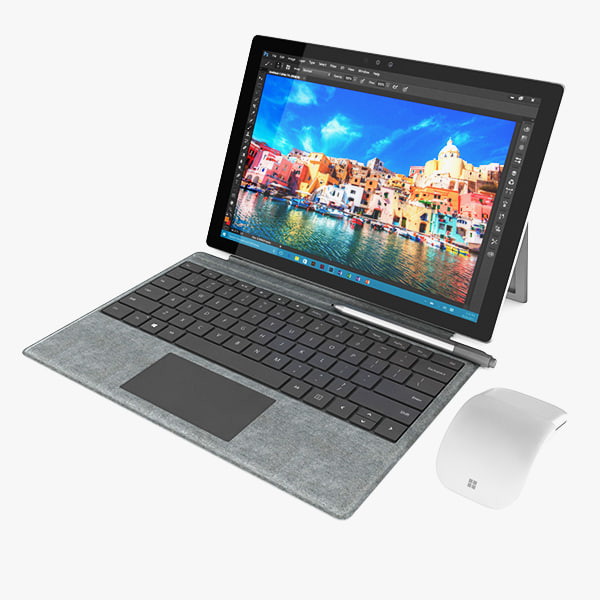
Surface Pro 2017 + Type Cover + Arc Mouse 3D model 3D Model
1. Surface Pro 20172. Surface Arc Mouse3. Type Cover—————————–The model has a fully textured, detailed design that allows for close-up renders, and was originally modeled in 3ds Max 2012 and rendered with V-Ray. Fidelity is optimal up to a 2K render. Renders have no postprocessing.—————————–File Formats:+ 3ds Max 2012 + Vray 2.0 full setup lighting, camera+ 3ds Max 2012 standard+ Cinema 4D R12 standard ( materials and textures was setup )+ Maya 2012 standard ( materials and textures was setup )+ Lightwave 11 ( materials and textures was setup )+ FBX 2012+ OBJ 2012+ 3DS 2012—————————–Geometry:+ No isolated vertices+ No coincident vertices+ No coincident/coplanar faces+ Quads and Triangles only ( Clean edge flow, mostly quads, subdividable topology, no poles with more than 5 edges on the model, holding/support edges present to retain shape after subdivision )+ Models resolutions are optimized for polygon efficiency. (In 3ds Max, the Meshsmooth/Turbosmooth function can be used to increase mesh resolution if necessary.)+ Real-world scale ( We make 3d model from actual size and images reference. It is best for making video intro, marketing, animation, games… )+ Naming and Organization ( All geometry is contained in a single layer structure, with the layer having the same name as the product. )+ Textures and Materials ( No texture paths referenced by the model. All texture paths must be stripped from the model. )—————————–About BeeTechZ:+ We are making all electronics 3d model ( latest and oldest ). Our collection is biggest in the world. It is place where you can find anything about technology for your project ( earlier and faster than others )+ Every model we build goes through thorough Quality assessment both visual and technical to make sure the assets look realistic and the models are of the best quality.+ Searching models you need by typing: beetechz + brand ( or beetechz + name the models ).
-
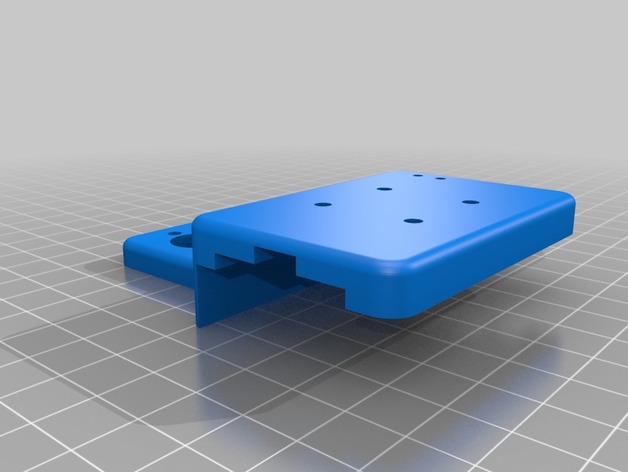
Modular Tevo Tarantula Dual Extruder X Carriage for MGN12H Linear Rail 3D Print Model
Summary
This is an X carriage for the Tevo Tarantula with dual extruder option. It is designed to be mounted on an MGN12H block on a linear guide rail. Make sure you get a block that has the same spacing as an MGN12H block (20mm distance between mounting holes).The belt is attached to the lower portion only and the upper portion screws on top of it (through it and into the MGN12H block). This allows the upper portion that holds the hotend, endstop, fans to be removed without detaching the belt. I designed it this way because I intend to have several different versions of the upper part to hold a single extruder or to hold other hotends.
Lastly, the top part has intentionally been left clear so as to accomodate other parts that can be bolted on later. I am currently working on cable management attachments that take advantage of this feature. It can also be used to attach fans, lights, etc.
Print Settings
Printer:
Tevo Tarantula Rafts:
Doesn’t Matter Supports:
Yes Resolution:
0.2mm Infill:
20% Notes:
Make sure your printer is calibrated correctly specially in the X and Y axes to ensure that the screw holes line up. -
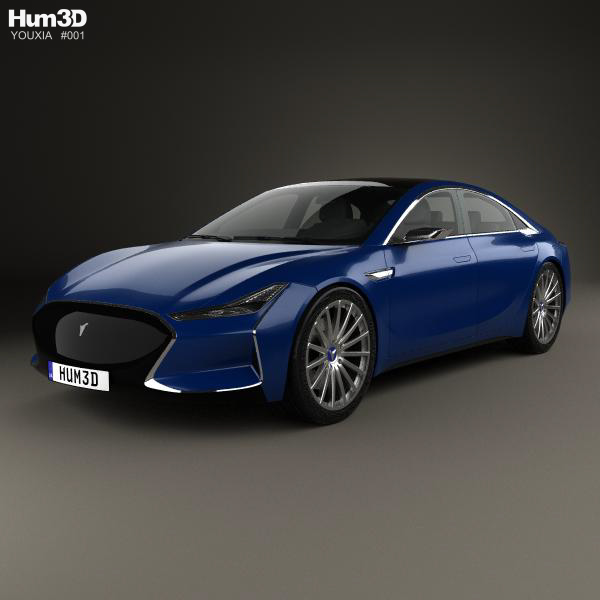
Youxia X 2016 3D Model
The 3d model based on a real car, created according to the original dimensions. All model files were “smoothed”. We can provide product files with original geometry by your request.
All main parts of the model are separated objects. Therefore, you can easy change all materials. We provide several formats for each model, most of them available by default.
* images rendered with using V-Ray plugin (we don’t include lighting and environment to a set). -
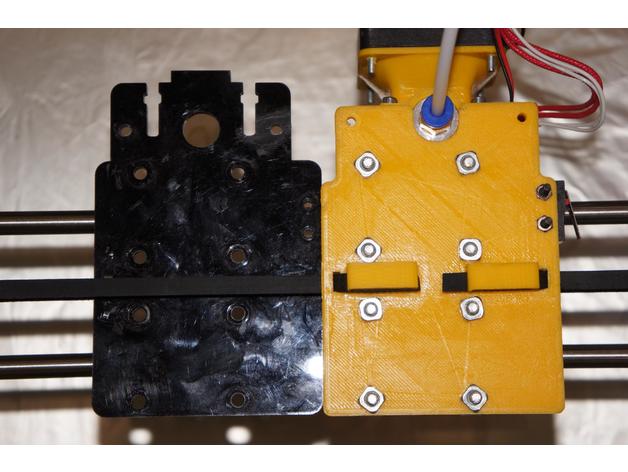
FLSUN Cube X carriage restyling 3D Print Model
Summary
My X carriage broken and i created restyled one. Some things bit simplified, i tried to make it more reliable, belt mount included. If hotend radiator doesn’t fit to it’s mount, just hot up radiator with boiling water and put to mount – mount will take your radiator shape.
FreeCAD source file included as usual 🙂 -

E3D – Motorola Moto E4 Plus Grey 3D model 3D Model
This pack:Element 3D V2.2 ( All colors )models preset easy to use- 1 file OBJ High poly- 1 file OBJ standard- 1 file C4D R12 standard render- 1 file 3ds max 2012 standard material- E3D file full materials set up like previewsHow to use it?1. Open After Effects CC 2014 ( or higher) and create new composition ( You need Element3D V2.2 to use )2. Create new Solid layer and add Element effect. ( Effect/Video Copilot/ Element )3. Click Scene Setup4. Click on IMPORT inside Element3D scene setup5. Choose my .e3d preset for the model and press Open.If you dont see the model do not forget to right click on the model name and press Replace model then select the .obj model file in the respective models folder.
-

Vossen x Work VWS-2 model 3D Model
Description : Detailed 3D model WVossen x Work VWS-2 caliper and brake rotorTechnical notes :- Low poly —71315 polygons- Hi poly — 592076 polygons two interactions- The model is a native of 3d max 2016, made with polygonal modeling and applying turbosmooth 2 subdivisions- The model in format 3D MAx 2016 incliyed Materials Vray 3.4 The model is 3ds Max 2016 native, made by polygonal modeling and applying 2 Turbosmooth.- The model format is 3ds Max 2016. All textures and materials are included.- No colaps smooth modified- maya – materials standard – OBJ – materials are not assigned on- c4d – materials standard- Textures formats: PNG- Final images rendered with V-Ray 3.4click my nikname for more models!rendering setup is not included.
-

Motorola Moto E4 USA Gold 3D Model
Motorola Moto E4 USA 2017………………….FEATURES:- This model is a highquality, details enuogh to close-up render- Images preview take from V-Ray rendering and not edited- Models resolutions are optimized for polygon efficiency, apply smooth function to increase mesh resolution- All textures was strip paths, open the file and all texture will be connected automatically. – Real world scale, we offer a model with an error of less than 5%.- No object missing- Model with 3 and 4 sides only- No polygons with more than 4 sides- No object with isolated vertices, overlapping faces or overlapping verts- No poles or crease- Poly counts: 19 168- Vert counts: 19 933In 3ds max files:- Frezze tramsform to zero ( 0,0,0 )- Group: Yes- Object with Parents and Childen: Yes- Layer apply to manage: Yes- Named all object………………….FORMATS: 1. 3ds Max 2012 + Vray 2.0: Native format- Vray 2.0 ( full setup materials, lights and camera make rendering like image preivews)- Standard materials ( full setup materials: colors, reflect, translucent )2. Geometry and standard materials with textures. Amount reflect and bump are not set:- OBJ 2012- FBX 2012- 3DS 2012 3. Standard materials with textures.Amount reflect and bump are not set. – Maya 2012- C4D R12- Lightwave 11…………………..TEXTURES:- Textures highquality, enough for close-up render ( 2048 pixels )- UVWs mapping with mixed: overlapping and non-overlapping…………………..Beemaxx team:With over 3 years of experience working with 3D models. We give you all the very best in quality, save time. Our customers come from all over the world. We want to develop a strong community starts from the expanded 3d models market.- Also check out our other models, just click on our user name to see complete gallery.- Summit a product rating will help us very much.
-
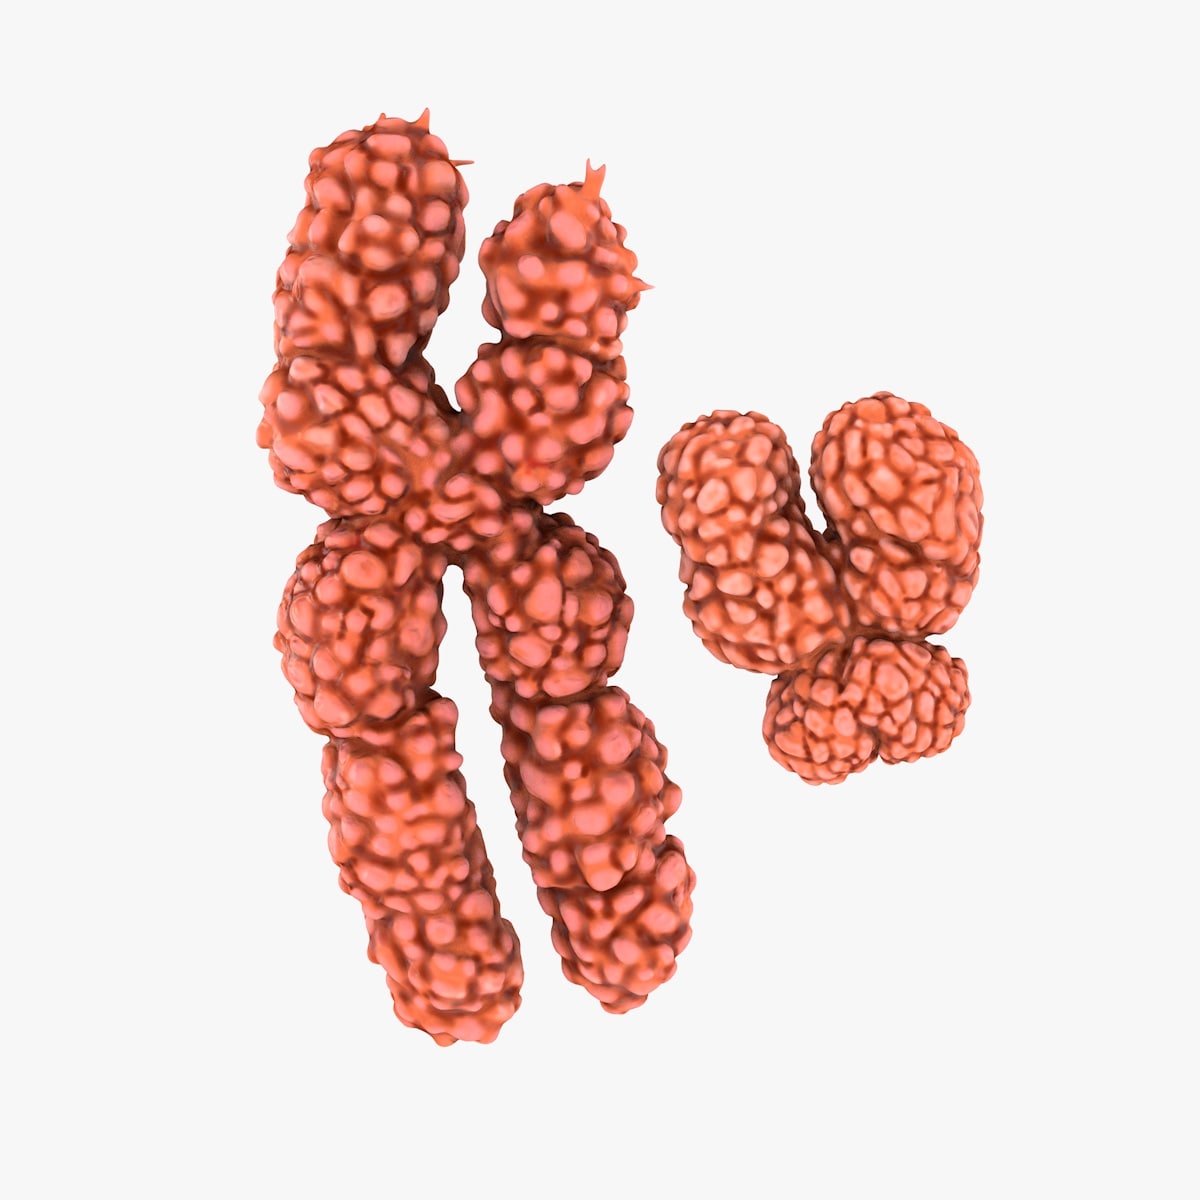
Chromosome 3D Model
Realistic high quality 3D models of X and Y Chromosome.>Scene Information- Scene include tow mesh objects (X and Y Chromosome);- The scene is prepared for Render; – Used Subdivision level 1;- All objects are organized and named descriptively;- No special plugin needed to open scene. >Geometry- Scene consist of tow polygonal objects made of quads and minimal triangle;- Total poly count without subdivision is: 33280;- Poly count with subdivision level 1(used on render) is: 166400.- Models include non-overlapping UV Maps.>Textures- Models has HD diffuse maps and model pf Cancer cell has normal map.- Totally there are 4 maps 4096×4096 in PNG format.
-

XBox One X Controller 3D Model
High quality and detailed 3d model of X-Box One X Controller.Topology of geometry:- forms and proportions of The 3D model most similar to the real object- detailed enough for close-up renders- the geometry of the model was created very neatly- there are no many-sided polygons- the model is ready and does not needed smoothing modifiersMaterials and Textures:- 3ds max files included Standart materials and Vray-Shaders- large size textures with layers (*.tiff) included- all textures paths are cleanedOrganization of scene:- to all objects and materials names in scene are appropriated- real world size (system units – mm)- coordinates of location of the model in space (x0, y0, z0)- does not contain extraneous or hidden objects (lights, cameras, shapes etc.)File Formats:- original file format – 3ds max 2009 + Vray- 3ds max with standard materials- 3ds, obj, fbx (Multi Format)- Cinema 4D and Maya – exported with standard materialsRenders:- all previews rendered 3ds max Vray- the model is completely ready for use visualization in 3ds max + Vray- realistic render (*.tiff format with alpha channel) included
-

X-Box One X Console model 3D Model
High quality and detailed 3d model of X-Box One X Console.Topology of geometry:- forms and proportions of The 3D model most similar to the real object- detailed enough for close-up renders- the geometry of the model was created very neatly- there are no many-sided polygons- the model is ready and does not needed smoothing modifiersMaterials and Textures:- 3ds max files included Standart materials and Vray-Shaders- large size textures with layers (*.tiff) included- all textures paths are cleanedOrganization of scene:- to all objects and materials names in scene are appropriated- real world size (system units – mm)- coordinates of location of the model in space (x0, y0, z0)- does not contain extraneous or hidden objects (lights, cameras, shapes etc.)File Formats:- original file format – 3ds max 2009 + Vray- 3ds max with standard materials- 3ds, obj, fbx (Multi Format)- Cinema 4D and Maya – exported with standard materialsRenders:- all previews rendered 3ds max Vray- the model is completely ready for use visualization in 3ds max + Vray- realistic render (*.tiff format with alpha channel) included
-
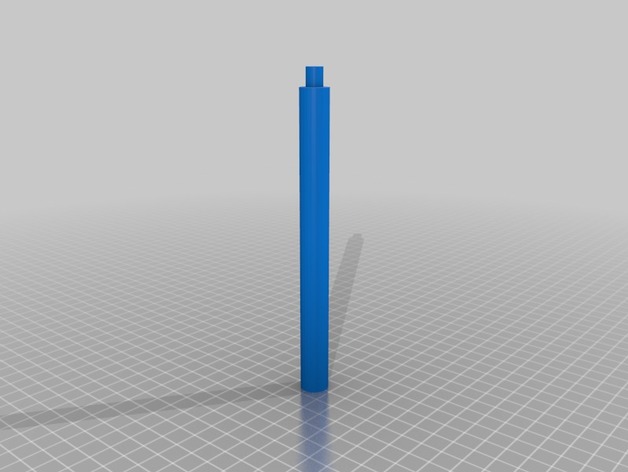
Anet A8 – X Axis Frame – Stabilizing Rod 3D Print Model
Summary
This is stabilizing rod for the main frame of the Anet A8.
Print both parts. put them together and install them as one rod.
The diameter of the outer holes are 8mm (M8 screws).
Print Settings
Printer:
Anet A8 Rafts:
Doesn’t Matter Supports:
No Resolution:
0.2 Infill:
20% Notes:
Use Brim
How I Designed This
Autocad 2017, I share the DWG File if you want -
delta legs x y z 3D Print Model
Summary
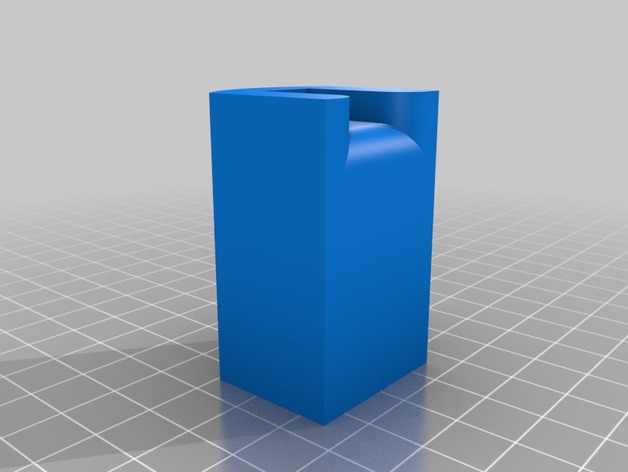
It’s to remember what tower is what X Y Z
and Feet to X Y Z legs -
Zoll X series 3D Model
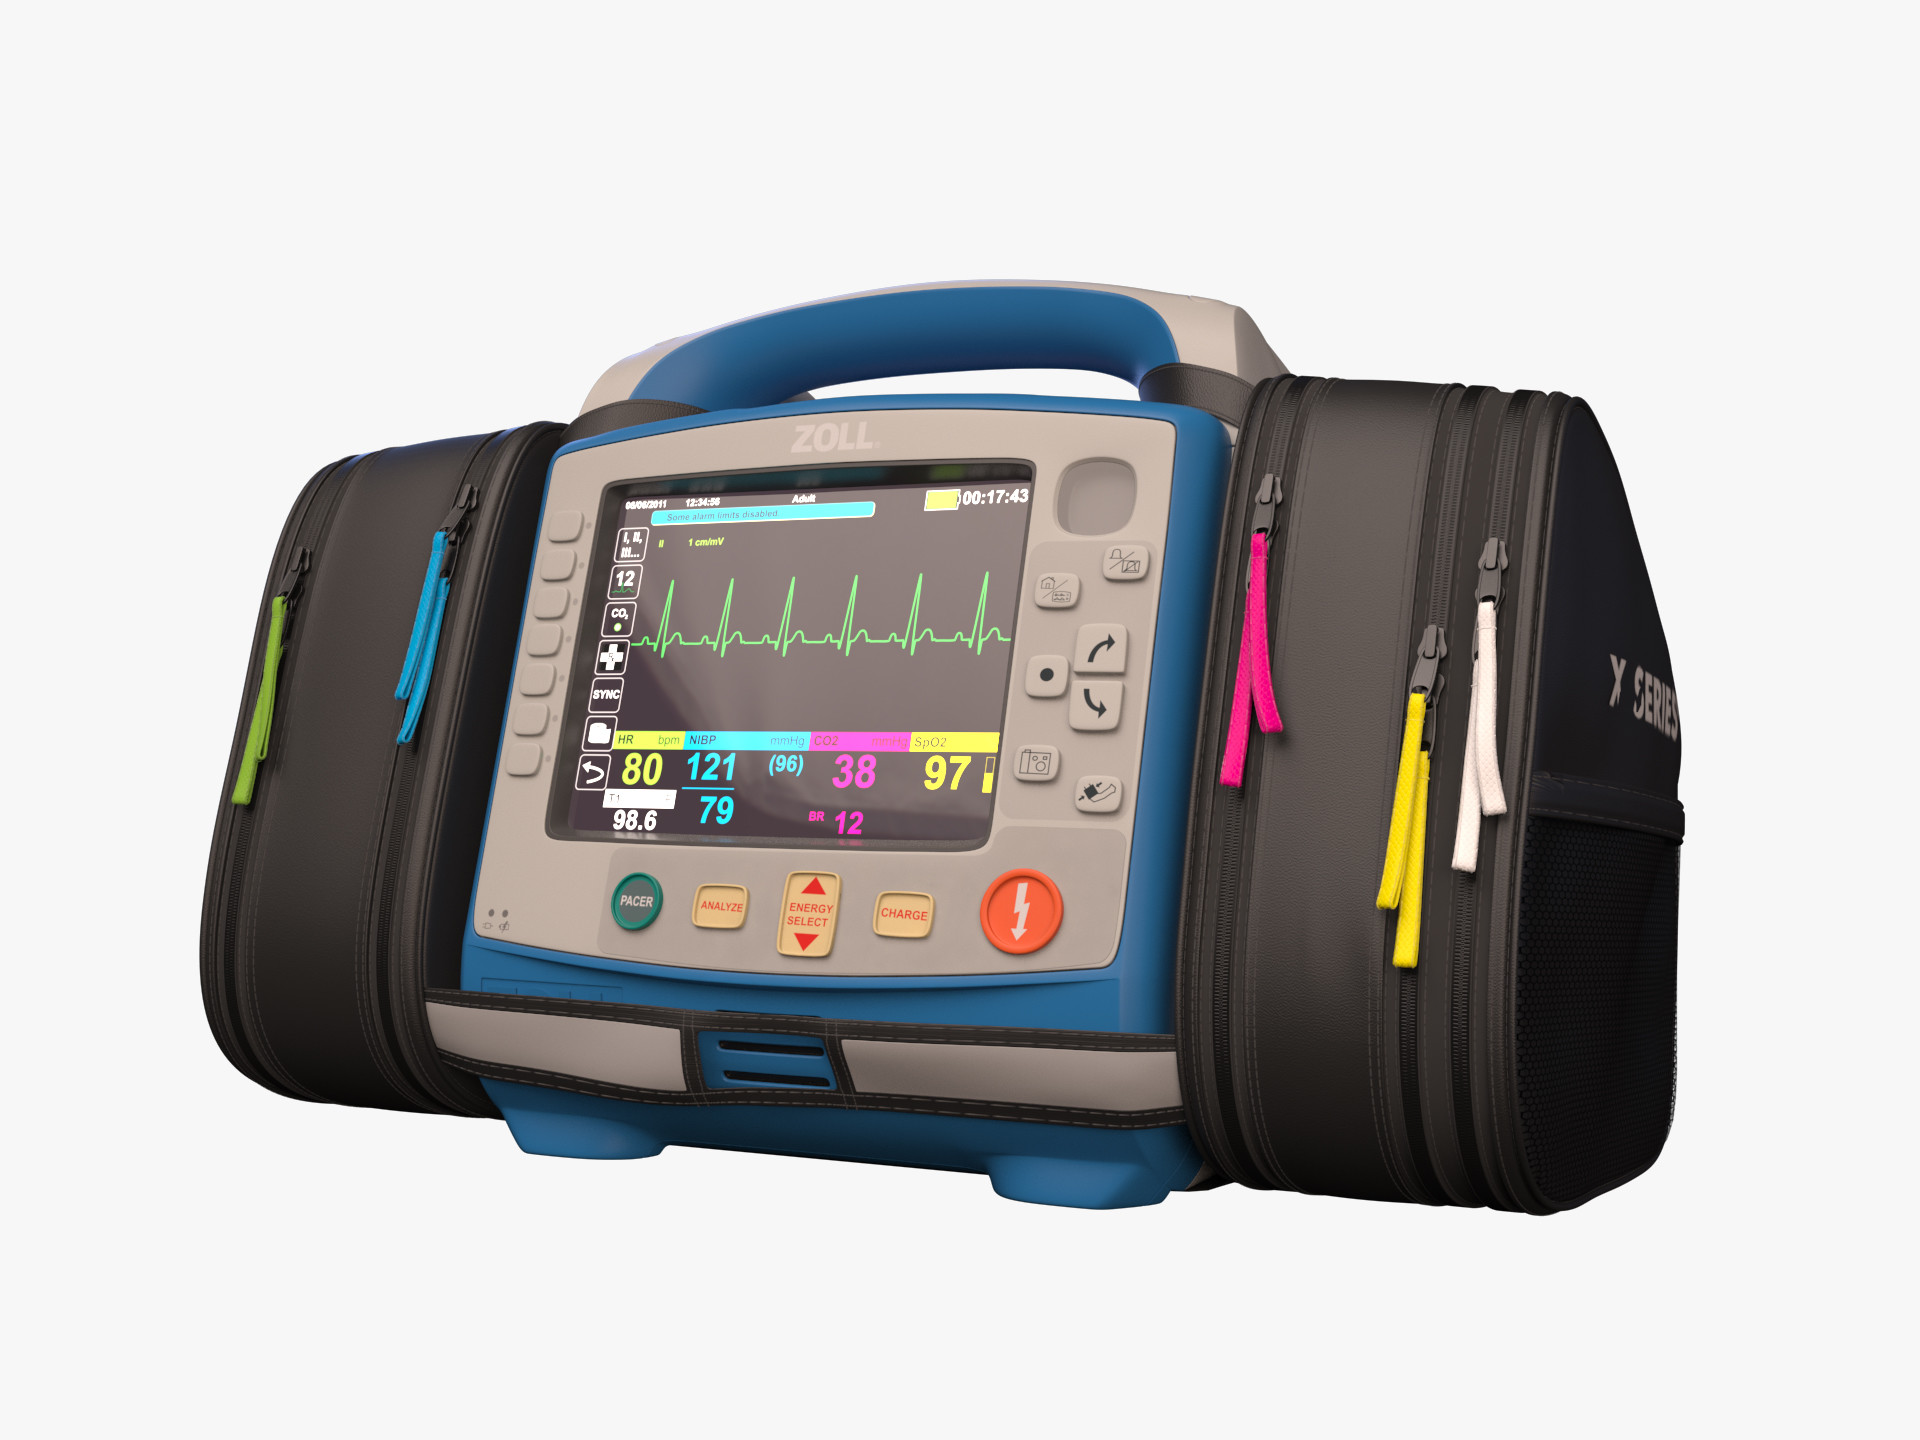
_General_3d highdetailed model of a Zoll X Series – ambulance equipmentnative format 3ds max 2014 -2011_Geometry_high detailed model ideal for closeupsreal world scalecenter to origin_Textures_High detailed texturesUVW mapping projectios / colapsed_Render_render is done with vray 3ready to renderplease rate
-

Chromosome 3D model 3D Model
This is a model of a Chromosome.Originally created with Blender v2.78A chromosome is a cell in a cell’s nucleus that carry genetic data from DNA.|| USAGE ||This model was designed for use as a real-time asset in a [videogame or simulation]This model is suitable for use in broadcast, high-res film close-up, advertising, forensic presentation, etc.This model is an accurate representation of a chromosome using a scale of 1unit = 20 micrometres.|| SPECS ||This model contains 1 objectThis model contains 16682 polygons with TurboSmooth OFF|| PRESENTATION IMAGES ||All preview images are rendered with Cycles RendererNo Photoshop or compositing used. LIghts and cameras are not included in the file.A custom colour profile (Filmic Blender (free)) was used rendering the representation images.Included with this download is a file that lists the render settings needed to produce images that match the thumbnails. This file includes information on lighting placement, camera settings and render settings.|| TEXTURES ||20482048 PNG Main object Height4096x4096 PNG Main object HeightAll textures are originalMultiple Texture Resolutions are includedVery High-Res Textures are included as separate download|| GENERAL ||Units used: Centimeters. Model is 10 centimeters tall. (divide by 10000 for actual size)Filmic Blender is recommeded in order to use this product.|| ADDITIONAL NOTES ||.obj, .fbx file formats do not have textures/materials applied and will not render like the preview images.File formats other than Blender exported as base mesh (not smoothed)
-
Headphones Beats X 04 3D Model
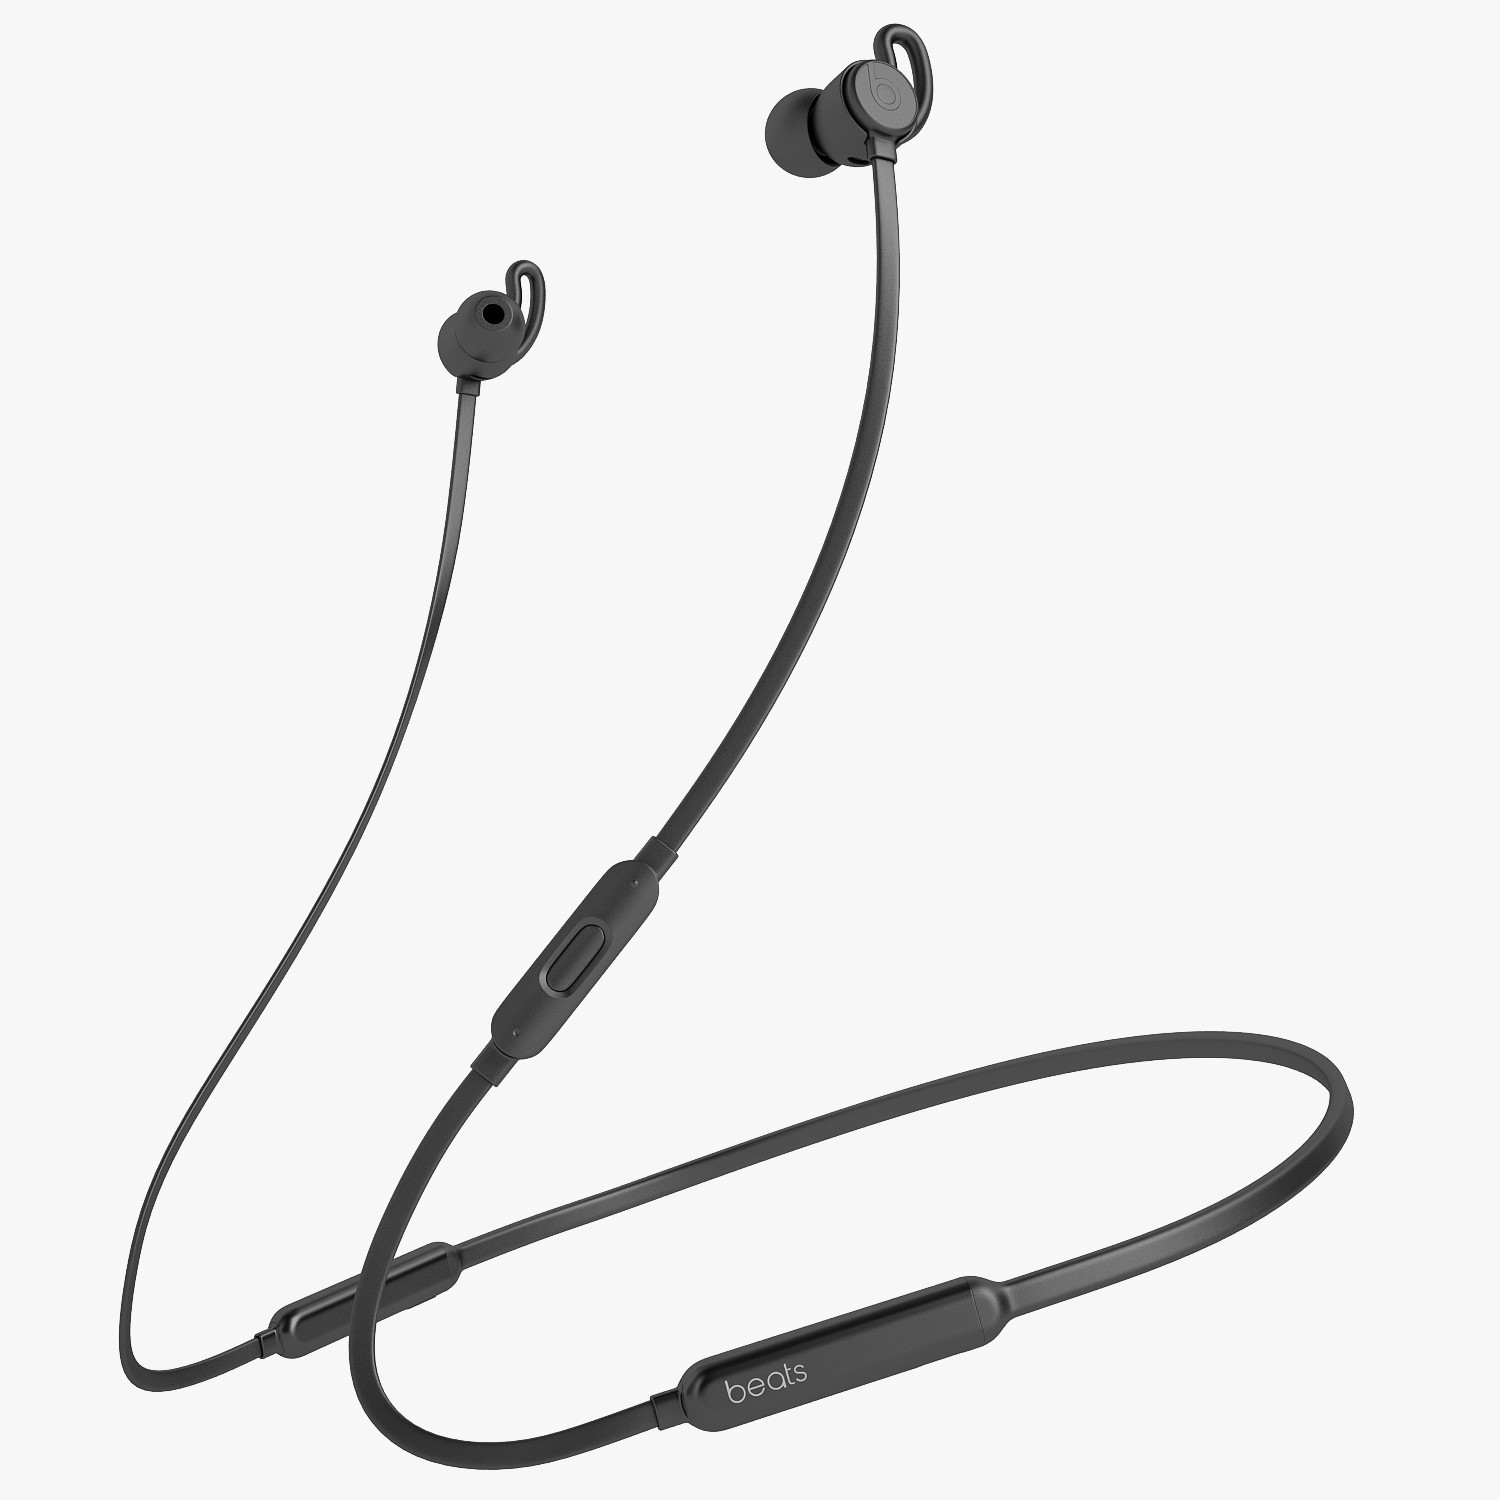
Models:2 object 1 textures :polygons: 15417points: 15930*********************************File formats:3DS Max 2010V-Ray 1.50 SP4OBJ Multi FormatFBX Multi FormatWRL Multi Format3DS Multi FormatEvery model has been checked with the appropriate software.*********************************Textures formats:JPEG (.jpg)*********************************
-
MendelMax X Carriage 3D Print Model
Summary
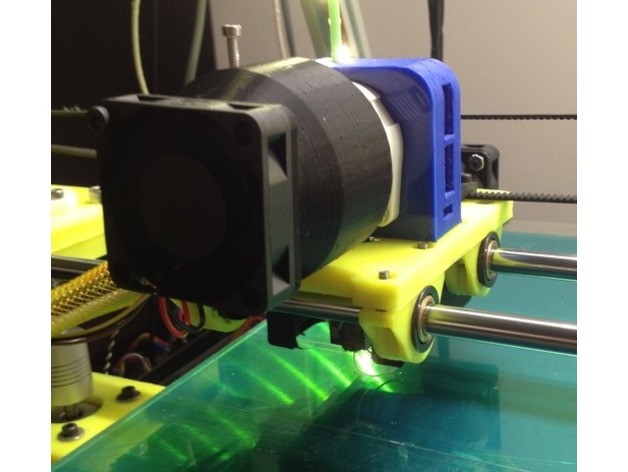
This MendelMax X Carriage has recesses in the bottom side for the flange of the SDP bronse bearing. It retains the bearing and helps minimize uneven bearing pressure.
This is a remix from the MendelMax and Lulzbot carriages. -
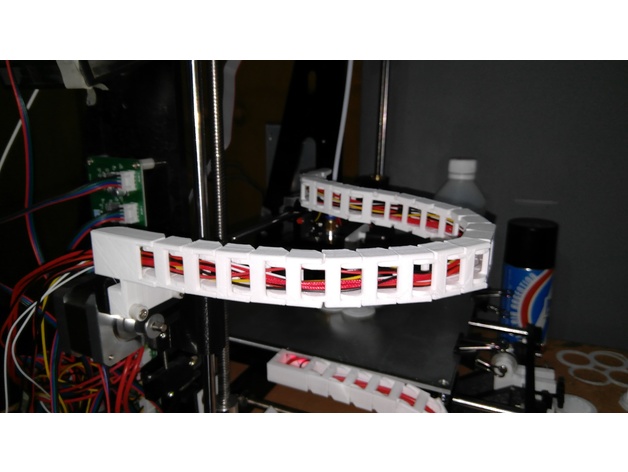
Cable Chain Adapter for Tronxy P802E – Axis X 3D Print Model
Summary
A simple remix from Cable Chain Adapter for Prusa i3 (Hictop) -
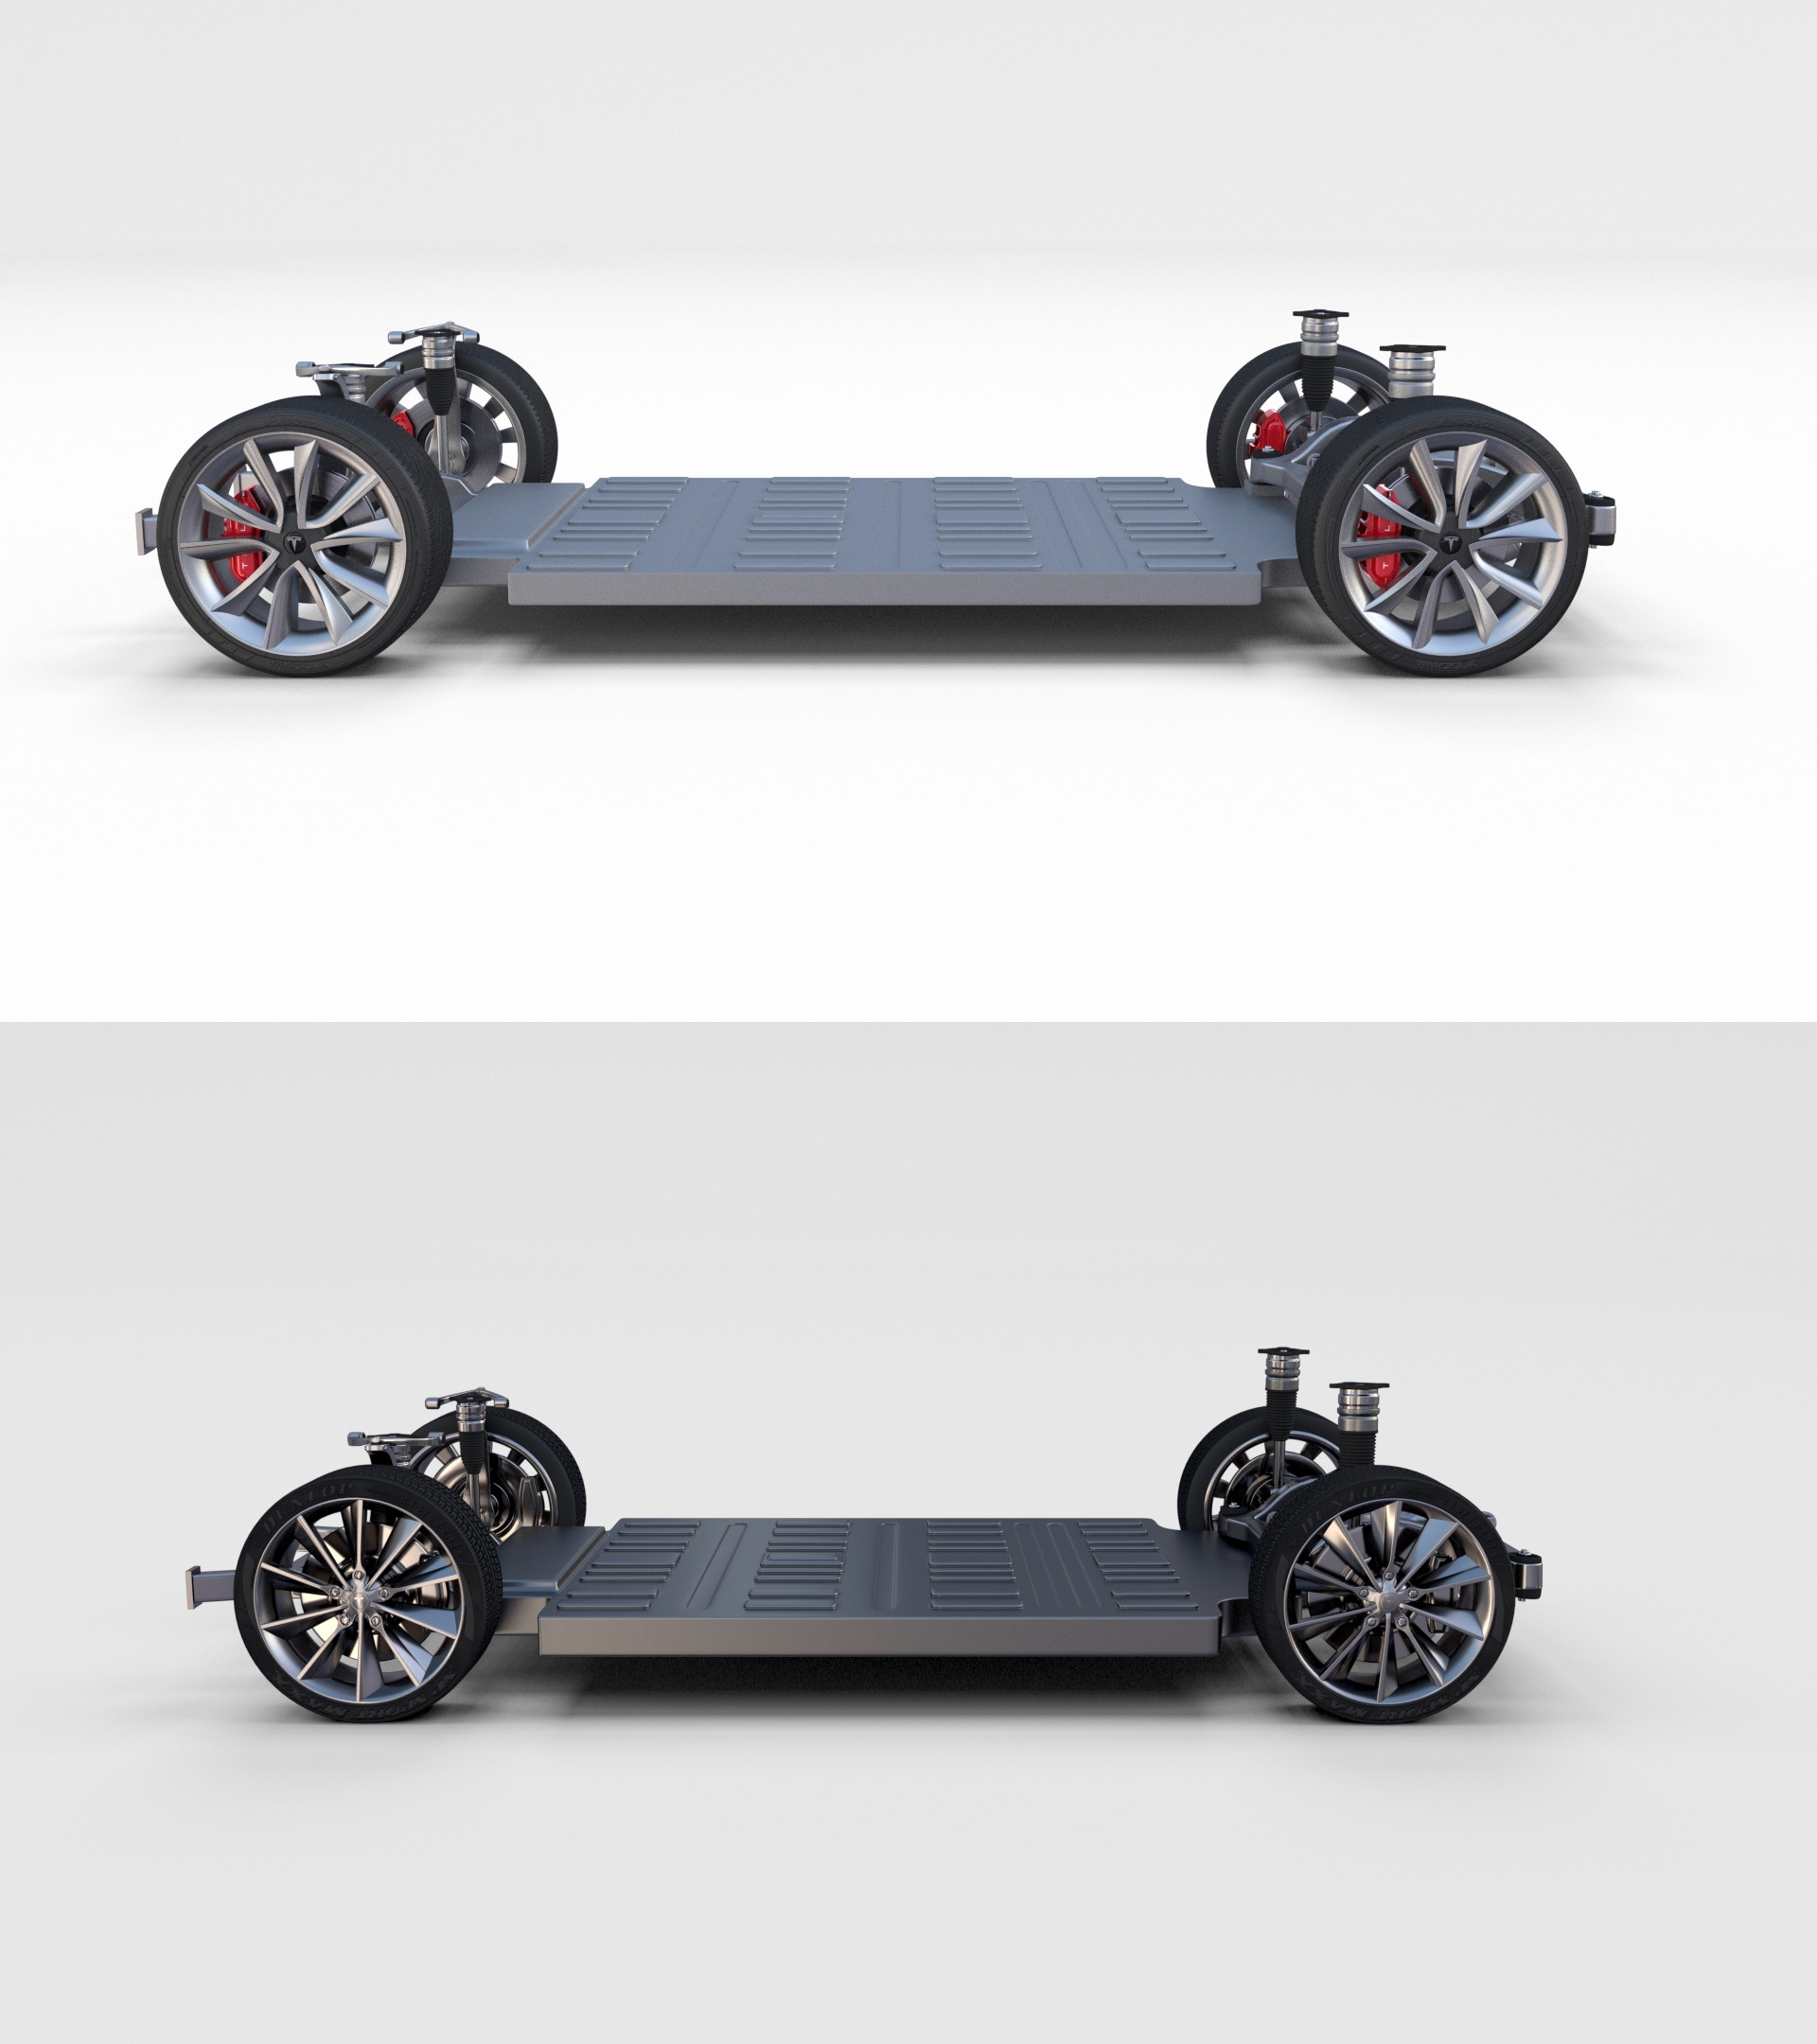
Tesla Model 3 and Model S Chassis Pack 3D Model
A pack containing both Tesla Model S and Tesla Model 3 chassis.The models come in five formats each:-.blend, rendered with cycles, as seen in the images;-.obj, with materials applied and textures;-.dae, with materials applied and textures;-.fbx;-.stl, ready to print in 3D;The models have materials applied in all formats, and are ready to import and render.The models are built strictly out of quads and are subdivisable.It comes in separate parts, named correctly for the sake of convenience.For any problems please feel free to contact me.Don’t forget to rate and enjoy!
-
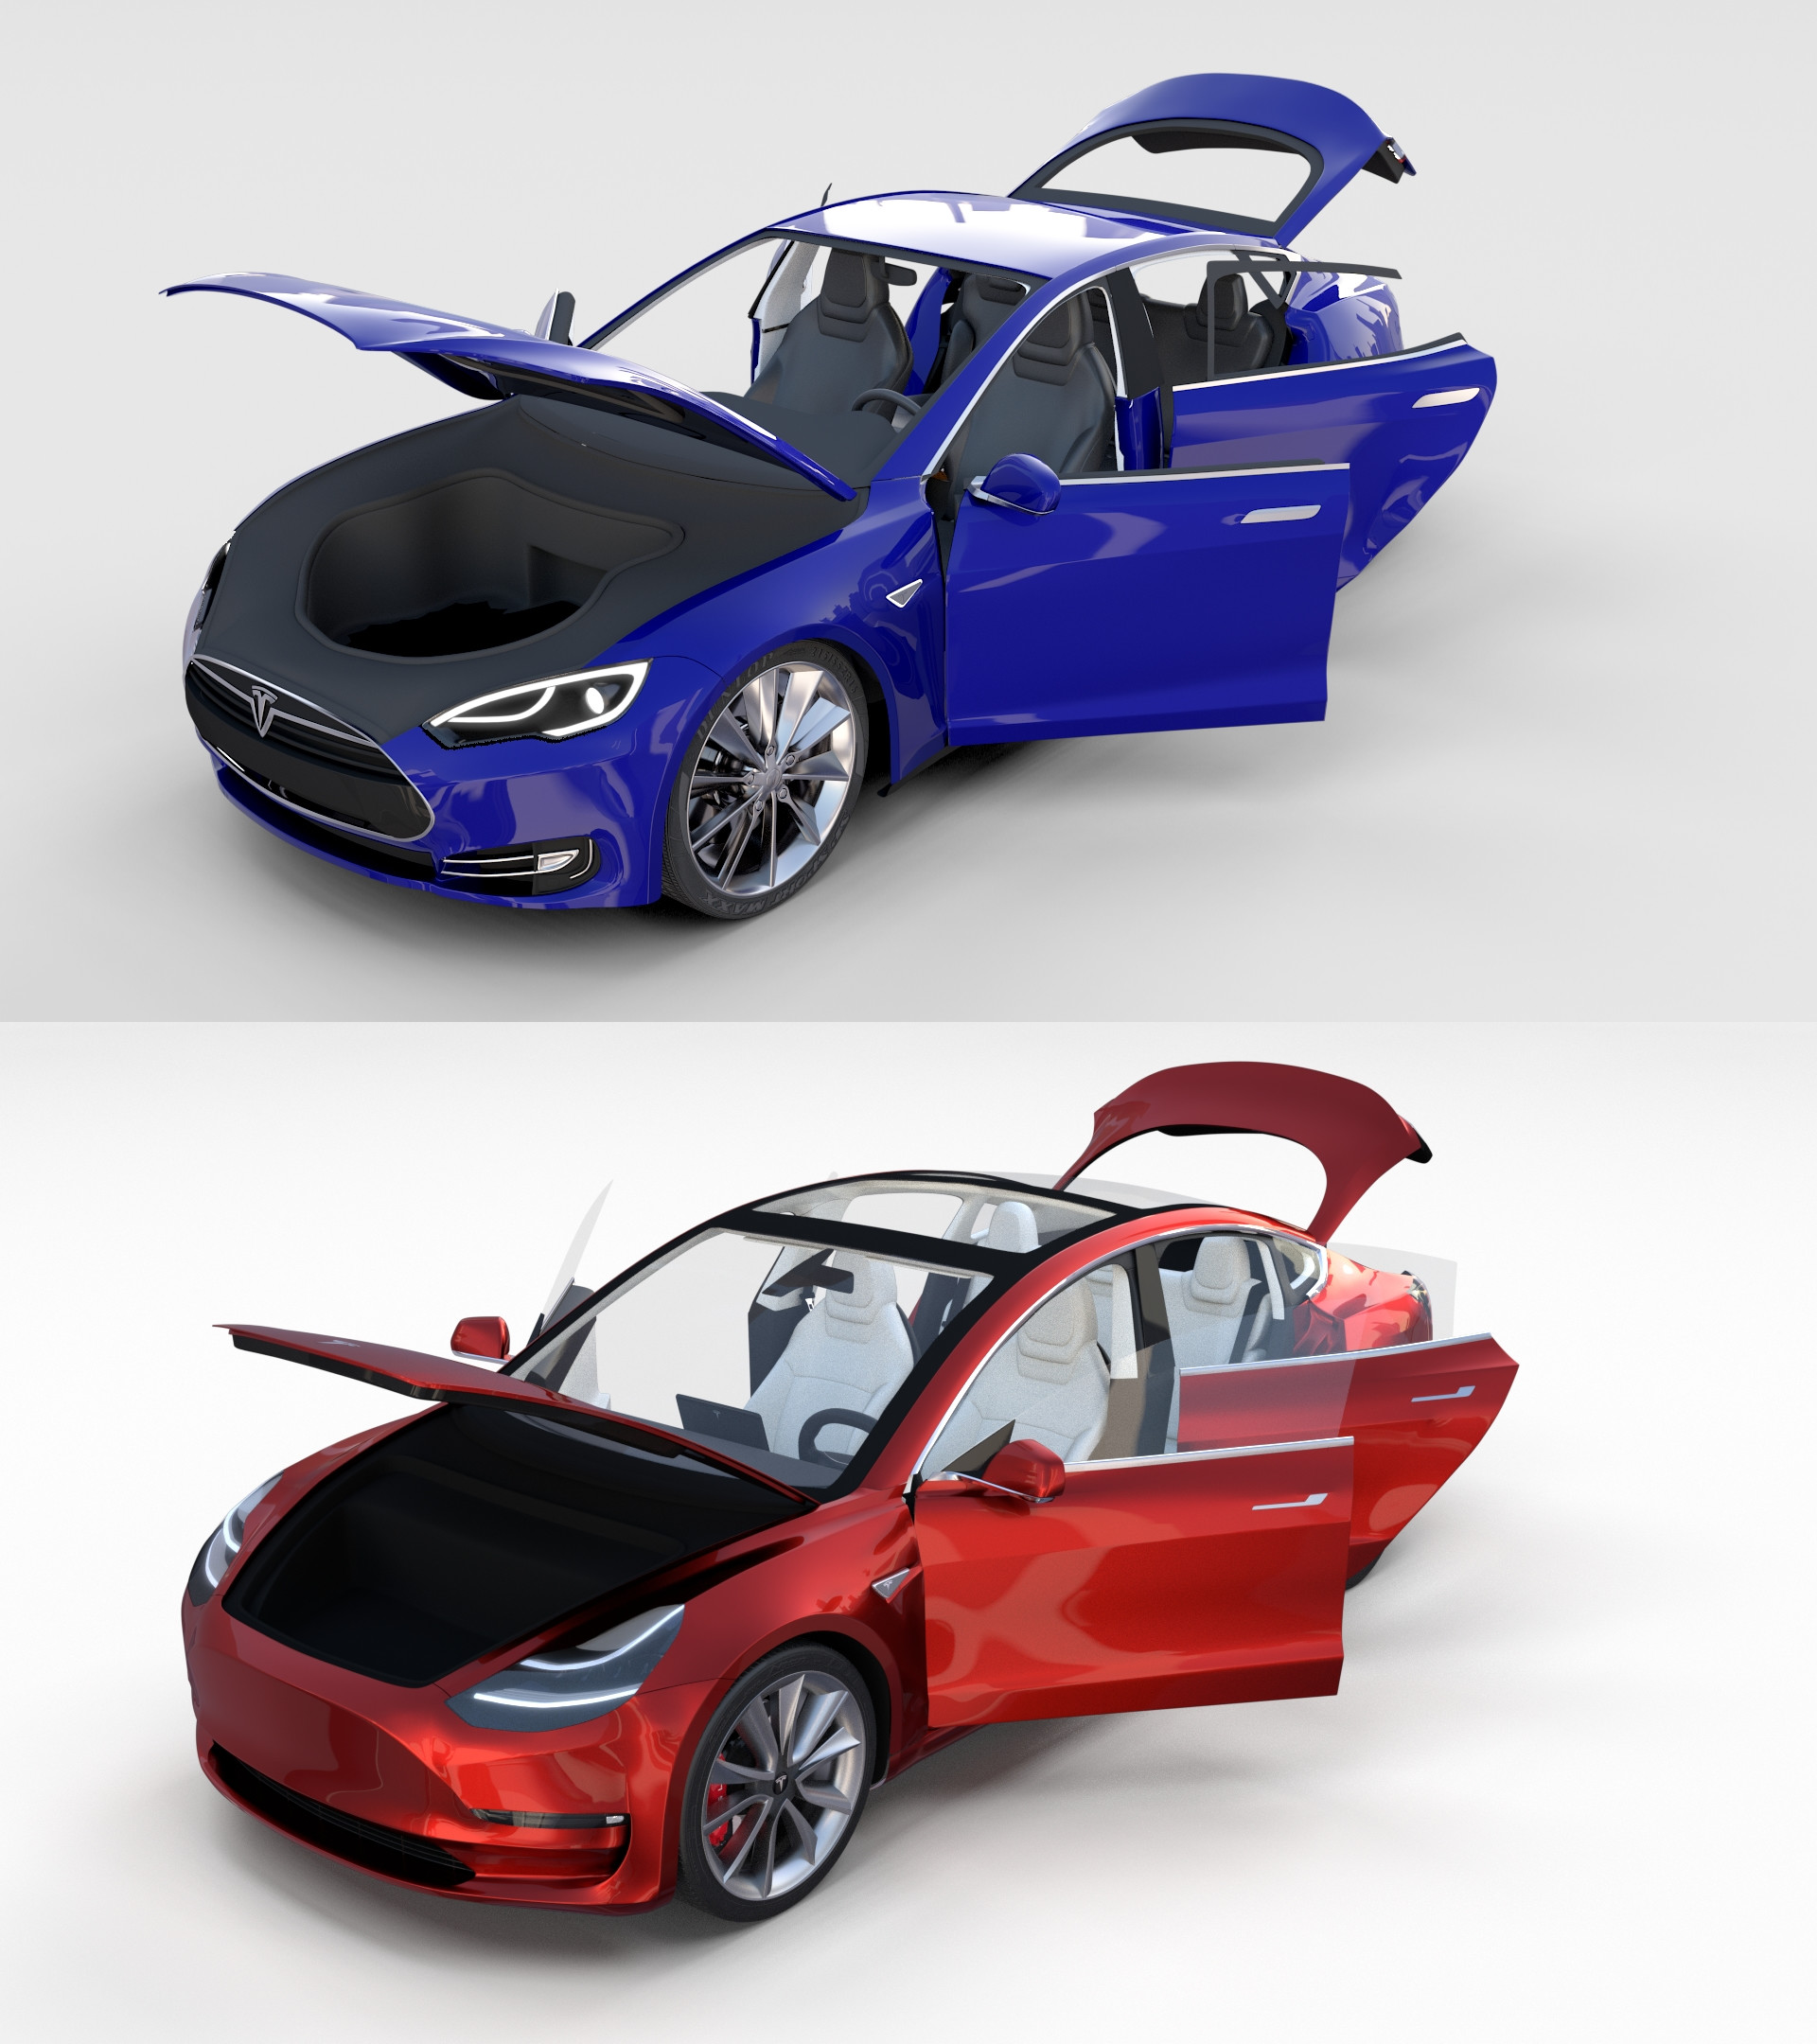
Tesla Model 3 and Model S with interior Pack 3D Model
A pack containing the Tesla Model 3 and Tesla Model S with HIGHLY DETAILED INTERIORS.The models come in five formats each:-.blend, rendered with cycles, as seen in the images;-.blend, rendered with cycles, with doors open, as seen in images;-.obj, with materials applied and textures;-.obj, with materials applied and textures and doors open;-.dae, with materials applied and textures;-.dae, with materials applied and textures and doors open;-.fbx, with material slots applied;-.fbx, with material slots applied and doors open;-.stl;-.stl with doors open;The models have materials applied in all formats, and are ready to import and render.The models are built strictly out of quads and are subdivisable.It comes in separate parts, named correctly for the sake of convenience.For any problems please feel free to contact me.Don’t forget to rate and enjoy!
-

E3D – Motorola G5 Space Gray
This pack:Element 3D V2.2 ( All colors )models preset easy to use- 1 file OBJ High poly- 1 file OBJ standard- 1 file C4D R12 standard render- 1 file 3ds max 2012 standard material- E3D file full materials set up like previewsHow to use it?1. Open After Effects CC 2014 ( or higher) and create new composition ( You need Element3D V2.2 to use )2. Create new Solid layer and add Element effect. ( Effect/Video Copilot/ Element )3. Click Scene Setup4. Click on IMPORT inside Element3D scene setup5. Choose my .e3d preset for the model and press Open.If you dont see the model do not forget to right click on the model name and press Replace model then select the .obj model file in the respective models folder.