The 3D model was created on real base. It’s created accurately, in real units of measurement, qualitatively and maximally close to the original.Model formats:- *.max (3ds Max 2008 scanline)- *.max (3ds Max 2008 vray)- *.fbx (Multi Format)- *.obj (Multi Format)- *.3ds (Multi Format)- *.mb (Maya 8.5)- *.lwo (Lightwave 6)- *.c4d (Cinema 4D 11)* renders Are made in 3ds Max 2008 using vray 1.5 (studio environment is not included in the set)If you need any other formats we are more than happy to make them for you.The model is provided combined, all main parts are presented as separate parts therefore materials of objects are easy to be modified or removed and standard parts are easy to be replaced. If you experience difficulties with separating standard parts we are more than happy to give you qualified assistance.We greatly appreciate you choosing our 3D models and hope they will be of use.We look forward to continuously dealing with you.Sincerely Yours,Hum3D Team
Tag: Sensor
-
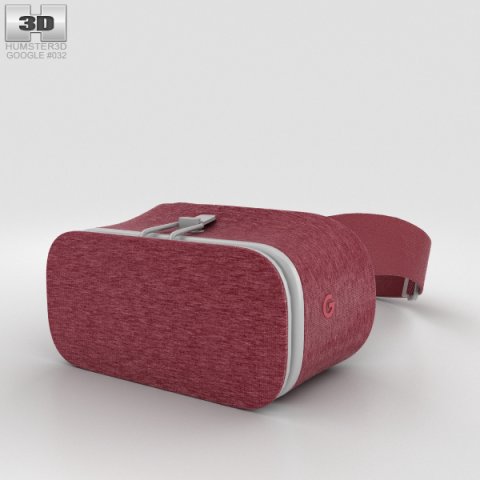
Google Daydream View Crimson 3D Model
The 3D model was created on real base. It’s created accurately, in real units of measurement, qualitatively and maximally close to the original.Model formats:- *.max (3ds Max 2008 scanline)- *.max (3ds Max 2008 vray)- *.fbx (Multi Format)- *.obj (Multi Format)- *.3ds (Multi Format)- *.mb (Maya 8.5)- *.lwo (Lightwave 6)- *.c4d (Cinema 4D 11)* renders Are made in 3ds Max 2008 using vray 1.5 (studio environment is not included in the set)If you need any other formats we are more than happy to make them for you.The model is provided combined, all main parts are presented as separate parts therefore materials of objects are easy to be modified or removed and standard parts are easy to be replaced. If you experience difficulties with separating standard parts we are more than happy to give you qualified assistance.We greatly appreciate you choosing our 3D models and hope they will be of use.We look forward to continuously dealing with you.Sincerely Yours,Hum3D Team
-
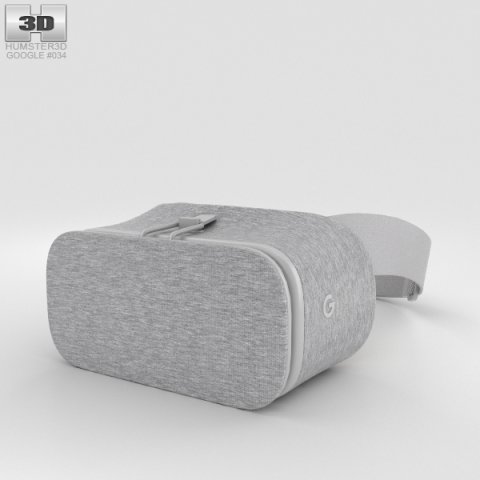
Google Daydream View Snow 3D Model
The 3D model was created on real base. It’s created accurately, in real units of measurement, qualitatively and maximally close to the original.Model formats:- *.max (3ds Max 2008 scanline)- *.max (3ds Max 2008 vray)- *.fbx (Multi Format)- *.obj (Multi Format)- *.3ds (Multi Format)- *.mb (Maya 8.5)- *.lwo (Lightwave 6)- *.c4d (Cinema 4D 11)* renders Are made in 3ds Max 2008 using vray 1.5 (studio environment is not included in the set)If you need any other formats we are more than happy to make them for you.The model is provided combined, all main parts are presented as separate parts therefore materials of objects are easy to be modified or removed and standard parts are easy to be replaced. If you experience difficulties with separating standard parts we are more than happy to give you qualified assistance.We greatly appreciate you choosing our 3D models and hope they will be of use.We look forward to continuously dealing with you.Sincerely Yours,Hum3D Team
-
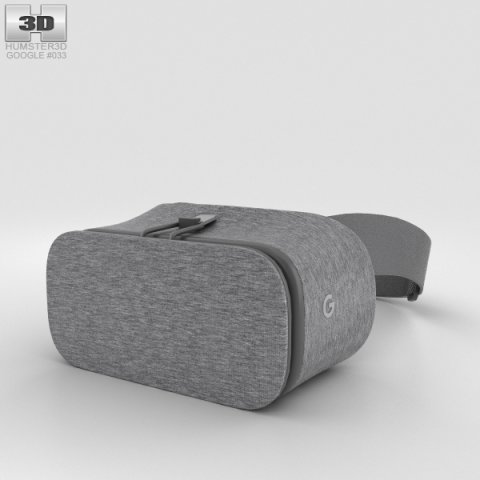
Google Daydream View Slate 3D Model
The 3D model was created on real base. It’s created accurately, in real units of measurement, qualitatively and maximally close to the original.Model formats:- *.max (3ds Max 2008 scanline)- *.max (3ds Max 2008 vray)- *.fbx (Multi Format)- *.obj (Multi Format)- *.3ds (Multi Format)- *.mb (Maya 8.5)- *.lwo (Lightwave 6)- *.c4d (Cinema 4D 11)* renders Are made in 3ds Max 2008 using vray 1.5 (studio environment is not included in the set)If you need any other formats we are more than happy to make them for you.The model is provided combined, all main parts are presented as separate parts therefore materials of objects are easy to be modified or removed and standard parts are easy to be replaced. If you experience difficulties with separating standard parts we are more than happy to give you qualified assistance.We greatly appreciate you choosing our 3D models and hope they will be of use.We look forward to continuously dealing with you.Sincerely Yours,Hum3D Team
-
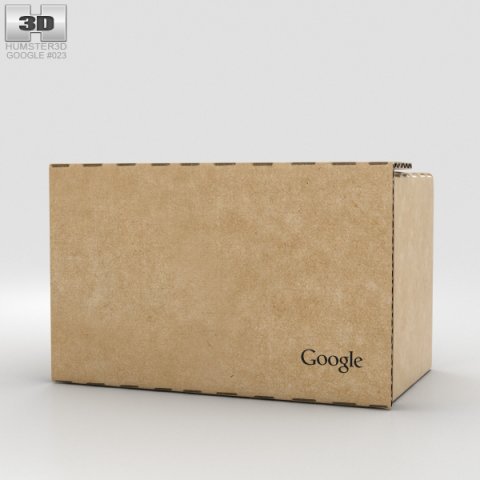
Google Cardboard 3D Model
The 3D model was created on real base. It’s created accurately, in real units of measurement, qualitatively and maximally close to the original.Model formats:- *.max (3ds Max 2008 scanline)- *.max (3ds Max 2008 vray)- *.fbx (Multi Format)- *.obj (Multi Format)- *.3ds (Multi Format)- *.mb (Maya 8.5)- *.lwo (Lightwave 6)- *.c4d (Cinema 4D 11)* renders Are made in 3ds Max 2008 using vray 1.5 (studio environment is not included in the set)If you need any other formats we are more than happy to make them for you.The model is provided combined, all main parts are presented as separate parts therefore materials of objects are easy to be modified or removed and standard parts are easy to be replaced. If you experience difficulties with separating standard parts we are more than happy to give you qualified assistance.We greatly appreciate you choosing our 3D models and hope they will be of use.We look forward to continuously dealing with you.Sincerely Yours,Hum3D Team
-
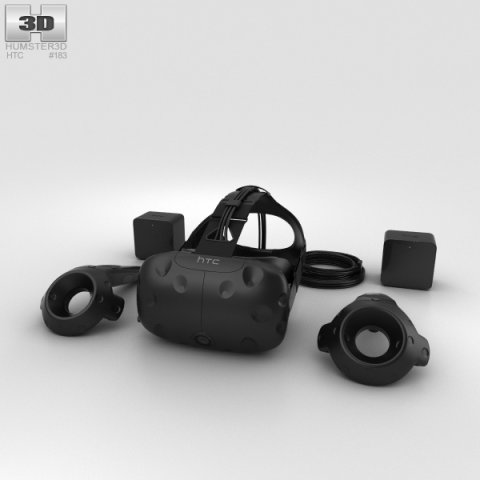
HTC Vive 3D Model
The 3D model was created on real base. It’s created accurately, in real units of measurement, qualitatively and maximally close to the original.Model formats:- *.max (3ds Max 2008 scanline)- *.max (3ds Max 2008 vray)- *.fbx (Multi Format)- *.obj (Multi Format)- *.3ds (Multi Format)- *.mb (Maya 8.5)- *.lwo (Lightwave 6)- *.c4d (Cinema 4D 11)* renders Are made in 3ds Max 2008 using vray 1.5 (studio environment is not included in the set)If you need any other formats we are more than happy to make them for you.The model is provided combined, all main parts are presented as separate parts therefore materials of objects are easy to be modified or removed and standard parts are easy to be replaced. If you experience difficulties with separating standard parts we are more than happy to give you qualified assistance.We greatly appreciate you choosing our 3D models and hope they will be of use.We look forward to continuously dealing with you.Sincerely Yours,Hum3D Team
-
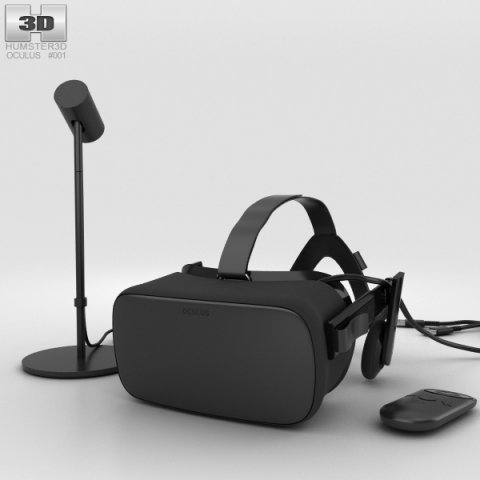
Oculus Rift 3D Model
The 3D model was created on real base. It’s created accurately, in real units of measurement, qualitatively and maximally close to the original.Model formats:- *.max (3ds Max 2008 scanline)- *.max (3ds Max 2008 vray)- *.fbx (Multi Format)- *.obj (Multi Format)- *.3ds (Multi Format)- *.mb (Maya 8.5)- *.lwo (Lightwave 6)- *.c4d (Cinema 4D 11)* renders Are made in 3ds Max 2008 using vray 1.5 (studio environment is not included in the set)If you need any other formats we are more than happy to make them for you.The model is provided combined, all main parts are presented as separate parts therefore materials of objects are easy to be modified or removed and standard parts are easy to be replaced. If you experience difficulties with separating standard parts we are more than happy to give you qualified assistance.We greatly appreciate you choosing our 3D models and hope they will be of use.We look forward to continuously dealing with you.Sincerely Yours,Hum3D Team
-
Lack Filament Sensor 3D Print Model
Summary
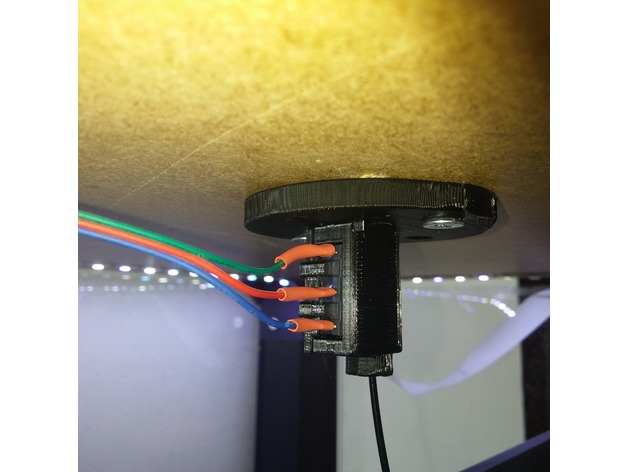
This is a microswitch filament sensor mount I’ve made for the IKEA Lack enclosure.
It takes 1 KW-12 switch.
Print Settings
Printer Brand:
Prusa
Printer:
i3 MK2S
Resolution:
0.2
Infill:
20
Notes:
Support on build plate only.
The lid snap isn’t perfect at 0.20 layer height. It hasn’t fallen off for me yet but you can try a higher resolution if you like.
Post-PrintingSwitch preparation
The switch lever should be slightly bent to an “S” shape as shown above. The first bend is done to insure the filament engages the switch. The bend at the tip is done to prevent the metal lever from snagging on the filament when you pull it back to the spool.
If you solder the leads you should do it before you insert the switch to the housing. The housing is also designed to allow open barrel terminals but I haven’t tried it yet.
The switch only goes into the housing with the lever pressed against the switch body. It should spring back into place once the switch is seated all the way in. If the lever stays pressed (meaning the switch is engaged and activated) you’ve probably bent the lever a bit too far up. -
Ikea Trådfri Motion Sensor Corner Mount 3D Print Model
Summary
Ikea Trådfri Motion Sensor Corner Mount
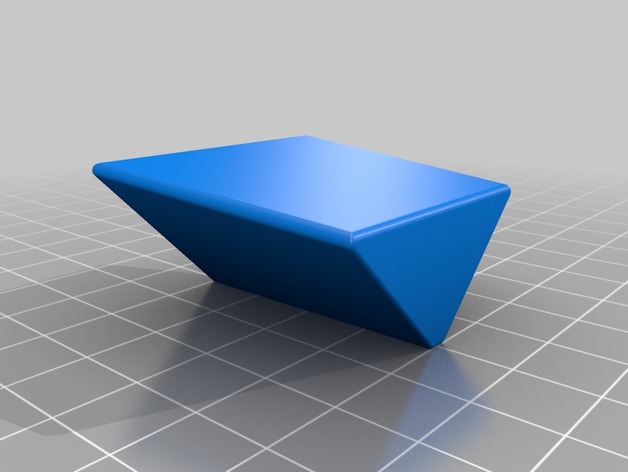
This is a simple wall edge/corner mount for the Ikea Trådfri Motion sensor.
I recommend using double-sided adhesive tape for mounting on the wall as well as attaching the motion sensor plate.
There’s two versions – a regular version and a version with a 5° skew in case you want to hang it at an angle. -
tronxy xy-08n sensor stable mount to Anet A8 3D Print Model
Summary
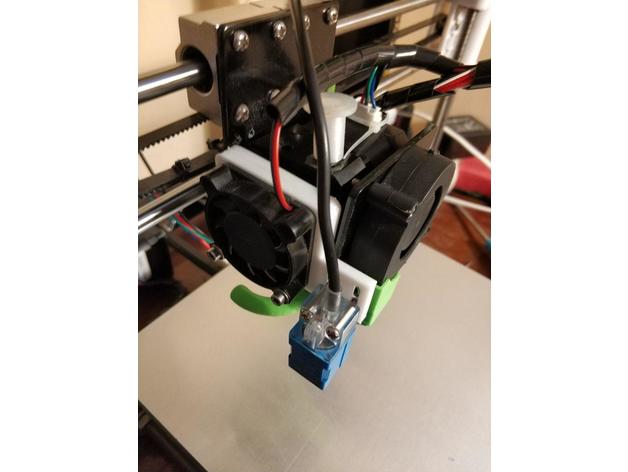
tronxy xy-08n sensor stable mount
Print Settings
Printer:
Anet A8
Rafts:
No
Supports:
No
Resolution:
0.2
Infill:
100 -
Aluminium door 3D Model
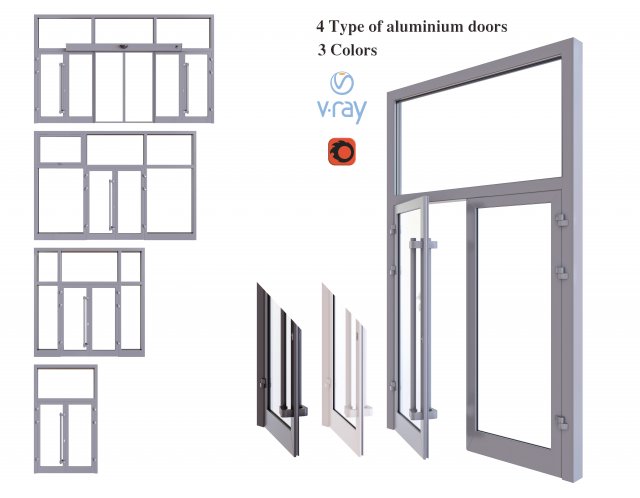
Aluminium door 3D modelIn the archive there are 4 types of aluminum doors, one of which is sensory.The file except for 4 doors contains 3 balls on which are applied 3 colors of aluminumThe height of the doors is the same 3330mm, you can give the width to the desired width by dragging the vertecks.ps: all the doors in the collection are closed initially, but the pivots in all the doors are placed so that they can easily be opened to the degree you need.Pleasant use!
-
Holder Autoleveling Sensor Anycubic Kossel 3D Print Model
Summary
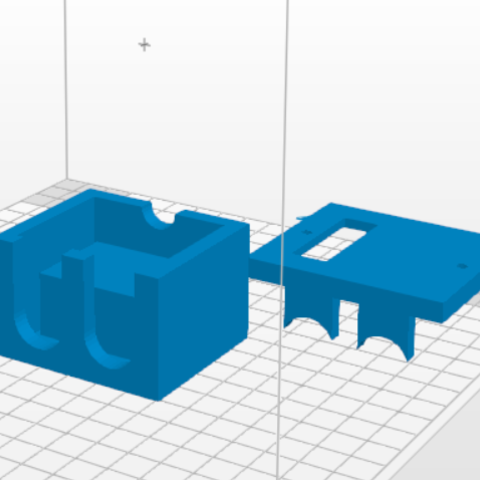
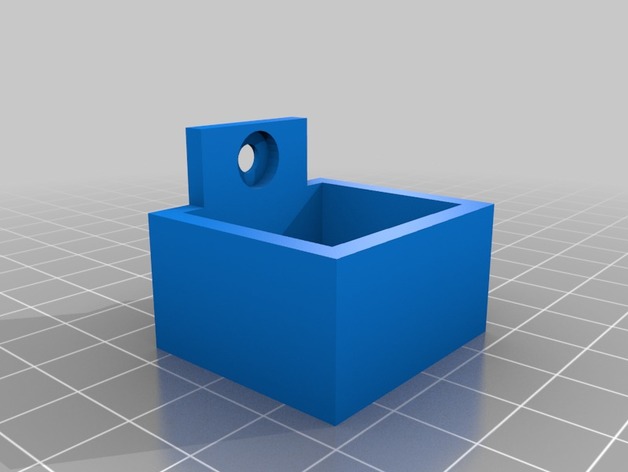
It’s a simple box to hold the Anycubic Autoleveling Sensor. -
Smartphone alcatel 3D Model
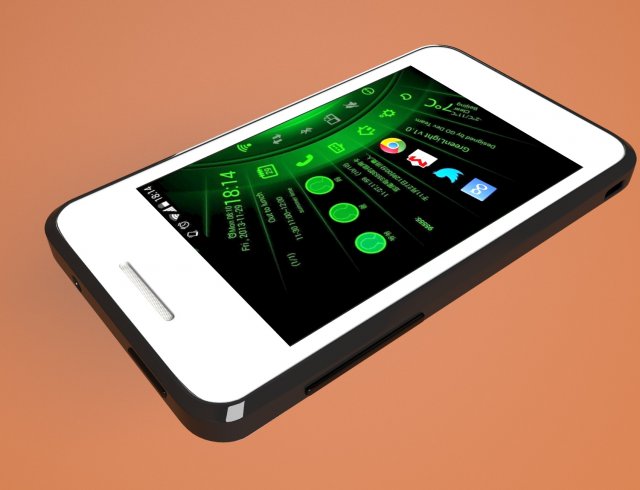
smartphone company Alcatel is old and reliable friend with a beautiful design
-
CR-10S Hinged Filament Sensor Mount (Bottom Plug) 3D Print Model
Summary
CR-10S Hinged Filament Sensor Mount (Front Plug)https://www.thingiverse.com/thing:2791872
CR-10S Hinged Filament Sensor Mount (Bottom Plug)https://www.thingiverse.com/thing:2826099
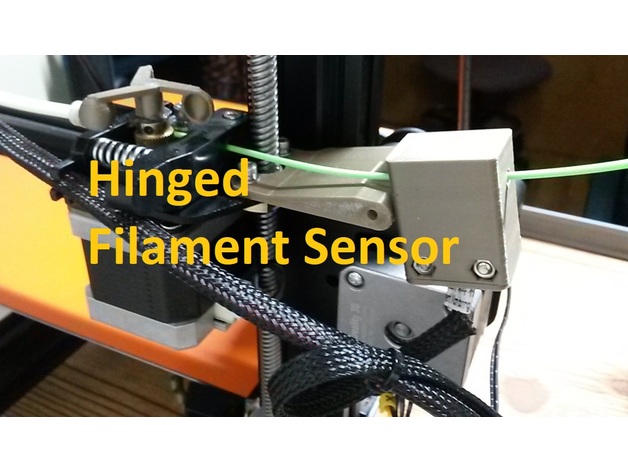
Lets be honest. The filament runout sensor is a great addition to the Creality CR-10S, but the factory slide-on mount that Creality supplies sucks. I download and printed several other designs from here and just wasn’t happy with the alignment or functionally of them, so I designed my own.
I wanted the filament to be feed straight thru with enough room inbetween to manage any kinks or wobbles in the filament with your hands. I also wanted a better way to reduce friction thru it when near Z=0 and Z = 200+ as the filament is drug thru the horizontal position of the sensor first which is dependent on the way you install the roll (over the top or under). Thats when putting a hinge inbetween seemed like the perfect solution as I run a TUSH spool holder with the extruder feed off the bottom of the spool. I designed this Hinged Filament Sensor Mount so it can be bolted onto the Z-axis brass lead screw nut using factory hardware, then the mount is stabilized to the Z column roller mount right at the hinge. I also designed it so you could run the sensor fully enclosed or with the printed cap to keep crud out. You will need (2) M3X20 screws with (2) M3 hex nuts. Hinge is printed in place.
Please note that after printing you will need to carefully twist the built-in support material off in the same direction as the pivoting hinge. If you use flush cutter on the support material, you may end up splitting the mount in half. The hinge for this design requires a M3 x 30mm LG screw and a M3 Nut as I couldn’t model it assemblied without alot of wasted support material.
The sensor I designed this around can be purchased here:https://macewen3d.com/products/cr-10-cr-10-s4-and-s5-replacement-endstop-limit-switch
Which is the same as the factory Creality CR-10S filament runout sensor or Axis stop sensors. My machine actually came with a spare, which made designing/refining it pretty easy.
Some people didn’t like my previous version of this mount since the plug for the sensor was in front, so I remixed it so the plug is now facing downward. -
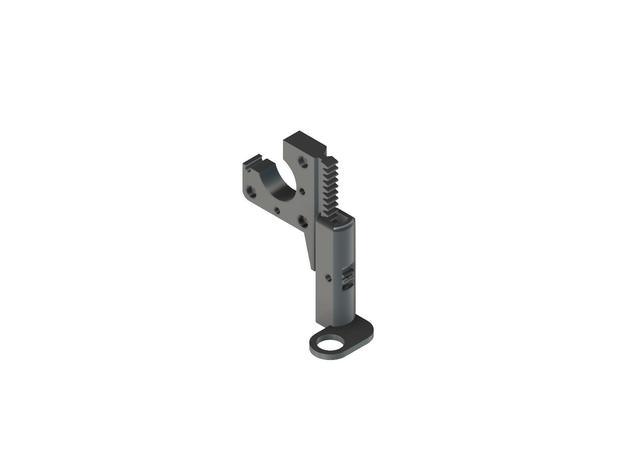
INDUCTIVE SENSOR RACK AND PINION – DRAKON EXTRUDER BODY 3D Print Model
Summary
THIS IS A MANUAL ADJUST SENSOR CARRIAGE FOR AUTOMATIC BED LEVELING.
-THE MAIN PROBLEM I HAVE WITH AUTO LEVELING WAS THAT SOME TIMES MY BED (MADE OF 3MM PLYWOOD) WOULD POSSIBLY WARP.
-ANOTHER POSSIBILITY IS THAT MY X_AXIS WOULD FLOAT OFF OF THE LEAD SCREW A LITTLE BIT IF I DIDN’T PRE-HEAT BEFORE I AUTO LEVELED.
-THIS ALWAYS MEANT I HAD TO REDO ALL THE ADJUSTMENTS BETWEEN THE X-AXIS AND THE SENSOR HEIGHT. I ALSO NEVER QUITE LIKED THE ADJUSTMENTS IN AVAILABLE IN THE FIRMWARE REGARDING SENSOR HEIGHT.
-THAT IS POINT OF THE RACK AND PINION CARRIAGE FOR THE SENSOR. TO DECREASE TIME SPENT ADJUSTING ANYTHING MECHANICALLY AND IN THE FIRMWARE/SOFTWARE.
-DECREASING THE WEIGHT AND SIZE WAS ALSO MY GOAL, TRYING TO KEEP THE SENSOR AS CLOSE TO THE NOZZLE AS POSSIBLE.
THE PINION HAS A PRESS FIT INNER DIAMETER THAT SHOULD STAY IN ITS PLACE PRETTY WELL AN IF THERE IS ANY MOVEMENT I ADDED A HOLE FOR INSERTING EPOXY TO REALLY STICK THE GEAR TO THE BOLT.
HARDWARE USED* [NOT INCLUDING ALL HARDWARE USED WITH THE DRAKON MOUNT ITSELF]
1- 4MM X 16MM WINGED BOLT (I IMPROVISED ON THIS MYSELF WITH A WING NUT AND A BOLT, USING PLIERS)
1- 4MM LOCK NUT
THERE IS A TOOL ADDED THAT IS USED TO HOLD THE GEAR IN PLACE AGAINST THE RACK WHILE YOU THREAD THE BOLT THROUGH THE GEAR TO KEEP IT FROM MOVING. -
E3D V6 Mount without Sensor (Hypercube Evolution) 3D Print Model
Summary
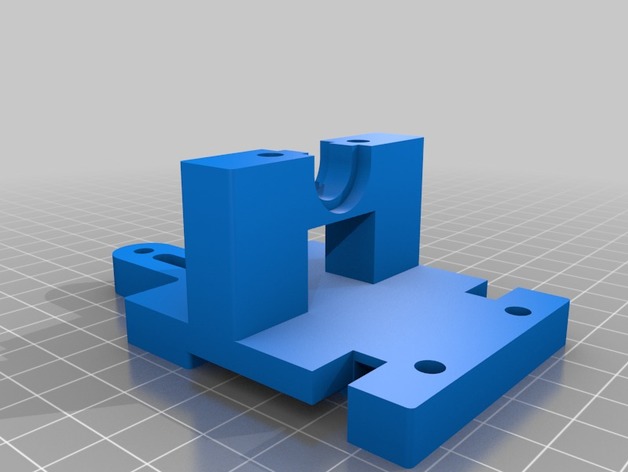
I have remixed the Extruder Mount for the E3D V6.
Now with 2 bigger holes for the Endstops and without Sensor.
Have fun with it 🙂 -
Palette+ sensor holder for Wanhao Duplicator 6 3D Print Model
Summary
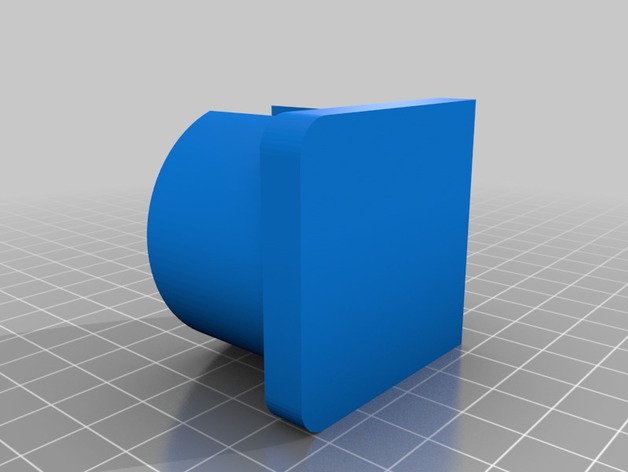
Holder for the Palette+ filament sensor. Can be screwed on to the backside of the D6 printer. Use the longer screw that came with your printer.
Print both parts an glue them together. I used CA for this job.
Print Settings
Printer Brand:
Wanhao
Printer:
Duplicator 6
Rafts:
No
Supports:
No
Resolution:
0.15
Infill:
45%
Notes:
Used PLA for printing. -
PIR Sensor V2 3D Model
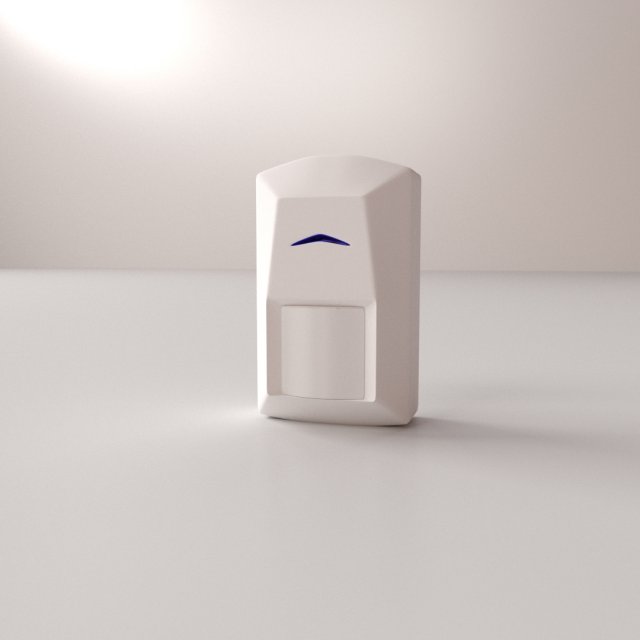
PIR SENSOR V2=================================- Modeled in Blender.- Preview image rendered using cycles.- All scene are included in .blend files.- Poly count are before sub division- Great for close up render.- All parts and materials are logically named.OTHER FORMATS=================- 3ds MAX- COLLADA (.dae)- Autodesk FBX- OBJ
-
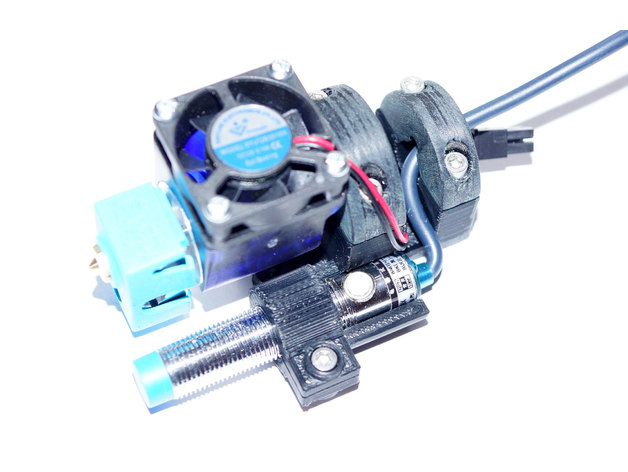
Rock-solid E3D V6 mount for CR-10 with 12mm ABL sensor support 3D Print Model
Summary
Since I would like to change my CR-10 hotend to a more reiable one in terms of clogging (my PTFE tube alway melts after printing ABS at 250 degree) I’ve decided to go for an original E3D V& hotend. OK, it’s not the cheapest solution but in terms of construction it really convinced me since the PTFE tube is to going straight down to the heated block but ends in the cold zone of the hotend.
So I waas looking for a mount that allows me to attach my new hotend to my CR-10 and lets me add an ABL sensor in addition. Unfortunately I could not find any that was working for me. Some were too bulky, some had some construction issues and some simply did not support ABL or the ABL holder was too weak.
Therefore I’ve started to build one from scratch which can be found attached. It fits very well to the CR-10 plate and is easy to print (just print the STL files as they are. The mount.STL migh need some supports to be printed well).
Also the construction is rock-solid – no shaky ABL sensor and no movement of the whole construction.
The ABL Sensor has been placed as close as possible to the nozzle so measurement discrepancies should be as low as possible if the bed is a little uneven. For ABL I’ve used the following capacitive sensor: Heschen LJC12 A3–5-Z/BX.
Print Settings
Printer:
Creality CR-10 Rafts:
No Supports:
Yes Resolution:
0.2 mm Infill:
30% Notes:
Use ABS because of hotend temperatures. Some supports might be needed for mount.stl.
How I Designed This
The mount had been designed in 123D Cad. Used the sensor and the E3DV6 hotend as reference and also did some trial and error when designing the whole mount.
The first design was paying attention to get the sensor as close to the hotend as possible and to have a minimalistic design – anyway, it failed because the sensor was not getting close enough to the bed.
The second approach was much better since the sensor height was perfect now and a cable clamp had been added. However, when trying to mount it to my CR-10 I’ve noticed that the roller screw was preventing the attachment of the mount.
1st attempt2nd attempt
-
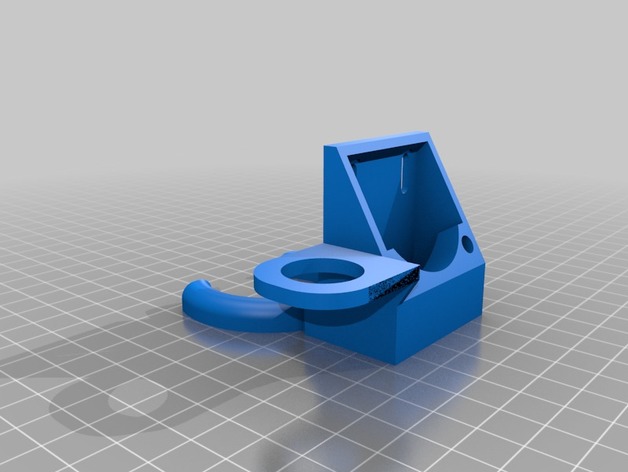
Fan Housing with sensor mount 3D Print Model
Summary
This is the 40mm cooling fan mount made by petitt57 modified with a mount for a 18mm abl sensor.
Visit the original here: https://www.thingiverse.com/thing:2271289 -
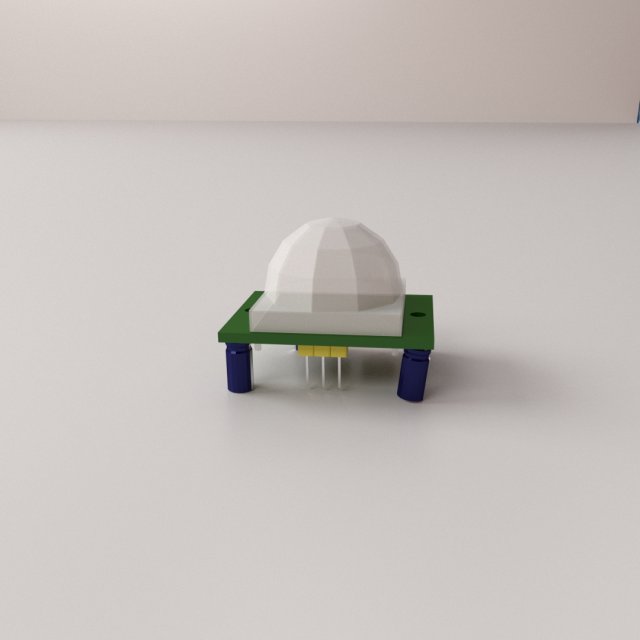
PIR Sensor 3D Model
PIR SENSOR=================================- Modeled in Blender.- Preview image rendered using cycles.- All scene are included in .blend files.- Great for close up render.- All parts and materials are logically named.OTHER FORMATS=================- 3ds MAX- COLLADA (.dae)- Autodesk FBX- OBJ
-
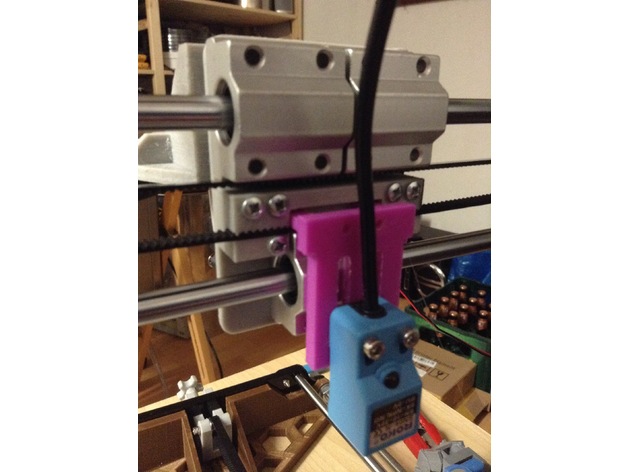
Anet A8 Stock Bed Level Sensor Mount for Bowden Setup 3D Print Model
Summary
Made for the original Anet A8 Auto Bed leveling Sensor to fit on these Beltholders: https://www.thingiverse.com/thing:1433295
which i used to upgrade to this bowden setup: https://www.thingiverse.com/thing:2099577
Works just like the original Anet one, but smaller. Uses the two screws that come with it and two screws to screw it to the belt holder.
Happy Printing 😉
Print Settings
Rafts:
Doesn’t Matter Supports:
Doesn’t Matter Resolution:
0,2 Infill:
10% -
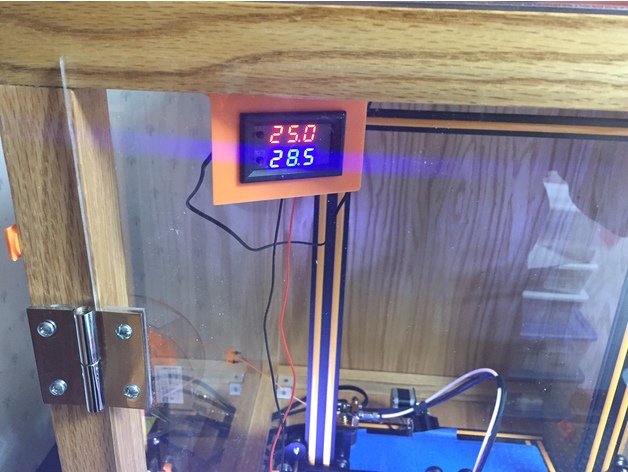
Mounting Bracket for Banggood Temperature sensor and fan control switch 3D Print Model
Summary
This is just a simple bracket to mount a Banggood temperature sensor and fan control switch I am using to monitor the temperature inside my CR-10 enclosure. It has a relay that can turn on a fan (non-PWM) base on the trigger temperature.
Link to the Banggood temperature sensor https://www.banggood.com/DC12V-50-110-Degree-LED-Digital-Thermostat-Temperature-Control-Smart-Sensor-Switch-p-1143380.html -
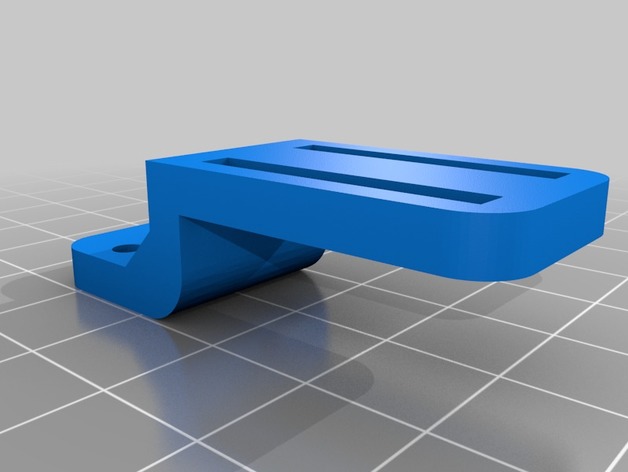
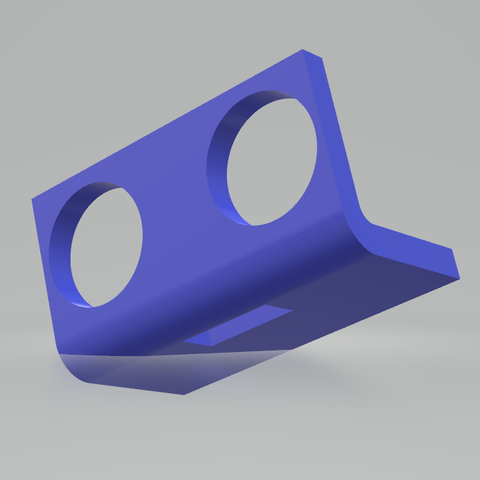
Proximity sensor support 4mm 3D Print Model
Summary
Support for proximity sensor 4mm for https://www.thingiverse.com/thing:1496019 -
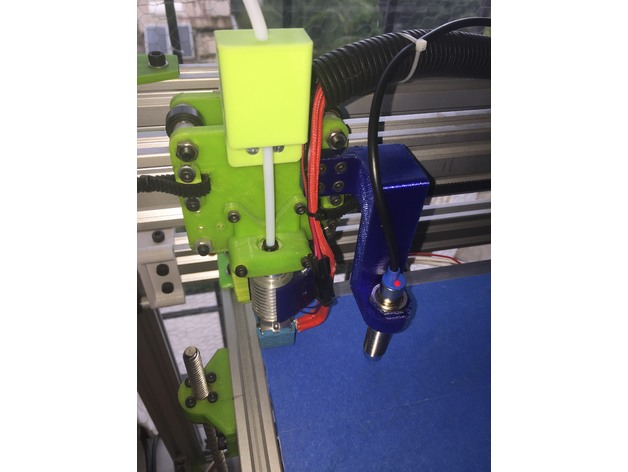
Induction sensor mount for the D-Bot Core XY 3D Print Model
Summary
An induction sensor mount for auto bed leveling on the D-Bot. I tweaked my printer for almost 6 months before realizing I needed this. After this, first layers are flawless and overall print quality has also improved.
Print Settings
Printer:
D-Bot Core XY Rafts:
Doesn’t Matter Supports:
Yes Resolution:
0.2mm Infill:
50%+ Notes:
Print with either ABS or PETG. -
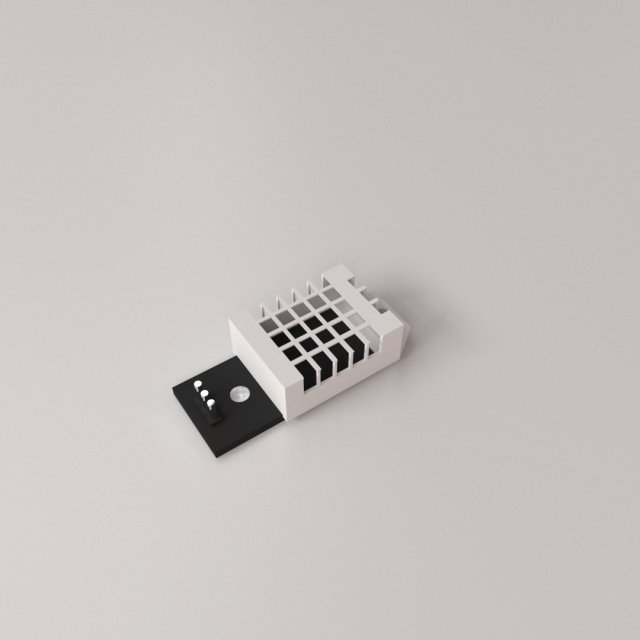
DHT22 Sensor 3D Model
DHT22 Sensor=================================- Modeled in Blender.- Preview image rendered using cycles.- All scene are included in .blend files.- Great for close up render.- All parts and materials are logically named.OTHER FORMATS=================- 3ds MAX- COLLADA (.dae)- Autodesk FBX- OBJ
-
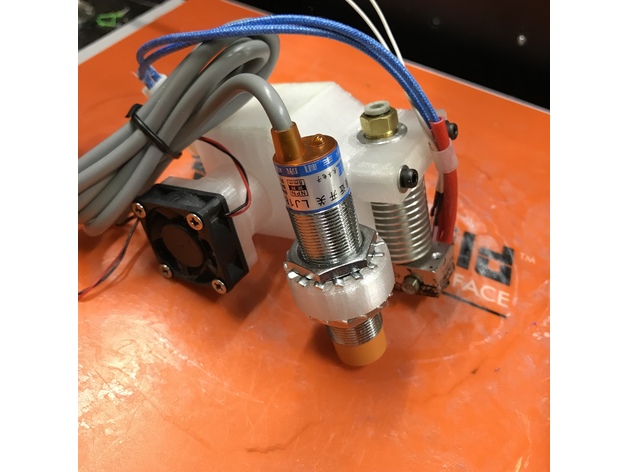
FT-5 E3D Mount + Sensor Mount 3D Print Model
Summary
This is an updated version of the FT-5 E3D Stock Bowden Mount V4. I’ve add a mount for an inductive senor.
Print Settings
Printer Brand:
SeeMeCNC Printer:
Rostock MAX v2 Rafts:
No Supports:
Yes Resolution:
.25 Infill:
40% Notes:
REMOVE the supports from all holes!!
Printed with PETG 245C 70C bed. -
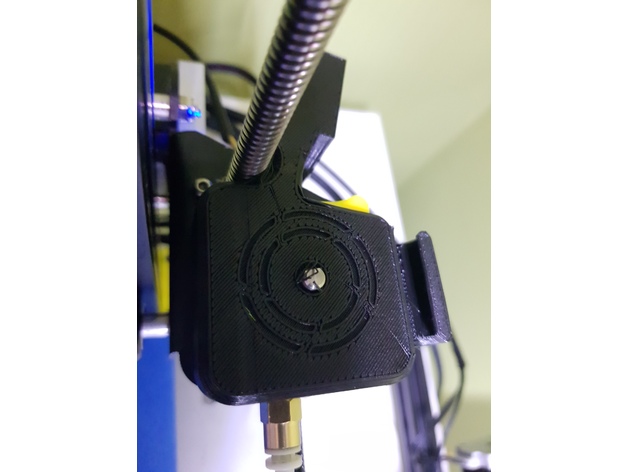
Filament Sensor and Cover (OEM sensor) 3D Print Model
Summary
Remix version that will work with the sensor that comes with the oem kit.
Print Settings
Printer:
Cr-10 Rafts:
No Supports:
No Resolution:
0.20 Infill:
30 -
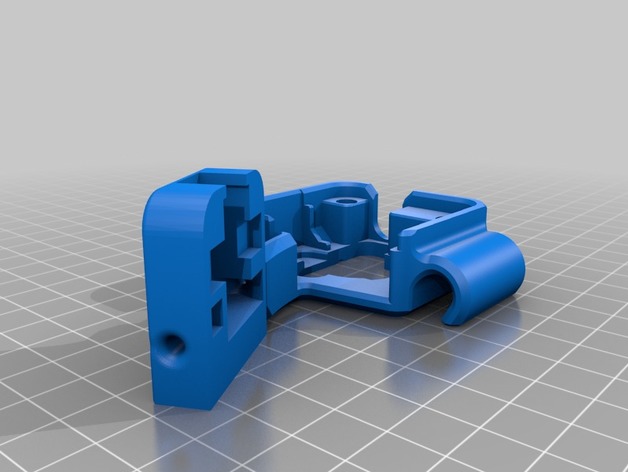
Cr-10 Filament Sensor Bracket 3D Print Model
Summary
PRINT:
NOTE: When using S3D slicer you must do: Mesh -> Separate Connected Surface
Otherwise you will get a hollow bits.
For Cura im not sure if you have this ability, please comment if you know how to fix the issue.
Sorry just my lack of design ability led to this issue.
I designed a Bracket to hold a filament run-out sensor i bought off ebay.
This gives my 3d printer the ability to sense when there is no more Filament left, and pauses the print.
It slips over the Extruder, and also has a cable holder integrated.
The design allows it so you can use a small amount of PTFE tube to make it easier for the filament to guide into the extruder motor.
Sensor i used:http://r.ebay.com/PxV1Jx
Connected to: Raspberry pi 3B
For setup: https://youtu.be/j7JfQXTf16U
Print Settings
Printer:
Creality Cr-10 Rafts:
No Supports:
Yes Resolution:
0.2 Infill:
10 Notes:
Supports settings:
Support pillar resolution: 2.5mm
Max overhang angle: 65 Degrees.
PRINT:
NOTE: When using S3D slicer you must do: Mesh -> Separate Connected Surface
Otherwise you will get a hollow bits. -
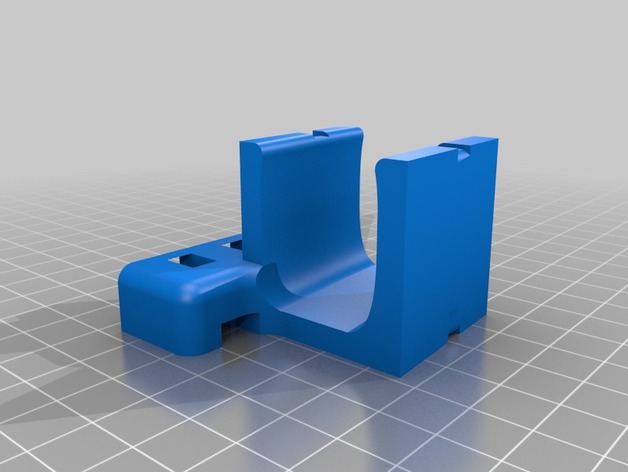
Cube Stereo Hybrid – Speed and Cadence Sensor 3D Print Model
Summary
Got a Cube Stereo Hybrid 120, a Full-Suspension E-Mountainbike.
The distance to the magnet on the spoke is much too large to get the BT smart speed and cadence sensor working with.
Sensor example: https://tinyurl.com/ycpqkn5g
Designed a base that is tightened with a zip tie to the frame and has the needed socket to install the sensor on it. So it uses the same magnet that is already in position for the Bosch motor and Bosch Intuvia / Purion display unit.
What you should have is a small flat rubber strip between the printed part and the frame to keep away any movements. Not too big and not too much, the 02_base.stl has only space for one side with 1mm thickness.
Print Settings
Printer Brand:
Prusa Printer:
Prusa Mk2 Rafts:
No Supports:
No Resolution:
0.3 Infill:
20% -
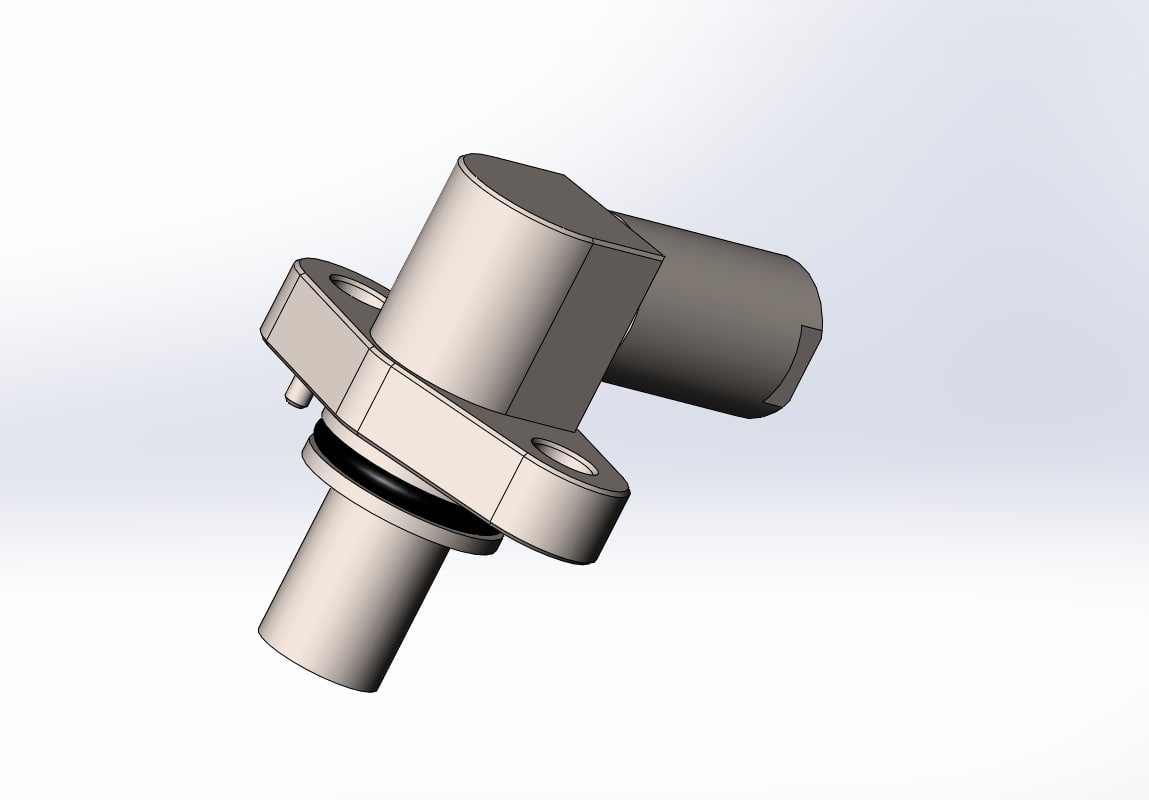
Speed sensor 3D Model
Speed sensorSpeed sensors, based on incremental impulse sensor for rail vehicles. Through the encoder signal the rotating direction and speed of locomotives, motor- and high-speed trains are detected.
-
Animalarm – a sensor to control pet movements 3D Print Model
Summary
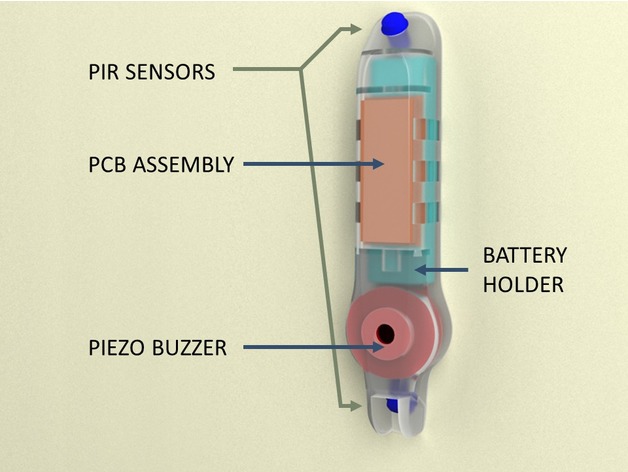
A simple but elegant project to create a “pet zone alarm” in your house. It uses infrared motion detectors to sense when a pet (or small child) is moving through a doorway or hall and sends out a loud tone. It does not beep when a (tall) person moves through the same area. With a bit of training animals recognise where they are welcome – without having to use physical gates.
NOTE: WIP – Some electronic component values are subject to change
Post-Printing
Caveats
Obviously, you will need to be able to get the PCB manufactured. The files are all there to do so and it is very cheap. And of course you need the skills and equipment to source and assemble the electronics!
If you want to use a different buzzer, you will need to make your own shell – but the electronics at least will work for you… Application
There is a single trimpot to set the length of the beep, once the alarm is triggered. You can also change component values (C1 in particular) to alter the delay before the alarm goes of before triggering the alarm. Set it longer if the system is triggering falsely.
There are pads in the 3D print design at the top and bottom of the Animalarm. Use double sided tape or bluetack at those locations to mount the alarm on the wall / doorway.
How I Designed This
How this works
The Animalarm uses two PIR (passive infrared) detectors to detect and discriminate between pets and people. The detector needs to be mounted on a door / wall about a meter above the ground. One PIR “looks down”, the other “looks up” to detect motion. A pet only triggers the lower detector and sets of the alarm. If a person is detected, the alarm either never triggers or is shut off.
The circuitry is built around a single CMOS chip and a few transistors – and of course battery, buzzer and PIR detectors. The circuitry is incredibly power efficient, drawing less than 30µW normally and only 10mA when triggered. This means the batteries will probably last a year in normal use… Electronics
The attached files include:
the Eagle design files (schematic and PCB)
Circuit schematic
PCB layers images
Gerber files for the PCB to be produced by seedstudio.com
List of special components and their sources
All the components are incredibly cheap; the PIR detectors are less than $2, the circuit board less than $1; indeed the most expensive component is the buzzer. The total component cost is about $15 (printed shell aside) -
Inductive Sensor Holder 18mm 3D Print Model
Summary
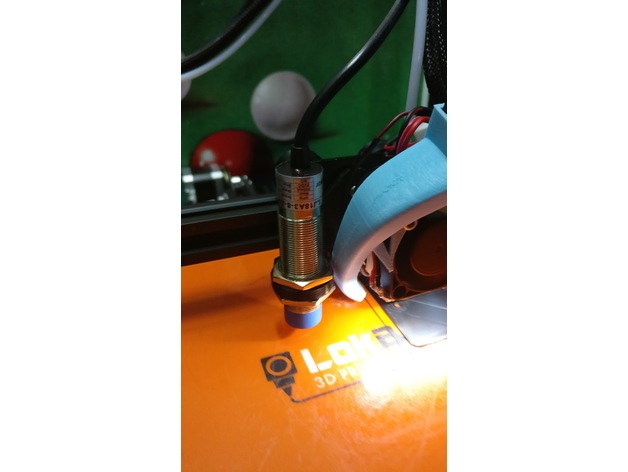
Support for inductive sensor to be used with autobed leveling.
This is for a sensor of 18mm.
Links for sensor:https://www.amazon.com/LJ18A3-8-Z-Approach-Sensor-Inductive-Proximity/dp/B008FZC8F2https://pt.aliexpress.com/store/product/M18-8mm-sensing-DC-5V-NPN-NO-LJ18A3-8-Z-BX-5V-cylinder-inductive-proximity-sensor/1162433_32719316657.html -
VL53L0X Rage Sensor Enclosure / Box 3D Print Model
Summary
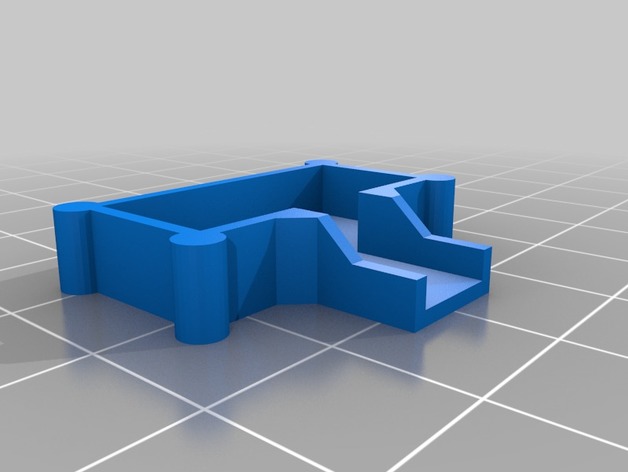
This is a enclosure for a VL53L0X Laser Sensor. I needed it for a Project where I have to mount it on a corner on a Wall, so i also designed a cable tunnel for it.
Printing without support with 0.2 is fine. Better works with 0.1
SketchUp File is free for download. However, this was 2 Days of work, so please be fair.
Have Fun 🙂
Konstantin Pfeiffer
Print Settings
Printer Brand:
Prusa Printer:
Prusa Clone Rafts:
No Supports:
No Resolution:
0.2 Infill:
50 -
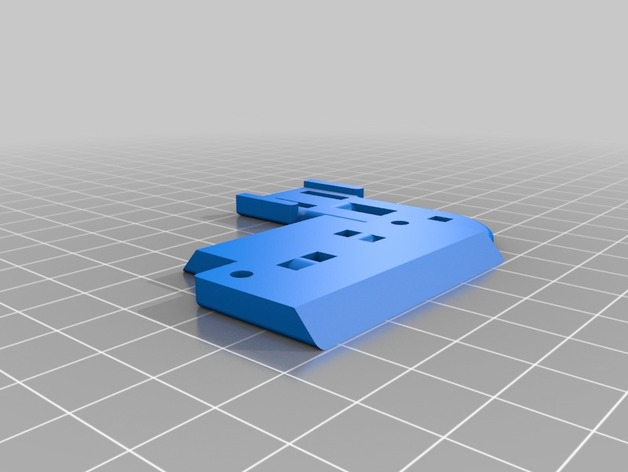
Anet Autolevel sensor mount(V6 hotend + Bowden) 3D Print Model
Summary
I originally printed the first one. I really like the design. The only problem is that the sensor sits too low to use the v6 hotend with a bowden extrusion setup. The highest you can raise it on the original, you were stil about 4mm away from the print surface.
So I chopped it a bit to make it higher, and gave it some more adjustment room.
I have not tested it. I haven’t had a chance to print it yet as the printer is not quite together yet. -
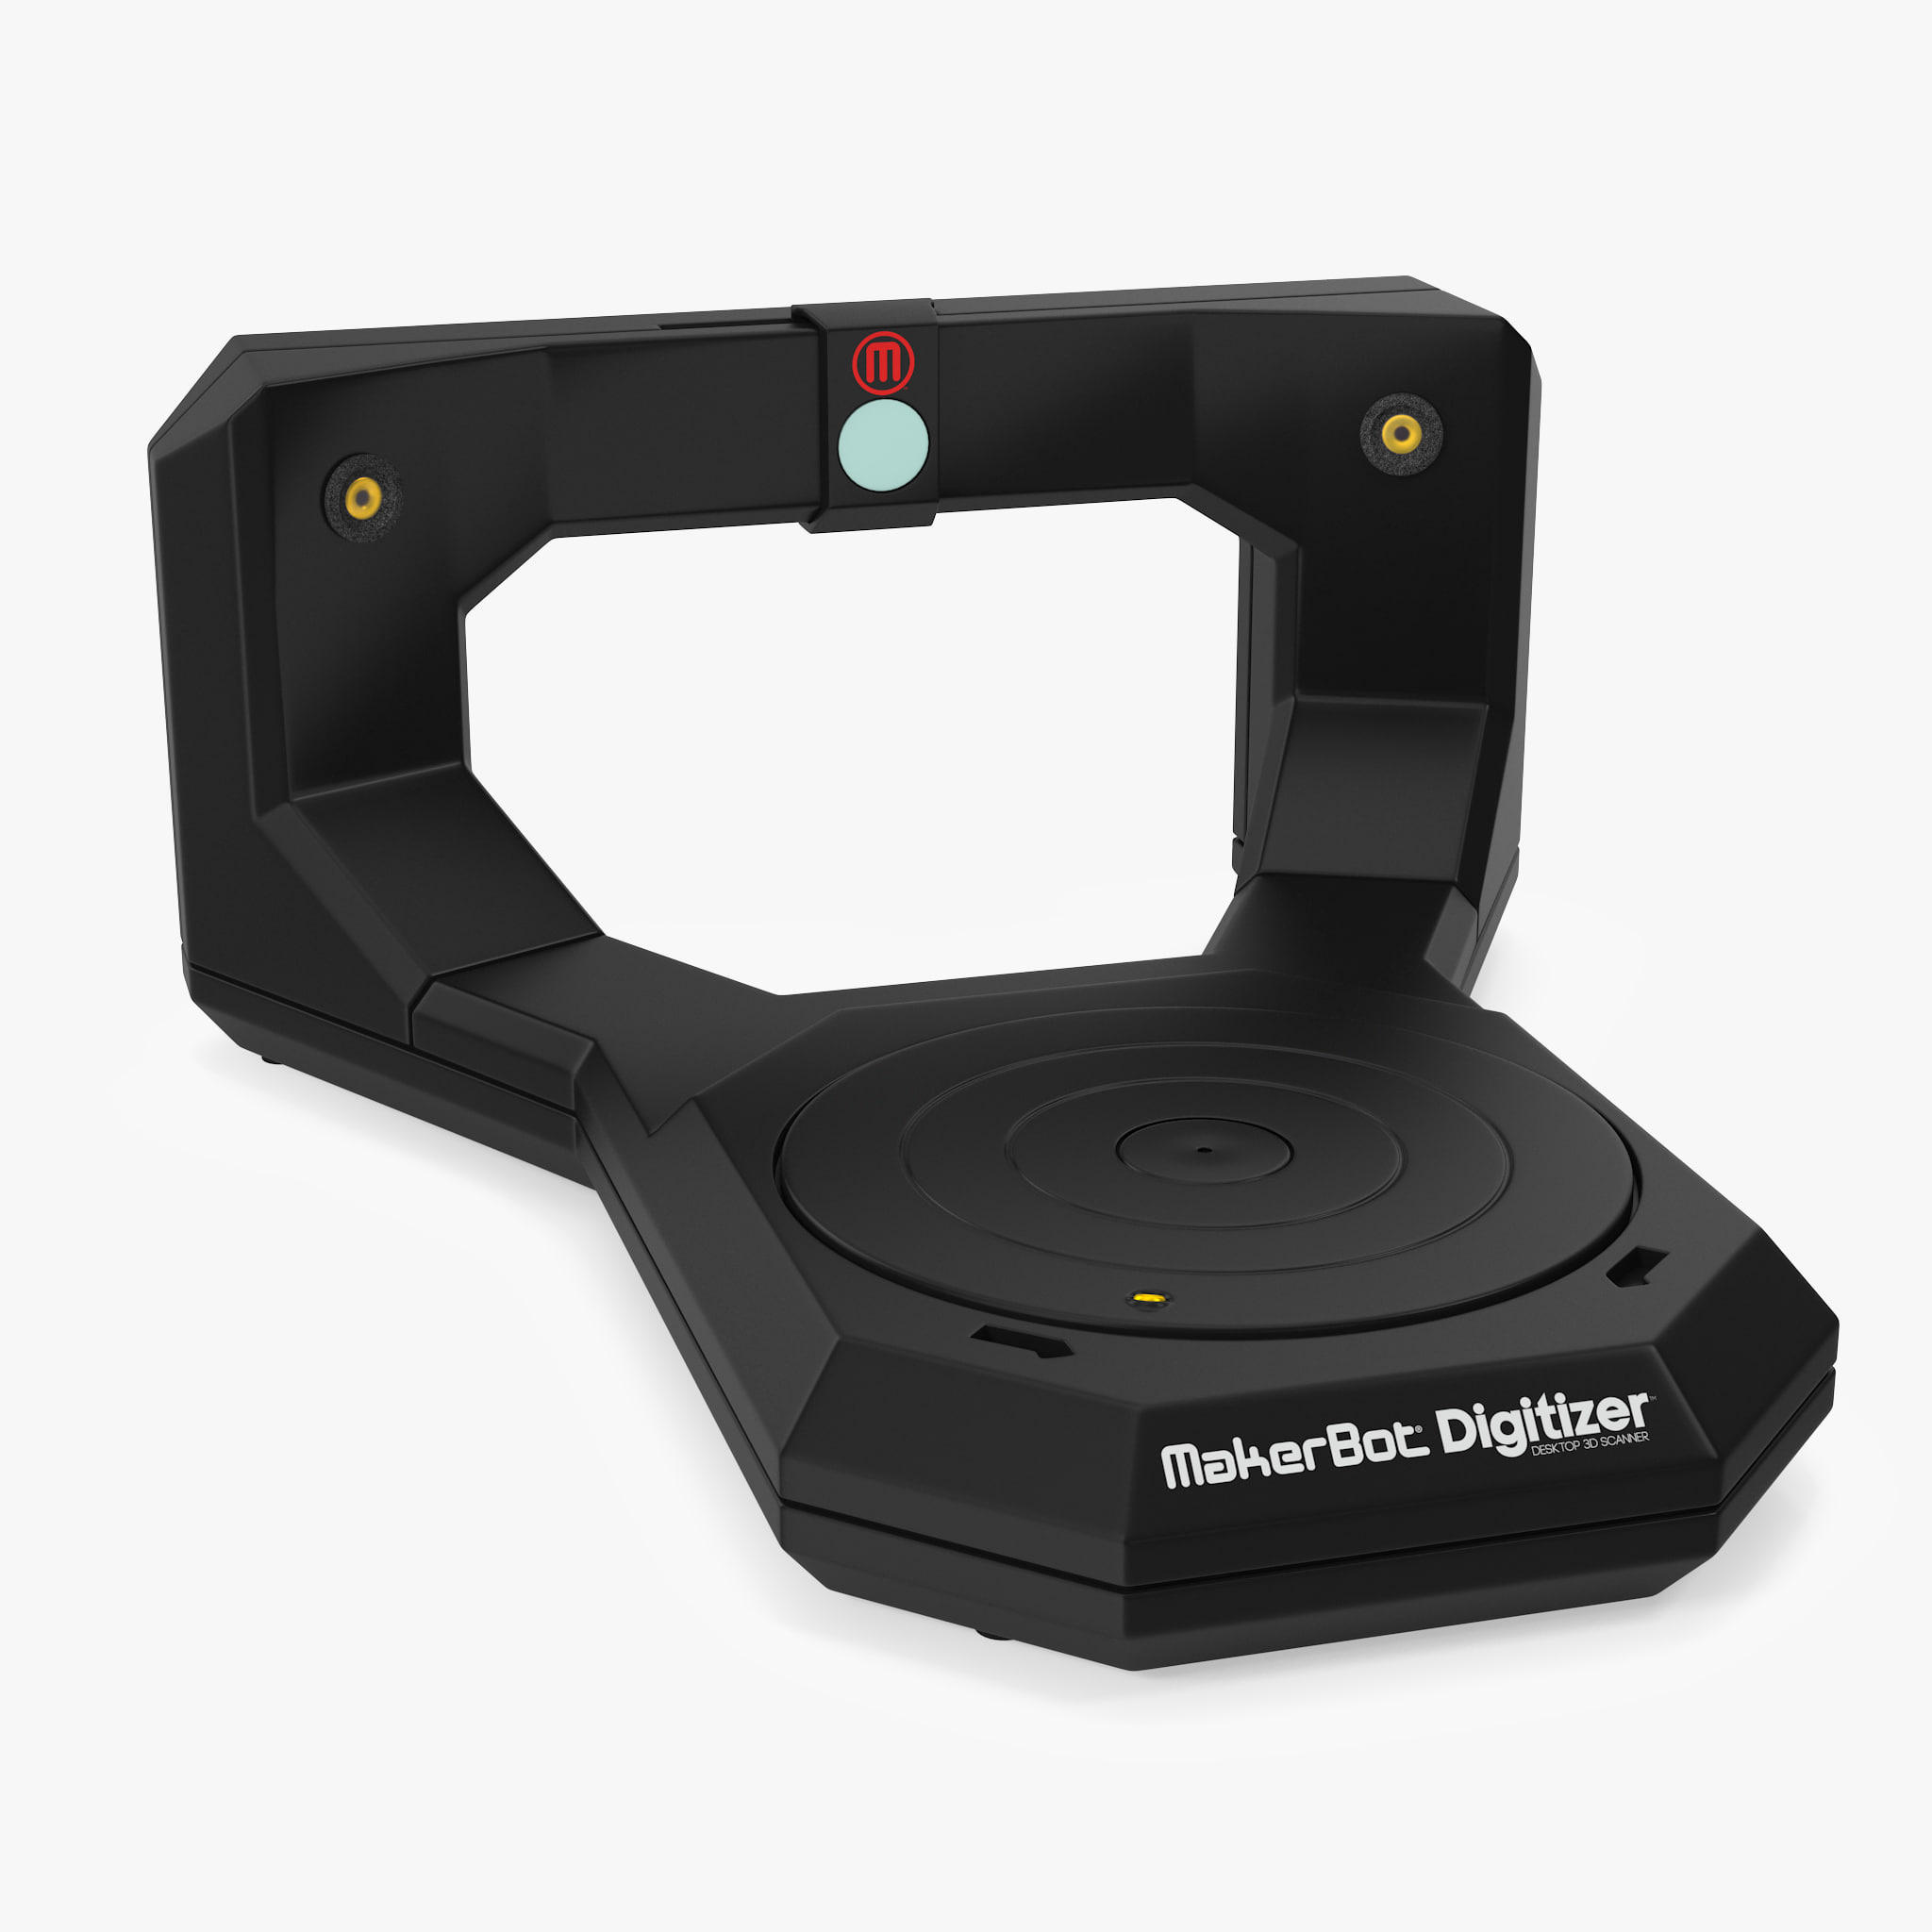
Desktop 3D Scanner MakerBot Digitizer 3D Model
Desktop 3D Scanner MakerBot Digitizer is a high quality, photo real model that will enhance detail and realism to any of your rendering projects. The model has a fully textured, detailed design that allows for close-up renders, and was originally modeled in 3ds Max 2012 and rendered with V-Ray. Fidelity is optimal up to a 2k render. Renders have no postprocessing.Hope you like it!*********************************Features:- High quality polygonal model, correctly scaled for an accurate representation of the original object.- Models resolutions are optimized for polygon efficiency. (In 3ds Max, the Meshsmooth function can be used to increase mesh resolution if necessary.)- All colors can be easily modified.- Model is fully textured with all materials applied.- All textures and materials are included and mapped in every format.- 3ds Max models are grouped for easy selection, and objects are logically named for ease of scene management.- No part-name confusion when importing several models into a scene.- No cleaning up necessaryjust drop your models into the scene and start rendering.- No special plugin needed to open scene.- Model does not include any backgrounds or scenes used in preview images.- Units: cm*********************************File Formats:- 3ds Max 2012 V-Ray and standard materials scenes- OBJ (Multi Format)- 3DS (Multi Format)- Maya 2011- Cinema 4D R14- FBX (Multi Format)*********************************Textures Formats:- (3 .png) 2048 x 2048- (1 .psd) 2048 x 2048*********************************3d Molier International is a team of 3D artists with over a decade of experience in the field. The company participated in various projects allowing us to learn our clients needs. Every model we build goes through thorough Quality assessment both visual and technical to make sure the assets look realistic and the models are of the best quality, which you can tell by looking at the renders none of the has any postprocessing. On the top of that all the models come with complete UVs and optimized topology, which allows you in no time alter geo or the textures if needed.Also check out our other models, just click on our user name to see complete gallery. 3d_molier International 2017
-

Digital Camera Panasonic LX100 Black 3D Model
Digital Camera Panasonic LX100 Black is a high quality, photo real model that will enhance detail and realism to any of your rendering projects. The model has a fully textured, detailed design that allows for close-up renders, and was originally modeled in 3ds Max 2012 and rendered with V-Ray. Fidelity is optimal up to a 2k render. Renders have no postprocessing.Hope you like it!The flash can be detached.*********************************Features:- High quality polygonal model, correctly scaled for an accurate representation of the original object.- Models resolutions are optimized for polygon efficiency. (In 3ds Max, the Meshsmooth function can be used to increase mesh resolution if necessary.)- All colors can be easily modified.- Model is fully textured with all materials applied.- All textures and materials are included and mapped in every format.- 3ds Max models are grouped for easy selection, and objects are logically named for ease of scene management.- No part-name confusion when importing several models into a scene.- No cleaning up necessaryjust drop your models into the scene and start rendering.- No special plugin needed to open scene.- Model does not include any backgrounds or scenes used in preview images.- Units: cm*********************************File Formats:- 3ds Max 2012 V-Ray and standard materials scenes- OBJ (Multi Format)- 3DS (Multi Format)- Maya 2011- Cinema 4D R14- FBX (Multi Format)*********************************Textures Formats:- (10 .png) 4096 x 4096*********************************3d Molier International is a team of 3D artists with over a decade of experience in the field. The company participated in various projects allowing us to learn our clients needs. Every model we build goes through thorough Quality assessment both visual and technical to make sure the assets look realistic and the models are of the best quality, which you can tell by looking at the renders none of the has any postprocessing. On the top of that all the models come with complete UVs and optimized topology, which allows you in no time alter geo or the textures if needed.Also check out our other models, just click on our user name to see complete gallery. 3d_molier International 2017
-
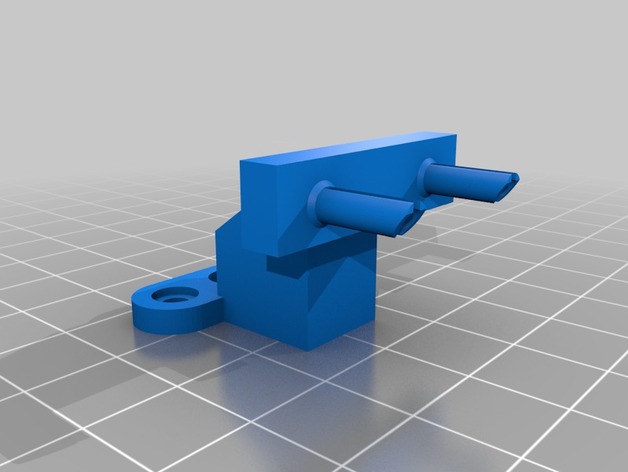
BLTouch/3DTouch rear sensor mount 3D Print Model
Summary
This is a remix of https://www.thingiverse.com/thing:2219963 to allow mounting a BLTouch sensor on the rear bearing of an Anet A8. I’ve included the customizer to allow the height
and many other features to be custom set for any printer . The “Measured Height” parameter is used to calculate the correct height with the 8.3mm offset to the nozzle. You simply need to move the print nozzle so that it touches the bed then measure the distance of top mount screw hole (on the rear lower bearing) to the bed. Enter this in the “measured height” field and create. The mount also includes side clearance to allow it to work on new Anet A8’s. Please note that for this mount, you need a mount to bed distance of at least 52mm or it won’t work.
Stock carriage settings:
define X_PROBE_OFFSET_FROM_EXTRUDER 20
define Y_PROBE_OFFSET_FROM_EXTRUDER 61
define FRONT_PROBE_BED_POSITION 61 -

Galaxy S8 Plus Midnight Black 3D Model
Highly detailed and realistic model of a Samsung Galaxy S8 PlusScene with all Vray settings 3DSMax 2015 V-ray 3.4Features:- Unit system is set to Centimeters- Work with Turbosmooth modifier.- Highly detailed and realistic- Preview rendered with V-Ray 3.4- Scene with all Vray settingsTextures:Env.exrGalaxy_S8_cam2.tgaGalaxy_S8_cam.tgaGalaxy_S8_back_mask.tgaGalaxy_S8_front.tgaGalaxy_S8_front_Midnight_Black
-
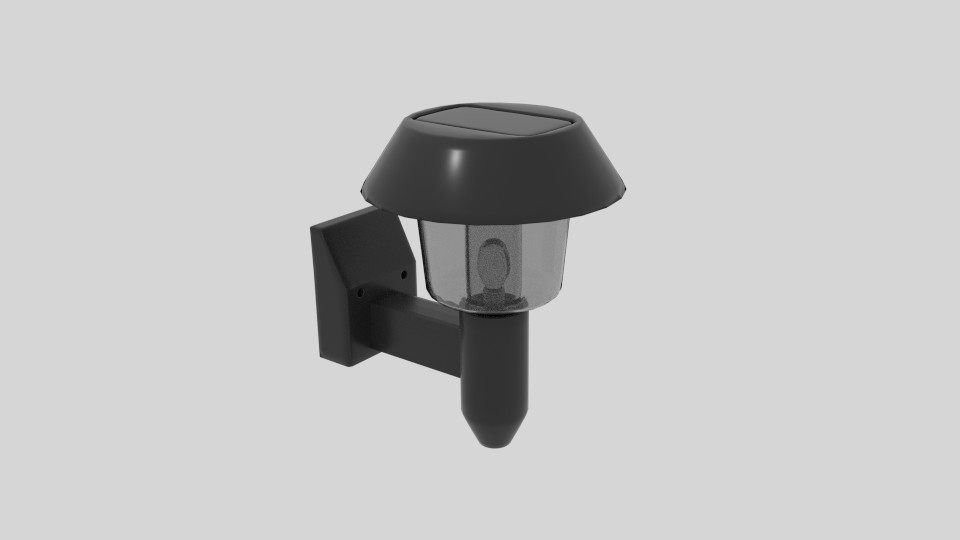
Solar Powered Wall Light 3D Model
3D Solar Powered Wall Light Created and Rendered in BlenderFeatures:-5 Different Format Included: Blender(Deafult), 3ds, dae,, fbx, obj-Everythings UV Unwrapped-Blender Scene and Node Included-Lowpoly Gameready
-
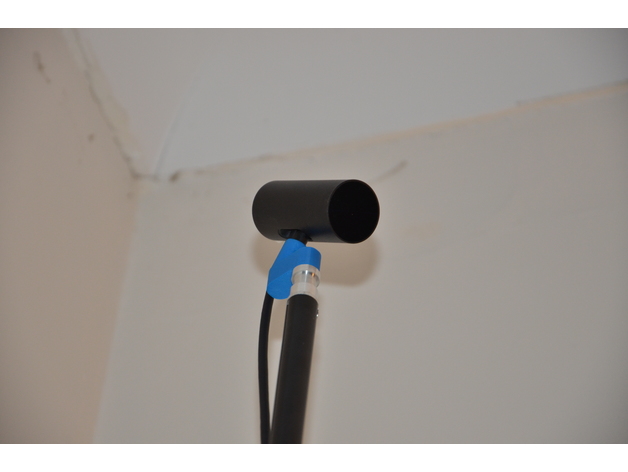
Angled adaptor for Oculus Rift sensor camera 3D Print Model
Summary
This adaptor screws onto a standard photography tripod, or onto the original rift sensor stand. It is designed to give the sensor more downwards coverage, for when the sensor is positioned in a high corner.
I implemented a “kink” or offset in an attempt to keep the correct center of gravity, but in retrospect, it really wouldn’t have mattered – the sensors are quite light-weight.
See this for good roomscale setup tips:https://www.oculus.com/blog/oculus-roomscale-tips-for-setting-up-a-killer-vr-room/
I use this app to visualise and tweak the sensor placement/coverage from within VR:https://www.wearvr.com/apps/desk-scene-check-your-camera-bounds -
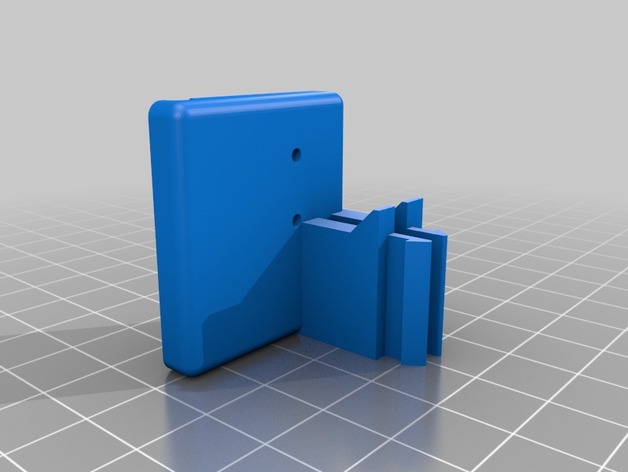
Wanhao Duplicator 6 Filament Runout Sensor
Summary
This is a bracket to mount an nc microswitch sensor on a Wanhao Duplicator 6/Monoprice Maker Ultimate to detect when filament runs out. To be able to use this feature you will need to install a custom Marlin firmware that was developed for the D6/MU:
https://github.com/1bigpig/Marlin
After installing the firmware, all you need to do is connect an nc microswitch to the board and mount it to the printer using this bracket.
For the microswitch you’ll need to get one with a similar design to the one in my pictures if you want it to fit perfectly without any modifications.
To connect the sensor to the board you’ll need a “JST XH 2.5-3 Pin” connector and connect that to the open J9 analog plug on the printer (using the two outermost pins) and connect those wires to the two outermost pins on the microswitch. The printer will automatically detect this once it’s plugged in and pause the printer when there is no filament keeping the microswitch closed.
Print Settings
Printer Brand:
Wanhao Printer:
Duplicator 6 Rafts:
Doesn’t Matter Supports:
No Resolution:
.15 Infill:
20% Notes:
You can print both of these upright without needing to use any support (there are two small support columns built in that will easily snap off) -
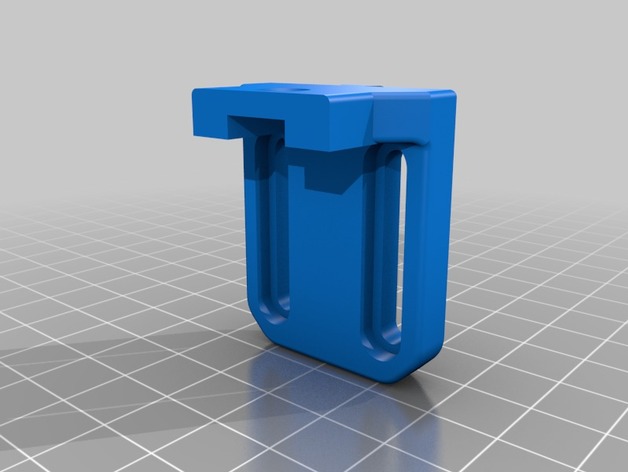
LPA Sensor Mount for Aluminium X-Carriage
Summary
Meant to be used in combination with Isaac’s aluminium X Carriage, and the LPA sensor dovetail sensor plates found under: http://www.thingiverse.com/thing:1829292
There are sensor plates for SN04, BLTouch, and LJ 18A Family sensors.