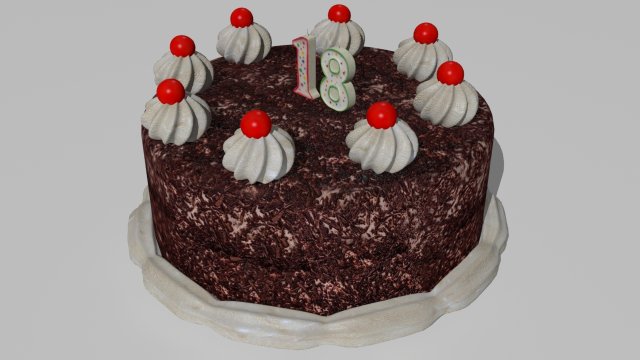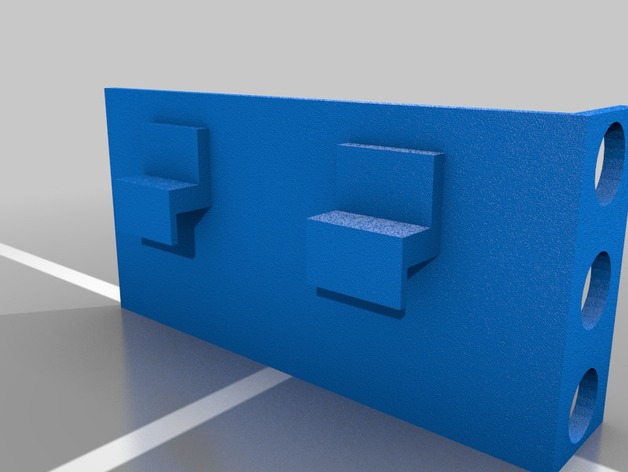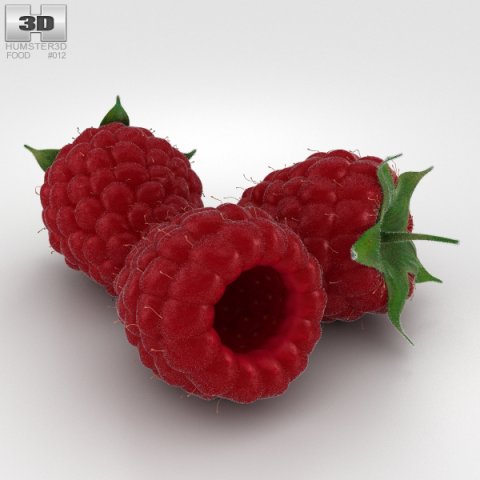
The 3D model was created on real base. It’s created accurately, in real units of measurement, qualitatively and maximally close to the original.Model formats:- *.max (3ds Max 2008 scanline)- *.max (3ds Max 2008 vray)- *.fbx (Multi Format)- *.obj (Multi Format)- *.3ds (Multi Format)- *.mb (Maya 8.5)- *.lwo (Lightwave 6)- *.c4d (Cinema 4D 11)* renders Are made in 3ds Max 2008 using vray 1.5 (studio environment is not included in the set)If you need any other formats we are more than happy to make them for you.The model is provided combined, all main parts are presented as separate parts therefore materials of objects are easy to be modified or removed and standard parts are easy to be replaced. If you experience difficulties with separating standard parts we are more than happy to give you qualified assistance.We greatly appreciate you choosing our 3D models and hope they will be of use.We look forward to continuously dealing with you.Sincerely Yours,Hum3D Team
Tag: Raspberry
-
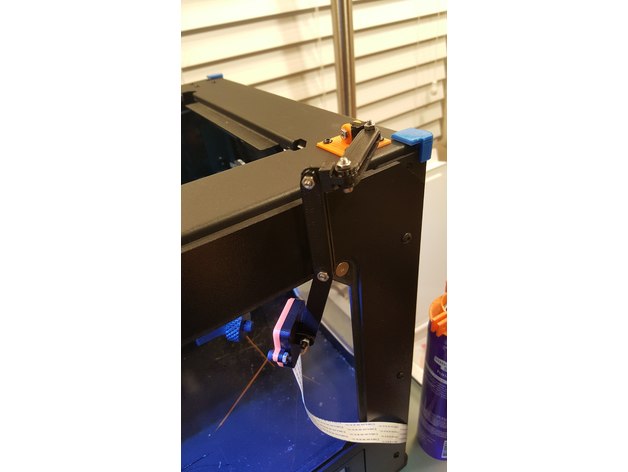
Adjustable Raspberry Pi camera mount for PowerSpec Ultra 3D Printer 3D Print Model
Summary
What you need:
I’ve included arm linkage at 40, 50, & 60mm lengths, but you really only need 6 of the 60mm lengths.
You should also print 2 of the arm_joint model.
That’s just to replicate the setup that I have, but it’s honestly very customizable. Print whatever you want!How to setup a streaming webcam with your Raspberry Pi:
https://pimylifeup.com/raspberry-pi-webcam-server/The different bases:
If you have the PowerSpec Ultra, I recommend printing the large base as it’ll allow you to perfectly connect the base to existing screws. You can still use the small base, It just connects at opposite corners and looks a little funny. I’m really just including it for anyone that might not have the PowerSpec Ultra since it may work better for them.
If you are using the large base, do not unscrew all 4 bolts at once! You don’t want to drop one of your axis arms down. Unscrew 3 of them, screw the base most of the way in on one corner, and then unscrew the forth bolt and swing the mount around to line up with the other holes.The different front cases:
I removed the pins out of the case for the v2 version of the camera because they seemed more likely to break than do anything useful. I haven’t modified the v1 version from the original that u/ReMake posted since I don’t have the v1 camera. Just wanted to put everything in one place for everyone else.Adjusting the camera:
If you have the v2 version of the camera, I would print this adjuster: https://www.thingiverse.com/thing:1574661
I recommend printing the taller socket style one as I was constantly hitting my M3 bolts using the wrench style one.
Print Settings
Printer Brand:
PowerSpec
Printer:
Ultra 3D
Rafts:
No
Supports:
Yes
Resolution:
0.32mm
Infill:
100% -
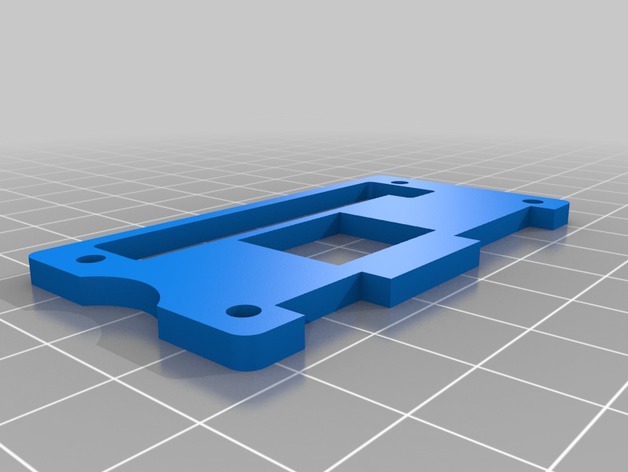
Simple raspberry pi zero case 3D Print Model
Summary
Simple raspberry pi zero case only needs 4 m2x10mm screws and 4 m2 nuts. -
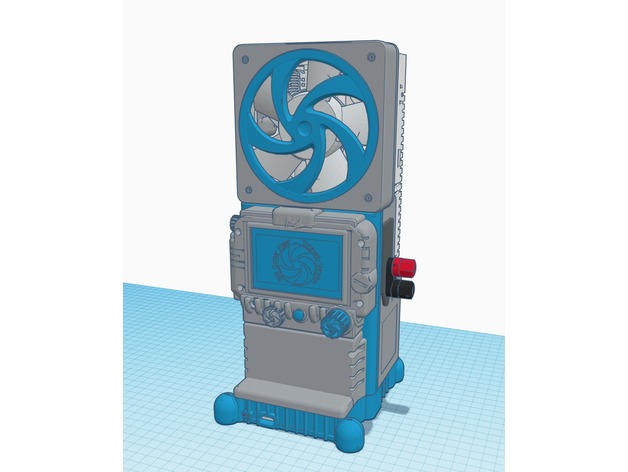
Toranado Power Tower Raspberry Pi Ramps 1.4 Full Graphics 3D Print Model
Summary
New improved version of the original popular thing: https://www.thingiverse.com/thing:894503
Improvements:Pass thru header connector system!!!
larger more stable base
Toranado Extruder themed styling
Full Graphics Controller
Raspberry Pi mounted inside unit (with power converter)
Mounting provisions for both Mechanical or Mosfet relay boards for heat bedDetails, links for electronic components & firmware downloads are at http://bigcooter.com/?p=1584!
The pass thu header connector system utilizes popular JST connectors for hot end and auxiliary circuits. The stepper motors and sensors utilize Dupont pin headers. The high current heating bed 2 circuits are now designed for using Aptiv 2.8mm automotive terminals (male terminals locked in place with self tapping screws, mates to commercially avaialbe Aptiv unsealed 2way APEX 2.8 female connector … another option for this connection could be to use the popular XT-60 connector used on my R/C battery connectors (feel free to remix and contribute!). NOTE: I have include one Pin-Out example, file which can be altered, printed out and taped to back of unit for reference, highly recommended!! -
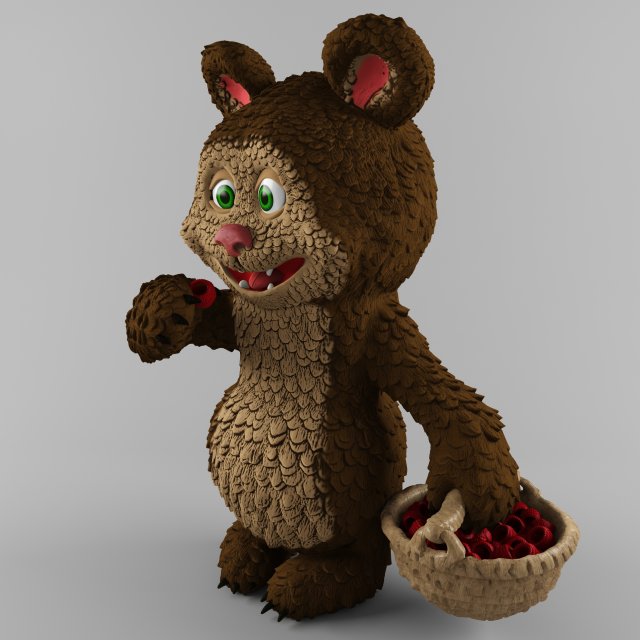
Bear and raspberries 3D Model
Children’s toy Bear and raspberry. The model contains 21184 polygons and 21334 vertices. The model is saved in 3d max 2014,3d max 2011, obj and FBX. Textures are stored in the materials library. The name of the library is bear_textures. Therefore, after importing FBX or obj files, you need to open the materials library via ‘get material’. Also, to some details of the imported model, the ‘TurboSmooth’ and ‘VRayDisplacementMod’ modifiers should be applied. The settings are shown in the embedded jpg file ‘11.1TurboSmooth and VRayDisplacementMod’. For missing parts in the list, these modifiers do not apply.
-
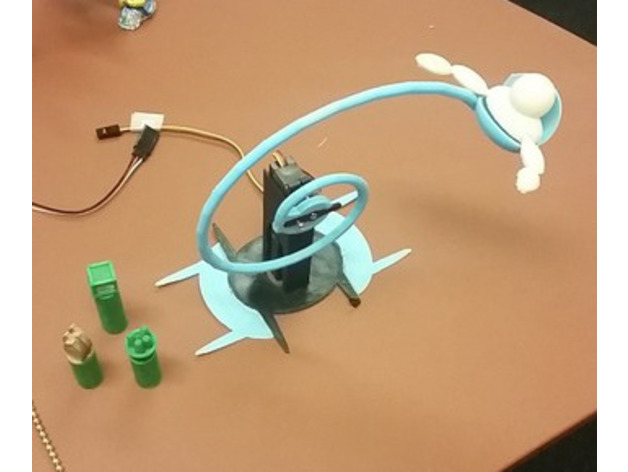
Robot Slingshot game 1vs1 for Raspberry Pi 3D Print Model
Summary
Build a robot game with your Raspberry Pi, battling with two players using your favorite slingshot ammo to shoot off crates and count points. The game works with a Raspberry Pi and a Mobile phone, Pad or any touch screen.
Play instructions:
Each player starts with 1p resource that they place in front of their own slingshot on top of the tower
Each player on their turn draws the sling and releases it, trying to hit the opponents resources. Before the turn place a new resource on your playing field, according to the game image
End of each throw count amount of resources on opponents field and add to your points
Points:
Corn, Barrel 1p
Leaf, Flour 2p
Gold crate 3p
Assembly: Print all parts, connect the spiral sling with a 9g micro servo, add additional screw to hold the servo better. Slide the servo inside the servo holder with the wire upwards. Adjust the servo when the servo is in middle position the sling cup is balanced horizontally.
Add 3mm / 4mm / 5mm Neodymium magnet balls if you want extra weight for the cannon balls.
Install instuctions GigaBrain Robot slingshot two player game
The Game is in BETA test mode, so leave feedback in comments.
Print Settings
Printer:
Creality CR-10 Rafts:
No Supports:
No Notes:
The slingshot stand is better with a support structure that you can leave on the print, it holds the stand better. -
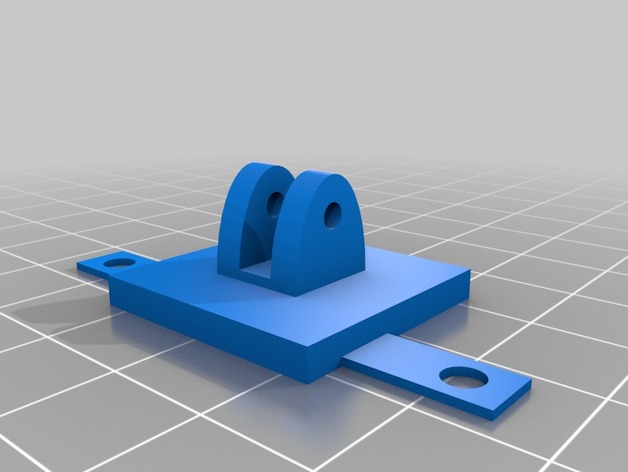
Lulzbot Mini Raspberry Pi V2 Camera Mount 3D Print Model
Summary
I used the files from Pschwamb to help develop a way to mount my Raspberry Pi Camera V2 inside my Lulzbot Mini. I added some mounting tabs on his base that fit the whole spacing on the mini. I have uploaded pictures of the camera installed. I ran the ribbon cable thru the small window on the left side of the machine. I am also added a screenshot of the camera view it gives. I should note that for the screenshot I am also using my LED light I have uploaded on thingiverse if you are interested in having some light inside the machine.
Print Settings
Printer Brand:
LulzBot Printer:
Mini Rafts:
Doesn’t Matter Supports:
Doesn’t Matter Resolution:
0.2 Infill:
30% -
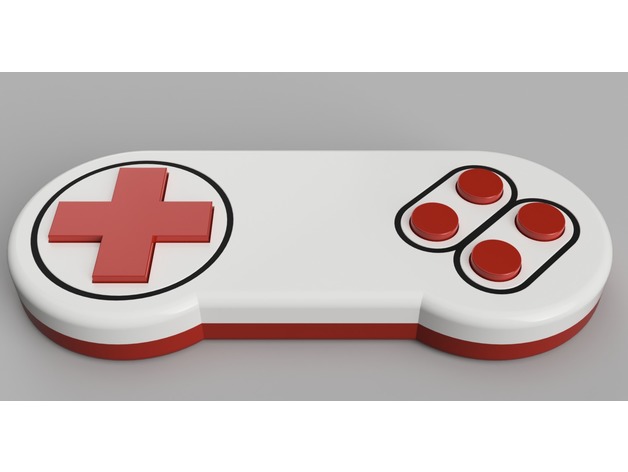
I2C Game Controller for Arduino / Raspberry Pi 3D Print Model
Summary
As part of my LED-Matrix Table project (uploaded soon) , I designed this game controller to control the table and to play games. It can be used as an input device for a wide variety of micro-controllers or raspberry pi computers.
Up to 8 controller can be used in parallel with the same control chip. The state of the eight buttons can be read by using the I2C protocol and therefore it only requires 4 wires for connection.
Additional Parts
The chip, included in the controller, is a PCF8574 on a small circuit board from Amazon (8€):https://www.amazon.de/gp/product/B06W564ZSD
And the pushbuttons are from Ebay (1.2€):http://www.ebay.de/itm/10-Stück-DIP-4-Mini-Drucktaster-Printschalter/272861590169
Additionally, you need a few wires for connecting the buttons to the PCF8574 chip and a 4-wire-cable with approx. 2 meter length to connect the controller to the raspberry pi.
Instructions
Print all parts 🙂
Cut out two perfboard pieces with a dimension of 40×40 mm each.
Solder 4 buttons on each perfboard, pay attention to the proper alignment (use the X button as reference, both perfboards require the same alignment)
Connect one pin of each button to the I2C port extender. Connect the other pin of each button to GND on the port extender circuit board.
Slide the two prefboards into their rails and use hotglue to fixate them (check if the align with the corresponding button holes as good as possible.
Connect the long cable to the port extender board. If you use the same board, you have to desolder the i2c connector on both sides.
Fixate the port extender board with some hotglue in the center of the controller as shown in the the pictures above.
Connect the other end to your arduino / raspberry pi and you are done.
Have fun! 🙂
Print Settings
Rafts:
No Supports:
No Resolution:
0.2 mm Infill:
15% Notes:
Multi-color
Multi-color printing of the front side of the controller can be achieved by pausing the print before layer 2 and 4 (0.2 mm layer height). Print layer 2 and 3 in a different color to achieve the colored inset, seen in the pictures above. -
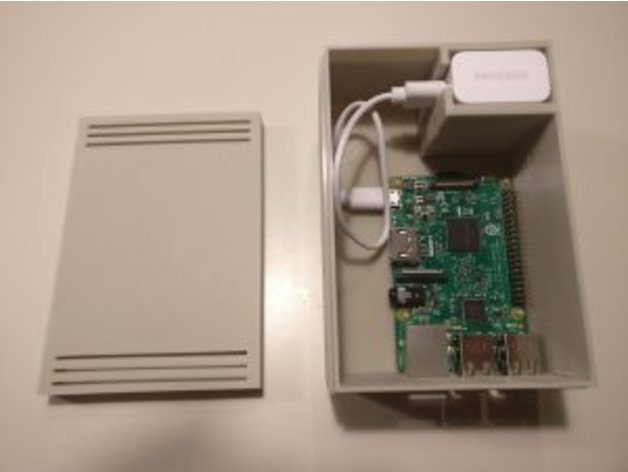
Single Unit Raspberry Pi case 3D Print Model
Summary
Iv built a single unit to house the raspberry pi and power adapter and cables, nice neat setup. -
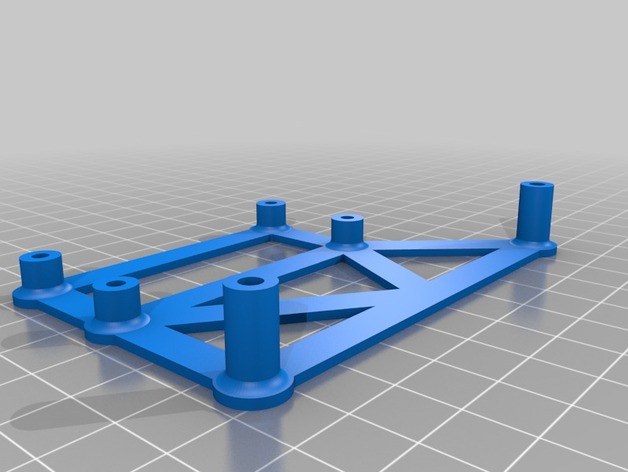
Raspberry Pi Zero (W) Mount Bracket for Anet A8 3D Print Model
Summary
Raspberry Pi Zero (W) Mount Bracket for Anet A8.
Remove the top two main board screws on the Anet A8 and replace the plastic distances with this mount bracket. Use four M3x8mm screws to secure the Raspberry Pi Zero to the mount bracket.
Print Settings
Printer:
Anet A8 Rafts:
Doesn’t Matter Supports:
Doesn’t Matter Resolution:
0.2mm Infill:
20% -
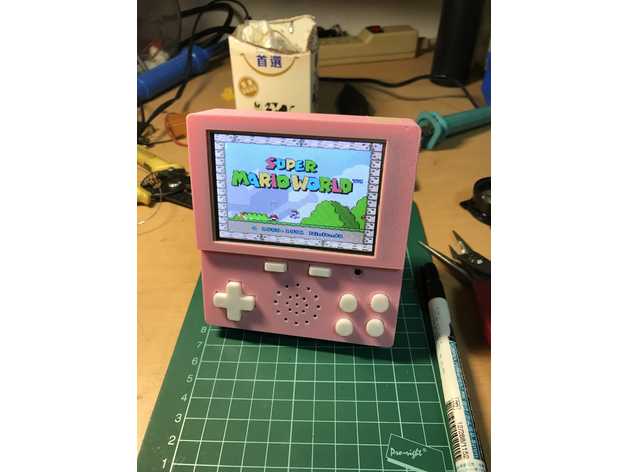
Raspberry Pi2/3 Portable 3D Print Model
Summary
Remove the top cover can do other applications.
Build a handheld game console that you can find HERE: https://ken77kuo.blogspot.tw/ -
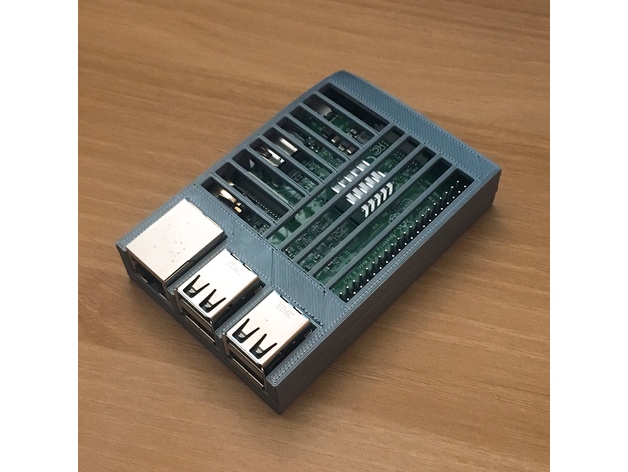
Simple case for Raspberry Pi 3b 3D Print Model
Summary
Simple case for Raspberry Pi 3b.
Print Settings
Printer Brand:
Prusa Printer:
i3 MK2S Rafts:
No Supports:
No Resolution:
0.2mm Infill:
20%
How I Designed This
I wanted to design my own case with a more organized pattern. -
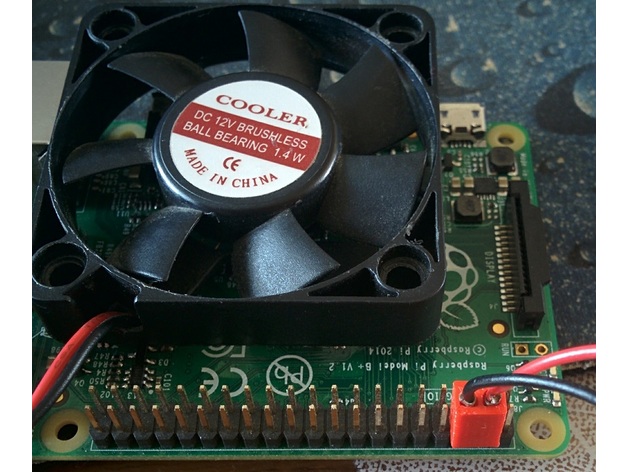
Connecteur de ventilateur pour Raspberry Pi / Fan connector 3D Print Model
Summary
Un simple connecteur permettant d’utilisant un ventilateur classique de PC (après avoir retiré le connecteur en plastique d’origine).
Il est important de conserver les lames ressort en état pour un contact efficace.
Les ventilateurs 12v tournent moins vite en 5v mais cela est largement suffisant pour le raspberry pi. -
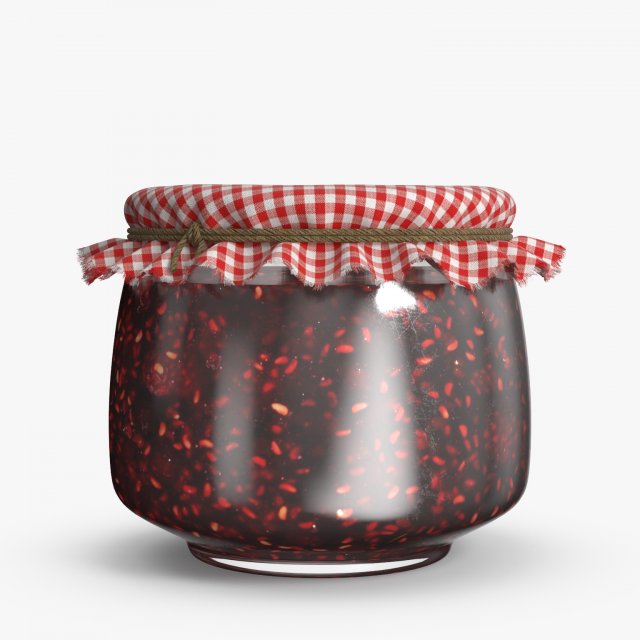
Jam Raspberry 3D Model
This is a model of a Jam RaspberryOriginally created with 3ds Max 2017|| USAGE ||This model was designed for use as a real-time asset in a [videogame or simulation]This model is suitable for use in [broadcast, high-res film, advertising, design visualization, forensic presentation, etc.]This model is an accurate representation of Jam Raspberry using a scale of 1unit = 1 centimeter.|| SPECS ||This model contains 6 separate objectsThis model contains polygons with TurboSmooth ON (set to 1 iterations.)This model contain 5917 quads, 0 tris, and 0 ngonsThis model contains Standard materials only V-Ray materialsThis product includes 3ds Max versions with and without V-Ray (separate downloads)|| PRESENTATION IMAGES ||Preview Images are rendered using the V-Ray version of the 3.40.01 renderer. If you render this file using a different version of this renderer, you may not have the same results as you see on the thumbnails.|| TEXTURES ||4096х4096 JPG ([X]) – Main object and detail areas4096х4096 JPG ([X]) – Background elementsAll textures are created from original photographs or drawings|| GENERAL ||Model is built to real-world scaleUnits used: Centimeters. Model is 11 centimeters tall.Scene objects are organized by groups.No third-party renderer or plug-ins needed is REQUIRED in order to use this product.The Hair and Fur modifier was used to simulate fringe on the fabric.
-
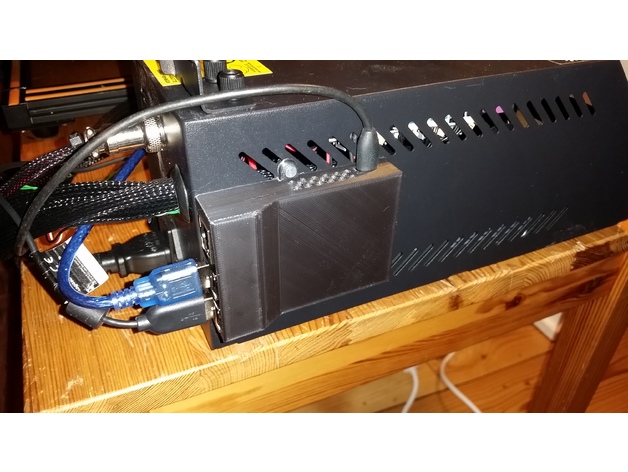
Enclosure for Raspberry Pi 3 and Creality CR-10 3D Print Model
Summary
This is an enclosure that is fastened with screws throw the grid at the side of the controller box. Therefore it is specifically made for the Creality CR-10 but will of course fit at other places when one want the box to be permanently attached to something.
The board is fastened by melting those pins like a rivet. -
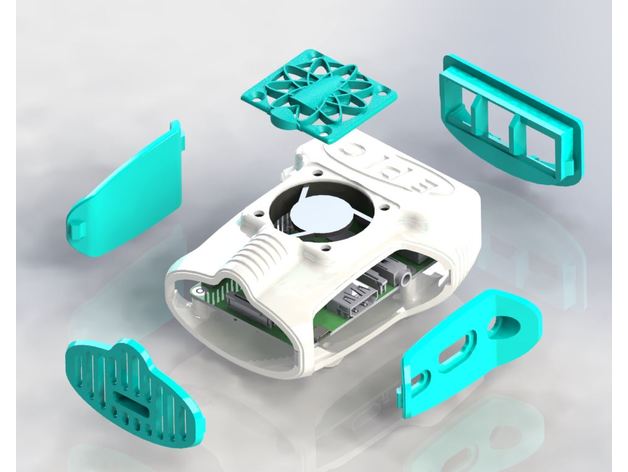
ePIc Pi Addons ( raspberry pi 2 and 3 case ) 3D Print Model
Summary
These are the addon plates for my raspberry pi 2 and 3 case called ePIc Pi. The main body can be purchased by itself that allows these plates to be printed in any color you wish to match your color scheme.
The ePIc pi mounts directly to 2020 extrusion for use with octopi via the mounting bracket I have included here.
I plan on releasing many upgrade plates to the main body after receiving feedback on the current plates.
The body can be found here.
https://www.etsy.com/listing/544101702/epic-pi-body-only?ga_order=date_desc&ga_search_type=all&ga_view_type=gallery&ga_search_query=epic pi&ref=sr_gallery_3
or search epicpi -
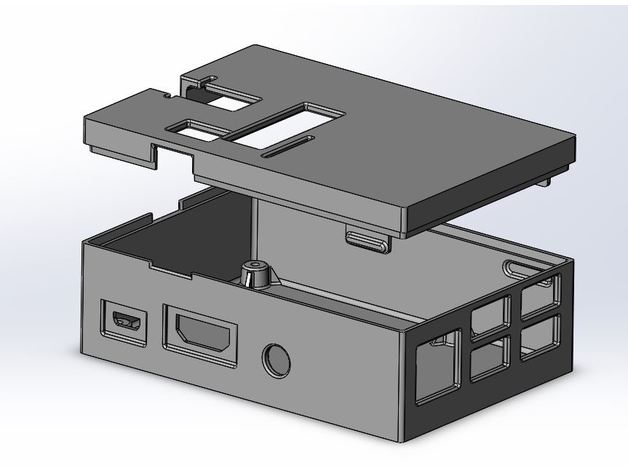
Raspberry PI case for RGB Matrix Hat 3D Print Model
Summary
This Raspberry PI case was designed to accommodate the add-on card “RGB Matrix HAT + RTC” from Adafruit. See the product here: https://www.adafruit.com/product/2345
That add-on card was needed for the Raspberry PI LED Matrix Display project.https://learn.adafruit.com/raspberry-pi-led-matrix-display/software?view=all
I made the shell 2mm thick and mounting bosses 5mm high
Sidewall indents for the power plug and HDMI cable are only 1mm thick to ensure the plugs have a solid connection
Screws used to mount the Raspberry Pi:
“#4 x 3/8in” -
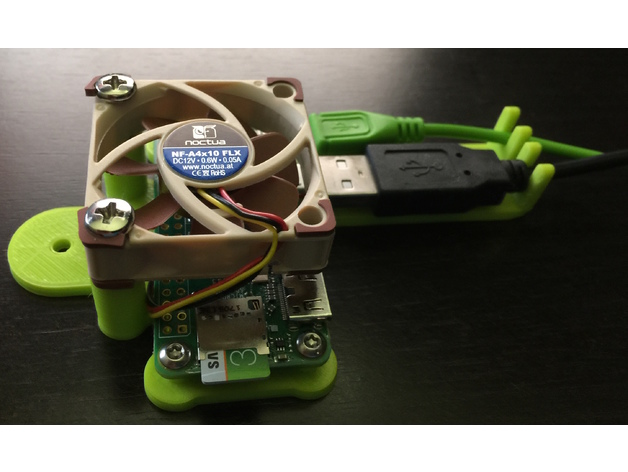
Raspberry Pi Zero wall mount bracket 3D Print Model
Summary
Due to a lack of space, I needed a way to mount raspberry pi zero on the wall. Hope you’ll find it useful for your project(s).
DC Fan dimensions: 40mm x 40mm. -
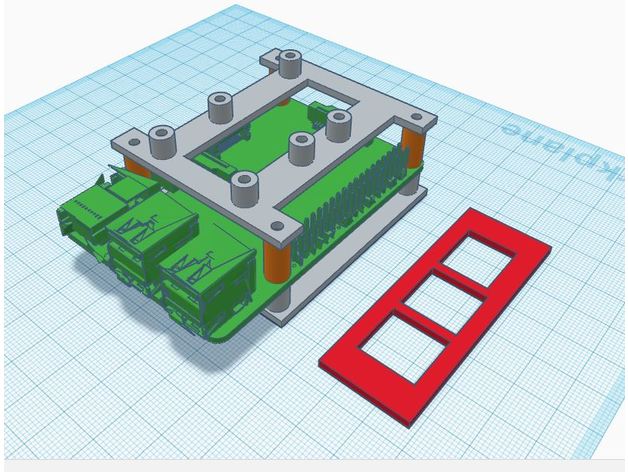
CR-10 Raspberry Pi Integration 3D Print Model
Summary
I integrated a raspberry pi inside of the CR-10 electronics case.
Instructions
Cut a 54mm x 20mm hole 11mm from the top and 40mm from the back of the case.
Epoxy pi mount in place. I don’t have measurements of where the mount should be placed as I kind of winged it by attaching the pi to the mount and then placing it where it needed to be.
Epoxy the IO cover to the outside of the case.
Note: The raspberry pi is placed directly over the cable tie mount. The mount will still be usable after installation the wires will just have to be run under the pi.
In addition to the raspberry pi mount there is a mount for a single channel relay and a LM2596 DC-DC adapter with spacers to mount it above the raspberry pi.
Note: If you just want to integrate the raspberry pi and power it with independently the power supply cable can be put through the existing cable grommet.
The pi is powered from the 12V power supply using the LM2596 and using the relay to toggle power to the CR-10 main board. The rear exhaust fan was, replaced with a quieter fan, and rewired to be powered on independently of the main board so that it runs as long as the power supply is switched on. The front fan still powers on with the main board.
I have had this setup install for about 2 weeks now and the printer has been running pretty much non stop since and I have had no issues.
Next time I open the case I will take some pictures of the inside.
Links to parts used.
LM2596:https://www.amazon.com/RioRand-LM2596-Converter-1-23V-30V-1Pcs-LM2596/dp/B008BHAOQO
Single channel relay:https://www.amazon.com/Tolako-Arduino-Indicator-Channel-Official/dp/B00VRUAHLE
Rear fan replacementhttps://www.amazon.com/Noctua-Cooling-Blades-Bearing-NF-A4x10/dp/B009NQLT0M
As for screws: I used the screws that held the old thicker exhaust fan to mount everything as they were the perfect length. To mount the new fan I used some M3x12mm screws that I had around. -
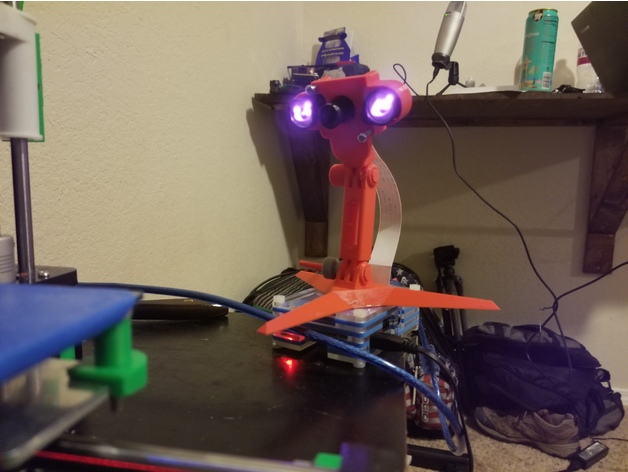
Raspberry Pi Night Vision Camera mount with Modular Mounting System attachment. 3D Print Model
Summary
I created this remix in order to mount my night vision Raspberry Pi camera onto the Modular Mounting system that I had previously printed.
The rest of the camera case can be found here: https://www.thingiverse.com/thing:1889356
The Modular Mounting System that it attaches to can be found here: https://www.thingiverse.com/thing:2194278
Print Settings
Printer:
Anet A8 Rafts:
Doesn’t Matter Supports:
No Resolution:
.2 Infill:
10% -
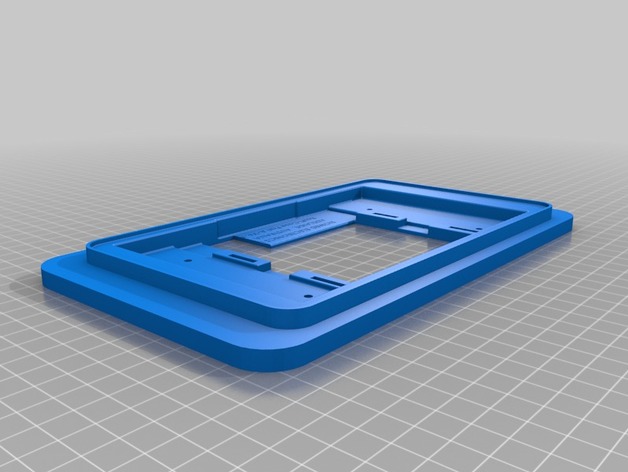
Raspberry PI with Screen adapter for InMoov back 3D Print Model
Summary
This is an adapter based on https://www.thingiverse.com/thing:1384316 that will hold the ras pi with the 7″ touchscreen in the back of the InMoov. -
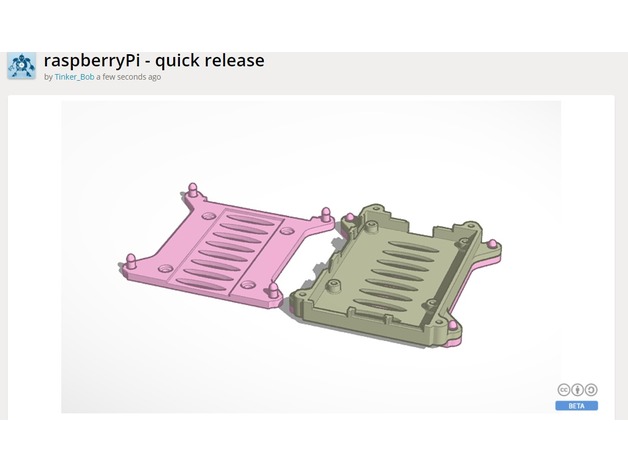
Quick release for Raspberry Pi Case 3D Print Model
Summary
This is a quick release mount for the case https://www.thingiverse.com/thing:922740
Wanted to be able to quickly take my Pi out of my printing cabinet when I need it for another project.
Print with high infill to make the pegs stronger.
Post print: push each peg through a hole a few times to clean up any residue. This will make it easier to put all 4 pegs on at once (IE they won’t break when you try to remove).
This is set up with my printers tolerances so it may be a bad fit for your case. You can edit the peg sizes here: https://www.tinkercad.com/things/l91VsItmHf9-raspberrypi-quick-release -
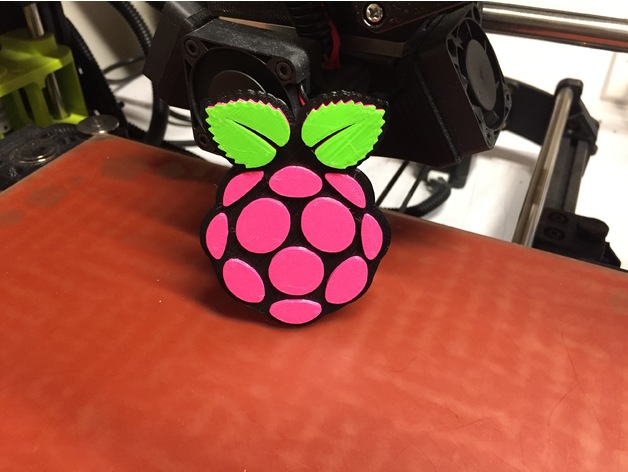
Raspberry Pi Logo 3D Print Model
Summary
I wanted a nice Raspberry Pi logo I could print in full color (3 colors) using a single extruder and filament swapping.
In the model each layer is 1mm thick though for the photo above in Cura I scaled the Z axis so that each layer was 2mm thick.
I’m happy with how it came out.
How I Designed This
I found an SVG for the Raspberry Pi logo, loaded it in inkscape, exported to DWF so SketchUp could ingest it and exported is as an STL -
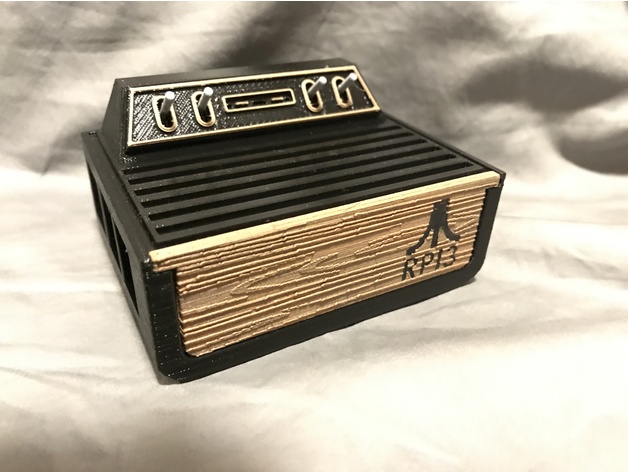
REMIX RPI3 2600 WOODGRAIN (Raspberry Pi 3 Atari 2600 Case) 3D Print Model
Summary
Had to make the bad ass design from Haunt Freaks https://www.thingiverse.com/thing:2269086
Even more bad ass by added a woodgrain front plate for a more Authentic look
Print Settings
Printer:
DREMEL Rafts:
No Supports:
Doesn’t Matter Resolution:
.15mm Infill:
15% Notes:
Print the Front piece vertical for best result i used matchbox wood fill so i could stain to a color of my choice. -
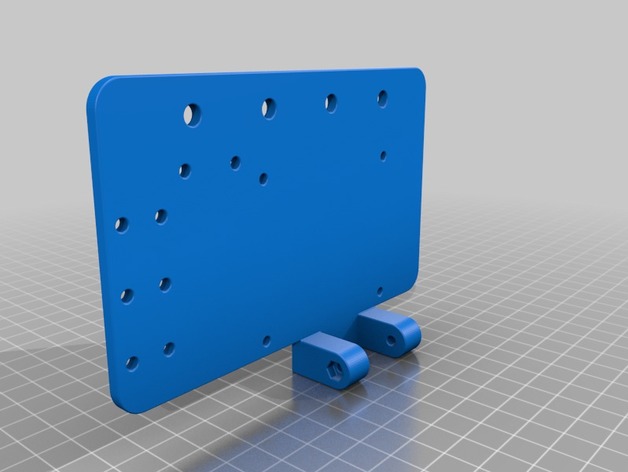
Raspberry Pi Holder Folgertech FT-5 Pi Cam 2020 Frame Octoprint 3D Print Model
Summary
Raspberry Pi Holder for Folgertech FT-5 with Pi Cam.
For 2020 Alu Profile, Octoprint.
With place for 12V to 5V Step Down and and holes for cable managment. -
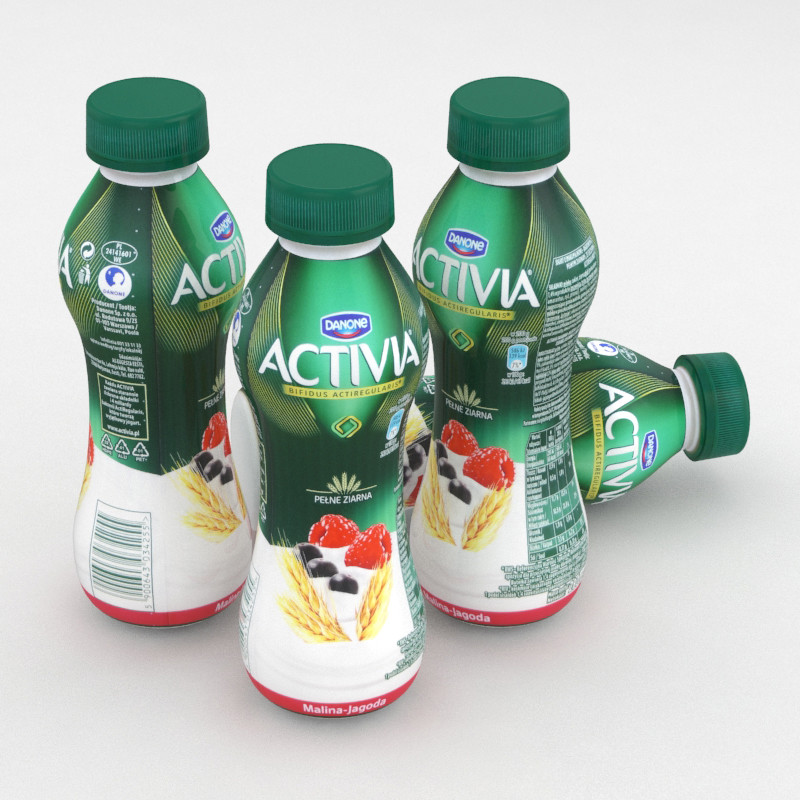
Dairy Bottle Danone Activia Raspberry Blueberry 300g 3D model 3D Model
Dairy Bottle Danone Activia Raspberry Blueberry 300gDetailed enough to be good looking, but also 3D model light enough to be useful.High fidelity texture.Real Dimensions.Bought in 2017.
-
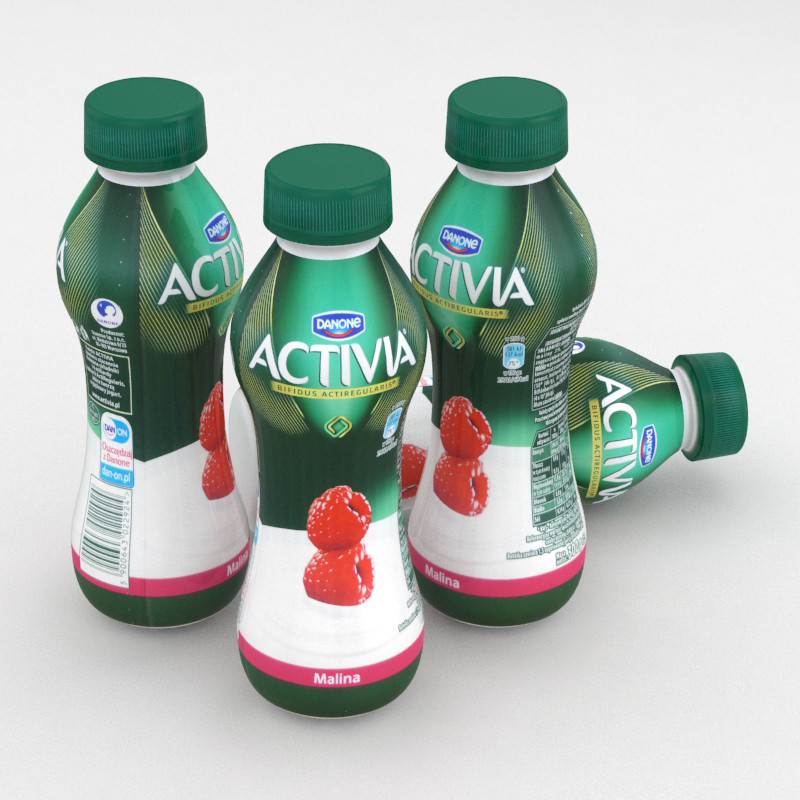
Dairy Bottle Danone Activia Raspberry 300g 3D Model
Dairy Bottle Danone Activia Raspberry 300gDetailed enough to be good looking, but also 3D model light enough to be useful.High fidelity texture.Real Dimensions.Bought in 2017.
-
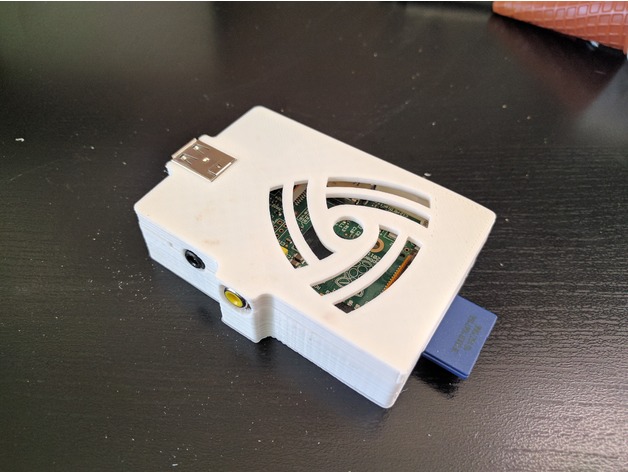
Raspberry Pi 1B Case – no screws 3D Print Model
Summary
Remixed from 0110-M-P’s excellent original design. I was going for style more than functionality, and removed the addtional port openings and screw holes. It’s designed to snap together, but probably isn’t sturdy enough to just toss in a bag and still stay connected.
Second photo shows a comparison between 0110-M-P’s original design on the left, and my remix on the right.
TinkerCAD links, in case anyone wants to see my atrocious editing job (might be useful for extracting the “logo” for your own design):
Top: https://www.tinkercad.com/things/9NS4N4xiAHE
Bottom: https://www.tinkercad.com/things/9ZxpVprNRZ3
Print Settings
Printer Brand:
SeeMeCNC Printer:
Rostock MAX v2 Rafts:
No Supports:
No Resolution:
.1 Infill:
20% -

Fruit in Bowl 3D Model
Fruit in BowlScene has 38,445 polygons.Preview images are rendered in Cycles Renderer.Models has subdividable topology.No third-party plug-ins used.Textures Resolution 4096 x 4096 pixels. Red Apple – 590 polygonsStrawberry – 1,132 polygonsLime – 544 polygonsBanana – 488 polygonsMango – 272 polygonsNectarine – 256 polygonsGrapefruit – 488 polygonsLemon – 864 polygonsLemon Halves – 1,176 polygonsLemon Slice – 360 polygonsPineapple – 10,007 polygonsBlueberry – 868 polygonsTangerine – 368 polygonsPear – 382 polygonsRaspberry – 4,800 polygonsPapaya – 336 polygonsKiwi – 256 polygonsAvocado – 352 polygonsOrange – 698 polygonsOrange Halves – 962 polygons
-
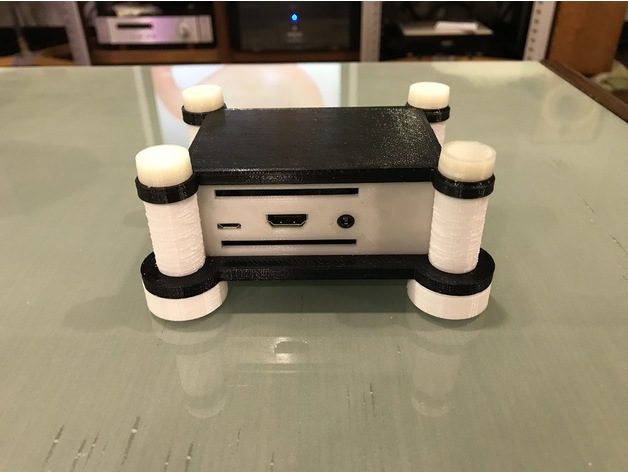
Raspberry Pi 3 model B case
Summary
I use Raspberry Pi as my digital audio player. So I like Raspberry Pi has a Hi-End audio machine look case.
It is easy to assembly, just look pictures you will know how to.
Note: you need prepare 8 pcs M3 screw for top and bottom cover.
Print pillar.stl 3 pcs + pillarUSB.stl 1 pcs; pillarUSB.stl must fix to USB connector side.
Print top-cap1.stl, top-cap2.stl *4 pcs
Others print 1 pcs.
Print Settings
Printer Brand:
RepRap Printer:
RepRap Ord Bot Hadron Rafts:
No Supports:
No Resolution:
0.1mm Infill:
30%
Post-Printing -
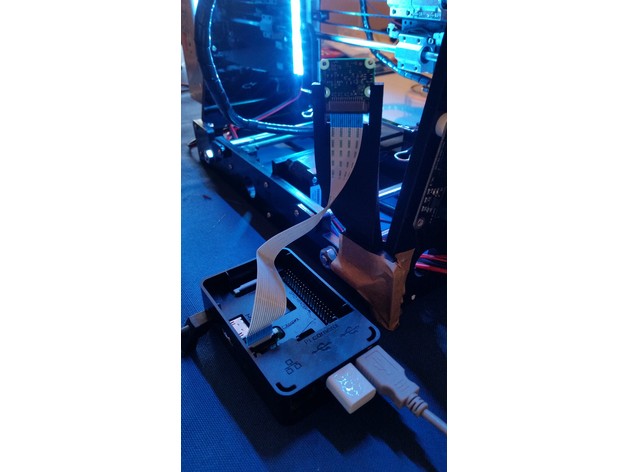
Raspberry Pi Camera 1.3 holder for Anet A8 (or any 3D printer with 8mm frame)
Summary
Simple one piece holder for Raspberry Pi Camera 1.3, i made this for the Anet A8 but as long your 3Dprinter frame is 8mm and you have clearance, it should be compatible.
Can be printed without supports.
Print Settings
Printer Brand:
Prusa Printer:
Prusa Clone Rafts:
No Supports:
No Resolution:
0.2 Infill:
10-20%