Summary
What to print:
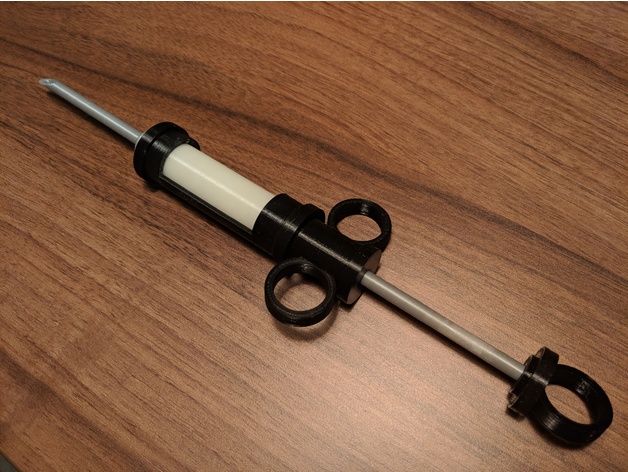
You need the “Body-Ring” three times. Every other part is only needed once.
How to assemble:
Glue 2 of the 3 body-rings onto the “handle-holder” part.
The remaining ring is glued onto the “plunger-cap”
Screw the handle-holder and the fluid onto the body. Both go in thread first.
Put the Body-Ring onto the fluid.
Screw the needleside-cap and the needle onto the fluid.
Pull the plungerside-cap over the plunger, thread first.
Screw the plunger into the plunger-cap
Push the plunger-assembly into the syringe and screw it onto the handle-holder.
Et voilà
You could print the Body and Body-Ring as one object, if you used support material.
Print Settings
Printer Brand:
Prusa
Printer:
i3 MK2S
Rafts:
Doesn’t Matter
Supports:
No
Resolution:
0,2mm
Infill:
30-40%
Notes:
You might need to adjust the clearances. I added the Fusion360-project for that.