Summary
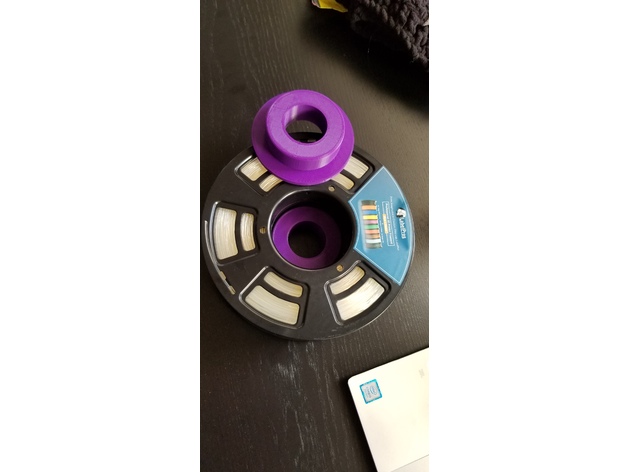
Filament Holder for 56mm Hole with 605Z Bearing
Layer high 0,2mm
Print Settings
Printer:
CR10S
Rafts:
No
Supports:
Yes
Infill:
15%
Tag: Filament
-
Filament Holder 56mm with Bearing 608Z 3D Print Model
-
MasterSpool Filament 608ZZ/Roller – Extended 3D Print Model
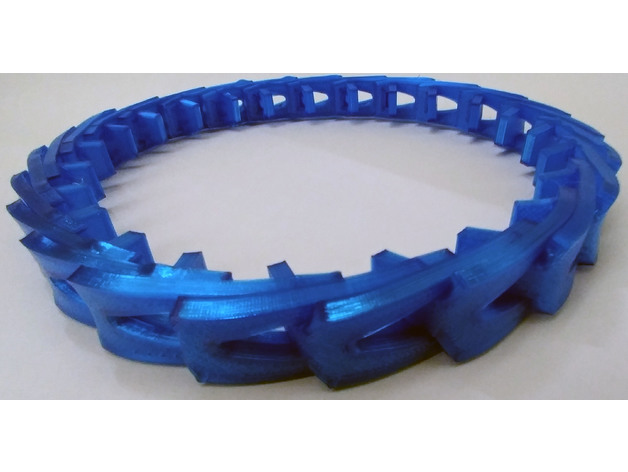
Summary
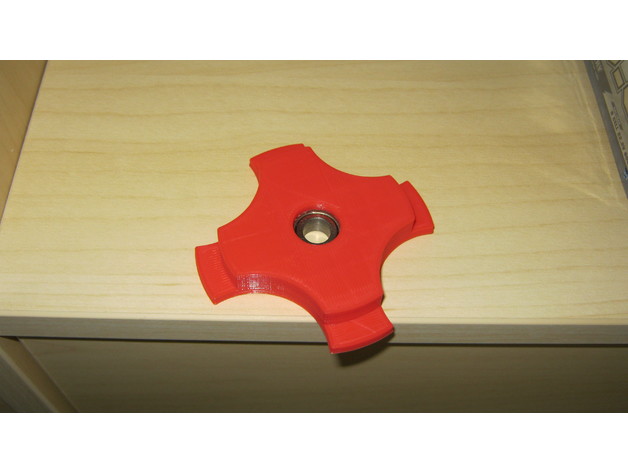
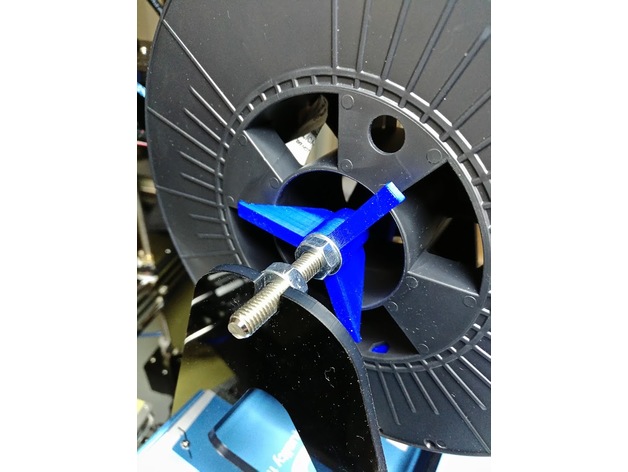
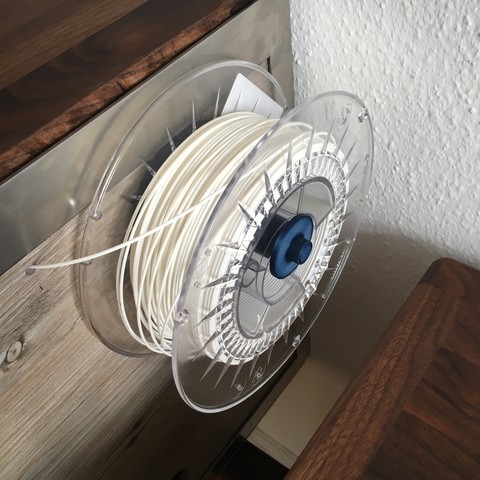
Remix of https://www.thingiverse.com/thing:2835600 – adds additional support arms to increase rigidity. It’s also very slightly taller. I also reduced the size of the hole for the 608zz bearing as I found the original wasn’t quite tight enough. Note that when printed with PLA, I had to gently hammer the bearings in with a rubber mallet.
These are 206mm diameter.
Print Settings
Printer Brand:
Prusa
Printer:
i3 MK2S
Supports:
No
Resolution:
0.2
Infill:
10-15% -
Lack Filament Sensor 3D Print Model
Summary
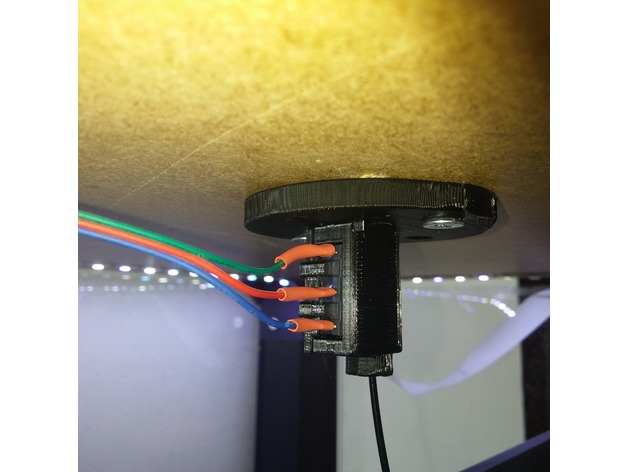
This is a microswitch filament sensor mount I’ve made for the IKEA Lack enclosure.
It takes 1 KW-12 switch.
Print Settings
Printer Brand:
Prusa
Printer:
i3 MK2S
Resolution:
0.2
Infill:
20
Notes:
Support on build plate only.
The lid snap isn’t perfect at 0.20 layer height. It hasn’t fallen off for me yet but you can try a higher resolution if you like.
Post-PrintingSwitch preparation
The switch lever should be slightly bent to an “S” shape as shown above. The first bend is done to insure the filament engages the switch. The bend at the tip is done to prevent the metal lever from snagging on the filament when you pull it back to the spool.
If you solder the leads you should do it before you insert the switch to the housing. The housing is also designed to allow open barrel terminals but I haven’t tried it yet.
The switch only goes into the housing with the lever pressed against the switch body. It should spring back into place once the switch is seated all the way in. If the lever stays pressed (meaning the switch is engaged and activated) you’ve probably bent the lever a bit too far up. -
Hygropeter (ThermoPro TP-50) mount for Filament storage box 3D Print Model
Summary
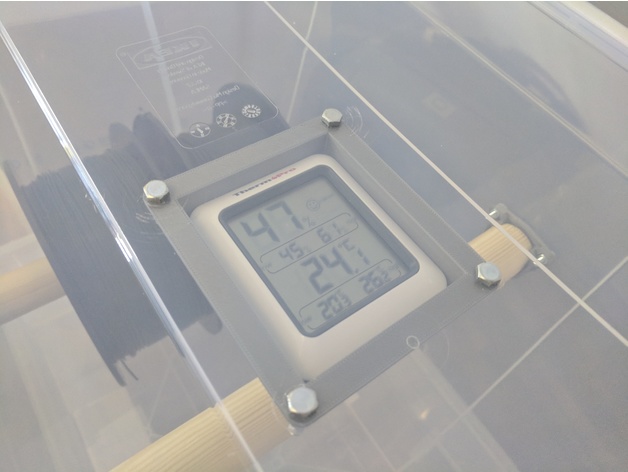
Mount for one of the most common Thermo- / Hygrometers on Amazon.
Mounting holes mad for M5.
Battery compartment still accessible after mounting.
ThermoPro TP50 on Amazon: https://amzn.to/2s1PSuA
Print Settings
Printer Brand:
Prusa
Printer:
i3 MK3
Rafts:
No
Supports:
Yes
Resolution:
2mm
Infill:
20% -
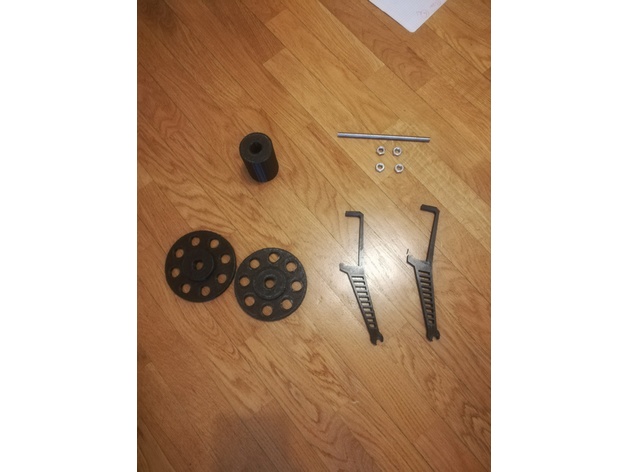
Filament Spool axis adapter 3D Print Model
Summary
Filament spool adapter for M8 type axis.
The part is optimized, it consume only 2m of 1.75 filament.
The adapters must be tight against the spool using the nuts and washers on the shaft. The axis rotates with the roller on the support.
The Solidworks file is provided to enable customization.
Print Settings
Printer:
ANET A8
Rafts:
No
Supports:
No
Resolution:
0.2mm
Infill:
20%
Notes:
Consumed: 1910mm of 1.75 PLA
Print time: 20 min -
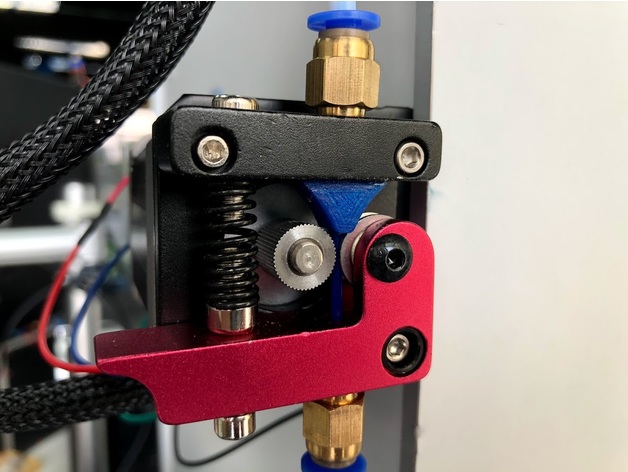
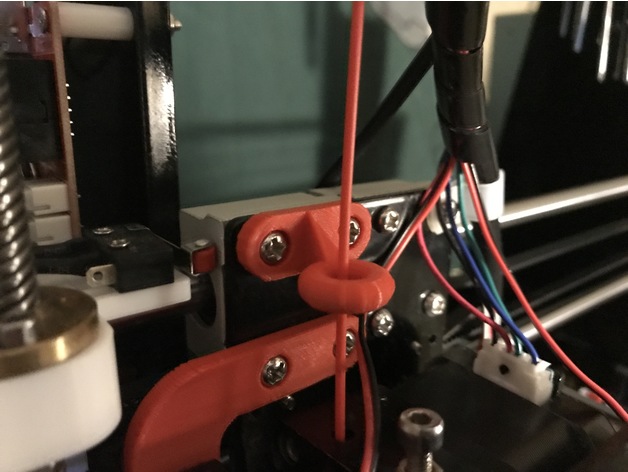
filament gate-in 3D Print Model
Summary
hello friend.. this is my first project uploaded to Thingiverse..
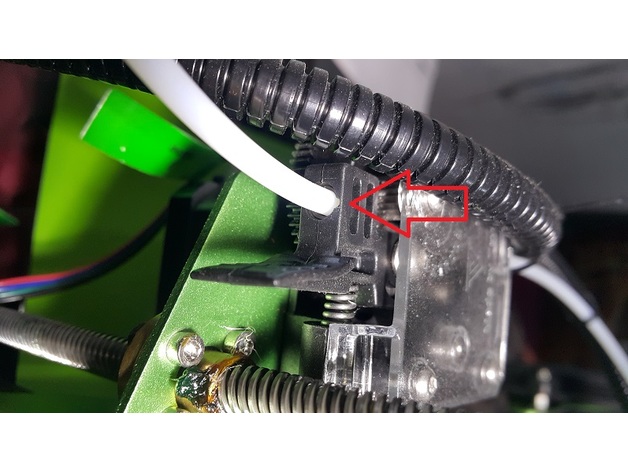
actually it’s a filament guide attached to superior 2020 frame..
i make it because suddenly after printing 1 roll of filament then i noticed a rub mark on the extruder gate-in..
for simple solution, you can cut PTFE about 5-10cm and attached it on extruder gate-in, but i think, it’s better if i leave it just like stock, maybe i need it someday..
Print Settings
Printer Brand:
TEVO
Printer:
Tornado
Rafts:
No
Supports:
No
Resolution:
0.2
Infill:
25
Notes:
i use temp around 200-220 C
speed 50mm/s (60% speed for outline perimeter)
How I Designed This
i use AutoCAD to draw design and use “stlout” menu to convert object.
slicer use was a S3D, set without any raft & support.Materials Needed
Requirements
you can use any filament include ABS, PLA and PLA+
spare PTFE tube
drill bit 2.5, 4 and 5 mm
tap bit M5x0.7
screw 5×10 mm
allen screw M3 & M4
attention
you have to disassembly superior 2020 frame before tapping it by M5x0.7. don.t worry if you make mistake when tapping, 2020 frame has 2 ends.
you have to drilling all holes to make it fit perfectly. size 2.5 for filament’s hole, 4mm for PTFE’s hole and 5mm for screw’s hole. -
2020 Extrusion Filament Spool Holder 3D Print Model
Summary
Wanted an easy to print, beefy, spool holder for my Folgertech FT-5. This is it. Should work with any 2020 extrusion. -
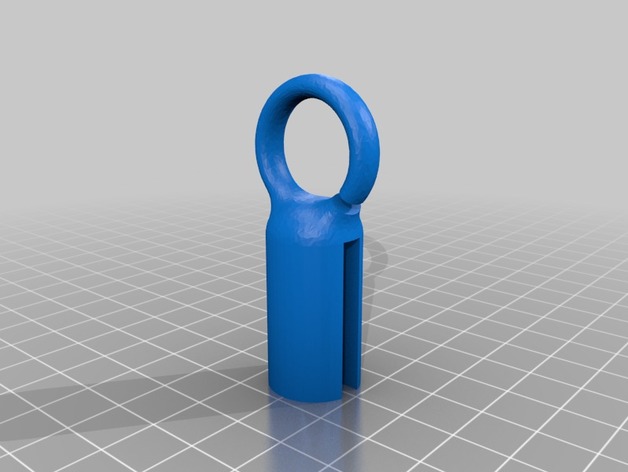
Robo3D R1 Filament guide 3D Print Model
Summary
Use this guide to install at the top of the printers cut-out hole.
Twist to lock it in place.
Take 6-8 inches 4mm PTFE tubing and insert thru the hole so that filament is fed from below and exits at the top.
Then, pull the filament into extruder.
This will cause PTFE tube to BOW and prevent filament to stap or grind against the printer when printing high objects or generally dealing with allot of LEFT to RIGHT motion.
Spool should be attached on the side of the printer. -
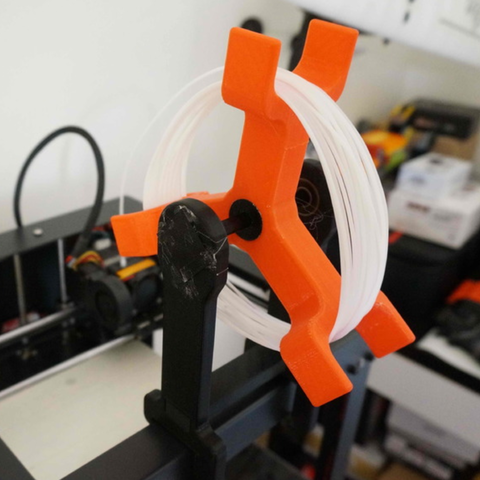
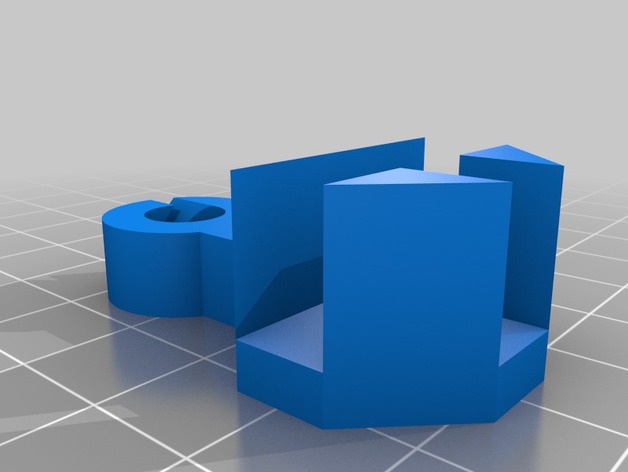
ANET A8 Small Filament Holder 3D Print Model
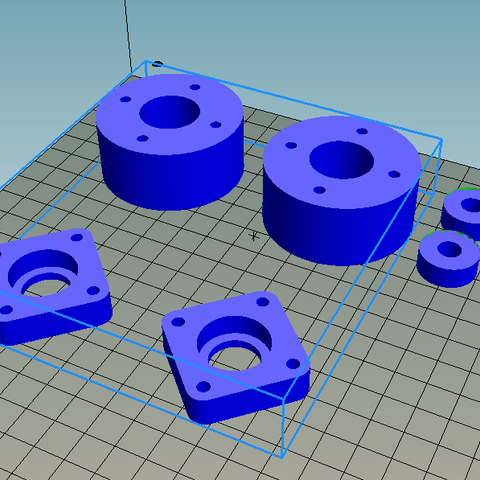
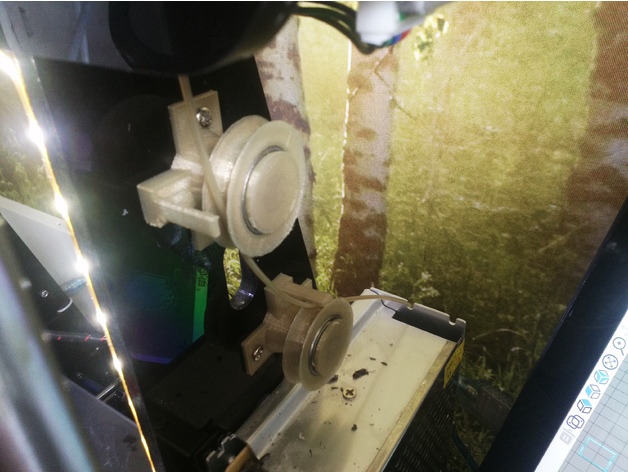
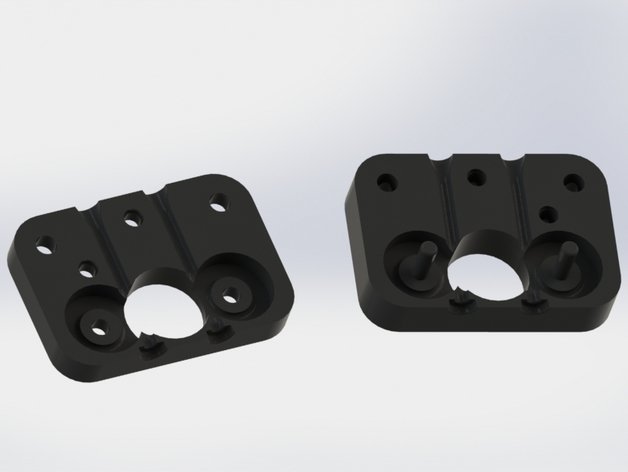
Summary
The project is a filament holder that attaches to the existing ANET A8 filament holder.
This was inspired by filamentry’s excellent design, TUSH The Ultimate Spool Holder, at https://www.thingiverse.com/thing:2047554, where the filament spool rests on 608 bearings. However the print time for the TUSH was a little longer than I wanted (I’m impatient). Therefore, taking the idea of a bearing filament holder, this design slims it down to just the essentials. It assumes you already have the filament holder provided with the ANET A8. These small holders simply slide onto the existing ANET A8 holder.
The file contains the design for half a holder. You will need two ‘halves’ for each ‘corner’ of the spool, and since there are four corners you’ll need to print eight ‘halves’ total. Glue two halves together with a 608ZZ bearing in between to make one holder. Make four holders total.
I based the design off of my own measurements of the 608ZZ bearings, ANET A8 spool holder, and the spool of filament in my possession. I know there have been some tolerance tweaks to theTUSH, but I haven’t cross-checked the measurements in this design with the TUSH…so your mileage may vary.
If you have the time, print a TUSH. If you’re in a hurry and already have the ANET A8 spool holder, perhaps this is the holder you seek.
Print Settings
Printer Brand:
Prusa
Printer:
Prusa Clone
Rafts:
No
Supports:
No
Resolution:
0.1mm
Infill:
20 %
Notes:
Although the thumbnail depicts the part standing up, I printing it lying flat.
Printed on an out of the box ANET A8, using Cura as the slicer.
Materiel: PLA
Extruder temp: 190 degrees
Bed temp: 50 degrees. Using glass and AquaNet on top of the heated bed
Print Speed: 50 mm/sec print speed. 100% flow rate
Fan Speed: 100%
Print Time: approx 40 minutes for one, about 1hr+15min to print a pair at the same time
Post-PrintingFilament on top of filament holders
half of a holder
half of the holder with 608ZZ bearing inserted
How I Designed This
designed using Fusion 360 -
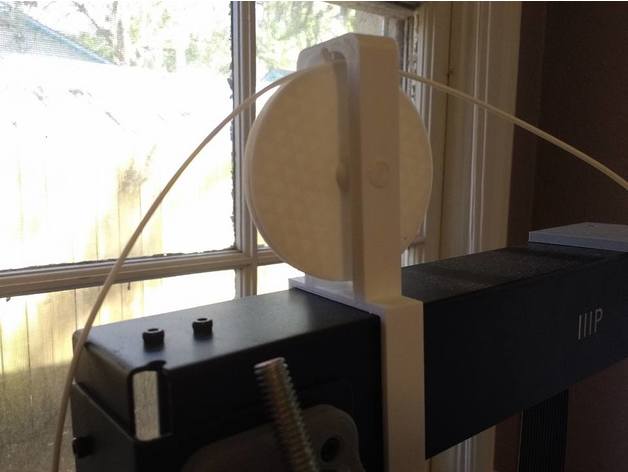
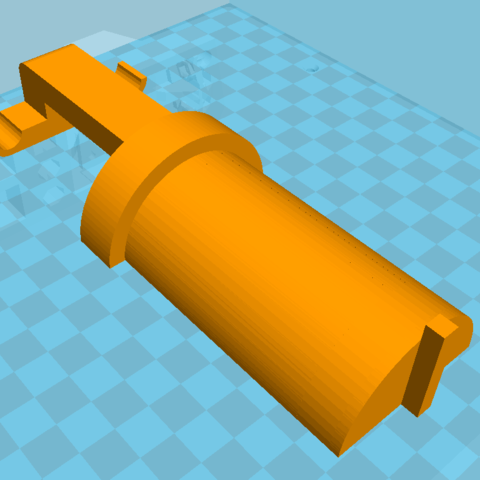
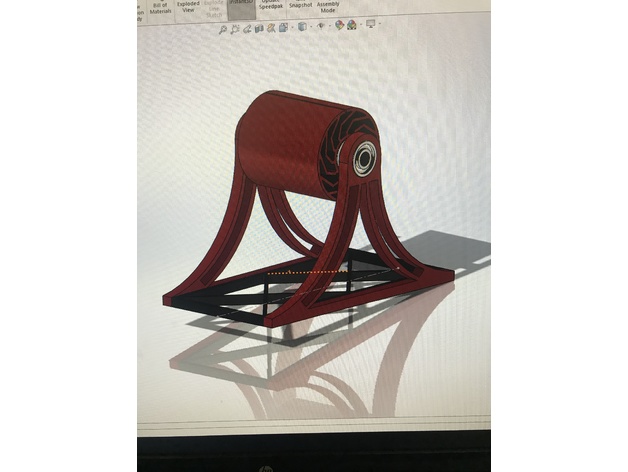
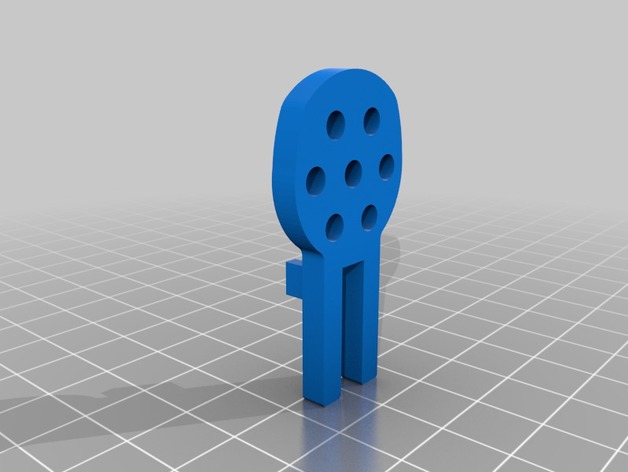
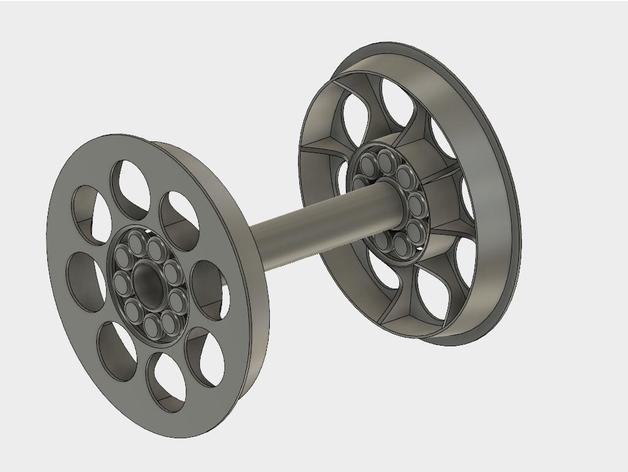
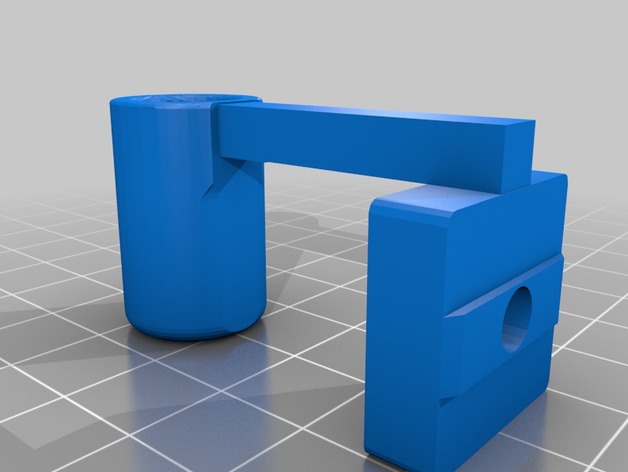
Filament Guide Wheel for Wanhao i3 Plus 3D Print Model
Summary
I designed this because I wanted my spool to sit beside my printer rather than on top, but I needed an elegant way for the filament to go up and back down over the top of the frame. This is the problem this wheel is meant to solve.
It’s designed to not need any glue. Just print the wheel, the frame, and the axle and assemble. Depending on your printer’s tolerances, you may need to sand the axle for the smoothest rotation.
Print Settings
Printer Brand:
Wanhao
Printer:
Wanhao Duplicator i3 Plus
Rafts:
Doesn’t Matter
Supports:
No
Resolution:
0.2
Infill:
wheel/frame:30%, axle:60%
Notes:
Use 3 or more lines for the axle. Print with a brim vertically. You don’t have to take the brim off to use it as an axle either, it’ll just butt up against the side of the frame.
You have two options to print the wheel. You can print the wheel as a whole piece with an extension on each side (with support) or you can print just the wheel and two washers separately. -
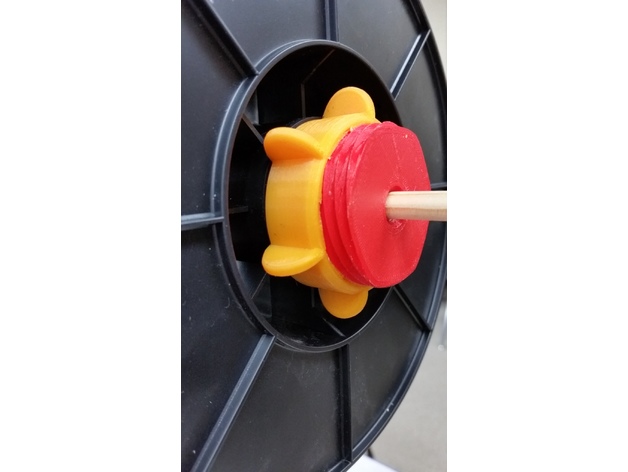
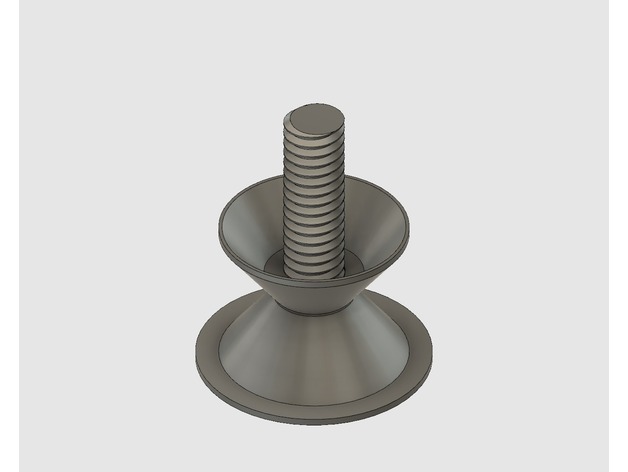
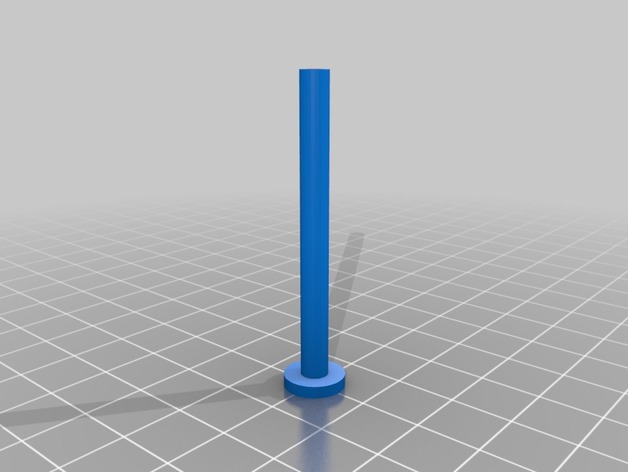
filament reel mounting screw 3D Print Model
Summary
So, this is my solution for quickly mounting filament reels.
The center bore is for a 3/8ths inch wooden dowel rod, about 40¢ at Michaels Hobby Store.
Total filament cost is about $1.25 when using $15/kg
Scale: 94 percent
Infill: 20 percent (100% for the pink nut)
Shell Thickness: 1.6mm
Resolution: 0.2mm
Rafts: None
Supports: None
Print Settings
Printer Brand:
Prusa
Printer:
i3 MK2S
Rafts:
No
Supports:
No
Resolution:
0.2mm
Infill:
20% -
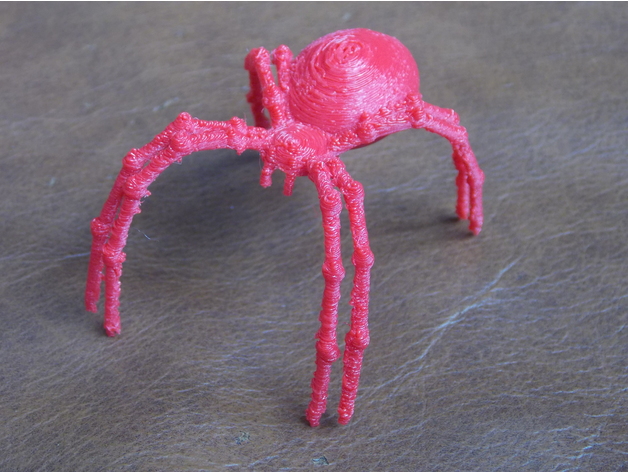
Filament Guide Spider 3D Print Model
Summary
So! Another filament guide to keep my line from getting tangled, and to look kinda cool, like he’s spinning webs for The Machine… He sits on my Y-Axis motor, on a clip that grips the stepper.
(Zip-tied on for now, pending gluing onto the clip…)
Print Settings
Printer:
FLSUN Prusa i3
Rafts:
Yes
Supports:
Yes
Resolution:
0.1mm
Infill:
10% rectilinear
Notes:
Printed in PETG, a challenging print, with the legs being 1.5mm in diameter. I couldn’t have been able to get this resolution and such small diameters printed successfully before I calibrated my E-steps/mm and my extrusion multiplier (with the _40x10.stl ), and these YouTube videos;https://www.youtube.com/watch?v=w_Wb0i0-Qvo,https://www.youtube.com/watch?v=cnjE5udkNEA&t=298s
Got the idea to print upside down from woodk, https://www.thingiverse.com/thing:1619849 -
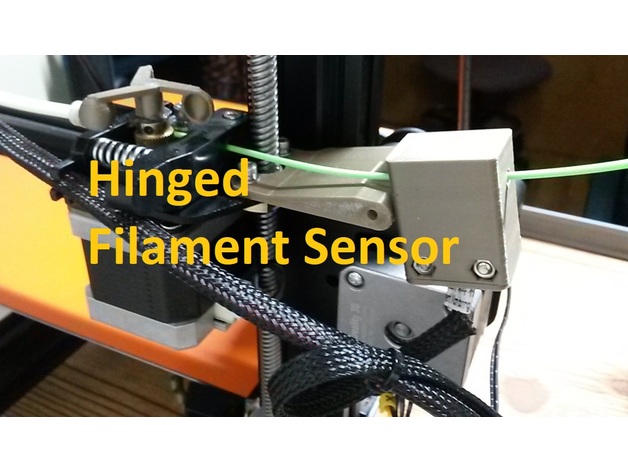
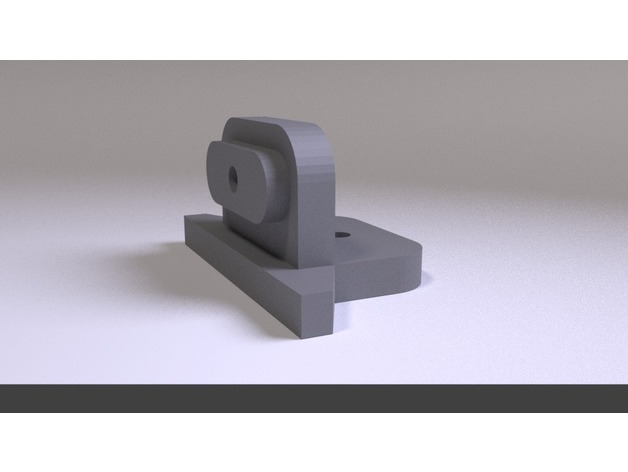
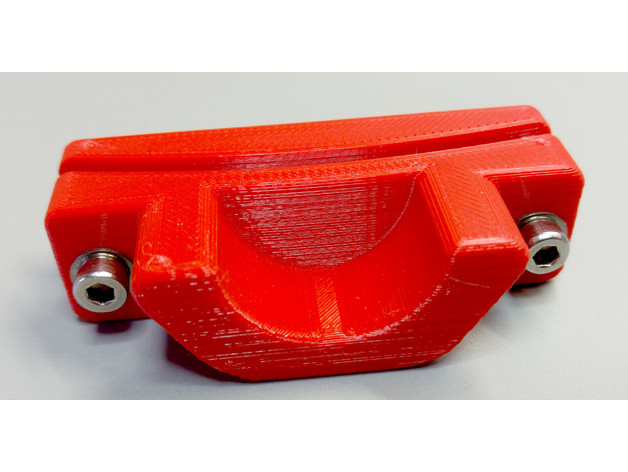
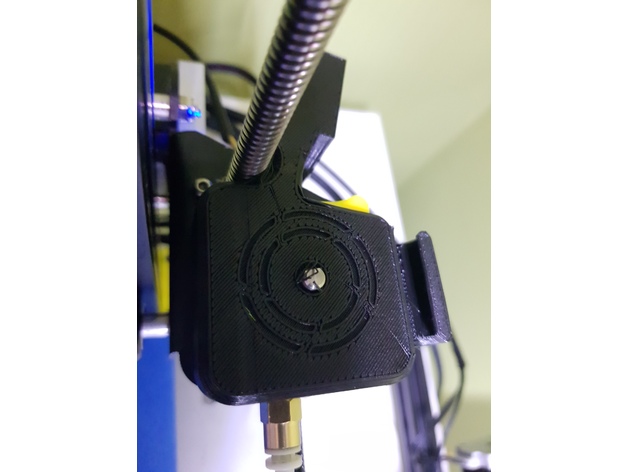
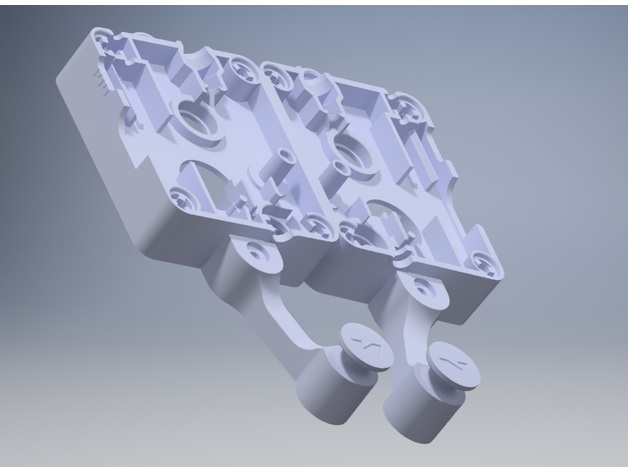
CR-10S Hinged Filament Sensor Mount (Bottom Plug) 3D Print Model
Summary
CR-10S Hinged Filament Sensor Mount (Front Plug)https://www.thingiverse.com/thing:2791872
CR-10S Hinged Filament Sensor Mount (Bottom Plug)https://www.thingiverse.com/thing:2826099
Lets be honest. The filament runout sensor is a great addition to the Creality CR-10S, but the factory slide-on mount that Creality supplies sucks. I download and printed several other designs from here and just wasn’t happy with the alignment or functionally of them, so I designed my own.
I wanted the filament to be feed straight thru with enough room inbetween to manage any kinks or wobbles in the filament with your hands. I also wanted a better way to reduce friction thru it when near Z=0 and Z = 200+ as the filament is drug thru the horizontal position of the sensor first which is dependent on the way you install the roll (over the top or under). Thats when putting a hinge inbetween seemed like the perfect solution as I run a TUSH spool holder with the extruder feed off the bottom of the spool. I designed this Hinged Filament Sensor Mount so it can be bolted onto the Z-axis brass lead screw nut using factory hardware, then the mount is stabilized to the Z column roller mount right at the hinge. I also designed it so you could run the sensor fully enclosed or with the printed cap to keep crud out. You will need (2) M3X20 screws with (2) M3 hex nuts. Hinge is printed in place.
Please note that after printing you will need to carefully twist the built-in support material off in the same direction as the pivoting hinge. If you use flush cutter on the support material, you may end up splitting the mount in half. The hinge for this design requires a M3 x 30mm LG screw and a M3 Nut as I couldn’t model it assemblied without alot of wasted support material.
The sensor I designed this around can be purchased here:https://macewen3d.com/products/cr-10-cr-10-s4-and-s5-replacement-endstop-limit-switch
Which is the same as the factory Creality CR-10S filament runout sensor or Axis stop sensors. My machine actually came with a spare, which made designing/refining it pretty easy.
Some people didn’t like my previous version of this mount since the plug for the sensor was in front, so I remixed it so the plug is now facing downward. -
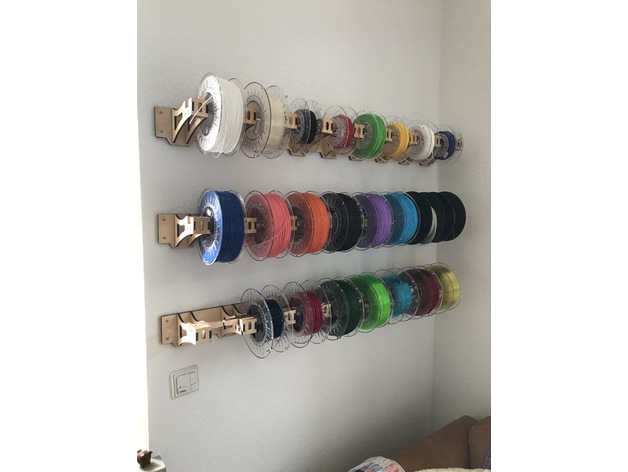
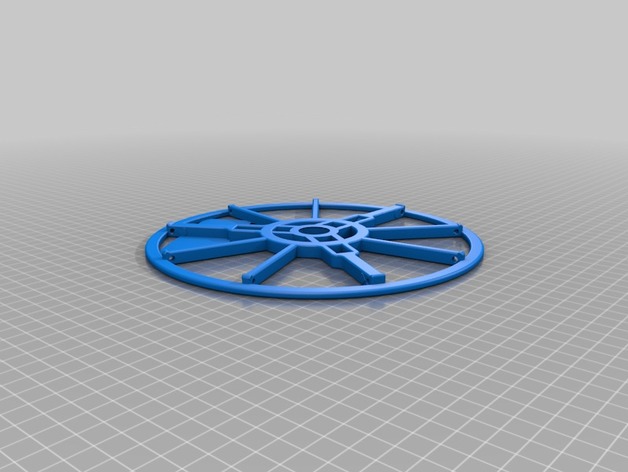
Laser cut Filament Rack 3D Print Model
Summary
This spool holder was designed in Fusion 360. It is made to hold 8x 20cm diameter spools. Plywood should be 6mm thick for optimal fit! -
Filament holder extension 3D Print Model
Summary
Just an easy extension for the existing filament holder of the Ender 2. The fialment spool width could now be around 100mm thick. Print and screw it on.
Print Settings
Printer:
Ender 2
Rafts:
No
Supports:
No
Resolution:
0.1
Notes:
Wall 5x should be great. Layer high only 0.1
Fit to the existing filament holder. Nothing to change. Printed with PLA black. Be sure your dimension settings from the printer are correct. -
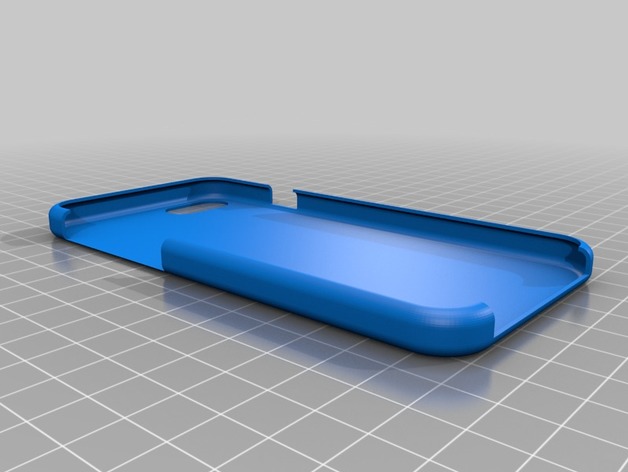
iphone 7 Case for Flexible Filament 3D Print Model
Summary
I designed this case to work with flexible filament. When I had printed other snap cases for my iphone 7, I printed with normal PLA filament. However, if I ever dropped my phone the material would snap off or crack.
When I tried printing the same design using a flexible filament, the fit was off.
I therefore designed this with dimensions for printing with flexible filaments.
Print Settings
Printer:
Raise 3D N2
Rafts:
No
Supports:
No
Resolution:
0.2
Infill:
20%Post-Printing
None -
Horizontal filament spool holder 3D Print Model
Summary
This is a two-piece filament spool holder that requires a 6002 bearing. It is mainly intended to be installed on top of a delta printer that has a ‘roof’ with a mount for the bearing, feel free to attempt other ways to install.
Print Settings
Printer:
Kossel XL
Rafts:
Doesn’t Matter
Supports:
Doesn’t Matter
Resolution:
up to 0.32mm layers with 0.4mm nozzle
Infill:
10% or more
Notes:
The bearing hole is a tight 32mm, so a well tuned printer and extrusion is needed and still the fit is tight. -
Better Filament Holder for Prusa i3 3D Print Model
Summary
this is a better filament holder for your Prusa machine.
Print Settings
Printer Brand:
Prusa
Printer:
Prusa Mk2
Rafts:
Doesn’t Matter
Supports:
No
Resolution:
.25
Infill:
20-30% -

Filament Cooler Fan Shroud, Dual Side, E3D Chimera and Cyclops 3D Print Model
Summary
Dual side shroud designed for lightness, access, and easy installation on a E3D Chimera or Cyclops hotend.
Printed with PETG, standing on fan mount surface.
Print Settings
Printer:
Banana 3D 330 Rafts:
Yes Supports:
No Resolution:
<= 0.2 Infill:
70 to 100% Notes:
Instead of a raft, a brim may be used with good results.
Heater block “socks” provided by E3D with their chimera and cyclops extruders should be used to minimize heat loss from peripheral air flow. -
Anet Filament Spool Rack Bracket A8 / A2 3D Print Model
Summary
This bracket is designed for the Anet filament rack. The oval extrusion on the side of the bracket will fit snugly inside the oval cutout on the standard Anet filament rack. This was designed to mount on top of the Anet A2, however could be used for a wall or other type of mounting.
Print Settings
Printer Brand:
Prusa Printer:
Prusa Clone Rafts:
Doesn’t Matter Supports:
Yes Resolution:
.2 Infill:
28% or higher Notes:
1.6mm wall thickness -
Filament Spool Hub with Print In Place Bearings 3D Print Model
Summary
Hubs to hold your spool in typical 8mm spool holders with print-in-place roller bearings.
Print Settings
Printer Brand:
Prusa Printer:
Prusa Clone Supports:
No Resolution:
I used 0.2 with a 0.3mm nozzle Infill:
N/A Notes:
The two hubs should be printed with the “flat” side down. You may need to use a raft if you get a lot of “Elephant Foot” on your first layer. The prints I have made usually needed to have a few of the roller bearings broken free so everything turns freely. If you have trouble with the bearing sticking together, try lowering the extruder temp and/or reducing the filament flow rate a bit.
I included a cover for the M8 nuts typically used. For these, pause the print at 6.8mm and drop the nuts in, then let it finish.
Post-Printing
Assembly:
Press the hubs into the spool with the spacer between them on the threaded shaft. Snug up lightly with the knobs and place in holder. -
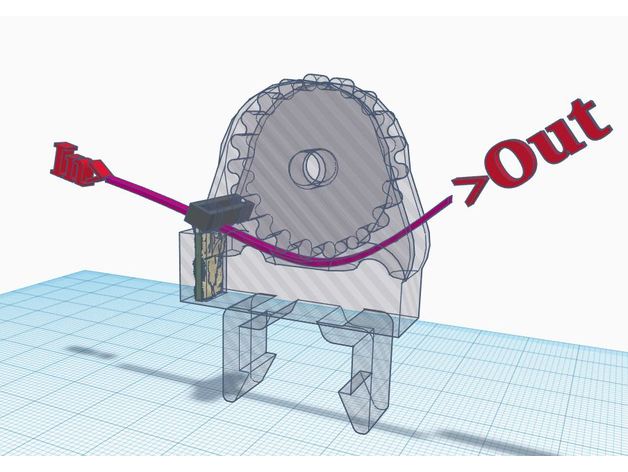
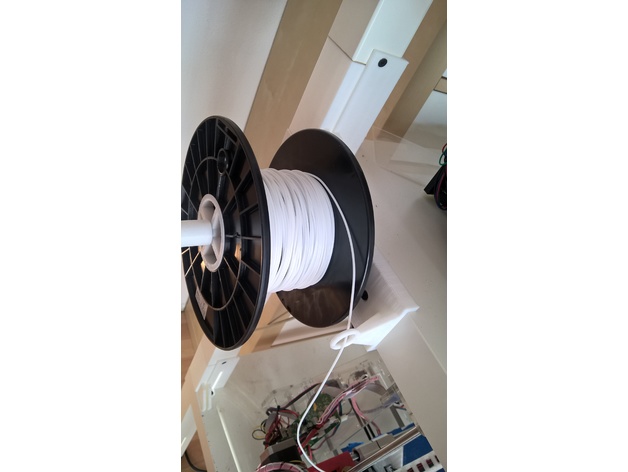
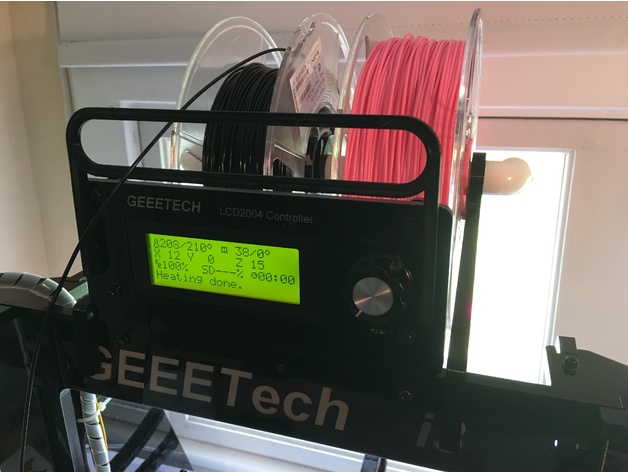
Filament dispenser box 3D Print Model
Summary
Introduction
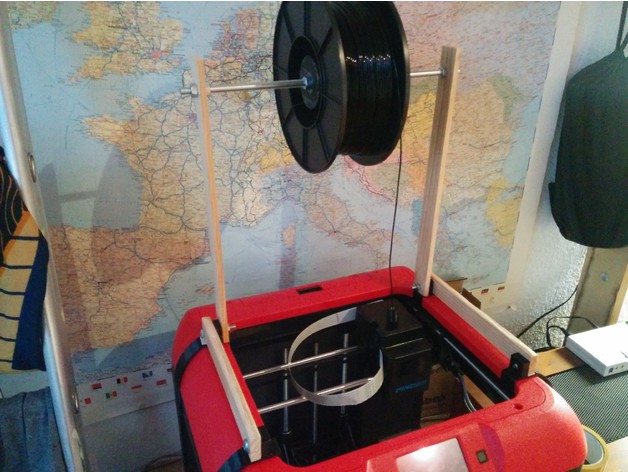
There are many filament spool holders available, with numerous geometries and types. However, all I tried so far worked with loose spools that I had to juggle around when switching filament. I wanted a simple system which serves as filament storage and allows easy access to the filament for use.
The idea as such is not new, there are similar designs available. This solution uses regular containers available at your local hardware store and a cheap plastic pipe. Additionally some pneumatic quick connectors, Teflon tube, M4 screws and zip ties are used.
My 3D printer is placed in an Ikea box with the filament dispensers on top. A feedthrough with an additional Teflon tube brings the filament inside. So far it’s been working great.
Required parts
Storage box (mine are approximately 370x270x270 mm)
Tube or similar (up to 25 mm diameter)
Pneumatic quick connectors + M5 nuts
Teflon tube
M4x20 screws + nuts
Zip ties (optional, to keep the spools in place)
Print Settings
Printer Brand:
Prusa Printer:
i3 MK2S Rafts:
No Supports:
No Resolution:
0.2 mm Infill:
20% Notes:
Printed in PETG, but PLA should also works just fine.
NOTE: The files must be rotated properly, NOT printed as shown. -

Light Bulb Free 3D Model
Light BulbLight Bulb 3D model ready for Virtual Reality (VR), Augmented Reality (AR), games, Postproduction, Photomanipulation and other real-time apps.Materials in 3DS Max & Sketchup included.Models already preloaded in lumion 6, just copy and paste on your computer or import it from the included scene.——————————Polygons: 119,264Vertices: 60,176—————————File formats:- 3dmax 2016 – Vray 3.40- OBJ- FBX- DAE- 3DS-Sketchup 2013-Lumion 6 (as “.x DirectX”)——————————-Enjoy!
-

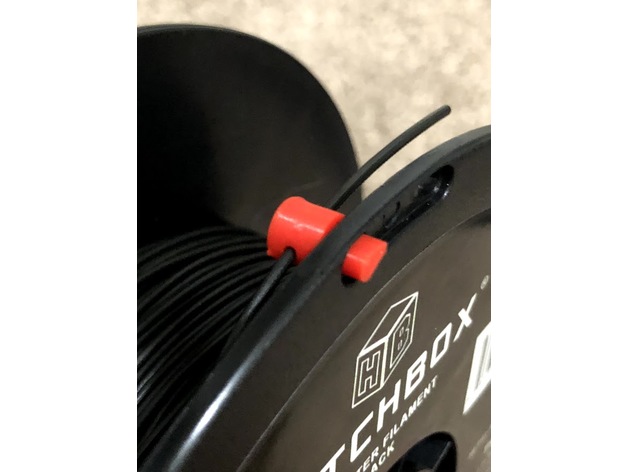
Filament roll retaining clip 3D Print Model
Summary
I designed these to hold 1.75mm filament to the edge of the reel to avoid bending the filament as when you use the holes on the edge of the reels. These are designed for the specific brand I use(3D spark) so they may not fit your particular reels. Try the single part first before printing the 12 x nest of parts,
I will also leave a STEP file so people can adjust the gap to fit their needs as they see fit.
I found that using 2 of they per reel worked best.
Print Settings
Printer:
tevo tarantula Rafts:
No Supports:
No Resolution:
0.2mm Infill:
20%
Post-Printing
If the hole is a little small, use a 2mm or 5/64″ drill to clean out the hole. -
TronXY X5 Snap On Filament Guide/Cleaner 3D Print Model
Summary
TronXY X5 Snap On Filament Guide/Cleaner
Cura File attached -
Hatchbox Filament Plug 3D Print Model
Summary
This plug was designed for Hatchbox 1.75 PLA may work with others.
I was using other “Clips” but they kept flying off so I designed this plug. It is pretty tight – so it has a better chance to not fall off. Note that not all holes in the reel are the same size. I found two on my test reel that are too small for the plug. If you can’t get it through the hole from the inside, insert it from the outside then try to insert it from the inside again.
Snip any melted/deformed filament from the end, insert the plug from the inside of the reel and thread the filament through the plug.
Print Settings
Printer:
Creality CR-10S Rafts:
Doesn’t Matter Supports:
No Infill:
100 -
Filament guide for Prusa Anet Geetech CTC printers 3D Print Model
Summary
This is my version of filament guide based on this one:https://www.thingiverse.com/thing:1240326
A larger pipe will keep more straight the filament at the end of the reel, when the loops are smaller.
Suitable for printers:
Prusa
Anet
Geetech
CTC printers
…and many models with a frame 5mm width.
Feel free to adapt the files to your needs.
Thank you so much for you comments, like, download and collecting!
Print Settings
Printer Brand:
Prusa Printer:
Prusa Clone Rafts:
No Supports:
No Resolution:
0,2 Infill:
100% Notes:
For better results, use cooling fan. -
75mm Filament Spool Adapter 3D Print Model
Summary
Adapts a spool with a 75mm center to fit on a Prusa without hitting the frame. I left the tolerances a bit large, however it works well and the spool turns smoothly.
Print Settings
Printer Brand:
Prusa Printer:
i3 MK2S Rafts:
Doesn’t Matter Supports:
No Resolution:
Low Infill:
15% Notes:
Printed in PLA, but really doesn’t matter as long as it fits.
How I Designed This
designed in Fusion 360 -

Prusa I3 Mk2/S Filament guide and light holder 3D Print Model
Summary
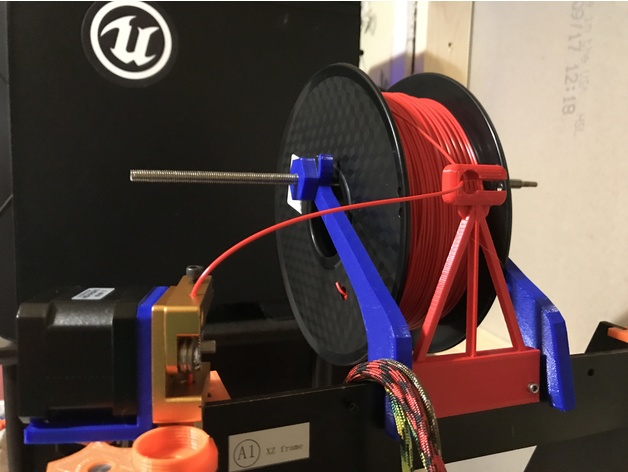
I have been running into problems with new rolls where the filament would spring of and get tangled. I was going to print one of the many filament guides available, but decided to make this. I use a Yorkville music stand light to light up the build plate when printing. Its pretty bright for its size, and you can power it off a spare usb port on the raspberry pi (assuming you use one for octoprint, but any usb port will work). I use the light both for checking in remotely and for the time lapses I create with octoprint. I initially had the light clipped to the frame of the printer but wanted to bring the light arms more forward to take care of some shadows. the holes in the side allow tie wraps to keep the power cord out of the way.
The light I use can be found here: https://www.long-mcquade.com/12870/Band/Metronomes_Tuners_Stands/Yorkville_Sound/Dual_Music_Stand_Lite.htm -

Lighbulb Free 3D Model
Photorealistic subdivisional model of a light bulb. PBR materials are properly set in 3Ds Max 2018 Arnold renderer and Blender 2.79. HDRI background is included and scene is render ready.Clean quads only mesh that can be further subdivided using Turbosmooth. Base screw section has non-overlapping UVs.No ngons, tris, overlapping faces or isolated vertices.
-
Lighbulb 3D Model
Photorealistic subdivisional model of a light bulb. PBR materials are properly set in 3Ds Max 2018 Arnold renderer and Blender 2.79. HDRI background is included and scene is render ready.Clean quads only mesh that can be further subdivided using Turbosmooth. Base screw section has non-overlapping UVs.No ngons, tris, overlapping faces or isolated vertices.
-
Flashforge Finder minimum resistance filament holder 3D Print Model
Summary
My Finder kept producing errors because of hard-to-pull filament,so I decided to build a mont with minimum resistance.
I think the pictures are self-exlanatory. If you still have questions, just leave a comment!:) -
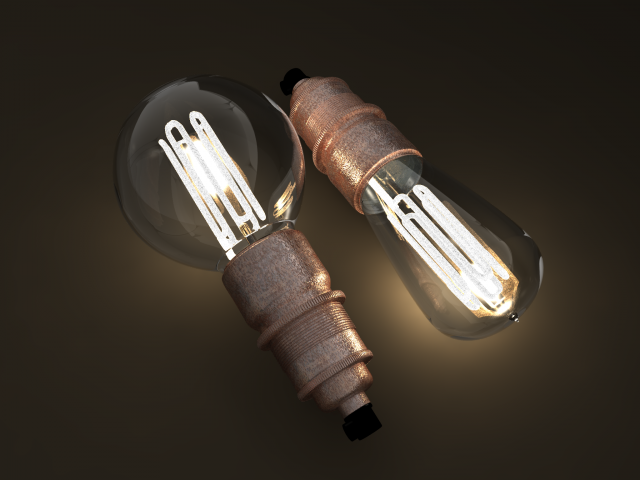
Eco-filament light bulbs combo 3D Model
Eco-filament light bulbs combo: Pear and Globe shapedVintage style bulbs.Highly detailed, works great with modern and vintage interiors and appliances. Very decorative.Comes with a lamp holder skirt as a base for the bulb.Originally made in Shade 3D ver.16 and rendered there, but also made in 3dsmax with Mental Ray renderer.
-
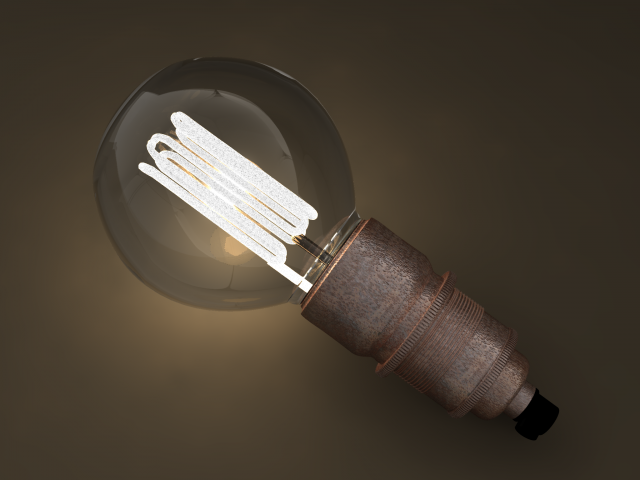
Eco-filament Globe shaped bulb 3D Model
Eco-filament Globe shaped bulb 3D model.Eco-filament vintage style bulb.Highly detailed, works great with modern and vintage interiors and appliances. Very decorative.Comes with a lamp holder skirt as a base for the bulb.Originally made in Shade 3D ver.16 and rendered there, but also made in 3dsmax with Mental Ray renderer.
-
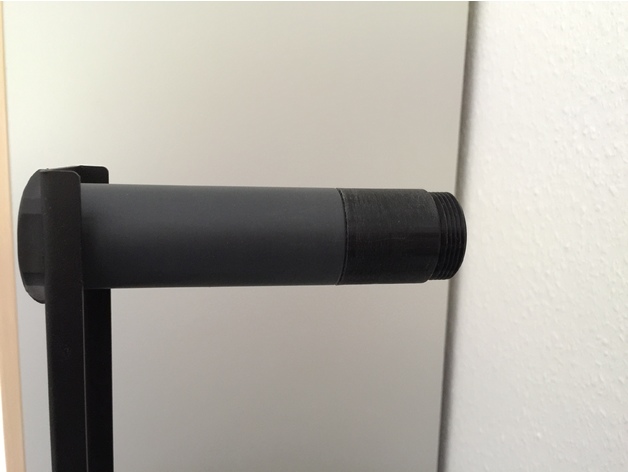
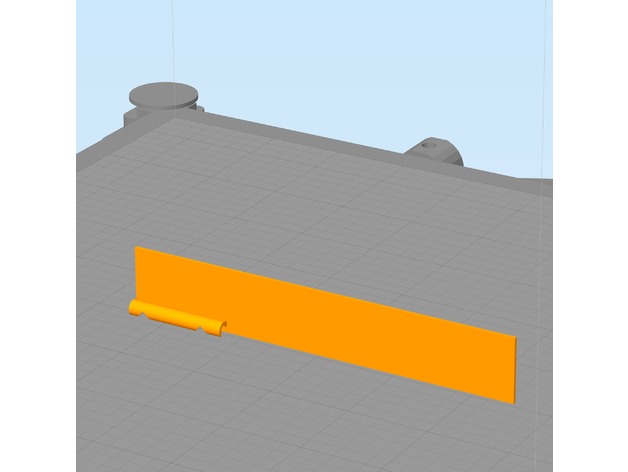
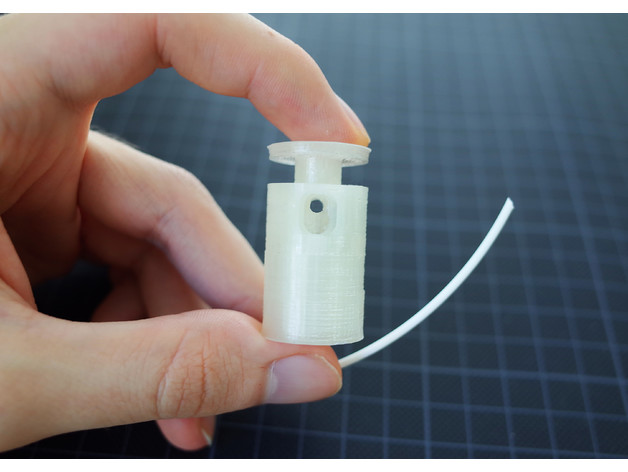
Ikea Lack Table Filament Guide 3D Print Model
Summary
Build this as a filament guide through a 1/4″ hole I drilled in my Ikea Lack Table for filament.
You can view and/or download the source file from here
The exterior diameter is 4.5mm while the interior is 3mm (good for 1.75mm filament, which is my use case)
I plan to make a better version of this soon, but this is currently what is fitted in my setup until after the holidays.
Print Settings
Printer:
Anet A8 Rafts:
No Supports:
No Resolution:
0.2 Layer Height Infill:
100% -

Clear Glass Bulb 3D Model
This is a photoreal model to any of your rendering projects for Animation,VFX,Architectural visualisation or Advertisements. This geometry in the scene is fully polygonal modeling.Folder Contains: 3D files in different formats with Vray Shaders and light, Rendered Images.File Formats: 3ds Max 2014 (V-Ray), OBJ,3DS,FBX.Polygon Count: 191756Vertex Count: 182173
-
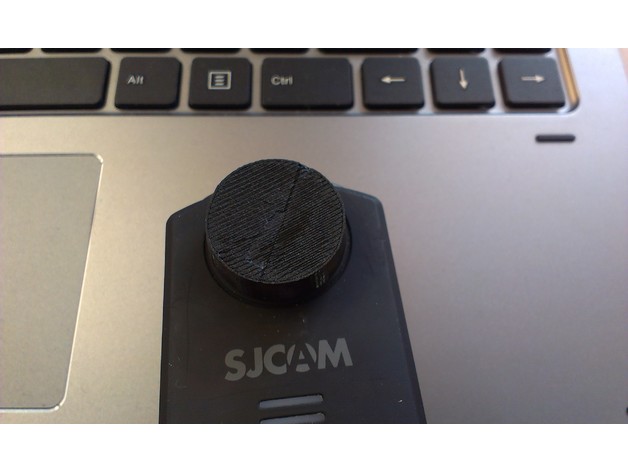
SJCAM M20 lens cap for flexible filament 3D Print Model
Summary
Simple lens cap for the SJCAM M20. Fits tight. Made for flexible filaments.
Internal ⌀: 21mm
External ⌀: 23mm
Internal hight: 4mm
External hight: 6mm
Print Settings
Printer:
Anet A8 Rafts:
Doesn’t Matter Supports:
Doesn’t Matter Resolution:
0.2 Infill:
100% Notes:
Printing time was about 10-15 minutes @ 45mm/s -
Filament Mount for LACK table 3D Print Model
Summary
Hy there,
i have mounted my Printers on IKEA Lack tables and now the Filament can easy Mount on the left or right side of the table.
Print Settings
Printer Brand:
Prusa Printer:
Prusa Clone Rafts:
No Supports:
No Resolution:
.2 Infill:
10 -
E-Step Calibration Jig (3mm filament) 3D Print Model
Summary
Trying to hold calipers or a ruler next to my filament while marking it for E-Step Calibration isn’t always easy, especially if your printer is in an enclosure. This jig has 2 notches. The lower notch is at 100mm the upper notch is at 120mm. Snap the filament channel onto the filament and lower the jig until it touches the top of the extruder. Then use a fine point marker to mark inside the V slots as shown in the photo. This jig requires your printer to be reasonably dialed in. You can use calipers to inspect the printed part for accuracy. I have found this tool to be quite handy.
E-Step calibration guides can be found in many places, I follow this: http://reprap.org/wiki/Triffid_Hunter%27s_Calibration_Guide#Measure
This is designed to be printed with the filament channel facing downward and a wide brim. The model was also designed to print with a .5mm nozzle but should print fine with smaller nozzles. The brim secures it to the build platform. Remove the brim after printing. See photos for usage.
Print Settings
Printer Brand:
LulzBot Printer:
TAZ 6 Rafts:
No Supports:
No Resolution:
.2 mm Infill:
none Notes:
This is designed to be printed with the filament channel facing downward and a wide brim. The model was also designed to print with a .5mm nozzle but should print fine with smaller nozzles. The brim secures it to the build platform. Remove the brim after printing. See photos for usage. -
Filament holder side mounted 3D Print Model
This holder is mounted with 3, 6mm bolts. Its easy to print, and works well for me.
Different spools fits on the holder. Spool width 35-80mm. -
Wanhao Duplicator 4x Filament Alignment Bracket 3D Print Model
Summary
Filament alignment bracket to fit Wanhao Duplicator 4x -
CTC Filament Guide 3D Print Model
Summary
This is a simple filament guide. This can be placed in front of the spool in order to keep the process simple.
Print Settings
Printer:
CTC Prusa I3 Rafts:
No Supports:
Yes Resolution:
.3mm Infill:
50% -
Extruder Filament Feed Calibration Ruler 3D Print Model
Summary
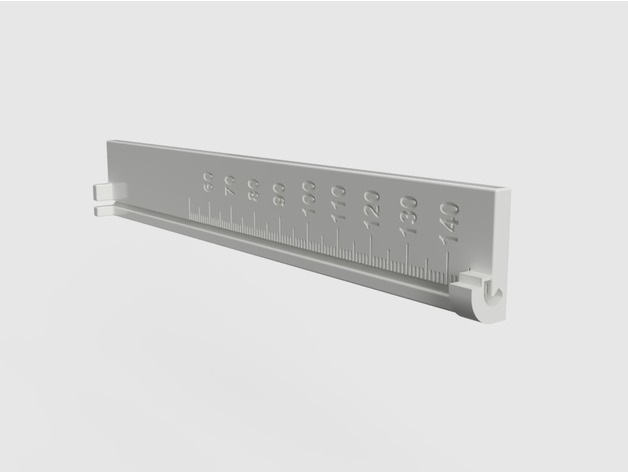
A ruler designed to mark the filament at 15 cm before feeding and reading off the actual length fed afterwards.
The filament snaps into the bottom and top of the ruler and fits into the grove to make reading off the length easier.
The length of the ruler is 15 cm with a ledge at the top that can be used as a guide for a sharp razor mark or marker line.
The markings on the ruler are in mm of actual fed filament to be read off where the mark lines up after feeding 10 cm of filament through the extruder.
Print Settings
Printer:
TEVO Little Monster Rafts:
Doesn’t Matter Supports:
No Resolution:
0.2 mm layer height Infill:
30%, not critical Notes:
I printed mine with ABS but see no reason why this would not work in PLA.
Print settings
0.2 mm layer height
30% infill, not critical
no support, already included in the model
raft does not matter
Post-Printing
You need to clip off the tiny support holding the end of the clamp at the bottom of the ruler.
How I Designed This
After realizing that the extruder feed accuracy needs to be tested for new filaments I decided to make a ruler designed for the task that allows easy marking and measuring of the extruder filament feed length and does not require three hands to hold the filament in place.
I am new to 3D printing and find Fusion 360 to be the easiest to use when taking an idea to a working model.
I use parameterized dimensions to allow easy tweaking and reducing the model size for faster test prints.Custom Section
Marking 15 cm before filament feed
Snap the filament into the top and bottom clamps of the ruler and press into the grove along the scale.
With the bottom of the ruler resting on the extruder intake mark off 15 cm using the top of the ruler as a guide. Only the bottom of the mark is relevant so don’t worry about how thin it is.
Reading actual feed length
After feeding 10 cm of the filament with:
G92 E0; reset extruder origin
G1 E100 F120; feed 10 cm of filament at 120 mm/min (adjust this to your usual feed rate
G92 E0; reset extruder origin
Read off the actual length from the bottom of the mark aligning with scale printed on the ruler. Numbers are in mm of actual feed. In the image, I adjusted my extruder steps/mm to compensate for always underfeeding by 5mm on 100mm feed so it is showing 100mm. -
Anycubic i3 Mega Spool Stand Filament Guide 3D Print Model
Summary
Quite often, when I moved the printer around, filament would come spiraling off the spool. This helps keep it on the spool. -
Filament Sensor and Cover (OEM sensor) 3D Print Model
Summary
Remix version that will work with the sensor that comes with the oem kit.
Print Settings
Printer:
Cr-10 Rafts:
No Supports:
No Resolution:
0.20 Infill:
30 -

Cr-10 Filament Sensor Bracket 3D Print Model
Summary
PRINT:
NOTE: When using S3D slicer you must do: Mesh -> Separate Connected Surface
Otherwise you will get a hollow bits.
For Cura im not sure if you have this ability, please comment if you know how to fix the issue.
Sorry just my lack of design ability led to this issue.
I designed a Bracket to hold a filament run-out sensor i bought off ebay.
This gives my 3d printer the ability to sense when there is no more Filament left, and pauses the print.
It slips over the Extruder, and also has a cable holder integrated.
The design allows it so you can use a small amount of PTFE tube to make it easier for the filament to guide into the extruder motor.
Sensor i used:http://r.ebay.com/PxV1Jx
Connected to: Raspberry pi 3B
For setup: https://youtu.be/j7JfQXTf16U
Print Settings
Printer:
Creality Cr-10 Rafts:
No Supports:
Yes Resolution:
0.2 Infill:
10 Notes:
Supports settings:
Support pillar resolution: 2.5mm
Max overhang angle: 65 Degrees.
PRINT:
NOTE: When using S3D slicer you must do: Mesh -> Separate Connected Surface
Otherwise you will get a hollow bits. -

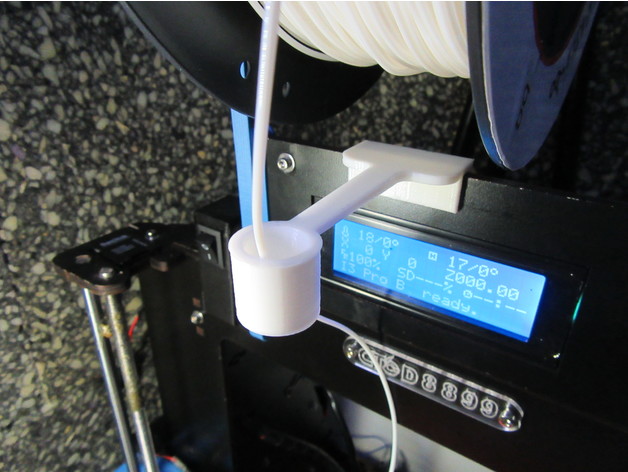
Filament spool holder for Geeetech Prusa i3 3D Print Model
Summary
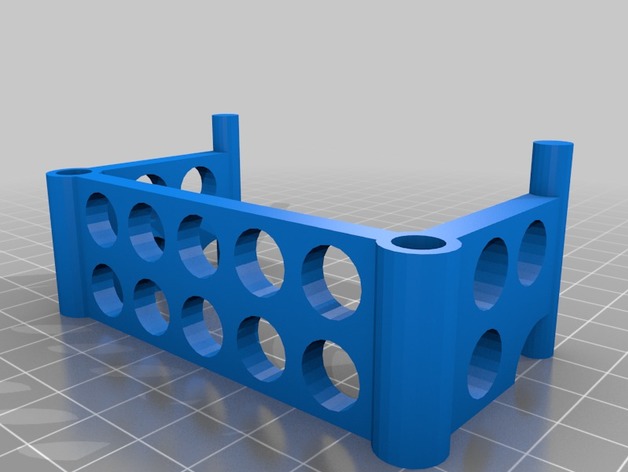
This spool holder is almost vertical to minimize the constraints on the 3D printer frame.
As it use the white pipe delivered with the Geeetech Prusa i3 Pro B, it can hold 2 spools side by side. Filament samples will be also fit to this holder.
The various holes in the holder allow to block the filaments in order to recover them very quickly. You can also use these holes to stock your Allen wrenches or your gauge used to remove the plastic jam in the extruder.
You’ll need 4 screws 3 x 12 mm to assemble the bottom with the top parts of the right and left supports.
Print Settings
Printer:
Geeetech Prusa i3 Pro B Rafts:
Doesn’t Matter Supports:
Yes Resolution:
0.2 Infill:
30% Notes:
Make sure that the front side of each arm is facing the heat bed in order to have a nice aspect on front of you when it is installed on your printer. -
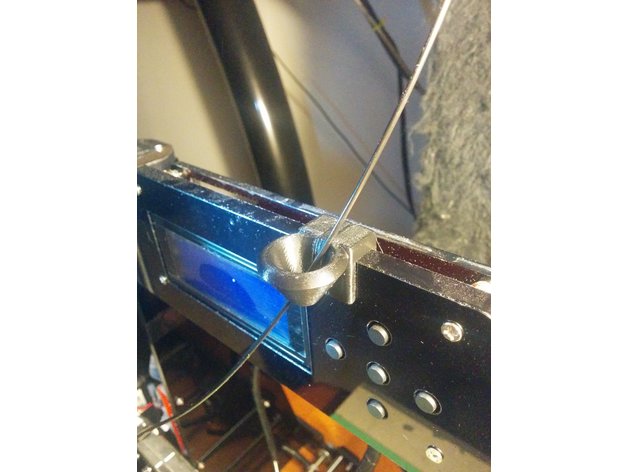
Geeetech filament guide 3D Print Model
Summary
A filament guide for the Geeetech I3 Pro B. I use a rear-mounted spool holder and this guide allows me to use the full Z height of the printer. The guide attaches to the mounting holes in the LCD cover plate. It is a press-fit, so no screws are needed. -
Filament Cutter 3D Print Model
Summary
This is my take on a useful tool.
It cuts 1.75mm filament in a 45° angle for a better grip when inserting it into the feeder gear.
Features:
• Works with a regular spring out of a pen.
• No screws are needed.
Prints without support.
The printer should be well calibrated before attempting this print, since it needes fine detail to work.
Additional Needed Parts:
1x Spring out of a pen
1x Three segments (15mm) of a 9mm snap-off cutter blade
Demonstration and Assembly: https://youtu.be/xb1yQvIPFL8 -
Spinning Filament Holder 3D Print Model
Created this for my Geetech MeCreator 2 Desktop 3D Printer. Holds lots of filament and moves and spins very free. No load on Extruder filament feeder motor. no tangles. Easy use.
-
Anet A8 Side Filament Guide V2 3D Print Model
Summary
Slots onto the corner of an Anet A8 and guides filament coming in from the side.
Will work with any T joint that is 8mm thick.
If you print one off, click “I Made One” above and show me!
This is the second version of this filament guide, you can view the previous version here: https://www.thingiverse.com/thing:2076358
Improvements:
Smaller size
Improved filament insertion slot
Reduced volume
Print Settings
Printer:
Anet A8 Rafts:
Doesn’t Matter Supports:
No Infill:
20%-100% recommended -
Ultimaker 3 Filament Guide 3D Print Model
Summary
Since this was requested quite a few times by our customers, we have decided to develop an easily printable filament guide.
This was designed for the Ultimaker 3 series but will work on an Ultimaker 2+ as well since they share the same feeder on which the guide is to be mounted.
We welcome any suggestions you may have in regards to the improvement of this filament guide.
Print Settings
Printer Brand:
Ultimaker Printer:
Ultimaker 3 Rafts:
No Supports:
Yes Notes:
Supports are needed at the mounting point.
Post-Printing
Mounting the filament guide.
To mount this filament guide, you will need an M3 x 25 screw, since the original is not long enough. -
Tronxy P802M (Prusa i3) Filament Guide 3D Print Model
Summary
Simple filament guide for Tronxy P802M (Prusa i3 Clone).
May work with other printers. Location of mounting hole may require remix or drilling to fit. -
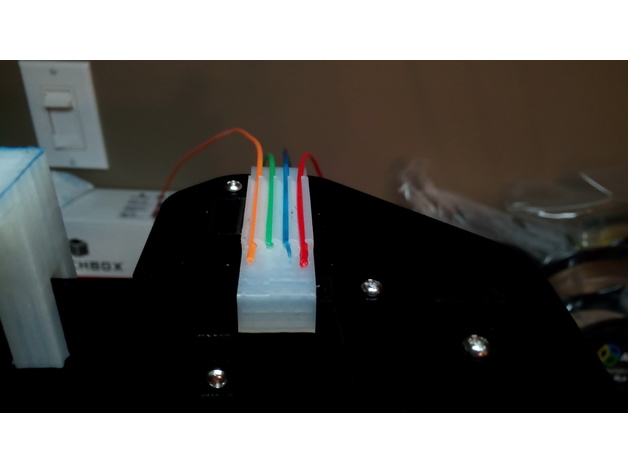
Filament Holder 3D Print Model
Summary
This can hold 4 strands of filament, for easier access to the ends when changing colours – or print 2 (one for each side) to hold 8 colours. Makes it a bit easier to find those ends when changing colours, especially if spools are on a rolling mechanism.
Designed using Design Spark Mechanical (Available for free here: https://www.rs-online.com/designspark/mechanical-software). Printed in PLA with Anet A8, no supports are needed. -
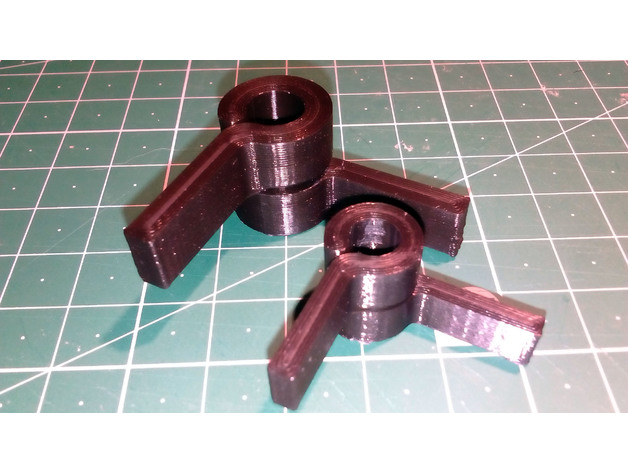
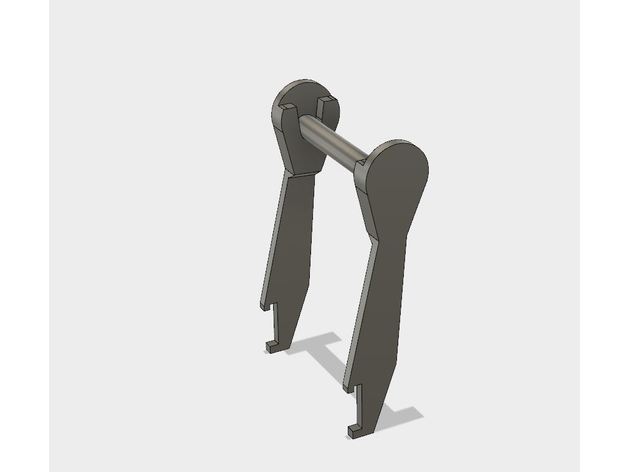
Squeeze clip for filament spool spindle / axle 3D Print Model
Summary
For my Anet A8 I wanted a quick release alternative to the supplied M8 nuts, so I designed this squeeze clip. To use just squeeze the arms together slightly to release the grip on the rod and slide off. They won’t grip as well as a nut with lock nut, but it works fine to hold the spindle in place.
I made 2 sizes one for the stock M8 threaded rod with an inside diameter of 7mm and a smaller one for a 6.4mm guide rod I salvaged for a scanner, used for a different spool stand.
Print Settings
Printer:
Anet A8 Rafts:
No Supports:
No Resolution:
0.2mm Notes:
I used a wide skirt to help with bed adhesion, My printer isn’t keen on small parts and I lose accuracy without the skirt. Your printer may vary.
The needed supports are all built in and will snap off. I print the clips with 4 lines on the walls / shells hence the 0% infill. I tried printing with thinner walls and 20% infill, but the clips were prone to snapping.
Post-Printing
Trim any skirt and stringing. The support in the gap between the rings that allows the clip to flex, will break free the first time the clip arms are squeezed.
There may be a small amount of support material that needs freeing up from the gap. I used tweezers and a craft knife.
How I Designed This
Designed with Fusion 360 -
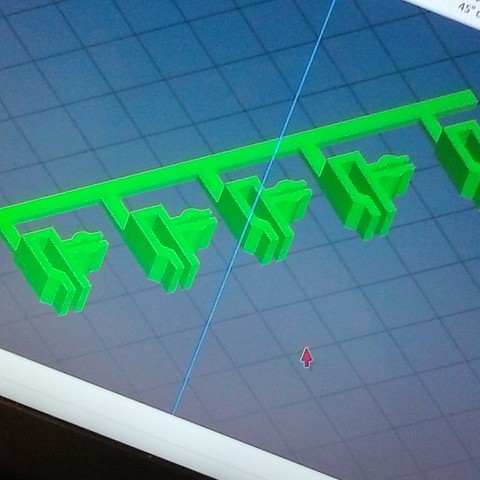
Filament keepers 3D Print Model
A set of 5 filament keepers got 1 with a spool of filament and made these in sketchup since I needed a gob more of them
-

Filament Guide 3D Print Model
Summary
Filament Guide for Anet A6 or Anet A8.
Print Settings
Printer:
Anet A6 Rafts:
No Supports:
No Resolution:
First Layer 0.3 rest 0.2 Infill:
20% -
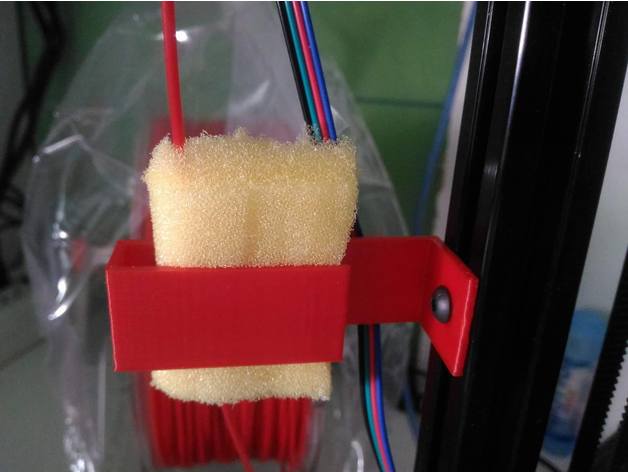
Filament Clean 2020 profile mount 3D Print Model
Summary
1x sponge
Print Settings
Printer Brand:
Deltaprintr Printer:
Deltaprintr Kit Rafts:
Doesn’t Matter Supports:
No Resolution:
0.2 Infill:
/ -
![[WIP] 3d printing filament spool holder 3D Print Model](https://3dhunt.co/static/2017/06/f4d9217058e74b3306cc55390014564f.jpeg)
[WIP] 3d printing filament spool holder 3D Print Model
Summary
A work-in-progress 3D printing filament spool holder.
Currently fits Inland and PolyMaker spools, and spools that are about 66 millimeters wide.
Designed to be cut out of 1/8″ cardboard (we love cardboard).
Laser cutting settings (40 watts laser cutter)
Speed 70
Power 100
Frequency 500
History
06/13/2017
Move to JocoLibrary MakerSpace account
Added .dxf files
06/12/2017
Removed the nested circles for spool centering
Re-generated .emf file (was crashing in Corel Draw)
06/11/2017
Initial upload: .svg and .emf files -
![[WIP] 3d printing filament spool holder 3D Print Model](https://3dhunt.co/static/2017/06/c687eb201d715418bbadef574b59acb1.jpeg)
[WIP] 3d printing filament spool holder 3D Print Model
Summary
A very much Work-In-Progress 3D printing filament spool holder. Quickly put together after my printed spool holder failed me and a big Inland spool came crashing on my OctoPi. Turned out to be much more durable and convenient than I expected!
Fits 67ish millimeters spools
Design to be cut out of cardboard -
hair man 5 3D Model
Low-Poly Model of high quality.1024×1024 texture size( normalmap, specularmap, diffusemap)
-
Anet A8 Filament Guide 3D Print Model
Summary
Hi!
This is a simple, clip on/slide on, filament guide that I made for my Anet A8. it’ll fit on anything that is 8mm thick.
It clips/slides on the top part, right between the screen and the buttons.
What’s different about this one is that it’s in two parts (both parts are “joined” by the smallest possible bridge so you print both in one file then detach the side part)… The big part has a gap where you can slide in your filament (you have to take It off the printer to do that), and the small part fills that gap once you’ve put in your filament. I thought it’d look neater that way.
I printed at 60mm/s with 15% infill and it was fine, although printing at 30mm/s gave me a better finish..
sorry for the photo quality, taking good photos of black parts is really hard.
Oh! there are two separate STL files, one has a straight “middle”, and the other one has a cross-shapped notch. I printed the straight one and it sits perfectly, but I thought having a notched one might be more secure. Print whatever you choose and comment about it. -
hair man 2 3D Model
Low-Poly Model of high quality.1024×1024 texture size( normalmap, specularmap, diffusemap)
-
Filament Guide for Wanhao i3 plus 3D Print Model
Summary
A teflon tube assisted filament guide for your Wanhao Duplicator I3 Plus! Also fits the I3 (non-plus.)
Print Settings
Printer Brand:
Wanhao Printer:
Wanhao Duplicator i3 Plus Rafts:
No Supports:
No Resolution:
0.20 Infill:
~20%
Post-Printing
5mm of Teflon tubing required.
Cut Teflon with razor blade to prevent making out-of-round.
Slightly persuade tube into appropriate hole with blunt object.
Use existing screws!
You’re done! -
Light Bulb 3D Model
Light BulbModel has 4 separate objects, correctly named and organized.Polygons: 31,338Verts: 31,601File Formats: -3ds Max 2017 V-Ray-3ds Max 2014 V-Ray-OBJ (Multi Format)-FBX (Multi Format)-3DS (Multi Format)
-

beauty hair 22 3D Model
Low-Poly Model of high quality.1024×1024 texture size( normalmap, specularmap, diffusemap)
-
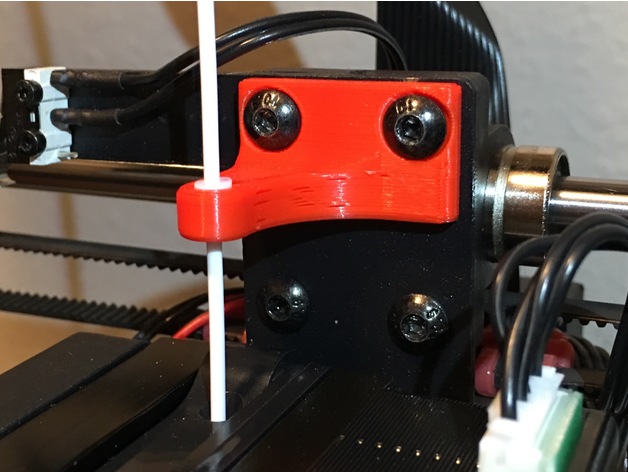
Anet A8 filament guide 3D Print Model
Summary
This simple filament guide screws into your extruder carriage and ensures that the filament is pulled directly straight down into the extruder. -
LinkBelt for flexible filament 3D Print Model
Summary
Link belt for v drive pulleys
Printing in Sainsmart flexible filament, but I’m sure many filaments would work well.
I don’t know how these will hold up over time, but should be good in a pinch.
The default size is 20mm at its widest point, and 4mm thick. Scale as needed.
I would suggest at least 25% infill. -
AM8 2020 2040 Filament Guide 3D Print Model
Summary
Just a filament guide if your using my spool holder remix. -
dummy CFL best made with glow in the dark filament 3D Print Model
Summary
dummy compact florescent light for filling in empty light sockets best made with some sort of glow in the dark filament acts as a night light without electricity -

Par 20 HD LED light Bulb 3D Model
Here is a very realistic LED Light Bulb. You get the V-Ray Scene plus the default scanline scene. It includes textures and all.Also a 3Ds, FBX and OBJ files
-
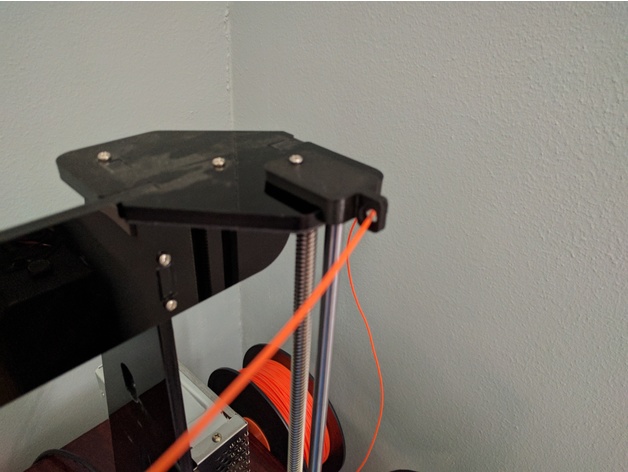
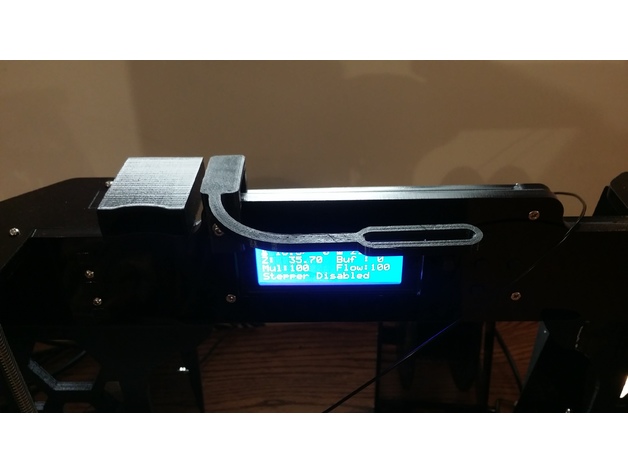
Wanhao Duplicator 6 Filament Runout Sensor
Summary
This is a bracket to mount an nc microswitch sensor on a Wanhao Duplicator 6/Monoprice Maker Ultimate to detect when filament runs out. To be able to use this feature you will need to install a custom Marlin firmware that was developed for the D6/MU:
https://github.com/1bigpig/Marlin
After installing the firmware, all you need to do is connect an nc microswitch to the board and mount it to the printer using this bracket.
For the microswitch you’ll need to get one with a similar design to the one in my pictures if you want it to fit perfectly without any modifications.
To connect the sensor to the board you’ll need a “JST XH 2.5-3 Pin” connector and connect that to the open J9 analog plug on the printer (using the two outermost pins) and connect those wires to the two outermost pins on the microswitch. The printer will automatically detect this once it’s plugged in and pause the printer when there is no filament keeping the microswitch closed.
Print Settings
Printer Brand:
Wanhao Printer:
Duplicator 6 Rafts:
Doesn’t Matter Supports:
No Resolution:
.15 Infill:
20% Notes:
You can print both of these upright without needing to use any support (there are two small support columns built in that will easily snap off) -
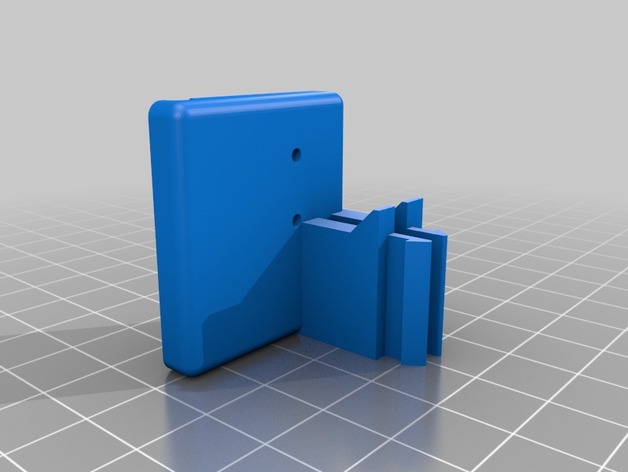
Anet A8 Filament Guide Arm redux
Summary
I needed a way to guide filament to the extruder, so I printed
Anet A8 Filament Guide Armhttp://www.thingiverse.com/thing:1915337
Made byhttp://www.thingiverse.com/DevDorian
but, it wouldn’t fit as I have a corner bracehttp://www.thingiverse.com/thing:2243664
that replaced the stand offs behind the LCD, so I made the connector thick enough to go around the three layers of the frame. I also worried it might be too wide to get around my SD Card adapter, so I shrunk its width. Which I now think was not necessary…