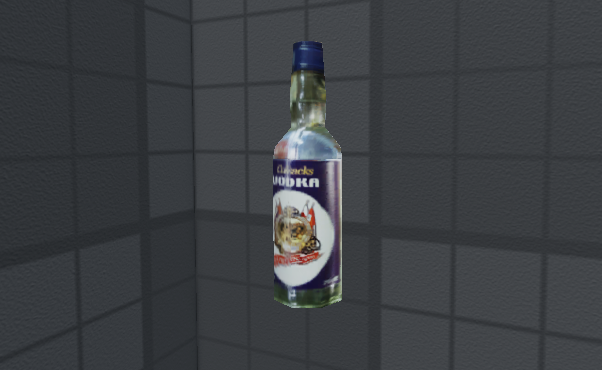
Водка из игры S.T.A.L.K.E.R.: Тень Чернобыля в формате fbx
Tag: /
-
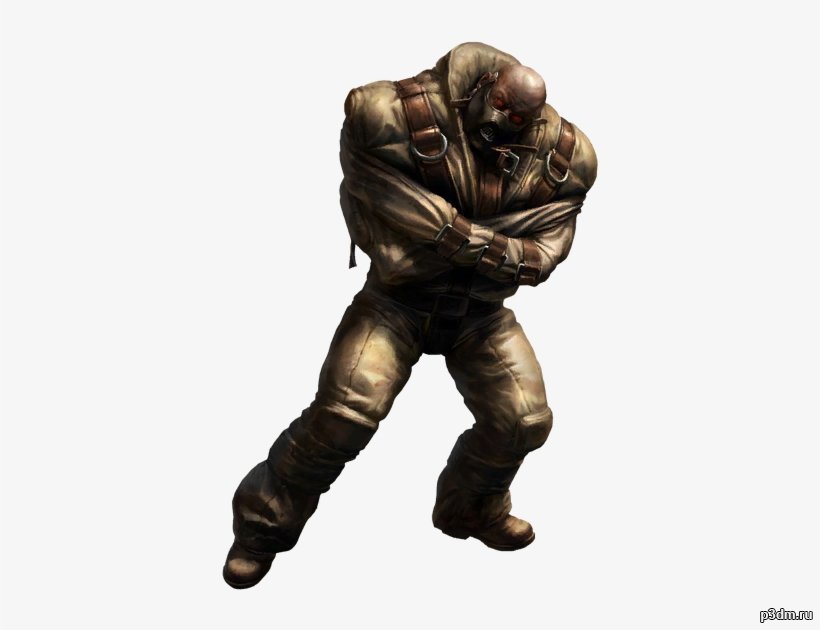
Таран / Ram 3D Model
С помощью Ninja Ripper выдрал модельку Тарана (англ. Ram) из Dead Island. Не уверен только, что оригинальную текстуру глаз подобрал, ибо получилось выдрать модельку с горем пополам, но тем не менее всё нужное на месте 🙂
-
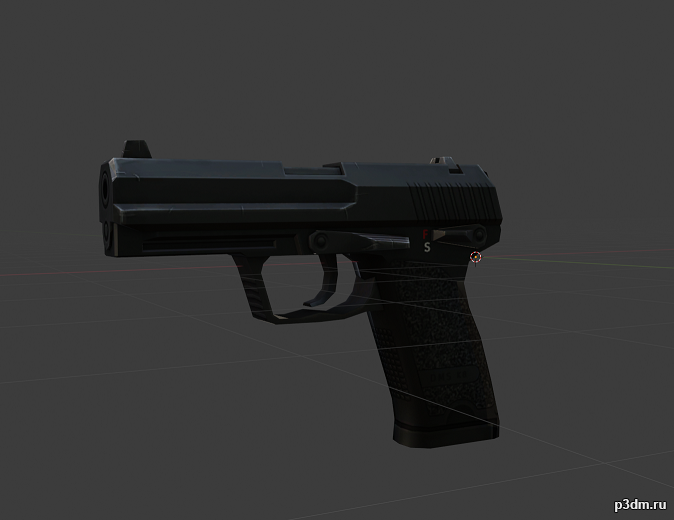
P8 / HK USP 3D Model
German Bundeswehr standart issue Handgun P8, derived from the legendary HK USP.
-
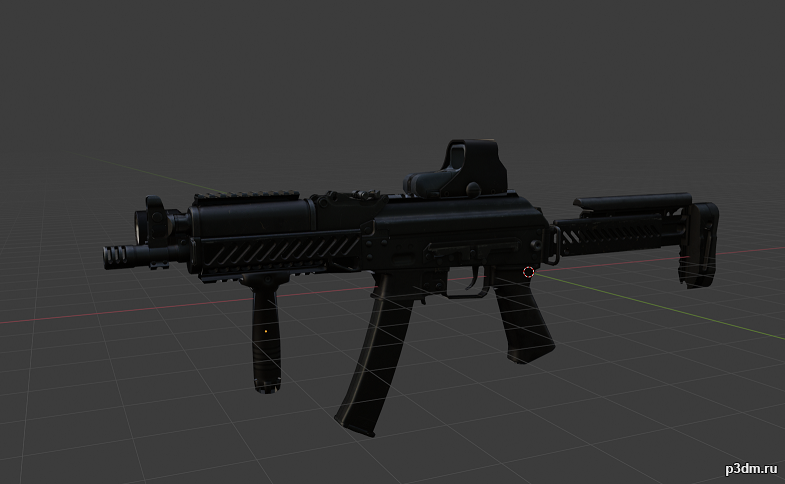
Vityaz-SN / PP-19-01 3D Model
Vityaz-SN / PP-19-01 is a russian Submachinegun manufactured by Izhmash.Model is divided into Body, Mag, Sight, Flashlight and grip.There’s an issue with the model where two siderails clip into each other, it should be hidden but it’s still there.
-
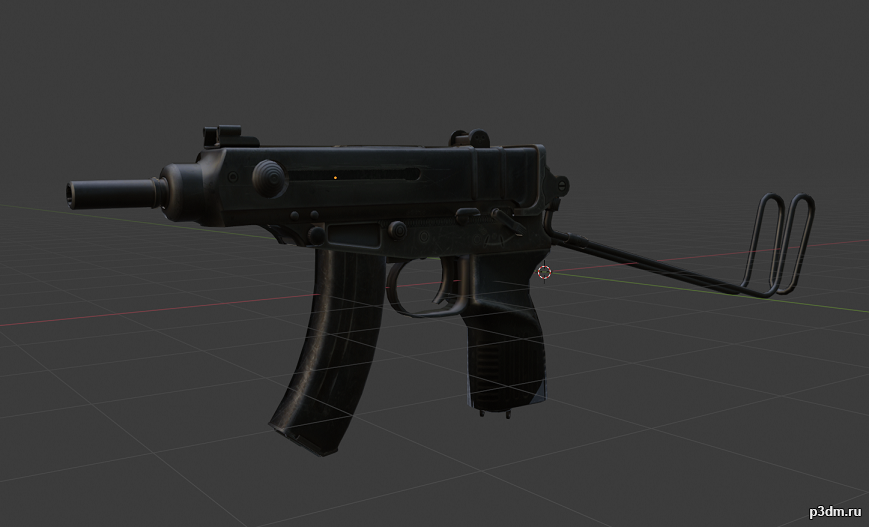
VZ-61 / Scorpion 3D Model
The VZ-61, also known as the Scorpion is a Submachinegun / Machinepistol of czechoslovaki origin.Model is divided into Body, Magazine and Reciever.
-
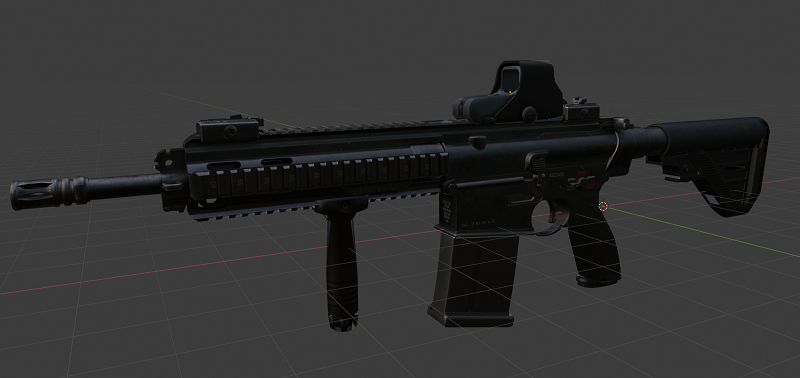
G27 / HK417 3D Model
HK417 / G27 from Call to Arms.Model is divided into Body, Mag, Grip, Reciever and Sight
-
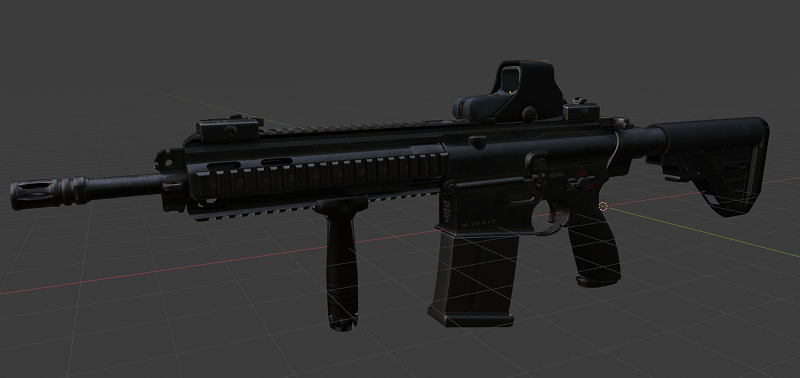
G27 / HK417 – C2A 3D Model
The G27 (Gewehr 27) is the military designation of the HK417 designated marksman rifle in the german Bundeswehr.Ripped from Call to Arms.Model is divided into Body, Magazine, Grip and Sight
-
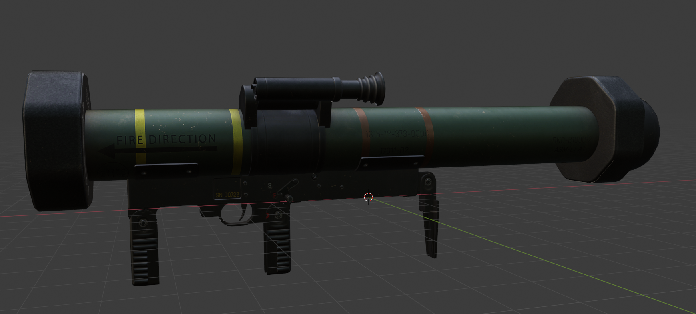
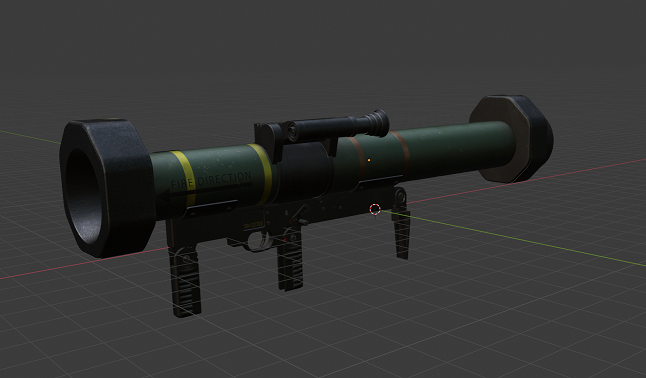
RGW 90 / Wirkmittel 90 / MATADOR 3D Model
The Raketengewehr 90 (RGW 90) / Wirkmittel 90 / MATADOR is a handweapon for anti-vehicle and anti-fortification use developed in 2000 by Dynamit Nobel Defense as a replacement for the Panzerfaust Armbrust in the german armed forces.Model from Call to Arms.Divided into Grip, Barrel and ammo.
-
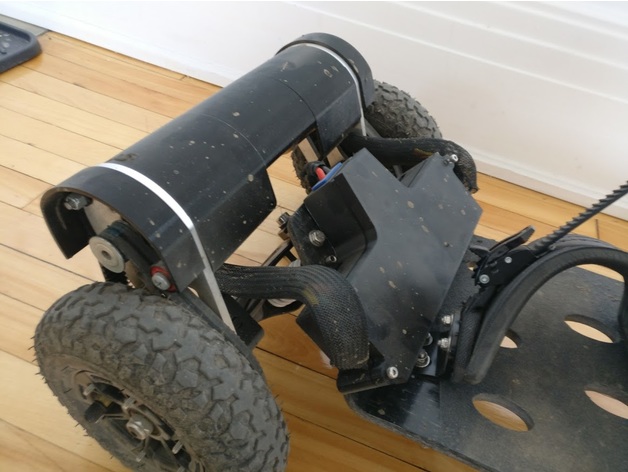
Electric Mountainboard – Enclosure for Enertion FOCBOX / Trampa deck. 3D Print Model
Summary
Enclosure for 2 Enertion FOCBOX Vesc / Trampa deck.
Printed in Advanced PLA / 50% infill.
Check the complete tutorial here: http://makertuts.com/electric-mountainboard-tutorial/ and check my designs for other parts (pulley, ESC/VESC Enclosures…)
Please help me develop new parts and release them for free or just pay me a beer on http://paypal.me/supportp3x to say Hello and/or Thank you! -
Box for keynya’s Nintendo ds / 3ds game card holder 3D Print Model
Summary
Box for keynya’s Nintendo ds / 3ds game card holder
Print Settings
Printer:
Anycubic i3 Mega
Rafts:
No
Supports:
No
Resolution:
0.2 mm
Infill:
20% -
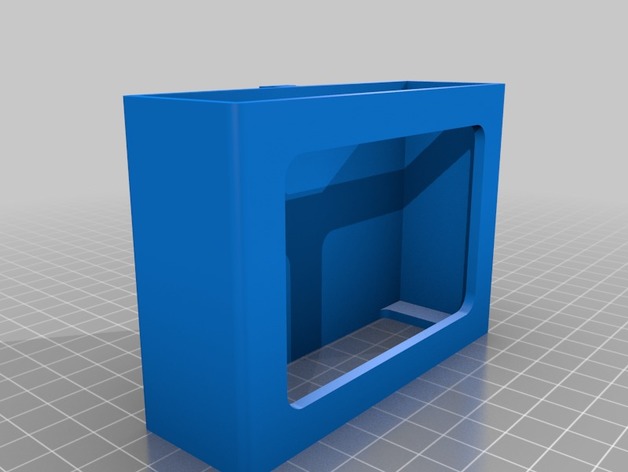
IOGEAR GUS434 USB switch / Ikea SIGNUM chassis 3D Print Model
Summary
Redid the cable management at my desk and didn’t like how my IOGEAR switch was hanging in the air. Built a chassis that attaches to the IKEA SIGNUM cable management rack. -
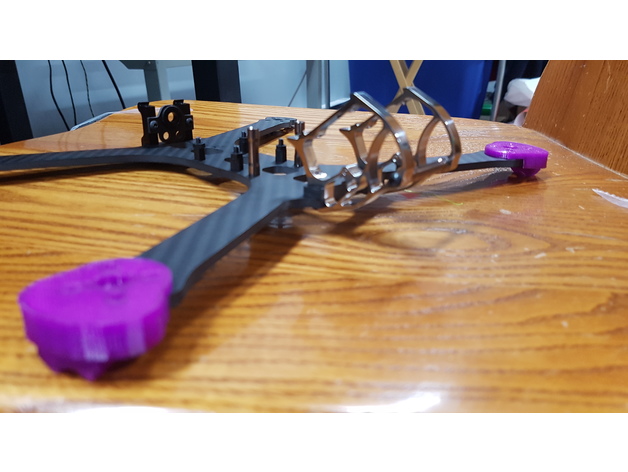
Armattan Chameleon Ti – Arm and soft Motor mount / landing gear 3D Print Model
Summary
this an flex protection for the end of the arm and btw , soft mount for your motor and landing gear
Print Settings
Rafts:
No
Supports:
No
Resolution:
.15
Infill:
45
Notes:
print in tpu -
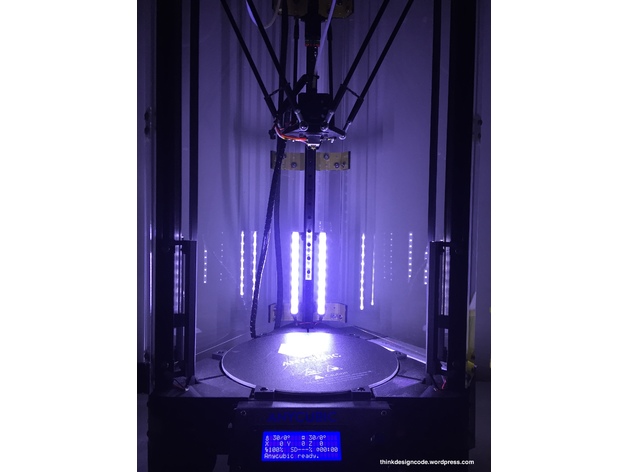
Add light for Delta / Kossel 3D printer 3D Print Model
Summary
I decided to add LED for my Kossel 3d printer (My model is Anycubic Kossel Linear Plus) to make it easier for me to check if I need to print overnight.
Material:
6x LED stripes (12VDC, width: 1cm, length: 15cm each)
M3x10mm bolts and M3 T-nuts
Wires
Printed parts:
6x Part01
6x Part02
6x Part02_Mirror
I already show to you guys how to make it step by step in each picture. Just follow them and you can make it.
Here are all those steps:
Step 01: Using 12V LED stripe (1cm in width) and cut to 6 pieces (15cm each)
Step 02: Soldering all 6 LED stripes.
Step 03: Wire out all LED stripes.
Step 04: Make a small board to attach all LED stripes, 12VDC power supply and ON/OFF switch
Step 05: Connect and test all LED stripes.
Step 06: Using a piece of thick tape to cover all circuit board.
Step 07: Using M3 bolts and M3 T-nuts for the board.
Step 08: Attach the board to the frame (below the heated bed)
Step 09: Print 6xPart01, 6xPart02 and 6xPart02_Mirror to make 6 LED stripes holder.
Step 10: Using super glue to attach LED stripe into LED stripe holder (Part01). Remember to attach the Part02 and Part02_Mirror to Part02 before doing this step.
Step 11: Attach all LED stripes to 3d printer frame with M3 T-Nuts.
Step 12: Remove the heated bed and connect all LED stripes to the small board we’ve made before. For the 12VDC input, you can use directly from 3d printer power supply.
Step 13: For the ON/OFF switch, you can place it in front.
DONE!!!
Print Settings
Printer:
Anycubic Kossel Linear Plus
Rafts:
No
Supports:
No
Resolution:
0.2mm
Infill:
20%How I Designed This
-
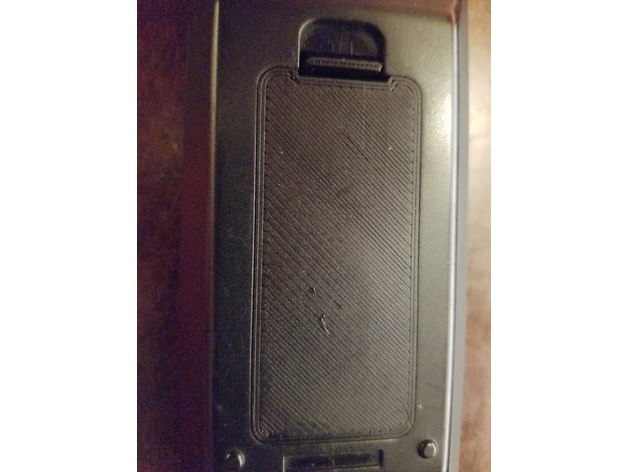
Insignia remote battery door / cover 3D Print Model
Summary
This is a replacement battery cover / door for an insignia tv remote.
Print with 100 percent infill.
You may want supports on the little rear tab, and possibly under the spring arm tabs if they come out droopy.
No raft needed.
Print Settings
Printer Brand:
Wanhao
Printer:
Wanhao Duplicator i3 Plus
Rafts:
No
Supports:
Yes
Resolution:
.2mm
Infill:
100% -
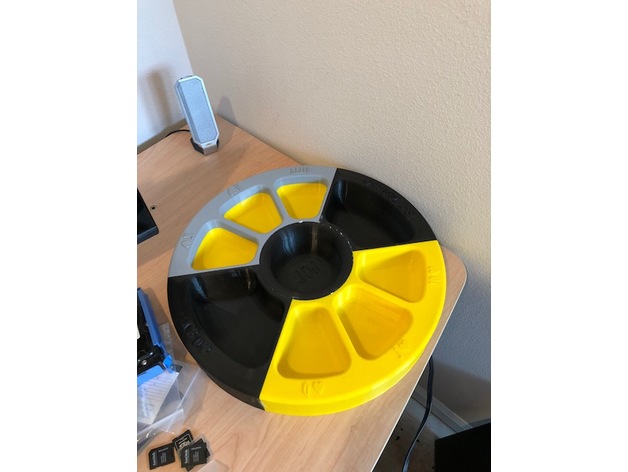
Tripoly / Michigan Rummy Tray 3D Print Model
Summary
Chip tray for Tripoly / Michigan rummy card game.
Print Settings
Supports:
Yes -
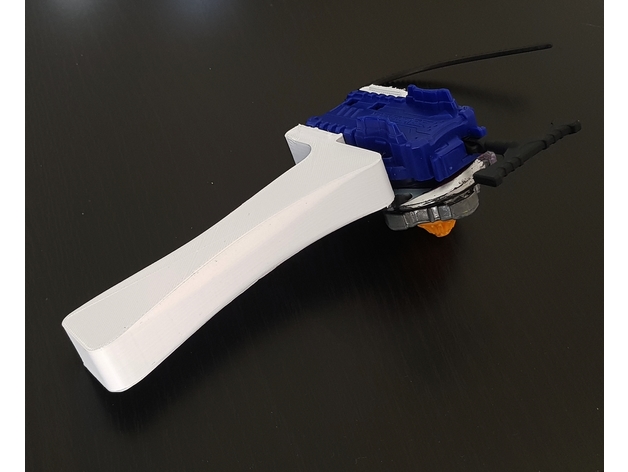
Beyblade Burst Launcher Grip / Manche pour lanceur Beyblade Burst 3D Print Model
Summary
English
A grip for the official Beyblade Burst launcher (sold by Hasbro), tested and approved by my 7 year old son.
Print it, clip the Hasbro launcher into it, done.
3… 2… 1… LET IT RIP !
Français
Un manche pour le lanceur officiel Beyblade Burst (vendu par Hasbro), testé et approuvé par mon fils de bientôt 7 ans.
Imprimez-le, placez le lanceur Hasbro dans le manche, c’est tout.
3… 2… 1… HYPER VITESSE !
Post-PrintingClip it
-
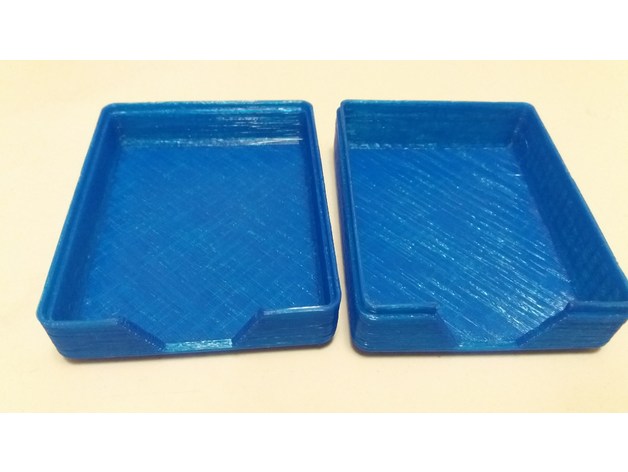
Dino-opoly / Monopoly Card Case 3D Print Model
Summary
My son’s Dino-opoly game has a lot of cards that got all scattered in the box every time we put it away so I thought I would make a nice little case to hold them all nice and neat. The one side is cut out so you can use it to hold the cards on the game board while playing and be able to pull them out easy. The two sides snap together.
Print Settings
Printer:
Anet A8
Rafts:
No
Supports:
No
Resolution:
.2
Infill:
25%
Notes:
Print with flat side down.
How I Designed This
Designed on Onshape.com -
Long Slot Post for Sixth-Finger / Sixth-Toe Capacitive Stylus 3D Print Model
Summary
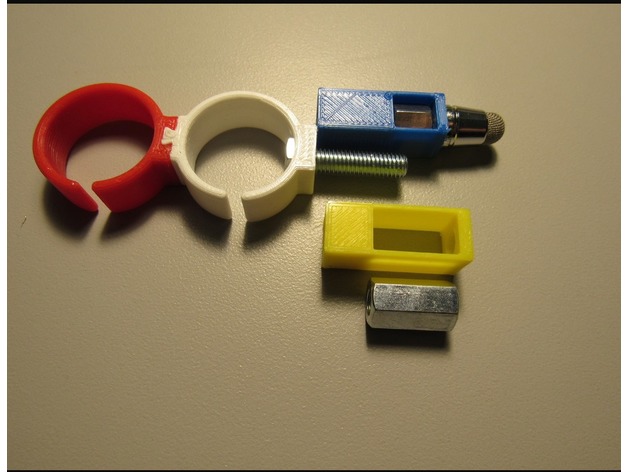
This remix is strictly to take advantage of a 15 mm long coupling nut that I found on Amazon (https://www.amazon.com/gp/product/B00Z3XE5ZA). The longer nut requires a longer slot be cut in the post (yellow post in picture) but it also means that, for the same length post, a shorter bolt can be used – between 5 and 8 mm shorter). A shorter bolt may be easier to insert into a small diameter ring.
As with the original design, you should only download the zipx file. The STL file is included just for visualization purposes. And, as with the original design, all assembly instructions can be found here: https://wp.me/P9evBA-25
Print Settings
Printer:
Monoprice Select Mini
Rafts:
No
Supports:
No
Resolution:
0.1 mm
Infill:
20% -
Fan / Light controller holder 3D Print Model
Summary
Fan/Light controller holder
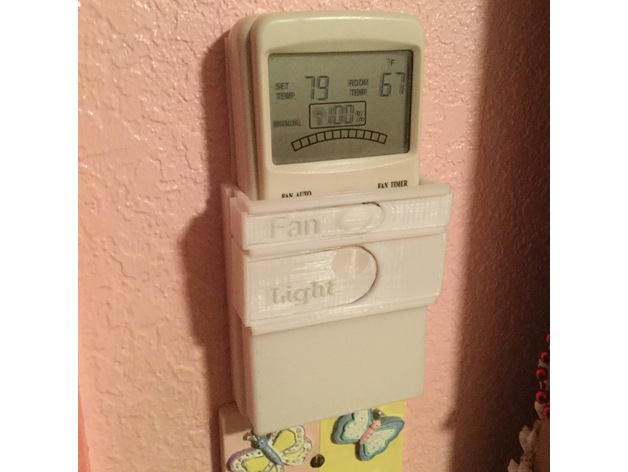
Many years ago the pull fan switch broke in one of our bedrooms. The replacement switch was no longer ‘available’. So instead of buying a new light/fan fixture I upgraded to a wireless fan/light controller. (Model FAN-9T) It worked great, the only problem was the controller. It kept getting moved all over, and it was impossible to turn it on (too many buttons) in a dark room!
So I designed this to hold the controller above the now unused light switch. And it allow someone to turn on the light and fan with the push of a button even in a dark room. What about the other buttons? Hardly ever used, but if you want to – the controller can be slipped out to operate the other buttons, and when done – slipped quickly back in. The perfect solution.
Print Settings
Printer:
TronXY X5S
Supports:
Yes
Notes:
Use supports as needed. Make sure the fan and light buttons are ‘flat’ on your print bed. They tend to be lifted up slightly if just rotated for printing. This is because the case is smaller at the bottom than at the top.
Post-Printing
remove any supports. sand and file for switch clearance as necessary.
Use ‘Super Glue’ to assemble the body pieces.
With the spacer, the fan switch didn’t quite reach the button, so I super glued a little spacer to the bottom of the switch.
How I Designed This
Designed in Fusion 360. The first printing didn’t work and was a little too tight, so I added the spacer and split the body into three pieces for ease of printing.
There is also a mounting plate in case you want to mount under an existing light switch.
I just used double sided tape to secure it to the wall. -
12V socket insert / cover /lid 3D Print Model
Summary
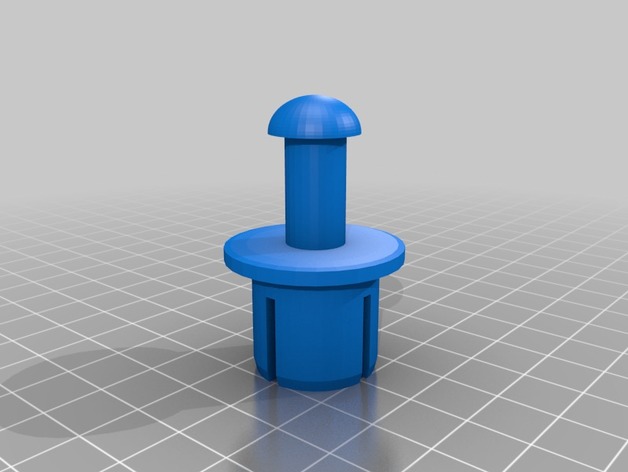
Needed a cover for a 12V power / cigarette lighter socket in order to prevent dirt/dust or moisture getting into it. (Mounted on my tractor)
Print Settings
Printer:
Prusa -3 clone
Rafts:
No
Supports:
Yes
Resolution:
0.2
Infill:
20
Notes:
Tried printing it without support first, but came out rather messy. Hence recommend using support for this one. -
pen holder / pencil case / knife holder 3D Print Model
Summary
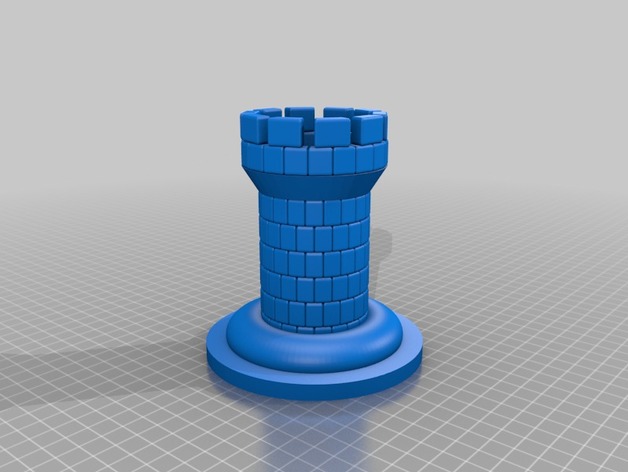
This product is suitable for holding knives and pens and pencils or similar things.
Print Settings
Printer:
ARM
Rafts:
No
Supports:
No
Resolution:
0.1 mm
Infill:
20% -
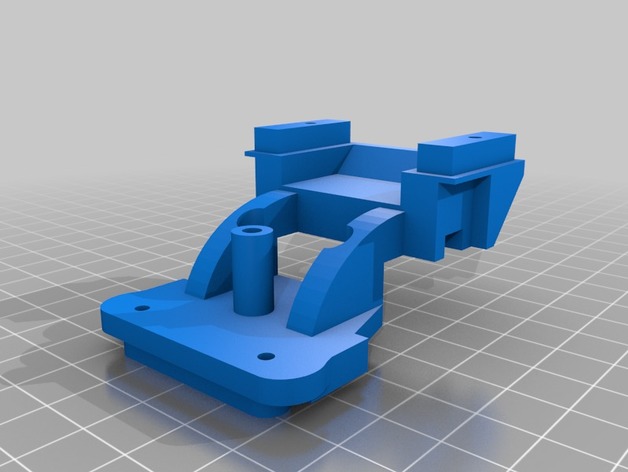
Tamiya Rising Fighter Upper Body / Spoiler Mount (Part D3) 3D Print Model
Summary
So my son’s Tamiya Rising Fighter lost out in a bike vs. r/c car collision and cracked the part where the upper body and spoiler mount to the chassis (part D3). Tried to get a replacement but was not available anywhere (Tamiya or online) except in the UK. So I did my best to design a replacement in Tinkercad.
Not sure if this is a common part to break no the car as this was kind of a strange accident but thought I would post in case someone else is in a similar situation.
Print Settings
Rafts:
Doesn’t Matter
Supports:
Yes
Resolution:
0.2
Infill:
100%
Notes:
I used ABS since I had some. I think PLA would work too but might not be as durable especially as you take the body off which screws into the piece. Best bet would probably be nylon but I didn’t have any so ABS it is.
Supports are needed given the shape. I use a brim when printing with ABS as I seem to get less issues with warping. Also, glue stick works really nice with ABS and allows for the part to be removed fairly easily.
I you want a really professional print you could order this through Shapeways which could be printed in nylon. -
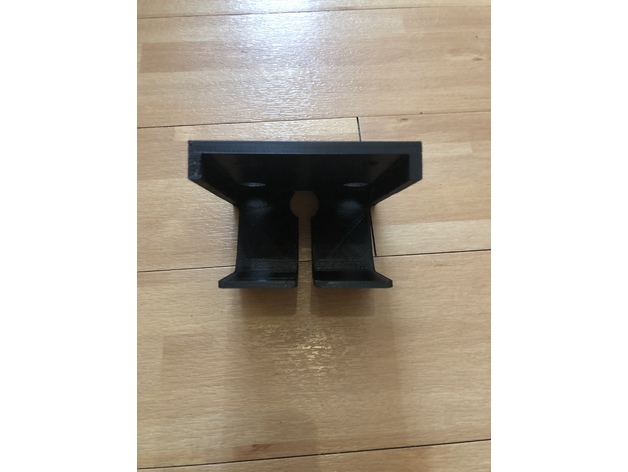
Bosch eBike chargerwallsupport / Bosch ladegerät Wandhalter 3D Print Model
Summary
Halter um ein eBike Lader von Bosch an die Wand zu schrauben. -
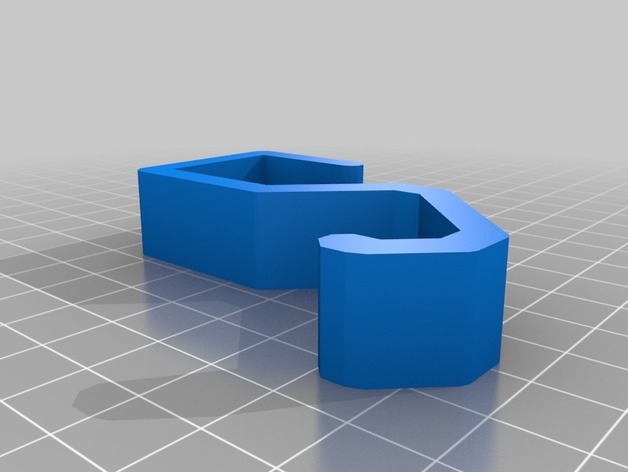
7/8″ Square Angled Shower Rod Hook / Hanger 3D Print Model
Summary
This is a simple hook I designed to hold some baskets which we use to hold my kids bathroom toys. There are many hooks and hangers available on Thingiverse. I wanted the hooks to sit out for ease of use versus just hanging down.
These hooks work very well and feel quite strong.
I made these out of PETG.
Print Settings
Printer Brand:
TEVO
Printer:
Tarantula
Rafts:
No
Supports:
No
Resolution:
200
Infill:
40
Notes:
This hook could be done in most materials. I used PETG for strength and flexibility.
Post-PrintingNotice how they hang forward, and not just down.
-
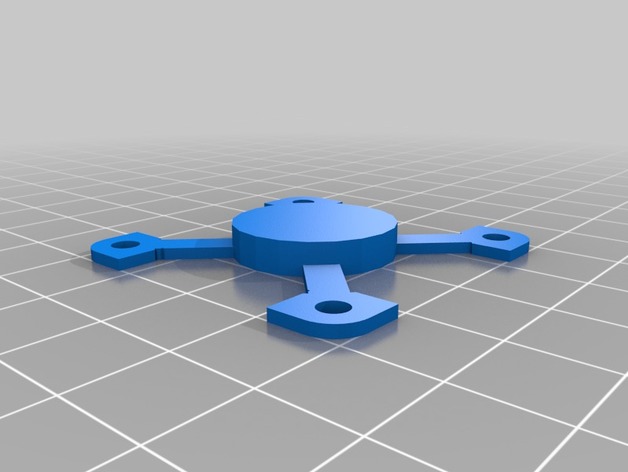
Minimalistic fan bracket / mount for 40mm fan on a nema 17 3D Print Model
Summary
I wanted to put a fan to a drive motor (nema 17), but do not have a lot of space for it, so I created this minimalistic fan bracket. Not ideal in any way, shape or form, but it does provide some cooling when there is little room for a fan.
Mount the bracket to a 40mm fan and glue the centre part with CA glue to the motor. Nothing more to it.
Print Settings
Printer:
Heavily modified mendelmax 2
Rafts:
No
Supports:
No
Resolution:
.250
Infill:
lots of it
Notes:
Print using a strong material and with lots of infill, since the arms are flimsy and need all the strength they can get. -
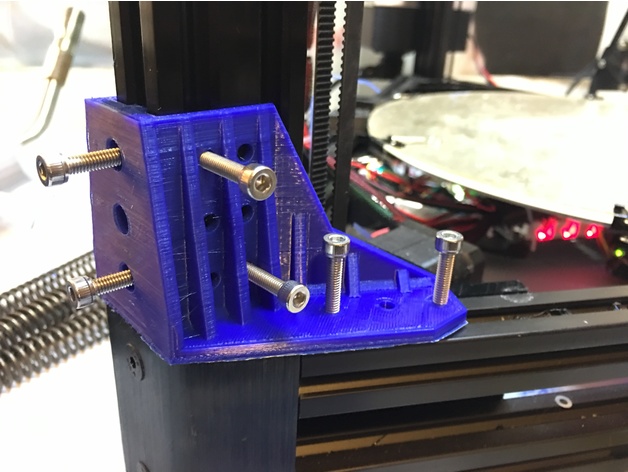
Kossel XL / Ultibots D300VS Corner Brace 3D Print Model
Summary
Deltas can be wobbly beasts, so I’ve made this bracket to keep mine a bit more stable. There’s versions of these for Kossel and Kossel Mini already, but I couldn’t find one that fit my Ultibots D300VS so I went ahead and made this.
There’s versions for M3, M4, and M5 hardware, and printable drop in or slide in T nuts to mount the bracket as well.
You don’t need to bolt in all the mounting holes! I put in lots of holes so there would be lots of options in attaching the bracket to the frame.
Sketchup source file included.
Print Settings
Rafts:
No
Supports:
Yes
Notes:
You don’t need a lot of infill on this, just good perimeters. I printed mine at 30% and 1.2mm (3 layers) of perimeter, and 1mm of top/bottom layers.
PLA is probably your best choice for these brackets as it’s stiffness is very good, and there’s not much heat to cause problems. -
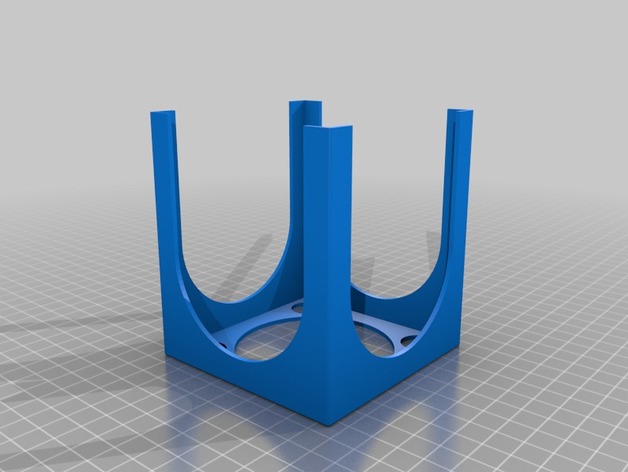
Ohrenspritzenträger / ear syringe holder 3D Print Model
Summary
Ein Halter für ein Ohrenspritzenball, bei dem die restliche Feuchtigkeit abtropfen kann.
A holder for an ear syringe ball, where the remaining moisture can drip off.
Print Settings
Printer:
CTC
Rafts:
No
Supports:
No
Resolution:
0,1 mm
Infill:
15 %
Notes:
PLA -
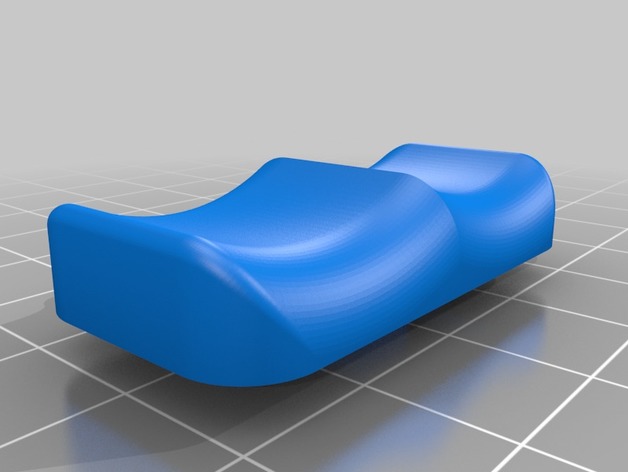
replacement moonroof / sunroof switch for lincoln ls 3D Print Model
Summary
mine was missing so I made this.. -
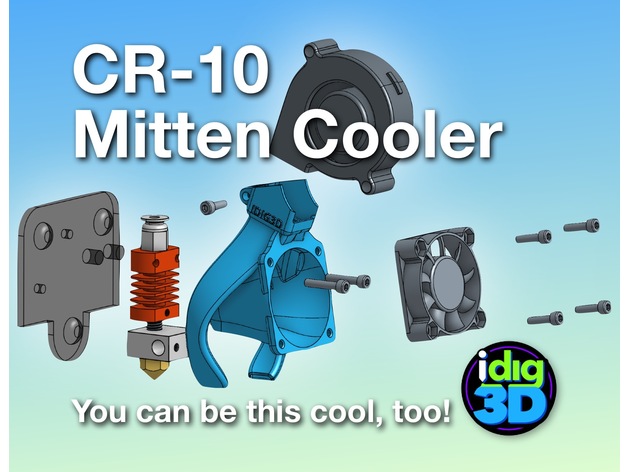
CR-10 / Tronxy Mittens Cooler 3D Print Model
Summary
Let’s keep it cool!
My take on a better cooler for the CR-10 Tronxy X1/3 type hotend. The stock CR-10 set up can cool the heater block too much if you don’t have it wrapped. The parts doesn’t cool all sides well. My Tronxy X3 didn’t have a parts cooler and the heater block couldn’t get temps over 205C.
I tried a couple other popular coolers but did not fit my original parts blower or just not that efficient.
So the Mittens Cooler evolved. Printed in PETG, it weighs 12 grams. Has a bit fo a twist for a little vortex of air.
Needs a few things: a 5015 blower/fan, a few screws, a bit of rewiring, and a bit of tenacity.
WARINING: It works for me. Your results may vary wildly.
If this helps you, a tip would be nice. At least a like and show your makes.
I’ve gone through dozens and dozens of printed revisions to get to this version. Help keep me in plastic. Thanks!
Please note, this is not compatible with the auto-leveling sensor. Send me one and I’ll try to make one fit.
Print Settings
Printer:
Creality CR-10
Rafts:
No
Supports:
No
Resolution:
0.2mm
Infill:
15%
Notes:
Printed with a 10mm brim. My CR-10 took about 2 hours to print.
2 perimeters/shells, 5 top and 4 bottom layers.
I printed in PLA to get started then switch to better temperature-resistance PETG.
Has a built-in support piece (square patch) that should snap out easily. If not, you may have a bit of over-extrusion.
Post-Printing
Clean up
Break out the square support. Careful using hobby knife, trim away the brim and any stray printed strands.Check the parts blower outlets and clean up as needed.
WARNING: Use at your own risk. I’ve tested this best I can at this time and works great for me. Your results may vary greatly.
Gather parts
existing 40mm fan
M3x12 or possible 10s (2-4) — for mounting fan to Mittens Cooler (should be able to reuse existing screws)
5015 blower/fan (needs to be wired–splice and solder or add a connector)
M3x8 screw — for holding 5015 fan/blower
M3x16 screw (2) — for attaching Mitten Cooler and block to mount (should be able to reuse existing screwsDisassembly
Disassemble the hot end removing the housing screws and the fan mounting screws.
Wire in the new 5015 fan.blower paying attention to red and black wiring.
Save the screws since some can be reused.Assembly
The screws should thread themselves into the Mitten Cooler. If they are super tight, you may be over-extruding. Ream the holes bit and try fitting the screws again.
make sure the printer is off
snap the hot end in the back of the Mitten Cooler with the heater wiring to the left
line up the mounting holes to the top two holes on the finned cooling block
push through the M3x16 screws
check to make sure the parts cooling outlets are above the nozzle opening
carefully line up to the mount
tighten screws — if there is an resistance, make sure the screws are aligned properly
insert the 5015 fan/blower
insert the Mx8 screw in the top hole
tighten screw to snuggle hold the 5015 fan/blower
screw in the 40mm fan using M3x12/16. Can get by with just two screws. Snug but not too tight or you could warp the fan adding more noise
check clearance on everything and the give it a go -
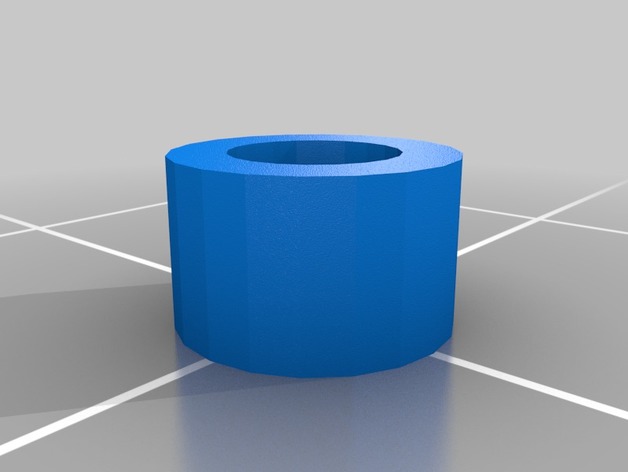
Maker Select Plus / Wanhao Duplicator Plus Hotend Fan Bolt Spacers 3D Print Model
Summary
The screws that attach the fan to my hotend in my Maker Select Plus / Wanhao Duplicator Plus bent. Those screws are apparently M3 x 37MM. I couldn’t find those anywhere, so I purchased very common M3 x 40MM bolts, and designed this spacer to make it fit correctly. It goes in between the bolt and the fan.
Print Settings
Printer:
Maker Select Plus Rafts:
Doesn’t Matter Supports:
Doesn’t Matter Resolution:
.1MM Infill:
Doesn’t Matter -
![[HappyKeys] Instagram / Facebook Auto Scroller, Arduino Attiny85 Programmable Macro Key Instruction 3D Print Model](https://3dhunt.co/static/2018/02/f81ac5955f34fe0357220d26f397a57a.jpeg)
[HappyKeys] Instagram / Facebook Auto Scroller, Arduino Attiny85 Programmable Macro Key Instruction 3D Print Model
Summary
———————————— Parts ———————————
Cherry Key Switch http://amzn.to/2BEygaX
Attiny85 http://amzn.to/2FvhOw6
Keycap http://amzn.to/2DO1ydg
Micro USB cable http://amzn.to/2Enrycm
Blu-Tack Reusable Adhesive http://amzn.to/2DQgOlT
Finished Product(soon) https://www.etsy.com/people/xhjkunl8?ref=hdr_user_menu
Material Kit(soon) https://www.etsy.com/people/xhjkunl8?ref=hdr_user_menu
———————————— Tools ———————————
Filament for 3d print (PLA 1.75mm) http://amzn.to/2DhxPpo
Hot melt glue gun http://amzn.to/2CMf8cE
3D printer (P802MA) http://amzn.to/2CWuVZE
Soldering Iron Kit http://amzn.to/2Gv8UA3
———————————— Instruction ————————–
Source Code https://github.com/happythingsmaker/HappyKeys
3D model file (for 3d printer) https://www.thingiverse.com/thing:2777861
Youtube https://youtu.be/Y8Oh4aj96gU
Manual https://github.com/happythingsmaker/HappyKeys/blob/master/README.md
Schematic https://github.com/happythingsmaker/HappyKeys
———————————— Follow Me ———————————
Instagram: https://www.instagram.com/happythingsmaker/
Facebook: https://www.facebook.com/happyThingsMaker/
Blog : http://happyThingsMaker.com -
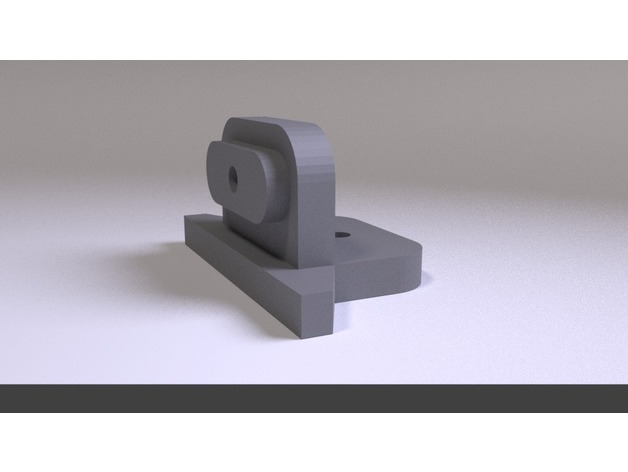
Anet Filament Spool Rack Bracket A8 / A2 3D Print Model
Summary
This bracket is designed for the Anet filament rack. The oval extrusion on the side of the bracket will fit snugly inside the oval cutout on the standard Anet filament rack. This was designed to mount on top of the Anet A2, however could be used for a wall or other type of mounting.
Print Settings
Printer Brand:
Prusa Printer:
Prusa Clone Rafts:
Doesn’t Matter Supports:
Yes Resolution:
.2 Infill:
28% or higher Notes:
1.6mm wall thickness -
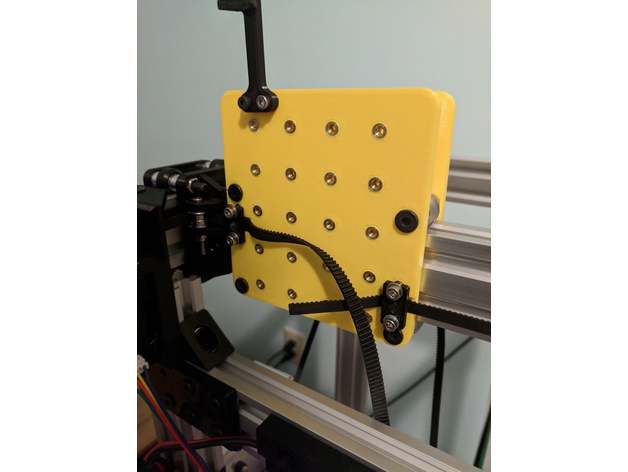
c-bot / d-bot multi-purpose x carriage 3D Print Model
Summary
The main idea behind this plate is to allow me flexibility in what tool I put on the x-carriage, where I put fans and other sensors etc. I’m planning to create a few parts which are based on this plate.
At present I’m just printing this plate twice and using for both sides. Technically over-kill but you never know ( quad extruder anyone? )
To use this plate you will need heat-set inserts. Either from Lulzbot or McMaster. I have set the spacing to be 20mm center to center and they should be just the right size to take these inserts. The lulzbot guys did a nice write-up demonstrating how to put them in.
You will also need the following:
4 x mini-v wheel kits ( either delrin or polycarb )
4 x 6mm spacers
4 x 6mm eccentric spacers
4 x M5 45mm
4 nylock nuts ( or regular and thread lock )
For each plate, 26 heat-set inserts ( see above for link options )
I’m still messing around with the extruder mounts. The titan large diameter gear screws around with the spacing so it sticks out kinda far which could make the hotend subject to moving during rapid transitions.
Also note, this is a work in progress. I’ve assembled it and done movement tests but have not used it for anything serious. Any thoughts or ideas on improvements or changes would be welcome. I plan to make a laser engraver mount and going to try a cnc mill later.
The c-bot you see in the photos is a small form factor so I can iterate on this kind of stuff without taking my main printer down so the plate looks huge 😉
Print Settings
Printer:
c-bot Rafts:
No Supports:
No Resolution:
.2mm Infill:
20-50% Notes:
Using kisslicer I use 3.25 perimeters. At 20% infill and the perimeters this plate feels plenty stiff using PETG. Use your best judgment there.
No overhangs or nut captures so no supports are necessary -
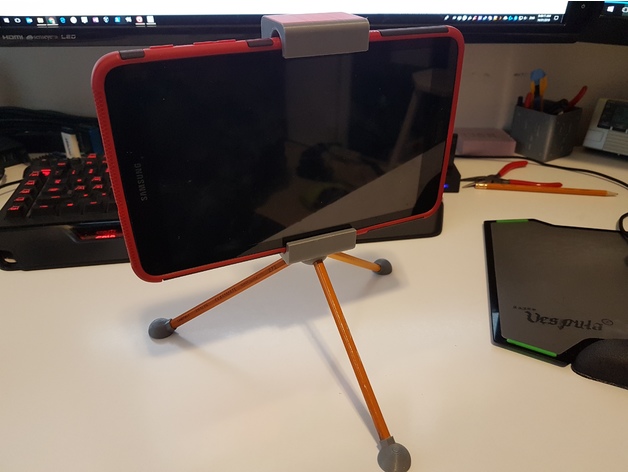
Tablet Stand / Tripod (works with Samsung Tab A 8.0 2017) 3D Print Model
Summary
A tripod holder and stand for my son’s Samsung Tab A 8.0 (2017). It uses standard #2 pencils ;), cut to the same length, as legs. This fits around the rubber/plastic case for the tablet. It is currently holding tightly due to the press fit of the dovetail joint.
I used the Tablet Tripod Mount by lynce9956 as inspiration for my design. My son liked his design but wanted a few things different so we redesigned it from scratch. If you print yours at a finer resolution than I used, 0.32 mm layer height, the dovetail joint might fit a bit loser. My suggestion would be to add an elastic band in the dovetail area such as what was done by lynce9956. They used two eye screws and a rubber band to create tension to hold it closed.
Print Settings
Printer Brand:
Prusa Printer:
i3 MK2S Rafts:
Doesn’t Matter Supports:
Yes Resolution:
0.4 Notes:
I printed this in a really rough layer height as my son was being impatient and just wanted this stand to use his tablet as a camera. The large layer lines meant the fit was just slightly tight, but this worked well as I didn’t have to add any springs or elastics to tension it around the tablet. I printed this laying on it’s side so that the layers would help increase the strength. (i.e. the layer are parallel to the stress).
How I Designed This
Designed in Fusion 360
Fairly simple design. My son told me what he wanted and I translated that to a printable object. -
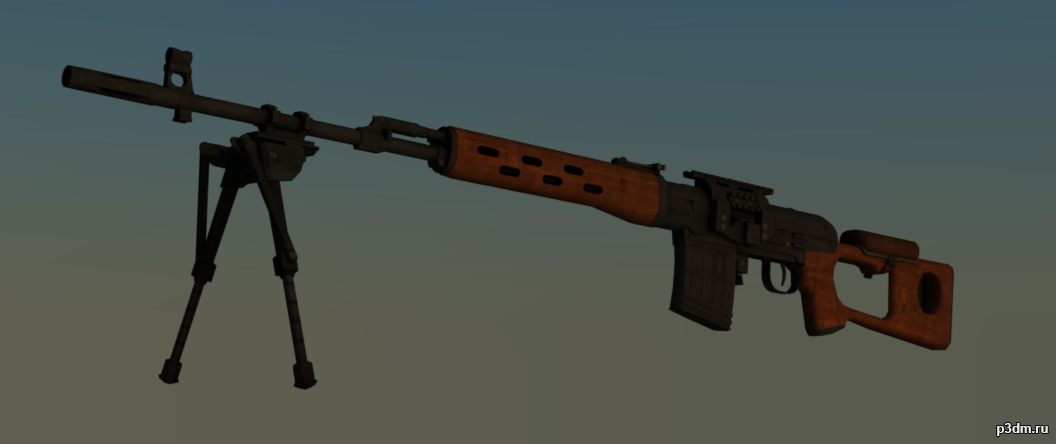
Снайперская Винтовка Драгунова (СВД) / SVD 3D Model
СВД вместе с сошками и планкой пикатинни для установки оптических и каллиматорных прицелов. Взято из игры WarFace.
-
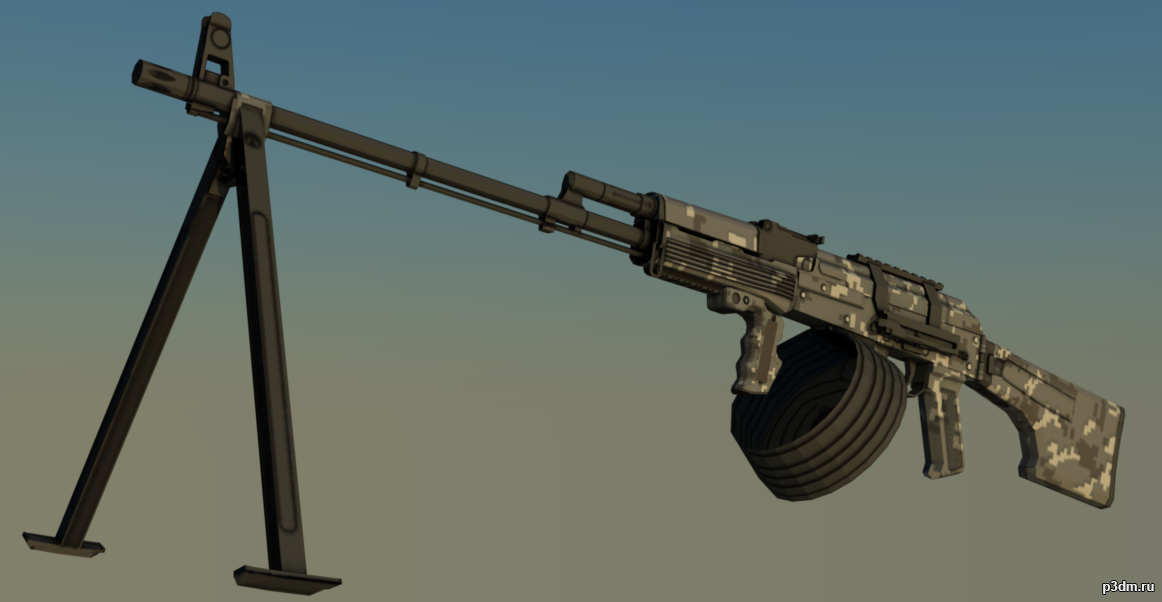
Ручной Пулемет Калашникова (РПК) в городском цифровом камуфляже / RPK Urban Camouflage 3D Model
7,62-мм ручной пулемёт Калашникова, советский ручной пулемёт, созданный на основе автомата АКМ. Принят на вооружение советской армии в 1961 году.Взято из игры WarFace. Также в архиве имеется тактическая рукоятка. Все модели имеют цифровой городской камуфляж. Также пулемет оснащен планкой “Пикатинни” для установки коллиматорных и оптических прицелов.
-
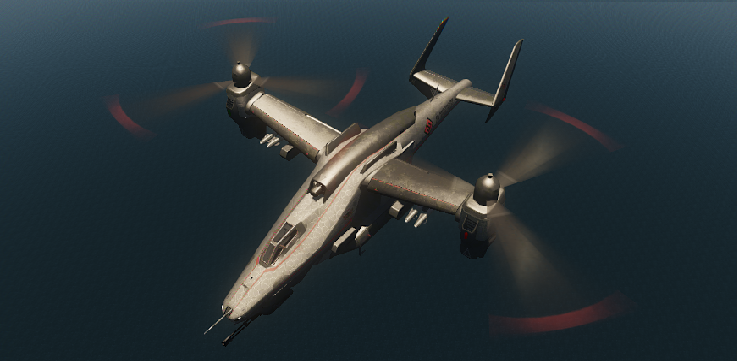
Винтокрыл MK. 2 / Black Wolf 3D Model
Вертолет который засветился во многих спецоперациях. В архиве имеется 2 варианта винтов роторов – стандартные и размытые в полете. Взято из игры WarFace.
-
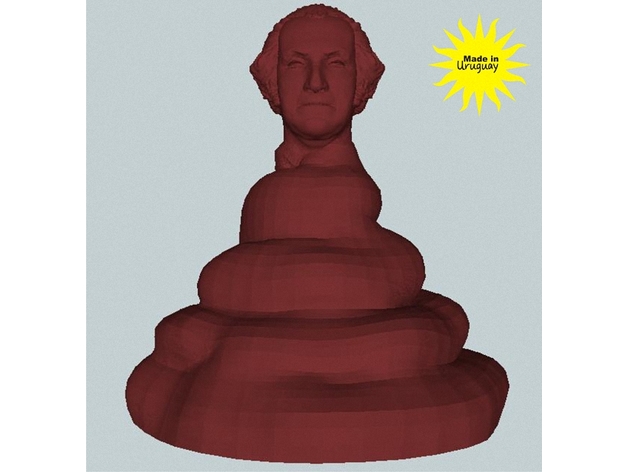
Washington Mierda / Shit 3D Print Model
Summary
Washington Mierda / Shit
La cara fea y gay de Washington fue sacado en “Washington Bust by tychodin” https://www.thingiverse.com/thing:2512787 Gracias tychodin
The ugly and gay face of Washington was pulled in “Washington Bust by tychodin” https://www.thingiverse.com/thing:2512787 Thank you tychodin
ATENCIÓN: quiero aclarar algo he recibido un email de esta empresa donde me pide una cuenta de paypal porque alguien de acá me dio una propina… estoy agradecido a esa persona, pero no me interesa el dinero… yo publico acá algunos de mis hobby solo para compartir porque de eso se trata de esta pagina una comunidad que comparten “cosas”.
Yo tengo la suerte de que soy uruguayo y no me falta nada (si fuera norteamericano estoy seguro que terminaría durmiendo bajo el puente de Brooklyn comiendo basura y muriéndome de hambre como muchos norteamericanos que lo viven…)
TODOS pero todos mis “cosas” pueden hacer lo que se le antojen… solo pido que mis frases no sea modificados pero si compartidos porque ese es mi deseo antes de morir.
La plata no me importa… una vez mas gracias a aquellos que quisieron poner algo.
Pero no lo hagan… Gracias
ATTENTION: I want to clarify something I received an email from this company where I asked for a paypal account because someone from here gave me a tip … I am grateful to that person, but I am not interested in the money … I publish here some of my hobby just to share because that’s what this page is about, a community that shares “things”.
I am lucky that I am Uruguayan and I do not need anything (if I were Northamerican I’m sure I would end up sleeping under the Brooklyn Bridge eating garbage and starving to death like many Northamericans who live it …)
ALL but all my “things” can do what they want … I just ask that my sentences are not modified but shared because that is my wish before I die.
Silver does not matter to me … once again thanks to those who wanted to put something.
But do not do it … Thank you
My Things:
Abraham Lincoln Mierda / Shit – https://www.thingiverse.com/thing:2752527
George W. Bush Mierda / Shit – https://www.thingiverse.com/thing:2752518
Logo Fire and Fury – https://www.thingiverse.com/thing:2748397
ASUS – Frontal PC Cover – Standard V2.0 by (Faca & Mussy) – https://www.thingiverse.com/thing:2745518
Messi cara de mierda / Messi face of shit – https://www.thingiverse.com/thing:2741274
Donald Trump Shit / Mierda – https://www.thingiverse.com/thing:2741267
Letras – Letters Astrolight – https://www.thingiverse.com/thing:2739136
Better read to understand this / Mejor lean para entender esto – https://www.thingiverse.com/thing:2736391
Velas demoníacas / Demonic candles – https://www.thingiverse.com/thing:2725134
Chapa/Plate Montevideo (decoración/decor) – https://www.thingiverse.com/thing:2721633
Graffiti PENE / PENIS (+18) – https://www.thingiverse.com/thing:2720582
Graffiti Skateboarding no es un crimen / is not a crime – https://www.thingiverse.com/thing:2706960
Snoopy (for my friend Mussy) – https://www.thingiverse.com/thing:2706127
Logo FX the serie 1996-1998 – https://www.thingiverse.com/thing:2703174
Woodstock – https://www.thingiverse.com/thing:2702669
Graffiti Independecia de EEUU de Northamerica – https://www.thingiverse.com/thing:2695303
Graffitis John Lennon – https://www.thingiverse.com/thing:2688181
Botella de agua / Water Bottle – https://www.thingiverse.com/thing:2683618
Graffitis LEY / LAW – https://www.thingiverse.com/thing:2671260
Graffiti Anti-Norteamericanos – https://www.thingiverse.com/thing:2670526
Cartel Bebé a bordo / Sign Baby on Board – https://www.thingiverse.com/thing:2653304
Botones/buttons – https://www.thingiverse.com/thing:2644421
comics anti-Cumbia poster (humor) – https://www.thingiverse.com/thing:2634262
Logo GoPro – https://www.thingiverse.com/thing:2632151
Graffiti droga – https://www.thingiverse.com/thing:2630467
California Country FREE!!!!! / California Pais libre!!!!! / https://www.thingiverse.com/thing:2628526
Atari Jaguar logo – https://www.thingiverse.com/thing:2620148
Letras / Letters Autograf_PersonalUseOnly (trial) – https://www.thingiverse.com/thing:2601850
Logo de Fiat 500 del 2007 / Logo Fiat 500 of 2007 – https://www.thingiverse.com/thing:2599019
Fuji film el viejo logo / Fuji film old logo – https://www.thingiverse.com/thing:2598637
Lamborghini Egoista (HD) – https://www.thingiverse.com/thing:2597212
My Customized classic bike license plates – https://www.thingiverse.com/thing:2592552
My Customized Braille Alphabet (software translator) – https://www.thingiverse.com/thing:2564926
Logo y Puerta para USB / Logo and Door for USB – https://www.thingiverse.com/thing:2561413
Logo Luis Suarez 3D (Alvaro Cabeza) – https://www.thingiverse.com/thing:2547895
Graffiti para el baño / Graffiti for the bathroom – https://www.thingiverse.com/thing:2504063
Regla para Klonk – Rule for Klonk (Image Measurement) – https://www.thingiverse.com/thing:2451930
Raspberry Inside – https://www.thingiverse.com/thing:2446419
Sign EXIT – https://www.thingiverse.com/thing:2446123
Ferrari 458 GT3 Race Car (2014) – https://www.thingiverse.com/thing:2435527
The Cumparsita Keychain – https://www.thingiverse.com/thing:2262407
My Customized Lithopane (Charlie Manson) – https://www.thingiverse.com/thing:2239964
Cartel STOP para la puerta de su cuarto – Sign STOP for your bedroom door – https://www.thingiverse.com/thing:2053810
Pendants – Dijes “666” – https://www.thingiverse.com/thing:2044749
ASUS logo Fan Grill 120mm – https://www.thingiverse.com/thing:2044124
T-shirt of Charlie Manson – https://www.thingiverse.com/thing:2040035
Fan Grille – 120mm, 6 vanes, 4 rings, ASUS logo – https://www.thingiverse.com/thing:2033662
Logo Aguada (Basketball Uruguay) – https://www.thingiverse.com/thing:2012851
FedEx Logo (created for a friend mrtai308) – https://www.thingiverse.com/thing:2012598
Pendants – Dijes / Key hangers – Colgadores de Llaves “Estrella del diablo – Devil star” – https://www.thingiverse.com/thing:2008589
Keychain NO a UBER – https://www.thingiverse.com/thing:2005711
Logo Nirvana – https://www.thingiverse.com/thing:2000093
AntiCumbia Grafitis – https://www.thingiverse.com/thing:1998858
Anti-CUMBIA – https://www.thingiverse.com/thing:1994919
CR7 Nike Logo Design Cristiano Ronaldo (keychain) – https://www.thingiverse.com/thing:1993509
CR7 – Cristiano Ronaldo (keychain) – https://www.thingiverse.com/thing:1993404
Koelner Haie Logo V2 – https://www.thingiverse.com/thing:1984912
Koelner Haie Logo V1 – https://www.thingiverse.com/thing:1984870
Koelner Haie Logo (To the request of a friend) – https://www.thingiverse.com/thing:1984018
Uruguay Natural (keychain) – https://www.thingiverse.com/thing:1982931
Logo JAMES Uruguay – https://www.thingiverse.com/thing:1982855
Logo Conaprole – https://www.thingiverse.com/thing:1982812
Logo Topper – https://www.thingiverse.com/thing:1981807
ASUS – Frontal PC Cover – Standard – https://www.thingiverse.com/thing:1981556
Logo SONY (Taken from original vector) – https://www.thingiverse.com/thing:1981376
Logo Meccano – https://www.thingiverse.com/thing:1981356
Logo 3D MTV – https://www.thingiverse.com/thing:1980111
Flag of Uruguay – https://www.thingiverse.com/thing:1979984
Logo HBO – https://www.thingiverse.com/thing:1905703 -
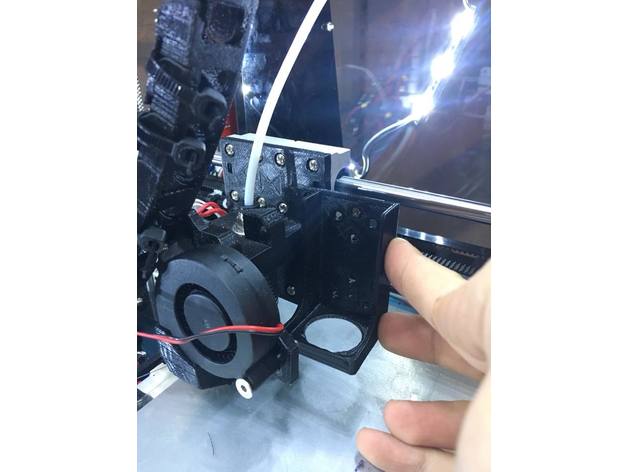
Anet A8 Laser bracket / Mount (Fits to E3D bracket) IN PROGRESS 3D Print Model
Summary
Anet A8 Laser bracket / Mount (Fits to E3D bracket) IN PROGRESS
I bought an laser to mount on my Anet a8.
But than i would need to take of my hotend, and recalibrate it every time.
Therefor i designed this bracket which i can mount next to my E3D V6.
I made this one for my 2.5W laser. -
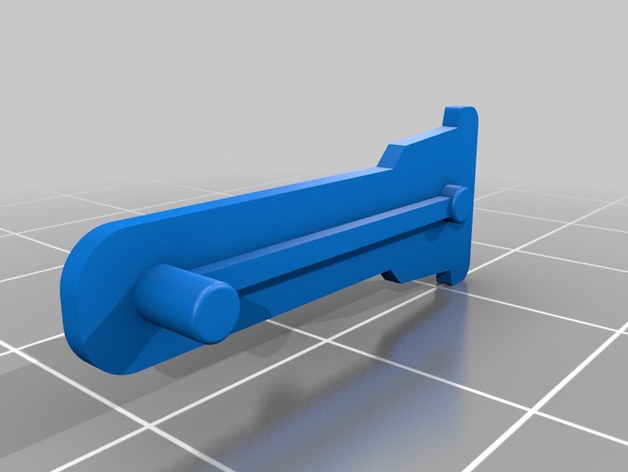
GSG / SIG 1911 magazine base lock 3D Print Model
Summary
GSG / SIG 1911 magazine base lock piece.
Have yet to print, measurements and fitment has not been double checked. -
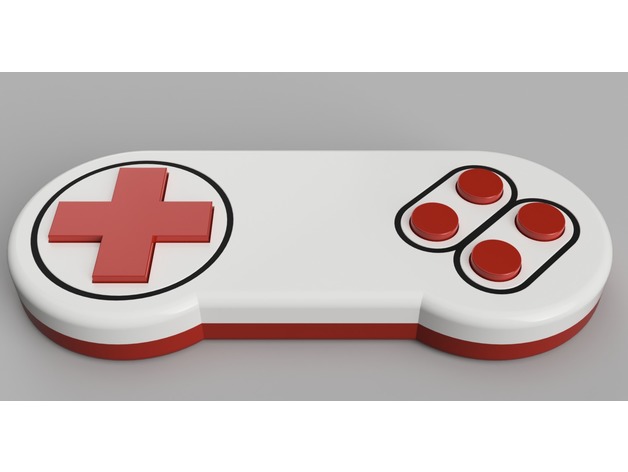
I2C Game Controller for Arduino / Raspberry Pi 3D Print Model
Summary
As part of my LED-Matrix Table project (uploaded soon) , I designed this game controller to control the table and to play games. It can be used as an input device for a wide variety of micro-controllers or raspberry pi computers.
Up to 8 controller can be used in parallel with the same control chip. The state of the eight buttons can be read by using the I2C protocol and therefore it only requires 4 wires for connection.
Additional Parts
The chip, included in the controller, is a PCF8574 on a small circuit board from Amazon (8€):https://www.amazon.de/gp/product/B06W564ZSD
And the pushbuttons are from Ebay (1.2€):http://www.ebay.de/itm/10-Stück-DIP-4-Mini-Drucktaster-Printschalter/272861590169
Additionally, you need a few wires for connecting the buttons to the PCF8574 chip and a 4-wire-cable with approx. 2 meter length to connect the controller to the raspberry pi.
Instructions
Print all parts 🙂
Cut out two perfboard pieces with a dimension of 40×40 mm each.
Solder 4 buttons on each perfboard, pay attention to the proper alignment (use the X button as reference, both perfboards require the same alignment)
Connect one pin of each button to the I2C port extender. Connect the other pin of each button to GND on the port extender circuit board.
Slide the two prefboards into their rails and use hotglue to fixate them (check if the align with the corresponding button holes as good as possible.
Connect the long cable to the port extender board. If you use the same board, you have to desolder the i2c connector on both sides.
Fixate the port extender board with some hotglue in the center of the controller as shown in the the pictures above.
Connect the other end to your arduino / raspberry pi and you are done.
Have fun! 🙂
Print Settings
Rafts:
No Supports:
No Resolution:
0.2 mm Infill:
15% Notes:
Multi-color
Multi-color printing of the front side of the controller can be achieved by pausing the print before layer 2 and 4 (0.2 mm layer height). Print layer 2 and 3 in a different color to achieve the colored inset, seen in the pictures above. -
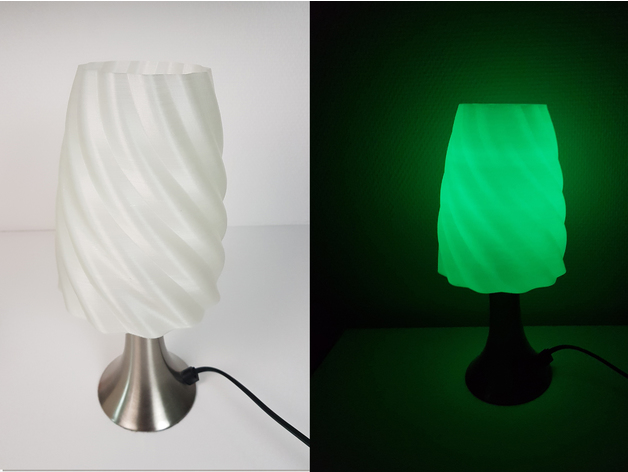
Lamp Shade / Abat Jour 3D Print Model
Summary
https://www.youtube.com/watch?v=TaMHD__nSLk&feature=youtu.be&t=416 -
Nissan Pathfinder / Xterra / Frontier hood prop rod clip 3D Print Model
Summary
Replacement hood prop rod clip
Fits:
Frontier 2005-2017
Pathfinder 2005-2012
Xterra 2005-2015
I printed mine with small supports under the little clip legs, and it printed fine.
Hope this helps! -
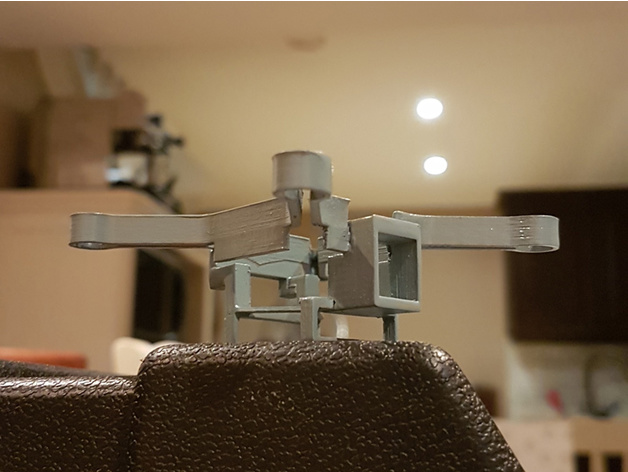
XL-RCM 10.0 PIXXY: Pocket drone / FPV quad Remix 3D Print Model
Summary
I chopped up the original model to print with no supports but some glue, a little sanding and patience are required. PLA
Print Settings
Printer:
Deegreen Rafts:
No Supports:
No Resolution:
100 μm Infill:
30% Notes:
I chopped up the original model to print with no supports but some glue, a little sanding and patience are required. PLA -
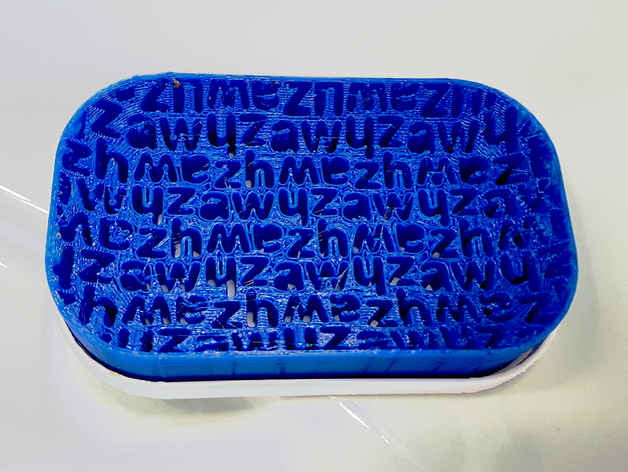
ZHAW Soap Dish / Sponge Holder 3D Print Model
Summary
This is a soap dish or sponge holder perfect for catching drips before they reach the counter. The design is based on the Zurich University of Applied Science (ZHAW) logo.
The holder consists of a top “dish” and a bottom “saucer”. STL files are provided for a 6x10cm version that fits common hand soap, as well as a larger 9.5x12cm version that is more suited for sponges.
The design was created in OpenSCAD using the SymmetryCAD library. The dimensions can be easily modified in the code, and the logo could be swapped for another with a minor effort. The tesselation pattern can also be modified to any of the 17 wallpaper groups; the ZHAW logo is tiled with cmm symmetry. -
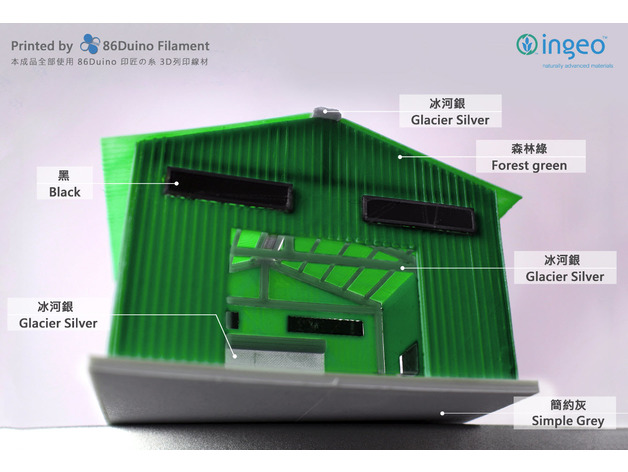
Taiwan style metal sheet building / 台灣鐵皮屋 3D Print Model
Summary
For more printing object please visit 86Duino facebook and give us a “like” and thanks for the tips…https://www.facebook.com/86duino
喜歡圖檔的好朋友請記得到 86Duino Filament 3D 列印 / 耗材 – 不正經研究中心 粉絲團給我們按讚哦 https://www.facebook.com/86duino
Post-Printing -
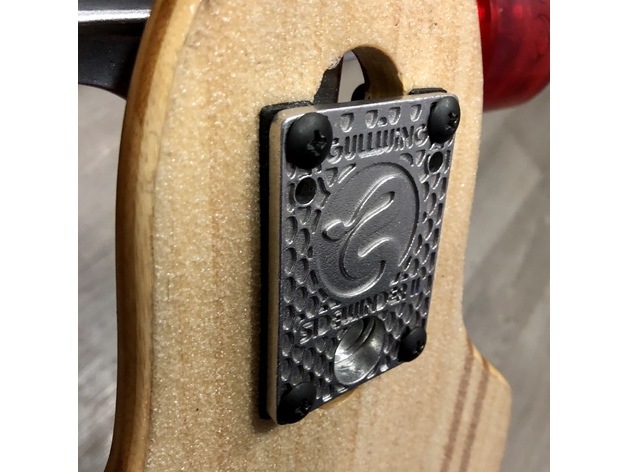
Drop through longboard risers / shock absorbers 3D Print Model
Summary
Designed these to add some shock absorption to my longboard with TPU risers and reduce the teeth-rattling feeling I had going over cobblestones. These fit standard drop-through trucks and match the hole pattern for mounting. They’re 2mm tall which allowed me to fit them without getting longer screws for the truck mounts, use the scale z command if you’d like them thicker/thinner.
These were printed with Ninjaflex Semiflex on Ultimaker 2+ with 100% infill
Print Settings
Printer Brand:
Ultimaker Printer:
Ultimaker 2 Rafts:
No Supports:
No Resolution:
0.1 Infill:
100 Notes:
Ninjaflex Semiflex prints well slowed down to 20-40mm/s and retraction off.
Post-Printing
Cleanup
Cuticle trimmers work great for removing TPU blobs stuck to the printed surfaces.
How I Designed This
Designed in Fusion 360, feel free to download and edit: http://a360.co/2AewbDs -
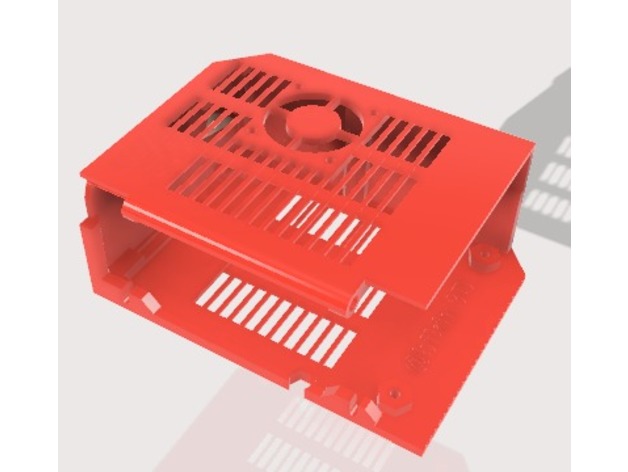
MKS GEN L V1.0 Prusa i3 MK2 / MK2s Case 3D Print Model
Summary
I edited using Fusion 360 and already printed for my self. I its work for you too.
Print Settings
Printer Brand:
Prusa Printer:
Prusa Mk1 Rafts:
No Supports:
No Resolution:
0.2mm Infill:
15 -
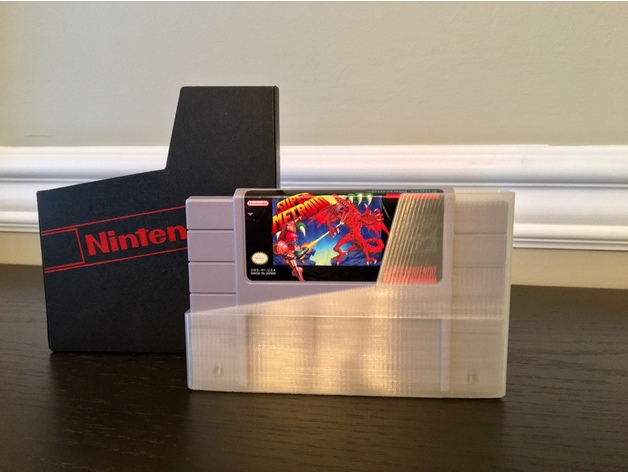
Nintendo SNES Cartridge Dust Cover / Storage Sleeve 3D Print Model
Summary
This thing is a storage solution for SNES (Super Nintendo) cartridges. Normally, SNES cartridges don’t stand on their side. This cover fixes this problem so you can store your SNES carts vertically on a shelf conserving space and allowing you to see all your cartridges. This cover is modeled after the classic NES dust cover.
The walls are sized to print 2 shells thick on a Replicator 2. At 0.2mm layer height this takes ~1 hours 30 minutes to print.
NOTE: If you have trouble with your replicator creating a weak seam at the “zipper” try setting your “retractDistance” to “1.1” or “1.2”.
Print Settings
Printer Brand:
MakerBot Printer:
MakerBot Replicator 2 Rafts:
No Supports:
No Resolution:
0.2 mm Infill:
Doesn’t Matter Notes:
The walls are sized to print 2 shells thick on a Replicator 2. At 0.2mm layer height this takes ~1 hours 30 minutes to print.
NOTE: If you have trouble with your replicator creating a weak seam at the “zipper” try setting your “retractDistance” to “1.1” or “1.2”. -
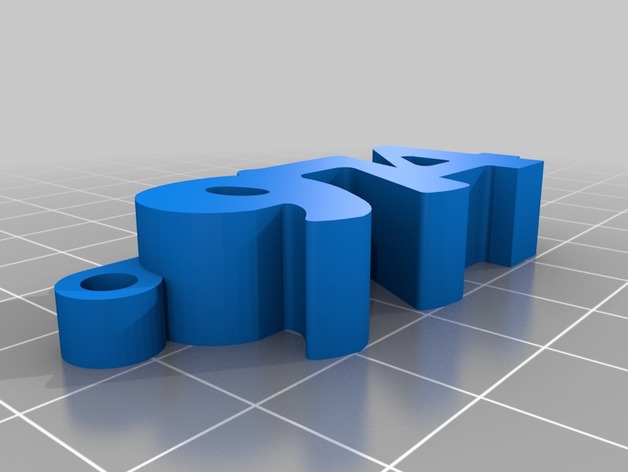
Keychains 971 / 974 (Guadeloupe) / (Réunion) 3D Print Model
Summary
Porte-clés avec numéro des départements français d’outre-mer.
Print Settings
Printer Brand:
DAGOMA Printer:
Neva Rafts:
No Supports:
No Resolution:
0.2mm Infill:
33% -
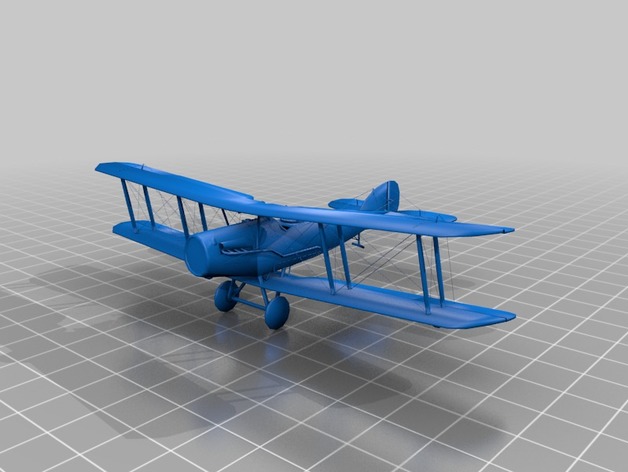
Bristol F.2B – First World War Airplane / Avion de la Première Guerre mondiale 3D Print Model
Summary
(Le français suit l’anglais)
The U.K. designed Bristol Fighter was the most successful two-seat combat aircraft of the First World War. It was initially designed as a reconnaissance machine, the Bristol Fighter’s robust design, powerful engine, good manoeuvrability and relatively heavy armament enabled it to excel as a fighter aircraft.
The Bristol F.2B found at the Canada Aviation and Space Museum was built in 1918. It was restored by Historic Aircraft Collection in the U.K. from the early 1980s to 2006. In 2006, it flew in several aerial displays in Britain. The Museum then acquired the fighter through an aircraft trade later that year.
For more information about the Bristol F.2B please visit:https://ingeniumcanada.org/aviation/collection-research/artifact-bristol-f2b-fighter.php
Note: This model is mainly meant to be viewed in a virtual environment using computer software. You can try printing it off, though we cannot guarantee the quality. For educational activities that this model can be used in, please visit:https://ingeniumcanada.org/ingenium/museums/education/3D-aircrafts.php
Our terms of use can be found at: https://ingeniumcanada.org/ingenium/doc/content/cstmc/CSTMC%20terms%20of%20use%203D%20ENG.pdf
De conception britannique, le Bristol Fighter est le chasseur biplace qui a connu le plus de succès pendant la Première Guerre mondiale. Étant donné sa robustesse, la puissance de son moteur, sa maniabilité et son armement relativement lourd, cet avion d’abord destiné à la reconnaissance a excellé comme chasseur.
Construit en 1918, le Bristol F.2B du Musée de l’aviation et de l’espace du Canada a été restauré par la Historic Aircraft Collection, au Royaume-Uni, du début des années 1980 jusqu’en 2006. Cette année-là, il a participé à diverses présentations aériennes en Grande-Bretagne. Le Musée l’a acquis la même année en l’échangeant contre un autre appareil.
Pour obtenir un complément d’information sur le Bristol F.2B, visitez le sitehttps://ingeniumcanada.org/aviation/collections-recherche/artefact-bristol-f2b-fighter.php
Remarque : Ce modèle est conçu pour être visualisé dans un environnement virtuel au moyen d’un logiciel. Vous pouvez tenter de l’imprimer. Toutefois, nous ne pouvons garantir la qualité de l’impression. Pour prendre connaissance des activités éducatives permettant l’utilisation de ce modèle, visitez le site https://ingeniumcanada.org/ingenium/musees/educatif/avions-3D.php
Vous trouverez nos conditions d’utilisation à l’adresse https://ingeniumcanada.org/ingenium/doc/content/cstmc/CSTMC%20terms%20of%20use%203D%20FR.pdf -
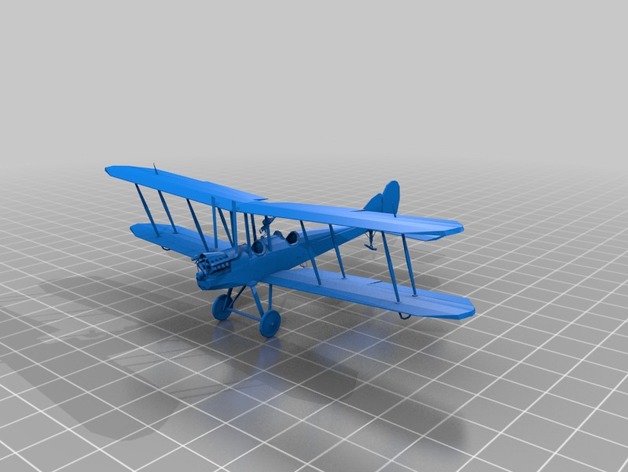
Royal Aircraft Factory B.E. 2c – First World War Airplane / Avion B.E. 2c de Royal Aircraft Factory – Avion de la Première Guerre mondiale 3D Print Model
Summary
(Le français suit l’anglais)
The U.K. designed B.E. 2s saw service with the Royal Flying Corps (U.K.) from 1912 onwards. The B.E. 2c operated in France, mainly for reconnaissance and observation, although some were single-seat bombers. Single-seat B.E. 2c night fighters downed six airships over Britain.
The B.E. 2c found at the Canada Aviation and Space Museum was sent to Canada as a war trophy in 1919. It was restored in the late 1950s and became a part of the Museum in 1964.
For more information about the B.E. 2c please visit:https://ingeniumcanada.org/aviation/collection-research/artifact-royal-aircraft-factory-b-e-2c.php
Note: This model is mainly meant to be viewed in a virtual environment using computer software. You can try printing it off, though we cannot guarantee the quality. For educational activities that this model can be used in, please visit:https://ingeniumcanada.org/ingenium/museums/education/3D-aircrafts.php
Our terms of use can be found at: https://ingeniumcanada.org/ingenium/doc/content/cstmc/CSTMC%20terms%20of%20use%203D%20ENG.pdf
De conception britannique, les appareils B.E. 2 ont été utilisés par la Royal Flying Corps (Royaume Uni) à partir de 1912. En France, les B.E. 2c ont été utilisés comme avions de reconnaissance et d’observation, ainsi que, dans quelques cas, comme bombardiers monoplaces. Des chasseurs de nuit B.E. 2c ont abattu six dirigeables au-dessus de la Grande Bretagne.
Le B.E. 2c du Musée de l’aviation et de l’espace du Canada a été envoyé au Canada en 1919 comme trophée de guerre. Il a été restauré vers la fin des années 1950 et a été ajouté à la collection du Musée en 1964.
Pour obtenir un complément d’information sur le B.E. 2c, visitez le sitehttps://ingeniumcanada.org/aviation/collections-recherche/artefact-royal-aircraft-factory-b-e-2c.php
Remarque : Ce modèle est conçu pour être visualisé dans un environnement virtuel au moyen d’un logiciel. Vous pouvez tenter de l’imprimer. Toutefois, nous ne pouvons garantir la qualité de l’impression. Pour prendre connaissance des activités éducatives permettant l’utilisation de ce modèle, visitez le site https://ingeniumcanada.org/ingenium/musees/educatif/avions-3D.php
Vous trouverez nos conditions d’utilisation à l’adresse https://ingeniumcanada.org/ingenium/doc/content/cstmc/CSTMC%20terms%20of%20use%203D%20FR.pdf -
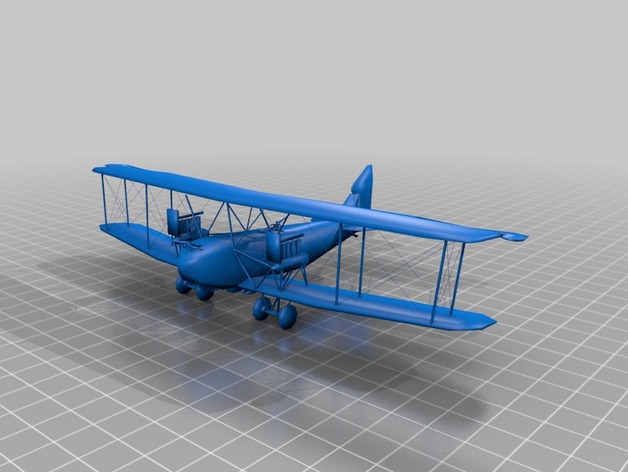
A.E.G. G.IV – First World War Airplane / Avion de la Première Guerre mondiale 3D Print Model
Summary
(Le français suit l’anglais)
The Allgemeine Elektrizitäts Gesellschaft (A.E.G.) G.IV bomber went into general
use with the German Air Force in 1917. Because of its relatively short range,
the G.IV served mainly as a tactical bomber, and operated close to the front lines.
The G.IV flew both day and night operations, but, as the war progressed, was
restricted increasingly to night missions. A.E.G. units operated in France,
Romania, Greece, and Italy.
The A.E.G. G.IV found at the Canada Aviation and Space Museum was transported to Canada in 1919 as a war trophy and has remained in the country ever since. It is the only
surviving multi-engine German aircraft from the First World War and it is the only surviving aircraft from this period covered in the unique German “night lozenge” camouflage pattern.
For more information about the A.E.G. G.IV please visit:https://ingeniumcanada.org/aviation/collection-research/artifact-aeg-giv.php
Note: This model is mainly meant to be viewed in a virtual environment using computer software. You can try printing it off, though we cannot guarantee the quality. For educational activities that this model can be used in, please visit: https://ingeniumcanada.org/ingenium/museums/education/3D-aircrafts.php
Our terms of use can be found at: https://ingeniumcanada.org/ingenium/doc/content/cstmc/CSTMC%20terms%20of%20use%203D%20ENG.pdf
Le bombardier Allgemeine Elektrizitäts Gesellschaft (A.E.G.) G.IV a été mis en service dans l’armée de l’air allemande en 1917. En raison de son rayon d’action relativement court, il a surtout été utilisé pour des missions de bombardement tactique près du front. L’A.E.G. G.IV a servi à réaliser des opérations de jour et de nuit, mais, avec le temps, on l’a de plus en plus réservé aux missions nocturnes. Il a été utilisé en France, en Roumanie, en Grèce et en Italie.
L’A.E.G. G.IV du Musée de l’aviation et de l’espace du Canada a été expédié au Canada comme trophée de guerre en 1919 et est demeuré ici depuis. C’est le seul avion allemand à plusieurs moteurs utilisé pendant la Première Guerre mondiale qui existe toujours et le seul appareil de cette période qui porte encore le distinctif camouflage de nuit à losanges.
Pour obtenir un complément d’information sur le A.E.G. G.IV, visitez le sitehttps://ingeniumcanada.org/aviation/collections-recherche/artefact-aeg-giv.php
Remarque : Ce modèle est conçu pour être visualisé dans un environnement virtuel au moyen d’un logiciel. Vous pouvez tenter de l’imprimer. Toutefois, nous ne pouvons garantir la qualité de l’impression. Pour prendre connaissance des activités éducatives permettant l’utilisation de ce modèle, visitez le site https://ingeniumcanada.org/ingenium/musees/educatif/avions-3D.php
Vous trouverez nos conditions d’utilisation à l’adresse https://ingeniumcanada.org/ingenium/doc/content/cstmc/CSTMC%20terms%20of%20use%203D%20FR.pdf -
ISD1820 Recording / Speaker Module Placeholder 3D Print Model
Summary
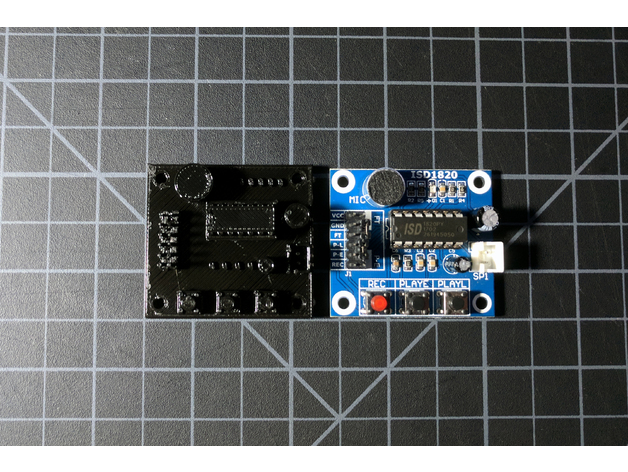
This is a placeholder you can print and/or incorporate into your models in place of an ISD1820 recording/playback module PCB. Useful for planning or test-fitting the module into your prints or other projects.
There are many variants of the ISD1820 and similar recording modules available online, but this is the one I used for this design: https://www.amazon.com/gp/product/B01I37DBNE
OpenSCAD file is included if you want to modify the geometry.
Print Settings
Printer Brand:
Prusa Printer:
Prusa Clone Rafts:
No Supports:
No Resolution:
0.3 Infill:
20 -
Model Ropeway / Ski Lift 3D Print Model
Summary
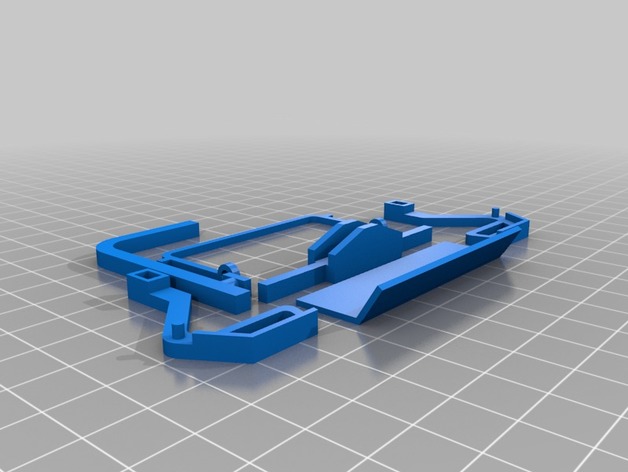
Extracted the files from the sketchup file created and posted by hein4bloed. No other changes have been made. -
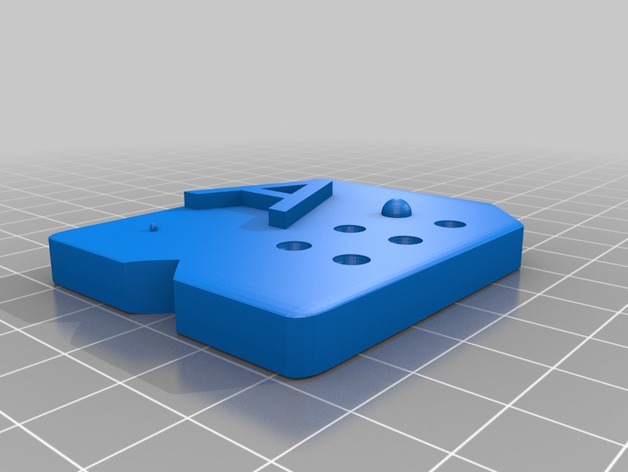
Abecedario Braille / Braille Abecedary 3D Print Model
Summary
Este es una serie de piezas para la enseñanza de Braille a discapacitados visuales.
This group of pieces was desgined to teach Braille to blind people. -
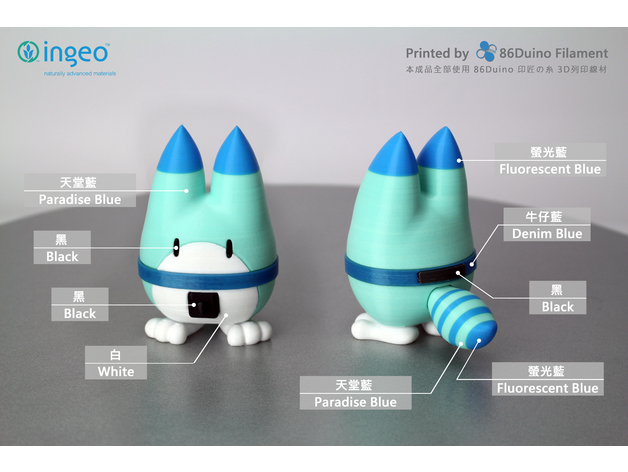
Lucky Beast / 幸運獸 / ラッキービースト 3D Print Model
Summary
For more printing object please visit 86Duino facebook and give us a “like” and thanks for the tips…https://www.facebook.com/86duino
喜歡圖檔的好朋友請記得到 86Duino Filament 3D 列印 / 耗材 – 不正經研究中心 粉絲團給我們按讚哦 https://www.facebook.com/86duino
Lucky Beast (ラッキービースト) is the name of several robots around Japari Park. Often referred to as “Boss” by Friends at the park, Lucky Beasts take care of maintenance, feeding the Friends and guiding visitors around if there aren’t any human park employees available.
Lucky Beasts appear exclusively in the Kemono Friends anime, with one specific unit serving as a Kaban and Serval’s window into past events at the park through pre-recorded memo-logs by Mirai as well as guiding them on their journey. Lucky Beasts are fully equipped to talk and give information on the park and all Friends registered within, but will only do so if a human is around.
Post-Printing -
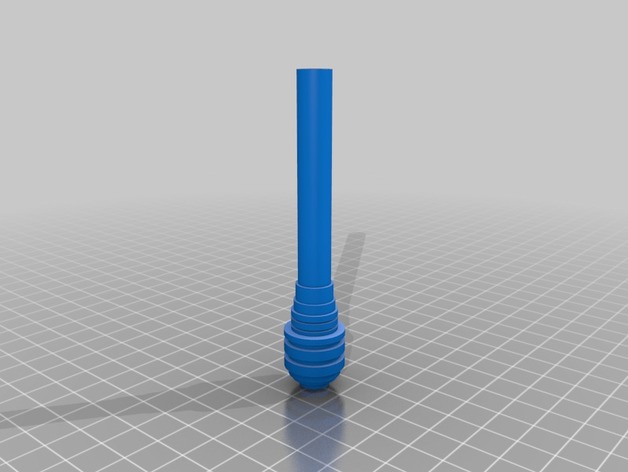
STAR WARS Imperial Code Cylinders for Pilot / Navy / officers 3D Print Model
Summary
Imperial Code Cylinders, just print it using Silver color ABS / PLA or any other colors and paint it silver, it will be good to go -
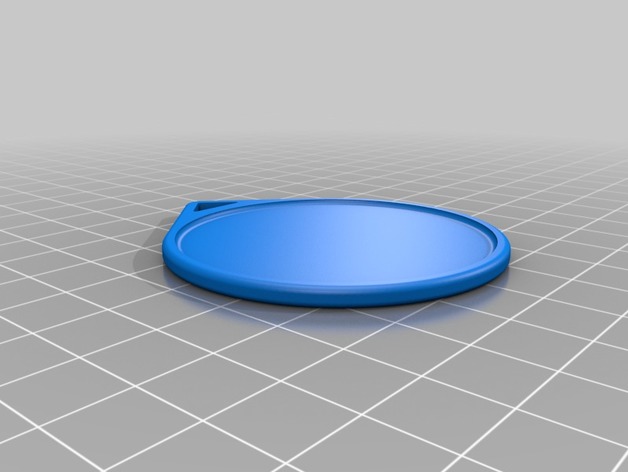
Blank Medal 50mm Image Diameter / Medalla en Blanco para Imagen de 50mm 3D Print Model
Summary
For fast printing < 10 min:
Layer Height: 0.29
Top Layers: 3
Bottom Layers: 2
Perimeter Shells: 1 -
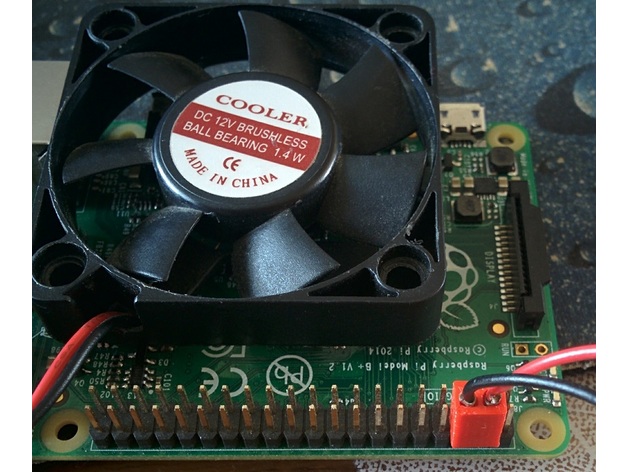
Connecteur de ventilateur pour Raspberry Pi / Fan connector 3D Print Model
Summary
Un simple connecteur permettant d’utilisant un ventilateur classique de PC (après avoir retiré le connecteur en plastique d’origine).
Il est important de conserver les lames ressort en état pour un contact efficace.
Les ventilateurs 12v tournent moins vite en 5v mais cela est largement suffisant pour le raspberry pi. -
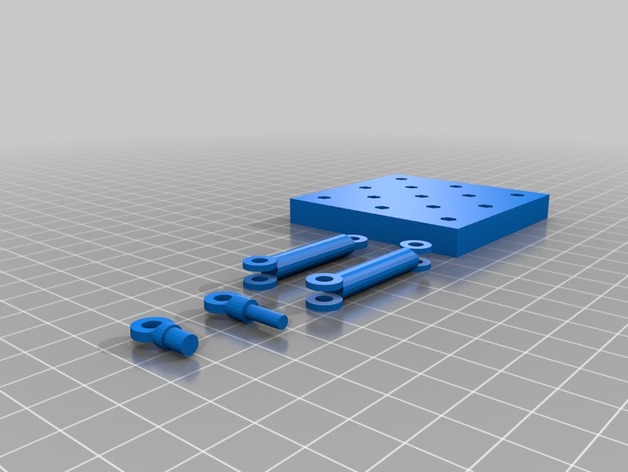
Nendoroid Stand / Base / Support 3D Print Model
Summary
Experimental version!! Need to print and test it
Nendoroid Base, using Legend Of Zelda Majora’s Mask version one for reference -
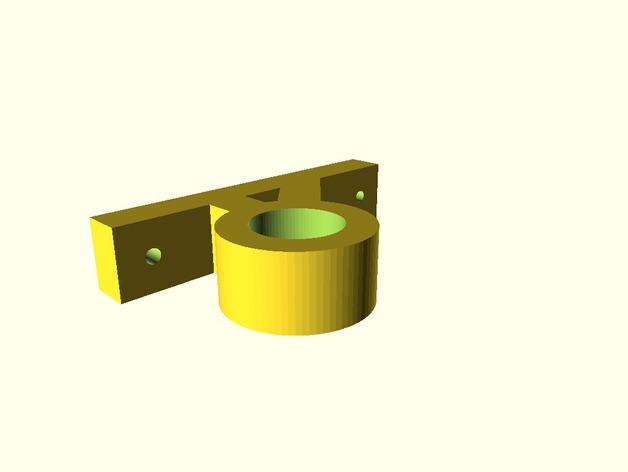
Customizable Curtain Rod Hanger / Wall Mount 3D Print Model
Summary
This is a customizable curtain rod hanger. There are a couple other hangers around, but i wanted one that i could adjust as needed.
Enjoy! -
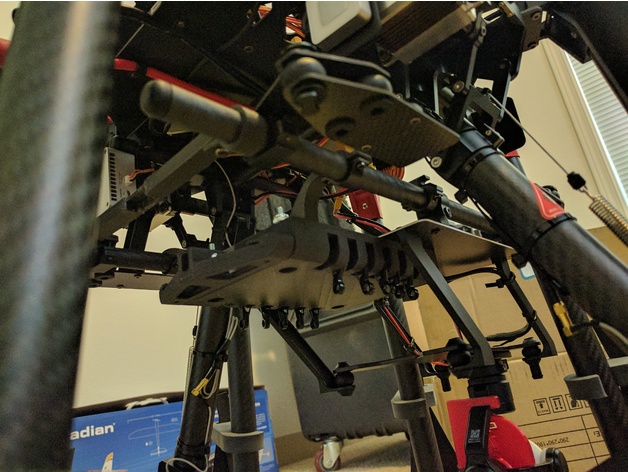
12-Slot Payload Release/Cargo Drop for DJI Matrice 600 / S1000 3D Print Model
Summary
Controlled by A3 shutter channel. Release single slot each time when pressing the shutter button. +5v power from SBus port. Arduino is converting the shutter pulse to 12 steps on linear servo.
Make sure you have 148mm (Matrice 600 standard) spacing between two carbon fiber tubes. If you are using S1000 + Z15 configuration, you might need to get a Matrice 600 Series – Z15 Series Gimbal Mounting Connector and print out new battery_mounting_bar to get correct spacing.
Part list:
Actuonix 100mm L12-R Micro Linear Servos
3mm carbon fiber rod
M2.5 screws
6-32 bolts and nuts
Arduino nano
Print Settings
Printer Brand:
SeeMeCNC Printer:
Rostock MAX v3 Rafts:
No Supports:
Yes Resolution:
.2mm Infill:
30 Notes:
battery_mounting_bar.STL is for S1000/S1000+ onlyCustom Section
-
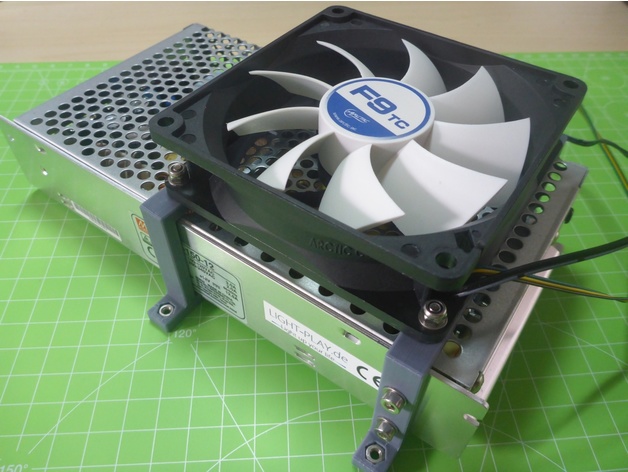
RS-150-12 Bracket / Fan Mount 92mm 3D Print Model
Summary
RS-150-12 bracket and fan mount for 92mm fan.
The front bracket (filename_F) has two mounting holes to secure the power supply (M3*8).
To attach it to the board, simply drop four M3 nuts into the holes.
Mounting Holes: 118,5mm x 82,5mm x 3,5mm -
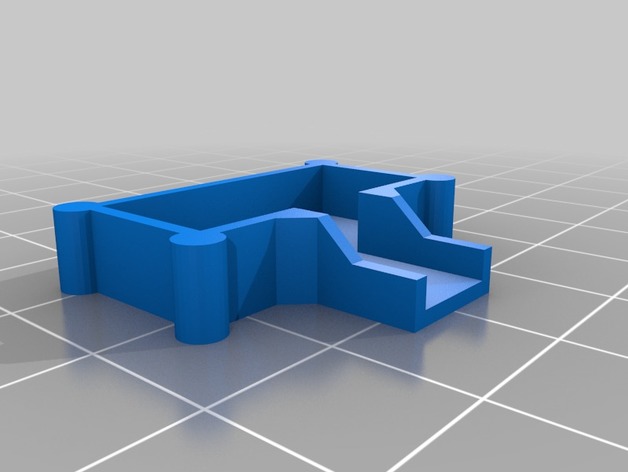
VL53L0X Rage Sensor Enclosure / Box 3D Print Model
Summary
This is a enclosure for a VL53L0X Laser Sensor. I needed it for a Project where I have to mount it on a corner on a Wall, so i also designed a cable tunnel for it.
Printing without support with 0.2 is fine. Better works with 0.1
SketchUp File is free for download. However, this was 2 Days of work, so please be fair.
Have Fun 🙂
Konstantin Pfeiffer
Print Settings
Printer Brand:
Prusa Printer:
Prusa Clone Rafts:
No Supports:
No Resolution:
0.2 Infill:
50 -
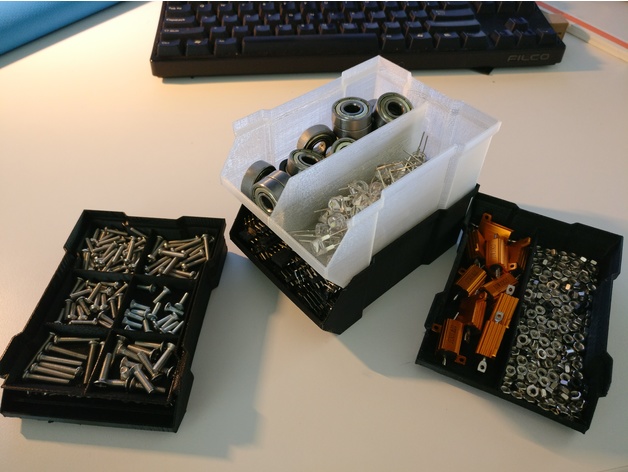
Stackable Box V4 full / half height with split variants + trays with various splits 3D Print Model
Summary
A set of Stackable BOX components I found most useful. Everything is redrawn from scratch.
Included STLs:
regular box
regular box with divider
half height box, properly edited (not just a scaled down version of the regular size
half height box with divider
tray
tray divided to half
tray divided into 4
tray divided into 6
One box fits exactly 4 trays, I tend to use half height boxes with 2 trays for really small parts.
Everything is printable without supports, 0.2 – 0.3 mm layer height is recommended, with 0.4 mm nozzle.
I opted to redraw everything as the original design had issues I realised when I imported the STL and tried to edit it – it had inaccuracies, non perfectly parallel faces, and minor glitches that made much more difficult to add the dividers that I needed than it should be. It’s still 100% compatible with the original one, and stacks nicely with those as well.
Enjoy!
How I Designed This -
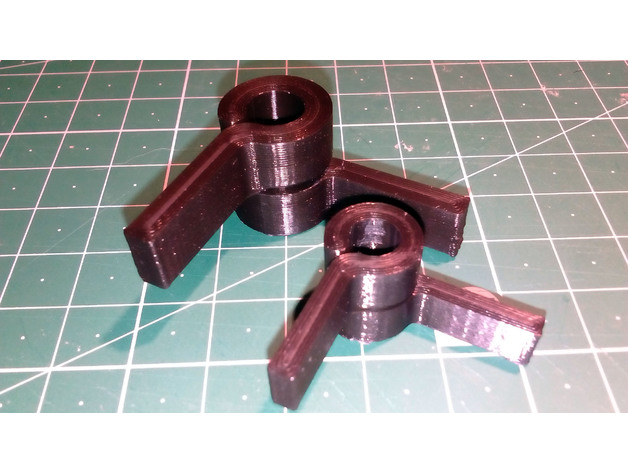
Squeeze clip for filament spool spindle / axle 3D Print Model
Summary
For my Anet A8 I wanted a quick release alternative to the supplied M8 nuts, so I designed this squeeze clip. To use just squeeze the arms together slightly to release the grip on the rod and slide off. They won’t grip as well as a nut with lock nut, but it works fine to hold the spindle in place.
I made 2 sizes one for the stock M8 threaded rod with an inside diameter of 7mm and a smaller one for a 6.4mm guide rod I salvaged for a scanner, used for a different spool stand.
Print Settings
Printer:
Anet A8 Rafts:
No Supports:
No Resolution:
0.2mm Notes:
I used a wide skirt to help with bed adhesion, My printer isn’t keen on small parts and I lose accuracy without the skirt. Your printer may vary.
The needed supports are all built in and will snap off. I print the clips with 4 lines on the walls / shells hence the 0% infill. I tried printing with thinner walls and 20% infill, but the clips were prone to snapping.
Post-Printing
Trim any skirt and stringing. The support in the gap between the rings that allows the clip to flex, will break free the first time the clip arms are squeezed.
There may be a small amount of support material that needs freeing up from the gap. I used tweezers and a craft knife.
How I Designed This
Designed with Fusion 360 -
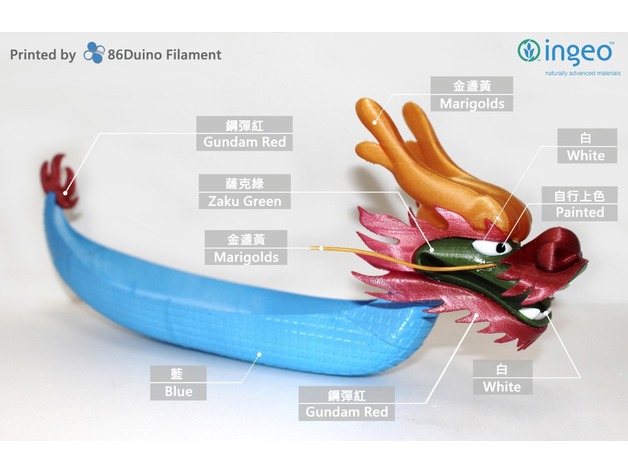
Dragon Boat / 龍舟 — (86Duino Original) 3D Print Model
Summary
龍舟(或稱龍船)是指漢字文化圈的龍形舟,也是中國和琉球端午節競賽活動時使用的人力船隻。
龍舟競渡流傳最廣的起源是,楚國人為紀念投江自盡的屈原,借龍舟驅散江中之魚,期望阻止魚吃掉屈原的身體。
龍舟不單是傳統中華文化的一部分,從其引伸發展出來的龍舟競賽現已發展為體育活動。由於賽龍舟被推廣成為體育項目,因此龍舟同時成為此體育項目的主要用品。
A dragon boat is a human-powered watercraft. They were traditionally made in the Pearl River Delta region of China’s southern Guangdong Province out of teak wood to various designs and sizes.
For more printing object please visit 86Duino facebook and give us a “like” and thanks for the tips…https://www.facebook.com/86duino
喜歡圖檔的好朋友請記得到 86Duino Filament 3D 列印 / 耗材 – 不正經研究中心 粉絲團給我們按讚哦 https://www.facebook.com/86duino
Post-Printing -
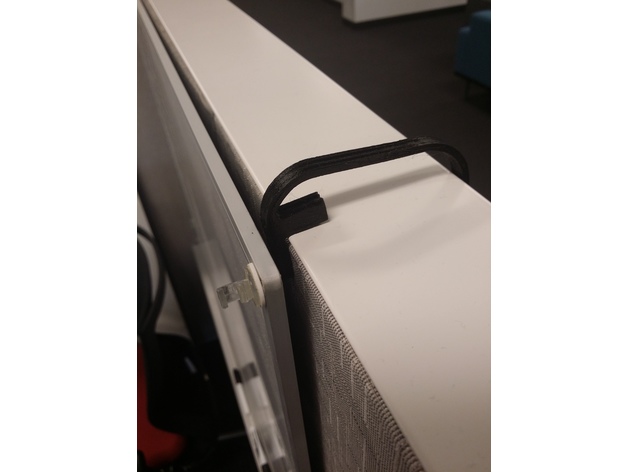
Arched Cube Top Hook / Holder 3D Print Model
Summary
An arched cubical wall holder, designed for plate-topped cubicles. I made this mainly for holding white boards and smaller signs, but it could be used for just about anything that has a standard mounting slot.
Update: Added another hook with the holder knob rotated 90°, for those with side-slotted boards.
Print Settings
Printer:
101Hero Rafts:
No Supports:
No Infill:
20% Notes:
Note that infill is less important due to the design of the thick holder edge. The edge has forced built-in walls across the print axis, making that part stronger than a heavier infill alone could achieve. -
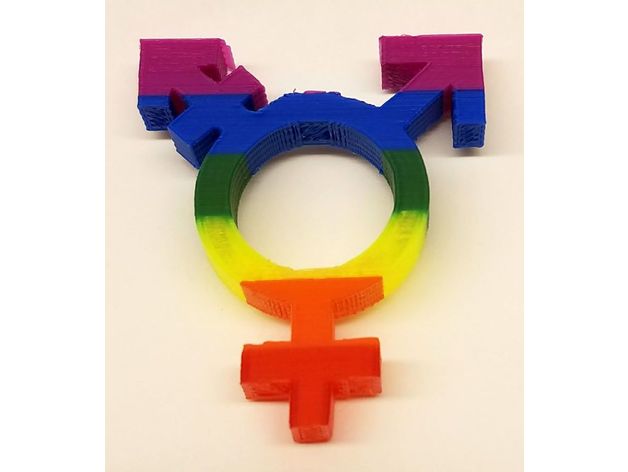
Transgender Symbol Ring / Napkin Holder 3D Print Model
Summary
A tripled Venus, Mars and Mars with stroke symbol (“⚧”) to represent transgender people.
Print Settings
Printer Brand:
Wanhao Printer:
Wanhao Duplicator i3 V2 Rafts:
No Supports:
No Resolution:
.2mm Infill:
10% Notes:
Printed using a single extruder with with five pauses, one for each color change. The photos show the model printed at 110%. Print it larger to get a napkin holder. -
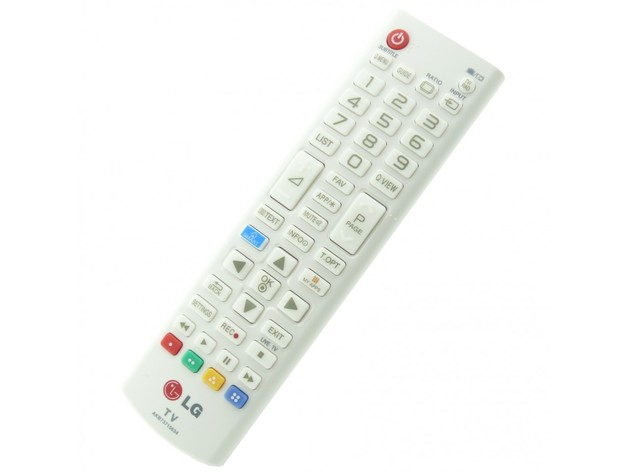
LG TV remote battery cover / Mando a distancia TV LG 3D Print Model
Summary
The battery cover of our LG smart TV remote (model AKB73715634) broke after a couple of months. The design is flimsy, to say the least.
I’ve sketched this quick replacement, it’s not perfect, but fits well and does its job.
=====================================================================
La tapa del compartimento de pilas del mando a distancia de nuestra smart TV LG (modelo AKB73715634) se rompió al cabo de un par de meses. Se trata de un diseño endeble, como mínimo.
He hecho un diseño rápido de esta tapa de reemplazo, no es perfecta, pero se ajusta bien y cumple su función.
Print Settings
Printer Brand:
Prusa Printer:
Prusa Clone Rafts:
Doesn’t Matter Supports:
Yes Resolution:
0,2 Infill:
50% -
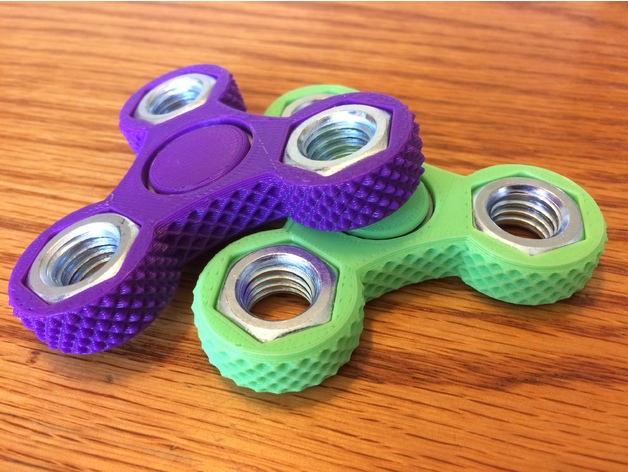
Knurled Tri-Spinner Fidget Widget / Triple Bearing Spinner 3D Print Model
Summary
I love the tri-spinners and I have made them for many people. I just don’t like having to use 4 608 bearings for each spinner with 3 of them just used as counterweights. I found that 1/2 inch nuts have about the same weight/size as a 608 bearing, so I modified the spinner to use them for counterweights.
I also modified the the knurling in the scad file to have not have partial knurling on the edges. I am a bit of a perfectionist.
This project is a remix of my other spinner but the nuts and bearing caps are flush.
Requires:
1x 608 bearing
3x 1/2″ nut
Everything press fits without glue. Enjoy!
Print Settings
Printer:
Monoprice Maker Select V2.1 Rafts:
No Supports:
No Resolution:
0.3mm Infill:
20% -
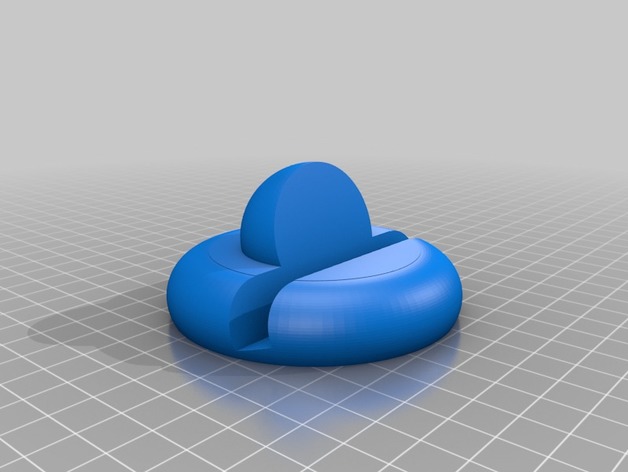
Base de escritorio moto g4 / g4 plus y otros celulares de hasta 9mm de espesor 3D Print Model
Summary
Desktop base for the moto g4 / moto g4 Plus and other cell phones up to 9mm thick.
Base de escritorio para el moto g4 / moto g4 más y otros celulares de hasta 9mm de espesor. -
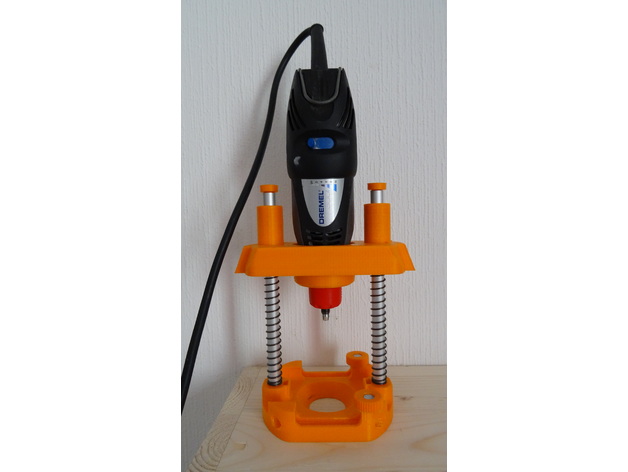
Dremel Plunge Router / Défonceuse 3D Print Model
Summary
!!! Non complète !!!
Butée, écrou et poignées à venir!
Accessoire défonceuse pour Dremel.
Imprimé en 0.2 avec 15% d’infill, les supports sont intégré aux pièces pas besoin d’en rajouter.
2x Vis à tête hexagonale M5x12
2x Barre creuse diamètre 10 longueur ???
2x Barre pleine diamètre 8 longueur au choix
1x Tige filetée M5 longueur ???
2x Vis à tête cyl M5x10
8x Écrou M5
2x Vis à tête cyl M3x??
2x Écrou M3
2x Ressorts de compression diamètre 12 longueur 100mm
Print Settings
Printer:
Dagoma Rafts:
No Supports:
No Resolution:
0.2 Infill:
10-15% -
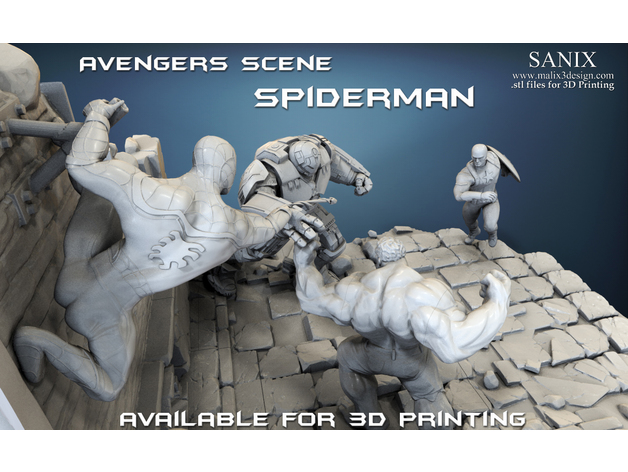
Avengers scene – SPIDERMAN / 3D Printable Model
Summary
About 37 hours of modeling and here it is the result, Avengers Scene -SPIDERMAN , 3D printable 1:13 scale model is a model ready for printing all settings included indifferent to the type of printer used, high quality poly allow printing a wonderful detailing, you can download four files absolutely free test, fully model can be found here: www.malix3design.com
Print Settings
Printer Brand:
Ultimaker Printer:
Ultimaker 2 -
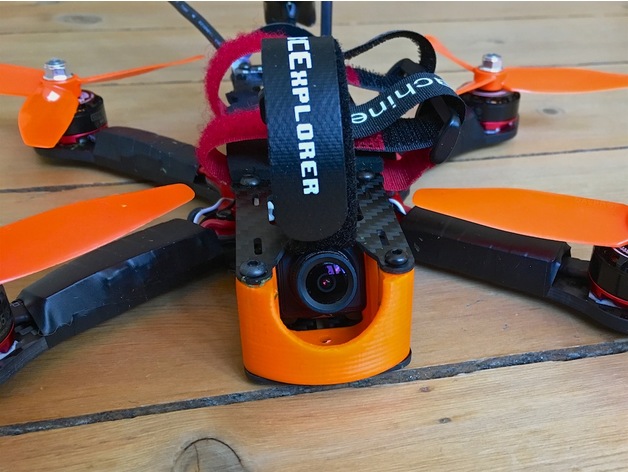
RunCam Swift mini mount for 25mm Martian II / Alien
Summary
Mount for the RunCam Swift Mini that allows use of 25mm stand-offs on the Martian II and Alien frames. Some modifications to the top plate might be necessary depending on the desired camera angle.
Replaces the stock camera mount.
Print Settings
Printer Brand:
Solidoodle Printer:
Solidoodle 4 Rafts:
No Supports:
No Resolution:
0.1-0.3 Infill:
100% Notes:
Tested using ABS. PETG and PLA should also be possible
How I Designed This
Autodesk Fusion 360