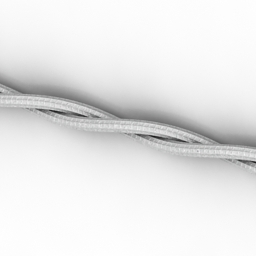
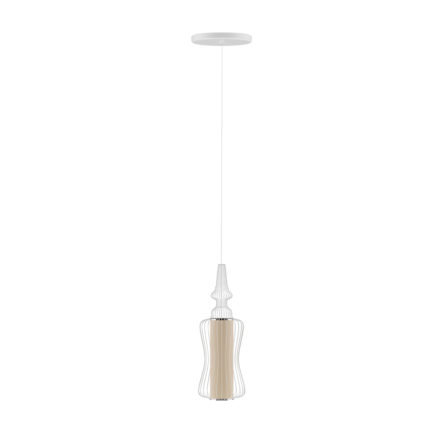
Additional Info: Cord electric 2 – 3D model (*.gsm+*.3ds) for interior 3d visualization.
Tag: wire
-
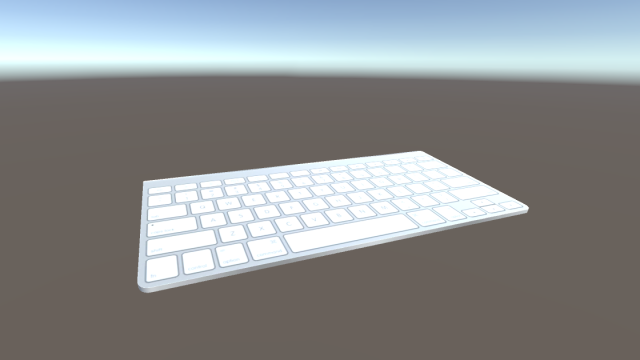
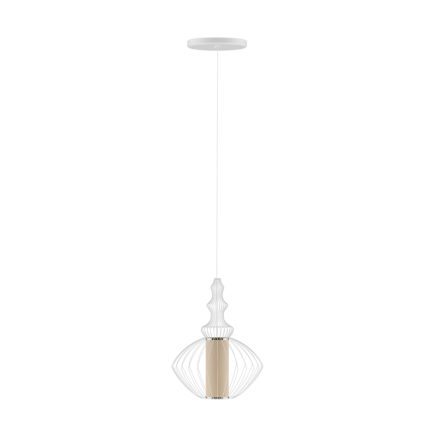
Cord 3D Model
Additional Info: Cord electric 1 – 3D model (*.gsm+*.3ds) for interior 3d visualization.
-
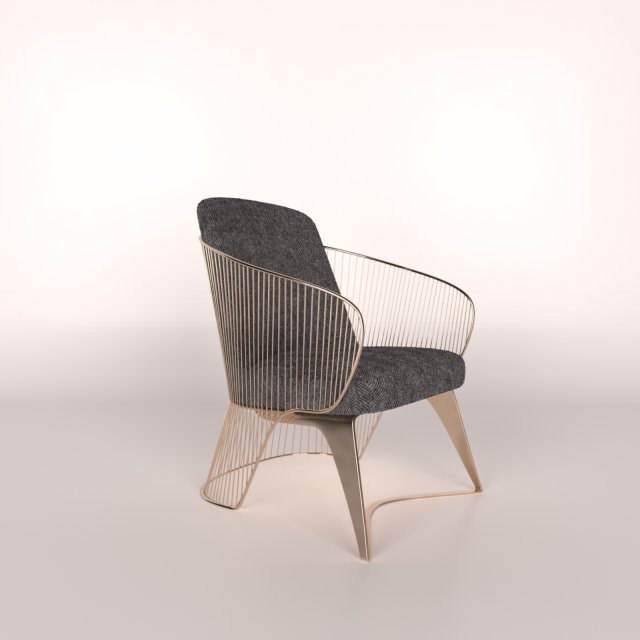
Wire Chair 3D Model
Archive Files – OPENWire Chair 3D model2011 3dsMax – 2014 3DsMaxFBX – OBJ -STL – 3DS – DXF formatsDownload Model
-
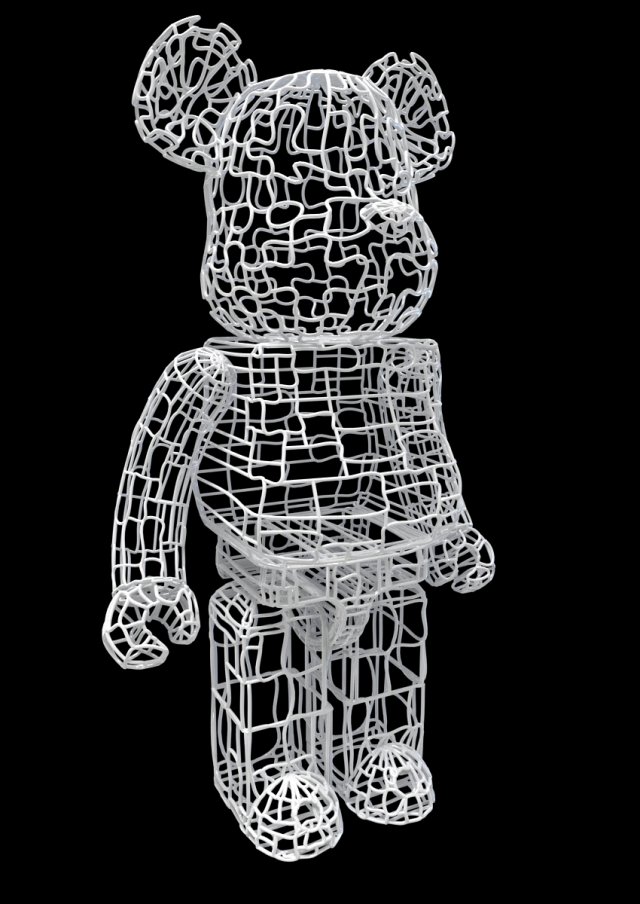
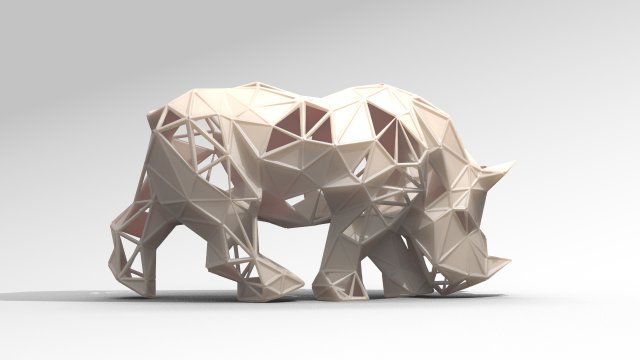
Wires Bear Brick 3D Model
Hi all,original made in max 2012 & Vray 2.0Poly 395,987Verts 404,304You can animate everything,For cartoon robotic like animation is perfect.display commercial product,You are getting complete vray light setup, with render setupWhen you press render you get those images, no edit photoshop.Also standard Max file, FBX, OBJ and DAE file available.
-
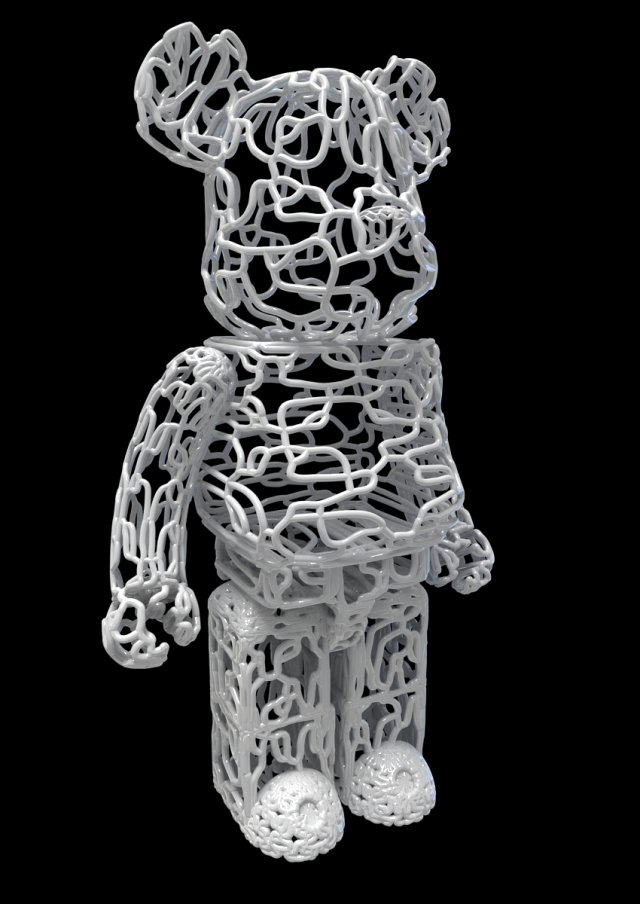
Wire BearBrick 3D Model
Hi all,original made in max 2012 & Vray 2.0Poly 757307Verts 768266You can animate everything,For cartoon robotic like animation is perfect.display commercial product,You are getting complete vray light setup, with render setupWhen you press render you get those images, no edit photoshop.Also standard Max file, FBX, OBJ and DAE file available.
-
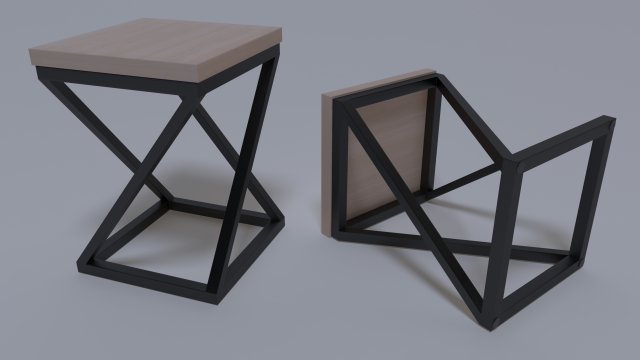
Chair 3D Model
Chair made of metal construction and wooden plate. On the bottom there are rubber feet that eliminate the risk of scratching the surface. Construction and plate are connected by self-adhesive spacers. The chair is intended as decoration in the yard or park.
-
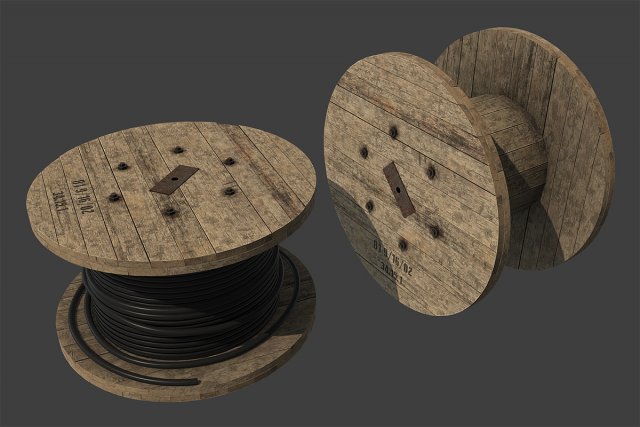
Cable Coil 3D Model
Cable Coil low-poly 3d model ready for Virtual Reality (VR), Augmented Reality (AR), games and other real-time apps.- Ready for Unity3d and other game engines.- Real world size.Textures:- Coil (diffuse, roughness, normal, ambient occlusion) – 2048×2048;- Wires (diffuse, normal, ambient occlusion) – 2048×2048;
-
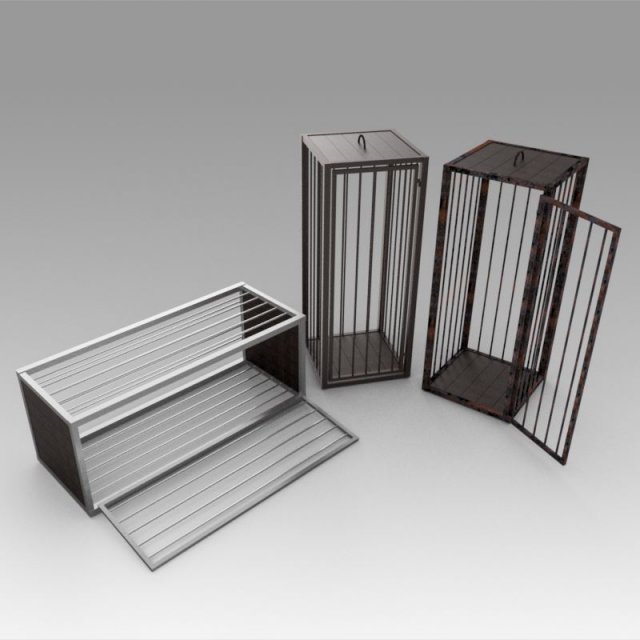
Medieval cages 3D Model
************************The object is modeled in the environment Autodesk Inventor 2018.To create a photo renderer, use Inventor Studio.************************The model contains the most popular formats************************The model contains the most popular formats. Each file was checked for opening and full content by the model.Thank you for coming to see this model. Also pay attention to other models by clicking on the name of the account in the right corner.
-
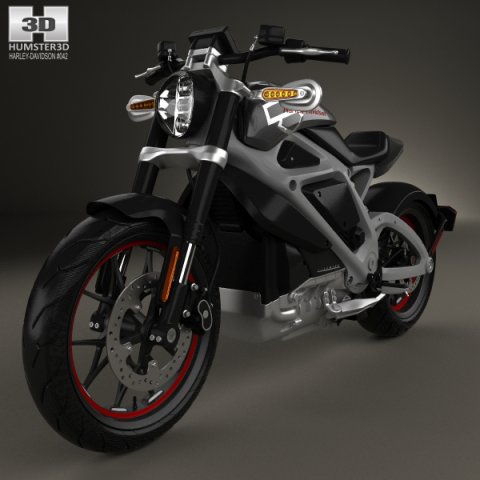
Harley-Davidson LiveWire 2014 3D Model
The 3D model was created on real car base. It’s created accurately, in real units of measurement, qualitatively and maximally close to the original.Model formats:- *.max (3ds Max 2008 scanline)- *.max (3ds Max 2008 vray)- *.fbx (Multi Format)- *.obj (Multi Format)- *.3ds (Multi Format)- *.mb (Maya 8.5)- *.lwo (Lightwave 6)- *.c4d (Cinema 4D 11)* tire’s texture is not included in the set.* renders Are made in 3ds Max 2008 using vray 1.5 (studio environment is not included in the set)If you need any other formats we are more than happy to make them for you.The model is provided combined, all main parts are presented as separate parts therefore materials of objects are easy to be modified or removed and standard parts are easy to be replaced. If you experience difficulties with separating standard parts we are more than happy to give you qualified assistance.We greatly appreciate you choosing our 3D models and hope they will be of use.We look forward to continuously dealing with you.Sincerely Yours,Hum3D Team
-
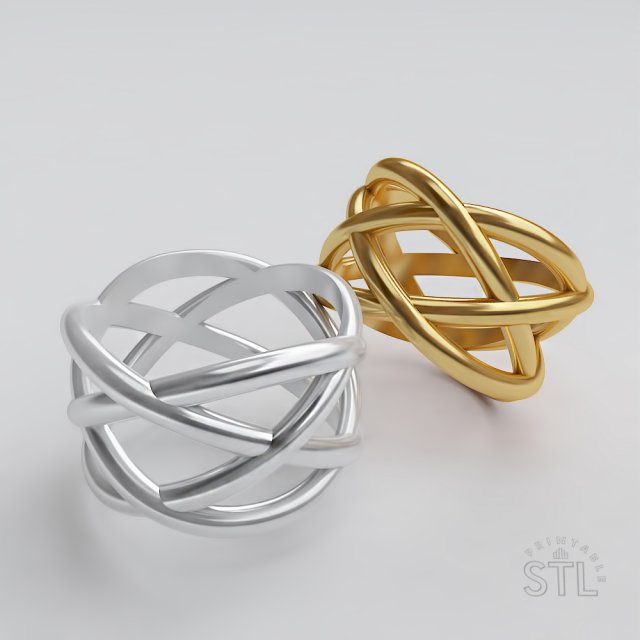
Wicker ring 3D Model
Dear customer,This model has been made for further production, nevertheless having the source file, you may amend it or change parameters of weight or dimensions as you like.Please, while printing, do not forget to take into account the shortage of the metal after the casting. If needed, rescale the model on 1-5% to avoid shortages during casting or making molds.Yours faithfully, Svetlana
-
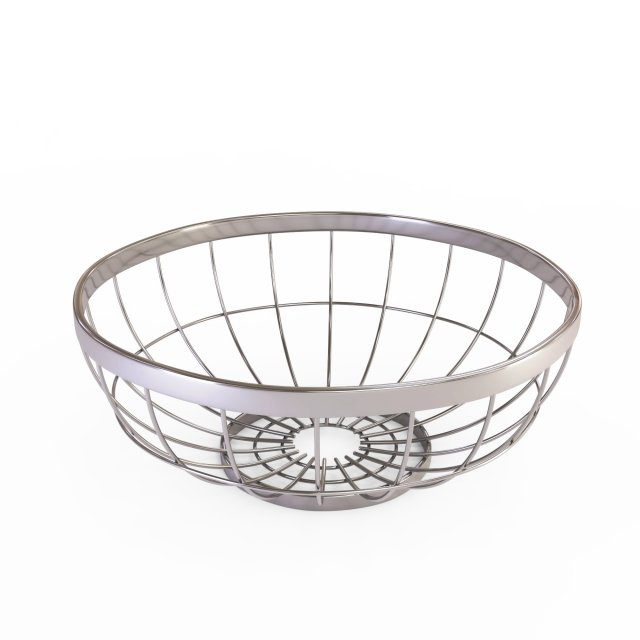
Round Wire Grid Fruit Basket Without Fruits model 3D Model
Round Wire Grid Fruit Basket (Without Fruits)High quality, realistic, detailed model.Excellent for closeups, and architectural visualization.Pack Included:-Fruit Basket 3D Model-3DS, FBX, OBJ, DAE file format.-Rendered images.Model Features:-Centered at origin-Unique and meaningful names for objects, materials and textures.-Ready for more SUBDIVISION. if you need it.The model has a realistic size.Please download the .RAR file, because that contains all the models, thetextures and the rendered images together. Thank you.Enjoy the model, and leave a feedback, please.
-
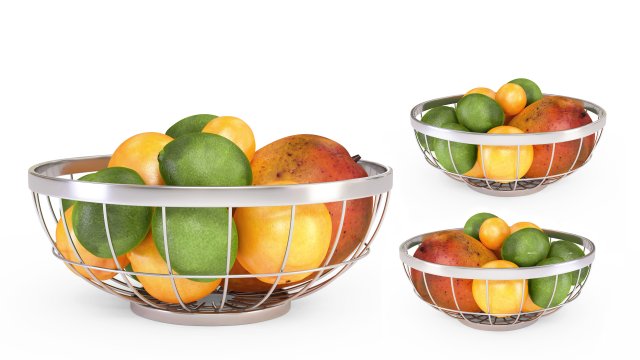
3D Chrome Wire Grid Fruit Basket with Fruits With Oranges Limes and Mangos 3D Model
Chrome Wire Grid Fruit Basket with Fruits (With Oranges, Limes and Mangos)High quality, realistic, detailed model.Excellent for closeups, and architectural visualization.Pack Included:-Fruit Basket 3D Model with Fruits-3DS, FBX, OBJ, DAE file format.-Textures / Diffuse, Normal and Specular maps for the Fruits/-Rendered images.Model Features:-Centered at origin-Unique and meaningful names for objects, materials and textures.-Clean UV’s-Ready for more SUBDIVISION. if you need it.The model has a realistic size.Please download the .RAR file, because that contains all the models, the textures and the rendered images together. Thank you.Enjoy the model, and leave a feedback, please.
-

Chrome Wire Fruit Basket 3D Model
Chrome Wire Fruit Basket (Without Fruits)High quality, realistic, detailed model.Excellent for closeups, and architectural visualization.Pack Included:-Fruit Basket 3D Model-3DS, FBX, OBJ, DAE file format.-Black diffuse texture /for the rubber legs/.-Rendered images.Model Features:-Centered at origin-Unique and meaningful names for objects, materials and textures.-Ready for more SUBDIVISION. if you need it.The model has a realistic size.Please download the .RAR file, because that contains all the models, thetextures and the rendered images together. Thank you.Enjoy the model, and leave a feedback, please.
-
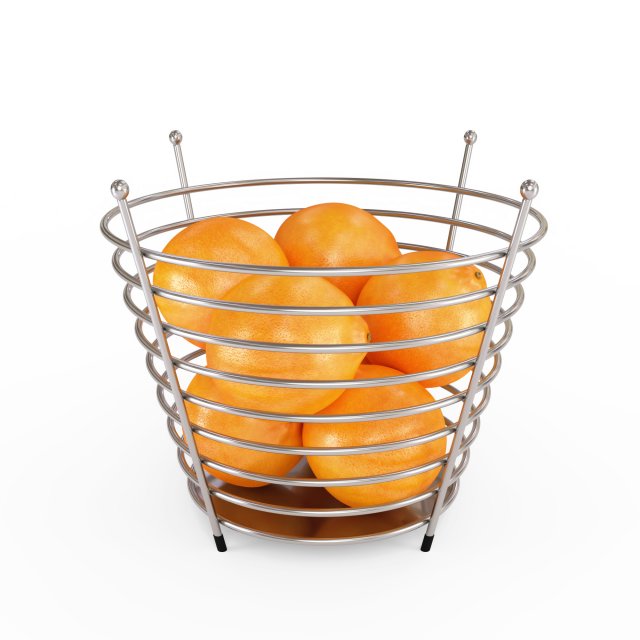
Chrome Wire Fruit Basket with Fruits With Oranges 3D Model
Chrome Wire Fruit Basket with Fruits (With Oranges)High quality, realistic, detailed model.Excellent for closeups, and architectural visualization.Pack Included:-Fruit Basket 3D Model-3DS, FBX, OBJ, DAE file format.-Textures / Orange Diffuse, Normal and Specular maps/-Rendered images.Model Features:-Centered at origin-Unique and meaningful names for objects, materials and textures.-Clean UV’s-Ready for more SUBDIVISION. if you need it.The model has a realistic size.Please download the .RAR file, because that contains all the models, thetextures and the rendered images together. Thank you.Enjoy the model, and leave a feedback, please.
-
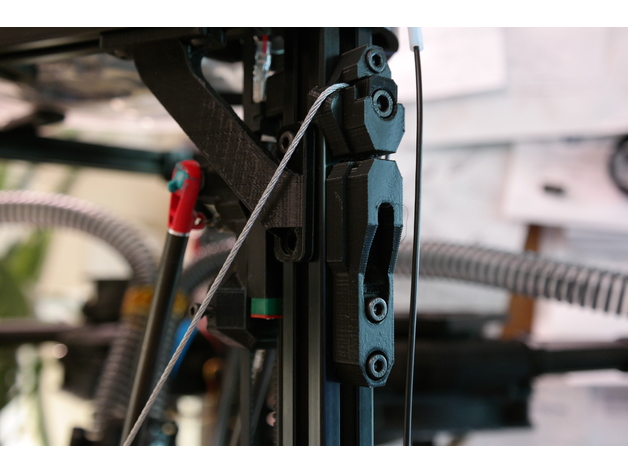
Kossel Wire Cable Frame Braces 2020 (Unlock WARP SPEED) 3D Print Model
Summary
Turn your Kossel from a wobbly tower that rings like a bell into a rigid, no-nonsense, crisp-printing etc. etc. etc. thing of awesomeness with these snazzy-looking anchors for steel wire frame braces and increase either your quality or speed/acceleration by a lot (or meet in the middle someplace), hurray!
It’s basically the same benefit you’d get from screwing big, thick panels of something stiff to all three sides of your printer. Or close, anyway, and waaaaaay less involved.
IMPORTANT DISCLAIMERS: this mod is fairly quick to print, remarkably easy to mount, has a dead cheap BOM, and offers huge and instant benefits, but it comes with the tradeoffs of a moderately reduced build envelope (basically, it’s going to cut off three outside chunks of the build platform somewhere near the inward extent of the horizontal frame members, but exactly how much depends on how far out the build plate extends over the frame horizontals, as well as your arm spacing — on my machine it’s about a 25 mm cut at the deepest) and the need to really verify your bowden/wiring clearances and look for new potential sources of wear — plus you could theoretically destroy your frame corners if you don’t take your time tensioning the setup evenly, although this mod is specifically designed to make it very difficult to apply uneven tension that would wrack your frame to death. Also, I would not recommend doing this mod without also having some compatible corner braces, like mine (https://www.thingiverse.com/thing:2474583), that will transfer twisting moments on the uprights into the horizontals, because otherwise I think this mod could eventually cam the uprights enough to split your corners.
But hey, you’re a big girl/boy and you want WARP SPEED, right? Read on to the design section and I’ll share a semi-secret that’s holding you back if you’ve never monkeyed with the stock Anycubic firmware settings, too!
Anywise. Also see the design section for all my reasoning that led to this design.
You’ll need 3 each of the adjustable and fixed anchors, 3 of the screw adjust mounts, 6 clamp washers, and 1 double eye join, plus:
1/16″ steel cable (about 4.5 meters for an AnyCubic Kossel XL, or estimate by taking your frame’s top to bottom diagonal measurement times 6 + 10%).
3x M5x20 bolts (socket head)
6x M5x12 bolts (socket head)
9x M5 nuts
15x M4x12 bolts (socket head)
15x M4 nuts
4x wire clips (preferably the screw-on kind, not the permanent ones) to fit the wire
Drinking straws in your favorite color
Kapton tape or similar
Special tools:
Wire clippers
A ball-end hex key to fit your M5 bolts will make life much easier.
After I put this on my printer I couldn’t resist dialing up the speed and acceleration to stupid speeds and trying to print a Benchy, and I was pretty shocked when something came out in half an hour that actually LOOKED like a benchy. Is it great? Heck no! My long ol’ bowden and direct drive extruder can’t even approach keeping up with these kinds of speeds. On the other hand, the visible ringing artifacts wouldn’t have been out of place on this machine at half the speed, if that, before I put this mod on it. So at the end of the day it is a vast improvement, but like with most such mods you push out one limitation and put the pedal down only to find the next limitation waiting 🙂 In the case of my AnyCubic Kossel, it’s definitely the extruder followed by the risk of the steppers skipping when doing psycho travel moves near the outside of the build envelope.
Print Settings
Printer:
Anycubic Linear Kossel XL
Rafts:
No
Supports:
Yes
Resolution:
.2 for the anchor pieces, .1 for the washers and eye join
Infill:
95% for the anchor pieces, 100% for the washers and eye join
Notes:
I printed in PLA with 3 perimeters + Cura’s alternating bonus perimeter, 6 top/bottom layers, and ironing on the anchor pieces. I also used Cura’s tree support for the screw adjust anchors to make sure the small lips on either side of the nut socket (gross) didn’t droop. The eye join doesn’t technically need much for support at 0.1 layers, but fiddling with tower/tree settings to get some bonus material around it will make it more likely to print successfully without getting knocked over or warping a lot.
Post-Printing
Super tip: fitting M4 nuts into vertical 2020 slots and holding them in place with something so you can screw bolts into them is a pain in the butt — UNLESS you stick a little rolled-up piece of scotch tape (sticky side out) into the slot first, and stick the nuts to that.
If you have corner braces on your machine, start by loosening up the bolts fixing them to the frame horizontals (you can leave the vertical-side bolts alone; this just ensures that if your frame wasn’t perfectly trued up because of the corner braces, you won’t be fighting that imperfection when you set up the wire braces).
Terminology notes: the fixed anchors are the ones with TWO holes for M4x12s, while the adjustable anchors have ONE hole for an M4x12, and the screw adjust mounts are the guys with the big slot for the M5x20’s. The M5x20 bolts are the ones you’ll use for applying final tension later.
Assembly Steps:
Stick all 9 M5 nuts in all the sockets that need them.
Stuff an M5x20 into each of the screw adjust mounts’ slots and wind it all the way up, then back it off until the one of the adjustable anchors can fit on top of it with no space in the joint. See the pictures if you’re not clear on this.
Bolt the 3 fixed anchors with the wire slot DOWN to the Kossel’s three uprights. Mount these as far down as they’ll go. (NOTE: you could slide them up a little bit — or a lot bit — to gain back some of your build envelope, but the higher they are, the more strain they’ll probably put on your plastic corner pieces. The goal is to have the twisting/tilting loads transferred as directly as possible into compression forces on the frame horizontals, and the further up the anchors sit, the more of a moment you’re inflicting on the corners to transfer the force).
Mount the 3 adjustable anchors at the top of each frame upright with the wire slots UP, and place them about 15-20mm down from the bottom of the plastic frame corner. You’ll need the extra travel above these for the final tensioning later. Don’t tighten these on too much.
Mount the 3 screw adjust mounts at the top of each frame upright with the M5x20 bolts inserted into the holes in the bottom of the adjustable anchors and scoot them all the way up so their top sides butt against the anchors’ bottoms (again, see the pictures…), then tighten them down. Make sure the M5x20’s are snug against the adjustable anchors, but not actually pushing them up yet.
The fun part: string the wire! Well, first put one end of the wire in the eye join and fix it good with two of the wire clips (leave yourself a tail of at least 5-8 cm); then wind the wire twice around the machine through the wire slots in each anchor, alternating up and down, until you get back to the eye join.
Run the second end of the wire through the eye join, snug it up, and tighten on two wire clips just enough to hold the wire in place. Clip off the excess wire, again leaving yourself a tail of at least 5-8 cm.
Now it’s the really fun part: applying the tension!
FIRST, give the top of your frame a rock and a twist to see how much it can flex, just so you have a point of reference when you rigid it up.
NOTE that this design uses a single loop of wire strung all the way around the machine so that you can avoid all the hassle of trying to get six different pieces of wire the exact same length and tension — as long as you don’t lock down the clamp washers until the very end, and make your tension adjustments in small increments to each joint in turn, you should get perfectly even tension all the way around. You can test for even tensioning as you go by simply plucking the wires — if they all generate the same tone, you know you’re good.
We kick off this process by getting as much slack out of the wire as possible by hand, without using the screw adjusters. Do this first by just going around the machine, snugging up each length of wire, and working the slack around to the side with the eye join, then tugging the slack through the eye join and wire clips to hold it in place. IMPORTANT: make sure you get the eye join someplace where you’ll have enough room for both tails, but also where it won’t risk interfering with the printer’s arms. I chose to mount mine pretty close to the top of its side, since the arms can only bump the wires on the bottom halves. This is very much most convenient to get situated while you’ve still got slack.
Once you’ve got most of the slack out, you can go ahead and mount all the clamp washers with the M5x12s. DON’T tighten these on, just get them on enough to put a tiny bit of friction on the wire.
Okay, now you can GENTLY tighten ONE of the clamps for the side with the eye join. This will hold that corner in place so we can work out slack around the machine and back to the eye join to take it out.
Start working around the machine again, taking out slack (easiest way to do this is to pull the wires gently OUT or IN, one segment at a time, in order) from the fixed corner and back to the other side of the eye join, where you can work it out through the eye and wire clips.
Don’t go crazy with the wire, just get it so it’s not sloppy. Now is a good time to do an initial check of how your build envelope is going to change by checking where the arms will touch the wires around the outside of the volume, and to make sure that your bowden and wiring have freedom of movement throughout the printable area. I ended up routing both through the bottom/center quarter of the same side of the printer, but had to shift my extruder a bit to get the bowden moving freely. Be especially sure that the wire and bowden can’t get caught with a loop on the wrong side of the wires in the case of a homing move starting close to that side of the build plate.
When you’ve got the slack pretty well out, tighten down all the wire clips really well on both sides of the eye join.
Now loosen that one clamp back up, along with the bolts holding on the adjustable anchors.
GENTLY screw in the M5x20’s in the screw adjust mounts until they all have about the same tension on them.
Now start going around the machine, CAREFULLY tightening each M5x20 bolt by 1/4 to 1/2 turn each time. The tension will rise faster than you think. GENTLY rock/twist the top of the machine from time to time — this will let you track how the rigidity is coming along, plus it will help distribute the tension evenly by helping the wires scoot around the corners if they need to.
When the frame feels decently solid and the wires feel decently and EVENLY taut (they should make a clear bass note when plucked, and all play about the same note), go ahead and re-tighten the M4’s on the adjustable anchors to fix them firmly to the frame.
This is also a good time to go around and make sure all the other M4’s are good and tight, and to re-tighten the bolts on the frame corner braces that you loosened earlier.
FINALLY! Go around the anchors in order and gently tighten each of the M5x12s to tighten up the clamps. This will put a final lick of tension on the assembly.
Okay, last steps:
You’ll want something on the wires to prevent wear and tear in the event that printer parts do contact the wires. I used scissors at an angle to spiral-cut some plastic drinking straws, which made pretty good ad hoc fenders when wound onto the wires and taped together at the crossing. The bottom halves are crucial to shield against arm contact, along with anywhere your bowden, wiring, etc. might brush up against.
Test carefully at first! A gentle bump or slide of the arms against the wires won’t hurt (the wires will give outward a bit even under a lot of tension), but a hard crash into them could seriously strain your frame. Likewise pay close attention to your bowden and wires until you’re confident they’re not going to bind anywhere. I assume no liability if you bork up your machine with this.
Re-level your printer after this mod (duh).
There’s going to be a wear-in period where some tension is lost to the wires conforming better to the corner radii, the PLA deforming a bit, etc. After a few prints, start by re-tightening all the M4’s holding the anchors to the frame, then loosen all six corner clamps again, along with the adjustable anchors’ M4s, and go around in order again, tightening the M5x20’s by a quarter turn at a time, until you’re back where you want to be, then tighten the adjustable anchors’ M4s again, followed by all the clamps. This might need to happen a few times.
Probably also get some loctite on the wire clips’ nuts.How I Designed This
I genuinely don’t know why nobody’s thought of this one yet (or if they have, I couldn’t find jack about it on Google).
The problem: if you’ve got a Kossel, you know it’s not a rigid setup. You’ve got plastic corners (or possibly metal) to keep the uprights true, but they don’t have much leverage, whereas the forces inflicted on the uprights are pushing way up high, where they have tons of leverage. Take the top frame and push it or twist it and watch what happens to your effector head — it’s going to shift all over the place. It’s not a good recipe if you want to go fast, because going fast takes high acceleration rates, which means you’re pushing your frame harder, which means every start, stop, and corner is like hitting your frame with a bat.
I figured this out pretty quick when I got my Kossel, and my first fix was designing some bolt-on corner reinforcements. They definitely helped with the ringing that came from the stock frame’s lack of rigidity, but they only reduced it, and the reason is pretty obvious from an engineering perspective: they just don’t have good mechanical advantage compared to the forces they’re meant to counteract. I got especially worried about this when I took out my steppers to put in some dampers and discovered that two of the three corners had cracked across the motors’ mounting faces. No idea when that happened, but heaven knows I’d been pushing my printer hard.
Anyway, from the inadequate corner braces, the next logical step is to look at stiffening up each side of the frame with longer braces, and the best-case for this would be braces that go all the way from corner to corner. Rigid braces would be ideal, but difficult in practice — you’ve got to get the lengths and mounting angles perfect to avoid wracking the frame out of true, plus at those lengths you’re not going to be able to count on good resistance to compression forces without having pretty fat chunks of CF tubing or similar, which is going to cost. The other idea (as done on printers like the Fisher) is to mount nice, stiff plates either around the corners or across the sides; I’d regard this as probably the ideal solution, but not the easiest one to implement at home without access to equipment for doing a really precise job of cutting the plates (and/or bending them) and getting all the holes in exactly the right spots. Plus, again, the plates will probably need to be made of something not-cheap even if you don’t have to pay somebody else for the custom fabrication.
So I wondered: why not just go for purely tensile bracing, which would mean nothing more complicated than steel wires? They’d self-align, and if I used a single loop they’d also self-adjust for even tensioning around the structure. Plus, with all the anchors mounted to the uprights, I figured the wires ought to be able to take on a lot of tension without putting terrible strain on the corners. The main tradeoff, then, would be balancing how far to mount the wires from center on the uprights, because too far out would mean giving the anchors a big moment arm to translate the uprights’ deviations from vertical into twisting forces on the uprights themselves (bad for the corners), but too far in would start cutting into the usable print volume by limiting how far side-to-side the printing arms could move. My first design iteration errs well to the “closer to the center” side of this, but if I really start to miss my lost printing volume, I’ll probably start experimenting with how far I can spread the wires without endangering the plastic corners.
Initial testing has shown that these wire braces can improve frame rigidity a LOT for a minor build volume loss; time will tell how it translates into more (or less, hopefully) wear and tear on the rest of the printer from reduced cyclical wear on the frame.
Oh yeah, and that secret to warp speed? Go into your firmware and change your DEFAULT_MAX_FEEDRATE to something like {400, 400, 400, 400} and your DEFAULT_MAX_ACCELERATION to something like {9000,9000,9000,9000}. If you’ve never done this, you’ve probably been stuck all this time with a speed limit of 200mm/s and 3k mm/s^2 on all axes. Even if you don’t push your speeds/accelerations up to these new limits, you might be surprised at the effect of raising them — in my case, I think my extruder had been constrained somehow by the lower limits, because until I made these changes my prints always suffered from underextrusion above about 30mm/s at 0.2 layer height.
But once you’ve raised the limits, it’s worth seeing what a 350mm/s travel move really looks like at 5500 or 6000 mm/s^2. (Answer: sorta scary, honestly)
Designed from scratch in SketchUp. -
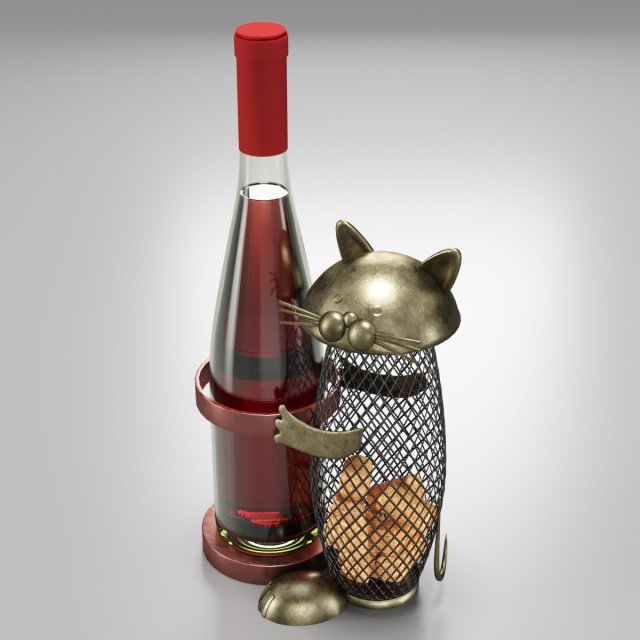
Wine Holder With Cat 3D Model
-No any third party plug-in used-No extra elements included with model-Lights and cameras are not included with model-HDRI map doesn’t included with modelMax Corona scene includes:- 6 Object(s)- 19 PNG textures at 4096×4096. All textures are PBR.Blender Cycles scene:- 6 Object(s)- 19 PNG textures at 4096×4096. All textures are PBR.Matlib archive includes:-2 sets of textures,2048×2048 PNG,512×512 PNG – for each scene. All textures are PBR.All objects are real-world scale.All scenes in “cm”.All priview images are rendered with Corona Render.
-
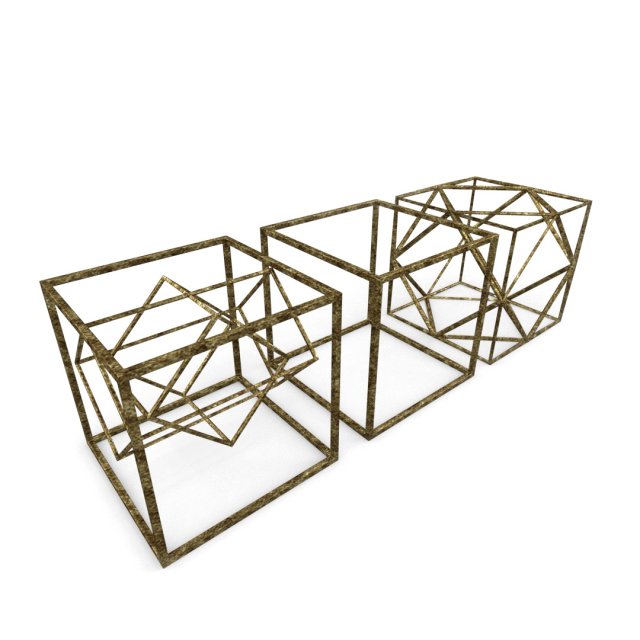
Geometric Decor Objects – Cube Frames 3D Model
Geometric Decor Objects – Cube FramesHigh quality, realistic, detailed model.Excellent for architectural visualization.Pack Included:-3 Different Decor Cube Model.-3DS, FBX, OBJ, DAE file format.-Brass Texture + NORMAL map-Rendered images.Model Features:-Centered at origin-Unique and meaningful names for objects, materials and textures.-Ready for more SUBDIVISION. if you need it.-The model has a realistic size.——————————————————————–Please download the .RAR file, because that contains all the models, the textures and the renderedimages together. Thank you.Enjoy the model, and leave a feedback, please.
-
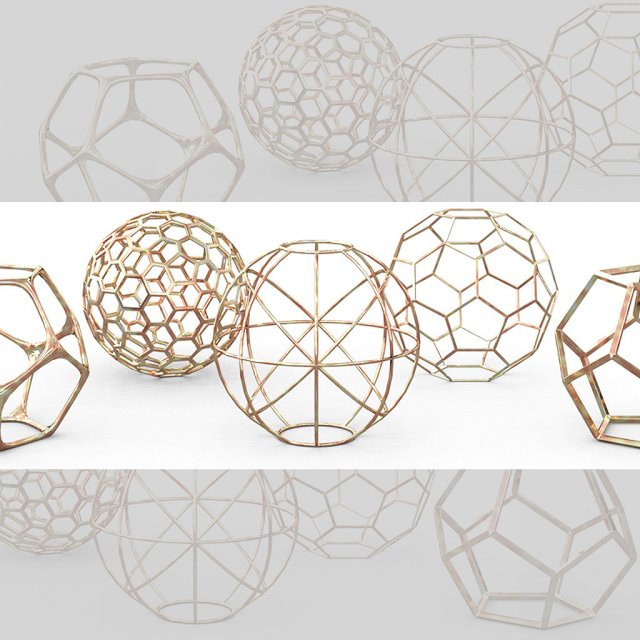
Geometric Decor Objects – Sphere Frames 3D Model
Geometric Decor Objects – SpheresHigh quality, realistic, detailed model.Excellent for closeups and architectural visualization.Pack Included:-5 Different Decor Sphere Wire Model.-3DS, FBX, OBJ, DAE file format.-Seamless Rosegold Texture + NORMAL map with small scraches.-Rendered images.Model Features:-Centered at origin-Unique and meaningful names for objects, materials and textures.-Ready for more SUBDIVISION. if you need it.-The model has a realistic size.Policounts from 1360 Faces (Descor Sphere 1) to 15,672 (full set with 5 models)Verts: 18,784 (full set with 5 models)——————————————————————–Please download the .RAR file, because that contains all the models, the textures and the rendered images together. Thank you.Enjoy the model, and leave a feedback, please.
-
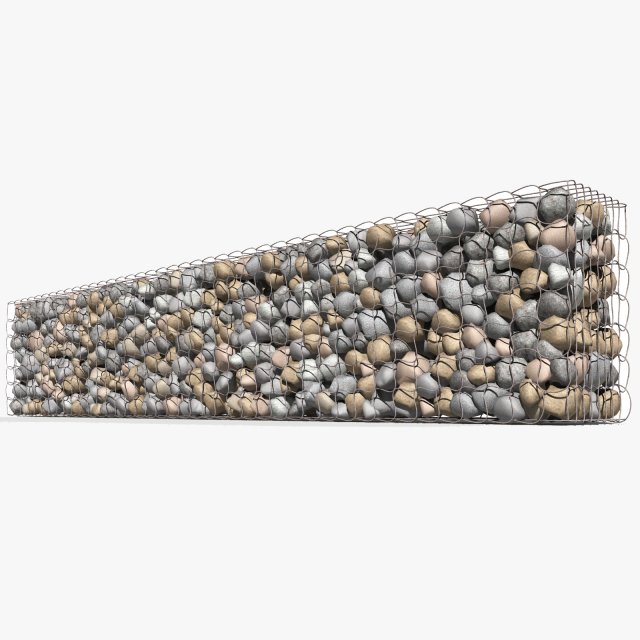
Gabion Baskets Wall 3D Model
Gabion Baskets WallOriginally created with 3ds Max 2015 and rendered in Mental Ray.Total Poly Counts:Poly Count = 312274VertexCount = 270869Model is placed to 0,0,0 scene coordinates.Every part of the model named properly.The model is Full UV unwrapped.Include 2 cameras and 3 light With Studio setup.Unit Setup: MeterUse 10 jpg textureTexture Size : 1600*1600 pxAlso available in many formats.3ds Max 2015 Mental RayOBJFBX3DS
-
Futuristic Building 01 3D Model
Modelled : 3ds Max 2013Rendered : 3ds Max 2013 – Vray 2.30Files : .max (2010, 2011, 2012, 2013).vrmesh filesand textures(c) 3D_SB 2016
-
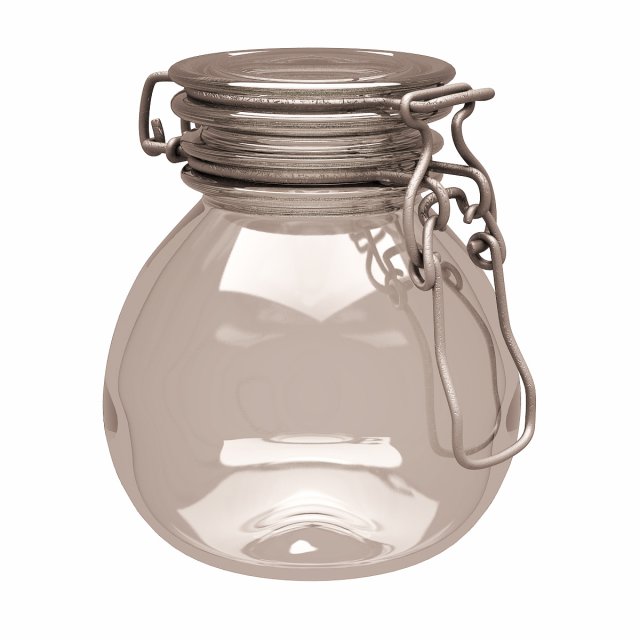
Empty Jar 3D Model
Modelled : 3ds Max 2013Rendered : 3ds Max 2013 – Vray 2.30Files : .max (2010, 2011, 2012, 2013).fbx.obj.mtland textures(c) 3D_SB 2016
-
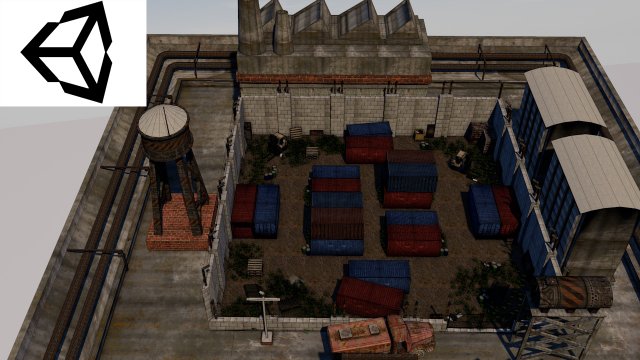
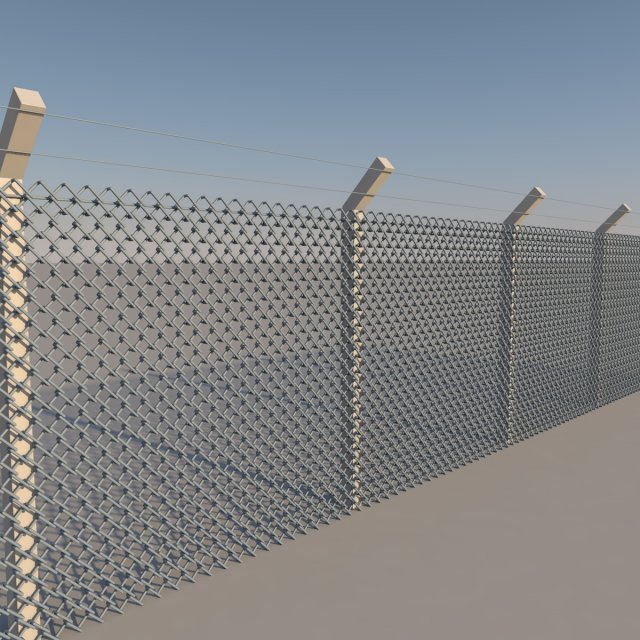
Military Area 1 3D Model
Military Area 2 is a high quality model to add more details and realism to your projects. All colors can be easily modified. Unreal Engine compatible models FBX . PROFESSIONALLY MODELED Models in scene were made without ngons and to keep polycount as low as possible: WELL ORDERED Like all our products this Military Area 2 is handy to use and easy to modify. In this product there is no problem with multiplied materials and textures! There is more models of this series – explore our models set! It is suitable for game engines :)Quoted poly count is for triangles.Game Environment is low-poly model ideal for game engines (Game-Ready).Very High detailed Game Environment ready for professional projects.- Poly 25000- Model completely unwrapped.- Texture 2048-2048 and 1024-1024- Model is fully textured with all materials applied.- Pivot points are correctly placed to suitanimation process.Other work will continue link https://www.artstation.com/artist/havolk
-

Military Area 2 3D Model
Military Area 2 is a high quality model to add more details and realism to your projects. All colors can be easily modified. Unreal Engine compatible models FBX . PROFESSIONALLY MODELED Models in scene were made without ngons and to keep polycount as low as possible: WELL ORDERED Like all our products this Military Area 2 is handy to use and easy to modify. In this product there is no problem with multiplied materials and textures! There is more models of this series – explore our models set! It is suitable for game engines :)Quoted poly count is for triangles.Game Environment is low-poly model ideal for game engines (Game-Ready).Very High detailed Game Environment ready for professional projects.- Poly 15800- Model completely unwrapped.- Texture 2048-2048 and 1024-1024- Model is fully textured with all materials applied.- Pivot points are correctly placed to suitanimation process.Other work will continue link https://www.artstation.com/artist/havolk
-
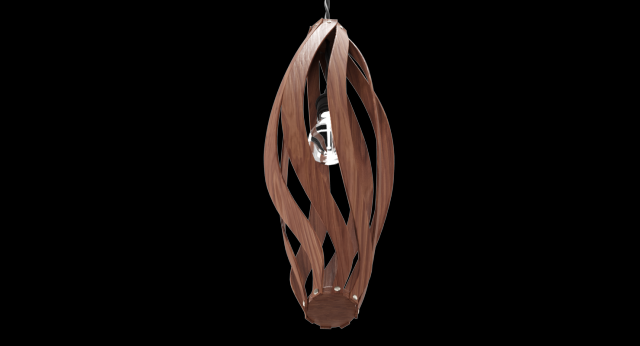
Lustre With A Wooden Plafond 3D Model
The 3D Model of Lustre With A Wooden Plafond modeled according to the reference.The model can be used for interior design in different premises like living groups,also in modern and minimalistic style.The model consists of:-Wooden Base;-One Light Bulb;-Black Electric Wire.-No any third party plug-in used-No extra elements included with model-Lights and cameras are not included with model-HDRI map doesn’t included with modelMax Corona scene includes:- 8 Object(s)- 36 PNG textures at 4096×4096. All textures are PBR.Blender Cycles scene:- 8 Object(s)- 36 PNG textures at 4096×4096. All textures are PBR.Matlib archive includes:-2 sets of textures,2048×2048 PNG,512×512 PNG – for each scene. All textures are PBR.All objects are real-world scale.All scenes in “cm”.All priview images are rendered with Corona Render.
-
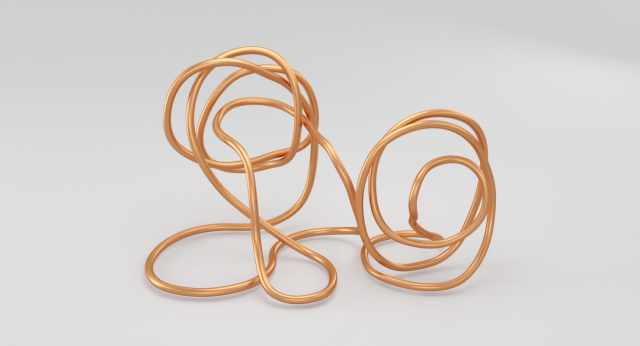
Copper Wire Sculpture 3D Model
This Copper Wire Sculpture is a high quality, photo real modelthat will enhance detail and realism to any of your projects. Locatedin the center of coordinates.The main components is the Copper Wire.The model can be used for interior design in different premises like living groups,also in modern and minimalistic style.The file is neatly modeled, grouped together.-No any third party plug-in used-No extra elements included with model-Lights and cameras are not included with model-HDRI map doesn’t included with modelMax Corona scene includes:-2 Object(s)-10 PNG textures at 4096×4096. All textures are PBR.Matlib archive includes:-2 sets of textures,2048×2048 PNG,512×512 PNG – for each scene. All textures are PBR.All objects are real-world scale.All scenes in “cm”.All priview images are rendered with Corona Render.
-
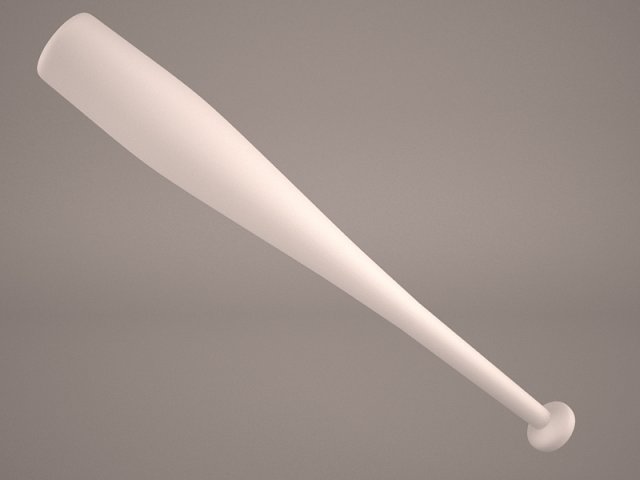
Baseball Bat with Barbed Wire 3D Model
Barbed Wire Baseball Bat Lucille Club Blood Bloody Zombie Violent Clean Dirty Photorealistic Negan The Walking Dead Smash Punch Weapon
-

Baseball Bat with Barbed Wire 3D Model
Barbed Wire Baseball Bat Lucille Club Blood Bloody Zombie Violent Clean Dirty Photorealistic Negan The Walking Dead Smash Punch Weapon
-
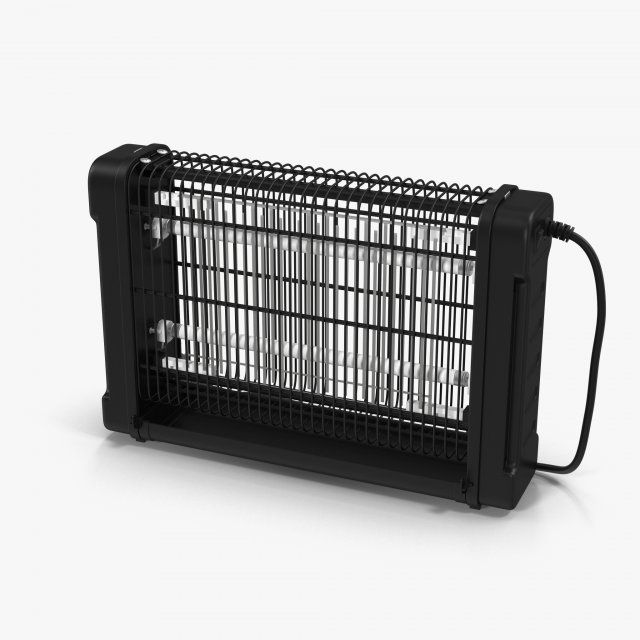
Electric Fly killer 3D Model
Electric Fly killerDimensions: 392 x 100 x 265 mmFeatures:-To turn the lamps on and off, you need to swap Mat ID 7 and 8-Fly killer, wire and fork are separate objects and are in a group.-Created in 3ds max 2014, saved to 3ds max 2011-Real world size (system units – mm) and centered in coordinate start.-Gamma 2.2-Files with the model does not contain extraneous or hidden objects (lights, cameras, etc.)-Model is subdivided (recommended iteration 1-2).File Formats:- 3ds Max 2011 V-Ray and standard materials scenes- 3ds Max 2014 V-Ray and standard materials scenes- FBX (Multi Format)- OBJ (Multi Format)- 3DS (Multi Format)- MAT (Material Library)Textures Formats:Only procedural textures 3ds max (Falloff, Gradient Ramp)Polycount:Polys 40306. Verts 41180.
-
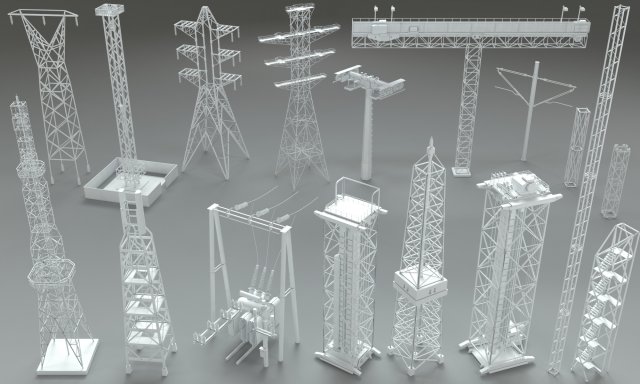
Electric Towers – 17 pieces 3D Model
17 pieces electric towersinclude max(2015), fbx, obj and stl filesinclude Vray material and HDRI
-
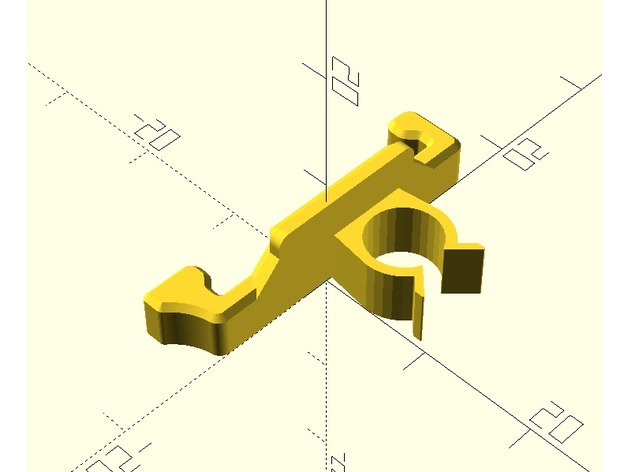
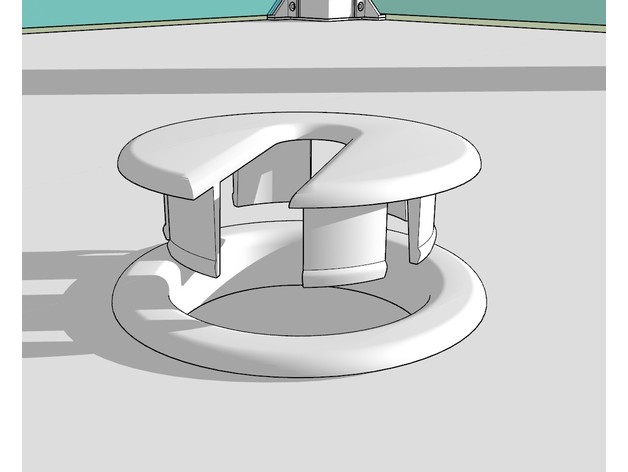
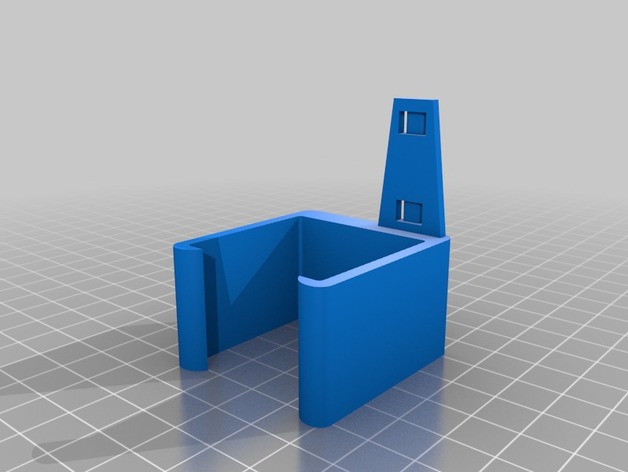
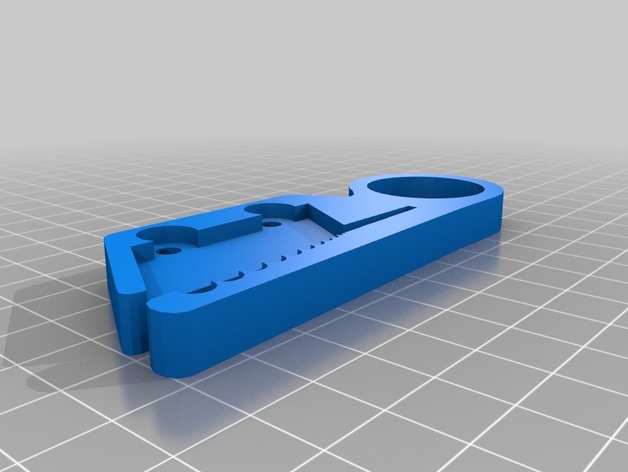
lock with wire clip for Creality Ender 2 wire chain 3D Print Model
Summary
I remixed the lock of the Ender Cable Chain by ninne (https://www.thingiverse.com/thing:2498801) with the clamp of the bowden wire clips by Evanrude (https://www.thingiverse.com/thing:2328449) to attach the hot bed cable to the chain. It prevents the hot bed calbe from scrubbing the chain and the power cable. -
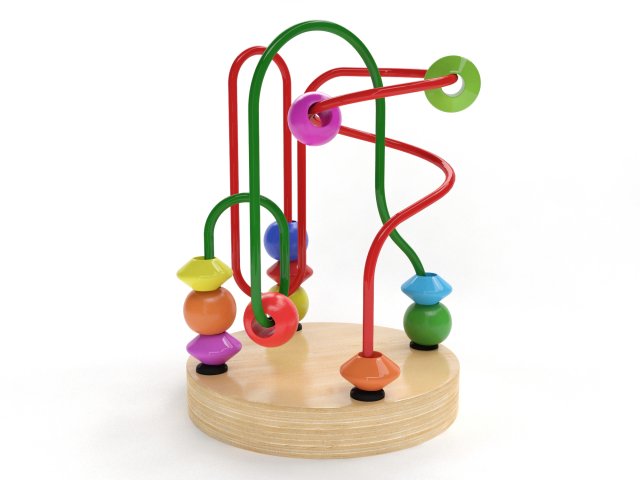
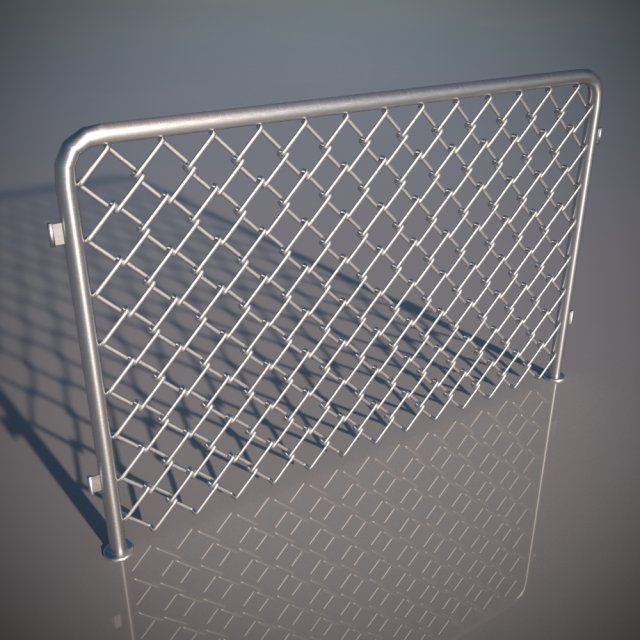
Wire maze 3D Model
3D model of Wire mazeThe model was originally modeled in 3ds Max 2011 and rendered with V-Ray 2.20.03All preview images are direct renders from 3ds Max using V-Ray. No post-production or Photoshop was used.************************************************FEATURES:- Model is built to real-world scale- Measurement units: millimeters- Object dimensions: height 12 cm- Model with TurboSmooth modifier- All textures and materials are included- All objects and materials have unique and logical names- Scene is layered properly************************************************Available in the following file formats:- 3ds Max 2011 with V-Ray materials (.max)- FBX (.fbx)- 3DS (.3ds)- OBJ (.obj)************************************************ATTENTIONAdditional formats do not include material definitions and may require some extra effort.Depending on which software package you are using, the exchange formats (.fbx, .3ds, .obj) may not match the preview images exactly.
-
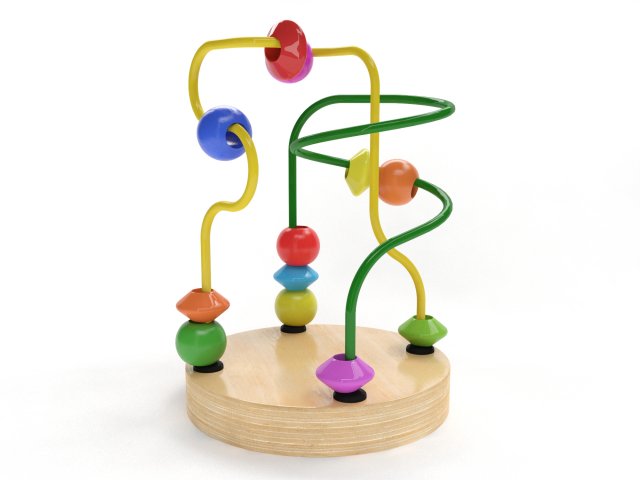
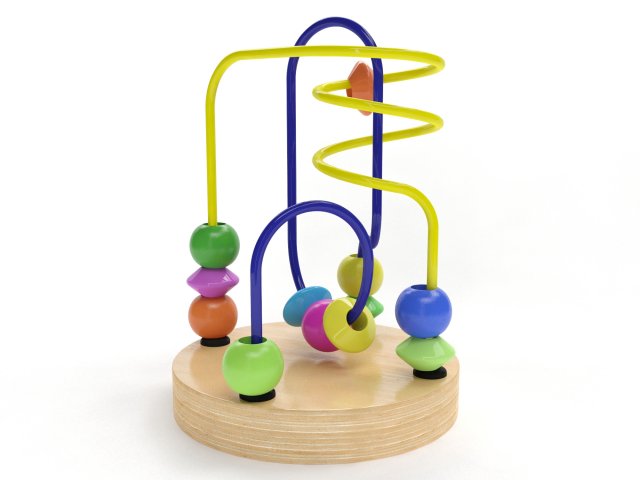
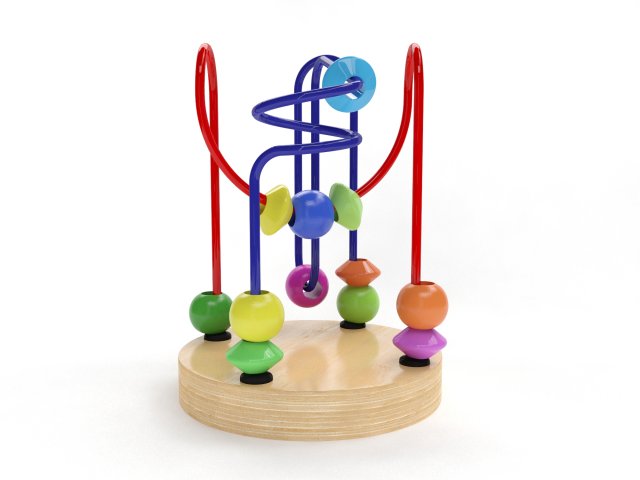
Wire maze 3D Model
3D model of Wire mazeThe model was originally modeled in 3ds Max 2011 and rendered with V-Ray 2.20.03.All preview images are direct renders from 3ds Max using V-Ray. No post-production or Photoshop was used.************************************************FEATURES:- 1:1 scaled, 100% from the original object- Measurement units: millimeters- Object dimensions: height 12 cm- Model with TurboSmooth modifier- All textures and materials are included- All objects and materials have unique and logical names- Scene is layered properly************************************************Available in the following file formats:- 3ds Max 2011 with V-Ray materials (.max)- FBX (.fbx)- 3DS (.3ds)- OBJ (.obj)************************************************ATTENTIONAdditional formats do not include material definitions and may require some extra effort.Depending on which software package you are using, the exchange formats (.fbx, .3ds, .obj) may not match the preview images exactly.
-
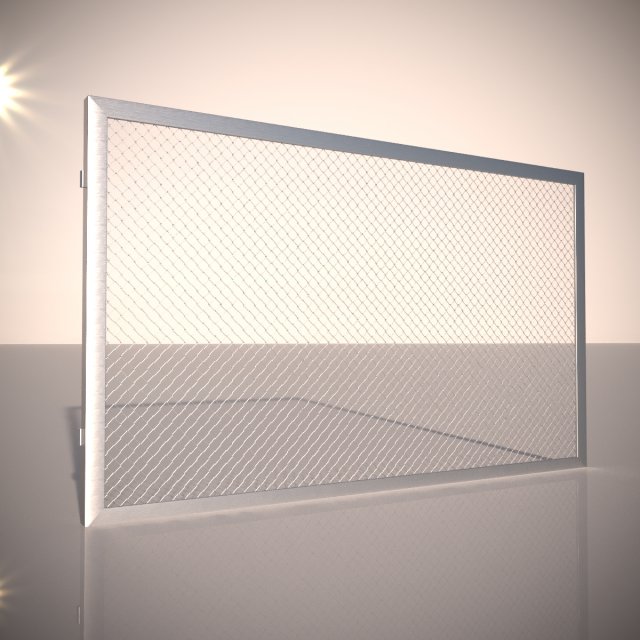
Low Poly Wire Netting 3D Model
It is a hexagonal wire mesh. the values given vary according to your length need !
-
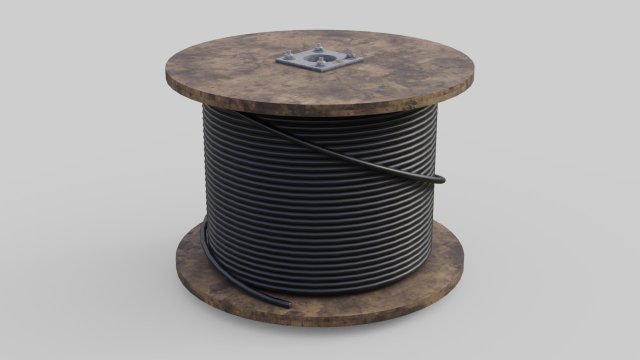
Cable Reel 2 3D Model
This is a model of a Cable Reel.Originally created with Blender 2.79.|| USAGE ||This model is suitable for use in broadcast, advertising, design visualization, real-time, video game etc.|| SPECS ||This model contains 4 separate objects.This model contains 6847 polygons.This model contains Blender Cycles materials.|| PRESENTATION IMAGES ||All preview images are rendered with Blender Cycles Renderer.Product is ready to render.Render setup is included as a separate Blender file, which is needed to produce images that match the thumbnails.|| TEXTURES ||Textures have 8 bits per channel.Cable_Reel_2_BaseColor.png 2048×2048.Cable_Reel_2_Metallic.png 2048×2048.Cable_Reel_2_Normal.png 2048×2048 X+Y-Z+.Cable_Reel_2_Roughness.png 2048×2048.cedar_bridge_1k.hdr 1024×512.|| GENERAL ||Model is built to real-world scale(the unit system is metric).No third-party renderer or plug-ins needed.|| ADDITIONAL NOTES ||Other file formats. May be needed to reassign textures and will not render like the preview images.-FBX-OBJ
-
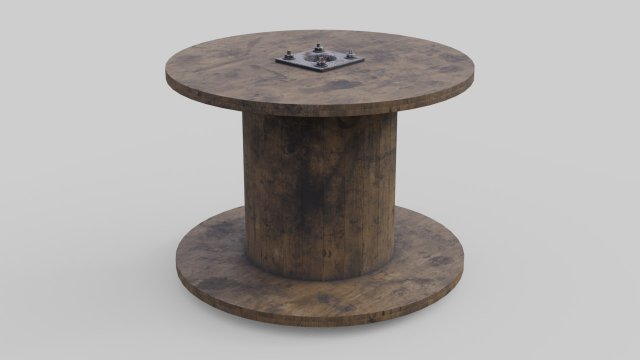
Cable Reel 1 3D Model
This is a model of a Cable Reel.Originally created with Blender 2.79.|| USAGE ||This model is suitable for use in broadcast, advertising, design visualization, real-time, video game etc.|| SPECS ||This model contains 4 separate objects.This model contains 2224 polygons.This model contains Blender Cycles materials.|| PRESENTATION IMAGES ||All preview images are rendered with Blender Cycles Renderer.Product is ready to render.Render setup is included as a separate Blender file, which is needed to produce images that match the thumbnails.|| TEXTURES ||Textures have 8 bits per channel.Cable_Reel_1_BaseColor.png 2048×2048.Cable_Reel_1_Metallic.png 2048×2048.Cable_Reel_1_Normal.png 2048×2048 X+Y-Z+.Cable_Reel_1_Roughness.png 2048×2048.cedar_bridge_1k.hdr 1024×512.|| GENERAL ||Model is built to real-world scale(the unit system is metric).No third-party renderer or plug-ins needed.|| ADDITIONAL NOTES ||Other file formats. May be needed to reassign textures and will not render like the preview images.-FBX-OBJ
-
LACK Attack #6: Pass the Lack (aka Wire The Lack Stack) 3D Print Model
Summary
This is a followup to:
LACK Attack #5: Inreda the Lack:http://www.thingiverse.com/thing:2673629
without further adieu….
Attack 6: Pass the Lack
Once I lit the Lack, the next step was to get the power cables out of the stack and filament into the stack…
I looked at some at Home Depot, saw some on Thinkgiverse, decided instead to make my own passthroughs for it as I wanted a single port/type that could be used for multiple things. So far I’ve built a filament filter insert as well as cable inserts, (and a blankoff), I’m sure I’ll come up with a few more as time goes on…
As always, comments are greatly appreciated, If you’ve made/fixed something to work better please let me know so I can fix it for others.
Coming Next:
Attack 7: not sure yet, likely remote mounting the display & Octopi…
Print Settings
Printer Brand:
Prusa Printer:
i3 MK2S Rafts:
No Supports:
No Resolution:
0.20mm Infill:
100% Notes:
Printed in white RepRapper white PLA, 210C nozzle, 60C bed.
Post-Printing
Build & Assembly Notes:
Another simple build:
Print the parts as needed.
For each port use 2 1/8″ a hole saw to drill each port.
Insert the port through the table, tap it down with a rubber mallet flush, snap the lock ring on the bottom to finish off the edge.
4a. For the filament filter pass-through cut a piece of foam to fit in the filter, snap the bottom on, then use a large needle/stiff wire to push holes through for each of the openings. pulling the filament to the side when you’re done with it will lock it in place.
4b. for the Wire passthroughs feed your wires through, pop in a cover, and done!
How I Designed ThisRevisioning:
v1.0 – Initial upload
Posted the thing -
CR-10 Mini X-Axis cover with wire tie 3D Print Model
Summary
remix of a CR-10 part to fit a CR-10 Mini, shortened the wire tie that sticks out, also moved it out of the way of the plug for the x-axis motor. i opted to use higher infill in printing becasue the wire tie part broke off my first print as i was puting it on the machine.
Print Settings
Printer:
HICTOP CR-10 Mini Rafts:
No Supports:
No Resolution:
.15 Infill:
50% Notes:
printed 2 shells, 3 bottem/top layers, bottem/top 30mm/s, rest was printed at 60mm/s
How I Designed This
remixed using fusion 360 -
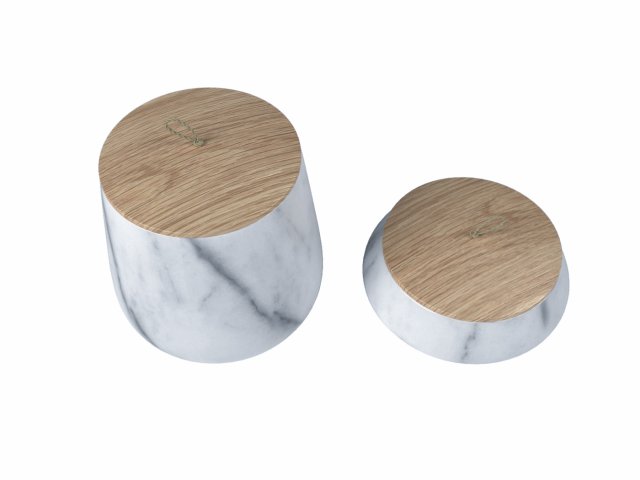
Jar Form Ovale Ronde LA REDOUTE model 3D Model
the model is made by 3ds max with right scale world no confuse to make selection,just grab model on scene and start render,all textures and materiel included like you see on images.i hope you like it just check others models on my profil
-
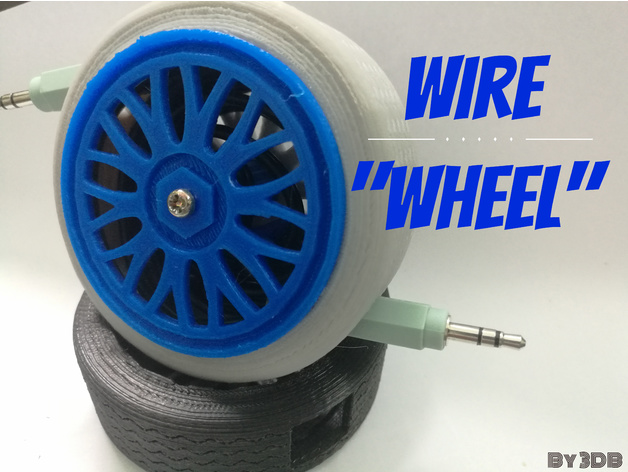
Wire wheel 3D Print Model
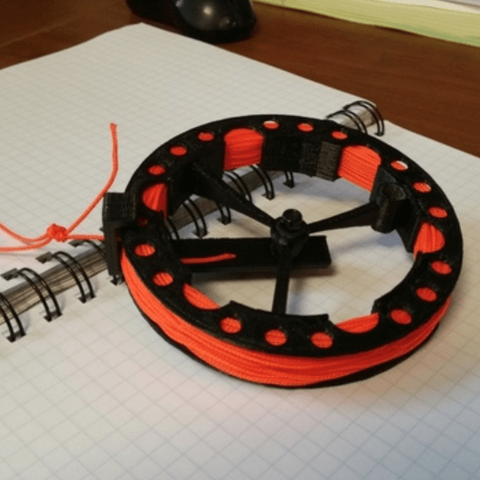
Summary
This is a fully working wire spool to store your long wires neatly. Before design this project, i get the inspiration from a sport car rim and wheel. This is just one possible combination of colors you can print. Fell free to modify it and print it with different colours and post it in made section. Hope you guys enjoy.https://youtu.be/A7ZcjpNkOzc
Print Settings
Printer:
Micromake C1 Rafts:
No Supports:
No Resolution:
0.2mm Infill:
100% Notes:
100% infill for the blue section as the holder need to be strong to spool the wire -
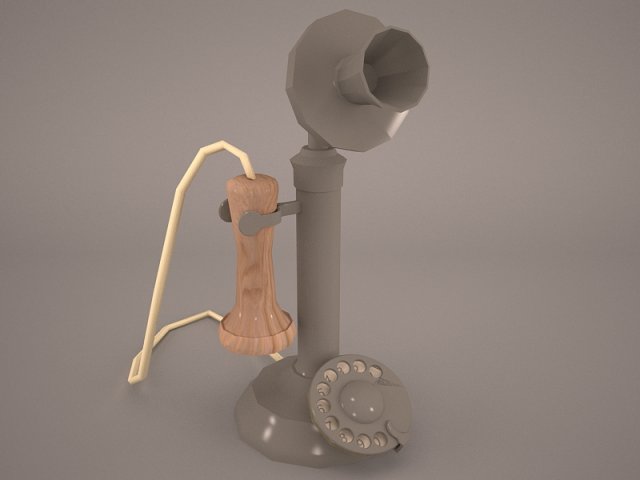
Vintage Telephone 3D Model
vintage telephone phone retro old classic dial antique wooden style cord corded communication wire british rotary box call home office accent vray
-

Noose 3D Model
rope texture medieval tortural torture weapon wood old punishment wire gallows hangman noose execution torment
-
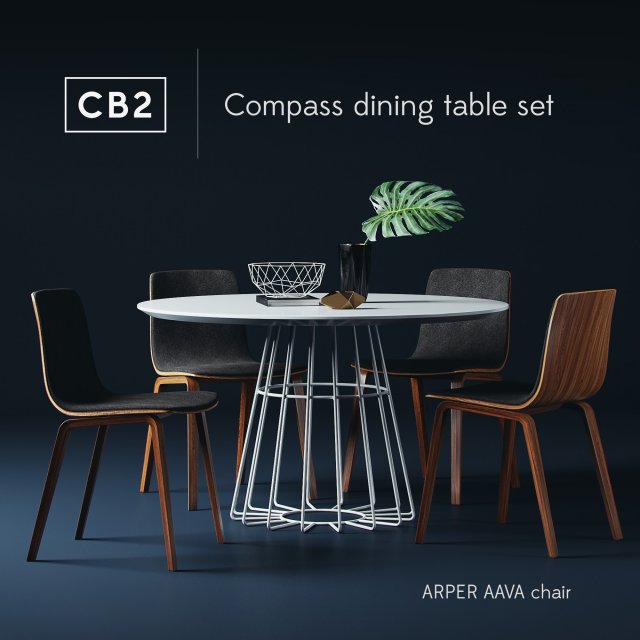
CB2 compass dining table set with Arper Aava chair 3D Model
CB2 Compass dining table set,Archive includes:Compass dining table, Arper aava wood chair, Book, 2 vases with leaf and wire bowl.renderer: CORONAPreview: YesUnits: CentimetersPolys: 207 336XForm: YesModel Parts: 10Render: CoronaFormats: 3Ds Max 2013, OBJ, FBX
-
Ceiling Lamp with Wire Shade 3D Model
3d model of beige ceiling lamp with white wire shade. Compatible with 3ds max 2010 or higher and many others.
-
Ceiling Lamp with Wire Shade 3D Model
3d model of beige ceiling lamp with white wire shade. Compatible with 3ds max 2010 or higher and many others.
-
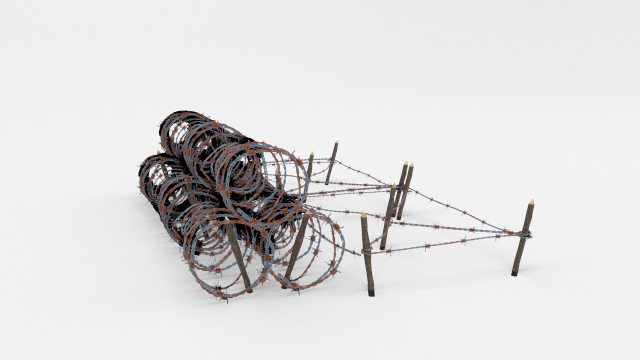
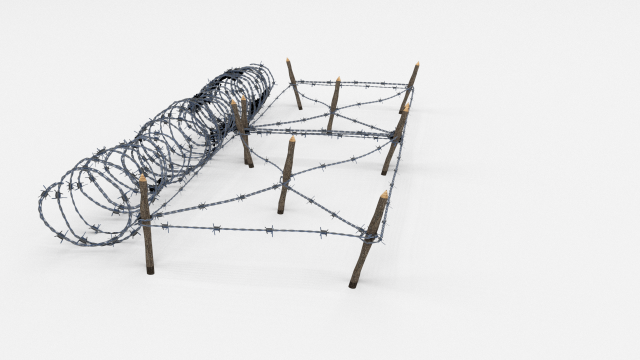
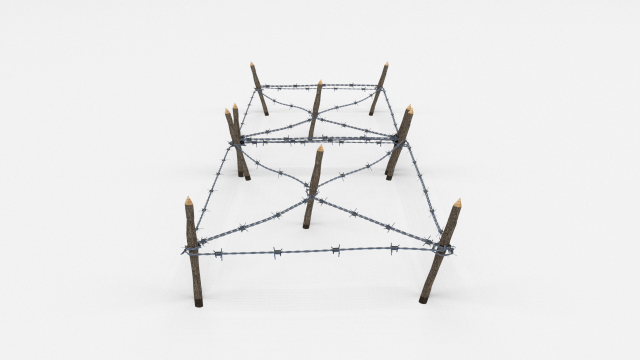
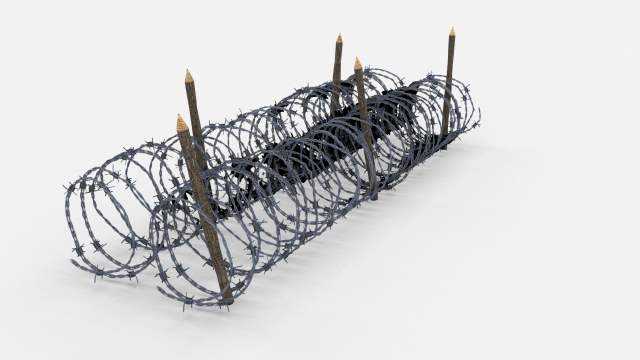
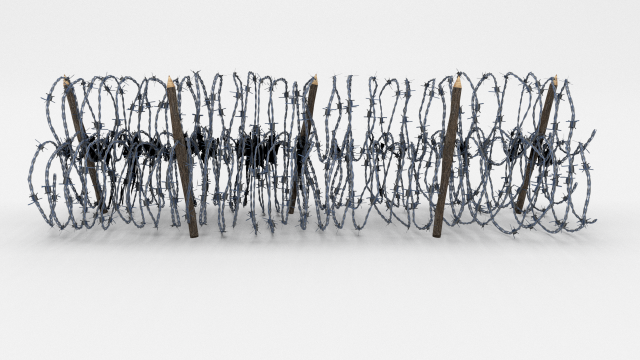
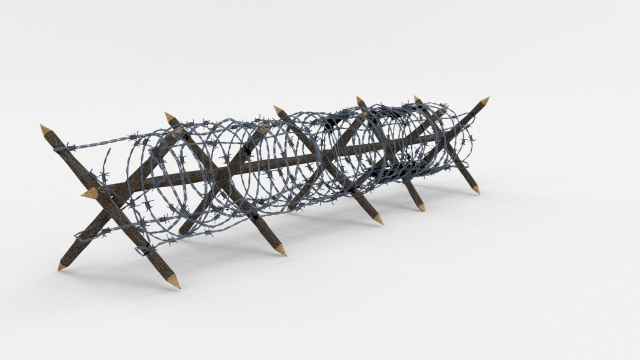
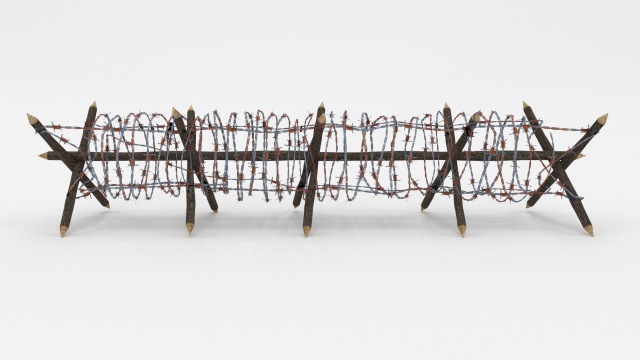
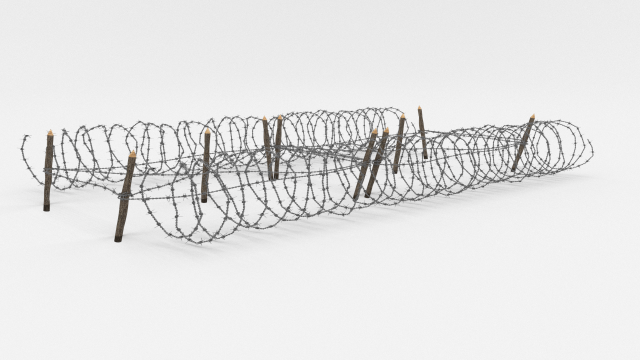
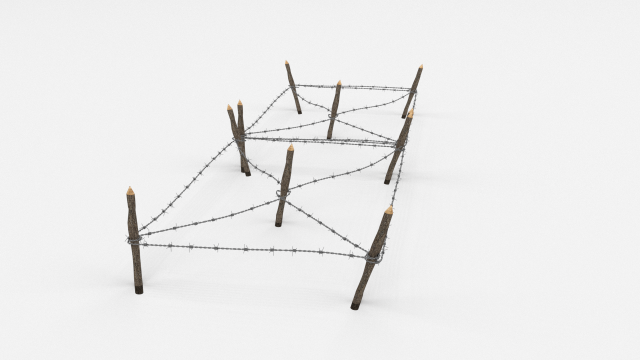
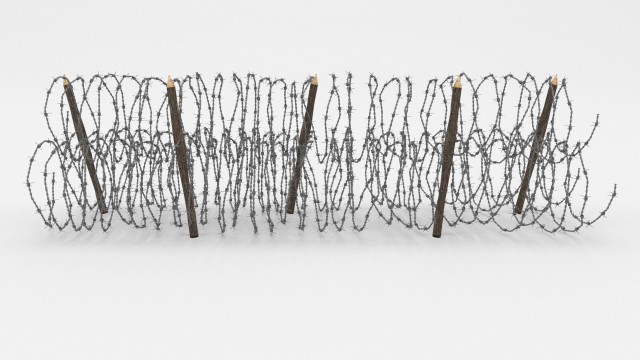
Low Poly Barb Wire Obstacle 23 3D Model
A very accurate model of a Low Poly Barbed Wire Obstacle.The model comes in five formats:-.blend, rendered with cycles, as seen in the images;-.obj, with materials applied and textures;-.dae, with materials applied and textures;-.fbx, with material slots applied;-.stl;The obstacle is in low poly, the barb is created using plane images.Depending on the 3D Software program used, slight material tweaking might be needed.This 3d model was originally created in Blender 2.78 and rendered with Cycles.The model has materials applied in all formats, and are ready to import and render.The model is built strictly out of quads and is subdivisable.For any problems please feel free to contact me.Don’t forget to rate and enjoy!
-
Low Poly Barb Wire Obstacle 24 3D Model
A very accurate model of a Low Poly Barbed Wire Obstacle.The model comes in five formats:-.blend, rendered with cycles, as seen in the images;-.obj, with materials applied and textures;-.dae, with materials applied and textures;-.fbx, with material slots applied;-.stl;The obstacle is in low poly, the barb is created using plane images.Depending on the 3D Software program used, slight material tweaking might be needed.This 3d model was originally created in Blender 2.78 and rendered with Cycles.The model has materials applied in all formats, and are ready to import and render.The model is built strictly out of quads and is subdivisable.For any problems please feel free to contact me.Don’t forget to rate and enjoy!
-
Low Poly Barb Wire Obstacle 21 3D Model
A very accurate model of a Low Poly Barbed Wire Obstacle.The model comes in five formats:-.blend, rendered with cycles, as seen in the images;-.obj, with materials applied and textures;-.dae, with materials applied and textures;-.fbx, with material slots applied;-.stl;The obstacle is in low poly, the barb is created using plane images.Depending on the 3D Software program used, slight material tweaking might be needed.This 3d model was originally created in Blender 2.78 and rendered with Cycles.The model has materials applied in all formats, and are ready to import and render.The model is built strictly out of quads and is subdivisable.For any problems please feel free to contact me.Don’t forget to rate and enjoy!
-
Low Poly Barb Wire Obstacle 22 3D Model
A very accurate model of a Low Poly Barbed Wire Obstacle.The model comes in five formats:-.blend, rendered with cycles, as seen in the images;-.obj, with materials applied and textures;-.dae, with materials applied and textures;-.fbx, with material slots applied;-.stl;The obstacle is in low poly, the barb is created using plane images.Depending on the 3D Software program used, slight material tweaking might be needed.This 3d model was originally created in Blender 2.78 and rendered with Cycles.The model has materials applied in all formats, and are ready to import and render.The model is built strictly out of quads and is subdivisable.For any problems please feel free to contact me.Don’t forget to rate and enjoy!
-
Low Poly Barb Wire Obstacle 20 3D Model
A very accurate model of a Low Poly Barbed Wire Obstacle.The model comes in five formats:-.blend, rendered with cycles, as seen in the images;-.obj, with materials applied and textures;-.dae, with materials applied and textures;-.fbx, with material slots applied;-.stl;The obstacle is in low poly, the barb is created using plane images.Depending on the 3D Software program used, slight material tweaking might be needed.This 3d model was originally created in Blender 2.78 and rendered with Cycles.The model has materials applied in all formats, and are ready to import and render.The model is built strictly out of quads and is subdivisable.For any problems please feel free to contact me.Don’t forget to rate and enjoy!
-
Low Poly Barb Wire Obstacle 19 3D Model
A very accurate model of a Low Poly Barbed Wire Obstacle.The model comes in five formats:-.blend, rendered with cycles, as seen in the images;-.obj, with materials applied and textures;-.dae, with materials applied and textures;-.fbx, with material slots applied;-.stl;The obstacle is in low poly, the barb is created using plane images.Depending on the 3D Software program used, slight material tweaking might be needed.This 3d model was originally created in Blender 2.78 and rendered with Cycles.The model has materials applied in all formats, and are ready to import and render.The model is built strictly out of quads and is subdivisable.For any problems please feel free to contact me.Don’t forget to rate and enjoy!
-
Low Poly Barb Wire Obstacle 17 3D Model
A very accurate model of a Low Poly Barbed Wire Obstacle.The model comes in five formats:-.blend, rendered with cycles, as seen in the images;-.obj, with materials applied and textures;-.dae, with materials applied and textures;-.fbx, with material slots applied;-.stl;The obstacle is in low poly, the barb is created using plane images.Depending on the 3D Software program used, slight material tweaking might be needed.This 3d model was originally created in Blender 2.78 and rendered with Cycles.The model has materials applied in all formats, and are ready to import and render.The model is built strictly out of quads and is subdivisable.For any problems please feel free to contact me.Don’t forget to rate and enjoy!
-
Low Poly Barb Wire Obstacle 18 3D Model
A very accurate model of a Low Poly Barbed Wire Obstacle.The model comes in five formats:-.blend, rendered with cycles, as seen in the images;-.obj, with materials applied and textures;-.dae, with materials applied and textures;-.fbx, with material slots applied;-.stl;The obstacle is in low poly, the barb is created using plane images.Depending on the 3D Software program used, slight material tweaking might be needed.This 3d model was originally created in Blender 2.78 and rendered with Cycles.The model has materials applied in all formats, and are ready to import and render.The model is built strictly out of quads and is subdivisable.For any problems please feel free to contact me.Don’t forget to rate and enjoy!
-
Low Poly Barb Wire Obstacle 16 3D Model
A very accurate model of a Low Poly Barbed Wire Obstacle.The model comes in five formats:-.blend, rendered with cycles, as seen in the images;-.obj, with materials applied and textures;-.dae, with materials applied and textures;-.fbx, with material slots applied;-.stl;The obstacle is in low poly, the barb is created using plane images.Depending on the 3D Software program used, slight material tweaking might be needed.This 3d model was originally created in Blender 2.78 and rendered with Cycles.The model has materials applied in all formats, and are ready to import and render.The model is built strictly out of quads and is subdivisable.For any problems please feel free to contact me.Don’t forget to rate and enjoy!
-
Low Poly Barb Wire Obstacle 15 3D Model
A very accurate model of a Low Poly Barbed Wire Obstacle.The model comes in five formats:-.blend, rendered with cycles, as seen in the images;-.obj, with materials applied and textures;-.dae, with materials applied and textures;-.fbx, with material slots applied;-.stl;The obstacle is in low poly, the barb is created using plane images.Depending on the 3D Software program used, slight material tweaking might be needed.This 3d model was originally created in Blender 2.78 and rendered with Cycles.The model has materials applied in all formats, and are ready to import and render.The model is built strictly out of quads and is subdivisable.For any problems please feel free to contact me.Don’t forget to rate and enjoy!
-
Low Poly Barb Wire Obstacle 13 3D Model
A very accurate model of a Low Poly Barbed Wire Obstacle.The model comes in five formats:-.blend, rendered with cycles, as seen in the images;-.obj, with materials applied and textures;-.dae, with materials applied and textures;-.fbx, with material slots applied;-.stl;The obstacle is in low poly, the barb is created using plane images.Depending on the 3D Software program used, slight material tweaking might be needed.This 3d model was originally created in Blender 2.78 and rendered with Cycles.The model has materials applied in all formats, and are ready to import and render.The model is built strictly out of quads and is subdivisable.For any problems please feel free to contact me.Don’t forget to rate and enjoy!
-
Low Poly Barb Wire Obstacle 14 3D Model
A very accurate model of a Low Poly Barbed Wire Obstacle.The model comes in five formats:-.blend, rendered with cycles, as seen in the images;-.obj, with materials applied and textures;-.dae, with materials applied and textures;-.fbx, with material slots applied;-.stl;The obstacle is in low poly, the barb is created using plane images.Depending on the 3D Software program used, slight material tweaking might be needed.This 3d model was originally created in Blender 2.78 and rendered with Cycles.The model has materials applied in all formats, and are ready to import and render.The model is built strictly out of quads and is subdivisable.For any problems please feel free to contact me.Don’t forget to rate and enjoy!
-
Low Poly Barb Wire Obstacle 11 3D Model
A very accurate model of a Low Poly Barbed Wire Obstacle.The model comes in five formats:-.blend, rendered with cycles, as seen in the images;-.obj, with materials applied and textures;-.dae, with materials applied and textures;-.fbx, with material slots applied;-.stl;The obstacle is in low poly, the barb is created using plane images.Depending on the 3D Software program used, slight material tweaking might be needed.This 3d model was originally created in Blender 2.78 and rendered with Cycles.The model has materials applied in all formats, and are ready to import and render.The model is built strictly out of quads and is subdivisable.For any problems please feel free to contact me.Don’t forget to rate and enjoy!
-
Low Poly Barb Wire Obstacle 12 3D Model
A very accurate model of a Low Poly Barbed Wire Obstacle.The model comes in five formats:-.blend, rendered with cycles, as seen in the images;-.obj, with materials applied and textures;-.dae, with materials applied and textures;-.fbx, with material slots applied;-.stl;The obstacle is in low poly, the barb is created using plane images.Depending on the 3D Software program used, slight material tweaking might be needed.This 3d model was originally created in Blender 2.78 and rendered with Cycles.The model has materials applied in all formats, and are ready to import and render.The model is built strictly out of quads and is subdivisable.For any problems please feel free to contact me.Don’t forget to rate and enjoy!
-
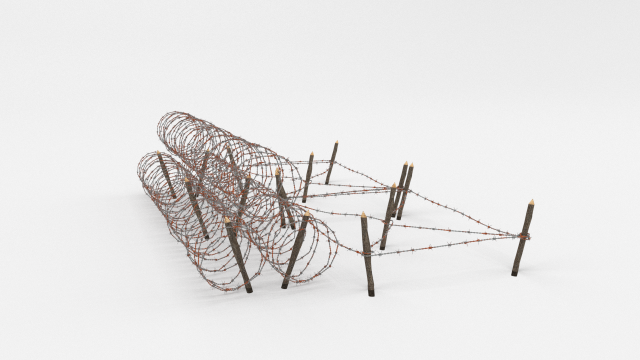
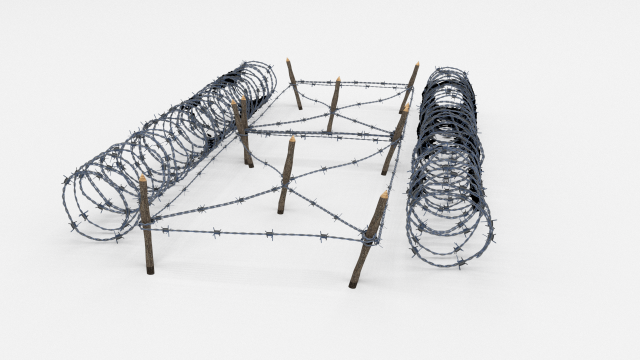
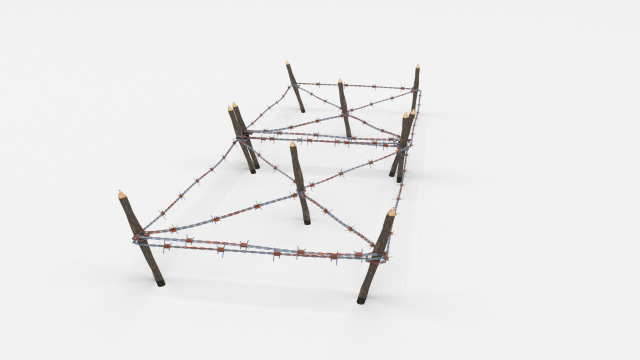
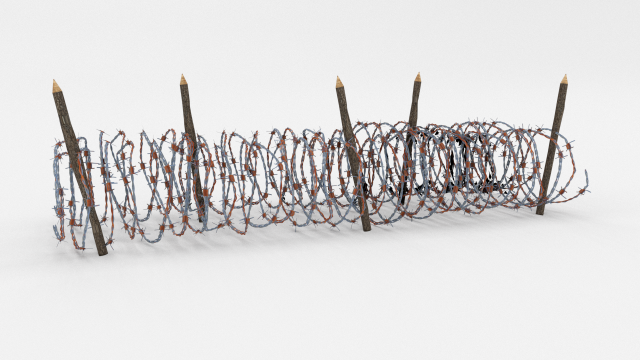
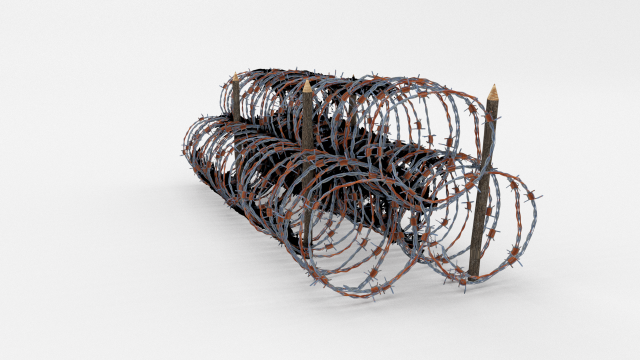
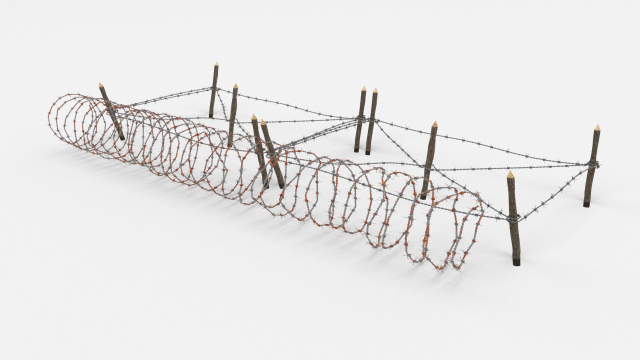
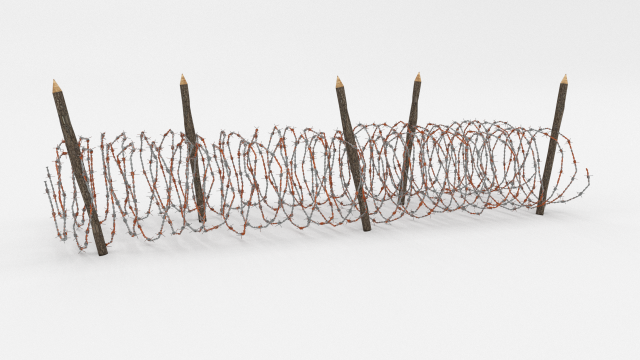
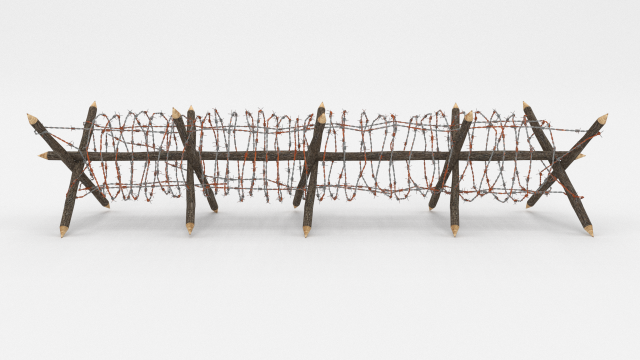
Barb Wire Obstacle 24 3D Model
A very accurate model of a Barbed Wire Obstacle.The model comes in five formats:-.blend, rendered with cycles, as seen in the images;-.obj, with materials applied and textures;-.dae, with materials applied and textures;-.fbx, with material slots applied;-.stl;Depending on the 3D Software program used, slight material tweaking might be needed.This 3d model was originally created in Blender 2.78 and rendered with Cycles.The model has materials applied in all formats, and are ready to import and render.The model is built strictly out of quads and is subdivisable.For any problems please feel free to contact me.Don’t forget to rate and enjoy!
-
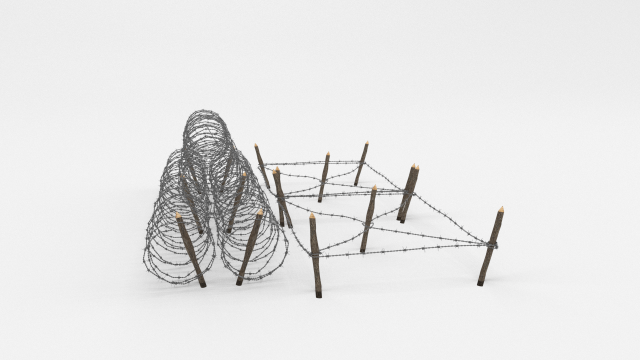
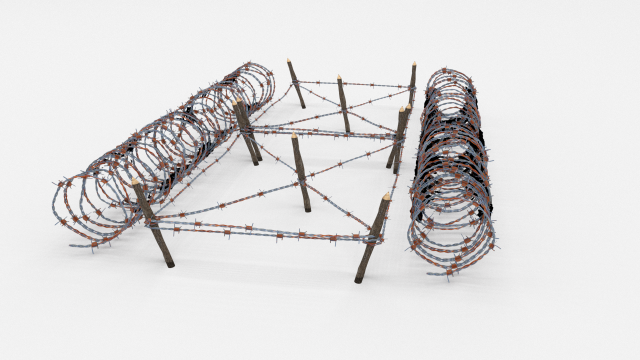
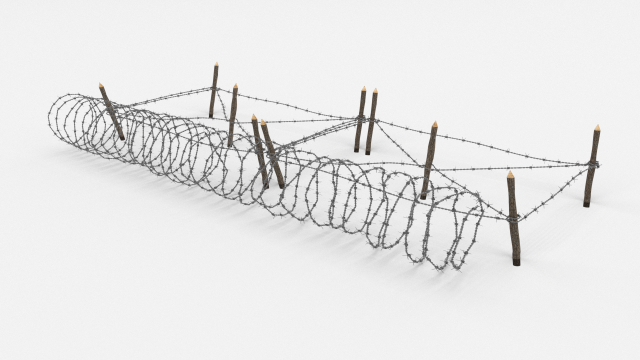
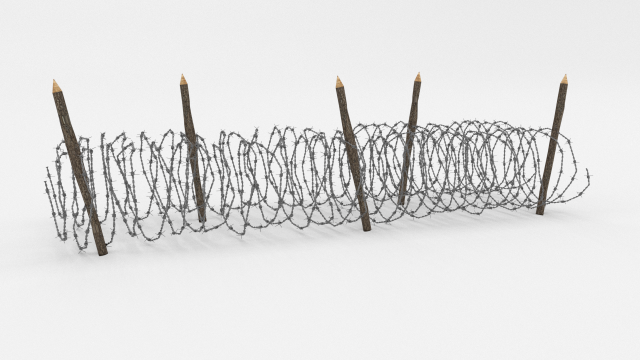
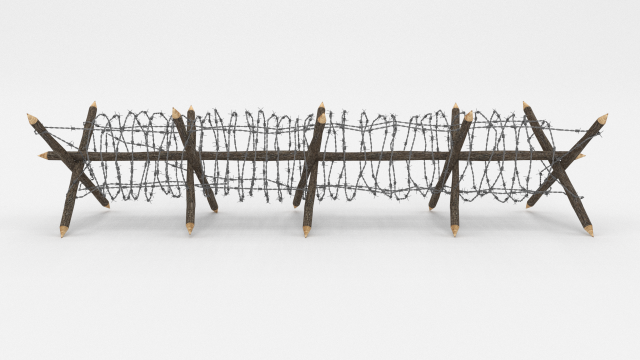
Barb Wire Obstacle 23 3D Model
A very accurate model of a Barbed Wire Obstacle.The model comes in five formats:-.blend, rendered with cycles, as seen in the images;-.obj, with materials applied and textures;-.dae, with materials applied and textures;-.fbx, with material slots applied;-.stl;Depending on the 3D Software program used, slight material tweaking might be needed.This 3d model was originally created in Blender 2.78 and rendered with Cycles.The model has materials applied in all formats, and are ready to import and render.The model is built strictly out of quads and is subdivisable.For any problems please feel free to contact me.Don’t forget to rate and enjoy!
-
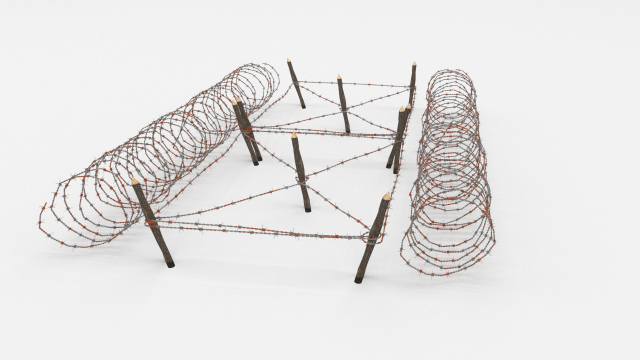
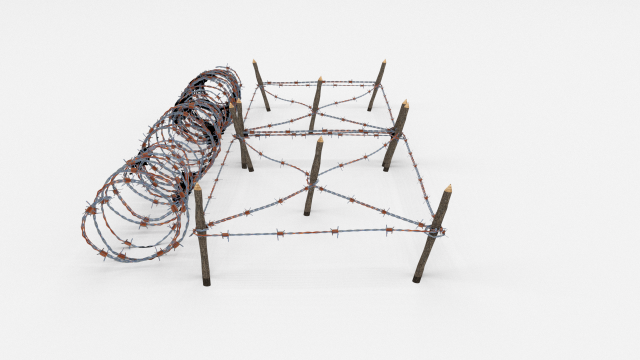
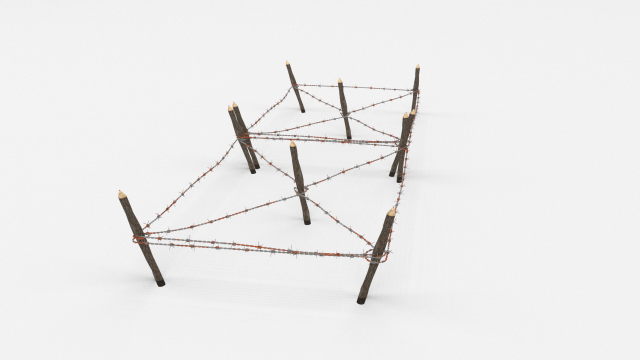
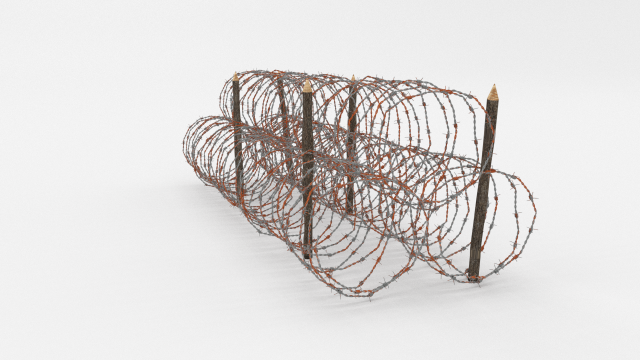
Barb Wire Obstacle 22 3D Model
A very accurate model of a Barbed Wire Obstacle.The model comes in five formats:-.blend, rendered with cycles, as seen in the images;-.obj, with materials applied and textures;-.dae, with materials applied and textures;-.fbx, with material slots applied;-.stl;Depending on the 3D Software program used, slight material tweaking might be needed.This 3d model was originally created in Blender 2.78 and rendered with Cycles.The model has materials applied in all formats, and are ready to import and render.The model is built strictly out of quads and is subdivisable.For any problems please feel free to contact me.Don’t forget to rate and enjoy!
-
Barb Wire Obstacle 21 3D Model
A very accurate model of a Barbed Wire Obstacle.The model comes in five formats:-.blend, rendered with cycles, as seen in the images;-.obj, with materials applied and textures;-.dae, with materials applied and textures;-.fbx, with material slots applied;-.stl;Depending on the 3D Software program used, slight material tweaking might be needed.This 3d model was originally created in Blender 2.78 and rendered with Cycles.The model has materials applied in all formats, and are ready to import and render.The model is built strictly out of quads and is subdivisable.For any problems please feel free to contact me.Don’t forget to rate and enjoy!
-
Barb Wire Obstacle 20 3D Model
A very accurate model of a Barbed Wire Obstacle.The model comes in five formats:-.blend, rendered with cycles, as seen in the images;-.obj, with materials applied and textures;-.dae, with materials applied and textures;-.fbx, with material slots applied;-.stl;Depending on the 3D Software program used, slight material tweaking might be needed.This 3d model was originally created in Blender 2.78 and rendered with Cycles.The model has materials applied in all formats, and are ready to import and render.The model is built strictly out of quads and is subdivisable.For any problems please feel free to contact me.Don’t forget to rate and enjoy!
-
Barb Wire Obstacle 19 3D Model
A very accurate model of a Barbed Wire Obstacle.The model comes in five formats:-.blend, rendered with cycles, as seen in the images;-.obj, with materials applied and textures;-.dae, with materials applied and textures;-.fbx, with material slots applied;-.stl;Depending on the 3D Software program used, slight material tweaking might be needed.This 3d model was originally created in Blender 2.78 and rendered with Cycles.The model has materials applied in all formats, and are ready to import and render.The model is built strictly out of quads and is subdivisable.For any problems please feel free to contact me.Don’t forget to rate and enjoy!
-
Barb Wire Obstacle 18 3D Model
A very accurate model of a Barbed Wire Obstacle.The model comes in five formats:-.blend, rendered with cycles, as seen in the images;-.obj, with materials applied and textures;-.dae, with materials applied and textures;-.fbx, with material slots applied;-.stl;Depending on the 3D Software program used, slight material tweaking might be needed.This 3d model was originally created in Blender 2.78 and rendered with Cycles.The model has materials applied in all formats, and are ready to import and render.The model is built strictly out of quads and is subdivisable.For any problems please feel free to contact me.Don’t forget to rate and enjoy!
-
Barb Wire Obstacle 17 3D Model
A very accurate model of a Barbed Wire Obstacle.The model comes in five formats:-.blend, rendered with cycles, as seen in the images;-.obj, with materials applied and textures;-.dae, with materials applied and textures;-.fbx, with material slots applied;-.stl;Depending on the 3D Software program used, slight material tweaking might be needed.This 3d model was originally created in Blender 2.78 and rendered with Cycles.The model has materials applied in all formats, and are ready to import and render.The model is built strictly out of quads and is subdivisable.For any problems please feel free to contact me.Don’t forget to rate and enjoy!
-
Barb Wire Obstacle 16 3D Model
A very accurate model of a Barbed Wire Obstacle.The model comes in five formats:-.blend, rendered with cycles, as seen in the images;-.obj, with materials applied and textures;-.dae, with materials applied and textures;-.fbx, with material slots applied;-.stl;Depending on the 3D Software program used, slight material tweaking might be needed.This 3d model was originally created in Blender 2.78 and rendered with Cycles.The model has materials applied in all formats, and are ready to import and render.The model is built strictly out of quads and is subdivisable.For any problems please feel free to contact me.Don’t forget to rate and enjoy!
-
Barb Wire Obstacle 15 3D Model
A very accurate model of a Barbed Wire Obstacle.The model comes in five formats:-.blend, rendered with cycles, as seen in the images;-.obj, with materials applied and textures;-.dae, with materials applied and textures;-.fbx, with material slots applied;-.stl;Depending on the 3D Software program used, slight material tweaking might be needed.This 3d model was originally created in Blender 2.78 and rendered with Cycles.The model has materials applied in all formats, and are ready to import and render.The model is built strictly out of quads and is subdivisable.For any problems please feel free to contact me.Don’t forget to rate and enjoy!
-
Barb Wire Obstacle 14 3D Model
A very accurate model of a Barbed Wire Obstacle.The model comes in five formats:-.blend, rendered with cycles, as seen in the images;-.obj, with materials applied and textures;-.dae, with materials applied and textures;-.fbx, with material slots applied;-.stl;Depending on the 3D Software program used, slight material tweaking might be needed.This 3d model was originally created in Blender 2.78 and rendered with Cycles.The model has materials applied in all formats, and are ready to import and render.The model is built strictly out of quads and is subdivisable.For any problems please feel free to contact me.Don’t forget to rate and enjoy!
-
Barb Wire Obstacle 13 3D Model
A very accurate model of a Barbed Wire Obstacle.The model comes in five formats:-.blend, rendered with cycles, as seen in the images;-.obj, with materials applied and textures;-.dae, with materials applied and textures;-.fbx, with material slots applied;-.stl;Depending on the 3D Software program used, slight material tweaking might be needed.This 3d model was originally created in Blender 2.78 and rendered with Cycles.The model has materials applied in all formats, and are ready to import and render.The model is built strictly out of quads and is subdivisable.For any problems please feel free to contact me.Don’t forget to rate and enjoy!
-
Barb Wire Obstacle 12 3D Model
A very accurate model of a Barbed Wire Obstacle.The model comes in five formats:-.blend, rendered with cycles, as seen in the images;-.obj, with materials applied and textures;-.dae, with materials applied and textures;-.fbx, with material slots applied;-.stl;Depending on the 3D Software program used, slight material tweaking might be needed.This 3d model was originally created in Blender 2.78 and rendered with Cycles.The model has materials applied in all formats, and are ready to import and render.The model is built strictly out of quads and is subdivisable.For any problems please feel free to contact me.Don’t forget to rate and enjoy!
-
Barb Wire Obstacle 11 3D Model
A very accurate model of a Barbed Wire Obstacle.The model comes in five formats:-.blend, rendered with cycles, as seen in the images;-.obj, with materials applied and textures;-.dae, with materials applied and textures;-.fbx, with material slots applied;-.stl;Depending on the 3D Software program used, slight material tweaking might be needed.This 3d model was originally created in Blender 2.78 and rendered with Cycles.The model has materials applied in all formats, and are ready to import and render.The model is built strictly out of quads and is subdivisable.For any problems please feel free to contact me.Don’t forget to rate and enjoy!
-
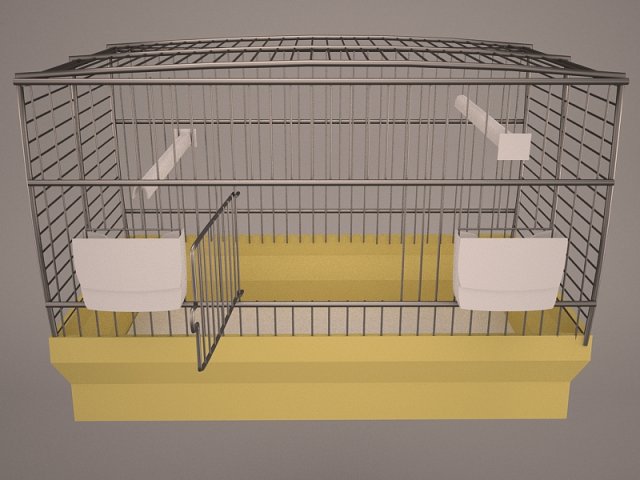
Birdcage 3D Model
Bird Cage birdcage terrarium parrot canary pet decoration interior design wire lattice large sing prison animal hobby
-
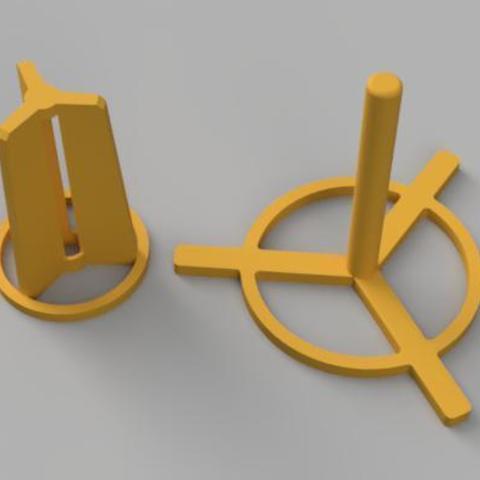
Wire Stripper (Cutter Blade) 3D Print Model
Summary
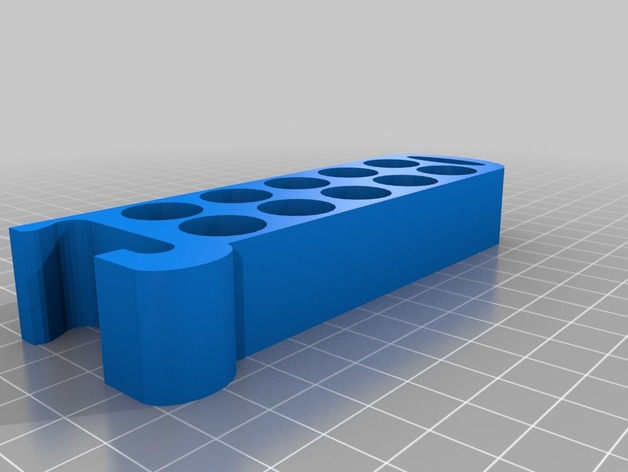
Wire Stripper (Cutter Blade)
You will need:
2x M4 5mm screw
2x M4 7mm nut -
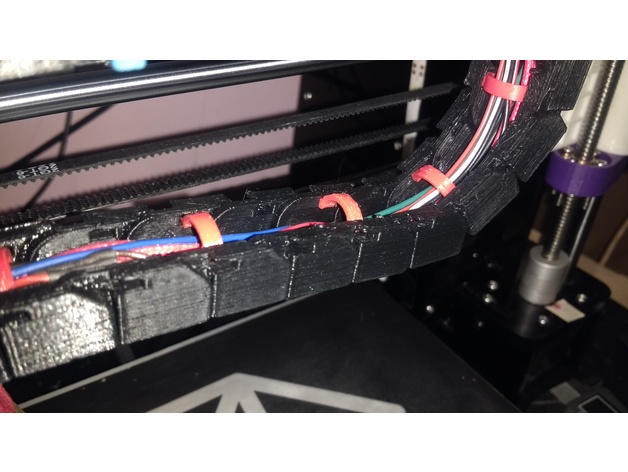
Linear Chain – Wire Tabs 3D Print Model
Summary
My Filament kept getting caught on the zip ties… this is my solution! -
Panton Wire 3D Model
One purchase gives access to all file formats available. By default only .max file format is selected for download.
-
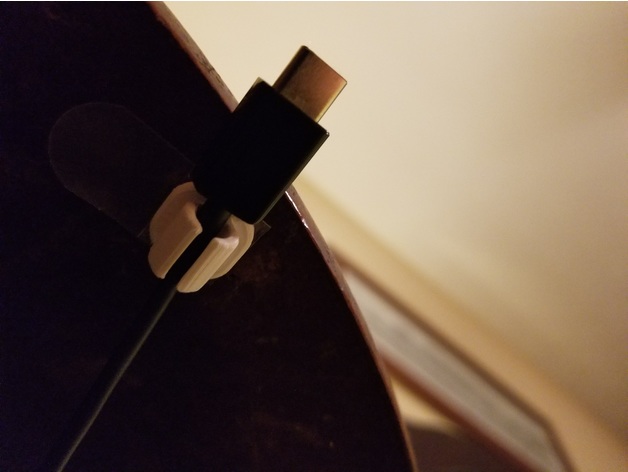
Wire Management Clip 3D Print Model
Summary
This is a simple wire clip, made to be stuck down to a table or the wall with some 3M double sided foam tape. Simply cut the tape down to the side of base of the clip (14×14 mm)
I personally use one under my bedside table to hold my USB-C cord, so when I unplug my phone, the cord doesn’t fall onto the floor. I also use one on my wall to hold my micro USB cable for my LG Tones. -
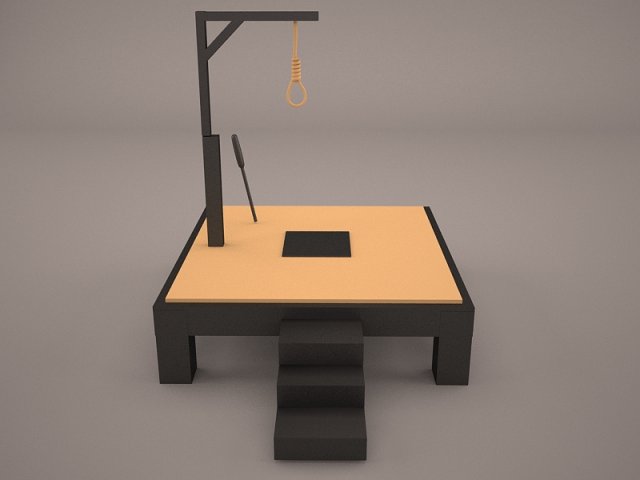
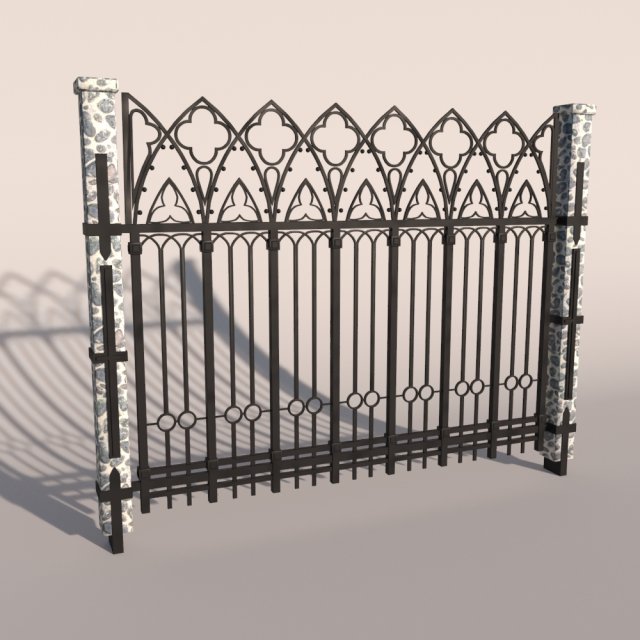
Gallows 3D Model
gallow gallows hanging west wild western medieval justice law hangman rope execution punishment hanger torture tortural wood old wire architectural ex
-
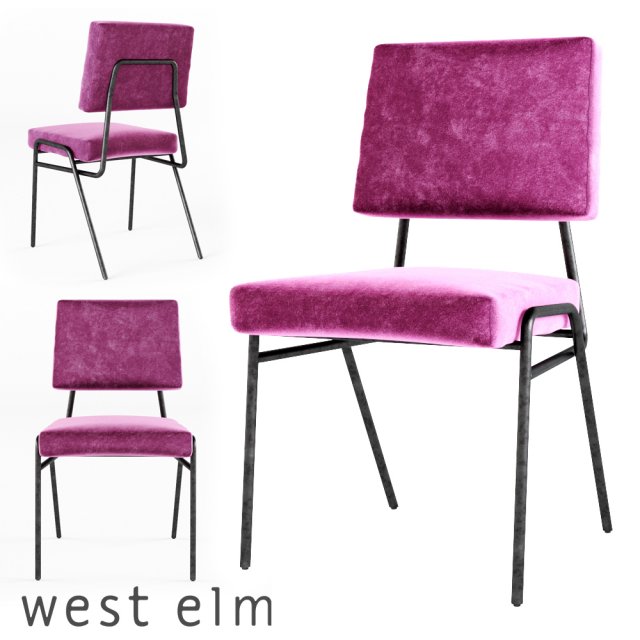
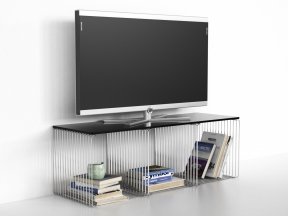
West Elm – Wire Frame Dining Chair 3D Model
https://www.westelm.com/products/wire-frame-dining-chair-h2561/Overall product dimensions: 18.1″w x 21″d x 31.9″h.
-
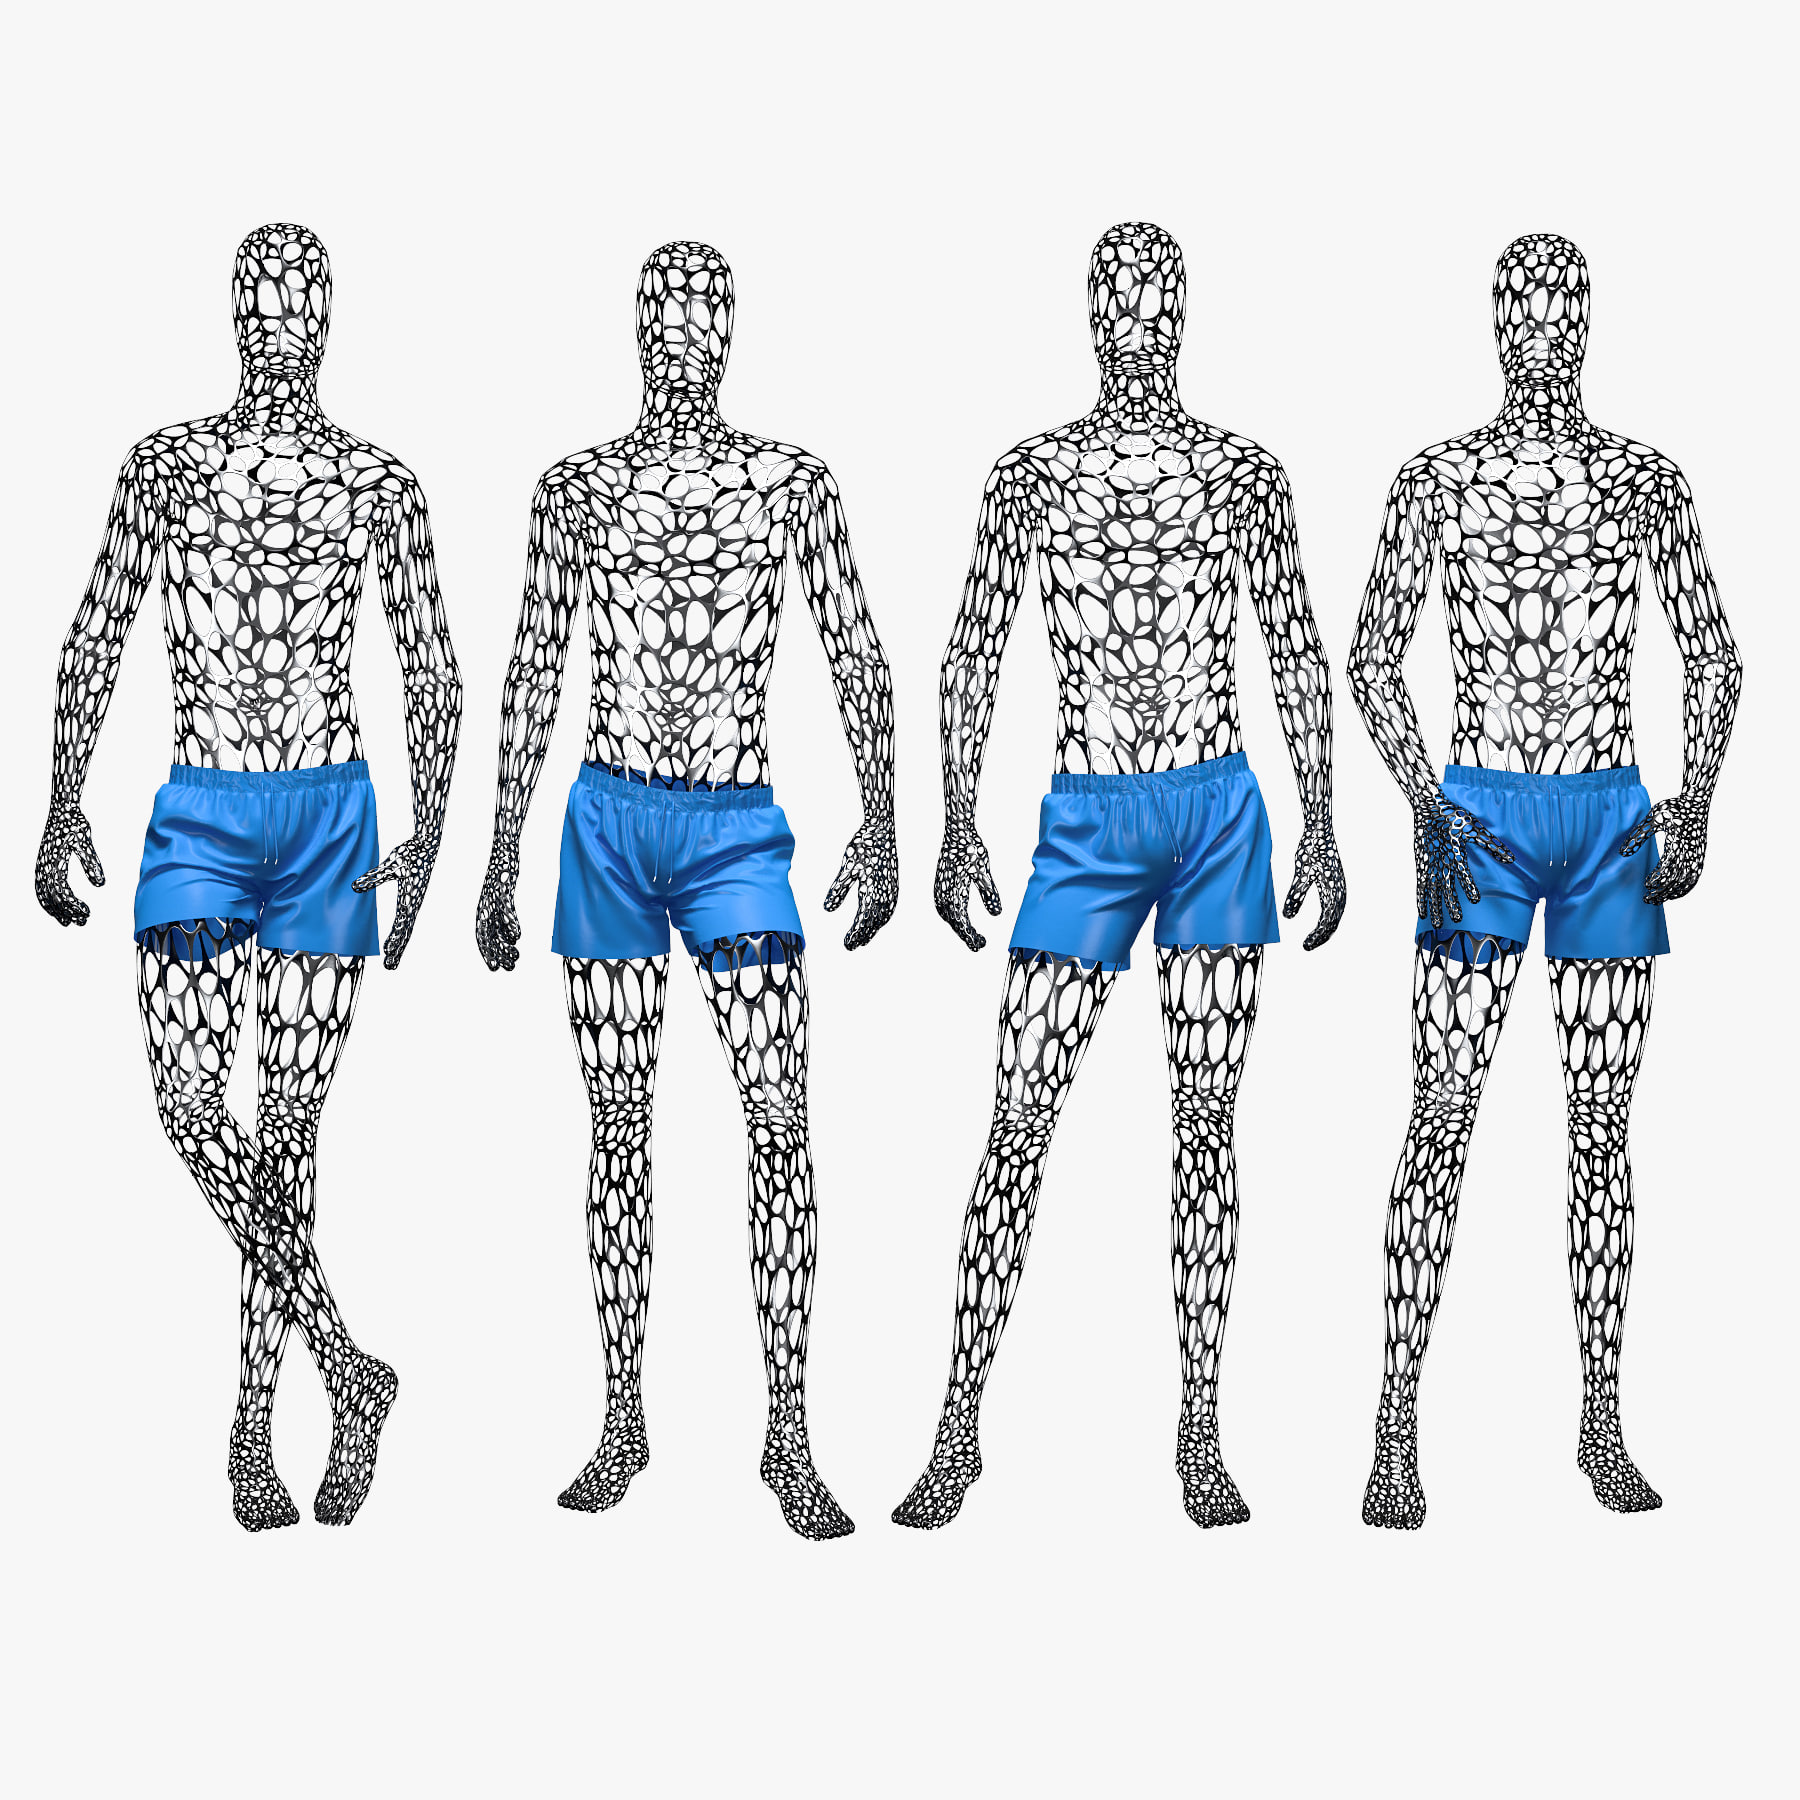
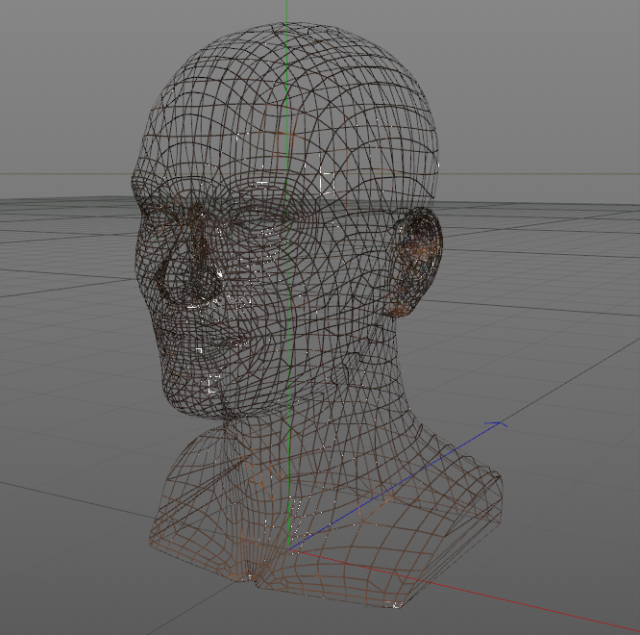
Male mannequin wire set 3D Model
Highly detailed, photorealistic 3d model set of male swimming suit with wire mannequin.Perfect for close-up. Models available in next formats: 3ds Max 20143ds Max 2010FBX OBJ The model is built to real-world scale (cm), making it easy to just drop in your scene and render. Archives are include only 3d model, textures and V-Ray material files (.mat), without any environment or light sources. The OBJ and FBX version comes without material definitions but it is UV mapped and all materials are provided.You also can to see my other models, just click on my user name to see complete gallery.
-
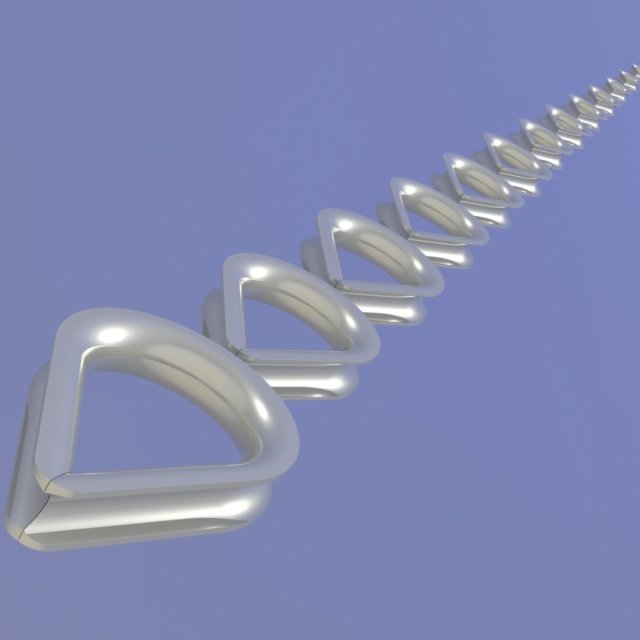
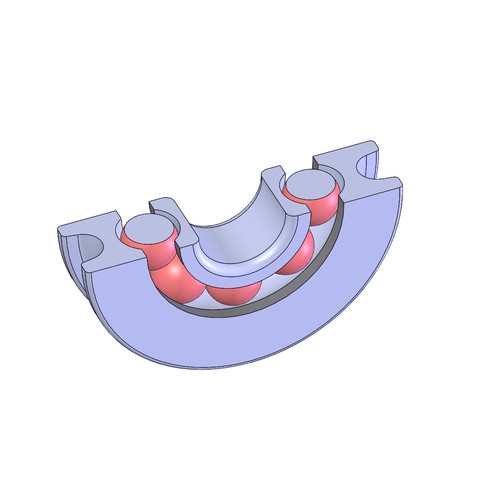
Thimble DIN 6899 SolidWorks 3D Model
Thimble corresponds to the DIN 6899. The model includes all standard sizes. The model is prepared to be added to the user’s library. Version of SolidWorks – 2015. Version of STEP – AP203. Version of SAT – 3.0. Units: mm.