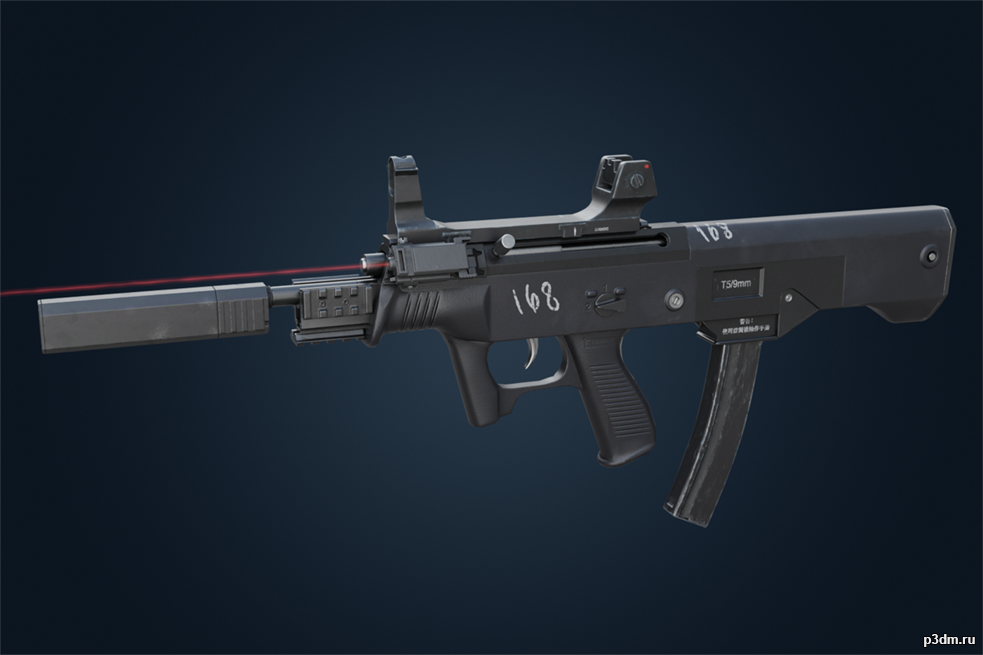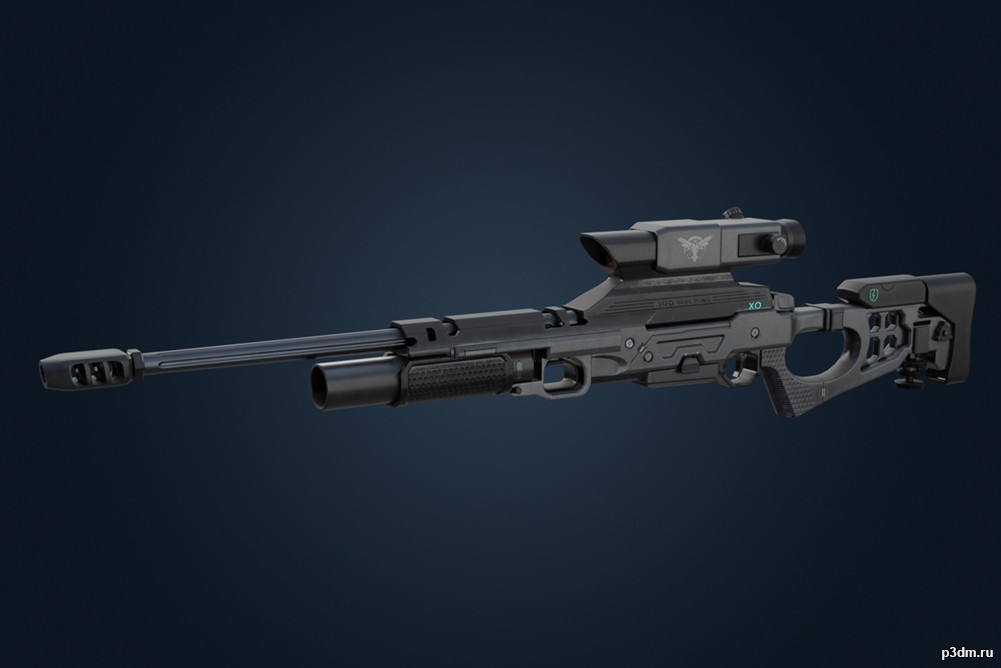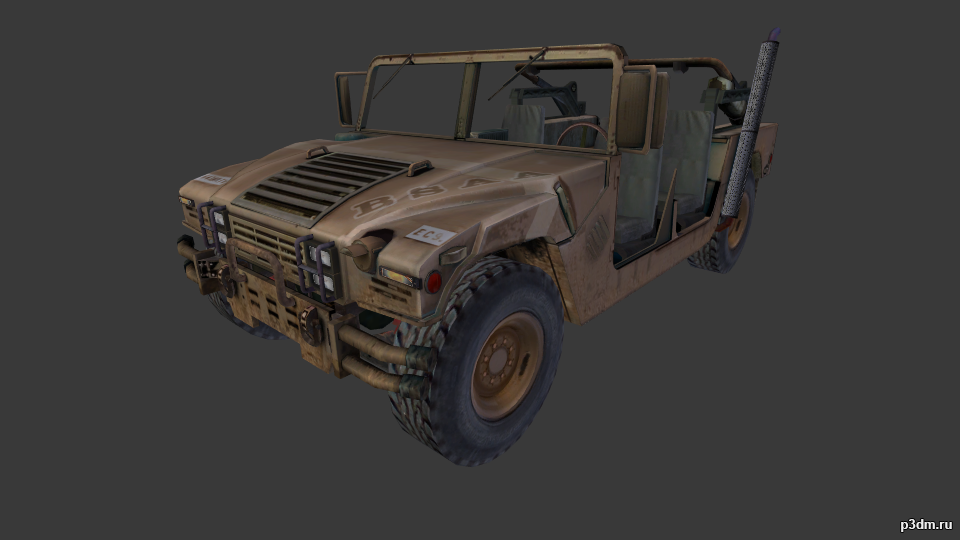
3д модель хаммера из игры “Resident Evil 5”
Tag: v2
-
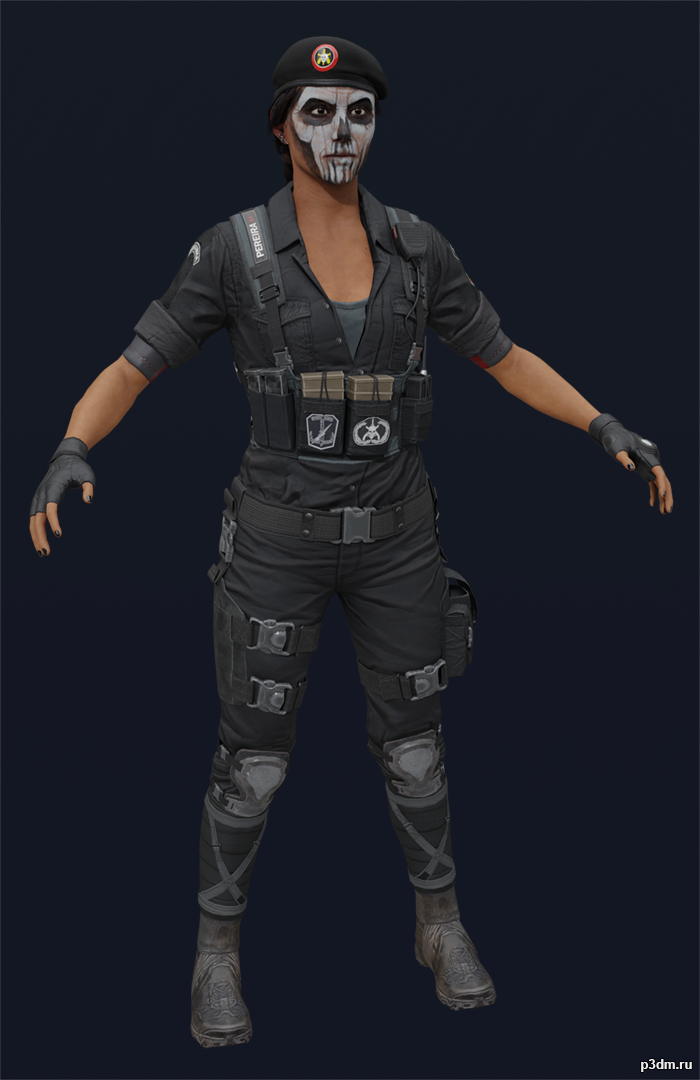
Caveira (v2) – Rainbow Six Siege 3D Model
Caveira’s updated model, normals and diffuses baked by me, I included the colors the game uses to color the diffuses in ‘mats.txt’ under the ‘raw’ folder alongside with the uncolored diffuses.Since the UVs are mostly the same for the body and headgear it’s possible to use Luxox’s old baked diffuses on this model as well (just flip the textures vertically 😀 ) tho Ubi changed her skin color and face paint too much to use those, luckily the gloves and arms have different materials so using the old glove diffuse is pretty easy.
-
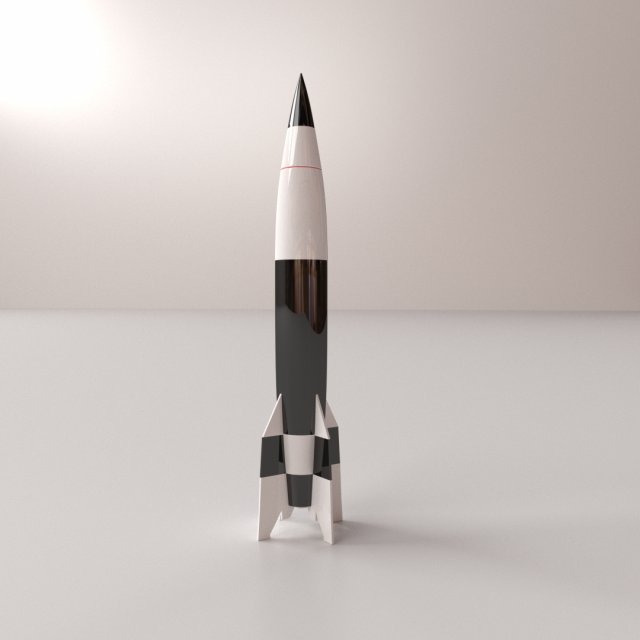
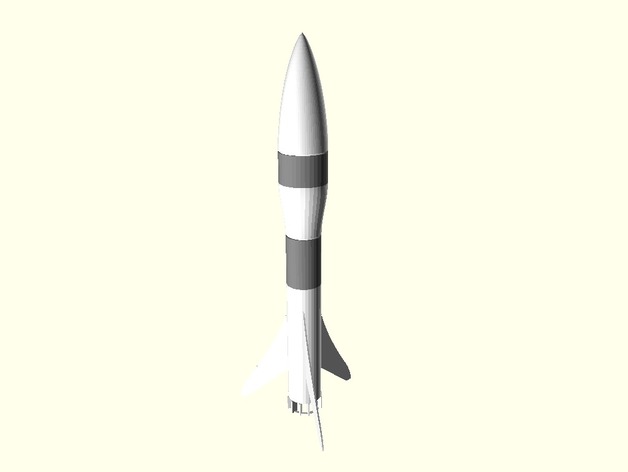
V2 Rocket 3D Model
V2 ROCKET===============================- Modeled in Blender.- Preview image rendered using cycles.- All scene are included in .blend files.- Poly count are before sub division- Great for close up render.- All parts and materials are logically named.OTHER FORMATS=================- 3ds MAX- COLLADA (.dae)- Autodesk FBX- OBJ
-
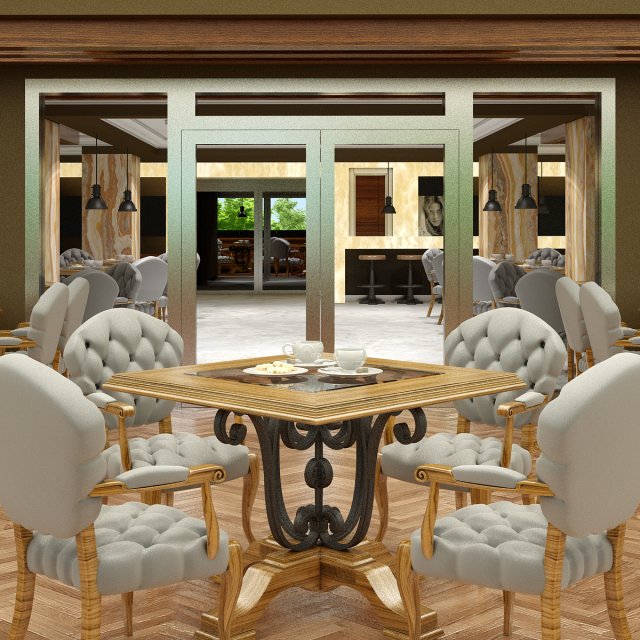
Restaurant Interior 04 V2 3D Model
Modelled : Autocad – 3ds Max 2016Rendered : 3ds Max 2016 – Vray 3.40Files : .max (2013,2014,2015,2016)and textures* Trees are not Included.(c) 3D_SB 2018
-
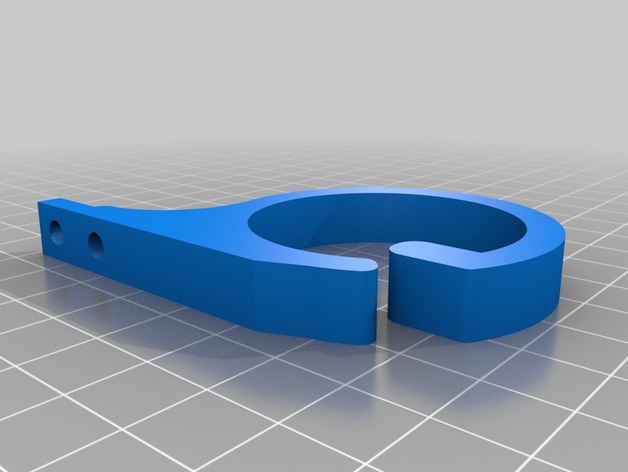
Cable clip v2 remix 3D Print Model
Summary
Thanks to JTM 88 for the original. I extended the base to add a second screw hole as it suited me more. Great design.
Print Settings
Printer:
ultibots d300vs
Rafts:
Doesn’t Matter
Supports:
Doesn’t Matter
Resolution:
.2mm
Infill:
50%+ -
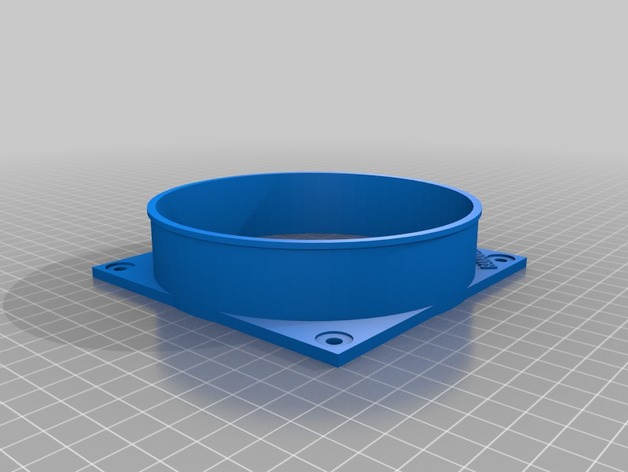
S9 Antminer Air Duct v2 3D Print Model
Summary
I custom made this for my S9 Antminer Farm
Print Settings
Printer:
CR10-4S
Rafts:
Doesn’t Matter
Supports:
Doesn’t Matter -
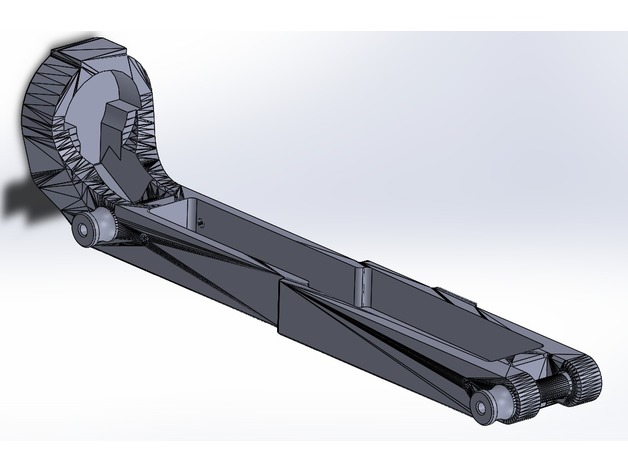
AR-15 Upper Receiver Cover V2 3D Print Model
Summary
Upper receiver cover for the AR15 platform, remixed from ZBROYAR’s cover (https://www.thingiverse.com/thing:2816693). This allows you to store your upper and Bolt Carrier Group together, and prevents dust/dirt/whatever intrusion into your receiver.
This version is optimized for faster printing, lower filament usage, easier assembly, and easier take-down.
Changes:
1) Removed material from center of model
2) Removed material from inside buffer tower
3) Removed text from bottom of model
4) Chamfered front mount area
5) Lengthened take-down pins and contoured to improve grip
Print Settings
Printer:
Qidi X-Pro
Rafts:
No
Supports:
Yes
Notes:
Print with the tower oriented vertically and on top. Supports everwhere.
How I Designed This
SolidWorks FTW!
Full CAD files provided, please feel free to remix to your little heart’s content. -
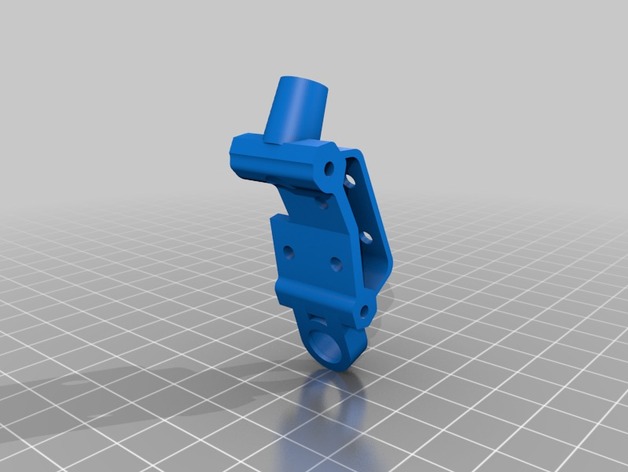
AirBlade Eclair V2 Backpack for Split Mini 3D Print Model
Summary
This is designed to re-locate the pouch on the backpack to the top, freeing up spaces inside the Eclair frame to stack up Split Mini boards. The eclair frame is able to take up to 4 boards inside the cage. The pouch is still for VTX. The receiver can be installed behind the stack.
Print Settings
Printer Brand:
Prusa
Printer:
i3 MK3
Rafts:
No
Supports:
Yes
Notes:
Print in TPU -
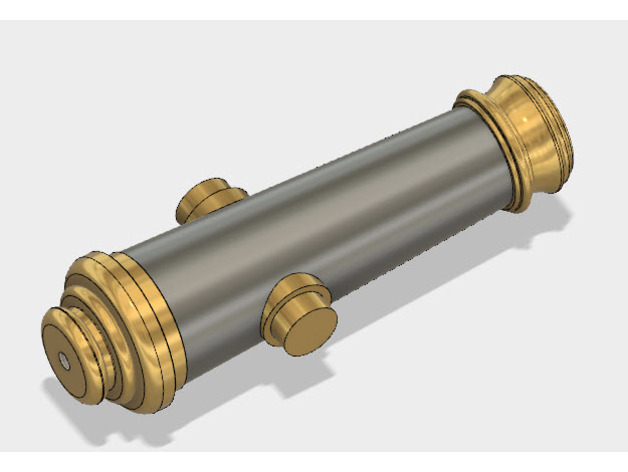
Cannon Bar Tap V2 3D Print Model
Summary
Check out all my tips at http://Makersteve.com! It’s worth the trip.
Redlegs!
As requested with threaded hole on breech end.
Working on a project for the St. Barbara’s Ball. Everyone likes cannons and everyone likes beer.. this is both.
It’s a fatty, 9 inches tall by 2 inches wide.
print it standing on breech end with supports for trunnions.
Threaded for a standard 3/8-16 UNC Bar tap thread.
If you need some brass colored filament, please consider the link below.
Brass Filament https://amzn.to/2rnnrqN (affiliate link)
Inexpensive, quality filament
Sunlu White https://amzn.to/2rnt1dD (affiliate link)
Sunlu Black https://amzn.to/2HQdbCh (affiliate link) -
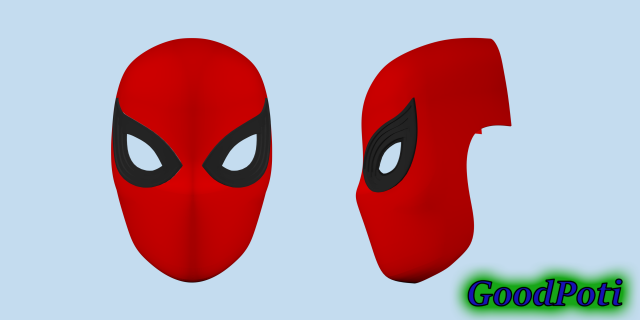
Spider-Man Mask v2 3D Model
Spider-Man Mask v2 3D print modelSpider-Man Mask v2The mask has removable eyesFile format: 3Ds,OBJ,STL.Spider-Man is a fictional superhero appearing in American comic books published by Marvel Comics. The character was created by writer-editor Stan Lee and writer-artist Steve Ditko, and first appeared in the anthology comic book Amazing Fantasy #15 (August 1962) in the Silver Age of Comic Books. The character is conceived as an orphan within the Marvel Universe named Peter Parker being raised by his Aunt May and Uncle Ben in New York City after his parents Richard and Mary Parker were killed in a plane crash. Lee and Ditko depicted the character as having to deal with the normal struggles of adolescence and financial issues with a large array of supporting characters such as J. Jonah Jameson, Daily Bugle editor and smear campaigner of Spider-Man and classmates such as Flash Thompson, Harry Osborn and romantic interests, Gwen Stacy and Mary Jane Watson. His origin story depicts him as being bitten by a radioactive spider and thus acquiring spider-related power and abilities, such as the ability to cling to most surfaces, shoot spider-webs using wrist-mounted devices of his own invention, which he calls “web-shooters”, and react to danger quickly with his “spider-sense”, enabling him to combat his many superpowered foes, such as Doctor Octopus, Green Goblin and Venom. Also within the origin story, Spider-Man originally uses this power for stardom, but after letting a burglar escape who is responsible for shooting his uncle, he learns to use his power responsibly.
-
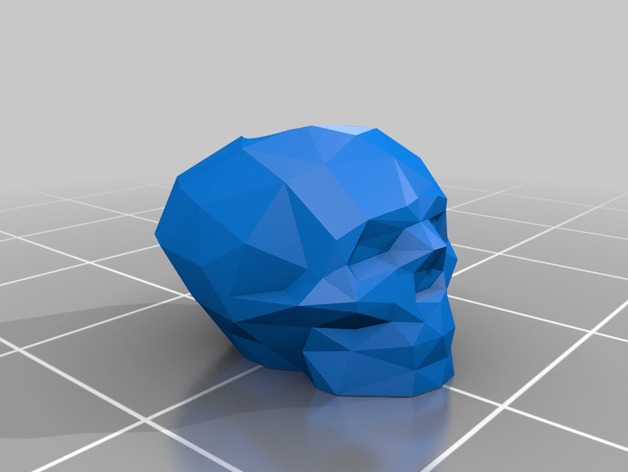
Low Poly Skull Paracord Bead V2 3D Print Model
Summary
This is a low poly skull bead with a horizontal hole. -
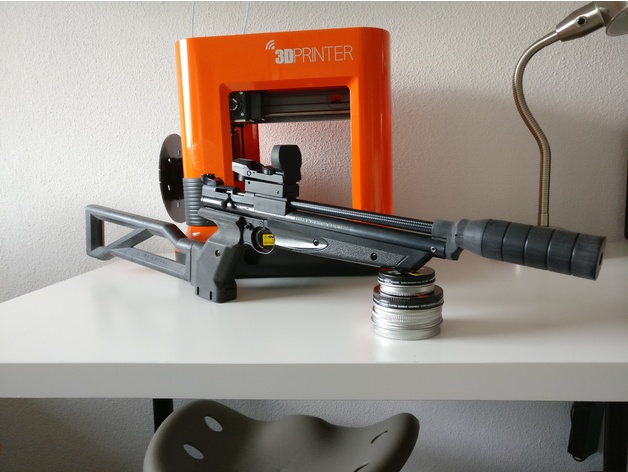
Crosman 1377 suppressor V2 3D Print Model
Summary
I had been searching for a nice way of attatching a suppressor to my crosman 1377 without having to buy a longer barrel. I couldn’t find anything on the internet that I liked, so I came up with something myself.
This is the second version of my idea. This new version is made out of just one piece. Its total length is a bit shorter and I hava made the fit with the 1377 much better by fitting the barrelband around the barrel instead of having it in front of it, plus extra support for the weight of the suppressor.
You can find my original design over here: https://www.thingiverse.com/thing:2556614
This suppressor works way better than its previous interation and I had ever expected it to work so well. The only thing I hear is the sound of the hammer hitting the valve. Now I can comfortably shoot it outside whithout having to worry about my neighbours.
And the total cost is less than $5,-.
Make sure to post the results when you made one for yourself.
Print Settings
Printer:
Da Vinci Mini
Rafts:
No
Supports:
No
Resolution:
0.2
Infill:
100%
Notes:
DO NOT USE YOUR SLICER’S GENERATED SUPPORTS!
It will most likely put support material inside the suppressor. I have included a model with supports. These might look weird, but they work extremely well.
Chose strength over looks!
You will need around 30 m of plastic for this project.
Post-Printing
Post-Printing work on the suppressor:
After the suppressor is printed, true up the inner holes with a 5.0 mm drillbit.
Then true up the hole that goes around the muzzle of the barrel with a 8.0 mm drillbit. This hole locks the barrel in place, so take your time. Use some sandpaper or a 11.2 mm drillbit to clean up the hole in witch the barrel must fit.
I put some carbon vinyl around the barrel just for asthetics.
Also to take away the cheap plasticy look I sanded it with 250 grid sandpaper and buffed it with some scotch-brite. This gives it the sort of weathered look. -
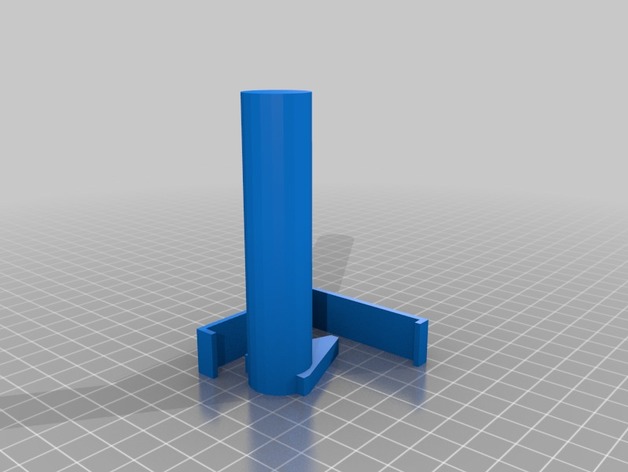
Monoprice maker select v2 spool holders 3D Print Model
Summary
spool holder (1) needs to have 2 copies and they need a 3/4 inch PVC pipe
Print Settings
Printer:
Monoprice maker select v2
Rafts:
Doesn’t Matter
Supports:
Doesn’t Matter
Resolution:
.2
Infill:
20
Notes:
spool holder (2) needs supports the others don’t -
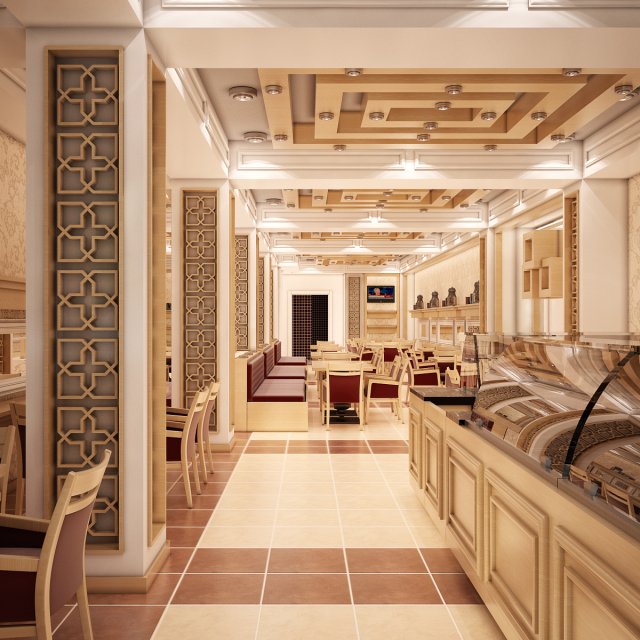
Restaurant Interior 01 V2 3D Model
Modelled : Autocad – 3ds Max 2013Rendered : 3ds Max 2013 – Vray 2.30Files : .max (2010, 2011, 2012, 2013)and texturesTrees are not Included.(c) 3D_SB 2015
-
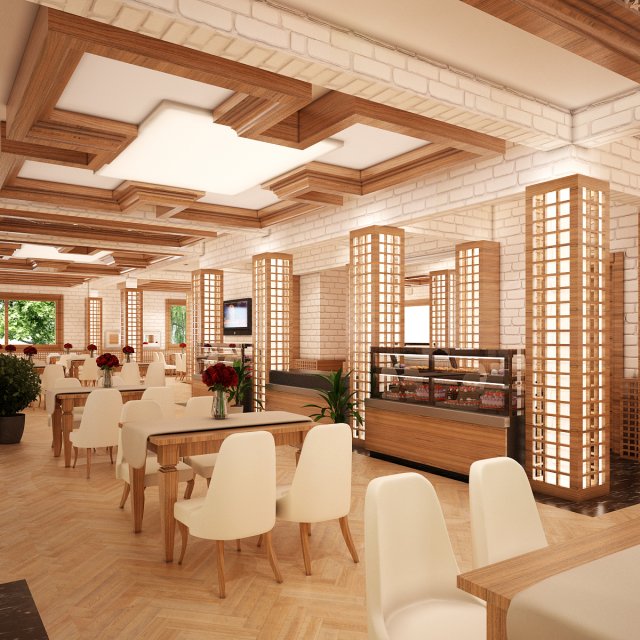
Cafe Interior 01 V2 3D Model
Modelled : Autocad – 3ds Max 2013Rendered : 3ds Max 2013 – Vray 2.30Files : .max (2010, 2011, 2012, 2013)and texturesTrees, Flowers and Plants are not Included.(c) 3D_SB 2015
-
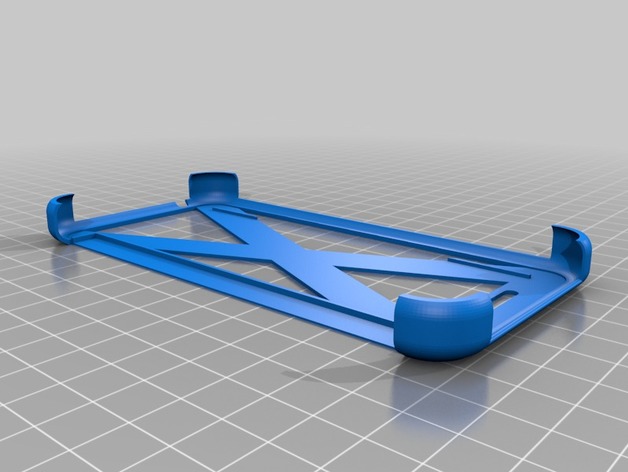
HTC 510 Dot View Solid Part V2 3D Print Model
Summary
HTC 510, Dot View, Solid Part.
Reste juste à coller ( Époxy ) la partie “Dot view”. Beaucoup plus mince et flexible que la première version.
Just stick to the “Dot view” part (with epoxy glue). Much thinner and flexible than the first version.
Print Settings
Printer Brand:
Robo 3D
Printer:
R1 ABS + PLA Model
Rafts:
No
Supports:
No
Resolution:
0.1mm
Infill:
90% -
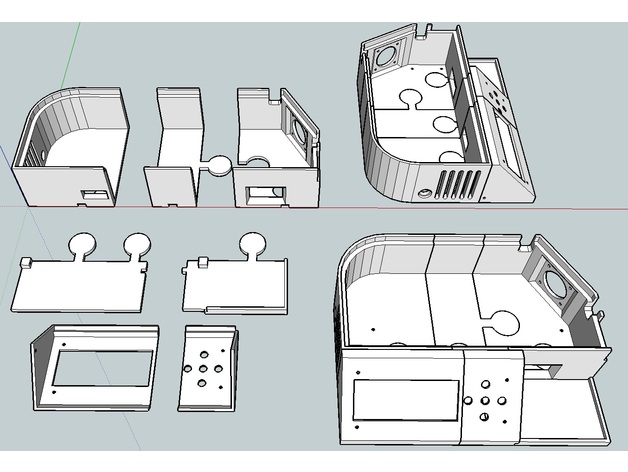
TronXY X1 Control Box and base V2 3D Print Model
Summary
all you guys and gals out there that are mad they now have to print a new better set you can blame (thank) Rob Zarfas from the FB “Tronxy X3, X1, X5 3D Printer Users (All models)” group
it was his suggestions and ideas that helped me draw this up
there are over 100 changers (i stopped counting at about 85)
in general its more compact and a better fitting unit
i have now printed this as yet but all the dimensions should work
Print Settings
Supports:
No
Resolution:
0.2mm
Infill:
30
Notes:
1.2 wall (0.4nozzle 3 wall thick)
0.8 bottom and top (4 layers at 0.2mm) -
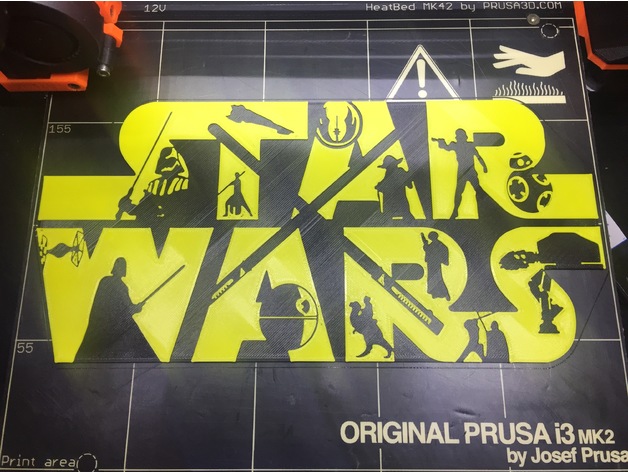
Star Wars Mural V2 3D Print Model
Summary
I thought since I’ve had a lot of interest with my other Star Wars Mural I thought I’d make another one.https://www.thingiverse.com/thing:2699968
Print Settings
Resolution:
0.2
Infill:
20% -
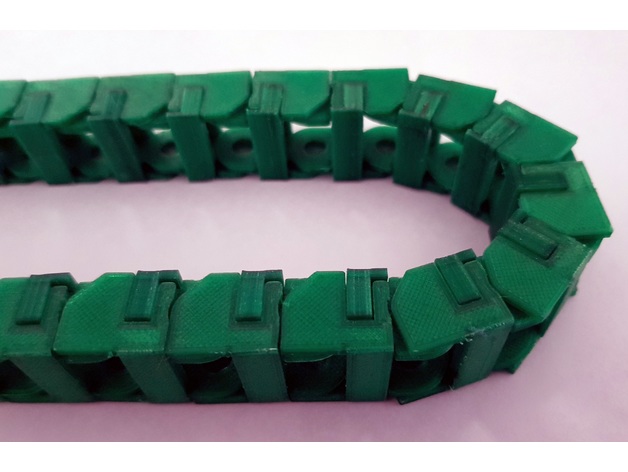
Flat Print Cable Chain V2 ( No Glue ) 3D Print Model
Summary
This is a flat printed Cable Chain that is folded into the final shape. This gives you a stronger, cleaner part that will move smoothly.
Print Settings
Printer:
Hypercube
Rafts:
No
Supports:
No
Resolution:
0.2 initial layer, 0.1 layers, 0.2 Nozzle.
Infill:
50%
Notes:
The clip needs to be printed in the given orientation so that it has the maximum strength during flexing. After cleanup ( I use PETG so it can be blobby ) reheat the link to 80C on the bed to prevent stress during bending. -
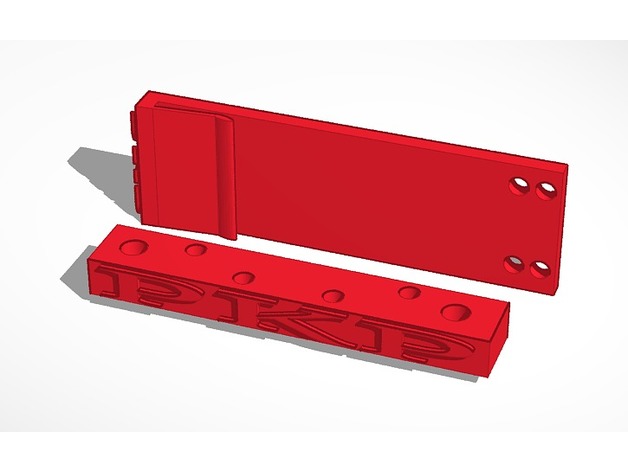
Fabrikator Mini II V2 ZAxis Fan Mount 3D Print Model
Summary
To improve cooling of PLA on large prints and small I made this to mount a 60mm X 60mm X 25mm Fan to the Z Axis Gantry.
You will need (2) M3 x 8mm to mount adapter to plate and (2) M4 X 30mm to mount 60mm Fan. You can also mount a 40mm Fan for just a little more cooling.
This travels perfectly from 0 Z position to 100 Z position.
Has my PKP (PeaceKeeperPrecision) logo on both pieces.
Print Settings
Printer:
Fabrikator V2 Mini Rafts:
No Supports:
No Resolution:
.2 Infill:
20% Notes:
This was printed with HobbyKing Silver Metallic PLA (210 C – 235 C) and was printed at 217 C 30mms.
I use this connected parallel with hotend fan on ribbon cable and also on really large items I plug directly into 12v source for alot more airflow. -
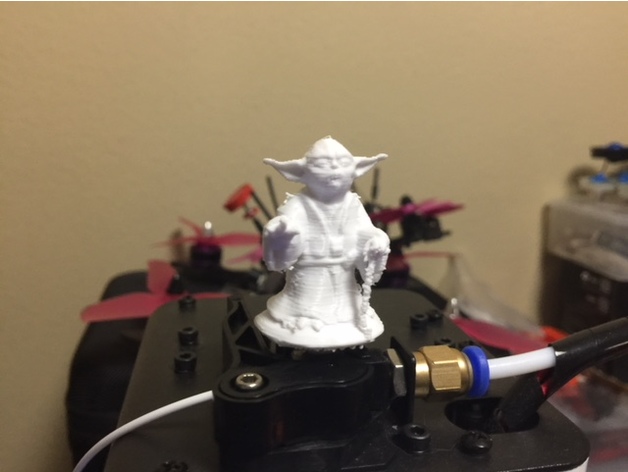
Yoda Extruder Spinner for MonoPrice Mini V2 5mm hole 3D Print Model
Summary
This is a remix of Force Yoda https://www.thingiverse.com/thing:2781362 reduced in size with a 5mm hole stand so it can be put on your Monoprice Select Mini v2 Extruder Rod.
Used:
PLA
220c on Extruder
50c on Bed
Supports: on all
Quality is up to you but in the Cura screenshot, you can see my inputs.
I used Speed 40
20% fill -
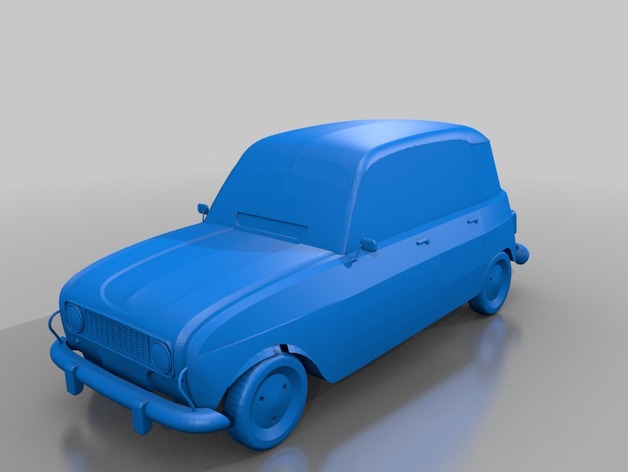
Renault 4L V2 3D Print Model
Summary
Renault 4L V2.
Print Settings
Printer:
TronXY P802M Rafts:
No Supports:
Yes Resolution:
0,20 Infill:
20% -
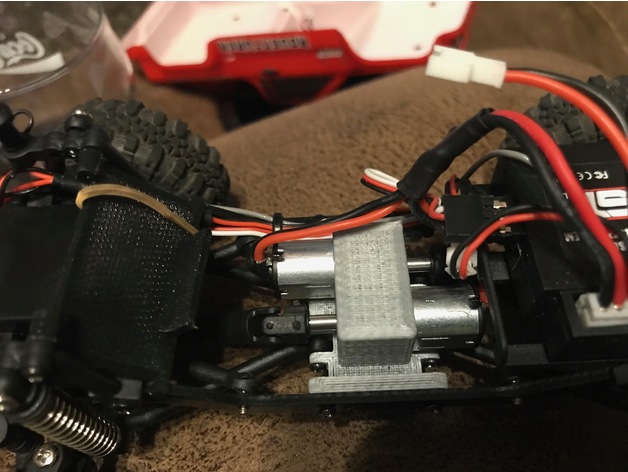
1/24 V2 (IMPROVED) Twin Motor mount/center skid/box ECX RGT FTX Barrage 3D Print Model
Summary
This is V2. I rotated the motors 90 degrees and moved them closer to center. I also raised them .050″. Now there is much better link clearance.
This is to mount two gear reduction motors in an ecx barrage or like rc crawler. Greatly slows it down for much more controlled crawling. Big improvement over stock. You have to either shorten the drive shafts or motor shafts slightly. Also you need to shave the links that mount under the motors. Uses factory hardware. No need to use screws to mount the motors. I used 300rpm motors. You can use the factory esc. Also you have to switch polarity on one of the motors. I’m thinking a higher rpm motor will be better for wheel speed. I’ll be experimenting with thathttps://www.amazon.com/Yosoo-Reduction-300RPM-Gearbox-Replacement/dp/B01C6MGK7G/ref=sr_1_7?ie=UTF8&qid=1517122153&sr=8-7&keywords=gear+reduction+motor -
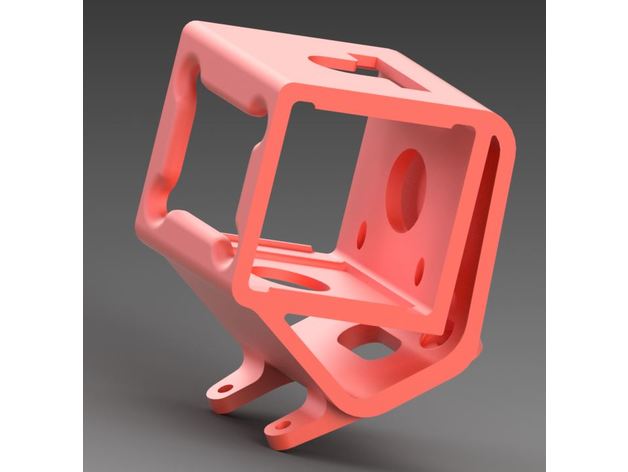
BOLT Blackops V2 Go Pro Session Mount 3D Print Model
Summary
GP Mount for the Bolt Blackops V2.
We suggest using (countersunk) washers on all four mounts.
Please change the front screws to something longer, circa 14-16mm.
The rear screws, use nylon nuts or drill the holes out to M4.5 and use inset nuts.
Thanks -
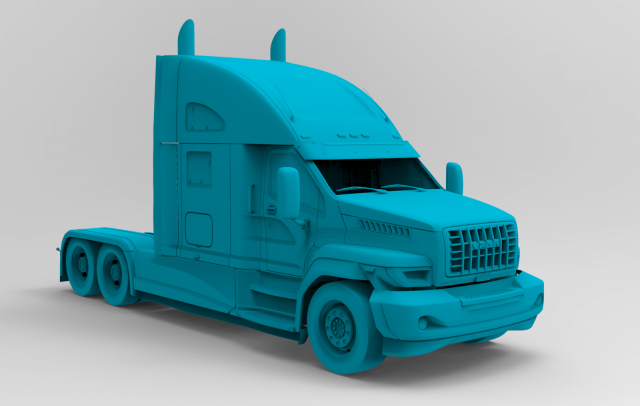
Urals Export v2 3D Model
Urals Export v2In connection with the breakdown of the computer did not have time to make a windshield and interior!!The model costs its money since it took a lot of time and labor..also suitable for 3D printing..
-
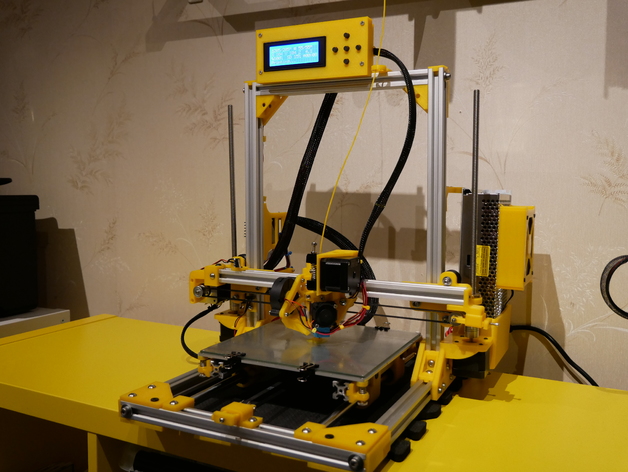
Cartesian One v2 3D Print Model
Summary
This is a my take of an Cartesian printer that should be relatively easy to build and easy to get good and consistent print quality. The Cartesian One is based on 2020 aluminium v-slot extrusion, some mini wheels and a lot of 3D printed parts. You should have access to a printer when building this one!
Some parts can be easily changed due to the modular design. You can change the extrusion lengths to get a bigger bulid plate, taller printer, different smooth rods etc.
On my build I have used 12mm smooth rod for the Y-axis, but it is simple to adapt it to 8mm smooth rods by replacing a few printed parts.
I decided to 3Dprint as many parts as possible including the 2020 corners https://www.thingiverse.com/thing:2502931. I even printed the gantry plates and the spacers to keep cost and waiting time for shipments down. A few components are coming from the AM8 project and from some of the AM8 remixes. The x-carriage is a new version of my thing, https://www.thingiverse.com/thing:2469435 ,just using wheels instead of bearings.
2020 extrusions for my build with a 220 x 220 build plate: (will obviously depend on your own build plate and the build height you would like)
3 pcs. 300 mm (X)
2 pcs. 385 mm (Z)
2 pcs. 380 mm (Y)
You will need one more v-slot for the x-carriage. Probably best to cut that one to exact length when you have the other components printed and mounted. (On my printer it was 370mm).
Tap the both ends of the y-extrusion, bottom end of the z extrusion and the top x-crossbar extrusion for M5 bolts.
I used some 2020 extrusion (1 pc 144mm and 2 pcs 214mm) for the base plate for the bed as well, but you could use something else. (The width between the smooth rods can be adjusted within a wide range and it should be easy to reuse something you have in stock)
You will need 20 teeth pulley and idler for X to clear the wheels on the x-carriage. You may use 16 or 20 teeth for Y belt. (16 teeth recommended).
300mm T8 lead screws with nuts
A lot of M5 bolts and t-nuts…
Wheels used in my build: https://www.banggood.com/3D-Printer-FlatV-Type-Plastic-Pulley-Concave-Idler-Gear-p-1038551.html type 2 -
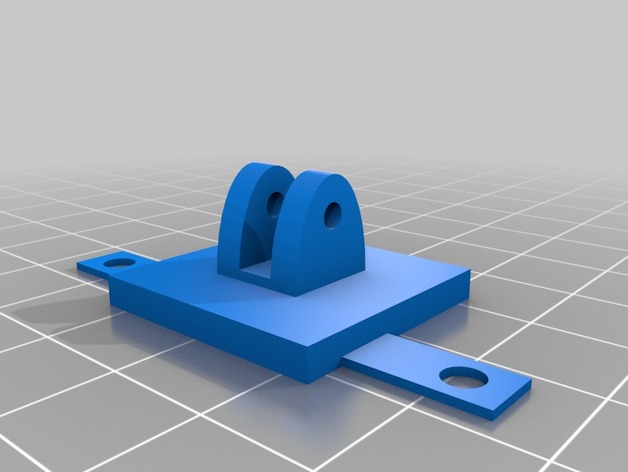
Lulzbot Mini Raspberry Pi V2 Camera Mount 3D Print Model
Summary
I used the files from Pschwamb to help develop a way to mount my Raspberry Pi Camera V2 inside my Lulzbot Mini. I added some mounting tabs on his base that fit the whole spacing on the mini. I have uploaded pictures of the camera installed. I ran the ribbon cable thru the small window on the left side of the machine. I am also added a screenshot of the camera view it gives. I should note that for the screenshot I am also using my LED light I have uploaded on thingiverse if you are interested in having some light inside the machine.
Print Settings
Printer Brand:
LulzBot Printer:
Mini Rafts:
Doesn’t Matter Supports:
Doesn’t Matter Resolution:
0.2 Infill:
30% -
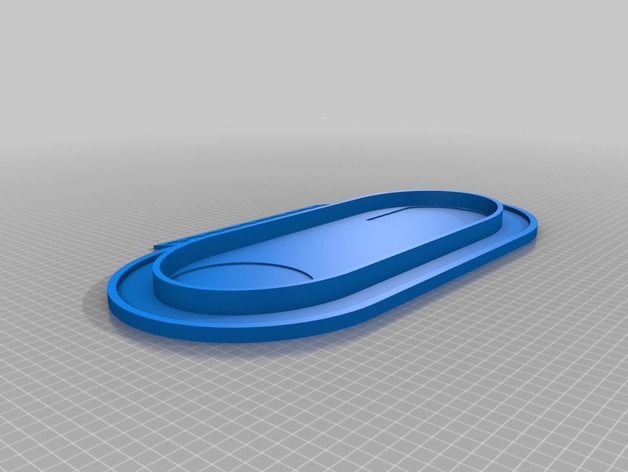
FFG Star Wars Dice Arena v2 3D Print Model
Summary
Inspired by a Dice Tower posted by the Staggering Dragon on Facebook here is my take on a FFG Star Wars Dice Arena.
This file is a free download. Please note that it is listed as “non-commercial”. Neither you nor I are allowed to buy or sell physical copies of this 3D model. You are allowed (and encouraged) to print copies for your own personal use. If you have been re-directed to this file from a source other than my site on thingiverse.com they have done so without my permission. Thank you for respecting the rights of the original copyright holder.
Print Settings
Rafts:
Doesn’t Matter Supports:
Yes Resolution:
.2 Infill:
20% Notes:
For the Towers, print with support. The tray has no overhang so its a mute point.
Post-Printing
Feel free to glue the Towers to the tray. -
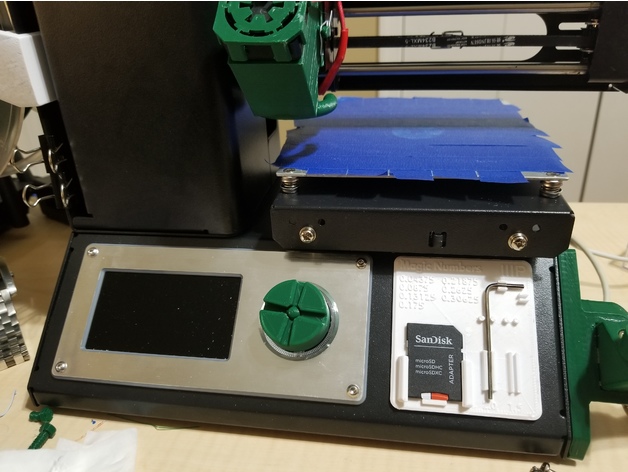
Menu Knob thing for MPSM Select Mini V2 3D Print Model
Summary
I was looking around for a knob for my V2 Select Mini but all the ones were for the V1 which has a different size middle thing so they didn’t work.
I found one but the design dimensions were sloppy and not that tight so I made my own based on the dimensions of that one but slightly smaller so it’s a very tight fit.
After printing it will take a bit of pressure to pop it onto the printer but after it’s on there it feels like it’s one piece with the printer. No glue or anything needed.
I printed mine in eSun PLA+ @210C and no heated bed. Print came out very nice.
Print Settings
Printer:
Monoprice Select Mini Rafts:
No Supports:
No Resolution:
0.2 or 0.1 Infill:
20% -
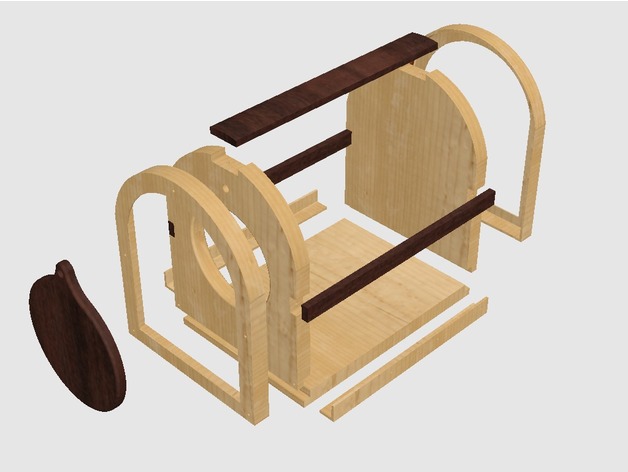
Insect Cage V2 3D Print Model
Summary
Insect cage for kids, Made to be printed on a 200mmx200mm bed
Screen goes under side and top struts, us a stapler to tack to bottom, small finishing nails to hold struts in place
Use flat thumb tacks to hold screen guard flashings in place. -
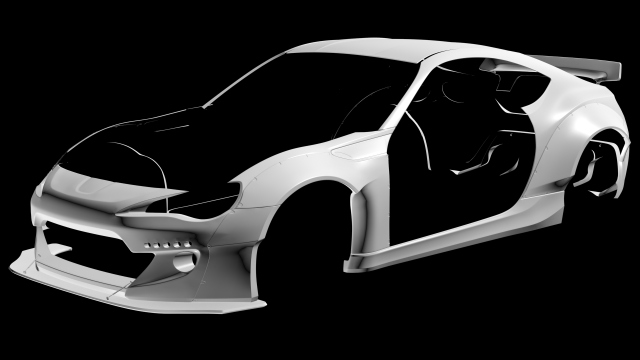
Toyota GT86 Rocket Bunny V2 3D Model
Toyota GT86 Rocket Bunny V2 BodykitTurbosmooth Not Collapsed (21,639 Poly’s 22,892 Verts)Turbosmooth Iterations = X1
-
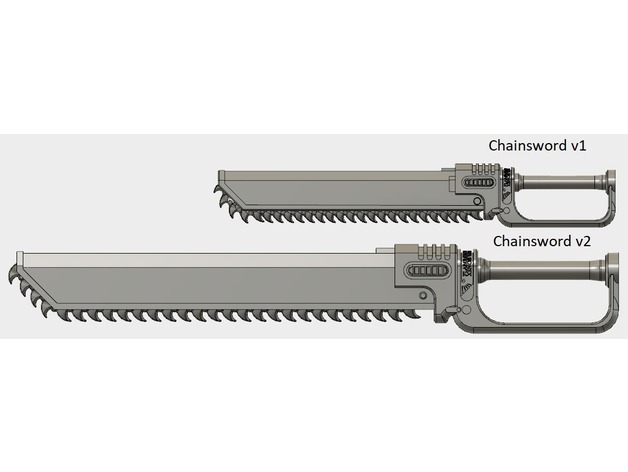
40K chainsword V2 3D Print Model
Summary
I have make some update on 40K chainsword V1 cosplay whit up the size of the chainsword and design so up can make chainsword bigger by add chainsword_3_v2.stl file. -
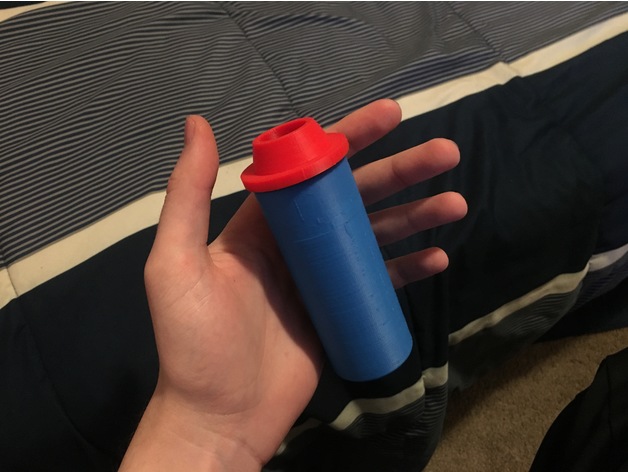
Reusable Sploof V2 3D Print Model
Summary
Designed with tight tolerances. Please let me know if there are any problems with the scaling. -
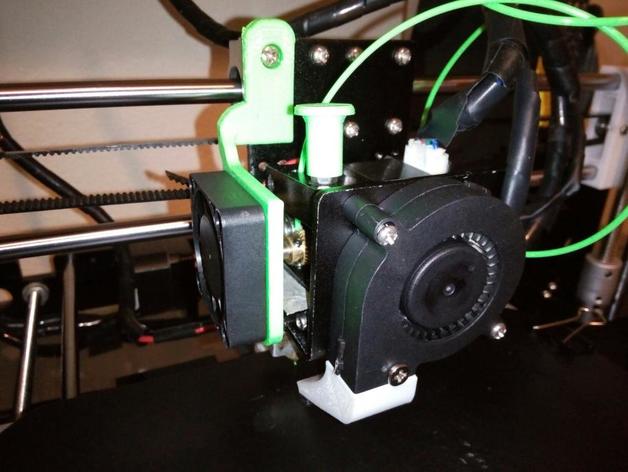
Anet A8 Fan Hinge V2 3D Print Model
Summary
A remix of a Mod for easily accessing the extruder gear.
Print Settings
Printer:
Anet A8 Rafts:
No Supports:
Yes Resolution:
0.3mm Infill:
100% Notes:
Print with fan plate facing down and arm getting vertical supports. (Same as shown in the Cura screenshot.)
Post-Printing
Post-Printing
Remove the support material holding the hinge arm and inside the screw hole. Get a long M4 screw (not sure how long mine is, whatever screw you use in your existing fan hinge configuration should work). Remove the top left screw holding onto the top left linear bearing and install the mod there. Optionally, remove the screw under the top left-most screw for a smoother hinge.
How I Designed This
Design
I simply took bartoaster’s awesome Anet A8 fan hinge (https://www.thingiverse.com/thing:2380825) and beefed it up in 123D Design. I then cleaned it up in Blender. -
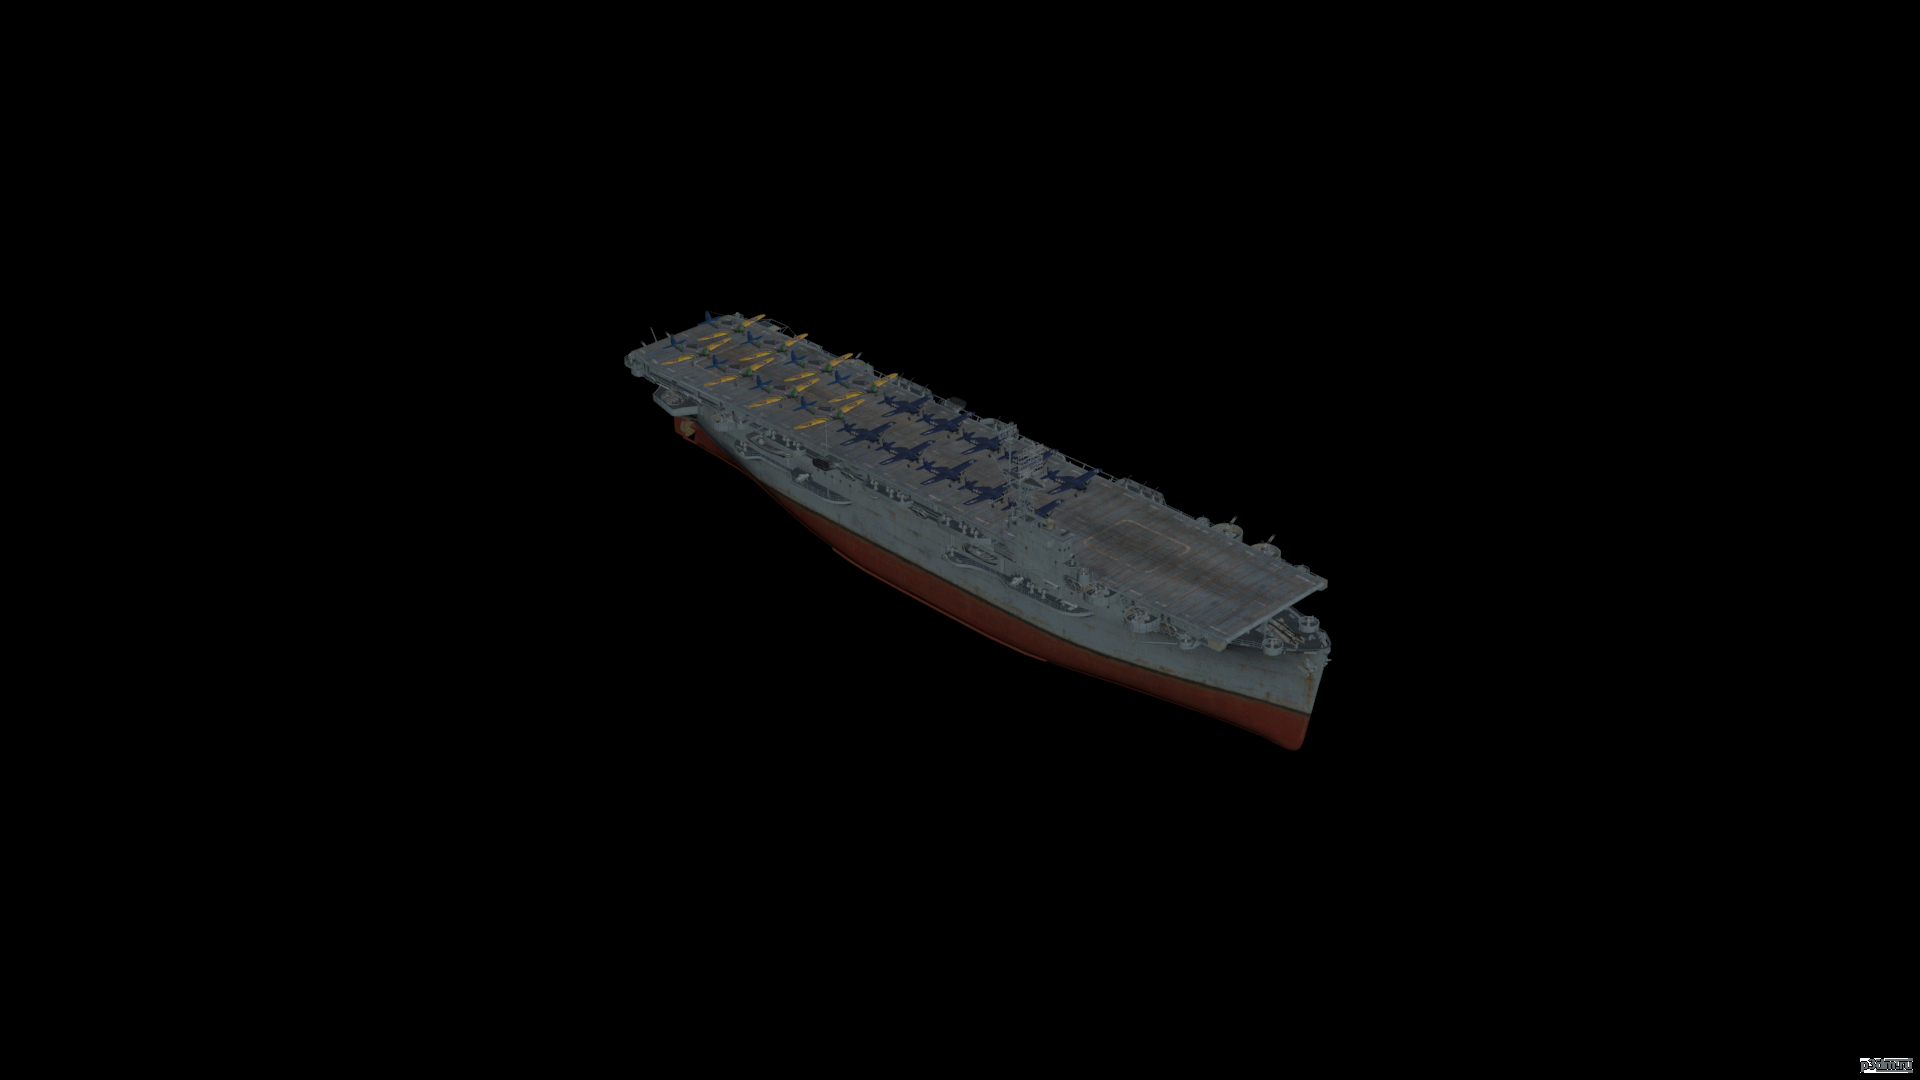
CVe Bouge V2 3D Model
Какой (танк) корабль следующей? В коментах пишите какой (танк) корабль вы хотите увидеть.
-
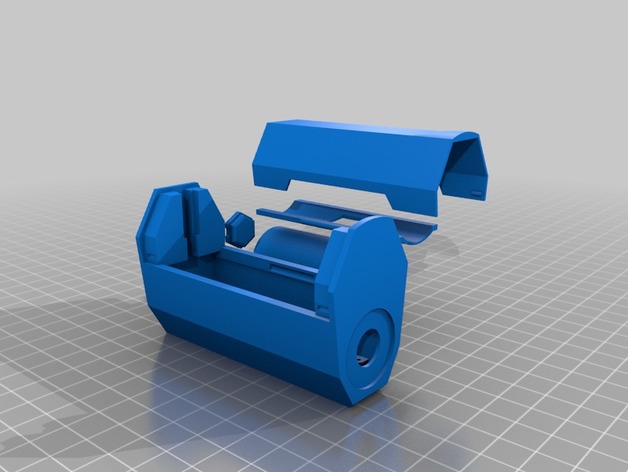
SX350J vape mod with 26650 or 18650 adapter V2. 3D Print Model
Summary
SX350J vape mod with 26650 or 18650 adapter V2.
For YiHi SX350J Boxer mod by Ginger Vaper, just disassemble the mod and transfer everything (except lower battery connector) into this enclosure. This enclosure only use 1 battery (26650 or 18650) so you can charge the battery directly using USB port. -
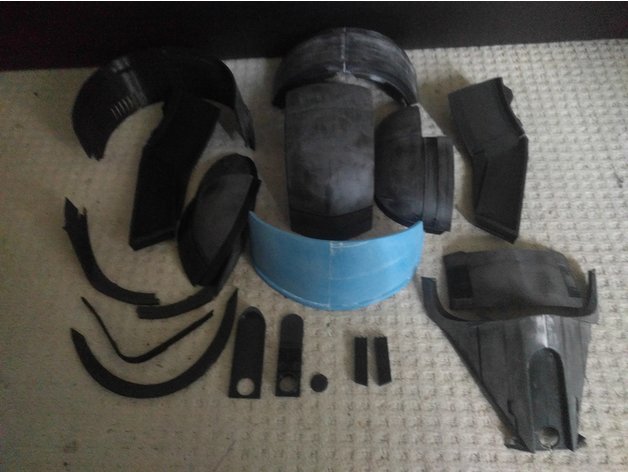
ShoreTrooper Helmet V2 (SeanKFields) Split to fit 200×200 build plate 3D Print Model
Summary
This is the V2 version of SeanKFields Shore Trooper helmet. All credit for this model goes to him I merely chopped the files to fit my bed. The original files (including the armour) can be downloaded directly from http://shoretrooper.co.uk
I have left the original sized pieces intact and added A and B options which are the bits I needed to split. The face will fit on the bed but I found it easier printing these split up and then gluing back together. I did put a registration tab on the rear rim but after printing a few of my chopped bits it wasn’t necessary so left the rest.
I’ve only managed to get the pieces printed so far and will update the images once I have put it together. I have done some test fits and all pieces line up with no issue.
Legal bit from the included text file (me being SeanKFields):
Usage Rights:
These files are distributed under the Creative Commons Attribution-ShareAlike 4.0 International (CC BY-SA 4.0) viewable here.https://creativecommons.org/licenses/by-sa/4.0/
Basically, it says that if you intend to redistribute my work in any way, you must credit me as the original creator. This mostly pertains to anyone wanting to use the files commercially. If you’re using the files to print your own helmet, you don’t need to tag me every time you post a picture. You can, but it’s not a part of the agreement.
Speaking of commercial use: Anyone who chooses to do so has my permission to create and sell helmets based on these files. As before, I ask that you not sell the 3D files themselves, but printing and selling a helmet, or selling a helmet cast from a mold made from a printed masters is perfectly acceptable.
As before, there are a few rules. Some of these are new.If you intend to create and sell a product based on these files (printed kit, resin casting, etc.), I ask that you send me a sample of said products. Consider this the licensing fee. I ask this for 2 reasons:
a. It serves as a means for me to identify every vendor using the files.
b. It gives me an opportunity to inspect overall product quality.If you profit from my work, I highly encourage you to take a portion of that profit and do something good in the world with it. Donate to charity. Buy a homeless guy a sandwich. Adopt a shelter dog. It doesn’t matter what it is. Follow your heart.
While I certainly do not require it, I will gladly and graciously accept tips this time. My Paypal address is [email protected]
-
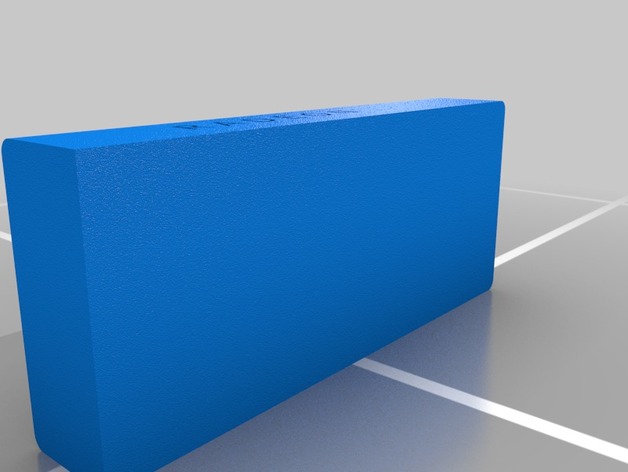
AMD Radeon Vega USB stick V2 3D Print Model
Summary
This is the second version of my Radeon USB stick.
The slot is slightly larger to hold different form factors of USB sticks.
The card itself is a slightly shorter and has been reduced to 2.4 inches (from 3 inches) so it looks more like a graphics card than a candy bar. -
Merlon con saetera v2 3D Print Model
Summary
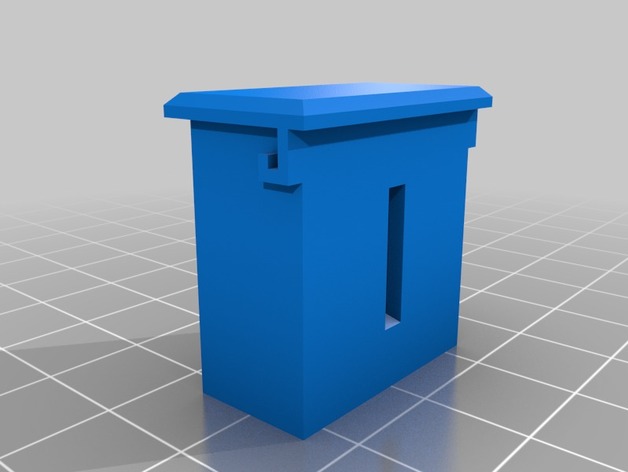
Merlón con saetera, para Exin castillos. El los lados tiene unos soportes por si queremos añadir un mantelete. -
3dconnexion SpaceNavigator Handrest v2 3D Print Model
Summary
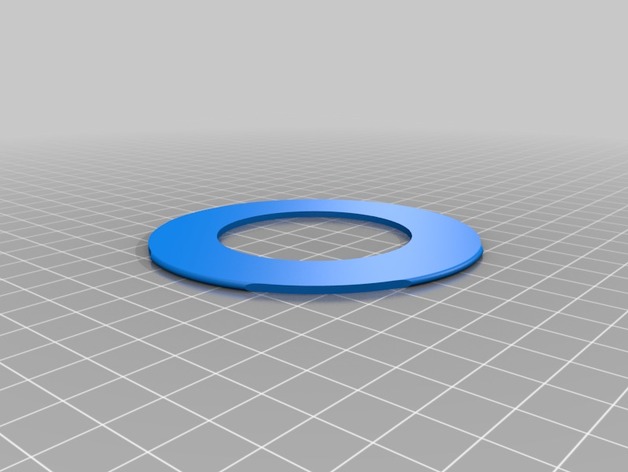
This is the same as DarthBane’s design… just split so that it can be printed on a Printrbot Simple Metal. Look at my make of his to see my settings.
Layer Height: .15 mm
Shell Thickness: 1.2 mm
Bottom/Top Thickness: 1.2 mm
Fill Density: 15%
Print Speed: 85
Printing Temp: 210 C
Support Type: None
Platform adhesion: None
Diameter: 1.75 mm
Flow: 95% -
6 inch 4 post rack V2 3D Print Model
Summary
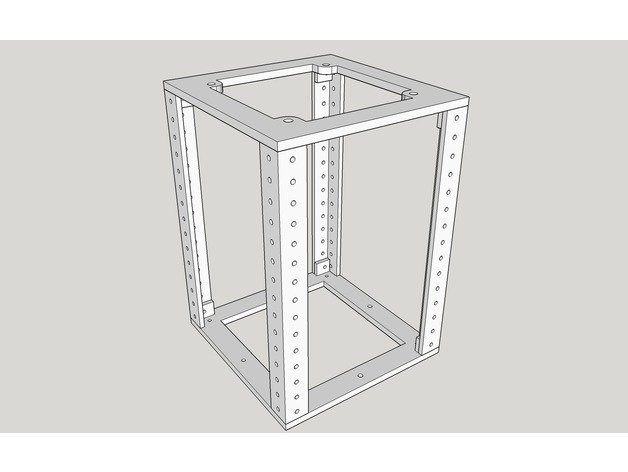
This is version 2 of the 6 inch 4 post rack. The original one relied on glue, but this time around, just screws. Another improvement made was the depth. This should allow for 120 mm fan on the sides (adapter will come in a little bit). -
Orca Whale 3D Model
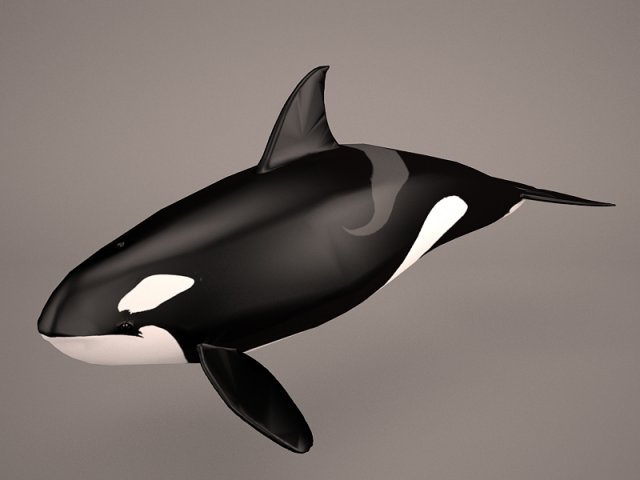
orca v2 killer whale deep diving animal fish fishing mammal ocean ship pacific atlantic swarm under water dolphin teeth lion herring sea world scuba
-
Parrot Bebop v2 3D Model
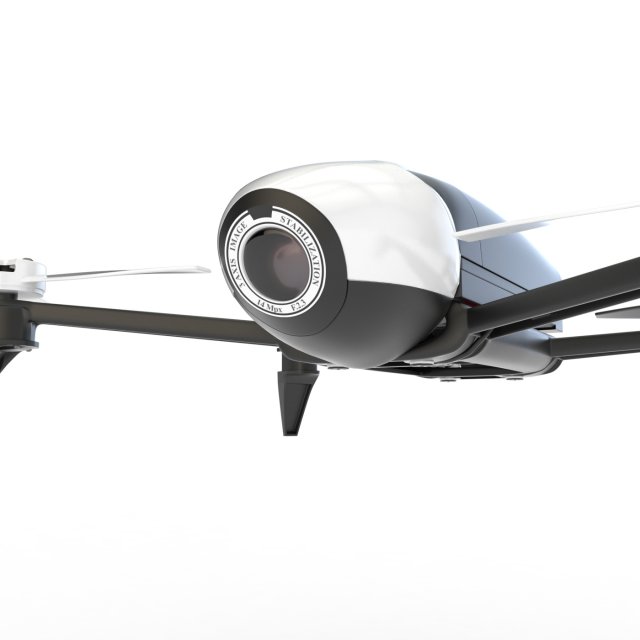
Great Hight Detailed 3d model of PARROT BEBOP 2The lightweight, compact HD video droneResulting from two years of design, the Parrot Bebop 2 is your ideal flight companion. Weighing 500 g and offering 25 minutes of autonomous flight time, this leisure drone is cutting-edge. Its high-performance specs mean it can fly, film, and take photographs brilliantly both indoors and outdoors.INFO:*- Origionally created with 3ds Max 2014*- This model contains separate 2 objects*- This model contains 72 324 polygons witn TurboSmooth OFF*- This model contains 551 238 poligons with TurboSmooth 1 iteration*- real world size (system units – cm)**- This model is completely ready for use visualization in 3ds max.*- All previews rendered 3ds max Vray realistic rendering.**- Texture: Parrot_texture 2048×2048 PNGAppreciate the time and trouble!if you are satisfied with the model, place the rating, it is REALY IMPORTANT!
-
Spider-Man mask with shutter lenses v2 3D Model
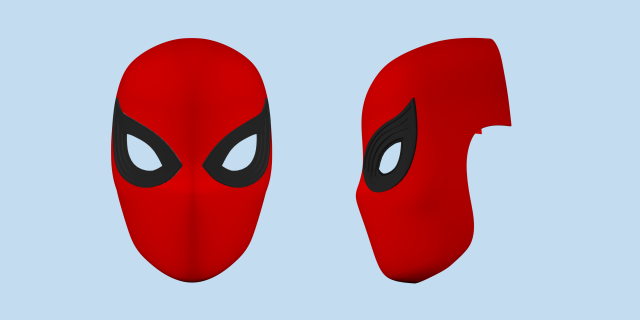
Formats of the model: OBJ,STL,3Ds.Spider-Man is a fictional superhero appearing in American comic books published by Marvel Comics. The character was created by writer-editor Stan Lee and writer-artist Steve Ditko, and first appeared in the anthology comic book Amazing Fantasy #15 (Aug. 1962) in the Silver Age of Comic Books. Lee and Ditko conceived the character as an orphan being raised by his Aunt May and Uncle Ben in New York City, and as a teenager, having to deal with the normal struggles of adolescence in addition to those of a costumed crime-fighter. Spider-Man’s creators gave him super strength and agility, the ability to cling to most surfaces, shoot spider-webs using wrist-mounted devices of his own invention, which he calls “web-shooters”, and react to danger quickly with his “spider-sense”, enabling him to combat his foes.
-
Recurve Bow v2 3D Print Model
Summary
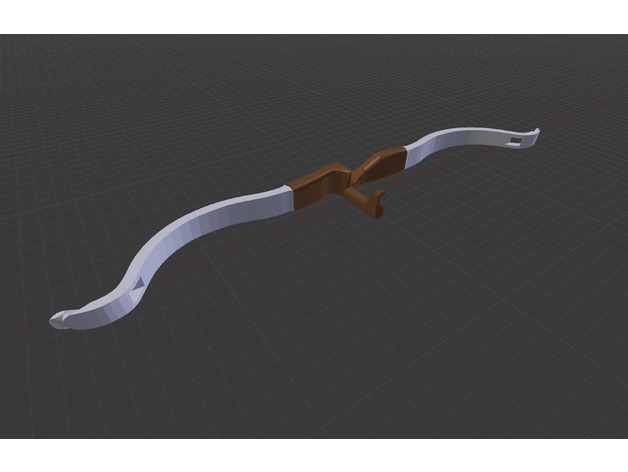
I redesigned the limbs for this bow to be a bit more traditional while still accommodating a rubber band. And I added a guard/rest so you don’t get snapped by the band. -
Spool Holder V2 – Quick Change 2020 Edition 3D Print Model
Summary
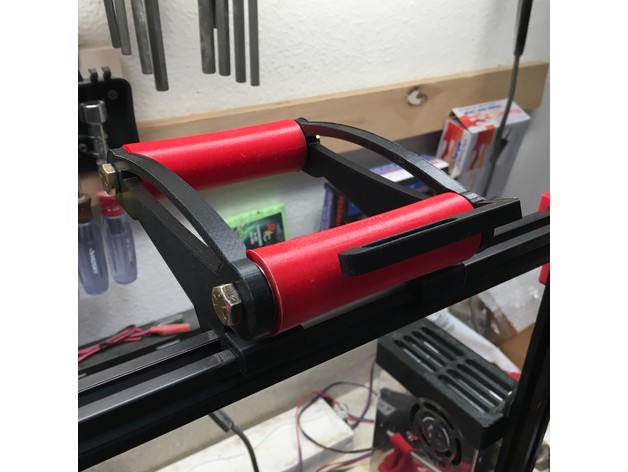
This is a remix of “New Prusa i3 MK1 & MK2 Spool Holder V2 – Quick Change” (https://www.thingiverse.com/thing:1768975) by IsmaelPR1 (https://www.thingiverse.com/IsmaelPR1/about).
I really liked his design, and am printing one for my Prusa MK2S, but I wanted a matching holder for my Tevo Tarantula. I remixed this so the holder can hang on a 2020 extrusion. There’s a provision for M4 screws to mount it to the back of the extrusion.
PLEASE NOTE: This was remixed from his 90mm holder. For the 140mm rollers and accessories, please visit his thing.
I have included IsmaelPR1’s 90 mm rollers and m8 rods, though I used 5/16″ bolts for mine.
Print Settings
Printer Brand:
Prusa Printer:
i3 MK2S Rafts:
No Supports:
No Resolution:
.2mm Layer Height Infill:
none Notes:
Easy print. Print the spools as shown. For more details visit the original thing at https://www.thingiverse.com/thing:1768975
Post-Printing
Simple Install
Used 608 bearings and 5/16″ bolts that I had in my shop. clamp it on to the top of your rig and add a couple of m4 bolts and T-nuts. That’s it!
Happy Printing! -
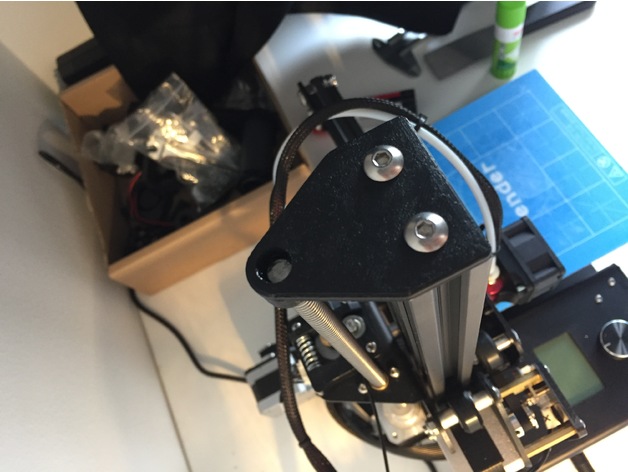
Creality Ender-2 Z-axis stabilizer mount v2 3D Print Model
Summary
New version.
This is a Z-axis leadscrew stabilizer for Creality Ender-2.
Print, drill out the main hole with a 8-9mm drill bit, it might be a good idea to use some grease as well when installing it. Before you tighten the screws, move the Z axis to the top to position the stabilizer correctly.
Print Settings
Printer:
Ender-2 Rafts:
No Supports:
No Resolution:
.15 Infill:
100% Notes:
Use either 100% infill or lower infill and thick walls, I used 25% infill and 1.6mm walls -
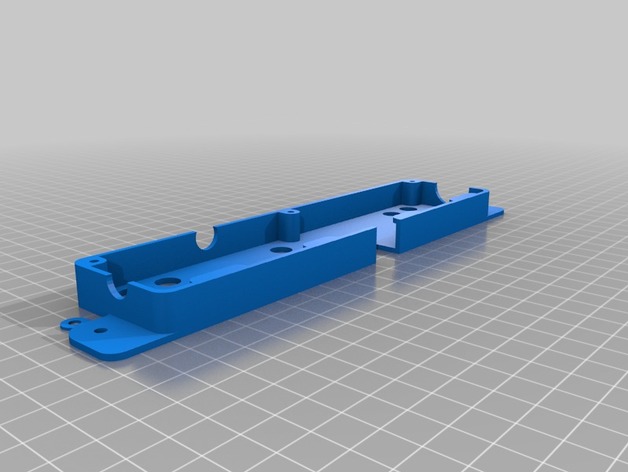
Monoprice (slight remix) Maker Select V2 Rear Cable Conduit 3D Print Model
Summary
This is the same as the version posted by inches, but I added a small name plate and changed the Wanhao lettering to the Monoprice logo on the cover plate. the base is exactly the same file, i just added it here so people wouldn’t have to pull from both thing files. Now those of us with the monoprice clone can accessorize in style. -
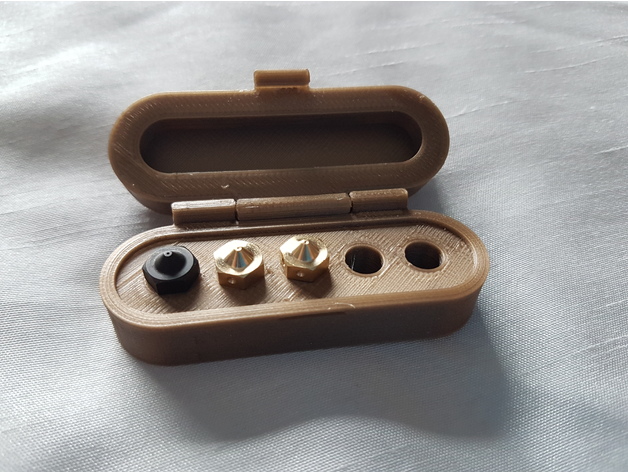
Spare Nozzle Case V2 3D Print Model
Summary
UPDATED VERSION
I designed this case to hold my spare nozzles for my Prusa i3. The case is printed in one piece with functional hinge and clip to keep the case closed when not in use. Never mislay those nozzles again. This one has text ‘Nozzles 0.4mm’ let me know if you would prefer one that just says ‘Nozzles’ or blank and i will add additional versions.
This version uses less supports as the top is printed directly off the build plate so only support required is for the hinge.
STL ‘Nozzle_Case_Nozzles_Text.stl’ = Top With text reading ‘Nozzles’
STL ‘Nozzle_Case_0.4Text.stl’ = Top With text reading ‘Nozzles 0.4mm’
STL ‘Nozzle_Case_Blank_Top.stl’ = Blank Top
Print Settings
Printer Brand:
Prusa Printer:
i3 MK2S Rafts:
No Supports:
Yes Resolution:
0.2mm Infill:
10% -
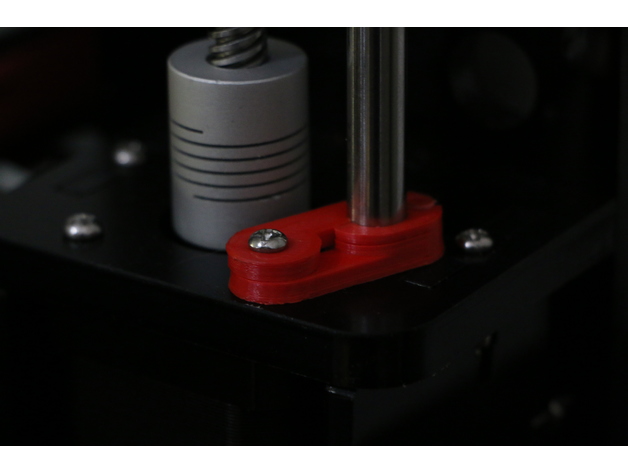
Z Rod Anti Wobble v2 3D Print Model
Summary
this is just an upgrade version z rod anti wobble as requested by FxDx i hope you like it.
old version support z stop https://www.thingiverse.com/thing:2480900
Print Settings
Printer:
Anet A8 Rafts:
No Supports:
No Resolution:
0.2 -
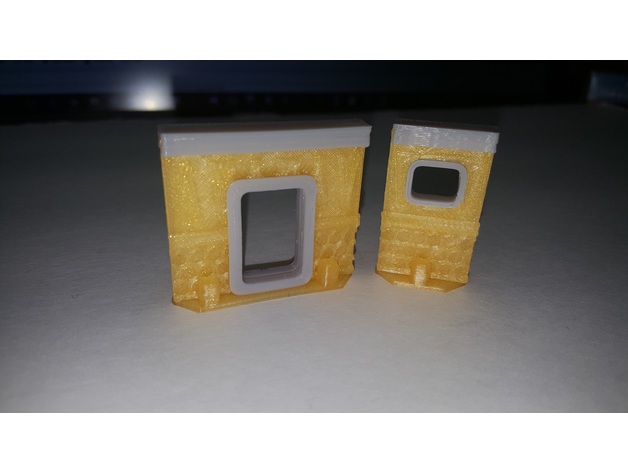
Sci Fi Walls v2 3D Print Model
Summary
This is a remix of my original Sci Fi walls.https://www.thingiverse.com/thing:2472303
I wanted to give more room for expansion so I modified them. I probably won’t be adding more styles to the original walls but these are the same scale so they’ll work fine together.
I added a cap and separate door and window inserts for a more detailed look. This allows the external face of the wall to have some texture as well. This also allows me to make these walls stackable and to add clip on flooring, even on multiple levels.
The walls with the cap and stands are 35mm tall, matching the height of dutchmogul’s models. They’re 1, 2 and 3 segments long, with each segment being 20mm long. This makes the wall segments 20×35, 40×35 and 60×45. The walls are actually 33mm tall and the cap and stand adds 1mm height each. The stands should clip on and hold just fine or you can glue them.
Because everyone’s printer is different, you may have to adjust print settings to get it just right. -
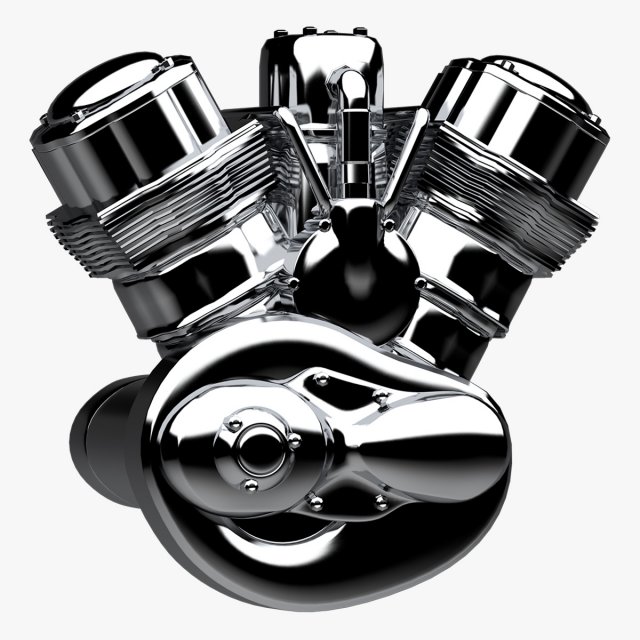
V bike engine 3D Model
3d model Engine.Model was tested by TurboSquid Inspector v1.009.Model has:lowpolypolys – 14187verts – 14258with turbosmooth (1 iterations)polys – 113248verts – 56821Versions:3ds max – 2013, 2014, 2015, 2016Vray – 2.40.04Other files: FBX, OBJ
-
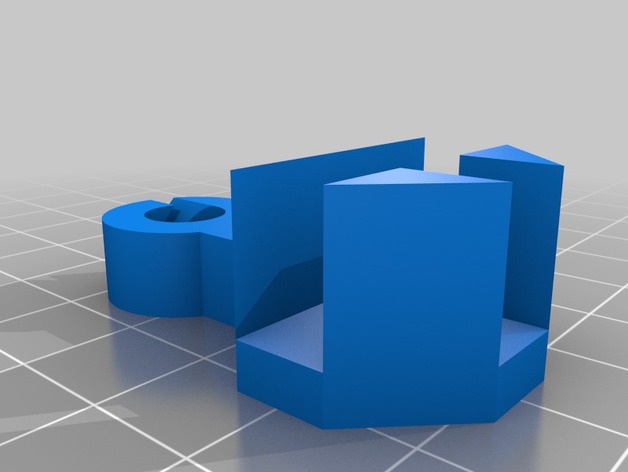
Anet A8 Side Filament Guide V2 3D Print Model
Summary
Slots onto the corner of an Anet A8 and guides filament coming in from the side.
Will work with any T joint that is 8mm thick.
If you print one off, click “I Made One” above and show me!
This is the second version of this filament guide, you can view the previous version here: https://www.thingiverse.com/thing:2076358
Improvements:
Smaller size
Improved filament insertion slot
Reduced volume
Print Settings
Printer:
Anet A8 Rafts:
Doesn’t Matter Supports:
No Infill:
20%-100% recommended -
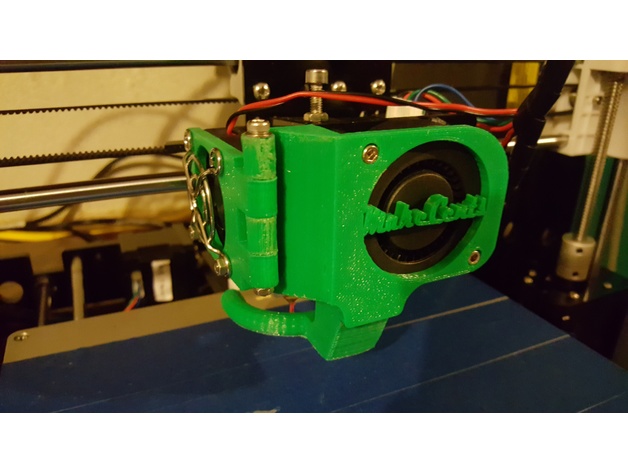
Anet A8 Remix of Extruder Fan Mod V2 by hadoko 3D Print Model
Summary
I added a slot on the bottom of the front of the front mount, and a tab on the half moon shape fan nozzle to hold it in place.
Print Settings
Printer:
Anet A8 Rafts:
No Supports:
Yes Resolution:
.2 Infill:
10 Notes:
Check out his original mod for instructions. Hardest part is drilling to flush mount the screws.https://www.thingiverse.com/thing:2290361
I added my logo to the front of mine, but the files uploaded I removed it. -
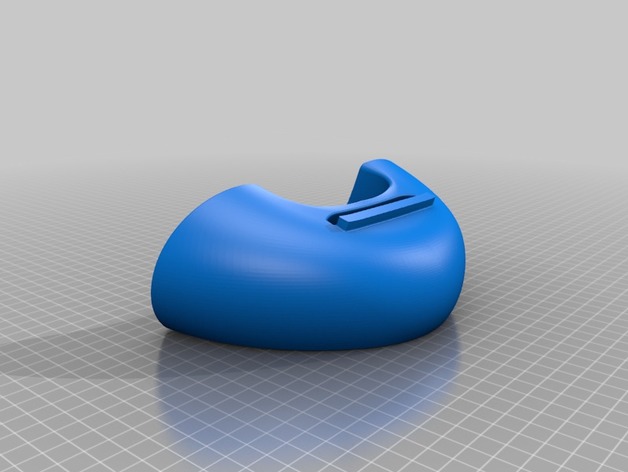
S7 Edge Speaker V2 3D Print Model
Summary
Just a simple amplifierd dock for samsung S7 and S7 edge speakers easy to print.
Print Settings
Printer:
Anet A6 Rafts:
Doesn’t Matter Supports:
No Resolution:
0.2 Infill:
20
Post-Printing
After Print
After printing you just need to stick the samsung name to the place with a glue , I used loctite. -
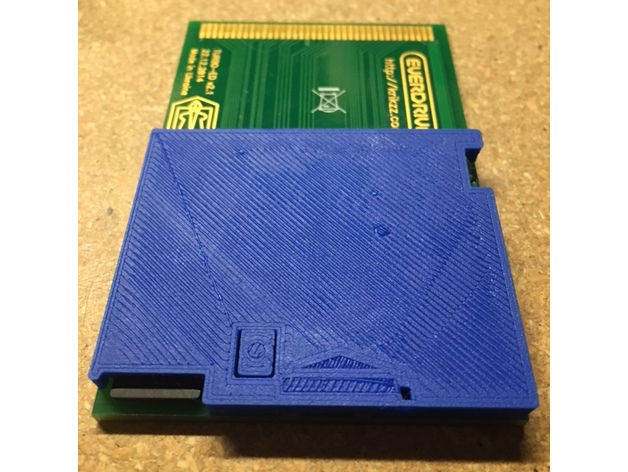
Turbo Everdrive Shell (updated for V2) 3D Print Model
Summary
This is based upon the excellent Turbo Everdrive Shell by DogP. I’ve updated this to work on my v2.1 (I expect it’ll work on other V2s as well, and would love for people to tell me what versions it works on) and made a few other changes.
Changes from original ‘no text label’ version:
removed/rearranged some of the support structure under the surface of the shell to fit the V2
added some more side wall structure where it was safe to do so to make up for the other change
slightly widened the hole near the region switch
relocated the window for the LED to match V2’s placement (I eyeballed it and lucked out)
shortened the outer perimeter lip on the corner near the micro SD slot so that this is compatible with the Turbo Duo and PC Engine Duo models (previously you had to snip that part off)
attempted to add a bit of ‘flex’ to the reset button cover – not sure if successful
I’m sure there’s room for further improvement; I’ll either upload a new version of this remix here or I might make a whole new one in another program. -

Motorcycle Bike Engine 3D Model
Quality 3d model of motorcycle and bike engine.HDRI map included.Rendered with V-Ray.
-
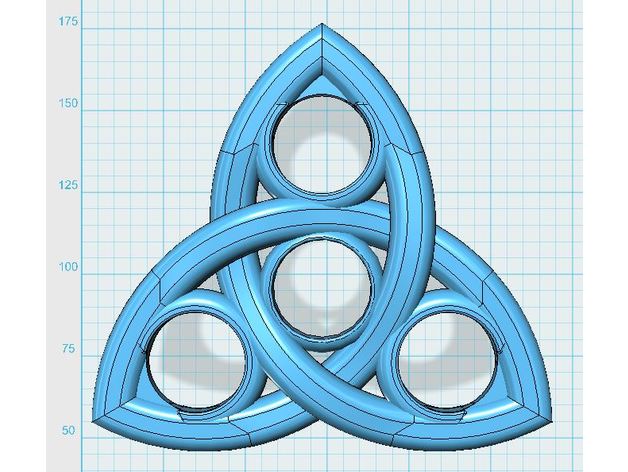
Celtic Knot Fidget Spinnner V2 3D Print Model
Summary
Celtic Knot Fidget Spinner meant to be used with Standard skateboard bearings eg.”608.”
This is version 2, it has slightly more rounded edges than the original.
Be Advised: I don’t have a 3D printer so I am not able to test this model. If you attempt to print this let me know what settings worked for you and I can add it to the description.
PS. I’m pretty new to this and would really appreciate your feedback on any tips you have on modelling for 3D printing. I have no idea what type of tolerances are common so the holes may need a bit of sanding to fit the bearing in.
Be sure to post photos if you do print this out. I’d love to see them! -
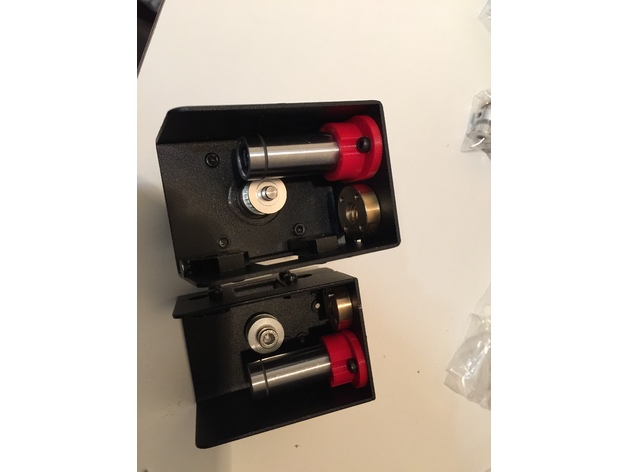
Maker Select v2 Z axis Bearing Mounts 3D Print Model
Summary
previously I created a set of X-ends for the Monoprice Maker Select v2 to replace the stock metal ones because I wanted a way to use standard LM8UU bearings for the z-axis. Those have been installed on my printer for the last couple of months, but I figured I’d try making a set of bearing holders in case any of you want to use different bearings, but are happy with the metal x-ends that your printer came with.
These seem to work pretty well. Just screw them in from the bottom, slide the bearing into place, and you should be good to go.
I printed these in ABS with 4 perimeters and 40% infill, but the walls are pretty thin so you could probably do them 100% infill and it wouldn’t make much difference in print time. -
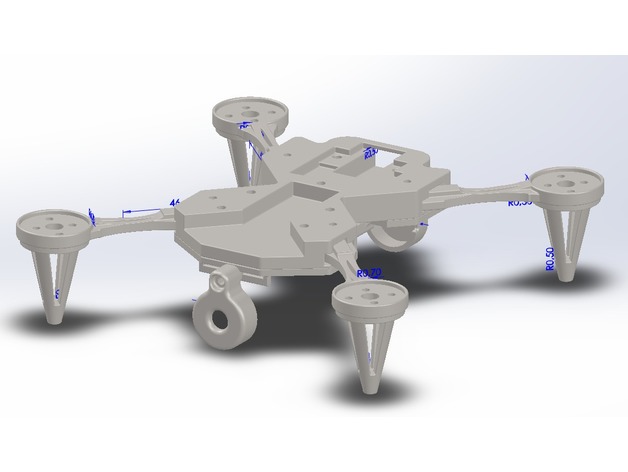
250er Quadrocopter with CC3D (v2) 3D Print Model
Summary
Because of the first 250er Quad design was to heavy I designed a lighter one.
Last parts are on the printer.
Designed for 2204er Motors
-12A Micro ESC 3S
-3S 1000mAh Lipo
-CC3D
-50x50mm Power Distribution Plate
-Orange DSM2 6CH RX -
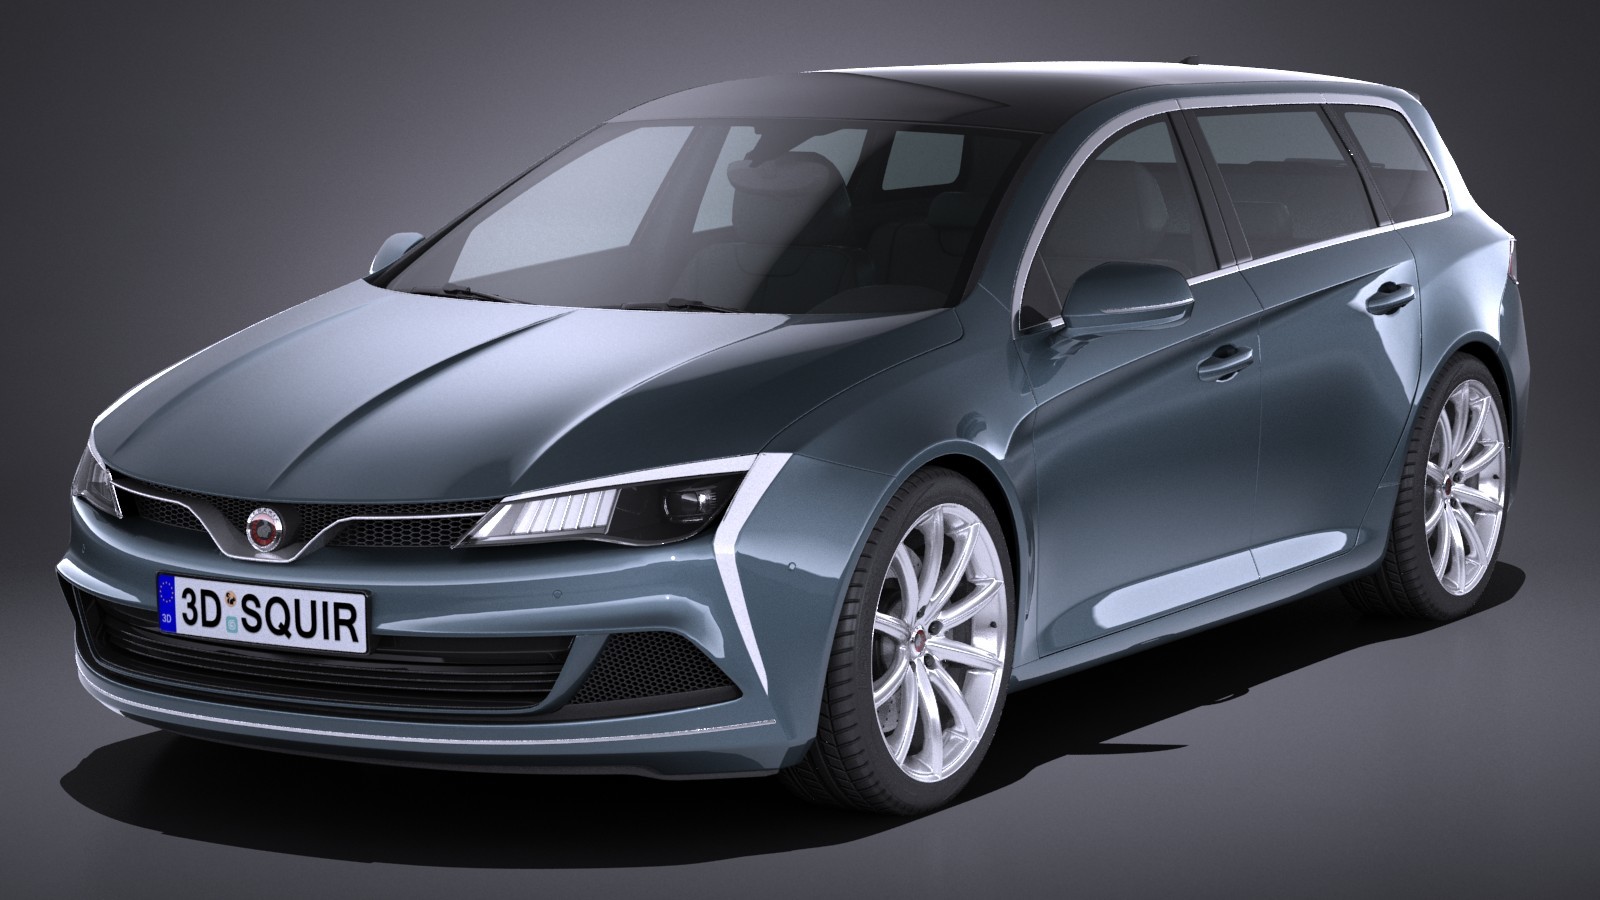
Generic estate wagon v2 2017 3D model 3D Model
————————————————————————————— High detailed model created by SQUIR team.—————————————————————————————Ready to render at 3dsmax with VRAY.It was rendered at 3dsmax 2015 with vray3.20Rendering scene with all lightning, materials, background setups is included only for 3dsmax2015 vray3 format.3dsmax 2010 format is also included, but without lightning/rendering studio setups and with standard materials only.Other than 3dsmax files (3ds,fbx,lwo,c4d,obj) include only standard materials without advanced shadders or background setup.All of our models was made on the 3dsmax, and we are able to provide uncollapsed modifier stack only for the 3dsmax. but if you’d need the lower polygon version at other programs, please contact with the support, and we will convert the reduced mesh to requested format. The lowest available meshsmooth level is shown at the wire view, next to the hipoly wire view.For this product there’s 3 different 3dsmax files included.’Set’ is uncollapsed, it’s a file where you can make changes at the model. ‘Hipoly’ is collapsed to hipoly with all the modifiers history cleaned to make it trouble free while using at other programs’Studio’ is the file with all rendering setups that we used to make the previews renderings.Because of different Disk topology at different computers it might be required to change the textures path at the destination computer.————————————————————————————— Thank you for buying SQUIR models—————————————————————————————
-
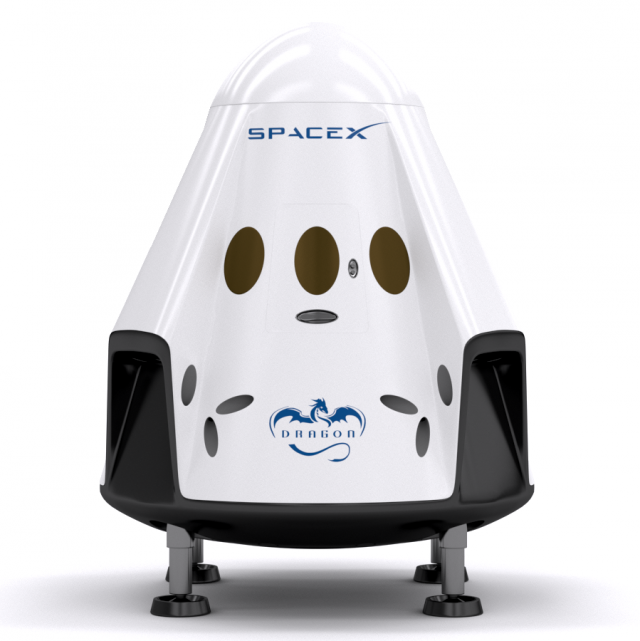
Dragon SpaceX 3d model vray 3ds max 3D Model
Space capsule of elon musk rocket for Mars travelling.
No plugins required, ready for production render. -
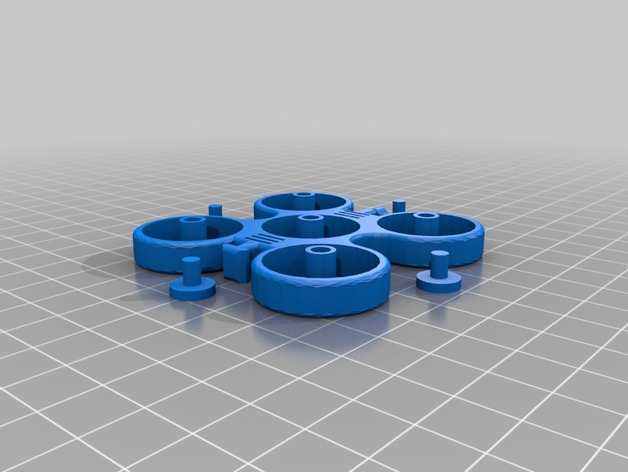
Mon-Mon Drone Fidget Spinner V2 (smaller)
Summary
Smaller newer version of Mon-Mon Drone Fidget Spinner. (same bearing specs) -
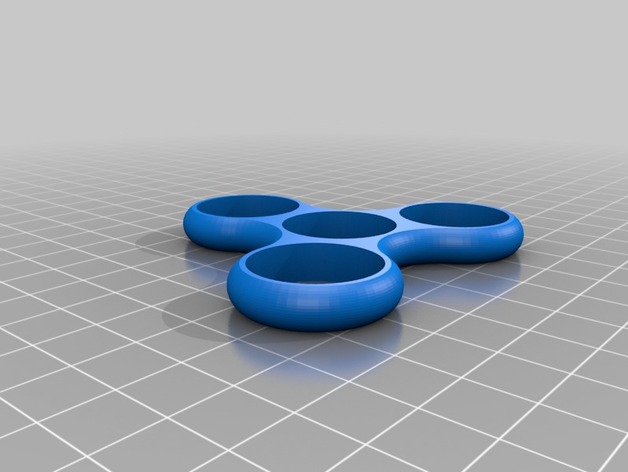
Fidget Spinner v2
Summary
A fidget spinner with multiple bearings. I’ve determined that printing them in one piece DOES NOT WORK!!! You will still need three 608zz ball bearings but that is unavoidable. If you use “Gear Bearing” then you will need “Cap 2.” I wouldn’t recommend using “Gear Bearing” but I’ve included it anyway for those rebels out there.