Model made in 3ds Max and Painted in a Substance painter.Textures 4096×4096 : Diffuse, AO, Normal, IOR, Glossiness, Reflection.Also there are textures under UE4 and Unity 5
Tag: Tester
-
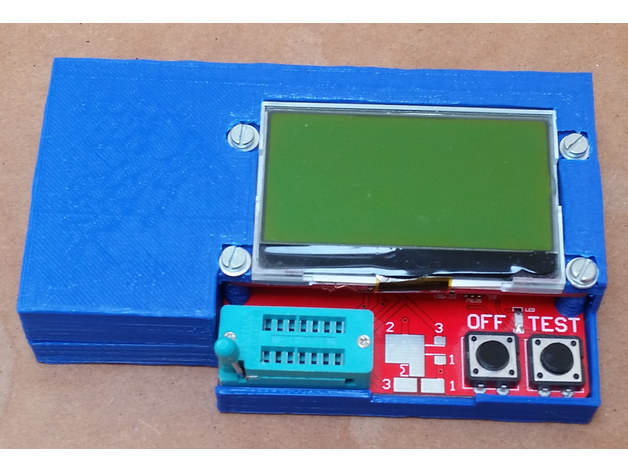
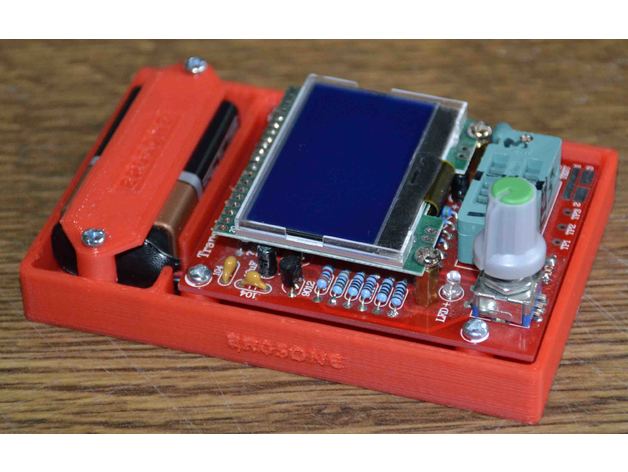
Fish8840 transistor tester box 3D Print Model
Summary
Yet another box for the fish8840 transistor tester.
This one uses M3 x 27 mm bolts to hold everything together, and includes a large box for a battery. I designed the box to hold this rechargeable battery
I’ve included the FreeCAD design file – have fun remixing!
This is my first design that I’ve published to thingiverse – I’d appreciate feedback. Thanks. -
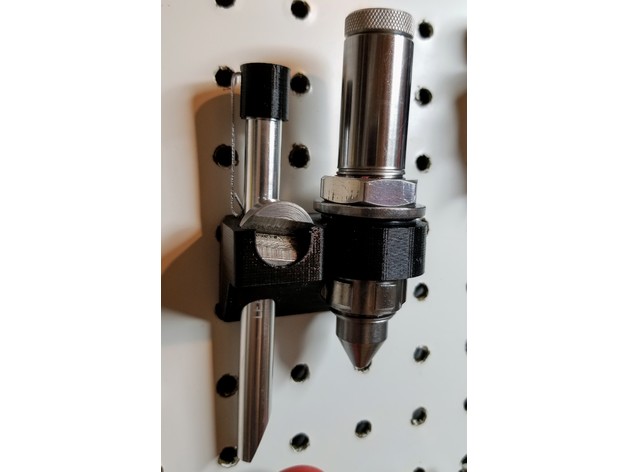
Lee Hardness Tester Peg Board Holder 3D Print Model
Summary
I customized https://www.thingiverse.com/thing:537516 to create a pegboard holder for the Lee Precision Hardness Tester.
Also included is a lens cap for the microscope.
The opening for the pressure die is sized for a Hornady Lock-N-Load die bushing, but it should work without the die bushing (though it will be loose).
If anybody is interested in the OpenSCAD files I will post them here.
Lee Precision Hardness Tester: https://amzn.to/2KWLRjT
Hornady Lock-N-Load Bushings:https://amzn.to/2HBnVRS (10)https://amzn.to/2qAi7Qe (3)https://amzn.to/2GZ7AcC (2)
Print Settings
Printer:
i3 “dolly” clone
Rafts:
Doesn’t Matter
Supports:
Doesn’t Matter
Resolution:
.2mm
Infill:
20%
Notes:
I usually print these successfully without supports, brim, or rafts. -
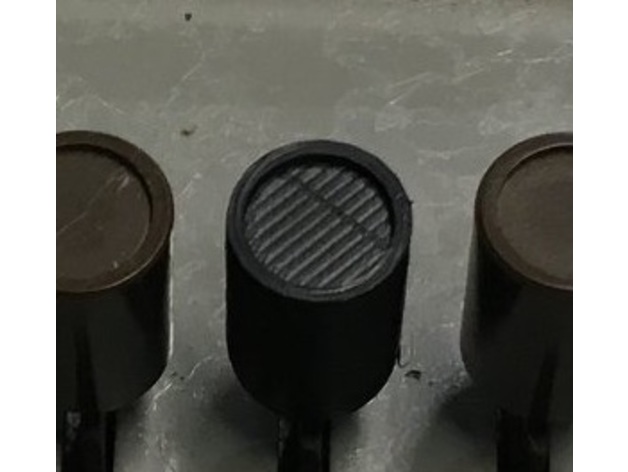
Knight 600A Tube Tester Lever Cap 3D Print Model
Summary
This is a replacement lever cap for a Knight 600A tube tester. It probably will fit other Knight models.
Print Settings
Printer:
Monoprice Select Mini V2
Rafts:
Yes
Supports:
No
Infill:
20% -
Component tester mounting for type: Hiland DIY M12864 3D Print Model
Summary
Requires to drill and tap to M3
4 off M3 x 10mm screws
2 off M3 x 15mm screws
OR
Small self tappers
Printer Anet A6
200 degrees nozzel, 50 degrees bed
50mm/sec speed, infill 20%, print flat side down.
Print Settings
Printer:
Anet A6 Rafts:
Doesn’t Matter Supports:
Doesn’t Matter Resolution:
.2 Infill:
20% -
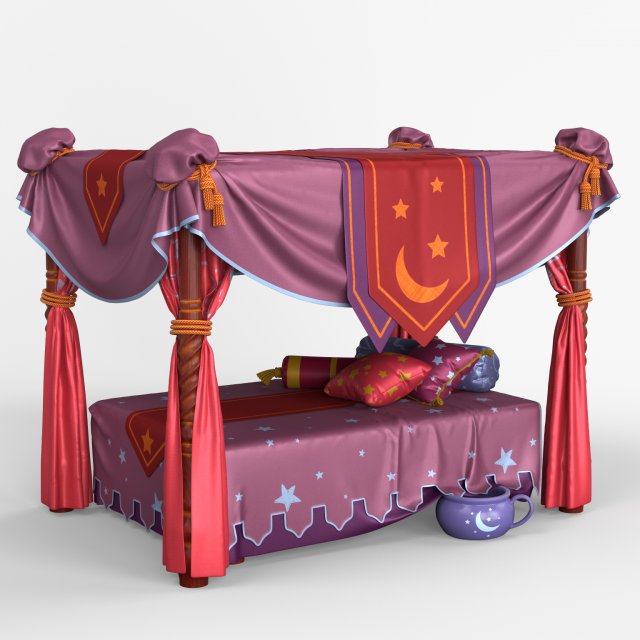
Canopy Bed 3D Model
3D model custom MarvelousDesigner6.5 and 3ds Max 2017 V-Ray v.3.40.01When modeling, quad-sided and triangular polygons only were used. All textures are high resolution 2048х2048. All objects have unique names. If necessary, you can easily change the color, size and the number of polygons of a model.Archive for download contains:- scene,- texture,- material,- lighting,- cameras,- file MarvelousDesigner 6.5Dimensions of the model:- x – 268 cm- y – 200 cm- z – 205 cmTotal Subdivision Level 1:polygons – 564222vertices – 572100Total Subdivision Level 0:polygons – 141148vertices – 145140
-
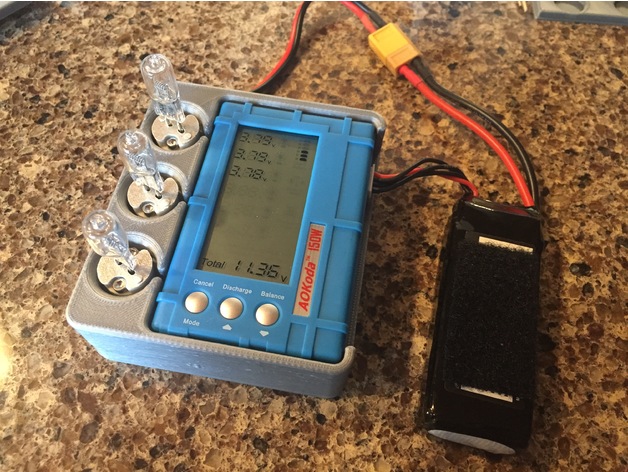
3 in 1 150W Discharger Voltage Tester Balancer For Lipo Battery 3D Print Model
Summary
Housing for the 150W lipo discharger that many RC guys are using. Has a press fit compartment for the actual controller and holders for the three light bulbs fixtures. The light bulb controller and all wires are located underneath the controller. There is also a storage compartment with a slide out cover to hold the battery cable and the three light bulbs when not in use. The unit ships with a Deans style T connector and I purchase a 9″ long XT-60 adapter cable and it is about the perfect length to be able to store and still easily reach the battery balance connector location when in use.
Hardware Required
Qty 18 x 4-40 Socket Head Cap Screws 0.500 long. (6 for bulbs holders & 12 for cover)
Qty 6 x 4-40 hex nuts (for light bulb holders)
The 12 screws for the cover can be shorter (I wouldn’t go less than 0.250 long) but the design will accommodate up to 0.500 long.
The threads for the bottom cover are designed into the part, but the screws will end up cutting the plastic a bit on first installation. I find it best to go slow with the screws about 1 turn at a time and then allow the screw to cool before continuing. When turned continuously the screws will get hot enough to melt PLA and ABS and destroy the threads.
I printed in PLA and have successfully discharged a 1500mah 4S battery from 16.8v to 14.8v without any overheating of the plastic parts (all 3 bulbs were on). However the bulbs get VERY HOT, DO NOT LEAVE UNATTENDED. I have not tested higher voltages than 4S.
Design files are included for easy modifications, Print Files are high resolution and do not always render on the thingiverse server.
Discharger amazon (the one in the pictures)https://www.amazon.com/Targethobby-Discharger-Voltage-Balancer-Battery/dp/B01ET33R5S/ref=sr_1_2?ie=UTF8&qid=1504837626&sr=8-2&keywords=150w+lipo+discharger
9″ Deans to XT-60 Cable Amazon (the one in the pictures)https://www.amazon.com/gp/product/B016AN4T8O/ref=oh_aui_detailpage_o01_s00?ie=UTF8&psc=1
Discharger Banggoodhttps://www.banggood.com/AOK-3-in-1-150W-Discharger-Voltage-Tester-Balancer-For-Lipo-Battery-p-1051214.html?rmmds=search
XT-60 Cable Banggood, A little shorter then I would recommendhttps://www.banggood.com/150mm-XT60-Female-Plug-To-T-Male-Plug-Adapter-Connector-p-1137559.html?rmmds=search
Print Settings
Printer Brand:
Prusa Printer:
i3 MK2S Rafts:
No Supports:
Yes Resolution:
.35 Fast default setting with support Infill:
20-25% Notes:
Make sure your slicer is not generating supports for the 12 threaded holes, it will be almost impossible to remove the support material from the threaded holes.
Print in the orientation shown in pictures 3, 4 & 5
How I Designed This
Designed in Alibre Design, Exported to Fusion 360 to add threads, Exported as .stl for printing. -
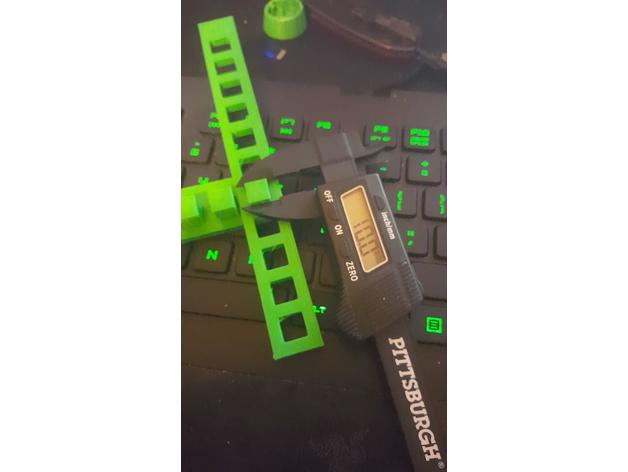
Tolerance Tester 3D Print Model
Summary
Designed a simple tolerance tester each square next to each other are ±.1 from 10mm to 11mm on both inside and outside. Might make one with circles to see if I get different results. -

Canopy Bed 3D model 3D Model
3D model custom 3ds Max 2017 V-Ray v.3.40.01When modeling, quad-sided and triangular polygons only were used. All textures are high resolution 20482048. All objects have unique names. If necessary, you can easily change the color, size and the number of polygons of a model. Archive for download contains:- scene, – texture,- material,- lighting,- cameras,- file MarvelousDesigner 6.5Dimensions of the model:- x – 268 cm- y – 200 cm- z – 205 cmTotal Subdivision Level 1:polygons – 564222vertices – 572100Total Subdivision Level 0:polygons – 141148vertices – 145140
-
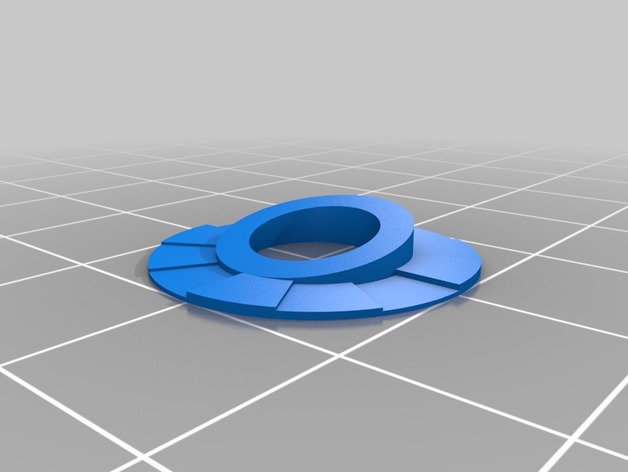
Bed Level Tester 3D Print Model
Summary
This is a tiny bed-level tester that I designed. I place one in each corner of my bed and one in the center, but this can be changed if appropriate for your needs.
This 20mm disk has segments that are one, two, or three layers thick. There is a sloped section in the middle with a hole. It is designed to be easily removed without damaging the thin parts. and for inspection of the first few layers.
I use a Monoprice Select Mini printer, so I originally designed it using the “Magic Number” layer heights. File “Bed_Test0.2625-_0.175.stl” is meant to be sliced with a first layer height of 0.2625mm, and remaining layers of 0.172mm.
I have also provided versions for 0.1mm (“Bed_Test_0.1.stl”) and 0.2mm (“Bed_Test_0.1.stl”) layer heights, as these seem common for most other printers. I have not personally printed them, but if you priter is capable they should work.
Print Settings
Printer:
Monoprice Select Mini Rafts:
No Supports:
No Resolution:
See Notes Infill:
100%