Summary
A remix of “loading_username” very nice PSU Cover,
This one can be screwed down/mounted.
Cheers Rob.
Tag: spindle
-
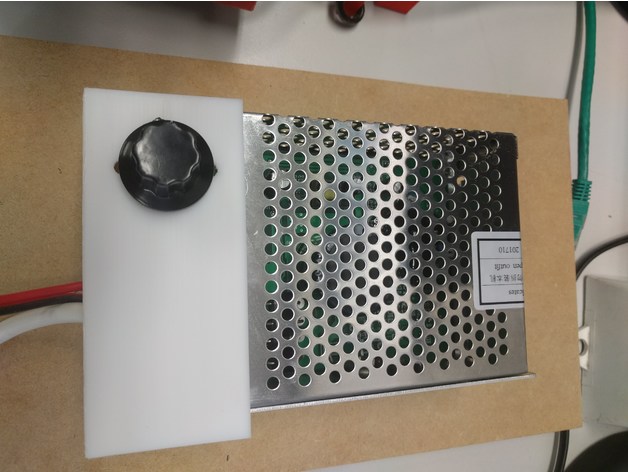
Power supply cover for ER11 spindle 3D Print Model
-
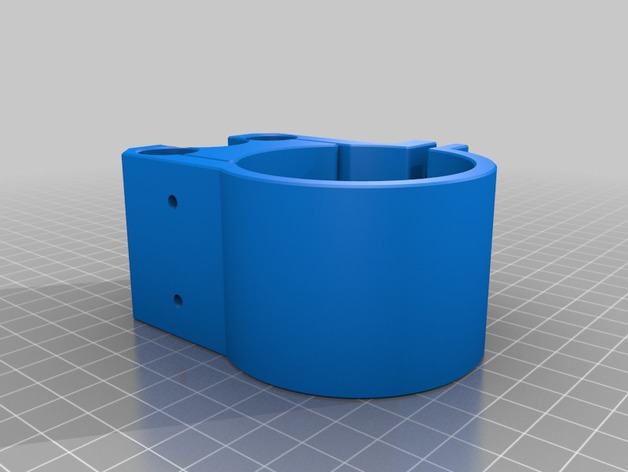
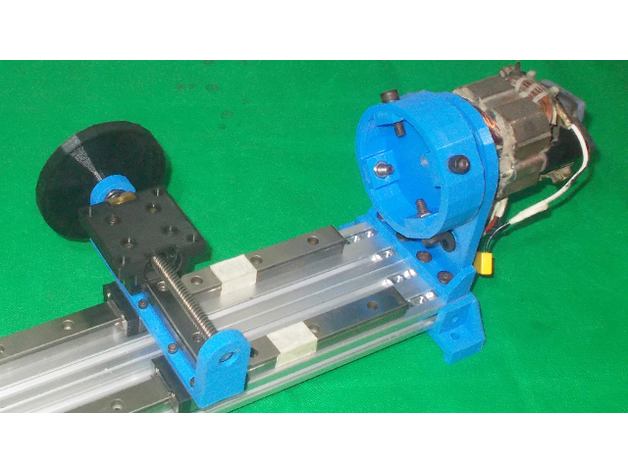
cnc2417 Z axis 55mm spindle mount holder 3D Print Model
Summary
55mm Spindle mount for chinese CNC “cnc2417” 24 x 17cm . This router mount 35mm spindle as default and not compatible with more diameter.
Assembly requires:
2 x bolts M3 >18mm
2 x nuts M3
4 x screws M3 16mm
No material support needed
Print Settings
Printer:
HyperCube 3D Printer Rafts:
Doesn’t Matter Supports:
No Resolution:
0.2mm Infill:
100% Notes:
https://www.thingiverse.com/thing:1752766
How I Designed This
Designspark Mechanical Downloads:
De: https://www.rs-online.com/designspark/mechanical-software-de
En: https://www.rs-online.com/designspark/mechanical-softwareBuy
Cnc router CNC2417
https://www.aliexpress.com/item/cnc-2417-diy-cnc-engraving-machine-3axis-mini-Pcb-Pvc-Milling-Machine-Metal-Wood-Carving-machine/32799560097.html?spm=a2g0s.9042311.0.0.eAyshb -
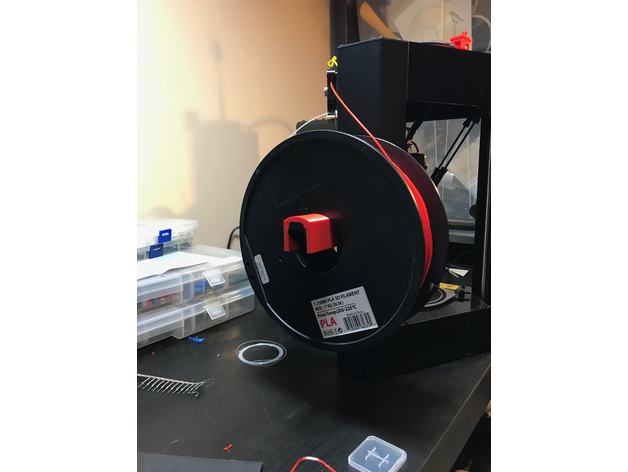
Monoprice Mini Delta Spindle Rounder 3D Print Model
Summary
I didn’t like the sharp edges of the bent metal spool holder on the Monoprice Mini Delta, so I modelled this up that slips over the spool holder and gives it a nice 26.5mm radius on the spindle. Should smooth out feeding of filament.
Inspired by Enzi1984’s design for the MPSM: https://www.thingiverse.com/thing:2036976
Print Settings
Printer:
MP Mini Delta Rafts:
No Supports:
No Resolution:
.2 Infill:
20% -
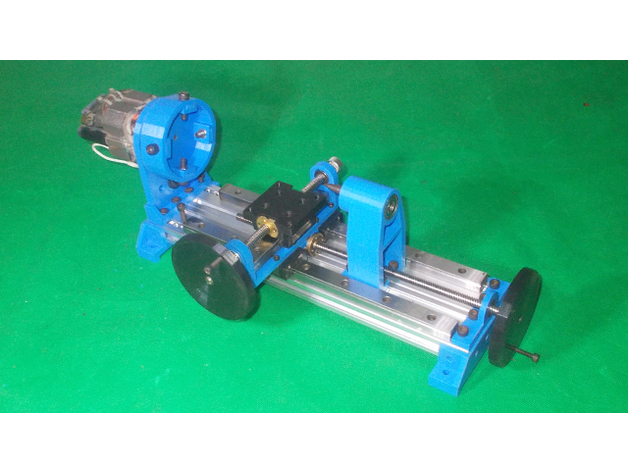
Homemade CNC Mini Lathe Chuck Drills Spindle Power Wood DIY Headstock Tool Rest Tailstock 3D Print Model
Summary
If you like my designs please consider buying me a coffee or tea!
DIY Bed Base here: https://www.thingiverse.com/thing:2567579
DIY Bed Base and Motor here: https://www.thingiverse.com/thing:2567294
DIY All Base here https://www.thingiverse.com/thing:2569111 -
Homemade CNC Mini Lathe Chuck Drills Spindle Power Wood DIY Headstock Tool Rest Tailstock 3D Print Model
Summary
If you like my designs please consider buying me a coffee or tea!
DIY Bed Base here: https://www.thingiverse.com/thing:2567579
DIY Bed Base and Motor here: https://www.thingiverse.com/thing:2567294 -
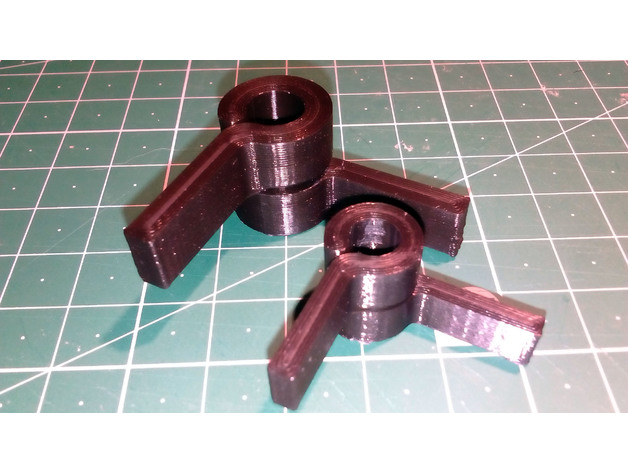
Squeeze clip for filament spool spindle / axle 3D Print Model
Summary
For my Anet A8 I wanted a quick release alternative to the supplied M8 nuts, so I designed this squeeze clip. To use just squeeze the arms together slightly to release the grip on the rod and slide off. They won’t grip as well as a nut with lock nut, but it works fine to hold the spindle in place.
I made 2 sizes one for the stock M8 threaded rod with an inside diameter of 7mm and a smaller one for a 6.4mm guide rod I salvaged for a scanner, used for a different spool stand.
Print Settings
Printer:
Anet A8 Rafts:
No Supports:
No Resolution:
0.2mm Notes:
I used a wide skirt to help with bed adhesion, My printer isn’t keen on small parts and I lose accuracy without the skirt. Your printer may vary.
The needed supports are all built in and will snap off. I print the clips with 4 lines on the walls / shells hence the 0% infill. I tried printing with thinner walls and 20% infill, but the clips were prone to snapping.
Post-Printing
Trim any skirt and stringing. The support in the gap between the rings that allows the clip to flex, will break free the first time the clip arms are squeezed.
There may be a small amount of support material that needs freeing up from the gap. I used tweezers and a craft knife.
How I Designed This
Designed with Fusion 360