Summary
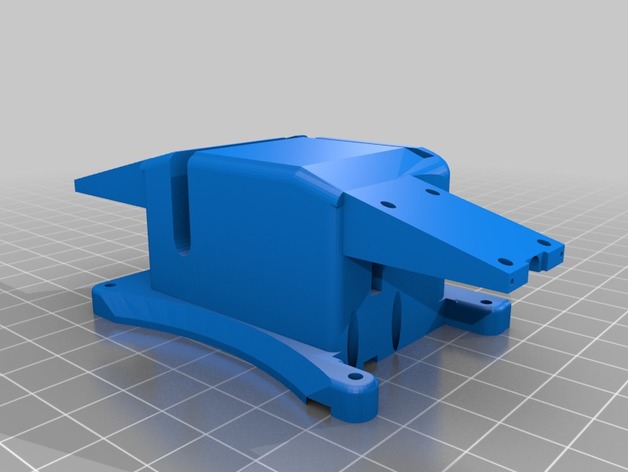
This attaches to the Solo’s Accessory Bay mounting holes. It can be used with or without a small breakout board like the Brownie Boards Nano. Extra space inside can contain all the wiring.
The 9G servo slides in and is held in by the unit being screwed to the Solo.
It you remove the pins from the connectors you can push the retract wires through the holes.
The info here will help you get it wired and working.https://www.hackster.io/phantom-phreak-7ccfe4/extend-3dr-solo-accessory-bay-be4073
This is the small breakout board I like.https://store.brownieboards.com/product/3dr-solo-nano-breakout-board/
Print with supports. Doesn’t require much infill. Most of the empty space it made to hold the wires.
Tag: release
-
3DR Solo Retractable Landing Gear Pads w/ Payload Release 3D Print Model
-
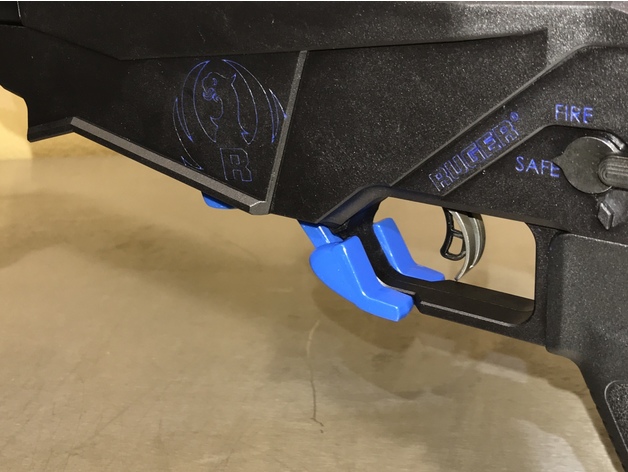
Ruger Precision RimFire Extended Magazine Release 3D Print Model
Summary
This is an extension for the Ruger Precision rimfire magazine release, it fits snug over the original lever… will not work with the Ruger 10 Round rotary magazines.
Print Settings
Printer:
QiDi X-PRO
Rafts:
No
Supports:
Yes
Resolution:
.15
Infill:
50
Notes:
I used ABS, 50% infill printed on side with support and Brim. For better fitment and finish you will need to file/sand the areas that needed support (bottom side)
Post-Printing
For better fitment and finish you will need to file/sand the areas that needed support (bottom side)
How I Designed This
Areas to file /sand -
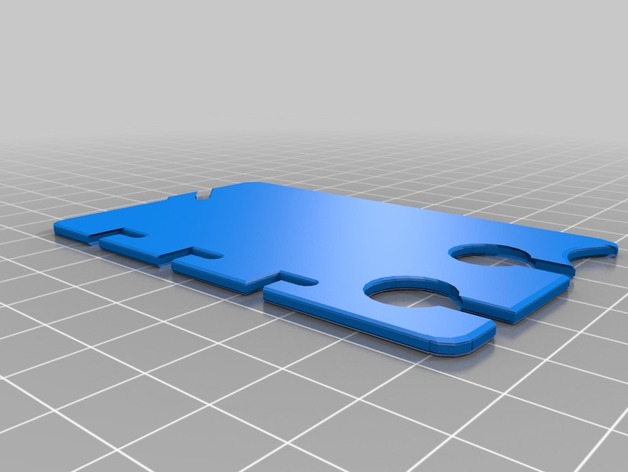
Customizable Earbud-Wrap with Fast Release 3D Print Model
Summary
This earbud holder features:
Convenient flat storage when not in use
Business card size, credit card size, and custom sizes
Quick wrapping action
Even quicker release feature. The last loop with the audio jack holds the other loops in place. Release it, and you can release all the other loops instantly.
Two central holes so you can thread the cord through them to keep it handy while you are listening
An optional notch for the slide-off side of the winding
Customizable location of notch for windings relative to earbud holes
Customizable width of slots for the cord
Customizable size of earbud holes
Customizable corner rounding. Make the corners square, even.
If Thingiverse’s Customizer is working, this is your best bet for customizing. If not, open the file in OpenSCAD, change the preset to “Custom” and start playing with the other settings.
Not much in presets yet. The Default matches DavidPhillipOster’s thing that I mixed from. If you find settings that work well for a recognizable pair of earbuds, let me know and I’ll add them to the presets.
Want a feature added? Let me know.
I tried to restrict the ranges of the settings to ones that result in valid models. If you manage to break the model using Customizer, let me know.
Print Settings
Printer:
Monoprice Mini select Rafts:
No Supports:
No Resolution:
0.2 mm Infill:
15% Notes:
These print settings were suggested by DavidPhillipOster for his thing. I went with a heavier infill when the extra features result in thinner sections.
How I Designed This
Remix, OpenSCAD and Customizer
Started with Earbud-Wrap with Fast Release by DavidPhillipOster, added some features suggested by my son, and made it all Customizer friendly.
Owe a debt to Splines for OpenSCAD by teejaydub as well. -
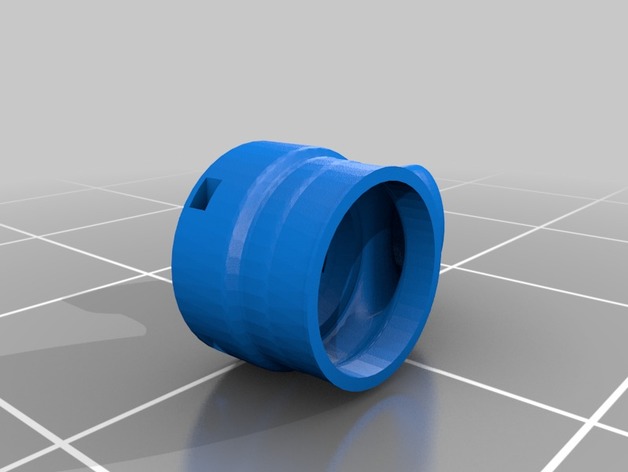
DW660 Quick Release Dust Shoe with ring for attaching skirt 3D Print Model
Summary
This is a simple remix of https://www.thingiverse.com/thing:410266 which is in turn a remix of https://www.thingiverse.com/thing:231219, a dust shoe for the DeWalt 660.
I found it necessary for our applications on our home brew router to have a skirt. This mix adds a ring in the appropriate place to zip tie a skirt to the dust shoe. It also removes some of the interior plastic that kept causing jams with larger wood chips. I am using 3/16″ thick rubber though vinyl or other materials would work just as well.
This is probably obvious, but print this upright. I realize it’s on its side. That was a side effect of importing it for me.
Good support settings are an absolute necessity on this one due to it having to reach up into the part to support the upper area.
I printed this at low resolution and fast speed. For me this helps with bridging which is handy for the cavity that the pin must travel through. Support doesn’t really work there.
Print Settings
Printer Brand:
Printrbot Printer:
Play Rafts:
Doesn’t Matter Supports:
Yes Resolution:
Low Infill:
20% -
Couch Sofa Release Lever Slip-on Replacement Fix 3D Print Model
Summary
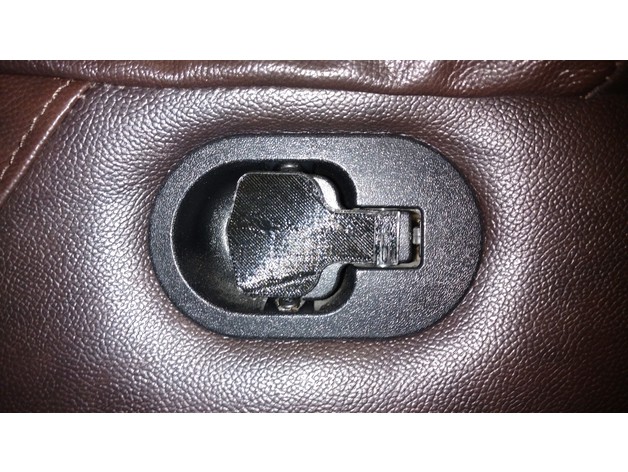
The release lever for my couch snapped-off, so I designed this fix for it. Since a “stub” of the original lever still remained, I designed this thing to slip on over the remaining stub. Printed in black PLA to match the couch, though I realize this makes it a bit hard to see in the photos.
The first photo shows the printed part attached to the couch. The second shows the “stub” that the printed part fits over. The third is a reference photo of a still-intact release lever. The fourth is just the part by itself.
Print Settings
Printer Brand:
Prusa Printer:
Prusa Clone Rafts:
Doesn’t Matter Supports:
Yes Resolution:
0.1 Infill:
20
How I Designed This
Fusion360. The .f3d file is included if you wish to tweak it based on the specifics of how your handle broke. -
Quick release for Raspberry Pi Case 3D Print Model
Summary
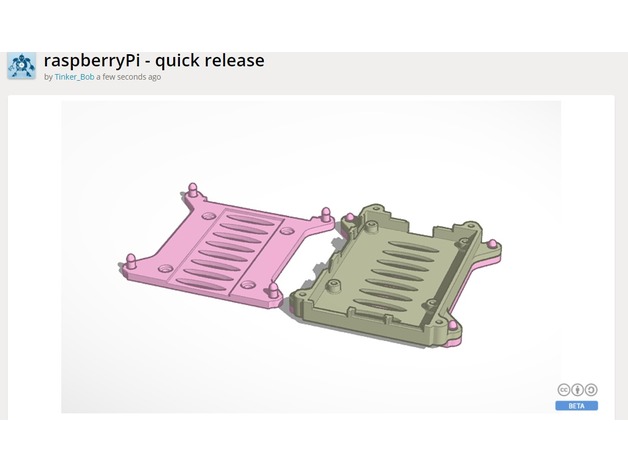
This is a quick release mount for the case https://www.thingiverse.com/thing:922740
Wanted to be able to quickly take my Pi out of my printing cabinet when I need it for another project.
Print with high infill to make the pegs stronger.
Post print: push each peg through a hole a few times to clean up any residue. This will make it easier to put all 4 pegs on at once (IE they won’t break when you try to remove).
This is set up with my printers tolerances so it may be a bad fit for your case. You can edit the peg sizes here: https://www.tinkercad.com/things/l91VsItmHf9-raspberrypi-quick-release