
High quality model ‘Human figure from IKEA’ specially for your projects.Quality and accurate modeling, allows you to use model in any projects. Model corresponds to all proportions and the real size. Elaborated all small details, accurate UVW mapping and high-resolution textures make the model more realistic, allowing you to use a model in high-resolution renderers (close-up), as well as for creating videos, or video advertising or use in the film industry.The model is created in Autodesk 3ds Max 2010, rendered with Vray 2.10.01, textures and materials are included.Do not forget to rate the model, for us it is very important :)3D model available in these formats: 3ds Max 2010 (.max), Autodesk FBX 2006 (.fbx), OBJ (.obj)Scene Statistic below:-Subdivision ON:Polys: 97 152Tris: 151 642Edges: 236 887Verts: 76 717-Subdivision OFF:Polys: 56 232Tris: 112 042Edges: 112 887Verts: 56 677- Scale of all details (100,100,100)- Model has real-world scale and is centered at 0,0,0- All pivots in place- Materials, objects and textures have the correct names- No cleaning up necessary, just drop your models into the scene and start rendering- Model is intended for subdivisionTextures are included:-Human_figure_from_IKEA_wood.jpg (2000×2000)Do not forget to rate the model, for us it is very important :)© Leonid Naku [Zurel] 2018
Tag: Posable
-
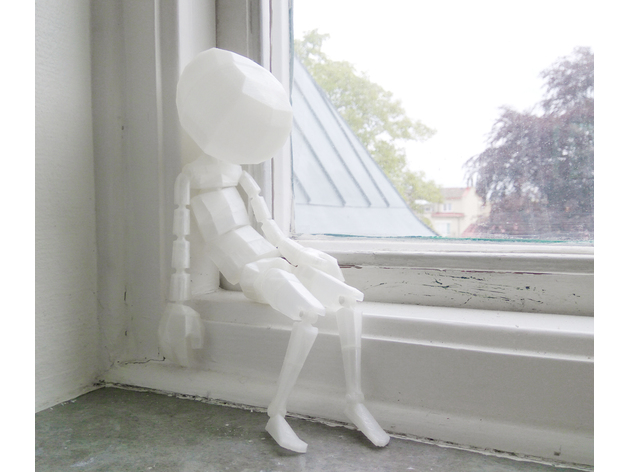
Posable Hollowed figurine 3D Print Model
Summary
Depending on assembly, the doll can be made to be very loose and more of a ragdoll or more of a posable figurine once assembled.
Needed for assembly:
Glue (preferably some kind of super glue)
About 100mm of 1.75mm PLA filament to use as rivets.
Something to heat up PLA, lighter or soldering iron works fine.
Sandpaper
This print is in 36 parts to ensure that it can be printed on pretty much any type and/or size of printer.
The two .stl files you see here are mostly for reference but Posable_Hollowed_Reference_Layout.stl can also be used to print out all parts at once if your print bed is large enough – you will have to print a 2nd copy of the head as it needs to be printed twice to give you both parts needed – .
With download you’ll get three Blender files, PosableHollowed_ColorCoded_LRUB.blend and PosableHollowed_ColorCoded_Position.blend are to help with assembly and PosableHollowed_Parts.blend is for those interested in modding or just curious how it’s built.
This design was a pet project of mine, mostly to learn about printing joints but also something I used to brainstorm poses for my creative work.
Print Settings
Printer Brand:
Printrbot Printer:
Play Rafts:
No Supports:
No Resolution:
tested 0.1-0.2 Infill:
No infill should be nessesary Notes:
As you might have noticed, there’s only one half of the head, that’s because it’s identical on both sides, so just print it twice and you’ll have all the parts.
The version in the pictures is printed in 0.2mm layer hight on a 0.4mm nozzle.
The print is designed to be able to be printed without any infill and support.
If you are experiencing problems with Left/Right arm_1 where the ball joint starts you might want to add some support or alternatively print multiple parts at once as with how small the parts are, if you don’t have cooldown settings the nozzle might not allow the print to cool down between layers causing it to sag down.
Keep a lookout for warping, especially on the head as all parts need to be flat when glued together.
Got any questions, is something off in the files or just curious about something?
Post a comment or send me a message and I’d be happy to help out 🙂
Post-Printing
Good to know for assembly.
Sandpapered off a tiny bit too much on a small part?
Super glue leaves a pretty thick, smooth and solid surface once dried.
So you might be able to salvage the part with a drop or two of super glue.
Most types of super glue goes matte once dried, use that to know when it’s ok to see if the part fits better with the added thickness from the glue.
Part references:
With the download you’ll get three Blender files, PosableHollowed_ColorCoded_LRUB.blend and PosableHollowed_ColorCoded_Position.blend are to help with assembly.
Turquoise = Right,
Red = Left,
Yellow = Top/Upper
Purple = Bottom/Lower
If a part is split in two, there can be a Top and a Bottom part.
Don’t have Blender?
Don’t worry, it’s a free software that you can get over at https://www.blender.org
All you need to know to use the 3D references is that you use the middle click to spin the camera around, select an object with right click and that all the parts are listed in the panel to the right of the screen.
Joint assembly:
There are three different types of assembly needed for the joints.
Most joints just pop into place, like arms, neck and the ball joints connecting the legs to the pelvis. If you are experiencing a lot of resistance, give the ball joint a light rub down with sandpaper and try again. The joints on the Pelvis might need to be heated up slightly as well as the Thigh parts are quite thick.
The joints in the torso require that you glue the front and back or left and right side while around the ball joint, if glued together before you will not be able to get the ball joint into the socket.
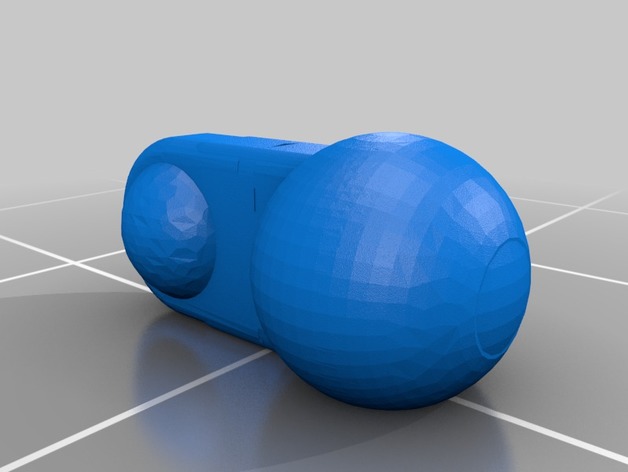
The ankle and knee joints require some special attention as they use 1.75mm filament as rivets.
For those who are new to useing PLA as rivets,
Cannedmushrooms explains how to create PLA rivets pretty spot on: www.youtube.com/watch?v=WqNxYHWpYko
Grab a lighter, soldering iron or something very warm and about 100mm of 1.75mm filament. I can only recommend PLA as I have not had the chance to test other materials for this use.
Heat up the end of the filament (only about 3mm of the edge) and push it against a smooth surface. Next thread the filament through the joints you want to connect until the flat surface is flush against the joints. Cut off the other end so only about 3mm sticks out, heat it up and push it against a smooth to create the other end of the rivet.
This only needs to be done 4 times to connect the ankles and knees, and that’s it! easy peasy.
Gluing parts together:
As with any surfaces that will be glued together, it will need to be lightly sandpapered down so that the surfaces will bond properly with the glue. For this print most super glues will work fine as there wont be any stretching going on.
As always, keep a fan on as fumes from super glue isn’t the best to inhale. -
Transformers CW Posable Hands 2.0 Knuckles (remix) 3D Print Model
Summary
This is a simple remix to re-orient the ball-joint version of the first knuckle on the fingers and thumbs of the Combiner Wars hands made by Sickofyou. The vertical orientation led to parts that would sheer off and cause breakage, while laying them vertically should produce greater durability and the ability to handle a little more force applied.
I used Tinkercad to orient the parts, move the flat spot of the ball joints to the side it rests on, and reinforce the issues with the mesh caused by importing it into Tinkercad. Print with the same settings you would use for the originals!