Summary
I’ve made enough 1-off designs for specific boards to motivate me into designing a fully parametric mounting plate. The included .stl file is for a Raspberry Pi with 6mm magnets as the mounting method, but you could use screws or glue just as well. The .f3d file can quickly generate similar mounting plates for other symmetrical 4-mounting-point circuit boards.
Print Settings
Printer:
creality cr-10
Rafts:
Doesn’t Matter
Supports:
No
Resolution:
.16
Infill:
25%
Notes:
MakerGeeks pro-HTPLA, 235C.
Post-Printing
The example print uses CA glue to secure 6mm magnets as the mounting method.
Tag: mounting
-
Parametric 4-post mounting plate for symmetrical circuit boards 3D Print Model
-
Xiaomi m365 Clamp (scooter Frame Mounting) to add a box or bag – Plateau et Collier de serrage pour rajout de boite ou sac 3D Print Model
Summary
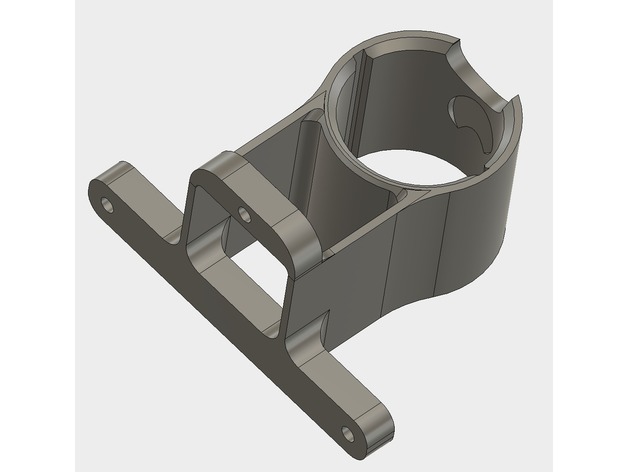
Participant à un groupe Telegram d’entraide/optimisation de la trottinette Xiaomi m365, j’ai modélisé ce plateau équipé de colliers de serrage s’intégrant sur le cadre entre la fourche avant et le deck pour rajouter une boite ou un sac rigide en les pinçant avec les éléments intérieurs,
A assembler avec des vis M5 x 60 à 70 (suivant l’épaisseur de votre boite) à tête cylindrique hexagonale et boulons associés
N’hésitez pas à me faire vos retours pour d’éventuelles améliorations, adaptations nécessaires… -
Mounting Plaque 3D Print Model
Summary
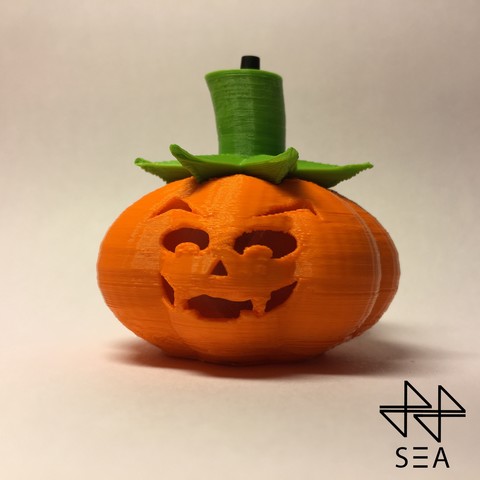
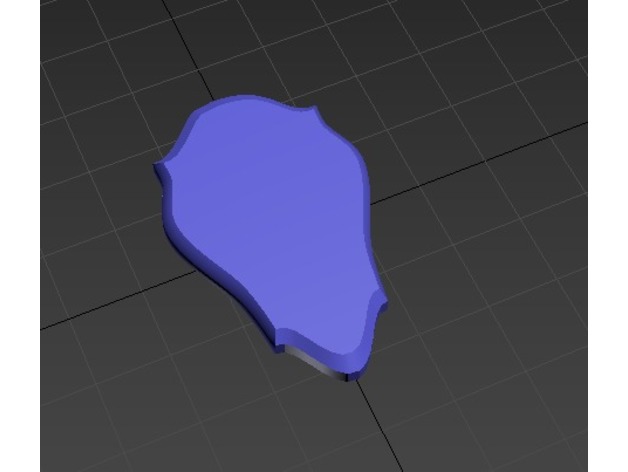
I use this as a fridge magnet to mount my tiny 3D printed heads onto! Now the awesome random head you printed can become a hunting trophy. Use some super glue to put a magnet into the hole in the back. -

Mounting Plaque 3D Print Model
Summary
I use this as a fridge magnet to mount my tiny 3D printed heads onto! Now the awesome random head you printed can become a hunting trophy. Use some super glue to put a magnet into the hole in the back. -
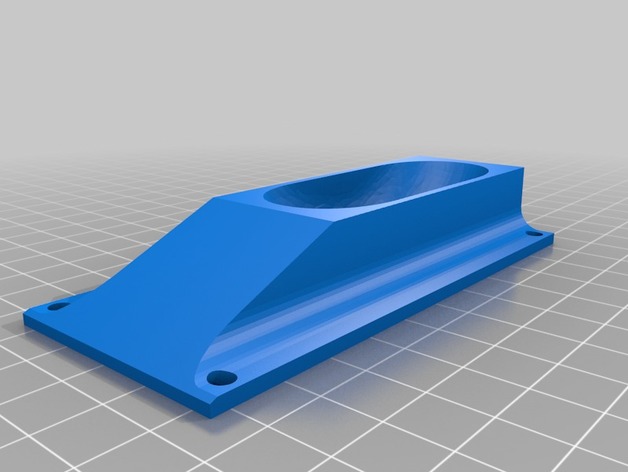
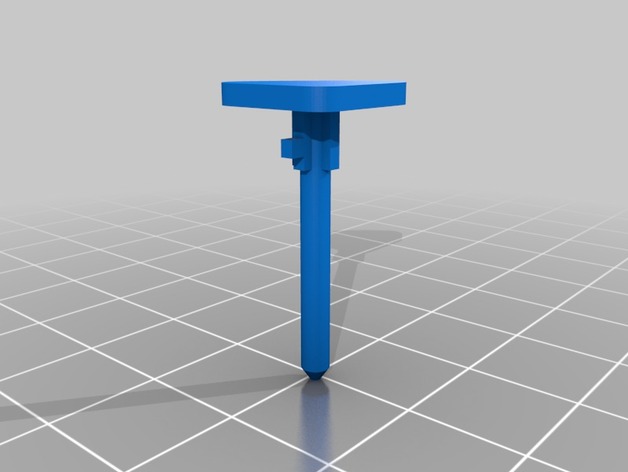
filament reel mounting screw 3D Print Model
Summary
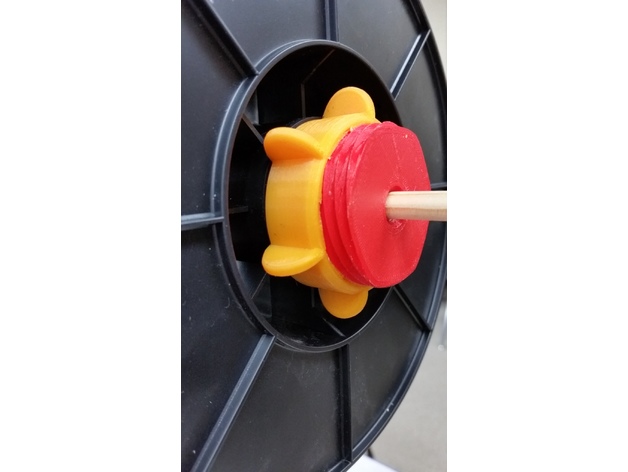
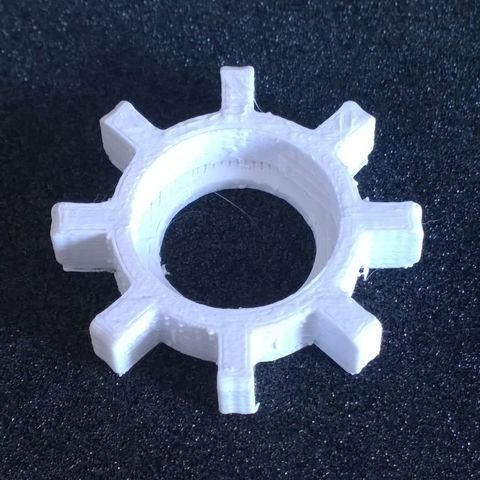
So, this is my solution for quickly mounting filament reels.
The center bore is for a 3/8ths inch wooden dowel rod, about 40¢ at Michaels Hobby Store.
Total filament cost is about $1.25 when using $15/kg
Scale: 94 percent
Infill: 20 percent (100% for the pink nut)
Shell Thickness: 1.6mm
Resolution: 0.2mm
Rafts: None
Supports: None
Print Settings
Printer Brand:
Prusa
Printer:
i3 MK2S
Rafts:
No
Supports:
No
Resolution:
0.2mm
Infill:
20% -
Mounting plate for a GT2560 Melzi board. 3D Print Model
Summary
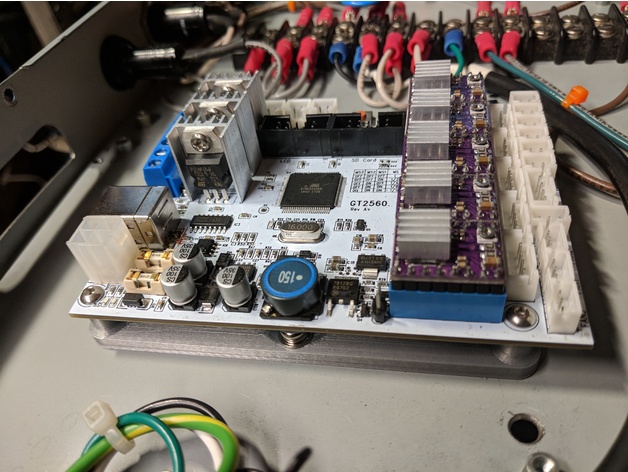
Simple standoff mount for a GT2560 Melzi board.
The 2 mounting holes in the center are designed for 4mm screws.
Standoffs are designed to be tapped with 3mm threads.
The specific board is here :https://www.amazon.com/gp/product/B074TZC27M/ref=oh_aui_detailpage_o04_s00?ie=UTF8&psc=1
Print Settings
Printer Brand:
Creality
Printer:
CR-10
Rafts:
No
Supports:
No
Resolution:
.2
Infill:
20%
Notes:
Hatchbox silver PLA @ 200°C.
How I Designed This
Tapped standoffs with 3mm tap – holes are printed at 2.6mm. Mounting holes are 4.2mm, designed for 4mm screws. -
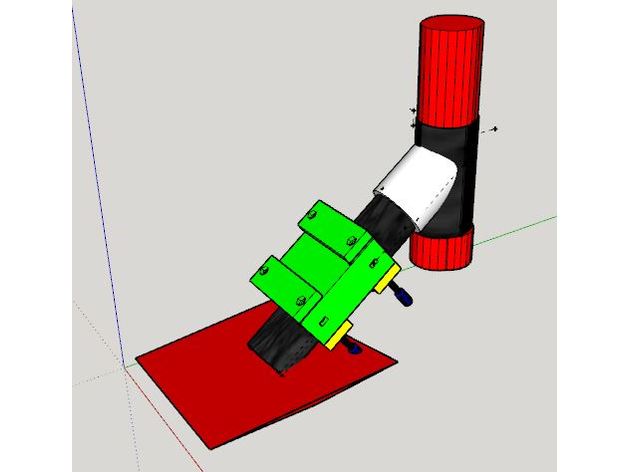
Horn System 3D Model
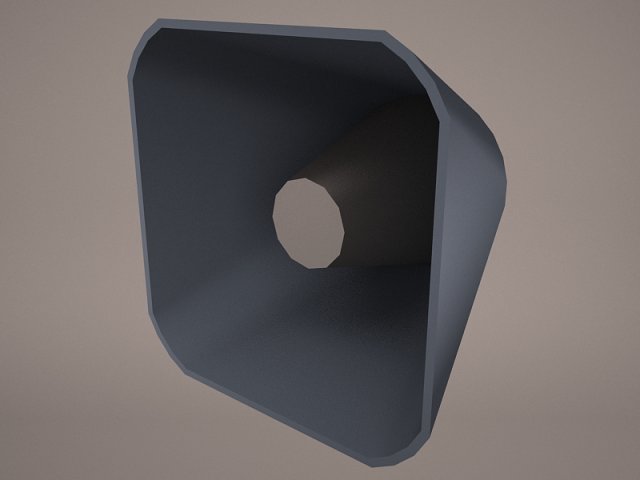
Outdoor Broadcast Horn System Pole speaker sound audio warning old public information electric alert loud voice amplifier megaphone mounting siren
-
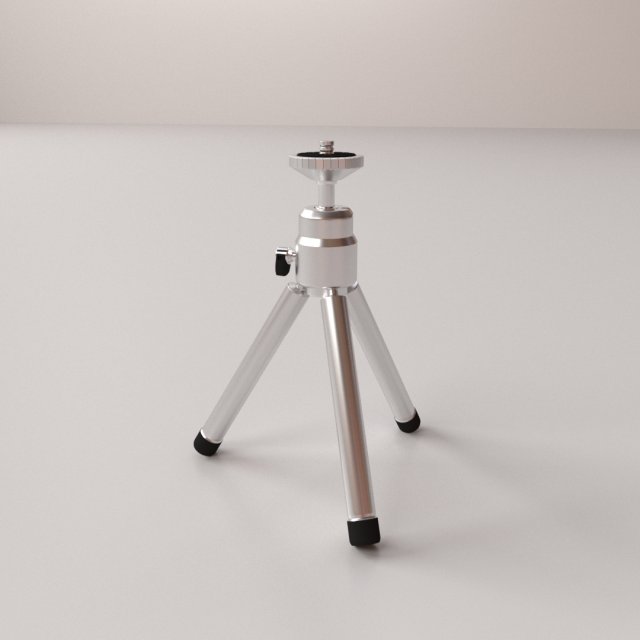
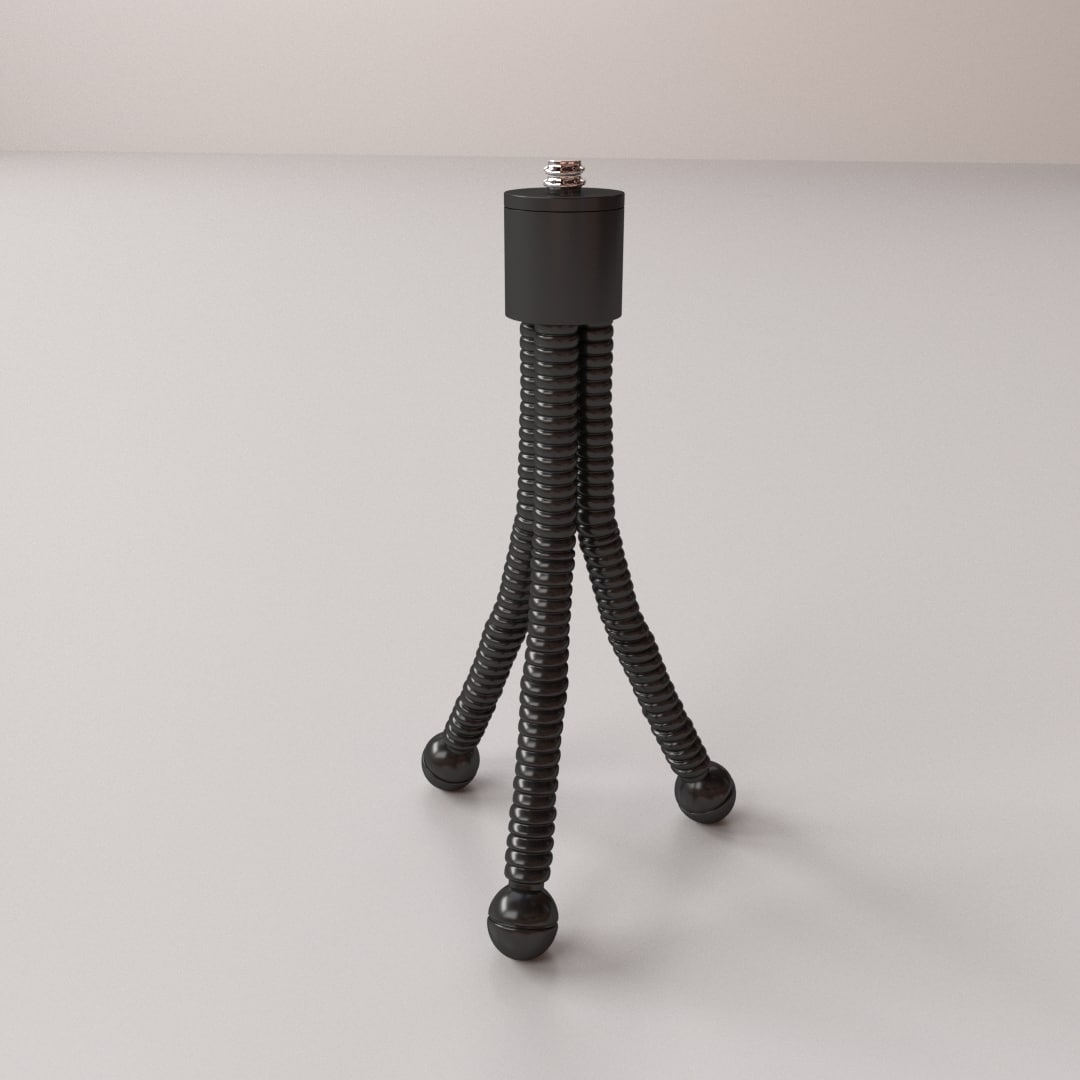
Mini Tripod V2 3D Model
MINI TRIPOD V2=================================- Modeled in Blender.- Preview image rendered using cycles.- All scene are included in .blend files.- Poly count are before sub division- Great for close up render.- All parts and materials are logically named.OTHER FORMATS=================- 3ds MAX- COLLADA (.dae)- Autodesk FBX- OBJ
-
Tool for mounting of furniture door 3D Print Model
Summary
petg
Print Settings
Rafts:
Yes Supports:
Yes Resolution:
0,2 Infill:
50 -
Component tester mounting for type: Hiland DIY M12864 3D Print Model
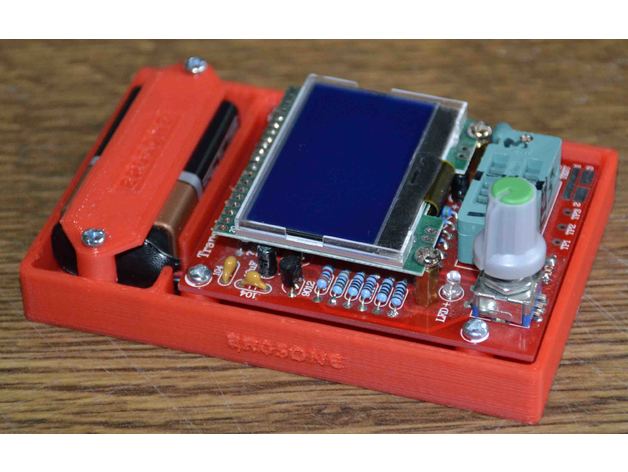
Summary
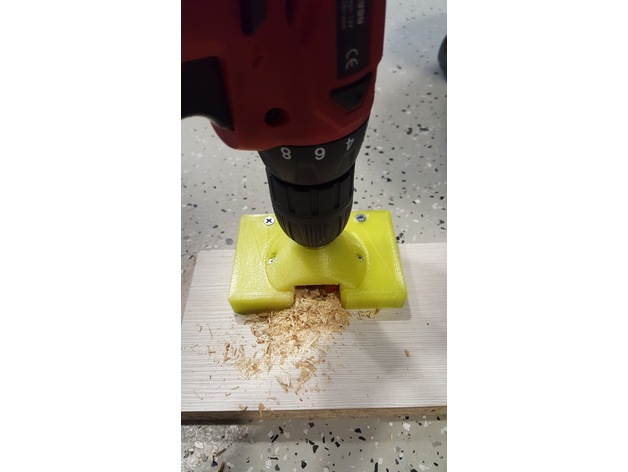
Requires to drill and tap to M3
4 off M3 x 10mm screws
2 off M3 x 15mm screws
OR
Small self tappers
Printer Anet A6
200 degrees nozzel, 50 degrees bed
50mm/sec speed, infill 20%, print flat side down.
Print Settings
Printer:
Anet A6 Rafts:
Doesn’t Matter Supports:
Doesn’t Matter Resolution:
.2 Infill:
20% -
Google home wall mounting bracket 3D Print Model
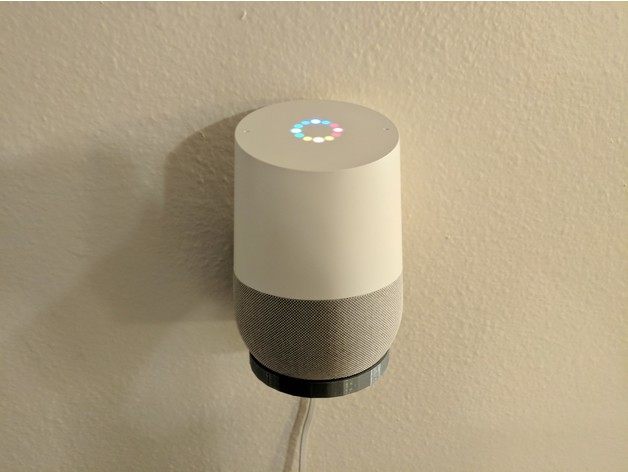
Summary
This wall bracket works well.. Just dont over-tighten it because it will crack like in the picture.
Also, be sure that the cable is in place before screwing it down.
Print Settings
Printer:
Anet A8 Rafts:
No Supports:
No Resolution:
.2mm Infill:
20% Notes:
Easy print. -
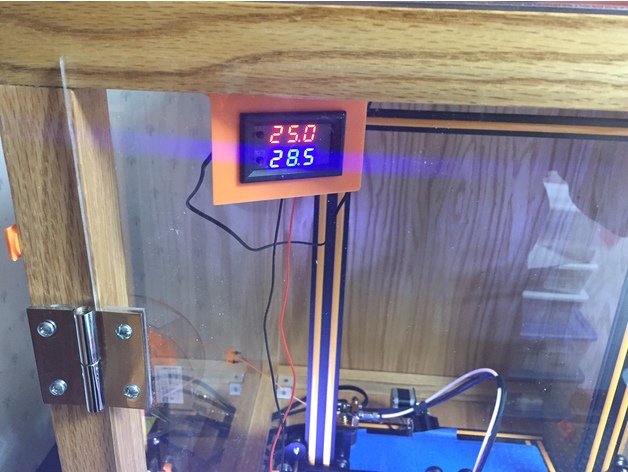
Mounting Bracket for Banggood Temperature sensor and fan control switch 3D Print Model
Summary
This is just a simple bracket to mount a Banggood temperature sensor and fan control switch I am using to monitor the temperature inside my CR-10 enclosure. It has a relay that can turn on a fan (non-PWM) base on the trigger temperature.
Link to the Banggood temperature sensor https://www.banggood.com/DC12V-50-110-Degree-LED-Digital-Thermostat-Temperature-Control-Smart-Sensor-Switch-p-1143380.html -
3 Inch wheel chocks, with mounting holes 3D Print Model
Summary
Scaled to fit 3 inch wheels and added mounting holes. -

3 Inch wheel chocks, with mounting holes 3D Print Model
Summary
Scaled to fit 3 inch wheels, and added mounting holes. -

3.5 Inch Wheel Chocks With mounting holes. 3D Print Model
Summary
I took Fireflynj wheel chocks and added mounting holes. -

Aura bass shaker mounting plate 3D Print Model
Summary
Designed this plate to mount an Aura Basshaker to my Playseat Challange.
Used the following clamp to mount it all:https://www.thingiverse.com/thing:561762
Used a simple woorden bar between the legs using the above clamps and used this mounting plate to mount the bass shaker itself.
Print Settings
Printer Brand:
Wanhao Printer:
Duplicator 6 Rafts:
Doesn’t Matter Supports:
No Resolution:
0.2 Infill:
50 Notes:
Used PLA. Tried PETG but its to flexible to me. -
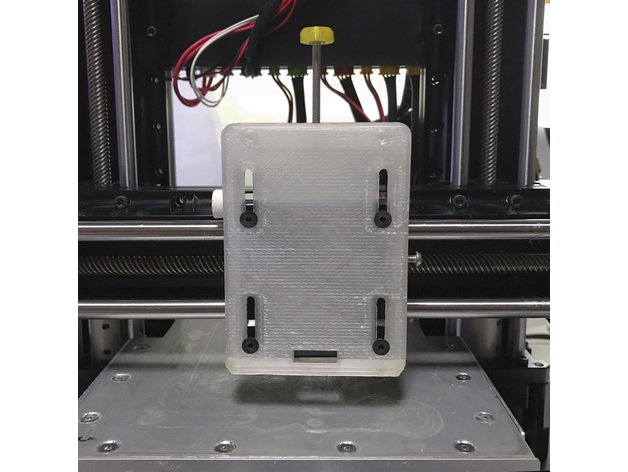
Extruder mounting Plate with adjustable height ver.2 3D Print Model
Summary
【 Slide-type Extruder mounting Plate with adjustable height / KODAMA TRINUS 】
先日作成した【Extruder mounting Plate with adjustable height】が強度的に弱くて、使用しているうちに変形してきたので各部を補強したバージョンを作りました。
オリジナルのExtruder mounting Plateをこれに変えれば、ホットエンドの高さ調整が一度で決まり、微調整も簡単に出来ます。
(ヒートベッドの水平の調整が完了している前提です)
ホットエンドをホームポジションからヒートベッドの真ん中に移動してから、紙を挟んで高さ調整用のネジで適度な摩擦になるように調整して側面の固定ネジを締めるだけで、ホットエンドの高さ調整が完了です。
【 別に用意するもの 】
プリントしたスライド式エクストルーダー用マウンター
M3の25~30mm以上のネジ×1
上側のネジ穴には、M3で25〜30mmのネジを使いエクストルーダーの高さを調整します。
M3の8~10mmのネジ×1
側面のネジ穴には、M3で8~10mmのネジを使います。
このネジはホットエンドとヒートベッドのクリアランス調整をした後、エクストルーダーを固定します。
(このネジの長さが長すぎたり、ネジの頭が大き過ぎるとエクストルーダーが右端に移動した時にスライダーのフレームに当たります。)
【 ホットエンドとヒートベッドのクリアランス調整の手順 】
1.まずヒートベッドの水平をしっかり調整します。
2.オリジナルのエクストルーダー用マウンターを外して、スライド式エクストルーダー用マウンターに取り替えます。
取り付けネジは元のネジ(4本)を使ってください。
この時、完全に固定せずにプレートがスムーズにスライドできる程度にネジを軽く締めます。
3.マウンターの2本の調整用ネジは仮止め程度に締めてください。
4.エクストルーダーを元のネジ(2本)を使ってスライド範囲の上端に取り付けて上部の高さ調整用のネジで落ちないように調整します。
(2のマウンターの取り付けネジが緩めでもエクストルーダーによって押えられるので外れることはありません)
5.エクストルーダーをホームポジションにセットしてから、ヒートベッドの真ん中付近に移動します。
6.適当な厚みの紙(コピー用紙等)をヒートベッドに置いて、上部の高さ調整用のネジを緩めてエクストルーダーを下げ、ホットエンドのノズルが紙の上に軽く乗るようにします。
7.ホットエンドのノズルとヒートベッドに挟んだ紙が適度な抵抗で動くように、上部の高さ調整のネジで高さを調整します。
8.マウンター横の固定ネジを締めて、紙を外したらクリアランスの調整は完了です。
最後に確認のため【 First Layer Calibration 100 x 100 x 0.1mm 】を印刷します。
綺麗に印刷できたら高さ調整は完了です。
詳しくはこちらの【 ブログ 】を参考にしてください。
【 印刷のパラメーター 】
printer:Kodama TRINUS 3DPRINTER
nozzle:0.4mm
layer height: 0.15mm
ExtruderTemp:225℃
HeatedBedTemp:105℃
PrintingSpeed:30mm/s
FillPattern:Rectilinear
Infill:100%
rafts:Yes
supports:Yes
Single outline corkscrew mode:No
filament : I use ABS 1.75mm
Print Settings
Printer:
KODAMA TRINUS3D Rafts:
Doesn’t Matter Supports:
Yes Resolution:
0.15 Infill:
100% Notes:
ガタが出ないように要所々のマージンが少ないので、削ったりの修正が必要かもしれません。 -
Cooler Master Vortex Plus CPU Cooler Mounting Clip 3D Print Model
Summary
Mounting clips for a Cooler Master Vortex Plus CPU cooler.
I had several of these break on me after moving my computer around, so I grabbed the remaining intact ones and modeled them out.
Print Settings
Printer:
Creality CR-10 Rafts:
No Supports:
Yes Resolution:
0.1 mm Infill:
100% Notes:
Printed with PETG for better temperature resistance.
I found the best orientation for these parts is to place Push Pin (A) horizontally with the long edge of the base triangle against the print bed and Push Pin (B) horizontally with the split tip perpendicular to the print bed and supports only on the parts touching the bed.
This is a small part so there will likely be some variation from print to print (mine came out pretty ugly, but functional).
Post-Printing
The slot at the top of Push Pin (B) needs to be cut to extend it out to edge of the part.
This wasn’t included in order to print more solidly, but it may be able to be printed with supports.
This allows Push Pin (A) to be inserted and rotated into the part.
How I Designed This
Designed in Fusion 360; .f3d file is included. -
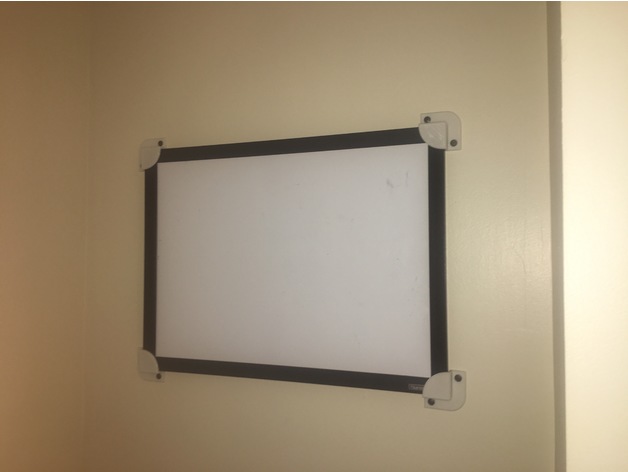
Whiteboard/picture-frame mounting brackets 3D Print Model
Summary
I sturdy and snug way to mount my whiteboard, and I couldn’t find anything similar so I designed this.
Print Settings
Printer Brand:
Afinia Printer:
AFINIA H480 Rafts:
Doesn’t Matter Supports:
Yes Resolution:
0.4mm Infill:
20% -
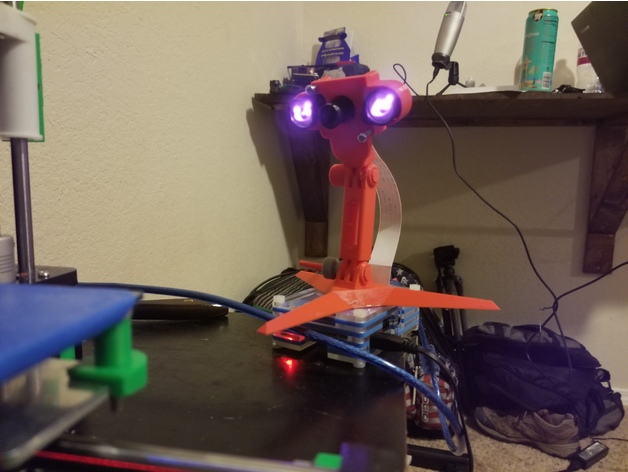
Raspberry Pi Night Vision Camera mount with Modular Mounting System attachment. 3D Print Model
Summary
I created this remix in order to mount my night vision Raspberry Pi camera onto the Modular Mounting system that I had previously printed.
The rest of the camera case can be found here: https://www.thingiverse.com/thing:1889356
The Modular Mounting System that it attaches to can be found here: https://www.thingiverse.com/thing:2194278
Print Settings
Printer:
Anet A8 Rafts:
Doesn’t Matter Supports:
No Resolution:
.2 Infill:
10% -
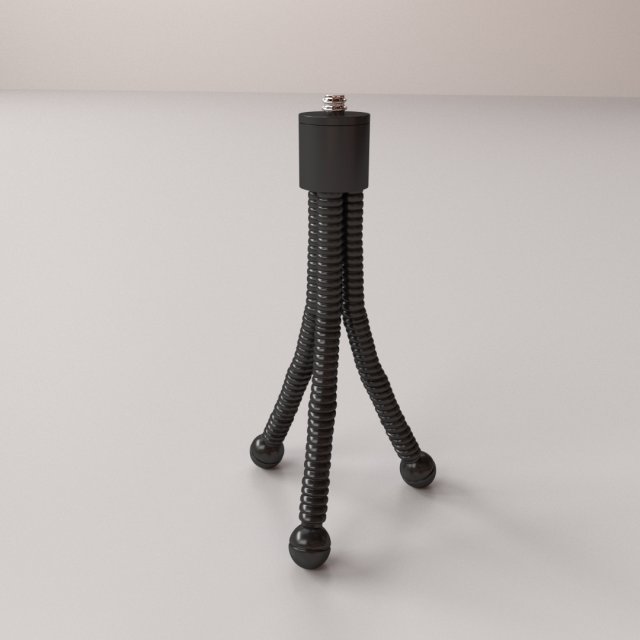
Mini Tripod 3D Model
MINI TRIPOD=================================- Modeled in Blender.- Preview image rendered using cycles.- All scene are included in .blend files.- Poly count are before sub division- Great for close up render.- All parts and materials are logically named.OTHER FORMATS=================- 3ds MAX- COLLADA (.dae)- Autodesk FBX- OBJ
-
Dyson V8 accessory mounting bracket 3D Print Model
Summary
The Dyson V8 comes with 6 fittings (7 if you count the pipe) but only 2 places to hang them. My broom closet is rather small so I needed a way of mounting where I could choose the placement for each fitting. The mount has been designed so that the Dyson fittings hang from it.
Print Settings
Printer:
Anet A8 Rafts:
Doesn’t Matter Supports:
Yes Resolution:
0.2 Infill:
40% Notes:
Refer to the picture to see print orientation. The supports breaks out easily. Minor cleanup required but Dyson parts will fit directly as it comes from the 3d printer. I included the gcode if you trust the way I sliced it 😉 and are printing with PLA. Otherwise, use the stl and slice it yourself.
Post-Printing
Minor cleanup and removal of the supports. Best way to mount is to pilot drill a single hole to start and then screw the bottom of the bracket onto the wall. This will allow you to rotate till level and then pilot drill the top 2 holes and fix with appropriate screws. -
Disassembly tool for breakers and foamers 3D Print Model
This tool allows dismantling and reassembly of sinks and foamers of sinks and sinks
-
Extended Arms – Spool Holder for Prusa i3 MK2 – Hex Design – Toolless Mounting – Fast spool replacement 3D Print Model
Summary
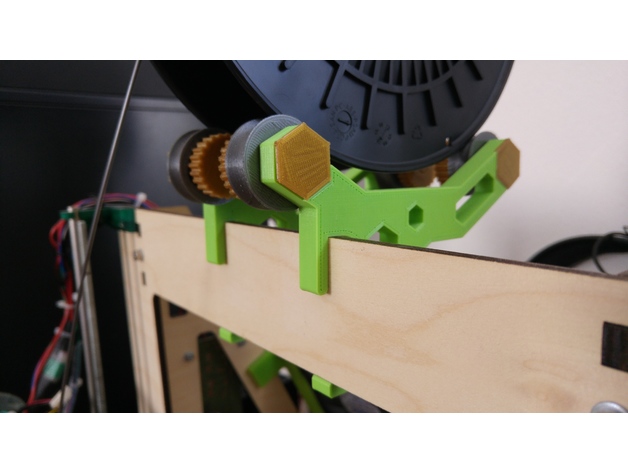
I Just extended the Arms to fit a 52mm (wooden) Frame. Thanks to Martin Majewski for this fantastic design!
Print Settings
Printer:
Custom Prusa I3 Rafts:
No Supports:
No Resolution:
0,1-0,3mm Infill:
20% Notes:
Grab the other Parts from the original design -

Endstop Mounting 3D Print Model
Summary
This part is used for endstop mounting and designed to fit with 2020 alu profiles. It can used for various types of printers and has 4 holes to fit with M3 screws. -
Dolly Camera on Dual Rail Slider 3D Model
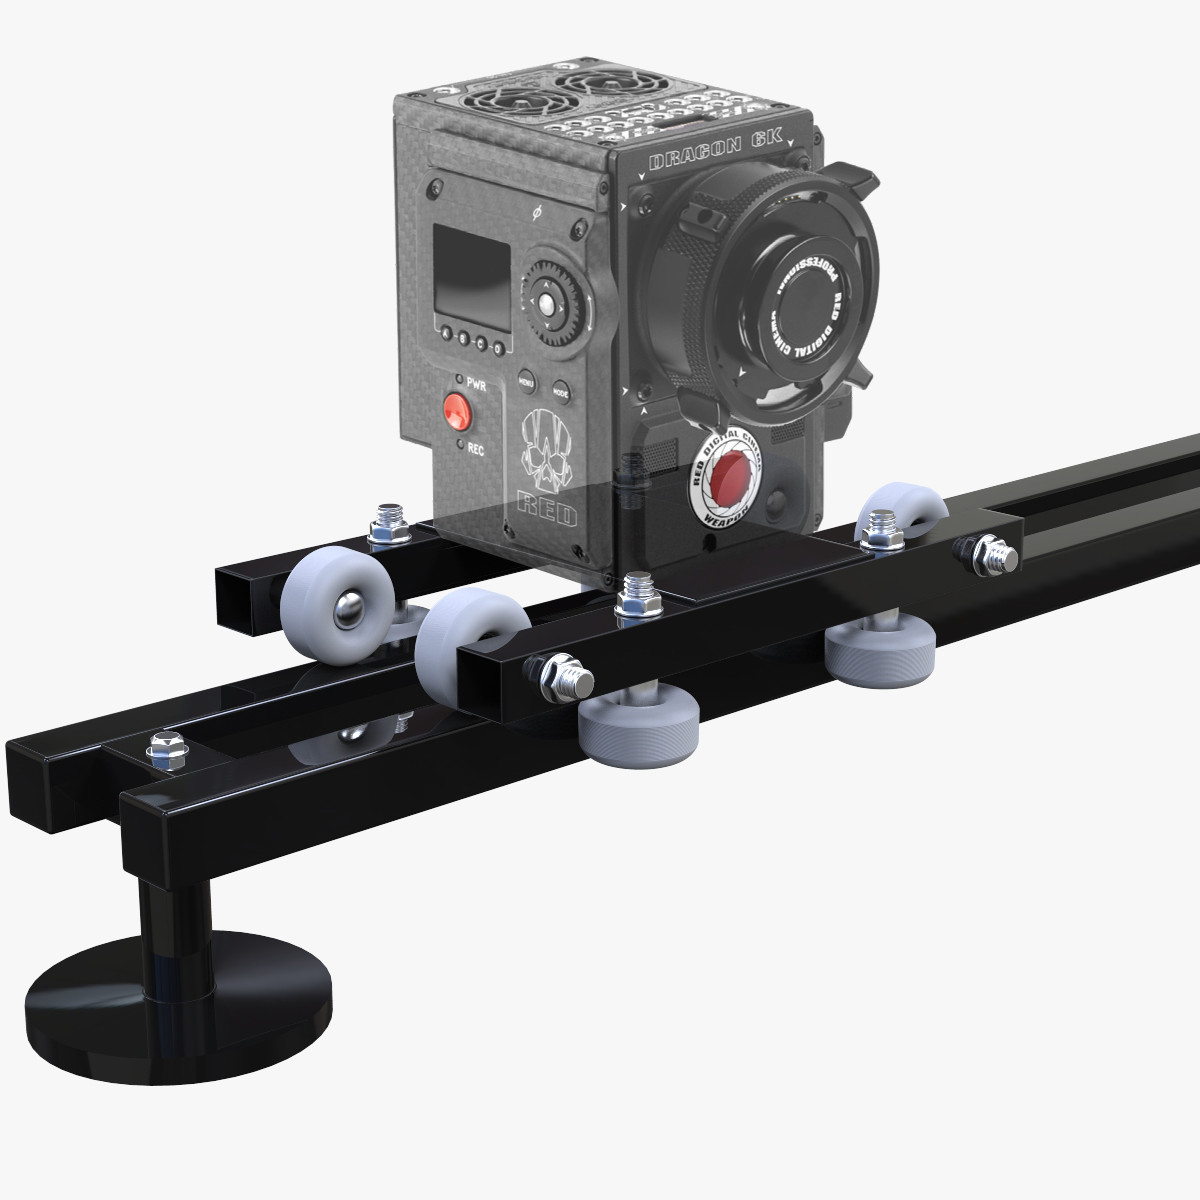
This is a representation of my DIY ‘Dolly Track Manual Slider’ .3D model to add more details and realism to your projects.for this render, i used hdri (not included)according to your HDRI, some adjustments on materials must be done*********************************Features: – Model resolutions are optimized for polygon efficiency(in 3ds Max the meshsmooth function can be used to increase mesh resolution if necessary).- All colors can be easily modified. – No part-name confusion when importing several models into a scene. – No cleaning up necessary, just drop model into your scene and start rendering.- No special plugin needed to open scene.- HDRI & scene not included*********************************File Formats:- Max 2013 – OBJ (Multi Format) – FBX (Multi Format) – Cinema 4D R15 Every model has been checked with the appropriate software.*********************************Hope you like it! Also check out my other models, just click on my user name to see complete gallery.Infos about my work:I work always my files with a lot of attention to details, good topology and optimizes polygons, I also bring a serious touch in the provided textures.I would like to thank every guys who bought my files, you motivate me to produce some more very nice 3D models.Newlc – 2017
-
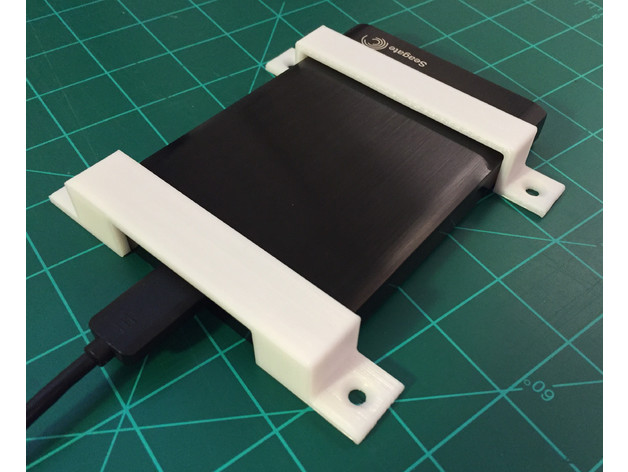
Seagate Backup Plus mounting brackets 3D Print Model
Summary
Use these brackets to mount your Seagate Backup Plus external hard drive under your desk or against any flat surface. The holes are countersunk to fit a #8 screw. See drawings for dimensions.